

Results 1 to 13 of 13
Thread: Pro-Daily 1973 Camaro
-
01-01-2021 #1

 Registered User
- Join Date
- Jun 2018
- Location
- Alamo, CA USA
- Posts
- 235

Pro-Daily 1973 Camaro
My family is a Camaro family. We've all owned a ton of them, specifically second-gens. I knew for this next one, it was going to be a project car with nearly everything but the body being completely modernized. Modern power and modern suspension with the purpose tracking it on the weekend and daily driving it during the week. A "pro-daily" car, if you will. This wasn't going to be a garage queen. I also had very little knowledge of what it took to do something like this. Knowing there was going to be a steep learning curve and I was bound to make numerous mistakes, I decided to just jump into it. No better way than just jumping in, right?
The search began early 2017 for an early second-gen with the hopes of finding a roller. All I cared about was a good body. In May 2017, I found a car. It was complete, but the price was right and the body seemed good. I almost felt bad purchasing a fairly clean car I knew I was going to tear apart, but whatever. I purchased it and drove it down from Sacramento to the East Bay. It overheated so much on that driver that I eventually gave up and had it towed half way down.
I spent a couple of weekends getting it drivable, swapped out the carb and intake, and just enjoyed it as is for about a year.
In July 2018, my brother and I tore it down completely over one weekend. That's, of course, when you start finding out how good (or in this case, how bad) of condition your body is in. There was rust in the usual spots, but we also found signs it was hit on the passenger side as well as rear ended.
In May 2019, I purchased all of my suspension and brakes. Went with the complete Speedtech ExtReme platform that included the subframe, torque arm, and complete Ford 9" rear-end. Coilovers were the single-adjustable ridetech. Brakes were the Baer Pro+ 14". Also picked up Speedtech downtime bars and trans tunnel, DCE mini tubs, and a Vintage Air kit.
After researching several body shops in the area, the car went off to Grand Collision in Hayward, CA in June 2019. There, it would have all body work and all paint done. Additionally, they would be installing the mini tubs and transmission tunnel as well as coating the undercarriage for heat/rust and the interior for sound dampening. Soon after they got the car and stripped it down, the bad news was delivered. Looks like there had been serious accidents in both the passenger side and rear end. The body work needed was all around and extensive. This was disappointing since I spent a premium on a complete car instead of roller thinking the body was straight. It wasn't. It was quite the disaster. It was so bad, in fact, that Grand Collision and myself contemplated selling it off completely and finding a different body. Ultimately, I decided to keep going on it, knowing the cost to get it straight was going to exceed budgets.
While the body work continued through Summer 2019, I started assembling the suspension. I also had the cage put in during this time.
In January 2020, the body was entirely completed and ready for paint. Life happens, though, and I needed to pull it for a while as we weren't ready, financially, to move forward with paint. This would give me time to test fit the suspension to the car and finalize the color before eventually sending it back for paint in September 2020.
The car was promptly painted and I received it back in November 2020. The color I went with was Porsche Agate Grey Metallic.
Purchased the LS427/570 and T56 in November 2020 and received them mid-December. Also purchased a McLeod RXT clutch and Quick Time bell housing.
More updates to come...1973 Camaro: LS427/570, T56, Speedtech ExtReme subframe/torque arm
-
01-01-2021 #2 Registered User
- Join Date
- Apr 2005
- Location
- Chicago
- Posts
- 2,788
Welcome and what a great introduction. I look forward to more updates and cant wait to see what your plans are for the interior and engine management.
marty-mj
GarageScene.net High Speed Welding KDHotrods RecoveryRoomInteriors WegnerAutomotive Autometer Ride-Tech
01-01-2021 #3 Registered User
- Join Date
- May 2018
- Location
- way east on a rock
- Posts
- 155
Wow, that thing is gonna be a hoot. In for watching you finish it!
02-03-2021 #4
Registered User
- Join Date
- Jun 2018
- Location
- Alamo, CA USA
- Posts
- 235
Hey all. I'm putting together a comprehensive story of this build on my site. You can check that out here. It's not fully updated yet, but it will be in time.
1973 Camaro: LS427/570, T56, Speedtech ExtReme subframe/torque arm
02-03-2021 #5
Registered User
- Join Date
- Jun 2018
- Location
- Alamo, CA USA
- Posts
- 235
So guys, I could use some help and direction. As mentioned, this is my first time building a car at this level. Everything I'm doing, I'm doing generally for the first time and with nearly no extra physical help, although I can get bodies if needed. I am relying on my resourcefulness to ability to learn quickly to move forward, knowing I'll make some mistakes here and there. You can read above where I'm at in the build, but I can give you the TLDR as well...
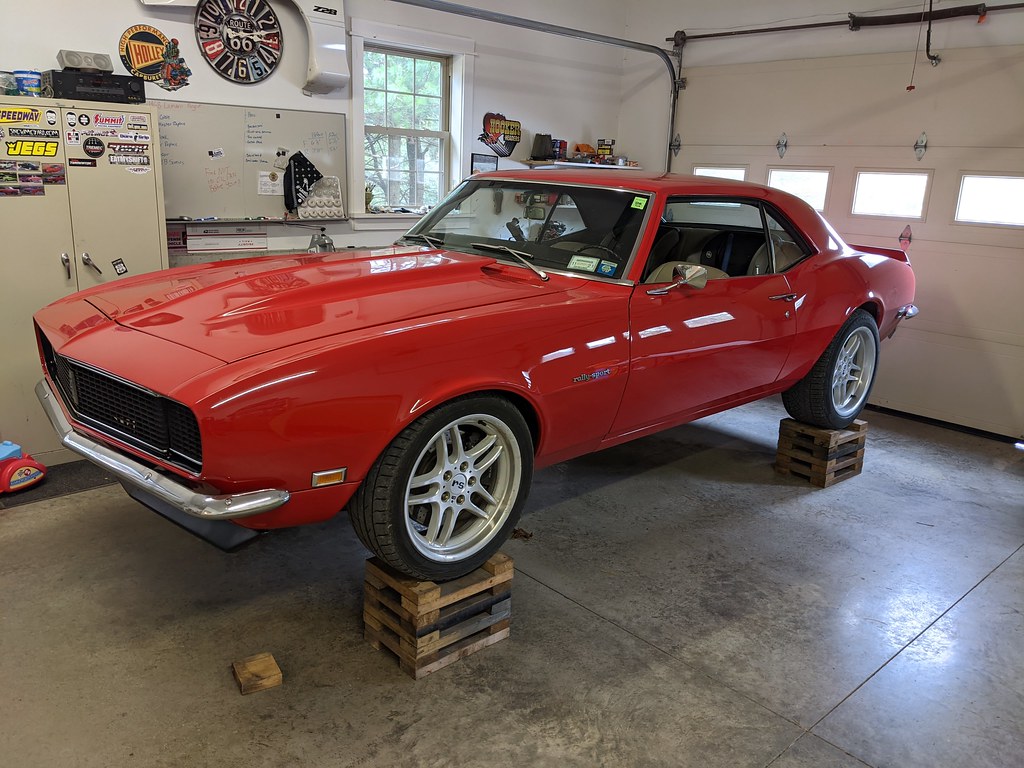
I have the a completed body with paint done. It's mated to a fully assembled and complete Speedtech ExtReme subframe and torque arm. The rear is complete. Mini tubs are installed. The transmission tunnel is installed. It's sitting on wheels that won't be used on the completed car. I have the following parts in hand, but not installed: engine, transmission, clutch, bell housing, brakes, AC, steering column, and some other smaller things.
I would think the next steps are to mate the engine and transmission and get that into the car, but then I'm thinking about how I do the cut the trans tunnel for the shifter, but them I'm thinking about placement of the shifter to my body, but then I'm thinking about where it is relative to the seats, but then I'm thinking about seats to the dash, but then I'm thinking about interior body panels, and so on, and so on, and so on. Or maybe all of this is wrong and I just don't know it yet. I'm at a point where I believe synergy comes into play and I'm just kinda getting overwhelmed because I know there's think I need to be thinking about that I'm not.
So, obviously, I could really use some feedback and direction here. What should I do next? What general steps should follow after that until "completion" (we all know it's never really complete, but humor me). If there's more information you need to make more accurate recommendations, please ask. I'm all ears (eyes?) at this point.1973 Camaro: LS427/570, T56, Speedtech ExtReme subframe/torque arm
02-04-2021 #6 Registered User
- Join Date
- Aug 2009
- Location
- ERIE, PA
- Posts
- 307
I would mate the engine and trans together on the subframe and roll it under the body. Pull the trans cross member out and mount the subframe to the body. You should have enough clearance to rotate the T56 up to the body to chalk outline a rough cut. Once you have relief cut the tunnel for the shifter, you can set the seats to a comfortable arm length to the shifter and steering wheel. Everything else should fall into place (in theory). There are plenty of members that have done the same retro-fitting; I'm sure if you reached out to them for some measurements they would be glad to assist.
 -Bennyhaha
02-04-2021 #7
Registered User
- Join Date
- Jun 2018
- Location
- Alamo, CA USA
- Posts
- 235
Thanks for the feedback. So if I don't have the option of lifting the car that high (don't have a lift), what do you think the order of events are at this point? Originally Posted by LUV2XLR8
 1973 Camaro: LS427/570, T56, Speedtech ExtReme subframe/torque arm
02-04-2021 #8 Registered User
- Join Date
- Sep 2009
- Posts
- 2,955
Thanks for posting! This is an awesome car and what a great story. My advice would be to start bolting stuff together and see what works and doesn't work. You'll likely have the motor and trans out 3-4 times for one thing or another.
As for not having a lift, there are ways around that . I built mine out of 2x4s 16" by 12". I've used them so many times for one thing or another. Great for suspension adjustments too since it keeps the car at ride height.
Good luck, I'm looking forward to the updates.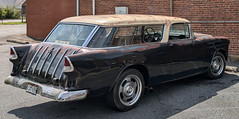
1955 Nomad project LC9, 4L80e, C5 brakes, Vision wheels
1968 Camaro 6.2 w/ LSA, TR6060-Magnum hybrid and etc SOLD
1976 T/A LS1 6 Speed, and etc. SOLD
Follow me on Instagram: ryeguy2006a
02-04-2021 #9 Registered User
- Join Date
- Nov 2018
- Posts
- 946
The car body's not on the frame? I had something where it was, but then realized I misread. What you can do is install the engine/trans on the frame, then measure from the center of the two front body mounting points to the center of the shifter. With that, you can build a T-shaped template that you can bolt to the body's mounting points. The top cross of the T would be screwed into the body's front mount points, and this should put the bottom point of the T right where you need to drill the hold for the shifter mechanism. I'd make that hole as small as you can and still fit the shifter through in case the hole's not quite perfect. The hole can always be enlarged once the body is mounted to the frame. If the body was mounted to the frame I was still suggesting the T-shaped template, only using the engine mounts as the top cross of the T.
02-04-2021 #10
Registered User
- Join Date
- Jun 2018
- Location
- Alamo, CA USA
- Posts
- 235
haha. I'm going to have to get it pretty damn high to safely slide a sub-frame and engine under it. Originally Posted by ryeguy2006a
- - - Updated - - -
No, you understood it right. The body is already sitting on the sub-frame, which has already been properly aligned. I can't imagine trying to re-align it with an engine attached to it, so maybe? But right now, I'm still thinking of going in from the top. Thoughts? Originally Posted by Vimes
1973 Camaro: LS427/570, T56, Speedtech ExtReme subframe/torque arm
02-04-2021 #11
Registered User
- Join Date
- Nov 2018
- Posts
- 946
Same procedure, different points. Bolt the engine and trans together and measure from the engine mounts to the shifter, build the template, then lay the cross board across the engine mounts on the frame. It should come to the same point.
02-05-2021 #12
Registered User
- Join Date
- Jun 2018
- Location
- Alamo, CA USA
- Posts
- 235
That helps. Thank you. Originally Posted by Vimes
- - - Updated - - -
I have a thread that's going into more detail on this next step here, if anyone wants to chime in, which I would appreciate!1973 Camaro: LS427/570, T56, Speedtech ExtReme subframe/torque arm
02-07-2021 #13
Registered User
- Join Date
- Aug 2009
- Location
- ERIE, PA
- Posts
- 307
Originally Posted by roguegeek
I just extended my jack-stands as high as they could go.... With the wheels on the subframe; I just rolled it back under to look for clearance issues.-Bennyhaha

 Reply With Quote


