

Results 1 to 20 of 29
-
01-24-2019 #1

 Registered User
- Join Date
- Jul 2012
- Location
- Traverse City, MI
- Posts
- 574

Barts 69 Chevelle ProTouring Project
Hey all, Ive posted here but photobucket ruined the whole thing. I kind of wanted to clean up the thread I had anyways so this "fresh start" is how Im going to do it. Loooong read.
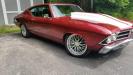
Moving on, I bought this car in July of 2012 sight unseen on ebay. I knew I shouldnt have done that but I did it anyways. I somewhat regret that. This photo is the day it came home. Check out that tach placement!
Ive copied pasted the specs from the ad and in () added what they actually meant - 396 60 over 9.6:, roller hydraulic valvetrain, Ported and Balanced and Blueprinted, Keith Black Pistons (hypereutectic), Edlebrock Performer RPM 8.5cfm (oversized untuned carb), Edlebrock Pro 2.0 intake (not port matched), Accel Performance Distributor, Accel Hi Temp Spiral Core Plug Wires, Headman ceramic coated headers (slighty beaten in), Flowmaster 50 series Dual 3" mufflers, MSD Igintion system, Holley Performance Fuel System (loud cheap external pump), Camaro Power Steering System (worst feedback ever), Hurst Shifter, 4" Cowl Fiberglass hood with locking pins
Doug Nash Ent. hybridized Super T10 close ratio (the "4" from a 4+2 vette trans), Centerforce Dual Friction Clutch (used and abused), 12 Bolt real axle, Clutch type posi w/3.31 gears, Custom Driveshaft (original steel driveshaft cut)
So, what I saw on the outside was a beautiful Chevelle. What I saw on the inside made my guts feel gross. Every SINGLE THING IVE TOUCHED it made me ask "WTF were those other guys thinking?
I need to get to work.
In the first couple of weeks I started on small cheap things. I noticed someone had spray painted the entire blue interior black. Over spray everywhere. Blue starting to show through in places. It needed to be fixed.
I pulled the carpet to get started and got this - a big damn hole in the floor that was patched with a huge hammered piece of sheet metal and self tapped in. I made an attempt to seal it up better and added more self tappers. Not ideal but I wanted to drive!
I cleaned up a bunch of stuff. Moved the tach. Painted the dash. Covered the original dash pad with a stitched faux leather cover. And leaving some of the boring steps out, ended up here.
I also replaced the carb and just cleaned up the engine bay a little.
That was enough for the season 1 for me. I just wanted to get out on the road and drive a bit. Since I dont have a heated garage I need to do my work in the spring when its warmish here in Michigan. So season 2 meant big mods for me. The core support was blown out from battery acid so that needed replaced, and I wanted some tube arms so I dug up 10k threads on china arms vs expensive arms and I cheaped out (sorry domestic vendors). I changed out the BJs for some Proforged units. I cut whatever springs were in there for the ride height I wanted and installed some CPP 3" drop springs in the rear. That was also a mistake, those springs ride like ass. I replaced them later with BMR 2" progressive rate drop springs.
I also decided to buy some seats from Cipher Racing. There were a vendor on here at one point. Initially I had thought these were decent seats but theyre too flexible and fell victim to sun fade real quick. Also, work not shown I replaced all of the worn body bushings with some poly units. New steering wheel. 3 point seat belts. And covered the A-pillars in same dash pad material. Here is a driveway shot post all those mods.
Season 3 next post
-
01-24-2019 #2
Registered User
- Join Date
- Jul 2012
- Location
- Traverse City, MI
- Posts
- 574
So moving on to 2015. This was the year for new wheels. I picked up 18x8 and 18x9.5 TSW Snettertons with 245/40 and 285/35 ContiSportContact 3s. The second I had those mounted I HATED the way the X8s looked in the front with no dish. So I sold those 2 wheels and picked up a pair of 9.5s. So all wheels are 9.5s. Same tires (this year Im changing tire size a bit though). This I liked!
That was all I did in 2015. Spring 2016 came around and I did dash panel with Speedhut (GPS) Gauges and CTS-V brakes on the front.
So I had it stopping good (still on a manual braking system) and I could actually see how fast I was going accurately and I didnt have a gigantic tach hanging from the dash. That was enough for 2016 other than some smaller interior stuff. Also installed a G8 GT Rear bench seat which actually fits perfectly and fabbed some side panels for the inside.
Spring of 2017 and I decided I should probably make the rear brakes match the front. Also needed to install new rear upper control arms as the ones that were on there were cracked and nearly broken off.
In the spring of 2018, the fun begins...........
01-24-2019 #3
Registered User
- Join Date
- Jul 2012
- Location
- Traverse City, MI
- Posts
- 574
Now to Spring of 2018 - LS SWAP time. I had originally planned to pick up an LM7/4L60E combo but came across a "drop in ready" LQ4/4L80E combo. I arrived at the guys house and it was an engine on a pallet with the trans off in another corner. The trans ended being from a '95 van and the engine was far from drop in ready. I picked this up the previous fall.
I cant leave things alone so I started coming up with a plan to replace or rebuild. Rebuilding is a lot more fun. So I commenced tear down.
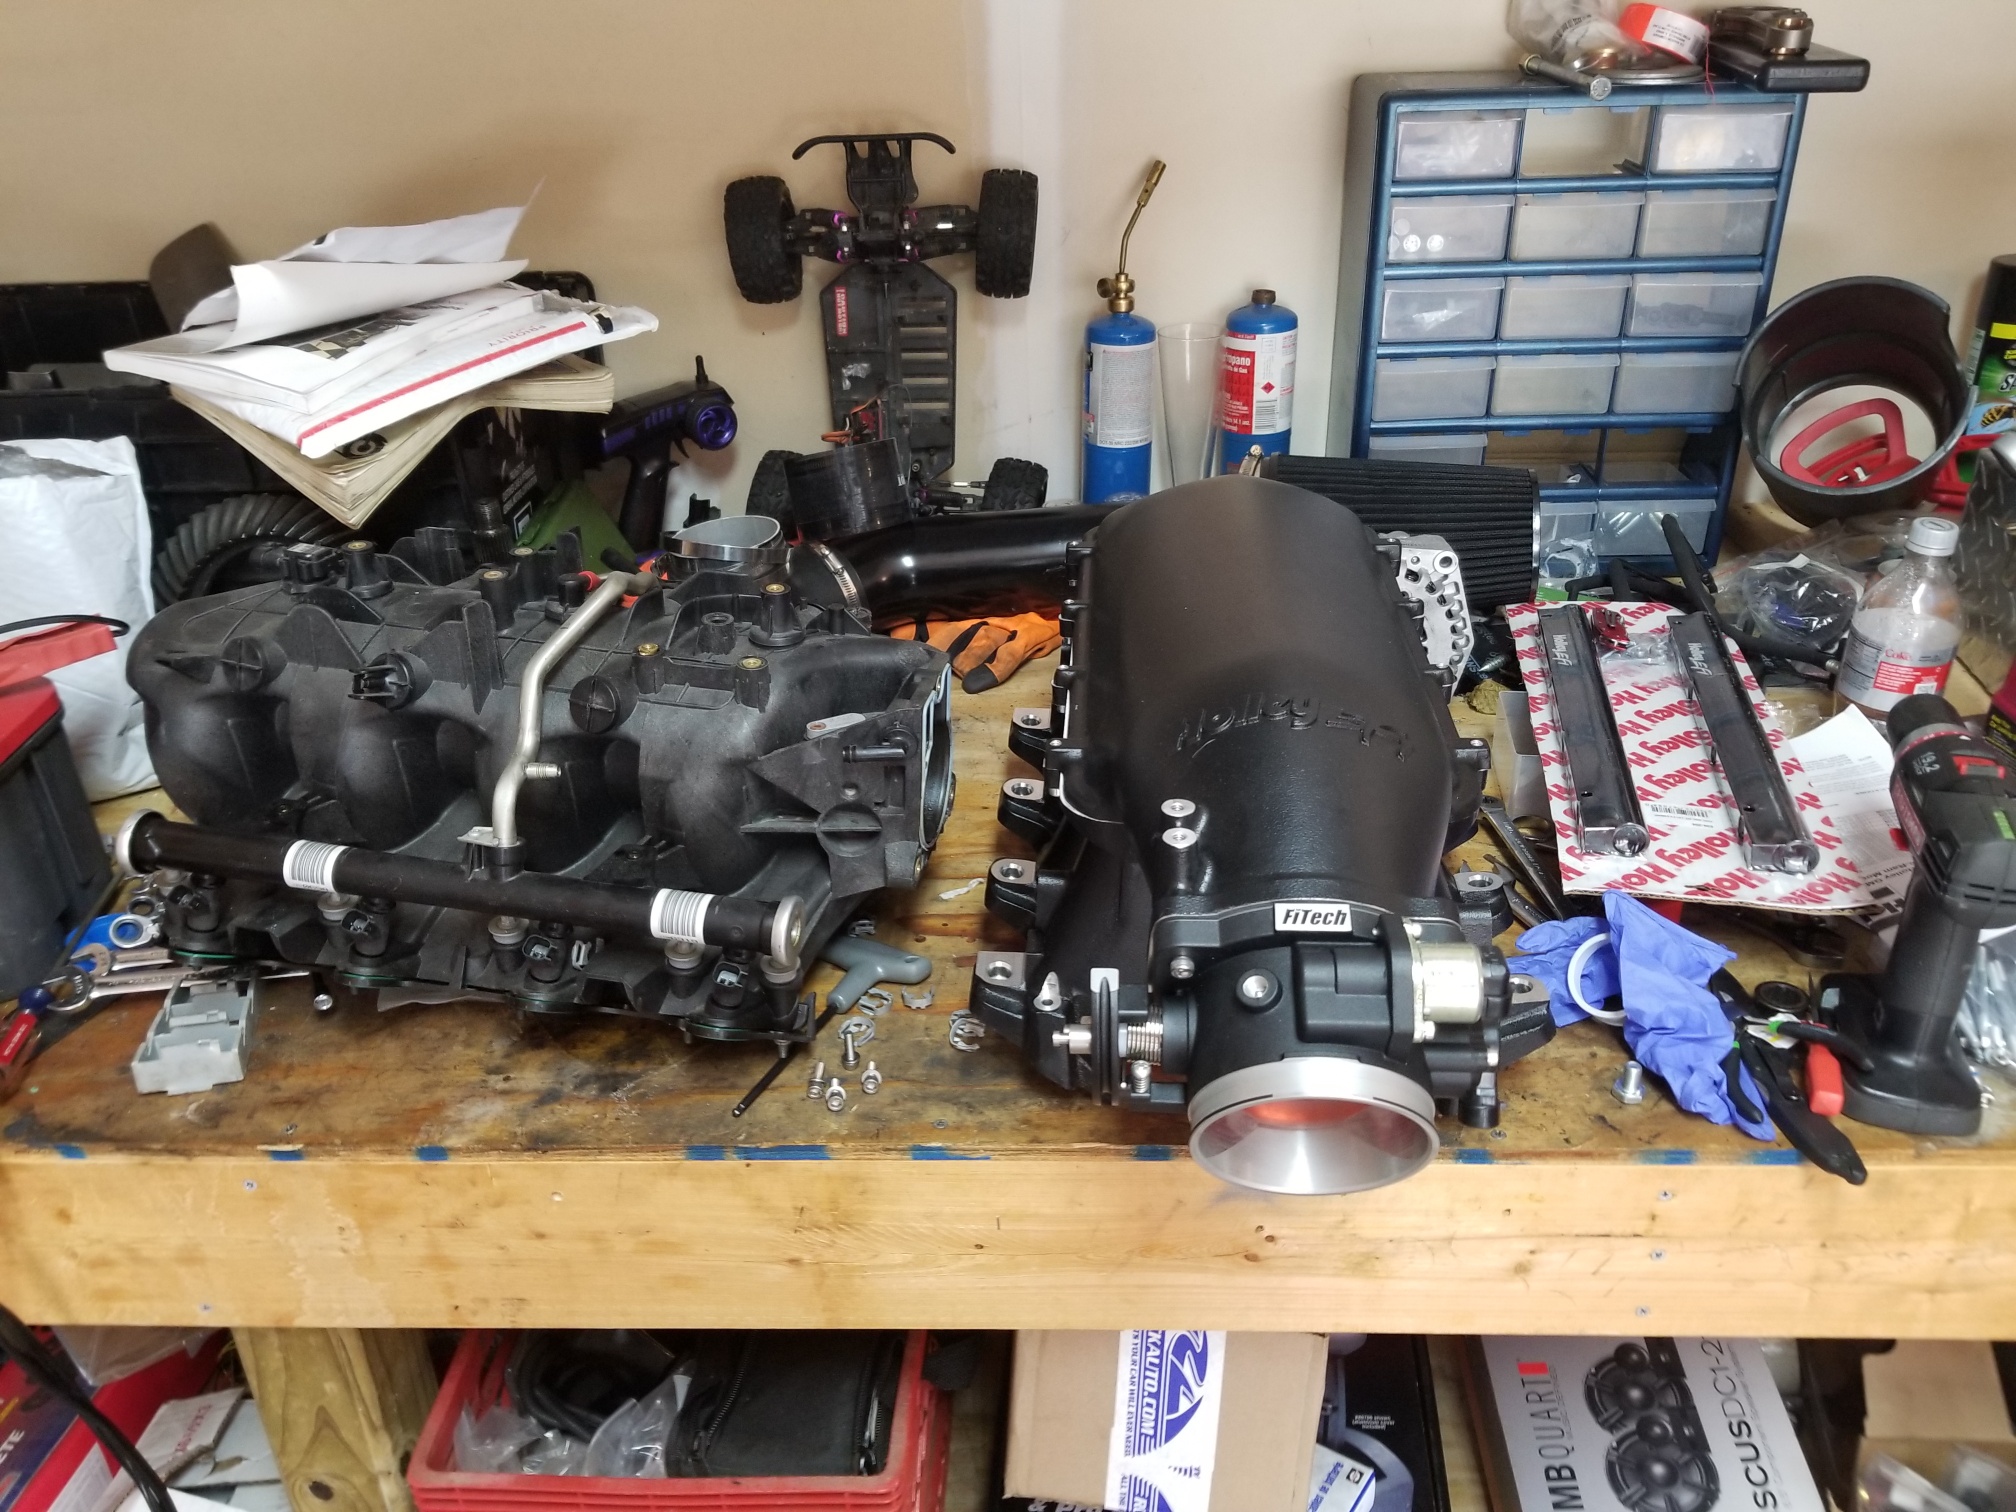
It was a disaster. Pretty nothing was reusable (thats what I told my wife). I kept the crank and the block and the caps. The new engine uses - DSS Racing Pistons, 243s shaved .030, PAC springs, PRW rockers, Elgin 585/585 228/230 cam, BT push rods, LT4 connecting rods, flex fuel injectors, Holley oil pan, truck intake, tuned by me.
01-24-2019 #4
Registered User
- Join Date
- Jul 2012
- Location
- Traverse City, MI
- Posts
- 574
Once that job was done I decided to rebuild the trans. Jumped into that head first with youtube and the DSG GM manual as my guide. Im not great at taking pics mid job but here are some of the parts - all over my bench.
I managed to rebuild the entire trans using a Alta Red master rebuild kit but still had to buy a couple of small wear parts that werent included in the kit. The only thing I forgot to do which I didnt realize until after I had installed everything in the car and started it up was connect the manual valve to the gear selection level inside of the trans pan. So I had to drop the pan and spill fluid all over myself to get that valve installed correctly. That was fun.
Regardless, I got the engine in the car. When installing I found out a couple of things. Not all motor mounts are equal. And I needed a new fan assembly to go with my new radiator.
I was disappointed when I first got it out on the road. It seemed sluggish and slow. A million things went through my head as to what I couldve done wrong. I spent a few weeks researching, troubleshooting, making threads, until I finally went out to the car and squirted the headers with a spray bottle. I found 2 dead cylinders and did some troubleshooting. Its amazing on how well an engine runs when all of its cylinders are working correctly. Additionally my valve covers leaked no matter what I did so I bought some Holley valve covers instead. I also installed a brand new fuel tank and swapped gears from the 3.31 to 3.73s.
Finally I went and did some runs and burnouts!
01-24-2019 #5
Registered User
- Join Date
- Jul 2012
- Location
- Traverse City, MI
- Posts
- 574
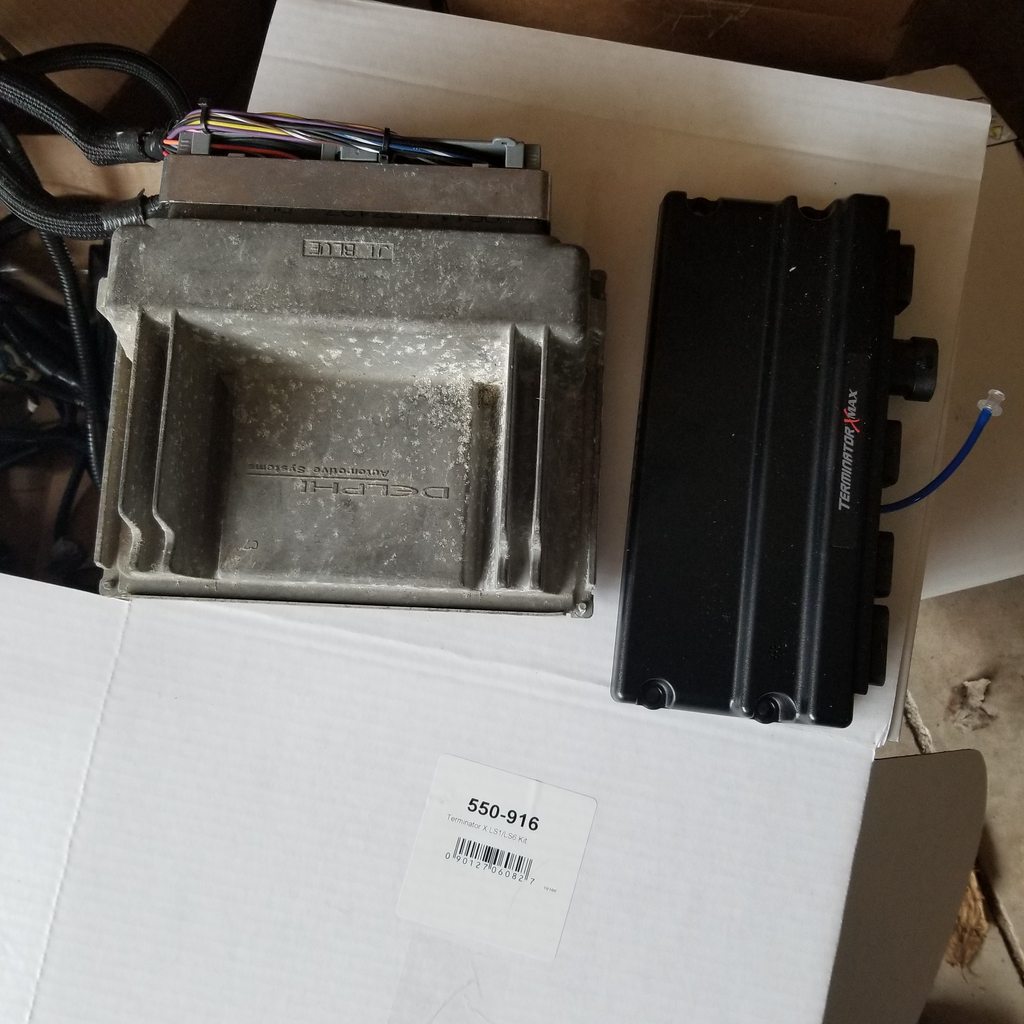
On this springs to do list - change to a GM type 2 power steering pump to halt the whining. And install these goodies! Open for tips if you have any.
01-24-2019 #6 Registered User
- Join Date
- Nov 2006
- Location
- Ma.
- Posts
- 5,569
Sweet! a lot of nice upgrades.
Wayne
Car FINALLY home !!!!!! lol
Project FNQUIK https://www.pro-touring.com/showthre...ghlight=FNQUIK
04-18-2019 #7
Registered User
- Join Date
- Jul 2012
- Location
- Traverse City, MI
- Posts
- 574
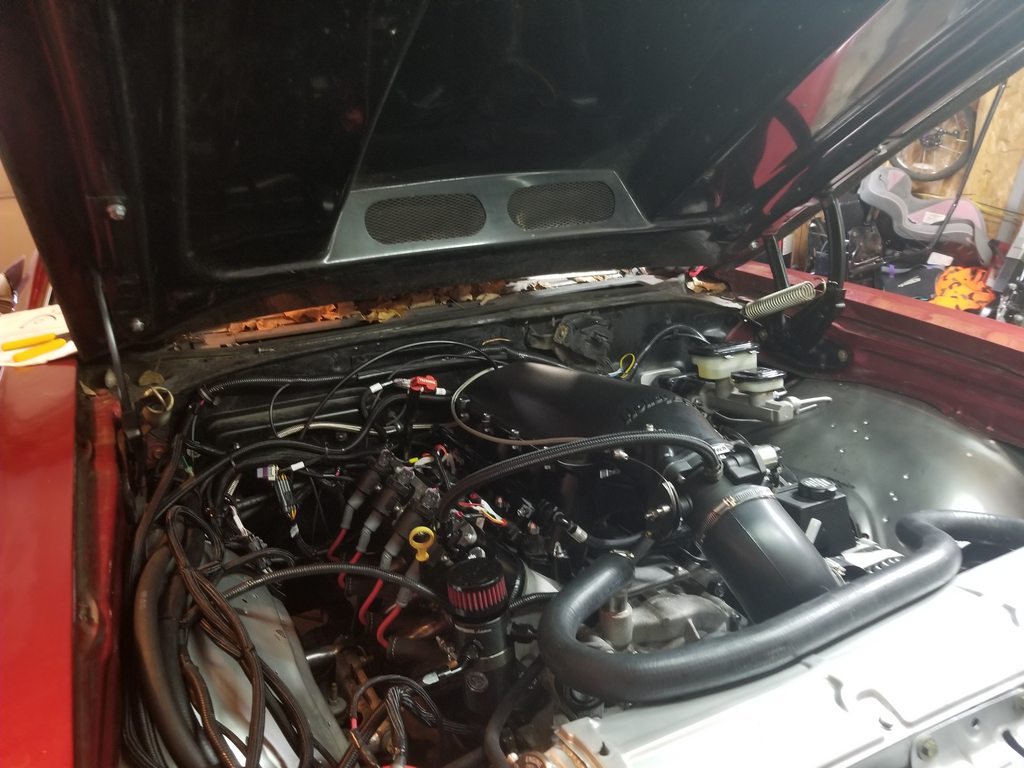
Finally getting started on the mods for this year............
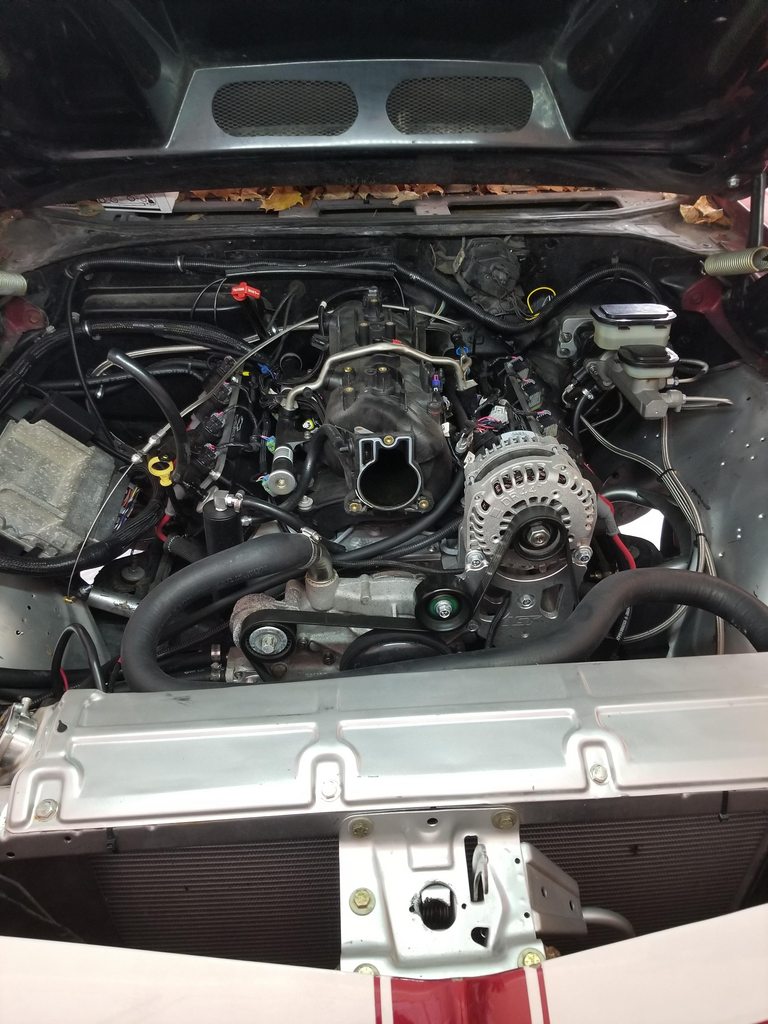
The way it is today -

Intake comparo -
Still doing this project as a driving project. Yet to come in the next month or so - convert from truck PS pump to Type 2 pump to hopefully cure the pump whine issue, Terminator X Max to replace Gen 3 wiring and controller, front c/os, rear c/os, full AAW wiring kit
04-18-2019 #8 Registered User
- Join Date
- Mar 2014
- Location
- Mesa, AZ
- Posts
- 637
Just a heads up, the pump on your engine is probably fine, all LS engines use a Type II pump as far as I'm aware. You probably just need to replace the flow control valve with a low flow one. If the pump has a high flow valve, the oil gets aerated and makes noise. If you get a low flow valve the aeration goes away and the pumps are quiet.
If the pump is worn out there's nothing to do but replace it. It is worth checking how the oil looks in your reservoir after driving the car and it's making noise, you can save some money if you don't need a whole new pump. I was told that most of the "new" pumps are actually rebuilt units and usually have the high flow valves installed in them.Nelson
1969 Chevelle "Cone Smasher" Family Project
https://www.pro-touring.com/threads/...uot?highlight=
1984 "Rustang" GT, 5.0, 5 Speed Project
https://www.pro-touring.com/threads/...T-(Slow-Build)
04-18-2019 #9
Registered User
- Join Date
- Jul 2012
- Location
- Traverse City, MI
- Posts
- 574
I appreciate the heads up. I promise it's a truck pump or "canned ham" style. It used to be truck motor before I completely rebuild it. This is my 3rd canned ham pump and my 2nd low flow valve. Also my second hydro boost unit. Still same whirring/whining issue. It just sounds a little bit different each time. Originally Posted by WallaceMFG

I've already bought all the stuff to swap to type 2. If that doesn't work, I'll just burn the car down.
Something about using the astrovan hydro boost and jeep GC steering box is causing the issue I guess.
04-18-2019 #10 Registered User
- Join Date
- Dec 2011
- Location
- Oregon coast
- Posts
- 254
I really dig the G8 rear seat. Might try and do that in my Pontiac. If you don't mind how did you mount them. I assume you made some custom brackets? Any info would be appreciated. Originally Posted by Barrrf
04-22-2019 #11
Registered User
- Join Date
- Jul 2012
- Location
- Traverse City, MI
- Posts
- 574
The bottom part just sits there. No brackets. It doesnt move but I might try to secure it somehow one day. I made a simple u-shape bracket that I screwed to the trunk wall so I could hook the backs on. I had to cut about 2" out of the rear seat because it was too tall. Pretty easy mod to do though. Originally Posted by boss_hoss
04-22-2019 #12
Registered User
- Join Date
- Jul 2012
- Location
- Traverse City, MI
- Posts
- 574
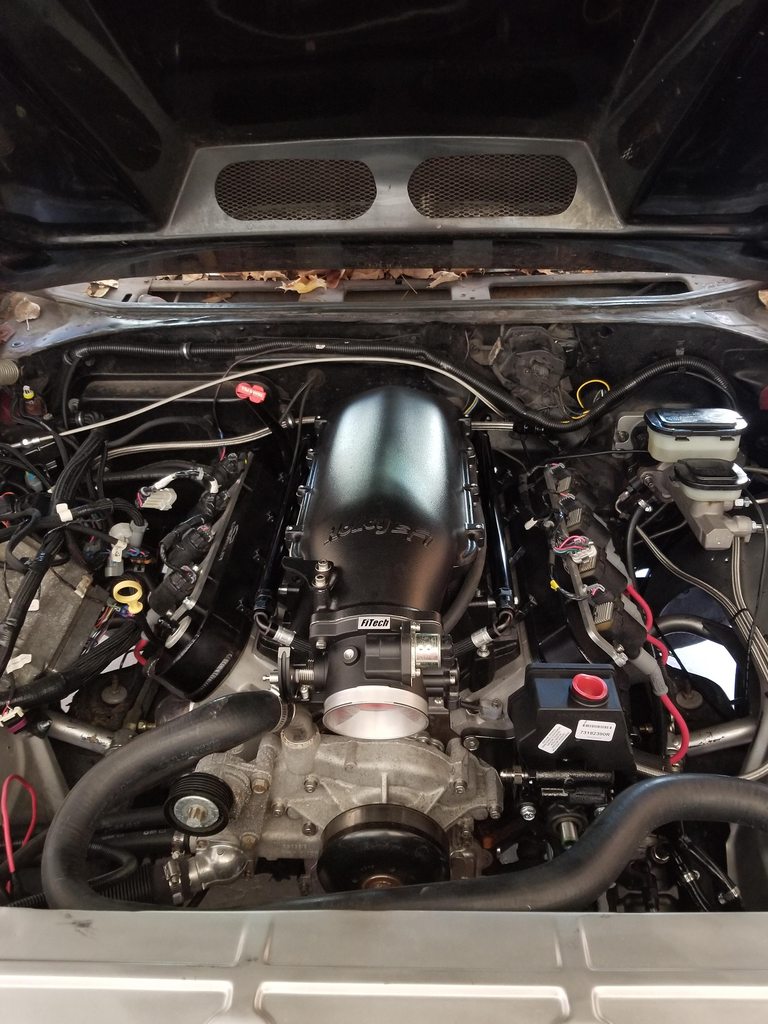
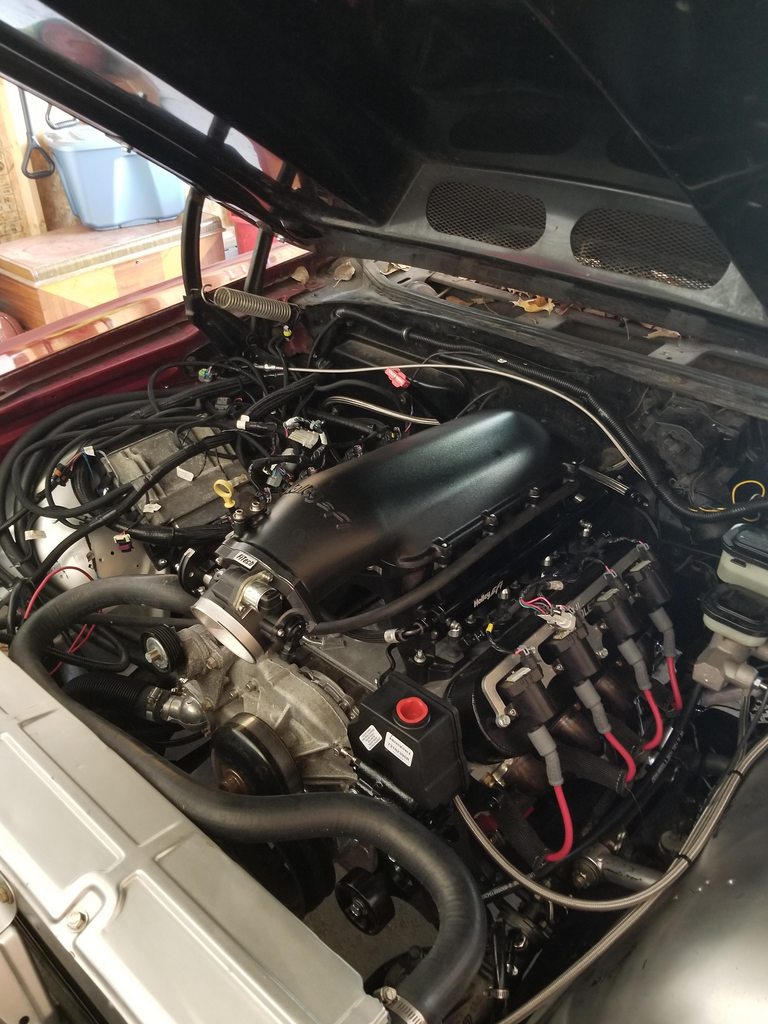
Got the intake and new brackets on. In typical fashion (read:poor planning) I dont have all of the fittings I need to complete the job so Im waiting. Amazing how pretty parts make all of the ugly ones stand out. Due my anxiety of wanting to drive this car, Im not wanting to remove a lot of stuff to paint currently. Terminator X Max shows up today. Hopefully be driving this weekend depending on how distracted I get.
04-23-2019 #13
Registered User
- Join Date
- Jul 2012
- Location
- Traverse City, MI
- Posts
- 574
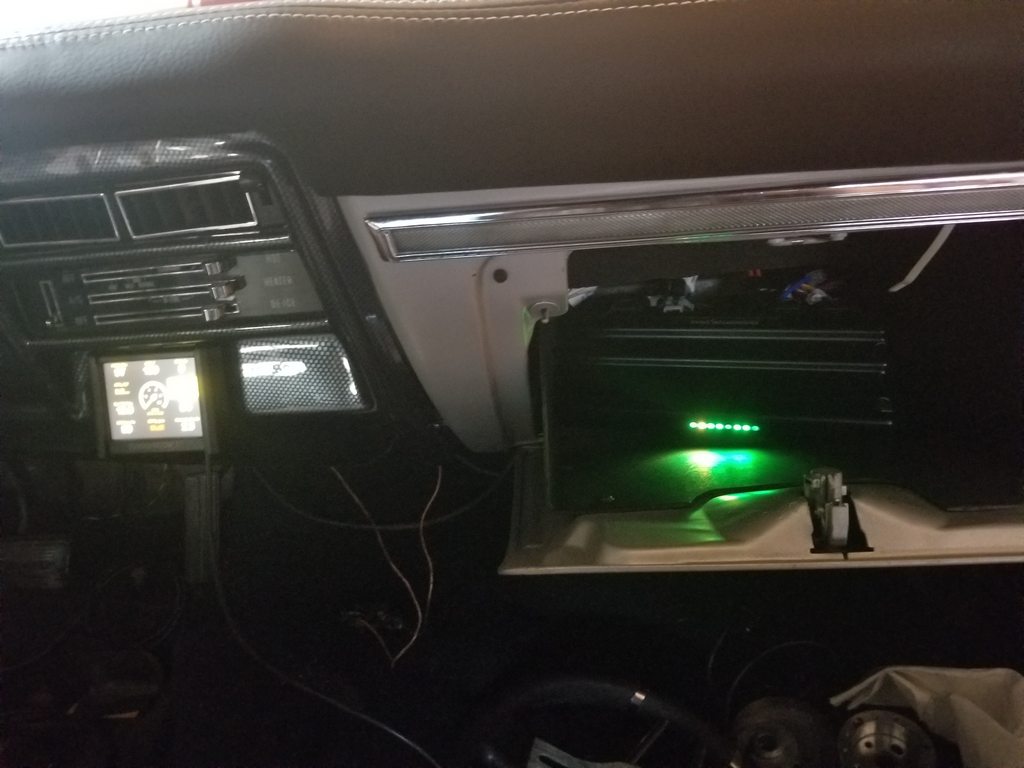
In case you all were wondering the size difference between the Terminator X Max and the Gen 3 controller.....
04-23-2019 #14 Registered User
- Join Date
- Sep 2014
- Location
- Huron South Dakota
- Posts
- 70
nice build. I'm curious about the DSS pistons on the LT4 Rods. Did you get pistons with standard LS pin size or did you open up the rods to except larger pins? thanks
04-23-2019 #15
Registered User
- Join Date
- Jul 2012
- Location
- Traverse City, MI
- Posts
- 574
I ordered standard pin size for that rod. My thinking is if that it can handle 650hp with a warranty, it should be fine for what Im doing. Possibly. Originally Posted by sodak65
04-23-2019 #16
Registered User
- Join Date
- Sep 2014
- Location
- Huron South Dakota
- Posts
- 70
Yea I'm sure those rods are plenty stout. I grabbed a set of those for 180$ and a takeout forged LT1 crank for 150$ but I'm using some wisesco junkyard dog pistons. I just didn't know DSS had an option.
04-25-2019 #17
Registered User
- Join Date
- Jul 2012
- Location
- Iowa
- Posts
- 399
Ive been following your other post about the AAW wire kit and wondering which kit you went with? I have a 72 chevelle that it would prolly be wise if I put and entire new harness in and kept the thing from burning to the ground.
Miles Boyer
The car hobby is dangerous,if the speed doesn't kill you, the cost of parts will.
91 V8 S10
88 Cutlass Pro-Tour
97 Chevy lifted Z-71
96 Corvette
04-26-2019 #18
Registered User
- Join Date
- Jul 2012
- Location
- Traverse City, MI
- Posts
- 574
I bought the AAW kit. Im currently doing the intake and Terminator X stuff first. Then probably the rear coil overs. Then probably the front coil overs. Then the wiring. It'll be a couple of months before I get to it. Just going by what everyone else has said, it should be a great kit and fairly easy to do. Originally Posted by silvermonte
After doing the LS swap and custom gauges, theres not much wiring left to do anyways lol.
05-06-2019 #19
Registered User
- Join Date
- Jul 2012
- Location
- Traverse City, MI
- Posts
- 574
First start on the terminator this weekend. I spent the better part of Saturday and Sunday looming wires and cleaning up my messes. Finally got it powered up and it started right up. Quite nice. But I think my engine bay is messier now than when I had the controller mounted on the inner fender. So many wires, heater hoses, and trans cooler hoses everywhere.
05-20-2019 #20
Registered User
- Join Date
- Jul 2012
- Location
- Traverse City, MI
- Posts
- 574
Well, car RUNS amazing. I thought i was developing an issue in the rear end so I pulled the axle and my kid and I rebuilt it, mostly. New bearings and seals all the way around. Reused gears. Turns out the issue I WAS having, was probably u-joint bind. Regardless, taking it apart wasnt a bad idea, there was some party glitter in the fluid.
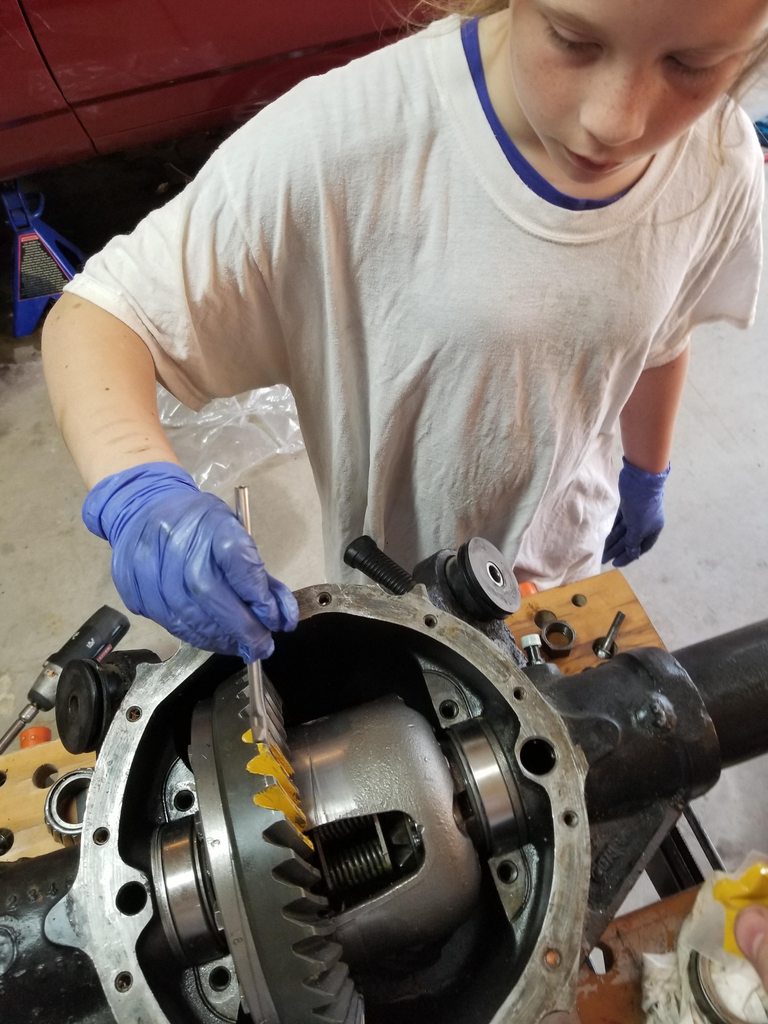
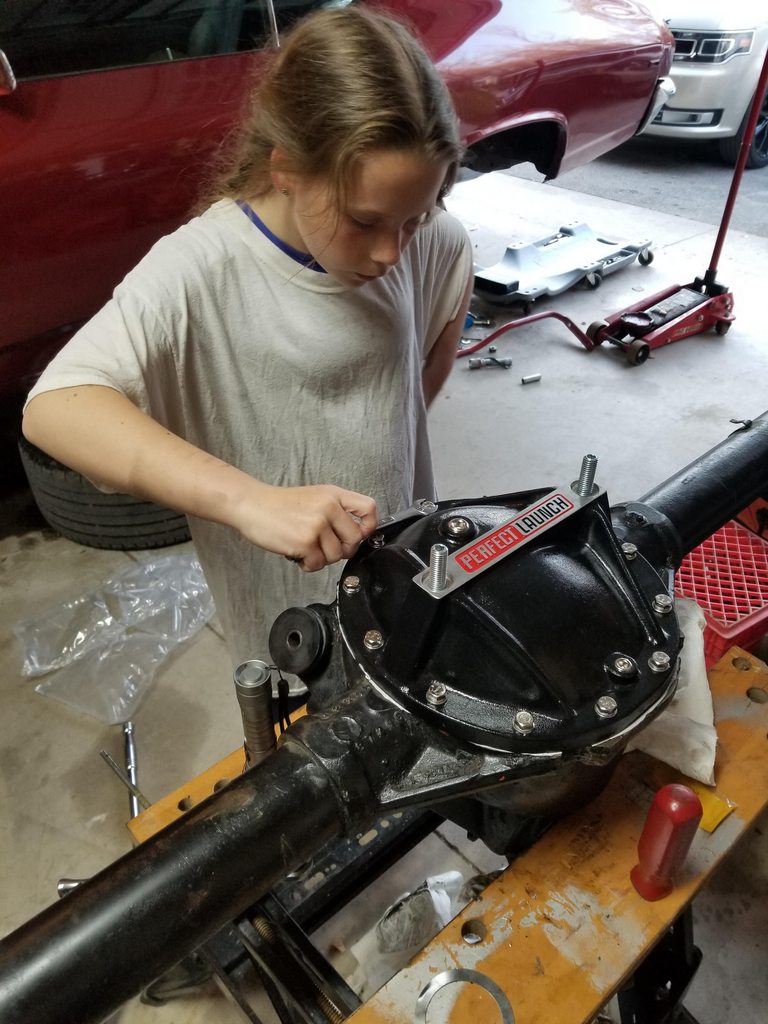
Was also a good time to mount the UMI/Viking Coil Overs
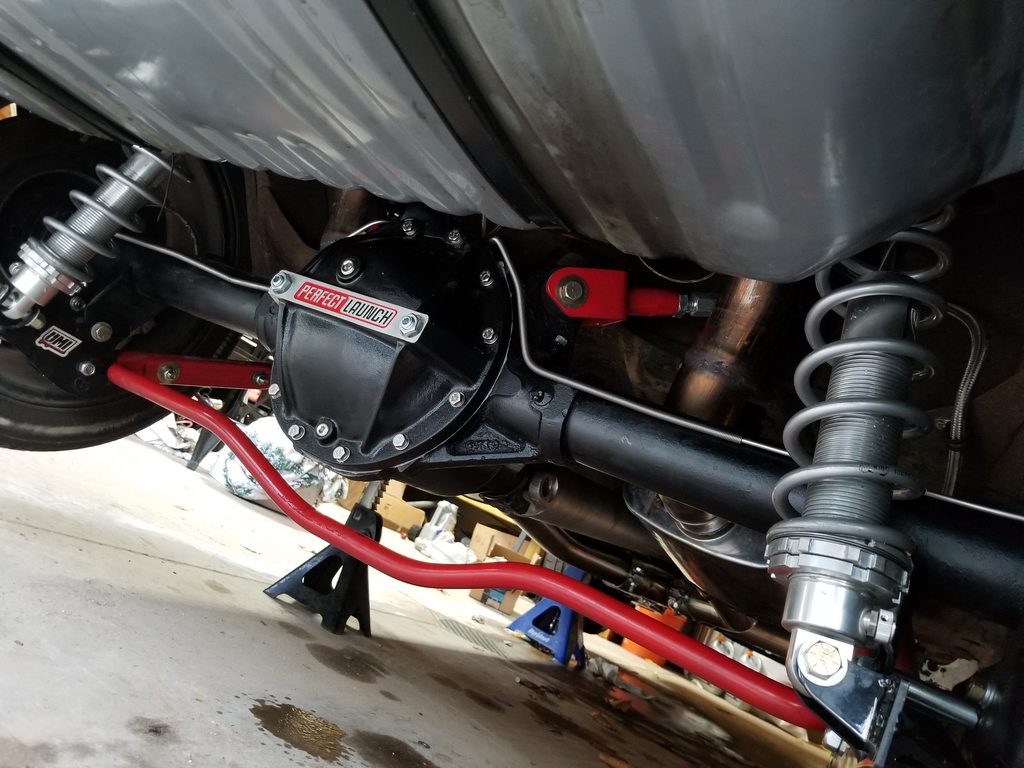
The first test run with all new stuff went great until I blew a power steering hose. Here is a little 2nd gear push, lots of tire slippage. More spirited clips will come as soon as I can get a co-pilot to take some vids.

 Reply With Quote


