Results 1 to 20 of 176
Thread: Chevelle 2.0
-
01-13-2018 #1

 Rat Pack Member

- Join Date
- Sep 2006
- Location
- Indiana
- Posts
- 2,670

Chevelle 2.0
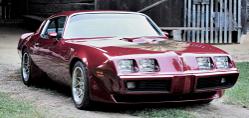
Since Photobucket kinda messed up my original Chevelle thread, I decided to just start fresh with a new one. So here goes Chevelle 2.0, AKA, The Blue Car.
The plan is to make this version a more dedicated track car along with some autox. The first step is to update the chassis and I decided to build my own (more or less) because my budget doesn't allow an aftermarket chassis.
This has been going on for some time so there will be an overload of pictures with or without comments just to get caught up.
As a side note, this is the first chassis Ive built. You may see some things that dont make sense to you or it may seem like Im doing things the hard way, and I probably am! Im learning as I go and ask for help when I need it.
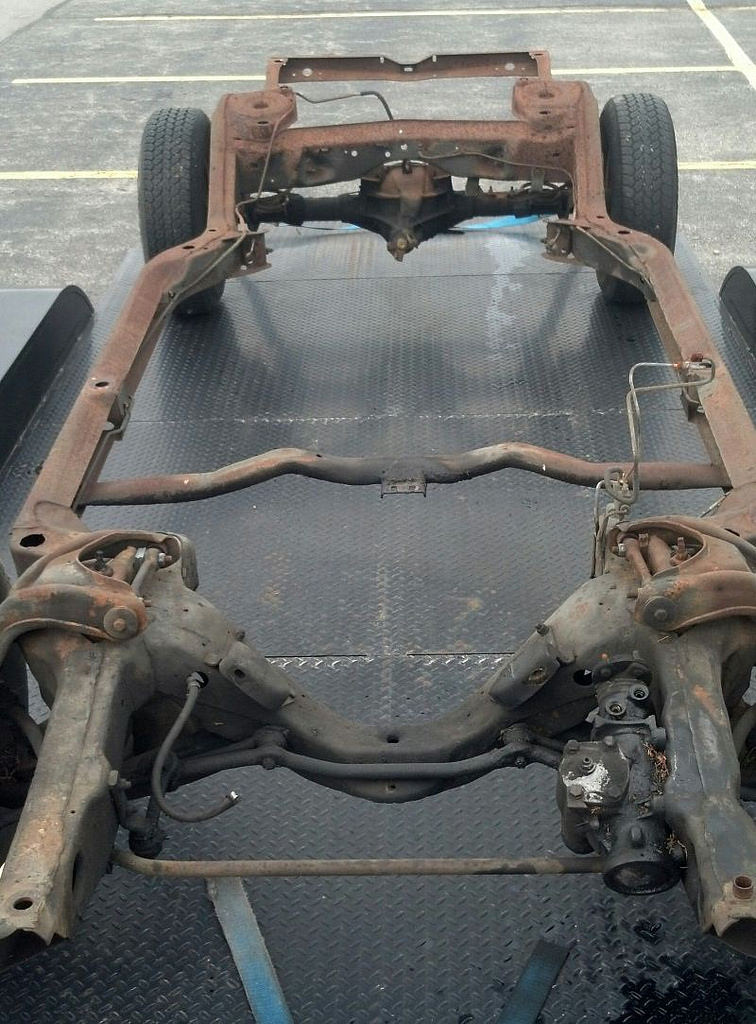
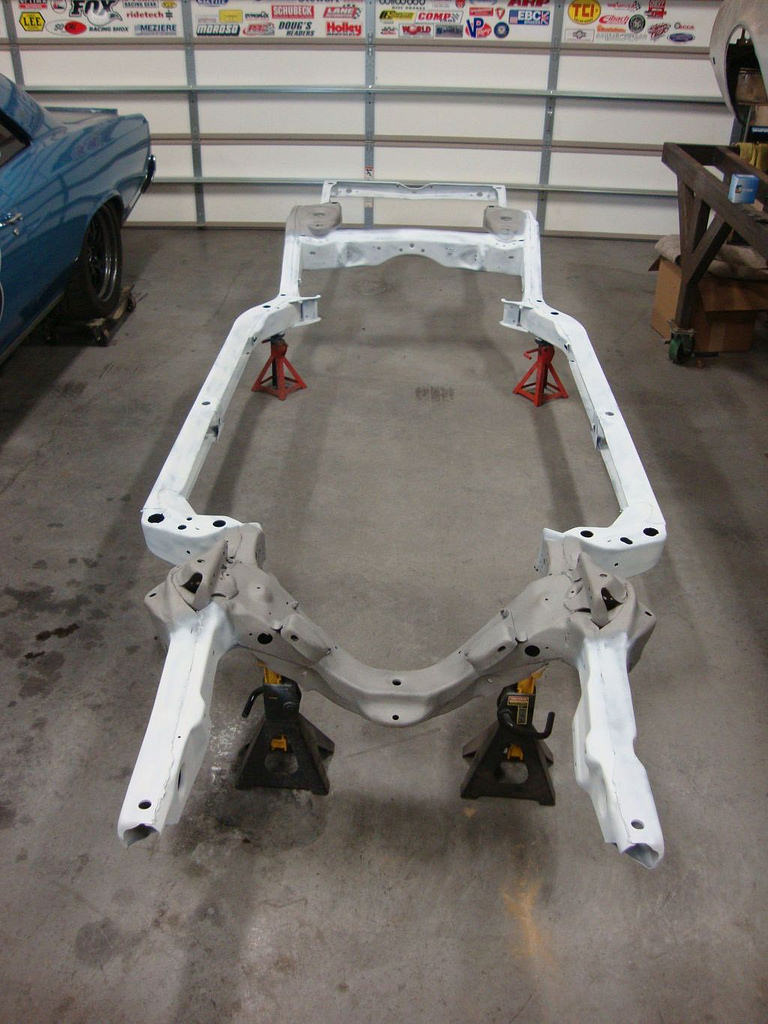
This is the donor '66 chassis I started with:
 00001 by Yelcamino, on Flickr
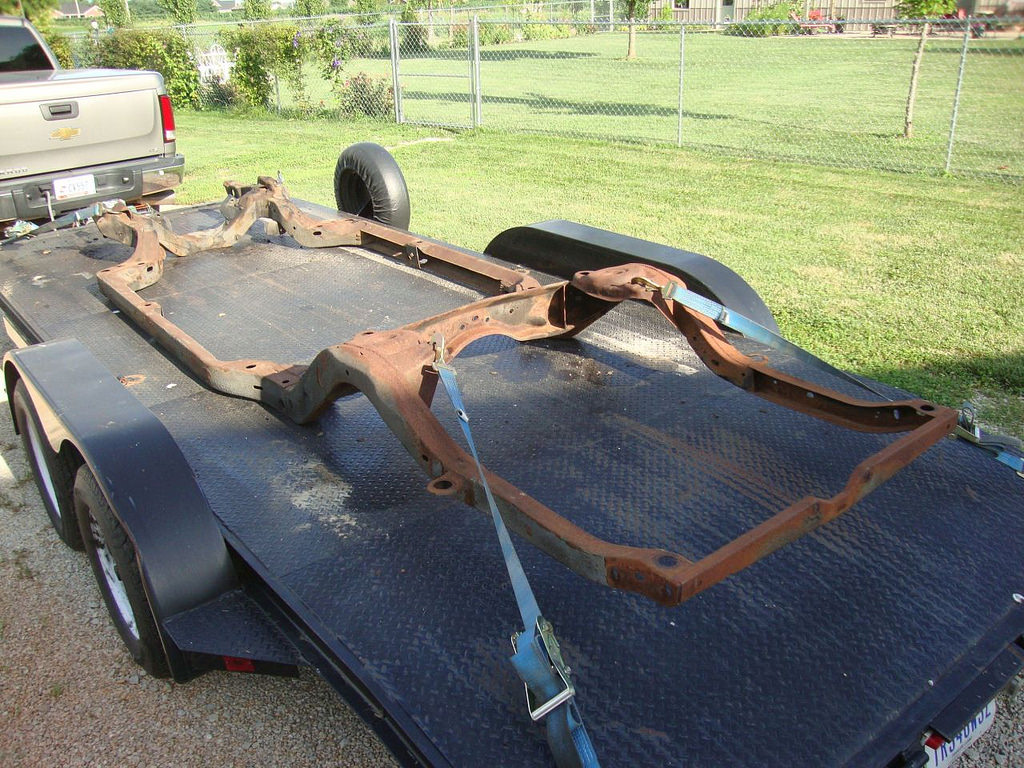
The first thing I did was to strip it down to the bare frame.
 00006 by Yelcamino, on Flickr
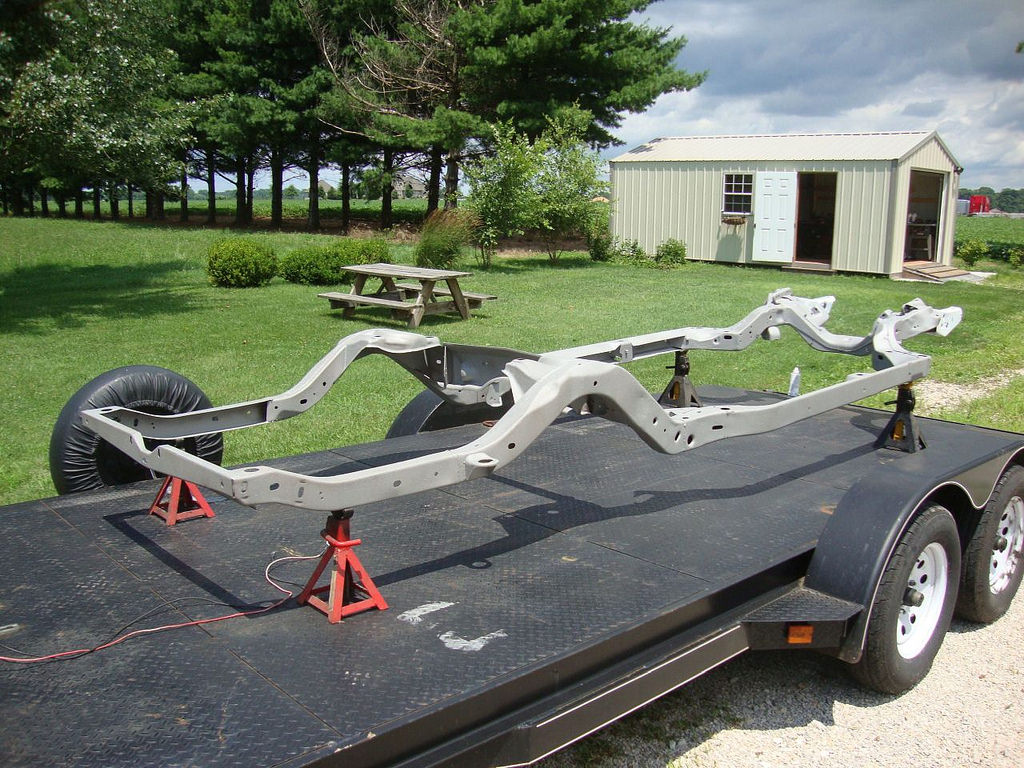
Next I got it sandblasted.
 00007 by Yelcamino, on Flickr
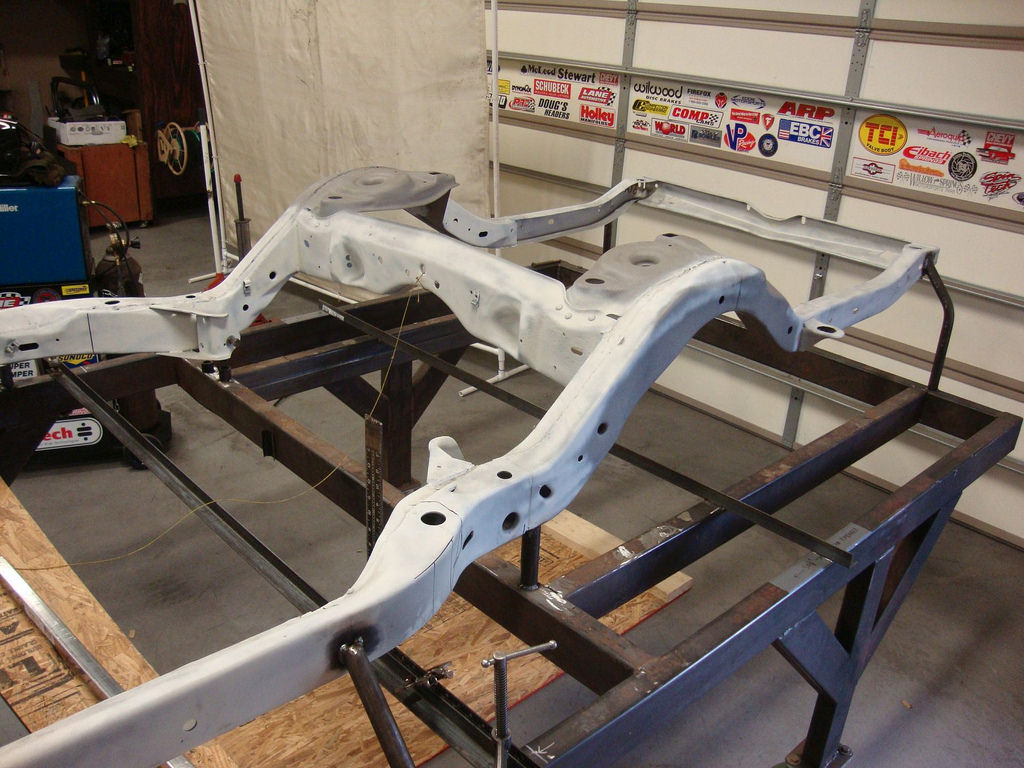
Then I sprayed some primer on the areas that I was going to keep.
 00008 by Yelcamino, on Flickr
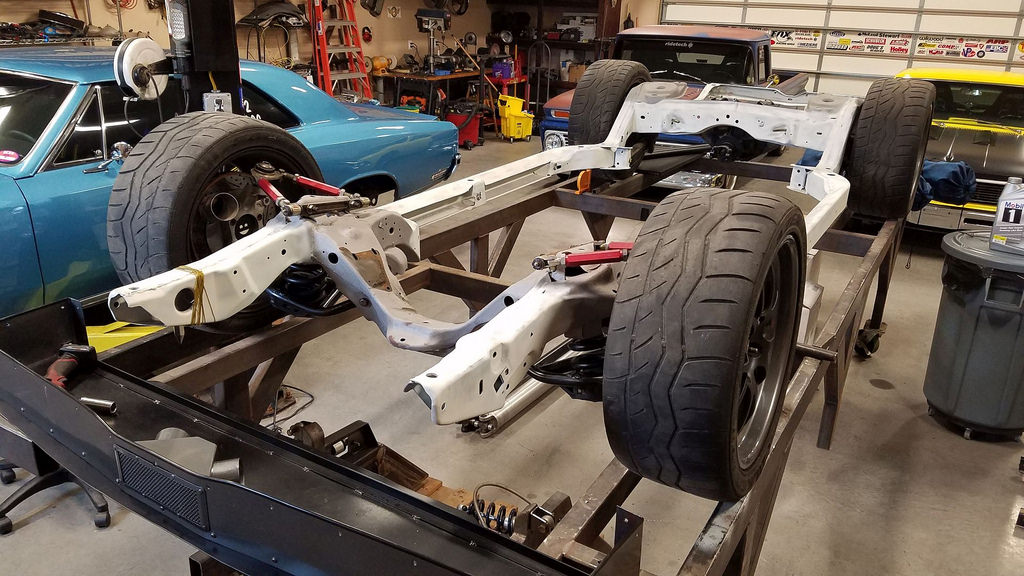
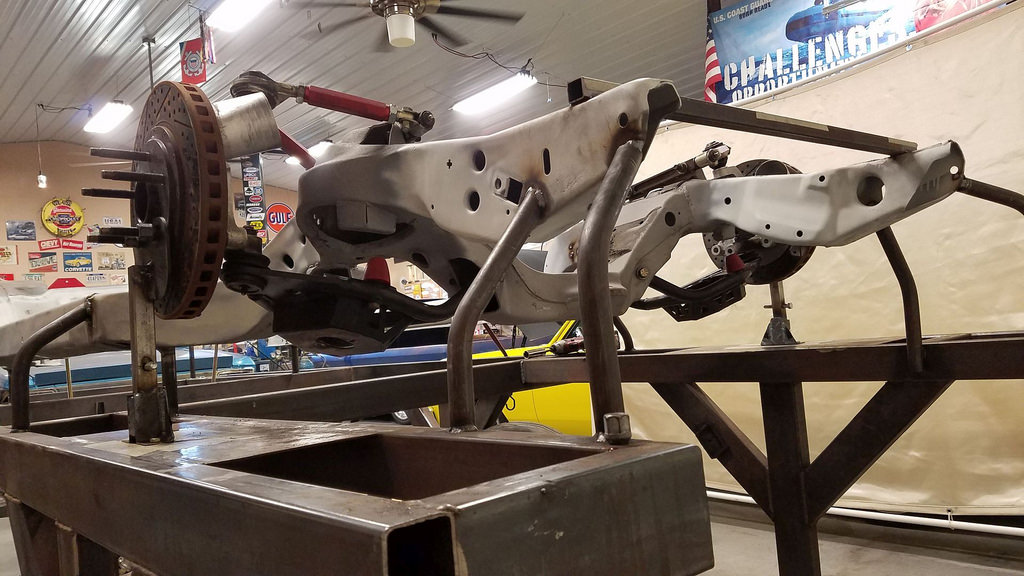
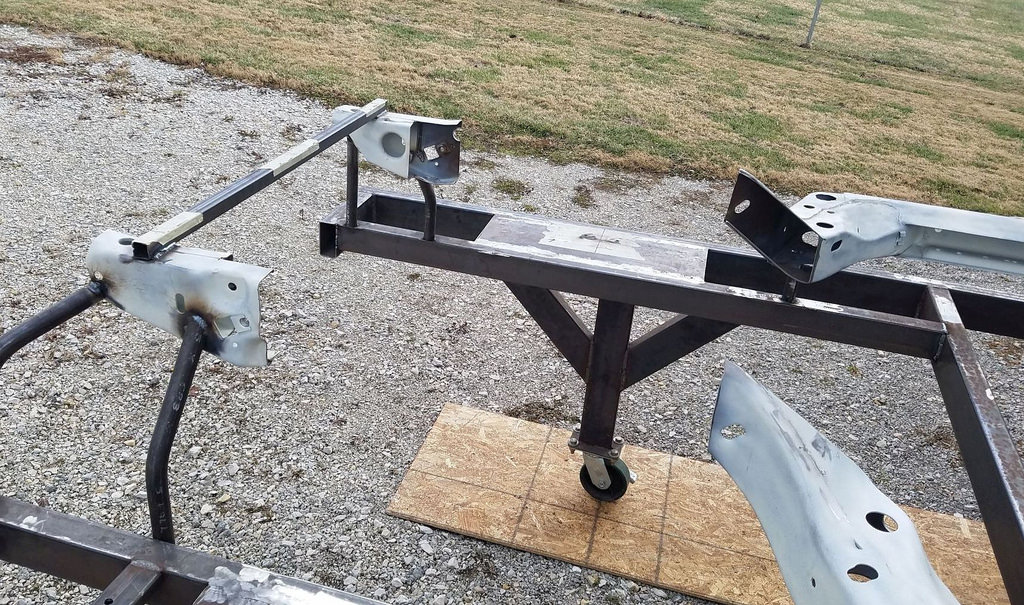
Once I got the frame mounted on the frame table, I installed all of the suspension from my car on to the new frame. That way I could locate the front and rear axle center lines. Once I cut the front and rear sections off the frame, I needed to know where to put the new stuff.
 00009 by Yelcamino, on Flickr
 00010 by Yelcamino, on Flickr
Speaking of new stuff, back when I worked at ridetech, I bought a front clip from Scott Mock that uses C5 components.
 00012 by Yelcamino, on Flickr
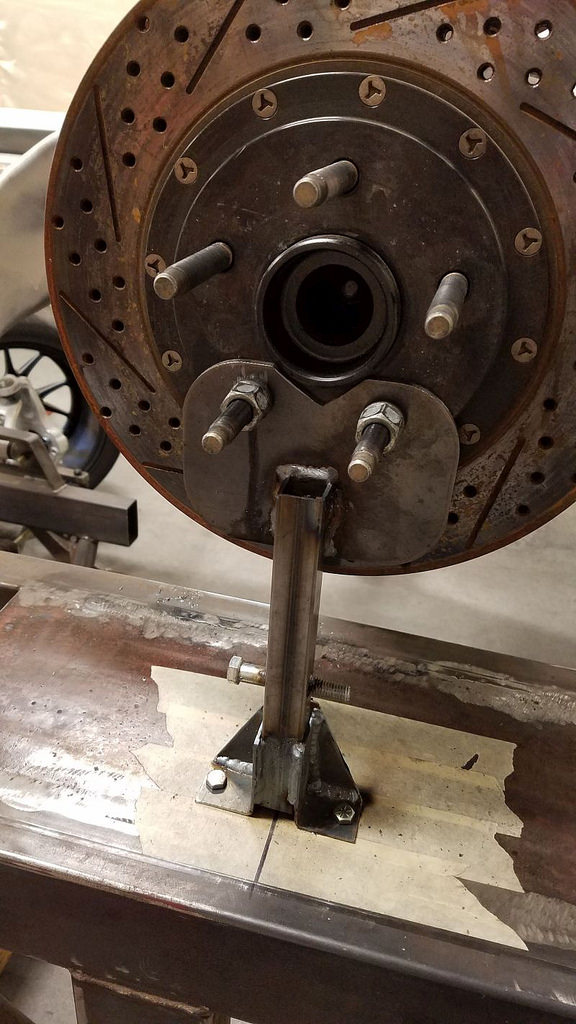
With the suspension mounted I was able to locate the front axle center line. To ensure I put the new spindles in the same place, I made a pair of stands that I could bolt to the hubs and table to keep things from moving around.
 00013 by Yelcamino, on Flickr
 00014 by Yelcamino, on Flickr
After I felt confident about the center line, I placed the new front clip on the frame to get an idea of where I needed to cut.
 00015 by Yelcamino, on Flickr
Instead of cutting off too much, I chose to be a little more cautious. First I cut the main cross member off
 00016 by Yelcamino, on Flickr
And then I followed that up with more precision cuts.
 00017 by Yelcamino, on Flickr
After I was happy with the cuts, I lowered the new clip in place to see how it fit.
 00018 by Yelcamino, on Flickr
 00019 by Yelcamino, on Flickr
 00020 by Yelcamino, on Flickr
After I got it in place and the fit seemed good, I needed to fine tune the location. I did that with string, bubble levels, and spacers.
 00021 by Yelcamino, on Flickr
 00022 by Yelcamino, on Flickr
 00023 by Yelcamino, on Flickr
After I was happy with its location, I tacked it in place and started figuring out how to permanently attach the clip to the side rails.
 00024 by Yelcamino, on Flickr
 00025 by Yelcamino, on Flickr
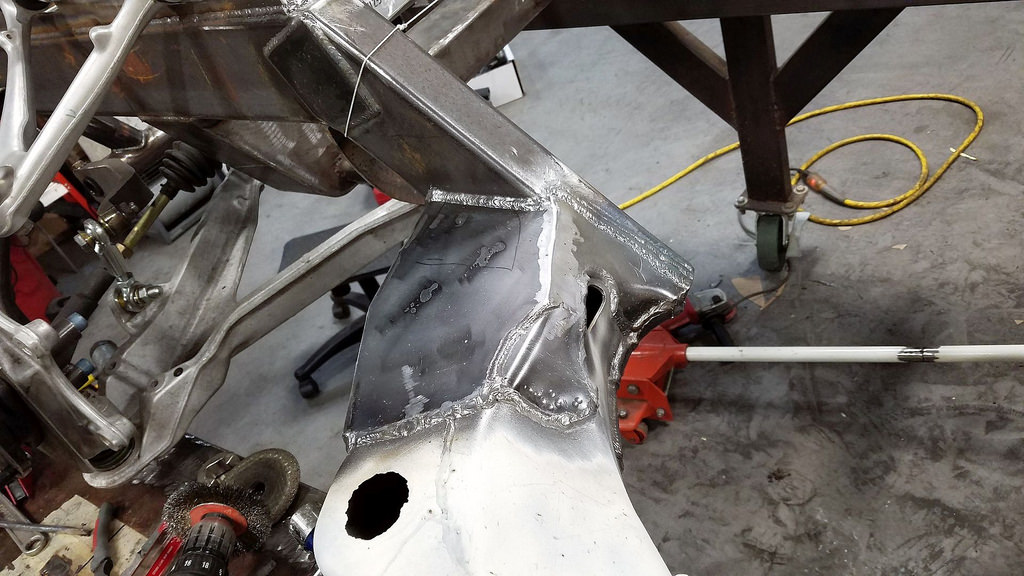 00026 by Yelcamino, on Flickr
With that out of the way, I made a wheel fitment tool because Im too cheap to buy one!
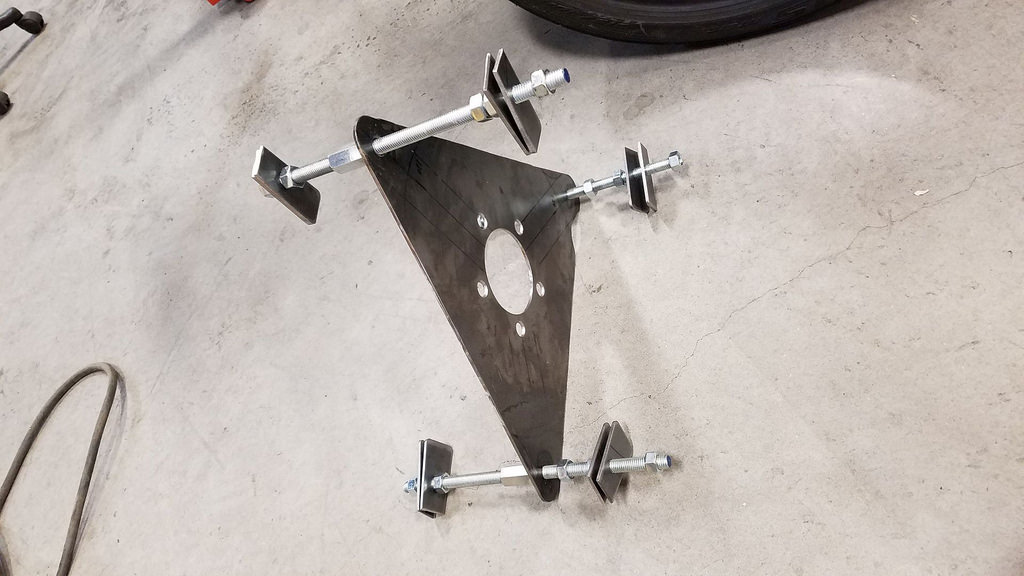 00027 by Yelcamino, on Flickr
With my new tool, I was able to mount a 315/30-18 tire and adjust the back space to simulate a wheel to check for clearance around the frame and suspension components.
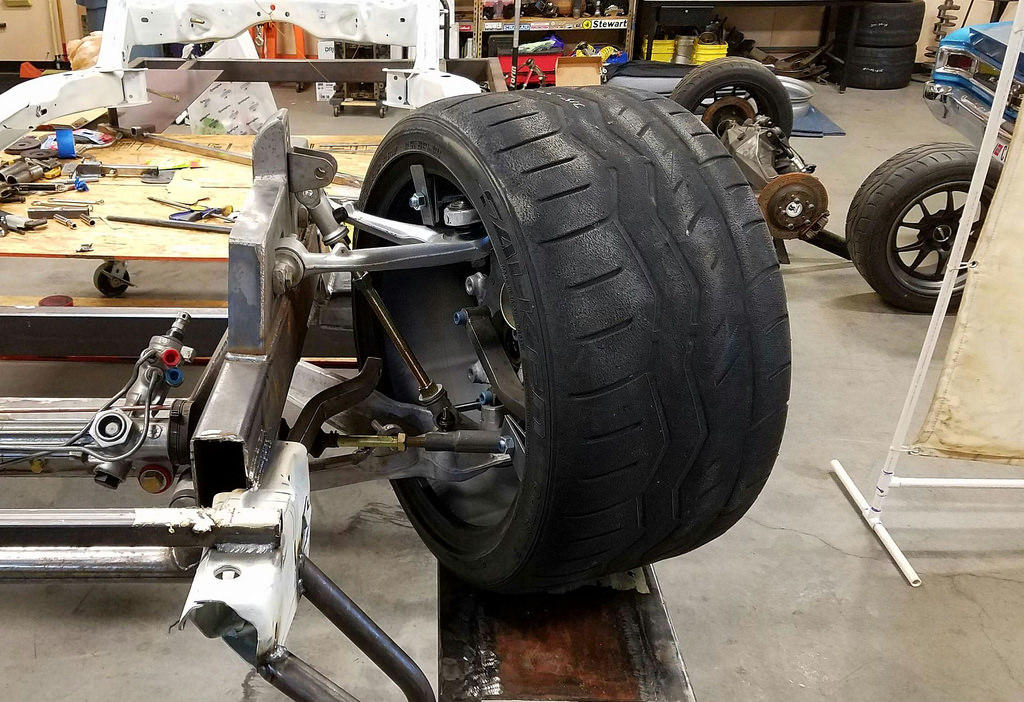 00028 by Yelcamino, on Flickr
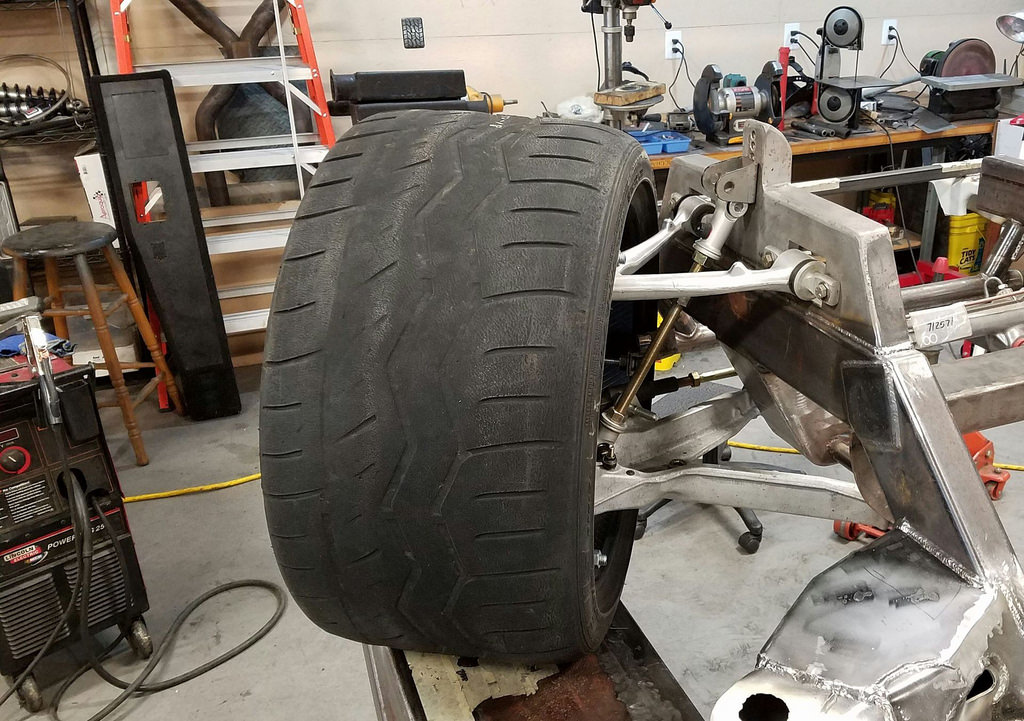 00029 by Yelcamino, on Flickr
Next comes the rear suspension
Last edited by Yelcamino; 01-13-2018 at 04:58 PM.
-
01-14-2018 #2
Rat Pack Member
- Join Date
- Sep 2006
- Location
- Indiana
- Posts
- 2,670
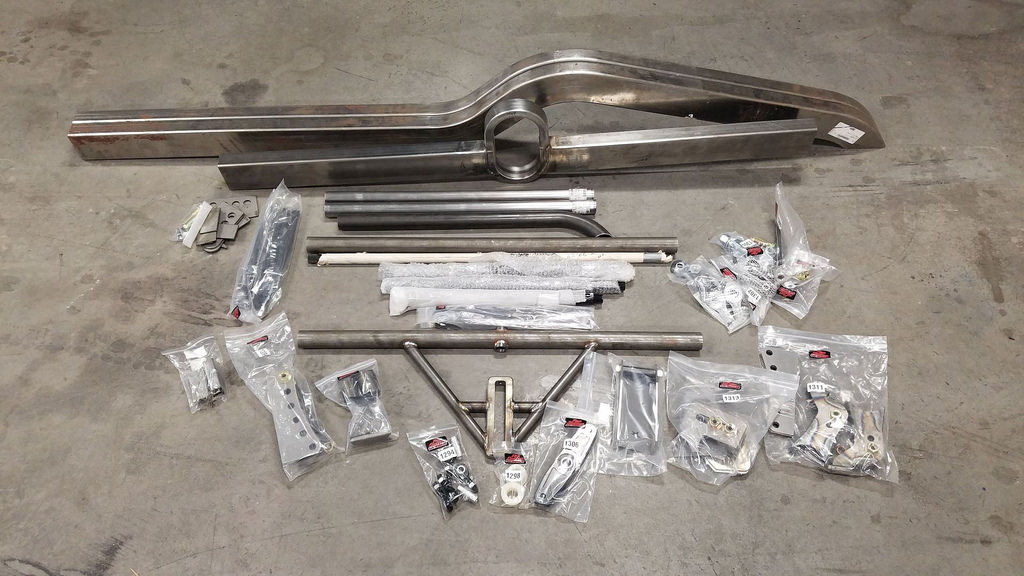
As promised, its time for the rear suspension. When I started this project my original plan was to get the rear frame kit from ABC Performance so I could stuff 335s out back. After thinking about it for a while I decided that if Im going to go through all this work I wanted to try something different. During my dealings with Ron Sutton while I was at ridetech, I learned about his suspension kits, specifically his offset three-link. After some discussions and numerous emails, a big ol brown box showed up on my door step with this stuff in it
 10015 by Yelcamino, on Flickr
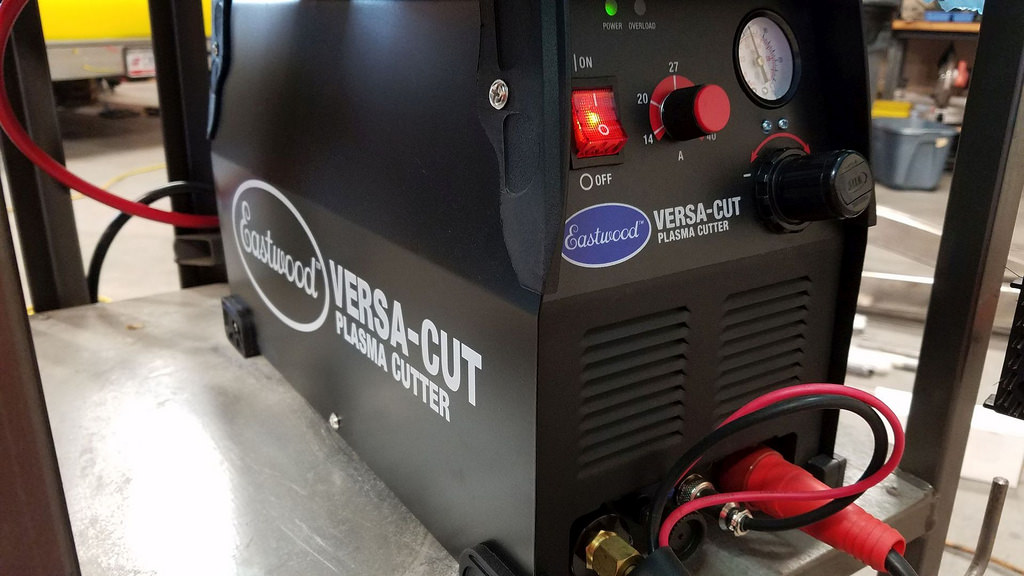
After having cut the front end apart with a 4 ½ grinder, I broke down and bought this Eastwood plasma cutter. It was relatively cheap, has a better warranty than the big names, and it works awesome! So far it has been able to cut ¼ plate without the slightest hiccup. Highly recommended if youre in the market for a plasma cutter.
 10020 by Yelcamino, on Flickr
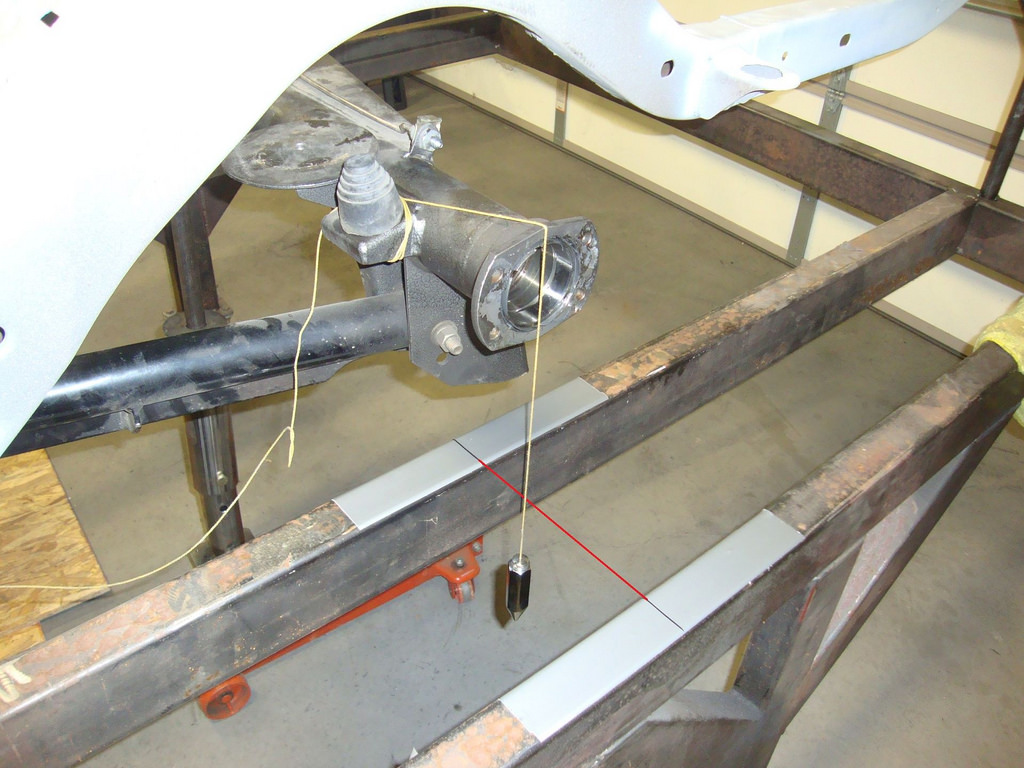
With the old 9 in place, I located the stock rear axle centerline using a good old fashioned plumb bob. (I added the red line to show the plane I was using)
 00012.1 by Yelcamino, on Flickr
With the centerline marked, I removed all the rear suspension and started measuring for the new parts.
 10027 by Yelcamino, on Flickr
Wanting to keep the body mount, I was able to do some fancy cutting thanks to the plasma!
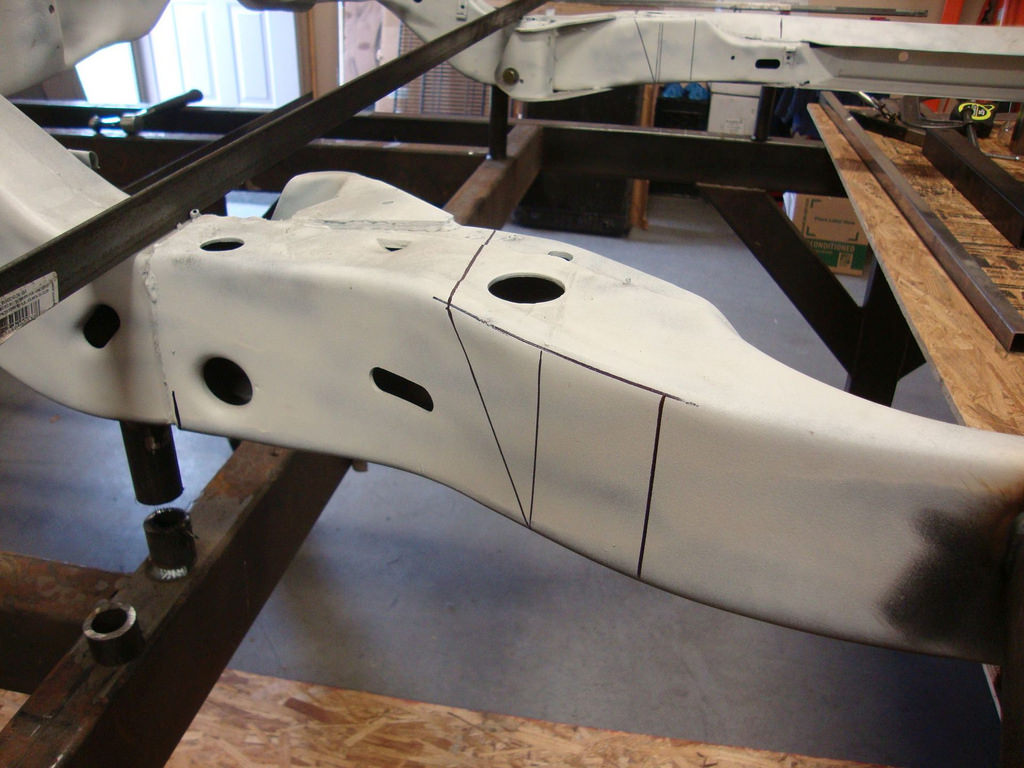 10028 by Yelcamino, on Flickr
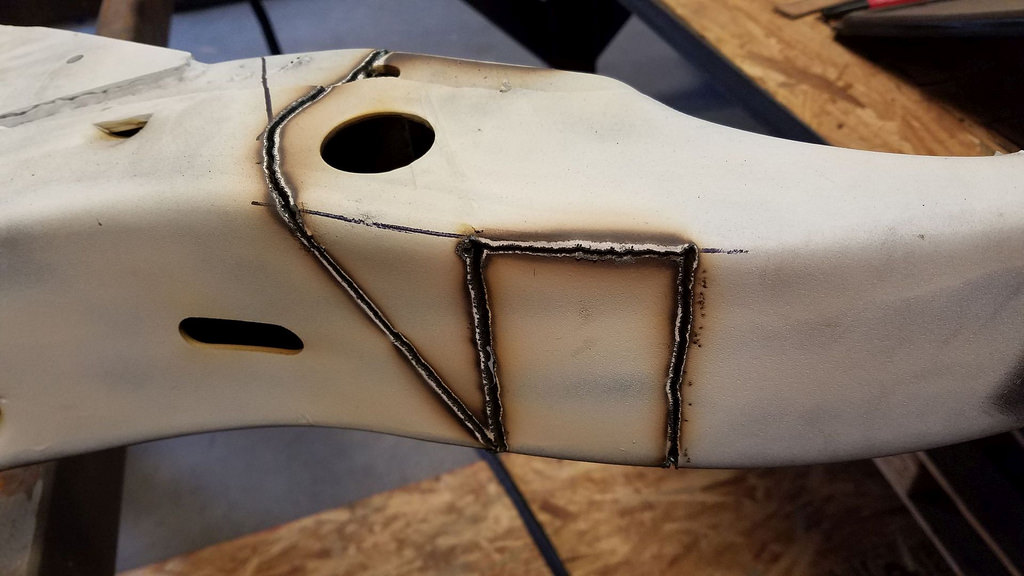 10029 by Yelcamino, on Flickr
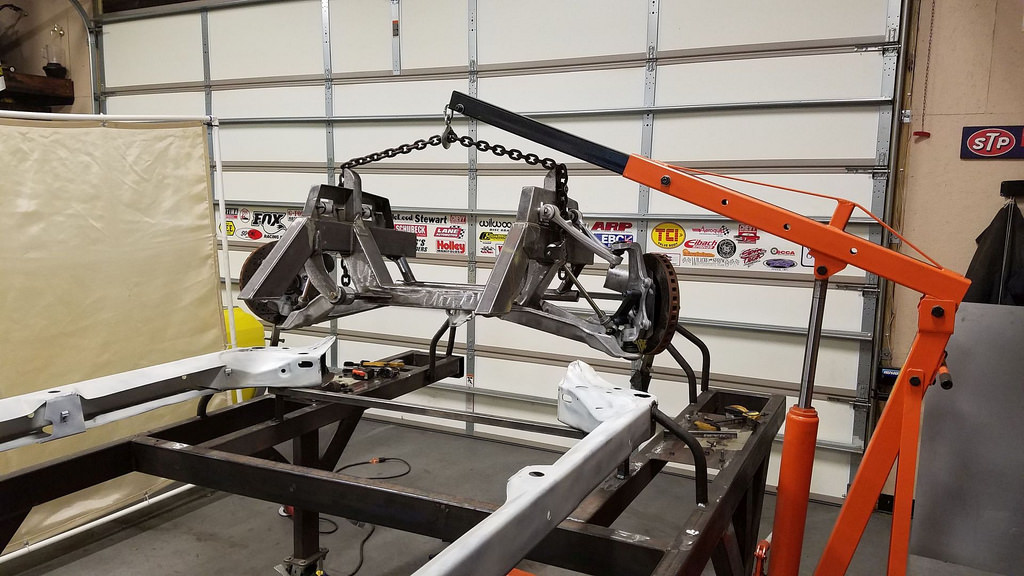
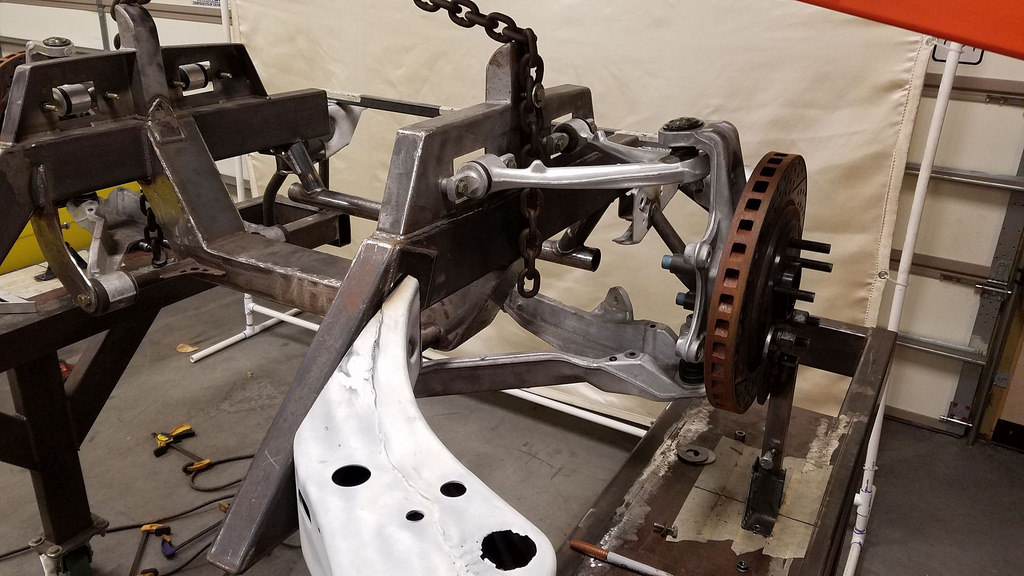
With all my cuts made, the engine hoist made quick work of getting the old stuff out of the way.
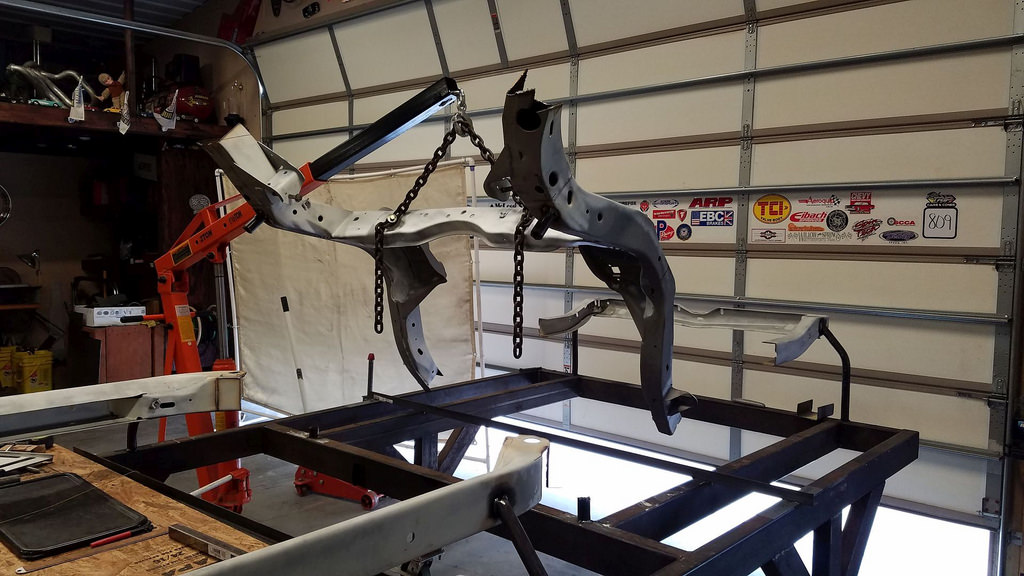 10030 by Yelcamino, on Flickr
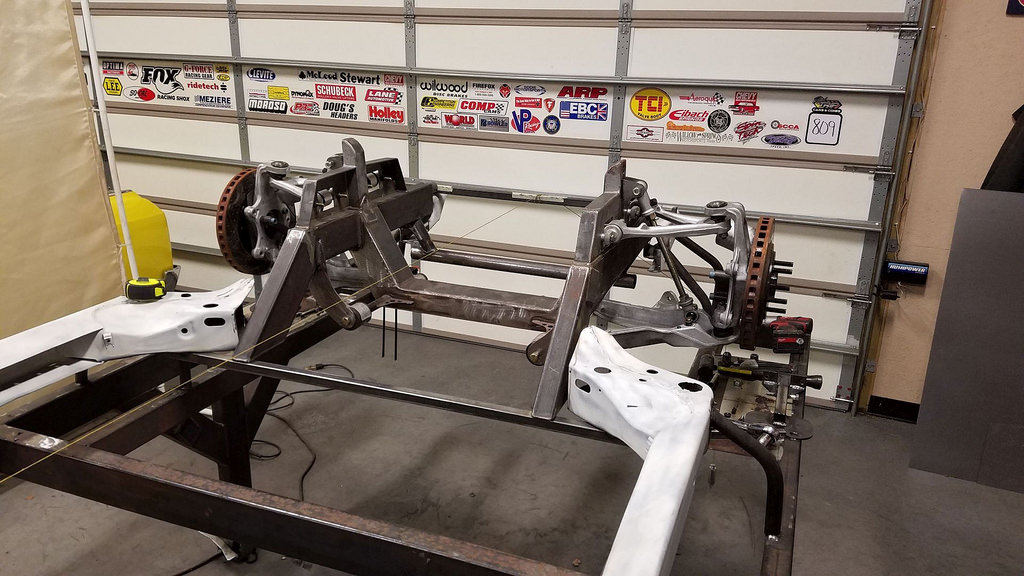
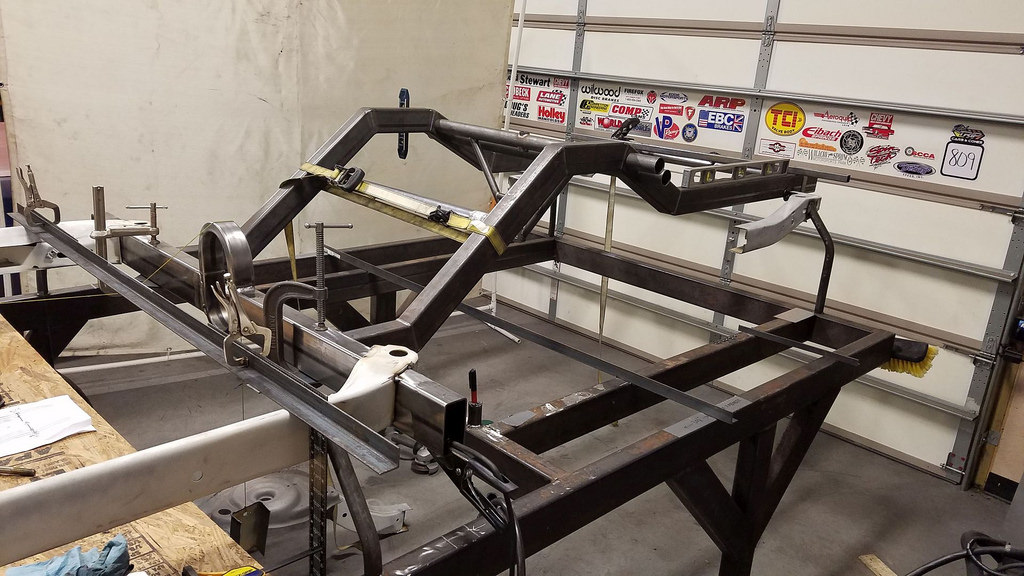
The first thing I did was get the new crossmember tacked in place so I could start fitting the new rear frame rails. After spending too much time trying to get these rails in the proper position
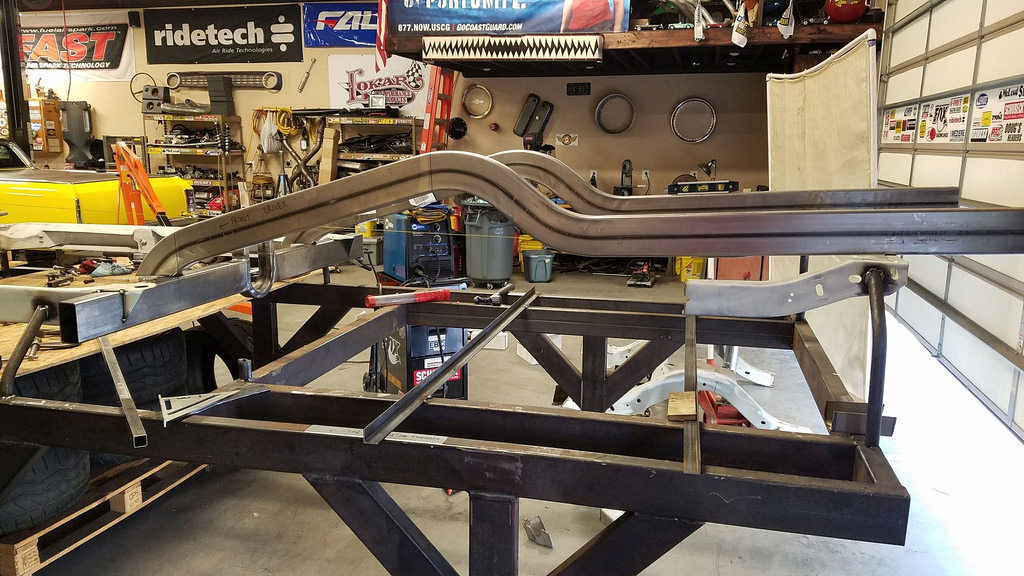 10031 by Yelcamino, on Flickr
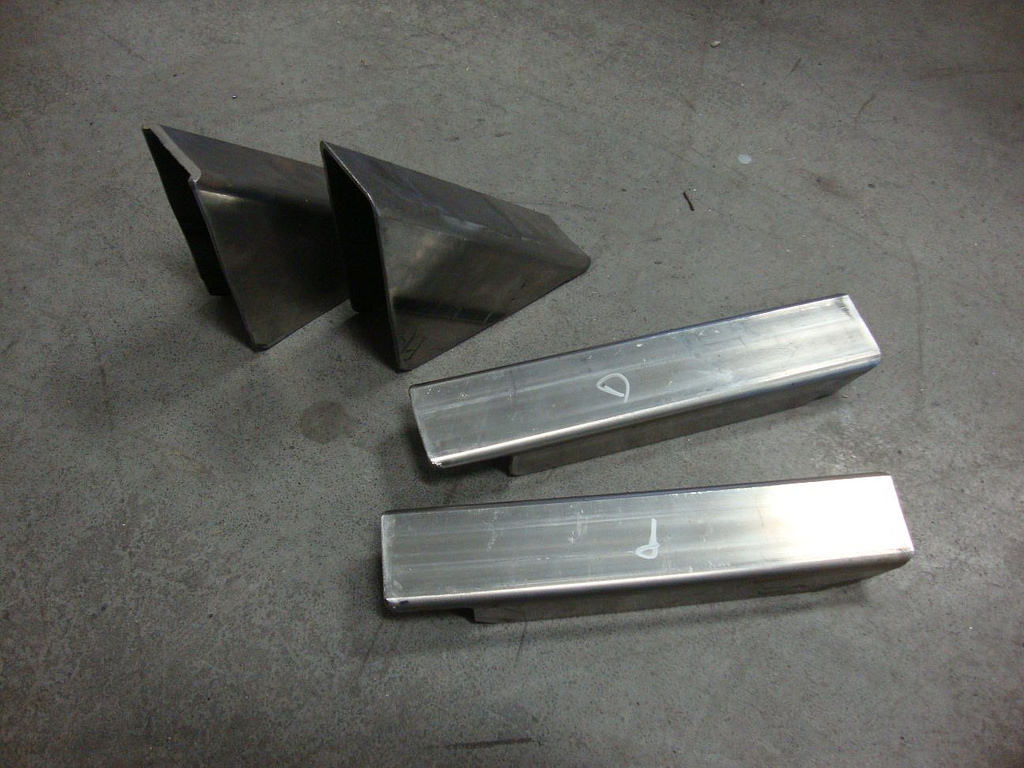
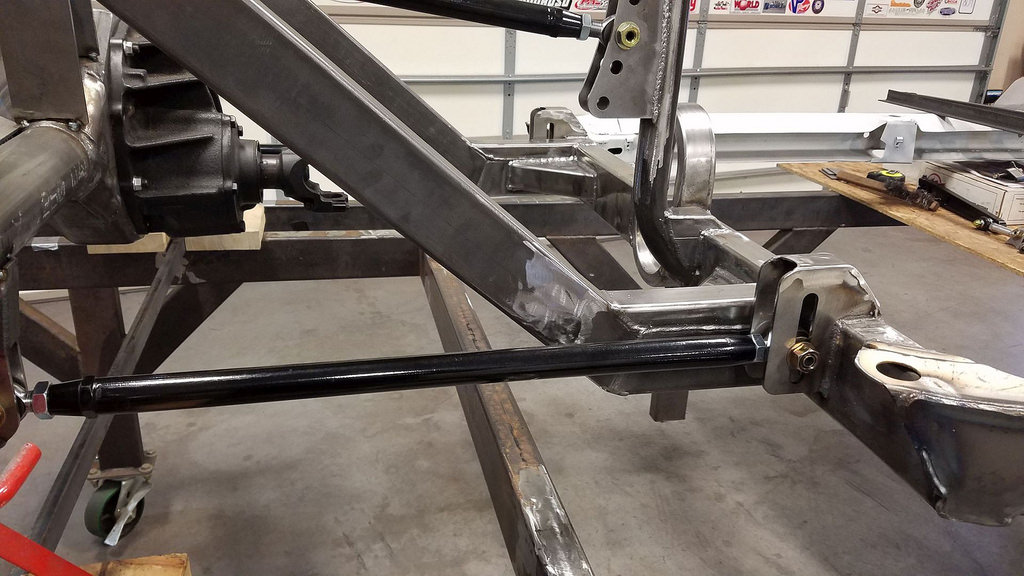
I got in contact with Ron and he sent me a new set of rails that were a better fit for me. Hell probably chime in with more details, but I think these are now the standard rails in his rear kits. A couple of cool features is the holes for the watts link crossmember and sway bar tube are already in place, and theres a line cut to locate the axle center line.
 10032 by Yelcamino, on Flickr
 10033.1 by Yelcamino, on Flickr
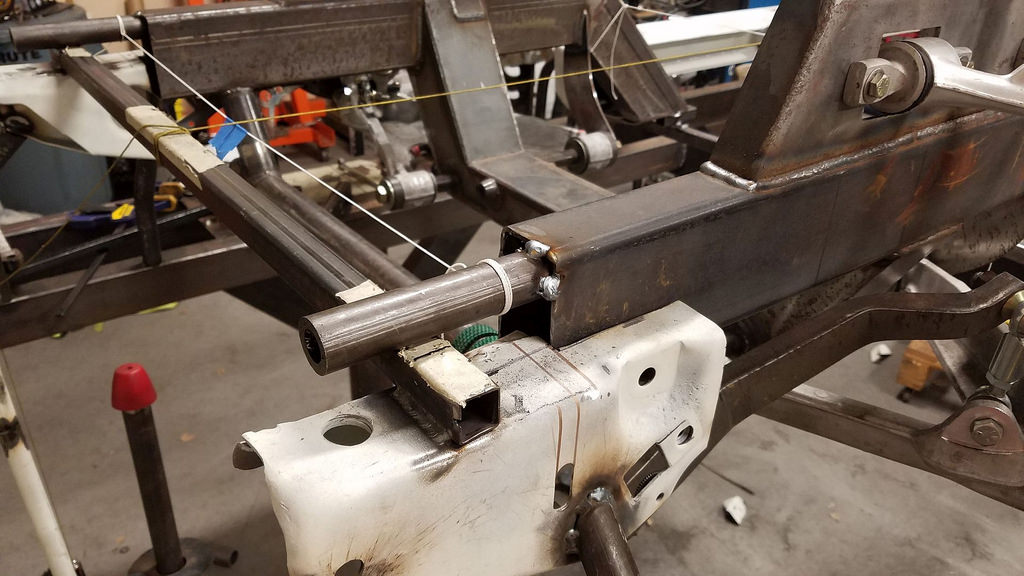
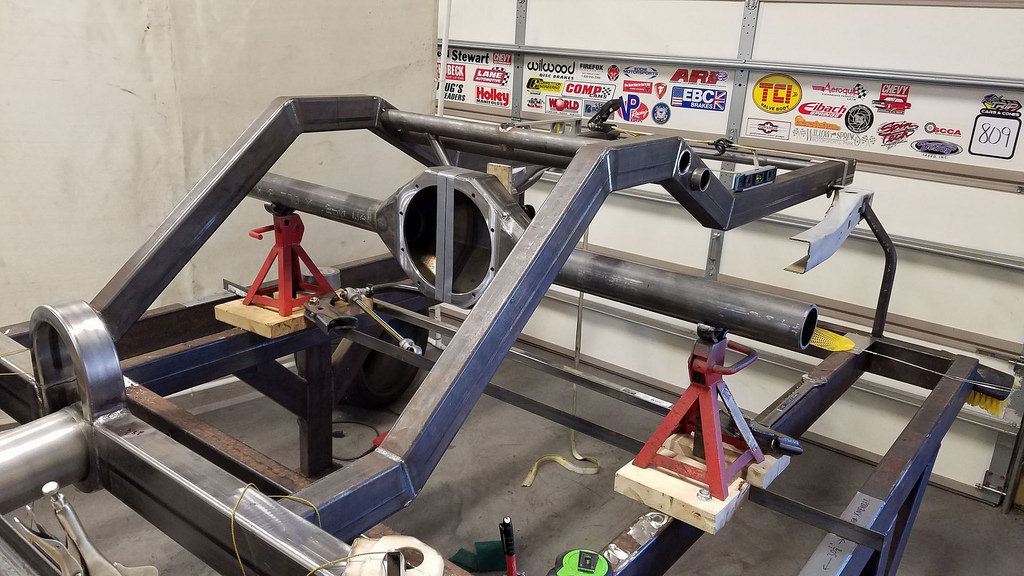
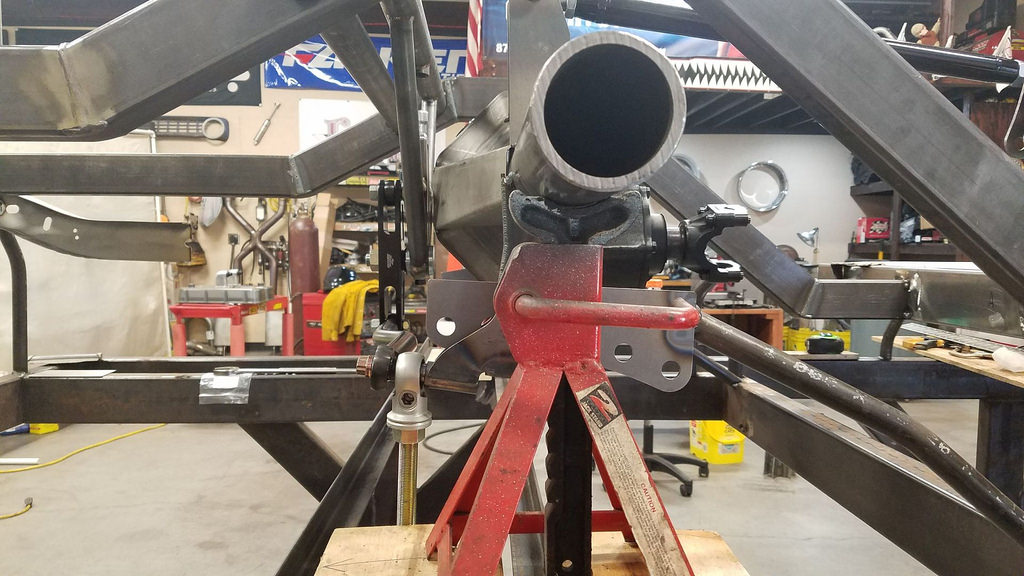
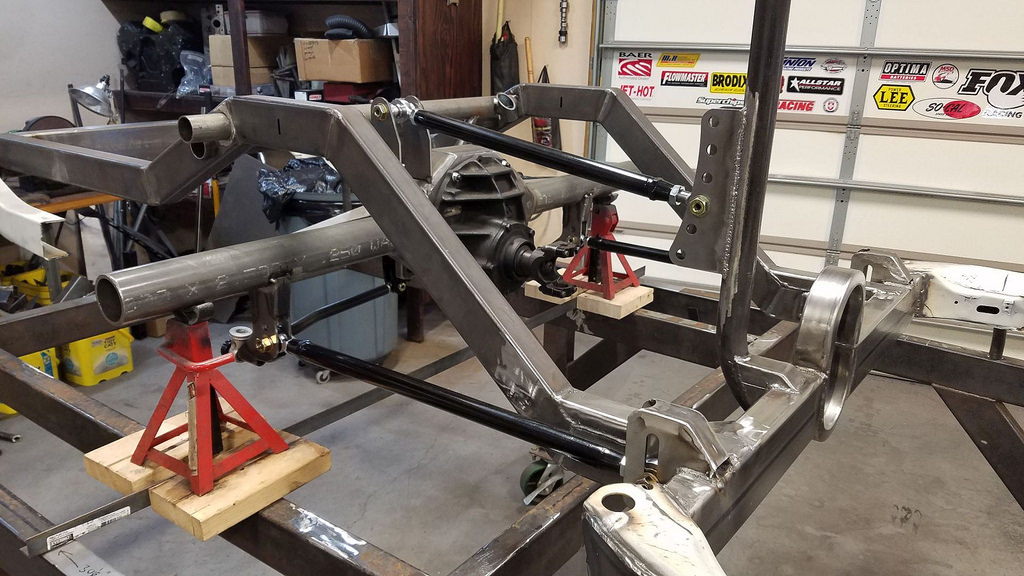
The next step was getting the new rear end housing in place so I could locate the suspension brackets.
 10033 by Yelcamino, on Flickr
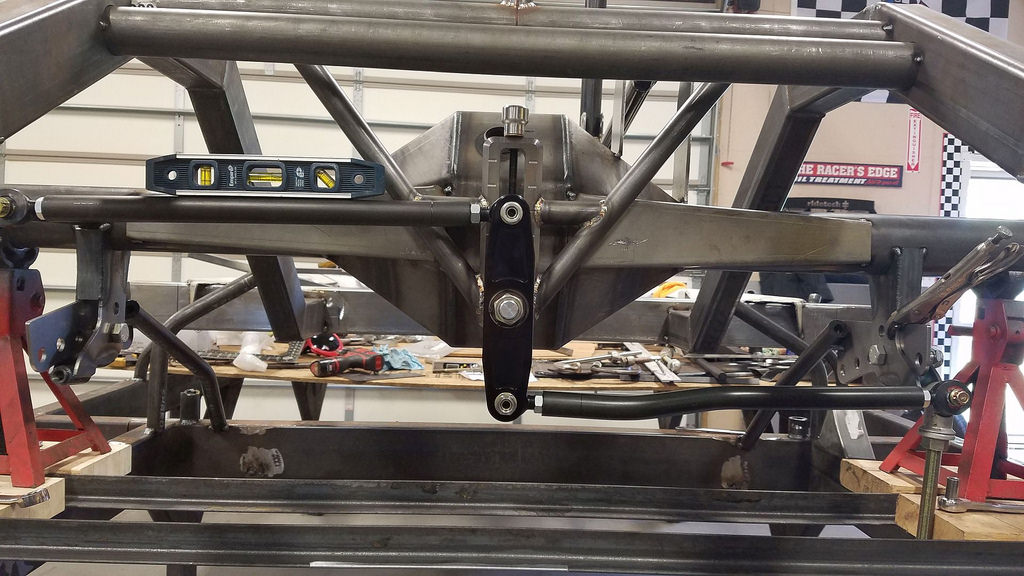
Here the watts link crossmember and sway bar tube are tacked in.
 10034 by Yelcamino, on Flickr
Lower shock mounts tacked in.
 10035 by Yelcamino, on Flickr
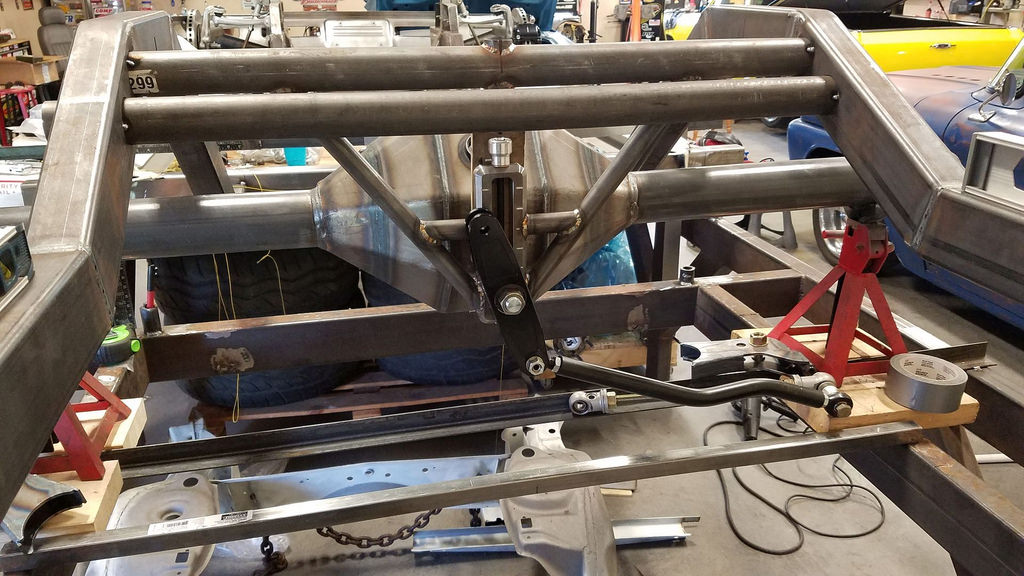
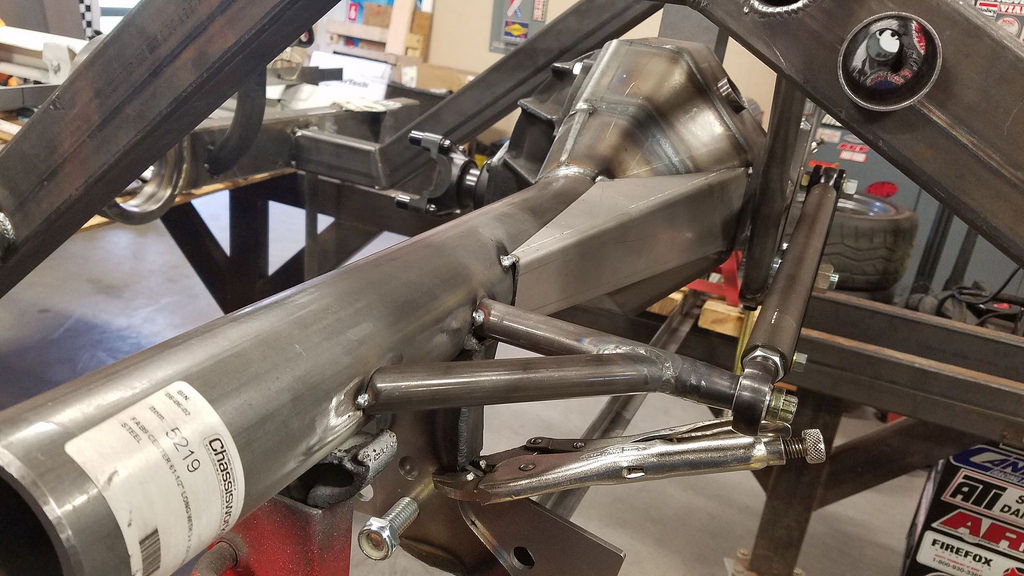
Third link tacked in.
 10036 by Yelcamino, on Flickr
 10037 by Yelcamino, on Flickr
Driver side watts bracket tacked in.
 10038 by Yelcamino, on Flickr
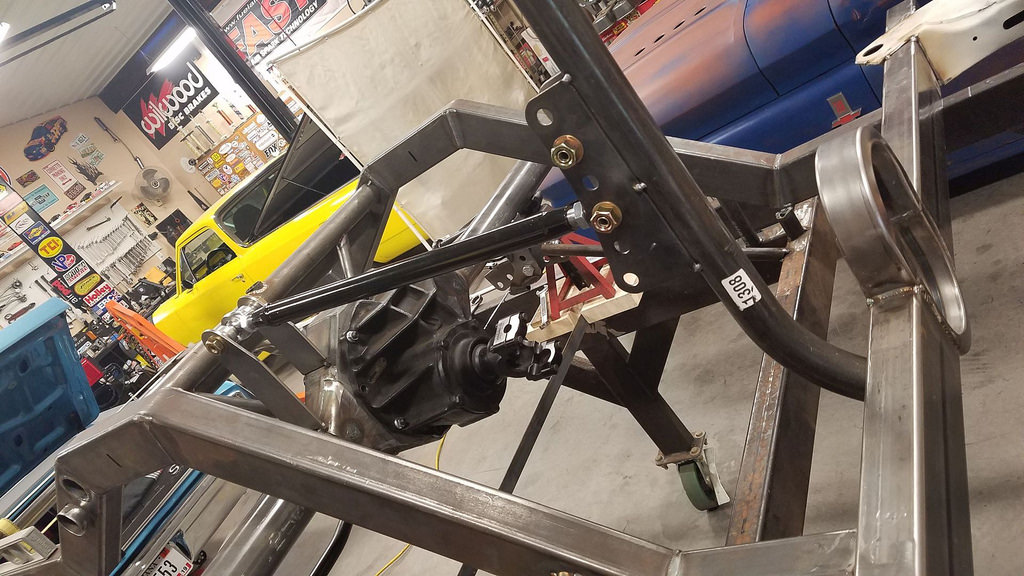
Its slowly starting to take shape. You can see in this photo the back brace is tacked to the rear housing. Down the road youll see I had to modify it to clear the coil overs.
 10039 by Yelcamino, on Flickr
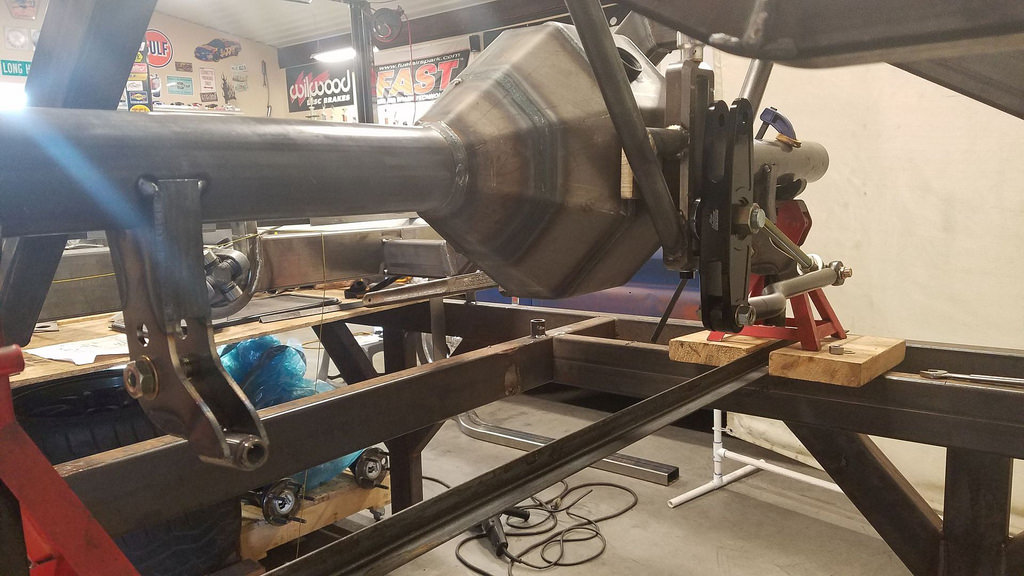
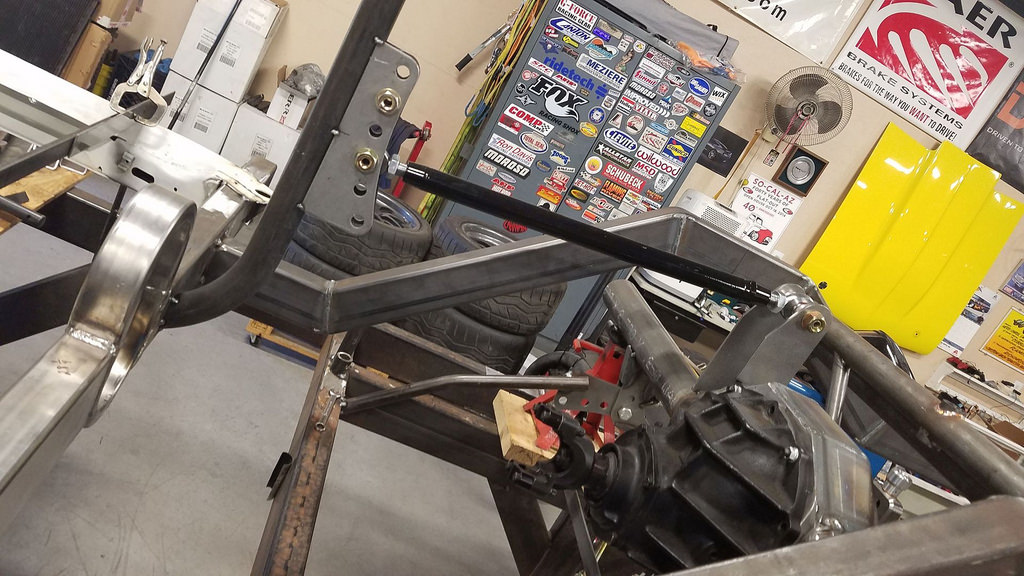
From this angle you can see theres about ½ of space between the back of the rear end housing and the watts a-frame.
 10040 by Yelcamino, on Flickr
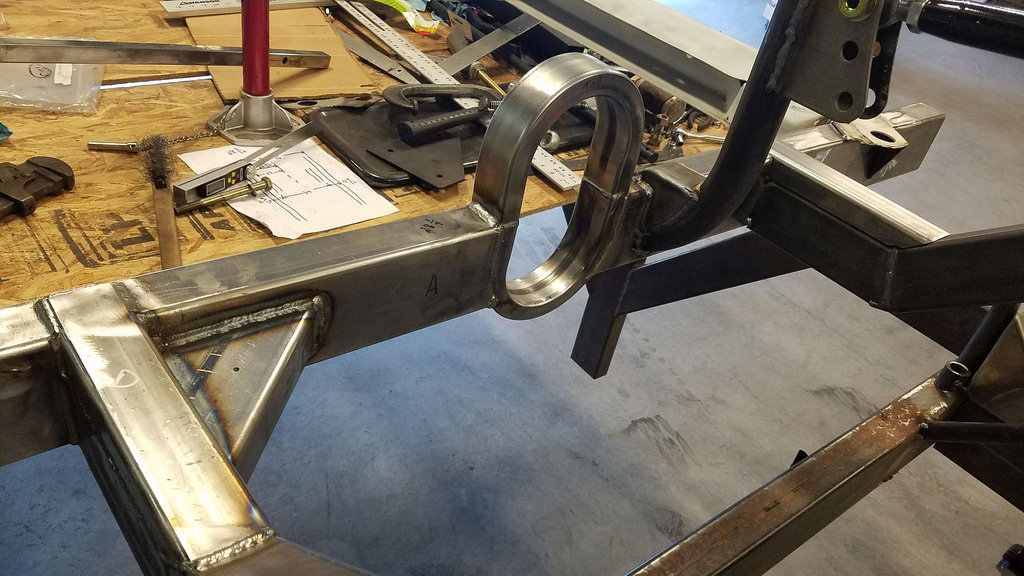
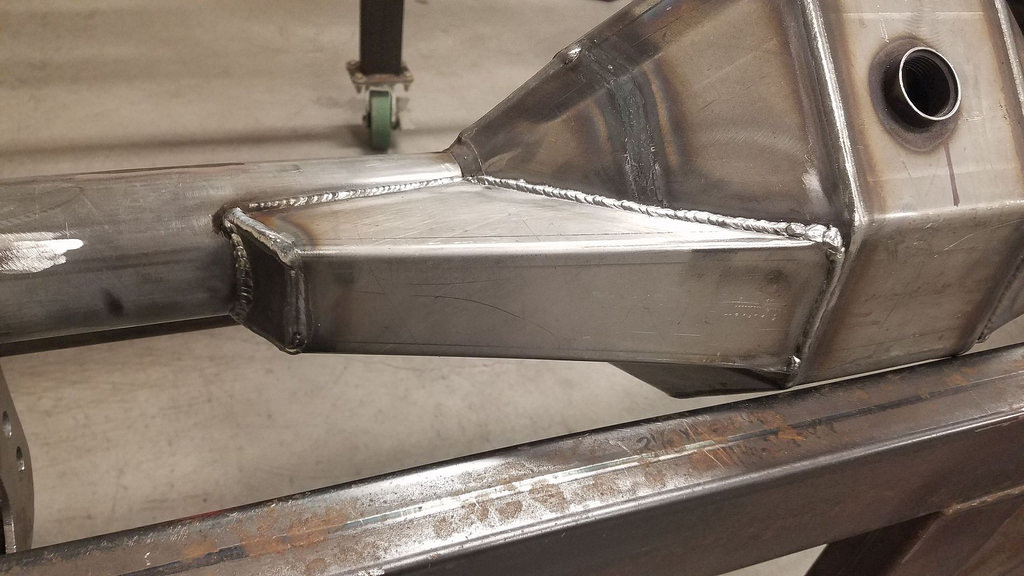
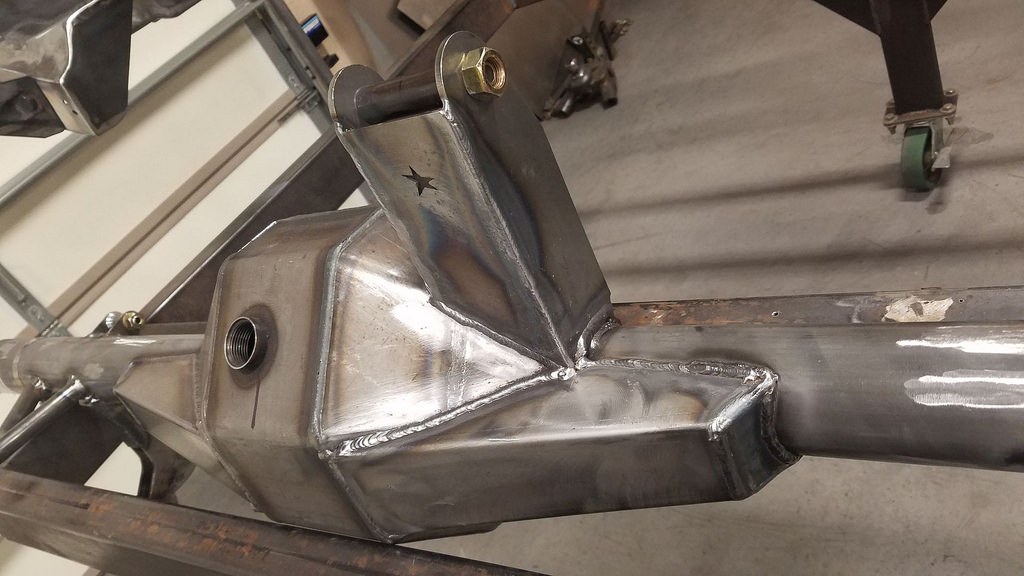
I made these gussets to help reinforce the joint between the rear frame rails and crossmember.
 10041.1 by Yelcamino, on Flickr
 10041.2 by Yelcamino, on Flickr
 10042 by Yelcamino, on Flickr
At this point just about everything is welded in permanently except for the housing brackets.
 10043 by Yelcamino, on Flickr
 10044 by Yelcamino, on Flickr
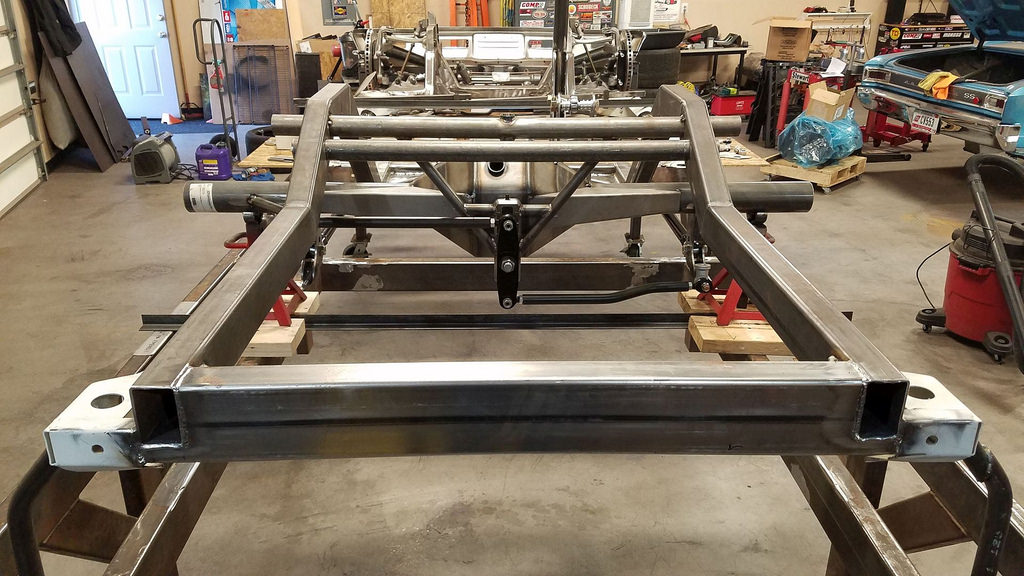
I added this rear crossmember which I cut from the original frame rails that Ron sent me.
 10045 by Yelcamino, on Flickr
01-14-2018 #3
Rat Pack Member
- Join Date
- Sep 2006
- Location
- Indiana
- Posts
- 2,670
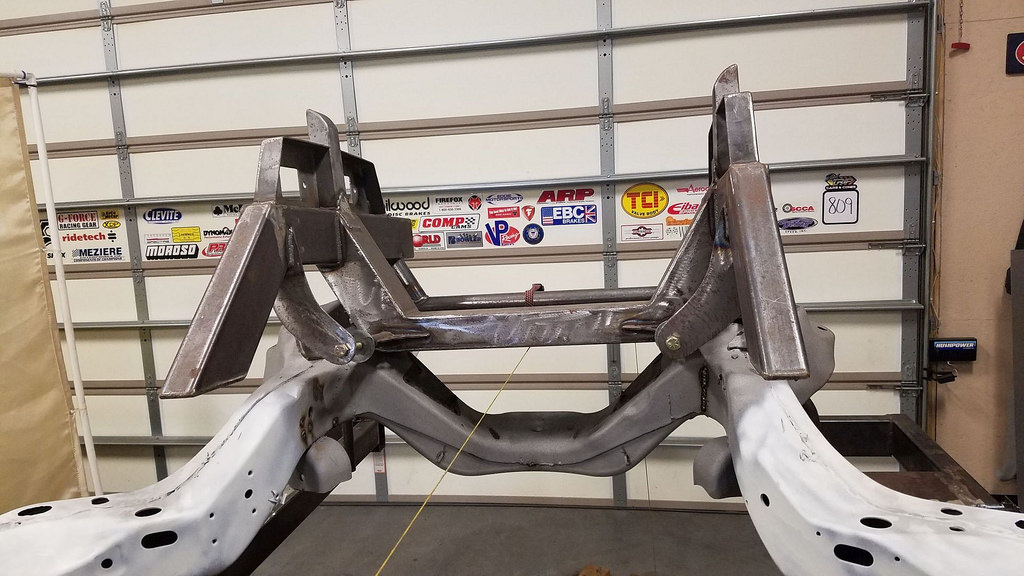
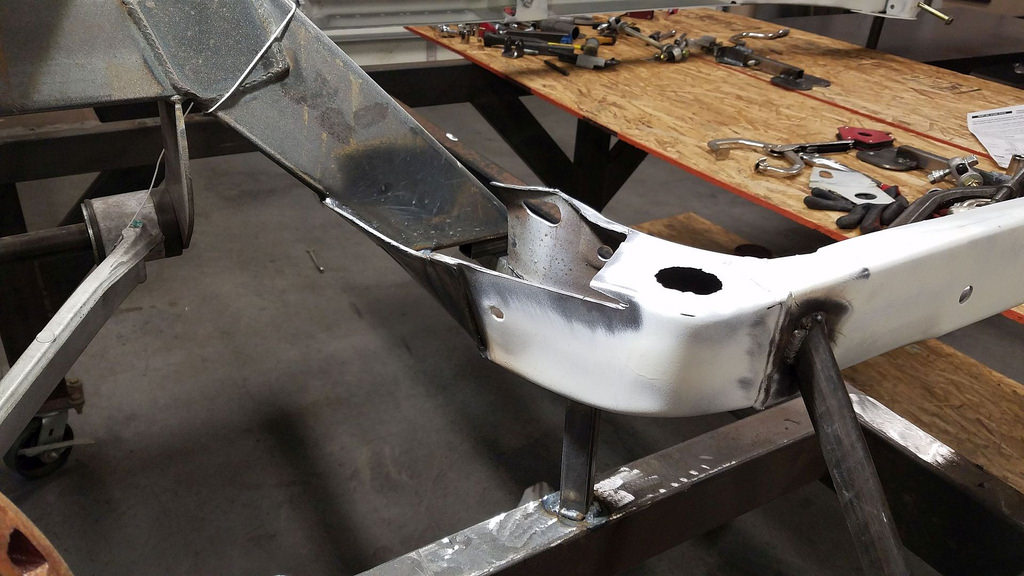
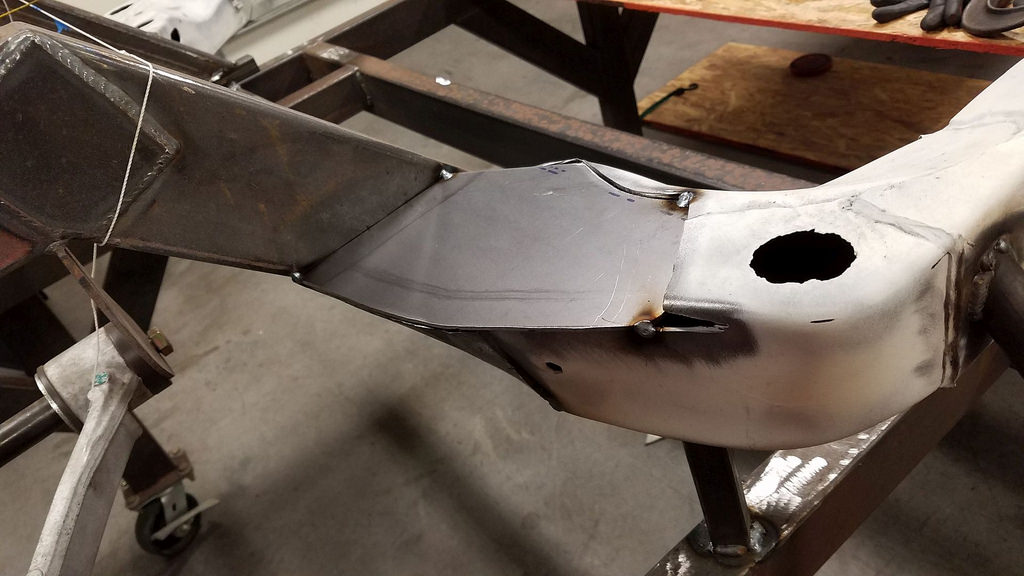
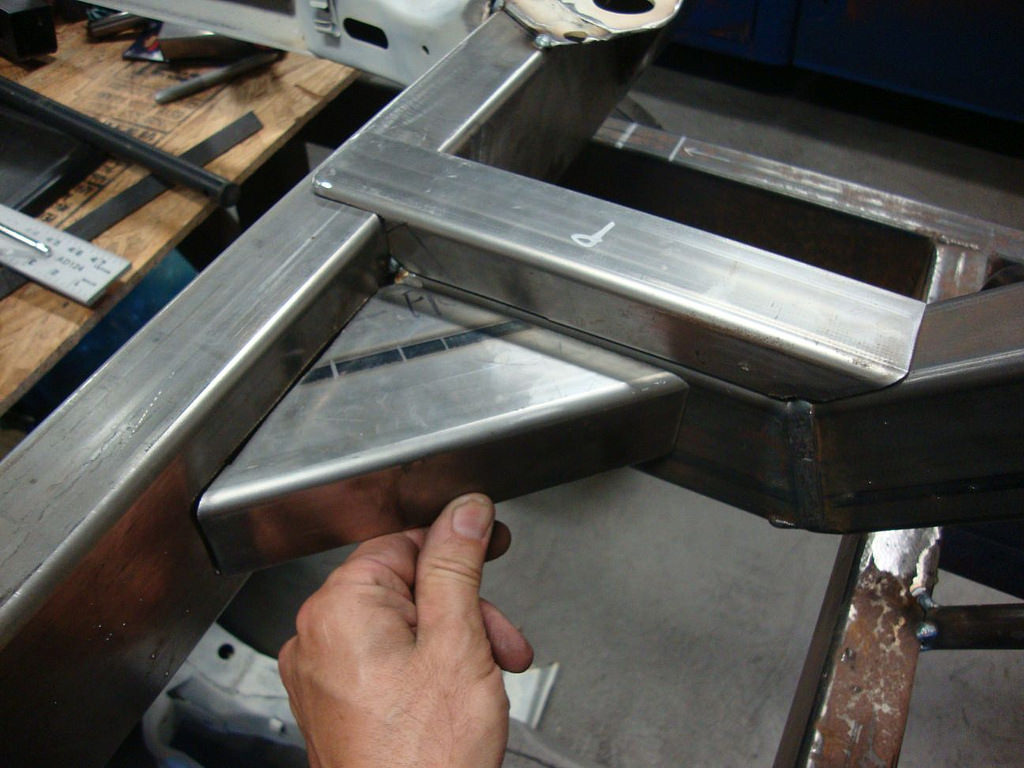
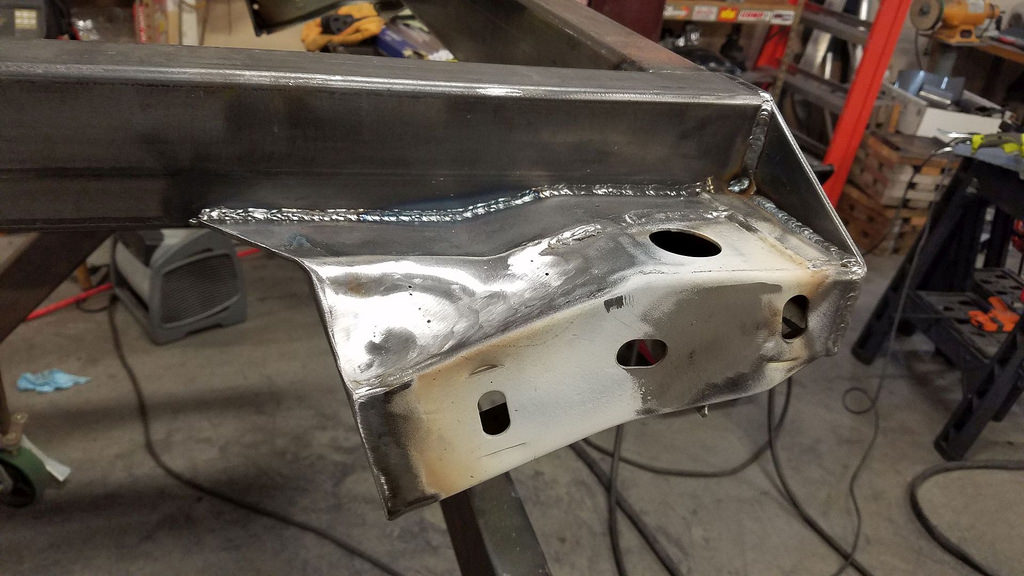
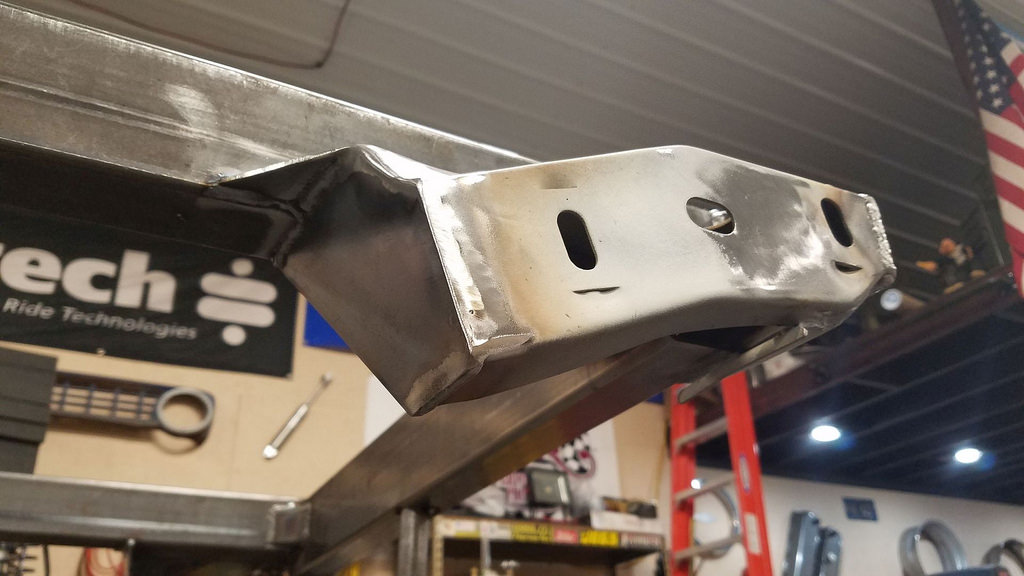
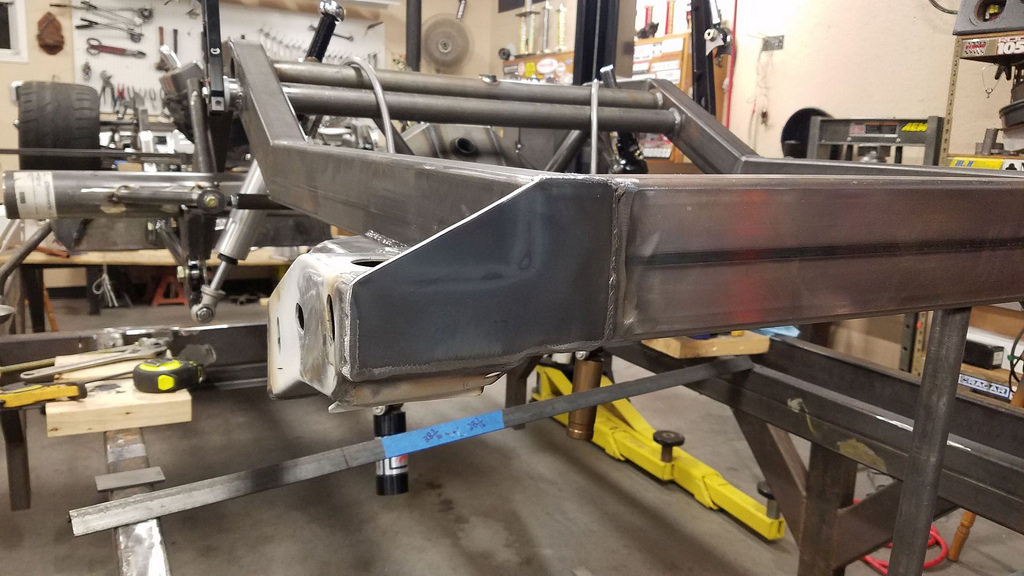
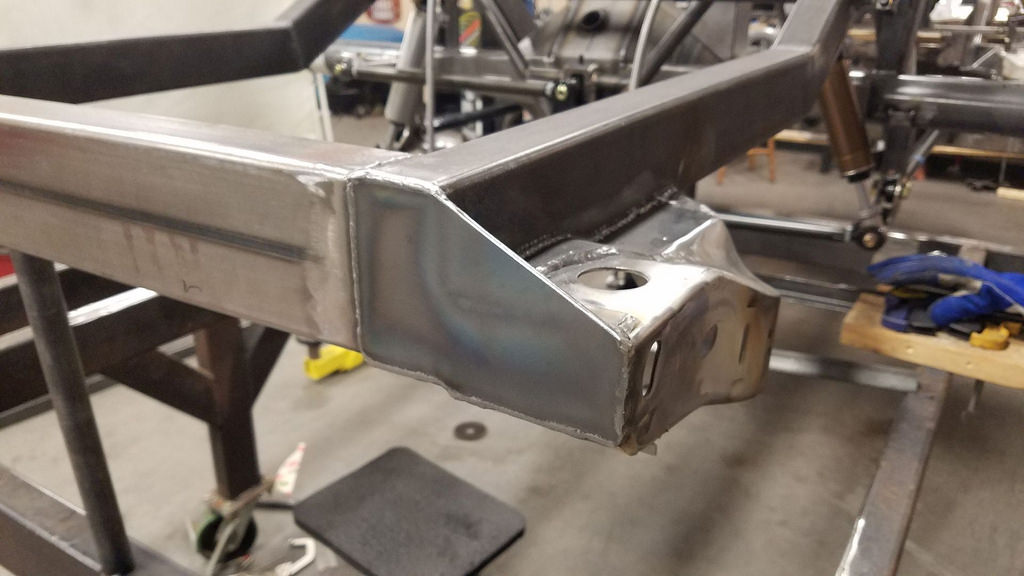
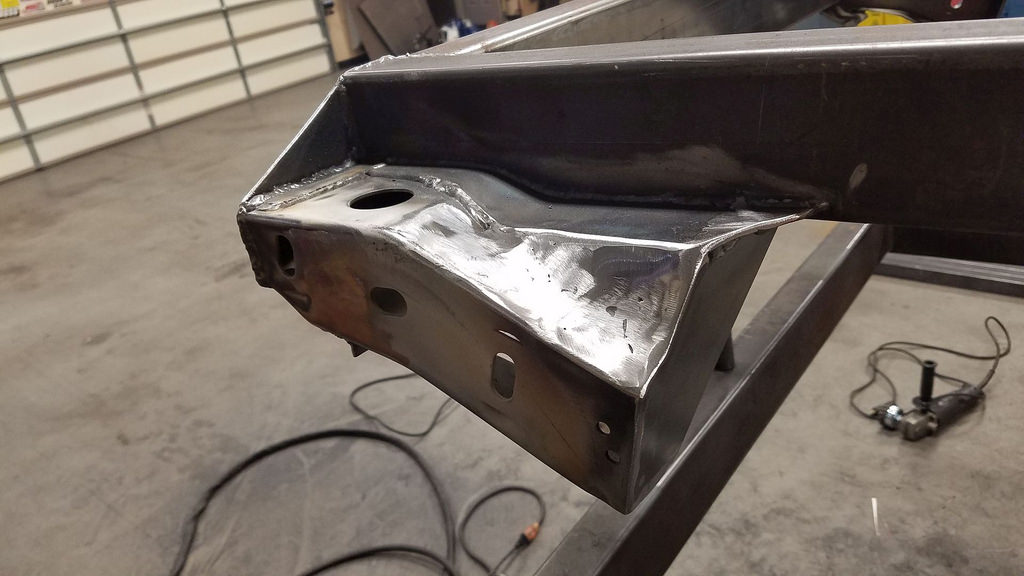
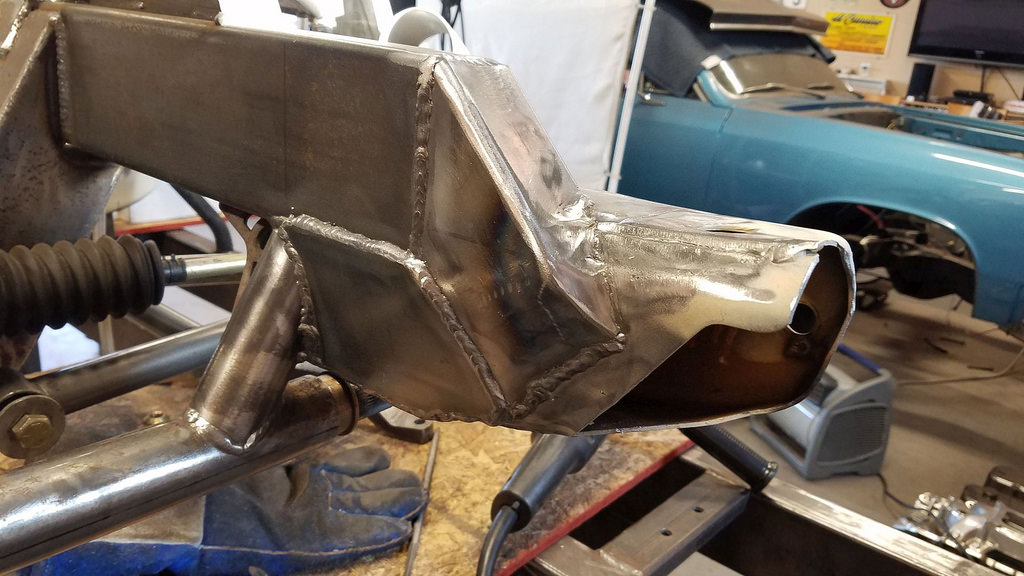
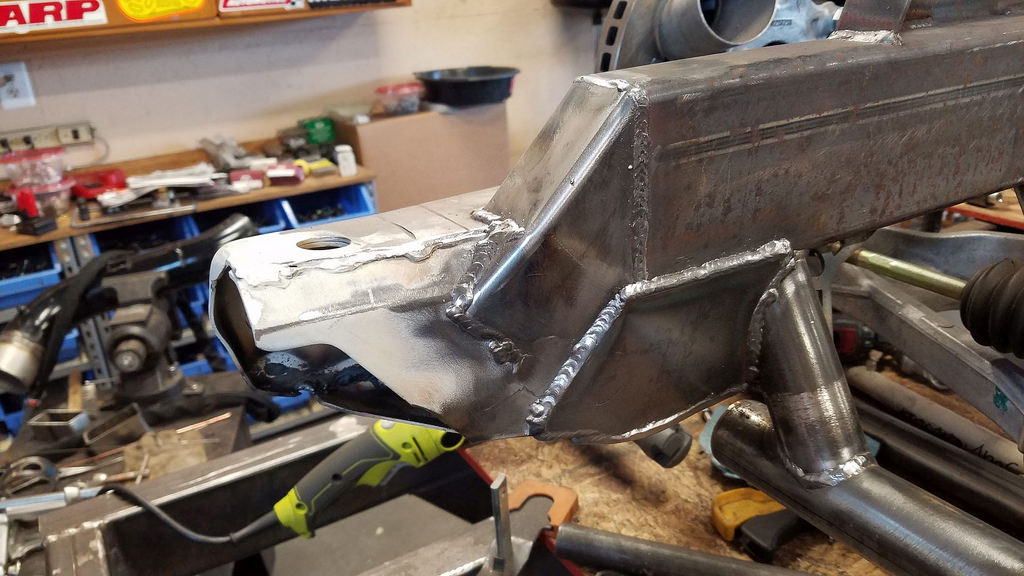
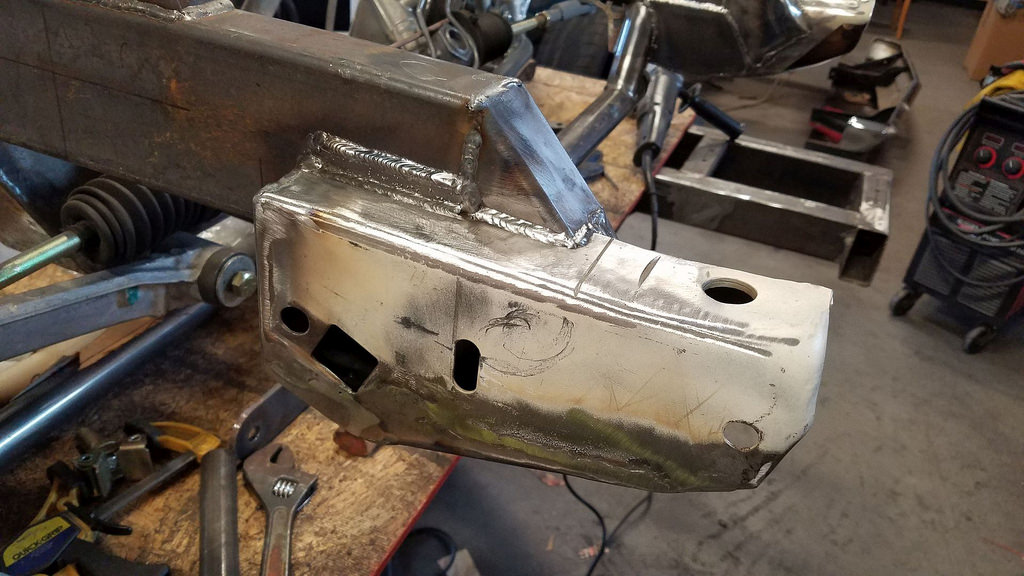
With all that done, it was time to connect the original frame horns to the new rails. They didnt turn out quite as pretty as I imagined them, but theyre pretty sturdy and put both bumpers where they should be.
 10046.1 by Yelcamino, on Flickr
 10046.2 by Yelcamino, on Flickr
 10046.3 by Yelcamino, on Flickr
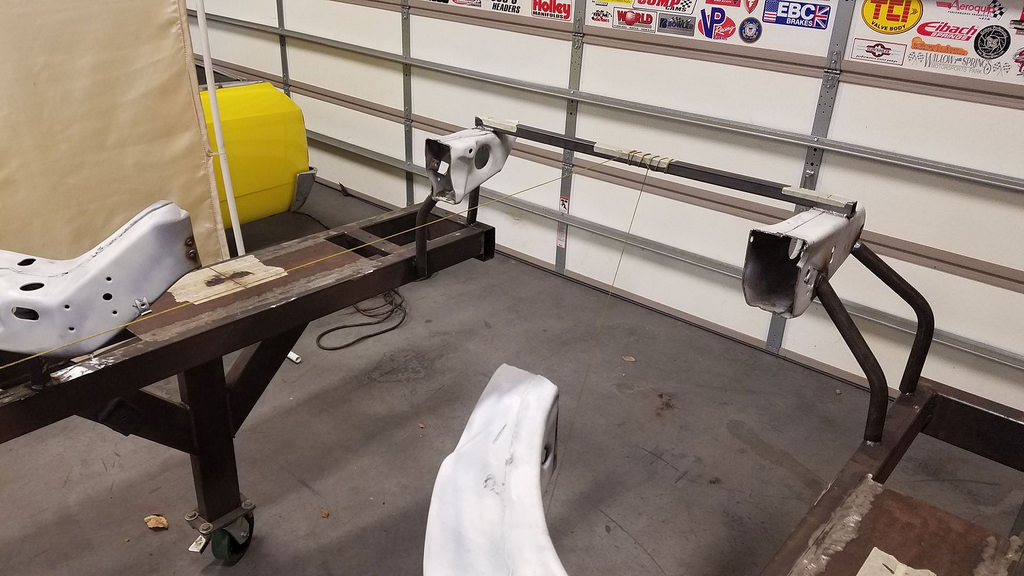
I tried to make both sides as similar as possible.
 10046.4 by Yelcamino, on Flickr
 10046.5 by Yelcamino, on Flickr
The bumper fits nice and doesnt bounce around!
 10054 by Yelcamino, on Flickr
Heres the front
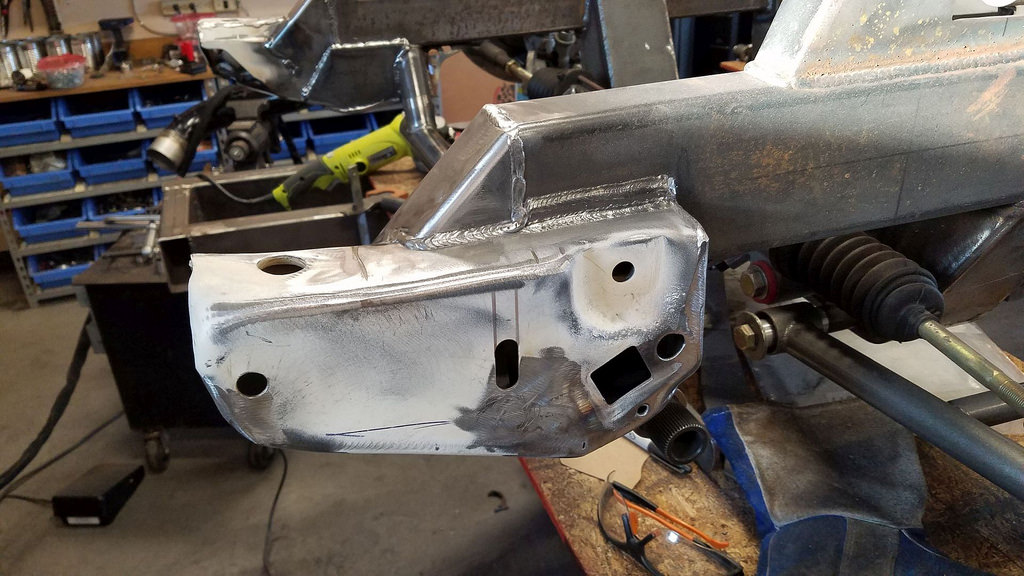 10046.6 by Yelcamino, on Flickr
 10046.7 by Yelcamino, on Flickr
 10046.8 by Yelcamino, on Flickr
 10046.9 by Yelcamino, on Flickr
And then I made a pair of boxing plates for the side rails and welded them in. (For some reason this is the only picture I took)
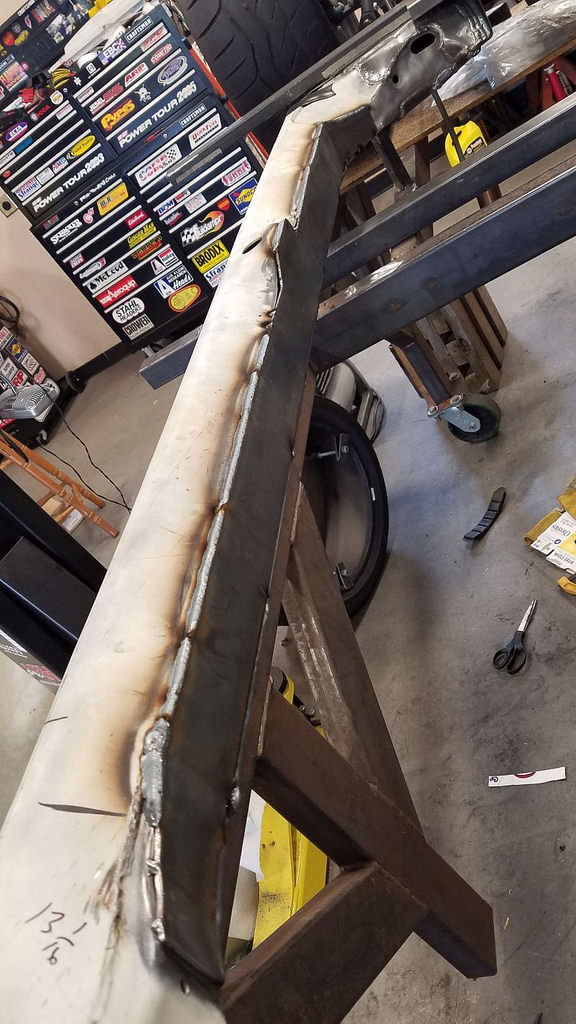 10046.91 by Yelcamino, on Flickr
The next big hurdle was permanently welding the suspension brackets to the rear end housing.
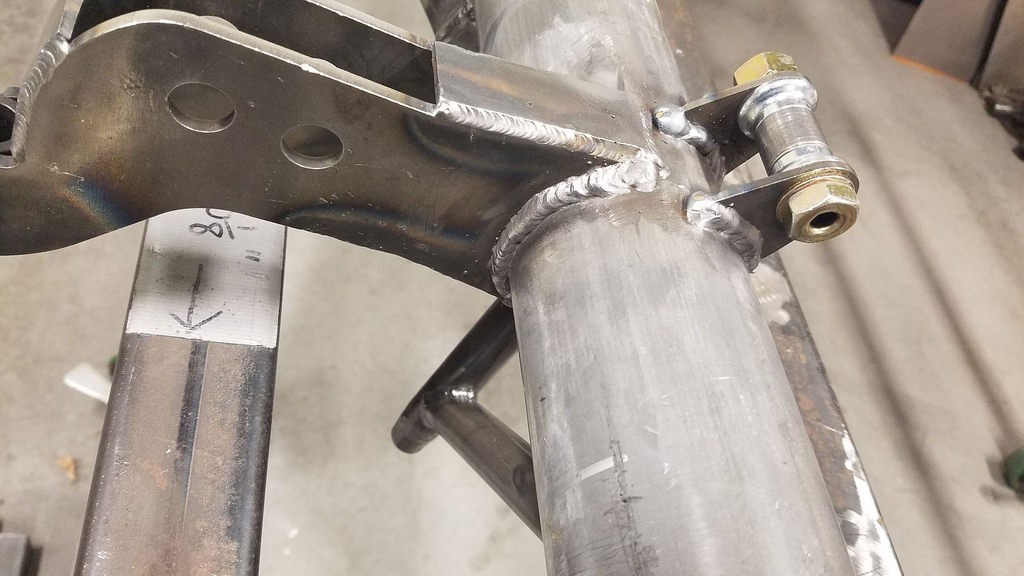 10046 by Yelcamino, on Flickr
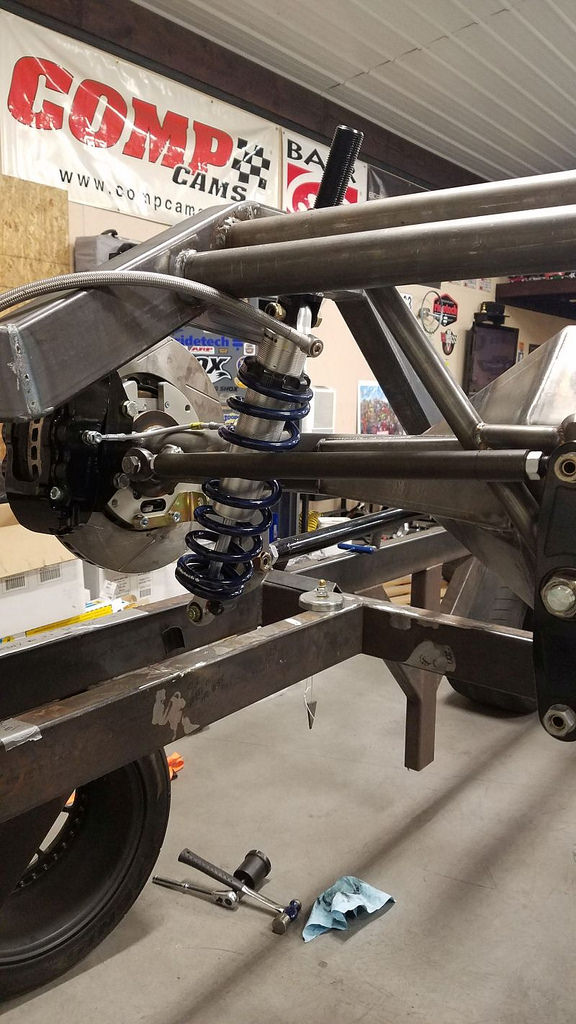
Here you can see how I shortened the back brace to clear the coil overs.
 10047 by Yelcamino, on Flickr
 10048 by Yelcamino, on Flickr
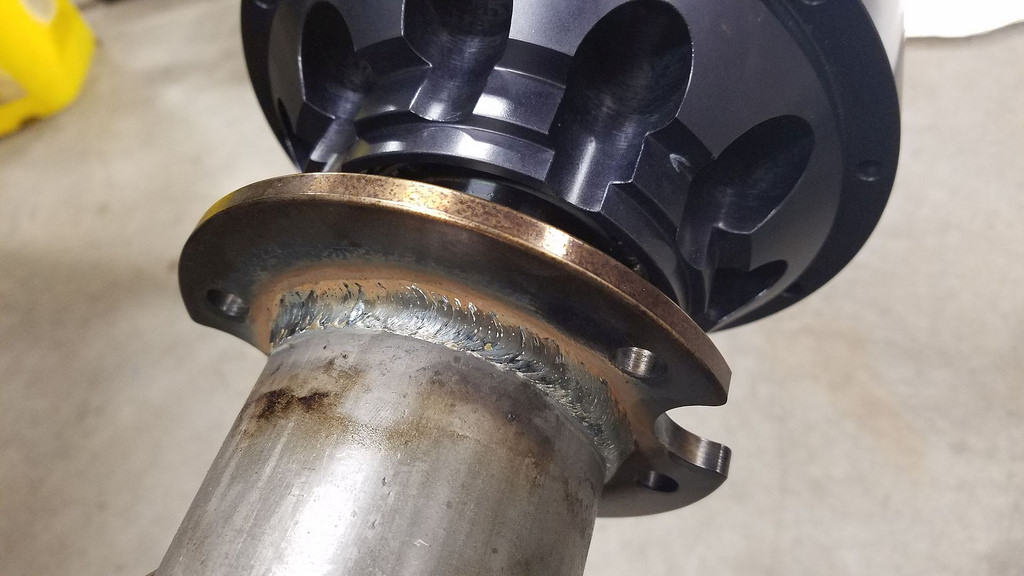
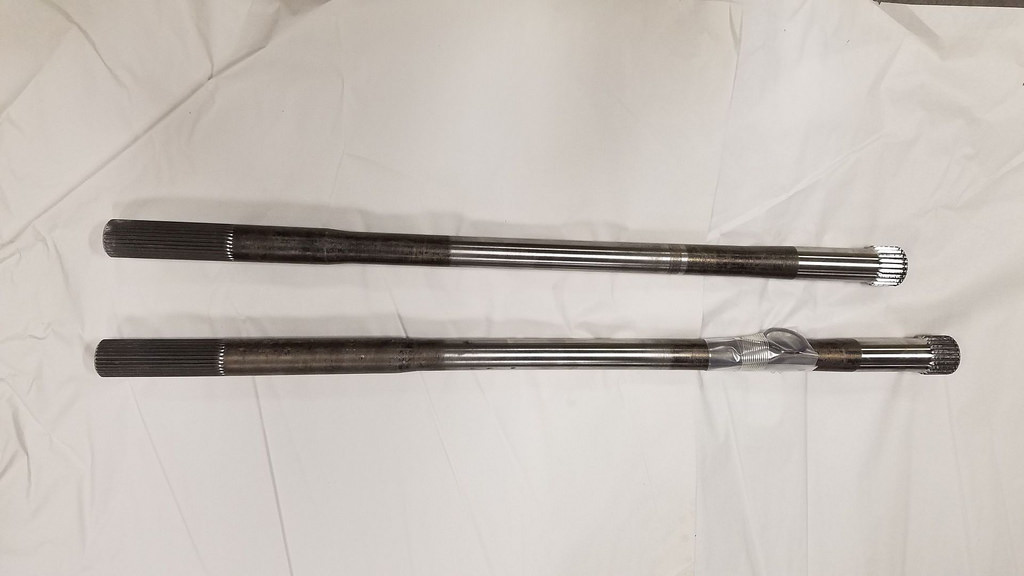
With all the brackets welded on, I made a trip to Moser and had them weld on the Baer floater ends and cut axles for me.
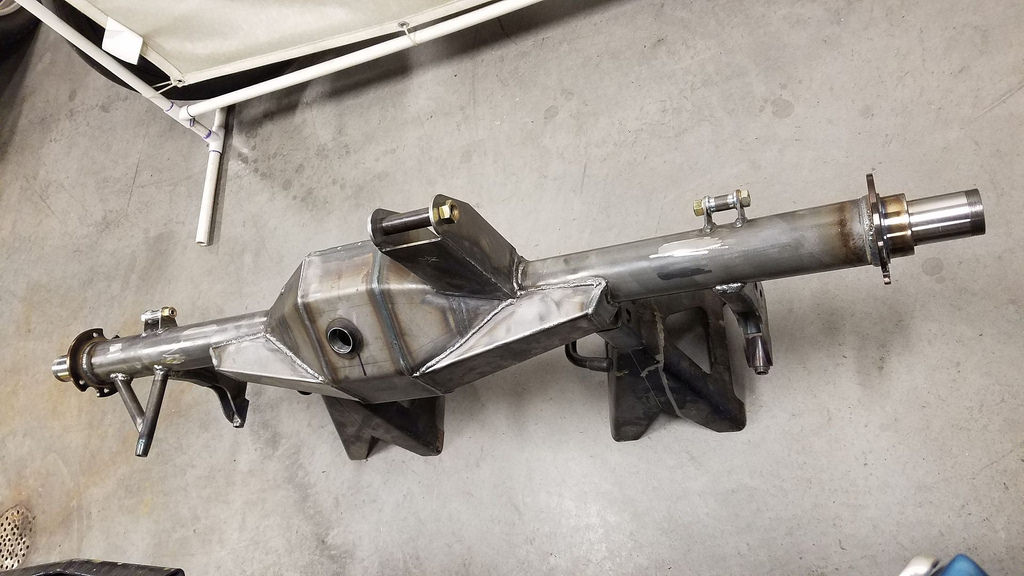 10049 by Yelcamino, on Flickr
 10053 by Yelcamino, on Flickr
 10050 by Yelcamino, on Flickr
I also picked up some gear oil and axle seals.
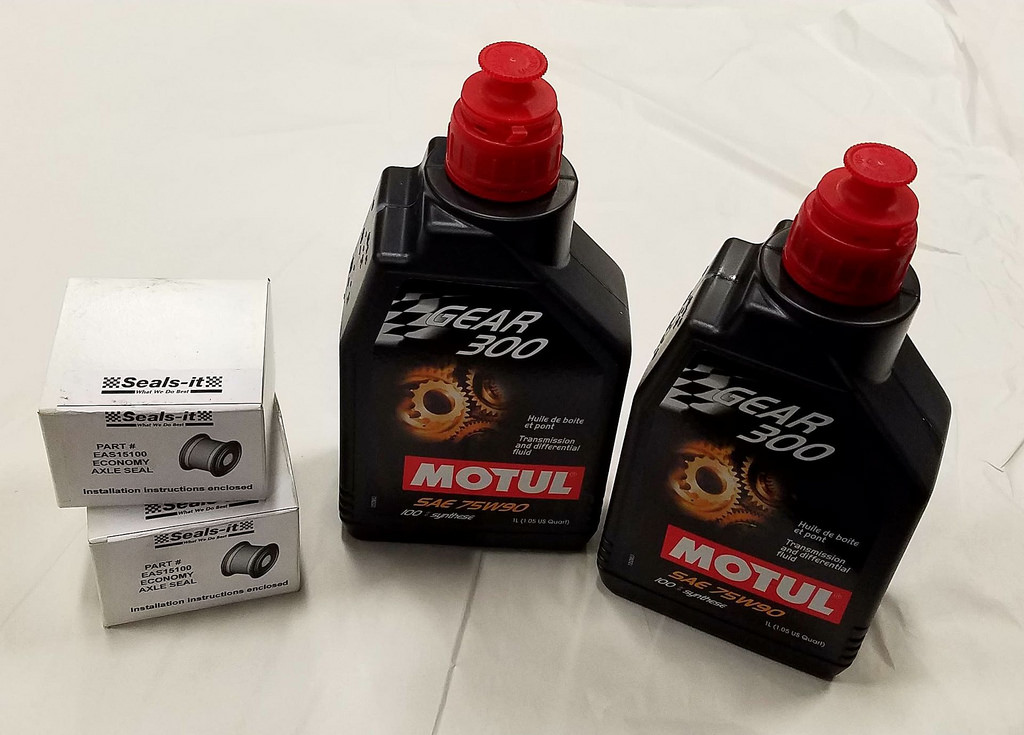 10051 by Yelcamino, on Flickr
And some Redline grease for the axle bearings.
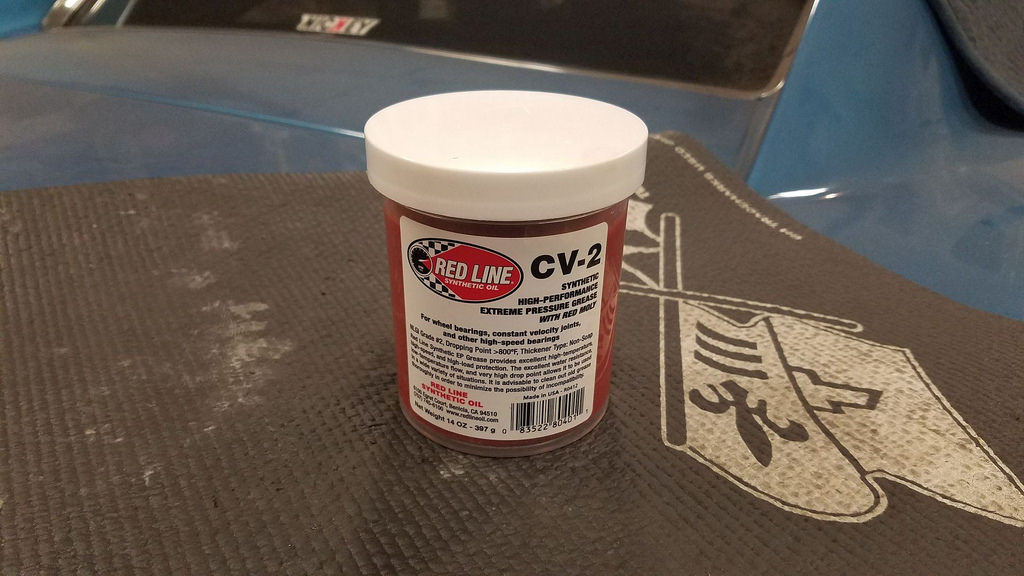 10052 by Yelcamino, on Flickr
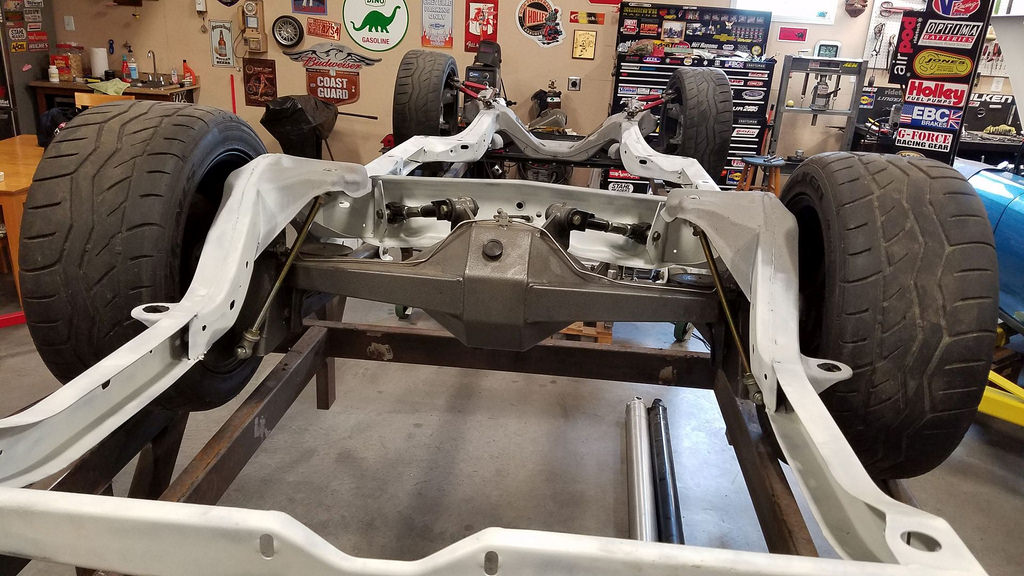
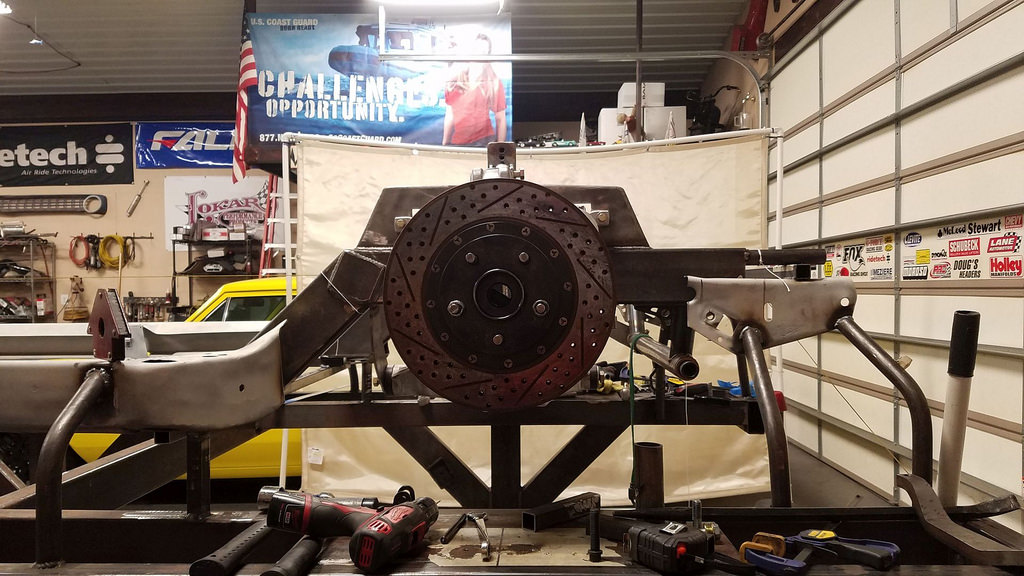
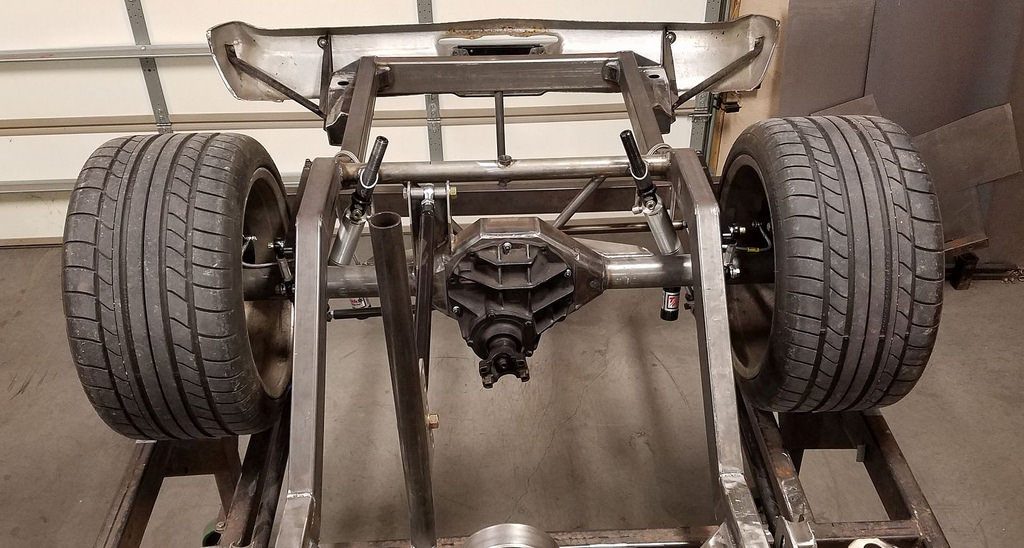
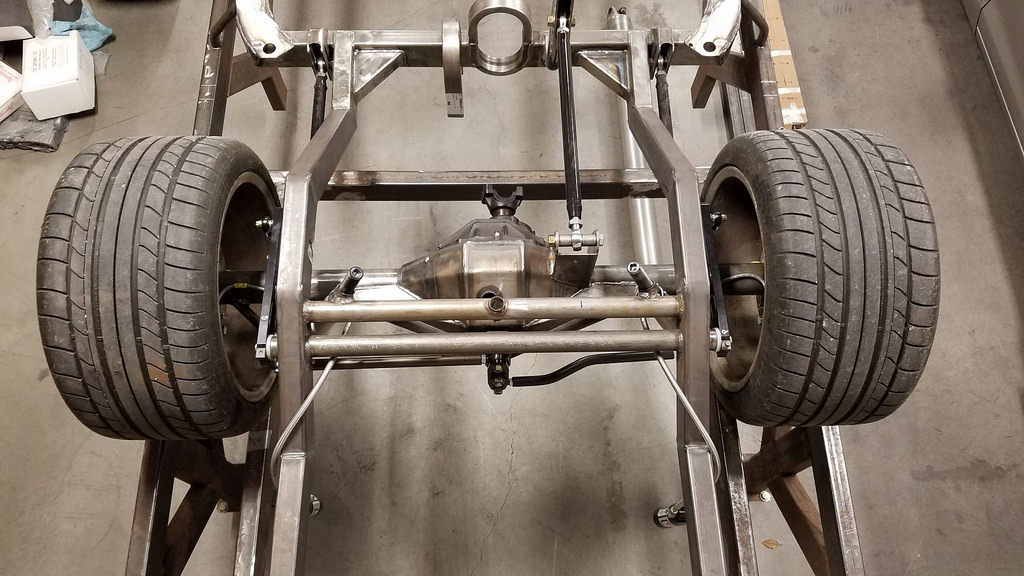
With everything welded, I put the housing back in to see how it all fits.
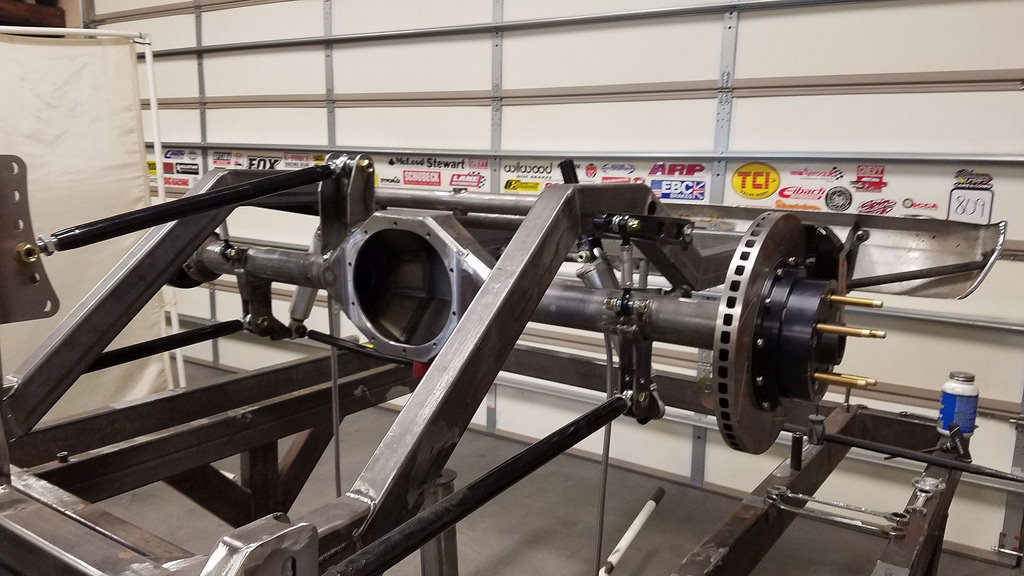 10055 by Yelcamino, on Flickr
Heres the ridetech coil over with a spring in place.
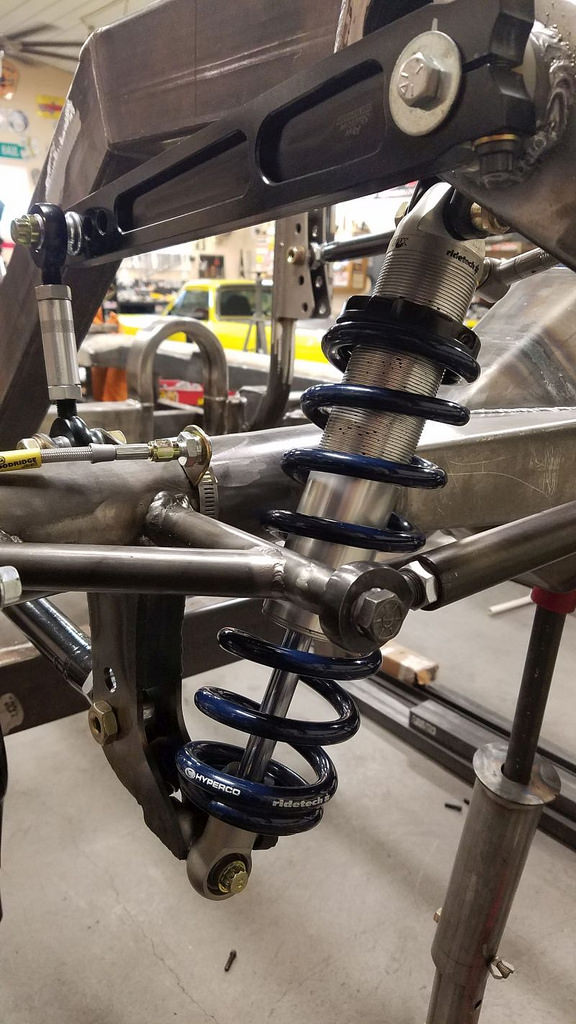 10056.1 by Yelcamino, on Flickr
 10056.2 by Yelcamino, on Flickr
Plenty of room!
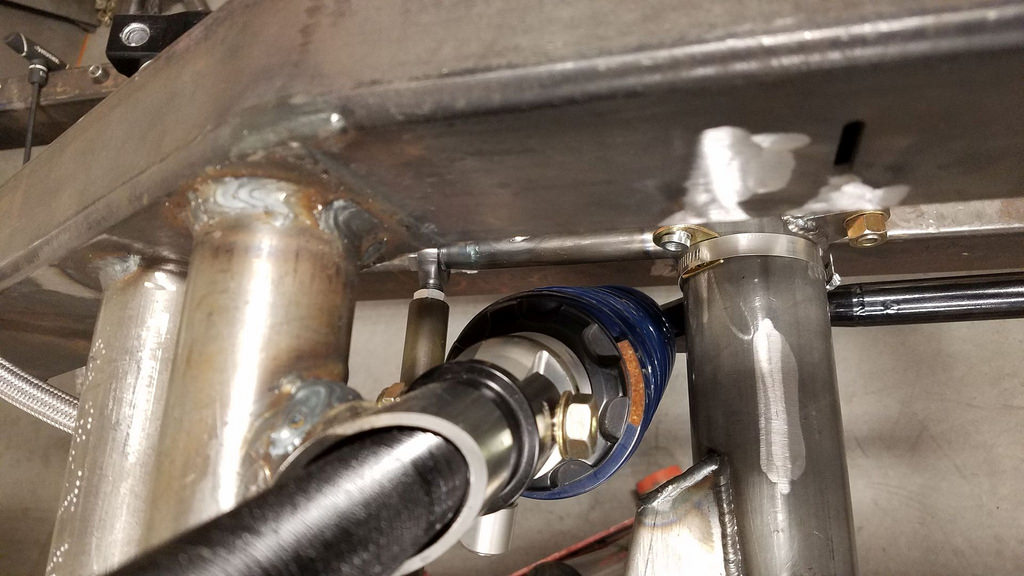 10056 by Yelcamino, on Flickr
With the rear wheels and tires in place, the track width is 72 just like it was before. With these little 10 wide wheels and 295 tires, theres 7 ½ between the inner side wall and the frame rail so I have lots of room to fit a 12 wide wheel with 335s!
 10058 by Yelcamino, on Flickr
 10059.1 by Yelcamino, on Flickr
01-14-2018 #4
Rat Pack Member
- Join Date
- Sep 2006
- Location
- Indiana
- Posts
- 2,670
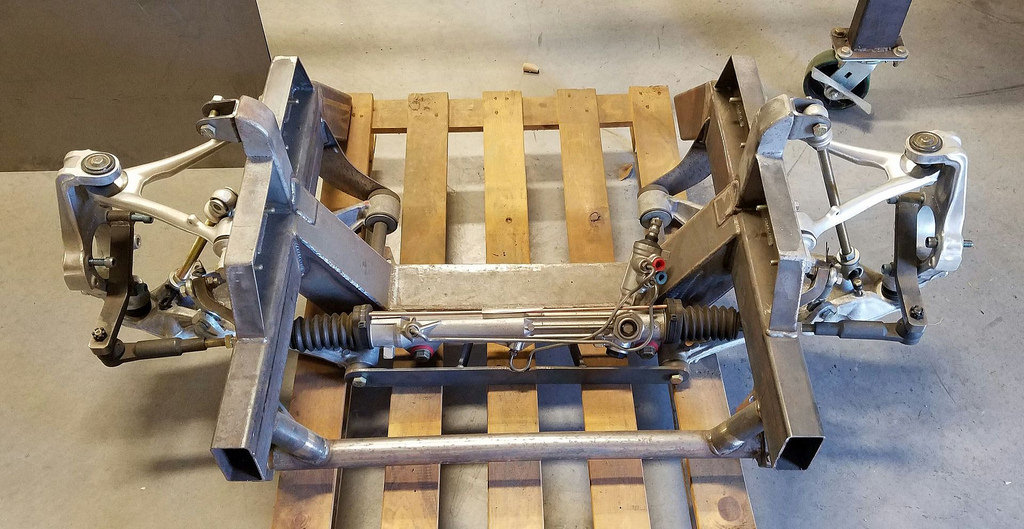
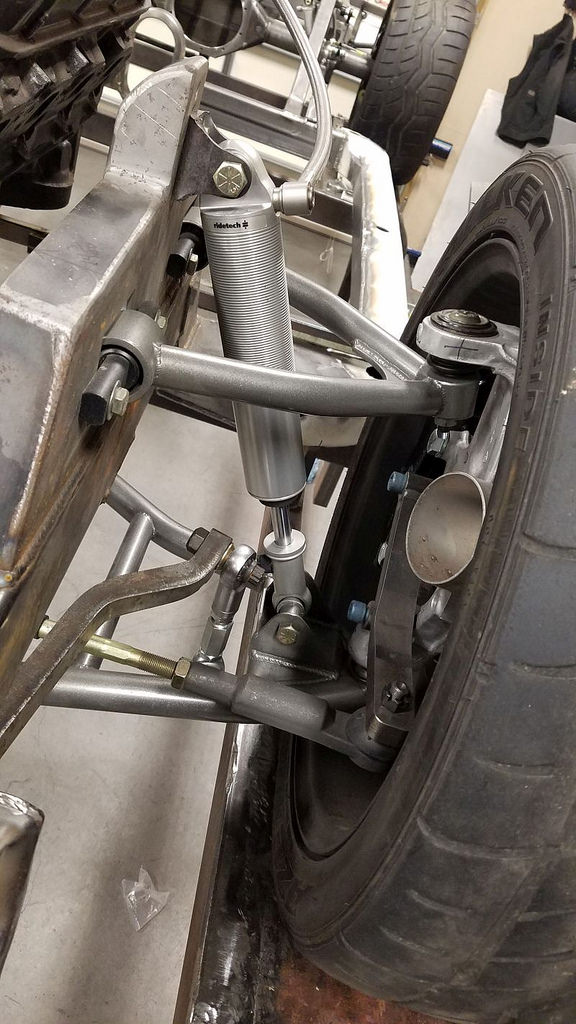
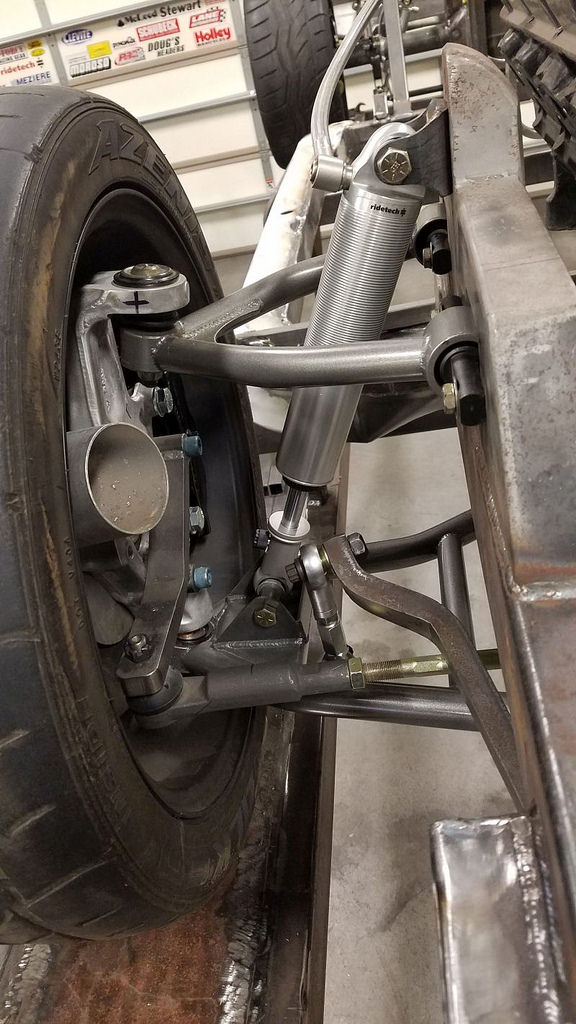
A while back I came across a set of Jakes Rod Shop C6 tubular arms being sold by Jon (Jtomas801) on Lateral-G. The price was right and I liked the way the lower arm was designed for a coil over vs the factory arm which requires a weak (IMO) trunnion to mount a coil over.
 10059 by Yelcamino, on Flickr
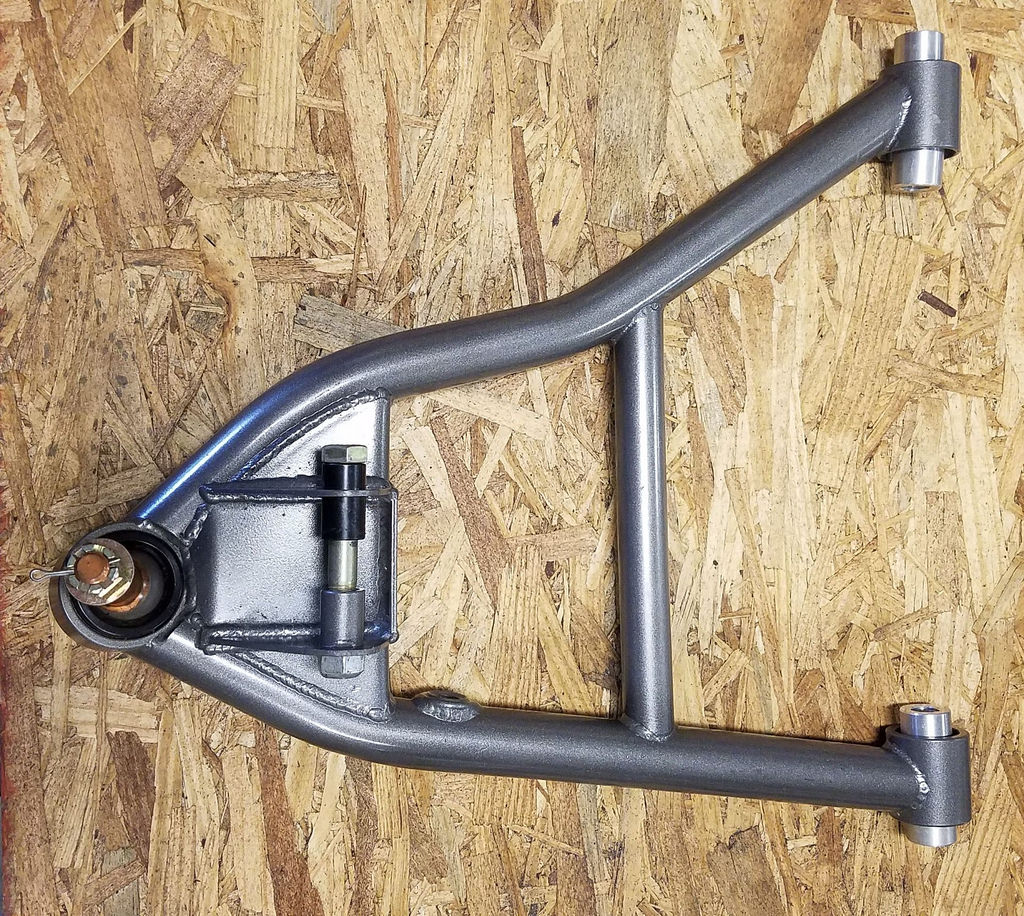 10060 by Yelcamino, on Flickr
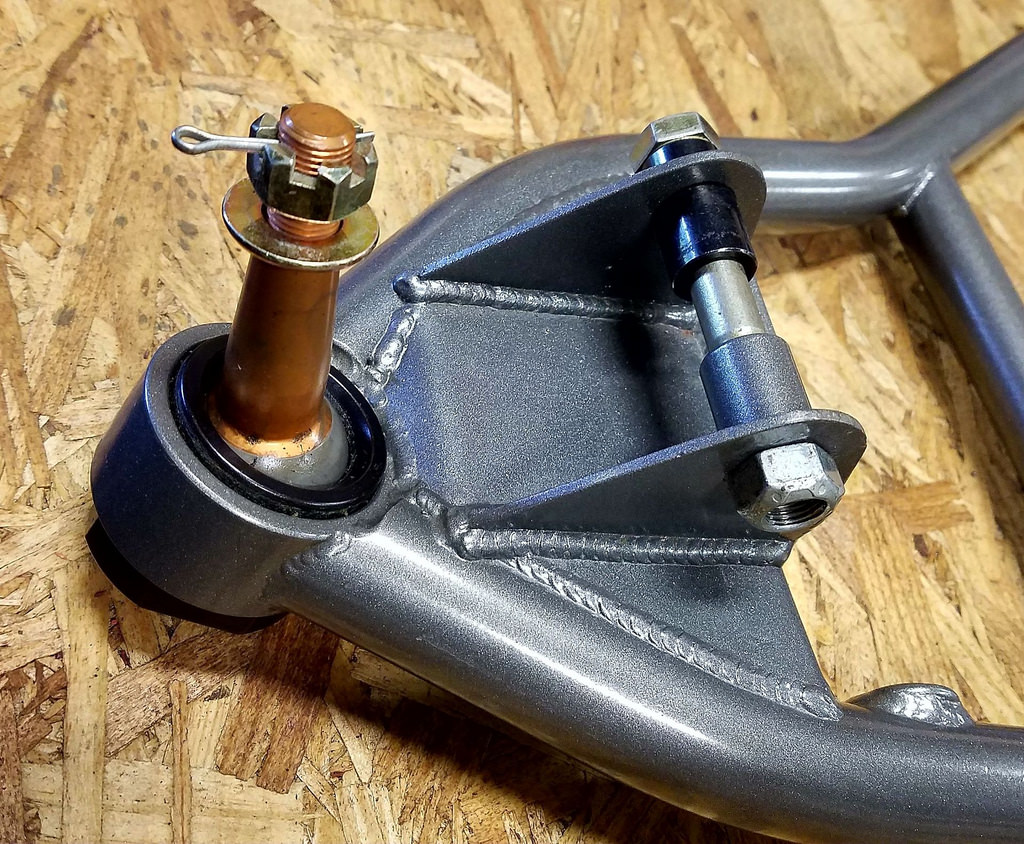 10061 by Yelcamino, on Flickr
Heres the Jakes Rod Shop arms mounted along with the new ridetech Track 1 C7 hubs.
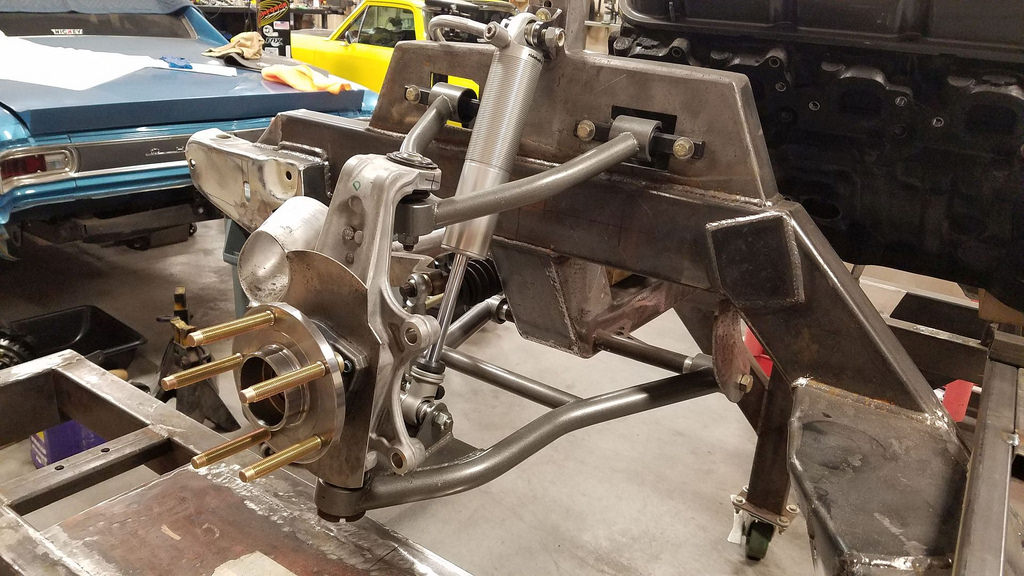 10063 by Yelcamino, on Flickr
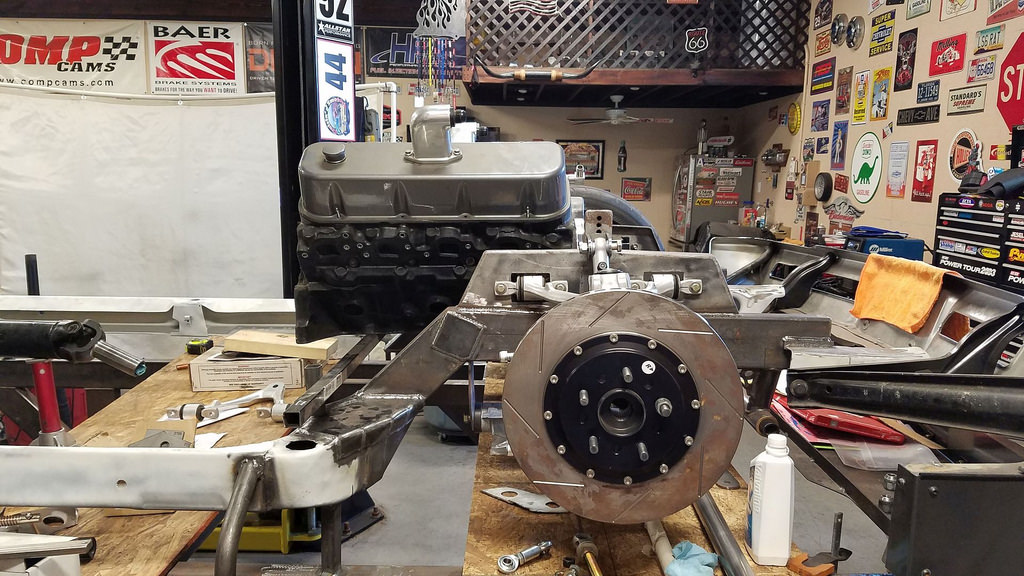
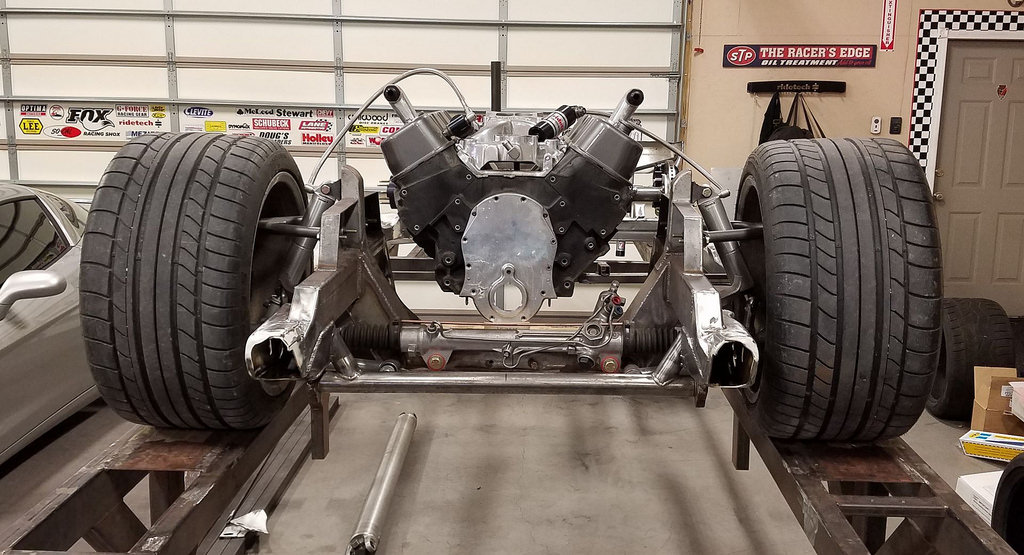
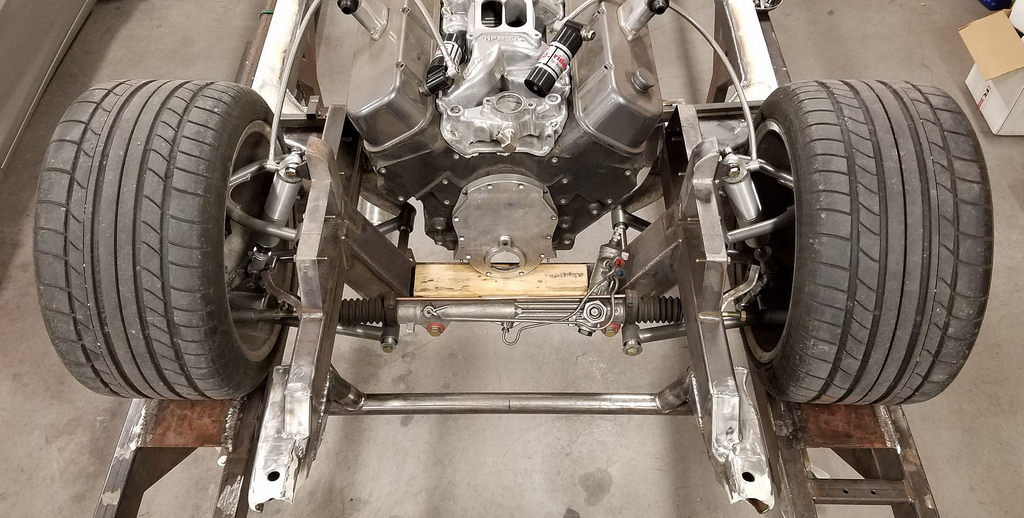
Now things are starting to get fun! Just to help me visualize things, I put my P-Ayr mock-up engine in place. In this position, its about 12 rearward of the stock location. The plan is to get the engine behind the front axle centerline.
 10062 by Yelcamino, on Flickr
 10064 by Yelcamino, on Flickr
For the most part the front suspension is all in place. I did a quick check of the alignment and I have 5* of caster on both sides, -1.5* of camber on one side and -1.4* of camber on the other. Not too bad as a starting point.
 10065 by Yelcamino, on Flickr
 10066 by Yelcamino, on Flickr
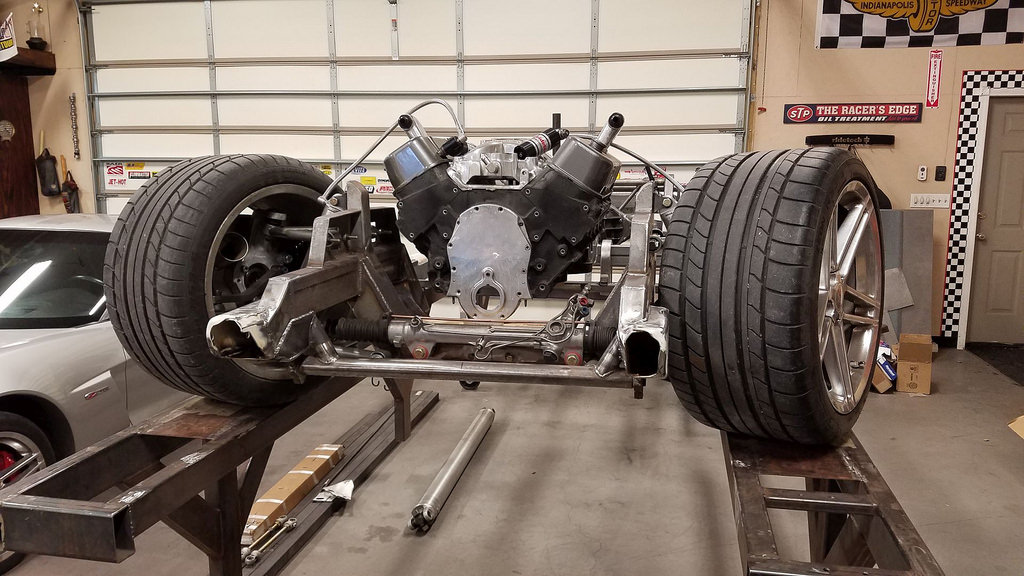
Its finally starting to look like a real chassis!
 10067 by Yelcamino, on Flickr
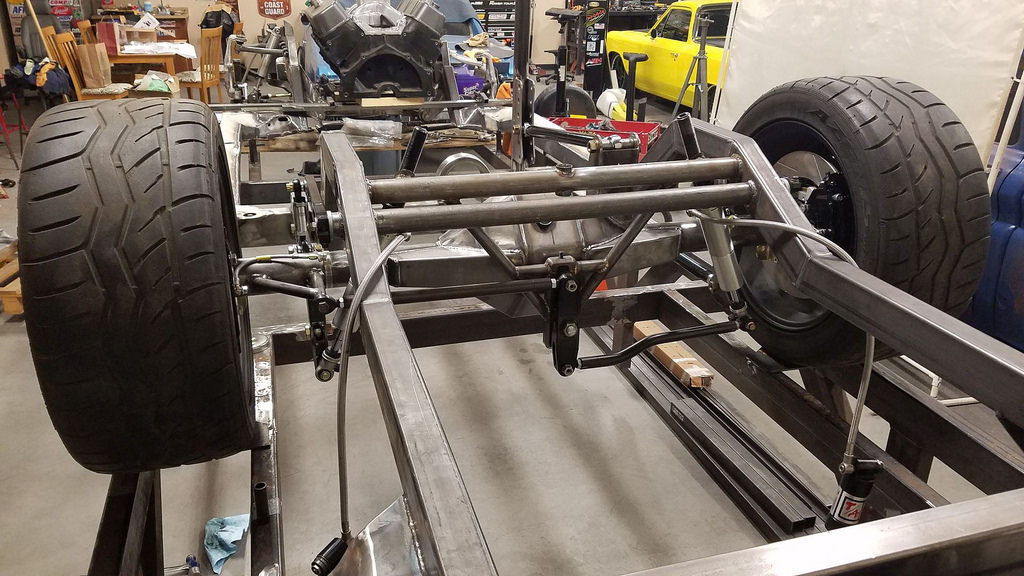
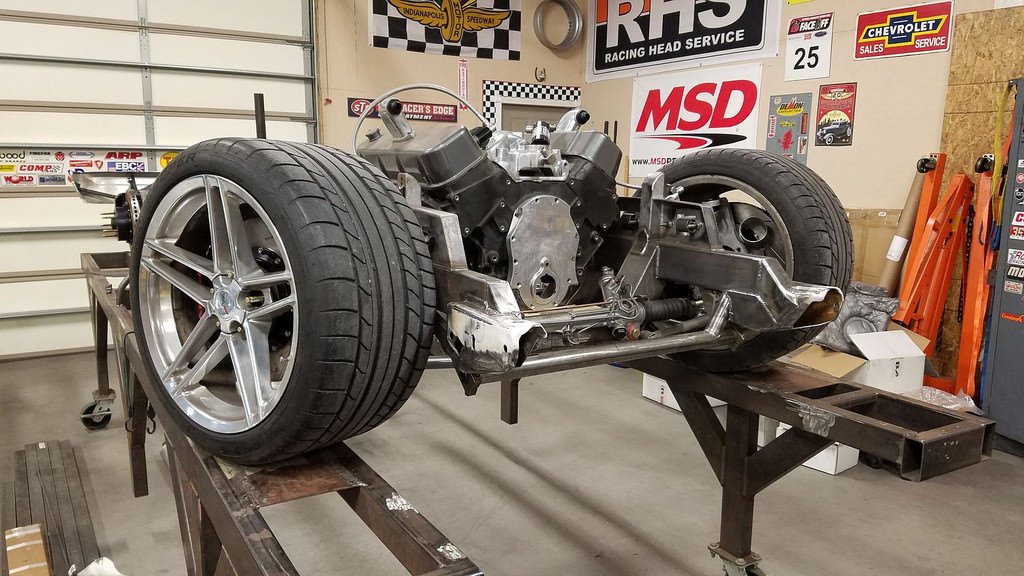
Now youre all up to date. I still have a few little things I need to get done on the frame but the next big step is test fitting the body. Due to the rear suspension, Im going to have to cut out some sections of the rear seat area and trunk floor. Before I can do that, I have to get the interior stripped. To get myself motivated, I took the rear wheels off the Z06 and put them on the frame to see how some big meats would fit
 10072 by Yelcamino, on Flickr
 10073 by Yelcamino, on Flickr
 10074 by Yelcamino, on Flickr
 10075 by Yelcamino, on Flickr
 10070 by Yelcamino, on Flickr
 10071 by Yelcamino, on Flickr
The Z06 rear wheels are obviously too wide for the front and they have too much backspace. However, they actually turn quite a bit so that tells me 11 wheels (with the proper backspacing) and 315s will fit! They fit great out back but again, due to the offset, they actually narrow the rear track width by 2".
01-14-2018 #5
Registered User
- Join Date
- Apr 2017
- Location
- TX
- Posts
- 138
Awesome build my man. Would it be okay if we drop my Cutlass body on top of that to see how it would look?
Dan
01-14-2018 #6
Rat Pack Member
- Join Date
- Sep 2006
- Location
- Indiana
- Posts
- 2,670
01-14-2018 #7 -Moderator/Sponsor-
- Join Date
- Apr 2001
- Location
- The City of Fountains
- Posts
- 16,117
Hey Herb,
Glad you started this new thread! Are you going to have to do major body mods to make the body fit on the new chassis?
Andrew1970 GTO Version 3.0
1967 Cougar build
GM High-Tech Performance feature
My YouTube Channel Please Subscribe!
Instagram @dr__efi
I deliver what EFI promises.
Remote Holley EFI tuning.
Please get in touch if I can be of service.
"You were the gun, your voice was the trigger, your bravery was the barrel, your eyes were the bullets." ~ Her
01-14-2018 #8
Rat Pack Member
- Join Date
- Sep 2006
- Location
- Indiana
- Posts
- 2,670
Hey Andrew! I shouldn't need to do any external body mods, but because of the 3rd link and the massive engine set back, I'll have to build a new firewall and floor around the rear seat and trunk area. If I go with a T56, then the tunnel will need surgery. In all likely hood, I'm going to build a complete new firewall and floor. Originally Posted by andrewb70

01-15-2018 #9 Registered User
- Join Date
- Dec 2007
- Location
- Lombard, IL
- Posts
- 545
Really outstanding work, Herb. Well thought out!
Dan
1971 Chevelle Maliboo Convertible 496/4L80E
1956 210 2 door Sedan 8-71 blown 468/T400
01-15-2018 #10 Registered User
- Join Date
- Feb 2013
- Posts
- 1,546
Impressive, as always. Glad to see you working on it, Herb!
01-15-2018 #11 Registered User
- Join Date
- Apr 2001
- Location
- The Netherlands
- Posts
- 1,509

very cool Herb! that is some awesome fabrication there :-)
01-15-2018 #12
Rat Pack Member
- Join Date
- Sep 2006
- Location
- Indiana
- Posts
- 2,670
01-16-2018 #13 Registered User
- Join Date
- Jan 2006
- Location
- McKinney, TX
- Posts
- 1,625
That's awesome! nice fab work
66 Mustang "Project: Ballin on a budget"
89 Mustang "Box Wine"
01-16-2018 #14 Registered User
- Join Date
- Dec 2005
- Location
- Maryville, TN
- Posts
- 844
Holy balls man!! See... this is what I should have done. Taught myself how to weld, and then do it all myself. Cool stuff!!
Dan
01-16-2018 #15
Rat Pack Member
- Join Date
- Sep 2006
- Location
- Indiana
- Posts
- 2,670
Thanks! Originally Posted by Z06killinSBF
- - - Updated - - -
Thanks Dan! I'm doing most of it myself. There are some things I'm not going to attempt, like the roll cage for instance. Originally Posted by 67SSDan
01-16-2018 #16
Registered User
- Join Date
- Oct 2007
- Posts
- 59
Wow that's lot of nice work.
You still planning on the alum 522 BBC build and is it destined for this car? Did you get further with that engine? Last time I saw it I think it was getting lifter bores done or something. Interested to see how that turns out because I too wanted to do a 4" stroke build.
John
01-16-2018 #17
Rat Pack Member
- Join Date
- Sep 2006
- Location
- Indiana
- Posts
- 2,670
Thanks John! Yes, the all aluminum 509 is still the one! In fact, Straub Technologies is just about done with my heads, intake, and custom cam. Originally Posted by BBC71Nova
Once I get those parts back I'll do an update on the engine with pics, lotsa pics!
01-16-2018 #18 Registered User
- Join Date
- Nov 2006
- Location
- Ma.
- Posts
- 5,569
I Can't wait to see that update! Nice work Herb.
Wayne
Car FINALLY home !!!!!! lol
Project FNQUIK https://www.pro-touring.com/showthre...ghlight=FNQUIK
01-17-2018 #19
Rat Pack Member
- Join Date
- Sep 2006
- Location
- Indiana
- Posts
- 2,670
01-17-2018 #20
Registered User
- Join Date
- May 2017
- Posts
- 118
Following, interesting project and great fab work.


 Reply With Quote