Results 1 to 20 of 41
Thread: 1975 Firebird Formula
Hybrid View


-
02-07-2025 #1
 Registered User
- Join Date
- Feb 2025
- Posts
- 44
1975 Firebird Formula
Long time lurker. Too lazy to work on the car tonight so figured I’d bite the bullet and share some details about my project.
The car is a 1975 Firebird Formula I purchased in Sept 2023 in Mesa AZ. My family has always been a Pontiac family, the price was right so I said wtf. From what I was able to research, it’s been an AZ car for at least the last 25 years. When I bought it there was no motor or tranny.
Why the project: I'm in the 7th inning of my professional career and wanted to build a car I can drive in retirement. I am a Mechanical Engineer by schooling but actually work in tech. Always been a hands on guy but I’ve never taken on a project like this before. My auto experience is built on basic car maintenance (fluid changes; wheel bearing changes, tune ups, etc). I needed a new challenge so here we are…
Back to the car. When I bought it I knew it needed some work. I saw there was some rust in the passenger floorboard, driver rear quarter needed to be patched, and the trunk pan needed replaced. I uncovered more rust but I’ll save this pleasant surprise for later.
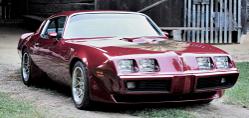
The car used to be Bimini Blue. What drew me to the car was the hood scoops. I just think they’re bad ass and you don’t see formulas around all the time.
Current Plans
Motor: 1970 Pontiac 455 bored .030 over (462). I had Paul Carter from Tucson Arizona machine the block for me. He s a really good guy and the Pontiac master in my neck of the woods.
Forged Ohio Crank
Icon Pistons
Molnar Rods
Crower Rockers
KRE Heads Ported
Torker 2 Intake
Sniper 2 EFI and fuel delivery, Hyperspark ignition, Including the tank, pump, etc
all other miscellaneous components sourced from Butler. I tried not to have a weak link in the system.
Cam: Lunati VooDoo Hydraulic Roller 294/302. This is supposed to be an aggressive street/mild race cam. Engine builder said it was legit. Who am I to disagree…
Lifters: Comp Cams Evolution
In the future (once im used to the baseline power) I’m planning to add a 100 shot of Nitrous. Just for “special occasions” if you catch my drift.
Transmissions: Art Carr 200 R 4. My heart wants to go 5 speed but some day this car will get handed down to my kids and they don’t know how to drive a stick lol. I’m thinking about putting in a Kilduff Lightning Rod Shifter to give me the best of both worlds though. lol. I always dug those in the Grand Nationals.
Headers: Doug’s 1.75” Ceramic
Exhaust: Pypes 2.5” cross flow crossmember back exhaust Race Pro Series. I hears from Pontiac guys this style delivers the most hp. Shouldn’t be too obnoxious unless you get on it; im going to also add cutouts for those “special occasions” as well. Not sure if I’m going to use Pypes or someone else’s. Open to suggestions.
Rear End: I’m rebuilding the stock 10 bolt. I am using 3.23 Richmond Ring/Gears and an Auburn Carrier. My engine builder suggested the 3.23 because he said the motor will be around 580 ft lbs torque (based on similar build) and he said if I go bigger on the rear end all I will be doing is wasting my gears and spinning tires. I will do some roadtrips up to my cabin in northern AZ so it’ll be nice to have lower rpm’s on the highway.
Suspension: I’m leaning towards using Pro Touring F Body tubular A arms up front and sticking with leaf springs in the back but all brand new. Going to lower it 2” and install subframe connectors. All the newer A Arms don’t seem that differentiated. PTFB has good prices and the reviews are good. Also, I’m not planning on tracking the car so this should be sufficient. Part of the Ethos on this build is I don’t want to over restore it if that makes sense…
Tires: something along the lines of 305/40/19 in back and 255/40/18 up front. I made the decision not to tub the car. I love big meats but I didn’t have it in me to do more metal work lol. I’ve seen what 285s look like so I know that’ll fit for sure and I liked it. If I can squeeze 305s in the back I’ll be happy.
Rims: I’m digging the Boze Pro touring SL. Color tbd. I like that they have a bit of old school snowflake shape like the Pontiacs had back in the day.
Color: still open. Leaning towards darker to try and hide the black bumpers. Speaking of bumpers I’ll probably replace them with 76 bumpers. They don’t have that black rubber strip. Im. It a fan of that. I located a set I just need to get off my ass and pick them up.
Interior: sticking with the stock look and feel. I will likely do aftermarket front seats though. Vendor TBD.
Brakes: for sure 4 wheel discs all around. I need to figure out if I want to go Wilwood or CPP C5. I read I can save money with the latter and that it’s a lower total cost of ownership (pads, etc). Open to suggestions.
As far as expectations go, the good news is I have been at this for over a year. So I should be able to keep content flowing. Im not planning to share exact steps. Y’all can watch YouTube like I did and learn from better mechanics. I’ll,just highlight my process, where I screwed up, what I’d do differently, and what went well. I hope you all enjoy this project.
-
02-08-2025 #2 Registered User
- Join Date
- Jul 2013
- Location
- N. Scottsdale
- Posts
- 422

Cool project! I finished up with my '70 Formula a couple years ago (aluminum 535 w/sniper, T56, DSE, etc.,) and am almost done with my son's '79 Y84 (LS, Terminator X Max, TXK, Ride-tech). Mini tubs are not difficult...my HS aged son's first welding project (taught himself) and they turned out great! The '70 is a blast to drive and super reliable, haven't driven the '79 yet. Look forward to watching your progress. Reach out if you need something...have lots of leftover parts from these projects and others. If you're in Mesa, I'm right up the road.
02-08-2025 #3 -Moderator/Sponsor-
- Join Date
- Apr 2001
- Location
- The City of Fountains
- Posts
- 16,126
 Originally Posted by Alponcho

Looks great! Please let me know if I can help with the Holley tuning. Shoot me an email: projectgattago at gmail dot com
Andrew1970 GTO Version 3.0
1967 Cougar build
GM High-Tech Performance feature
My YouTube Channel Please Subscribe!
Instagram @dr__efi
I deliver what EFI promises.
Remote Holley EFI tuning.
Please get in touch if I can be of service.
"You were the gun, your voice was the trigger, your bravery was the barrel, your eyes were the bullets." ~ Her
02-08-2025 #4
Registered User
- Join Date
- Feb 2025
- Posts
- 44
Awesome thank you. Yeah the tubs were definitely doable but I’m a weekend warrior and wanted to manage scope creep. I’ll update the thread with new details soon!
02-08-2025 #5
Registered User
- Join Date
- Feb 2025
- Posts
- 44
The disassembly went fine… just a lot of bagging and tagging. One surprise was this collision damage on the driver side cowl. This would be my first real project…holy **** we’re really doing it buddy!!!
I drilled out the spot welds and was able to remove the outer metal. Then once I had access to the inner cowl I used a handheld crowbar, a long screw, nut, and two large OD washers to gain leverage and bend the damaged piece out. Once it was most of the way there I was able to use a hammer and dolly to get it as flat as possible. I welded the holes I drilled closed when done.
Overall it came out good for what it was. It won’t be visible anyway when the fender is reattached.
02-08-2025 #6
Registered User
- Join Date
- Feb 2025
- Posts
- 44
I should also highlight that before I welded the outer piece on I neutralized any rust on the inside with ospho, cleaned it up good and sprayed with epoxy.
This was my first time welding. I bought one of the HF Titanium welders. I watched some you tube videos to figure out how to mig weld. This project gave me plenty of plug welding practice. It wasn’t pretty but after belt sanding it was respectable.
02-08-2025 #7
Registered User
- Join Date
- Feb 2025
- Posts
- 44
Apologies the pics are in the reverse order vs what I intended.
Also the two “after”,pics are recent. I couldn’t find the older pics right after welding them in. In these two pics you can see the car is in epoxy now and I Raptor lined the bottom. I’ll share more about those steps later.
02-11-2025 #8
Registered User
- Join Date
- Aug 2007
- Posts
- 738
Old car projects are like a box of chocolates, you never know what you going to get per Forest Gump. LOL.
I've done a few 2nd gen Fbodys. Great platform.
My current project is a 80 Camaro. LS3/4L60E swap. I'm getting old and tired of shifting.
Few things I've done on my projects.
1. Tubular a-arms so you can dial in more caster. Many suppliers.
2. C5 brakes all around. You can find calipers and rotors anywhere. Tobin at Kore3.com is a good source. Or Custom Works in north CA.
3. 1350 u-joints all around.
4. Eaton Tru Trac posi. 30 spline.
5. Moser 30 spline axles.
6. Weld the axle tubes to the center section. Need to be done by a pro welder since it means welding the mild steel tubes to cast iron center section.
7. Toss up. Hotckiss springs all around or just in the back and coil conversion in the front.
8. Tanks's Inc tank for the EFI.
Man I like spending other peoples money. LOL.
Good luck with your project.
02-12-2025 #9
Registered User
- Join Date
- Feb 2025
- Posts
- 44

thanks for the recommendations!,,,,,,,,,,,,,,,,,,,,,
02-12-2025 #10
Registered User
- Join Date
- Feb 2025
- Posts
- 44
Ok, so now that I was a self trained welding expert I decided to step up my game and tackle the floorboards. I figured if it wasn’t pretty at least it would be covered by carpet.
During the euphoria of the initial vehicle purchase I surveyed the car and purchased various sheet metal/panels because supply chain was still a little sketchy. My original assessment was the rear passenger pan had to be replaced and the passenger side floor pan up to, but not including the toe board. After I started tearing into though I realized the passenger toe board was all pitted as well and needed repair. It was just too thin to leave it as is….Unfortunately I could not source a third piece in the toe board only. I had to buy another entire passenger pan including the toe board. This was an unforced error and cost me a few hundy. Maybe I’ll take on another f body in the future and I can use it lol. If anybody can use it lmk I’ll give you a good deal.
I used a cutoff wheel, body saw, and air hammer to cut out the old floor. The torque box had some surface rust but nothing I couldn’t clean up. The frame rails were just dirty no rust.
02-12-2025 #11
Registered User
- Join Date
- Feb 2025
- Posts
- 44
To prep the new area I used wax and grease remover and applied ospho to treat rust. Then I cleaned everything up including in the rails, applied epoxy and weld thru primer on the areas I would be welding.
I started with the rear panel. I watched a lot of videos to learn best methods. I drew inspiration from Carthage Classic Cars, Vinyl Village Garage, Fitzie, and my friend Pete! After a lot of fitting and tweaking I had a pan that could install well. My plan was to cut and butt the pan in with the old one. One thing I screwed up when I started was my cut off wheel thickness could have been thinner. It created a big gap in one section and I had to weld it up which was a pain for a rookie. Anyway it came out solid but I had to do a lot of belt sanding to make it respectable.
Another consideration I had is I wasn’t too hung up on making the welds blend in on the inside. Given it will be covered by sound barrier and carpet I was fine leaving the welds a little proud for additional strength.
02-12-2025 #12
Registered User
- Join Date
- Feb 2025
- Posts
- 44
The installation of the main passenger pan went ok. One thing I did which I think was thoughtful is there is one cross member that doesn’t go all the way across (one does, the other doesn’t). I made sure to keep enough original floor pan connected to the shorter cross beam and then attached the new pan to that cross beam also. I felt like this would be stronger way to tie in the old pan with the new.
As you can see from the pics it looks like I got good penetration.
For now, I just sprayed the welds with primer and moved on. My plan will be to dress the welds better under the car, apply some duraglass on the welds and do what I can, within reason, to hide the welds.
As a SPOILER ALERT, I actually recently did this body work with Duraglass, took it to 120, reapplied epoxy primer (SPI) and applied raptor liner and it came out really nice. You can hardly tell it was replaced. For the inside I applied 3m seam sealer to the welds and seams and sprayed it all with SPI Epoxy.
02-12-2025 #13
Registered User
- Join Date
- Feb 2025
- Posts
- 44
A recent pic on how it looks on the inside with seam sealer and epoxy. For my first time I’ll take it!
02-14-2025 #14 Registered User
- Join Date
- Feb 2013
- Posts
- 1,557
Good work! Getting those kinds of repairs done always feels good!
03-03-2025 #15
Registered User
- Join Date
- Feb 2025
- Posts
- 44
After the floor pan the next step was to install the Detroit Speed firewall panel. Im going to go with a Vintage AC System so the holes on the passenger side are no longer required.
Overall it went on fine. It’s a lap weld joint for this install. I took the firewall down to metal then used epoxy primer for the middle parts and weld through primer where I need to weld. Overall it’ll work I think….. Ill dial it in with some body work later in the process.
03-03-2025 #16
Registered User
- Join Date
- Feb 2025
- Posts
- 44
Final for now. My primer skill on the spray can needs a lot of work LOL
03-03-2025 #17
Registered User
- Join Date
- Feb 2025
- Posts
- 44
Sticking with the metal work theme, I realized around this time that the drivers side toe board had some rust. It was small rust holes. I could have left it and used Duraglass but I didn’t want to half ass it. Had I known the extent of the floor damage I would have done a total floor pan vs how I did it. I guess as a consolation it’s nice to know there is still approximately half an original floor in the car.
Anyway, this patch went on pretty straight forward. Similar as the passenger side, I cleaned and osphoed everything and then applied epoxy to hopefully protect it for another 50 years.
03-05-2025 #18
Registered User
- Join Date
- Feb 2025
- Posts
- 44
Next step was to get the trunk repaired. I wasn’t looking forward to this project given the awkwardness of working in the trunk.
As you can see from the pics the rust was concentrated to the pillar structures on either side of the trunk pan.
I elected to not replace the pan 100% but instead patch it side to side completely (all the way to trunk drop offs in other words) but only high enough into the trunk so that the rails that hold the fuel tank straps would still be welded to the original metal. I also decided to put the new pan in two pieces. Lots of cars offer pans in two pieces only so there is precedent from a quality and robustness point of view…and I figured I could save some labor with respect to removing the tail pan (which looked like a whole other can of worms).
I strategically made the cut in the new pan so the butt weld will be concealed underneath by one of the rails. I then also plug welded the heck out of both pieces onto that rail to give it added strength.
Similar as other phases of this project, thoroughly cleaned up the rails and applied epoxy and weld thru primer.
Once I had it welded in, I applied SPI epoxy to seal it up and then did some minor body work to hide the repair. I knew I was going to raptor line the trunk so I didn’t have to go too crazy on the body work because raptor would offer some coverage.
I did have a zinger on this project. The new patch piece wasn’t in spec. When I fitted it in the trunk the hump section did not sit flush with the tail pan (see pic). Given I already cut the part I couldn’t get a refund so I had to fab a small patch to fill the gap. What I did was cut the hump area and bent what flange I had to work with flush to the tail pan. Then I used tape to create a template and I welded the patch in. It’s not perfect but I didn’t worry too much about it because the trunk latch mechanism will cover 90% of that area anyway. It’s solid and sealed so should be good to go.
One last consideration, the driver side quarter needed to be patched and when I cut into it to investigate the extent of the damage I saw the drop off needed replaced also. I used the old rusted drop off as my reference for the new trunk but I didn’t weld that part in. This way when I tore out the rusty drop off the new trunk pan could then serve as a reference for positioning the new piece.
I was kind of 50/50 on raptor in the trunk but after I got it done im very pleased with the outcome.
Metal work is kicking my butt. I smell like a steel mill and feel like I have metal shavings sweating out of my pores lol. Should be all downhill from here as it pertains to metal work…I did not keep perfect accounting but this probably took me 5 or 6 weekends. Big job!
Apologies for some reason the pics are not uploading in the right order
03-05-2025 #19
Registered User
- Join Date
- Feb 2025
- Posts
- 44
I should also mention while I had access to the frame rails I bought some of that Eastwood spray that’s supposed to neutralize and treat rust inside of frame rails. While I was at it I also blew out the rockers as best I could and sprayed the Eastwood stuff in the rockers too. They looked in good shape so hopefully this buys me another 50 years.

03-09-2025 #20
Registered User
- Join Date
- Feb 2025
- Posts
- 44
Now that the trunk was done and I had a little bit of experience with metal work the time was to patch the drivers quarter panel. Here quality of installation is paramount.
Here is the baseline

 Reply With Quote