


Results 21 to 40 of 54
-
12-17-2015 #21
 Registered User
- Join Date
- Jan 2009
- Location
- San Antonio, Texas
- Posts
- 283

Crazy week here. Got back from Bosnia (Sarajevo) on Wednesday, only to find out that I had to leave for Ethiopia on Thursday. However, after my flight from Naples to Frankfurt, I was called back to the mother ship; trip canceled. Painful trying to get back to Naples – I flew from Frankfurt to Munich to catch a connecting flight to Naples, but the flight to Naples was canceled. So I spent the night in Munich. Next day, I flew back to Frankfurt and caught a flight to Naples.
So instead of a weekend spent in Ethiopia, I was home and able to get a bit of work done. Can’t really tell by looking at the car, but I was fairly productive –
-Got the brake booster/master cylinder out, along with the clutch master cylinder.
-Got the brake and clutch pedals out, and made up a few new curse words in the process.
-Front wiring harness is almost out.
-Intake manifold off.
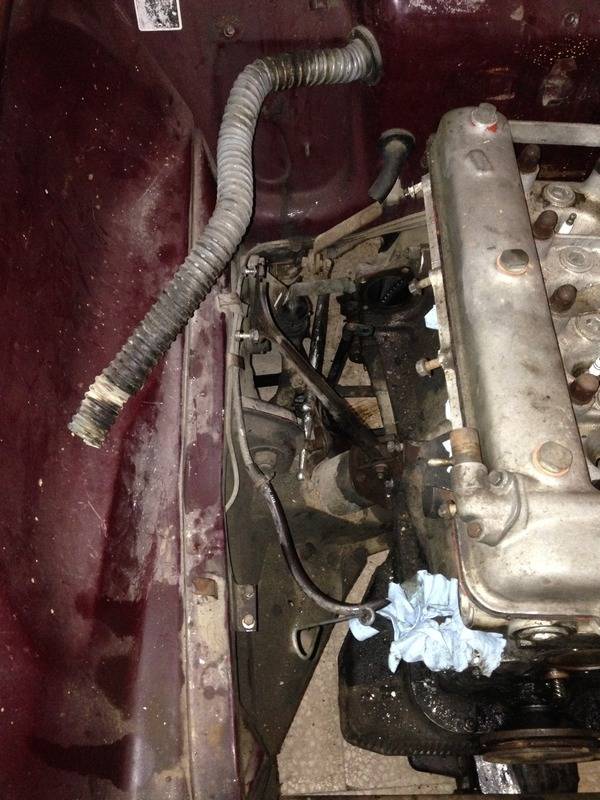
-Exhaust manifold/exhaust off. I loves me some Kroil – this stuff is great for loosening up stuck/rusted bolts.
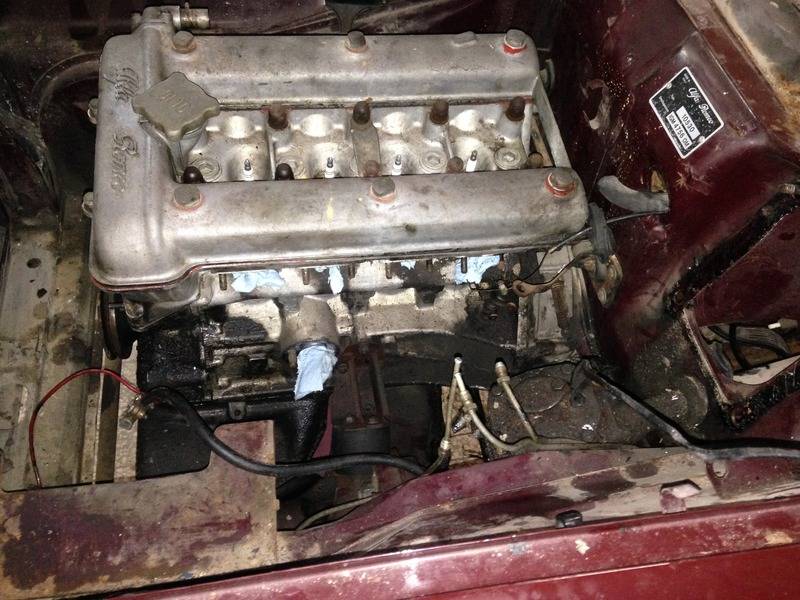
-Water pump off.
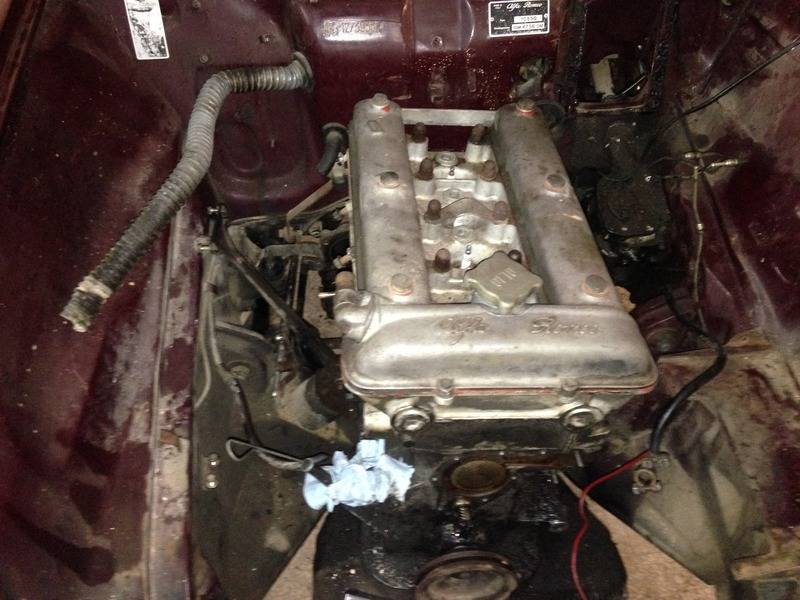
-Shifter out.
-One crossmember out – this one appears to be mainly for the driveshaft. Still have to get the transmission crossmember off.
-Front bumper off.
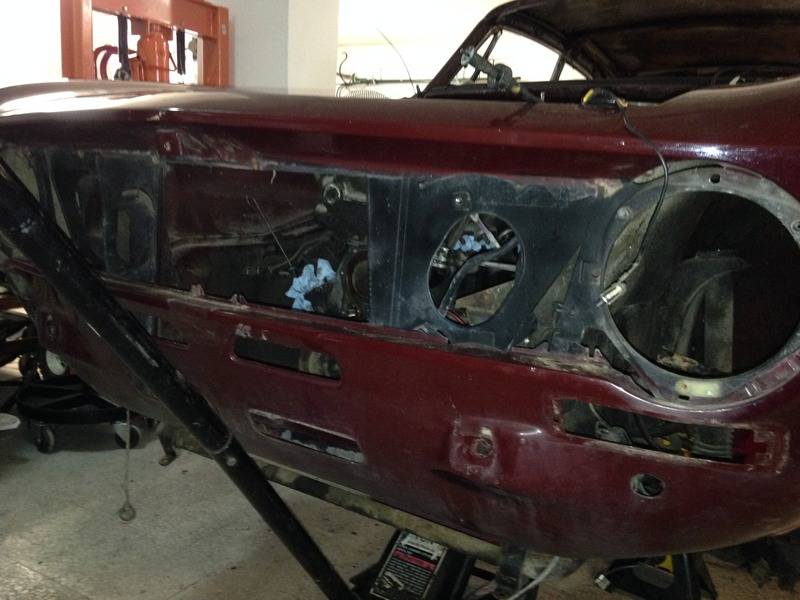
-Inner fender covers out – had to drill out about 5 rivets on each side. Was quite pleased to see how nice the sheetmetal looked behind the covers. The actual covers are in good shape, too.
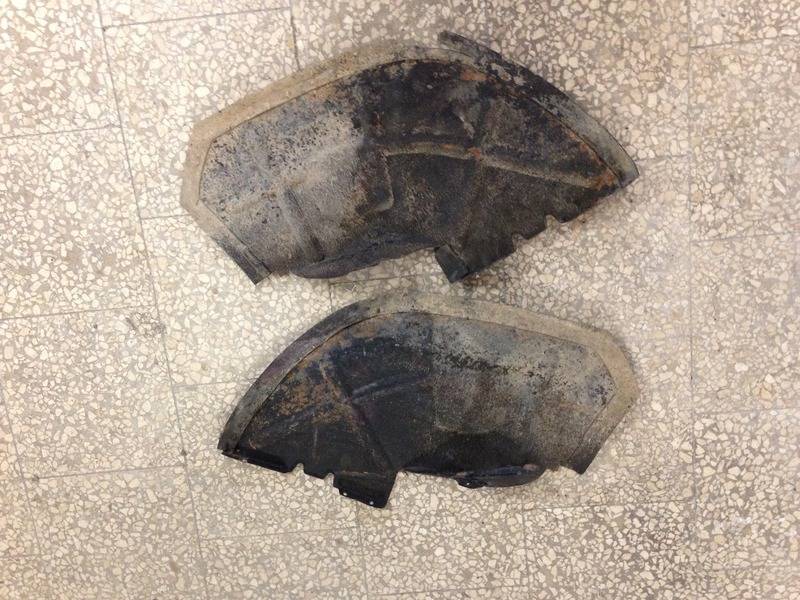
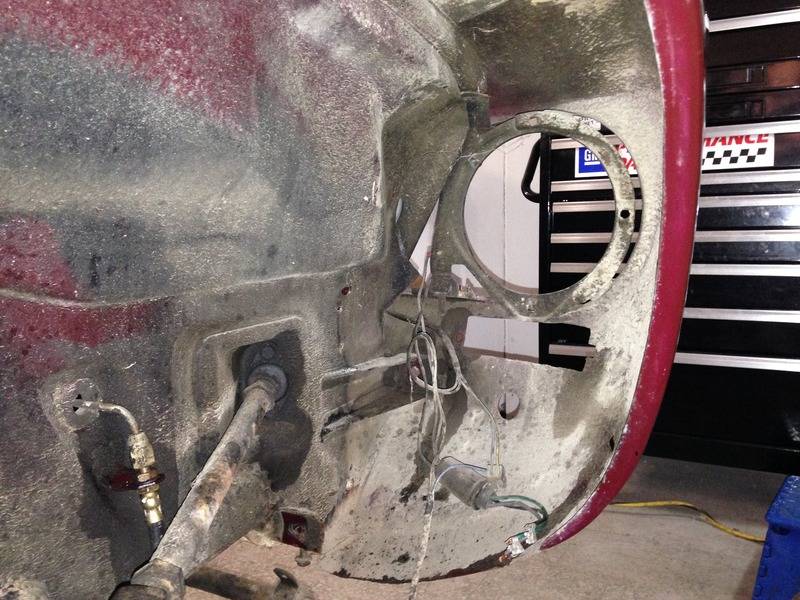
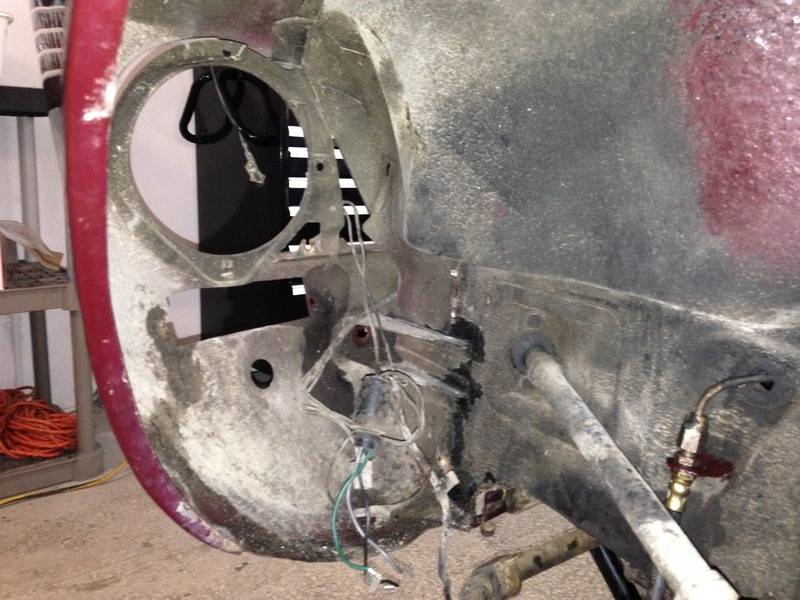
Headed to Berlin for a few days of vacation this weekend. Should be able to spend some time on it in the next few weeks. Plan was to have disassembly complete by 1 January, and I don’t know if that’s going to happen.
Next step will be to pull the engine and trans. Had planned to drop the bellhousing and trans out the bottom, but that’s before I decided to fab up a wooden gantry to hang a chain hoist from. Now I may pull them as a unit.Check out my YouTube channel for vintage car and truck rescues and rebuilds! THE BULLETPROOF GARAGE!!! - YouTube
-
12-17-2015 #22
 Registered User
- Join Date
- Nov 2009
- Location
- the dirty mitten
- Posts
- 1,217
Sure do, its pretty long now but I like to keep it up to date Originally Posted by Bulletpruf

https://www.pro-touring.com/threads/...ighlight=ratonSteve
1968 Dodge Charger All Wheel Drive project Red Bull<script type="text/javascript" src="safari-extension://com.ebay.safari.myebaymanager-QYHMMGCMJR/5cce6da5/background/helpers/prefilterHelper.js"></script><script type="text/javascript" src="safari-extension://com.ebay.safari.myebaymanager-QYHMMGCMJR/85dc54c0/background/helpers/prefilterHelper.js"></script><script type="text/javascript" src="safari-extension://com.ebay.safari.myebaymanager-QYHMMGCMJR/85dc54c0/background/helpers/prefilterHelper.js"></script>
-
01-19-2016 #23
Registered User
- Join Date
- Jan 2009
- Location
- San Antonio, Texas
- Posts
- 283
Trying to catch up with some pics and details of work over the past month or so. More to follow…
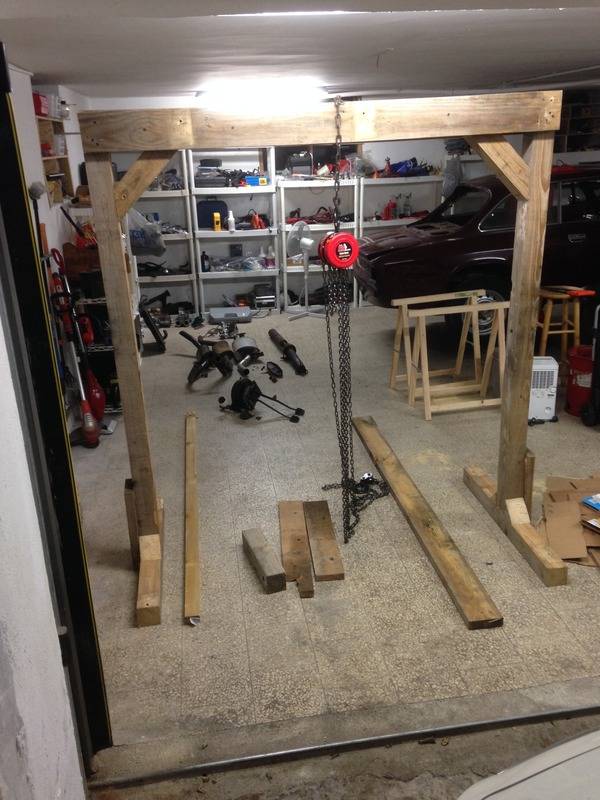
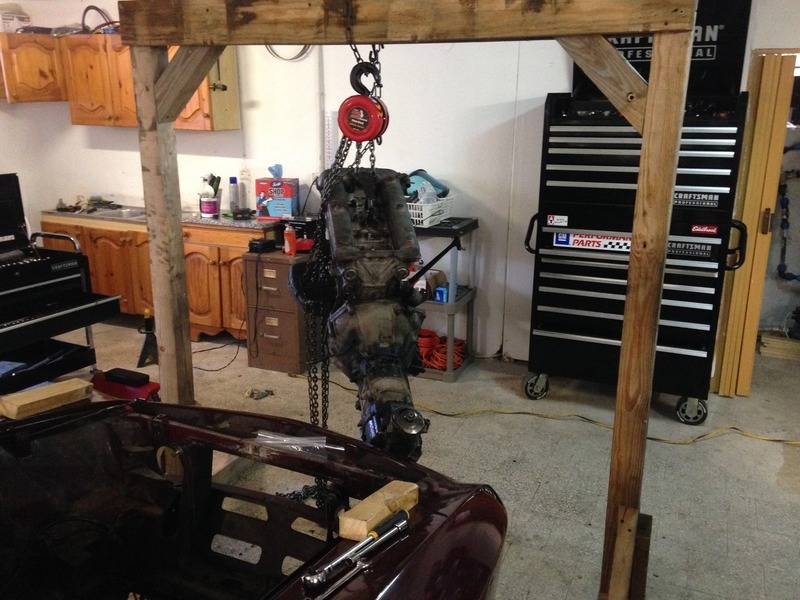
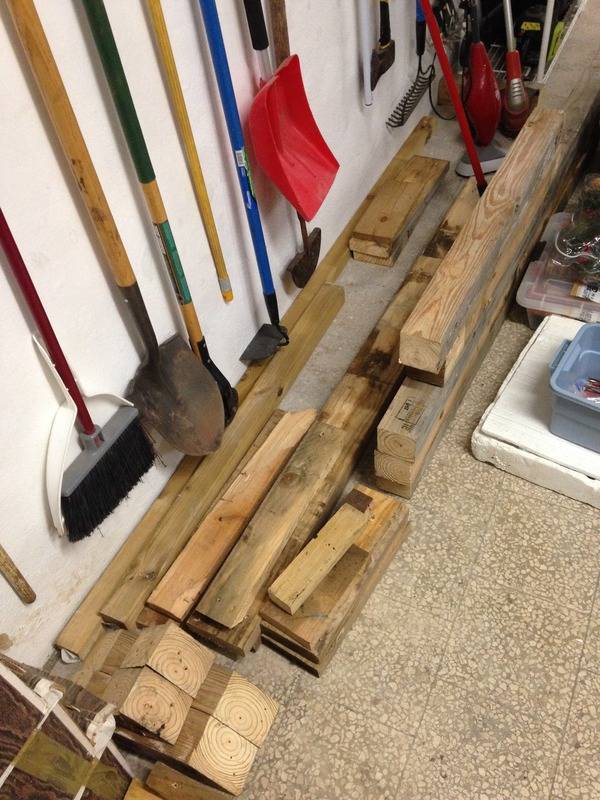
Here’s the gantry I built. Pretty simple construction, and the wood (4x4’s and 2x6’s) was scrap that I got for free. I used a chain hoist that I bought from Amazon; maybe $50? I added some bracing from the uprights to bottom pieces after taking this picture. It was quite sturdy.
Poor Bimmer got pressed into service for lumber hauling…
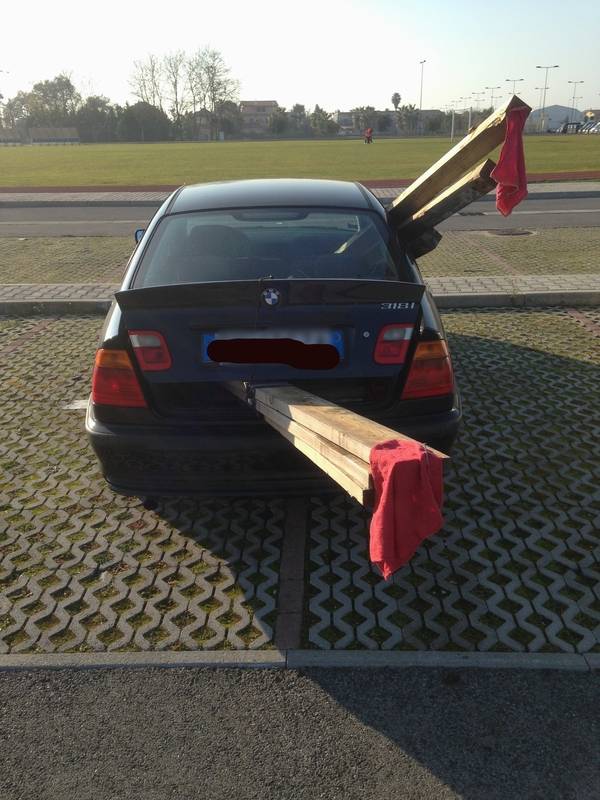
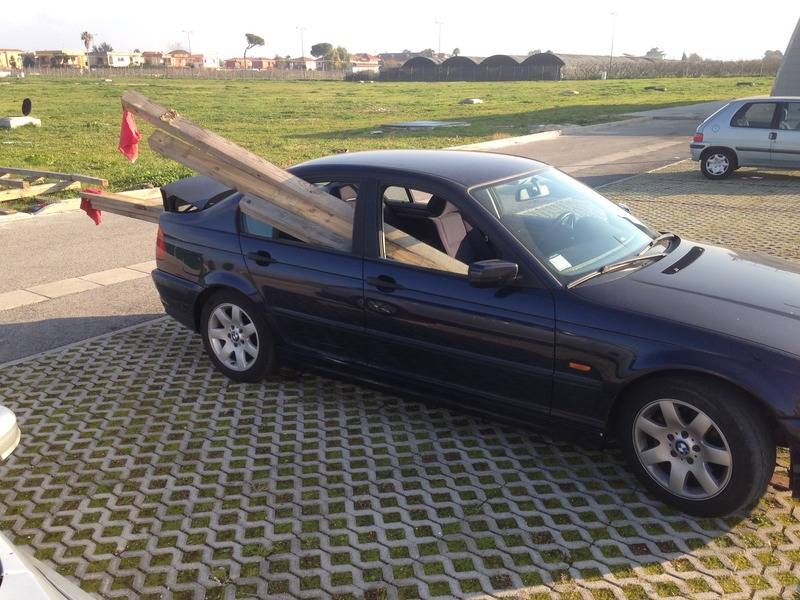
Ended up pulling the engine and trans together and glad I did. Had trouble getting the clutch master cylinder slave cylinder out, but it was fairly easy once I got the engine and trans out.
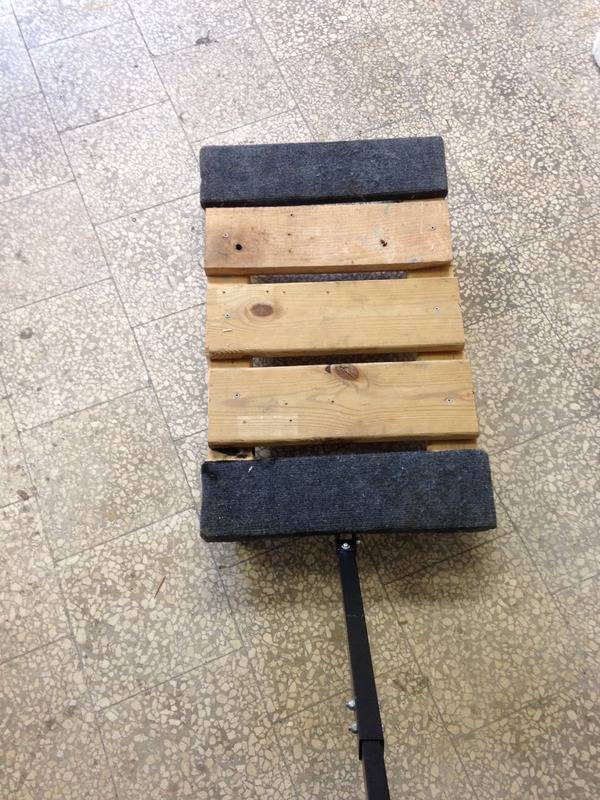
Screwed some scrap lumber to the top of my $5 Harbor Freight furniture dolly. Now it’s an engine dolly.
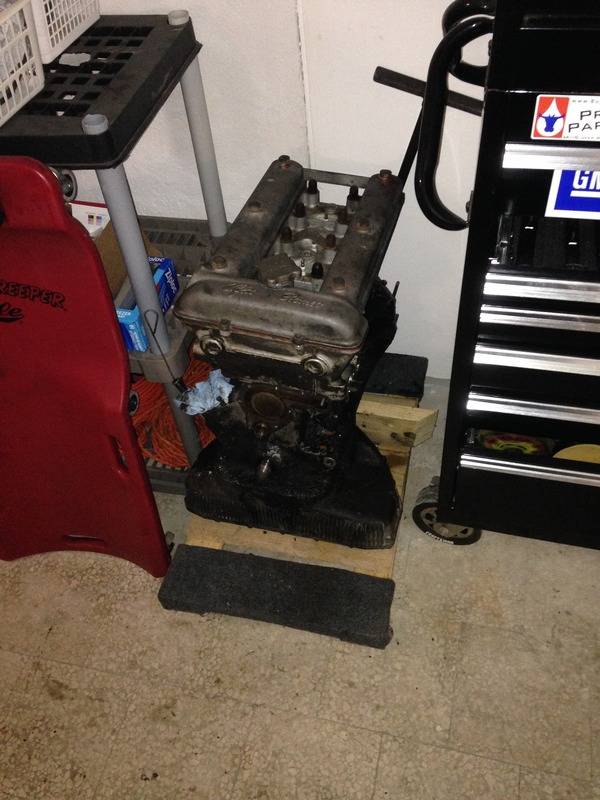
Here’s the gantry now – just a stack of lumber. Since it was screwed together, took me about 15 minutes to disassemble. I had planned to repurpose the lumber to use to build a dolly for the car, but I ended up saving it as-is because I’ll need it again to reinstall the engine and trans. Now it’s just sitting in a stack behind my workbench.
 Check out my YouTube channel for vintage car and truck rescues and rebuilds! THE BULLETPROOF GARAGE!!! - YouTube
-
02-01-2016 #24
Registered User
- Join Date
- Jan 2009
- Location
- San Antonio, Texas
- Posts
- 283
Doors are off. Was able to do this myself since they're pretty light. Doors themselves are in very nice condition; no rust or repairs evident.
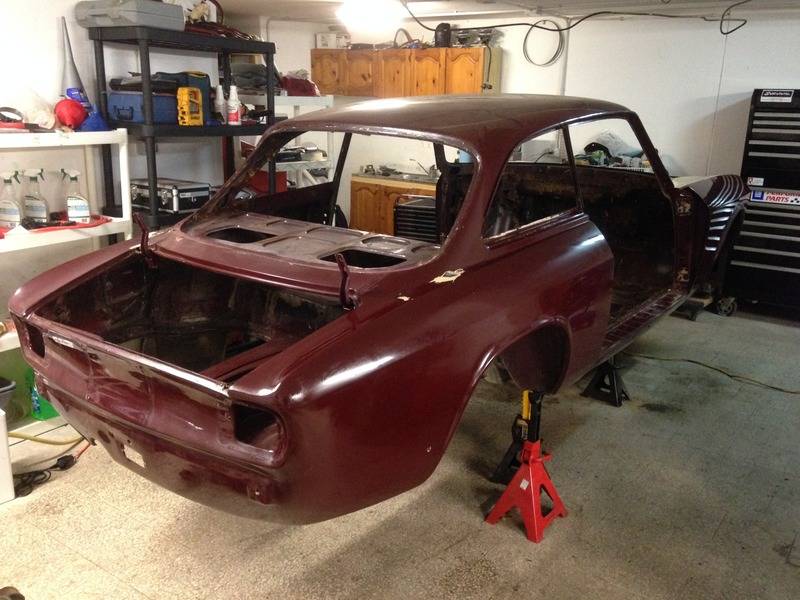
All the suspension is off but the majority of it needs to be cleaned and inspected.
Took off the panels at the rear of the front wheel wells. One is in need of repair. Can't believe how much dirt was behind them. Found an old rusty wrench back there, too. Given the amount of crud back there, surprised that this area did not rot significantly. Having said that, there is some rust on the driver's side at the front of the rocker that will need some attention.
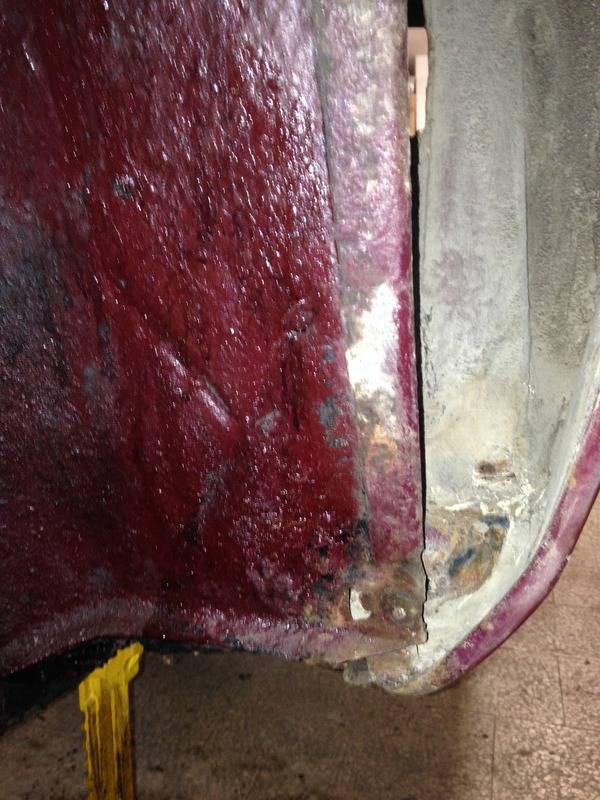
Trunk lid is off. It's pretty rough.
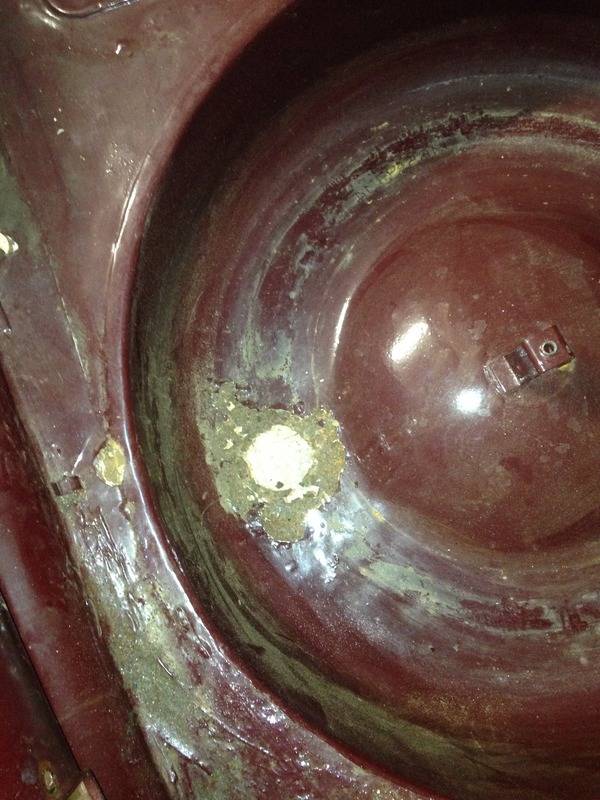
Spare tire well has some rot that will need to be fixed.
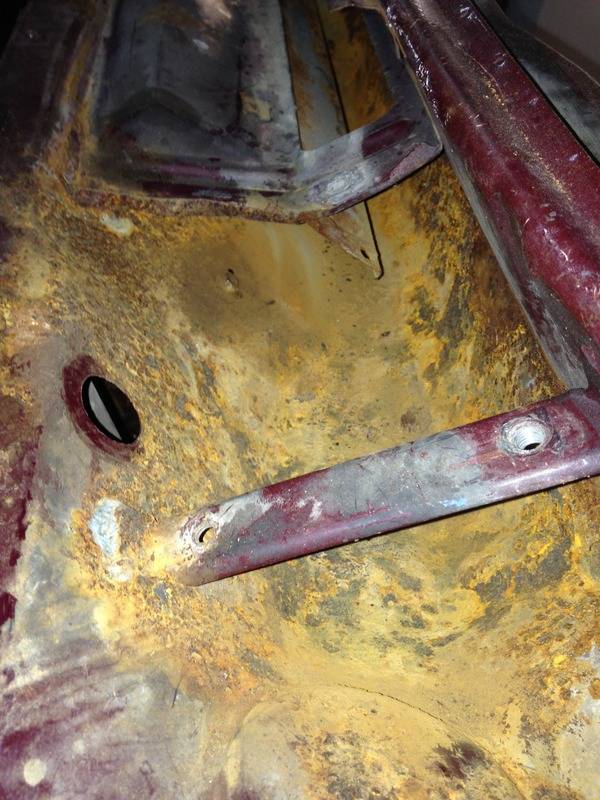
Area under the windshield wiper transmission will need some work. Not going to be easy forming new metal to replace what's rotted.
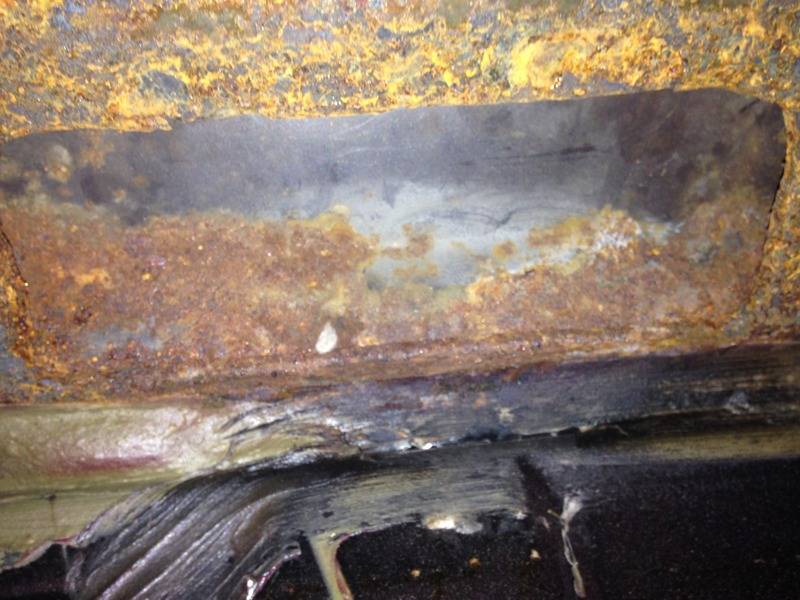
Tried to do a bit of paint removal by scraping with a razor blade. It was easy enough to get the paint off but not the tan primer. Under the primer is a coat of bondo - pretty thick in places.
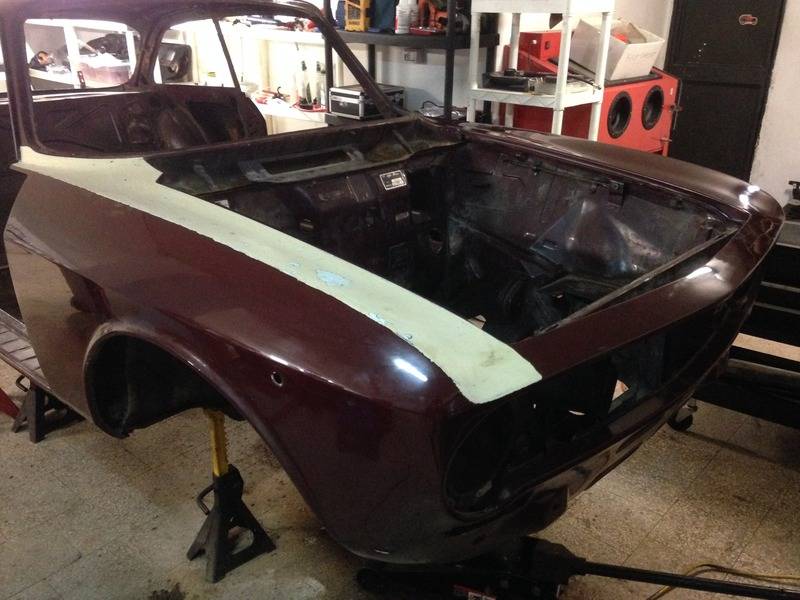
Interior is all out, of course. Front floor pans will need some patching.
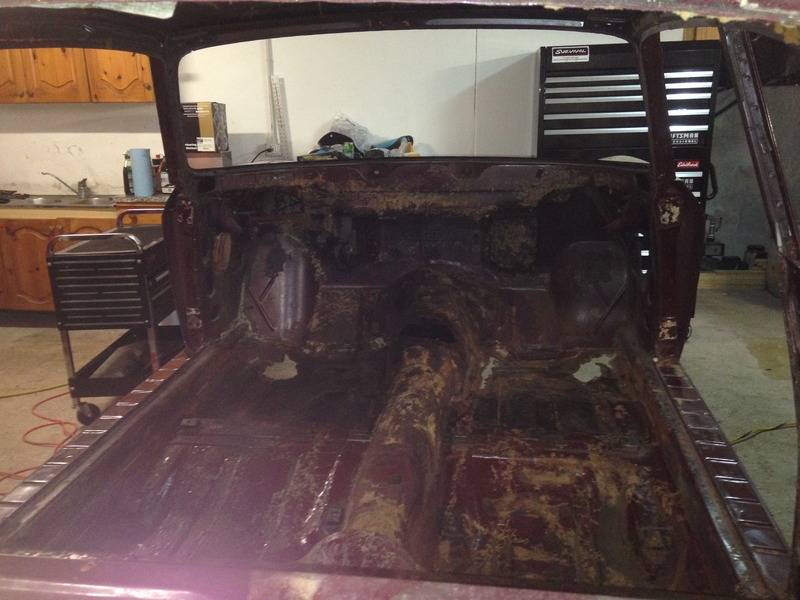
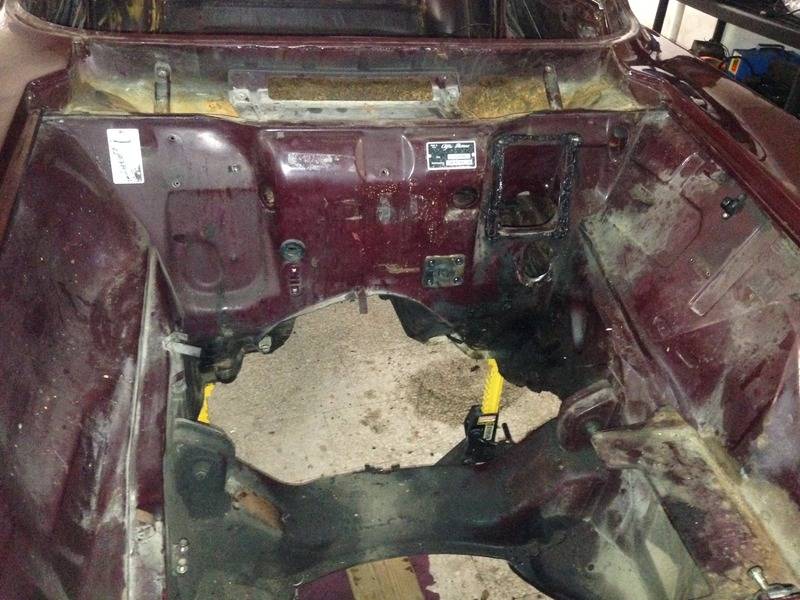
Engine compartment needs a good cleaning before I start with the paint removal.
 Check out my YouTube channel for vintage car and truck rescues and rebuilds! THE BULLETPROOF GARAGE!!! - YouTube
-
02-01-2016 #25
 -Moderator/Sponsor-
- Join Date
- Apr 2001
- Location
- The City of Fountains
- Posts
- 16,120
Man...This is quite a project!!!
Have you considered dropping an alternative engine into this car?
I was thinking that one of these would be awesome!!!
http://www.chevrolet.com/performance...-cylinder.html
Andrew1970 GTO Version 3.0
1967 Cougar build
GM High-Tech Performance feature
My YouTube Channel Please Subscribe!
Instagram @dr__efi
I deliver what EFI promises.
Remote Holley EFI tuning.
Please get in touch if I can be of service.
"You were the gun, your voice was the trigger, your bravery was the barrel, your eyes were the bullets." ~ Her
-
02-01-2016 #26
-Moderator/Sponsor-
- Join Date
- Apr 2001
- Location
- The City of Fountains
- Posts
- 16,120
Man...This is quite a project!!!
Have you considered dropping an alternative engine into this car?
I was thinking that one of these would be awesome!!!
http://www.chevrolet.com/performance...-cylinder.html
Andrew1970 GTO Version 3.0
1967 Cougar build
GM High-Tech Performance feature
My YouTube Channel Please Subscribe!
Instagram @dr__efi
I deliver what EFI promises.
Remote Holley EFI tuning.
Please get in touch if I can be of service.
"You were the gun, your voice was the trigger, your bravery was the barrel, your eyes were the bullets." ~ Her
-
02-01-2016 #27
Registered User
- Join Date
- Jan 2009
- Location
- San Antonio, Texas
- Posts
- 283
Going to stick with the original type engine (had 1300 cc, upgrading to 2000 cc). Originally Posted by andrewb70
Thanks
Scott
- - - Updated - - -
Going to stick with the original type engine (had 1300 cc, upgrading to 2000 cc). Originally Posted by andrewb70
Thanks
ScottCheck out my YouTube channel for vintage car and truck rescues and rebuilds! THE BULLETPROOF GARAGE!!! - YouTube
-
02-15-2016 #28
Registered User
- Join Date
- Jan 2009
- Location
- San Antonio, Texas
- Posts
- 283
Paint removal will be with razor blade and heat gun. Should only take a few hours to get rid of 90% of the paint. Rest will have to be done by hand, with stripper, or media blasting.
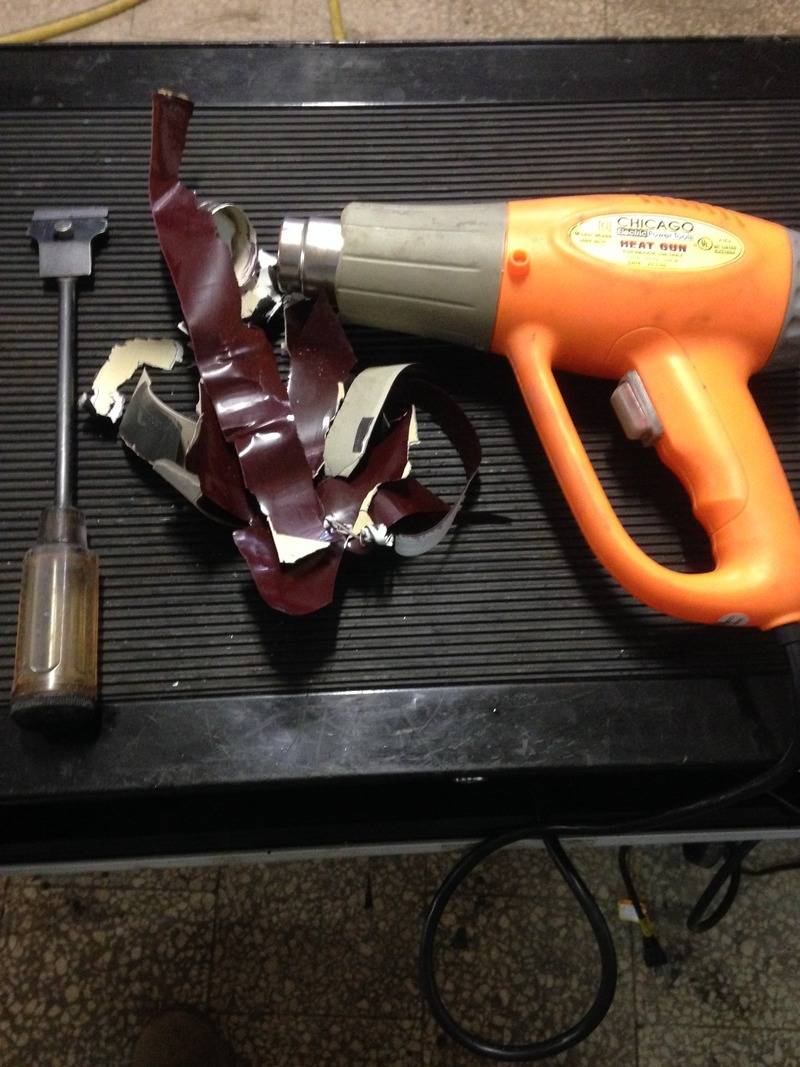
Just heat up a small area with the heat gun and it scrapes right off in big strips.
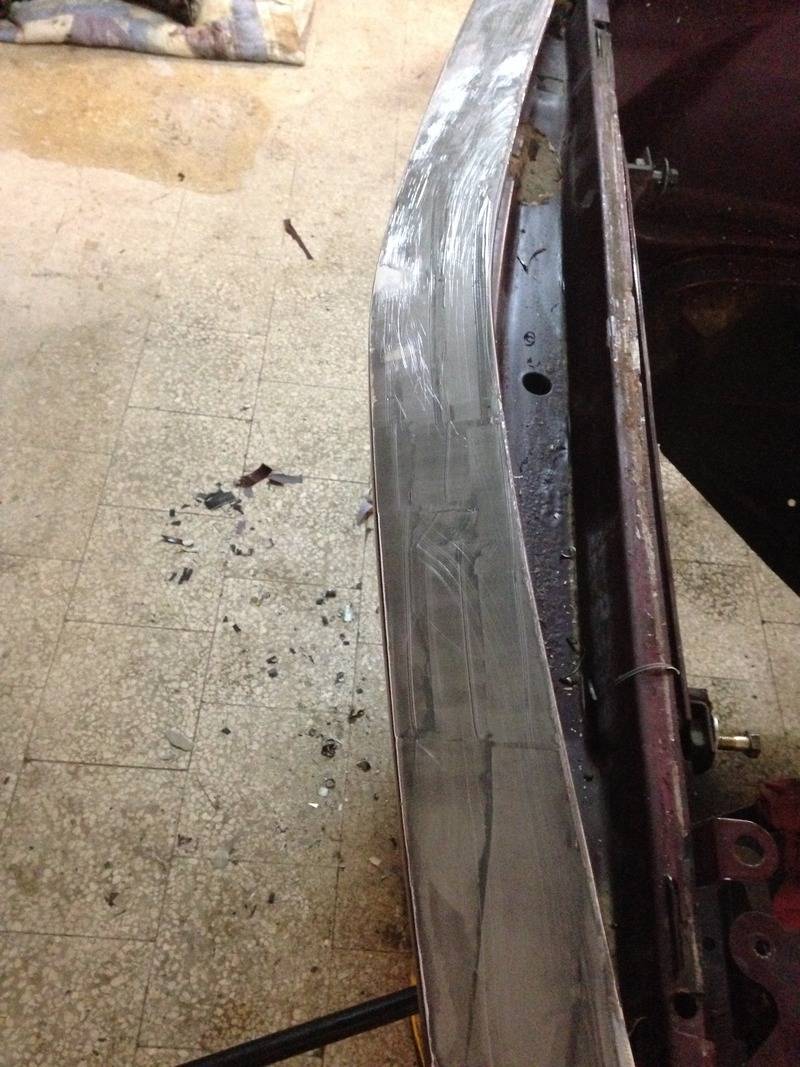
I have some Picklex on order to treat the bare metal for now. Need to source some epoxy primer locally.
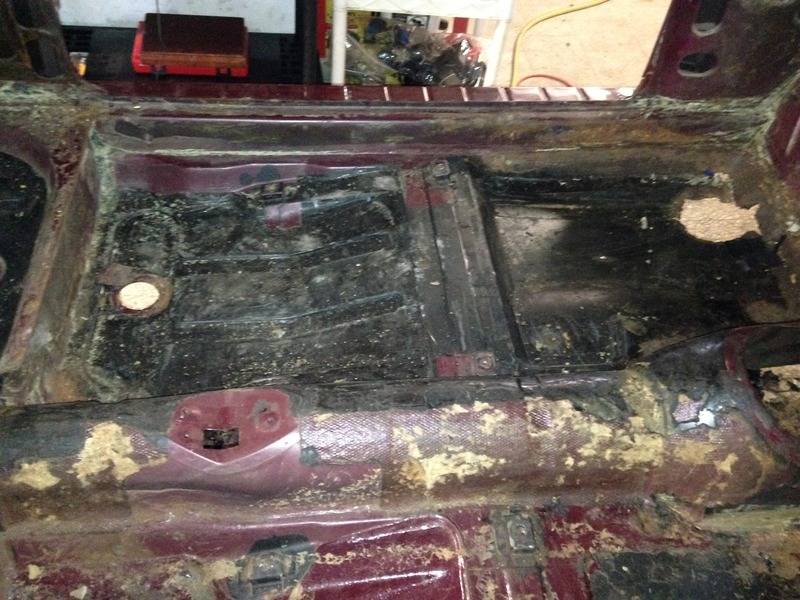
Got the tar scraped off the floorboards. Several hours worth of work with the heat gun and a scraper. Using dry ice to freeze it would have been easier, but by the time I figured out how to say "dry ice" in Italian and figure out where to buy it locally, I would have been done.
About halfway done in this picture. I need to get after the caulking/seam sealer with a wire brush on an angle grinder. I also need to finish getting the tar residue off the floors - I'll use diesel or some sort of solvent to get down to bare metal.
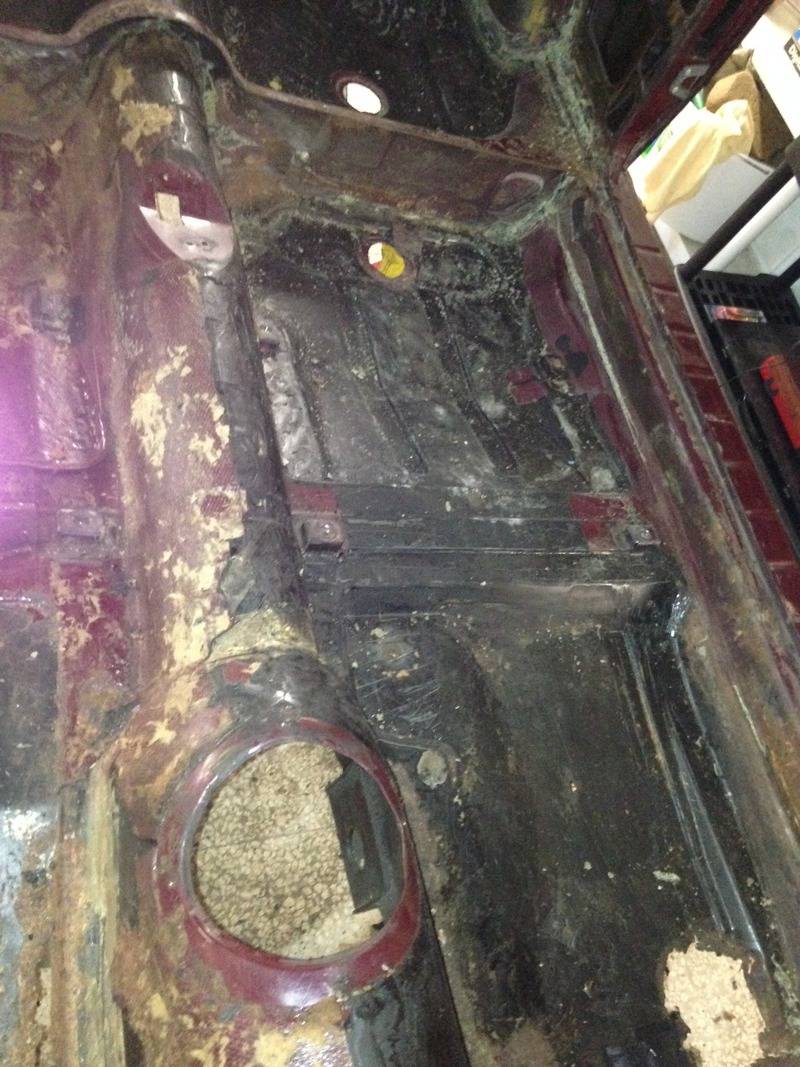
Floors look pretty good under the tar, but I did uncover a few areas that may need some attention. Wouldn't have found these if I hadn't removed the tar.
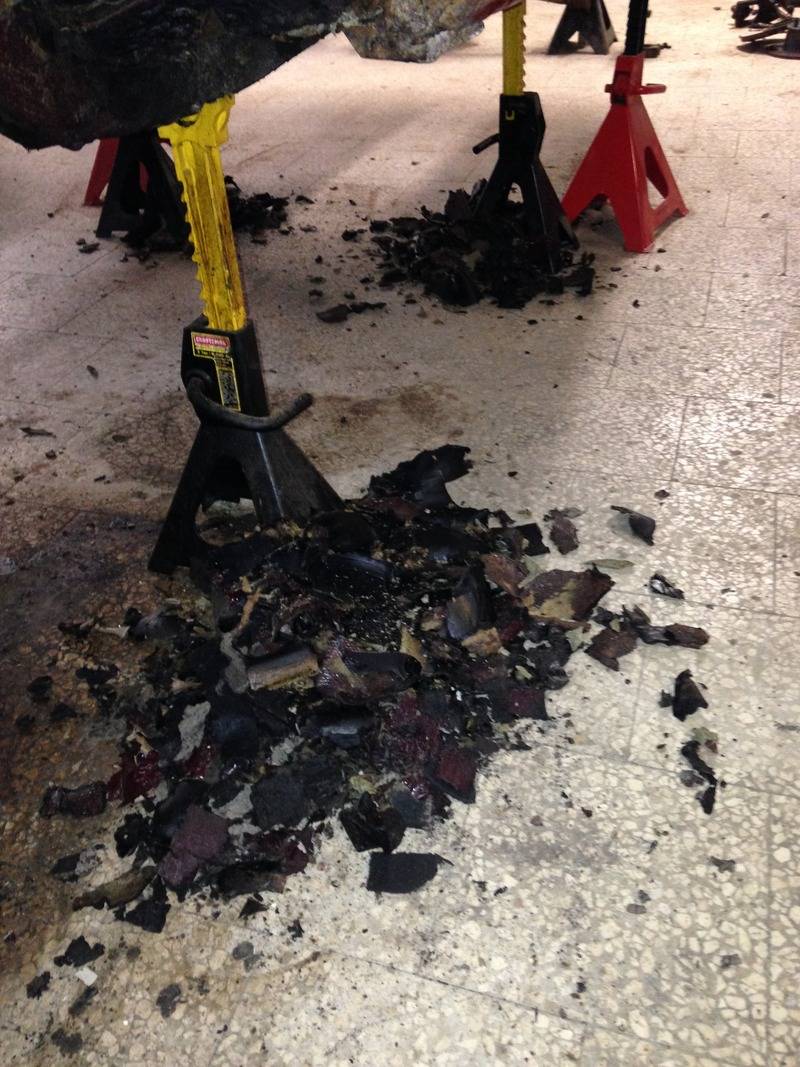
Just for sh*ts and giggles, I weighed most of the tar that I removed. Came to 20 lbs. Not earth shattering, but a step in the right direction.
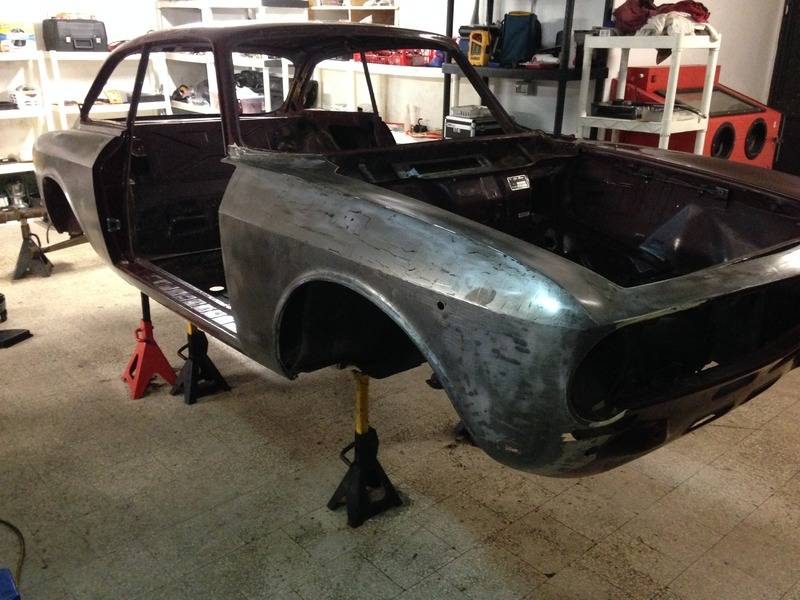
Need to get the undercoating scraped off the bottom, too. Plan at this point is to patch the floors instead of replace them entirely but will make final decision after I get it all undercoating off.Check out my YouTube channel for vintage car and truck rescues and rebuilds! THE BULLETPROOF GARAGE!!! - YouTube
-
02-15-2016 #29
Registered User
- Join Date
- Jan 2009
- Location
- San Antonio, Texas
- Posts
- 283
More progress. Got about 1/3 of the car stripped down to the metal.
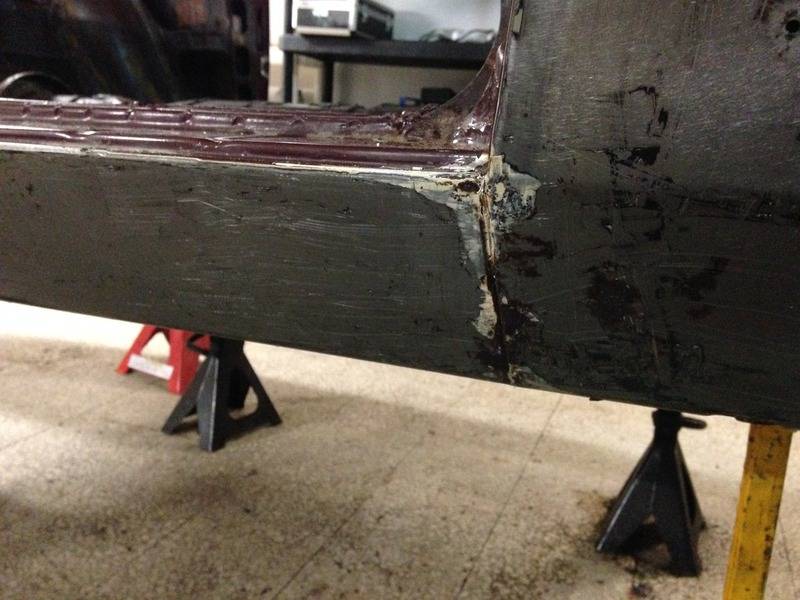
This is the worst spot on the passenger side rocker! Hooray! Driver’s side is the same. Rockers are notorious for rusting out on these cars and it did have some bubbling in the paint here.
Not such good news on the quarters. Both have been replaced and they were brazed in.. Passenger side has some accident damage, too -- bondo was 1/4 and thicker in places. Will need some hammer and dolly work. What would y’all do about the shoddy looking brazing? Cut the quarters off and re-attach? I’m assuming the bronze melts at a lower temperature than steel, but can I melt it out like lead without warping the panels?
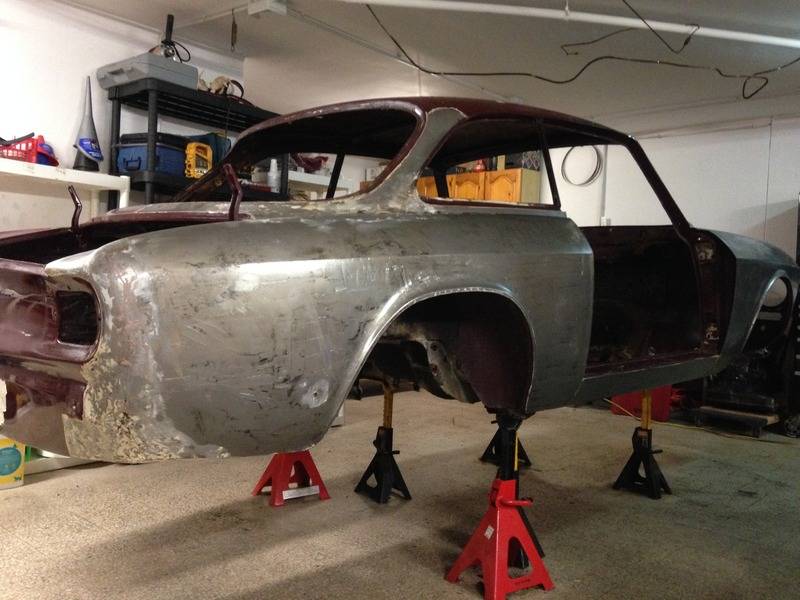
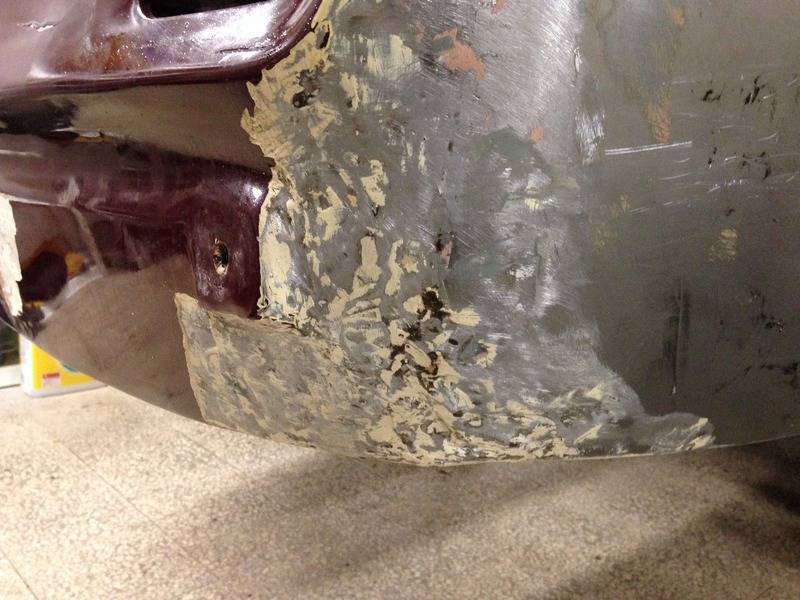
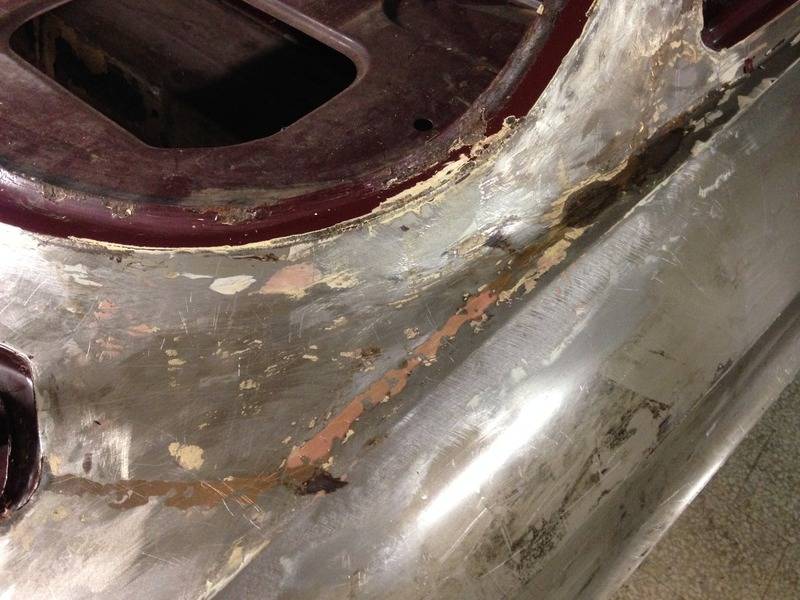
I'll end up using all sorts of paint removal methods by the time I'm done -- paint stripper spray/liquid (found some at the local box store; works ok), sandpaper on DA grinder, media blasting, etc. However, I'll strip the majority of the paint with heat gun and razor blade. Very easy to clean up.
Thanks
ScottCheck out my YouTube channel for vintage car and truck rescues and rebuilds! THE BULLETPROOF GARAGE!!! - YouTube
-
02-16-2016 #30
Registered User
- Join Date
- Nov 2009
- Location
- the dirty mitten
- Posts
- 1,217
Love watching this car progress, reminds me of a '74 BMW 2002Tii that I wish I never got rid of. Only got that because I couldn't afford one of these cars in this country
Steve
1968 Dodge Charger All Wheel Drive project Red Bull<script type="text/javascript" src="safari-extension://com.ebay.safari.myebaymanager-QYHMMGCMJR/5cce6da5/background/helpers/prefilterHelper.js"></script><script type="text/javascript" src="safari-extension://com.ebay.safari.myebaymanager-QYHMMGCMJR/85dc54c0/background/helpers/prefilterHelper.js"></script><script type="text/javascript" src="safari-extension://com.ebay.safari.myebaymanager-QYHMMGCMJR/85dc54c0/background/helpers/prefilterHelper.js"></script>
-
02-17-2016 #31
Registered User
- Join Date
- Jun 2005
- Posts
- 436
You should be able to melt out the bronze/brazed metal out without warping it, assuming you don't torch the crap out of the panel.
-
02-17-2016 #32
 Registered User
- Join Date
- May 2009
- Location
- Connecticut
- Posts
- 409
I came across this video the other day. Thought you may like it.
Aldin
1969 Camaro (Weapon of Choice) in the works
-
02-17-2016 #33
 Registered User
- Join Date
- Feb 2013
- Location
- South Carolina
- Posts
- 935
I couldn't find the "Like" button.
-
02-17-2016 #34
Registered User
- Join Date
- Jan 2009
- Location
- San Antonio, Texas
- Posts
- 283
Sorry to hear about the 2002. I'm a fan of those, too. Originally Posted by Motorcitydak
Ciao,
ScottCheck out my YouTube channel for vintage car and truck rescues and rebuilds! THE BULLETPROOF GARAGE!!! - YouTube
-
02-17-2016 #35
Registered User
- Join Date
- Jan 2009
- Location
- San Antonio, Texas
- Posts
- 283
Thanks. I'm kind of new to this, so can I melt it with a generic propane torch like you can buy at the big box stores or am I using a rosebud tip on an oxy-acetlyne torch? Originally Posted by maxharvard
Scott
- - - Updated - - -
Originally Posted by 19,69camaro
Thanks, Aldin.
Scott
- - - Updated - - -
Thanks, JJ. I'm kind of fond of it, too.
Grazie,
ScottCheck out my YouTube channel for vintage car and truck rescues and rebuilds! THE BULLETPROOF GARAGE!!! - YouTube
-
02-17-2016 #36
Registered User
- Join Date
- Apr 2014
- Posts
- 803
Very cool car! good luck with your build!
Pat
-
02-17-2016 #37
 Registered User
- Join Date
- Jul 2011
- Location
- Prescott, AZ
- Posts
- 206
Love the dedication. All the work will be worth it to have a car thats 100% rust free.
-
02-19-2016 #38
Registered User
- Join Date
- Jan 2009
- Location
- San Antonio, Texas
- Posts
- 283
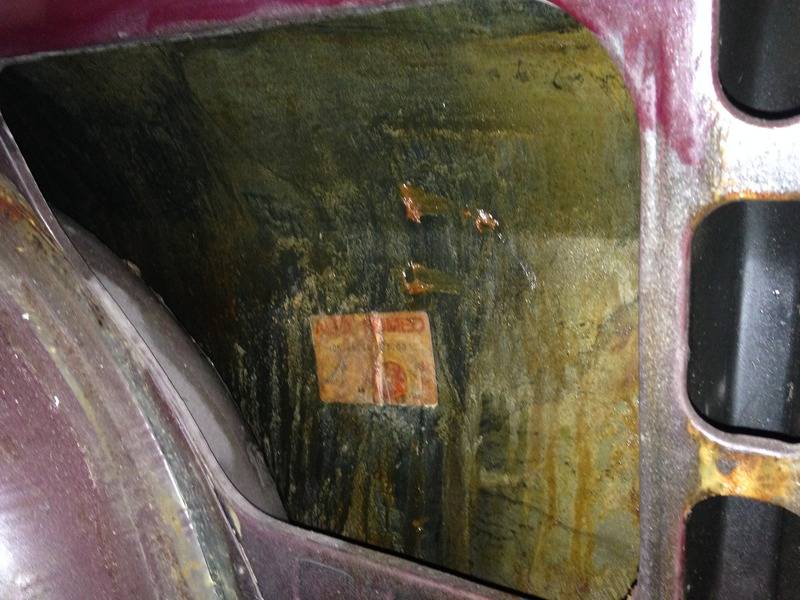
Did a bit more investigating. Certainly appears that both quarters have been replaced. Looking from the inside of the car, the driver's quarter has an Alfa Romeo sticker on it, and it's slathered with grease of some sort. No sticker that I can see on the passenger side, but it's slathered with grease, too.
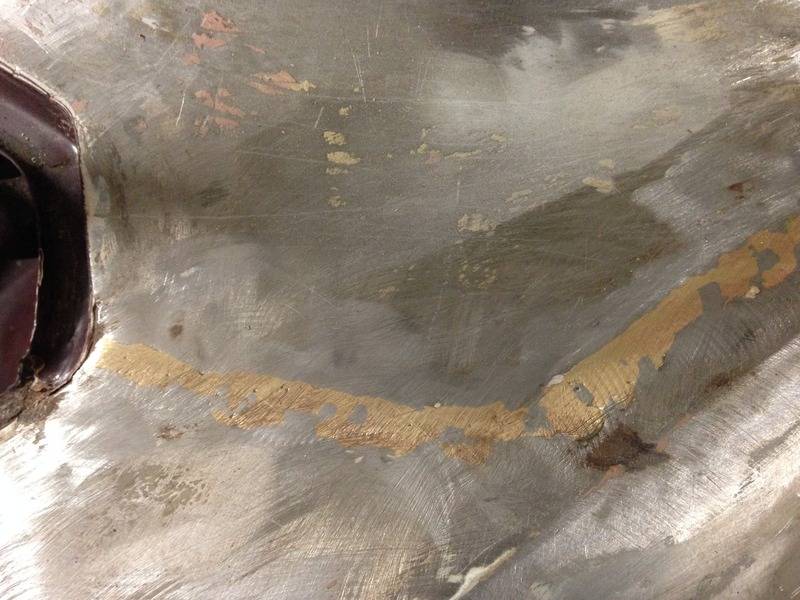
Passenger side here -- cleaned it up a little bit with a Roloc on my angle grinder. You can't easily see the seam here, when you feel underneath, you can tell the panels were lapped, not butted.
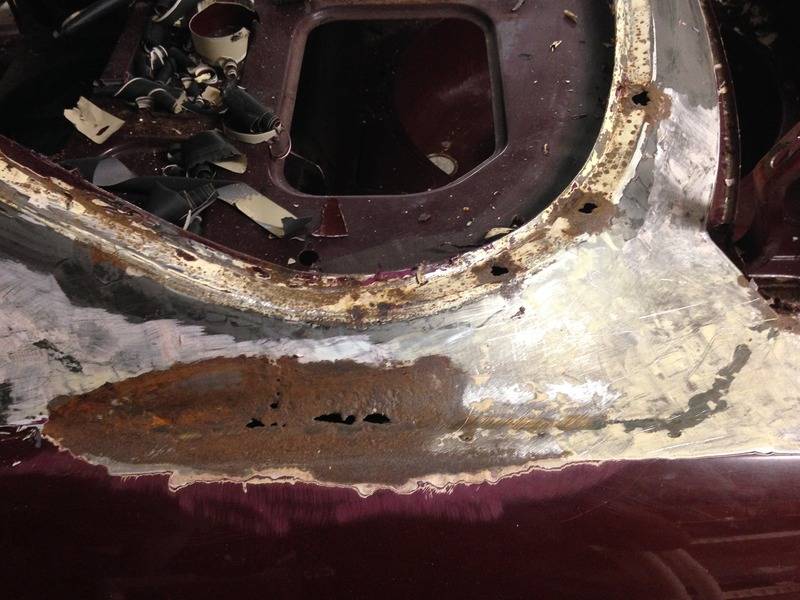
This is the driver's side - that's the base of the C pillar. As you can see, it rotted completely through in the spot where the new quarter was brazed.
And this is a blurry shot taken from in the trunk -- that's the underside of the brazing on the passenger quarter. As you can see, it's nice and rusty.
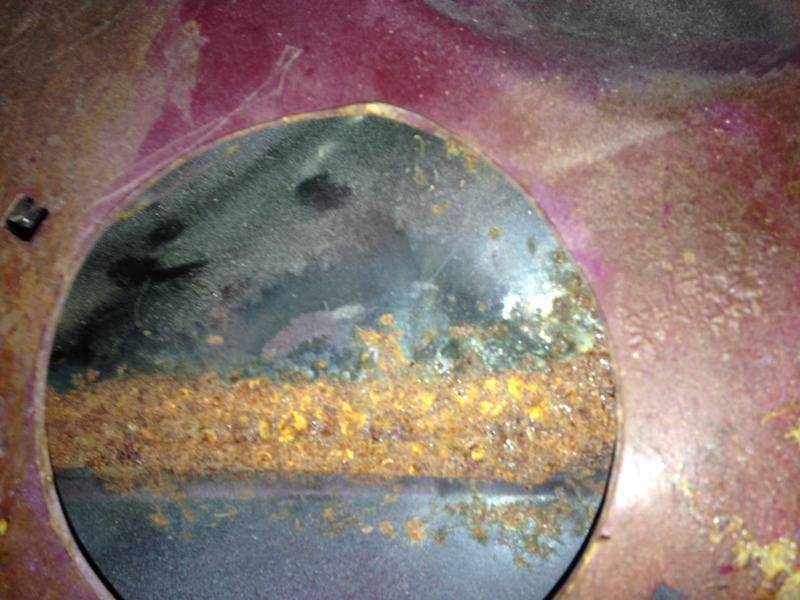
Given the rust showing in the last picture, I'm inclined to get rid of all of the brazing. Since it's lap welded, I could potentially cut it on one side of the brazing and then try to remove the brazed lapped portion from the panel. However, I'm not ready to attempt a fix quite yet. I'll completely strip the trunk, figure out if I'm going to keep the rear panel or not, and come up with a plan.
Thanks!
ScottCheck out my YouTube channel for vintage car and truck rescues and rebuilds! THE BULLETPROOF GARAGE!!! - YouTube
-
02-19-2016 #39
Registered User
- Join Date
- Jun 2005
- Posts
- 436
Scott[/QUOTE]
I believe you should be fine with a butane torch. Test it out ahead of time of course. Using a metal file/chisel/putty knife or brush will help scrape it away.
-
02-22-2016 #40
Registered User
- Join Date
- Jan 2009
- Location
- San Antonio, Texas
- Posts
- 283
I believe you should be fine with a butane torch. Test it out ahead of time of course. Using a metal file/chisel/putty knife or brush will help scrape it away.[/QUOTE] Originally Posted by maxharvard
That's what I plan to use. Good point on the file/chisel/putty knife.
Working in the trunk now. Some bondo in the passenger rear corner from a fender bender that wasn't repaired properly. Once I get it all stripped, I'll have a good idea of whether to repair, weld in a patch, or just replace.
Thanks,
ScottCheck out my YouTube channel for vintage car and truck rescues and rebuilds! THE BULLETPROOF GARAGE!!! - YouTube


 Reply With Quote





