


Results 421 to 440 of 1589
Thread: Modern Bullitt Charger build
-
01-02-2016 #421

 Registered User
- Join Date
- Nov 2006
- Location
- Ma.
- Posts
- 5,560

Very nice Pat, I always look forward to your updates.
Wayne
Car FINALLY home !!!!!! lol
Project FNQUIK https://www.pro-touring.com/showthre...ghlight=FNQUIK
-
01-03-2016 #422
Registered User
- Join Date
- Apr 2014
- Posts
- 803
Yes it is close, about 2" from the lights and 4" from the ceiling. Originally Posted by wfo guy

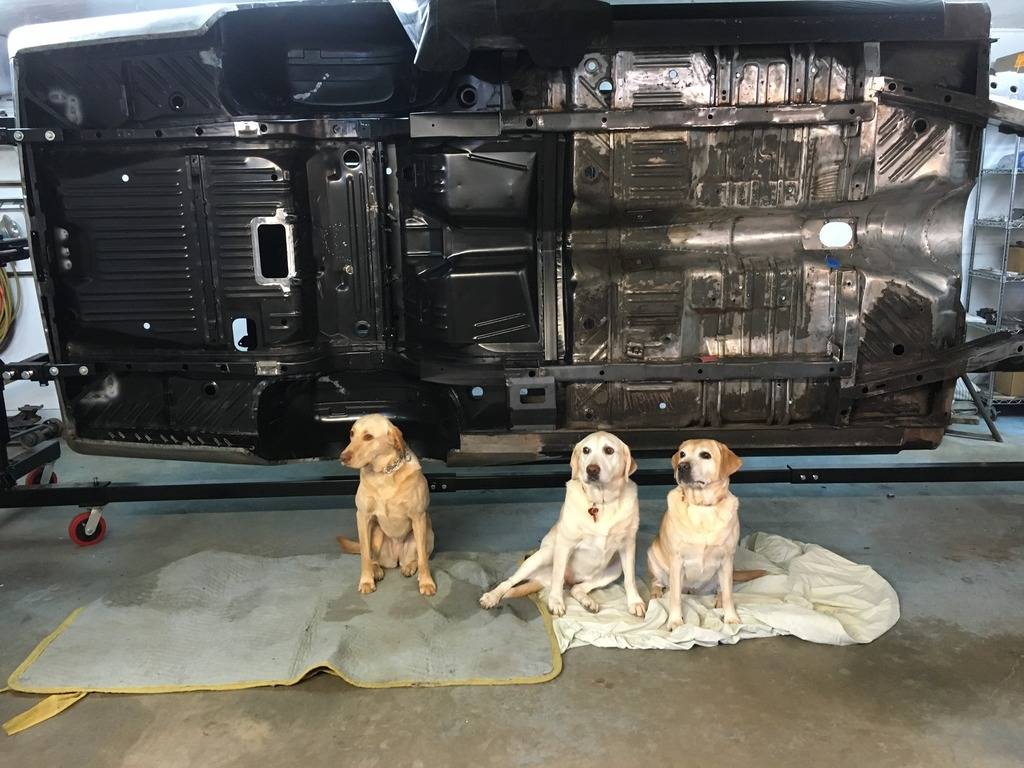
Had some help at the shop today ;-)
Thanks
Pat
-
01-08-2016 #423
Registered User
- Join Date
- Apr 2014
- Posts
- 803
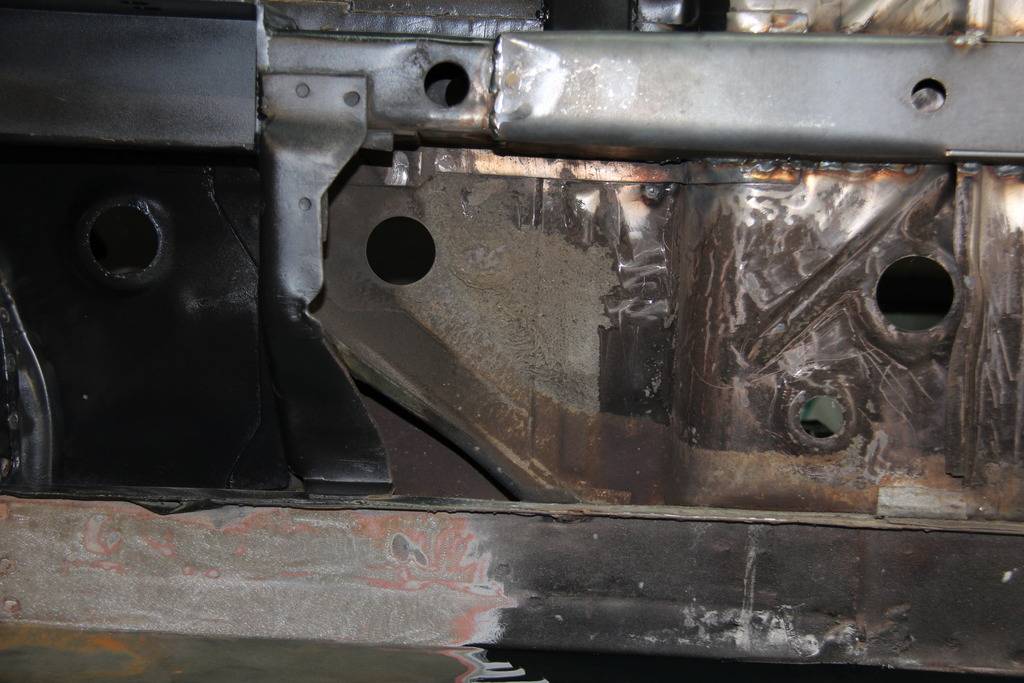
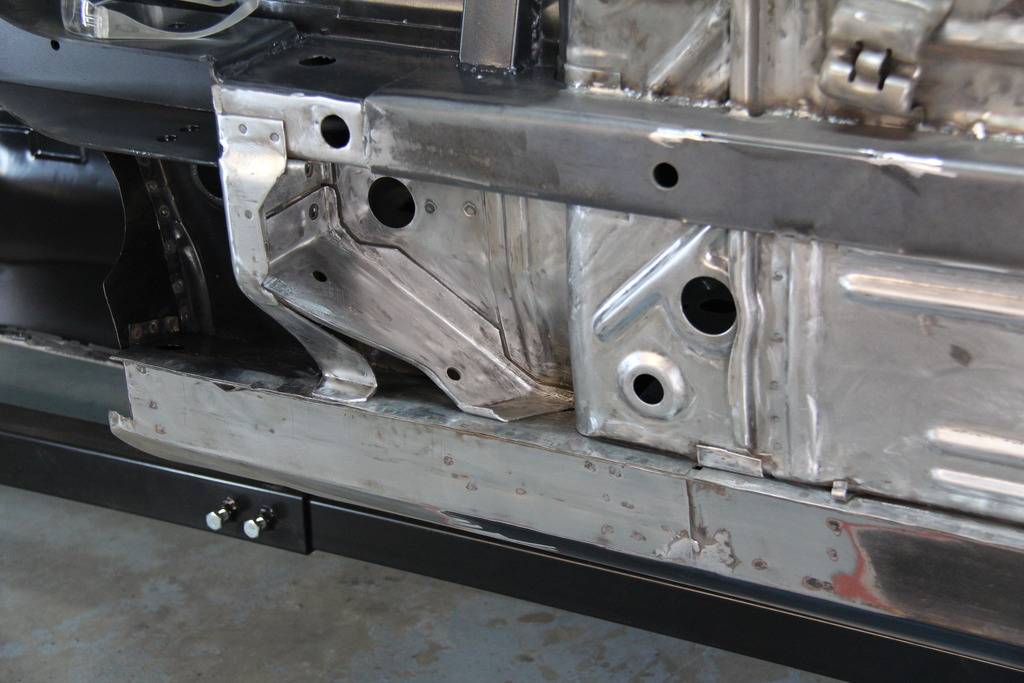
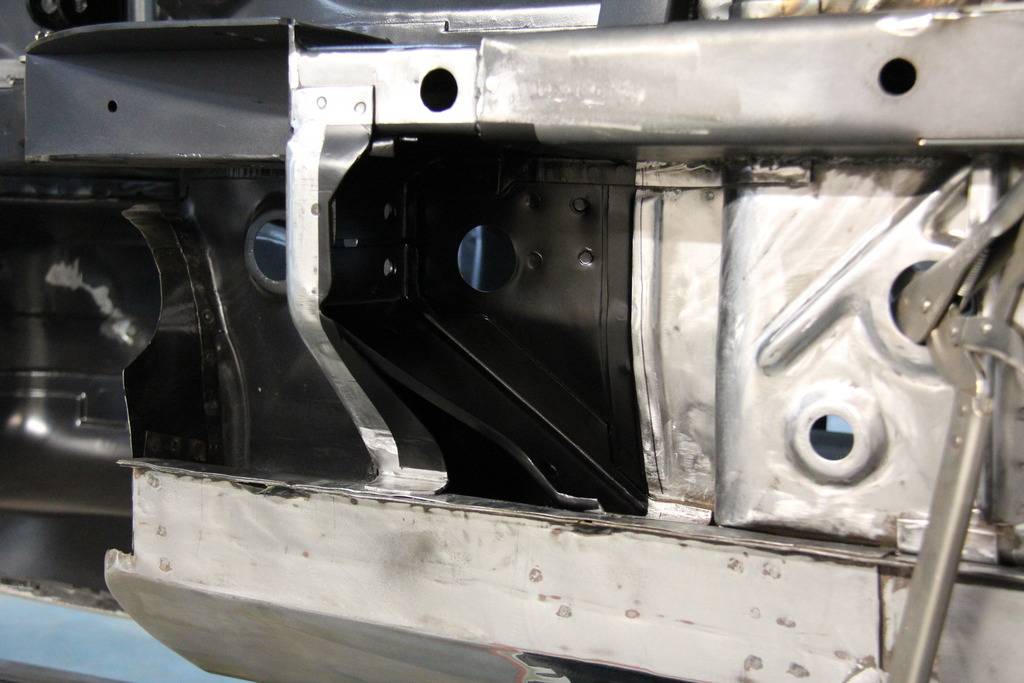
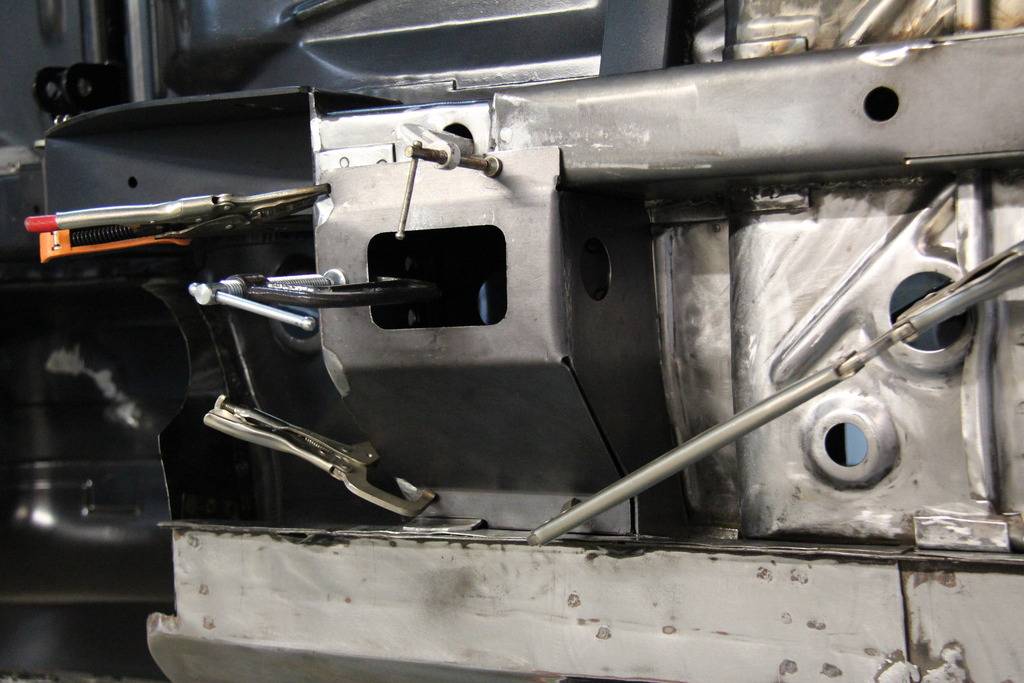
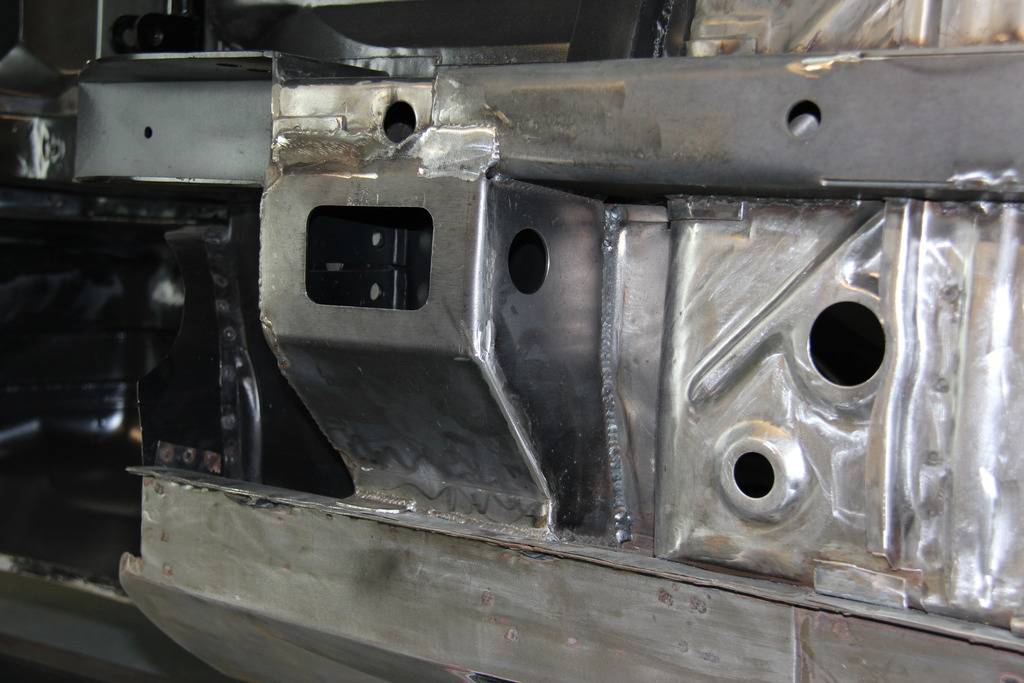
Started installing the torque boxes and have the left aft welded in. The US Car Tool boxes fit nice and only need a little adjustment. I added a 1 ½” hole for a future rear brake vent.
Thanks
Pat
-
01-08-2016 #424
Registered User
- Join Date
- Sep 2013
- Location
- sw Kansas
- Posts
- 1,661
I bet about now, the rotisserie has become your best friend.

-
01-08-2016 #425
Registered User
- Join Date
- Apr 2014
- Posts
- 803
Yes! it is a must have tool!! Originally Posted by wfo guy
Thanks
Pat
-
01-10-2016 #426
Registered User
- Join Date
- Apr 2014
- Posts
- 803
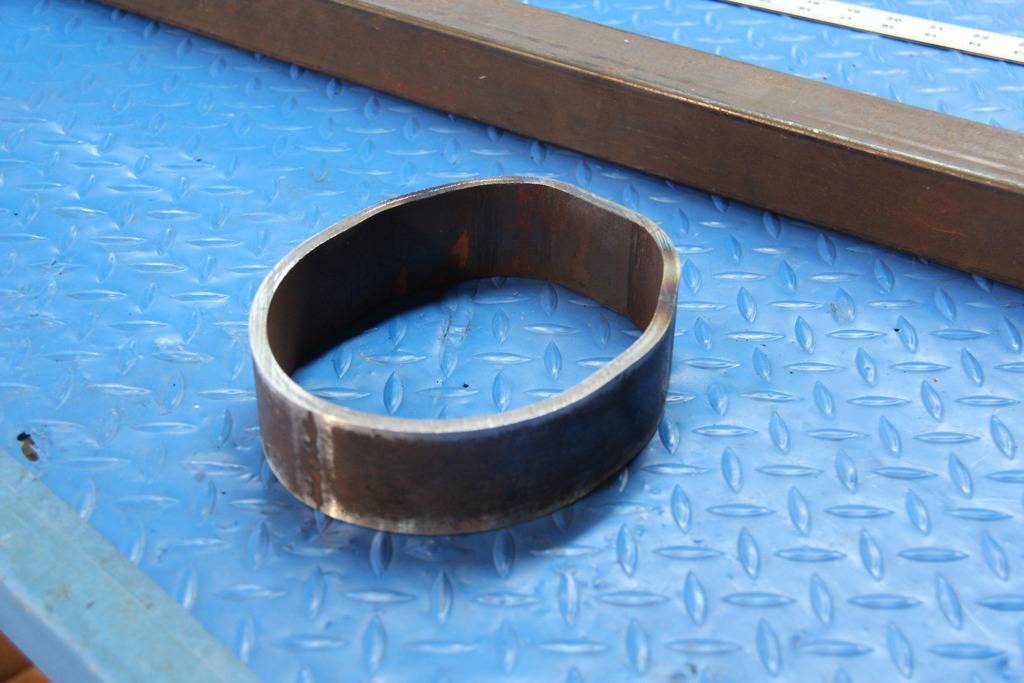
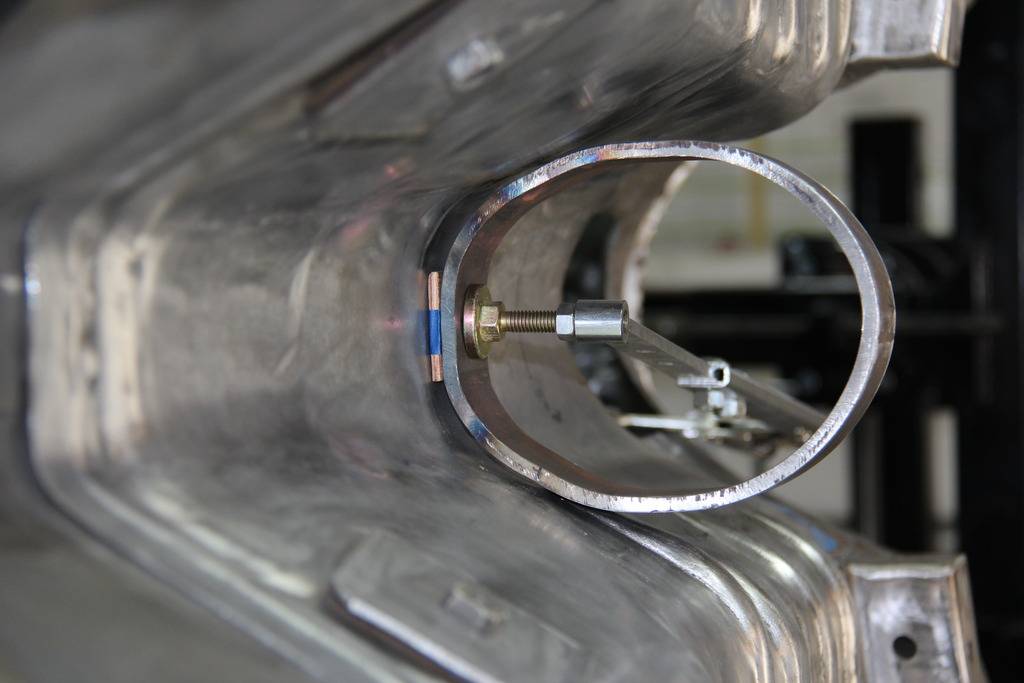
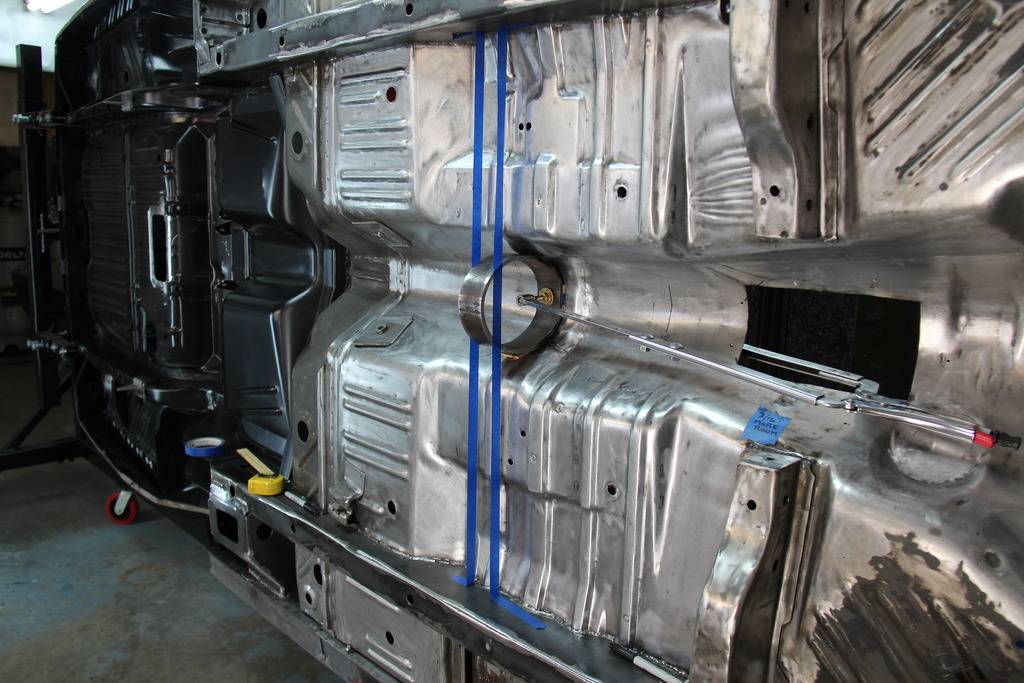
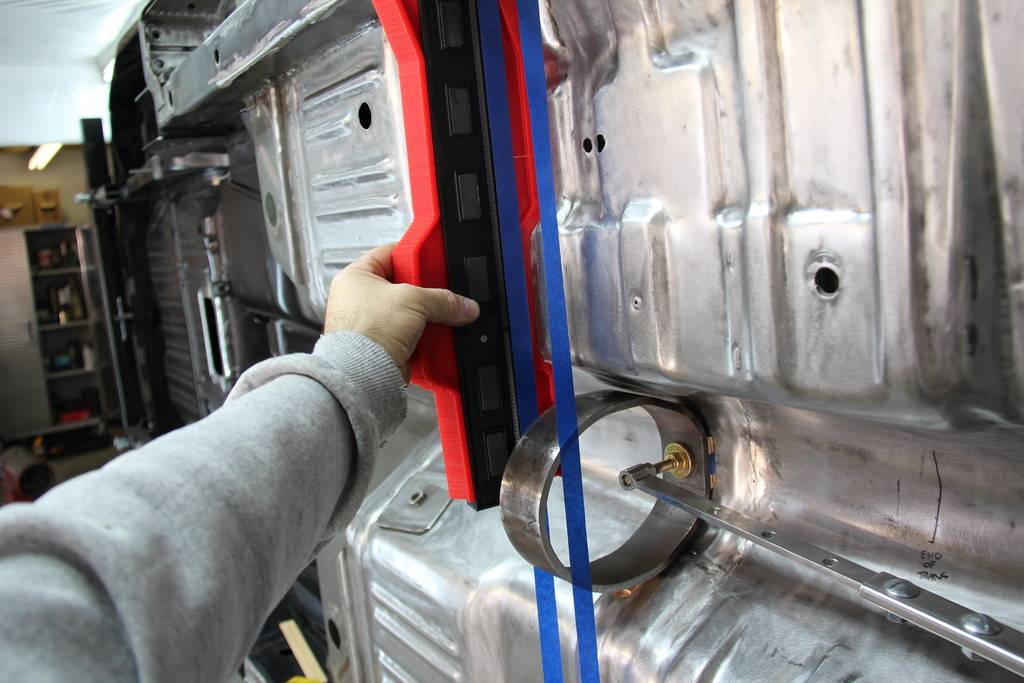
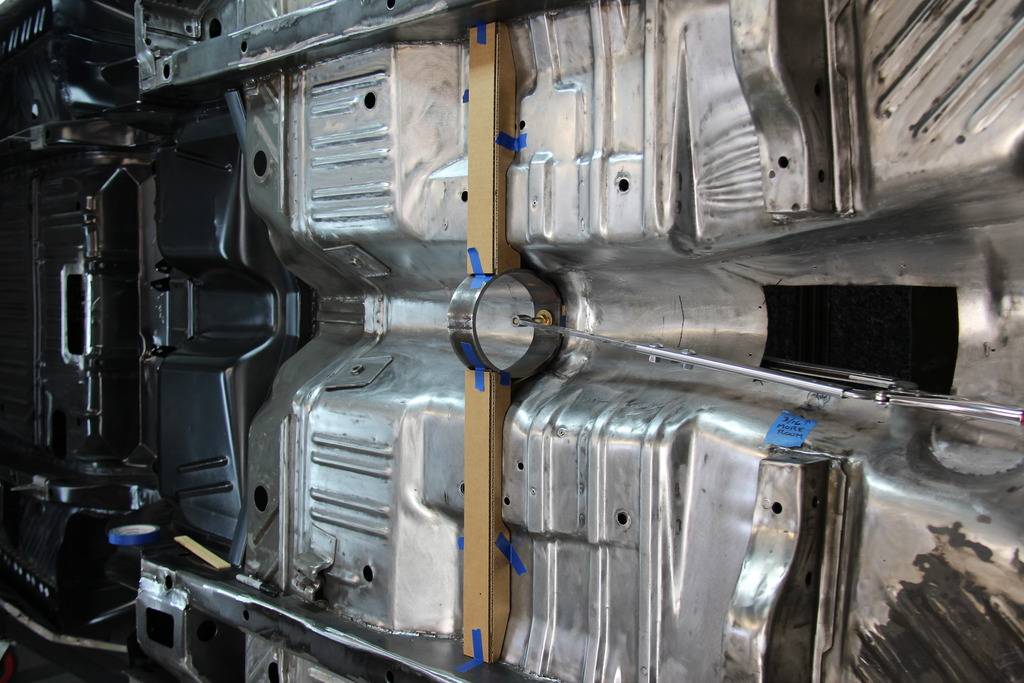
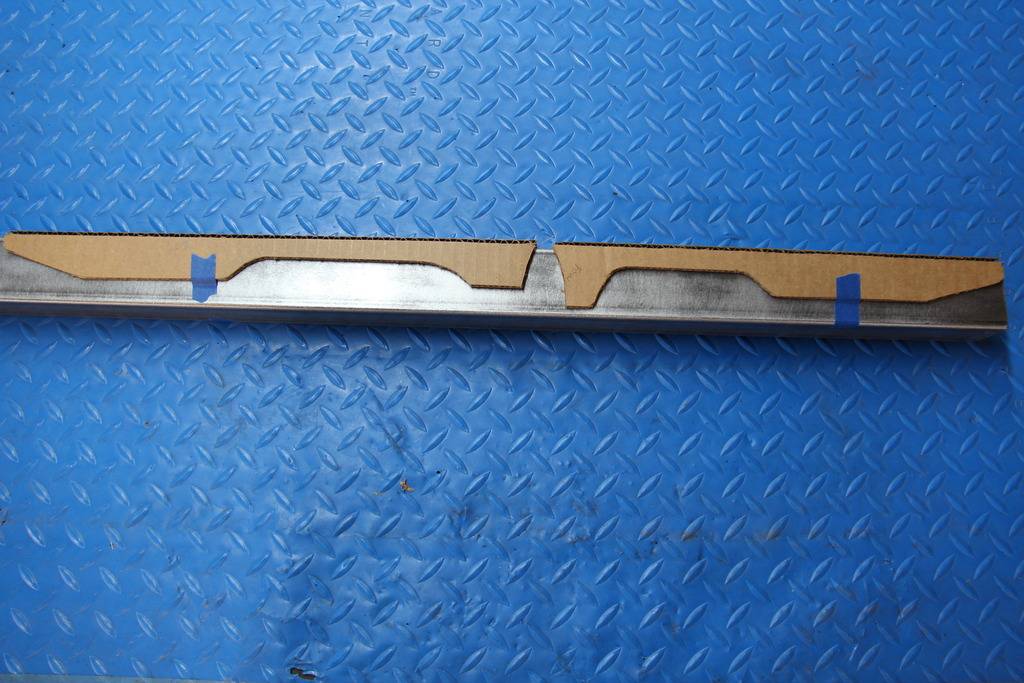
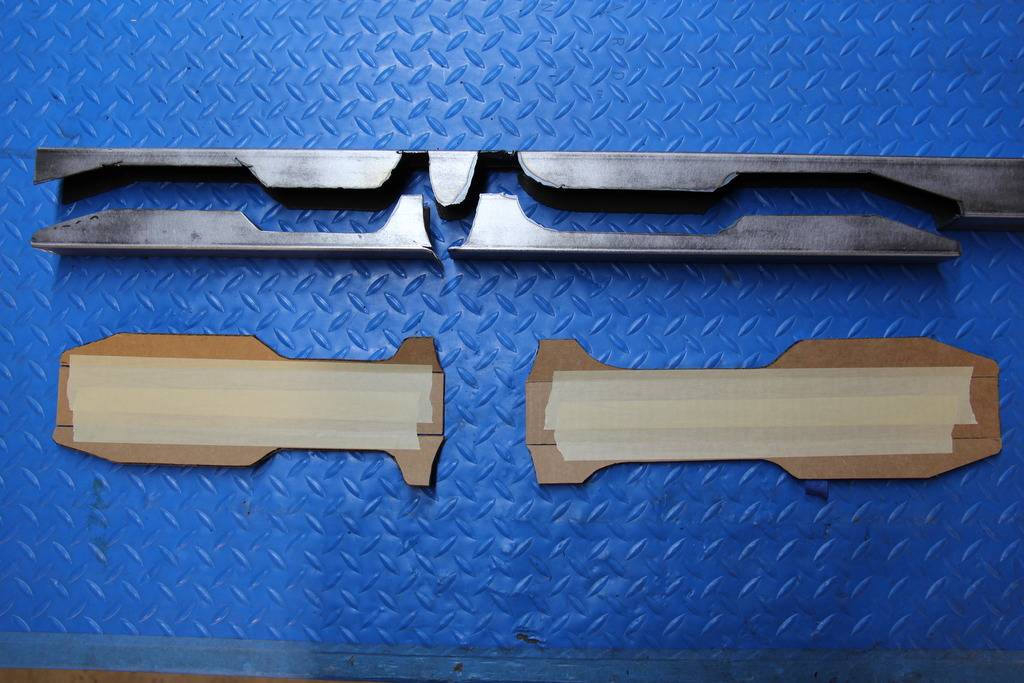
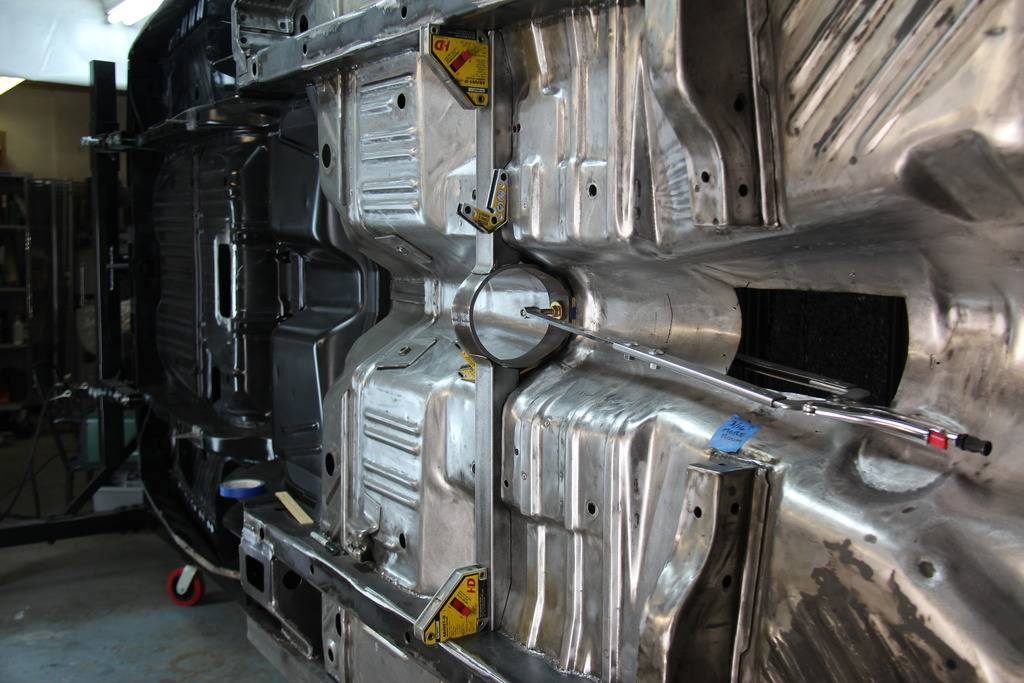
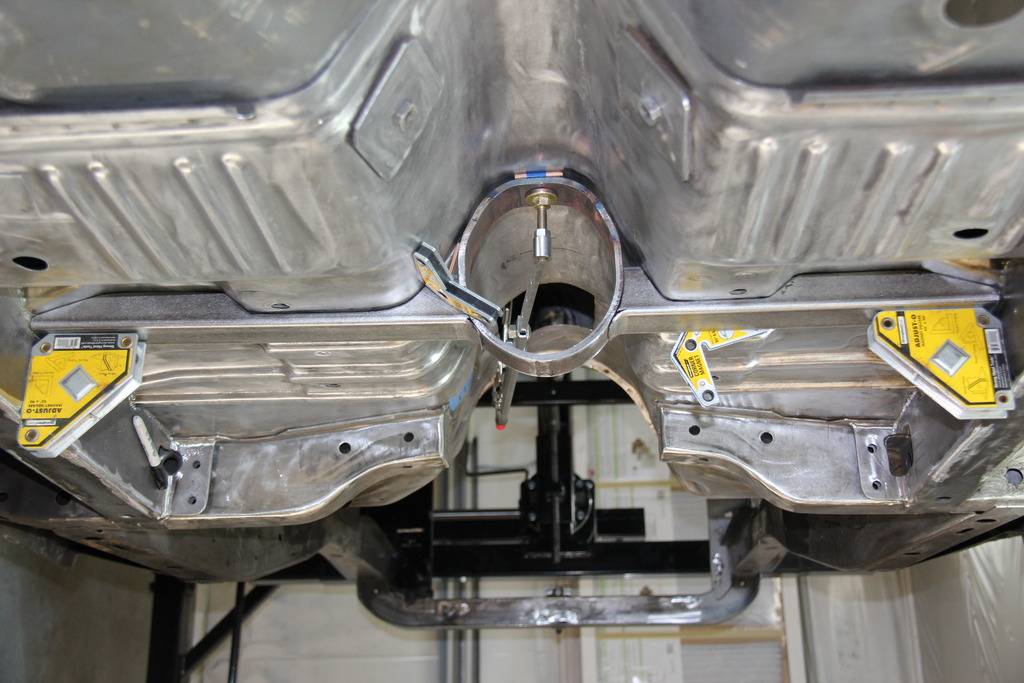
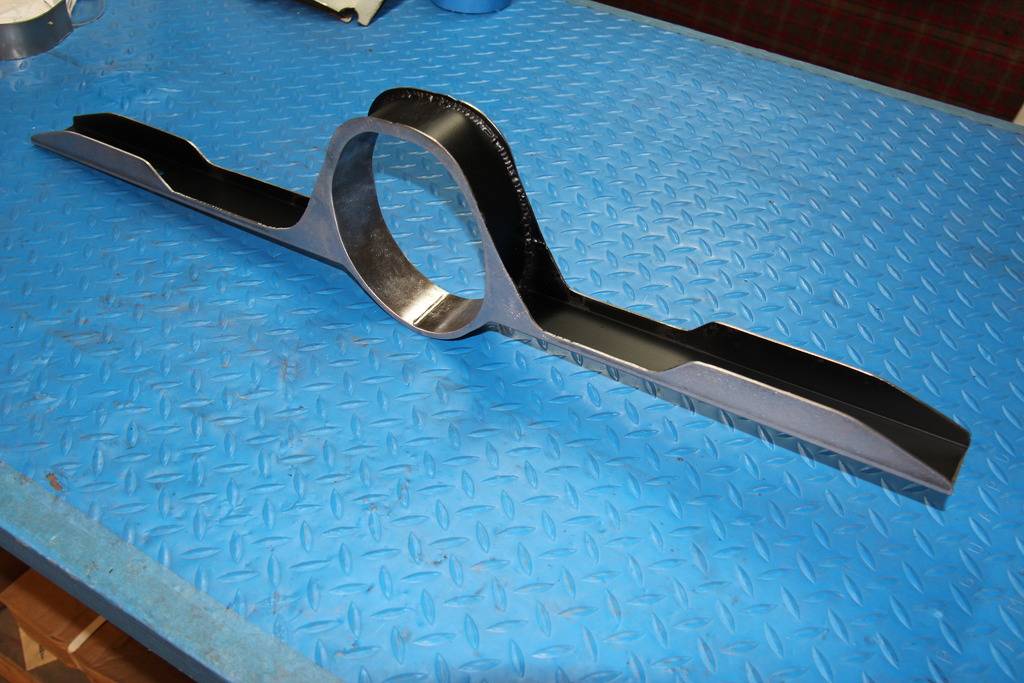
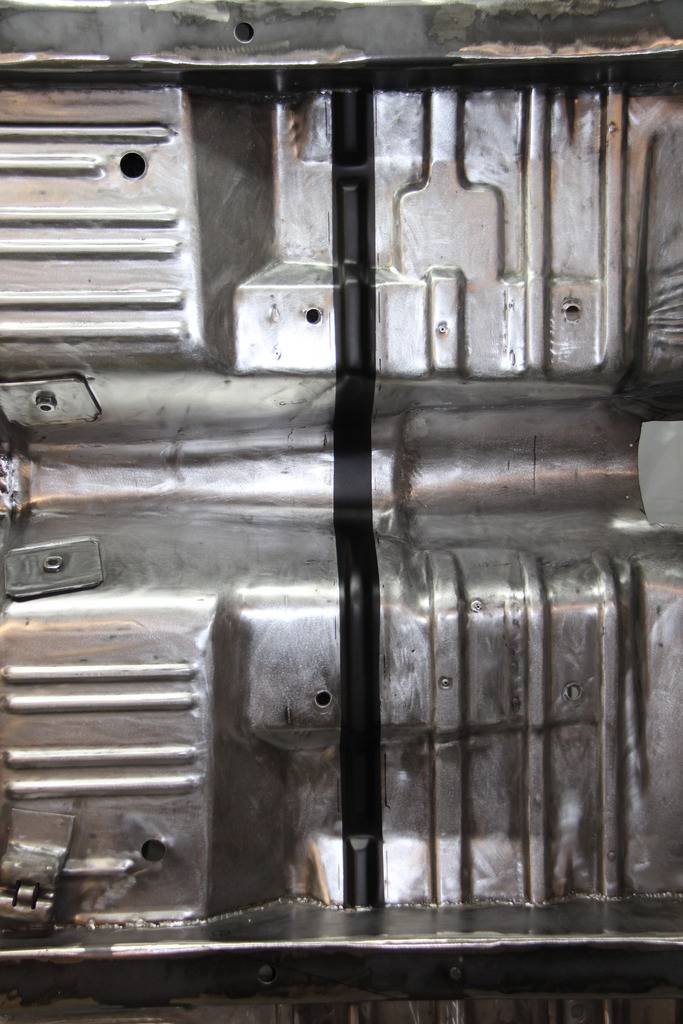
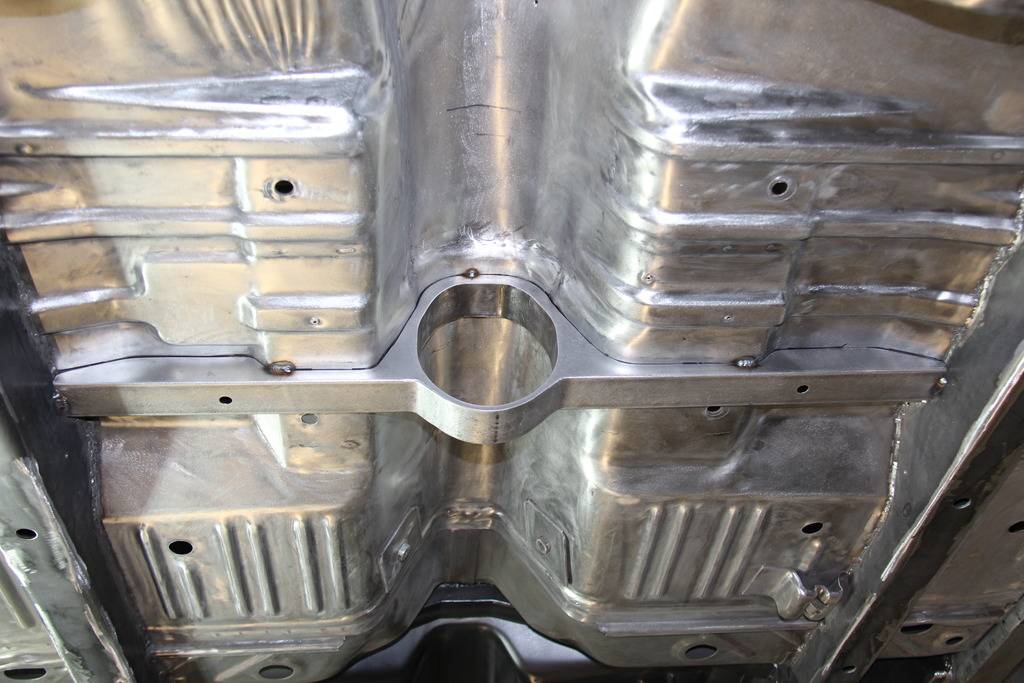
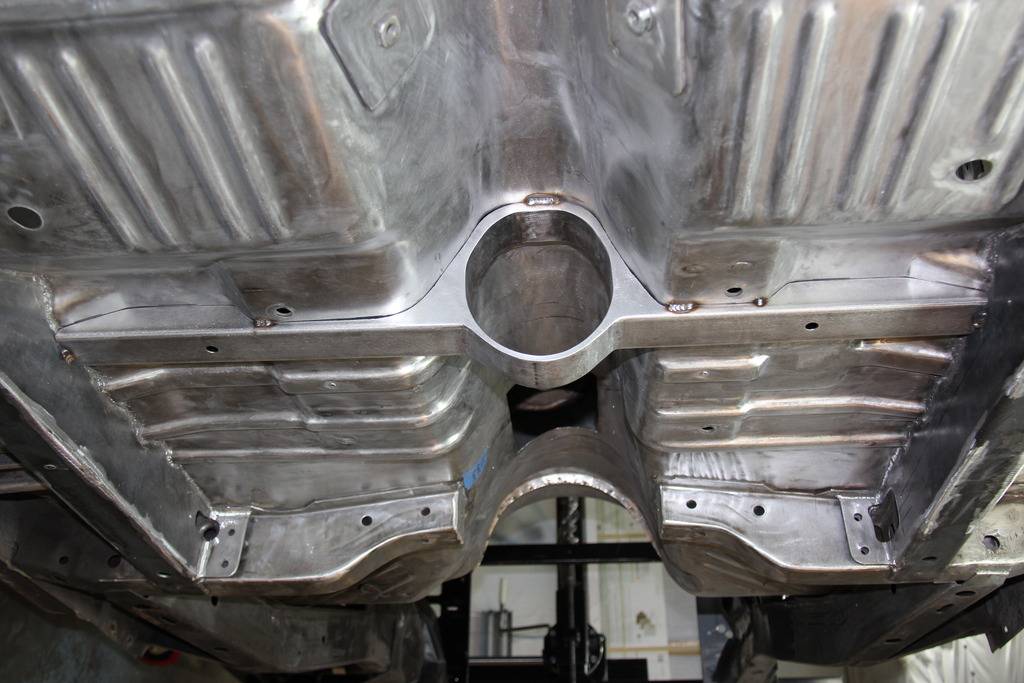
I started on the driveshaft loop/crossmember today. Using a press I oval a 2” section of 6” pipe and hammered the top half to match the shape of the driveshaft tunnel. With the loop clamped in place and using a 15” contour gauge (a must have tool) I made two cardboard pattern for the crossmember. With the cardboard center section of each pattern as wide as the square tubing (2”) I was able to lay it over the tubing to get a precise line to cut with the plasma cutter. I still need to make the pattern for inside the tunnel above the loop before I can weld it to the floor.
Thanks
Pat
-
01-10-2016 #427
Registered User
- Join Date
- Nov 2006
- Location
- Ma.
- Posts
- 5,560
Wow, very nice job matching it up to the floor.
Wayne
Car FINALLY home !!!!!! lol
Project FNQUIK https://www.pro-touring.com/showthre...ghlight=FNQUIK
01-11-2016 #428
Registered User
- Join Date
- Apr 2014
- Posts
- 803
Thank you Wayne! Originally Posted by Motown 454
Pat
01-11-2016 #429
Registered User
- Join Date
- Sep 2013
- Location
- sw Kansas
- Posts
- 1,661
I like your multi extended vice grips.
I wanted a contour gauge for a while. Now I see why I need one.
01-11-2016 #430 Registered User
- Join Date
- Oct 2004
- Posts
- 2,624
Looks like you're puppy printer ran out of in by the time you did the middle one. Originally Posted by keepat
Red Forman: "The Mustang's front end is problematic; get yourself a Firebird."
01-11-2016 #431
Registered User
- Join Date
- Apr 2014
- Posts
- 803
It's the first time I had a real need to use those vice grips and I have to say money well spent! And the contour tool is from Eastwood and I have used that on a few other projects. Originally Posted by wfo guy
Thank you!
Pat
01-11-2016 #432
Registered User
- Join Date
- Apr 2014
- Posts
- 803
:-) The middle lab is actually the oldest and she has always been light colored but as she's gotten older the gray is taken over, like me ;-) Originally Posted by 68Formula
Thanks
Pat
01-11-2016 #433 Registered User
- Join Date
- Aug 2011
- Location
- North Platte,NE
- Posts
- 876
I have a 6" pin style contour tool but a longer one would great to. Thanks for spending more of my money Pat.
Emil Bunger
01-13-2016 #434
Registered User
- Join Date
- Apr 2014
- Posts
- 803
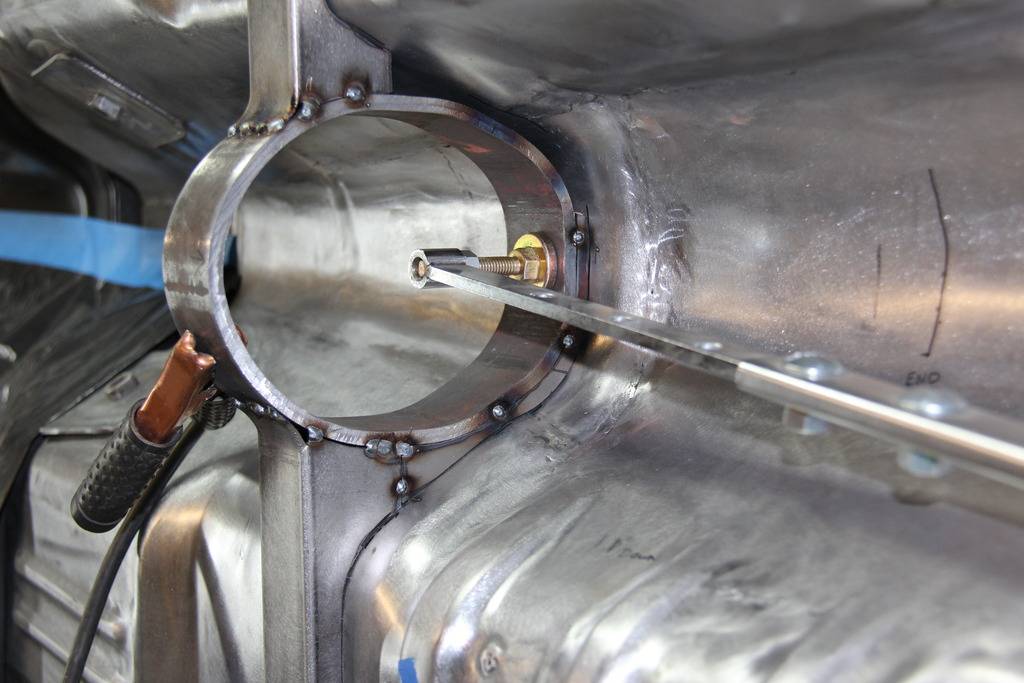
The drive shaft loop/crossmember is made and tack welded in place. Back to the torque boxes.
Thanks
Pat
01-13-2016 #435
Registered User
- Join Date
- May 2015
- Posts
- 67
Nicely Done!
01-13-2016 #436 Registered User
- Join Date
- Oct 2015
- Posts
- 122

Magic. Nice fit. You should be very proud of your work.
01-17-2016 #437
Registered User
- Join Date
- Apr 2014
- Posts
- 803
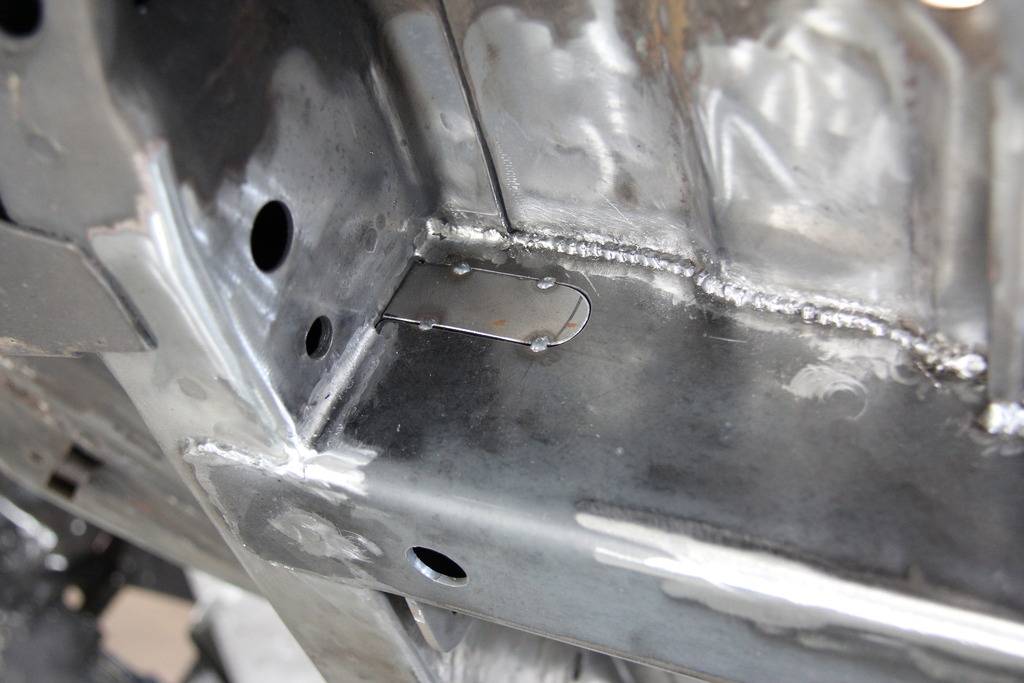
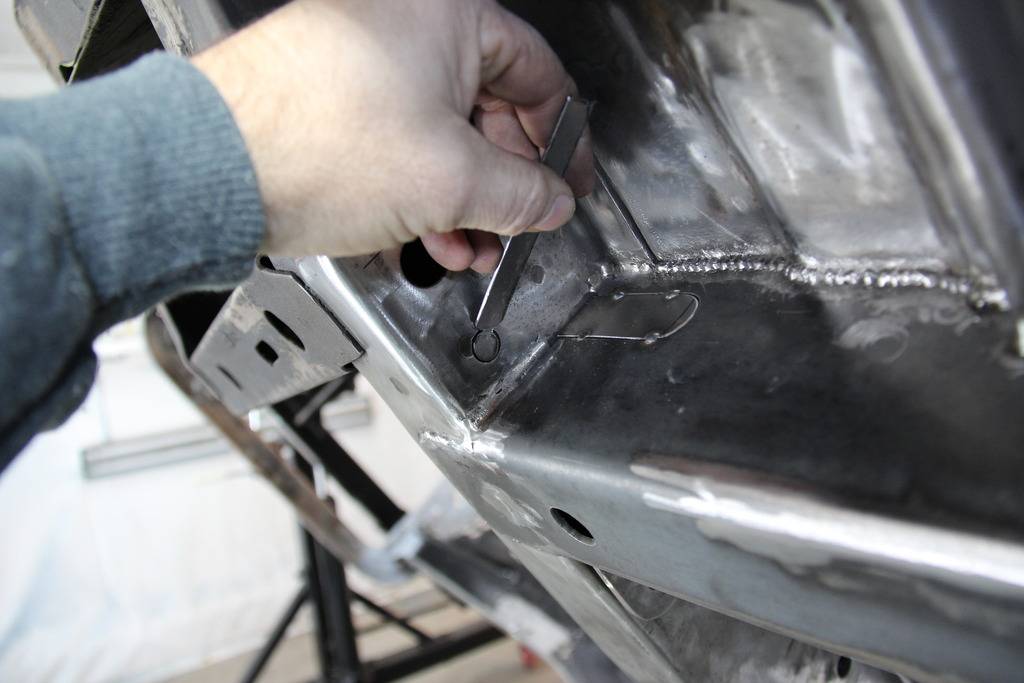
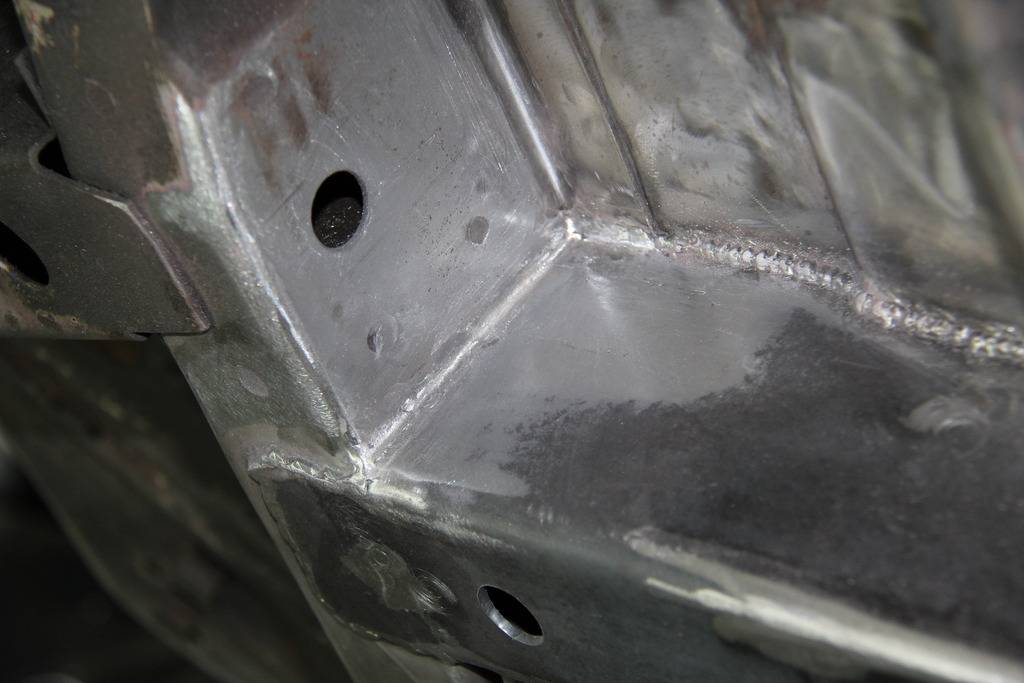
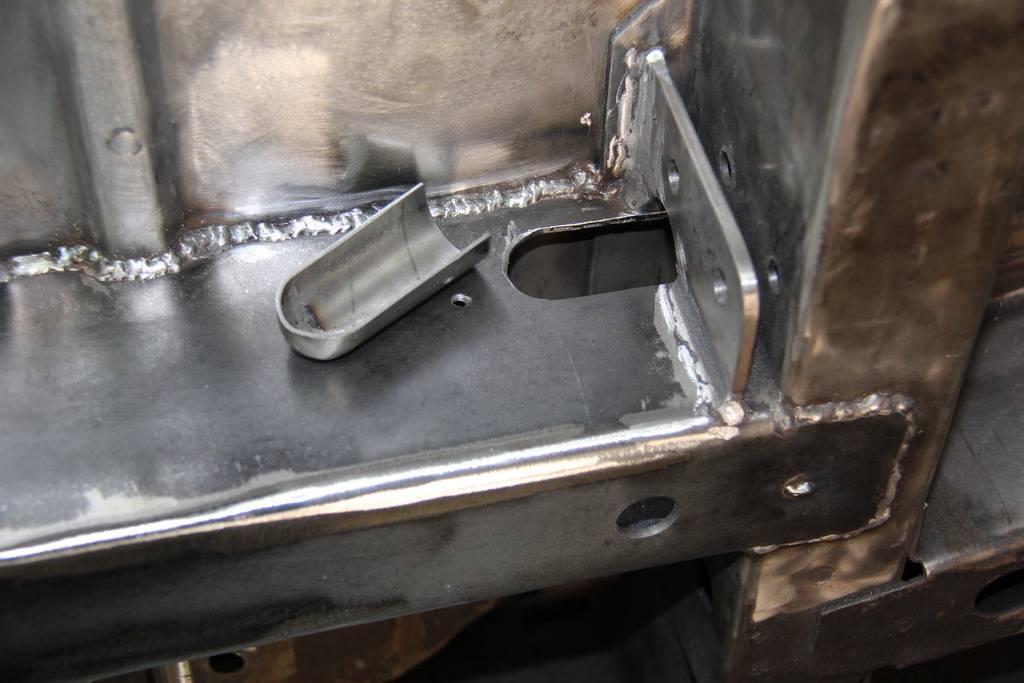
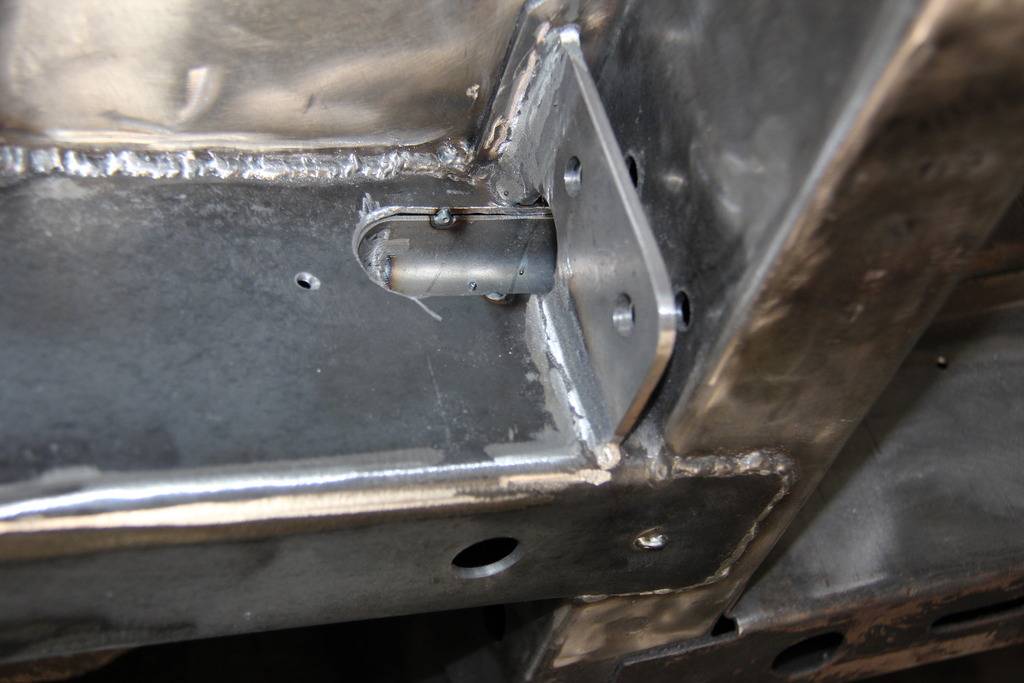
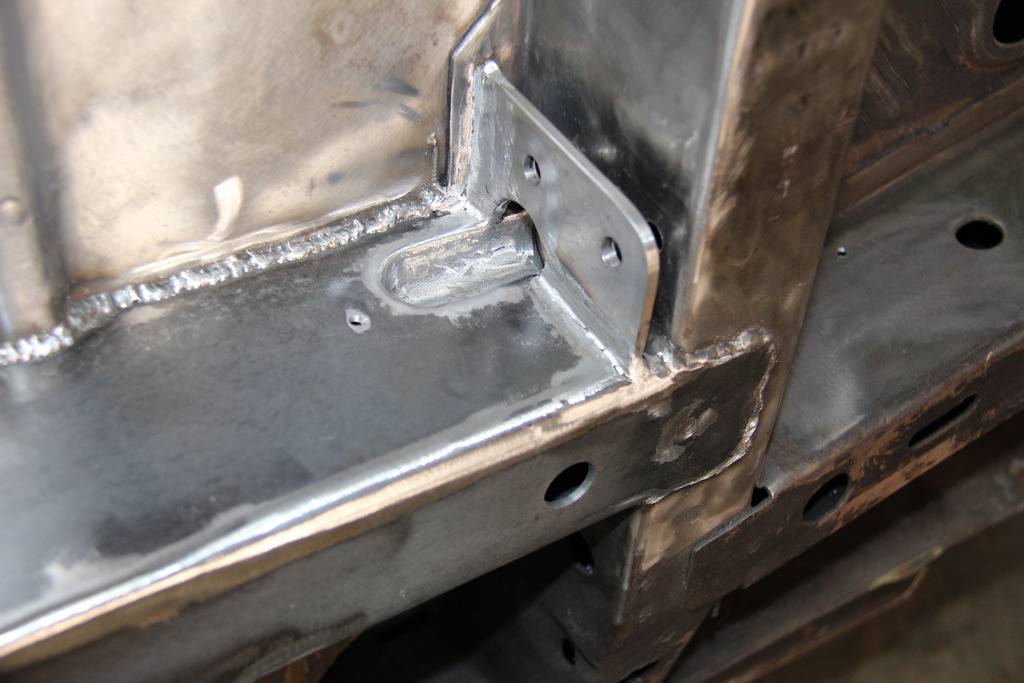
Finished up a few details on the front of the frame connectors today. Front torque boxes are next.
Thanks
Pat
01-17-2016 #438 Registered User
- Join Date
- Sep 2013
- Location
- Chicago suburbia
- Posts
- 228
Wow, once again your attention to detail is amazing. Very clean work--the best kind.
'69 Charger TT Viper project - SOLD
'65 Mustang Shelby clone project "almost done"
01-22-2016 #439
Registered User
- Join Date
- Apr 2014
- Posts
- 803
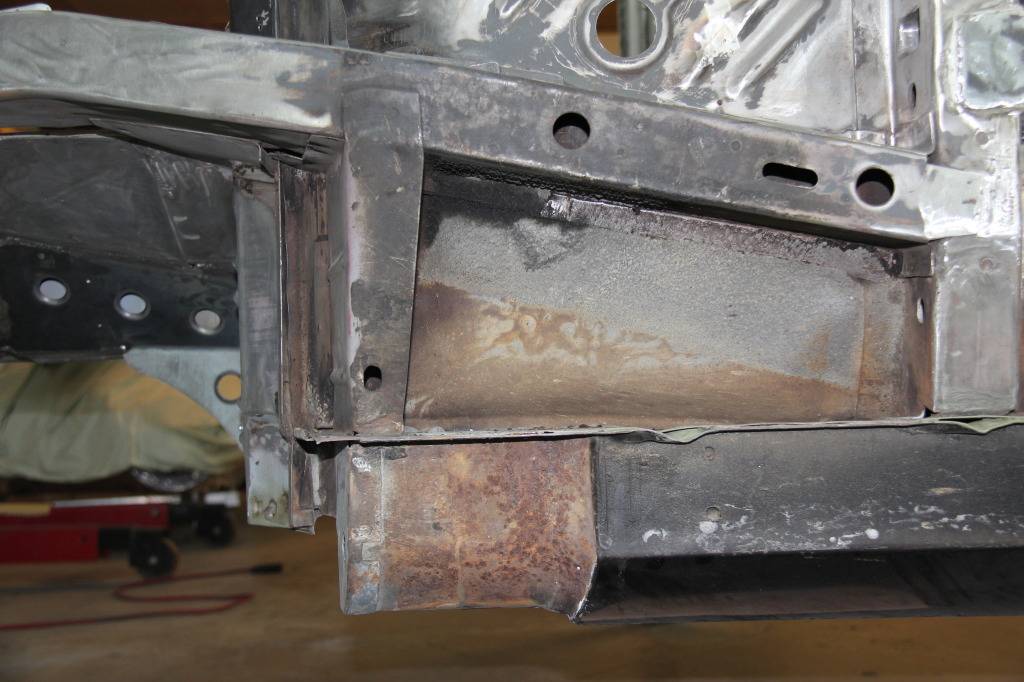
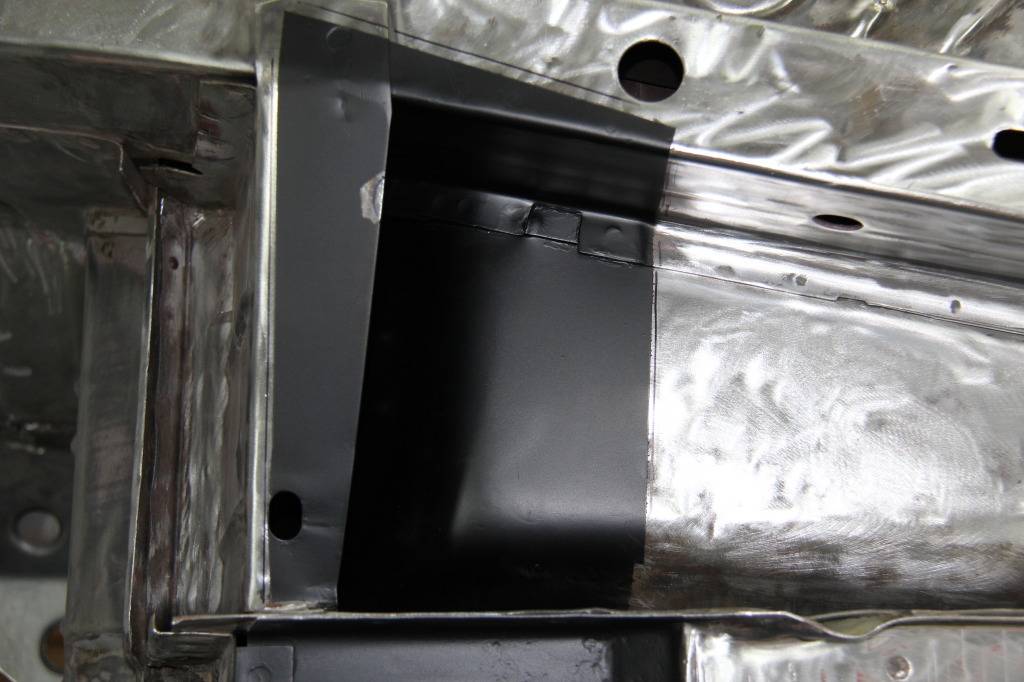
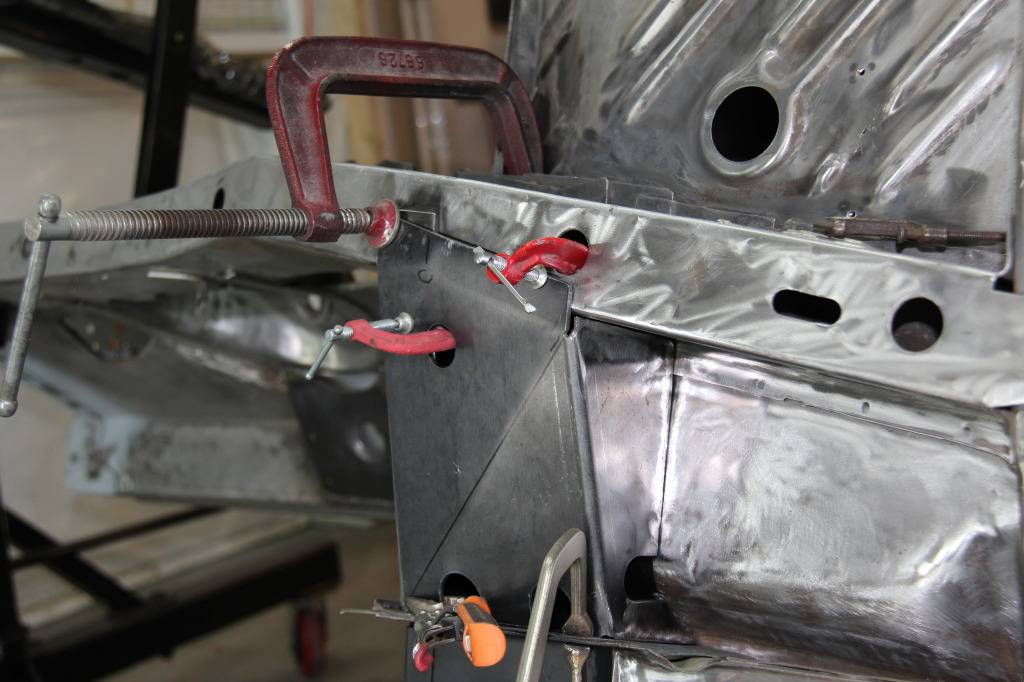
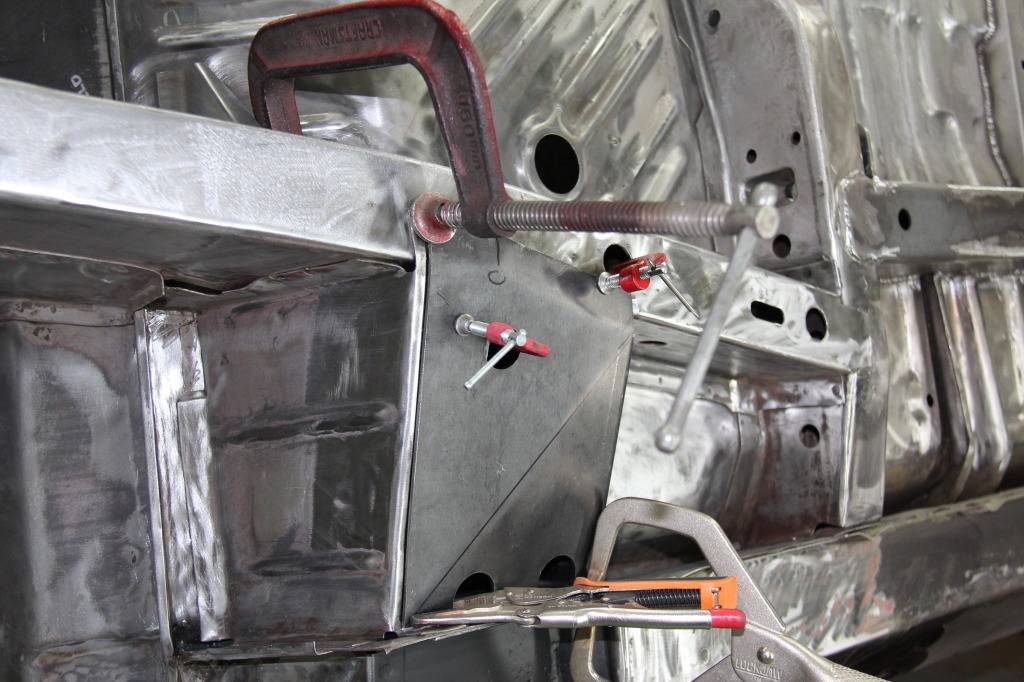
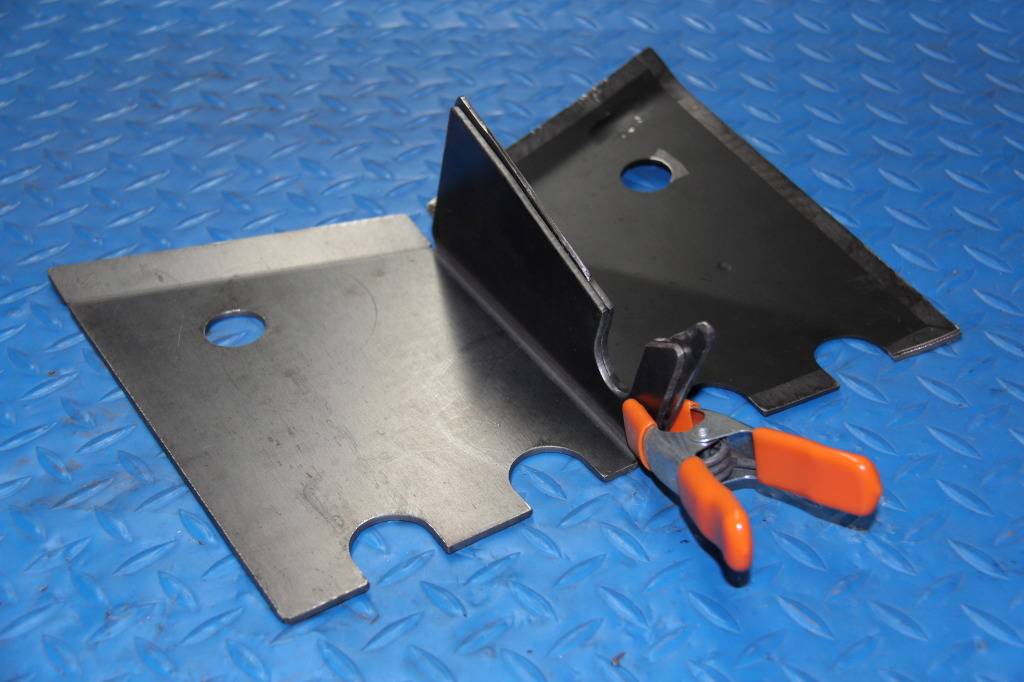
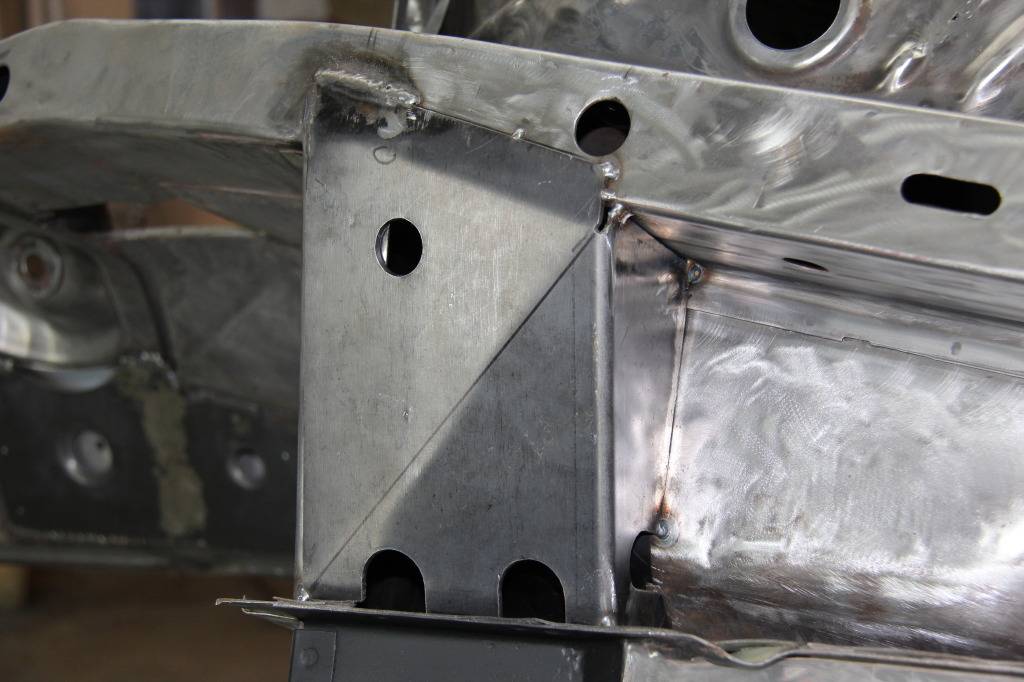
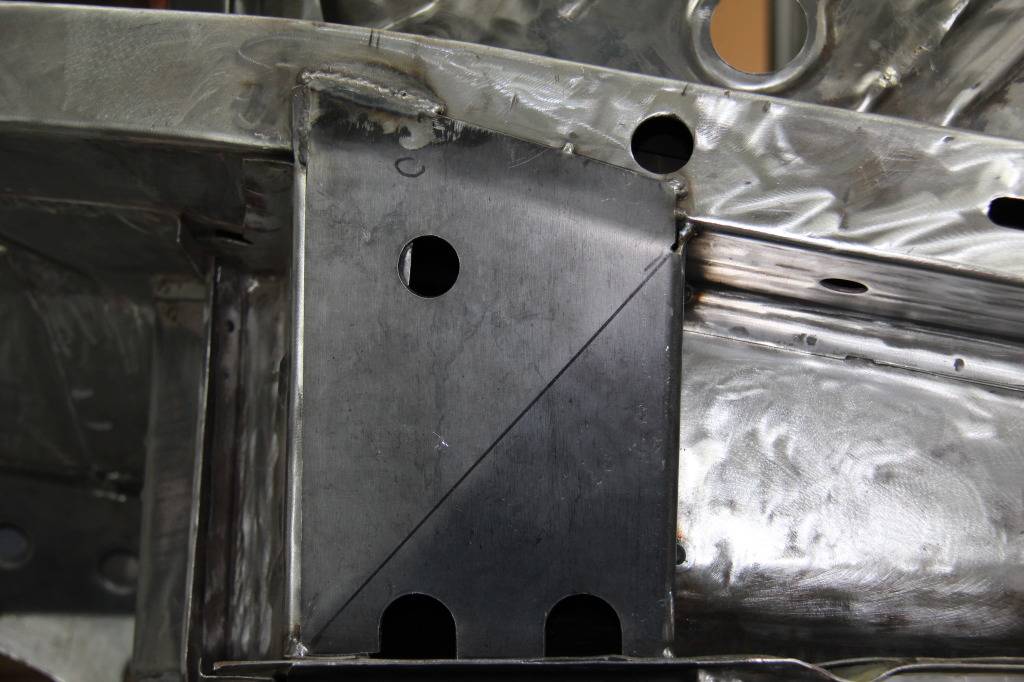
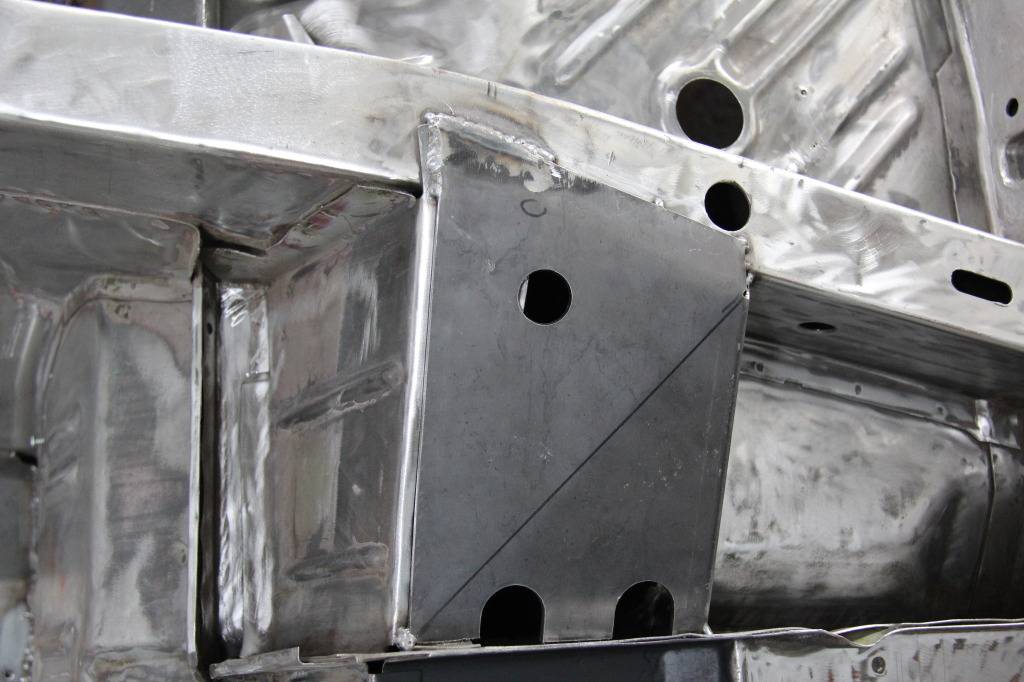
Fit and tack welded the right front torque box. Had to bend the US Car Tool torque box on an angle and added ¼” along the floor side to get a good fit. Both sides will need the same alteration to fit correctly.
Thanks
Pat
01-28-2016 #440
Registered User
- Join Date
- Apr 2014
- Posts
- 803
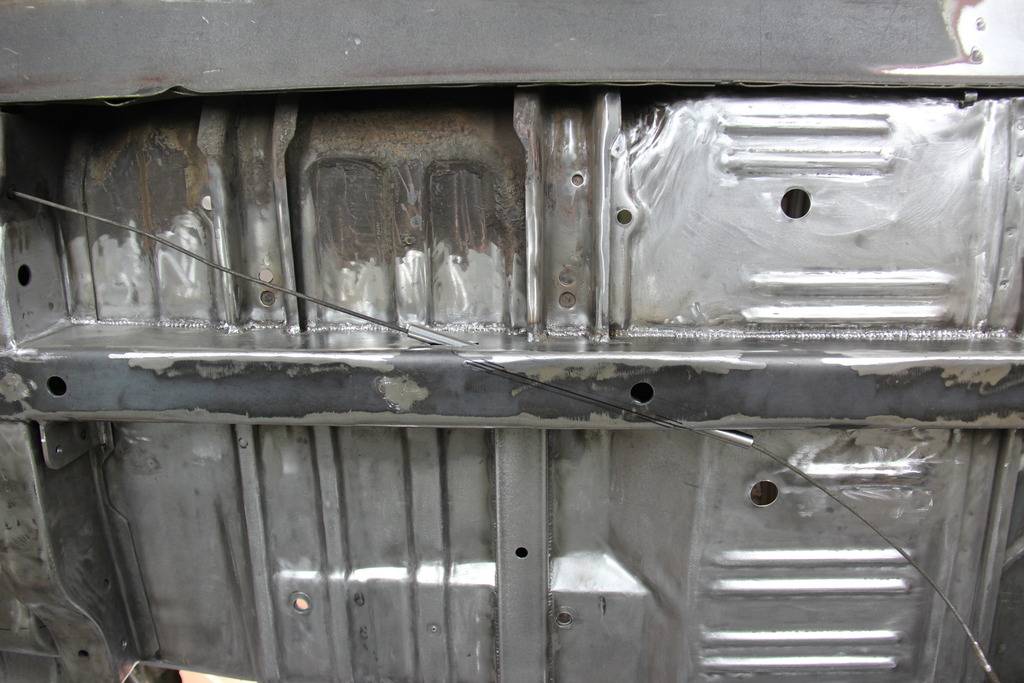
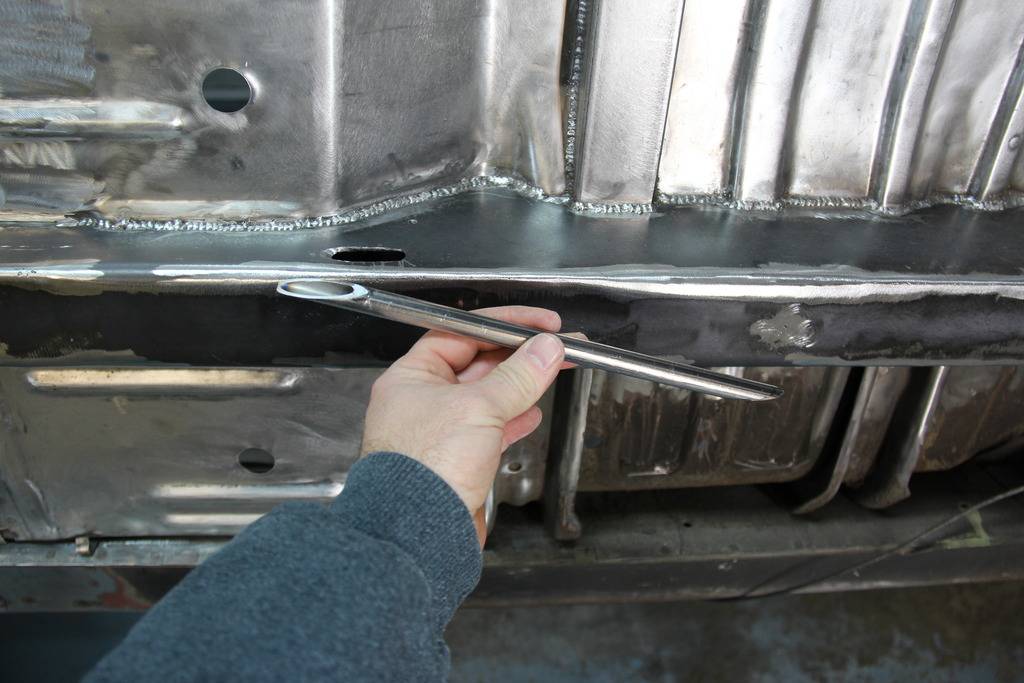
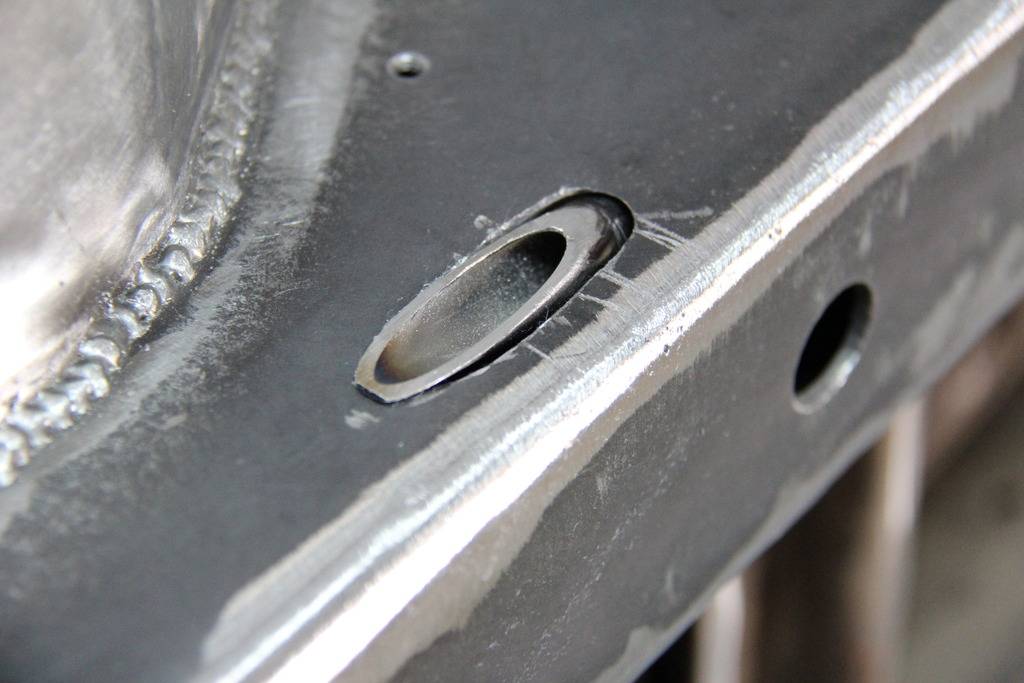
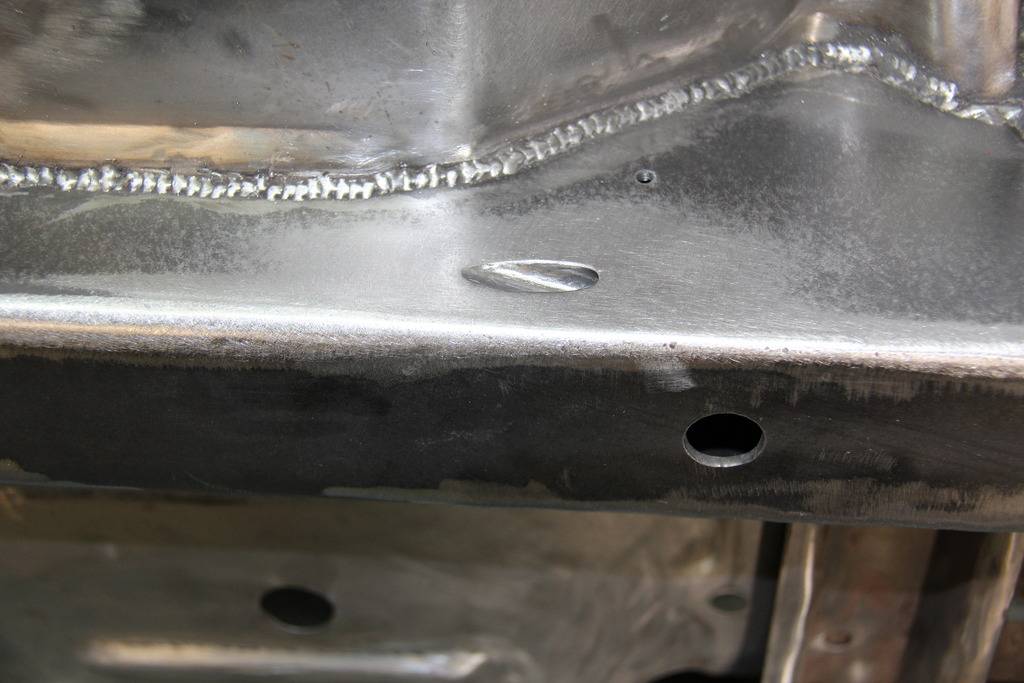
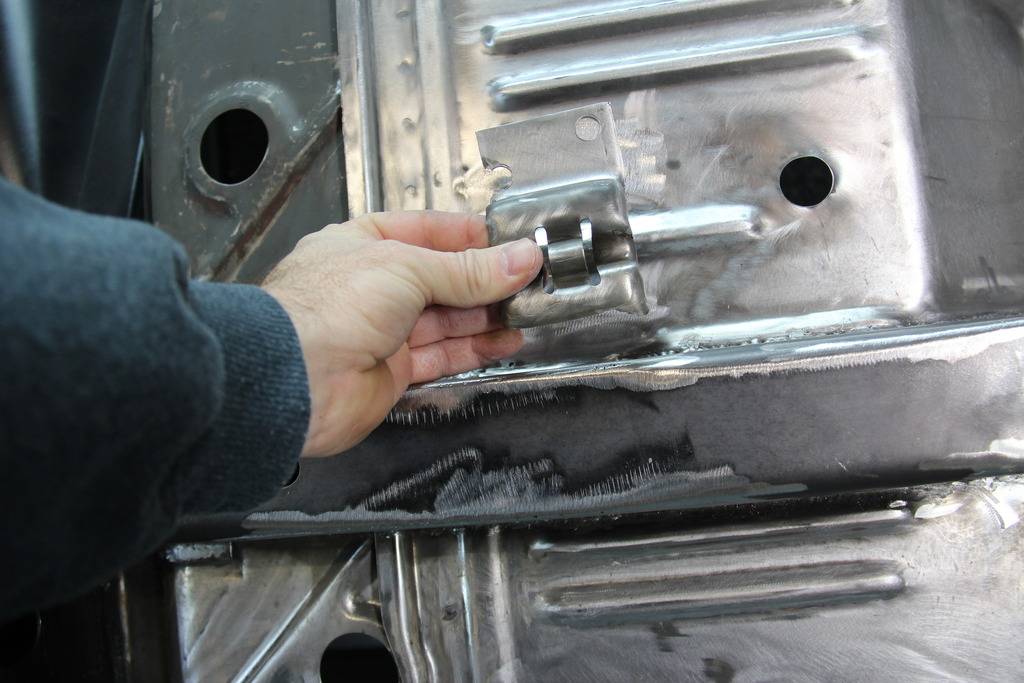
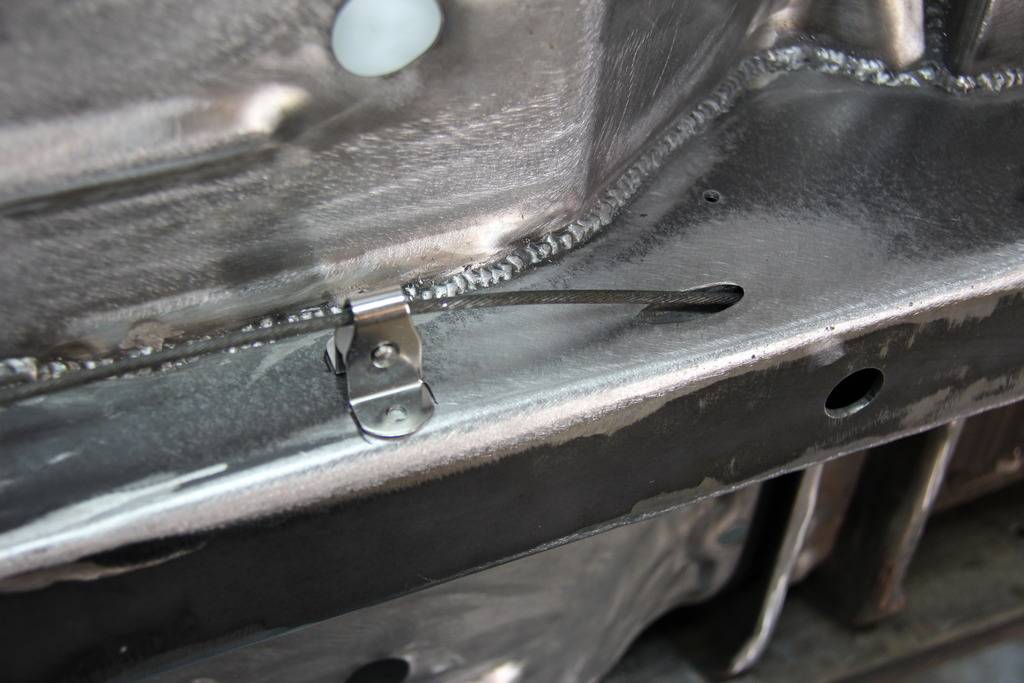
Installed the parking brake cable pass-through tube in the frame connector. I also remove the original floor mount for the parking cable as I’m going to install a small roller to redirect the cable along the frame.
Thanks
Pat

 Reply With Quote





