


Results 21 to 39 of 39
-
10-24-2013 #21
 Registered User
- Join Date
- Apr 2013
- Posts
- 1

Doh...just looked at the time stamps and re-read the intro. Wondered why no one was commenting!
Nice ride. Noticable changes but not over the top. I hope to drop into somethign similar soon. 4th gen nova and it's cousins are really growing on me, different enough to be noticable, but same enough to be able to find parts.
-
10-24-2013 #22
Registered User
- Join Date
- Jul 2012
- Location
- Auburn Hills, MI
- Posts
- 40
Thanks for the comments guys. Chaz417, my suggestion to you would be for whatever you decide on, get something that is rust free. Replacement parts can be hard to find, or in the case of the 4th gen X-Bodies, non existant. The aftermarket doesnt really seem to know these cars exist yet. At least not to the extent of camaros and chevelles
10-24-2013 #23
Registered User
- Join Date
- Apr 2013
- Location
- Granite Bay, CA NORCAL
- Posts
- 40
4th gens have been growing on me lately. I like this color too for some reason. I'm going to try and keep an eye on this to see how the console turns out.
10-26-2013 #24 Registered User
- Join Date
- Jan 2008
- Location
- Charlotte
- Posts
- 1,295
Keep up the great work!
2005 LeMans Blue Corvette w/ T56 & Z51 & C6Z06 Brakes, Build Thread: https://www.pro-touring.com/showthread.php?64496
2005 GMC Sierra 2500HD LLY / Allison
2014 Chevy SS LS3 / 4 Door
10-26-2013 #25 Registered User
- Join Date
- Mar 2009
- Location
- overseas
- Posts
- 3,434
nice project - looks good!! good job!
 Kevin S. (overseas in Germany)
1963 Chevrolet Impala 2d ht Coupe
www.CruznArt.com
CRUZN - Automotive Artworks
10-27-2013 #26
Registered User
- Join Date
- Jul 2012
- Location
- Auburn Hills, MI
- Posts
- 40
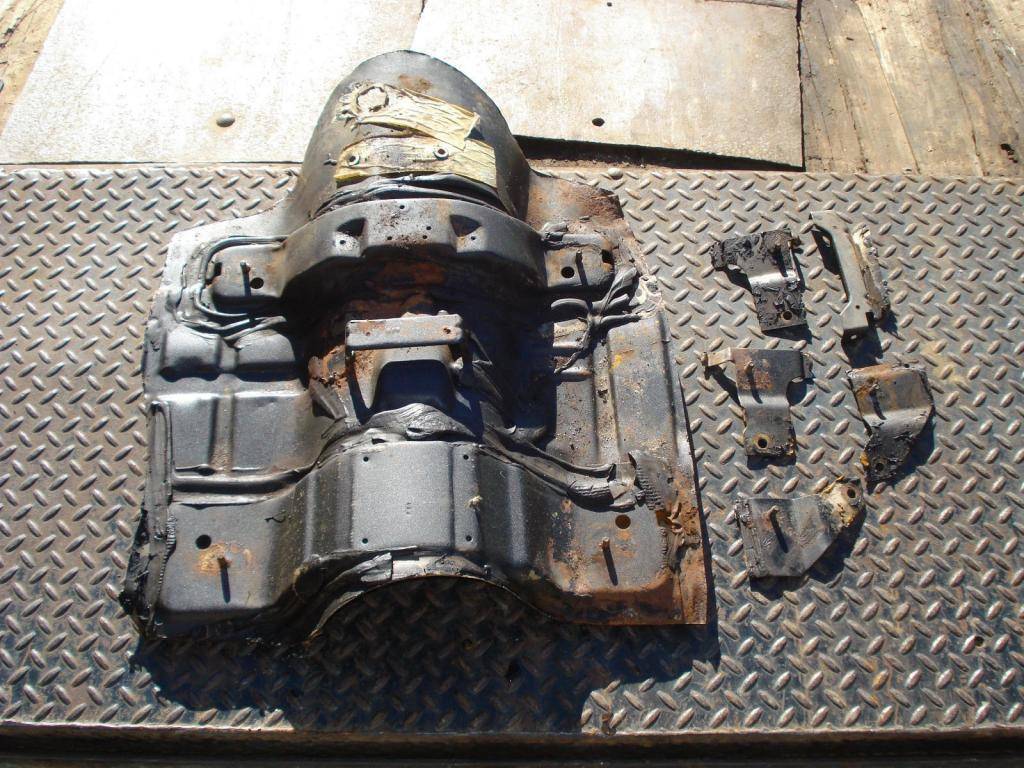
Didn't waste any time in getting to work on the bucket seat conversion. Dad and I got the brackets separated from the floor section after I cleaned the factory seam sealer off of the edges. Took about 2 hours total from start to finish. Can't eve imagine how long it would take with it in the car.
Before:
After:
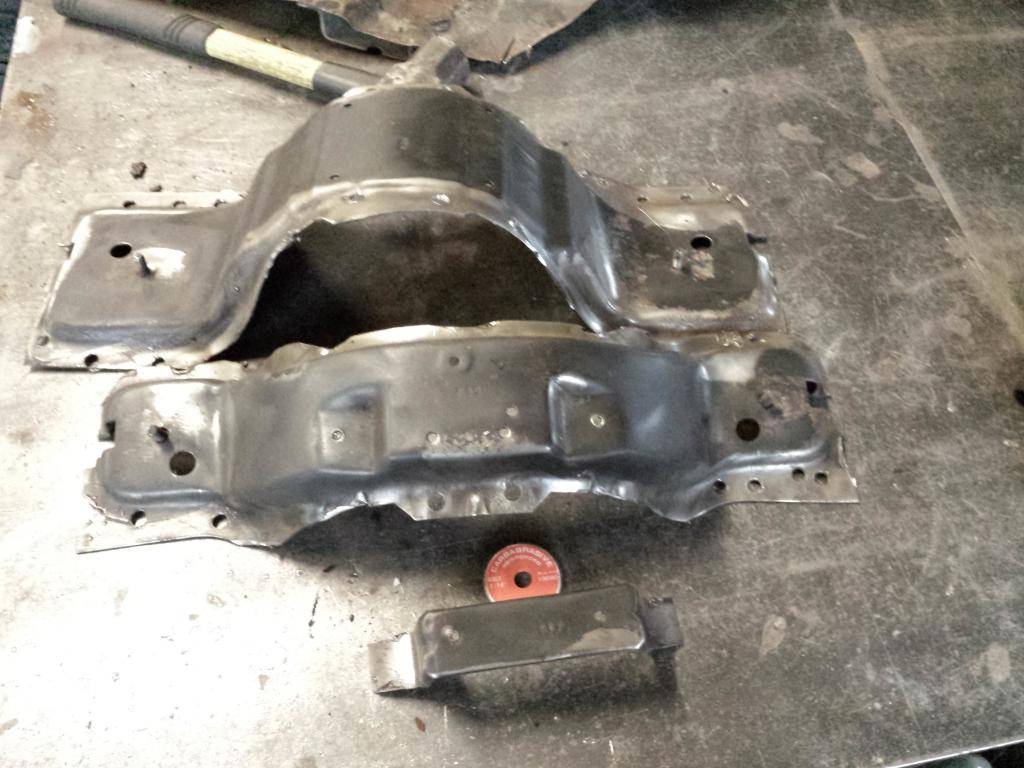
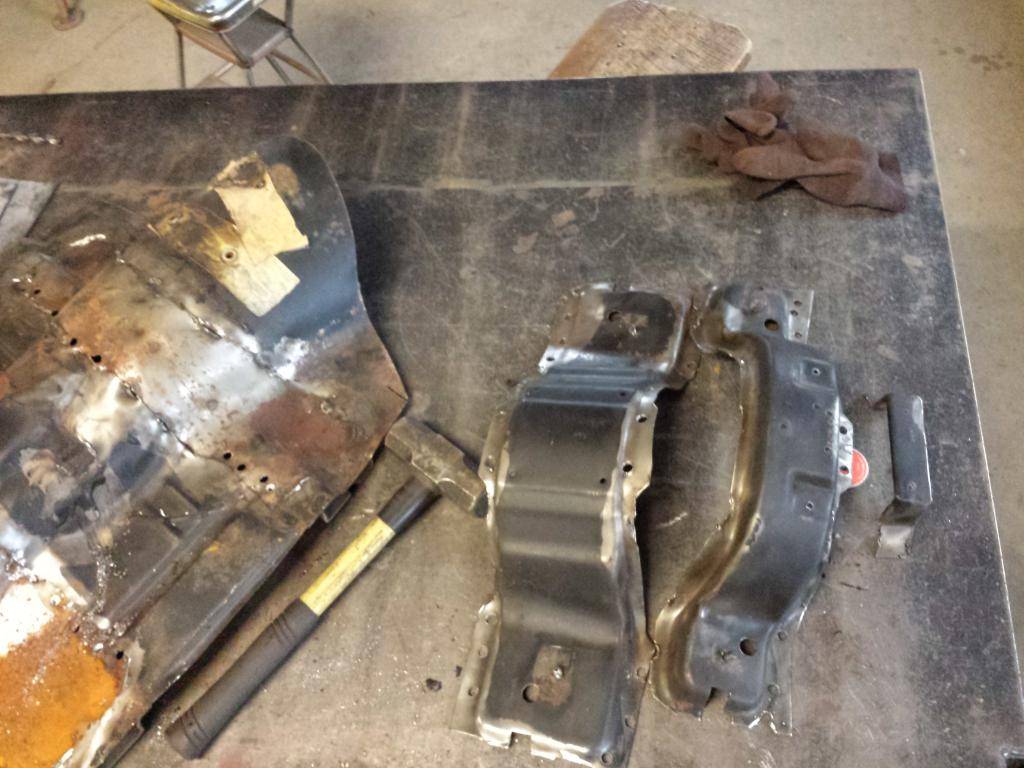
The power drivers seat works great and functions smoothly in all directions. Looks like the drivers seat won't take too much fab work, but the passenger side seat bracket will take some fab work to bolt in. Here is how it will look with the center console:
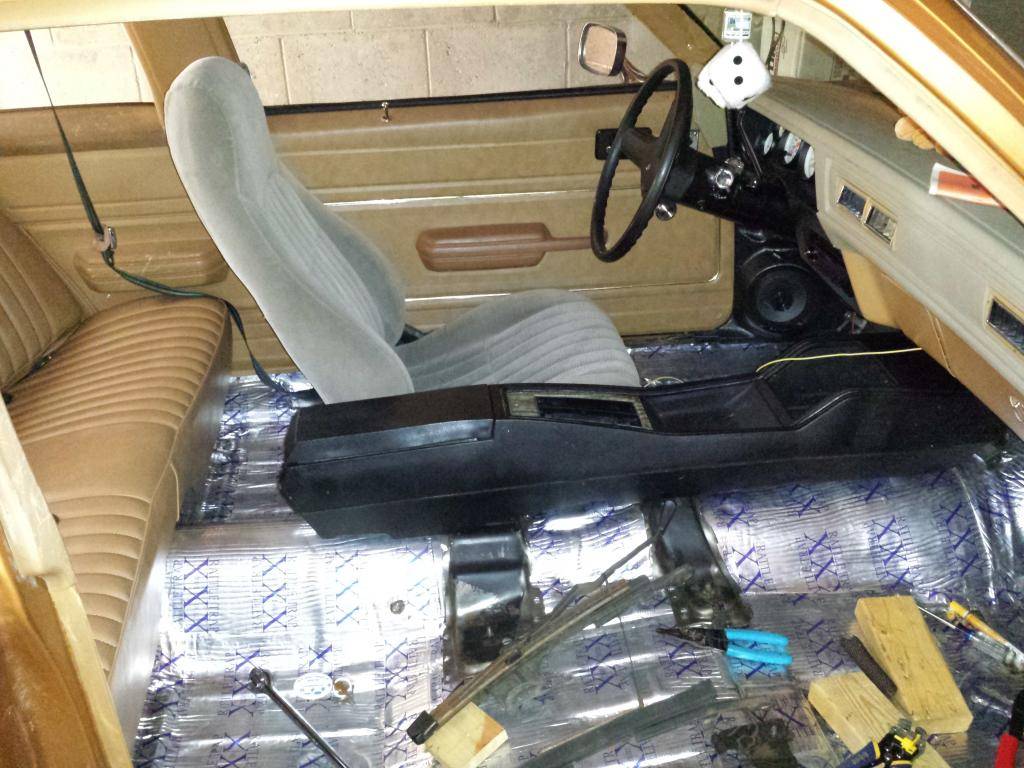
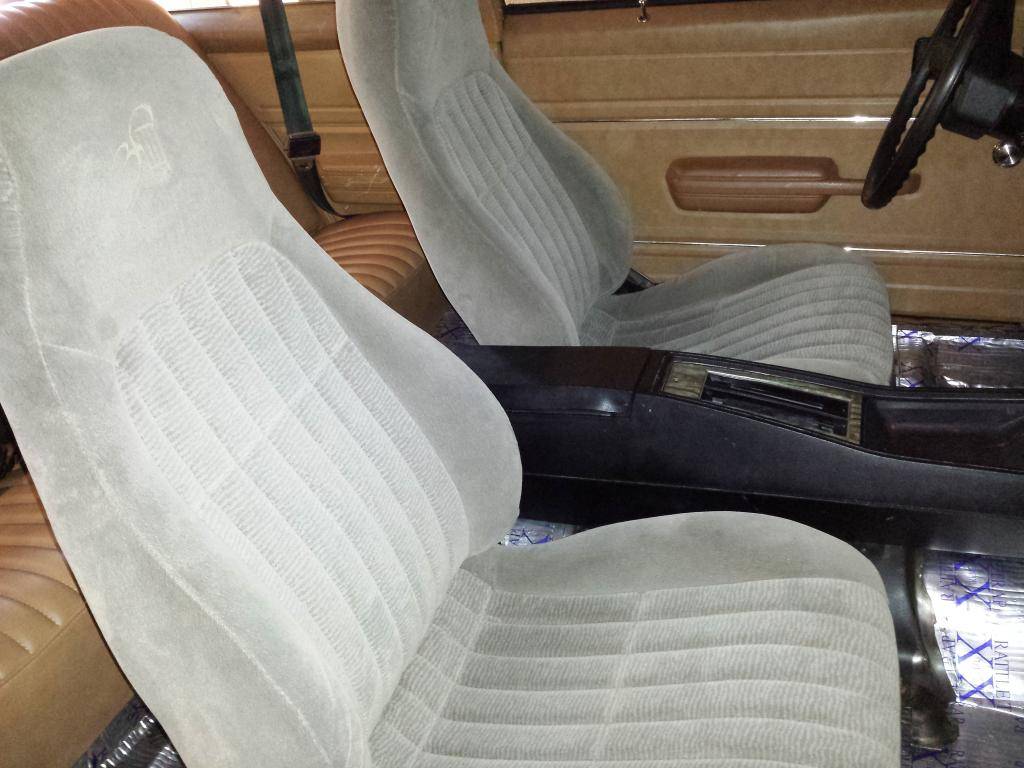
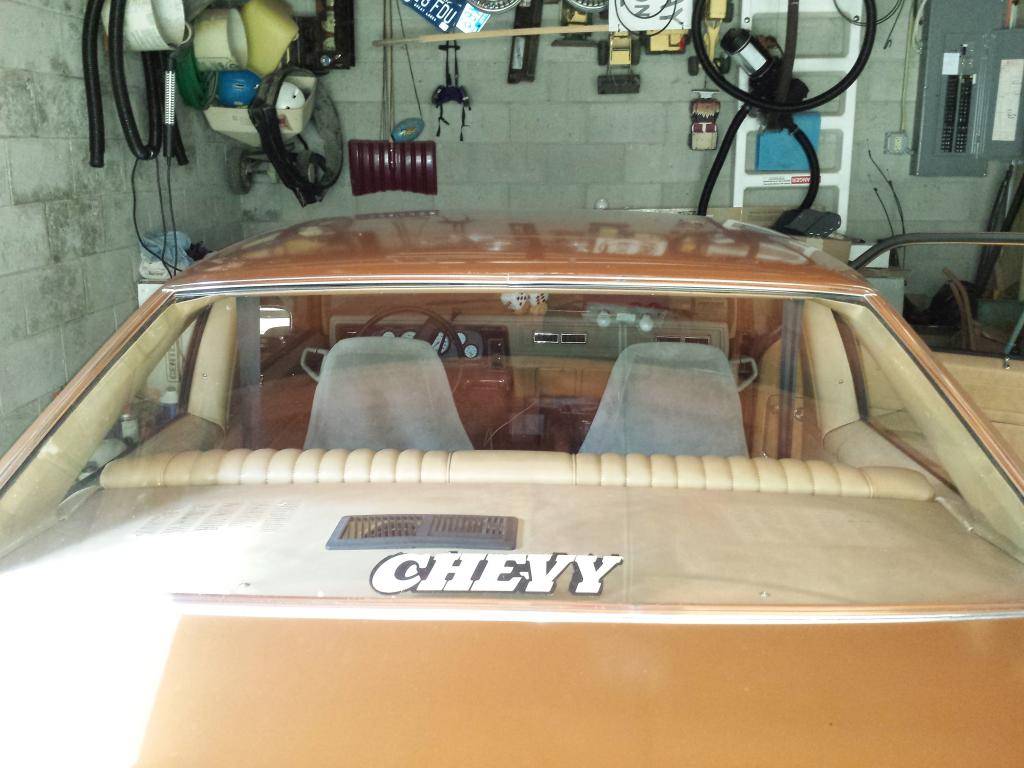
The console needs to go forward about an inch or two to be perfect, but should provide good access of the center storage compartment with my normal seat position. I'm just a shade over 6' so the seat will be back pretty far. The only thing limiting how far forward it can go is the vintage air unit. However it does look like a manual trans shifter coming through the tray area will be about perfect for placement. Figuring out how to fab up some cup holders that don't have a knife edge around the top though will take some thought. I'm thinking about using exhaust tube and some sheet metal, but making the transition smooth on the edge will be the trick. It will take some grinding and radiusing....
01-27-2014 #27
Registered User
- Join Date
- Jul 2012
- Location
- Auburn Hills, MI
- Posts
- 40
I have not been happy with my brakes since I have had the car, so I decided to pull the trigger on a Kore3 setup:
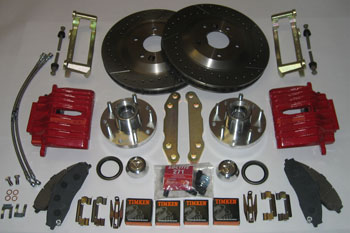
GM TALL-SPINDLE, ø325mm C5/C6 front brake kit from Kore3. Very pleased with the quality of their product and customer service. I dealt directly with Tobin, and I couldn't be happier. Also had a question regarding the fitment of the C5 rear calipers on the LS1 rear abutment brackets, and he said it would work no problem since I will not be using the anti-rattle spring.
I also got some rear C5 calipers, and BAER D&S decelarotors; C5 front and LS1 rear. I will be running HAWK ceramic pads for this setup and the KORE3 flexKORE braided stainless steel brake lines. Hopefully I will have this installed by the end of February, just have to order my new 30 spline axles and 30 spline posi.
On another note, I finally had some time to work on the car this past weekend so I decided to tackle painting the interior panels. I used the OER prep cleaner, adhesion promoter and then 2-3 coats of the color. It turned out pretty good, just wish I would have gotten two more cans so I could have done everything in 3-4 coats. I still have the center console, trim on the seats and the front edge of the dash pad. However it did make everything the same color and seems to have stuck very well.
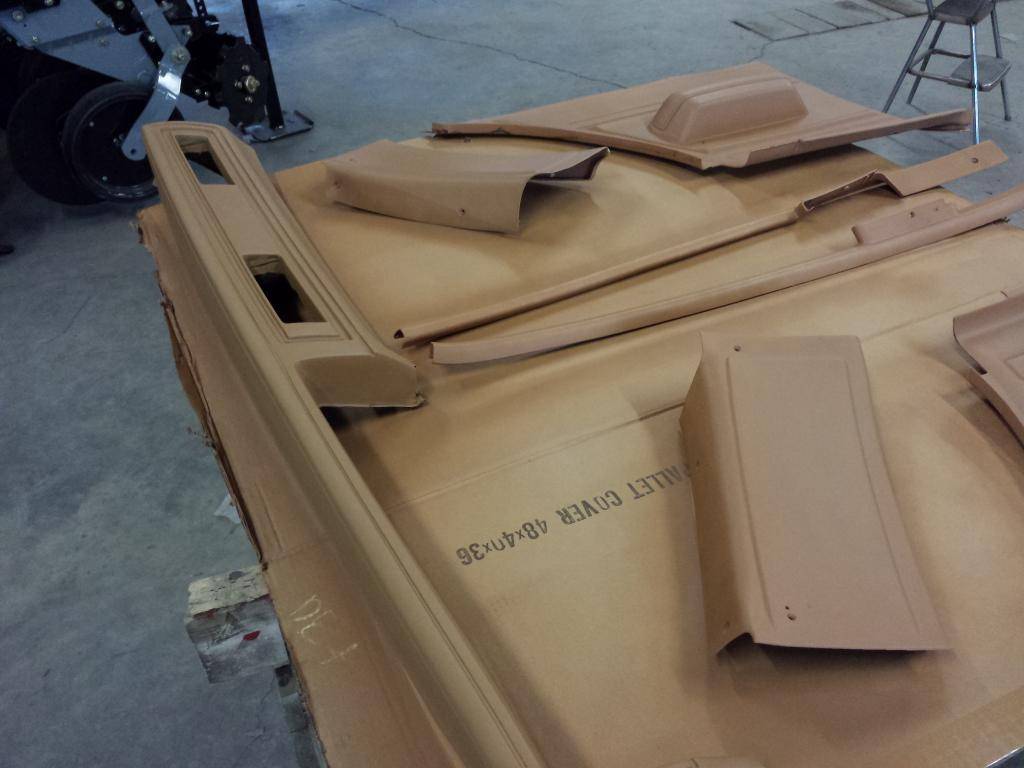
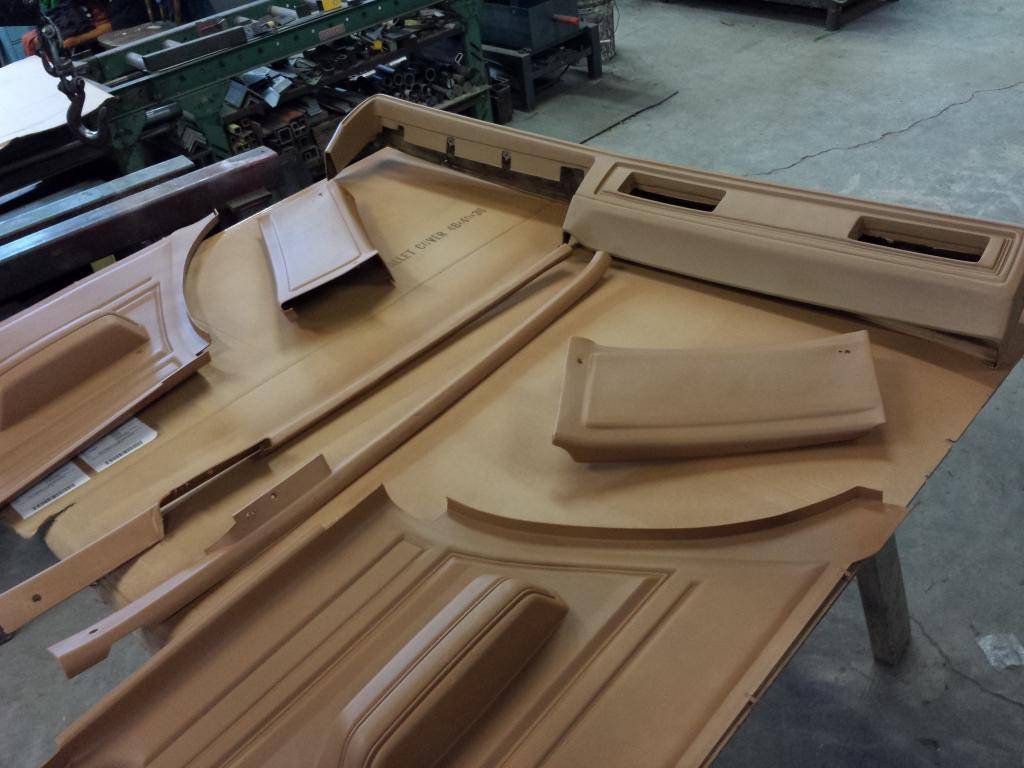
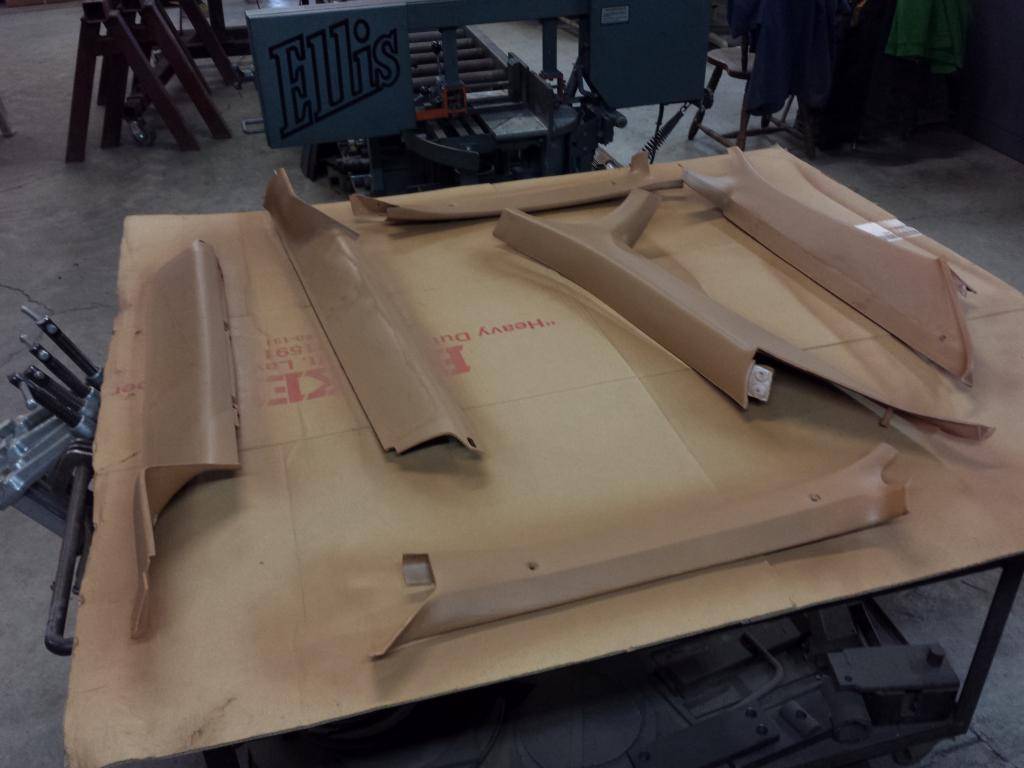
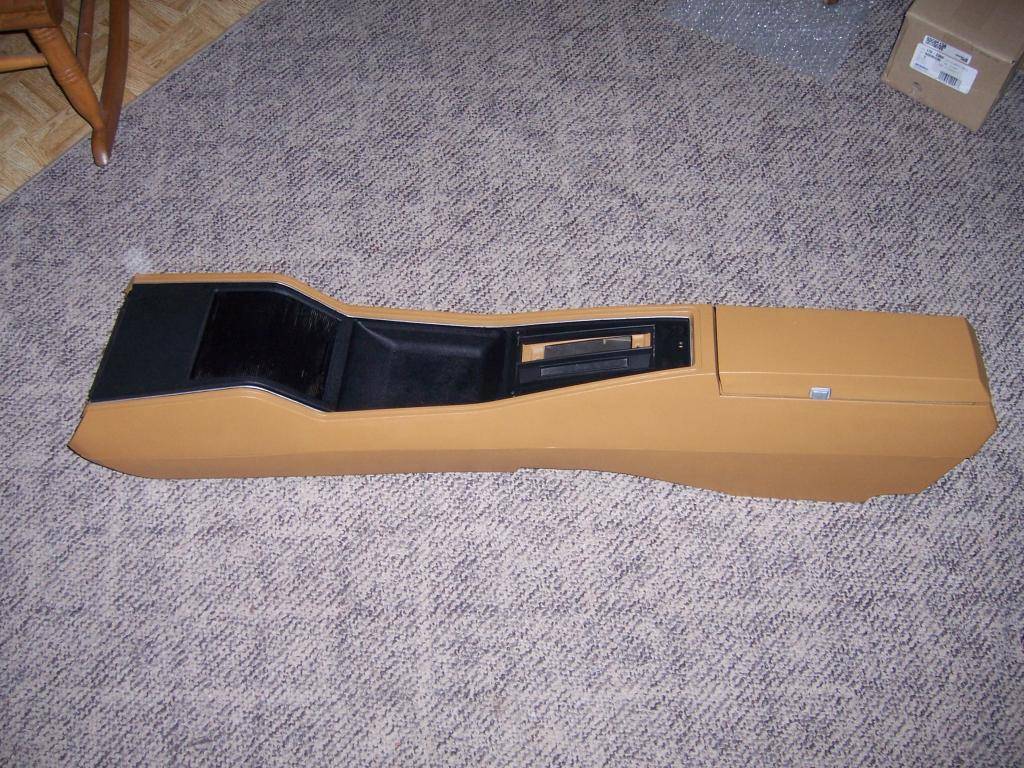
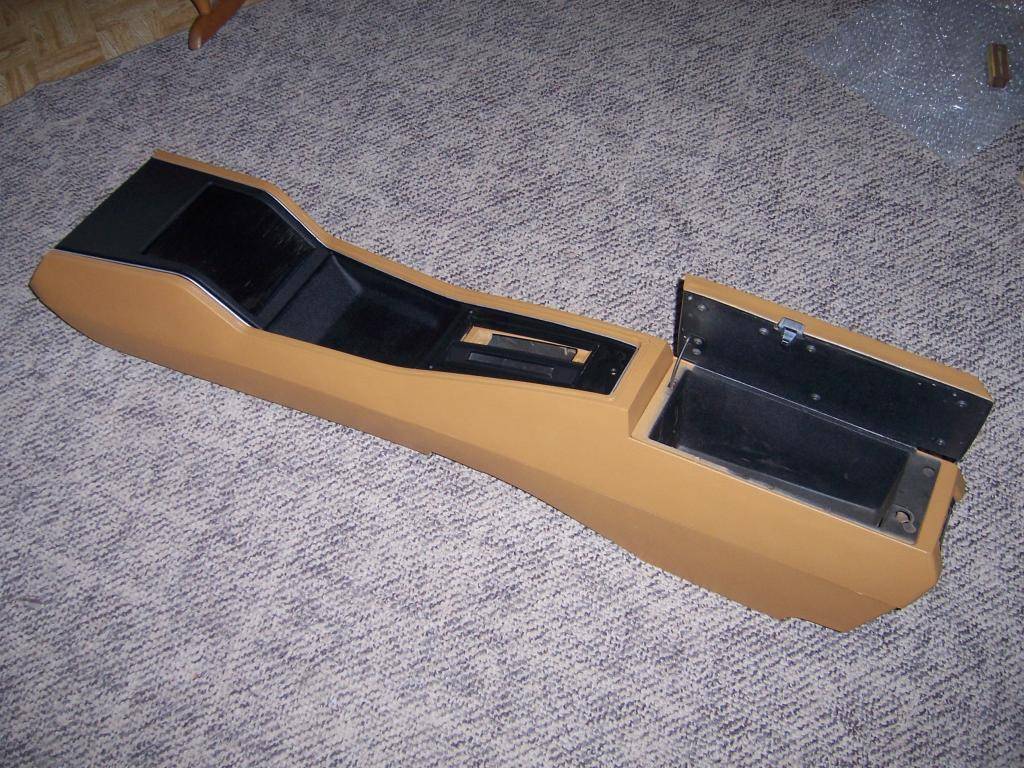
Last night I submitted an order for some more paint and prep cleaner, so I should be able to take care of the remaining trim pieces and console this coming weekend. The only thing that I am changing the color of is the center console - it will be tan instead of all black, but the middle portion of it will remain black.
02-03-2014 #28
Registered User
- Join Date
- Jul 2012
- Location
- Auburn Hills, MI
- Posts
- 40
Made some progress this weekend. Finished painting the interior parts including the center console. During painting:
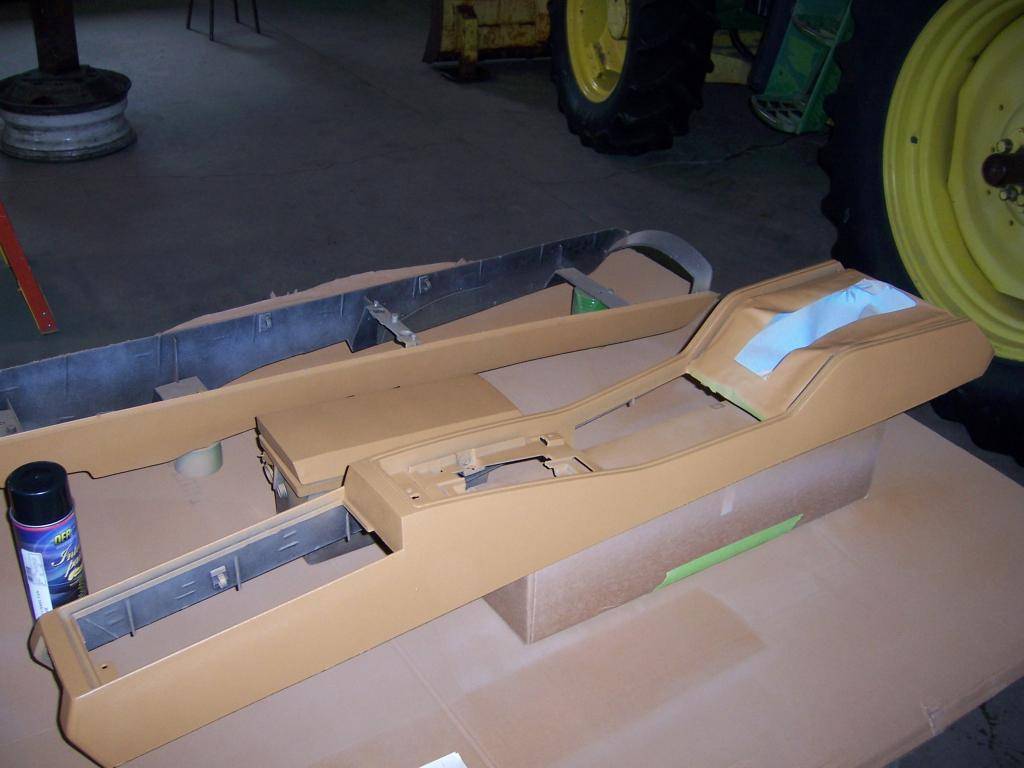
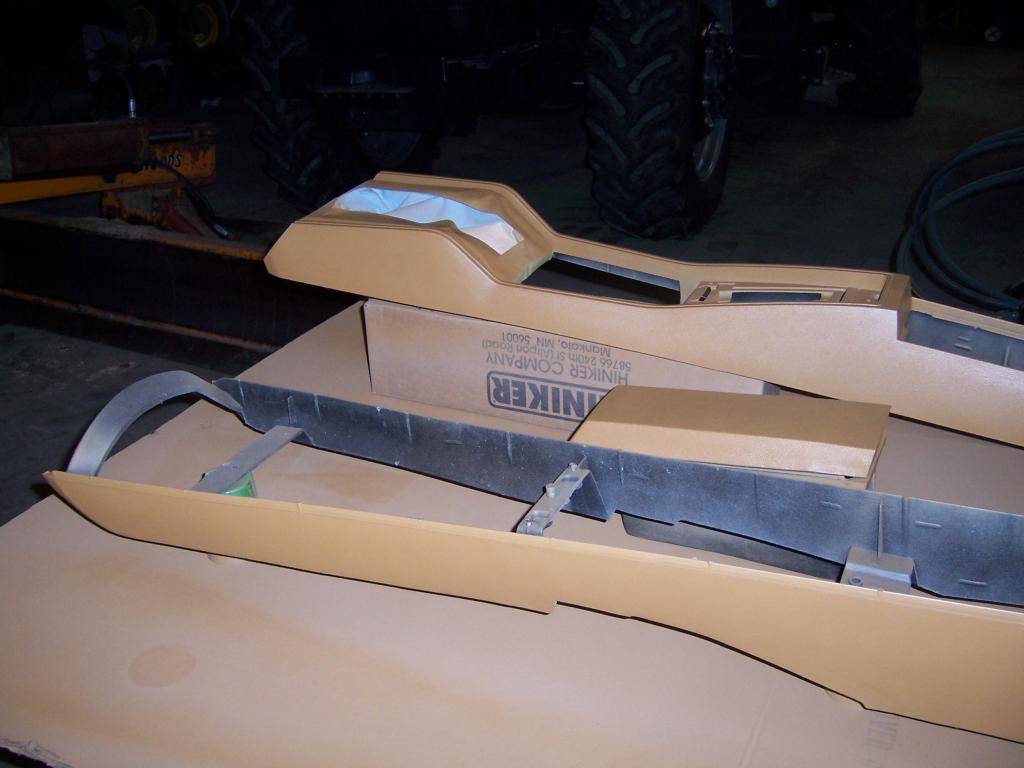
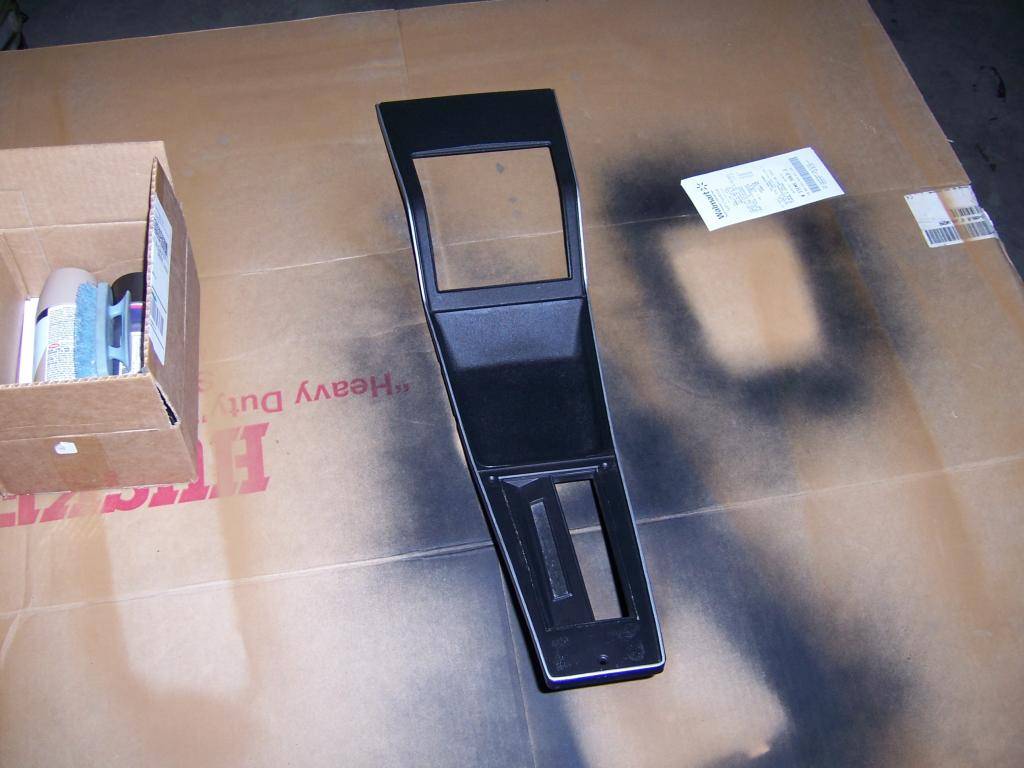
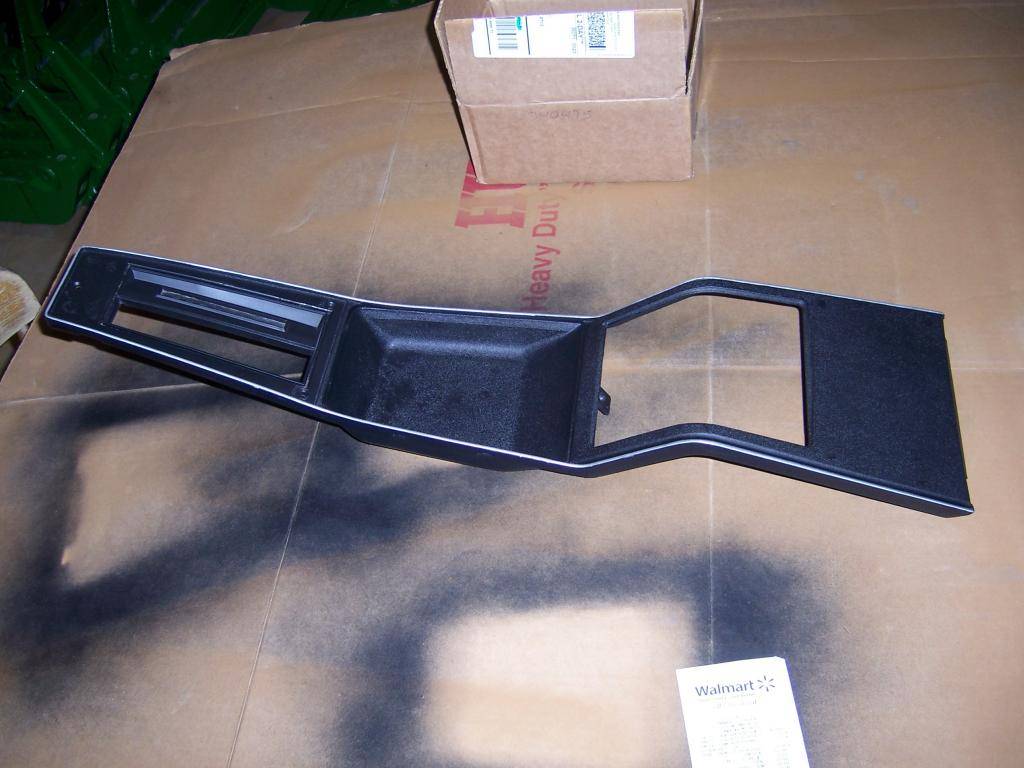
After:
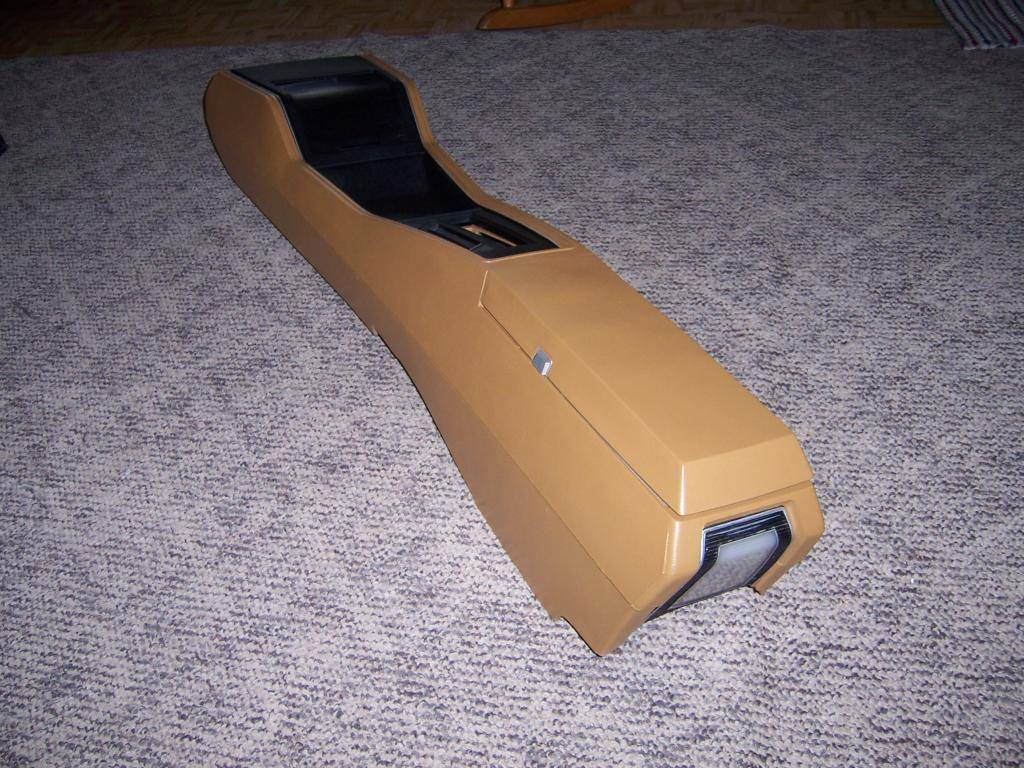
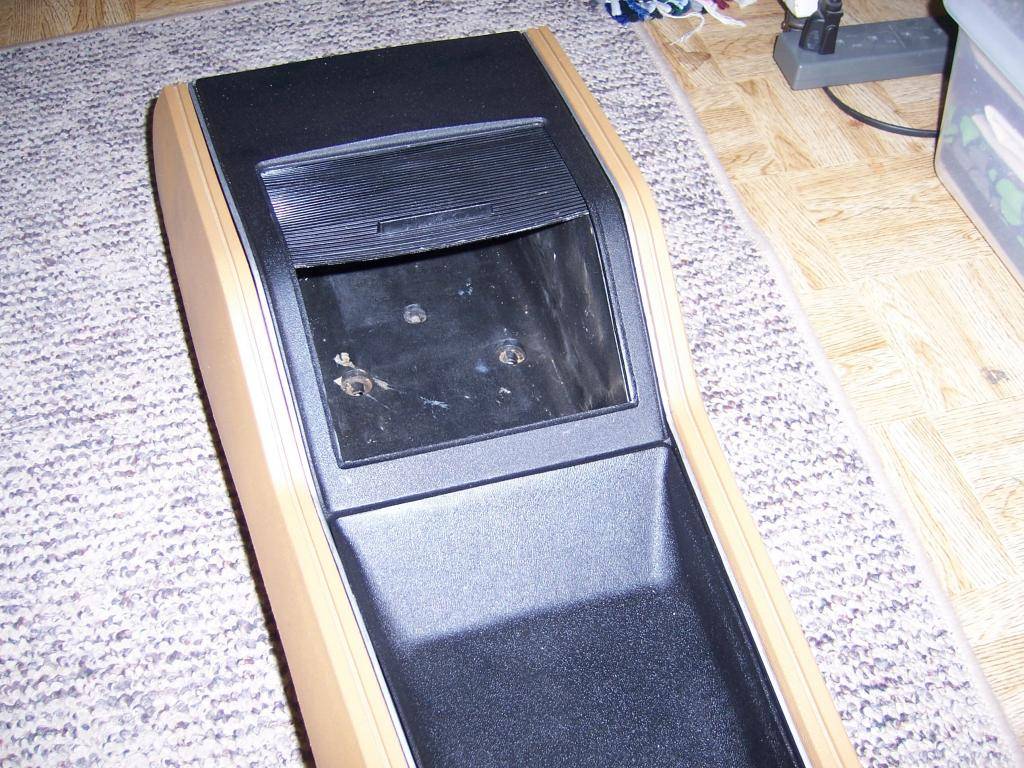
Also started on the rear brakes. Here is the passenger side (yes I know it is the wrong rotor):
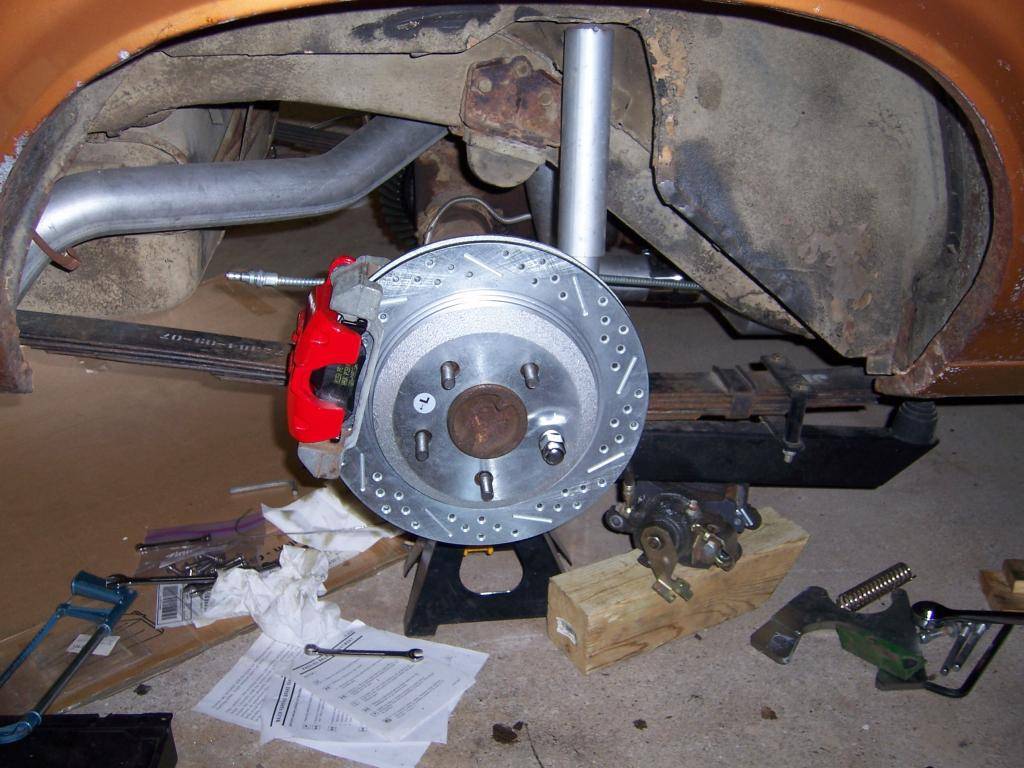
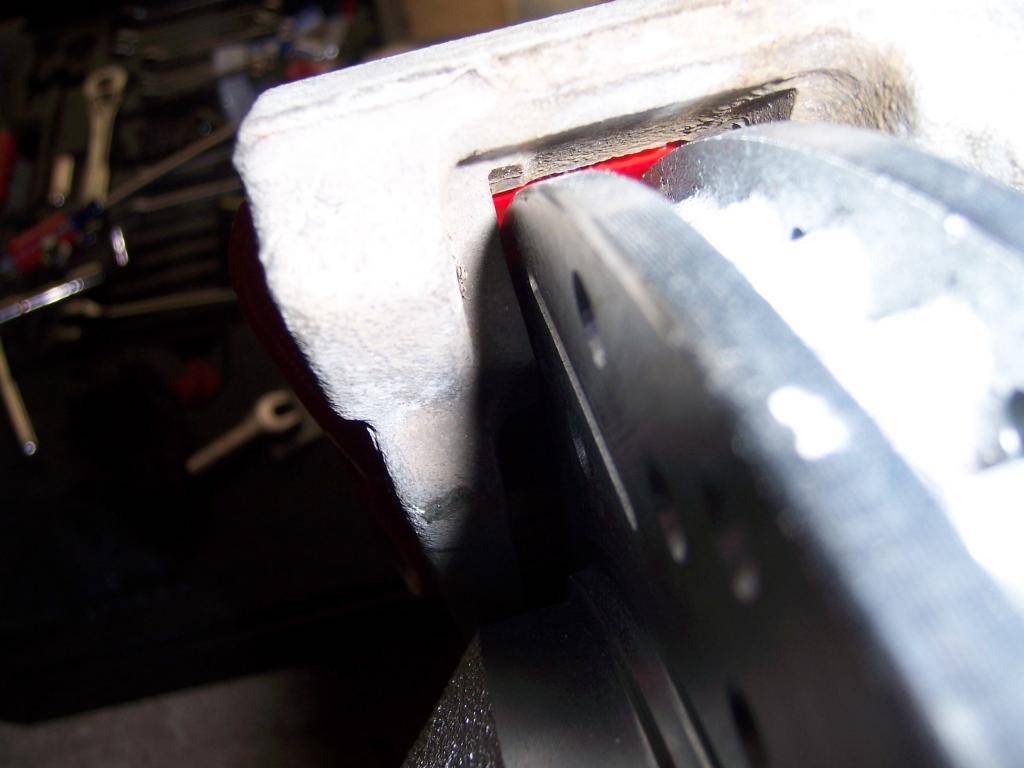
With this setup, you have to center the abutment bracket over the rotor. You do this by putting a shim between the backing plate and the axle flange. Mine is off by a little on the pass side. Outboard clearance:
Inboard clearance:
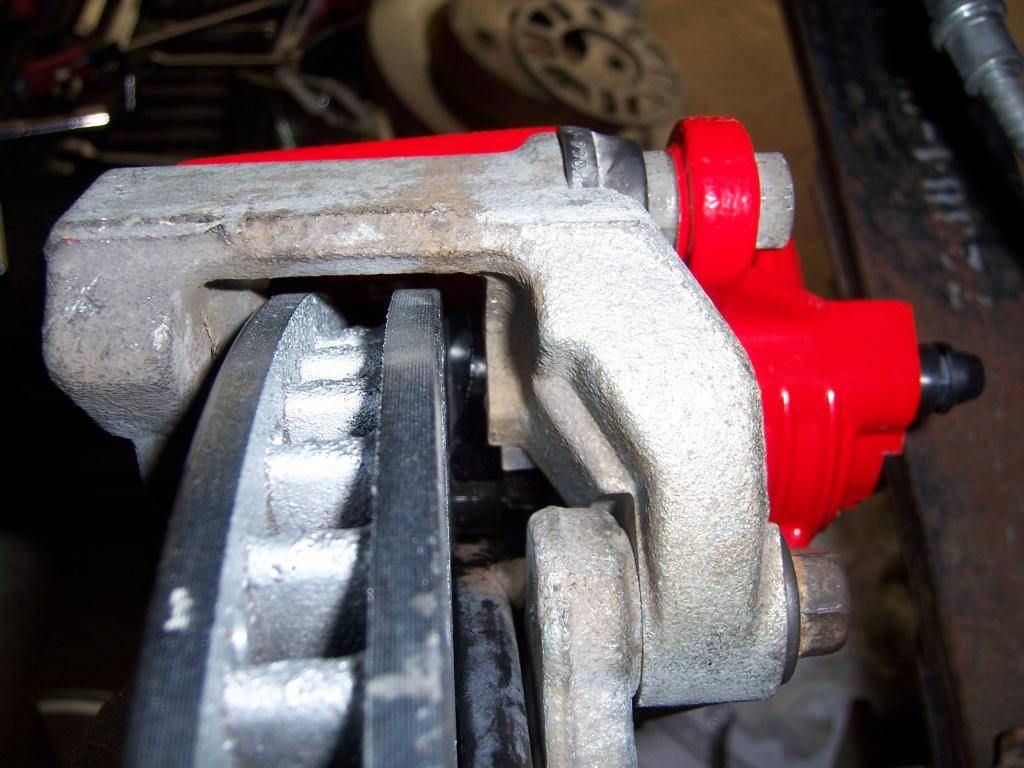
Drivers side was worse - the caliper was touching the rotor. For me it took about 0.140" shim under the backing plate to center the abutment over the rotor. The pass side is going to take about half that.
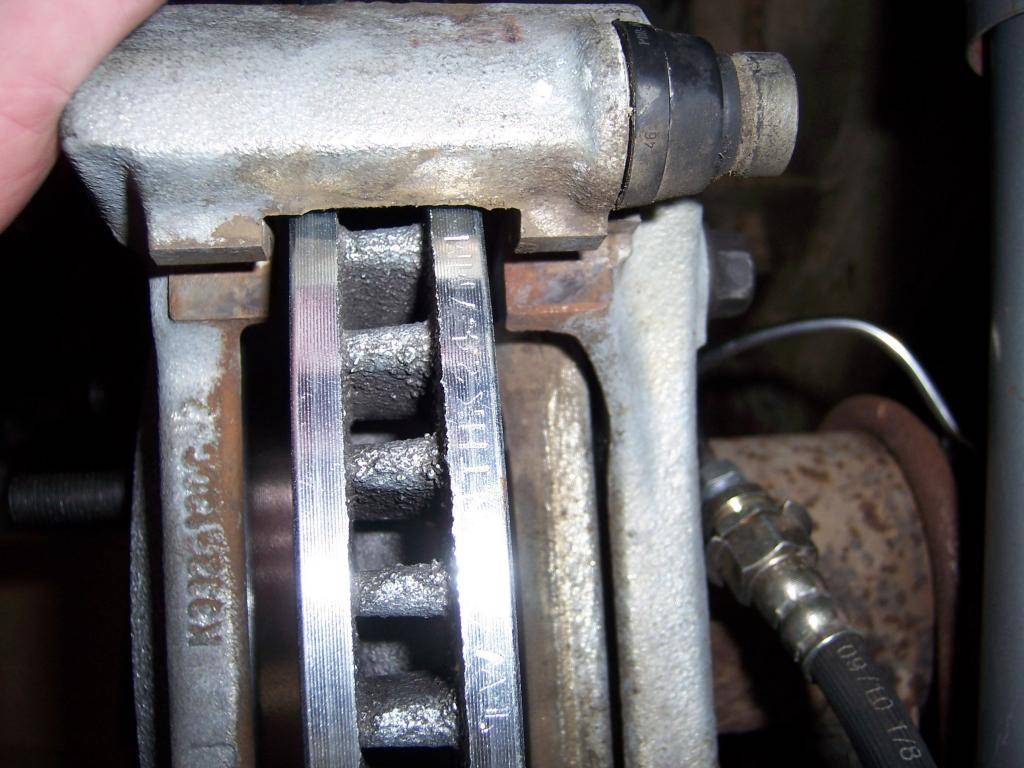
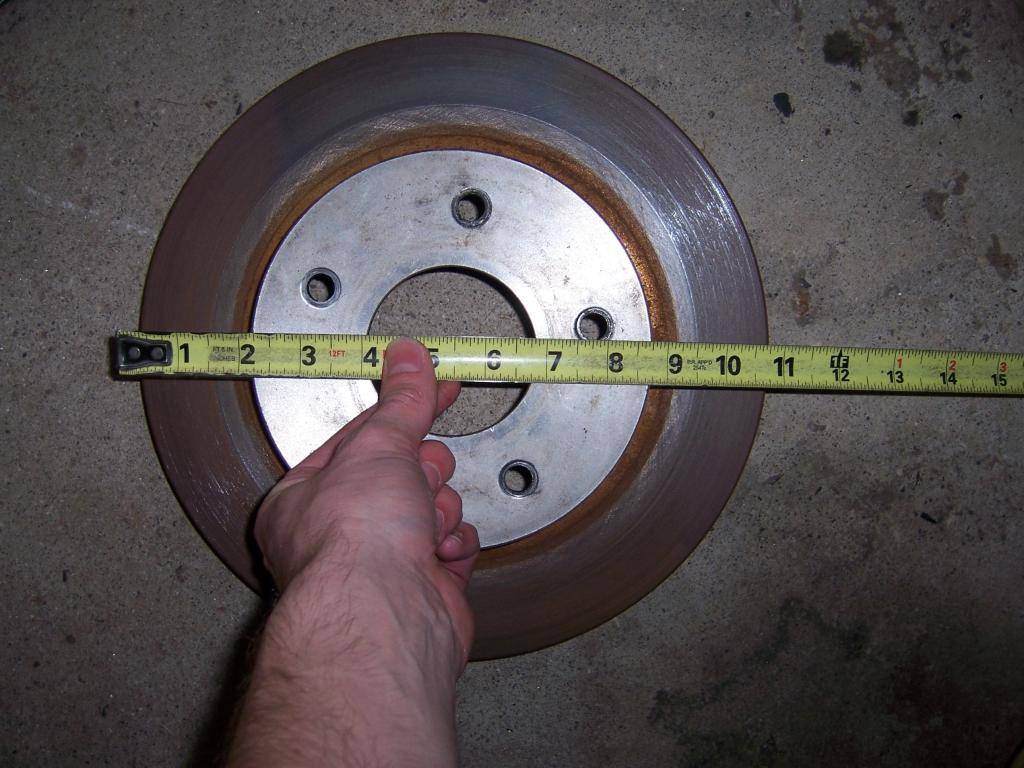
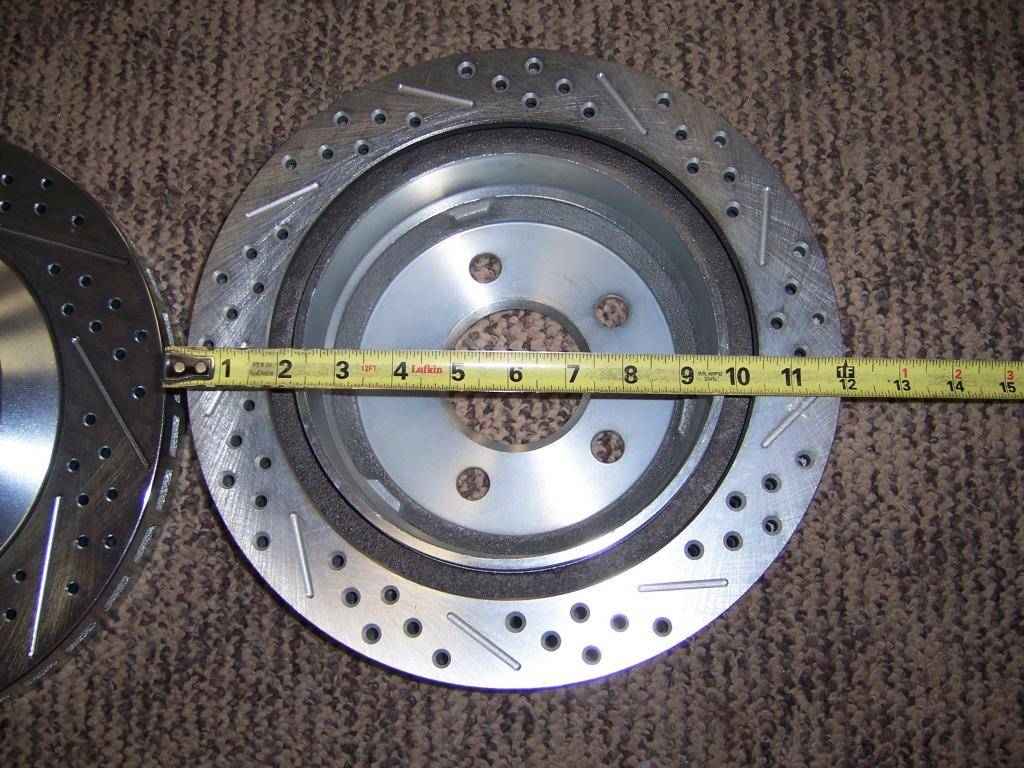
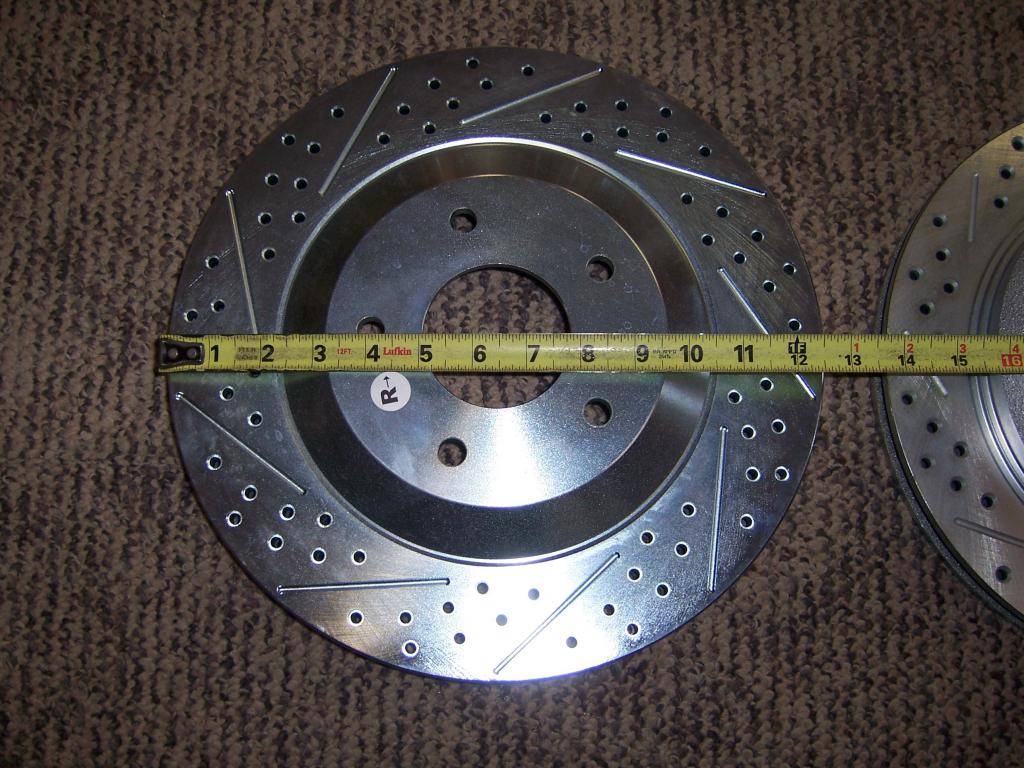
This fits nicely in my 17's with about an inch between the caliper and the wheel hoop. The fronts should fit but it will be tight. Just for comparison, here are the rotor sizes. Previous rear:
New rear rotors:
New front rotors:
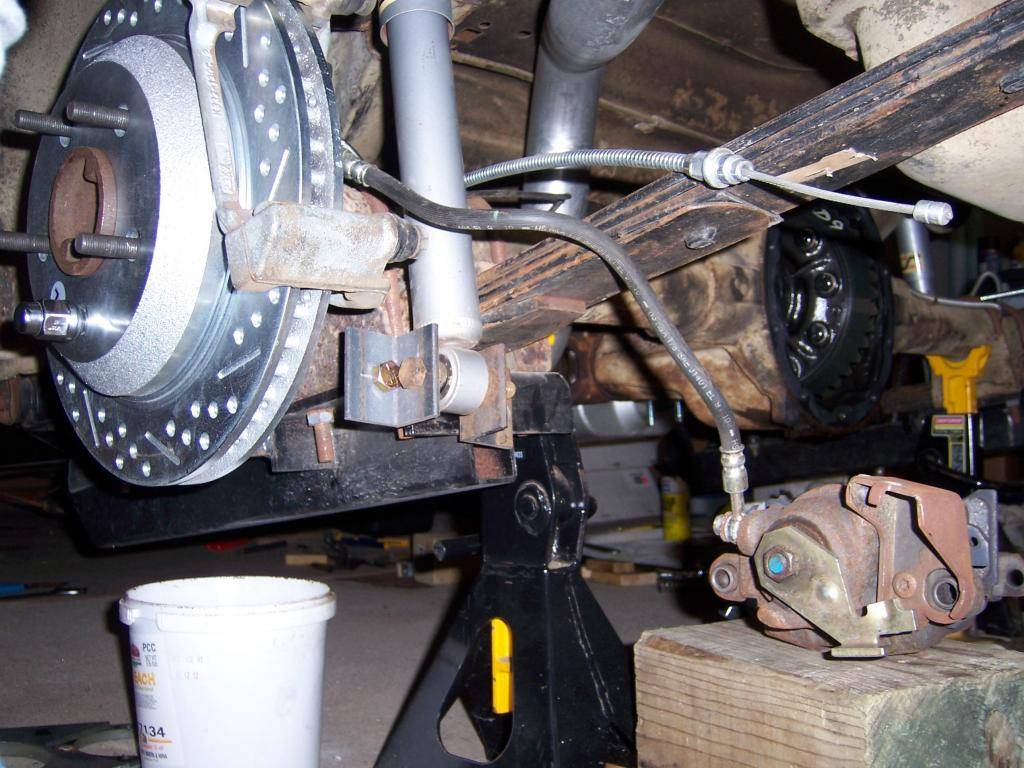
This does require relocating the driver side shock. With the traction bars, I am able to move my drivers side shock inboard about an inch to clear the caliper even at full inboard travel. I used two pieces of angle iron to make a double shear mount. This is just mocked up, but the finished product will be welded.
02-17-2014 #29
Registered User
- Join Date
- Jul 2012
- Location
- Auburn Hills, MI
- Posts
- 40
This weekend I started on the front brake install. It went very smoothly once I got over having to cut up my factory spindle!
 I will put together a few pics of how to do the swap, but I need to take a few more first. Here is how it looks with the wheel on:
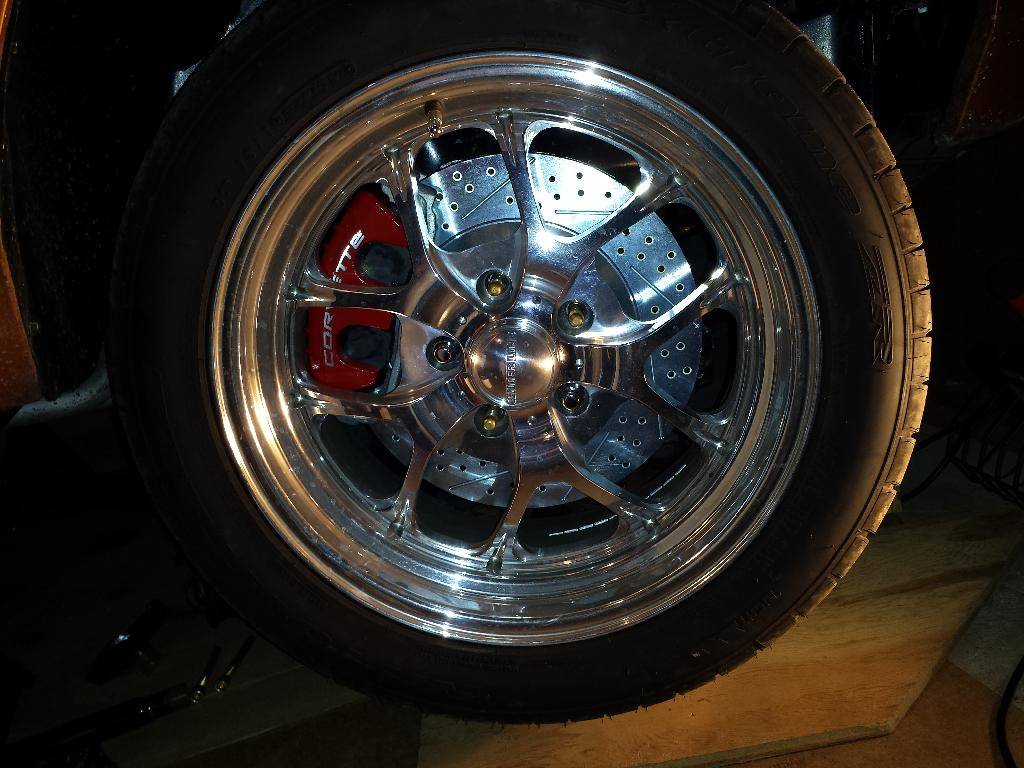
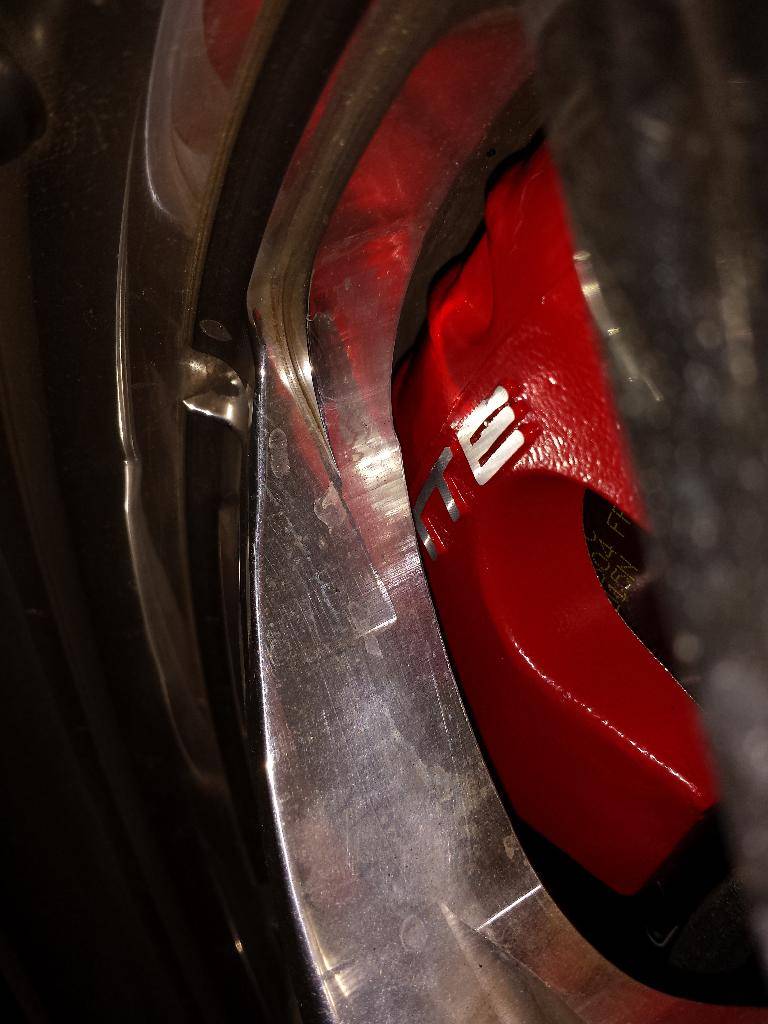
I have better than 1/8" clearance between the wheel and the caliper on both the face and top. I am going to have to modify the ARP wheel studs so I can use my closed end lug nuts.
02-17-2014 #30
Registered User
- Join Date
- Jun 2010
- Location
- Painted post NY
- Posts
- 115
Real nice work! Nice to see something different! What happen to the 4th gen rears before you got the Kore setup? I'm looking to do the 4th gen fbody brake swap (rear) or the Kore setup...
LeonLeon Reed
1978 Trans Am
LS1/4L60E
my build..updated 11-21-13 https://www.pro-touring.com/showthre...8-TA-LS1-build
02-17-2014 #31
Registered User
- Join Date
- Jul 2012
- Location
- Auburn Hills, MI
- Posts
- 40
Thanks Leon, the 4th gen f-body rear setup is going on the car. The front brakes are the kore3 325mm kit for gm tall spindles. The only reason I went with the 4th gen f-body rears over the kore3 rear kit is that I found a really good deal on the backing plates and e-brake cables.reedld
Real nice work! Nice to see something different! What happen to the 4th gen rears before you got the Kore setup? I'm looking to do the 4th gen fbody brake swap (rear) or the Kore setup...
Leon
02-17-2014 #32
Registered User
- Join Date
- Feb 2012
- Location
- SW, Michigan
- Posts
- 875
Looks like a pretty clean car,, don't see to many of these..
If you don't mind asking what wheel company do you work for?
02-17-2014 #33
Registered User
- Join Date
- Jul 2012
- Location
- Auburn Hills, MI
- Posts
- 40
Thanks for the complement. My goal for this project has been to make some upgrades to the car, but make it look like the factory would have done it this way. I try to use GM parts whenever and where ever I can. Mainly I do this because someone has put time into engineering the components, and replacements can be found at any auto parts store.
I actually work as a mechanical engineer for GM doing Flow and Acoustic analysis on induction (think from throttle body or compressor inlet forward) and exhaust systems. Before that I worked at a tier one supplier as a project/release engineer on electric power steering. Anything I present here is strictly my opinion/thoughts - Not GM's.
02-25-2014 #34
Registered User
- Join Date
- Jul 2012
- Location
- Auburn Hills, MI
- Posts
- 40
Now that you guys have seen what the front system will look like in "final trim", I will go over what was involved in getting there. I ran out of time this last weekend to complete both sides, but I am done with the fab and mock up work - just final assembly is left. I couldn't really find a good conversion thread on this, so I plan on outlining here what all is involved in the swap to C5/LS1 brakes. Here it goes:
Step 1: Break loose the lug nuts on the front wheels. Jack up the car and support with jack stands. Remove wheels. Using a 3/8" allen wrench, remove the two caliper pins holding the caliper to the spindle. Turning the wheels will give greater access to the caliper bolts.


Step 2: Move caliper out of the way, making sure to support it so the rubber hose is not holding the weight of the caliper. Usually wire can be used to support the caliper, but here I have place the caliper on a box.

Step 3: Remove the rotor bearing assembly dust cover with a screw driver. Remove cotter pin, castle nut, and keyed washer. Save castle nut and keyed washer and keep free of dirt. It helps to place it in a plastic bag to make sure it doesn’t get lost and to make sure it stays clean.

Step 4: Remove three bolts holding dust shield on with ½” wrench. Set aside.

Step 5: The next steps involve cutting material from the spindle. To help reduce the risk of getting contaminants in the new bearings, clean grease from spindle shaft and protect with a bag or towel or similar. You will need to remove the two fingers that locate the original caliper, and part of the webbing that is on the rearward in-car side of the spindle to clear a bolt further in the procedure. I have marked what is required to be removed.


Step 5: The Kore3 instructions have you remove more, but I wanted to keep as much strength as possible in the spindle, so I removed a little at a time and snuck up on what was required. Use a hack saw, cutoff wheel, sawzall, or similar to remove the material. Here is what you are looking for:

Step 6: Next you have to drill out the topmost and rearmost holes originally used to secure the dust shield to 27/64. Make sure to drill the hold straight and don’t allow the drillbit to wander. I used the original hole as a guide. I would drill a little, then check to make sure I was still centered on the existing hole. The top hole needs to be drilled to at least 1.25” depth, but don’t drill all the way through the material. Keep this a blind hole. The rearmost hole is a through hole already, use the same technique on this to keep the hole straight.

Step 7: Tap both holes drilled out to 27/64 in step 6 with a 1/2-13 UNC tap. The top hole will require a tapered tap to start and finish off with a bottoming tap to provide enough thread length.

Step 8: If all went well, you should be able to take the adapter bracket and bolt it to the spindle using the supplied ½-13 BHCS.

That concludes part 1 of the step by step conversion. I will have part 2 updated in the near future when I get back to work on the car. I was able to get the pass side hub assembled with bearings, and installed on the spindle shaft.
02-25-2014 #35 Registered User
- Join Date
- Jul 2013
- Location
- Gilbert, AZ
- Posts
- 934
Looks great! I love seeing the oddball cars getting some attention.
Josh Campbell- Pushing the limits of my HOA since 2011
71 Firebird- 455, Ridetech front suspension. https://www.pro-touring.com/threads/...04#post1124504
67 Camaro RS/SS clone, Speedtech front suspension, coilovers, soon to get LT1/T56.
82 Z28- cheapie beater, soon to get a 406.
66 Mustang coupe- 393, T-5, sold. https://www.pro-touring.com/threads/...-Coupe-GT393-C
04-20-2014 #36
Registered User
- Join Date
- Jul 2012
- Location
- Auburn Hills, MI
- Posts
- 40
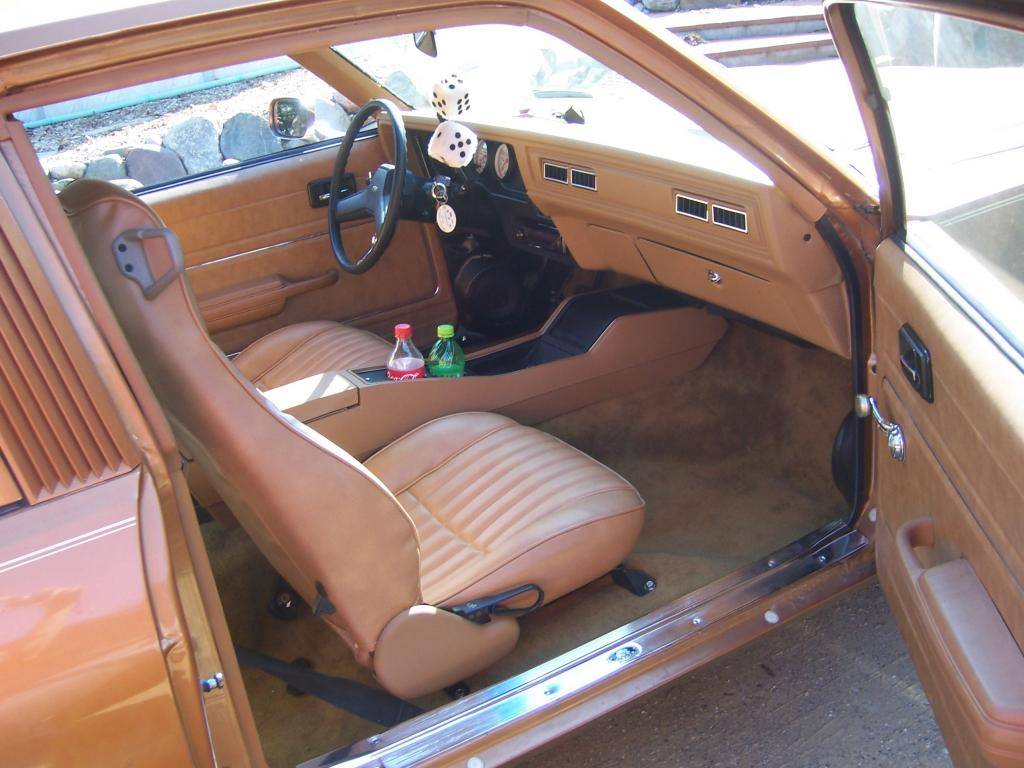
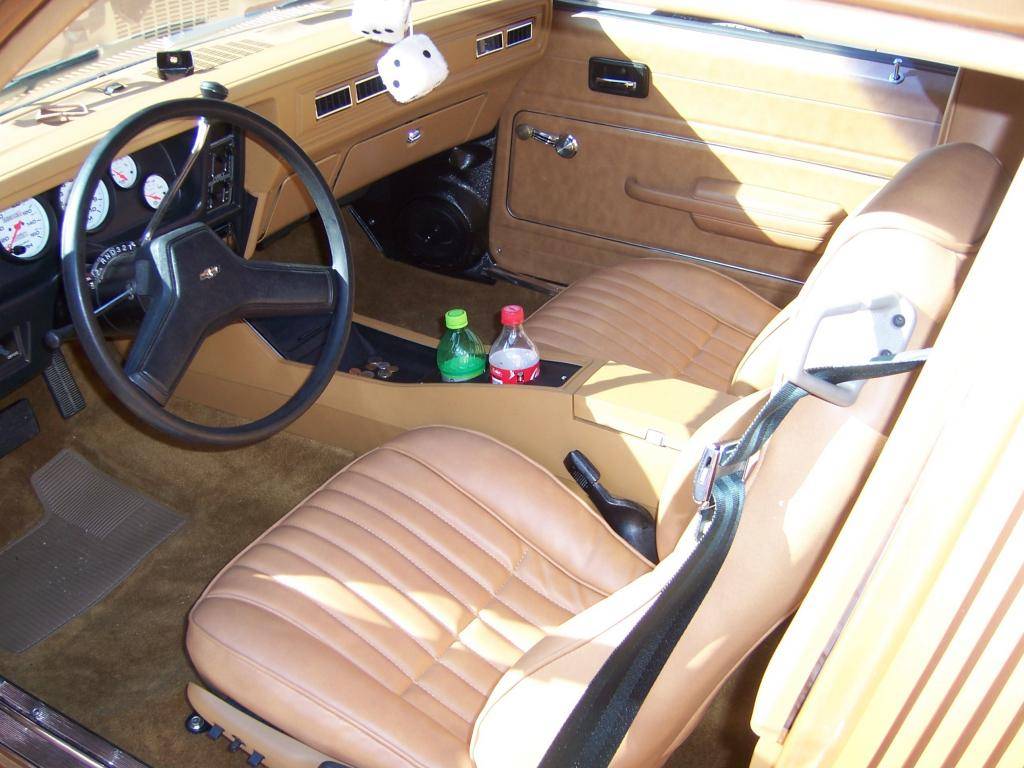
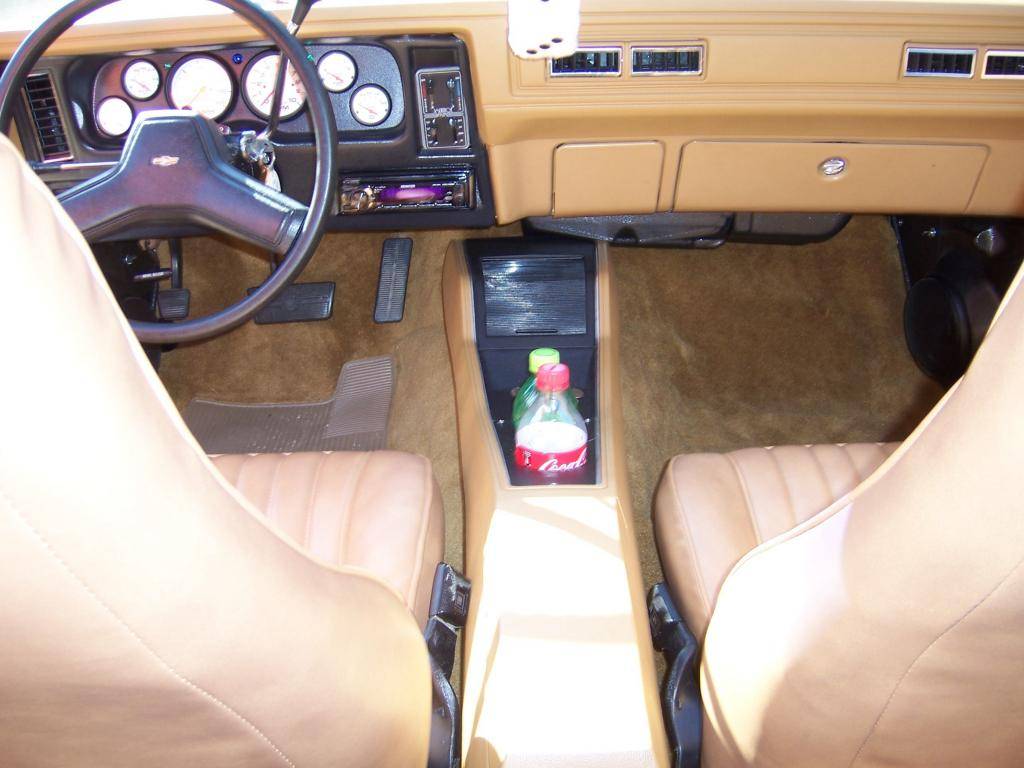
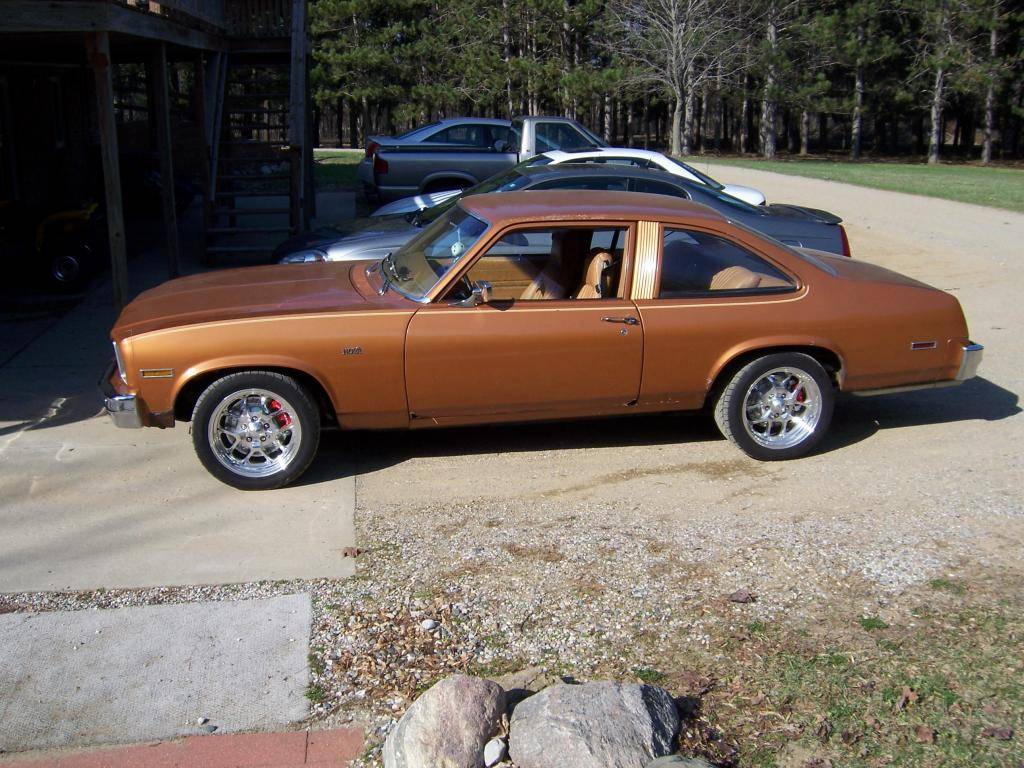
Haven't posted here in a while, but I finished the brake conversion, and got my bucket seats and console installed. The cup holders are made out if a piece of sheet metal and 3" to 3" header reducers. I put a new 1 piece carpet in made by trim parts. I installed a 30 spline eaton posi - first time ever tearing into a rear end, but just swapped the ring gear to the pos unit and shimmed until correct backlash was obtained. Along with the posi went 30 spline moser axles and 1/2-20 ARP studs. I was able to road test it today. The brakes haven't even fully bedded in yet and they already put you into the windshield if you touch the whoa pedal a little too hard. Here are some pics of what I have accomplished:
04-20-2014 #37
Registered User
- Join Date
- Apr 2010
- Location
- San Antonio, TEXAS
- Posts
- 202
Nice car. I did the same brake set up for the front on my second gen, haven't driven the car yet but I hope for good results.
2000 Pontiac Trans Am, Ls1/t56, SLP lid, LT's, cut-out, Borla cat-back.
1980 Pontiac Trans Am, soon to get Ls1/t56 transplant.
10-07-2016 #38
Registered User
- Join Date
- Oct 2016
- Posts
- 1
I purchased a 78 for my sons first car. Wow, never buy a old car late on a Sunday night. One of my first tasks is to put in a new wiper system. the guy advertised in needed wipers, and I thought wiper blades. Doh. $200 bucks later and I now have a new motor, wiper transmission and arms. I have no idea how this fits together. Anyone have a picture under the cowl the can post, so I know how to put this thing back in?
10-07-2016 #39 Registered User
- Join Date
- Dec 2006
- Location
- oshawa ontario
- Posts
- 1,607

When I got my licence at 16 (in '78) my brother was the first person to take me out driving....in his new black '78 Rally Nova

Same dash, same wheel as yours except all black. Cool man Nascar 69 Chevelle project, 1999 Hutch Pagan Nascar chassis, 69 Chevelle body,700hp, Penske's, slicks, roadrace track day https://www.pro-touring.com/showthre...le-Cup-project
89 Iroc 406 Fitech 5 spd
01 chevy 2500HD 4x4 8.1 Allison
31 Scarab 2 x 454

 Reply With Quote



