


Results 21 to 40 of 100
Thread: '72 Nova project
-
12-16-2008 #21
 Registered User
- Join Date
- Feb 2008
- Location
- Staten Island, New York
- Posts
- 367

nice love those body styles
-
12-16-2008 #22
Registered User
- Join Date
- May 2008
- Posts
- 36
Boy did your pictures bring back some memories. I installed a HRTH Truckarm set-up in my 77 Nova last winter. Our cars are basically the same (structurally) from the firewall back, so my guess is our experiences are also going to be similar.
I'm sorry to hear you had some installation issues. Overall I was relatively impressed with the kit, but having a 4th Gen Nova I'm impressed when ANYTHING from the aftermarket that works on my car. I think I had to call them one time for support, and that had to do with the harp plate. Everything else on my install followed the instructions to the letter, including measurements.
I was able to get about 2 weeks worth of road time on the Nova this June before I dismantled it for paint. I got to push the suspension pretty hard, and I have to say I was very pleased with the results - it's predictable in the corners, hooks up and launches hard and solid, and has what I consider reasonable street manners. It doesn't squeak and rattle like some 3/4 link set-ups, and the adjustable ride height is just pure gravy for me. Having installed the suspension and gotten some real-world driving done with it, I would not go back and do it different. I would call myself a satisfied customer.
With the similarity of our cars, I would hope that you find the same success with your car when its done. Of all the mods I have made to my car (tubular A-arms, six speed, big brakes, etc.) I think the rear suspension is my favorite.
Good luck with the rest of your project. Car looks good.
J
Jason T.
77 Nova Pro Tourer
-
01-12-2009 #23
Registered User
- Join Date
- Jul 2007
- Location
- Wisconsin
- Posts
- 57
The car finally made it back home. I am quite happy to see it back in the garage. Now the fun journey of getting it back on the road begins.
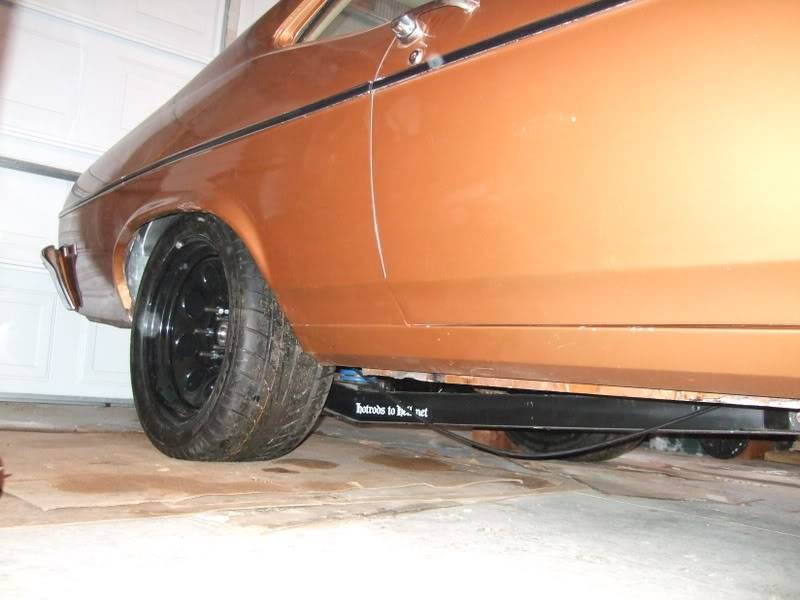
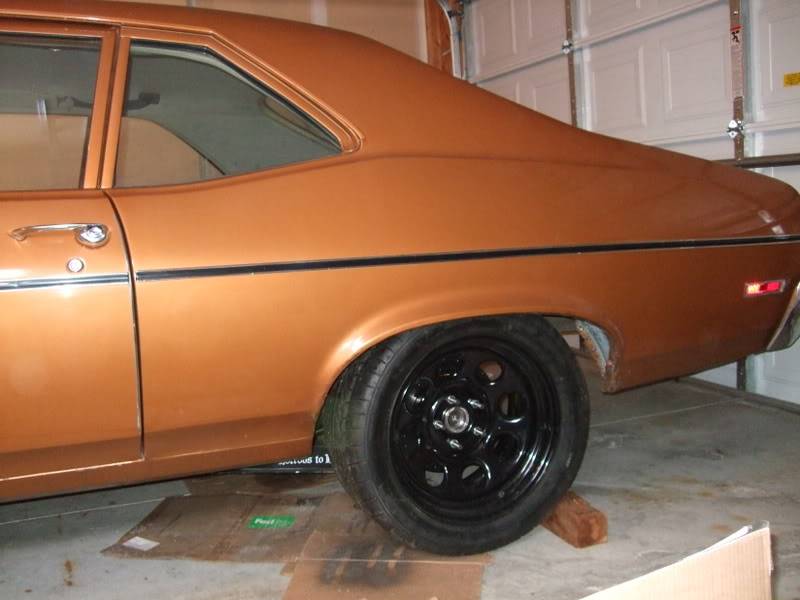
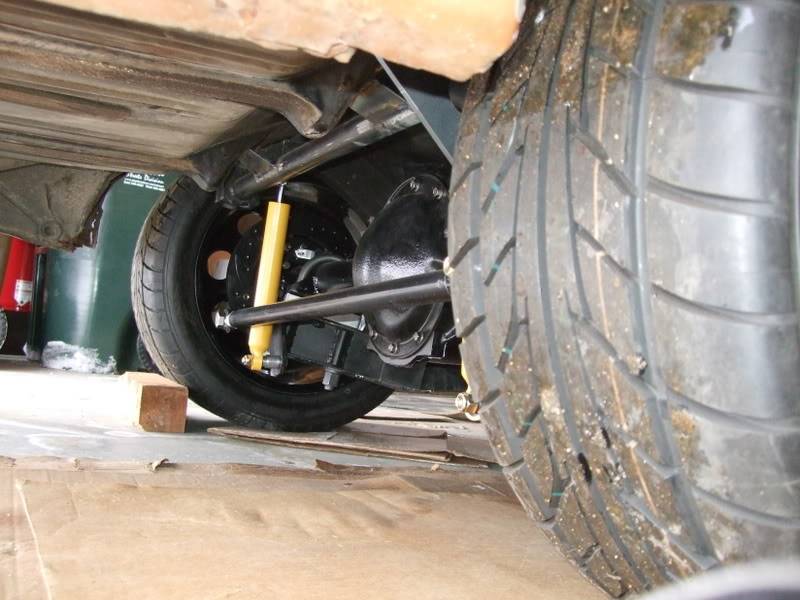
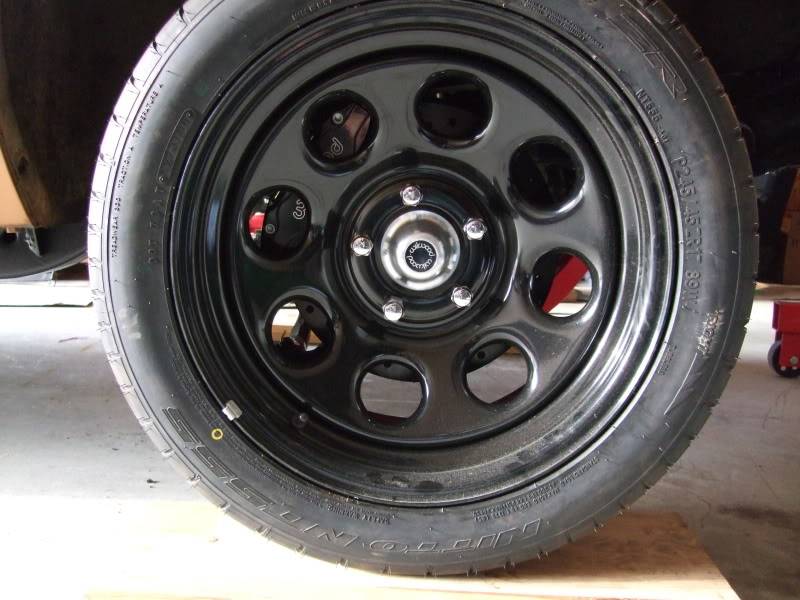
After getting it back together with all the HTH suspension, the C-clip eliminator kit, and the Wilwood brakes I realized the track width was too wide. We ended up taking 1.75 inches out of each side of the axle tube to get some clearance. The tires have about 2" between the sidewall and the fender lip now. It doesn't look quite as stuffed but it gives me a bit more room to play with. These wheels are 17x9 with 5" backspacing.
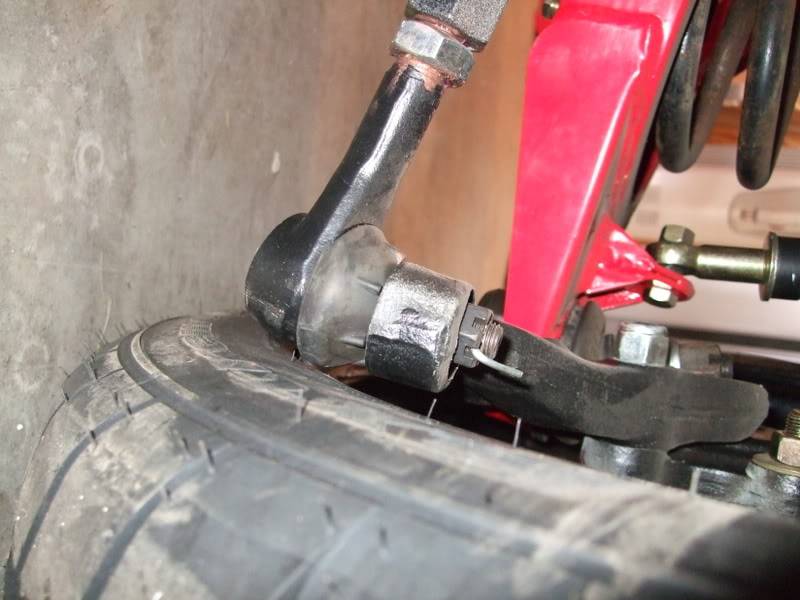
The front is going to have to come apart to determine how much needs to be cut off the springs to get the desired ride height and I have to add some spacers to move my steering arms away from the sidewall.
-
02-05-2009 #24
Registered User
- Join Date
- Jul 2007
- Location
- Wisconsin
- Posts
- 57
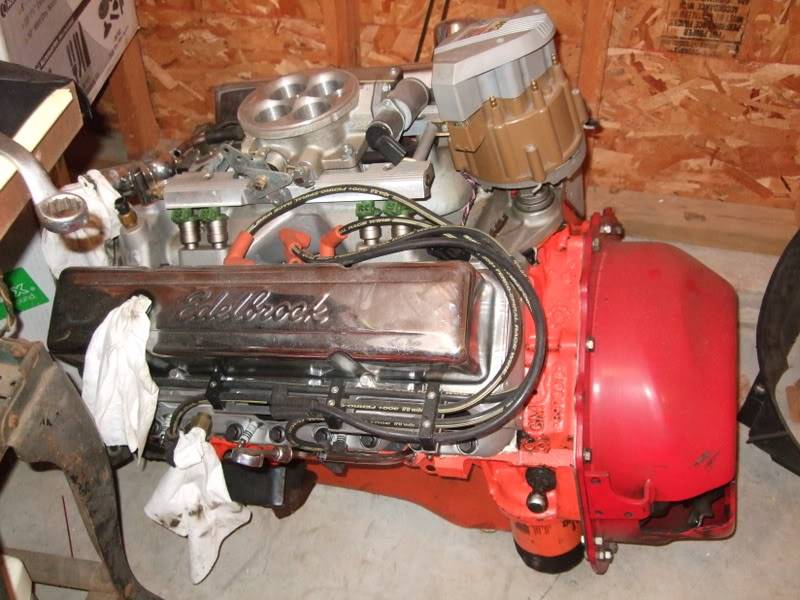
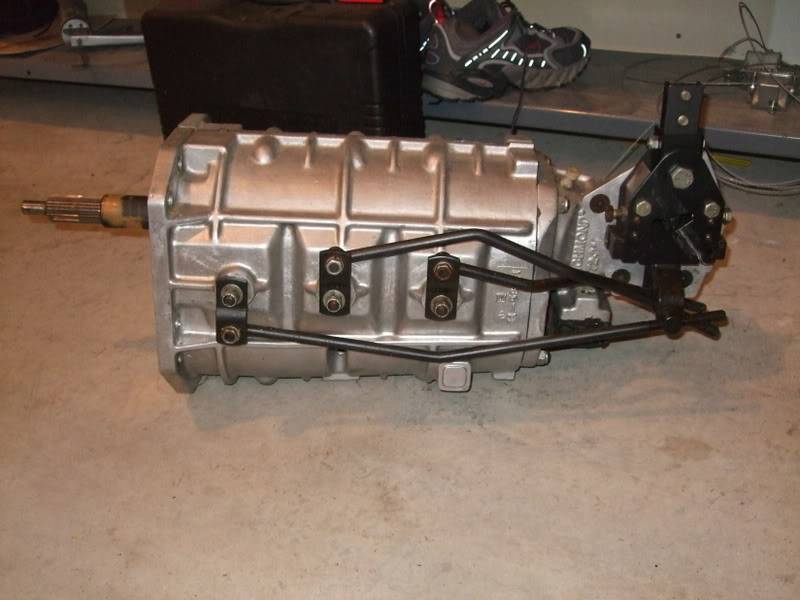
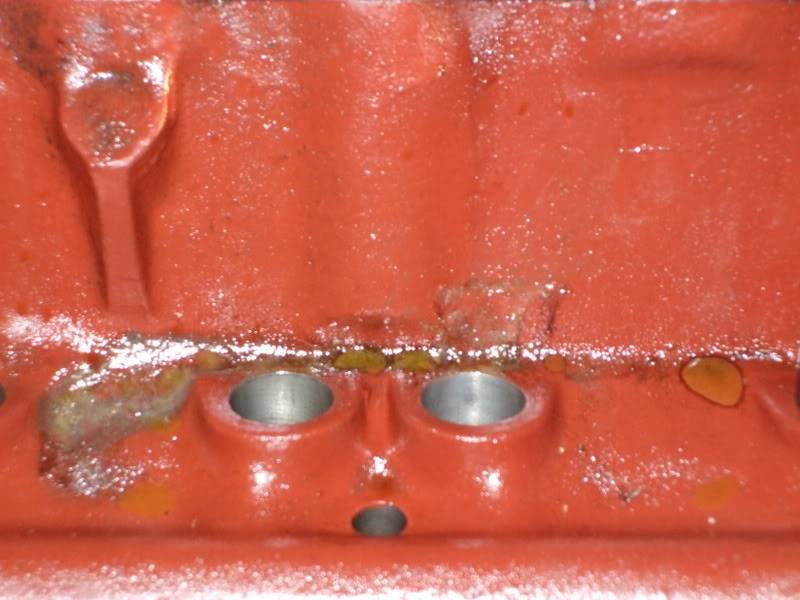
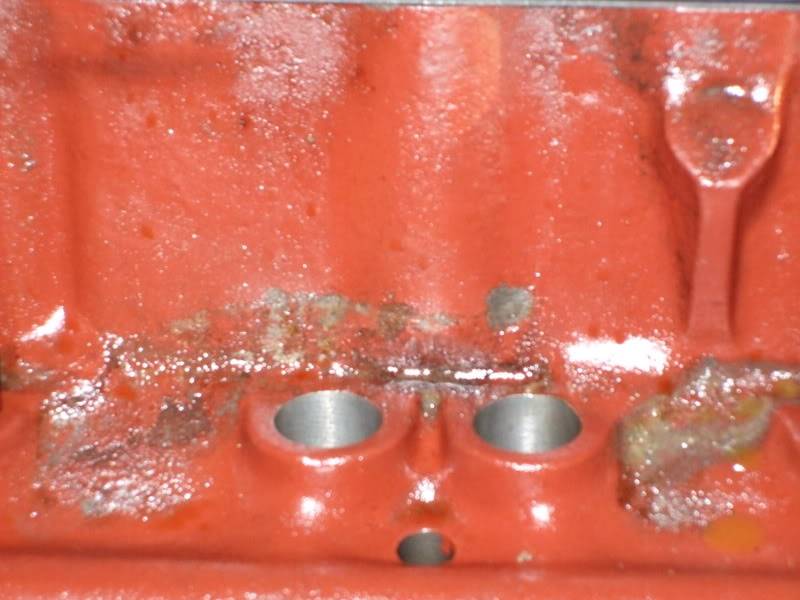
Crappy week with the motor. I was hoping to drop the old small block back in. It is a 355 with Trick Flow heads, a hydr. roller cam and Edlebrock Pro-flow (pictured above). Only problem was that as we got it out of the engine bay last year the cheap chain that came with the engine puller snapped. The motor dropped about 2 feet. The brunt of the hit seemed to be on the oil pan and the scatter shield. I had to replace the pan and planned to check the internals while the bottom was opened up. I wanted to check the endplay on the crank and run a dial indicator on the end.
I drained the oil and dropped the pan. The car has less than 10,000 miles in this configuration and has always run Mobil 1. There was a sludge in the bottom of the pan and there was obvious green antifreeze. I started to feel sick.
I was unable to get anything else apart until yesterday. I pulled the 1-7 bank valve cover. The rockers were covered in a slime and there was a chocolate milk looking substance next to the # 3 Intake valve spring. I pulled the other valve cover and had no signs of antifreeze. When I pulled the intake I could see a straight line above the lifters for # 3 and for #5 that had a greyish slime that then pooled between the lifters. The lifters for #3 and 5 were covered in the same slime as the rockers had been covered in.
The crank also seems to have a lot more endplay than when it was assembled. I haven't had been able to pull the caps to look at the bearings but my guess is the watered down oil burned the bearings.
Crappy day..... I have the LQ4 and now have to work at getting all the needed items for that transplant.
I will post more tomorrow.
02-06-2009 #25
Registered User
- Join Date
- Mar 2005
- Location
- Jackson Ms
- Posts
- 1,220
sorry to hear about the engine.
what kind of "spacers" do you plan to run to clear the front tires?Chris V
SOLD
02-06-2009 #26
Registered User
- Join Date
- Jul 2007
- Location
- Wisconsin
- Posts
- 57
I haven't figured that out yet. Fatman Fab states I can space the steering arm out slightly with washers but it can't be too thick. It sounded like I can gain 1/4" that way. I have to measure my clearance to the fender lip but since it isn't sitting at the final ride height I can't quite do that yet.
It looks like the tie rod is hitting the tire in the picture but in reality it clears by a very narrow margin. Not enough that I would ever drive it but better than starting with a rub.
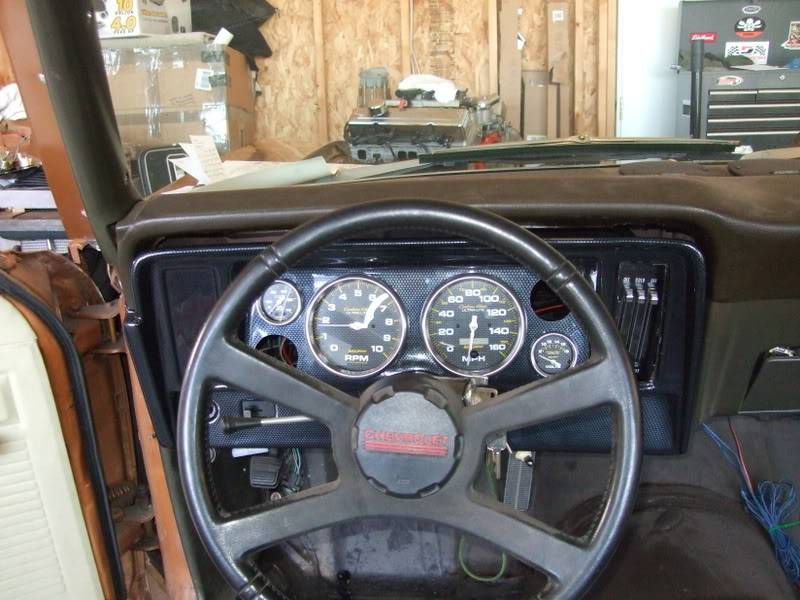
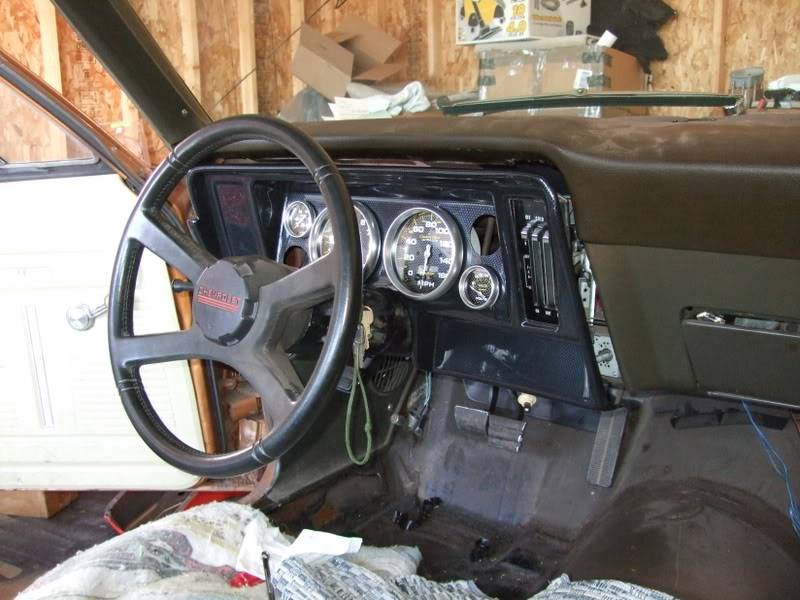
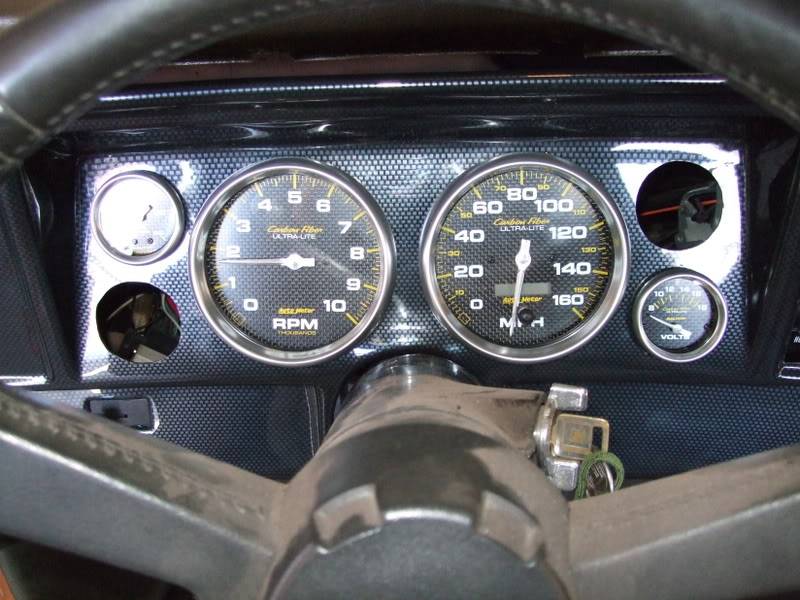
On the better side of things. I got my dash put mostly fitted and mocked up. I still need to do some final fitting so it isn't completely in but here are some photos. I got a blank Covan's piece and cut it for a 5" tach and speedo and 2 1/16" small gauges. The water temp and the oil are both full sweep while the voltmeter and gas are partial sweep gauges. Covan's doesn't offer a 5" dash for Nova's and they told me over the phone that it wouldn't fit. I measured it out and thought they were wrong. I was right.
02-06-2009 #27
Registered User
- Join Date
- Dec 2007
- Location
- Bakersfield,CA.
- Posts
- 120
Sorry about your engine, man. At least you should be able to part it out and recoup some of your LS transplant money.
02-06-2009 #28
Registered User
- Join Date
- Jan 2009
- Location
- Europe - Austria
- Posts
- 24
nice chassiswork you've done!!
looks good
02-08-2009 #29
Registered User
- Join Date
- Jul 2007
- Location
- Wisconsin
- Posts
- 57
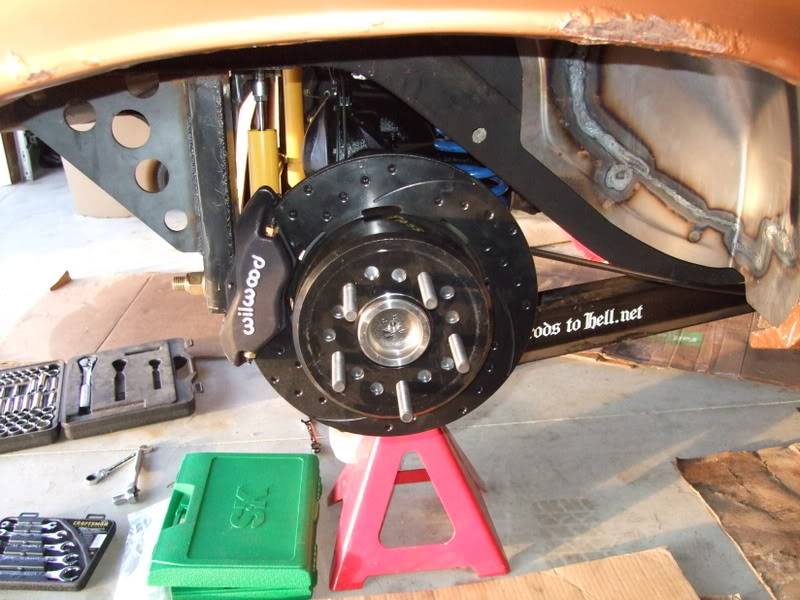
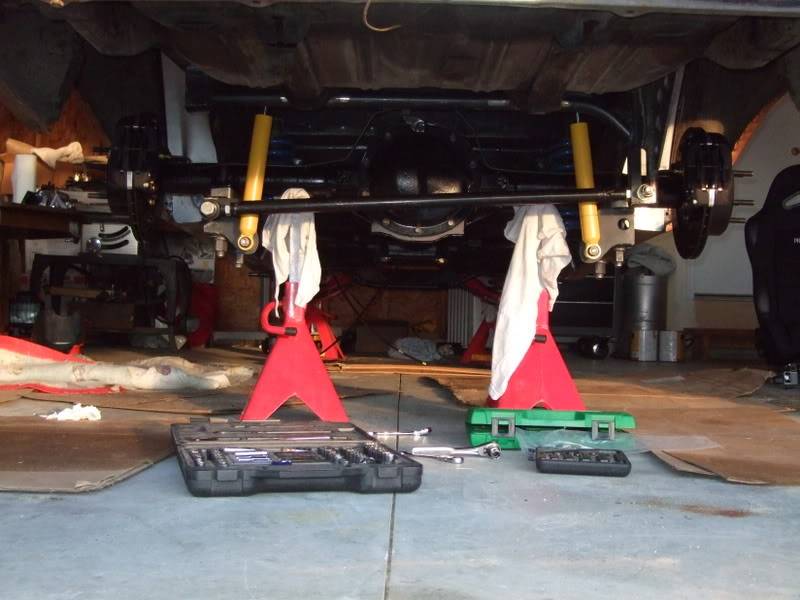
Grabbed a few pics today while I was working on the car. I got brake lines run on the rear and started working out seat bracket issues. I also figured out how the E-brake set up will probably work but I still have to make some brackets and route the cables.
Here are some of the 4 piston rear calipers.
and I got some close-ups of the cracks on the SBC.
02-09-2009 #30 Registered User
- Join Date
- Jan 2008
- Location
- Long Beach, Ca
- Posts
- 1,564
Bummer on the engine!
I will be watching this closely, I am planning on doing a LS and 6-speed in my '72. Also glad you put some Soft-8s on, thinking of ditching my KMCs for those.
Why did you ditch the leafs for your 2-link?
02-10-2009 #31
Registered User
- Join Date
- Jul 2007
- Location
- Wisconsin
- Posts
- 57
I ditched the leaf springs for the HTH Truckarm set up because I had talked to a couple people running it. It sounded like an upgrade and made sense to me. I started this project long before discovering this forum and a number of the parts were ordered then. There are a number of other set-ups that can probably out perform the Truckarm rear but, even without driving it, I still think it is better than the leaf springs. It gave me a lot more room for tire, it gives me adjustable ride height and ties the front and rear subframes together.
To do it over I would probably look at the Lateral Dynamics 3 link or the DSE Quad link. I am happy with the install on the HTH set-up but it does limit my exhaust options.
Good luck with your build. Keep us updated.
02-10-2009 #32 Registered User
- Join Date
- Nov 2007
- Posts
- 151
That thing is gonna look tough I think. Bad deal with the engine, maybe you can still hawk some of the parts?
02-11-2009 #33 Registered User
- Join Date
- Dec 2006
- Posts
- 543
Nice looking project.
The body looks to be in good shape. Sorry to hear about the engine and hopefully some good can come out of it.
Those Nitto's look awesome under there.
Keep us posted.
03-10-2009 #34
Registered User
- Join Date
- Jul 2007
- Location
- Wisconsin
- Posts
- 57
Here are some updates. I have been learning to speak the language of the LSx.... like learning a completely new language. They are also expensive. Every aftermarket part is twice as much as small block things. Trying to do it on a budget and starting with just the long block (plus intake) puts me at a loss. I have spent countless hours on the phone and ebay trying to gather things to make this work. LS1 forum is a lifesaver. Everything has been done before and someone will get you an answer.
I am slowly gathering items. Tonight I picked up my knock sensors and the MAP sensor. I am still trying to determine if I am going DBW or cable throttle. I don't have a PCM or throttle body yet so either is a possibility.
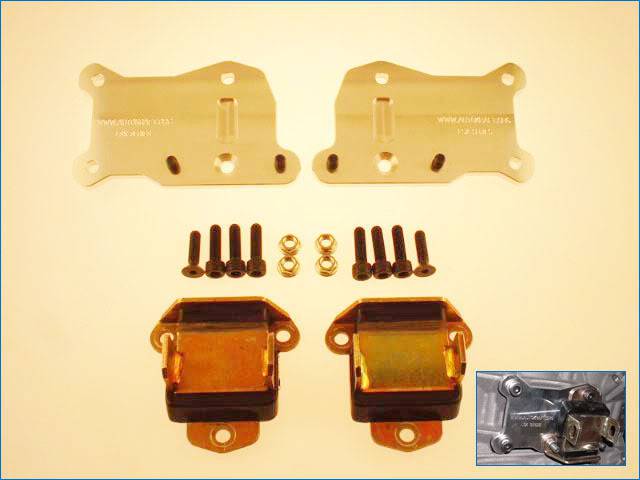
I did find that with the right motor mount adaptors I will be able to run the truck intake. It may be ugly as sin but I am working on cleaning it up and it produces the better power than factory LS1 intakes.
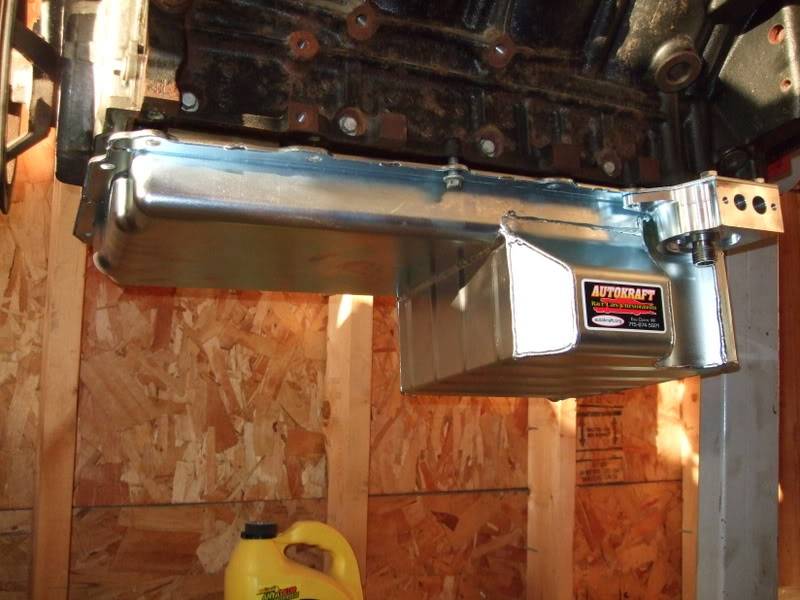
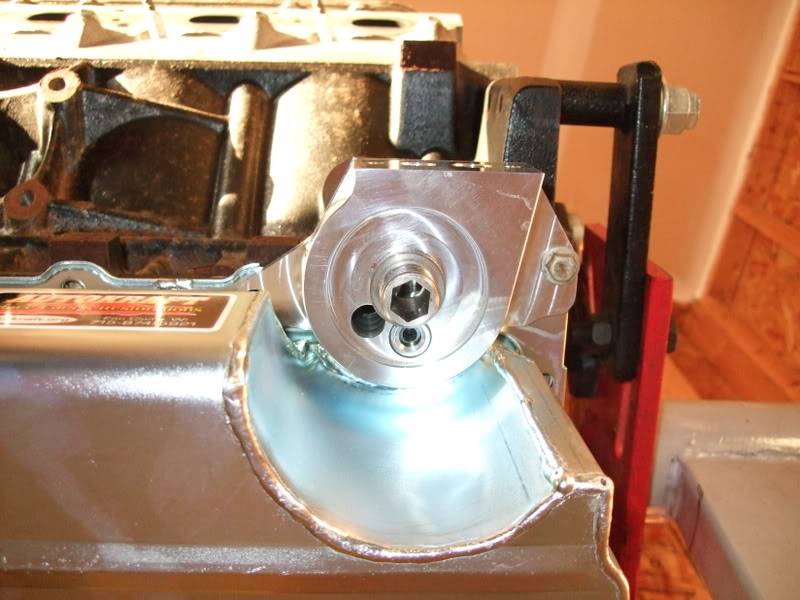
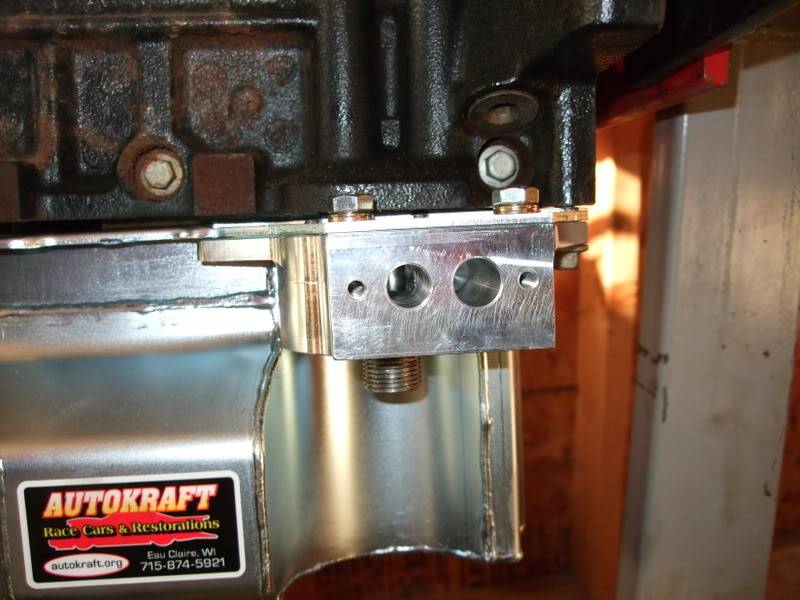
I picked up an Autokraft oil pan and adaptor plates. They should mount the motor lower than the BRP style. The oil pan is very nice, it has all 4 corner baffled, a oil filter adaptor and its own pick-up for under $400. S&P offers a nice modded F body pan but without a trade-in they want $500. They also won't take truck pans as trade-in's even thought they sell those too.
I am set to order my accessory drive but waiting for last months credit card to clear. I am going with the Kwik Performance set up. It is the best for my budget, runs on the truck water pump and the truck crank pulley.
Here are some pics of the new oil pan and mounts. I should have more this weekend. If the weather cooperates I am going to test fit the engine.
03-10-2009 #35 Registered User
- Join Date
- Feb 2006
- Location
- SoCal
- Posts
- 1,622
That thing is gonna handle REAL nice!
John'66 Chevy II - The "NEW" '69 Camaro!
***Under Construction***
Build Update Link:
https://www.pro-touring.com/forum/sh...ad.php?t=17108
03-11-2009 #36 Registered User
- Join Date
- Nov 2005
- Location
- Houston,TX
- Posts
- 1,159
Good looking build, I just purchased a low mileage LQ9 and am doing a swap in an 05' Sierra. If you need any parts (complete truck intake, TB, PCM, accy's, wiring harness, etc...) I have it all in great shape
71' Nova - LY6, T56
03-11-2009 #37
Registered User
- Join Date
- Jul 2007
- Location
- Wisconsin
- Posts
- 57
NvrDun,
I will keep you in mind. Is your throttle body cable or DBW. I have a DBW but am not sure if I want to go that route. As I move along I will PM you if I need something.
03-11-2009 #38
Registered User
- Join Date
- Nov 2005
- Location
- Houston,TX
- Posts
- 1,159
Cool man, just figured I would throw it out there...... piecing together parts for these motors does get expensive fast. Actually have two like new throttle bodies, but they are both DBW Originally Posted by mikem
 71' Nova - LY6, T56
03-24-2009 #39
Registered User
- Join Date
- Jul 2007
- Location
- Wisconsin
- Posts
- 57
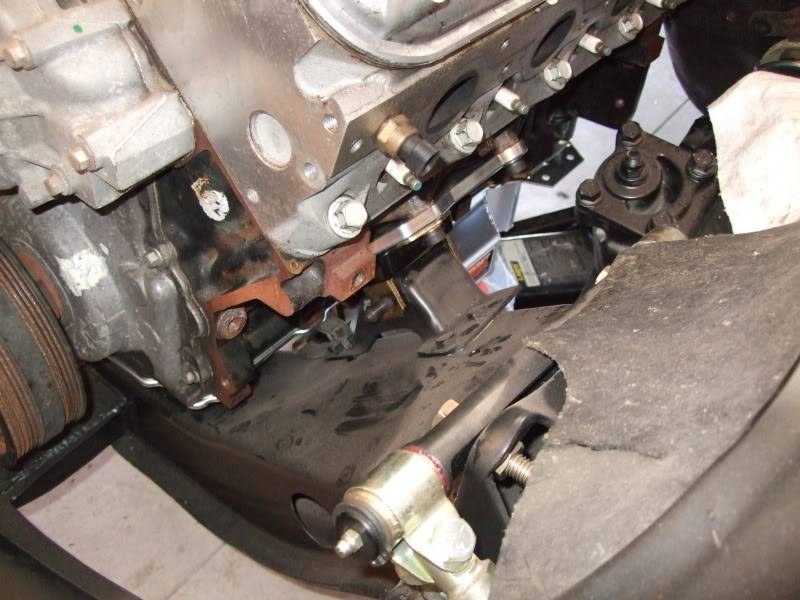
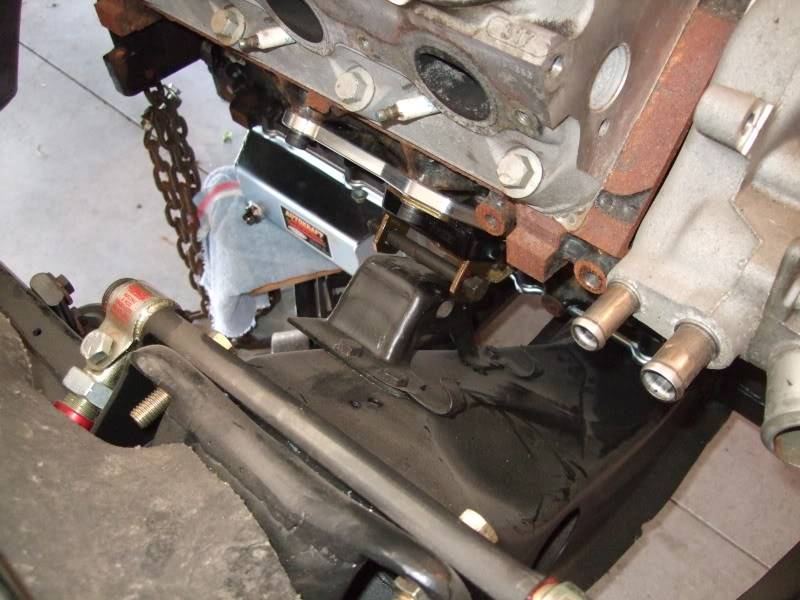
We finally got a test fit of the motor done. Not everything went according to plan. The engine came down and it was apparent something was not lining up between the motor mounts on the frame and the mounts from Autokraft. We got the bolt in on the drivers side and the mount on the passenger side was off. It looked like the one of the mounts was too short (either the mount on the frame or block). As we continued to set it down to see if it would come closer the oil pan came down on the cross member. We lifted it back up and put the bolt just through the mount on the engine. It sat on top of the frame mount then and allowed me to take some measurements. We also test fitted the hood and it should clear even though the motor was not exactly in its position.
I called Autokraft on last Monday and explained the problem. They stated they had run into this only a few times as GM apparently used a number of different frame mounts in F-bodies and X-bodies. He told me to look at the frame mounts and try to replace them with a taller version. I looked around online and the original replacement everyone sells is nowhere close to what I have. My original mount on the drivers side measures 1.5" from the frame to the center of the hole. The original replacement measures 2 1/16". That is a 9/16" difference. I can't even find anyone that lists what I have as an option. I have the new mount in and hopefully can drop the motor in for another test this week.
Meanwhile I am working on brakes and setting up the master cylinder.
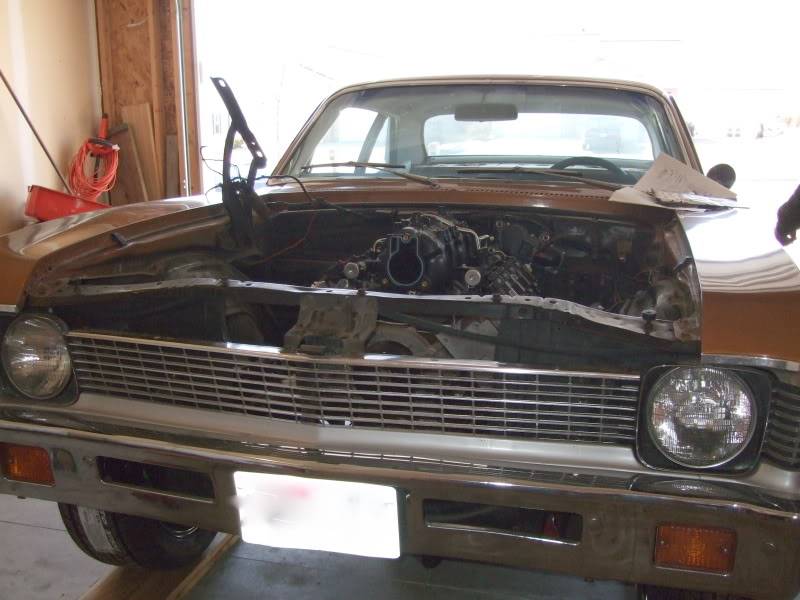
Here are some pics of the motor in the bay. You can kind of see the beginnings of me smoothing out the intake some. I have cut off most of the taller plastic fins and plan to smooth them down even more before it is up and running.
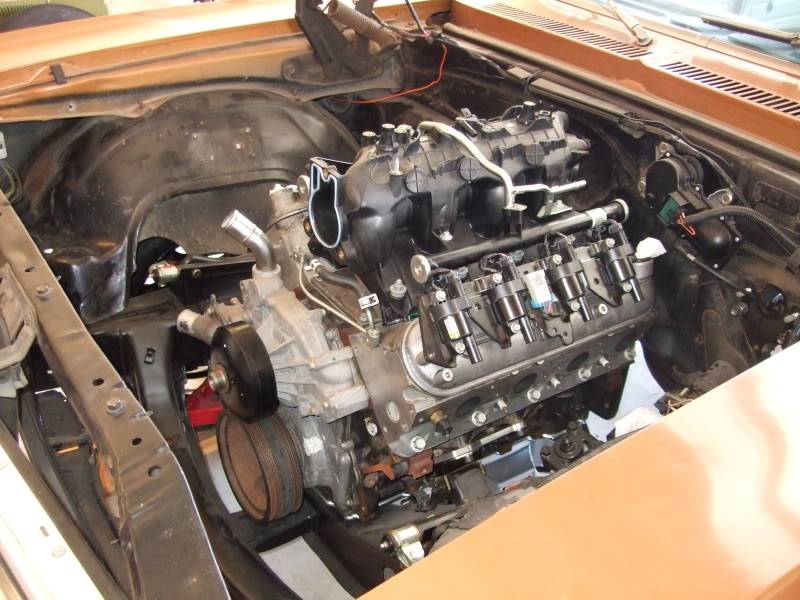
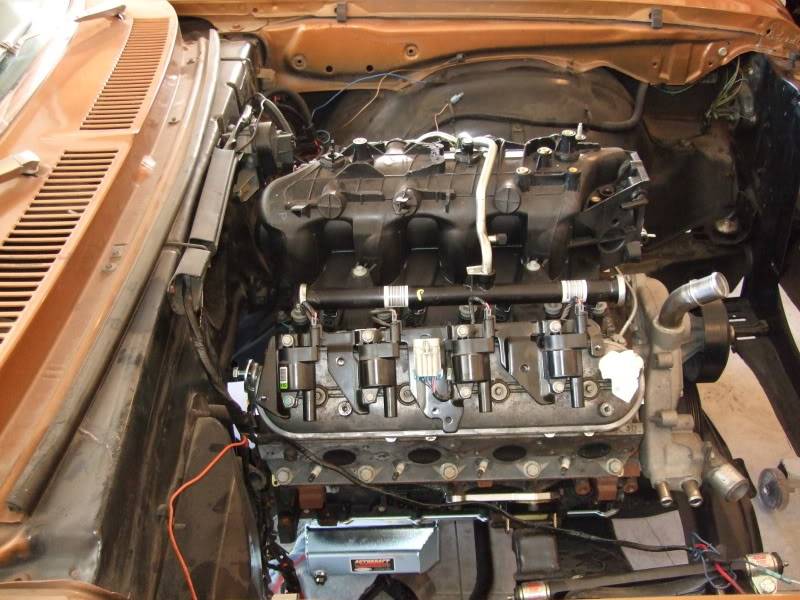
Here you can see the drivers side mount is connected and in the next picture you can see how I had to set up the passenger side to get it to not ride on the oil pan. Hopefully the new frame mount will correct this
03-27-2009 #40
Registered User
- Join Date
- Jul 2007
- Location
- Wisconsin
- Posts
- 57
I got a new driver's side frame stand for the motor. The one the car came with was 9/16" shorter than this replacement. The motor now sits in the car and we were able to put the motor mount bolts in.
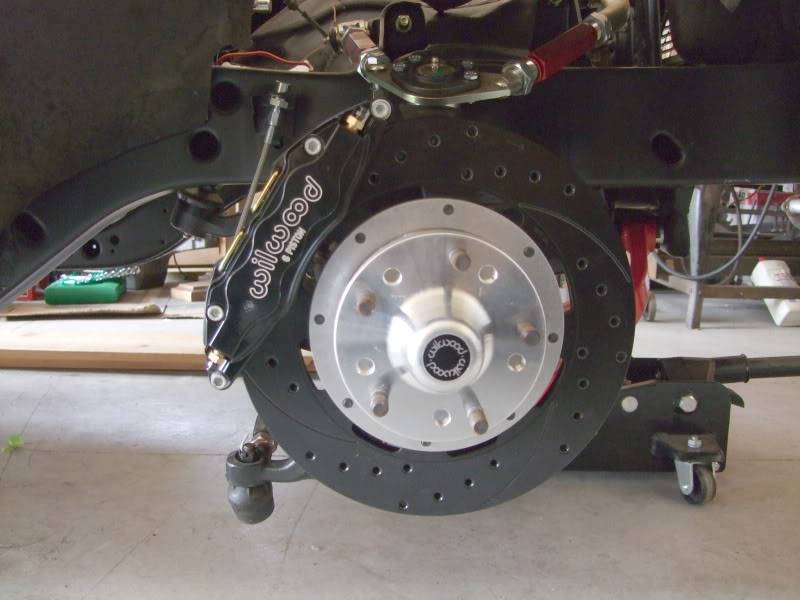
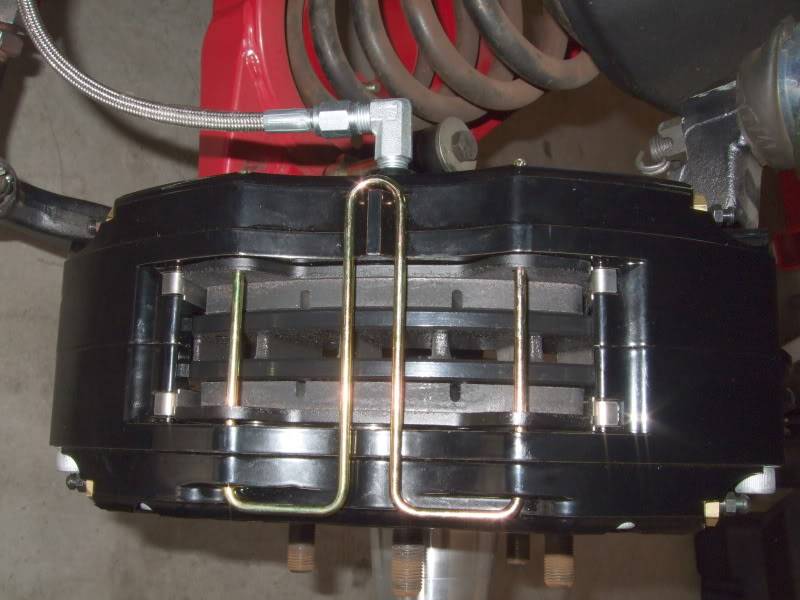
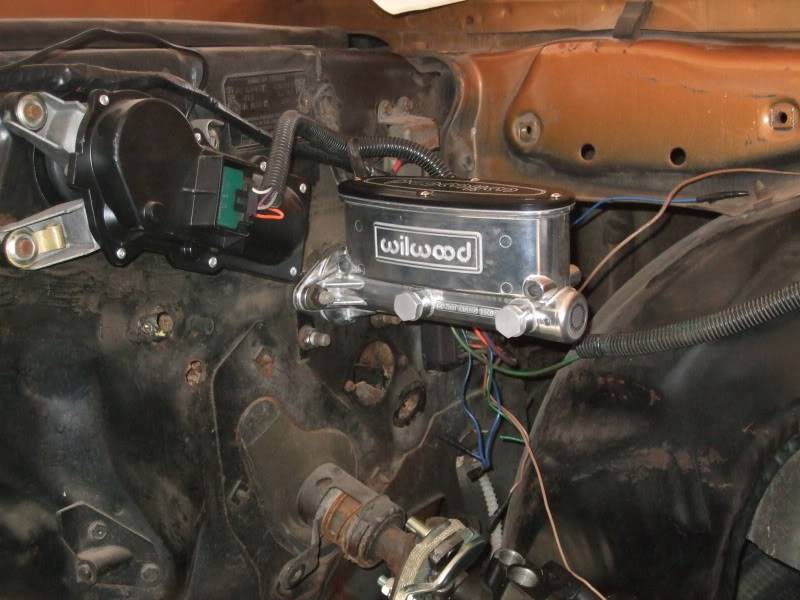
I also got the front calipers on and started working on brake lines. I also have the master cylinder mounted and connected to the pedal. It was a power brake car originally but the pedal came with a hole for manual brakes as well. I just moved the clevis up to the higher hole and adjusted the brake light switch to hit the pedal. I have almost 1.5" of travel at the master cylinder and it hits the floor just before bottoming in the master.
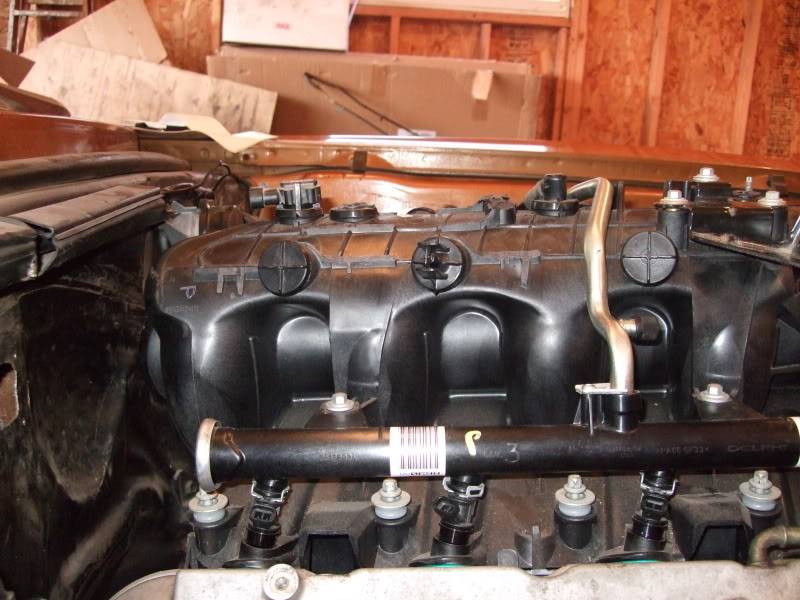
I have been working on smoothing off the truck intake and it is coming along nicely. I need to start working with a small file and sandpaper now as almost all the rough cutting is done.
Here are some shots I took.

 Reply With Quote




