

Results 641 to 660 of 786
Thread: 1970 GTO Version 3.0
-
02-09-2023 #641

 Registered User
- Join Date
- Nov 2009
- Location
- the dirty mitten
- Posts
- 1,212

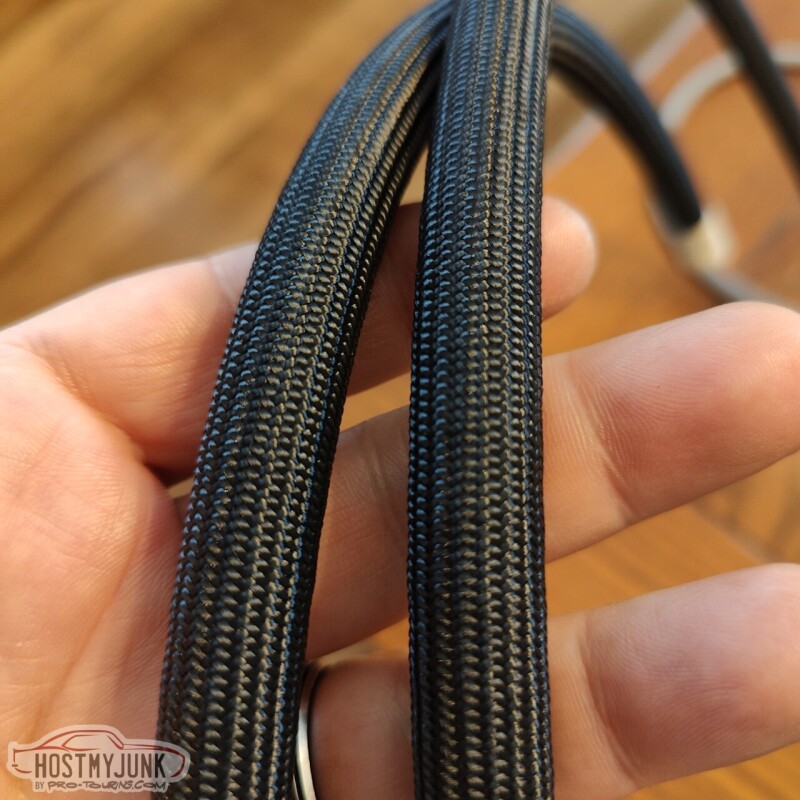
That cooler line looks like a pain to deal with. Could you attach the end to the hose and tighten it, then get the banjo fitting in place? What is that fabric sleeve you are using and what is its heat range? I used some corrugated aluminum stuff of varying sizes on lines that got near the exhaust. Its all out of sight but I like the look of the stuff you used there
Steve
1968 Dodge Charger All Wheel Drive project Red Bull<script type="text/javascript" src="safari-extension://com.ebay.safari.myebaymanager-QYHMMGCMJR/5cce6da5/background/helpers/prefilterHelper.js"></script><script type="text/javascript" src="safari-extension://com.ebay.safari.myebaymanager-QYHMMGCMJR/85dc54c0/background/helpers/prefilterHelper.js"></script><script type="text/javascript" src="safari-extension://com.ebay.safari.myebaymanager-QYHMMGCMJR/85dc54c0/background/helpers/prefilterHelper.js"></script>
-
02-09-2023 #642 Registered User
- Join Date
- Sep 2004
- Location
- Orlando, FL
- Posts
- 1,078
Source for the material for the intercooler plumbing? Looks great!!
SMSgt Ty Ingle, USAF
"CF71" - Freedom BirdHoodpins.com, Inland Empire Driveline, Billet Accessories Direct, Modo Innovations, AutoRad Radiators, Morris Classic Concepts, Marquez Design, Anvil Auto, Fesler Billet, US Collision (DOOM), AGR Performance, Pro-touringF-body.com, Phoenix Transmission Products, Shiftworks, ACC Carpet, Hedman Hedders, BMR Fabrication, American Autowire, MityMounts, TIN INDIAN Performance, Kauffman Racing Equipment, Pypes, RobbMc Performance, WMC, Holley, NOS, PST
02-09-2023 #643 -Moderator/Sponsor-
- Join Date
- Apr 2001
- Location
- The City of Fountains
- Posts
- 15,983
The intercooler plumbing is Earl's Super Stock hose and fittings. Originally Posted by OLDFLM

Andrew1970 GTO Version 3.0
1967 Cougar build
GM High-Tech Performance feature
My YouTube Channel Please Subscribe!
Instagram @projectgattago
Dr. EFI
I deliver what EFI promises.
Remote Holley EFI tuning.
Please get in touch if I can be of service.
"You were the gun, your voice was the trigger, your bravery was the barrel, your eyes were the bullets." ~ Her
02-09-2023 #644
Registered User
- Join Date
- Sep 2004
- Location
- Orlando, FL
- Posts
- 1,078
The shrink fit covering over the hose?
SMSgt Ty Ingle, USAF
"CF71" - Freedom BirdHoodpins.com, Inland Empire Driveline, Billet Accessories Direct, Modo Innovations, AutoRad Radiators, Morris Classic Concepts, Marquez Design, Anvil Auto, Fesler Billet, US Collision (DOOM), AGR Performance, Pro-touringF-body.com, Phoenix Transmission Products, Shiftworks, ACC Carpet, Hedman Hedders, BMR Fabrication, American Autowire, MityMounts, TIN INDIAN Performance, Kauffman Racing Equipment, Pypes, RobbMc Performance, WMC, Holley, NOS, PST
02-09-2023 #645
-Moderator/Sponsor-
- Join Date
- Apr 2001
- Location
- The City of Fountains
- Posts
- 15,983
It's heat shrink fabric sleeve that I got from www.wirecare.com Originally Posted by OLDFLM
Andrew1970 GTO Version 3.0
1967 Cougar build
GM High-Tech Performance feature
My YouTube Channel Please Subscribe!
Instagram @projectgattago
Dr. EFI
I deliver what EFI promises.
Remote Holley EFI tuning.
Please get in touch if I can be of service.
"You were the gun, your voice was the trigger, your bravery was the barrel, your eyes were the bullets." ~ Her
02-11-2023 #646
-Moderator/Sponsor-
- Join Date
- Apr 2001
- Location
- The City of Fountains
- Posts
- 15,983
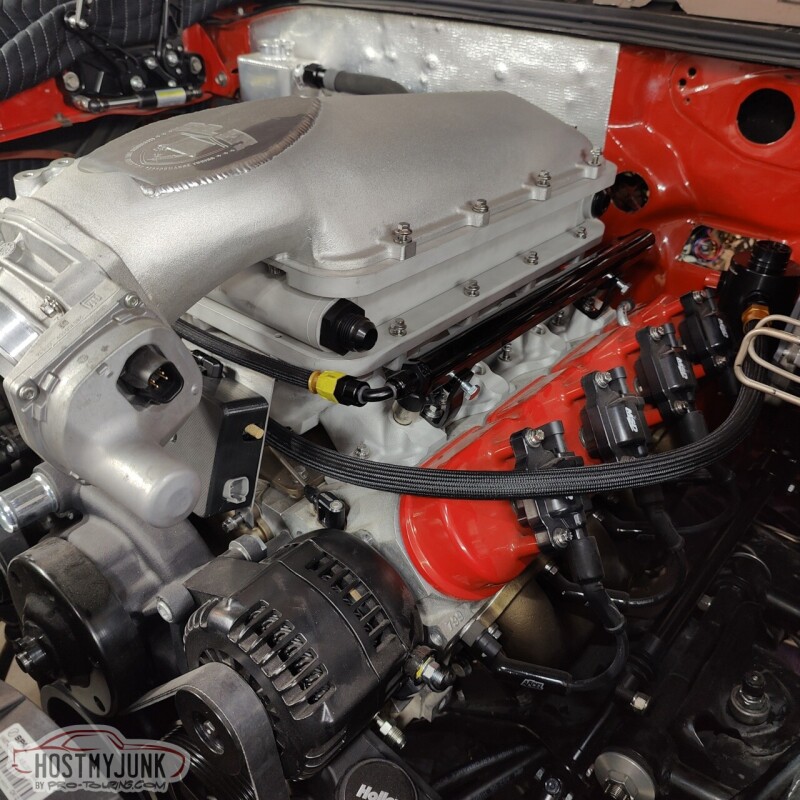
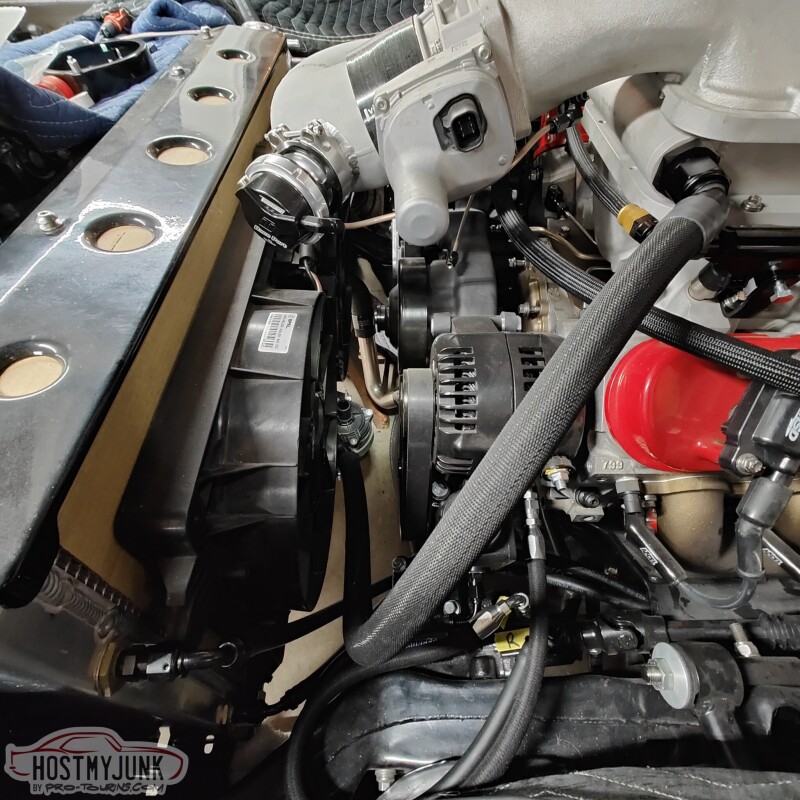
This is Earl's Ultra Pro hose and it is by far the nicest hose I have ever worked with. It is super flexible, light weight, and looks fantastic. Sadly, for some reason, Earl's no longer sells this hose in sizes smaller than AN-10. I had a 6 foot section of AN-6 hose that I had purchased a while back.
So I decided to use it to make some of the needed hoses under the hood. This is the fuel rail crossover that links the two rails together in the front.
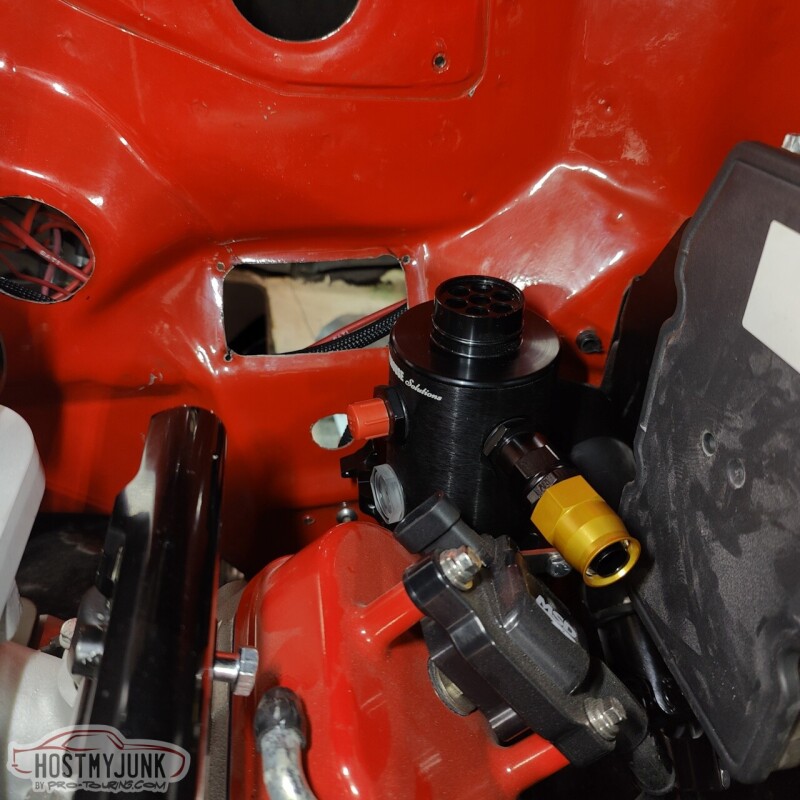
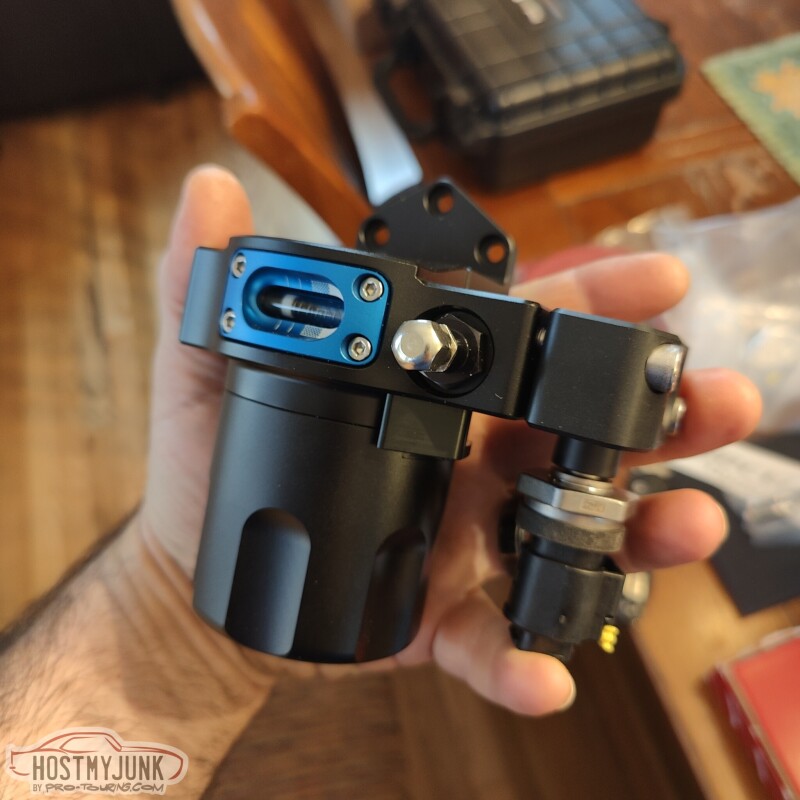
The original plan was to have the Mighty Mouse catch can mounted to the master cylinder mount. However, with the Bosch iBooster in place, that was no longer an option. I got on the MM website and saw they had a basic mount that was designed to bolt to the head.
Mounting it to the front of the heads was not an option. The passenger side has the turbo and the driver's side has the alternator. I could have modified this mount to work on the driver's side front, but instead, I chose to flip it around and mount it to the back of the driver's head.
It fit perfectly in the back.
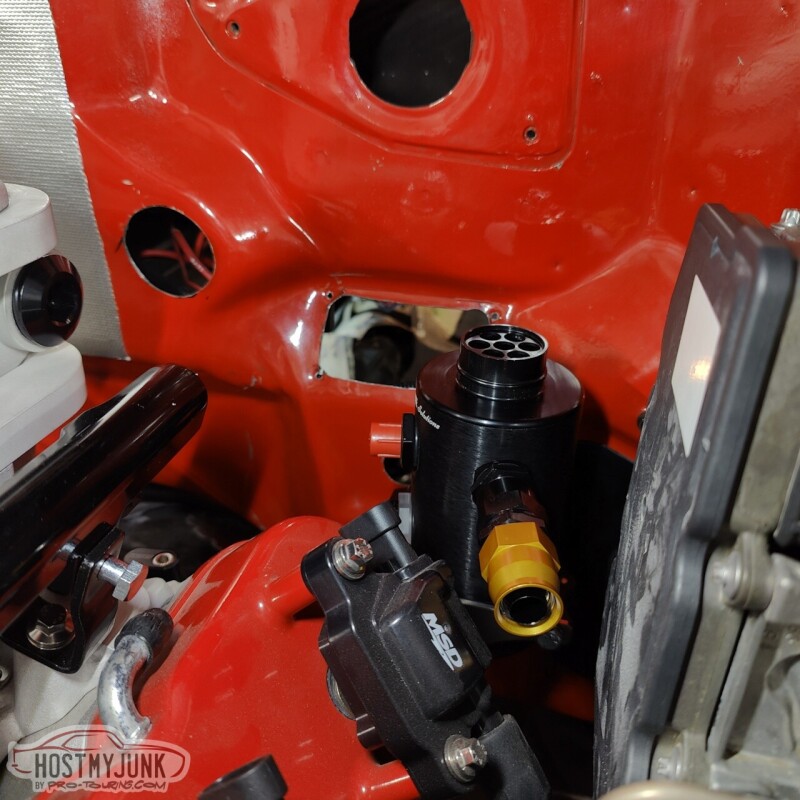
It places it approximately in the same location as the MC mount. There is plenty of clearance all around the can and the mount.
I got this 150 degree fitting and some Earl's Ultra Pro hose in AN-10.
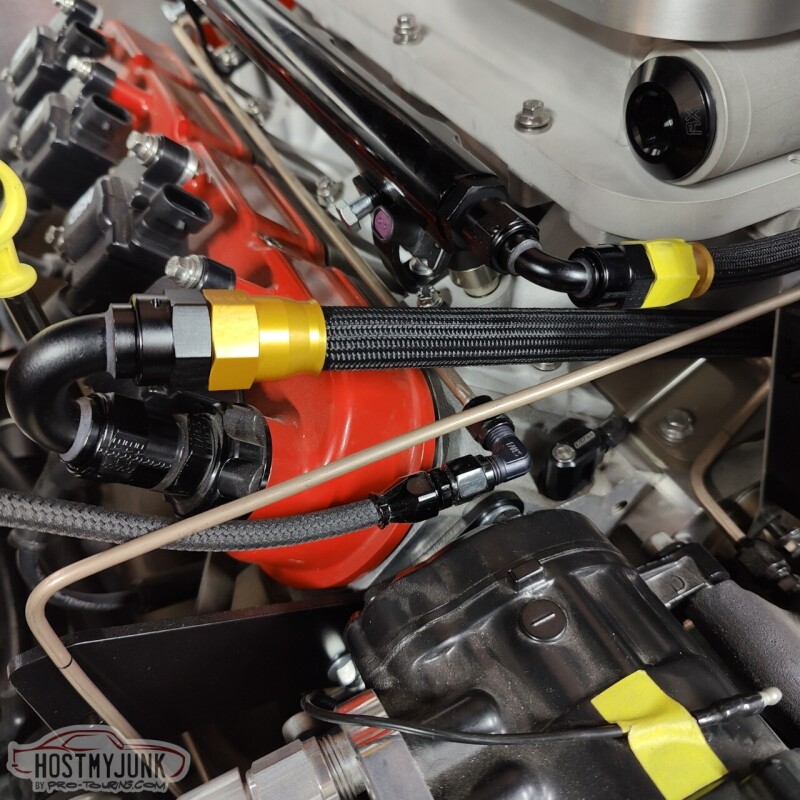
The hose then gently bonds to the catch can.
And in the front, it passes under the plate that holds the boost solenoids.
Lastly, this arrived.....
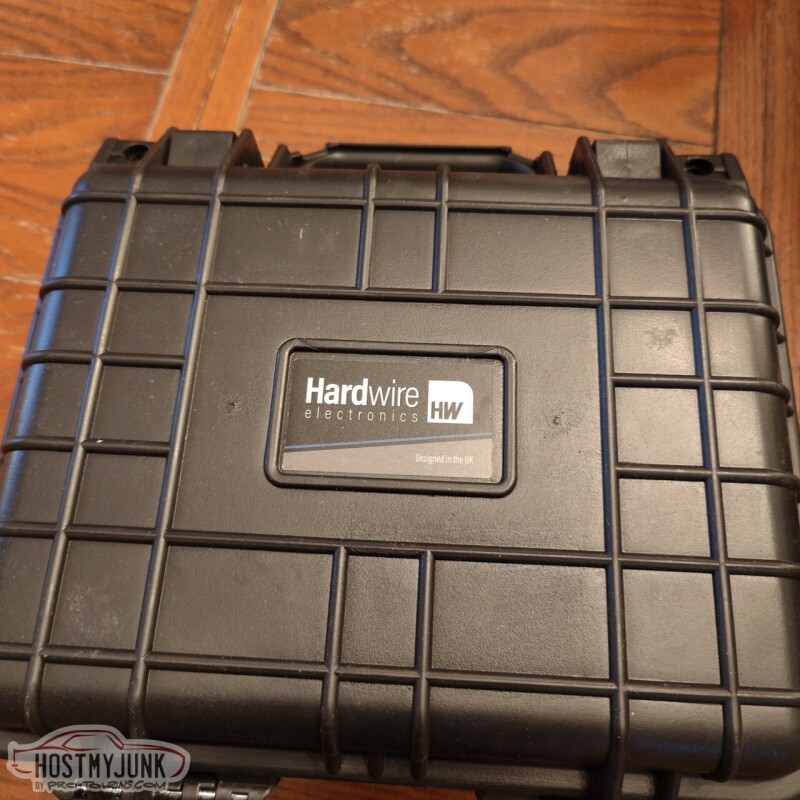
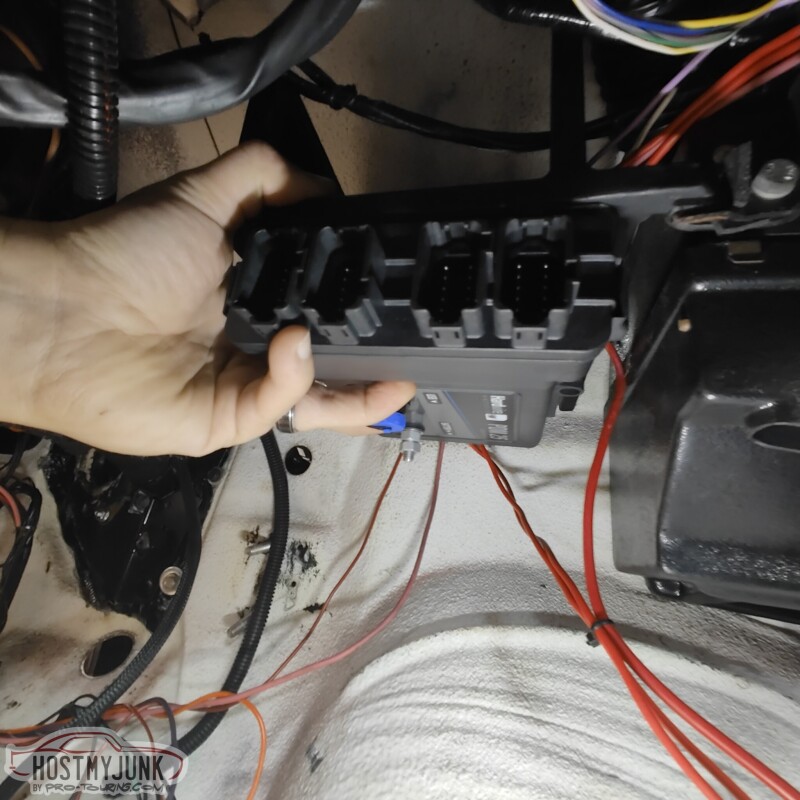
This is the Hardwire Electronics 25 channel PDM.
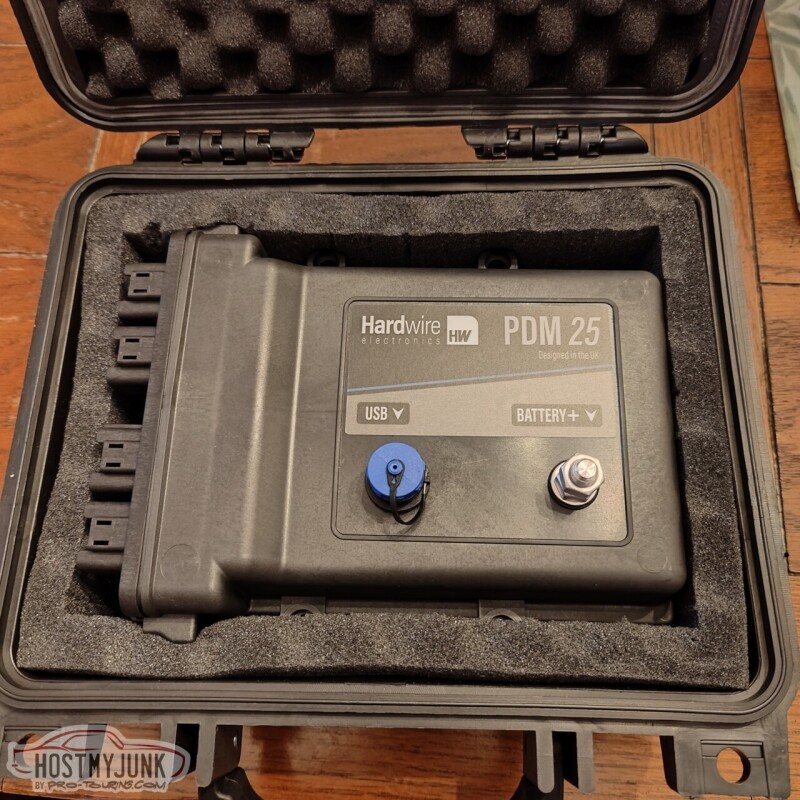
I saw these guys at the PRI show and was very intrigued by the product. This has way more channels than I need for the moment, but I may eventually have it handling the power distribution for the whole car. For now, the original harness will take care of all the interior and exterior lighting and the power windows. The Hardwire PDM will be use for the EFI, AC, and any other system under the dash.
The Hardwire PDM also supports the Holley 3rd Party CAN protocol (AKA the Racepak protocol), so I be able to do some neat things. More to come on that much later when I start on the wiring.
AndrewLast edited by andrewb70; 02-11-2023 at 06:59 PM.
1970 GTO Version 3.0
1967 Cougar build
GM High-Tech Performance feature
My YouTube Channel Please Subscribe!
Instagram @projectgattago
Dr. EFI
I deliver what EFI promises.
Remote Holley EFI tuning.
Please get in touch if I can be of service.
"You were the gun, your voice was the trigger, your bravery was the barrel, your eyes were the bullets." ~ Her
02-14-2023 #647
-Moderator/Sponsor-
- Join Date
- Apr 2001
- Location
- The City of Fountains
- Posts
- 15,983
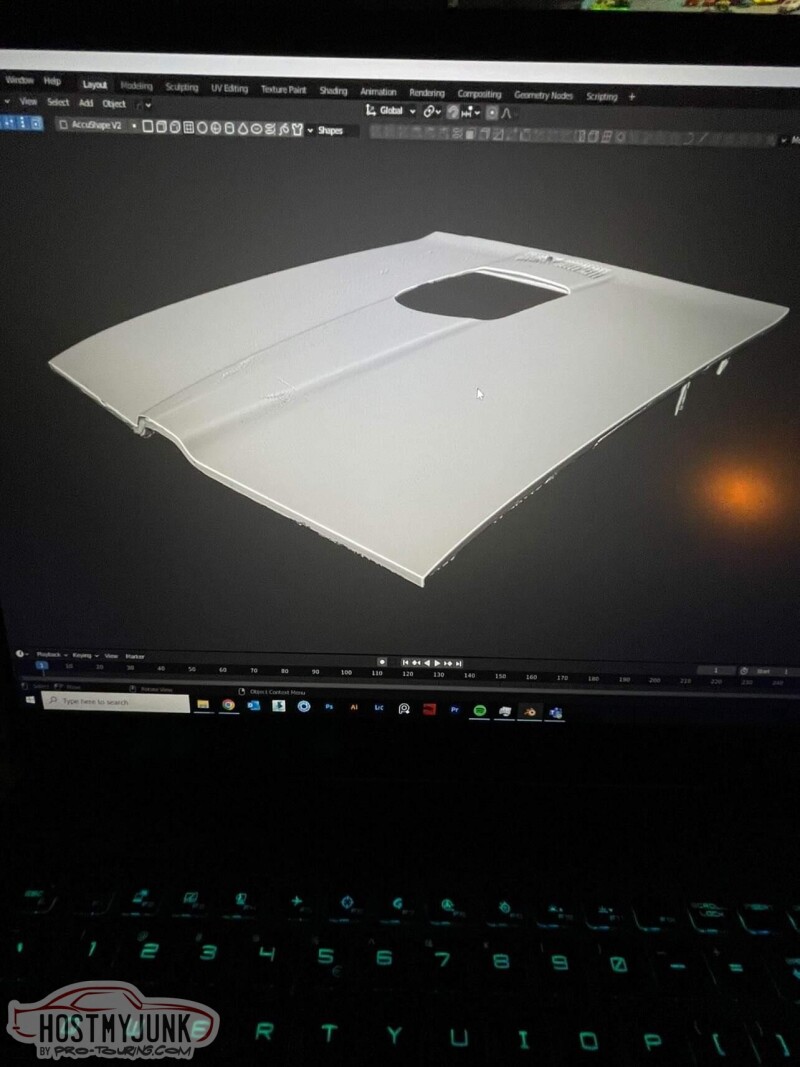
The hood 3D scan turned out really well. I had a chance to work with Kris Horton with the tuning on his Chevelle and he has been working on a rendering of my GTO. He will use the hood scan to refine the rendering and also come up with various ideas about how to deal with the hole in the hood.
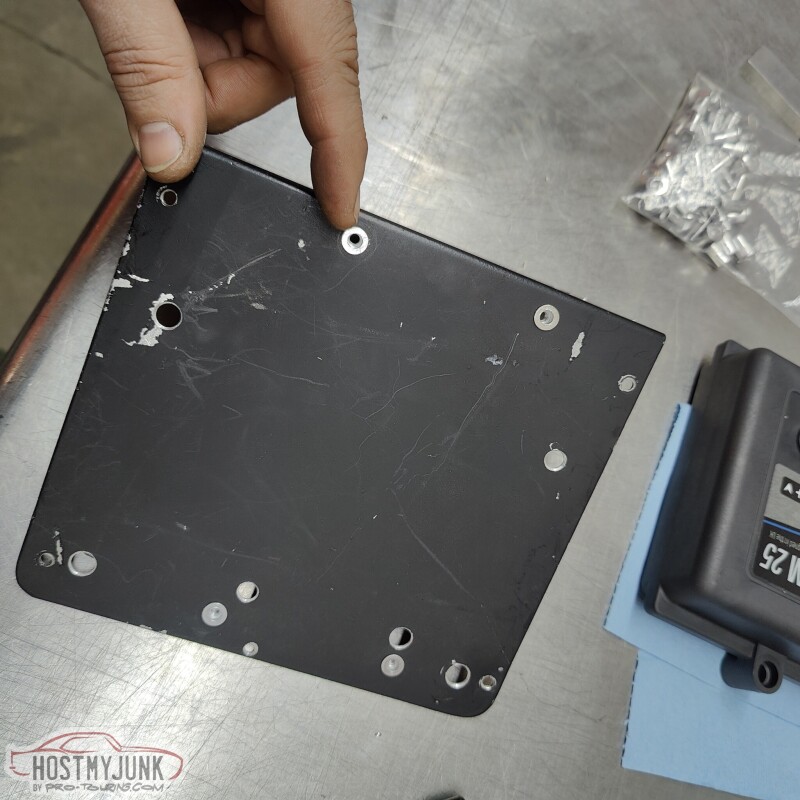
Next on the list was finding a suitable location for the Hardwire PDM. My under-dash structure is not like a typical A-body because 20 years ago a frame was built to hold the VA AC unit. Part of this fram structure was also a little shelf where the old Holley Commander 950 ECU used to live.
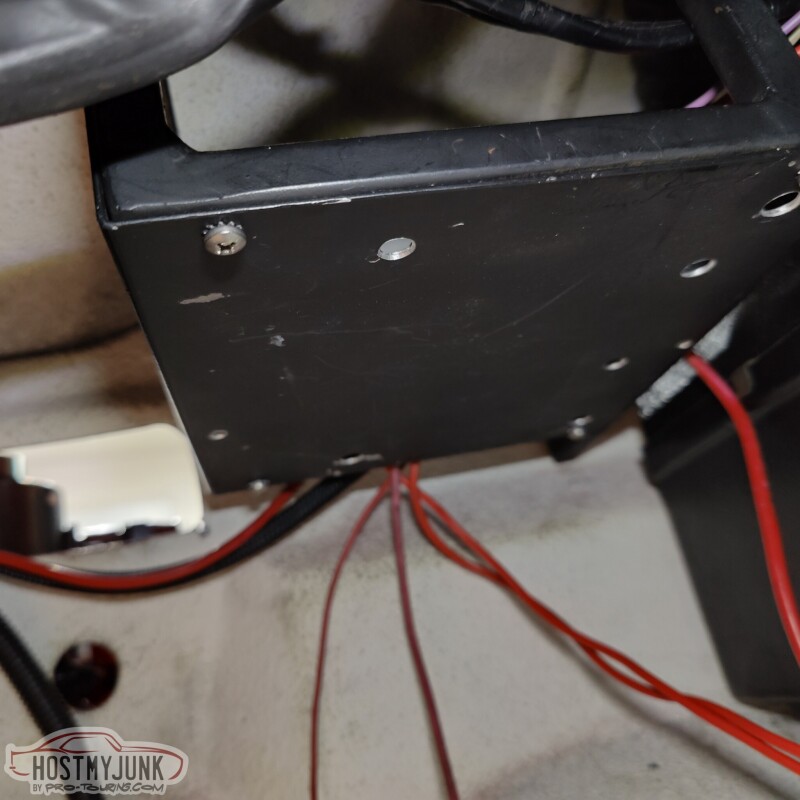
I figured that attaching the PDM under the shelf would be the perfect, central location.
I added some #8 rivnuts to the plate...
With the PDM bolted down in place...
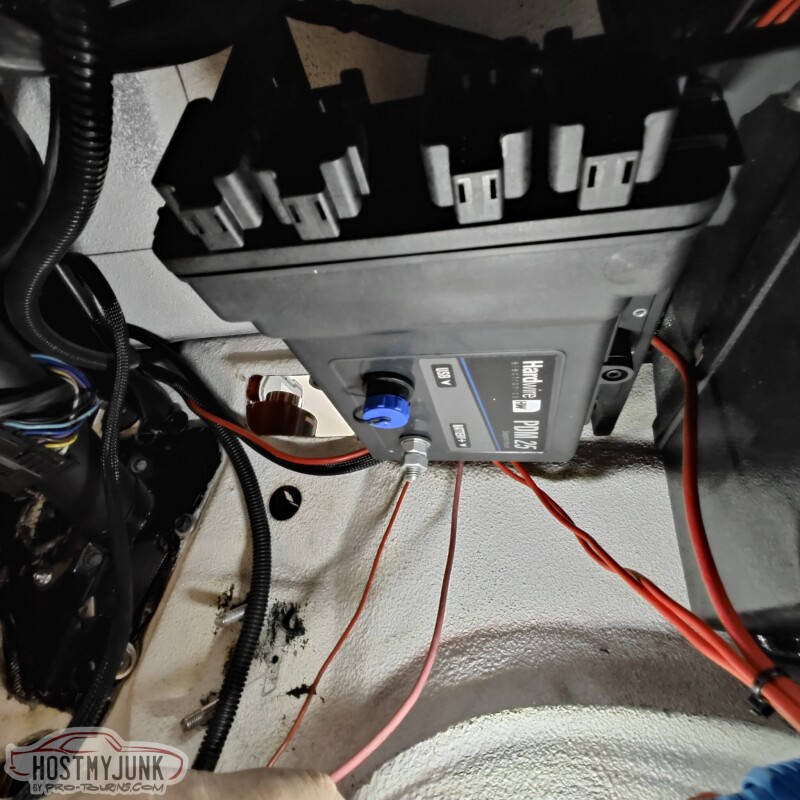
It is slightly below the level of where the old ash tray used to be, but it is much more inconspicuous than what the pictures indicate. It is tucked up under the dash, while still having all of the connectors easily accessible.
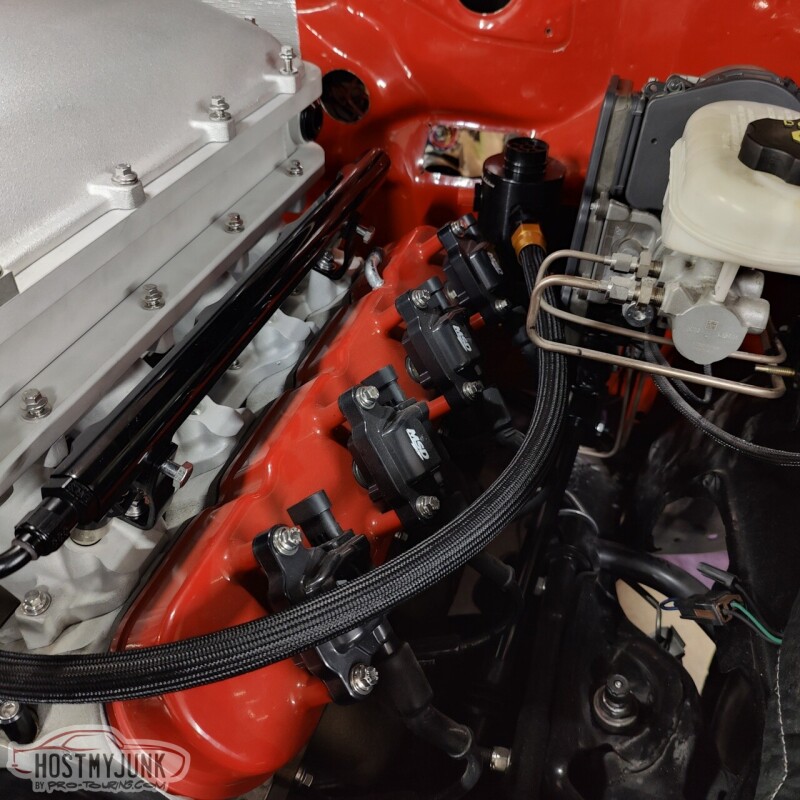
More plumbing....I made the short hose that goes from the catch can to the back of the intake manifold.
Lastly, I made a short hose for the power steering pressure side.

Andrew1970 GTO Version 3.0
1967 Cougar build
GM High-Tech Performance feature
My YouTube Channel Please Subscribe!
Instagram @projectgattago
Dr. EFI
I deliver what EFI promises.
Remote Holley EFI tuning.
Please get in touch if I can be of service.
"You were the gun, your voice was the trigger, your bravery was the barrel, your eyes were the bullets." ~ Her
02-14-2023 #648
Registered User
- Join Date
- Oct 2017
- Posts
- 56
Are the power steering lines crimped, what did you use and where did you get it done. I am trying to figure that out on my car right now and not finding any real good answers. Thanks.
02-14-2023 #649 Registered User
- Join Date
- Sep 2013
- Location
- sw Kansas
- Posts
- 1,648
GTO Jack, the ps hoses are not crimped. Those are 2 piece hose ends. There are many sources for that. If you look at Summit's website for one, you will find several brands that are available. If you have a Carquest parts store near you, most offer hydraulic line crimping so there is another option for this.
02-14-2023 #650
-Moderator/Sponsor-
- Join Date
- Apr 2001
- Location
- The City of Fountains
- Posts
- 15,983
It was some hose and fittings that Vic had left over from another project. They are not crimped. Originally Posted by GTO Jack
Yes, this exactly. Thank you! Originally Posted by wfo guy
Andrew1970 GTO Version 3.0
1967 Cougar build
GM High-Tech Performance feature
My YouTube Channel Please Subscribe!
Instagram @projectgattago
Dr. EFI
I deliver what EFI promises.
Remote Holley EFI tuning.
Please get in touch if I can be of service.
"You were the gun, your voice was the trigger, your bravery was the barrel, your eyes were the bullets." ~ Her
02-15-2023 #651
-Moderator/Sponsor-
- Join Date
- Apr 2001
- Location
- The City of Fountains
- Posts
- 15,983
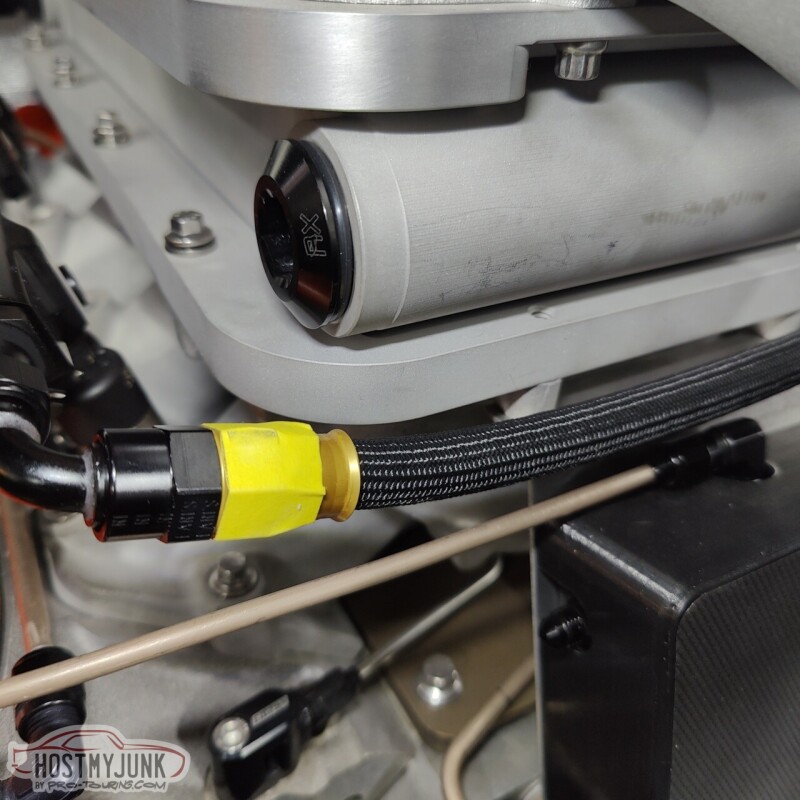
When I originally built the car, twenty years ago, I had the foresight to install a 1/2" stainless fuel hardline that runs from the back, along the frame rail, and exits here at the front of the frame. It already had a AN-8 male fitting on the end.
I have been sourcing some of my plumbing supplies here locally from Star Performance. This PTFE hose is branded under the Red Horse brand of hoses and fittings.
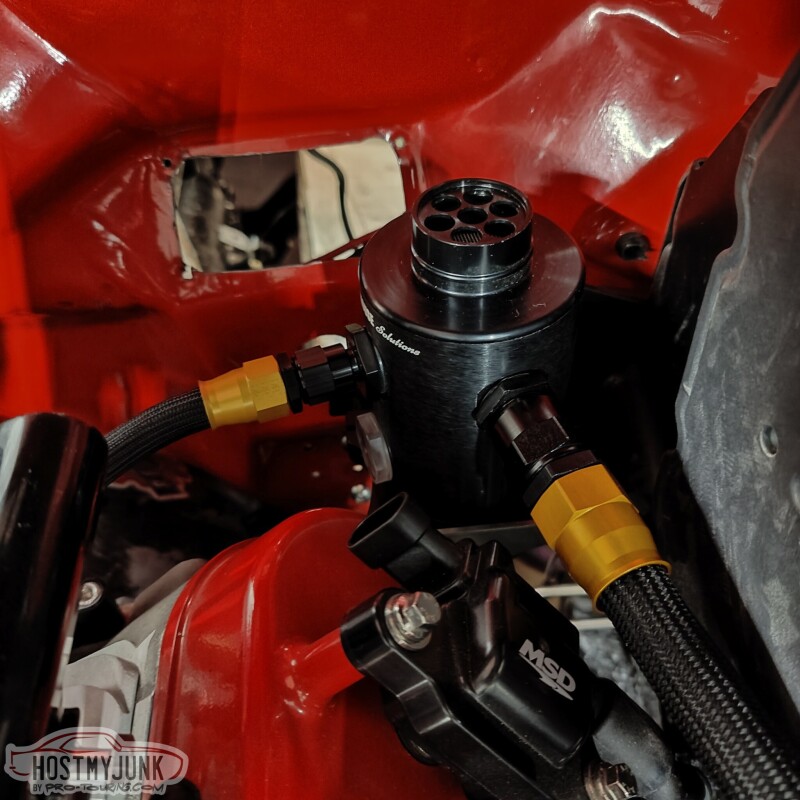
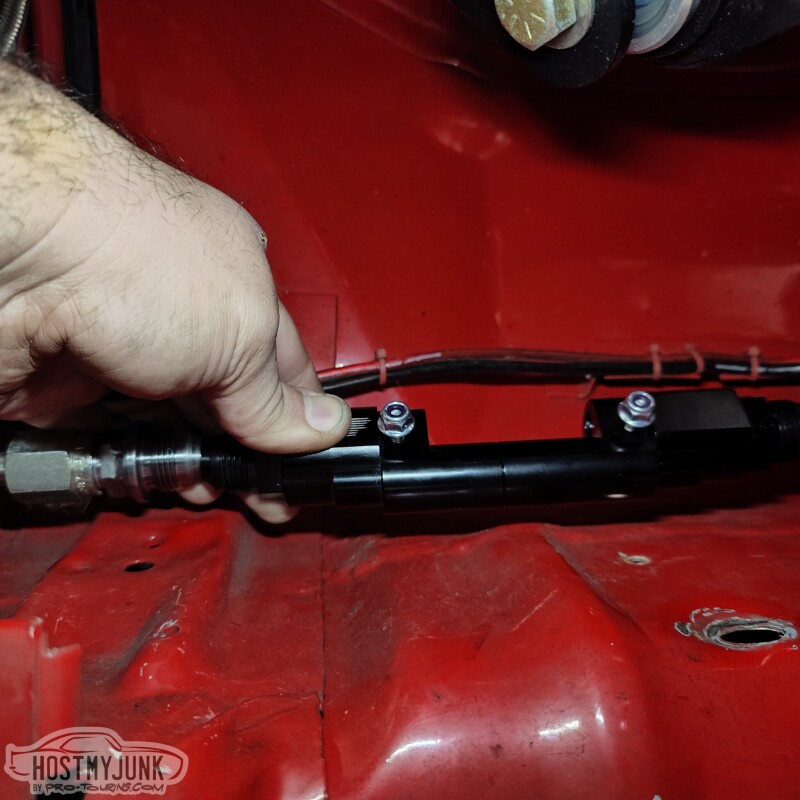
Vic and I also made a little mount for the TMAP sensor that is above the Tick intercooler. This way I can datalog both air temperature and boost pressure above and below the intercooler, so I can see how well it is working.
Vic also cut out the rest of the panels to cover the firewall. I really like the overall look. It looks clean and adds a layer of heat insulations.
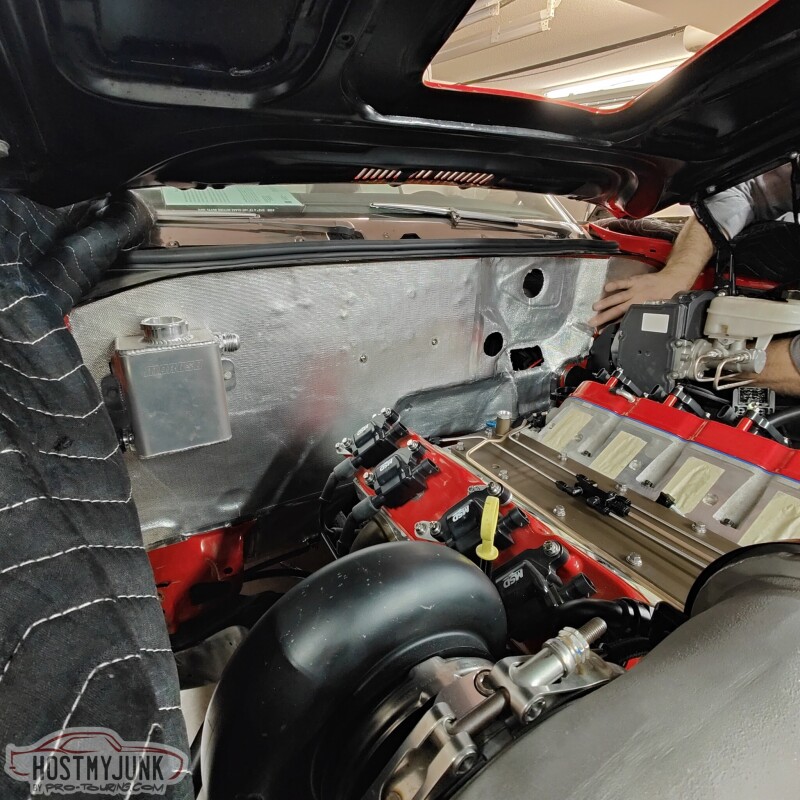
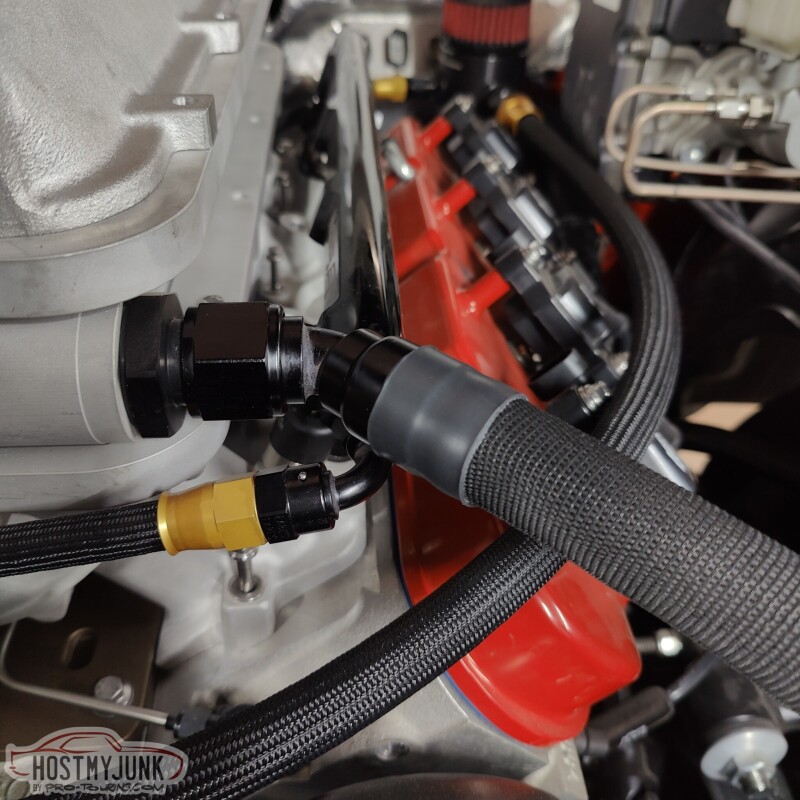
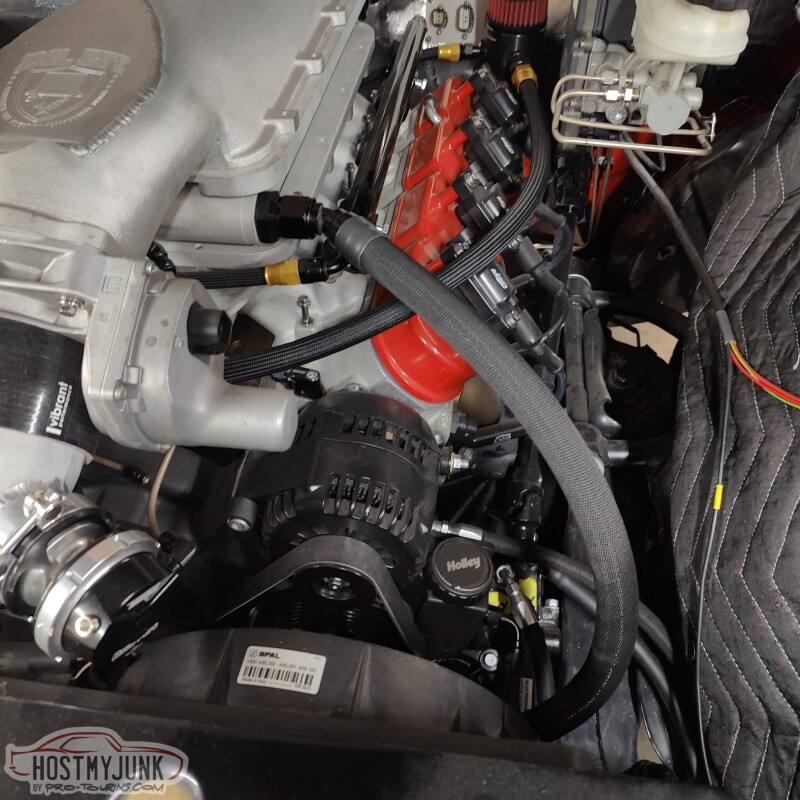
Back to the fuel system. I was originally going to bring the -8 hose from the frame rail, to the back of the intake and have a Y-bock and 2 -6 hoses to the rails. This was proving to be kind of a pain in the a$$, so I made my life easier...

The -8 hose from the frame rail feeds into the passenger side fuel rail.
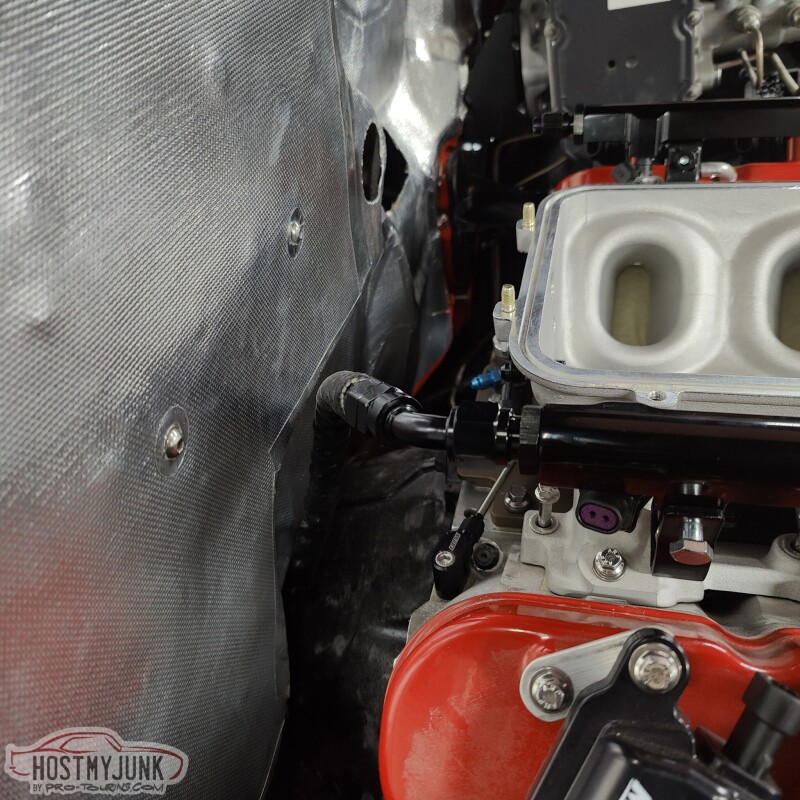
There is a cross-over hose at the front and the rear of the driver's side fuel rail is capped off.
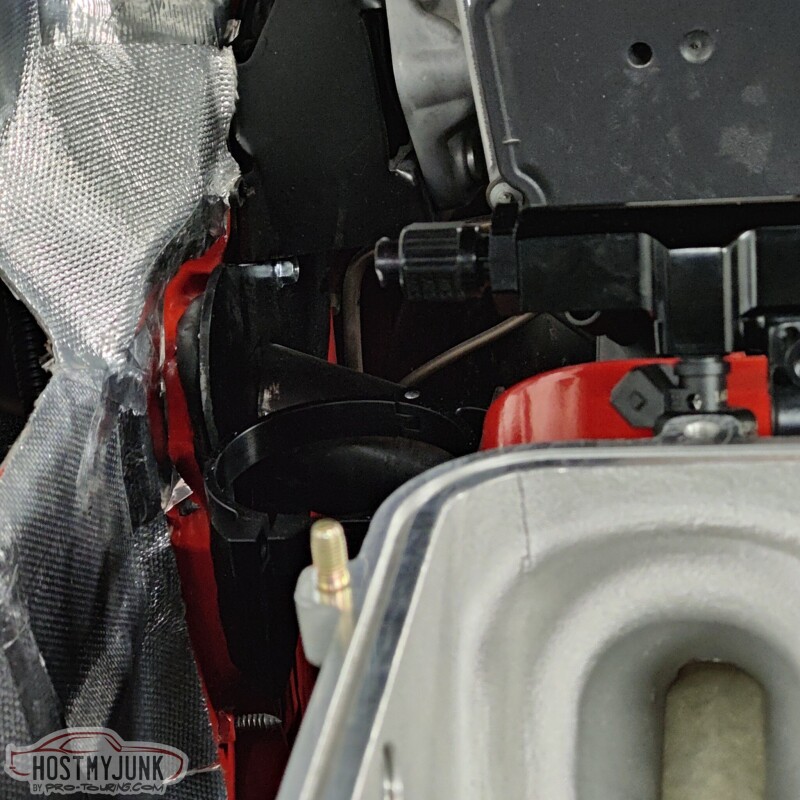
I also bent up a little NiCopp tube for the blow-off valve.

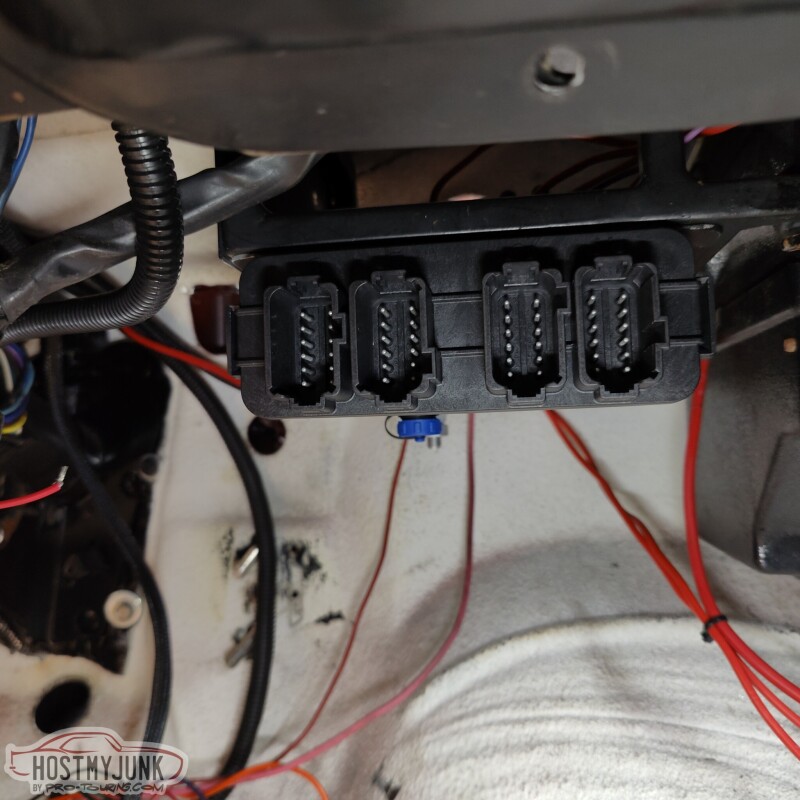
This is the plate that I had made earlier. These connectors will be for the injectors and coil harnesses.

Andrew1970 GTO Version 3.0
1967 Cougar build
GM High-Tech Performance feature
My YouTube Channel Please Subscribe!
Instagram @projectgattago
Dr. EFI
I deliver what EFI promises.
Remote Holley EFI tuning.
Please get in touch if I can be of service.
"You were the gun, your voice was the trigger, your bravery was the barrel, your eyes were the bullets." ~ Her
02-16-2023 #652
Registered User
- Join Date
- Oct 2014
- Posts
- 266
Progress looks great Andrew.
I've installed one of those Hardwire PDMs, once of the best units I've used (and I've used several brands). You'll love that thing.1988 Mazda RX7 - Forged LS/T56, 76mm turbo, ProEFI, Ford 8.8 - Sold
1965 Mustang Coupe - TT Coyote, TR6060, Haltech, big brakes, updated suspension.
2007 Aston Martin V8 Vantage - Full bolt-ons
2016 BMW 428iX GranSport - Stock...ish.
02-16-2023 #653
-Moderator/Sponsor-
- Join Date
- Apr 2001
- Location
- The City of Fountains
- Posts
- 15,983
Blake, Originally Posted by digitalsolo
That is great to hear about the Hardwire PDM. I will be getting started on the wiring in a few weeks.
Andrew1970 GTO Version 3.0
1967 Cougar build
GM High-Tech Performance feature
My YouTube Channel Please Subscribe!
Instagram @projectgattago
Dr. EFI
I deliver what EFI promises.
Remote Holley EFI tuning.
Please get in touch if I can be of service.
"You were the gun, your voice was the trigger, your bravery was the barrel, your eyes were the bullets." ~ Her
02-18-2023 #654
-Moderator/Sponsor-
- Join Date
- Apr 2001
- Location
- The City of Fountains
- Posts
- 15,983
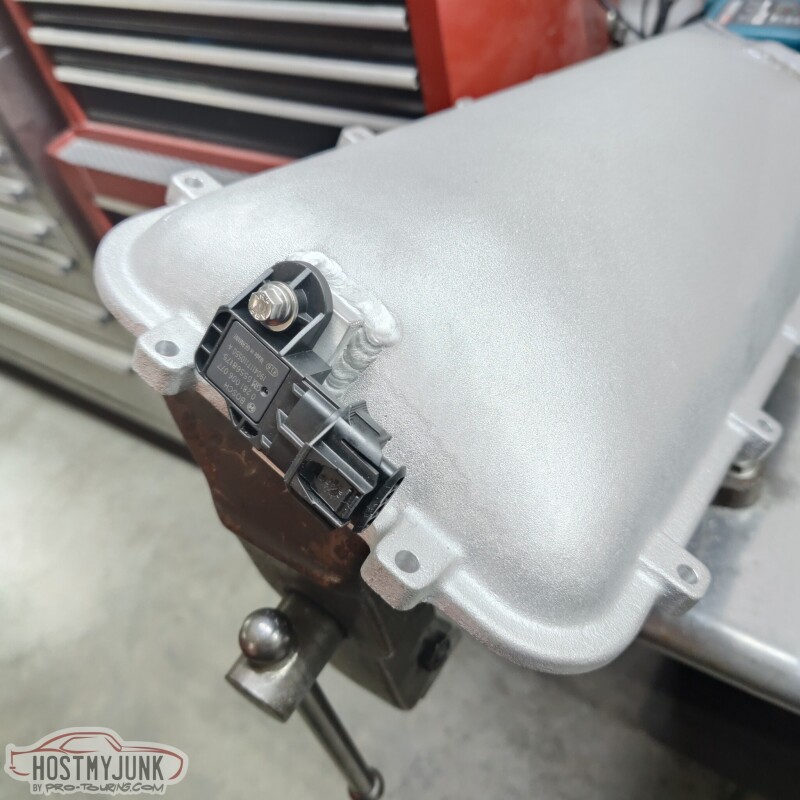
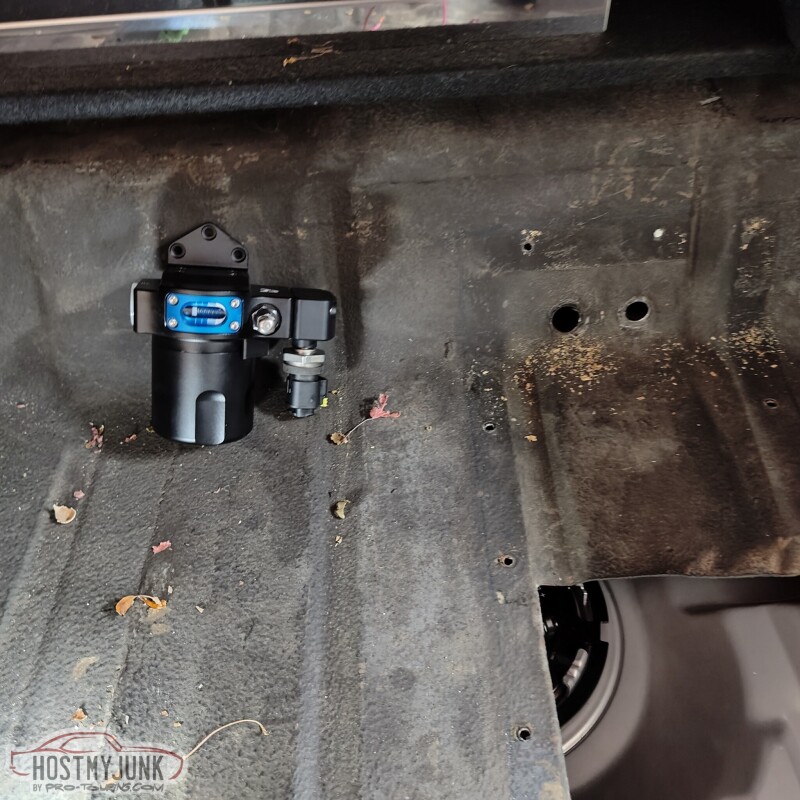
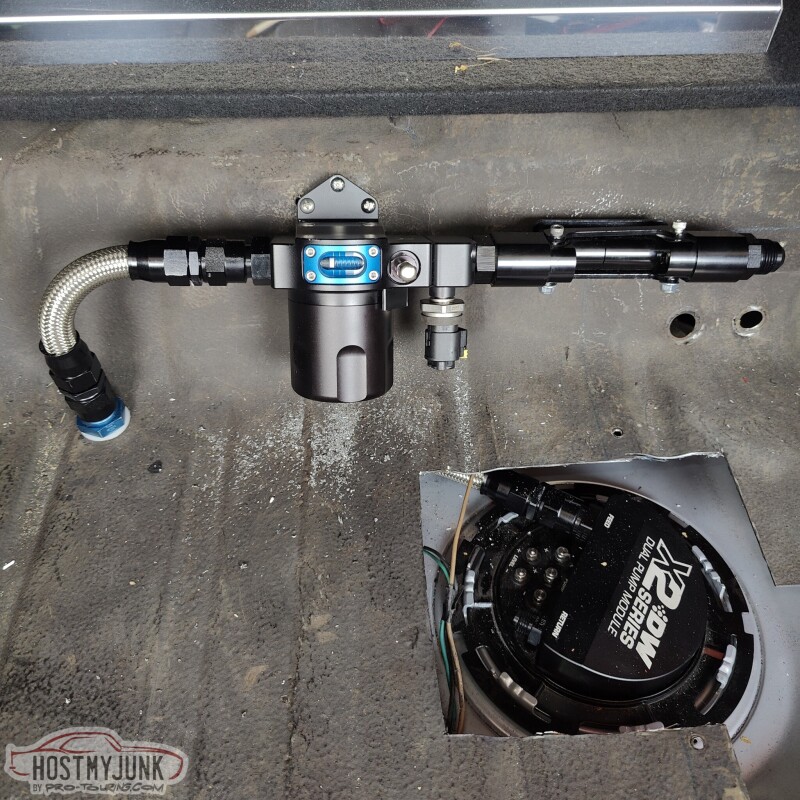
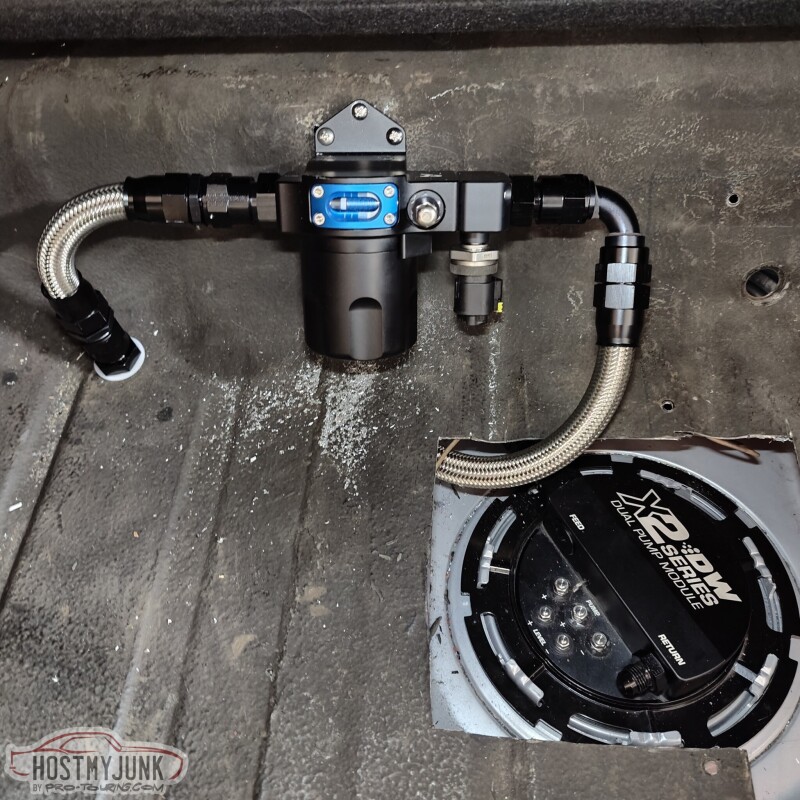
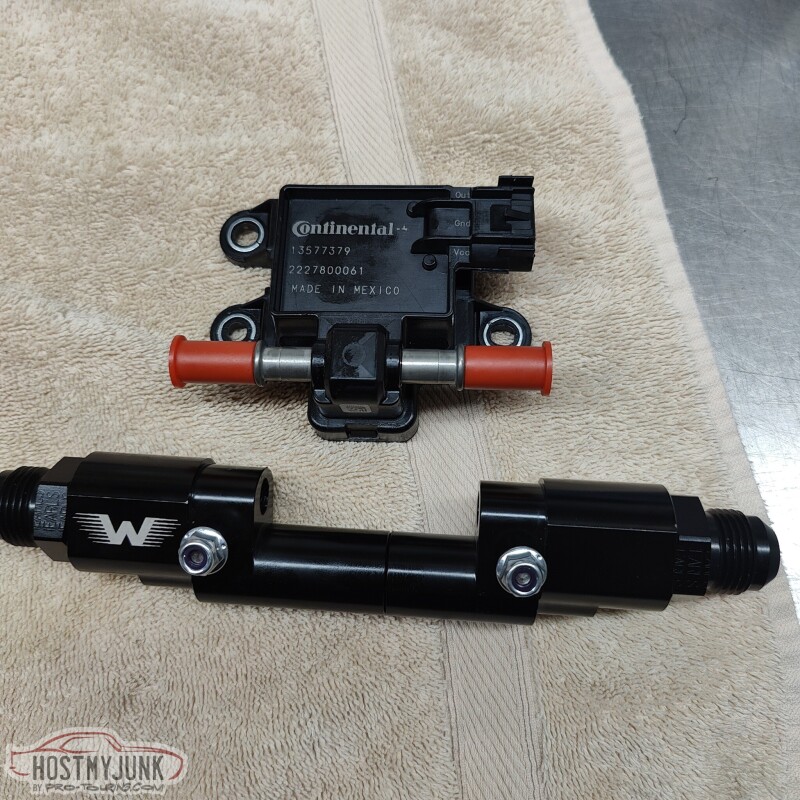
With the fuel plumbing finished up under the hood, it was time to figure out what needed to be done in the back. I recently ordered some wiring supplies from www.milspecwiring.com, and as I browsed their website, I got suckered in by this little piece of jewelry. It is the Injector Dynamics ID750 fuel filter. I got mine with the optional Bosch Motorsports fuel pressure/temp sensor. The little Schrader valve port will be repurposed to plumb the pressure relief valve that was recommended by Carl at vaporworx.
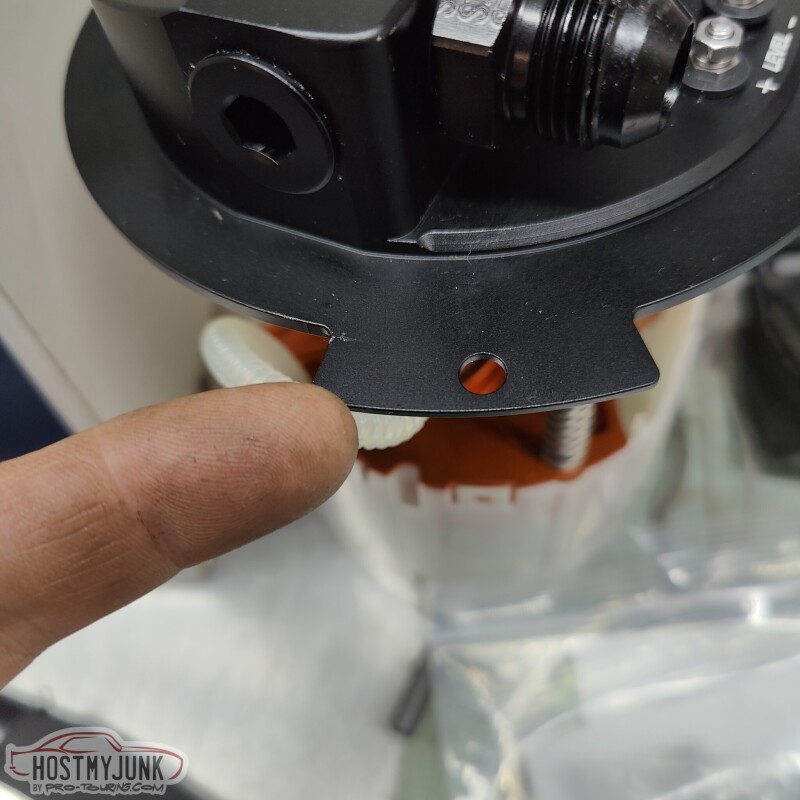
The DeatschWerks 5th Gen Camaro pump module that I am using has this alignment tab that is used in the OEM application to properly clock the pump. Since mine is going into a Rick's RestoMod tank, I did not need this tab, so it was cut off.
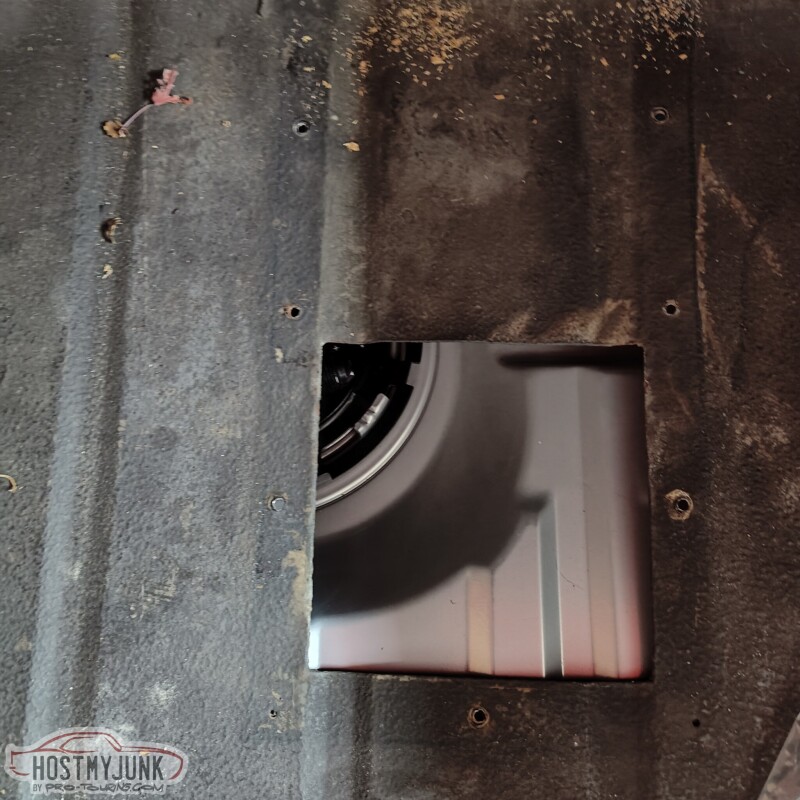
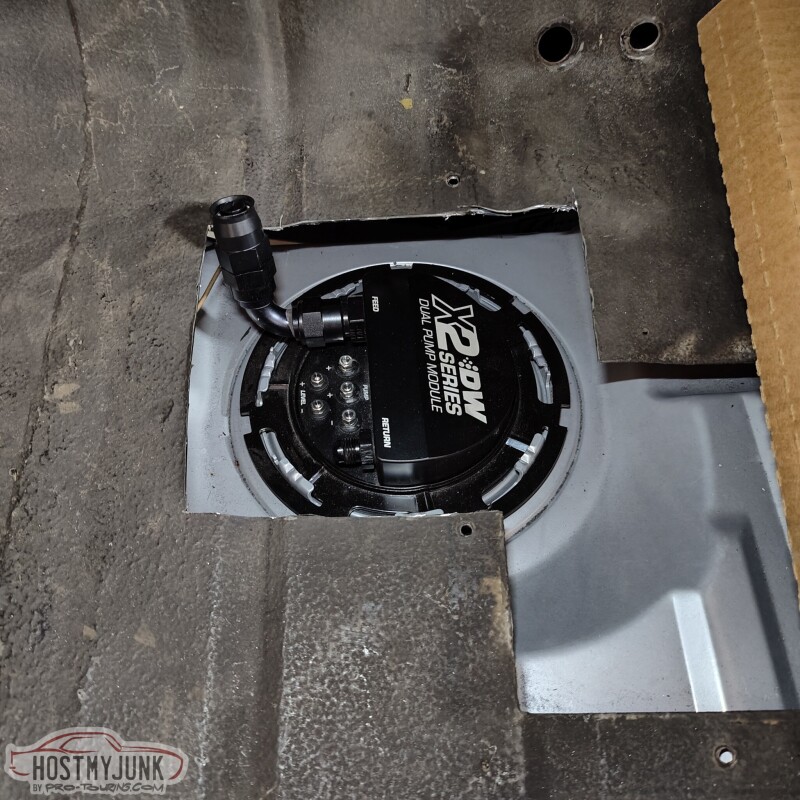
Once the tank was installed in the car, it was obvious that the access hole that was there before was not going to work.
I am also thinking that the fuel filter, flex fuel sensor, and the pressure relief valve will be plumbed inside the trunk. There is just not a lot of room under the car. I know it is "risky" (whatever that means) but that is how I am going to do it.
I got the whizzwheelofdeath out and made a new hole in the trunk. All of this will get cleaned up with a nice cover panel.
Andrew1970 GTO Version 3.0
1967 Cougar build
GM High-Tech Performance feature
My YouTube Channel Please Subscribe!
Instagram @projectgattago
Dr. EFI
I deliver what EFI promises.
Remote Holley EFI tuning.
Please get in touch if I can be of service.
"You were the gun, your voice was the trigger, your bravery was the barrel, your eyes were the bullets." ~ Her
02-19-2023 #655
-Moderator/Sponsor-
- Join Date
- Apr 2001
- Location
- The City of Fountains
- Posts
- 15,983
I don't know how I feel about this yet, but that's what I got so far.
The fuel line comes to of the pump, under the trunk floor, through a bulkhead fitting, then to the fuel filter and the flex fuel sensor holder.
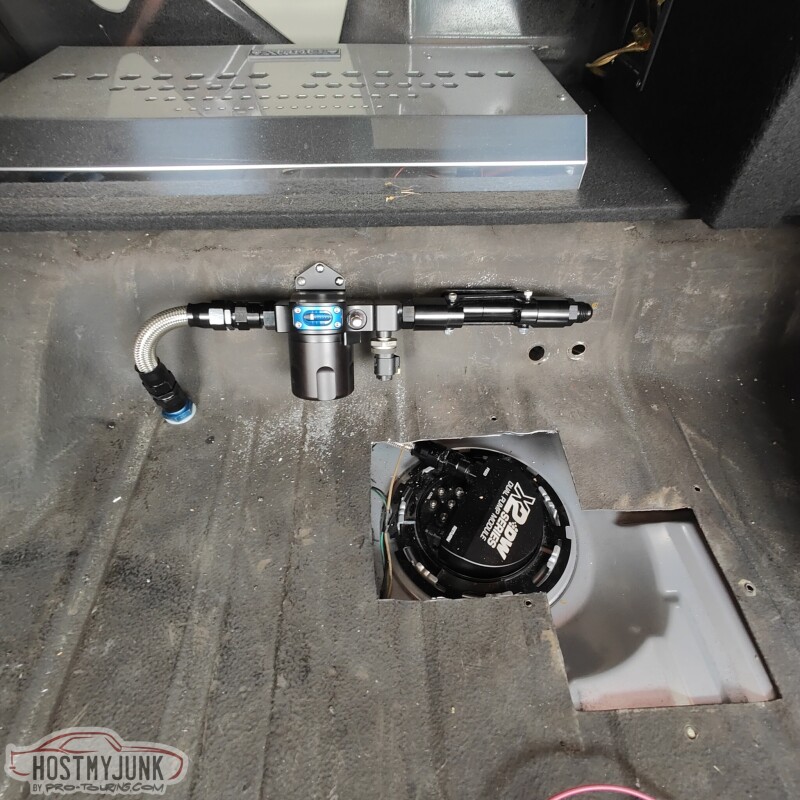
The upside to this arrangement is that servicing the fuel filter, flex fuel sensor, and the wiring would be very simple and easy.
Andrew1970 GTO Version 3.0
1967 Cougar build
GM High-Tech Performance feature
My YouTube Channel Please Subscribe!
Instagram @projectgattago
Dr. EFI
I deliver what EFI promises.
Remote Holley EFI tuning.
Please get in touch if I can be of service.
"You were the gun, your voice was the trigger, your bravery was the barrel, your eyes were the bullets." ~ Her
02-21-2023 #656
Registered User
- Join Date
- Nov 2014
- Posts
- 235
Return or return-less fuel system?
02-21-2023 #657 Registered User
- Join Date
- Sep 2009
- Posts
- 2,716
That fuel filter set up looks really nice Andrew! You're going to have so many inputs to use for datalog, I'm jealous. I like the way the location looks in the trunk, but when you go to replace the filter does that mean that fuel will spill all over the trunk? If so, I'd be moving it under the car.

1955 Nomad project LC9, 4L80e, C5 brakes, Vision wheels
1968 Camaro 6.2 w/ LSA, TR6060-Magnum hybrid and etc SOLD
1976 T/A LS1 6 Speed, and etc. SOLD
Follow me on Instagram: ryeguy2006a
02-21-2023 #658
Registered User
- Join Date
- Oct 2015
- Posts
- 63
Not sure how often the filter would need replacement but I cant imagine very often. Dont expect there would be much fuel leak out as the lines on both ends are facing down. I like the set up much easier to service when its required. Originally Posted by ryeguy2006a
02-21-2023 #659
-Moderator/Sponsor-
- Join Date
- Apr 2001
- Location
- The City of Fountains
- Posts
- 15,983
Today it was "drive your hotrod to work day" so I drove the Cougar to Vic's place.
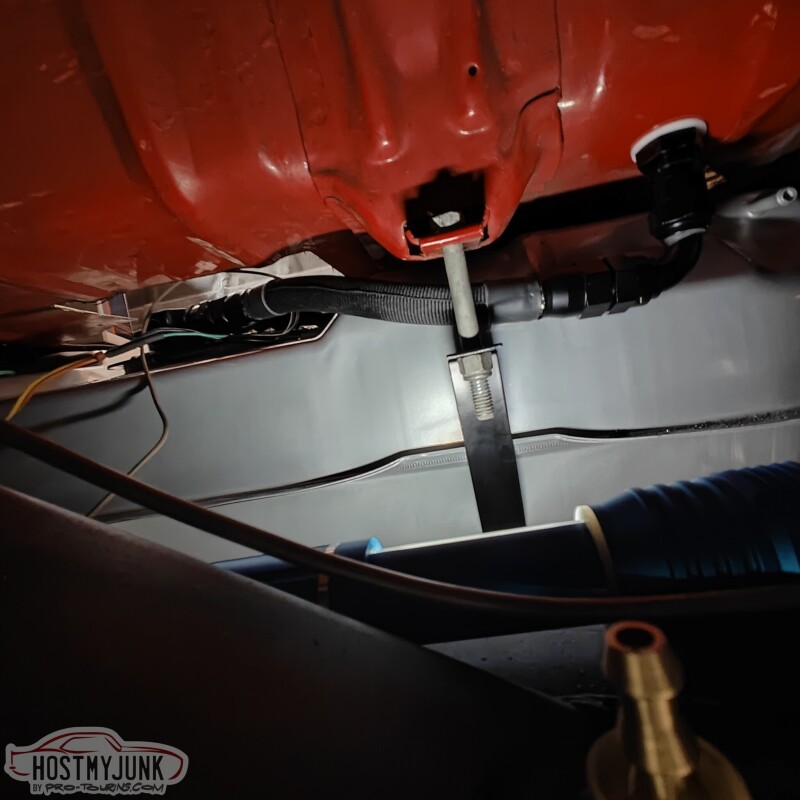
I put some fabric sleeving on the fuel line that goes from the pump to the bulkhead. This is how it looks when viewed from the bottom. It looks like it is touching, but there is clearance all around that hose.
This view is from the front, looking over the top of the rear axle.
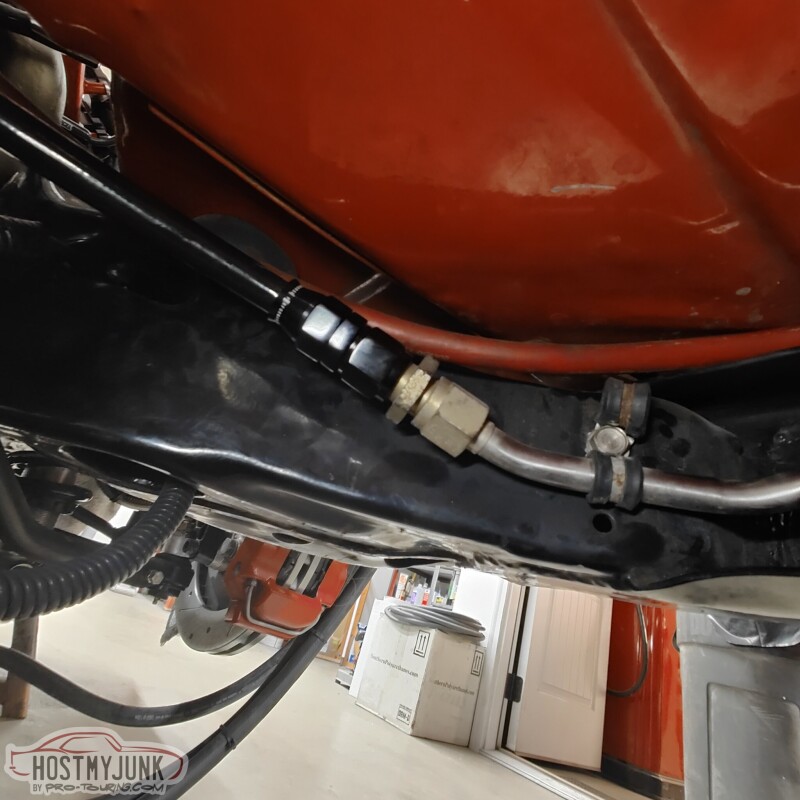
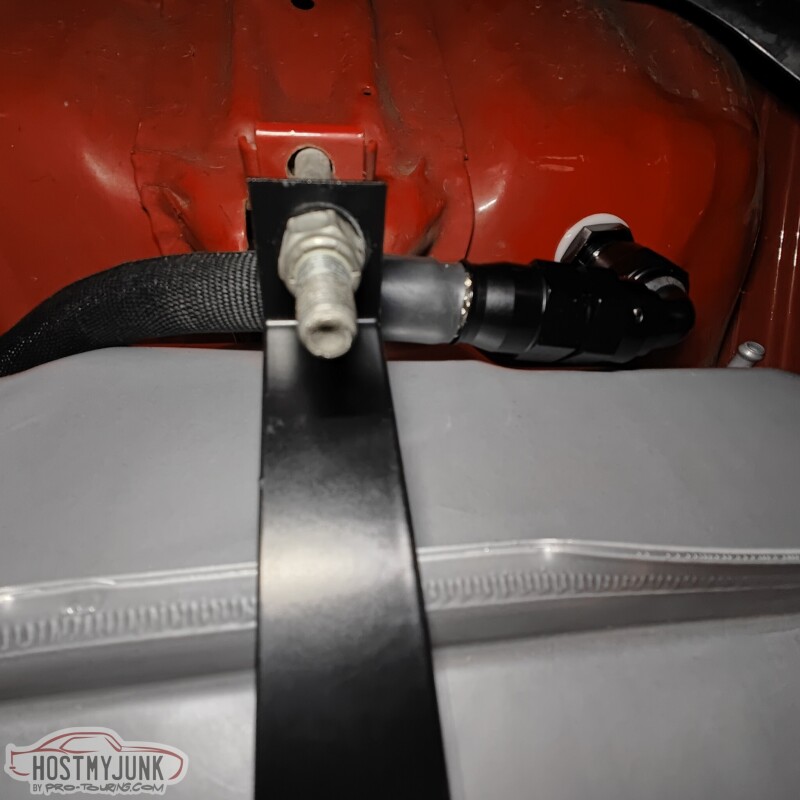
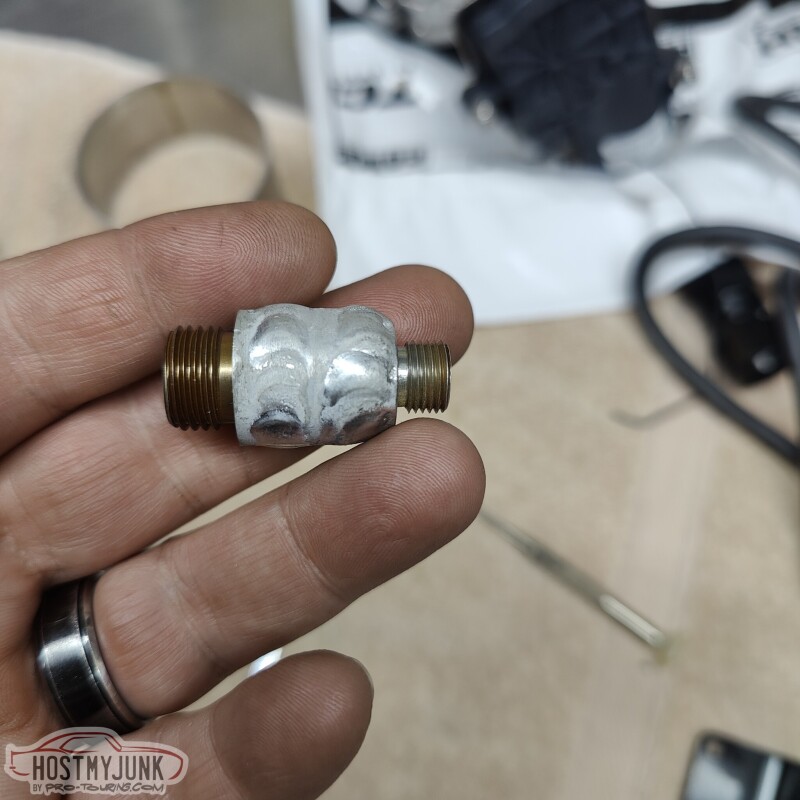
Once that was sorted, I moved to the other side where the 1/2" stainless tube terminates. The top fitting is what I had in there. It is a -AN8 to -AN6 male union.
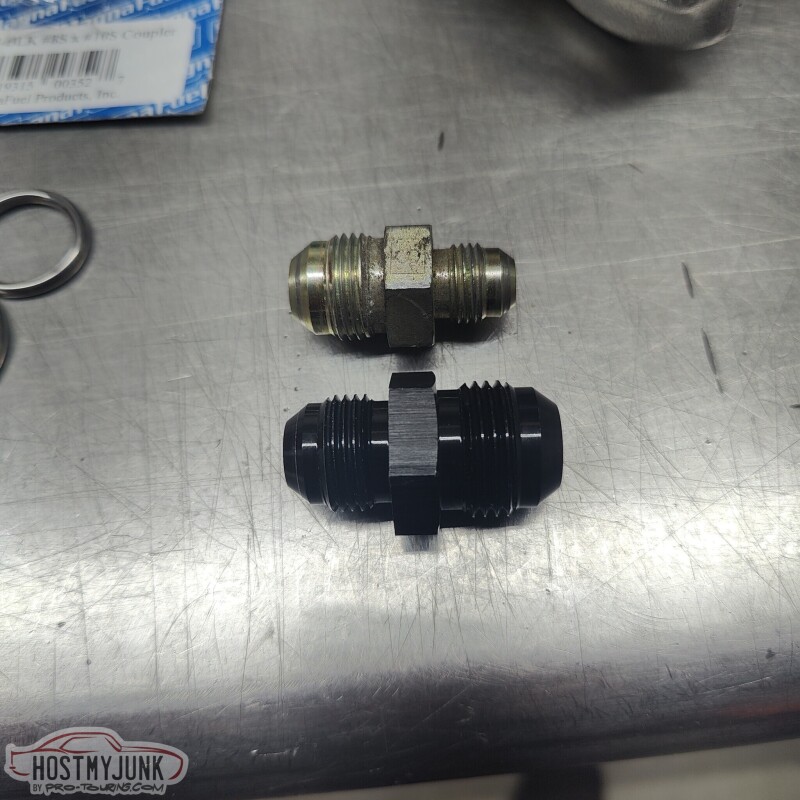
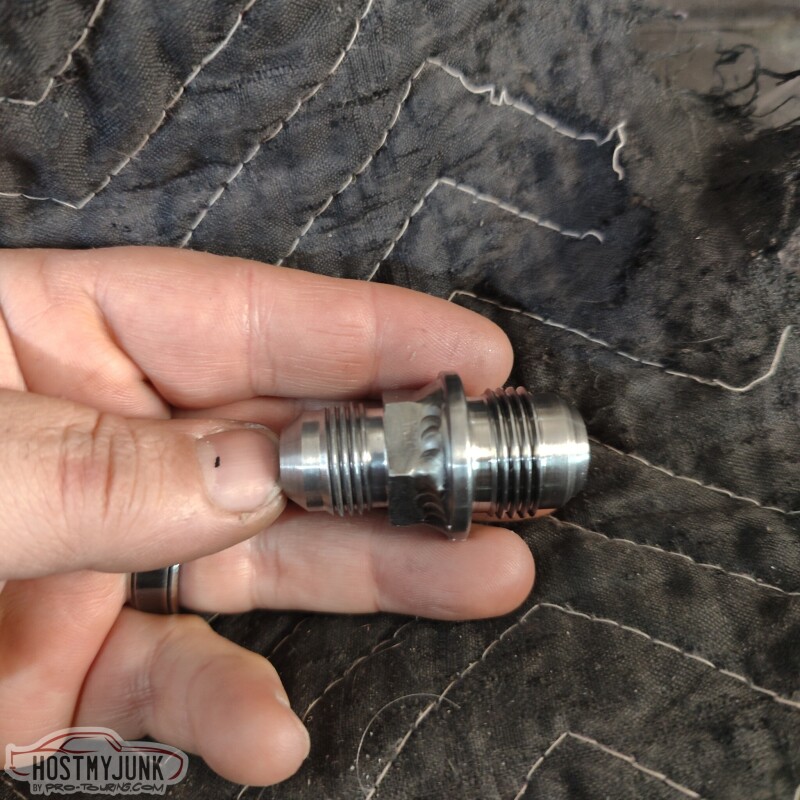
Since the fuel like that I am using in the rear is -AN10, I needed the adapter shown at the bottom. The one that I got from Star Performance was aluminum, as they didn't have any steel ones. After discussing it with Vic, it was decided that a steel fitting would be more appropriate. So we got a -AN10, steel male weld bung, and Vic made a new fitting, using part of the old fitting.
The other thing that I decided to change was not have the flex fuel sensor holder be right after the fuel filter. Even with the filter shifted to the left as much as possible, I just don't have the linear room to mount everything and still have enough room for the hoses to routed appropriately. With the flex fuel holder gone, this is how I plan to run the hose. It will sweep gently, back under the trunk floor and turn back towards the right side, where the stainless tube is located.
The flex fuel sensor holder will be attached to the end of the tube with a -AN10 to -AN10 female union.
Andrew1970 GTO Version 3.0
1967 Cougar build
GM High-Tech Performance feature
My YouTube Channel Please Subscribe!
Instagram @projectgattago
Dr. EFI
I deliver what EFI promises.
Remote Holley EFI tuning.
Please get in touch if I can be of service.
"You were the gun, your voice was the trigger, your bravery was the barrel, your eyes were the bullets." ~ Her
02-26-2023 #660
-Moderator/Sponsor-
- Join Date
- Apr 2001
- Location
- The City of Fountains
- Posts
- 15,983
I got the flex fuel sensor, but of course I got the wrong one to work with the Motion Raceworks holder...
I was missing one last fitting to complete the intercooler hoses. The inlet to the intercooler needs a 45 degree fitting in order to clear the fuel rail that is below it. I used the fabric heat shrink on top of the Earl's Super Stock hose and it looks remarkably similar to the Earl's Ultra Pro hose.
This hose makes a gentle sweep down and towards the center of the fan shroud...
Where it connects to the water pump. You can see the pump mounted to the fan shroud.
Vic took a couple of fittings and welded them together to make an adapter.
The adapter is used to mount the pressure relief valve.
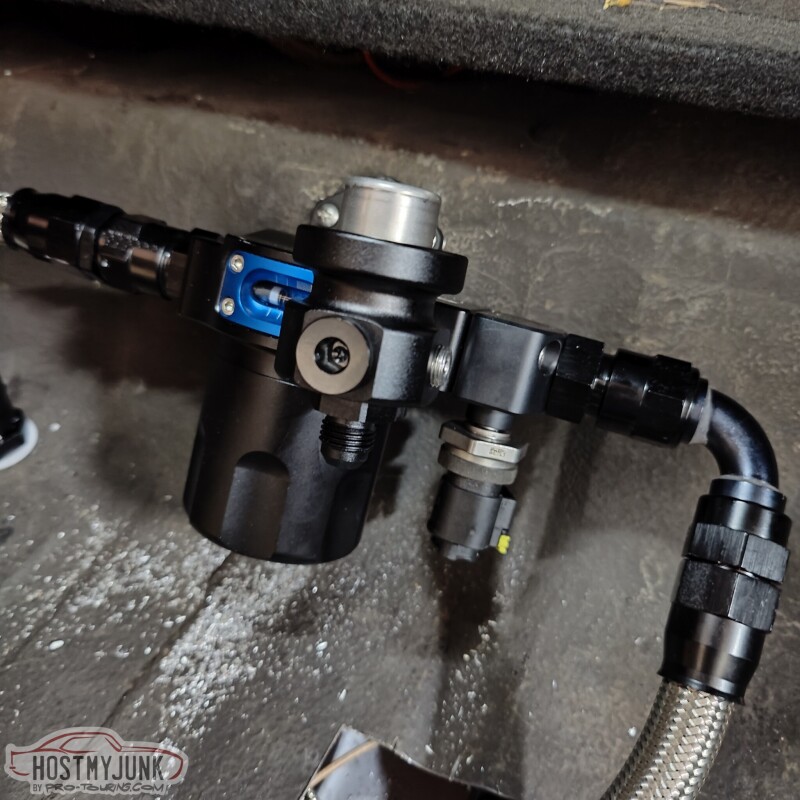
Carl from vaporworx told me this was necessary to keep the system from getting vapor locked. He told me to purchase a small Radium Engineering fuel pressure regulator and send me a special 80psi diaphragm for it.
When the car has been running for a while, then it is turned off, pressure in the feed line can build up and lock up the injectors from firing. This valve will burn the feed line once the pressure exceeds 80psi.
I also got a modern Helical exhaust valve that uses a Küster 3 pin motor. This will be controlled by the Holley Dominator ECU.
AndrewLast edited by andrewb70; 02-26-2023 at 08:42 AM.
1970 GTO Version 3.0
1967 Cougar build
GM High-Tech Performance feature
My YouTube Channel Please Subscribe!
Instagram @projectgattago
Dr. EFI
I deliver what EFI promises.
Remote Holley EFI tuning.
Please get in touch if I can be of service.
"You were the gun, your voice was the trigger, your bravery was the barrel, your eyes were the bullets." ~ Her

 Reply With Quote


