


Results 1 to 20 of 20
Thread: 68 Max-G build
-
05-29-2013 #1
 Registered User
- Join Date
- Jul 2008
- Posts
- 105
68 Max-G build
I have been building this for a few years and finally have a good jump on the project. Purchased as a “solid roller” after I found out my wife was pregnant. Katie called it my quarter life crisis. I started tearing it apart the day I got it home and I quickly found out how solid it wasn’t! I just wanted a neat car and liked the body style of 68 the best. Intention was a 427 big block, 4speed and some simple suspension upgrades so it didn’t twist in half, you know some simple stuff to get it going. I wanted something I could drive to the track, play a bit and tinker with to give me something to do other than work. Everything including paint will be done by me and the help of a few knowledgeable friends.
As soon as I got it home I got the car torn apart and on a simple stand so I could wheel it around inside the 2 car garage. The more I dug the more I wish I hadn’t but knew I had to keep going. I was working on an old repair on a quarter panels and when I smacked it pretty good a fist sized glob of rotten bondo fell off the roll pan! I started searching websites on how to repair it when I came across this one and a couple others. Then… I found this dang website and the wheels pretty much fell off the cart. After Gunner was born I dint have much time to work on the car, so here I am 4 years later. I built a shop in the back yard (my Camaro cave) and finally have some time to play.
Final plans are to ditch the LS1 in favor of a LS7 from Texas Speed or see what comes of the new GM engines. I don’t have a completion date so the final motor selection may be decided later. Color will be gloss black with flat black stripes and tan leather interior with Recaro sportster CS seats. The rims have gloss black hoops with flat black centers. I will add an integral split spoiler, flush mount glass and do some custom interior work.
Here’s what I got going so far:
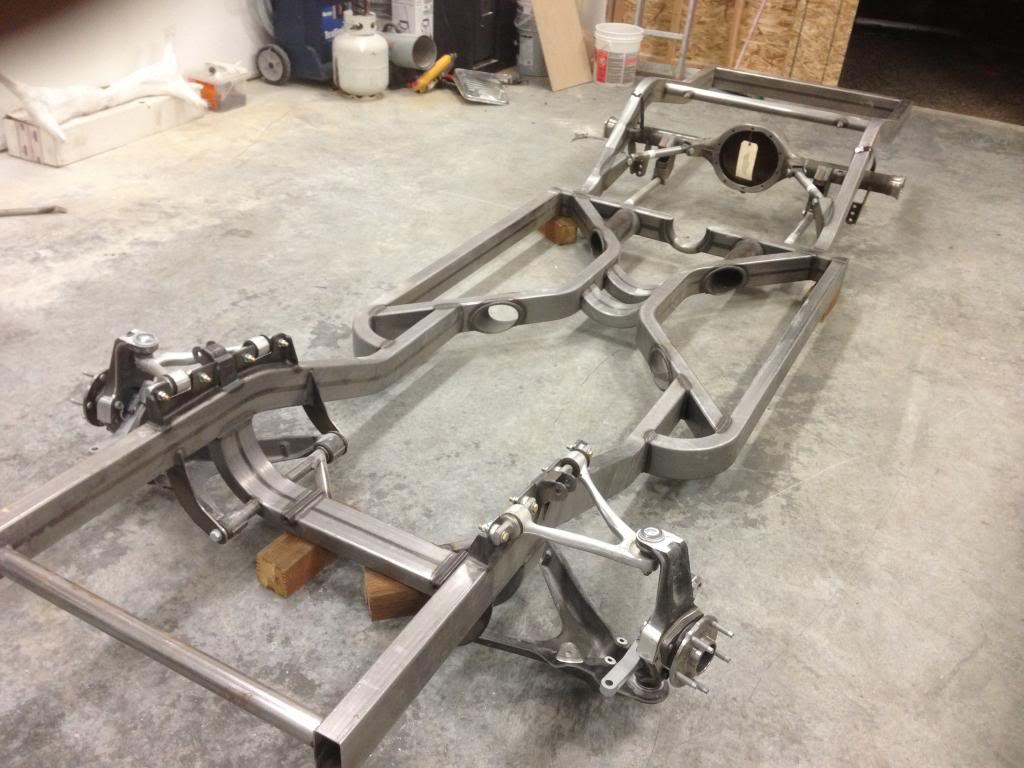
Max-g chassis, C6 front, triangulated 4 bar 9” rear
4:11 gears
Wilwood brakes
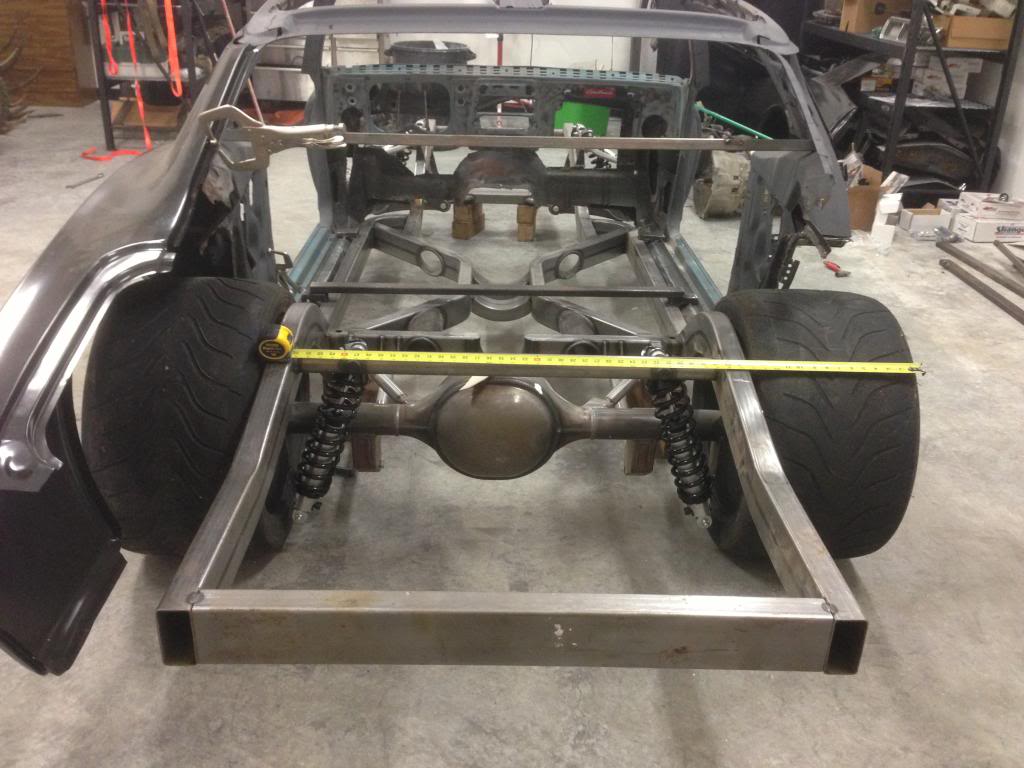
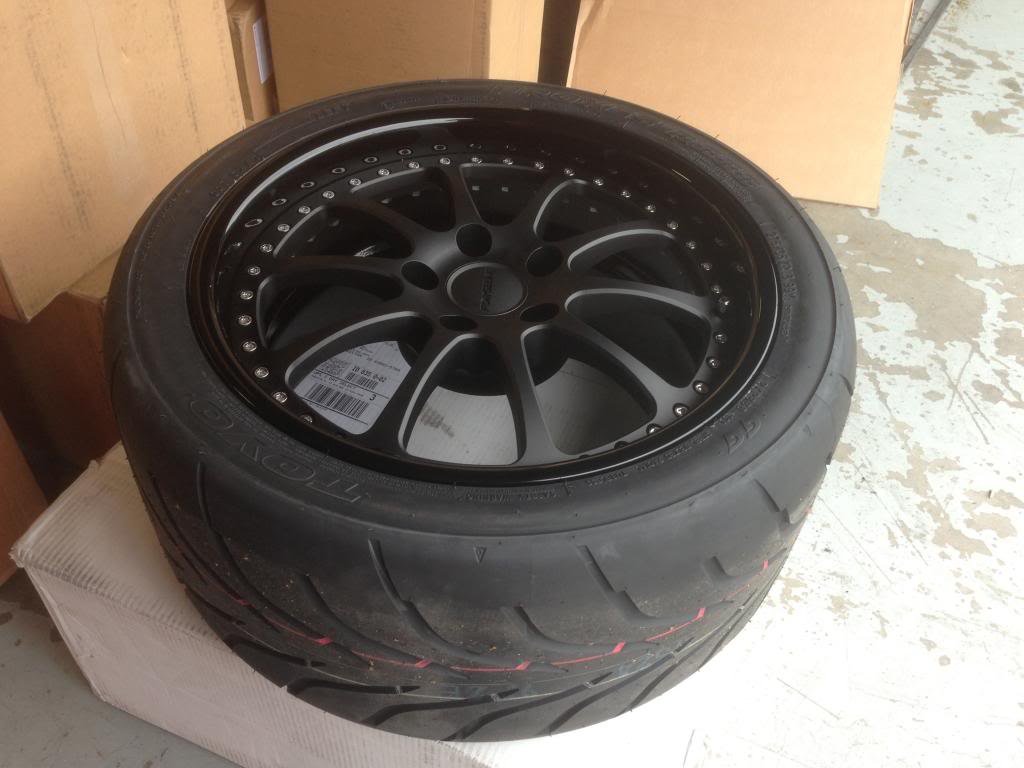
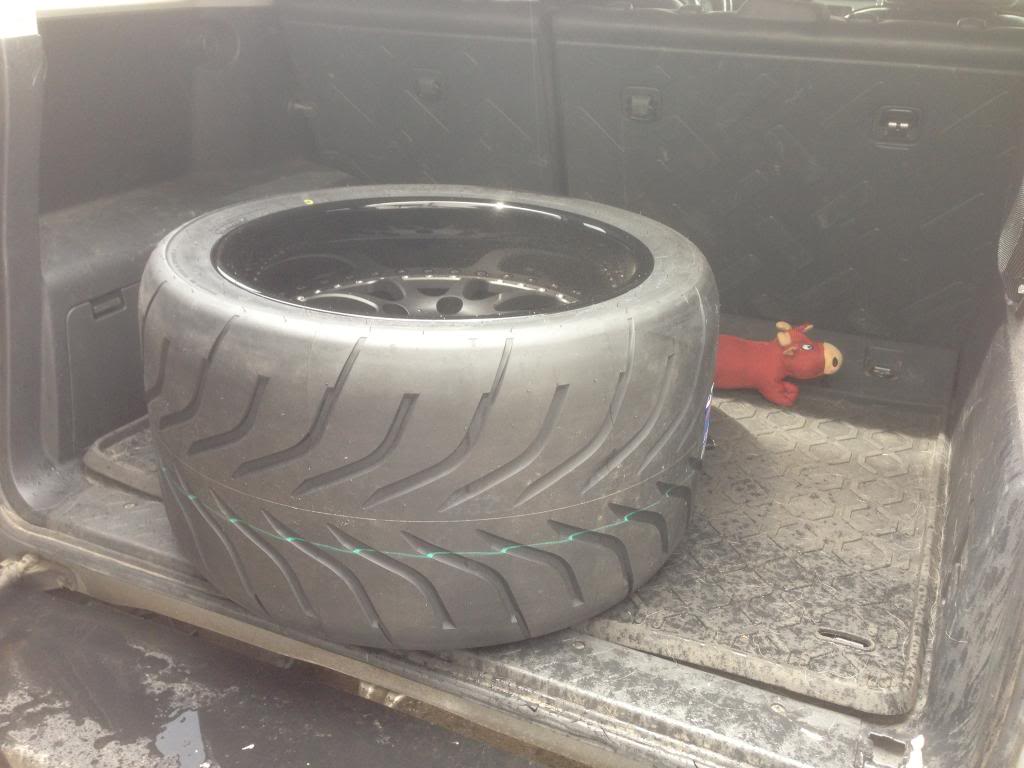
Forgeline ZXP3’s With 335x18 R888’s
T56 and LS1 from 04 GTO
Allot of sheet metal, welding supplies and grinding widgets!
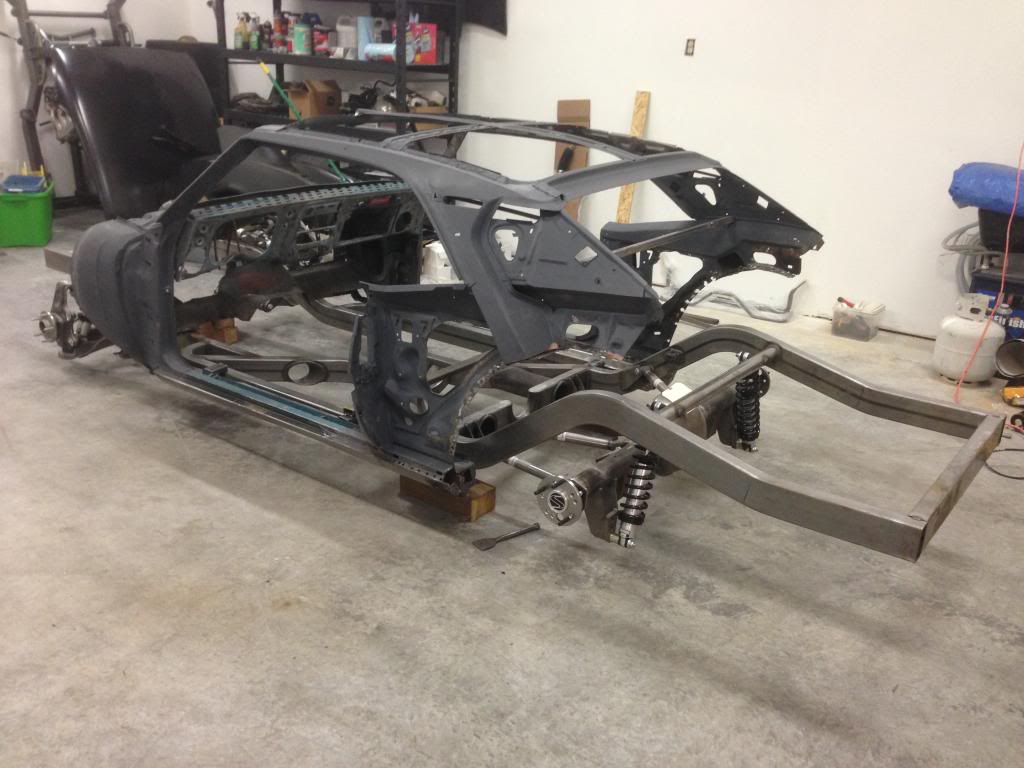
Bringing it home and tearing down. I installed mini tubs and had the hole back of the car bolted together waiting on Jakes rod shop suspension. That didn’t work out, so out came the plasma again to start over!
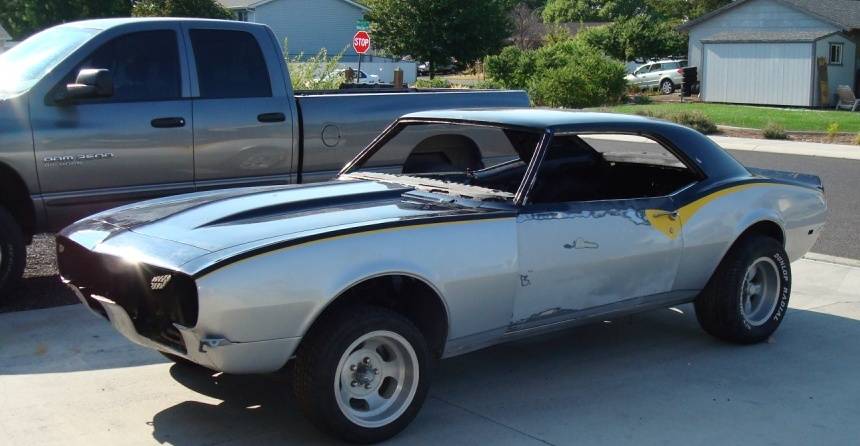
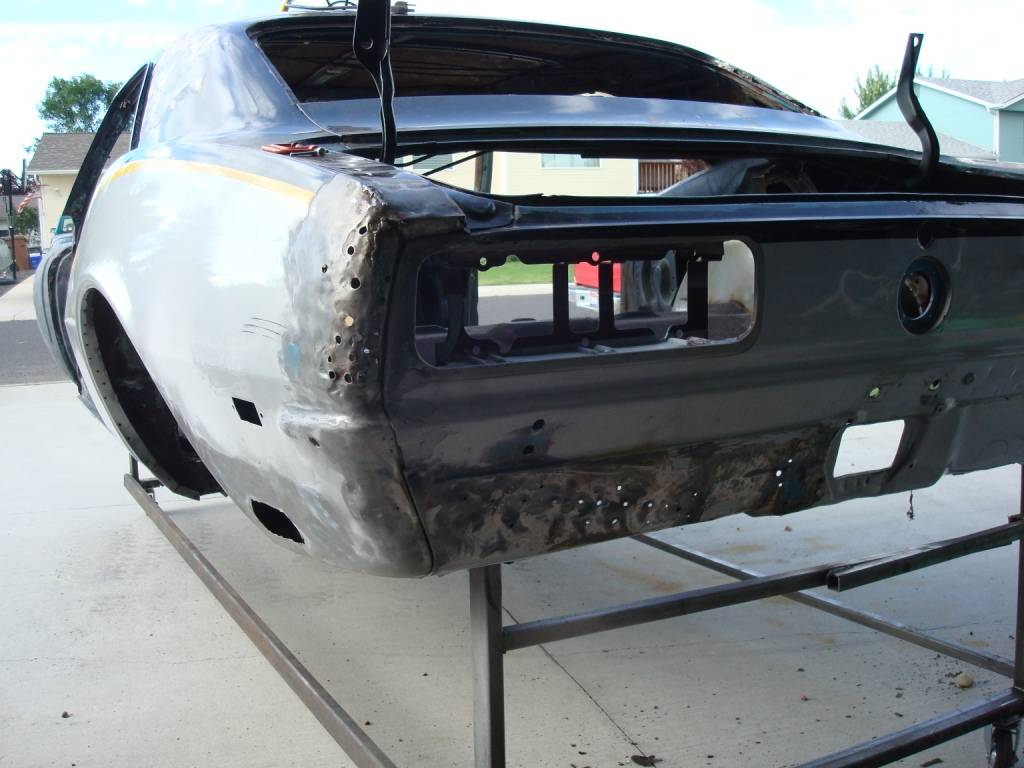
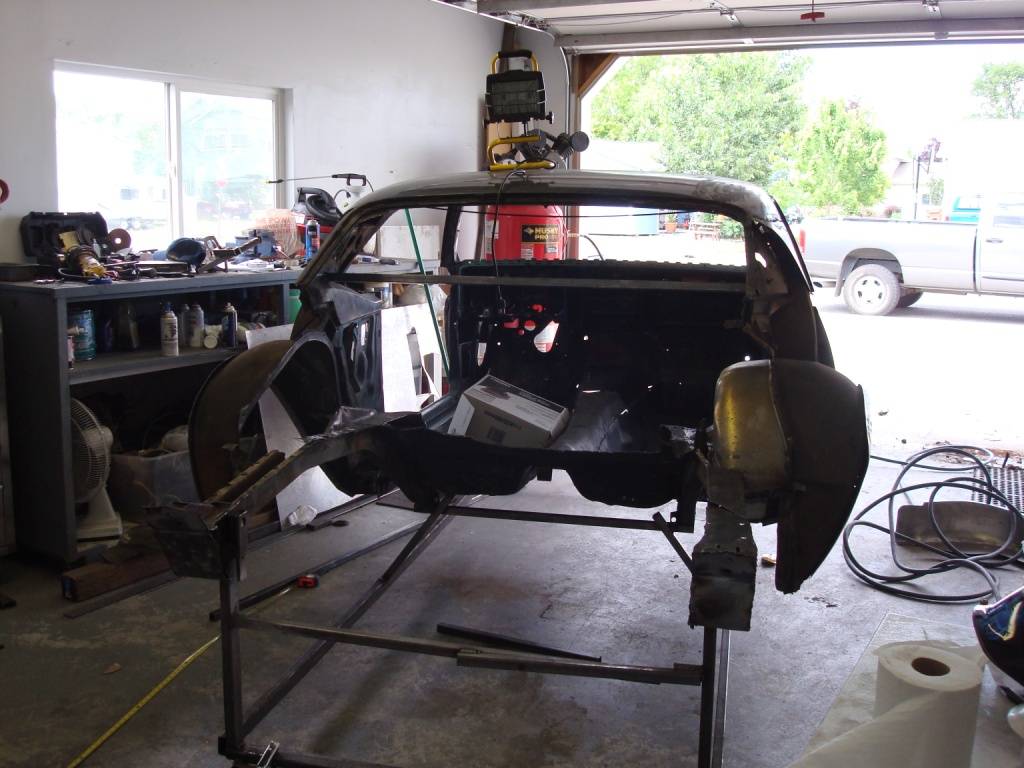
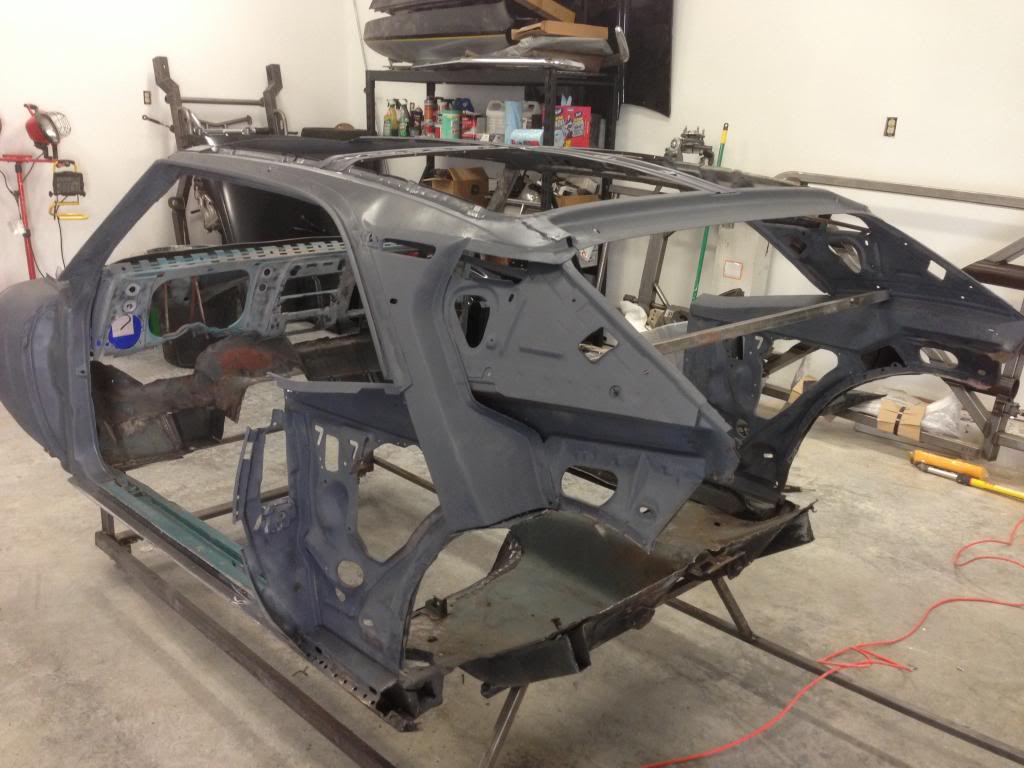
Here it is on the Max-G frame. These things are works of art!
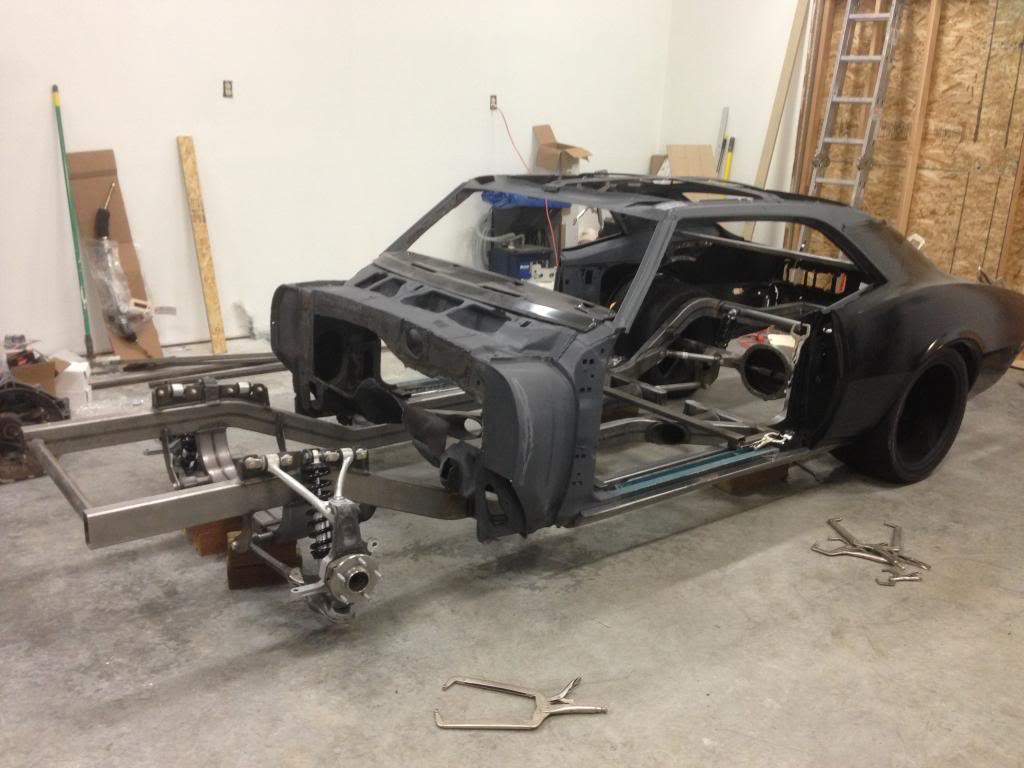
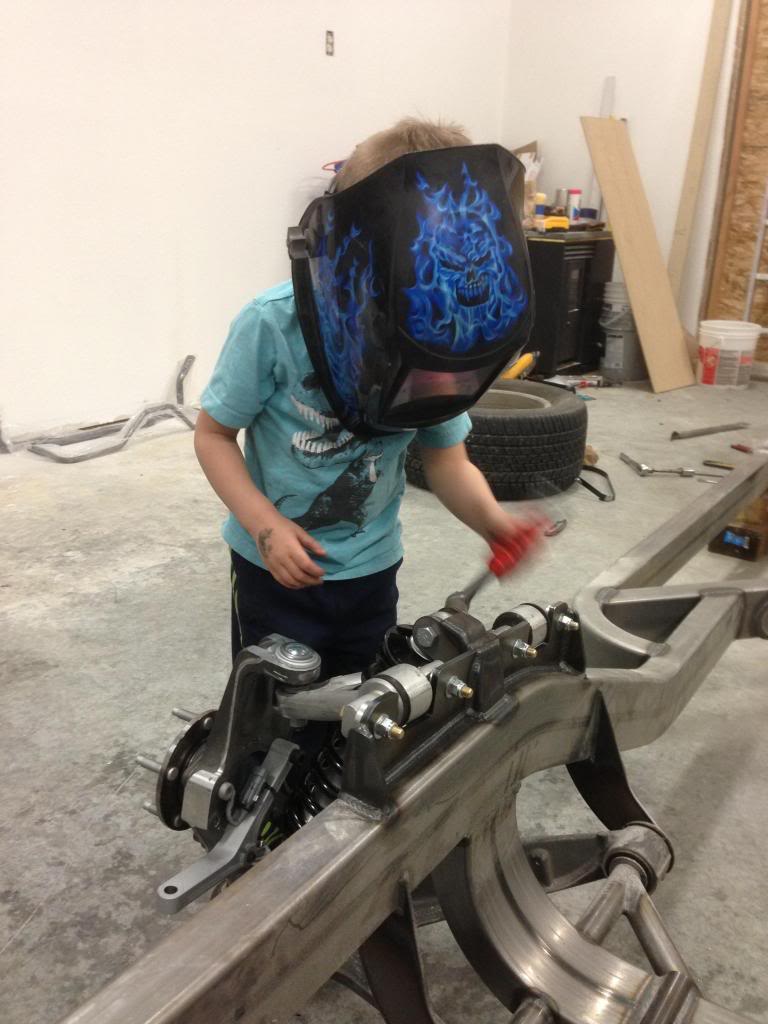
Lil helper getting the front suspension dialed in
I got as far as I could then ordered these rims and tires so I could finish fitting everything. They turned out way better than I had hoped!

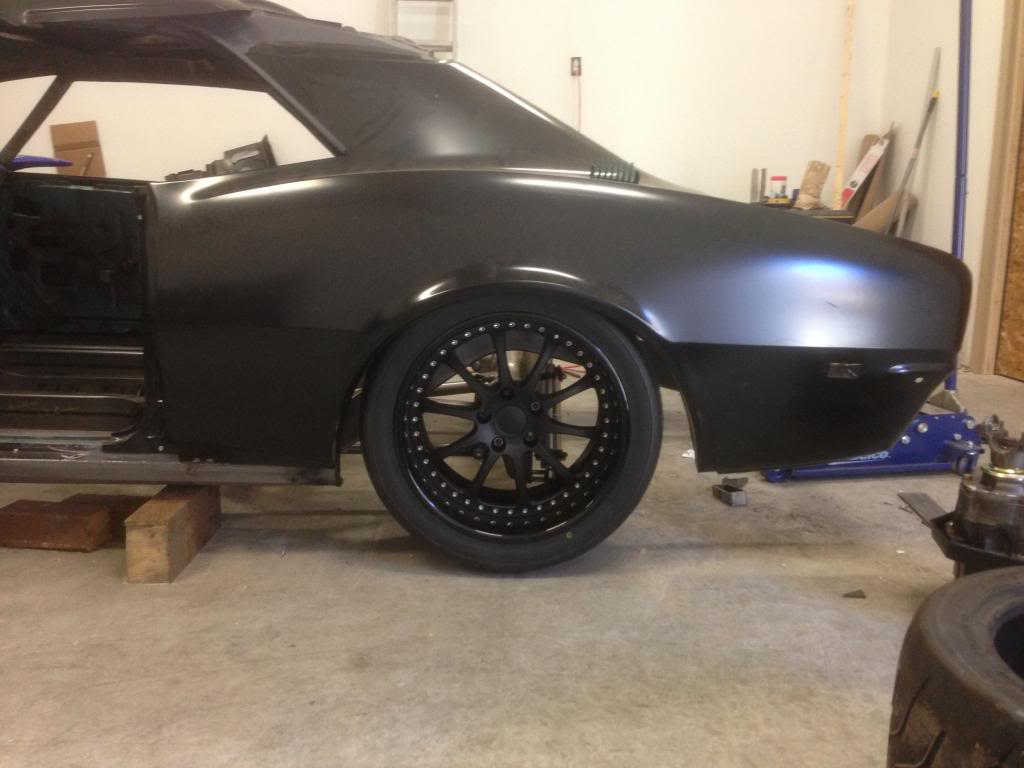
I cut the lip off the wheel well to make extra room for the tires. A friend suggested welding a piece of brake line tubing to the lip to give it that rounded look. It turned out perfect, but took a bit of time. Welding sheet metal is one thing. Welding a tube to it is something else! Cut the outer wheel wells to match.
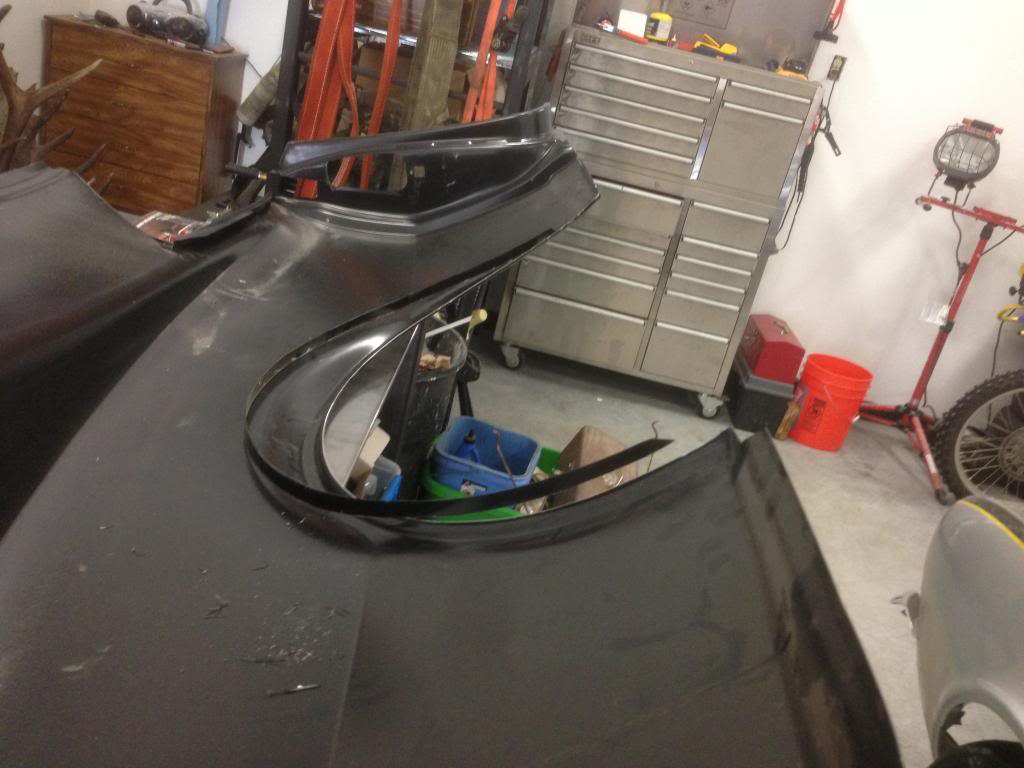
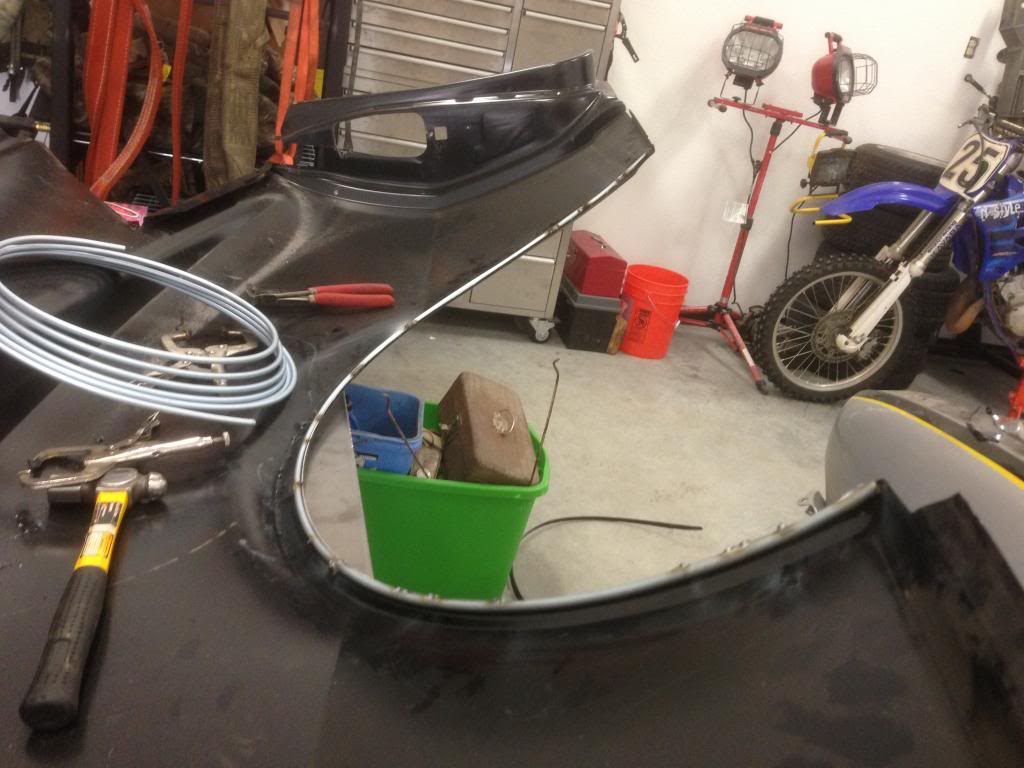
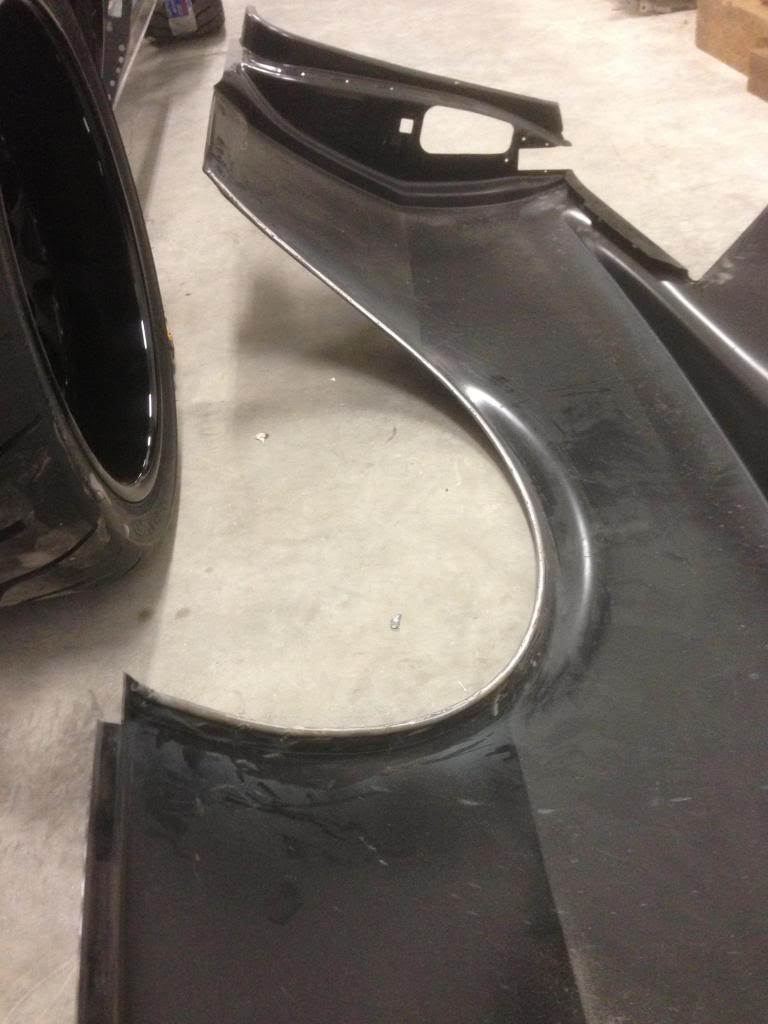
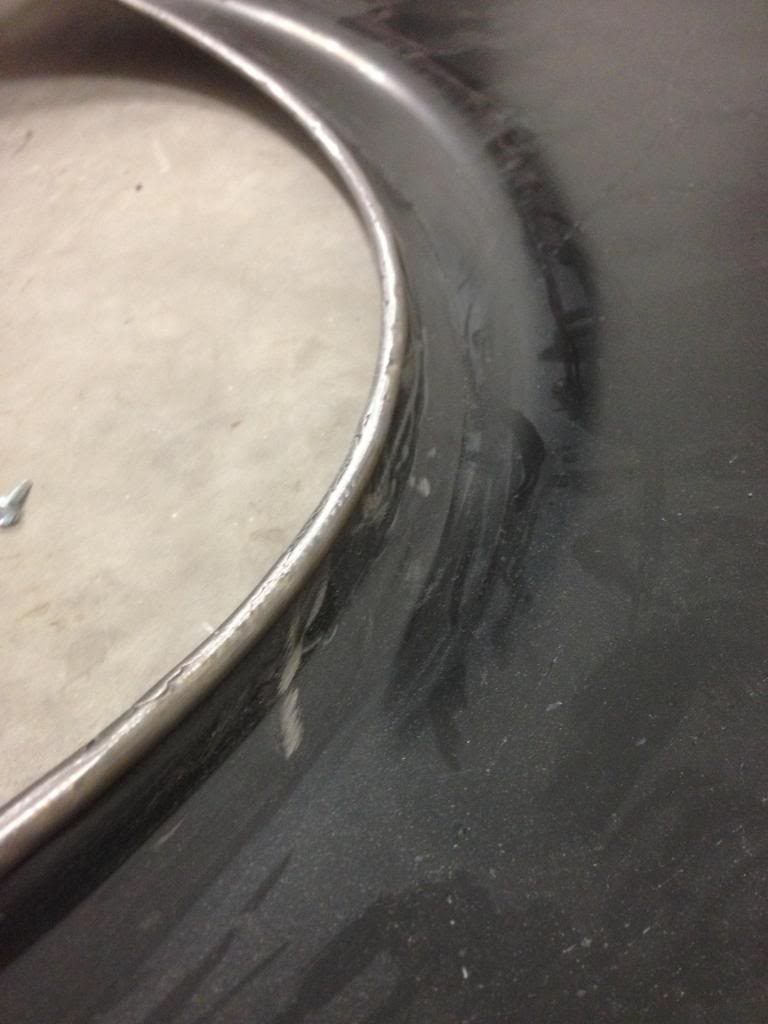
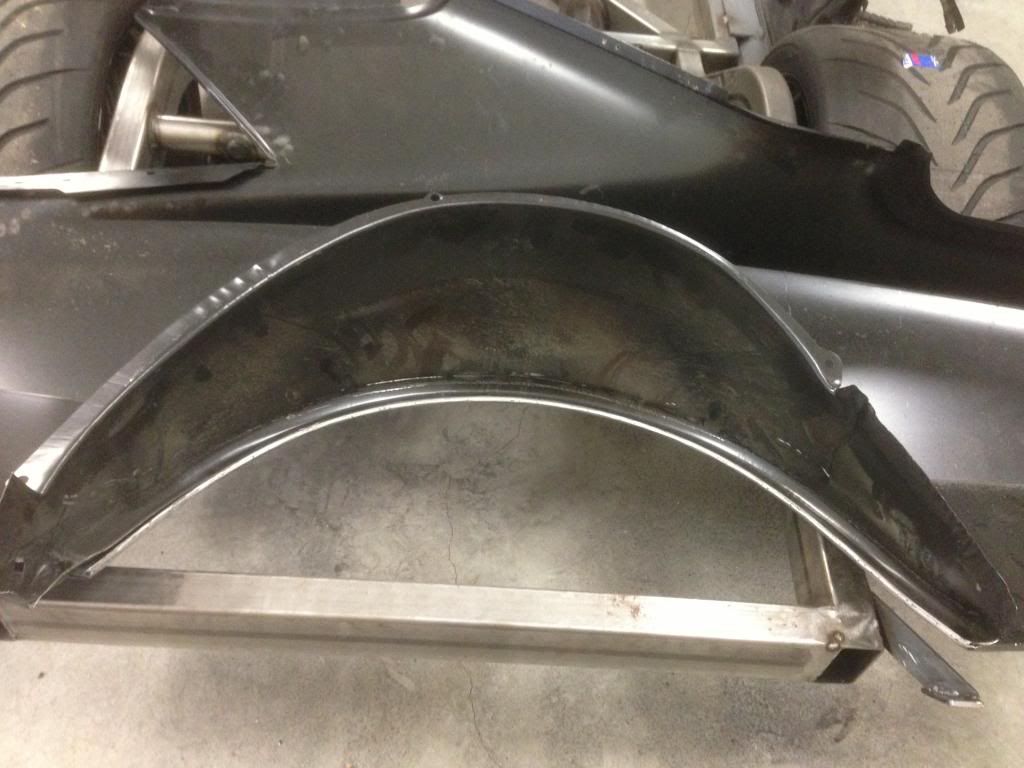

I was able to get the rear bumper brackets made and attach the rear tail pan. I will be fabing all of the internal sheet metal

This week I should have both quarters, tail pan and outer wheel wells on permanently. Seems like I’ve had those quarters off and on a hundred times. I’m excited to weld the suckers on. Then I will start working on the trunk floor and close internal body sheet metal this weekend.
-
05-29-2013 #2
Registered User
- Join Date
- Apr 2012
- Posts
- 17

this looks like a fun project.. whats the drive train going to be?
05-29-2013 #3 Registered User
- Join Date
- Feb 2006
- Location
- Idaho Falls, Id
- Posts
- 1,341
I've always wondered what you've been up to with this. Glad to see you're getting some where
Traven
05-29-2013 #4 Registered User
- Join Date
- Jul 2008
- Location
- ohio
- Posts
- 1,135
wow nice work...
keep the wheels a spinning and the Beavers a grinning (burt reynolds-smokey and the bandit)
05-30-2013 #5 Registered User
- Join Date
- Jul 2011
- Location
- Atlanta, Ga
- Posts
- 30
This looks like a sweet project!
Could you share your wheel and tire sizes?1967 Mustang Coupe
2011 Mustang GT/CS
1971 C-10 SWB Shop Truck
1970 GMC Suburban (Betty) Tow Rig
05-30-2013 #6 Registered User
- Join Date
- Oct 2012
- Location
- Jupiter Florida
- Posts
- 70
Nice looking project.
Its hard to find good help but it looks like you are in good hands.
05-30-2013 #7
Registered User
- Join Date
- Nov 2012
- Location
- Boogie Down Bronx
- Posts
- 84
Those Rear Tires are HUGE!!! What's Their Size?
05-30-2013 #8
Registered User
- Join Date
- Jul 2008
- Posts
- 105
Thanks guys. So far its been quite the learning experience. Never done any body work or this kind of fab before, so its allot of fun but im a bit slow at it. Gunner is my 4 year old. He calls this his hotwheel car

Tires are Toyo R888's 335/30-R18 rear 275/35-R18 front. Wheels are ZX3P's 10x18 with 7-3/8 backspace for the front and 18x12 with 7" backspace for the rear. They fit perfect and the quality couldn't be higher!
You working on your car still T Raven? Come by some time if your still in the area..
05-31-2013 #9
Registered User
- Join Date
- Jul 2008
- Posts
- 105
Quarters should be welded on by the end of the weekend! I'm going to need to order an engine soon. Thinking about a ls7 or something supercharged. Any suggestions? Would like 600-650hp at crank
06-01-2013 #10
Registered User
- Join Date
- Oct 2012
- Location
- Jupiter Florida
- Posts
- 70
Mast has a nice selection that will meet your HP numbers.
We just orders a LSX 440 X Block 660 HP for a customer. They are great to work with.
We also have an LS3 Black Label in the 1968 Camaro we are finishing. And I think all you have to do is look at the accelerator and the car want to take off.
06-01-2013 #11
Registered User
- Join Date
- Feb 2006
- Location
- Idaho Falls, Id
- Posts
- 1,341
Working on my 69 right now and driving the 67. Gonna start on the 67 this fall. I moved back to Idaho Falls, but I'll stop by when I'm up that way Originally Posted by seekins
 Traven
06-04-2013 #12
Registered User
- Join Date
- Jul 2008
- Posts
- 105
Got the quarters and tail pan welded on. I must have had them on and off 200 times! They fit great. This week im starting on the internal sheet metal for the floor and trunk area assuming the bead roller and sheet metal brake show up! Finally, after 4 years get to see some progress!!
06-04-2013 #13 Registered User
- Join Date
- Jan 2008
- Location
- Perth Western Australia
- Posts
- 233

Keep up the great work, it's look awesome.
Used to be known as tonner
06-04-2013 #14 Registered User
- Join Date
- Apr 2005
- Location
- IN/MI border
- Posts
- 1,920
Nice! Love the wheels and finish!
07-16-2013 #15
Registered User
- Join Date
- Jul 2008
- Posts
- 105
Inner wheel wells are done! They weren't too bad but definetly challenging. I will post some pics! Other than that I don't have allot to report. Waiting on a bunch of parts to come in so I can test fit and not get too far ahead of myself.
The ls3 crate engine, billet ring brothers goodies and recarro cs sportster seats arrived this week. I have a LS3-B cam bunch of other needed things and whippe charger kit coming from texas speed. Also waiting on willwood pedal assembly with dual master cylinders to get here so I can finish the firewall and floor.
07-20-2013 #16
Registered User
- Join Date
- Jul 2008
- Posts
- 105
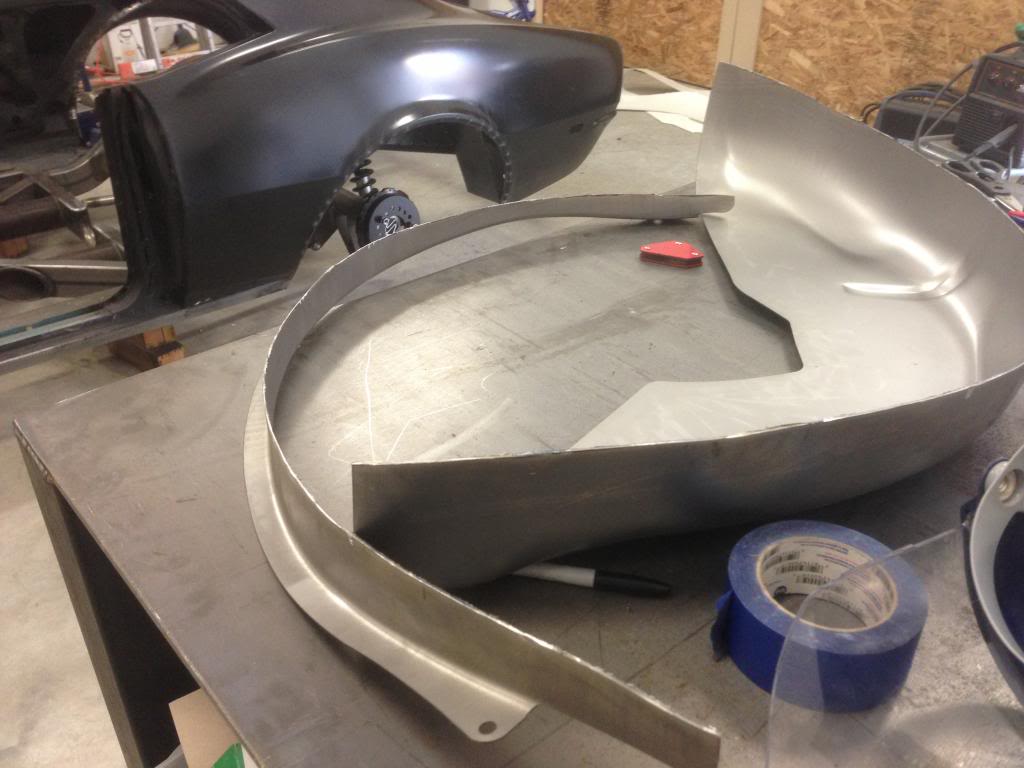
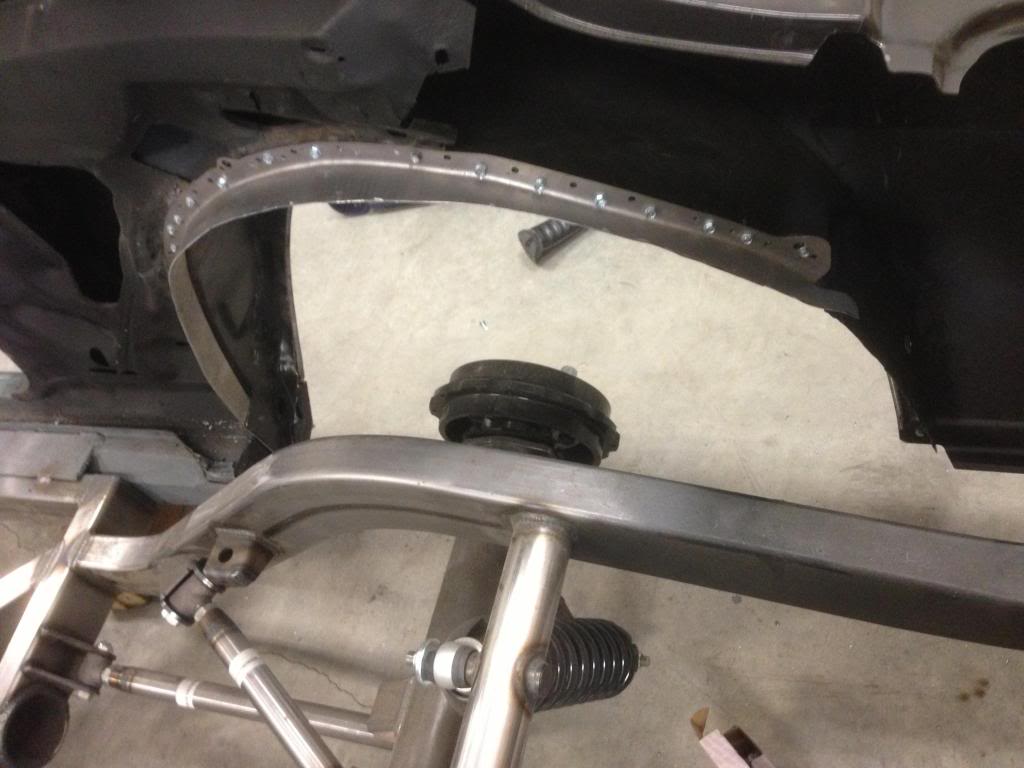
Here are some pics of the inner wheel well.
Cut the lip off of a new inner to use it as the base for the custom ones
Punched some holes in it for spot welds and attached where i wanted it to go using sheet metal screws. The screws hold things very tight and are fast to install. I prefer them over anything else.
Made a pattern and then the real deal!

Finished inner wells.


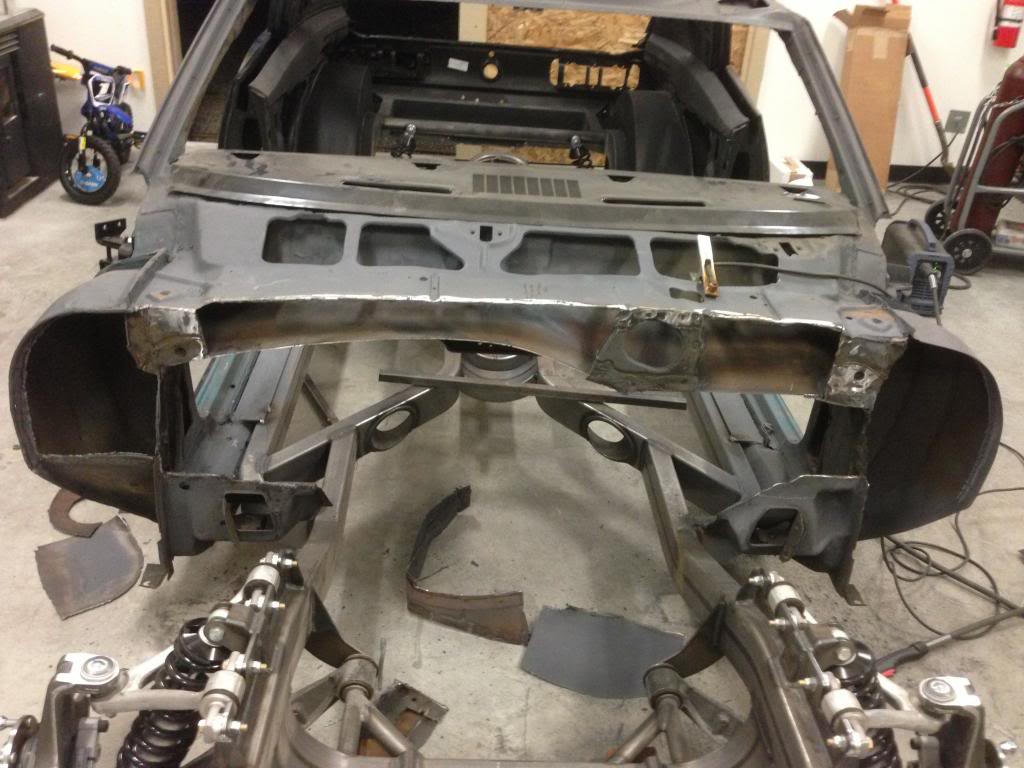
Next week the Whipple charger and some other goodies from texas speed will be here. seats, pedals and almost everything else has arrived so i can make some progress! Still trying to decide if i want to move the wiper motor under the fender or not. The LS3 is here so i cut out the remainder of the firewall to set the motor in and start making a new one.
07-21-2013 #17
Registered User
- Join Date
- Aug 2008
- Location
- Iowa
- Posts
- 304
nice work on the inner fenders!!
04-13-2014 #18 Registered User
- Join Date
- Feb 2014
- Location
- Boise , Idaho
- Posts
- 320
Glad to see your not squandering all your talent on firearms Glen
04-16-2014 #19 New to Pro-Touring
- Join Date
- Apr 2014
- Posts
- 30
great job man, love seeing these older cars with new body frames. Subbed!
Connor
11-19-2016 #20
Registered User
- Join Date
- Sep 2005
- Posts
- 16
Any updates on this project?


 Reply With Quote





