


Results 1 to 10 of 10
-
05-26-2013 #1
 Registered User
- Join Date
- Oct 2011
- Posts
- 81
The 67 Camaro Rear End Saga ( Rebuilding The Rear End And Building A Custom 4 Link )
Hey Guys. Gonna start a build thread on my rear suspension. But before I start ill give a little Background on the car itself. About 5 Years ago I traded a 2000 Camaro Z28 for a Rolling chassis 67 Camaro that was in Primer With the hopes of Learning and Performing everything myself. The car was a drag car, had ladder bars, coilovers and a fuel cell. In the few years after trading, I swapped a Ls1/t56 into it, Painted it, built and swapped a forged, cammed iron block ls1 into it, swapped a 98 trans am dash/console into it. rewired front to back. installed a holley efi system, and recently did my first exhaust system. I built this car with the mindset that Im gonna Almost daily drive it.
Start

Current

About a month ago, while cruising in my 67 Camaro my rear end started to make a growling noise, once I got home I Jacked up the rear and noticed there was a dent in the diff cover as if something tried to get out. Not Good, Upon taking the cover off I noticed a bolt in the bottom of the rear end, then another, then another until I pulled ten bolts out of the bottom of the rear end.
At this point I realized I dont really know anything about rear ends, so for a solid week I read and watched everything I could get my hands on. Once i was a little more confident I began dis-assembly of the rear end. Wasn't and easy task, the small bolt that holds the Pin in sheared and It was a matter of beating and cutting the pin til i could get it out. Only then I realized that the rear end was equipped with C-Clip Eliminators, so the pin removal did nothing for me.
Heres a pic of the Old Carrier
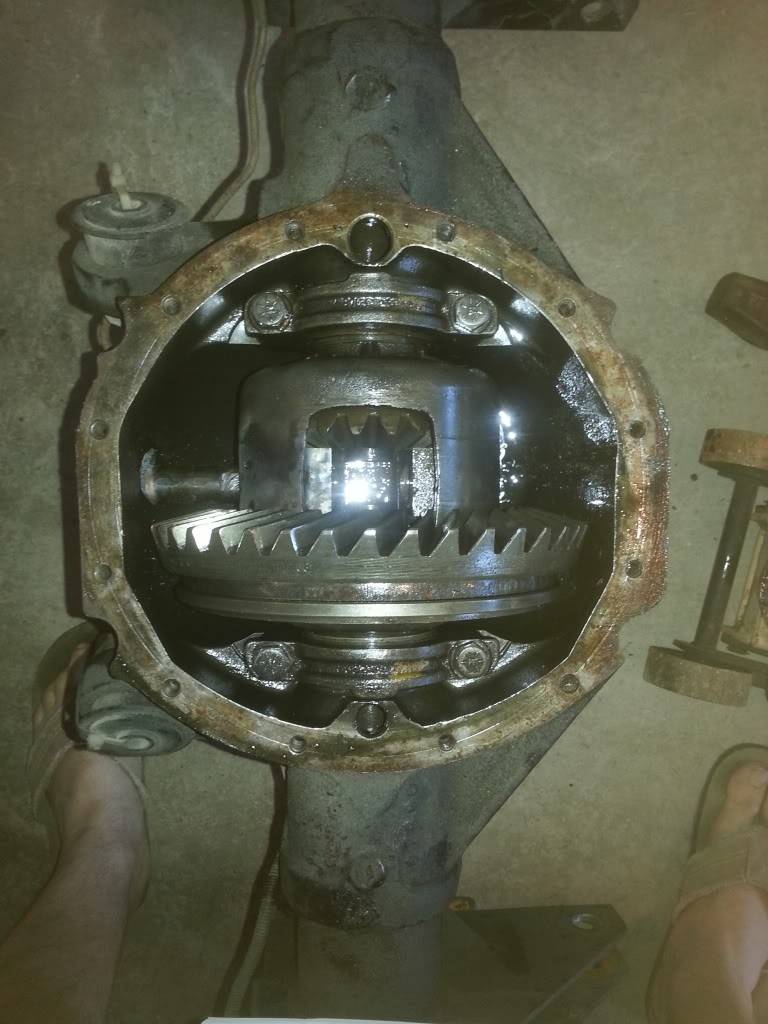
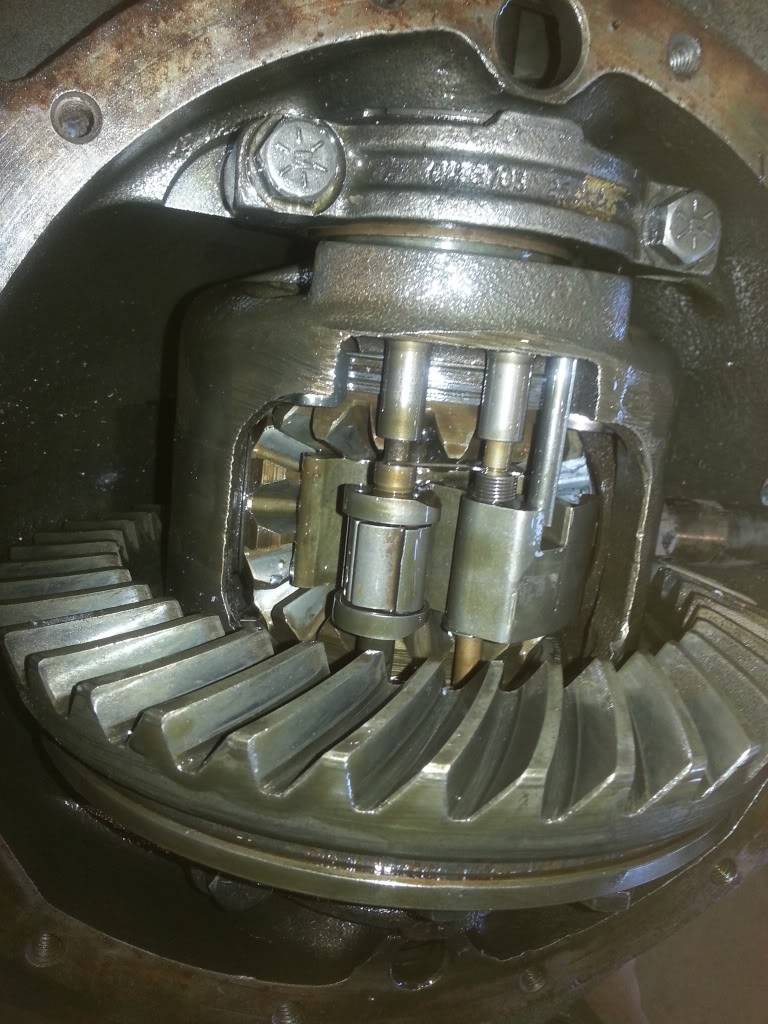
Once i removed the axles I was able remove the caps and pull out the carrier, turns out its a 12 bolt car gov-lock carrier. upon research there also called time bombs lol. lucky for me i had a chevelle rear end laying around and pulled the Eaton style posi out of it, bought some 3.55 gears to replace the 4.11's . and this begins this build. starting with an empty rear end and some parts laying around everywhere.
-
05-26-2013 #2
Registered User
- Join Date
- Oct 2011
- Posts
- 81
STEP 1
Now that you have a bare rear end housing its a good time to clean and paint it, Although Painting will be my last step due to the fact I will be welding New Brackets and cutting the ladder bar brackets off. Grab some easy off oven cleaner and soak it for a Hr or so. Then take it outside and hit it with a pressure washer, then repeat a couple of times. for the real tuff stuff get a 4" Grinder with a wire wheel and go to town. that along with wire brushes and maybe a dremel will make quick work of it. after that give it another bath of easy off and a last pressure washing, followed by an acetone wash, fill a spray bottle and soak everything down and wipe with a rag. Then its just a matter of deciding what u want to paint it with, Undercoat?, Truck bed Liner?, Good Ole Rustoleum? Chassis Paint?. Ill probably Be using either rustoleum gloss black or Bed liner, leanin towards bed liner. ive used it in the past for projects that needed a tough finish and its worked great. and has a nice finish.
05-26-2013 #3
Registered User
- Join Date
- Oct 2011
- Posts
- 81
STEP 2: Filet Pinion
Now comes the Fun, Theres two ways to setup a Pinion, theres a tool that makes it simple but of course you pay for simple. And theres also the tougher but Much Much Cheaper way. Of course my cheapass chose the cheap, more labor intensive route. If you noticed upon dis-assembly of your rear end pinion, there is a small bearing that comes out the front of the rear end and theres the larger bearing thats pressed in that was probably not real easy to get off ( In fact I ended up having to use a cutting torch to get mine off ).
What we do now is this, either take the old bearing if its still in good condition, or buy a new bearing, and take a Dremel with a grinding wheel, or get someone with a lathe and turn a couple thousands off the inside of the bearing. The goal is to take enough off to allow you to slide the bearing on and off the pinion without having to press it on. the reason for this is so you can switch out shims to move the pinion closer or farther away from the ring gear which gives you the wear pattern.
Alot of the time you can use the same amount of shim that u took out. but a good place to start from if you go from scratch, is around .035" Mine is closer to .032".
05-26-2013 #4
Registered User
- Join Date
- Oct 2011
- Posts
- 81
STEP 3: First Assembly
Using this method you will assemble and dis-assemble the rear end several times, unless your just super lucky. but heres what you do
now that we have our mockup bearing from step 2 we can place the shim ( .035 or whatever you took off the old one ) on the pinion all the way up against the gear and slide on the mockup bearing on. next take the new races and install them in the same places you took the old ones off from. pretty easy to install them just sit them in, place something flat and soft like aluminum on top and tap them into place. once it gets close place the old bearing on top of the new one and tap the rest of the way on.
Now Slide the pinion in. take the new smaller pinion bearing and slide it in from the front of the rear end. it may be tight but thats ok get it on far enough to install the yolk and nut. and tighten down till everything is seated.
IMPORTANT: Now that u have it installed you need to check the amount of torque it takes to turn the pinion unloaded, so before you install the carrier we need to take a 1/4" Beam style torque wrench, has to be a beam due to the fact that a click type breaks away after it hits the torque setting you choose, and you also need an adapter to go from 1/4" to 1/2" and a 1 1/8" socket.
Place the torque wrench on the yolk nut and turn it, your shooting for 21-25 In/Lbs of force.
once you have it, we can move onto installing the carrier. grab your carrier and races and slide them into the rear end,its not as easy as it sounds but you will get the hang of it. now take your original shims and install them, if you dont have original shims, then measure with a set of calipers, originally it should be close to .485" mine ended up with just over .480". with all your shims installed you shouldnt be able to slide the carrier in and out. it should be a tight fit. in fact the only way i could get mine back out is to take the yolk off and give the pinion a smack with a dead blow. tighten the carrier down with the caps and torque to around 50 ftlbs.
05-31-2013 #5
Registered User
- Join Date
- Sep 2005
- Posts
- 49,371

Nice write up so far!!! What are you planning for the rear suspension? We would love to have you on Team BMR!
05-31-2013 #6
Registered User
- Join Date
- Oct 2011
- Posts
- 81
Well Planning on a Custom 4 link. Cant really afford a all in one 4 link package, but the car has coilovers already so its just a matter of setting up brackets and bars to something suitable for street and maybe a little autocross. Big fan of BMR's Products I see yall every year at the Ls-Fest, do yall sell just brackets? as of now my plan is to use some ride tech brackets since I already have half of what I need from a friends build. but if I could find some affordable brackets I may use them due to the fact that I will have to modify the ridetech Brackets like this
This is the axle bracket from ride tech, and the problem with it, is that its a Completely parallel 4 link bracket if you get the frame brackets that go with it which I do have already. so no Instant center, no Antisquat blah blah blah.

So my plan is to purchase this bracket, and weld it on top of the first bracket.
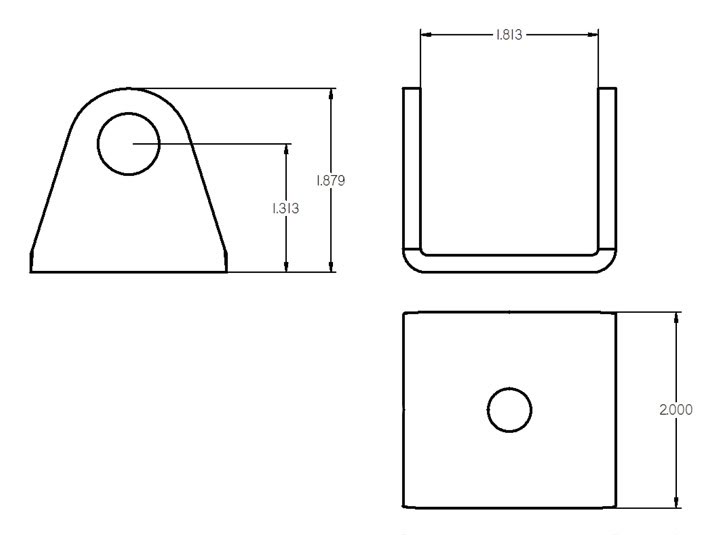
And it will raise the top link about an inch and a half which will give me a about 40-50% antisquat and a decent instant center and will look like this
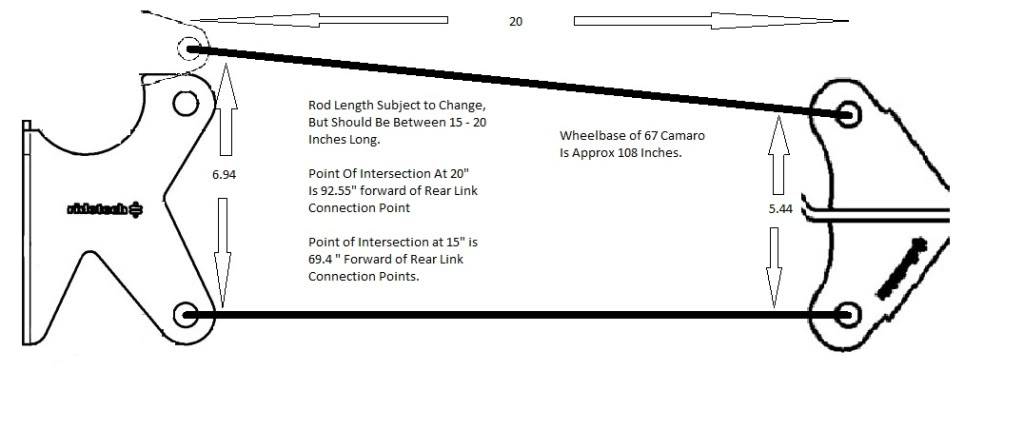
05-31-2013 #7
Registered User
- Join Date
- Oct 2011
- Posts
- 81
STEP 4: Repeat, Repeat, Repeat, Get Pissed Grab A Beer, Take A Break, And Repeat.
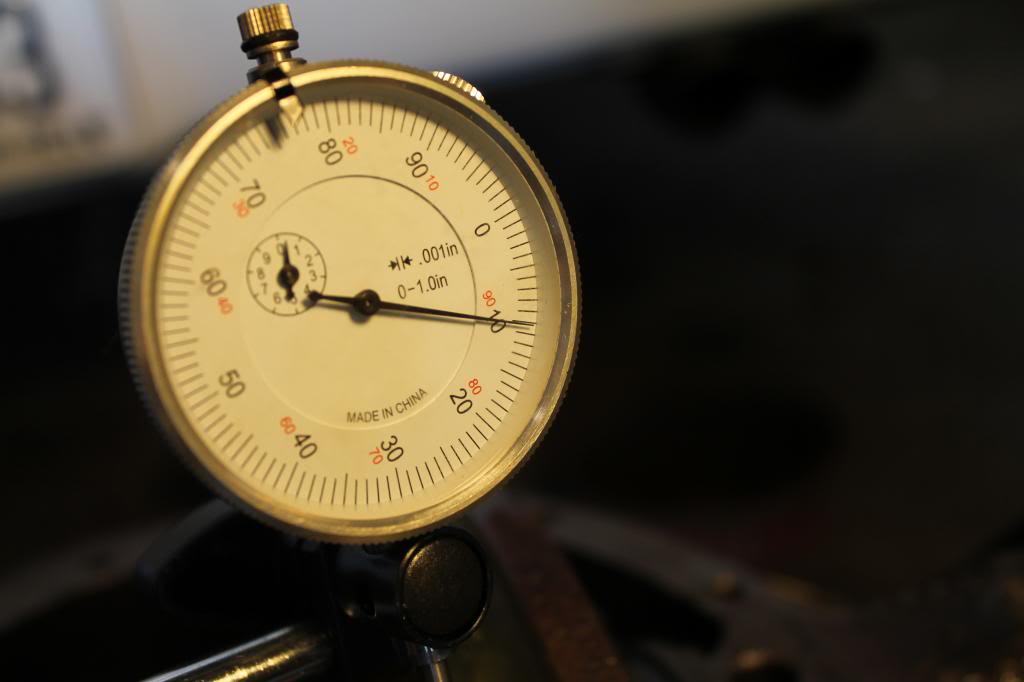
This is the most time consuming step you will have most likely if its you're first time. Start with checking the backlash, to do this place a dial indicator as close to perpendicular to the tooth surface as you can like so.....
(Lol forgot to get a pic of this So go to google images and search "check Backlash differential")
Backlash is a measure of how close the ring is to the pinion, your checking how far engaged the teeth are..... so if you have .020" backlash and need .010" then you need to move the carrier closer to the pinion. vice versa if u check and its .002" then you need to move the carrier away.
Your looking to get a Backlash on a street car to between .008" and .012". My first attempt landed me at .020". So now we have to remove the carrier, only problem is that it shouldn't be easy to get out, in fact mine was real tight, but its supposed to be. So what you do is remove the caps, and then the pinion nut, yolk and give the pinion a decent tap, it should start moving the carrier out. be careful not to drop it on the floor ( I tapped it from the side so the carrier wouldn't fall out) once its close to coming out you should be able to pull it out.
IMPORTANT: MAKE SURE EACH TIME AFTER YOU REMOVE THE PINION, UPON RE-INSTALLING YOU TORQUE TO 25ISH IN/LBS ROTATING FORCE BEFORE INSTALLING CARRIER AGAIN.
Change your shims but make sure your not adding any amount of total shim thickness, you should just be subtracting from one side to add to the other.
Now repeat from step one and check backlash again, I check in at least two places on the ring, ill check it then spin the ring around and check somewhere else to ensure its correct. once your within range its time to move on.
heres where mine ended up, during this mockup stage.
06-01-2013 #8
Registered User
- Join Date
- Oct 2011
- Posts
- 81
STEP 5: Bite Marks
This step is the second most time consuming and just as critical as the previous step.
SETTING PINION DEPTH.
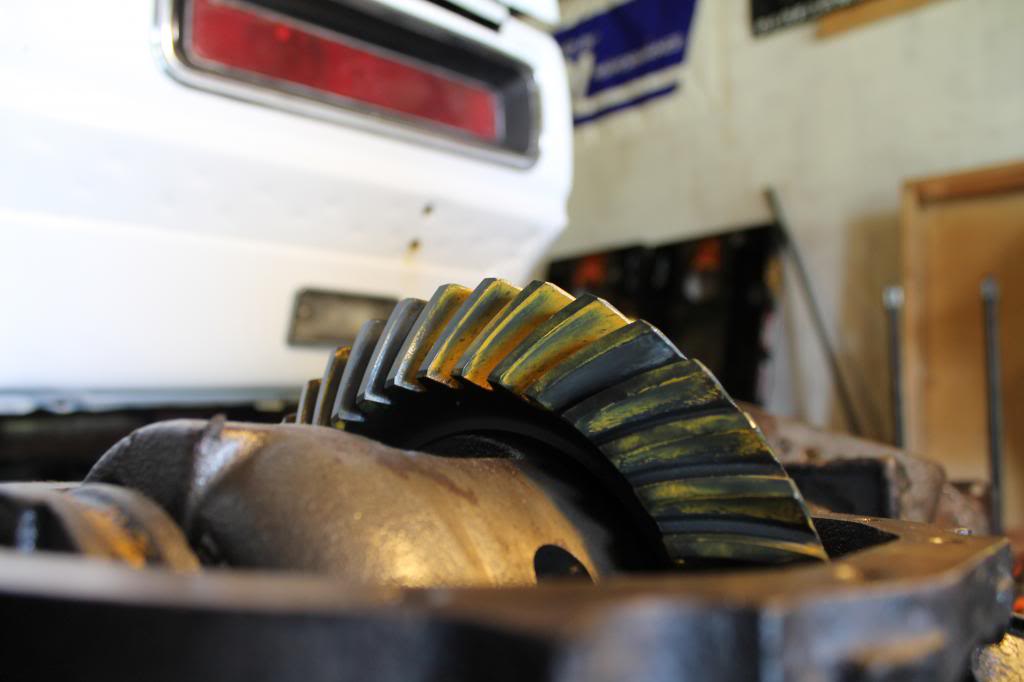
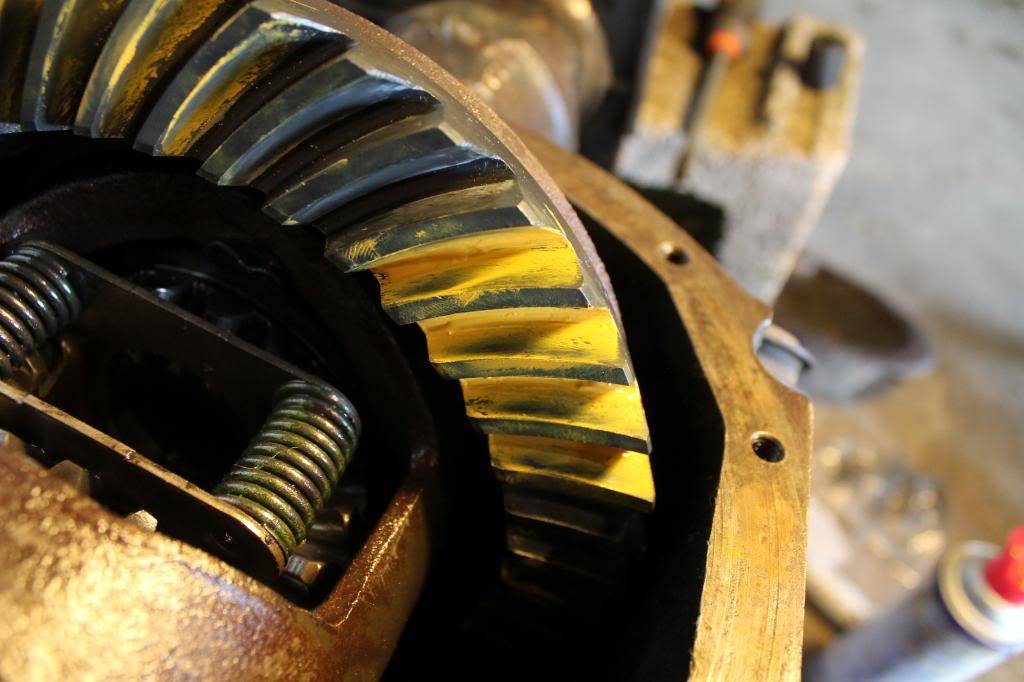
Since we done have the mockup bearing and .035 (or whatever came out of it) installed, it is now time to check your wear pattern. with everything installed, the backlash set, we can take the some white grease or in my case the yellow stuff that came in the master bearing kit, and paint about 4 of the teeth on the ring gear, next we need to turn the carrier a couple revolutions in both directions using either the carrier or slide an axle in to turn the carrier, do not spin the pinion. make sure you go in both directions and when your done you should be able to see a wear pattern, and if your lucky like I was you may be able to get it on the first try by using the same shim thickness that was removed from the old pinion. You can find reference pictures of what the wear pattern should look like online, but heres what mine ended up like.
An old timer also told me that if you can send an index card thru the gears without tearing the paper and only getting nice creased folds then its setup correctly. I also did this and it worked.
Grab a beer, the worst is over.
06-01-2013 #9
Registered User
- Join Date
- Oct 2011
- Posts
- 81
STEP 6: Push It Real Good.
Ok now that the worst is over its time for the final assembly. With everything back apart, take off your mockup bearing and replace with your final bearing (Same brand Preferably) which must be pressed in, most shops will do it for free, make sure its pressed on real good. Be sure to leave the shims behind when u take the mockup bearing off. My final shim was around .032"
Now that the pinion is ready to be Installed permanently, we need to install the crush sleeve and seal this time, so heres how it should install. It should be the pressed bearing, the crush sleeve, the outer bearing, the seal, the cover, the yolk, the washer, and then the nut.
Here's the fun part. We have to get the rotating torque back to around 25 In/Lbs, but don't expect it to be as easy as it has been before, you will have to put about 200 Ft/Lbs or more on it this time. Take a large pipe wrench and hook it on the yolk. Use the floor to support the pipe wrench, now take a large 1/2" breaker bar and a 2 foot cheater bar and install on the pinion nut and put on your big boy pants. Tighten in small increments until it reaches the desired 25 In/Lbs Rotational force. I actually ended up at 26. Ive read that if you overshoot you cant back down that you have to get a new crush sleeve, however I would assume that if your 30 in/ lbs or less than you could probably give it the bump back to 25 and be ok. Just my opinion tho.
Now comes the Carrier, do nothing different from before, install the carrier with races and shims, torque to Appropriate Ft/Lb. and do a final check on backlash. Upon doing a final check my backlash actually lowered to right at .008", not real sure why but I was fine with it still within spec.
Re-Install the axles and C-Clips, Pin and Pin bolt, and your ready for the Diff cover. In my case I also had to re-install the rear end in my car.
Hope this helps someone if you have any questions or comments feel free to drop me a line.
06-01-2013 #10
Registered User
- Join Date
- Oct 2011
- Posts
- 81
Afterthoughts To Part 1:
Ive had the rear end back in the car about 4 days now, I was super surprised at how quite it was. If anyone tells you cheap gears can be set up to not whine, simply take a Micheal Jackson glove and smack them in the face. Mine was a $130 set of Richmond gears and its quite as a mouse. I actually didn't realize how loud the old poorly set up rear was til I finished this one.
Make sure to fill the rear end with appropriate oil and also the positraction additive. Im going to run mine about 500 miles then change it with some good synthethic oil and additive.
Pre-Part II: Designing and Building My First Rear Suspension.
Why not right? I know theres ten million options out there I could buy and install, hell a lot of them are bolt ons, and if it wasn't for the fact that the leaf brackets were cut off the body and axle I may go with a bolt on solution. But wheres the fun in that, I wanna understand the dynamics, see it for myself and learn everything I can, so with that ive decided to build a custom 4 link for the street/autocross course.
What is a good suspension? Launch?, Cornering?, Ride quality? you could ask ten people and probably get ten answers, the most important things to me are ride quality, and decent handling. So with that in mind its time to start designing and building a suspension, Ive chosen a 4 link with panhard bar suspension, originally I wanted a 3 link but packaging a 3 link in is much more difficult, so I chose a 4 link.
Now I just have to get the two things all car guys need... Money and Time.


 Reply With Quote





