Results 1 to 20 of 22
Thread: Bumper Surgery
-
04-30-2013 #1

 Registered User
- Join Date
- Mar 2012
- Location
- Marianna, FL
- Posts
- 394

Bumper Surgery
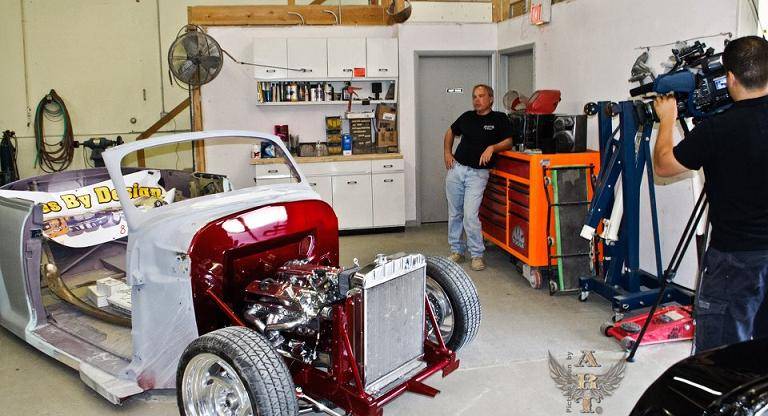
I have a car I'm working with a rather long list of things we are doing here in my shop. I thought I'd share some of the "easier" custom stuff that I am doing. The point of this is to give you guys an idea of what you can do with simple tools to change the way your looks without paying someone. Ironic seeing as that's what I get paid to do :D
Please do keep in mind two things, this isn't like a super detailed write up with a ton of pics and it's not finished so there's imperfections at this stage. If you've done this I'd like to see some pics of yours too!
The car came into the shop with a stock front bumper that's on every other '65 El Camino... which I forgot to take a pic of so use your imagination! The instructions I received were to smooth the bumpers, at first I thought just get rid of the bolts, easy enough. Wrong... quickly I realized he wanted the bumper like filled, narrowed and tucked. Instantly, I thought of you guys. Here goes!
I spent about an hour stripping the chrome and nickle off to get back to bare metal. I used several types of sanding disks and my air sander to smooth tool marks as I went. Before cutting in the work area it was prepped with 120 grit. Keep in mind the bigger, longer the passes are the better off you'll be. I'm using that finish as my base line to get the bumper back to when I'm done. Free Pro-Tip of the day, when you see sparks you've arrived at base metal. In my case I didn't see sparks until I was back to steel, if you have input other wise please let me know.
I started by first laying out all the damage, like big dings or tweaks from the stamping process. I wanted to remove as many as I could in my customization. Once that was established I found the contour of the bumper, so high points to high points and laid lines along there. I used a cut-off wheel to remove the chunk I wanted gone. In this case I cut the whole light and opening out. Silver lines are cut lines and black are damage in the pics below.

Afterwards I de-burred the cuts and began laying out my pieces. I did each side (one side so far) in three pieces. I did cheat and use my CNC plasma to cut some parts, however, this could be accomplished with a band saw, hand plasma or a cut off wheel. I was lucky and found three very vertical lines distinct lines I wanted to follow. I marked both sides and measure accordingly. Alternatively, you can use a piece of poster board and a dull piece of aluminum to make some really killer lines, then use scissors to cut along them and form a template.
Once the part is trimmed to fit now you can form the metal into shape. I used 10 ga. cold rolled which is a little bit thicker than the bumper, use 12 ga. if you can get it. In this case the back is getting metal finished to so the slight chance in thickness won't be apparent. Another free Pro-Tip, a dead blow hammer and a block of wood will do some amazing things! Neither material will mar the metal which is good if you plan to re-chrome the bumper. I used an assortment of tube, table edge and slip form roller to change the shapes. In the past I've also feather cut thicker material to make compound curves. After all it's just metal, you can weld it and blend out the rest later.
I continued to trace, cut and form the rest of the pieces.
It should be noted that being mindful of the shape the bumper is taking could be the difference of hours of reshaping or a few minutes of light metal finishing. I measured the bumper brackets before and after the modification to see the change relative to the other side.
Thanks for reading and I hope this comes in handy for someone!
-
05-01-2013 #2
Registered User
- Join Date
- Mar 2012
- Location
- Marianna, FL
- Posts
- 394
Here is both sides tacked up ready to be modified more.
05-05-2013 #3
Registered User
- Join Date
- Mar 2012
- Location
- Marianna, FL
- Posts
- 394
I continued progress on the bumper by narrowing it two inches. I cut along the outer body line in the bumper so that I could keep the lines similar. I ended up with a more pronounced peak that looks like the one in the upper fender. Once this thing is blended and chromed it's going to be hard to tell it's not stock.
05-05-2013 #4 Registered User
- Join Date
- Mar 2011
- Location
- Buffalo NY
- Posts
- 259
Nice work thanks for the write up!
Dave "Big Nasty" B
05-05-2013 #5
Registered User
- Join Date
- Mar 2012
- Location
- Texarkana, TX
- Posts
- 186
Amazing work. Figuring out how to do my bumpers is the bane of my existence.
63 Biscayne
Schwartz Performance Chassis
My build thread: https://www.pro-touring.com/showthre...ht=#post916553
05-05-2013 #6
Registered User
- Join Date
- Mar 2012
- Location
- Marianna, FL
- Posts
- 394
I found that making everything a simple geometric shape is the easiest. It's not like rocket surgery so you get to be creative to your hearts content.
Matt
 Originally Posted by renegade6

05-05-2013 #7
Registered User
- Join Date
- Mar 2012
- Location
- Marianna, FL
- Posts
- 394
Thank you I hope you can use this. Originally Posted by daveybtv
05-05-2013 #8
Registered User
- Join Date
- Mar 2012
- Location
- Texarkana, TX
- Posts
- 186
My bumpers have the big pieces missing in the middle and a curve in the center. I would greatly appreciate any suggestions.
http://www.hotrodders.com/forum/cust...er-231977.html
Originally Posted by 53Vipette
63 Biscayne
Schwartz Performance Chassis
My build thread: https://www.pro-touring.com/showthre...ht=#post916553
05-05-2013 #9 Registered User
- Join Date
- Dec 2005
- Location
- Birmingham, AL
- Posts
- 3,355
Thanks for pulling the curtain back and show off fab tricks.
Stephen
05-05-2013 #10
Registered User
- Join Date
- Mar 2012
- Location
- Marianna, FL
- Posts
- 394
So you could stay tuned for the next installment where I cut out the license plate holder out of the middle. I'd make it out of a couple pieces like 4 or so that way you can capture the shape you need. Also, cutting along the edge of the bend so you can pick up a new line. I think by back setting the piece you end up with a bumper that looks filling and not stock. Furthermore, grinding more of the chrome and nickel off with aid in make cleaner, better looking welds. My concern would be that welds would be brittle and start cracking over time.
Either way you are on the right track if that's your bumper just be creative and push your skills!
Matt
Originally Posted by renegade6
05-05-2013 #11 Registered User
- Join Date
- Dec 2010
- Location
- Charlestown NH
- Posts
- 352
shoulda just given the guy back a 69' camaro, they make different smooth bumpers for them. "whoops did ya a favor and ditched the L"
https://www.pro-touring.com/showthre...-Touring-Truck
DMP Fabrication LLC
Follow me on Instagram for welding and truck progress! - Americangraffiti
05-05-2013 #12
Registered User
- Join Date
- Mar 2012
- Location
- Marianna, FL
- Posts
- 394
Nah... He's not a camaro guy. Now that he found someone who can build **** I think there will be less bolt on stuff on his future projects! Did you do burn outs yet Dan? I'm gonna do a "How to change a tire" write up for my car too. Should be a chuckle-fest for a few here. Originally Posted by the dan
05-06-2013 #13
Registered User
- Join Date
- Dec 2010
- Location
- Charlestown NH
- Posts
- 352
as if my truck will ever be under its own power again. lol. Originally Posted by 53Vipette
i actually looked at my bed yesterday and am thinking about bringing it up and getting that done so the rear half of the truck is complete. then ill my version of how to change a tire.. we should air the videos in the same thread. Bumper looks great by the way. have you ever done bumper work and had it rechromed? how smooth do you have to get the weld finish so its not scratched or wavey?
i ask this because im going to be doing the same. removing the rivets and sectioning maybe 2 bumpers together so i dont have a license plate bosshttps://www.pro-touring.com/showthre...-Touring-Truck
DMP Fabrication LLC
Follow me on Instagram for welding and truck progress! - Americangraffiti
05-06-2013 #14 Registered User
- Join Date
- Nov 2009
- Location
- illinois
- Posts
- 146
nice work on the bumper
05-06-2013 #15 Registered User
- Join Date
- Aug 2008
- Location
- jacksonville,fl
- Posts
- 972
Although I can pretty much figure out how to do something in metal, I always love seeing in progress pictures for inspiration. Even if it has nothing to do with changes I need to make to my stuff, I still find them inspiring. Kinda like putting food in front of a hungry person.I think custom bumper work can be the difference between another average nice restored ride & an exceptional one.
I did a customized el camino rear bumper years ago using part of a narrower Nova bumper , which I've never been happy with. My next plan is to fab an entire outside with the sharp angular shapes of a caddy cts_v rear bumper, which should blend well with my 2010 Camaro nose conversion. Now that will be a bit of work & time to make from thick metal.
05-07-2013 #16
Registered User
- Join Date
- Mar 2012
- Location
- Marianna, FL
- Posts
- 394
So here's what I did tonight to give you an idea how to delete the plate section. I plan on using all of the stamped piece I cut off to remake a factory looking bumper. I don't have a way to form tight, uniform radii by hand which kind of sucks but this is custom car building.
In order to keep things smooth and not wavy I use my air sander and dyechem as a guide coat. If I see a low spot I tap it out with hammer and dolly, if I see a high spot I grind it down. Keep making long smooth passes to reduce a chance to dig into the base metal. I will finish this with 150 grit sand paper and pray that it's good when it leaves for chrome!
Originally Posted by the dan
05-08-2013 #17 Registered User
- Join Date
- Mar 2004
- Location
- Mid-Michigan
- Posts
- 2,764
Can I make a suggestion to fill in the "hook" at the end of the bumper. Bring it straight across, parallel to the grille.

MarkMark:
"Bad Ast" Astro Van. Just because I did it... Doesn't mean it's possible...
This my Bad Ast thread...
https://www.pro-touring.com/showthre...roject-Faze-II
This is my Fotki album...
http://astroracer.fotki.com/
05-08-2013 #18
Registered User
- Join Date
- Mar 2012
- Location
- Marianna, FL
- Posts
- 394
Yeah thanks for the idea but I'm already all over it Originally Posted by astroracer
the top edge is messed up anyways since it doesn't match the valance panel right. The plan was to trim and fit it to match everything.
05-08-2013 #19
Registered User
- Join Date
- Aug 2008
- Location
- jacksonville,fl
- Posts
- 972
Glad you mentioned dyechem, I'm fixin to get back to work on my metal ground effects I posted in this section before.High spots are definitely worse than low spots when it comes to bodywork. Guess I'll see if napa has some.
Good chromers do some sanding with the soft copper anyway. With what I think your skillset appears to be, if you think it's good, I'm sure they will also. They just don't like to have to multiple dip & sand to fill someone's gouge marks where some newbie ground his repairs into gouges.
05-10-2013 #20
Registered User
- Join Date
- Mar 2012
- Location
- Marianna, FL
- Posts
- 394
When it leaves the shop I hope have it finished in 150 grit paper with no tooling marks. I'm combating the urge to fuss over every tiny detail until I'm closer to the end.
Originally Posted by jlcustomz

 Reply With Quote