


Results 1 to 20 of 63
-
12-27-2011 #1
 Registered User
- Join Date
- Feb 2010
- Location
- Central Texas
- Posts
- 78

1967 Mustang Coupe
After reading build threads and seeing the ingenuity of the people on this forum, I decided to start my own build thread. I look forward to continue to get ideas from all of you and can hopefully help others in the process.
I've owned my Mustang since 2008. The car needed plenty of work when I purchased it and I tackled some in the few years since. This is my first vehicle I've restored so there is a lot of learning involved for me. My only experience working on cars was the four years I did car audio work in college.
I'll post up some pictures and get everyone up to date on the project soon.
-
12-27-2011 #2
Registered User
- Join Date
- Feb 2010
- Location
- CO (orig. NY)
- Posts
- 140
Welcome! Looking forward to seeing the pics. Glad to see more Mustangs on here lately

12-27-2011 #3
Registered User
- Join Date
- Feb 2010
- Location
- Central Texas
- Posts
- 78
My original plan was to restore my Mustang to original condition. As the restoration has progressed, I've incorporated more and more modifications. Since finding this forum, my thoughts have strayed even farther from an original restoration.
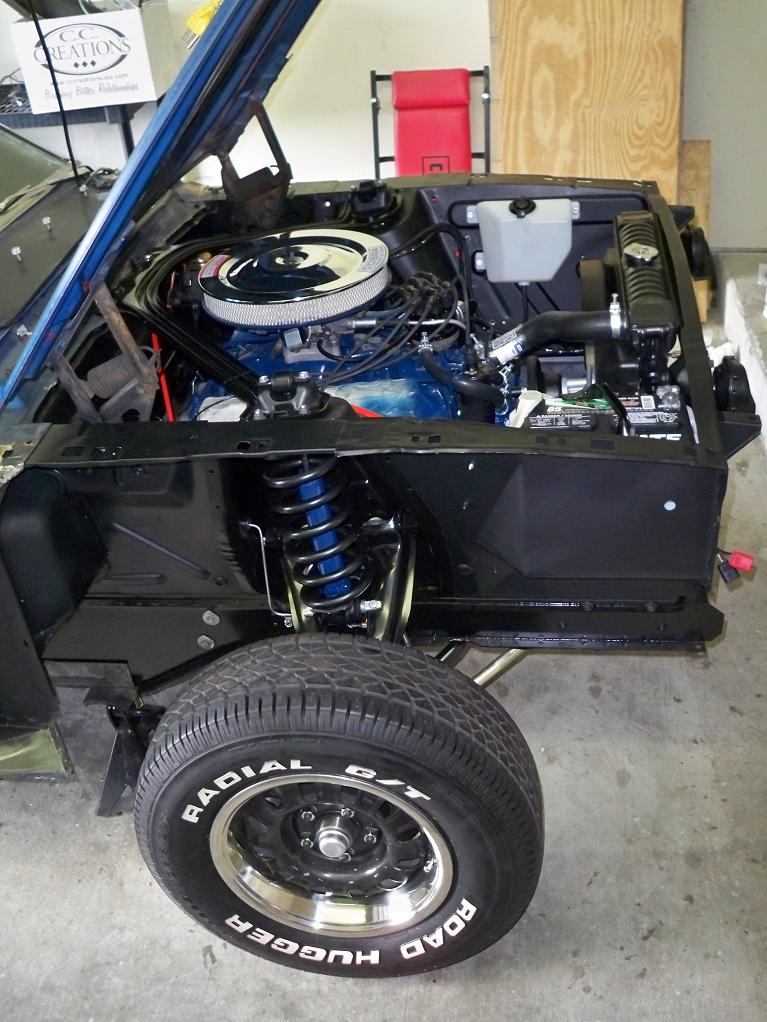
The first project I handled during 2008 was the restoration of the engine compartment. I stripped everything from the firewall forward to bare metal. Everything except the sheetmetal and the engine were redone completely. This includes all new Open Tracker suspension, disc brakes, all new steering components, etc.
The departures from stock at this point included '70 Mustang spindles and disc brakes, roller spring perches, roller idler arm (manual steering), heim joint strut rods, and 1-1/8" sway bar.
12-27-2011 #4
Registered User
- Join Date
- Feb 2010
- Location
- Central Texas
- Posts
- 78
I'm restoring the Mustang one large project at a time. I enjoy this approach as I can work on the car but then have a break and opportunity to drive it for a while. Unfortunately, each project always expands and takes much longer than I expected.
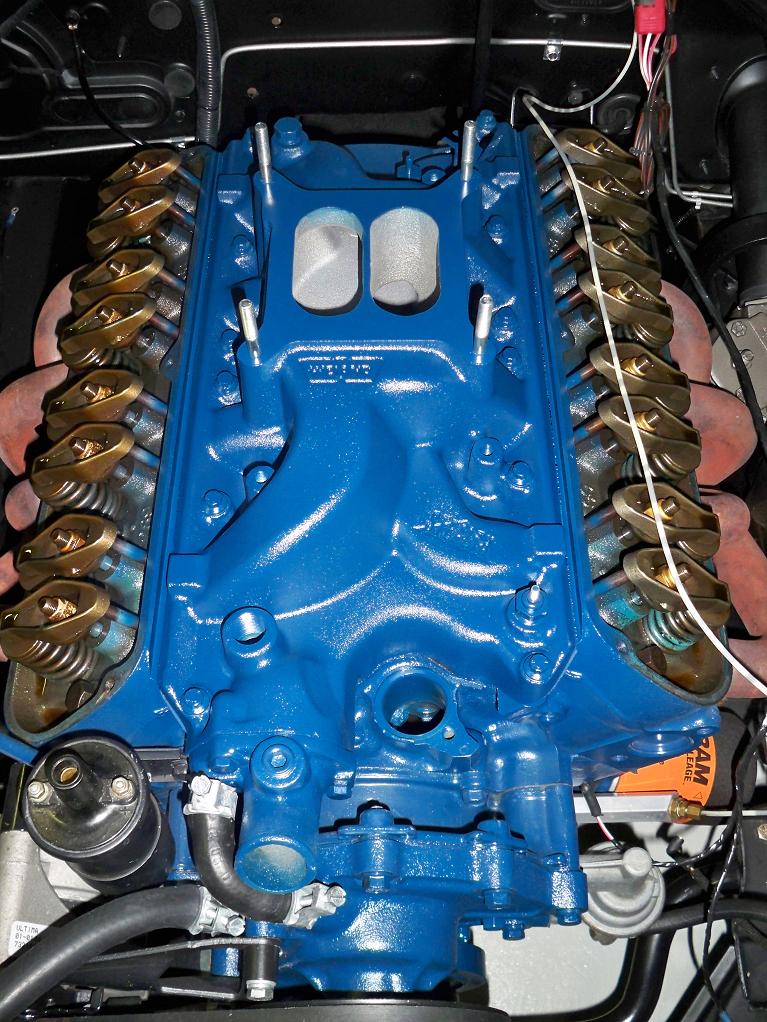
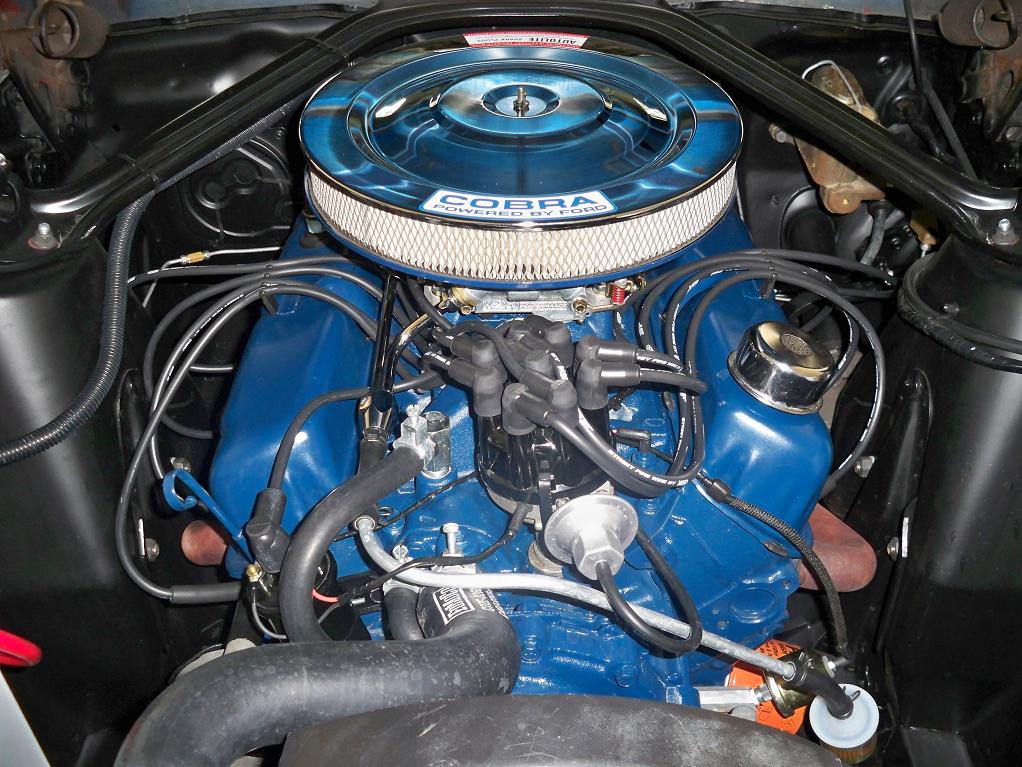
After finishing the restoration of the front end, I drove the car occassionally for a few months. Before long, I grew more and more disappointed with the lack of performance and decided to install a Weiand intake and Holley Street Avenger carburetor. This helped some but it required a large amount of learning to get the carburetor to run right so I did not have a bad hesitation.
12-27-2011 #5
Registered User
- Join Date
- Feb 2010
- Location
- Central Texas
- Posts
- 78
I've not mentioned it yet but this is a true budget build. It takes me a while to save up for all the items I need for each project. I'm constantly selling old parts to help pay for the new parts I need. Additionally, I do all the work myself so I don't have to worry with labor costs.
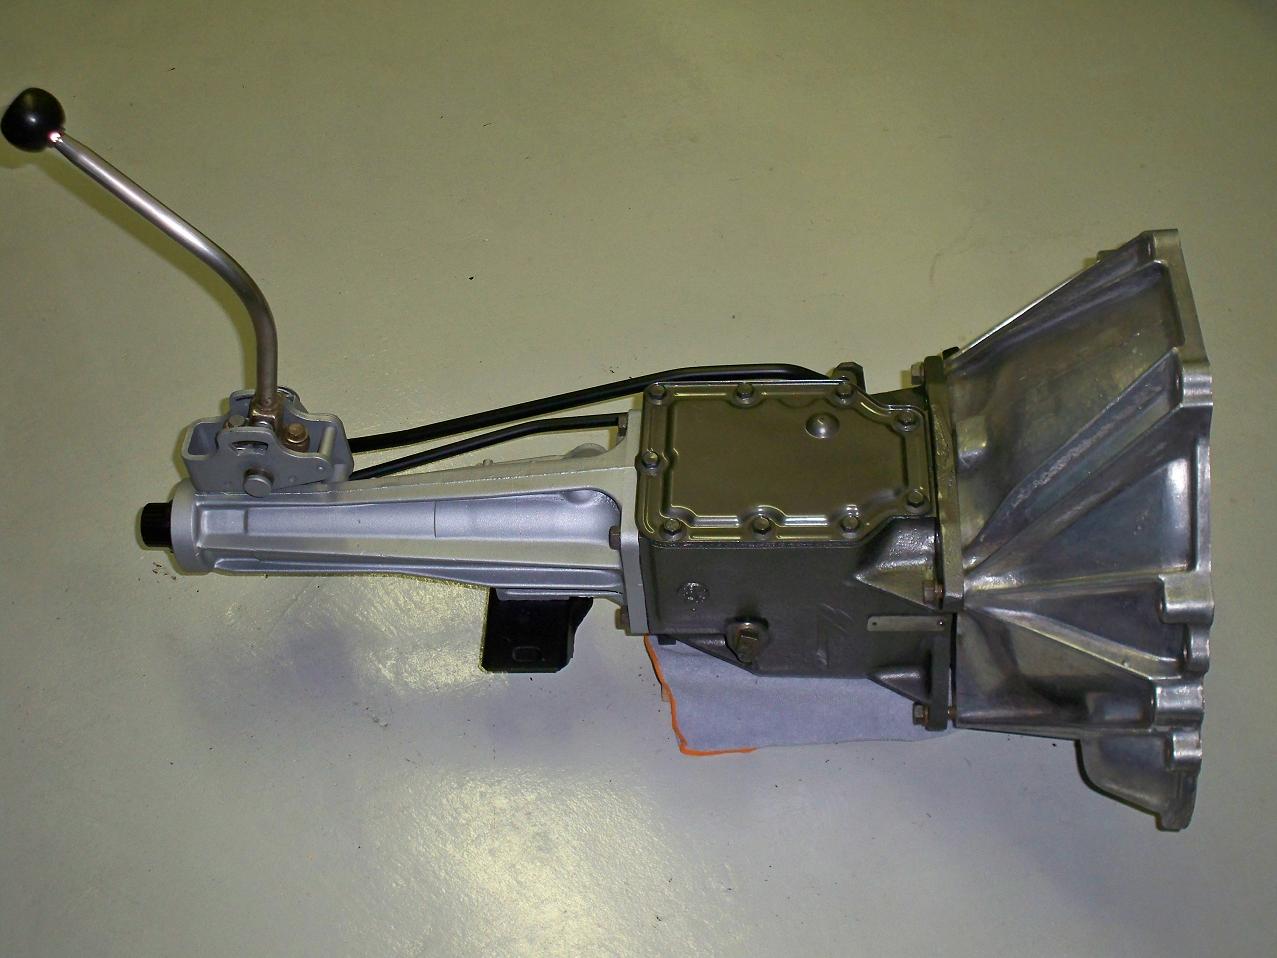
The stock transmission is the original 3 speed toploader (manual). The transmission leaked from the shift seals and covered the bottom of the Mustang in oil. I continued to want to go faster but I could not swap my rear gears (2.79:1) with this leaking all over the axle and undercarriage. This made the transmission my next project for the end of 2009.
I'd love to install a new T5 transmission. However, I didn't have the money for a 5 speed transmission or the various parts needed to install it in my '67. As a result, I decided to rebuild my current transmission as it only cost about $150 in parts.
My starting point...
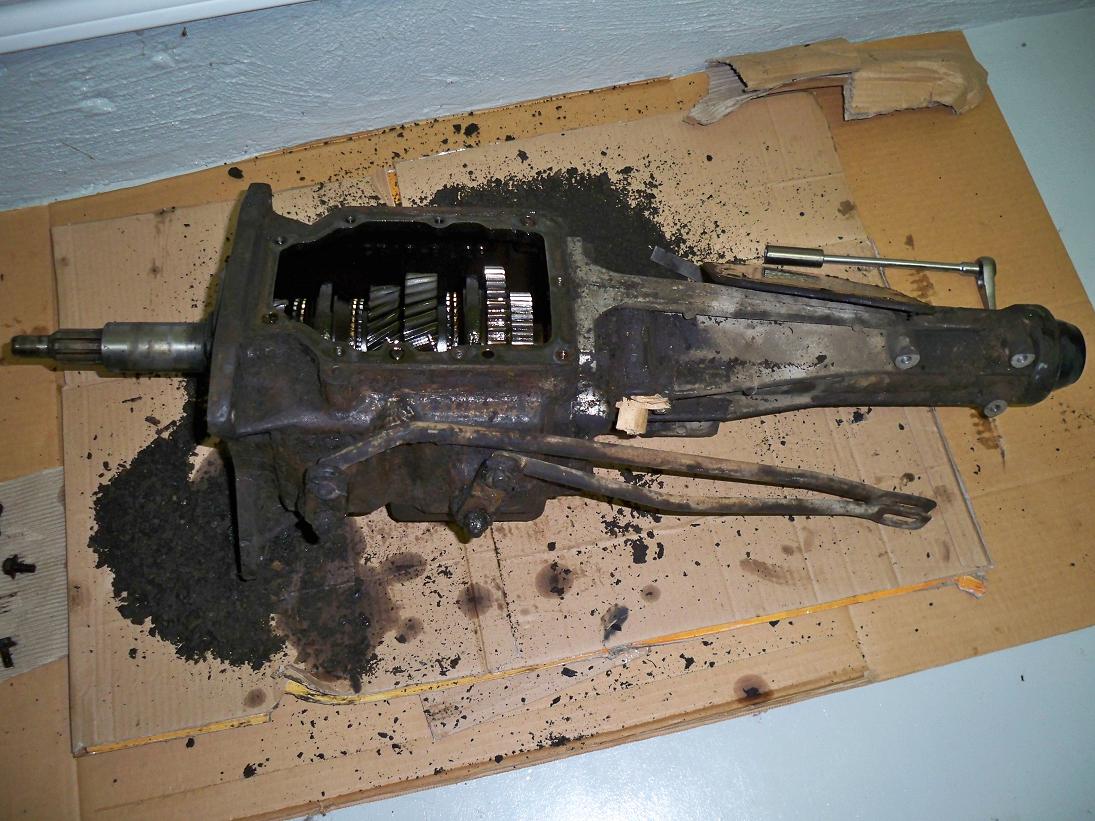
I installed a Centerforce Stage II clutch and pressure plate during the transmission rebuild. The transmission received an all new bearings, seals, and syncros. The transmission looked imaculate when I was done and the leak was fixed.
12-27-2011 #6
Registered User
- Join Date
- Feb 2010
- Location
- Central Texas
- Posts
- 78
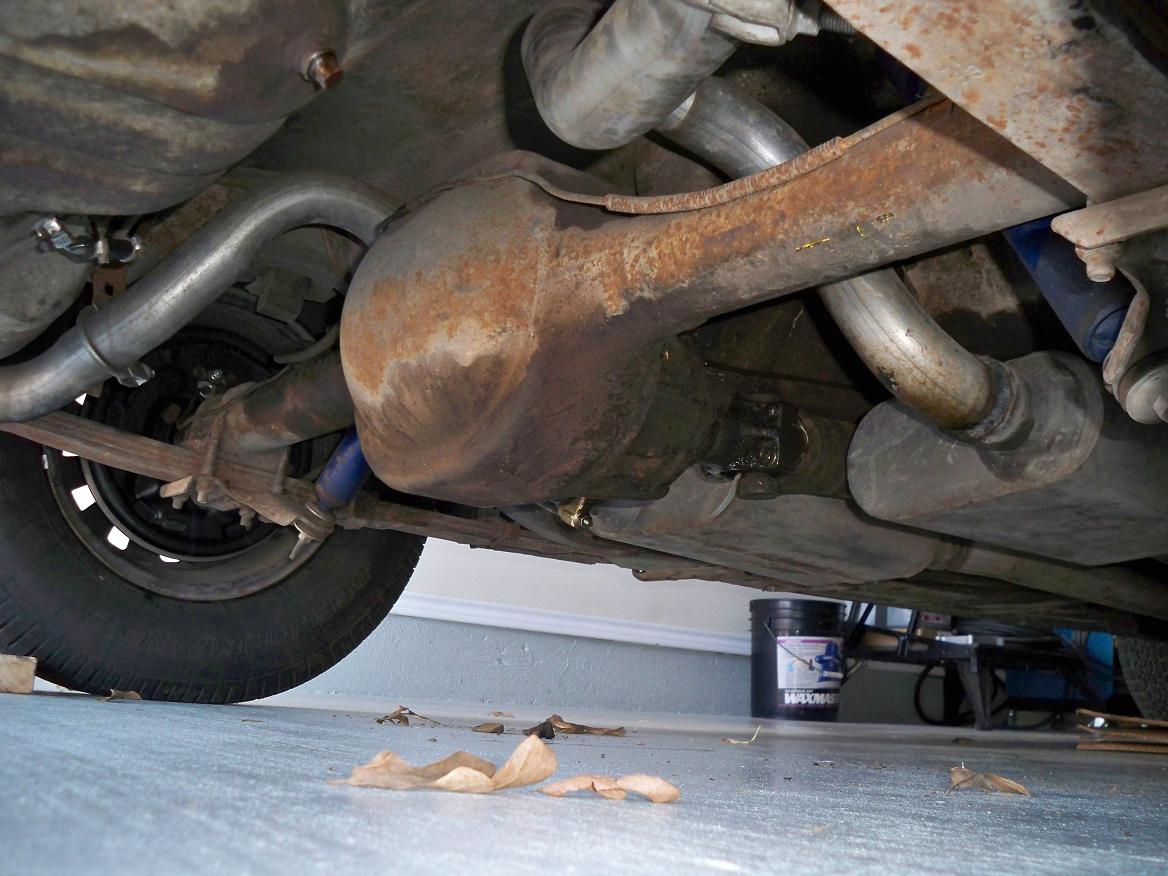
At the beginning of 2010, I decided to go ahead and swap out my rear gears. The stock ratio was 2.79:1. I decided to switch to a 3.25:1 ratio and a Detroit True Trac differential. The new ratio will work with my existing 3 speed transmission or a 5 speed transmission when I get to upgrade in the future.
You might be asking.... If he can't afford a $1,000 transmission how can he afford a rear axle upgrade. I was able to make this happen through a series of Christmas gifts and with accumulated Summit $20 off codes.
Before:
After:
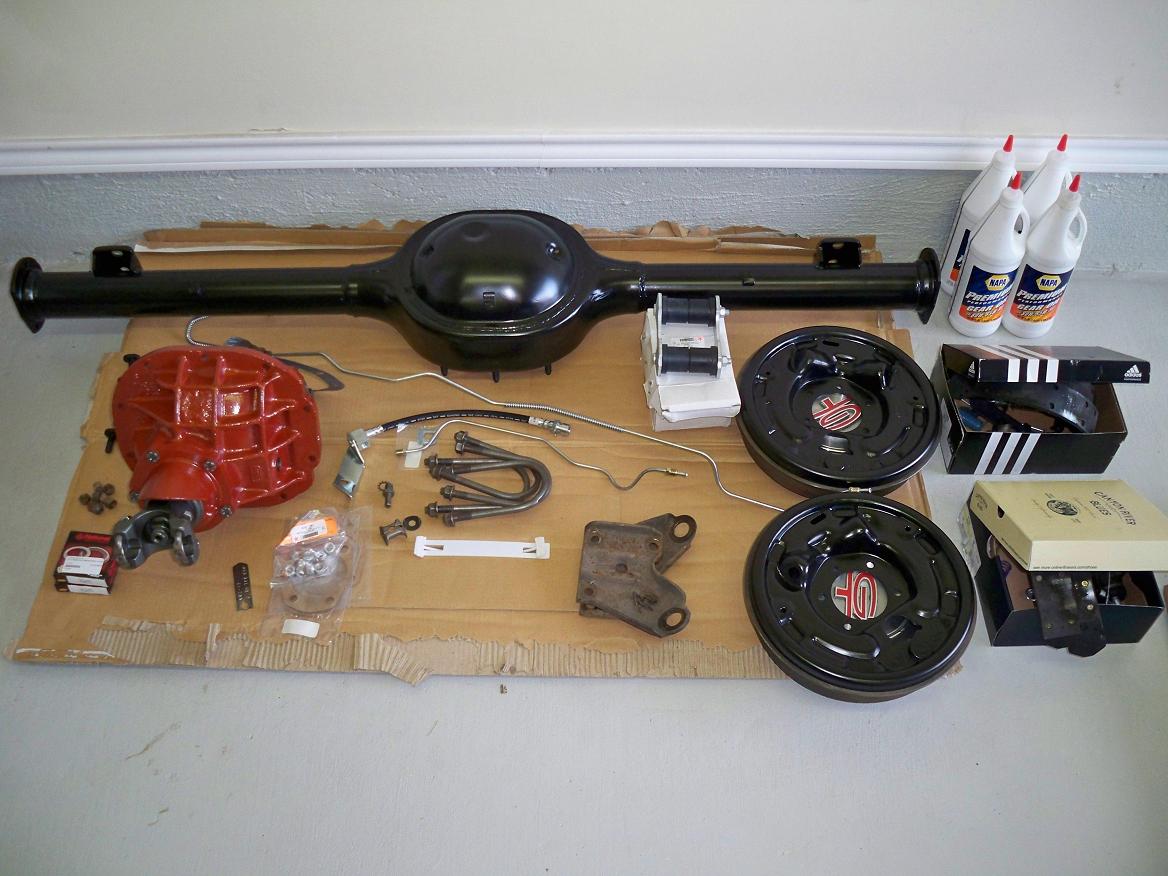
This upgrade made a performance difference but not much in my opinion. However, I'm pleased to have the drivetrain all restored. As you can tell by the pictures, I restored the stock rear brakes but had to leave the stock rear suspension for now.
12-27-2011 #7
Registered User
- Join Date
- Feb 2010
- Location
- Central Texas
- Posts
- 78
Life happened in 2010 and I was not able to do any other projects on my Mustang.
At the end of 2010, I started work on replacing the entire floorpan in the Mustang. The only portion of the floorboard without significant rust holes was the passenger rear floorboard. The previous owner broke the driver window regulator so it would not roll up. This did not bother him and he continued to park it outside. This caused all the rust but at least it is isolated to the floorboards.
Here are a few pictures of the rust damage to the floorboards.
The removal of the floors was a messy project. I was a little worried about removing the entire floor as it could hurt the structure of the Mustang. I leveled the Mustang on jacks and then cut enough of the floor out to install subframe connectors. Once they were in place, I removed the rest of the floor.
I finished replacing the floorboards using a Dynacorn full floor. The toe boards needed to be replaced on both sides.
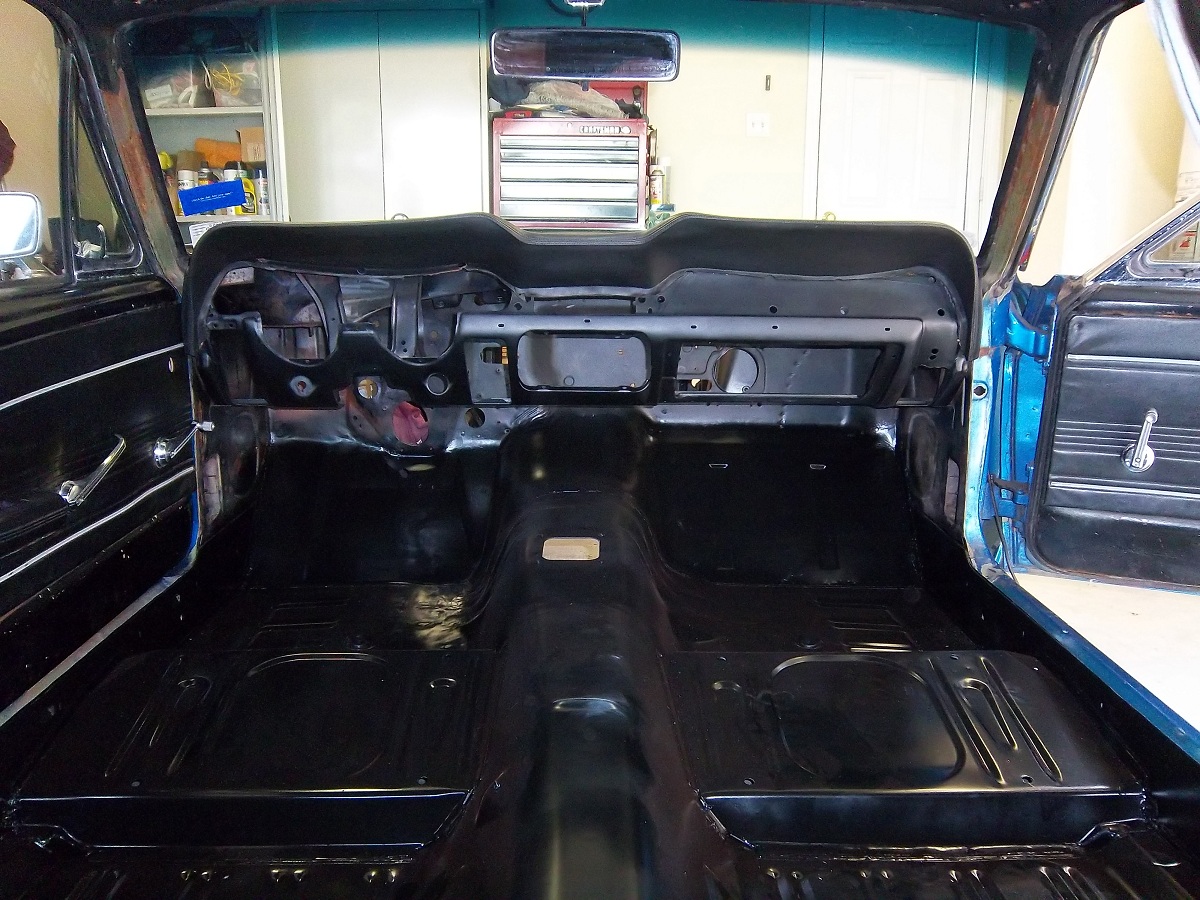
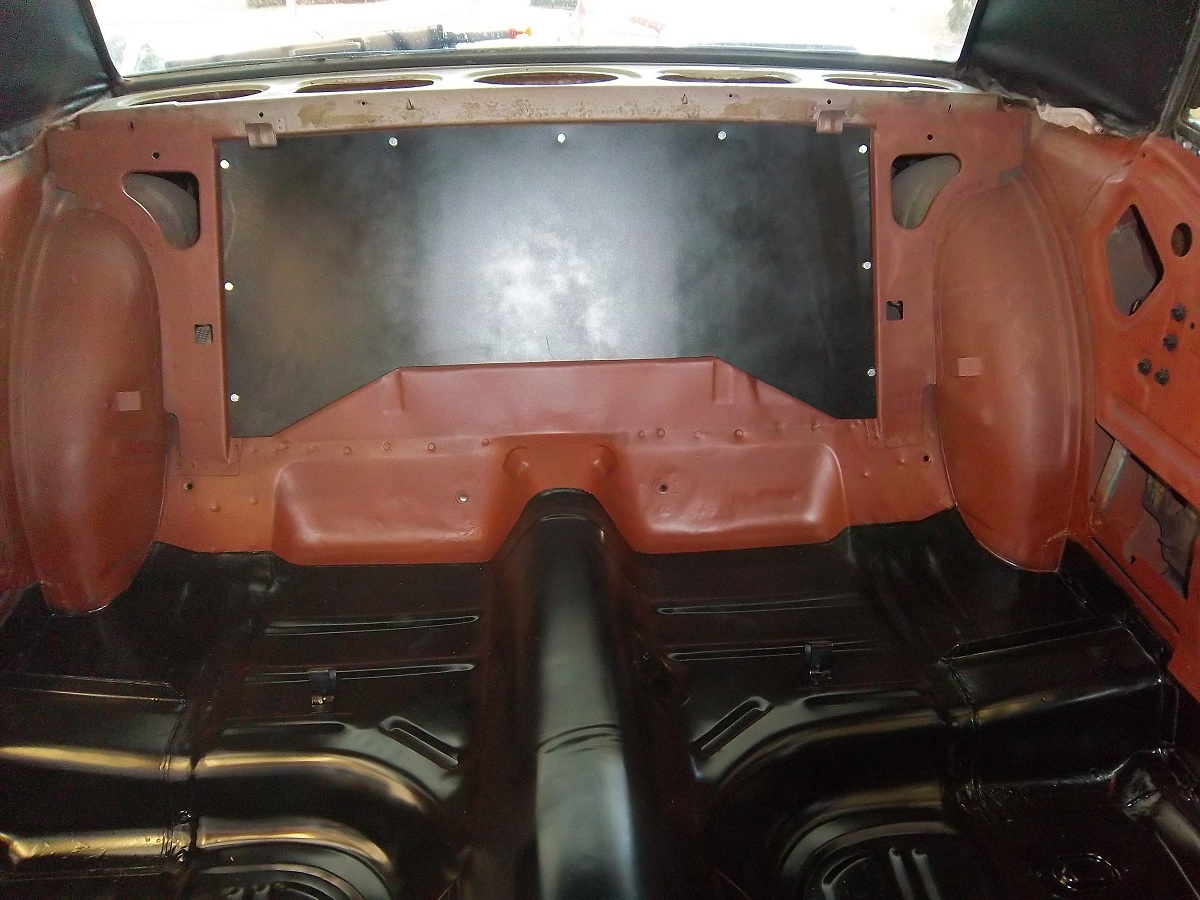
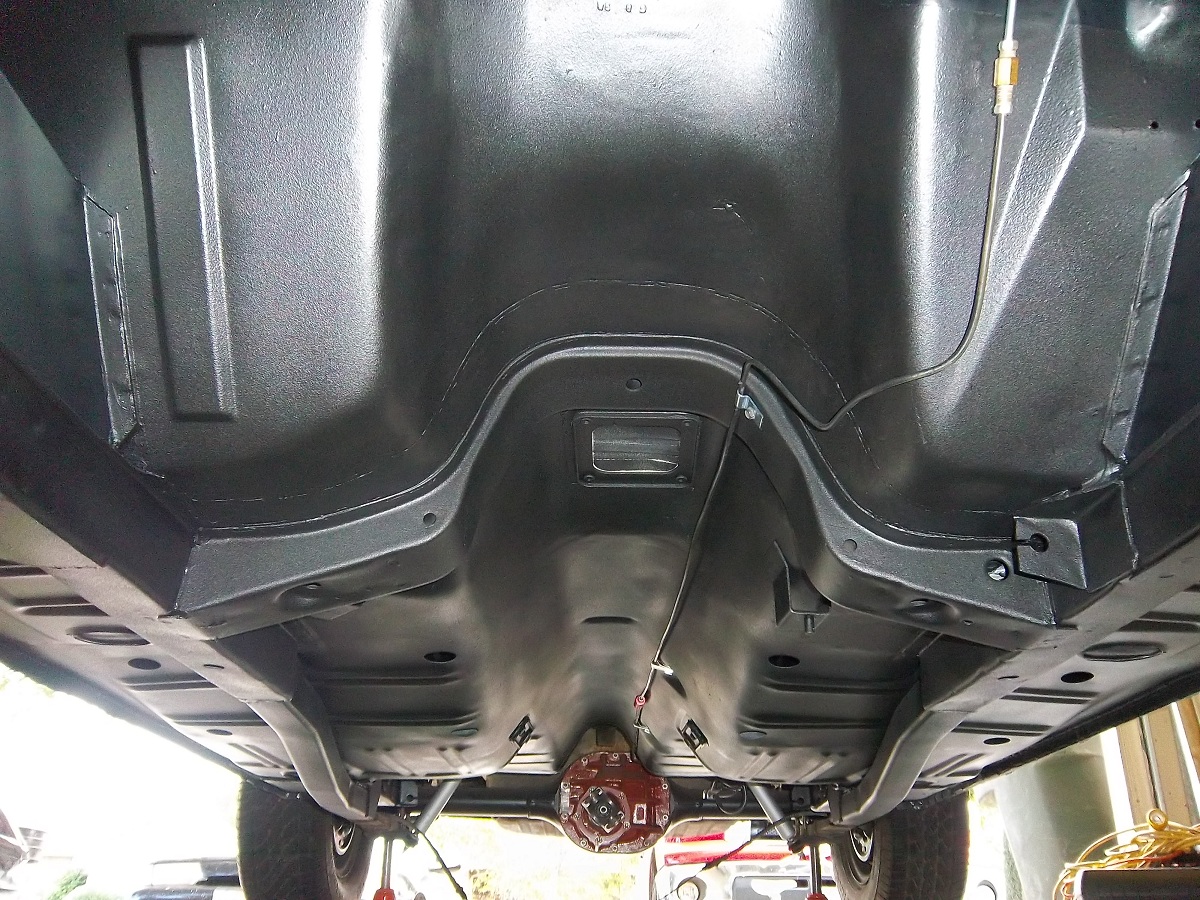
The interior floors are just painted with standard rattle can spray paint. The underside has all the seams covered with 3M seam sealer followed by a bedliner which does not have much texture. The appearance in the following picture looks splotchy but it is just because the picture was taken while it was still drying.
12-27-2011 #8
Registered User
- Join Date
- Feb 2010
- Location
- Central Texas
- Posts
- 78
The final picture in my last post is of the undercarriage from the engine compartment. I ended up removing the engine in order to clean the underside of the toe board welds. Additionally, it gave me greater clearance to undercoat the floorboards. While the engine was out, I thought I'd replace the cam and then the project expanded beyond belief. I'll post a little more on this in the future.
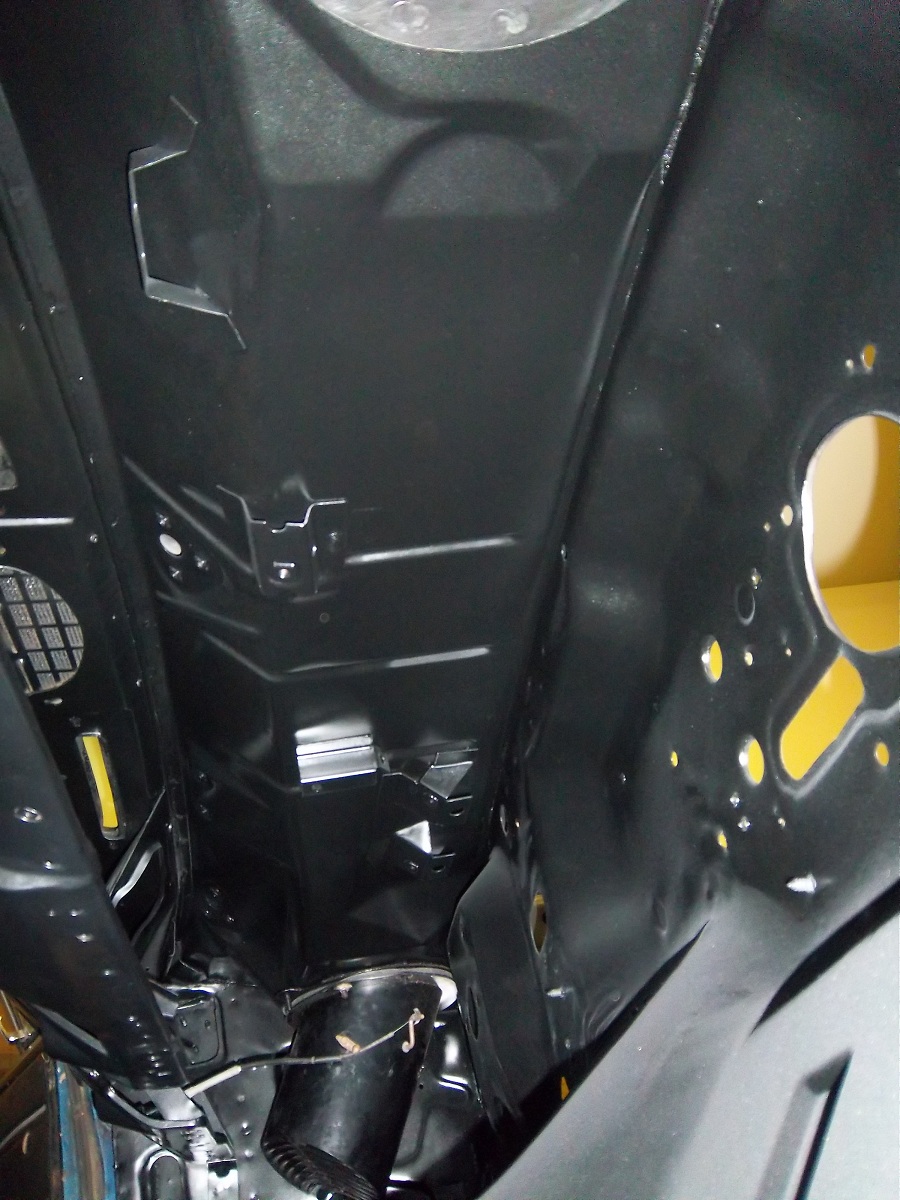
After completing the floorboards, I stripped the area behind the dash. This was a big pain but turned out great. The dash is welded in place so you don't have much space to work in and much of the metal was lightly covered in surface rust. The end result...
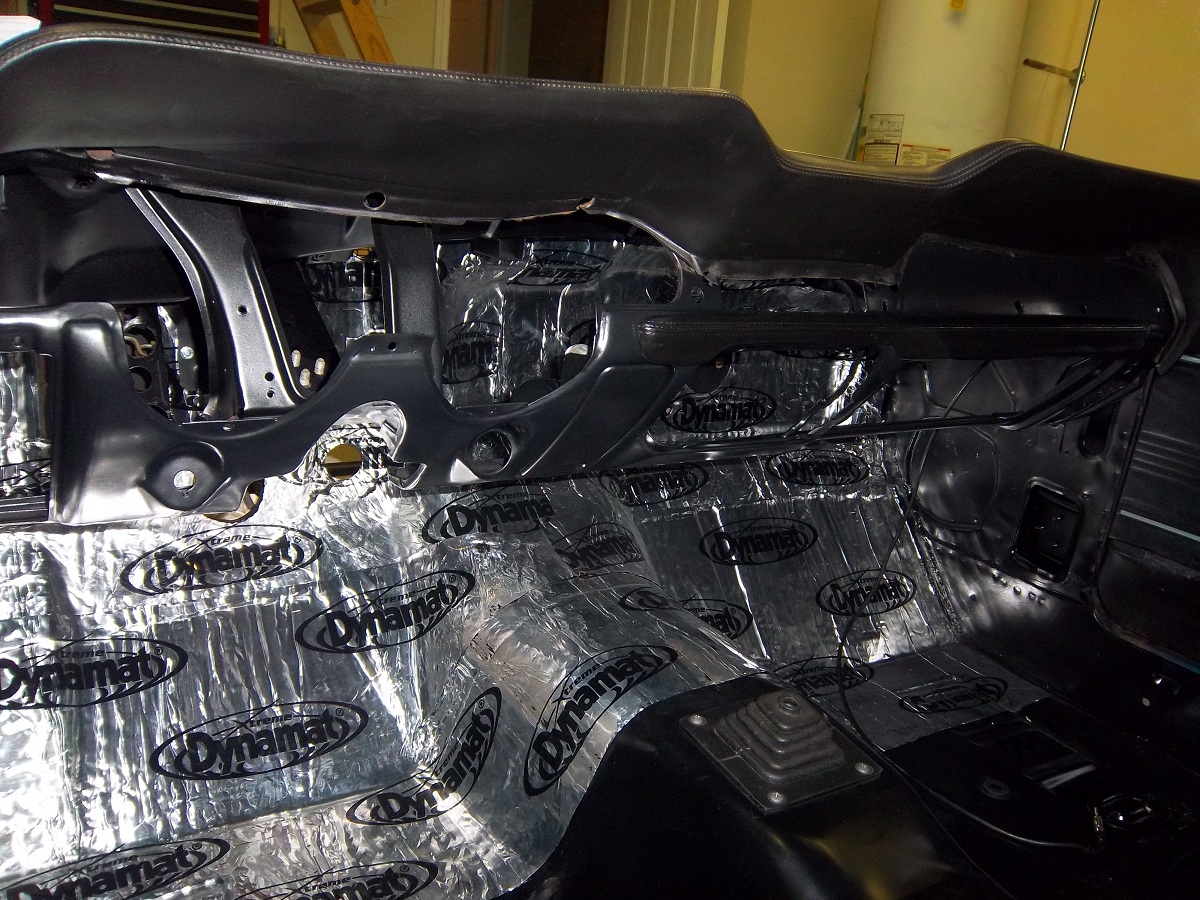
I decided to install some Dyamat and covered the firewall and front floorboards. Here is a picture of it during the installation process.
This is a picture after the interior has been installed. Unfortunately, I can't drive it yet as my engine is still at the machine shop.
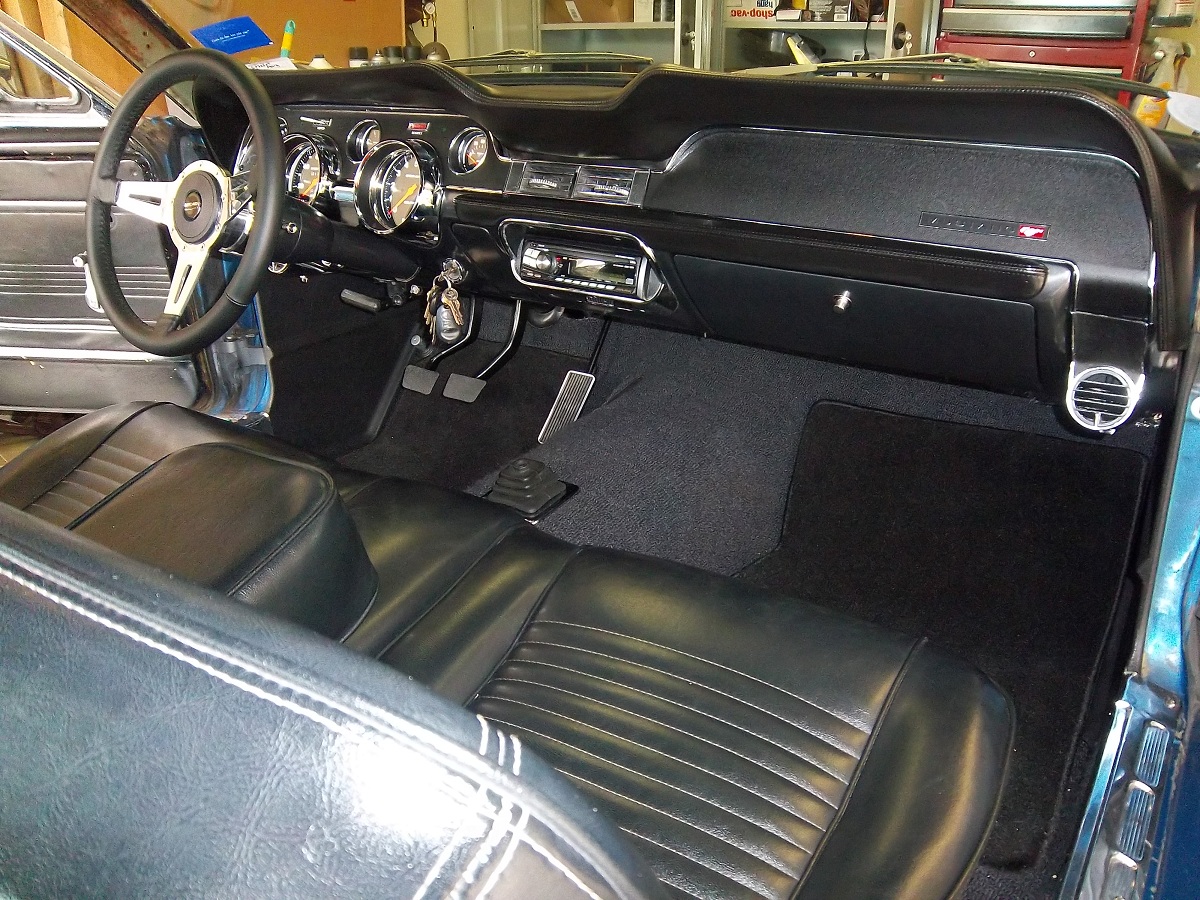
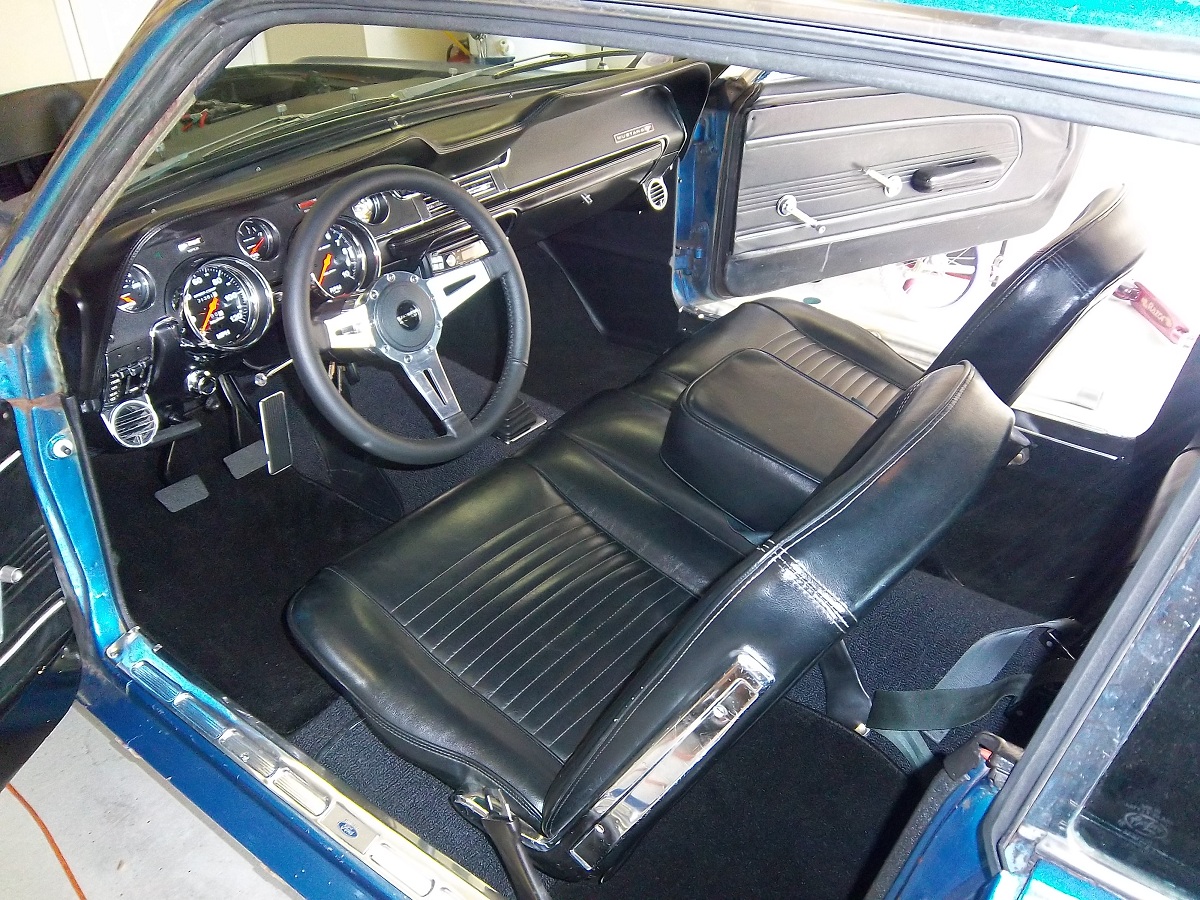
The instrument cluster is something I built using a stock bezel and a collection of Autometer gauges. It turned out really nice.
12-27-2011 #9 Registered User
- Join Date
- Sep 2010
- Location
- Tampabay, Florida
- Posts
- 78
Nice work. Your car is looking great. T5's are an easy swap and in my area you can find them all the time for $400 or so. It is truly amazing how much an improvement that it was. Another great swap is an 8.8 rear. I have about $300 in changing to an 8.8 with disc's, posi, 3.73 gear, and aluminum drive shaft.
12-28-2011 #10 Registered User
- Join Date
- Mar 2009
- Location
- overseas
- Posts
- 3,434
x2 looks great! awesome job on it!
 Kevin S. (overseas in Germany)
1963 Chevrolet Impala 2d ht Coupe
www.CruznArt.com
CRUZN - Automotive Artworks
12-28-2011 #11
Registered User
- Join Date
- Dec 2008
- Location
- Sweden/Hedemora
- Posts
- 11
Really nice work! I look forward to more updates!
12-28-2011 #12 Registered User
- Join Date
- Mar 2010
- Location
- Rochester NY
- Posts
- 403
Very nice work - it's nice to see another "Joe" working on his own ride and doing projects along the way while still driving as much as he can.
Good luck with everything!Don
Grace - 67 Camaro daily driver with upgrades along the way.
https://www.pro-touring.com/showthre...-Camaro-Driver
12-28-2011 #13
Registered User
- Join Date
- Feb 2010
- Location
- CO (orig. NY)
- Posts
- 140
Awesome. I like the one step at a time approach. One of the next cars I build I think I'll stick to that method. Keep up the good work.
12-28-2011 #14 Registered User
- Join Date
- Mar 2011
- Location
- Buffalo NY
- Posts
- 259
NICE!...Great job so far keep the updates comming.
Dave "Big Nasty" B
12-28-2011 #15 Registered User
- Join Date
- Dec 2006
- Location
- SF Bay Area
- Posts
- 463
Looking good! Always nice to see someone taking the low buck approach - I think alot of us can relate to it!
chunger
'68 Ranchero 500
'70 Cougar XR-7 Convertible
'98 Mustang GT Convertible
12-28-2011 #16
Registered User
- Join Date
- Feb 2010
- Location
- Central Texas
- Posts
- 78
I removed the motor from my Mustang about three months ago to finish up some work to the new toe boards.
The Mustang does not feel like much of a muscle car. I realize most don't consider it a muscle car with a 289 engine but I think I should be able to get some respectable performance from it. Unfortunately, I've not found much with the changes I've made (intake, carb, and gears). Since the motor was out, I decided to go ahead and install a new cam.
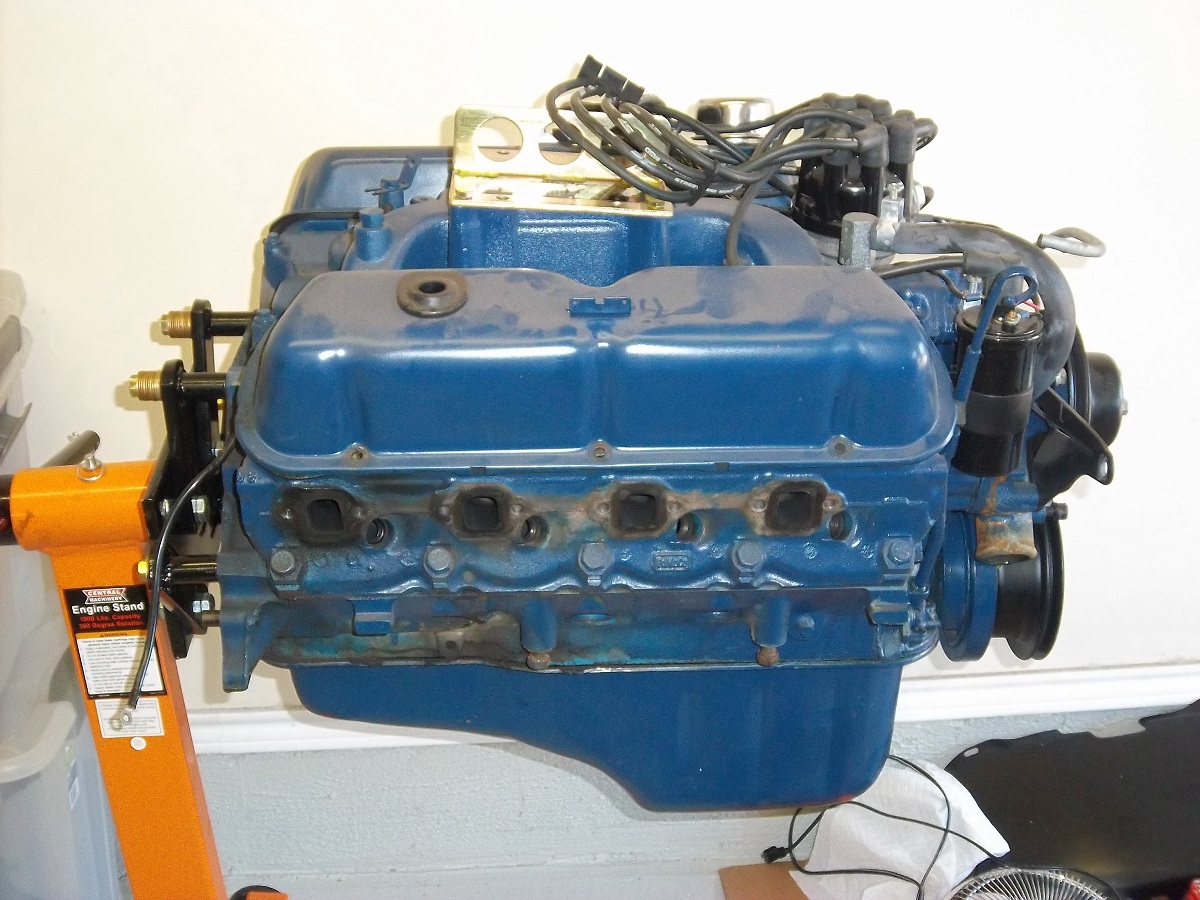
To install a high lift cam, I'd need to put screw in studs in my heads. I put the engine on a stand are starting tearing it down. The oil pressure for the engine was always a little on the low side due to high miles. When I started to pull out the cam, I realized the back of the front cam bearing was somehow damaged by someone slaming in the distributor.
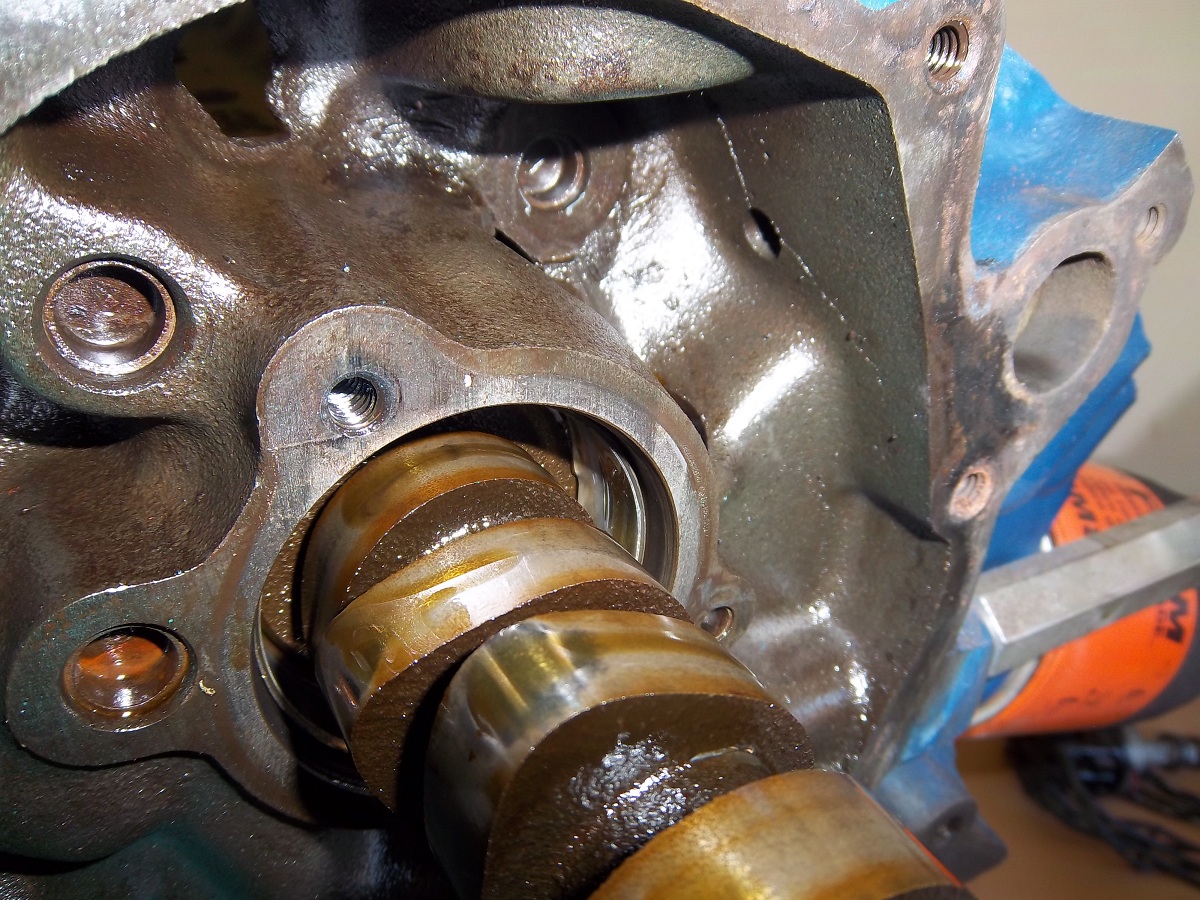
I then removed the heads and found they do not have hardened exhaust seats. Not only that, the pistons are .035 in the hole at TDC and have a 12cc dish. This places my current compression ratio at 8.2:1 with the current 54 cc heads.
A friend stopped by and we checked the crank and rod bearings. He stated they looked like it needed to be rebuilt based on the wear marks through the surface of the bearing. I located a machine shop to rebuild the engine and dropped it off at the beginning of November. I'm still waiting for it to be finished up.
I really broke the bank with the engine rebuild. I spent money I've been saving for body work and even accumulated a little credit card debt which it something I normally refuse to do. However, I soon have a rebuilt engine with the following specs:
289 bored .040 over/zero decked
Keith Black flat top pistons (KB115)
KB moly rings (4000AM8.040)
Cloyes Timing Chain (9-1135)
Comp Cams XE256H (31-324-3) cam and lifter set
Edelbrock 5025 E Street Heads
I'm hoping this gives me the increased performance I've been looking for with past upgrades.
12-28-2011 #17
Registered User
- Join Date
- Feb 2010
- Location
- Central Texas
- Posts
- 78
I'm current on the past projects on my Mustang but I did a little work today.
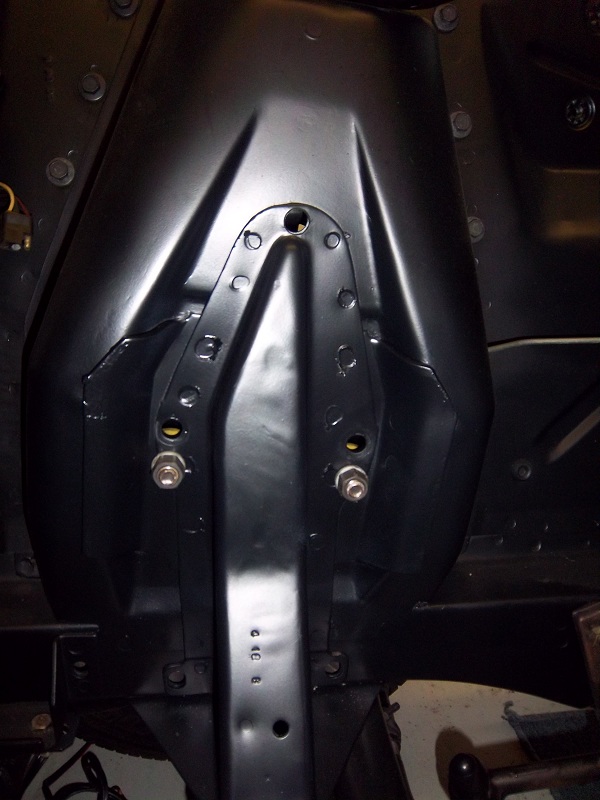
Today, I performed the shebly drop on my front suspension. This involves removing the shocks, springs, and then the upper control arm. The mounting holes for the upper control arm are relocated 1” down perpendicular to the centerline of the original UCA mounting. This was something planned by Ford (Klaus Arning) during the design of the Mustang but it was actually not performed so the car would understeer if pushed to the limit.
This was a change made by Shelby on the GT350 and GT500 cars. I took on the project today and removed a 1/4 coil from my front coil springs while they were out of the car. While the car is back together, I can't see the difference yet as the engine is not in the vehicle. Once it is in, I'll be able to see how much this dropped the front end and get a new alignment performed.
Speaking of alignments... The last time I needed to get an alignment, I talked to a local shop which stated they could set the alignment to my specs and would not damage the car. In the end, my newly refinished undercarriage which was so clean you could eat off of it was messed up. It is really just the swagged joints which they adjust to perform the alignment. They seemed to have just used vice grips on them and torn them up on my new heim joint adjustable strut bars.
The picture does not really capture how screwed up the part looks but anyway...
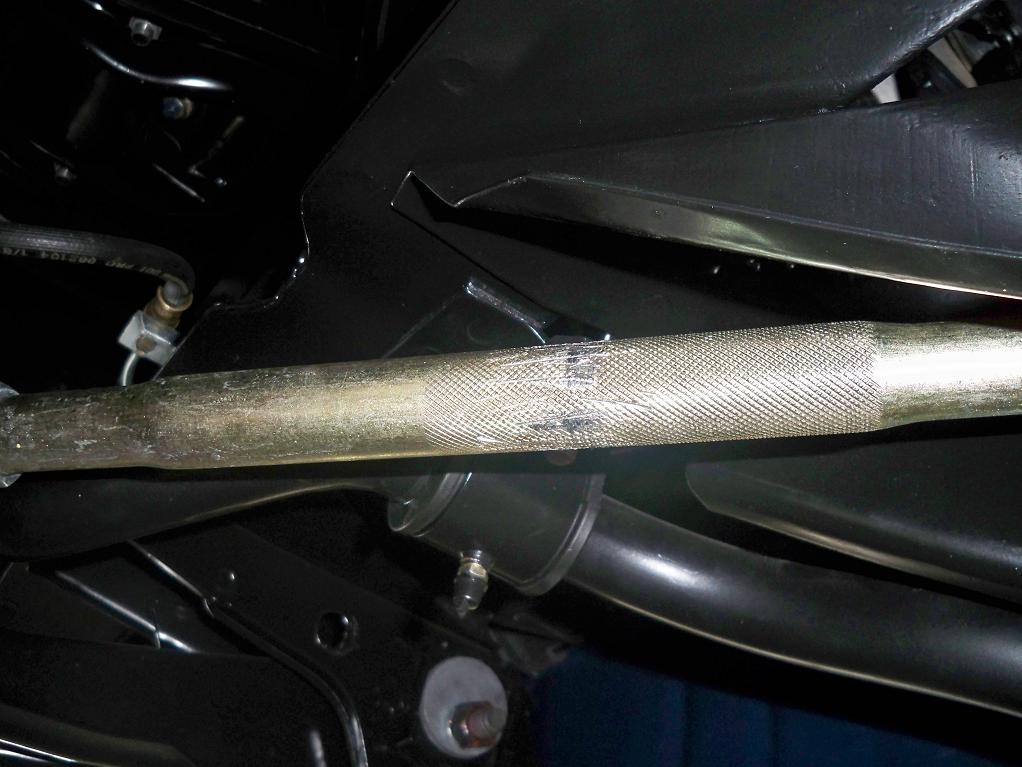
I don't look forward to going through this again. I'd like to get a swagged tube which is hex shaped so the alignment can be performed without tearing anything up. Anyone know a good provider for such a part?
12-28-2011 #18 Registered User
- Join Date
- Mar 2009
- Location
- San Antonio, TX
- Posts
- 1,635
Congrats on your build, I really appreciate a garage build as that is my style too.
Keep up the updates!
 Dave
Dave
84 Monte SS - just a few bolt-ons
12-29-2011 #19
Registered User
- Join Date
- Sep 2010
- Location
- Tampabay, Florida
- Posts
- 78
Love where your'e going. Your rebuild should help a lot in the go fast dept. When you've saved for your next evolution, you might look into 5 speeds. It's like putting in a 4.88 gear and still cruising at 70 turning 1500 rpm's. No, I didn't do the math,just my impressions. That is the single best change I did to my car. Good luck with your engine.
12-29-2011 #20 Registered User
- Join Date
- Jan 2009
- Location
- Chattanooga, TN
- Posts
- 291
hex tube
Good looking car! Always glad to see another 67 coupe on here! Have you checked mcmaster.com for a hex tube? I'm almost positive they have bar, can't remember seeing tube. Not the cheapest place but it's like Walmart for engineers haha! It'd be under raw material about halfway down. Keep up the good work!
Stephen S.
1967 Ford Mustang 4.7L, T5

 Reply With Quote



