

Results 41 to 57 of 57
Thread: Fuel tank construction
-
01-10-2013 #41

 Registered User
- Join Date
- Dec 2004
- Location
- California
- Posts
- 794

The drawing set is complete for this go around. It is going to be a 6 drawing set including a 3D rendering, sheet sets, billet drawings w/ 3D Isometric views for detail. The contact sheet will follow. It will be in .DXF and .DWG format. I will send it all out tomorrow night. There are a few details that are on you to add like bung placement and filler tube location. Everything else is there. The big test is going to be who is going to build the tank first and any revisions that are required. Anyone else want in on the share just let me know.
-
01-10-2013 #42 Registered User
- Join Date
- Apr 2006
- Location
- Coronado, CA
- Posts
- 1,688
Shep, if there is anything back here in SD just let me know.
Johnny C.
-----------------------------------------------------------------------------------------------------------
70 'cuda, Pro-Charged 408 stroker, Tremec 5 speed, Strange S-60, Alter-k-tion, Tri 4, Hydroboost and Wilwoods
01-11-2013 #43 Registered User
- Join Date
- Sep 2010
- Location
- corona,ca.
- Posts
- 1,115
Thanks you shep.when are you coming back to the west coast?i would be cool to meet up at del mar g.g. This yr.phil
72 chevelle.
01-11-2013 #44 Registered User
- Join Date
- Mar 2005
- Location
- Austin, TX
- Posts
- 137
Busy at work right now, so I can't say much, but here's my tank that I made from 16 ga. stainless a couple years ago. Helps if you own a sheet metal fab shop!

Todd Longfellow
01-11-2013 #45
Registered User
- Join Date
- Sep 2010
- Location
- corona,ca.
- Posts
- 1,115
Very nice todd.yes the right tools make or break the end result of a project.todds tanks hmm?
72 chevelle.
01-12-2013 #46
Registered User
- Join Date
- Dec 2004
- Location
- California
- Posts
- 794
Damn todd that looks pretty good, is that an A-body tank? Where did you get the dimensions for the module mounting ring? I went off info provided but I am weary about the accuracy..on that note...PHIL! You have an email. The files are in .DWG format, do you want them in a different format? I was going to send .DXF as well but I am having internet issues. Let me know what ya think
01-13-2013 #47
Registered User
- Join Date
- Sep 2010
- Location
- corona,ca.
- Posts
- 1,115
Shep,i was not able to open the files you sent me on my computer.i seemed i needed autocad to open it?maybe im doing something wrong?thank you.phil.
72 chevelle.
01-13-2013 #48
Registered User
- Join Date
- Dec 2004
- Location
- California
- Posts
- 794
Phil, what program are you running on your computer? What format do you use, I will send you the DXF files but that will not allow you to view 3D images.
01-17-2013 #49 Registered User
- Join Date
- Apr 2012
- Location
- Lethbridge, Alberta
- Posts
- 34

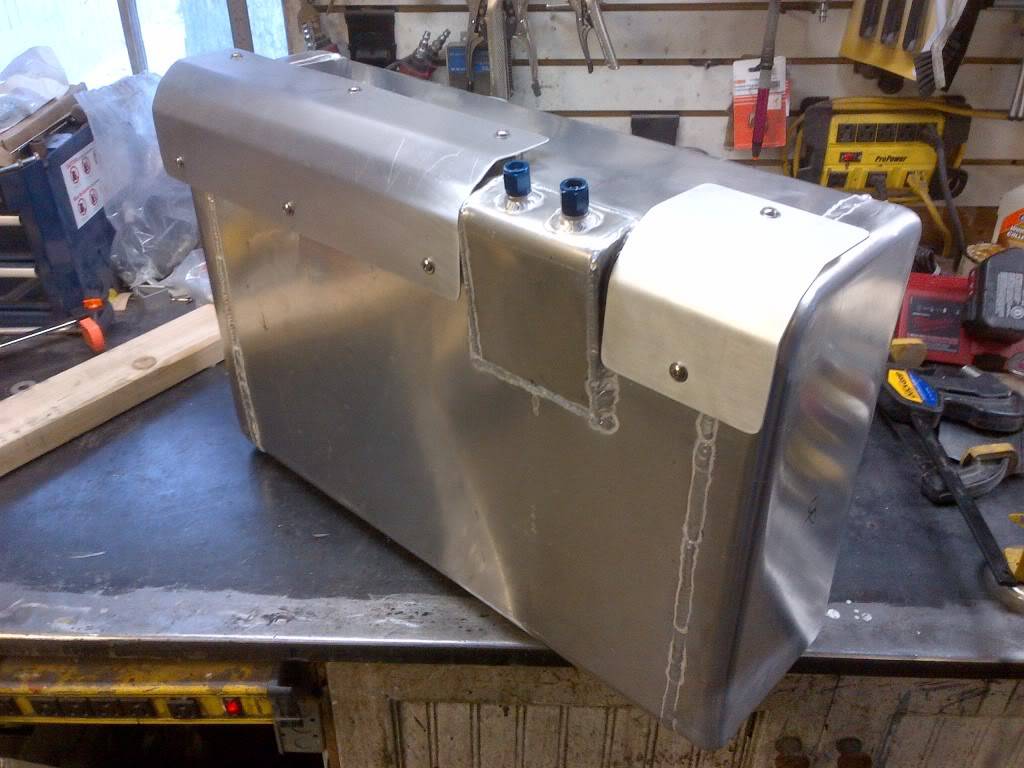
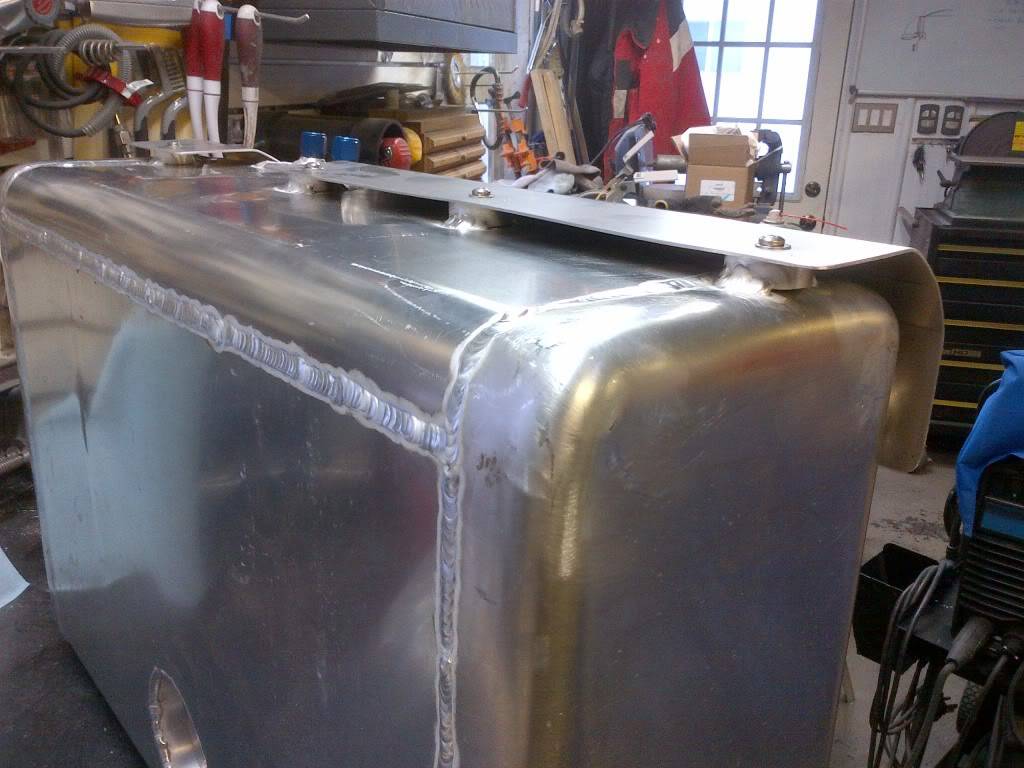
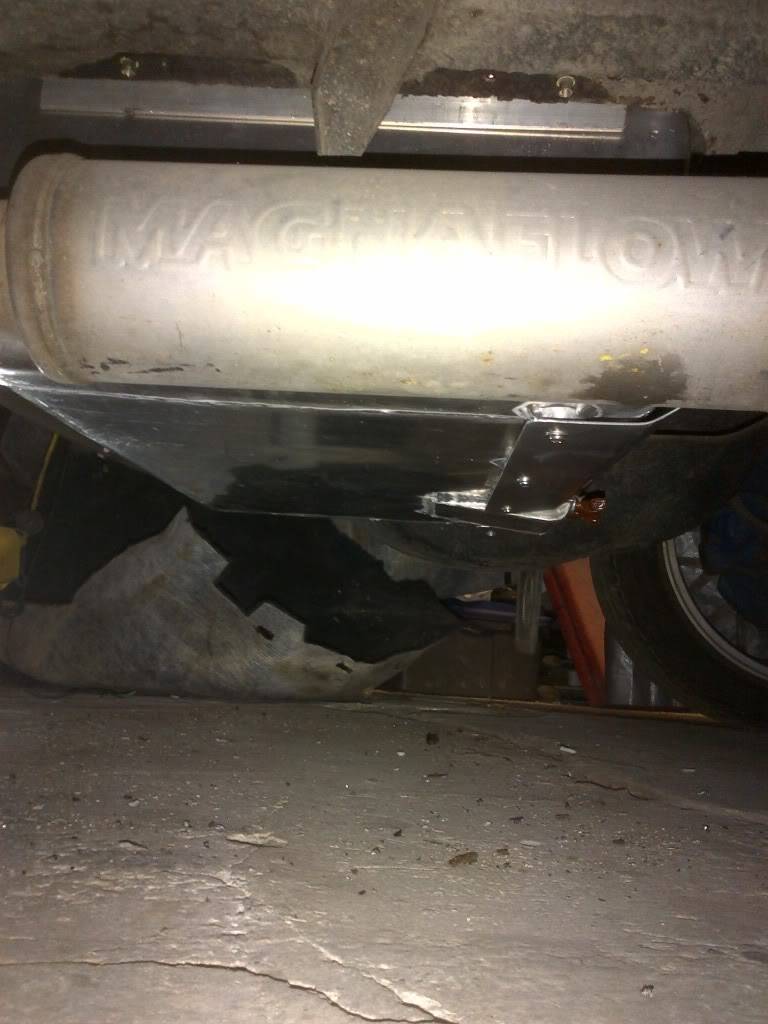
Here's the tank I built for my current project. I had the local tin basher knock me out the basic shape of the tank (it's 10 ga 6061 Al) and then I formed the end caps and baffles to fit. Before everyone freaks out about using aluminum in this application, it's 10 ga, and I've put a rock shield on the front. It's safe and strong as heck (replacing a 20 ga steel unit).
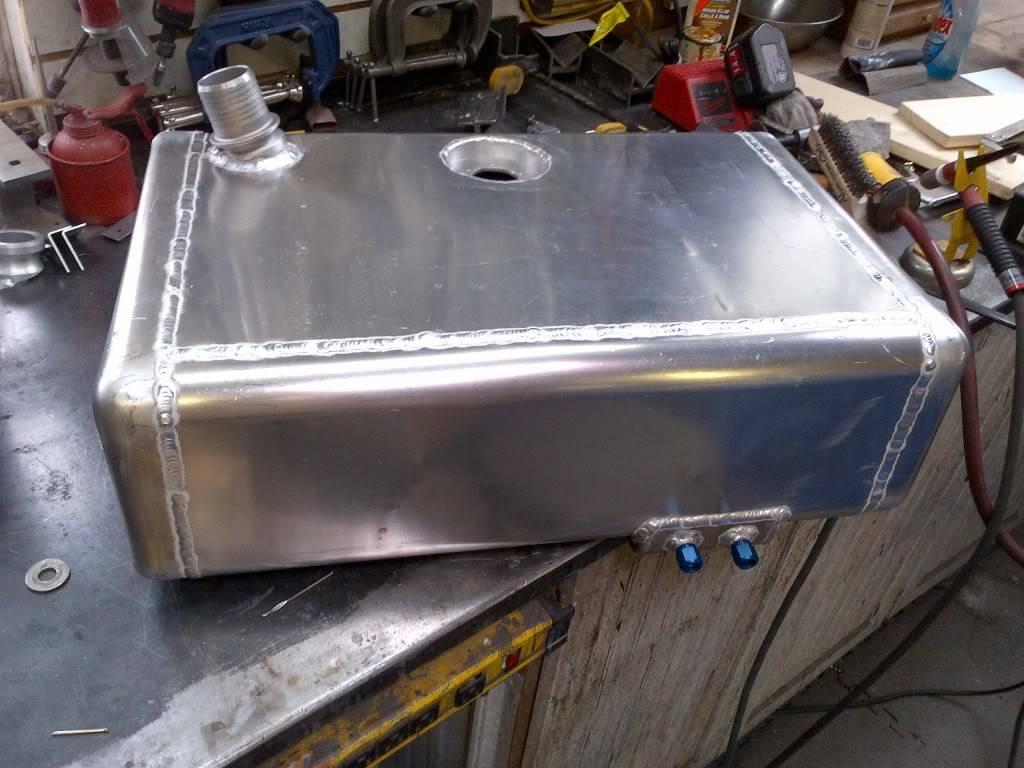
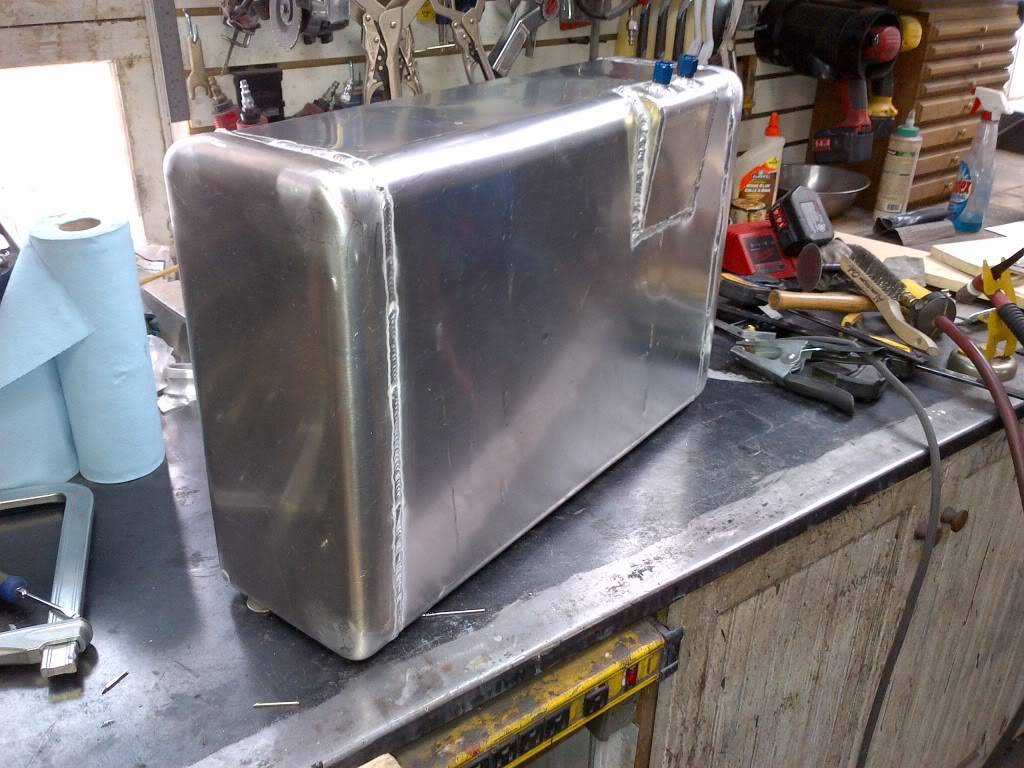
Here's the rock shield installed. Following the rest of this tank design, it's 14 gauge - bull strong.
01-20-2013 #50
Registered User
- Join Date
- Dec 2004
- Location
- California
- Posts
- 794
I dont see any problems with that setup. I am not a fan of Al tanks but that's a personal preference. The additional rock shield is good additional protection, everything helps. You made a good decision by going with 6061. How many gallons is that thing? It looks like a beast
01-23-2013 #51
Registered User
- Join Date
- Apr 2012
- Location
- Lethbridge, Alberta
- Posts
- 34
It's about 50 liters in capacity - which will extend my cruise range to something more reasonable than the old 40 l tank. It's fully internally baffled and has provision for fuel injection. All upgrades over the old tank. If I was doing it again, I'd do it out of stainless steel for sure. But for a first effort, I'm happy. It's also getting a coat of bed liner before installed for good.
 Originally Posted by SShep71

01-24-2013 #52
Registered User
- Join Date
- Dec 2004
- Location
- California
- Posts
- 794
What about adding a full bottom rock pan instead of bed liner. Why hide all of that great work with rubberness.
01-24-2013 #53
Registered User
- Join Date
- Apr 2012
- Location
- Lethbridge, Alberta
- Posts
- 34
Extra safety factor. It's not a hot rod, so there won't be mirrors under it at shows. I've analyzed many fuel tanks on this model of car and it's the leading edge that gets hammered - so that's where I put the protection, form following function and all that stuff.
Back on topic, has anyone done the calculations (I didn't know where to start) for sizing the holes through the baffles? I've seen many baffled tank designs where the ports look way too large to stop fuel sloshing around. In my tank, I decided that given the size of my engine (fuel consumption) and the volume of the pick up that cutting the corners (only) of the baffles (there are 2) to allow 1" square per hole would be more than enough to allow the tank to supply fuel to the pickup no matter what the road/track conditions would be (sure it wouldn't work if I was driving counter-clockwise on a high banked oval with an empty tank...but that's not likely to happen). There's no going back now - but for reference for someone building a tank, is there another way to work this out?
Originally Posted by SShep71
01-24-2013 #54
Registered User
- Join Date
- Dec 2004
- Location
- California
- Posts
- 794
The baffles wont stop fuel transfer from one compartment to the other. All of the baffles I have seen are not designed to stop fluid transfer but are designed to slow transfer. You would have to add trapdoors similiar to the way that circle track oil pans are designed to stop the fuel from moving compartment to compartment. It all comes down to time, its the time spent and the force exerted on the fluid that determines the flow through the holes. You can have a small hole and as long as the force and time are long enough all of the fluid will flow from one side to the other until the compartment is full. So if you had really small holes and made a right turn for long enough all of the fuel will wind up on the left side. The bulkheads are multipurpose, they act as verticle reinforcements for the tank where it is compressed by the mounting straps and they allow fuel control. There is no way to properly determine a hole size, there are too many unknown variables and variables with changing parameters. As long as the tank remains in a level plain and the car does not accelerate or decelerate the holes would need to match the maximum working volume of the pump. As the tank rolls and the car accelerates/decelerates the hydraulic pressure of the fuel acting on itself will change. It comes down to hydraulic engineering. There really is no simple answer to this one! As long as the total cross section of all of the holes are not smaller in size than the cross section of the pump pickup tube you will be fine.
01-24-2013 #55
Registered User
- Join Date
- Dec 2004
- Location
- California
- Posts
- 794
BTW....does anyone have dimensions for a stock GM A-body tank? I need the physical dimensions of the tank and I need the centerline spacing between the tank mounting brace on the trunk underside so I can accurately determine the proper location for the bulkheads! The same goes for first/second gen camaros, I want to draw up a sheet set for a camaro tank. THANKS!
01-24-2013 #56
Registered User
- Join Date
- Mar 2005
- Location
- Austin, TX
- Posts
- 137
Mine is a narrowed F-body tank, so I have room to do a minitub in the future. Had to make a spacer to fill up the step in my trunk. I already had the fuel pump and sender in hand to use for templates before cutting/drilling any holes for them. As for the holes in my baffles, I just took a wild guess at the size. I'm sure liquid moves freely through them. I did weld some stainless steel hinges over the holes going to the sump to act as gates. Has always worked 100% and only cost me the price of the pump & sender, so I'm pleased!!
Couple of tips: I sloshed some Eastwood fuel tank sealer around the bottom before sealing it up to to make sure there are no leaks, and I had to go with a boat-type sending unit 'cause I didn't have room for an arm-type sender to work with the baffles.Todd Longfellow
01-15-2014 #57
Registered User
- Join Date
- Jan 2007
- Location
- Yardley, PA
- Posts
- 163
Nice read, bumping the thread, curious if you ever got the tank built. I had though about doing one for my G-body wagon in the future.

 Reply With Quote


