


Results 41 to 60 of 200
-
09-04-2012 #41

 Registered User
- Join Date
- Sep 2009
- Posts
- 2,966

Thanks for the info on the build. I will be following this one very closely.
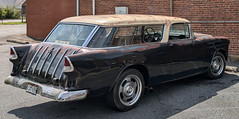
1955 Nomad project LC9, 4L80e, C5 brakes, Vision wheels
1968 Camaro 6.2 w/ LSA, TR6060-Magnum hybrid and etc SOLD
1976 T/A LS1 6 Speed, and etc. SOLD
Follow me on Instagram: ryeguy2006a
-
09-07-2012 #42 Registered User
- Join Date
- Dec 2011
- Location
- Umatilla, Florida
- Posts
- 129
1981 2nd Gen fuel tank conversion for LS2
Though I would share the fuel tank conversion we did for X-clean.
When we bought the LS2 the fuel tank complete was included as we wanted to utilize the factory pump as well as the tank flanges and fittings where possible. This would allow us to modify the existing Trans Am fuel tank so that we did not have to fab up special mounts or buy a 1200.00 tank.
Here is the stock TA tank with the GTO fuel tank flange on the top. We mounted it where the vent vapor line came out. We tacked it in.
We then test fist the tank. The clearance on the trunk would not allow the tank to go up high enough. We also did not want to modify the floor of the trunk. Next step. Also prior to that we modified the stock GTO fuel pump assembly so that it would fit in the tank.
What we did then was cut a recess into the tank on the top to allow the ring to clear the trunk. Here is a shot of the tank after powder coating.
As we were not going to use the crossflow muffler, it allowed us to place the fuel out and return, as well as the filter/regulator on the bank of the tank. More pictures to come
OldGuy Garage
Umatilla, Florida
09-07-2012 #43
Banned
- Join Date
- Aug 2012
- Posts
- 82
How much are you gona sell the turbo engine for?
09-08-2012 #44
Registered User
- Join Date
- Dec 2011
- Location
- Umatilla, Florida
- Posts
- 129
PM me please.. Thanks Originally Posted by Trans
 OldGuy Garage
Umatilla, Florida
10-01-2012 #45
Registered User
- Join Date
- Sep 2009
- Posts
- 2,966
Anymore updates?
1955 Nomad project LC9, 4L80e, C5 brakes, Vision wheels
1968 Camaro 6.2 w/ LSA, TR6060-Magnum hybrid and etc SOLD
1976 T/A LS1 6 Speed, and etc. SOLD
Follow me on Instagram: ryeguy2006a
10-01-2012 #46
Registered User
- Join Date
- Dec 2011
- Location
- Umatilla, Florida
- Posts
- 129
I would love too, but the server here wont allow me to upload any more pics to it. 15MB is all. Originally Posted by ryeguy2006a
OldGuy Garage
Umatilla, Florida
10-01-2012 #47
Registered User
- Join Date
- Dec 2011
- Location
- Umatilla, Florida
- Posts
- 129
I would love too, but the server here wont allow me to upload any more pics to it. 15MB is all. Originally Posted by ryeguy2006a
OldGuy Garage
Umatilla, Florida
10-02-2012 #48
Registered User
- Join Date
- Sep 2009
- Posts
- 2,966
Use a service like Photobucket and let their server host the pictures. All you have to do is copy the image code from the pictures and paste it in your build thread.
1955 Nomad project LC9, 4L80e, C5 brakes, Vision wheels
1968 Camaro 6.2 w/ LSA, TR6060-Magnum hybrid and etc SOLD
1976 T/A LS1 6 Speed, and etc. SOLD
Follow me on Instagram: ryeguy2006a
10-02-2012 #49
Registered User
- Join Date
- Dec 2011
- Location
- Umatilla, Florida
- Posts
- 129
Thanks Much, going to work on it asap
OldGuy Garage
Umatilla, Florida
10-05-2012 #50
Registered User
- Join Date
- Sep 2009
- Posts
- 2,966
I am doing a very similar swap, so this thread will be very helpful! I hope you are able to get more pictures up soon.
1955 Nomad project LC9, 4L80e, C5 brakes, Vision wheels
1968 Camaro 6.2 w/ LSA, TR6060-Magnum hybrid and etc SOLD
1976 T/A LS1 6 Speed, and etc. SOLD
Follow me on Instagram: ryeguy2006a
10-15-2012 #51
Registered User
- Join Date
- Dec 2011
- Location
- Umatilla, Florida
- Posts
- 129
Here's our recent interior work on this customers 1981 Trans Am. Specifically the dash, console and console lid.
When we got the car to work on the dash looked to be in good condition. However upon removal we discovered exactly how dry and brittle the old dash covering actually was. Also the dash was quite warped along the front upper edge where it meets the cowl.
Additionally the console needed quite a bit of work as well. It too was warped and curled and we had to fill in the turbo light switch and the computer access door. The console bin lid was trashed as well.
We did look all over for a good condition dash, however as all of you know they are unobtanium at the moment. Yes there was some dashes that were repaired with the urethane filler, however we felt that while they look good, how long with they last? New ones? Not available.
The molded dash caps were not an option. We used some in the past on other vehicles and found them to be just ok, but not a high quality like a recovered dash or a new dash.
Most professionals don't like to share their secrets. We do !
We feel that by sharing the knowledge and what it takes to accomplish the task, you know what exactly it takes to to make your car like new. This way you can do it yourself, if you have the skills and/or the patience required, or send it out to be professionally done.
We do hope you find the information helpful. If you have any questions please let us know.
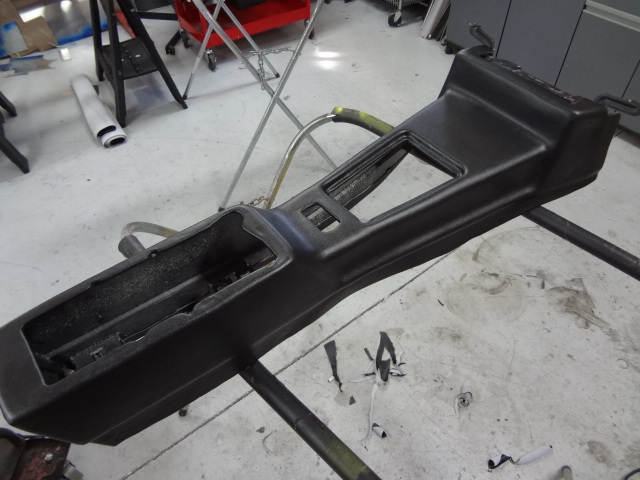
Lets start with the center console and console lid. The console is out of a 1981 Trans Am and as such has the computer access door and turbo light switch. We did have the original access door.
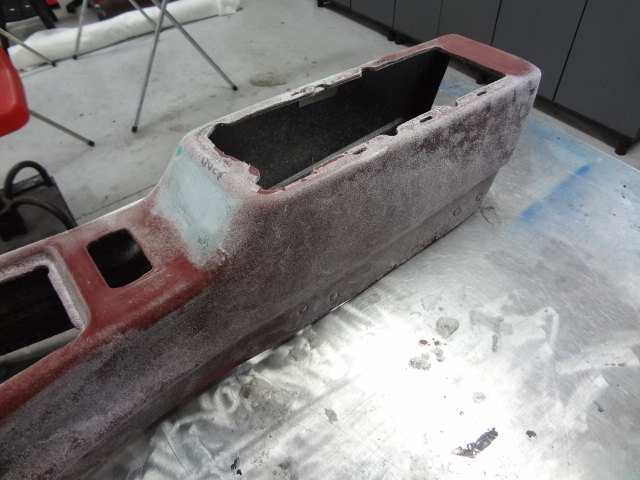
The backing of the console is made with ABS. We made patches out of ABS material, .050 and glued them in with ABS cement. This way we are 100% assured the patches will stay permanently.
Once the patches were completed we filled the voids with urethane dash repair putty and sanded them smooth and sprayed a lite coating of glue on it like a primer.
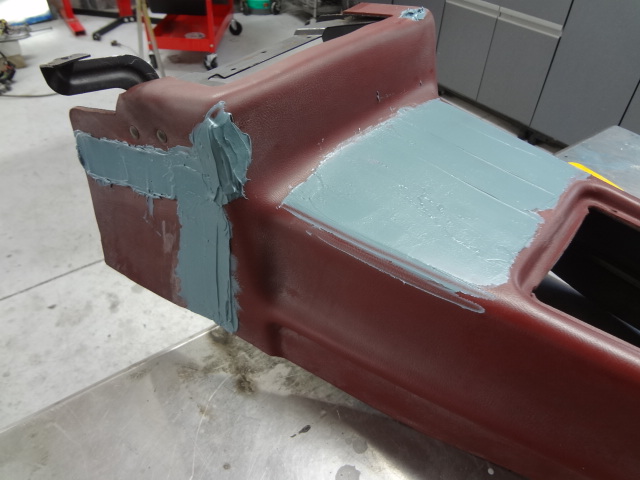
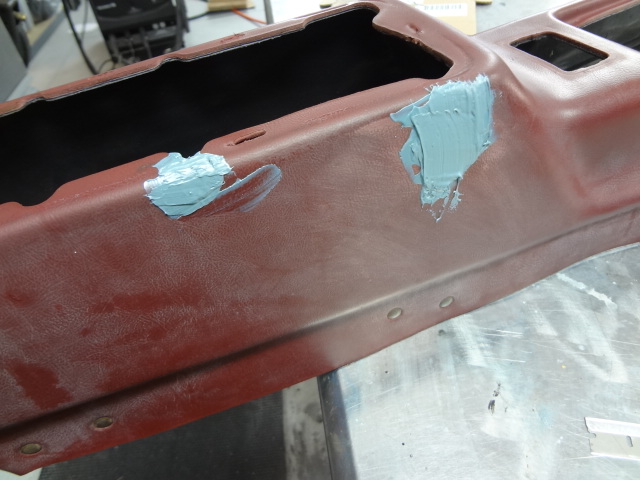
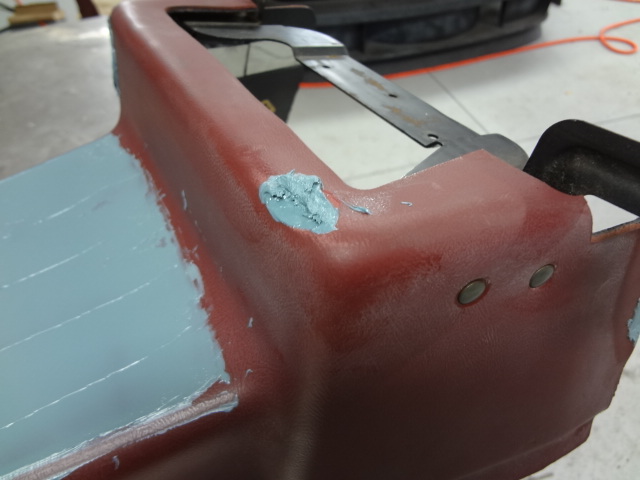
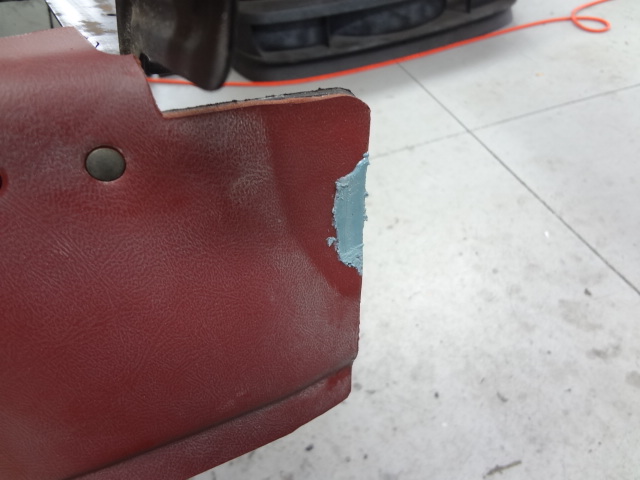
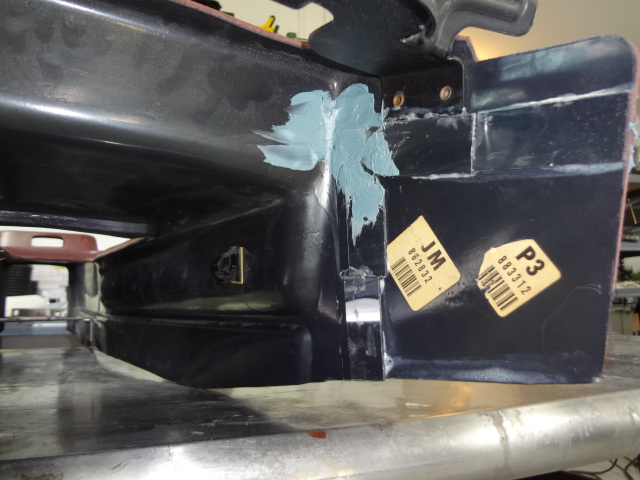
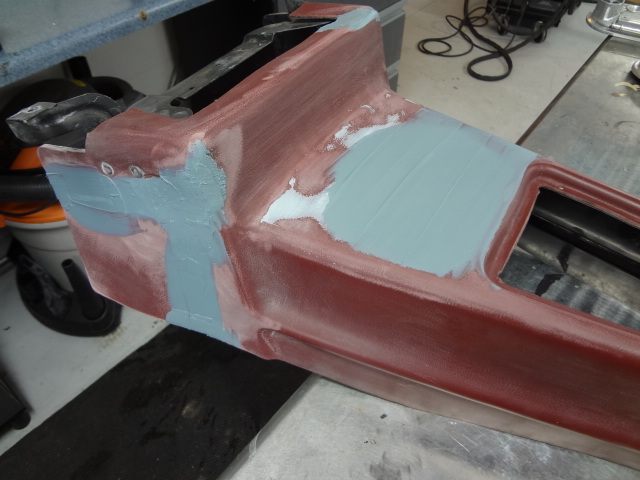
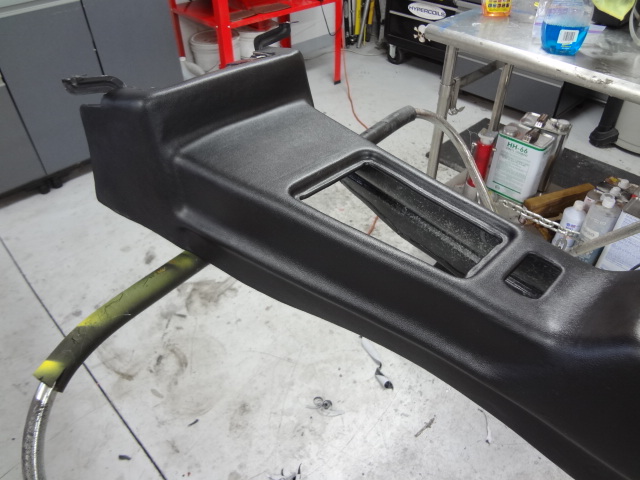
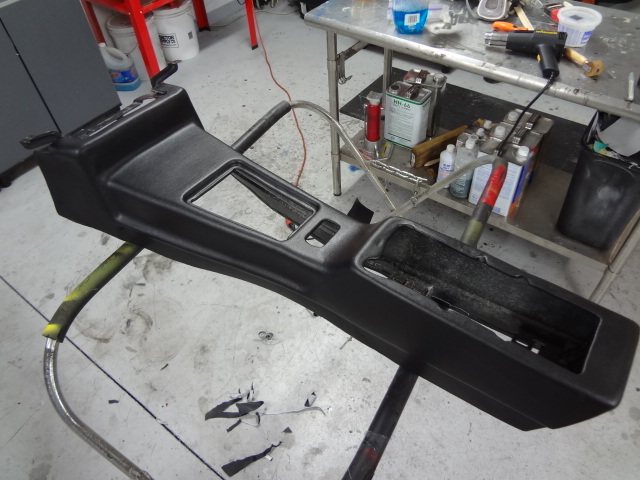
The biggest problem with the console was the fact that the area where the shifter goes, as well as along the bin area and sides, were curled and not straight or flat.
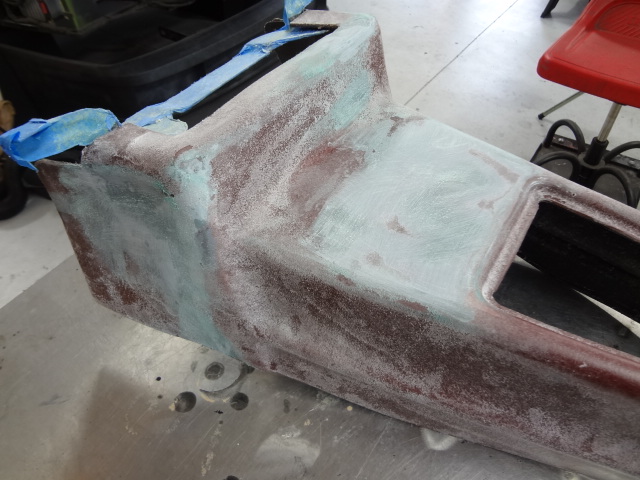
What we did was use a heat gun on the ABS backing and carefully straightened the complete console out so that everything is now straight and flat. We did have to fill the area on the top front however slightly.
All sanded and prepped for covering

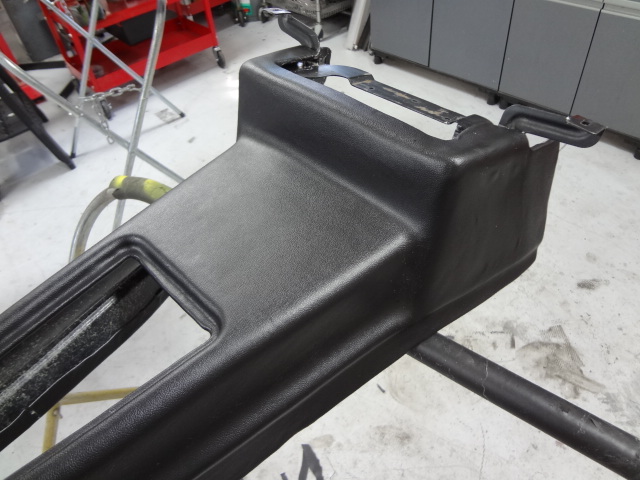
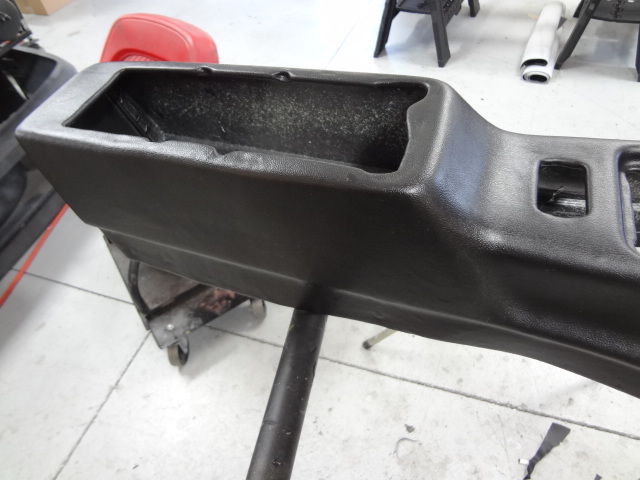
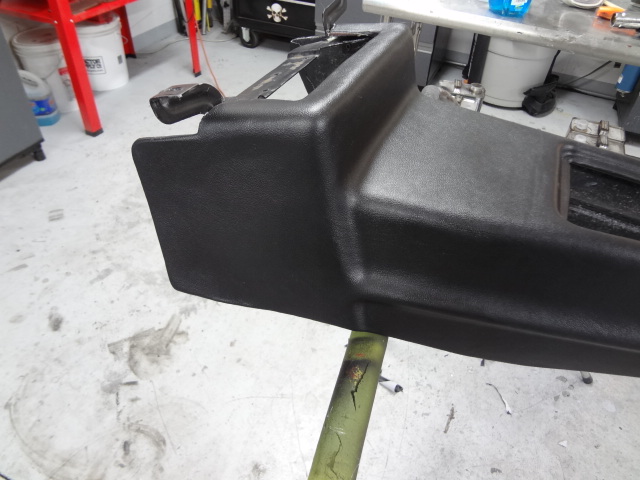
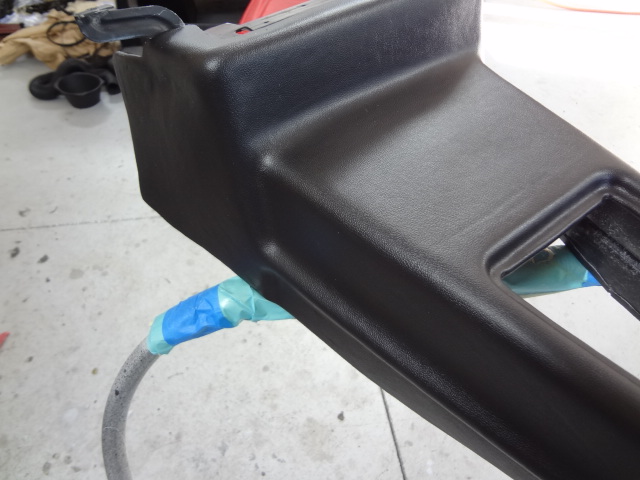
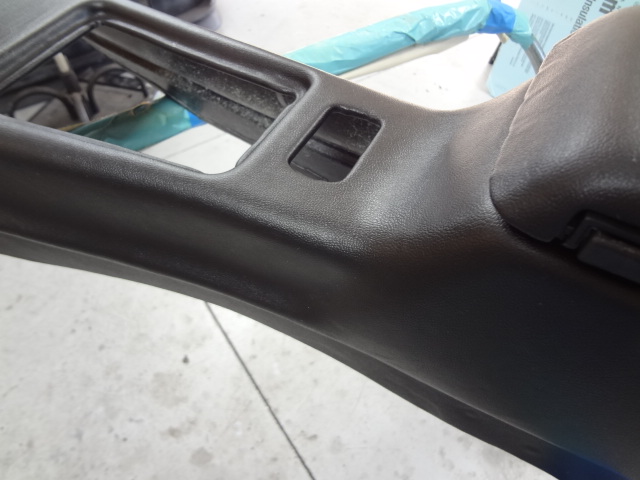
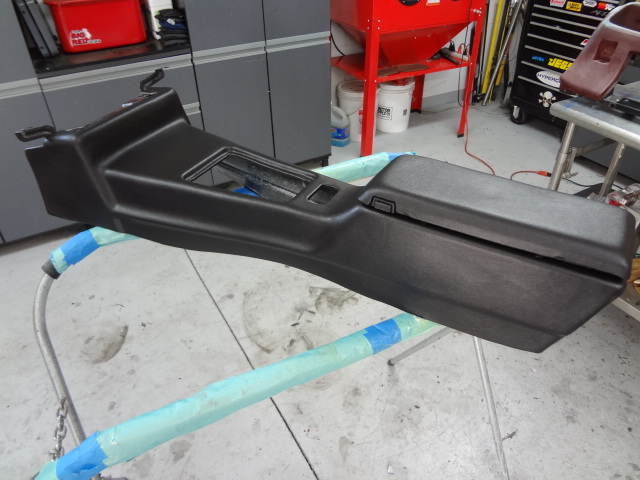
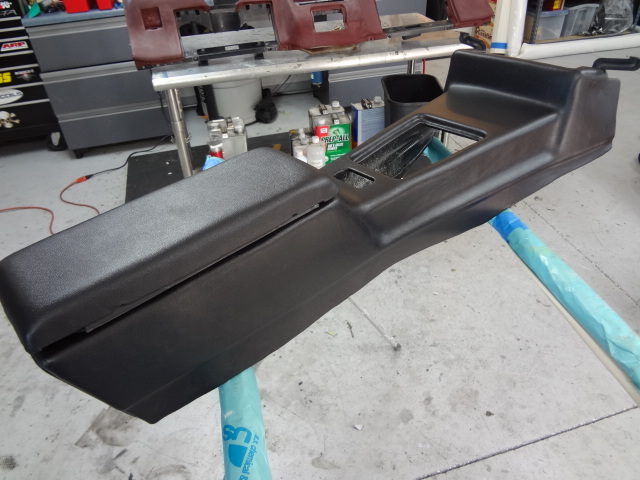
Here are the finished images of the console with the console lid cover. Note the lid and console box are just sitting in the position and will be drawn down tighten to the console once mounted.
Please note the vinyl shown covering the dash and console are each just ONE SHEET. There are no seams whatsoever!!

 OldGuy Garage
Umatilla, Florida
10-15-2012 #52
Registered User
- Join Date
- Dec 2011
- Location
- Umatilla, Florida
- Posts
- 129
Hope you like the console, here is the lid images. Like all TA's the lid was covering was totally shot. We added two 1/4 pieces of foam to give the cover a little more cushion for the customer.

Now the dash.
Please remember that this piece of vinyl that is covering the dash is all ONE continuous piece. There are NO SEAMS.
Lets start with the original dash pictures. As you can see it now looks pretty rough. While it was in the car it looked actually quite good, with just a little split over the left side of the grab handle. It was also lumpy along the cowl with a bulge where the dash rises up.
We removed/broke out all the dry brittle dash that we could. Here are the results
Here we filled and sanded, Rinse and repeat a few times to get it right :-)
OldGuy Garage
Umatilla, Florida
10-15-2012 #53
Registered User
- Join Date
- Dec 2011
- Location
- Umatilla, Florida
- Posts
- 129
We did smooth and blend the detail ridge along the dash front as the vinyl would have left a minor impression and pretty much washed it out anyway.
We also converted the radio hole to a single DIN opening. Rather than hack the dash up as most do, we made a DIN template from 1/8 aluminum to the exact size of the dash opening and the radio opening. Once the part was made we bonded the plate into the dash with 3M panel bonding adhesive for a permanent fix. We did allow some room in the DIN opening for the vinyl.
Once it was fully cured we cut away the underlying old dash and smoothed out the backside.
OK, on to the covering of the dashboard itself.
There are a couple of IMPORTANT things you MUST know.
The first and most important is to use the CORRECT adhesive. Not a 3M spray can adhesive or the stuff from the home centers, but the best you can buy for the application. For both the console and the dash we used Weldwood Landau Top Contact Adhesive, HIGH HEAT. If you use a glue similar to this you will have success, if not you will be sorry. You were warned.
Additionally we "primed" the dash and console with HH66 contact adhesive so that it bonded with the factory vinyl. We did let that fully cure for 48 hours.
You will need two people to do this job. We are not saying you cant do it with one, but on certain areas around the gauges you NEED two people. This is not an easy job to do. Especially in one piece.
On the top on the dash, even though we did the repairs with the urethane filler, we wanted the dash to come out perfectly smooth with no chance of the underlying substrate to break apart and print though on the vinyl. We covered the dash top with 1/8 volara closed cell foam. We then sanded and blended the foam perfectly, tapered the edges, and top to the factory dash. There is no chance of a print thru. Additionally the faom adds strength to the dash top.
Once the foam was sanded and contoured, we "primered" it again on the foam with the Weldwood HH.
OldGuy Garage
Umatilla, Florida
10-15-2012 #54
Registered User
- Join Date
- Dec 2011
- Location
- Umatilla, Florida
- Posts
- 129
We found the best place to start was here. The curves are quite complex in this area. We laid the material down and coated both sides with the adhesive.
Here is the area after covering.
We then worked on the foam covered area and down the dash in the center.
Once we completed the center section we moved to the ends.
OldGuy Garage
Umatilla, Florida
10-15-2012 #55
Registered User
- Join Date
- Dec 2011
- Location
- Umatilla, Florida
- Posts
- 129
We think the finished results speak for themselves. A perfectly covered dash. A lot of pictures so that you can see it from every angle finished.
If a picture is worth a thousand words, then...... Here's some more.
OldGuy Garage
Umatilla, Florida
10-15-2012 #56 Registered User
- Join Date
- Feb 2005
- Location
- Sydney, Australia
- Posts
- 1,797

Thats an amazing finish for not doing via vacuum forming. Top job on both console and dash!!!!
Regards,
Leigh
Sydney, Australia
1971 Firebird 455
https://www.pro-touring.com/showthre...Project/page27
10-15-2012 #57
Registered User
- Join Date
- Dec 2011
- Location
- Umatilla, Florida
- Posts
- 129
Thanks Leigh !! Originally Posted by LeighP
Good morning down under.
We get paid for it and love it, but we hope it inspires others!OldGuy Garage
Umatilla, Florida
10-15-2012 #58
Registered User
- Join Date
- Jan 2012
- Posts
- 28
outstanding job!
ed
10-15-2012 #59
Registered User
- Join Date
- Dec 2011
- Location
- Umatilla, Florida
- Posts
- 129
thanks ed!! Originally Posted by pinky49
OldGuy Garage
Umatilla, Florida
10-15-2012 #60 Registered User
- Join Date
- Oct 2012
- Location
- Waltham, MA
- Posts
- 108
Great work. Also a great lesson in how to do the job the right way.
Life is full of problems.
It depends on how you deal with them and move forward.
This will show others the type of person you are.
Make the best of things that are put in front of you and enjoy life.
Tags for this Thread

 Reply With Quote



