


Results 21 to 40 of 61
-
08-03-2012 #21
 Registered User
- Join Date
- Nov 2004
- Location
- Orlando, FL
- Posts
- 110

Subframe cleaning continues...
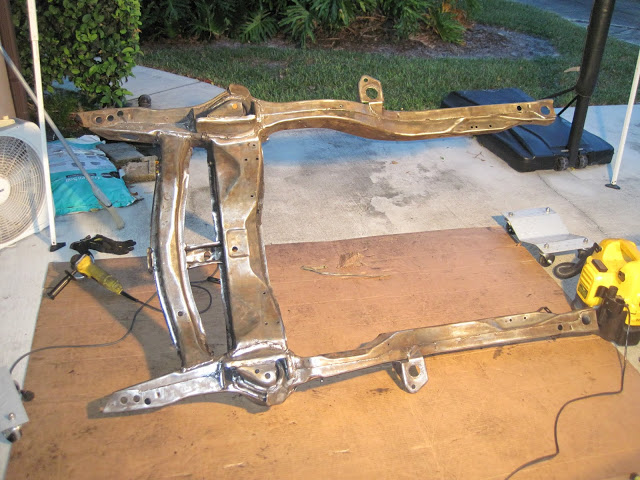
I couldn't easily get it up on the table by myself, so I grabbed a 2x4 and used it as a kickstand...
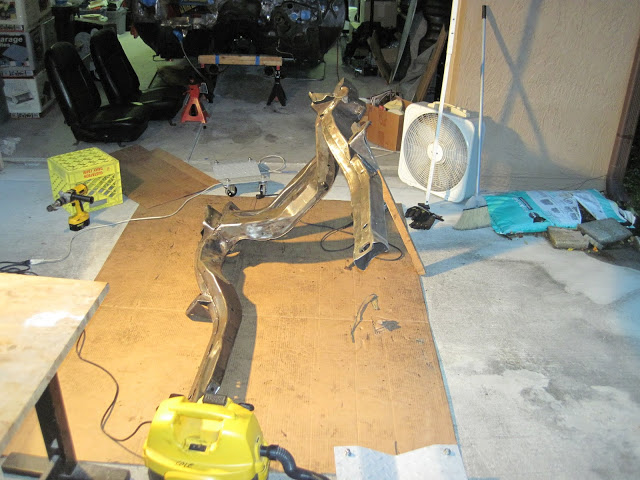
After more cleaning, I took some photos of my concerns...
The firewall bushing pads look thin and abused...
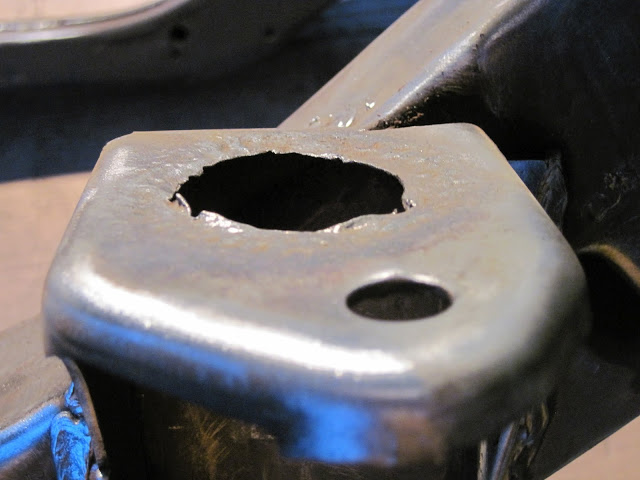
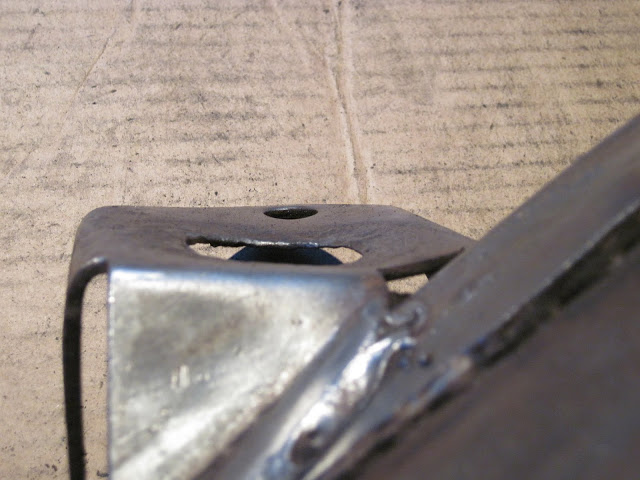
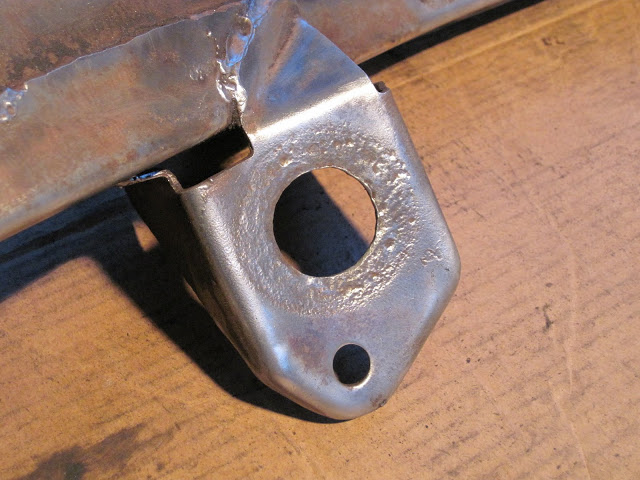
and one side of the framerail looks distorted - this is the passenger rear bushing pad...
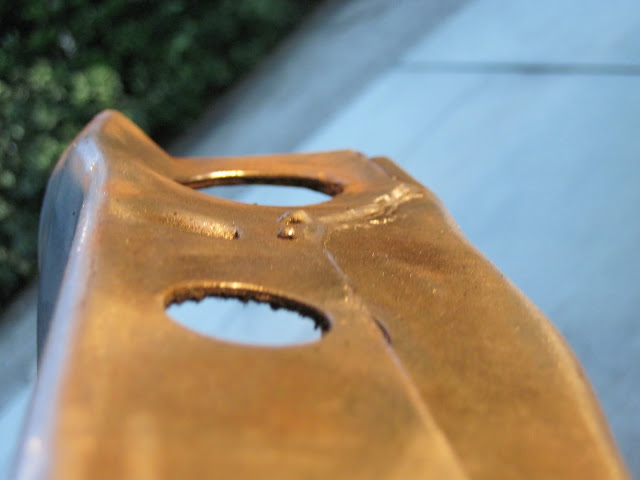
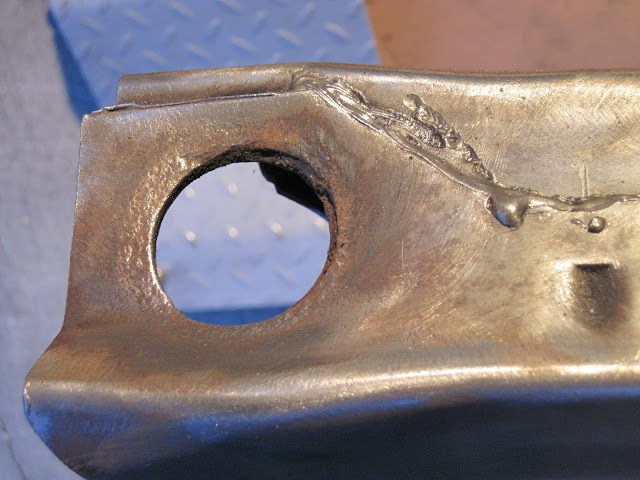
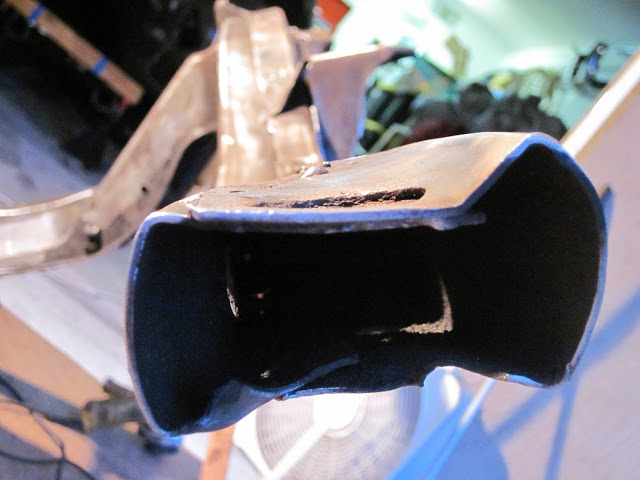
I'll keep cleaning...
-
08-04-2012 #22 Registered User
- Join Date
- Feb 2005
- Location
- Sydney, Australia
- Posts
- 1,797

Ouch...looks kinda like someone hung the car up on that rear frame rail...kinda squished it.
Regards,
Leigh
Sydney, Australia
1971 Firebird 455
https://www.pro-touring.com/showthre...Project/page27
08-05-2012 #23
Registered User
- Join Date
- Nov 2004
- Location
- Orlando, FL
- Posts
- 110
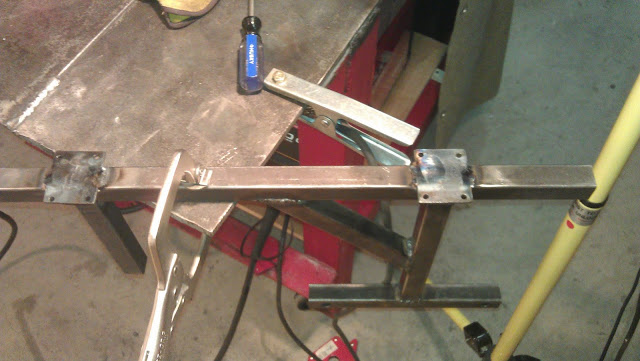
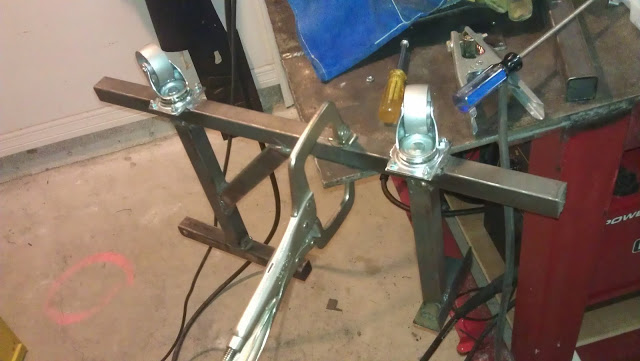
With the new A/C and all my welding gear in the Firebird garage, I fabbed up an engine cradle finally.
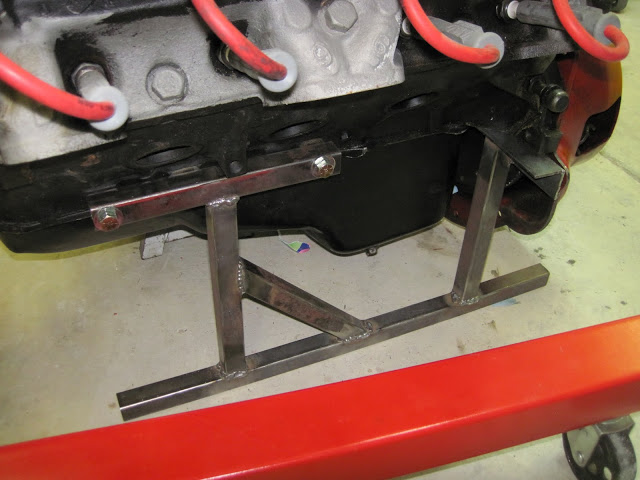
I still need to make the other side, and weld on baseplates for casters. My welding is improving, but still needs lots of improvement. I haven't ground them down to make them pretty yet... more interested in being able to move this big thing (and engine hoist) into the corner
I also removed the transmission today to make the whole assembly easier to deal with. I cleaned the case and rolled it into the corner for now.
Here's the newly organized corner with all the welding gear. The welder / plasma are under the welding table. I have to move it out from the wall to connect it to power / C25 gas, but then it is surprisingly functional.
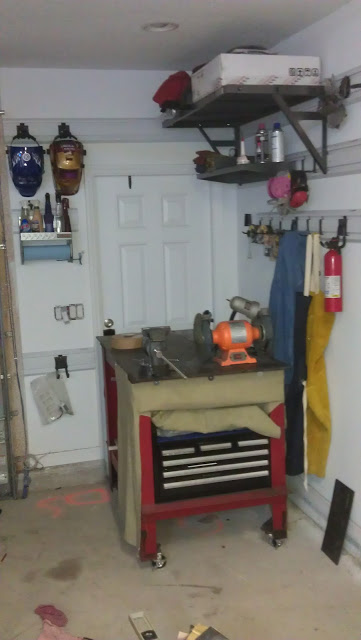
I really should put that lightswitch back in and put a cover on them
08-06-2012 #24
Registered User
- Join Date
- Sep 2005
- Posts
- 49,371
 Originally Posted by digitalman2112

Well if you need a place to blast it there is a place called Carters near us....
Looking forward to meeting you and the boys when you get a chance to come over. I can show you our stuff on our shop 69 Camaro. Originally Posted by digitalman2112
08-07-2012 #25 Registered User
- Join Date
- Apr 2004
- Location
- Cedar Rapids, IA
- Posts
- 999
subscribed
That looks like a tuff fix to un-squish that sub frame end. Not sure if you can get it red hot and beat into shape or not. The frame mount pads are not all that hard to pound back into place and I would get the patches they sell for thoes and weld them in for strength.
Thoes subframes are not that hard to find but could be hard to find a better one. Be sure the frame is square and strait and I would recommend fully welding the seams for extra strength.Some times I'm fast sometimes I'm half-fast
08-07-2012 #26
Registered User
- Join Date
- Nov 2004
- Location
- Orlando, FL
- Posts
- 110
I didn't get to measuring it this past weekend, but it is up first on the todo list...I suspect the end can be dealt with, especially with weld-on subframe for added strength - but if there are other issues, I won't sink more time / money into it.
Took me a long time to convince myself I _didn't_ need an aftermarket subframe - looks like I may end up right where I started
08-07-2012 #27
Registered User
- Join Date
- Nov 2004
- Location
- Orlando, FL
- Posts
- 110
I was really annoyed by some other things tonight, so I decided to "add insult to injury" and go measure my subframe - figuring I had bad news coming...
I used the measurements here - http://www.1stgencamaro.net/frame.htm
I had some large allthread that I put in the holes for risers and tried to measure as best I could by myself.
Here are my measured dimensions:
A = 38 5/16 (very close to the expected 38 1/4)
B = 35 3/8 (very close to the expected 35 1/4) (measured on passenger side)
C = 54 3/16 (exactly the expected measurement)
D = 44 3/4 (3/16 more that the expected 44 9/16)
E = 34 5/6 (a whopping 9/16 more than the expected 33 3/4)
Now, a bit of this shift in E comes from the damage at the end of the subframe, but I suspect given the 3/16 of spread showing up at D, that the rear rails are pulled apart some. Some of this could be measurement error, but I marked off the expected value of E, and it isn't even close.
I didn't do any of the vertical measurements.
And the $5k question...now what? Is this bad enough to not use it and walk away from the bad subframe? Should I work to repair the subframe compressed end, and get the rear bushing holes back in line while making that repair?
08-08-2012 #28
Registered User
- Join Date
- Aug 2008
- Location
- Iowa
- Posts
- 304
Depends on what your time is worth. It might take awhile to get it just right, but if you have the time, it might be worth it to spend that $5k somewhere else on parts.
08-09-2012 #29
Registered User
- Join Date
- Nov 2004
- Location
- Orlando, FL
- Posts
- 110
I don't mind taking time to repair something, provided I can be confident that the repair will be safe and not need additional repair / rework later...that lingering doubt is what typically leads me to replace things. Originally Posted by armourmark
I'm also very discouraged in looking at the aftermarket subframes, because it seems very few directly support Pontiac engines, and I don't plan to swap engines at this time. Spending $7-8k total on a custom sub and suspension to then have to have motor mounts and headers made and HOPE I get proper clearance doesn't excite me. I've been hunting on the site for Firebirds with Pontiac engines with aftermarket subs, but so far only found ones with LS engines. I'll keep looking... and call DSE since they show Pontiac Motor mounts on their options. I need to understand the other impacts (headers, oil pan, other clearance issues)
Thanks for the input...
08-09-2012 #30
Registered User
- Join Date
- Apr 2004
- Location
- Cedar Rapids, IA
- Posts
- 999
I was thinking some one sells a new stock sub-frame pretty reasonably.
Some times I'm fast sometimes I'm half-fast
08-09-2012 #31
Registered User
- Join Date
- May 2009
- Location
- Minnesota
- Posts
- 615
I would try to fix the frame and then add sub frame connectors to help tie it all together. The main weakness in the stock frame is the stitch welding. Weld up the mounting points, heat up the rear portion and straighten. Then take your time and weld the frame up solid taking care to not heat it up to much and warp it.
08-09-2012 #32
Registered User
- Join Date
- Sep 2005
- Posts
- 49,371
Ian, Originally Posted by rohrt
We can get this new 68 subframe for you and then install our coil-over mod to it..
https://www.autometaldirect.com/stor...Sub-Frame-Assy
08-10-2012 #33 Registered User
- Join Date
- Mar 2010
- Location
- Orlando, FL
- Posts
- 266
great build so far. i tend to have a soft spot for family oriented home builds. i have a 68 camaro convertible that i am basically keeping warm until i hand it off to my son (he is about to turn 2). so in the mean time i am just doing what i can to it, little by little. i am still waiting to have my camaro shipped here from NJ but once it is, if you need an extra set of hands, let me know, since we are basically a stone throws distance away from each other.
keep up the good work i look forward to seeing this car progress.Live for today, tomorrow is never promised.
Project Eternity: https://www.pro-touring.com/showthre...rs-convertible
08-11-2012 #34
Registered User
- Join Date
- Nov 2004
- Location
- Orlando, FL
- Posts
- 110
Thanks for the positive feedback. Kids today are pulled in so many directions - Internet, Video Games, endless TV / DVR - that it is hard to get them to stop and spend time to MAKE something, but that's what I've been trying to do. We also do a lot of work with electronics projects, are involved with our local hackerspace (www.familab.org), and the local Maker Faire (www.orlandominimakerfaire.com) - One of my goals is to have the car ready for Maker Faire next year (likely Memorial Day weekend), and to show off the electronics that we intend to custom design for it. Of course there is a lot of learning and hard work between now & then, so I'm not adding too much stress to hit the date and am trying to keep it fun. Originally Posted by LV42DAY
Thanks for the offer of hands - I get stuck sometimes and just need someone to say - "go for it, you are overthinking it", which is one reason I maintain this thread. It is good seeing all the Florida guys posting lately to know there are some local guys to smack me upside the head when I get stupid
08-12-2012 #35
Registered User
- Join Date
- Nov 2004
- Location
- Orlando, FL
- Posts
- 110
I spent a bunch more time working on my MIG welding and fabrication skills this weekend. Having the garage air conditioned means that I can spend hours out there cutting / cleaning / welding with the proper protective gear on and without getting heat stroke.
The big news is that the engine is on the stands, and I rolled it into the corner today. This frees up a huge amount of space that was taken up by the hoist and engine.
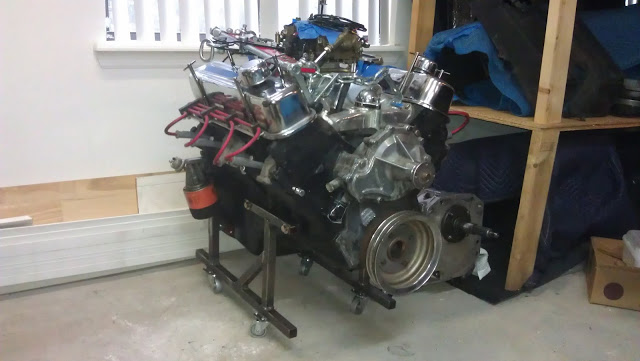
You can also see my Richmond 6 speed ROD transmission peeking out. It is sitting on a rolling tire dolly.
I originally started out to make this design

but I was worried about all the weight on just two welded joints. I was easy to add another post on the drivers side, but the passenger side took some work due to the oil filter. In the end, the driver's side block rests on the back post, but on the passenger side, that post has a plate that can be bolted to the bellhousing. You can see that plate in this pic...
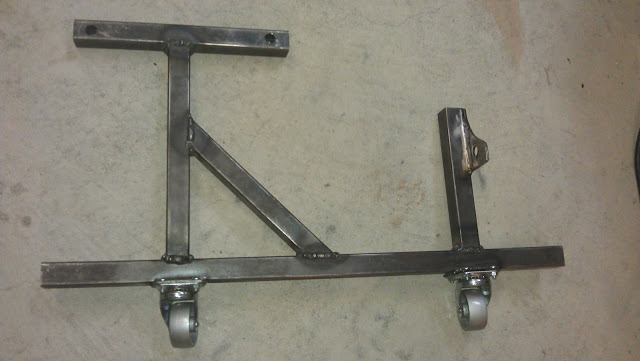
After looking at this pic, it definitely doesn't look square, but it works
That plate was some of my last work today, and I was really happy with the freehand curve on the plasma cutter, and the MIG welds. I didn't clean up any of the other welds, but I hit these with the flap disc for the nut clearance, and then did the outside one just to make it look pretty...
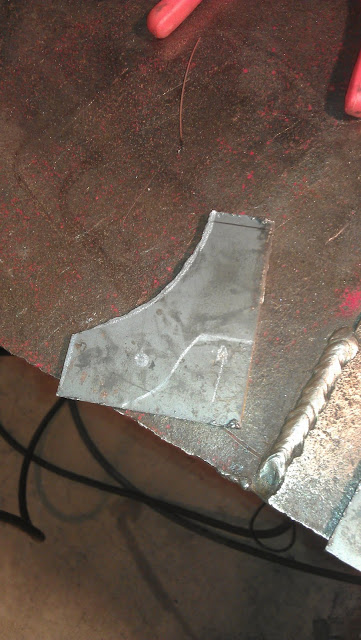
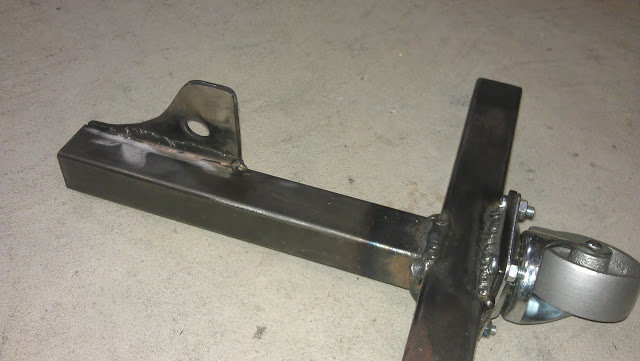
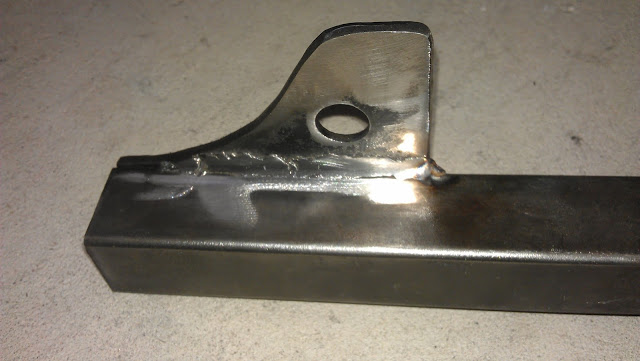
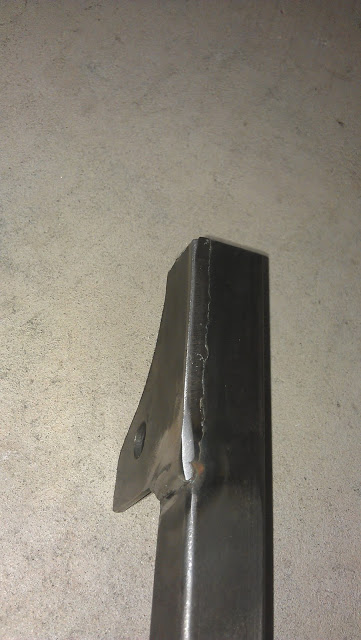
When I originally bought parts to make this cradle two years ago, I couldn't find shaft mount casters, so I cut four plates, welded them on, and then drilled / bolted the casters. It had to take 3 extra hours to cut / drill / clean / weld / bolt those damn things...but they work great!
One last pic - side view...
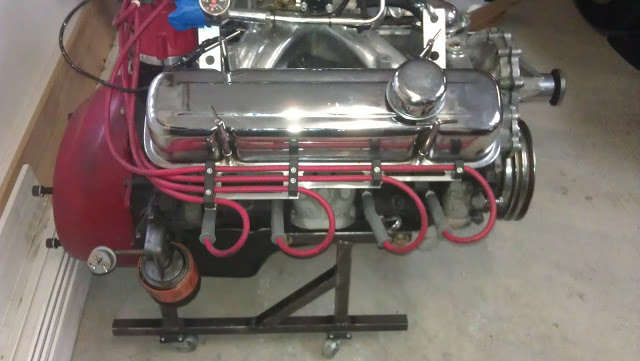
I started making a bolt-on front crossbar, with welded nuts to hold the hardware when not in use, but didn't get it done tonight. I also ordered some paint for it...Pontiac metallic blue engine paint
Sorry for the crappy photo quality today, used my phone since I forgot to take the shop camera back out there and was tired of making trips back in the house...
08-17-2012 #36
Registered User
- Join Date
- Nov 2004
- Location
- Orlando, FL
- Posts
- 110
We visited Rich at BMR Suspension today - I posted pics in a separate thread - well worth the trip.
08-18-2012 #37
Registered User
- Join Date
- Nov 2004
- Location
- Orlando, FL
- Posts
- 110
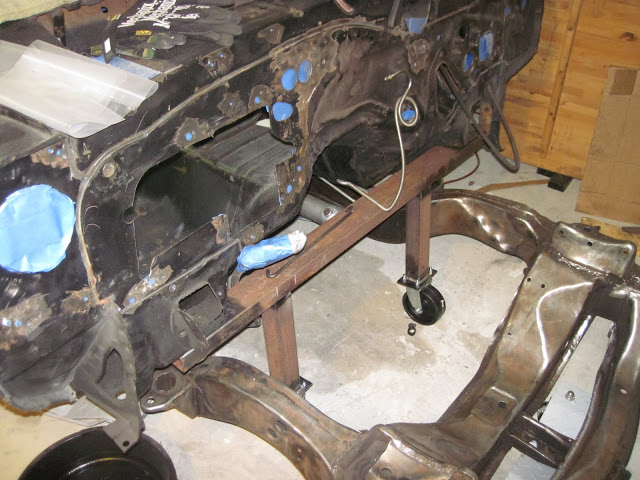
With limited space, NOT being able to move the car around easily has been challenging since I took off the front subframe. I've seen a bunch of cars on here with supports that mount to the firewall subframe mounts and allow the car body to be rolled around. I would call these a "chassis dolly" although I'm not sure of the right term. Today, my 12 year-old (Adam) and I set out for the steel supplier, ready to make one.
Turns out the local steel supplier, L&C Metals, is not only open on Saturday mornings, but one of the owners, Jeff, is an awesome guy.
We picked through his drop wall, selected a 49" piece of 3" x 1.5" x 1/8th" and a 34" piece of 2" x 1/8" tube. He let Adam program the cuts on this monster bandsaw, and showed us all the different metalworking equipment, their machine shop, etc. They have a break there that will bend a 12 FOOT long piece of 1/2" steel!
We brought the steel home and started fabricating. This type of build may be simple for others, but it is not routine for us. We did it in about 4 hours with all the cleaning, drilling, plasma cutting (the caster mounts), and the welding.
Attaching one side of the 44" wide main tube...
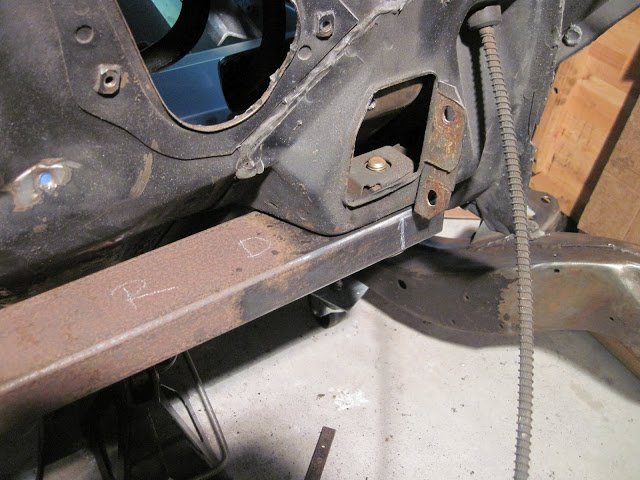
Cleaning off LOTS of surface rust for weld prep...
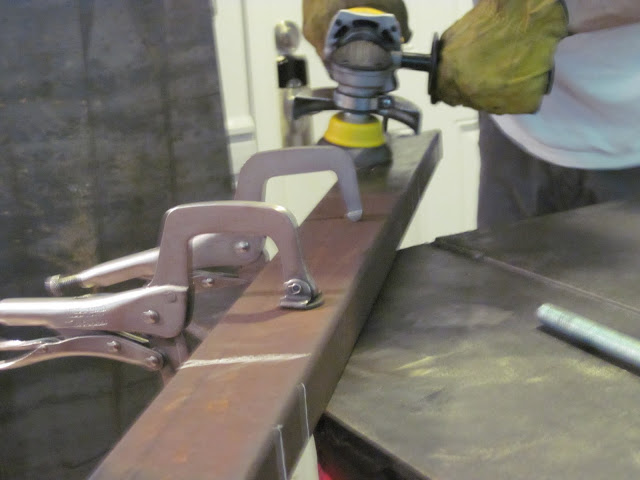
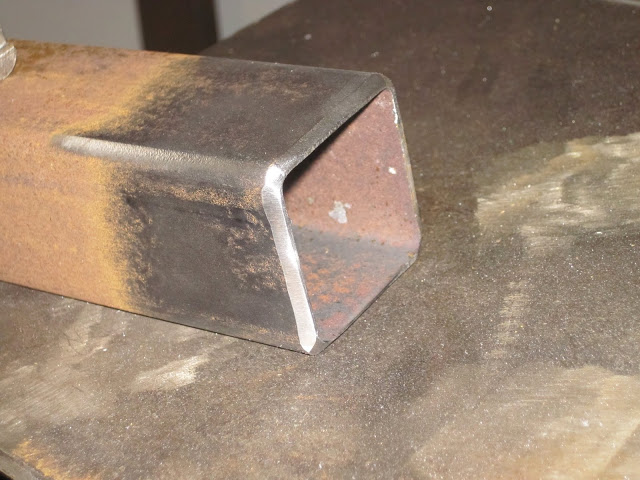
I beveled the edges of the riser tubes...
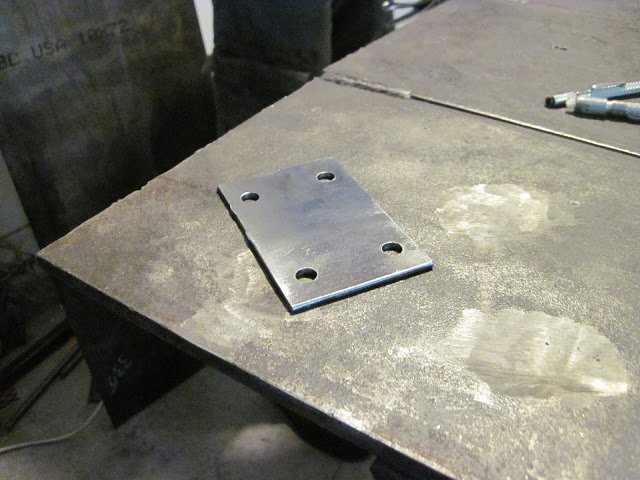
Plasma cut some 1/8" plate for the caster mounting flanges
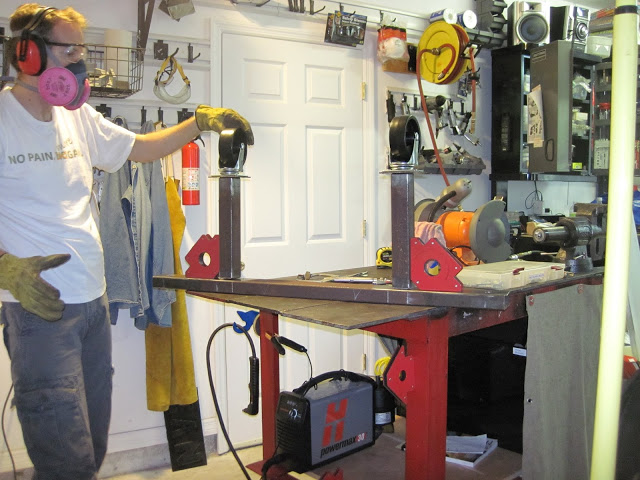
Test fit...
Melting metal...
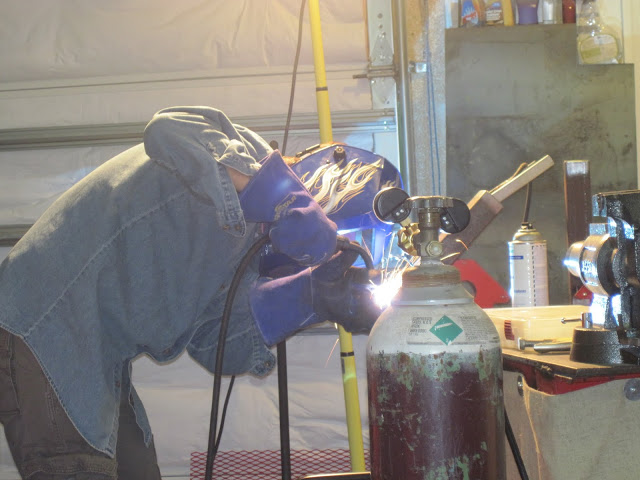
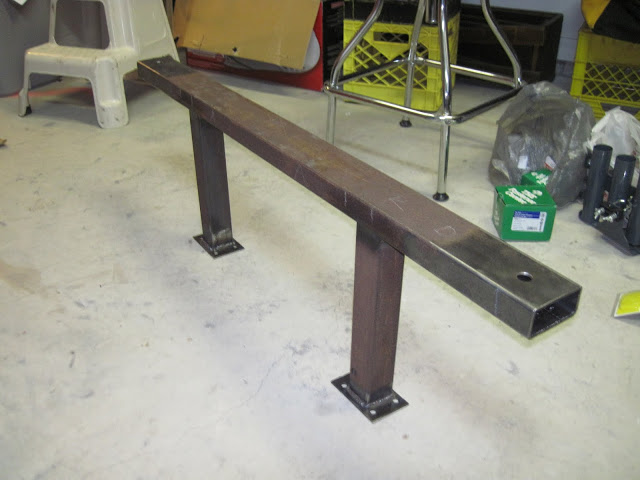
Finished welding...
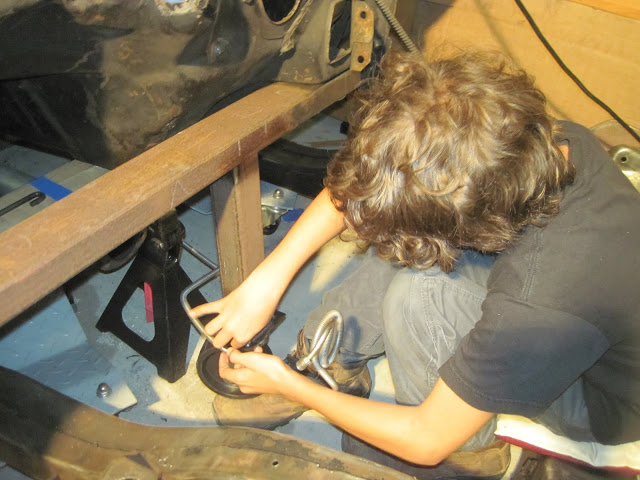
Mounting casters...
Done!
Notes:
- Main tube = 44"
- Risers = 12"
- Casters = 6" swivel (no brakes...but back wheels are blocked)
- Risers are 10" (outside edge) in from end of main tube - this lets the subframe sit directly below the body, the risers are not in the way
- Used the body bushing bolts, worked great with that size tube...
09-02-2012 #38
Registered User
- Join Date
- Nov 2004
- Location
- Orlando, FL
- Posts
- 110
Not making as much progress this weekend as I'd hoped, but I did make some. Most of my time was removing paint from the firewall around all the extra holes. I even got the interior side of the holes, which was good because some of them had some greasy crap on the inside which would have really contaminated the welds.
some example areas...cleaned and ready to have the holes filled...
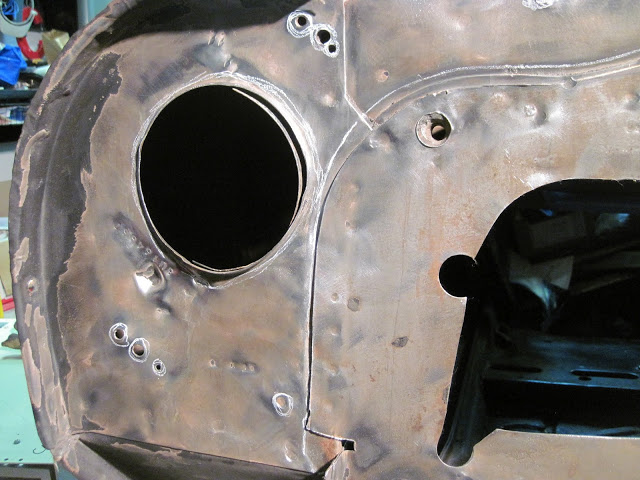
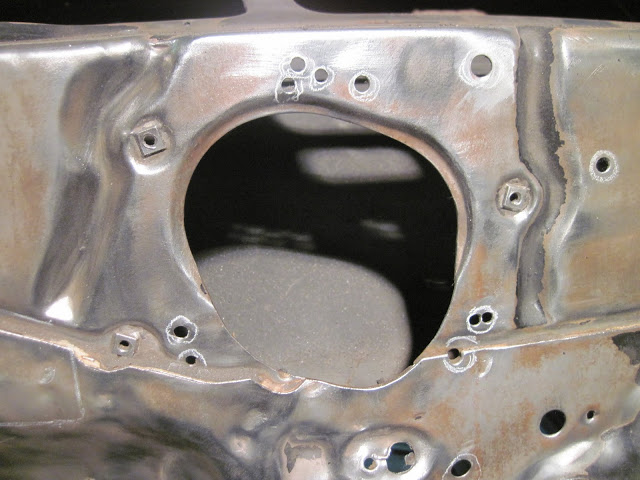
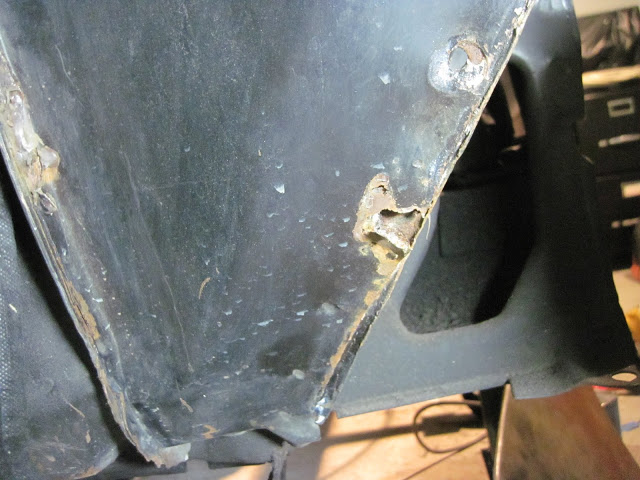
No surprises on the main firewall, but on the passenger outer firewall, i found some goop. The good was hiding a crappy patch...and rust. This is my first encounter with panel rust, and it was quite discouraging.
Here's what it looked like when I removed the goop...
and after hitting it with the knotted cup brush...
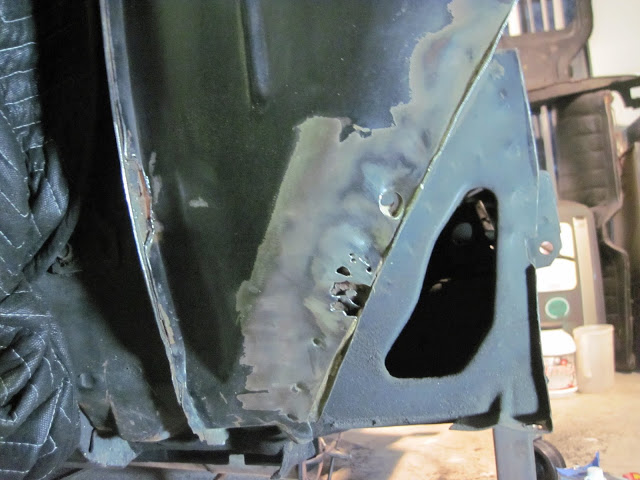
I'll cut it out and then see if there is more rot anywhere, if not, I can just replace that piece (if anyone knows better than me, please chime in!)
11-24-2012 #39
Registered User
- Join Date
- Nov 2004
- Location
- Orlando, FL
- Posts
- 110
I'm back from a car work (and forum hiatus) - work and other family / personal commitments needed focus. Luckily the holiday weekend gave me some time to venture back out the garage.
I decided to tackle the bent subframe end. I borrowed a 6 ton benchtop press and proceeded to have a go at bending some metal.
Here's the before shot:
and here's the after
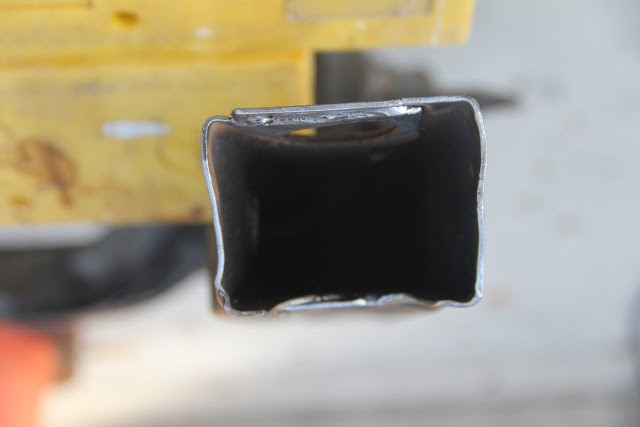
Its not perfect, but it is pretty good.
There is a crack I'm concerned about, I guess I'll weld it up and see how it looks...the crack is at the edge of the overlapping metal inside...
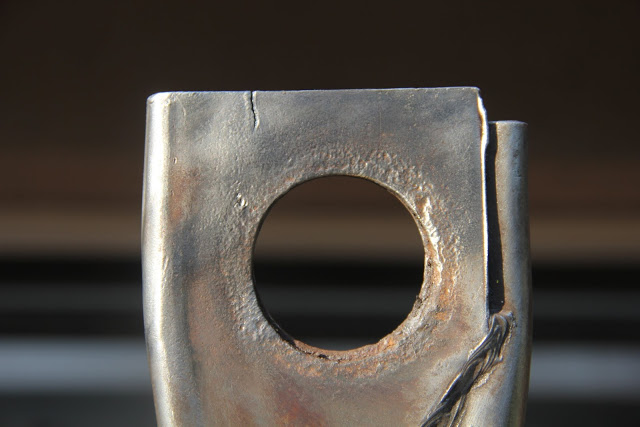
Any thoughts / opinions welcomed...
11-25-2012 #40 Registered User
- Join Date
- Mar 2010
- Location
- GR Michigan
- Posts
- 105
Drill a hole (1/8") at the end of the crack before welding it (the crack and the hole) up. This will stop further cracking.
Jeff
73 Mustang Convertible
Tags for this Thread

 Reply With Quote



