

Results 1 to 20 of 77
-
02-08-2012 #1

 Registered User
- Join Date
- Mar 2005
- Location
- Woodbine, MD
- Posts
- 2,770

Ridetech G Body Rear Coilover Install
This is my write up of the ridetech Chevrolet G Body rear bolt on coilover kit. I performed this install in my home shop on a Rotary 10,00lb lift.
**I will have the comments associated with the given picture above the pictures**
The boxes as they came in.
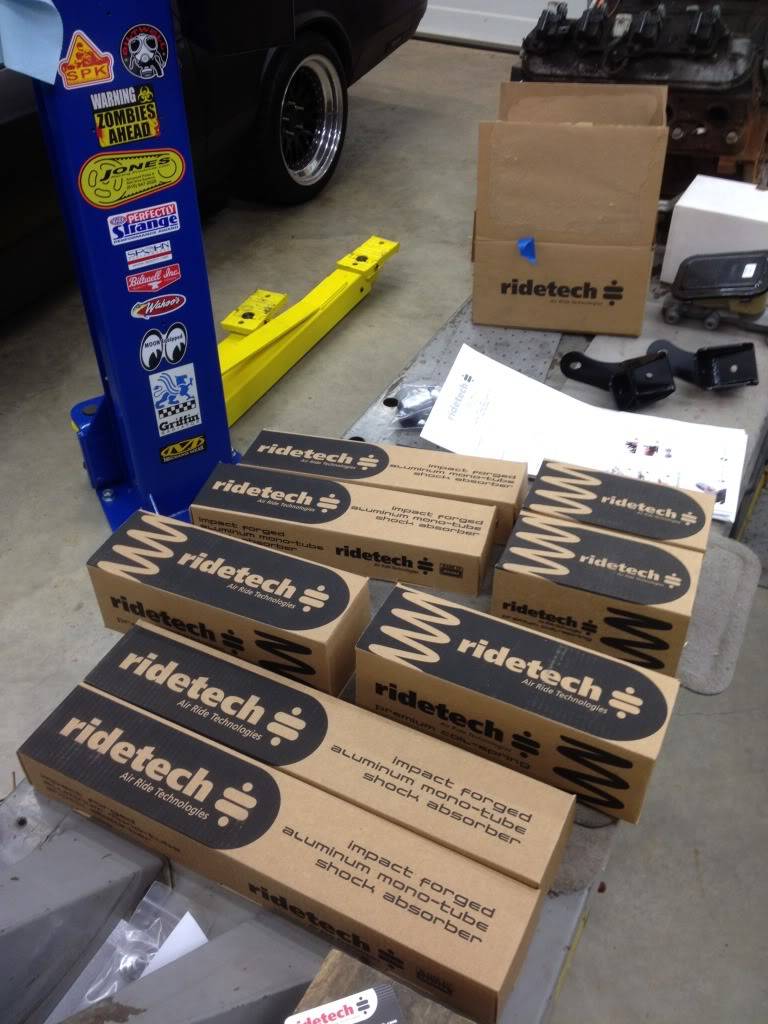
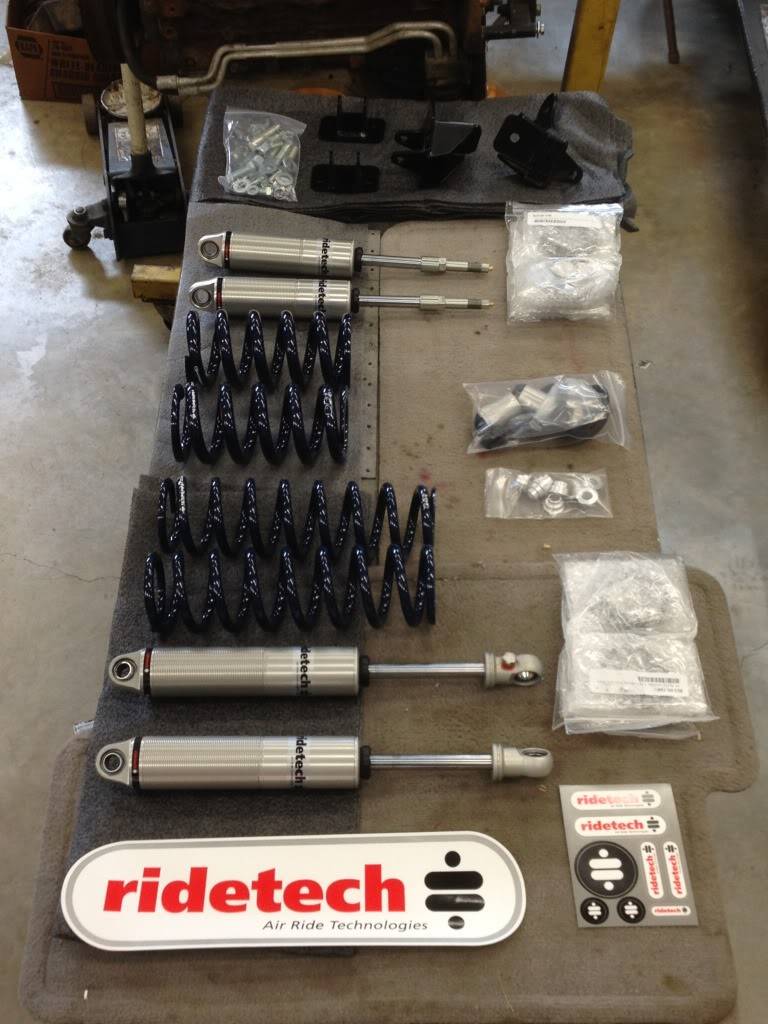
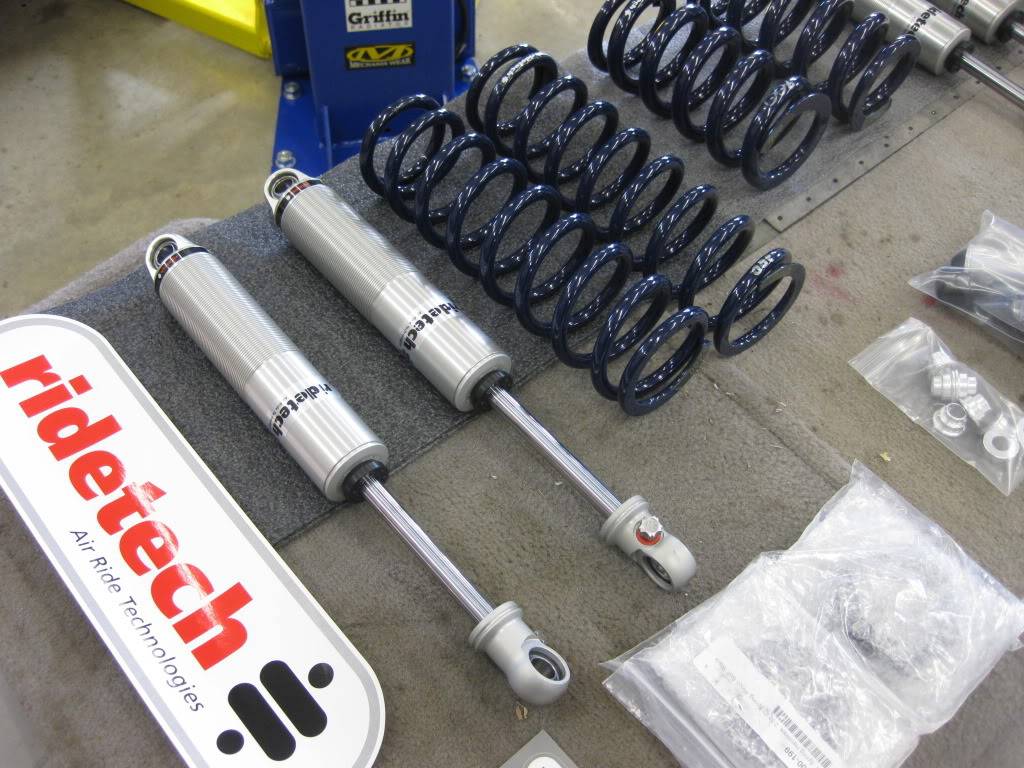
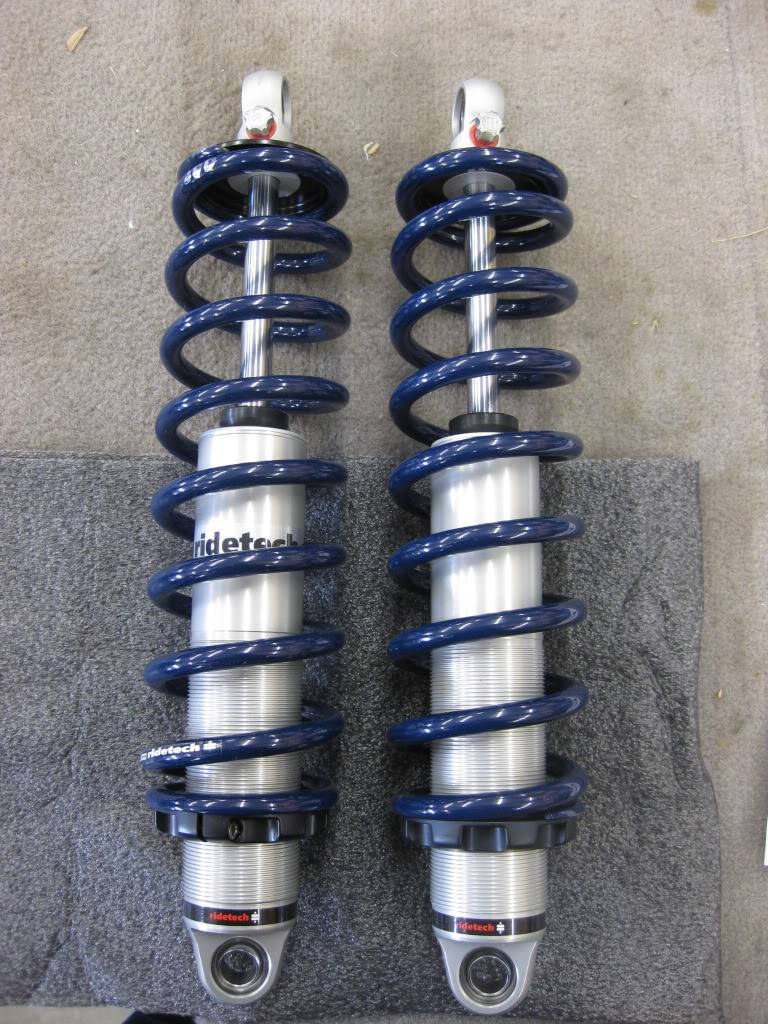
The boxes all unpacked. This is the front and rear coilover set up's.
This is my old set up. Vari-shocks and CPP coil springs #603-4. This set up provided an amazing stance but horrible ride and handling!! I was pretty much bouncing off the bump stops.
Old set up gone. I know..I know...I need to clean up the underside of my car!!! lol
 Douglas Lutes
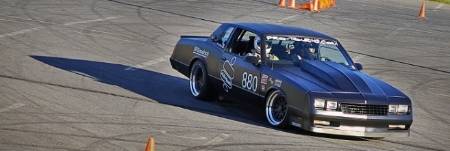
1988 Monte Carlo SS
"Never race anything you can't afford to set on fire and push off a cliff."
-
02-08-2012 #2
Registered User
- Join Date
- Mar 2005
- Location
- Woodbine, MD
- Posts
- 2,770
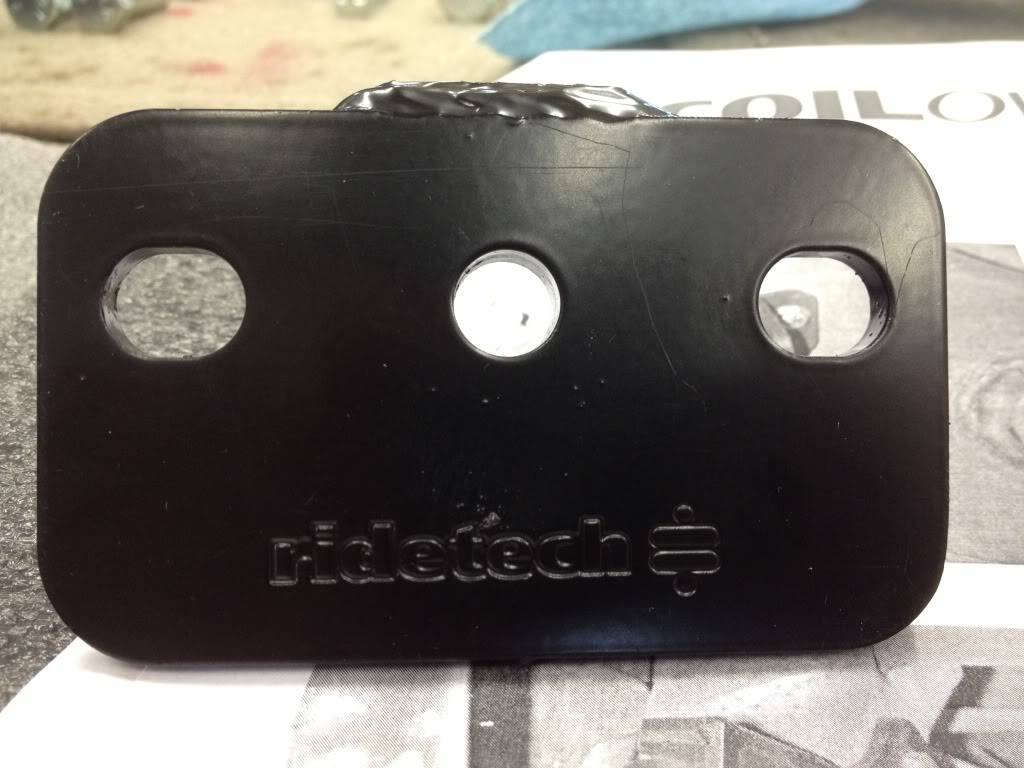
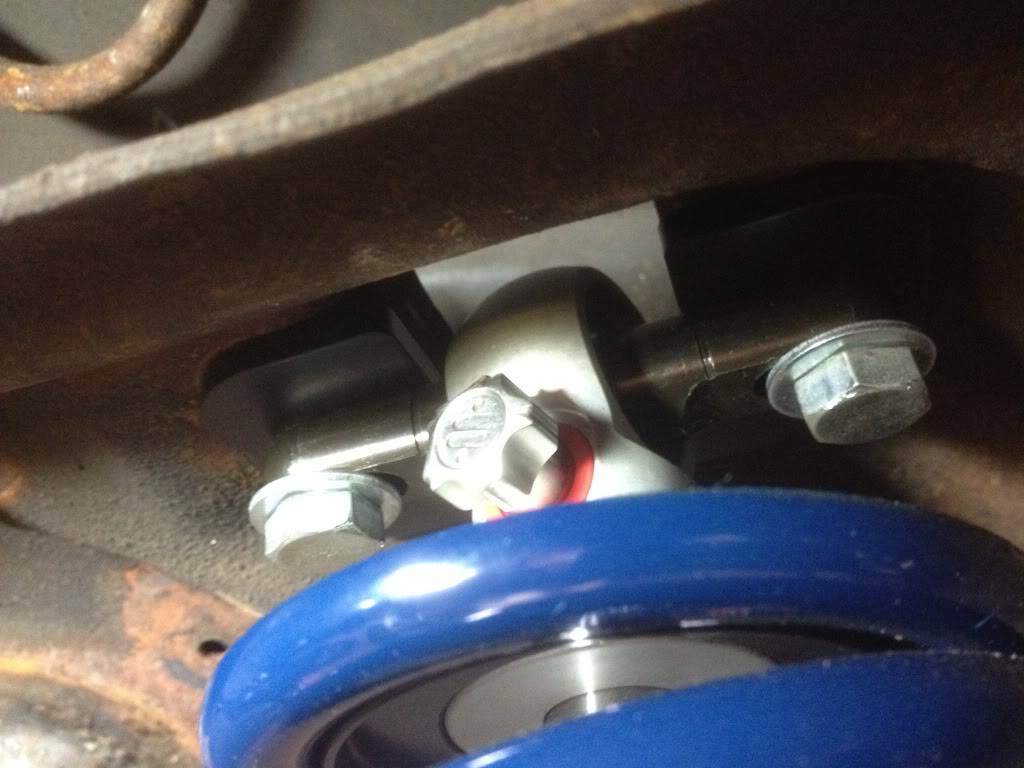
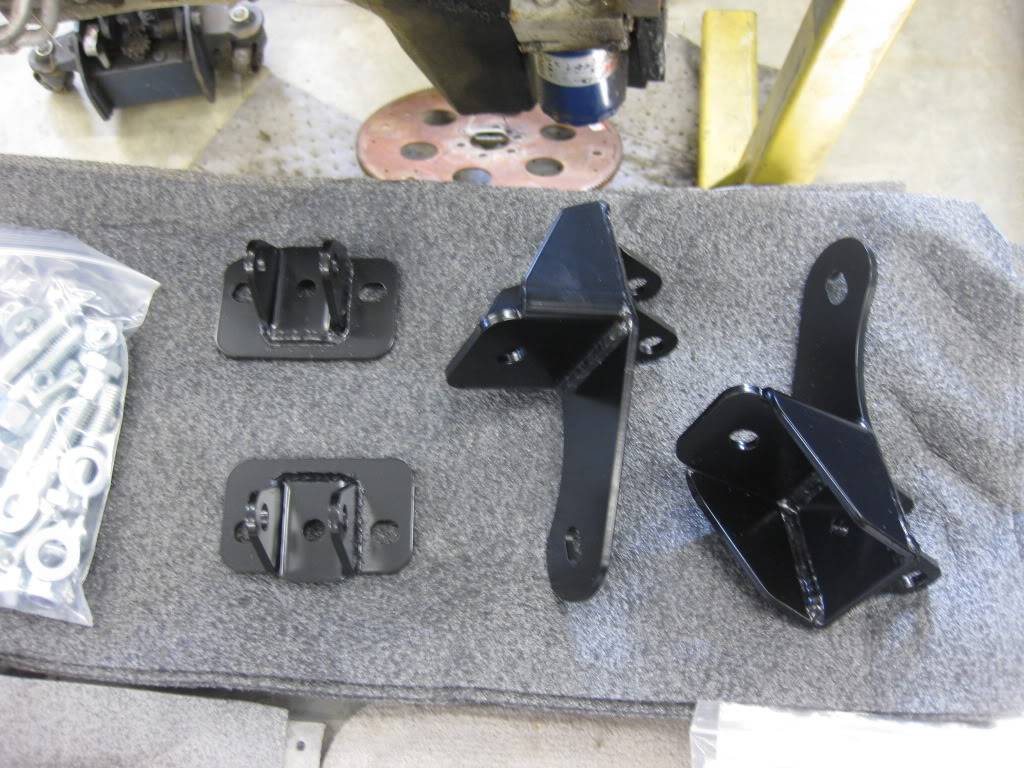
This is the underside view of the top bracket provided by ridetech. I thought it was a nice touch that the logo was on it!!
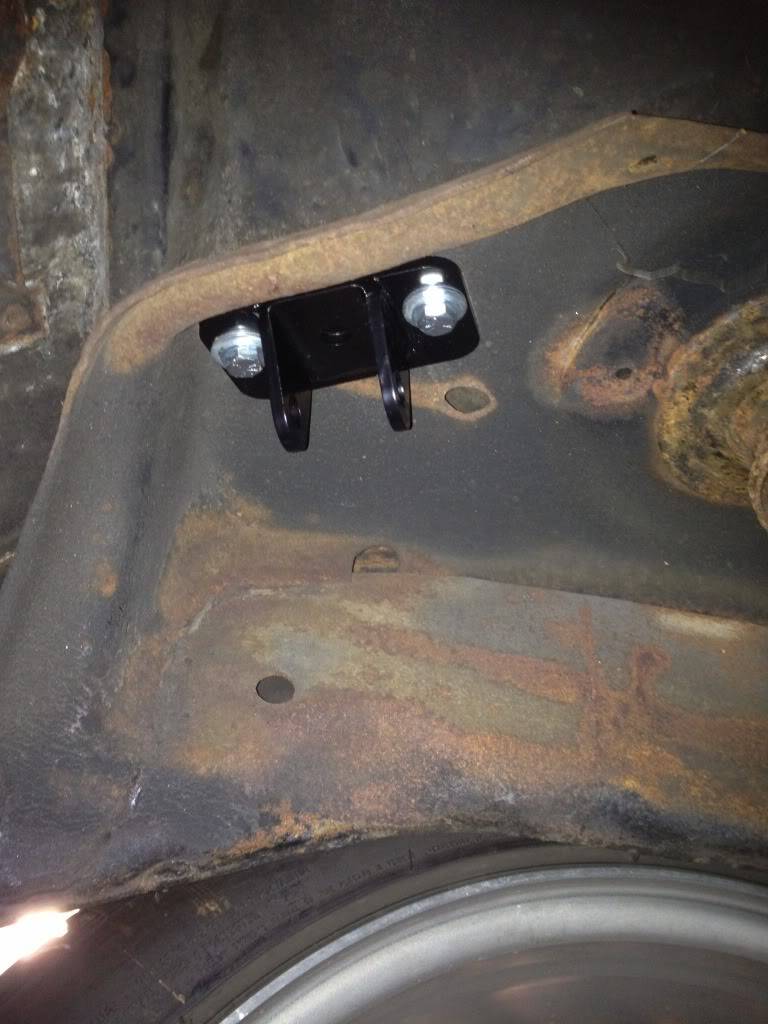
Top bracket is installed. **be sure to follow the instructions on the top bracket b/c it faces a certain way**
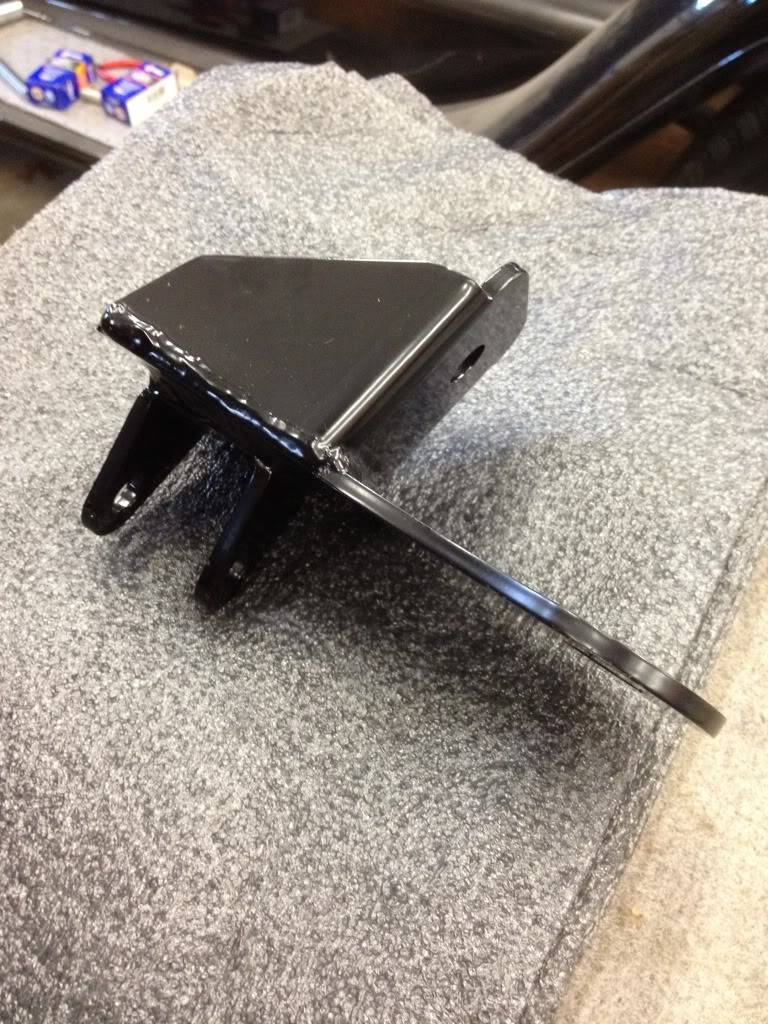
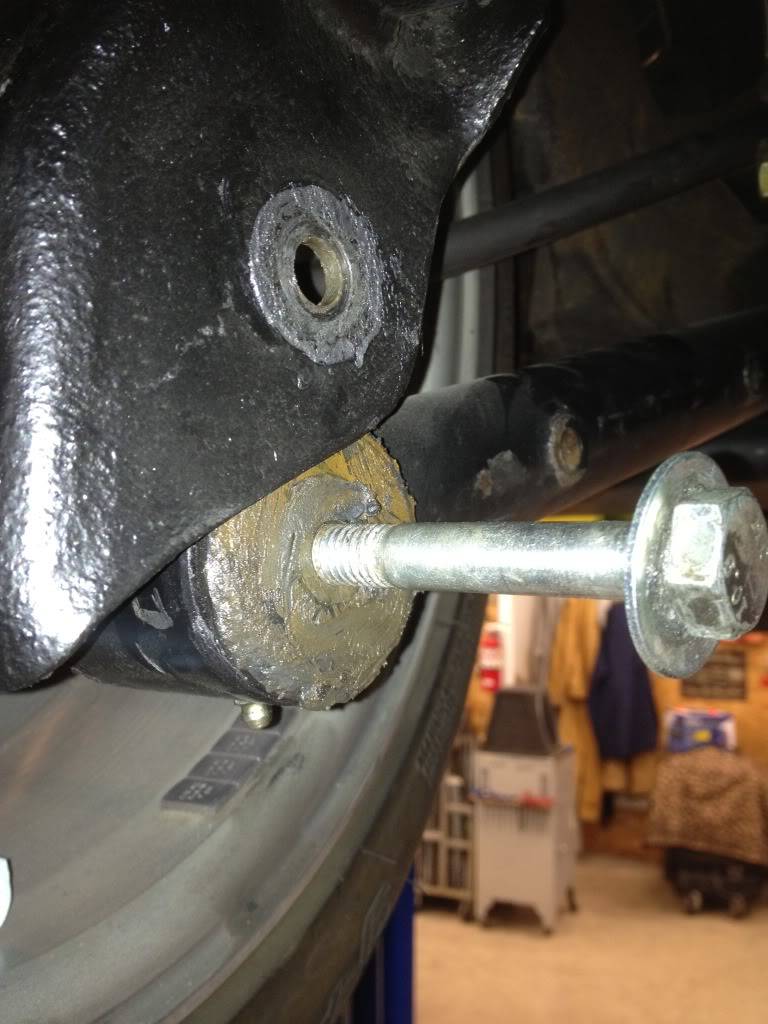
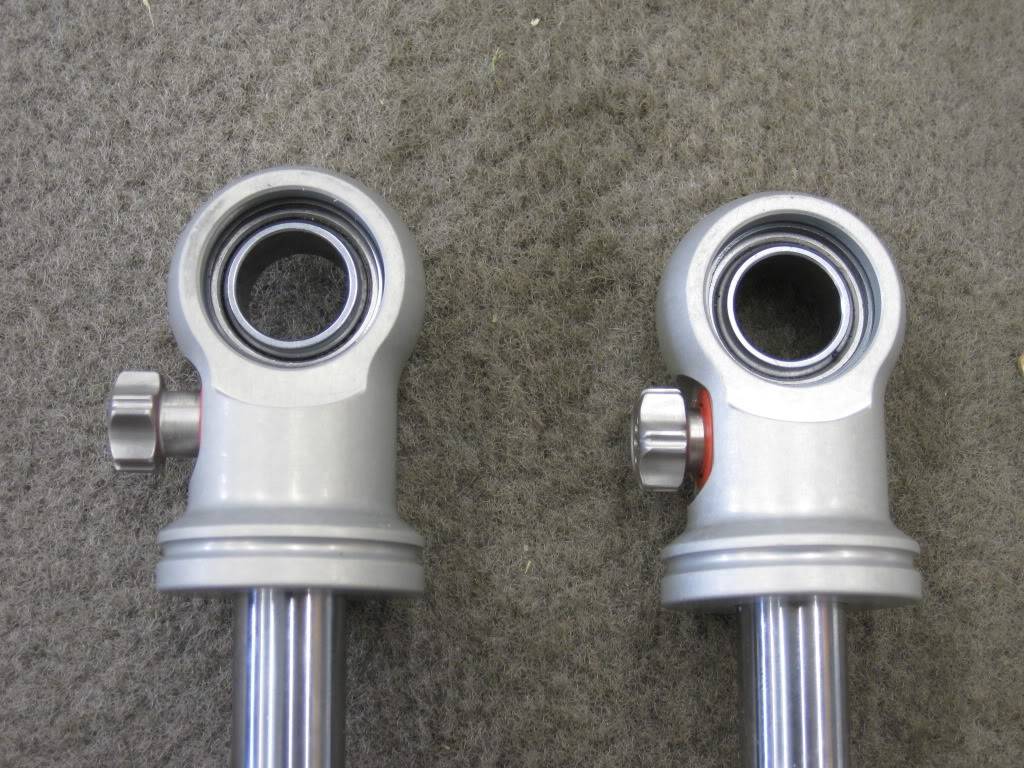
This is a view of their bottom bracket.
I wanted to test fit the hardware ridetech provided and found out that the bolt used to mount the lower bracket was a hair to big for my lower control arm.
 Douglas Lutes
1988 Monte Carlo SS
"Never race anything you can't afford to set on fire and push off a cliff."
02-08-2012 #3
Registered User
- Join Date
- Mar 2005
- Location
- Woodbine, MD
- Posts
- 2,770
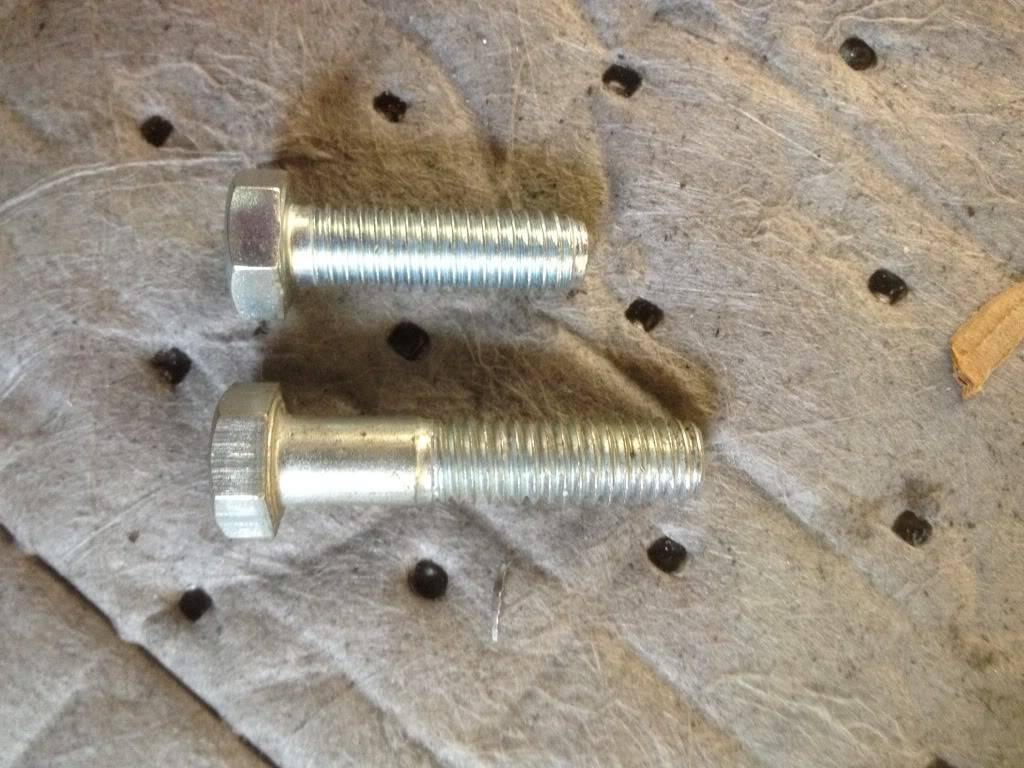
The bolt on the left is the 1/2" bolt that ridetech supplied with the kit and the one on the right is the 12mm bolt that was supplied with the control arms (Curr-Trac Lower Control Arms)
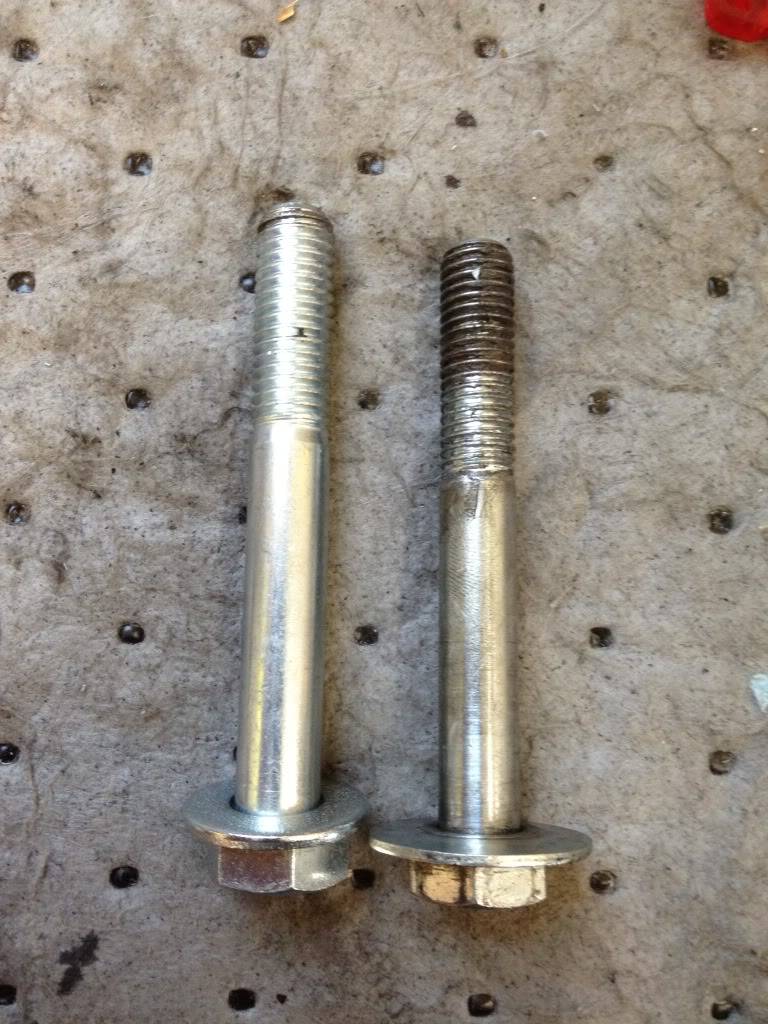
12mm
1/2"
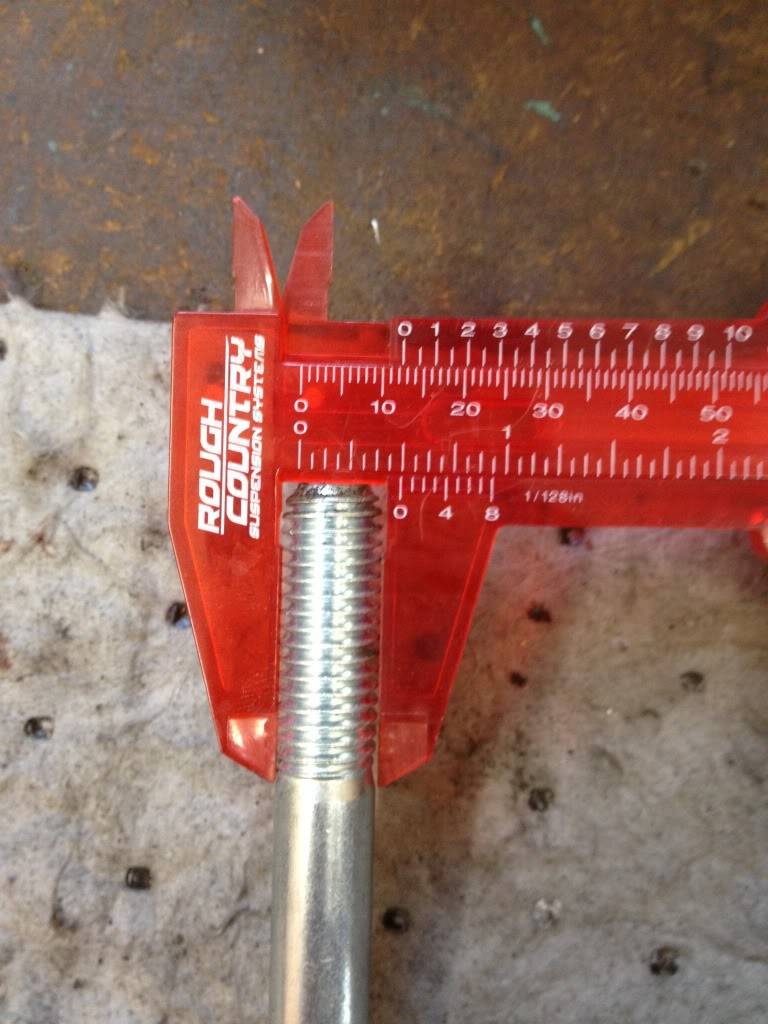
I called ridetech and they sent me out the correct length 12mm bolts in no time at all!!!! Great customer service over there!!Douglas Lutes
1988 Monte Carlo SS
"Never race anything you can't afford to set on fire and push off a cliff."
02-08-2012 #4
Registered User
- Join Date
- Mar 2005
- Location
- Woodbine, MD
- Posts
- 2,770
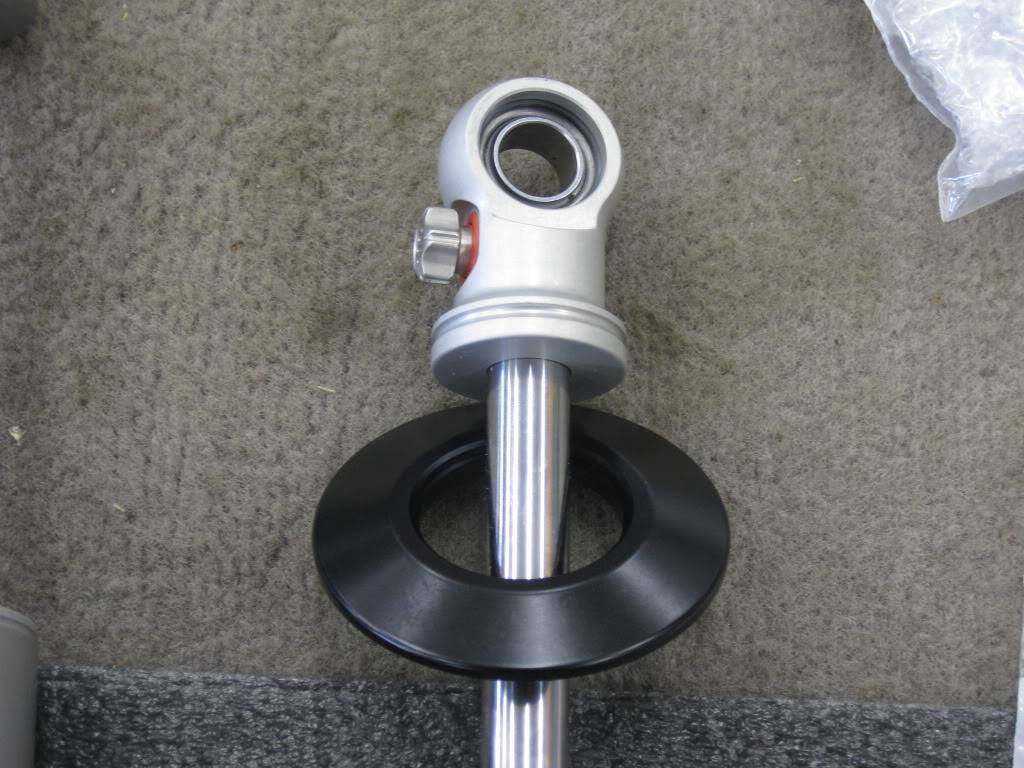
Driver side lower bracket installed
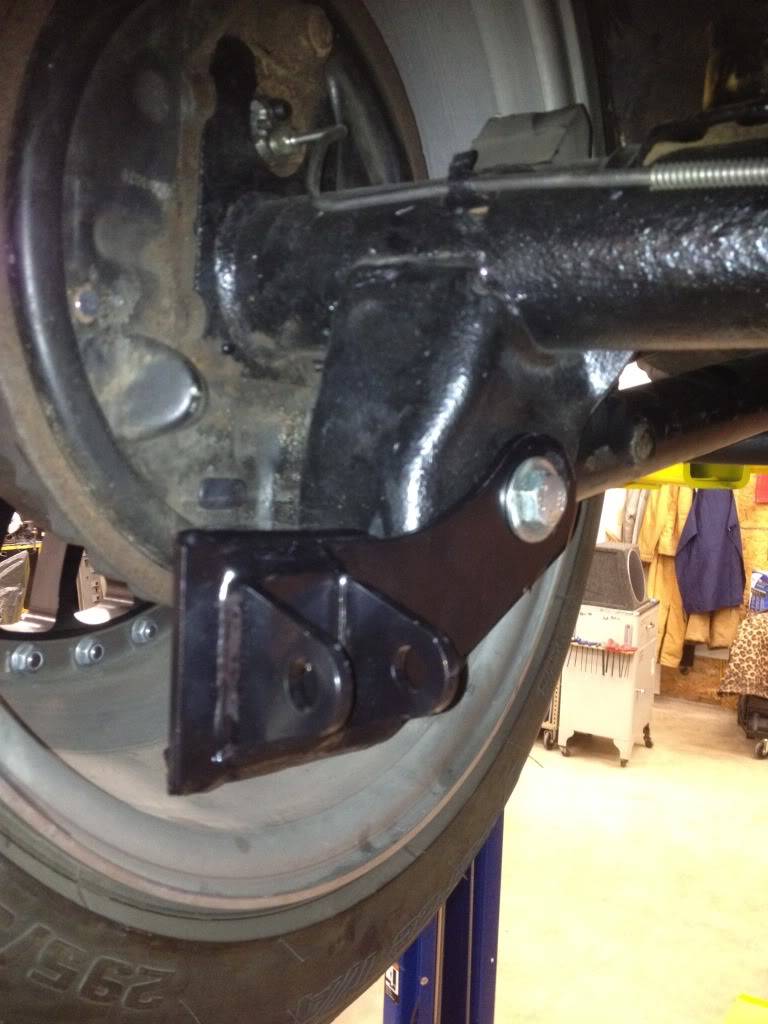
Passenger side lower bracket installed
This is a view of the support bolt that also holds on the lower bracket.
 Douglas Lutes
1988 Monte Carlo SS
"Never race anything you can't afford to set on fire and push off a cliff."
02-08-2012 #5
Registered User
- Join Date
- Mar 2005
- Location
- Woodbine, MD
- Posts
- 2,770
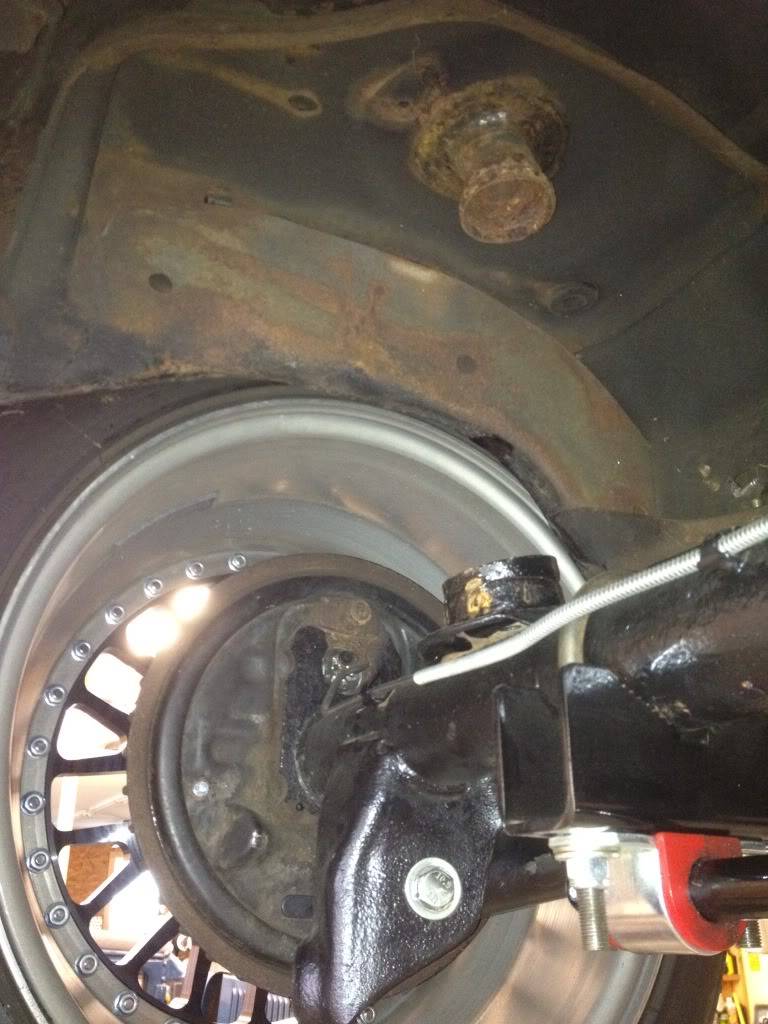
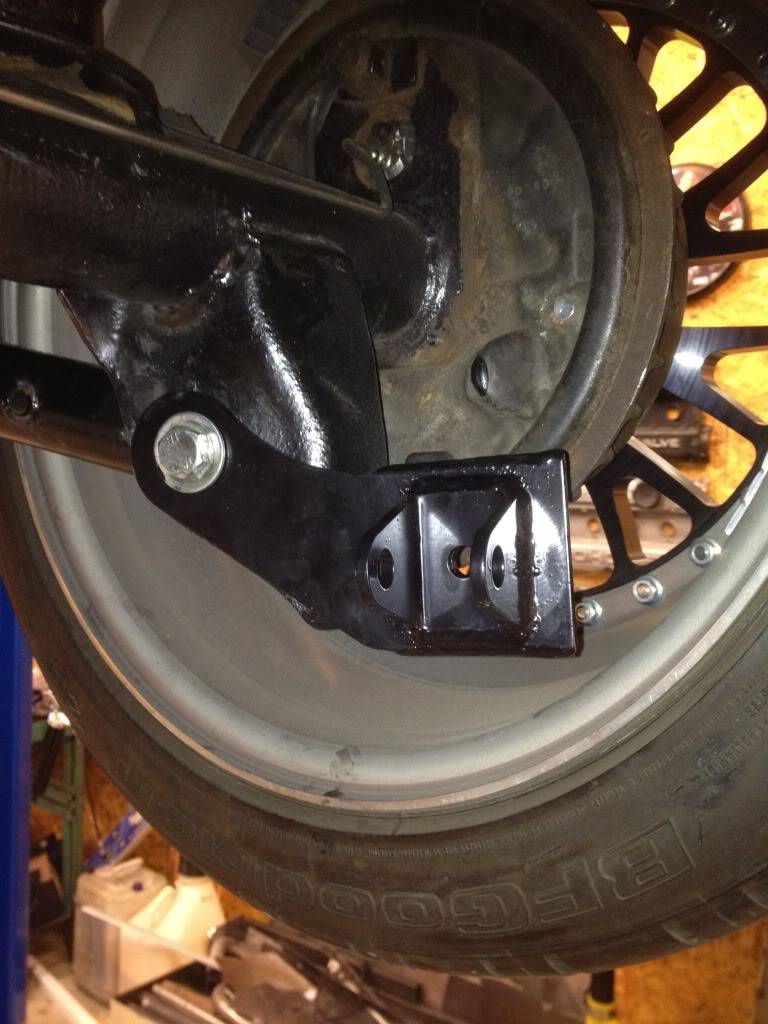
It does look like the lower brackets are close to my wheels. My rear wheels are 18x10.5 and there is about .75 inches between the bracket and tire.
This is a pic of the bushings that need to be used on the shock eyelets so the 1/2" bolt can be used.

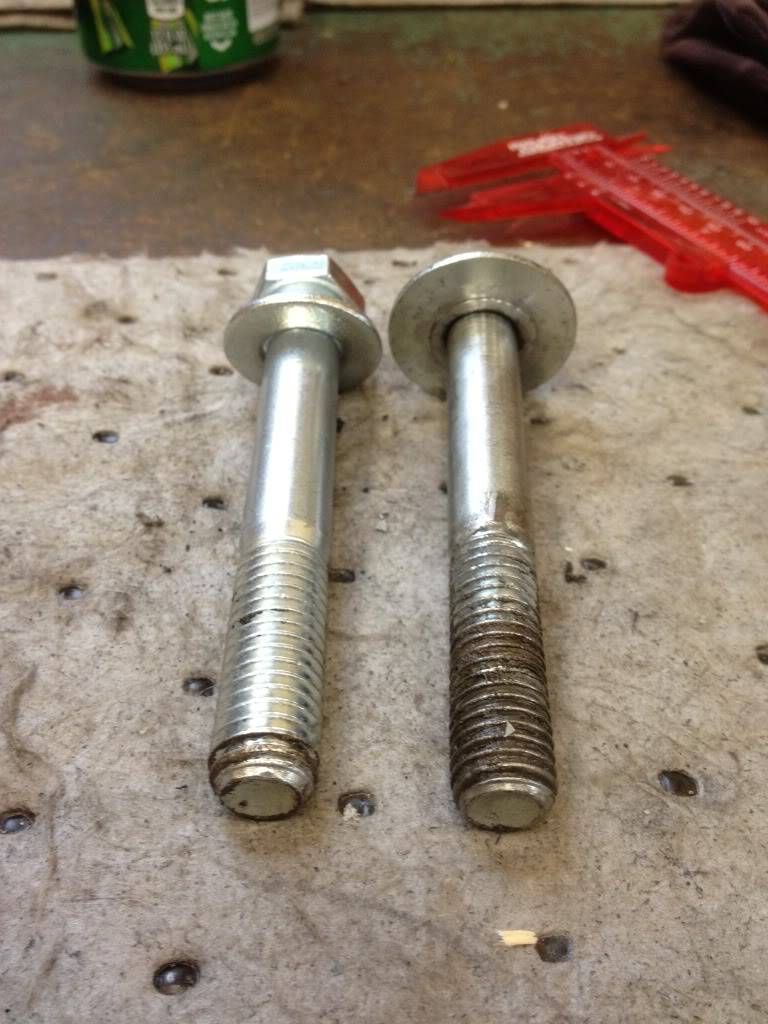
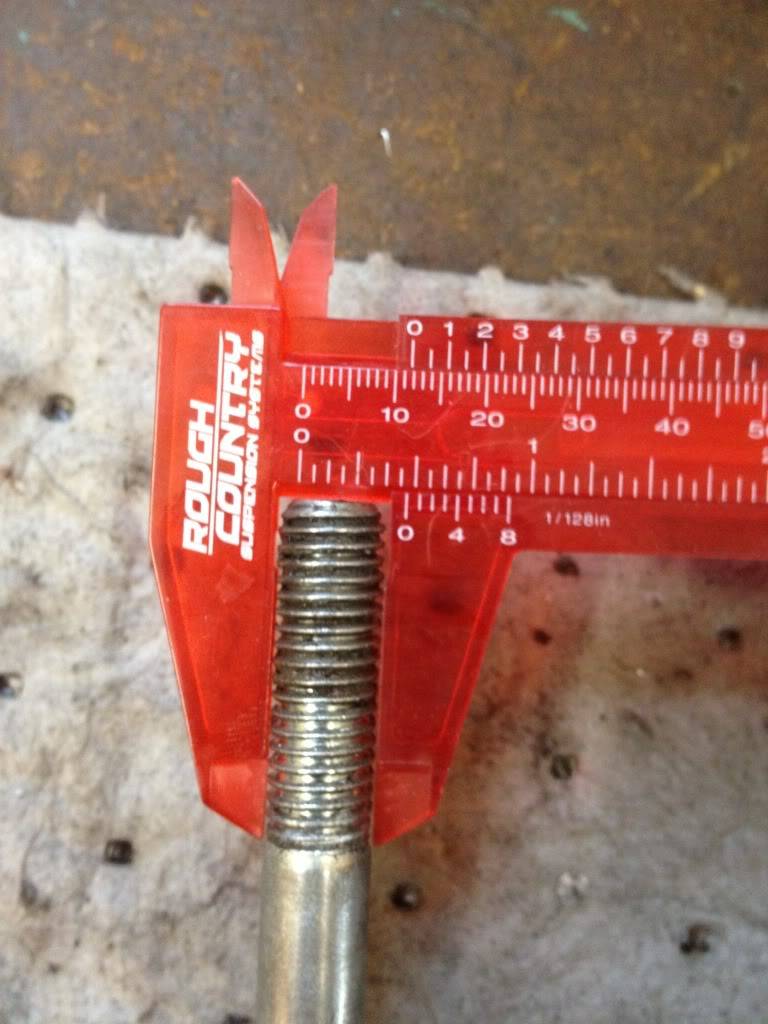
And here is a pic of the shock bolts that ridetech provided. The one on top was provided by ridetech and is 2.5 inches long. It worked but didn't provide enough thread engagement for my likeing so I got some grade 8 bolts that were 2.75 inches long. These worked out prefectly!!
 Douglas Lutes
1988 Monte Carlo SS
"Never race anything you can't afford to set on fire and push off a cliff."
02-08-2012 #6
Registered User
- Join Date
- Mar 2005
- Location
- Woodbine, MD
- Posts
- 2,770
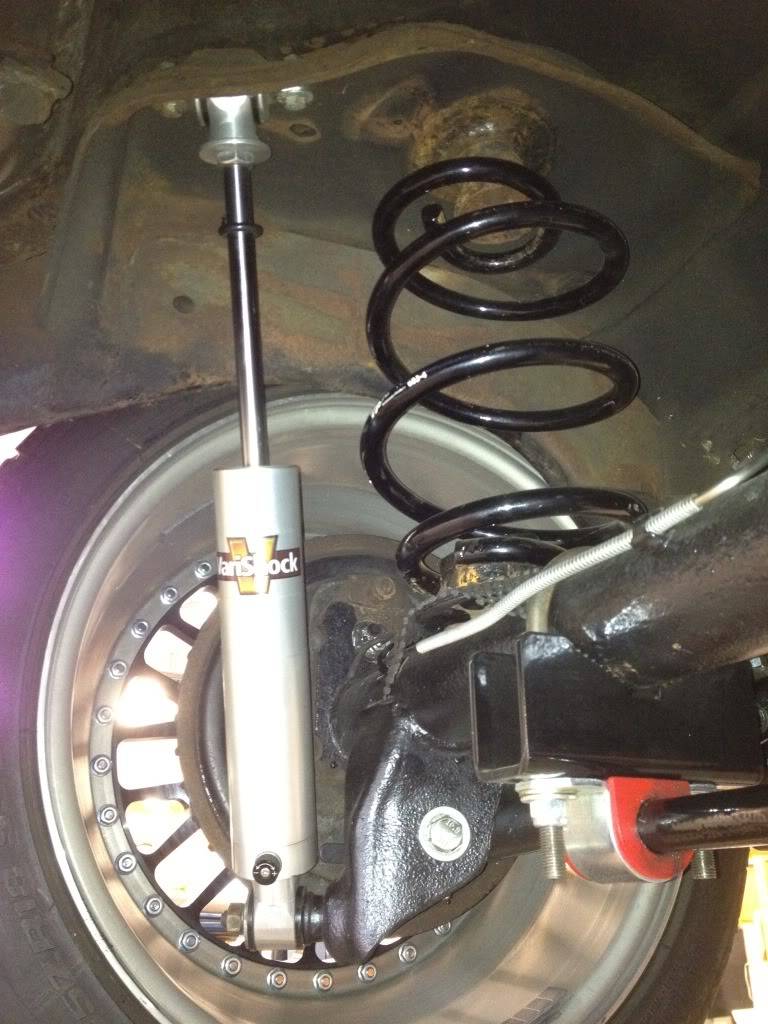
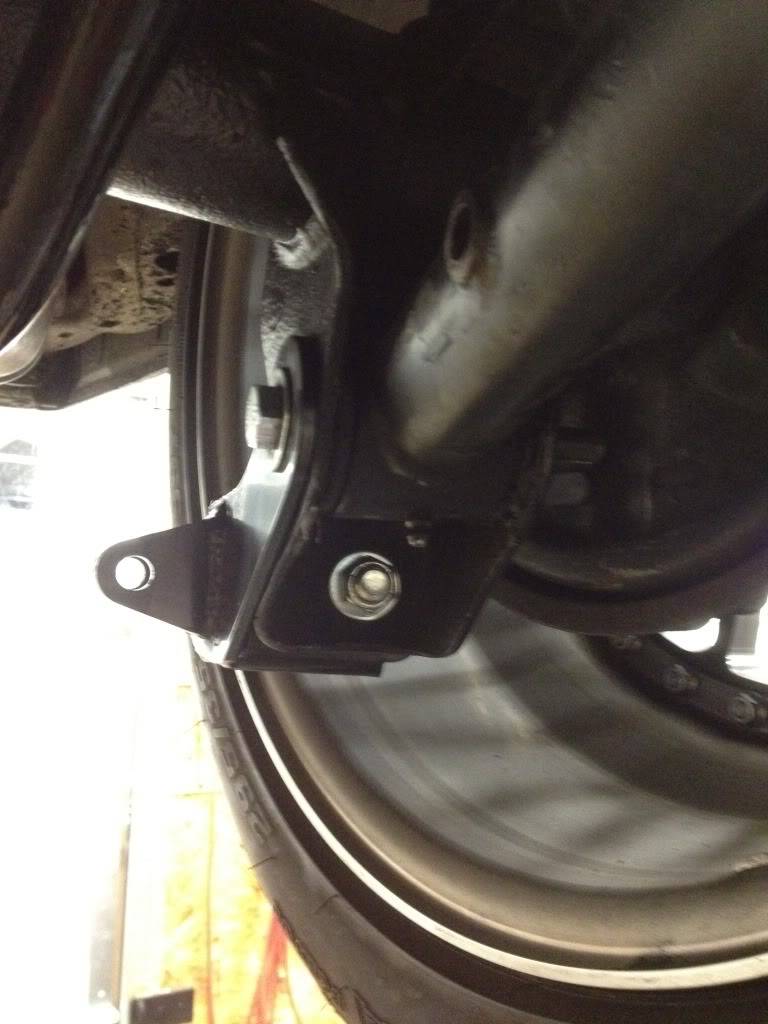
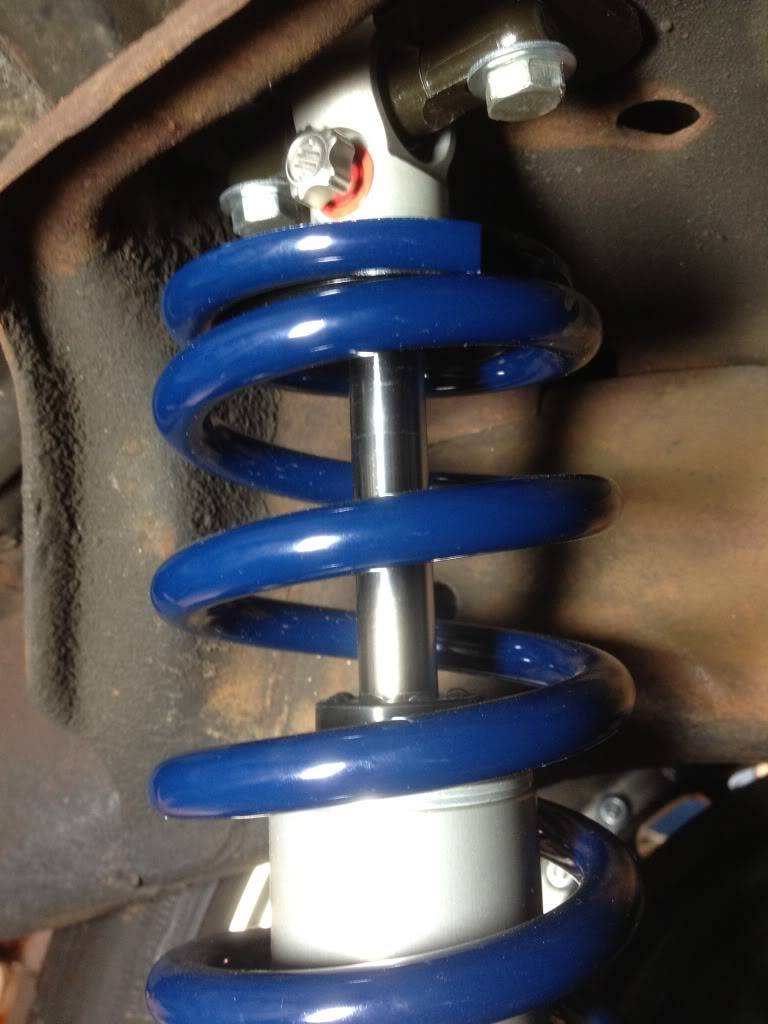
This is a pic of the set up installed with the supplied brackets.
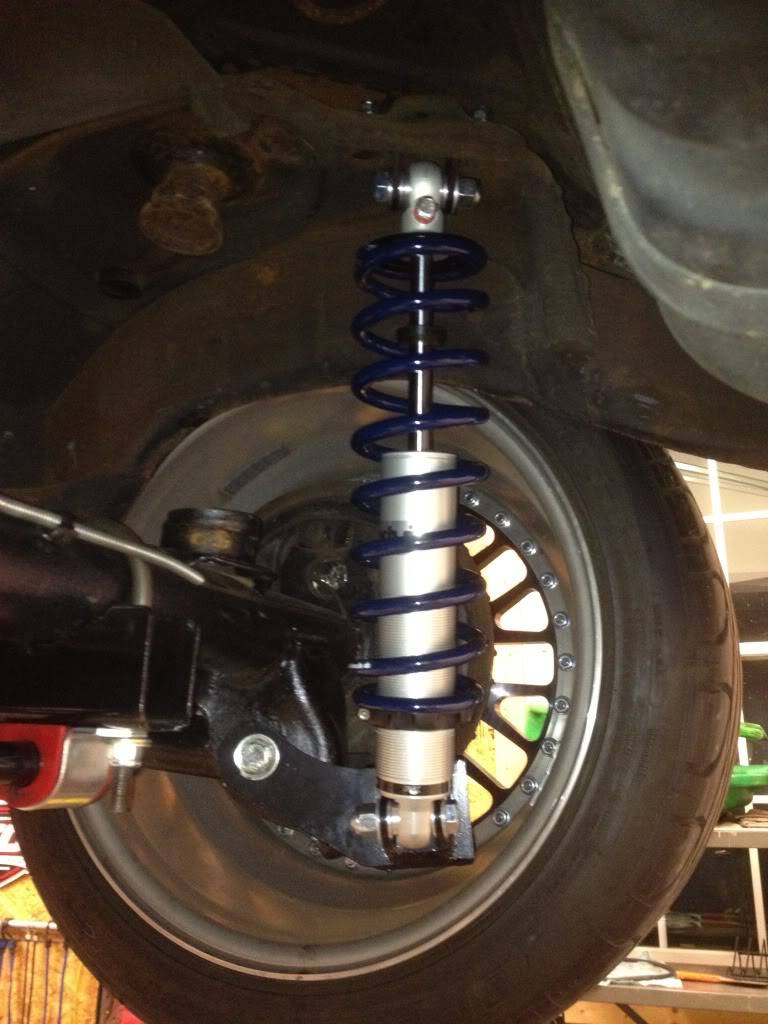
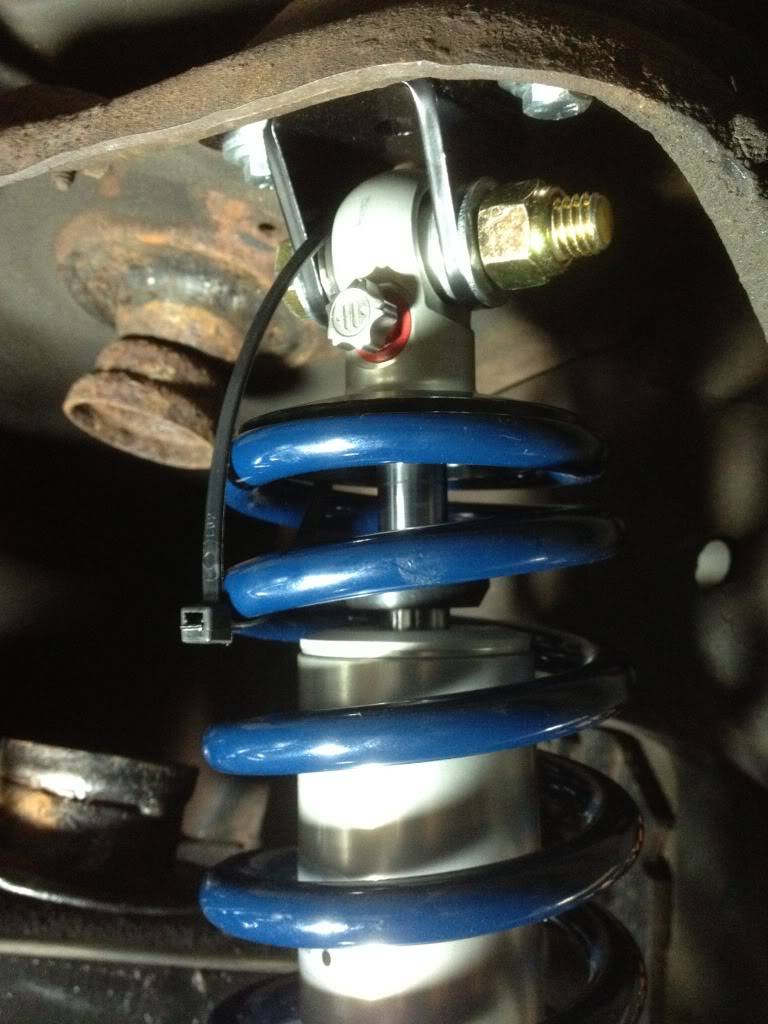
To get my desired ride height I had to turn the bottom spanner all the way down. This was not desireable because if I ever caused the suspension to unload enough the spring could have popped out of the spring cups...and that's a bad thing!
I drove it like this around the block and zip tied the spring to the upper mount so it would not pop out of the spring cup.
 Douglas Lutes
1988 Monte Carlo SS
"Never race anything you can't afford to set on fire and push off a cliff."
02-08-2012 #7
Registered User
- Join Date
- Mar 2005
- Location
- Woodbine, MD
- Posts
- 2,770
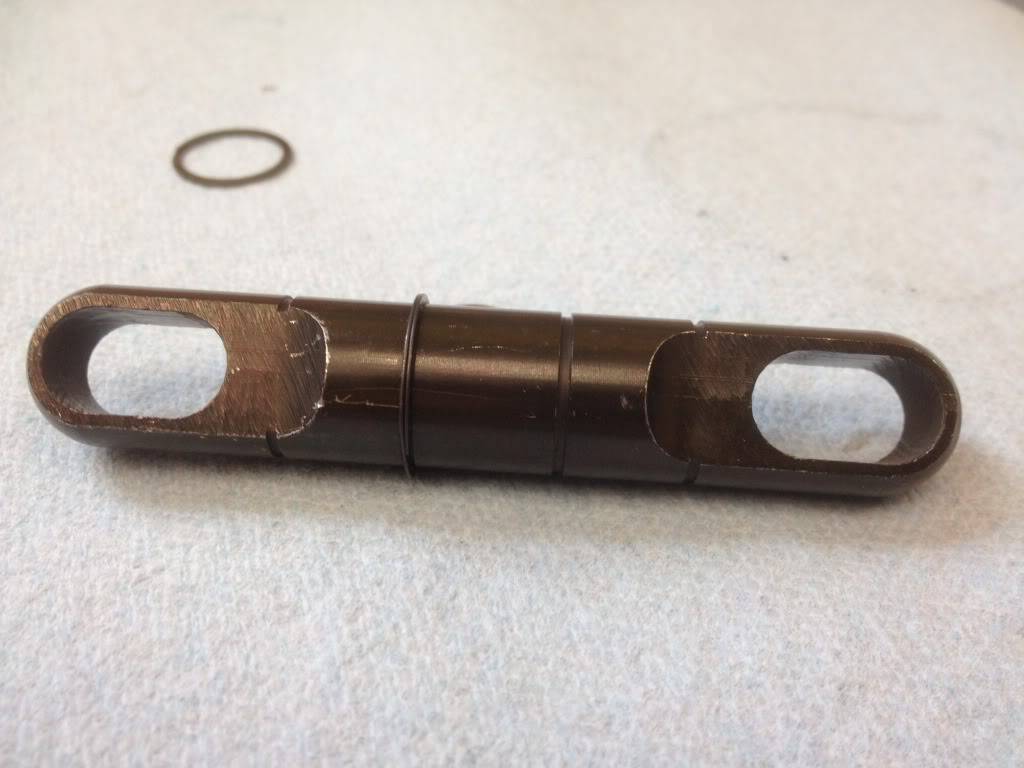
To remedy this situation Darren at ridetech thought outside of the box and sent me some A body upper coil over mounts. These mounts are actually a t-bar set up and are very similar to a factory G body upper shock mount.
Here is a jig that I came up with to compare the two mounting solutions. The A body set up is on the left and the supplied G body set up in on the right.
Here are the T-bars and the spring clips that keep them in the shock eyelet. They are tricky to install but a small screwdriver took care of them no problem!!
 Douglas Lutes
1988 Monte Carlo SS
"Never race anything you can't afford to set on fire and push off a cliff."
02-08-2012 #8
Registered User
- Join Date
- Mar 2005
- Location
- Woodbine, MD
- Posts
- 2,770
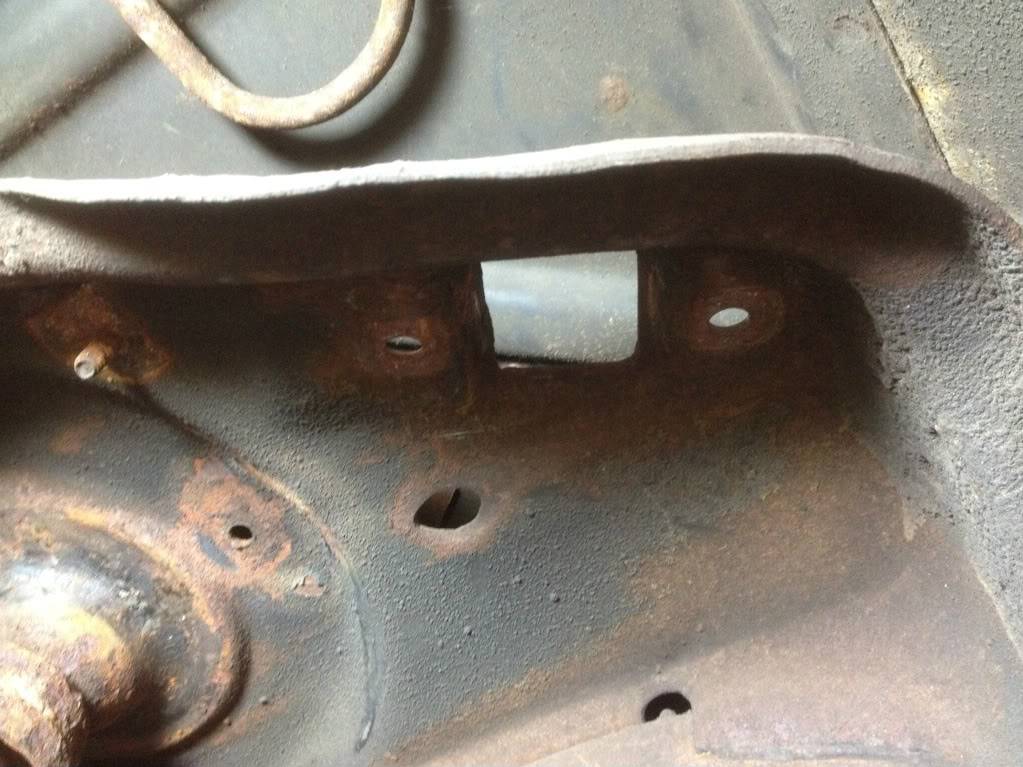
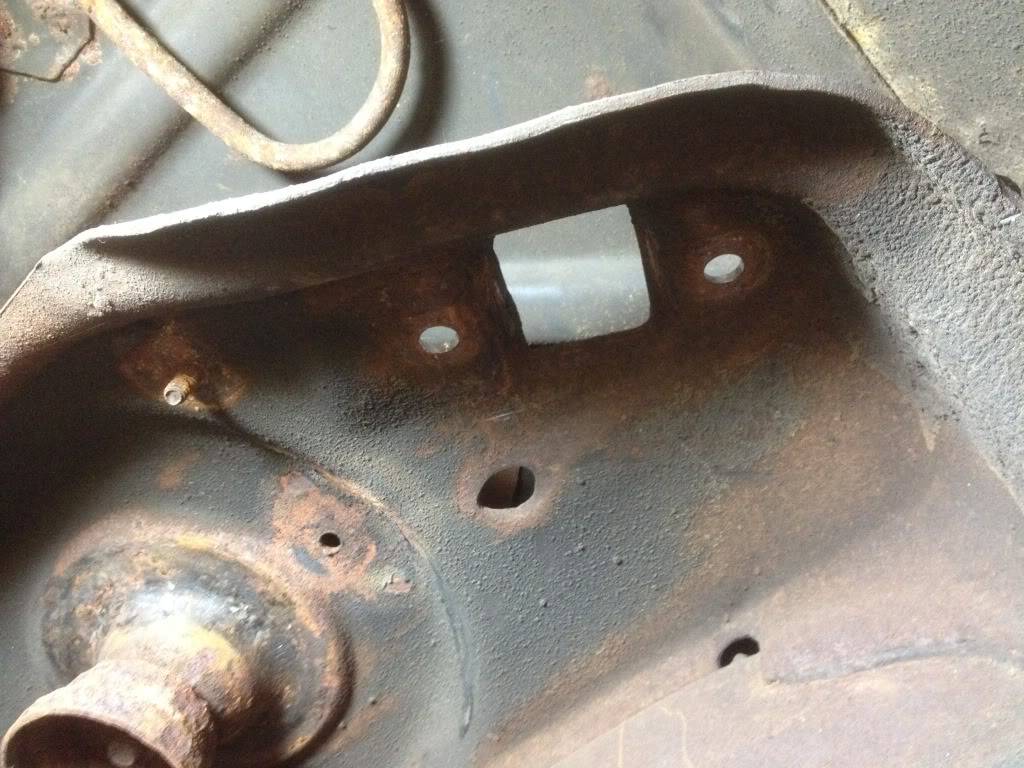
The factory upper shock mounting holes were too small and had to be drilled out to 3/8"
Before
After
This is with the upper mounts all installed. Follow the directions for the A Body mounts because the stress the fact to be sure to mount the bolts from the bottom up!!!. ridetech supplied 1.25" long bolts but like the shock bolts I went with a little bit more thread engagement and got 1.5" bolts.
 Douglas Lutes
1988 Monte Carlo SS
"Never race anything you can't afford to set on fire and push off a cliff."
02-08-2012 #9
Registered User
- Join Date
- Mar 2005
- Location
- Woodbine, MD
- Posts
- 2,770
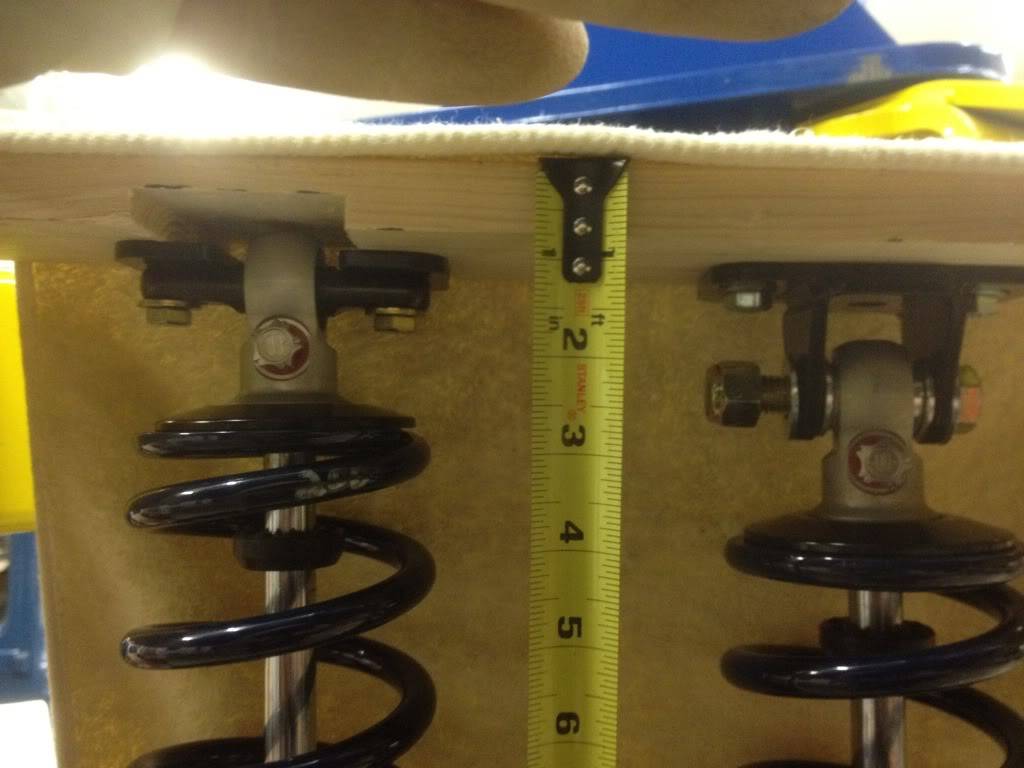
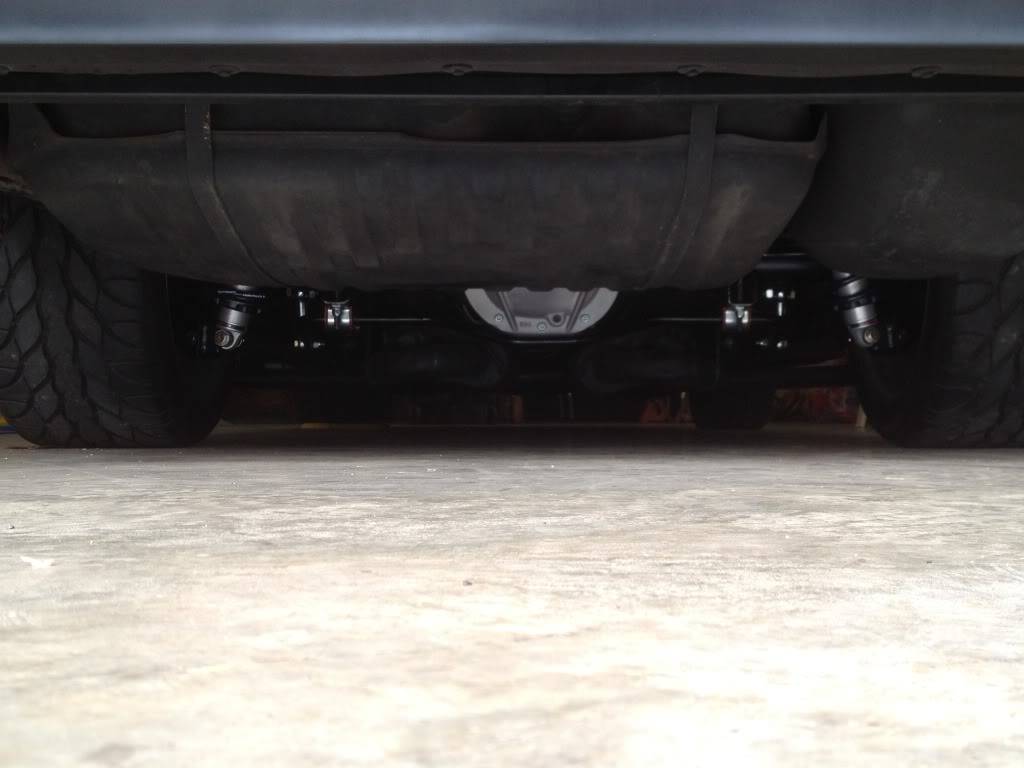
This is how much travel I now have at my desired ride height. For what it is worth the top of my rear fender is 26.75" from the ground and that's with a 295/35/18 tire on a 18x10.5 rim.
ridetech says that these shocks should be between 13.5-14.5 inches from eye to eye at ride height. That lenght is in the shocks "sweet spot".

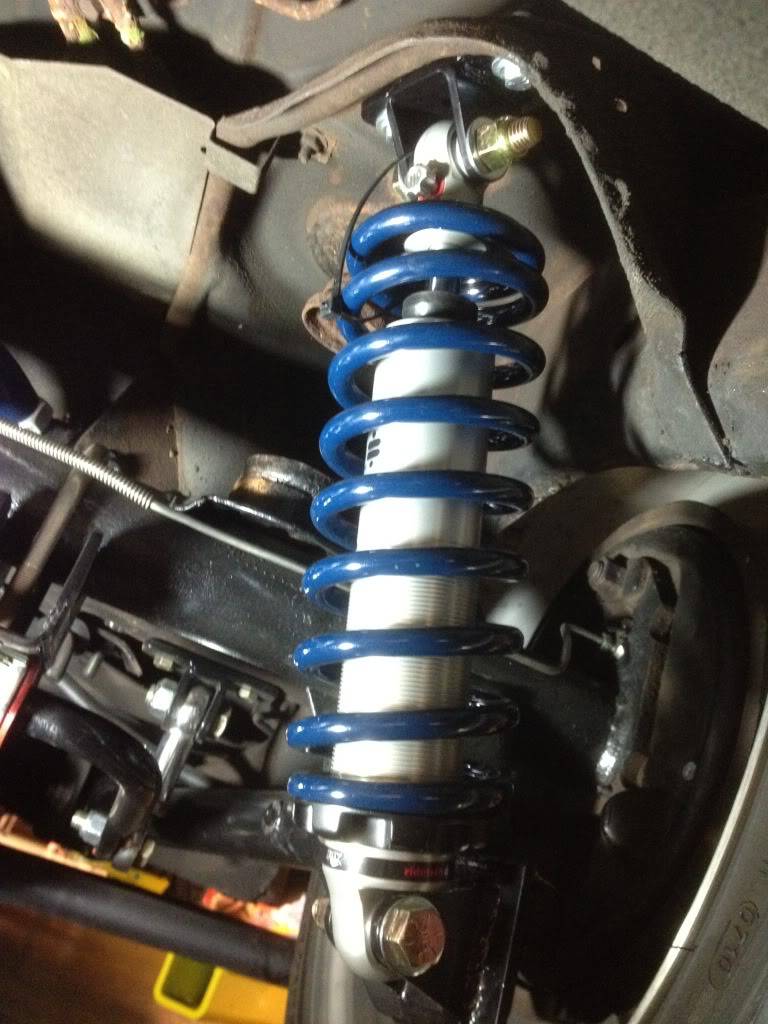
Pic of the final product.
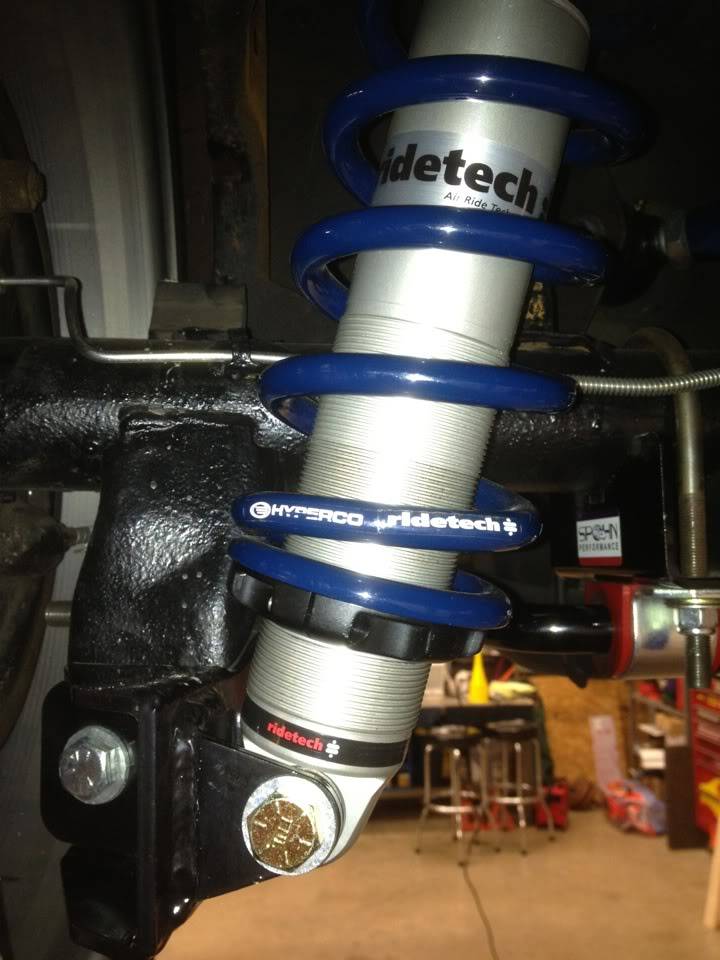
Cool view from the rear of the car...those coilovers look good under there!!!
I am very impressed with this coil over kit. The difference in ride quality and handling is night and day!!! The guys at ridetech really helped me out with the ride height issue and got me to where I wanted to be. I couldn't be happier with this product! The springs and shocks are 100% A+ quality and they are made in America...which just makes it that much better!!!
Feel free to ask me any questions.Douglas Lutes
1988 Monte Carlo SS
"Never race anything you can't afford to set on fire and push off a cliff."
02-08-2012 #10
Registered User
- Join Date
- Mar 2005
- Location
- Woodbine, MD
- Posts
- 2,770
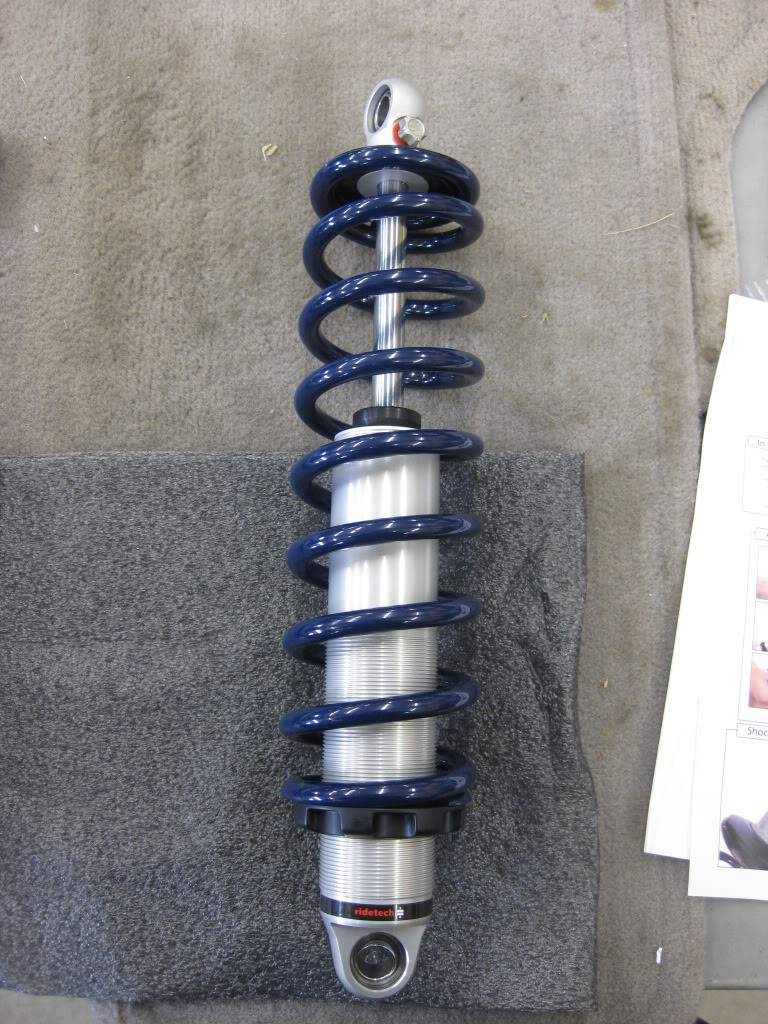
Wow...I totally forgot the pics on how to put these darn coilovers together!!!!
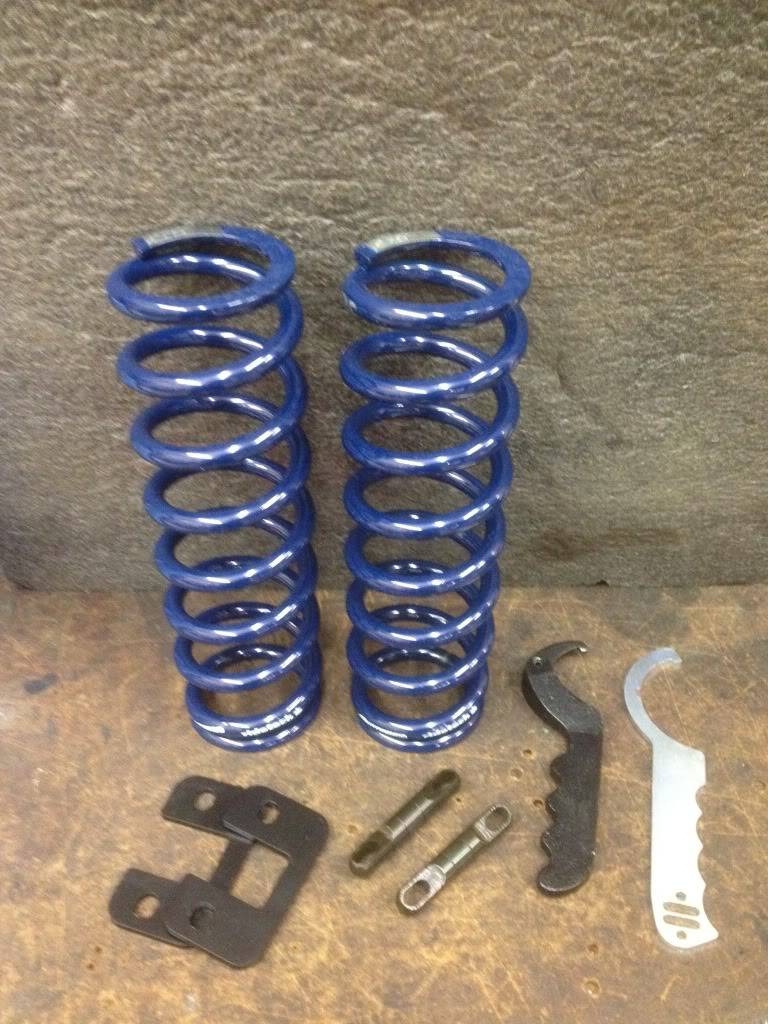
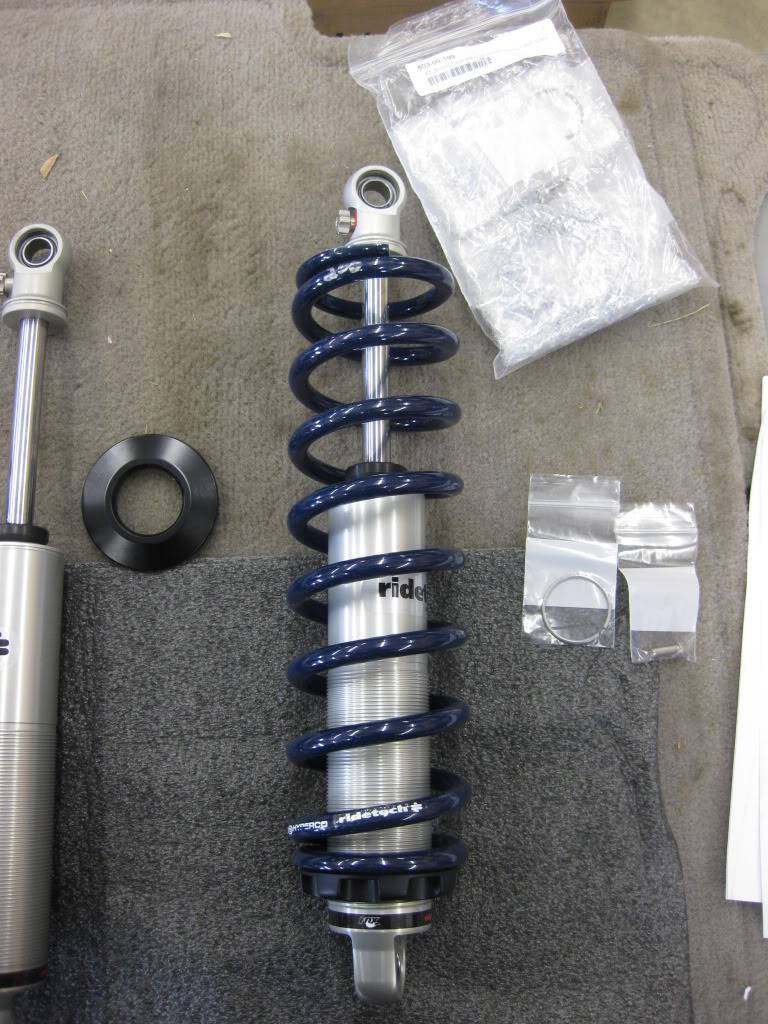
Pic of the seperated shocks and springs, which are 200lb springs.
Much better pics of the upper and lower brackets in the G Body kit.
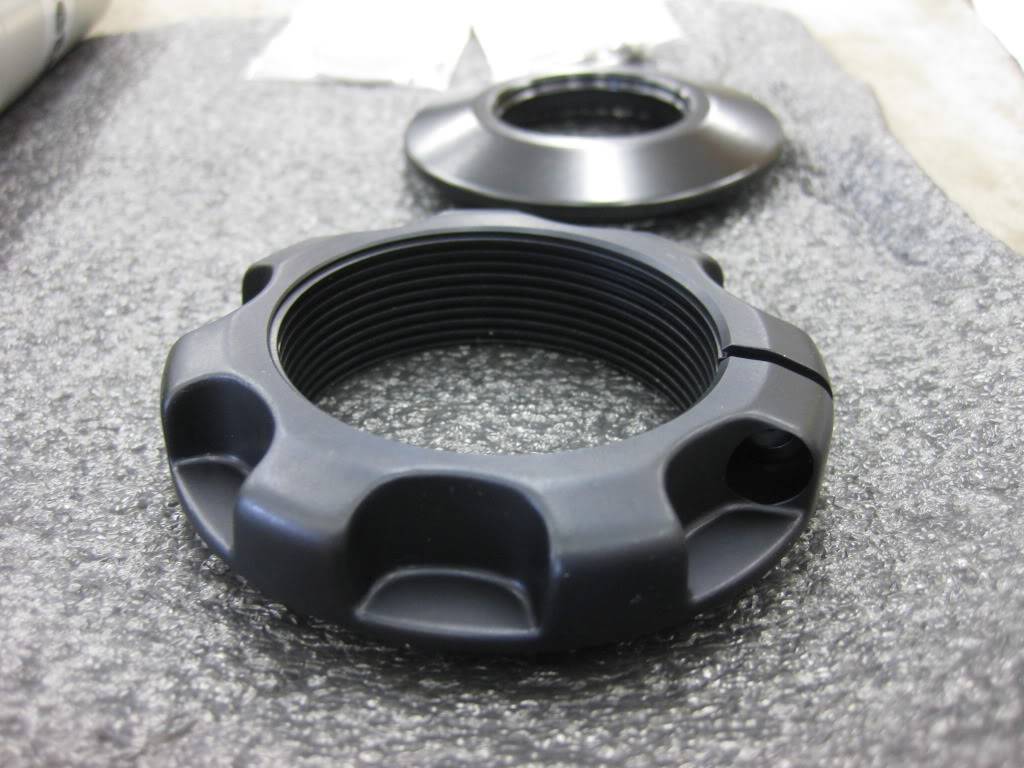
Upper spring cup/retainer
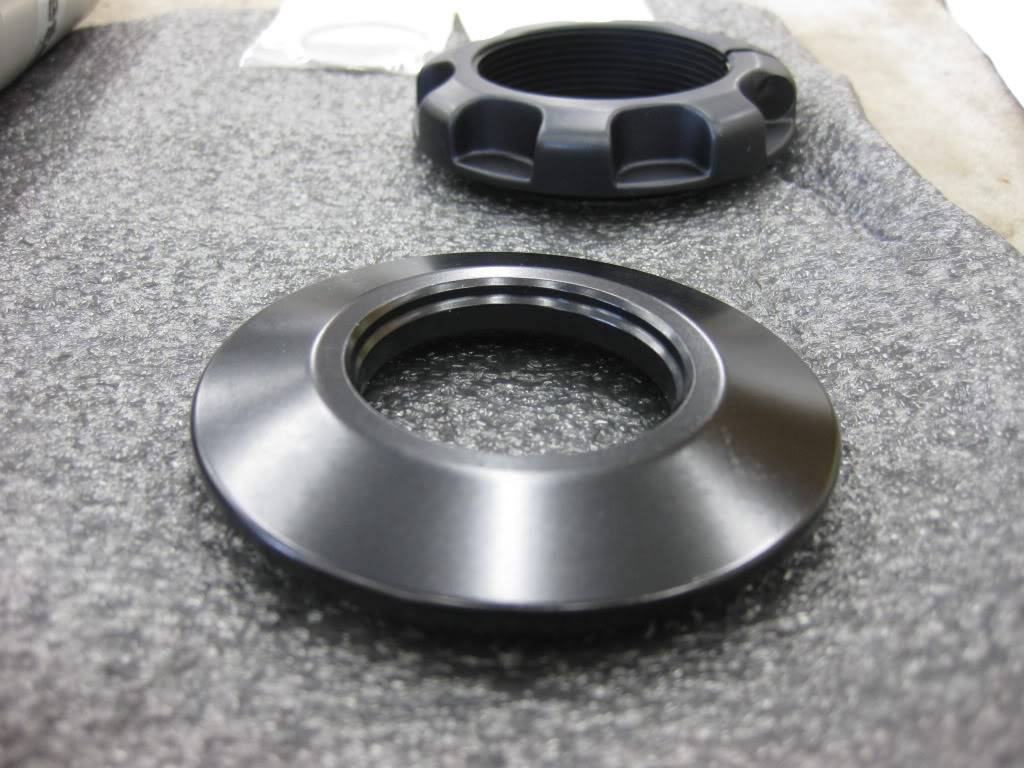
Lower spring cup/retainer/spanner
 Douglas Lutes
1988 Monte Carlo SS
"Never race anything you can't afford to set on fire and push off a cliff."
02-08-2012 #11
Registered User
- Join Date
- Mar 2005
- Location
- Woodbine, MD
- Posts
- 2,770
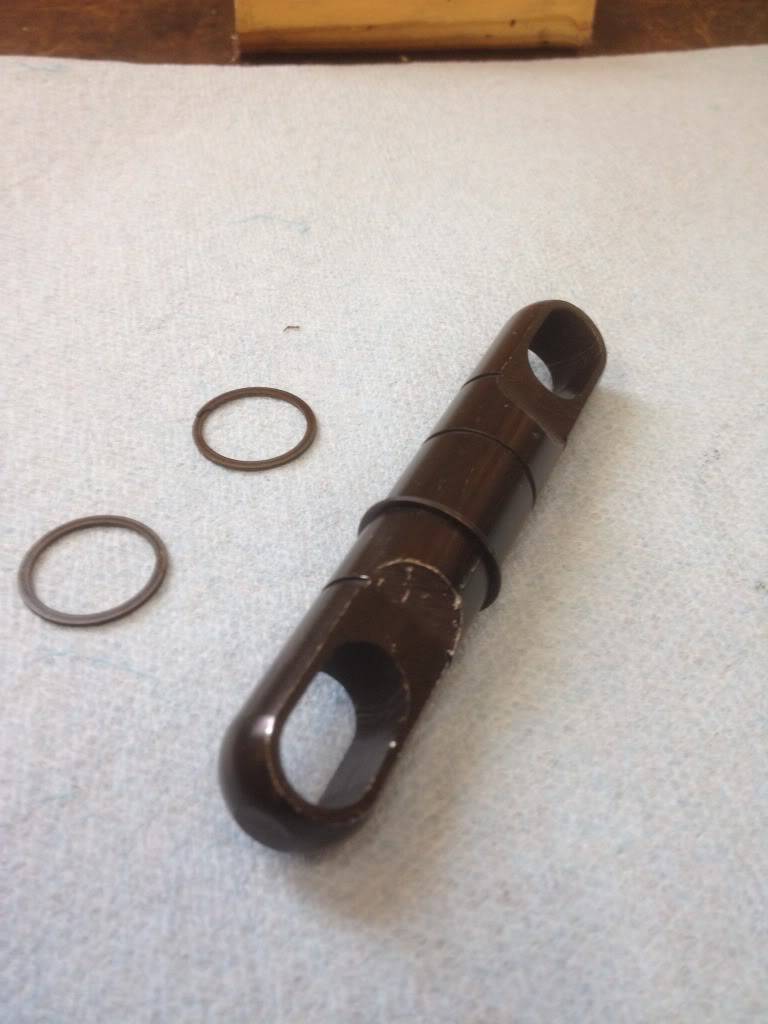
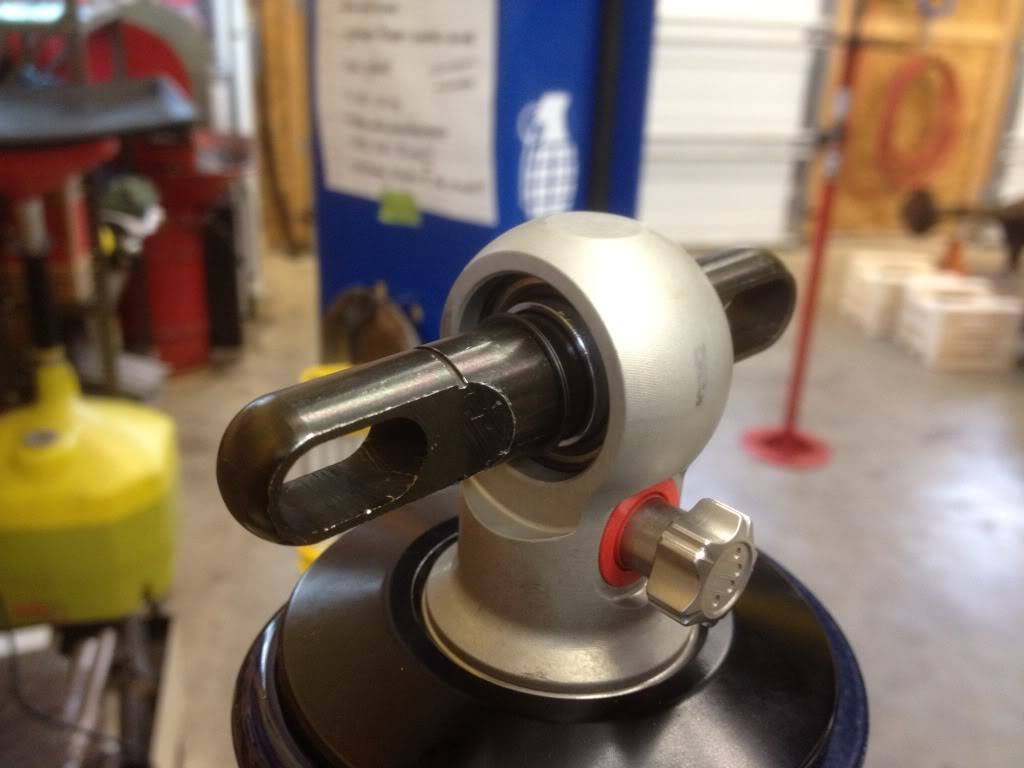
This is a pic of the upper eye of the shock where the adjusters are. You have to fully turn in the adjuster to allow the upper spring retainer to fit over it. The one on the left is fully extended while the one on the right is fully turned in.
You can see that groove there on the base of the shock's head. A retainer ring slides into that groove and allows the upper spring retainer to rest on it and not fall out.

That retainer ring is in the bag that is next to the shock in this picture.
 Douglas Lutes
1988 Monte Carlo SS
"Never race anything you can't afford to set on fire and push off a cliff."
02-08-2012 #12
Registered User
- Join Date
- Mar 2005
- Location
- Woodbine, MD
- Posts
- 2,770
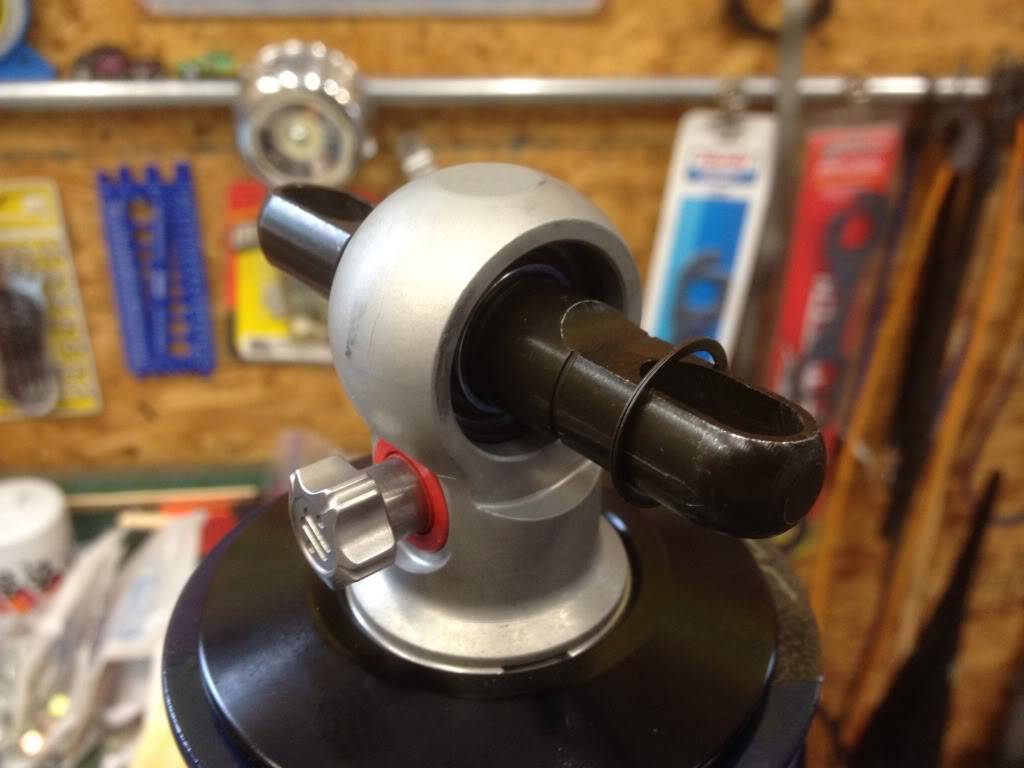
Once the upper retainer is in place all you need to do is slide the spring over the shock and screw on the lower spring cup/retainer/spanner. Once you have the bottom spanner at the spot where you would like it this little set screw keeps the spanner in place. The screw uses a 4mm allen wrench to tighten.
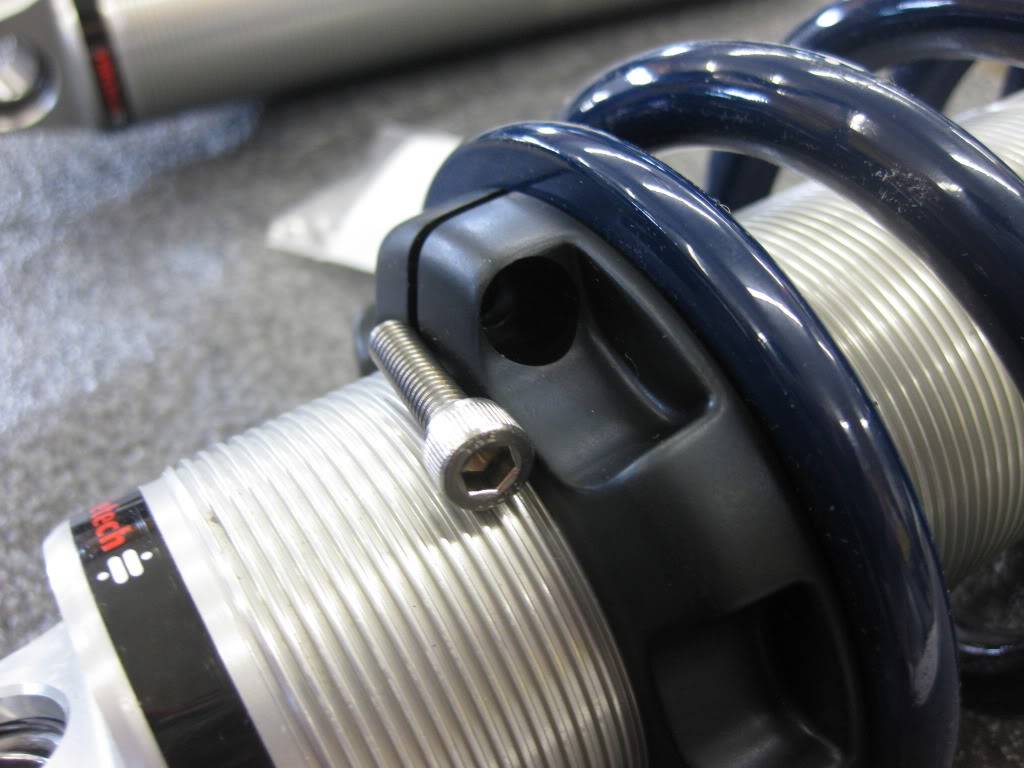
You want to start the intsall process with the bottom spanner just touching the springs so that they wont fall out of the upper spring cup/retainer. This gives the spring 0 preload and is the ideal spot to start at.
 Douglas Lutes
1988 Monte Carlo SS
"Never race anything you can't afford to set on fire and push off a cliff."
02-09-2012 #13 Registered User
- Join Date
- Apr 2009
- Location
- san diego
- Posts
- 5,102
Nice write up! It looks like ridetech did a great job helping you out along the way.
Great looking shocks.My build thread: https://www.pro-touring.com/showthre...ing&highlight=
The mustang build thread: https://www.pro-touring.com/showthre...el)&highlight=
02-09-2012 #14 Pro-Touring.com Sponsor
- Join Date
- Oct 2011
- Location
- Philipsburg, Pa
- Posts
- 528
Wow Doug. Excellent write-up. It's pretty cool when a fellow enthusiast takes the time to do something this detailed for the benefit of the rest of the gang.
Darren from ridetech was at our place the other day for a visit and I'll vouch for the excellent customer service and knowledge on his part. It was cool to talk with him and see some of their stuff first hand.
Good job.
ramey
02-09-2012 #15
Registered User
- Join Date
- Oct 2010
- Posts
- 10
Thanks for the write up. I just ordered this kit for my Cutlass yesterday and it's good to know about the A-body hardware for the top eye if I need some more adjustment.
Rob
02-09-2012 #16 Registered User
- Join Date
- Sep 2011
- Location
- Ontario, Canada
- Posts
- 29

Love the very imformative write up!!!
A side note are the spring adjuster made of Aluminum? If they are I hope you put some Anti-seize on the stainless hardware before you tightened them up to prevent galling of the two materials.
Looking badass!!! 1970 Buick GSX Restoration/Pro Touring Build
1987 Buick Regal Turbo T
02-09-2012 #17
Registered User
- Join Date
- Mar 2005
- Location
- Woodbine, MD
- Posts
- 2,770
Yes they are aluminum. The only screw that goes into it is that lil allen set screw. Originally Posted by BBSkylark
 Douglas Lutes
1988 Monte Carlo SS
"Never race anything you can't afford to set on fire and push off a cliff."
02-09-2012 #18 Registered User
- Join Date
- Oct 2005
- Location
- Jasper,IN
- Posts
- 540
Nice pics Doug, thanks for posting. Got any pics of the extra low stance you were after? How much room do you have between the axle the frame at that height? Just want to make sure we don't bottom out too easily. Since we put the 200# springs back in there, you don't need the zip ties any more right?
02-09-2012 #19
Registered User
- Join Date
- Aug 2009
- Posts
- 179
Great write-up, Doug!
Are you still running the 7.5" rear? Thought I saw that you were in another post.
Couple of quick questions for ridetech based on this:
- Are only 200 lb springs offered for the rear, or are different rate springs also offered?
- The front springs are 900 lbs, correct? Same question for these: Different rate springs offered?
- Based on Doug's pictures of the clearance with 18" wheels, and I right in guessing there may be some fitment issues with a 16" or 17" wheel?
Thanks in advance!Dave N.
1987 Monte Carlo SS
https://www.pro-touring.com/showthre...Monte-Carlo-SS
1987 Monte Carlo LS
https://www.pro-touring.com/threads/...Monte-Carlo-LS
02-09-2012 #20
Registered User
- Join Date
- Mar 2005
- Location
- Woodbine, MD
- Posts
- 2,770
I will get you some pics of the ride height as soon as it stops snowing outside!!!
No more zip ties with the #200 springs. With the coils at 0 preload the car sits like a dream.Douglas Lutes
1988 Monte Carlo SS
"Never race anything you can't afford to set on fire and push off a cliff."

 Reply With Quote


