


Results 181 to 200 of 573
-
06-12-2012 #181

 Registered User
- Join Date
- Aug 2004
- Location
- Amsterdam,The Netherlands
- Posts
- 880

Love the seats, seem to be very comfortable.

Cliff
1968 Firebird
Project Cheyenne Pro Performance
-
06-12-2012 #182
 Registered User
- Join Date
- Jan 2011
- Location
- Boston, MA
- Posts
- 1,180

 Originally Posted by 72Z/28
 Thanks guys. Originally Posted by CliffS
-
06-13-2012 #183
Registered User
- Join Date
- Jan 2011
- Location
- Boston, MA
- Posts
- 1,180
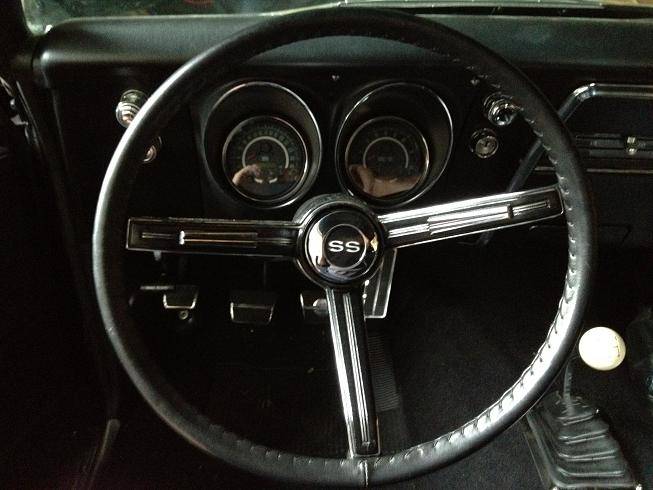
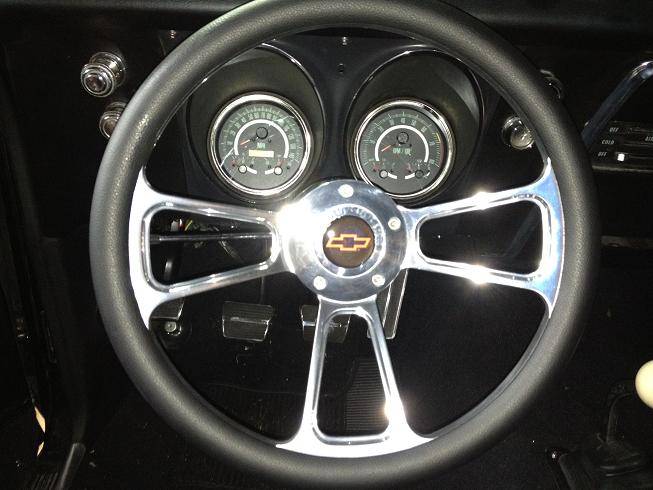
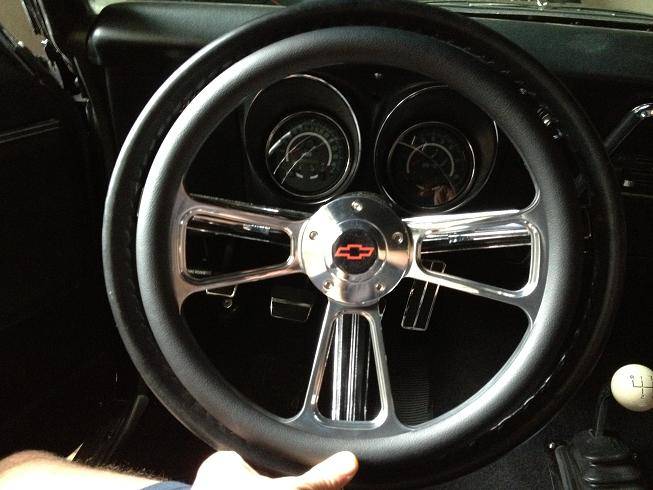
I installed the new steering wheel today. I really liked my old one, but it was way too big...like driving a school bus. It was also out of round by quite a bit.
I may have skimmed over the instructions and missed a key step and had to take everything apart a few times. I figured this would take an hour and somehow it turned into 3. Time for a beer.
Before 15 1/2":
After 14":
A comparison of the two:
-
06-15-2012 #184
Registered User
- Join Date
- Jan 2011
- Location
- Boston, MA
- Posts
- 1,180
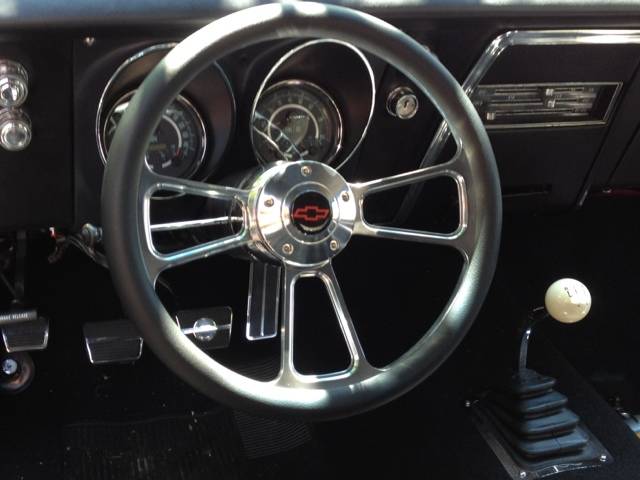
Here's another view of the the steering wheel and gauges:
-
06-21-2012 #185
Registered User
- Join Date
- Jan 2011
- Location
- Boston, MA
- Posts
- 1,180
This week I added a passenger side Bowtie mirror to match the driver's side mirror, but didn't take any pics.
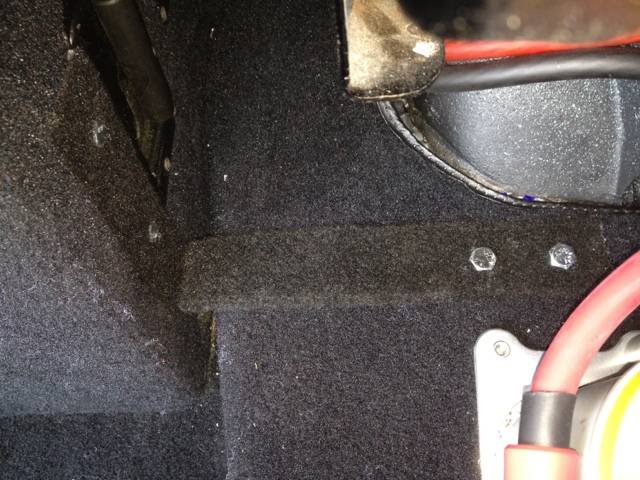
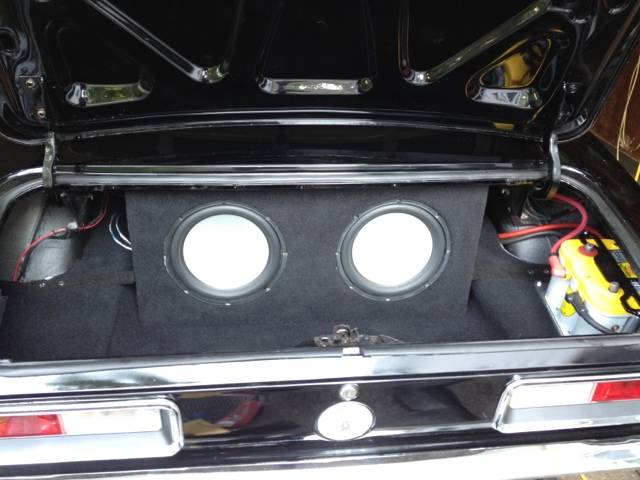
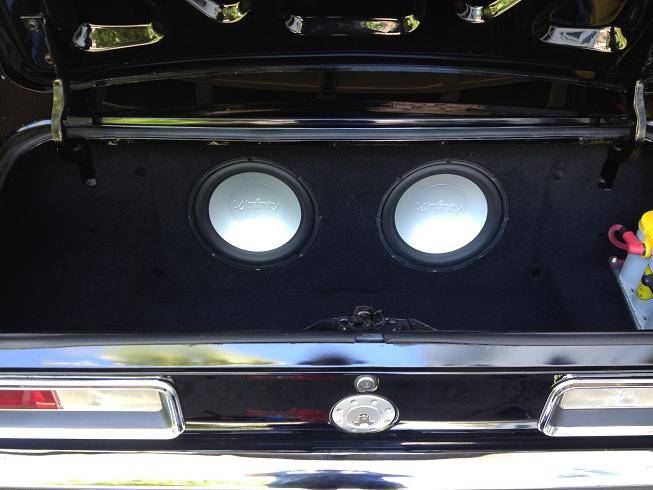
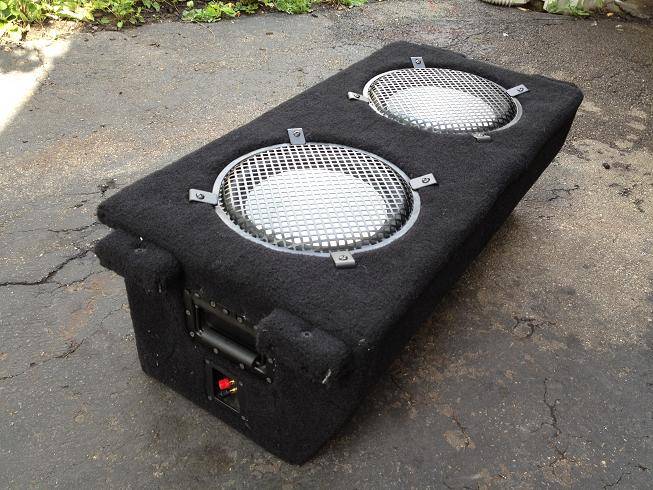
I also mounted the subwoofers to the box and mounted the box to the trunk. I wanted to be able to easily remove the box incase I ever AutoX it. I would just need to unbolt four 1/4" bolts from the sides and slip it out. Finding a location for the brackets I fabricated turned out to be a challenge. The rear frame rails run right below Everywhere I wanted to attach them. The carpet on them isn't a perfect match but eventually I will build some panels to carry the ends of the box out to the quarters.
Brackets:

Carpeted and bolted down:
This is where I left off. I still need to add some grilles to protect the subs:
-
06-24-2012 #186
Registered User
- Join Date
- Jan 2011
- Location
- Boston, MA
- Posts
- 1,180
I finished up fabricating and installing the closeout panels for the trunk. I mocked them up with some cardboard first:

And then cut the panels out of luan:

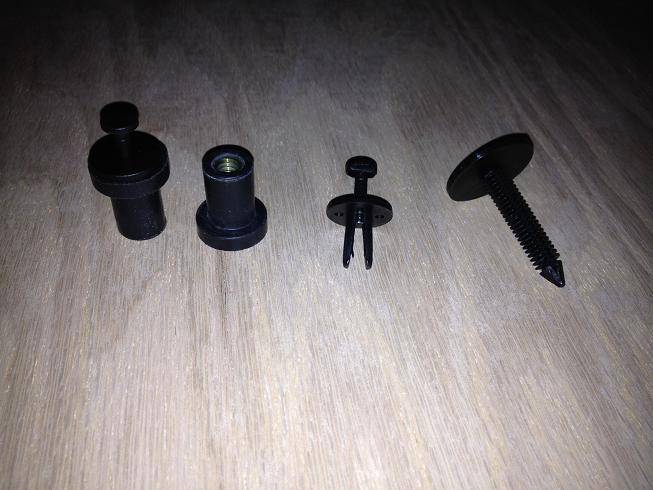
To hold them in place I picked up a couple different automotive fasteners, and a weird rubber nut with a threaded end on one side and a boot on the other:
I cut a couple of blocks and drilled out for the rubber boot and wrapped them in carpet:
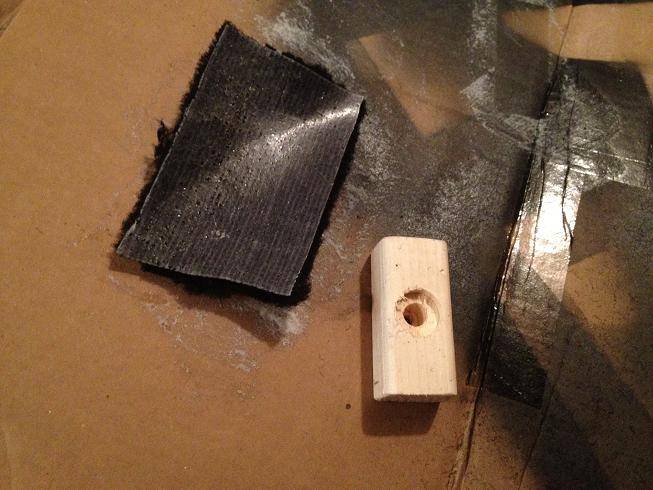
I attached the blocking with some 3" drywall screws:
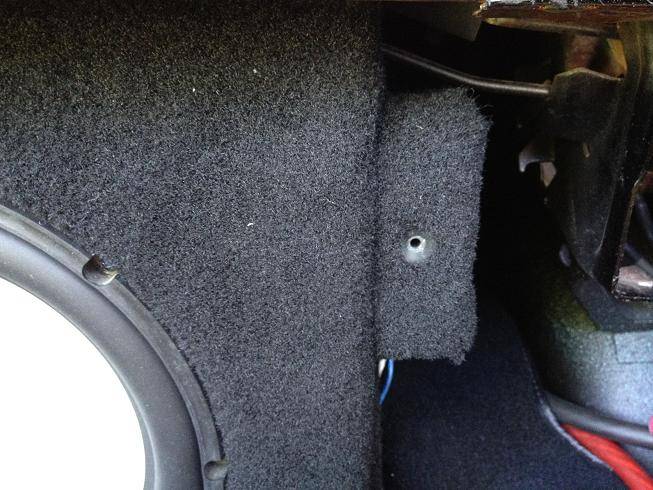
I wanted to use the push button style fastener, but it didn't hold as well as the one with all the ridges. Here's one of the panels carepeted and installed:
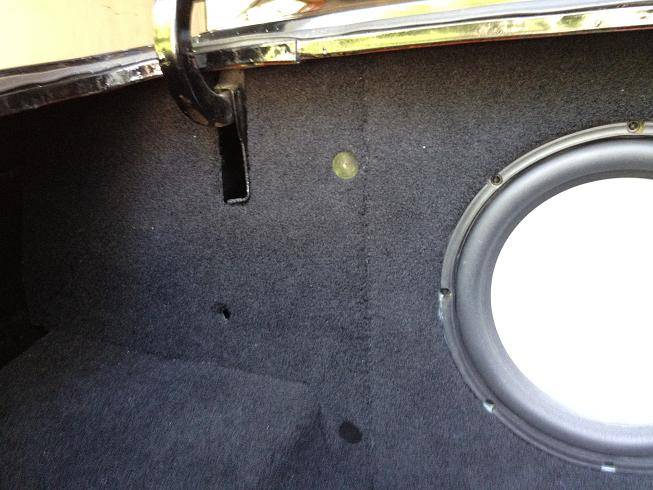
I'm pretty happy with the look. Clean and fairly simple:
-
06-24-2012 #187
Registered User
- Join Date
- Jan 2011
- Location
- Boston, MA
- Posts
- 1,180
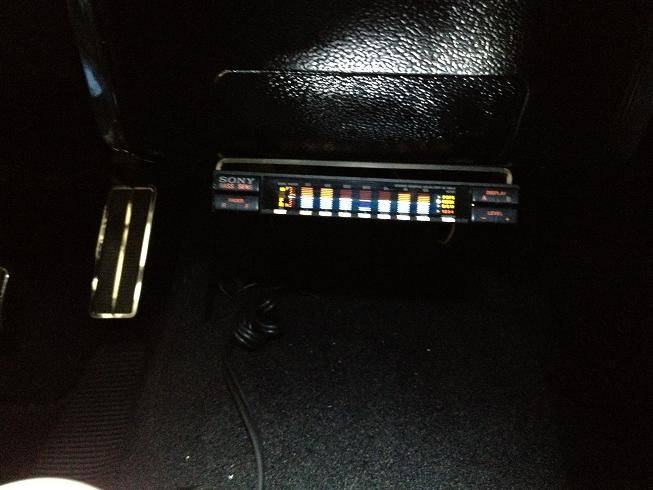
The radio I want still won't be available until the end of the summer, so I think I'm going to wire up an old EQ that I have lying around and hook my iPod up to that. It's actually a nice digital EQ with one set of RCA inputs and 3 sets of outputs for front, rear and subwoofer channels.
I just need to connect the amps to a heavy duty fuse and then connect that to the battery, then run power and ground to the EQ and hook up the remote turn on leads for the EQ and all three amps. I'll use a Y connector for the iPod with a mini jack (head phone jack) on one end and a pair of RCA jacks on the other end. Connect that directly to the EQ, and I should have a working stereo for the time being.
-
06-25-2012 #188
Registered User
- Join Date
- May 2012
- Location
- Thousand Oaks, CA
- Posts
- 105
What are you looking at getting? Originally Posted by 67rally
-
06-25-2012 #189
Registered User
- Join Date
- Jan 2011
- Location
- Boston, MA
- Posts
- 1,180
I want the RetroSound Model Two. It will look pretty stealthy in there, and I won't have to cut up the dash. But it has 3 sets of pre-outs and iPod display/control/charging which is key. Originally Posted by wally_245
It was supposed to be available early spring, then early summer, and then late August. Now it's late July/August. They had problems with the software that Apple supplied them, and it wasn't going to be compatible with some iPod models, so they wisely chose to delay the release rather than releasing a product with a know bug.
-
06-27-2012 #190
Registered User
- Join Date
- Jan 2011
- Location
- Boston, MA
- Posts
- 1,180
I made good progress! I got the Sony EQ wired up to the amps and can use my iPod or iPhone for music till the Model 2 is ready. The EQ allows me to fade front to rear, and left to right. It also has a couple of crossover points and 4 programmable EQ curves, plus 3 presets. I have 3 sets of RCA's on the back each going to a different amp. This EQ is just a temporary setup, but it fits the bill. I made a quick bracket out of a piece of aluminum I had lying around, and used the screws that hold the bezel to the dash to mount it, so I didn't have to drill any new holes in the dash.
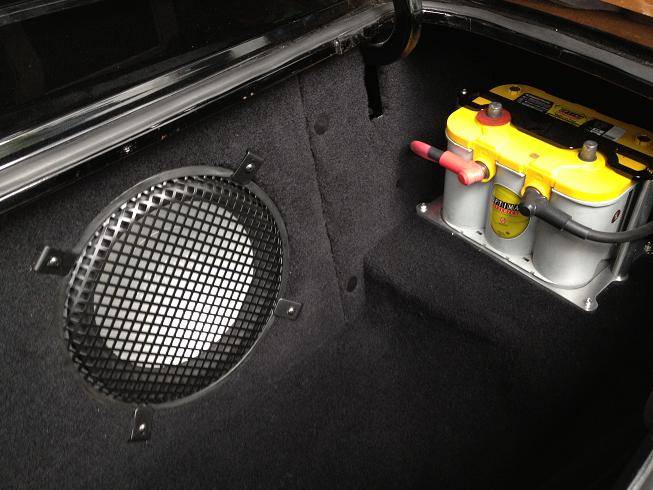
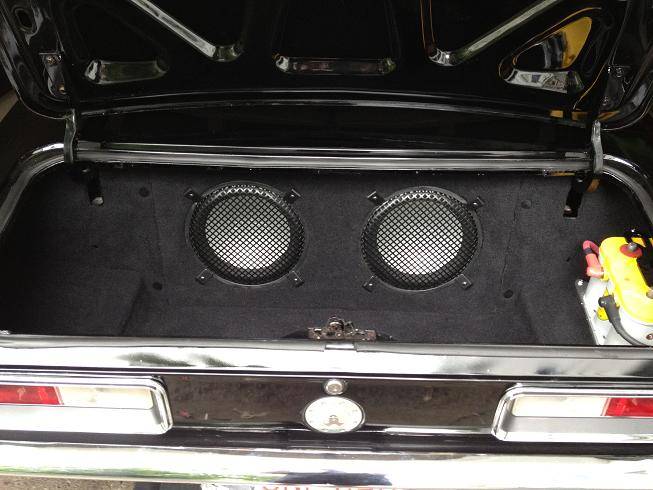
I added some grilles to the subs while I had it out of the Camaro (again). I'll probably look for something a little less rugged, but these will keep anything from puncturing the speakers in the mean time:
A closeup of one sub and the battery:
And another pic of the whole setup:
06-27-2012 #191
Registered User
- Join Date
- Jan 2011
- Location
- Boston, MA
- Posts
- 1,180
The only downside to this subwoofer setup is that in hiding the amps behind the sub box, you have to pull the box in order to get to the amps. That means that while you are fine tuning the crossover points and the gain on each amp, access is a royal pain. I think that if I redo the system in the distant future, I'd probably go with two of the newer digital Alpine stacakable amps and put them on the driver's side opposite the battery for ease of access.
07-19-2012 #192
Registered User
- Join Date
- Jan 2011
- Location
- Boston, MA
- Posts
- 1,180
Well. Just a quick update. A few of you already know through PM's that I am out of commission for a few months, but for those who don't...
I tore my left biceps tendon while playing softball and trying to tag a runner out at home plate. I had to have surgery to repair the tendon, and am in a splint for 6 weeks and 6 months of PT to get back to normal.
Needless to say, I can't drive a 4 spd, or even do much (any) work on the car right now.
The bright side is that I'm going to start stashing money away and start thinking long and hard about doing an LS swap with a 6 spd. I have plenty of time to do the research, and there are lots of good threads here as well as ls1tech.com that cover the conversion. My real decision will be whether to look for a pullout engine/tranny or look at crate engines.
07-19-2012 #193 Registered User
- Join Date
- Nov 2000
- Location
- O-town
- Posts
- 4,330
bummer, get better, get ahold of Travis Daytonayellowz, he does alot with pullouts,
Steve68- 1968 Camaro SS LSX T56, 12bolt 3:90's, 18" Fikse Profil 13s, Deep Fathom Green paint, Spearcos, just bunch of old junk because another member said so, LOL
70 Nova SS street/drag 454, T400, 3:55, ugly!
07-19-2012 #194
Registered User
- Join Date
- Jan 2011
- Location
- Boston, MA
- Posts
- 1,180
Thanks, and thanks for that referral as well. Originally Posted by Steve68
07-20-2012 #195
Registered User
- Join Date
- May 2012
- Posts
- 19
Sorry to hear about the injury. I hope you heal up quick!
Looks great!! I think I want about 3/4 of the parts you're using so far. :D Do you happen to have a parts listing for what you used? Especially the seats and gauges? Also, roughly how much does the audio stuff weigh? I'm looking at doing a similar, though smaller, setup in my 68, but want to keep it as light as possible.- Neil
- 1968 Camaro. Currently: SBC .040 over, 700R4, 10 bolt w/ 3.73's.
07-21-2012 #196
Registered User
- Join Date
- Jan 2011
- Location
- Boston, MA
- Posts
- 1,180
The gauges are a set of one off 3-1 gauges that I had Mark from New Vintage USA design for me. However, they make a stock set that looks just like the '68 gauges. The seats are Scat ProCar Rally Smoothbacks, with a custom set of brackets from Wedge Engineering that allow the seats to sit a couple inches lower than the Scat brackets. Originally Posted by Oramac
As far as the other upgrades, I'll list them below. If I miss something, please feel free to ask.
07-21-2012 #197
Registered User
- Join Date
- Jan 2011
- Location
- Boston, MA
- Posts
- 1,180
Here's a list of the mods I've done that I can remember since I bought the car.
Front:
Unisteer Delphi 670 steering box
Moog inner/outer tie rod ends
Moog pitman/idler arm
Heavy duty center link
Hotchkis tie rod sleeves
Speed Tech UCA/LCA
Proforged tall upper ball joints
Hotchkis 2" lowering coils
Bilstein shocks
Wilwood 12" drilled/slotted rotors
Wilwood 6 piston red DynaPro calipers
Wilwood billet master cylinder
Hurst Roll Control
Rear:
12 bolt posi with 3:31's
Moser axles
Perfect Launch differential cover
Hotchkis 1 1/2" lowering springs
Bilstein shocks
Hotchkis Swivel Max bushing upgrade
Hotchkis Chassis Max brace
Hotchkis subframe connectors
Wilwood 12" drilled/slotted rotors
Wilwood 4 piston red DynaPro calipers
Tires/wheels:
18x8 and 18x9 Foose Legend Wheels
Nitto NT555's 245/40/18 and 275/40/18 tires
Other:
Fesler solid billet body mounts
Summit Racing headers
Flowmaster 2 1/2" dual exhaust
Magnaflow mufflers
Lunati VooDoo 60103 cam
Vortec heads w/LS6 springs
Be Cool aluminum radiator
Tuff Stuff 150 amp alternator
New Vintage USA 3-1 Gauges
Billet Steering Wheel
Scat ProCar Rally Smoothback seats
Wedge Engineering seat brackets
Retro Electro hidden headlight motors
MAD Electrical "New System" wiring
optima yellow top battery relocated to trunk
New fuel tank/lines
Holley Black fuel pump/regulator
New front/rear bumpers
Passenger side mirror
ACC Carpet
RattleTrap XXX sound deadener
Stereo:
2 Alpine MRV-T420 amps
1 Alpine MRP-M1000 amp
2 12" Infinity subs
Alpine 6.5" component Type R's
Alpine 6x9 coaxial Type R's
Screamin' Performance kick panels
07-23-2012 #198
Registered User
- Join Date
- May 2012
- Posts
- 19
Wow! Thanks for that! I'd forgotten about the body mounts. Definitely something I want to look into also. You've got one hell of a nice Camaro there.
- Neil
- 1968 Camaro. Currently: SBC .040 over, 700R4, 10 bolt w/ 3.73's.
09-09-2012 #199
Registered User
- Join Date
- Jan 2011
- Location
- Boston, MA
- Posts
- 1,180
I've gotten back to working on the Camaro. I'm still on limited duty, but I can wrench a little. I have been trying to troubleshoot an issue that I didn't really even know I had.
The Camaro runs very strong in the low to mid RPM's, but it falls on it's face above 4000rpm. I started a thread here: http://www.camaros.net/forums/showthread.php?t=211544. I never knew I wasn't hitting the higher rpms because I didn't have a tach until I installed the new gauges.
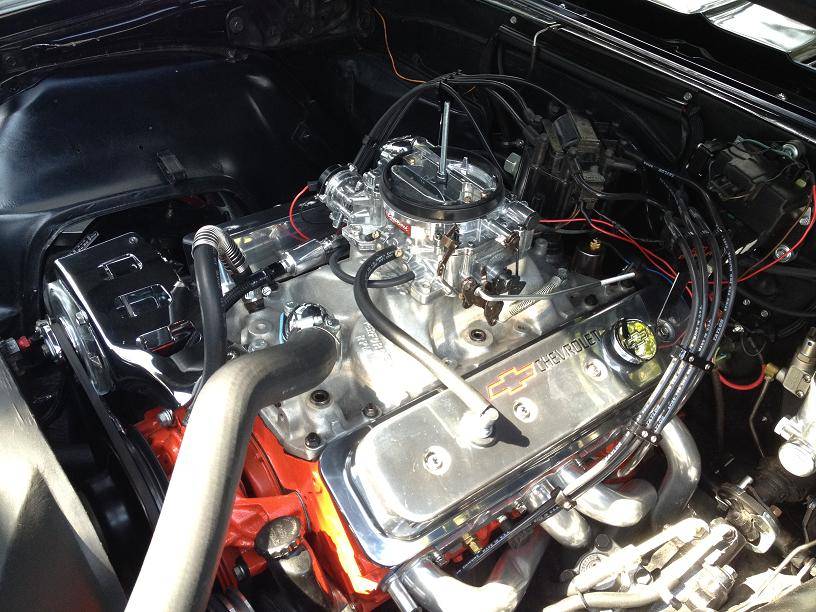
I have been playing with the timing and trying to tune the carb and it hasn't taken care of the high rpms problems. I installed a new Edelbrock 1806 650cfm carb with adjustable secondaries, and it woke up the bottom to mid-range even more, but still didn't resolve the top end. I just installed a new set of Taylor 8mm spark plug wires, but that didn't help.
New carb and plug wires:
09-09-2012 #200
Registered User
- Join Date
- Jan 2011
- Location
- Boston, MA
- Posts
- 1,180
I mapped out the distributor curve and I'm getting 17 degrees of advance, all in by 2750. Here's the curve:
1000rpm - 17.1 degrees
1250rpm - 20
1500rpm - 22.5
1750rpm - 24.6
2000rpm - 26.6
2250rpm - 28.7
2500rpm - 30.9
2750rpm - 32 degrees
3000rpm - 32
3250rpm - 32
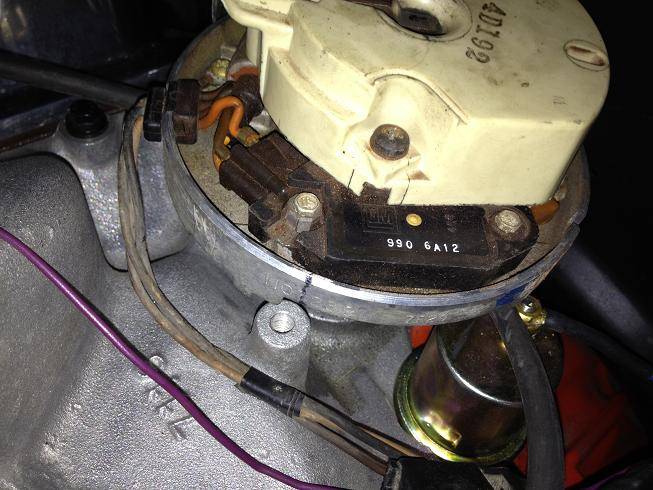
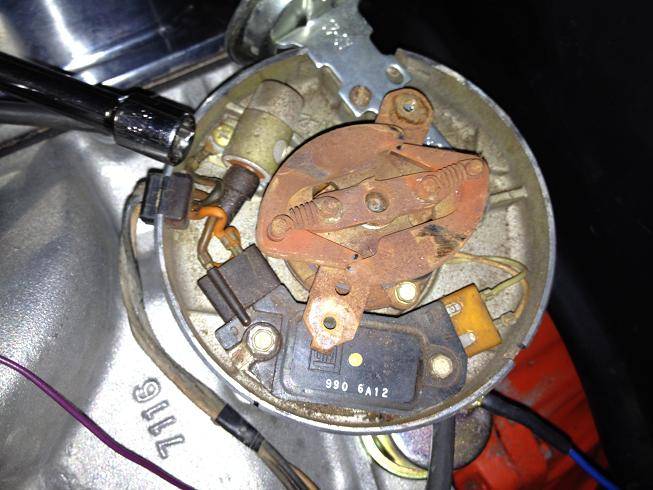
The dizzy is a stock Delco-Remy HEI and it's pretty crusty inside. I'm not sure if this is my issue, but I have adjusted my initial from 8 degrees all the way to 20 degrees in 1 and 2 degree increments. I have tried running with no vacuum advance, and with vacuum advance from 6 degrees to 16 degrees. I have tried the vacuum advance on the ported and the manifold side.
I could rebuild this one, but I would end up replacing the coil, module, springs, weights, etc., and to be honest I think there is probably too much end play, and that could be the root of the problems. I decided it was time to order an new dizzy, so I contacted Davis Unified Ignition (http://www.performancedistributors.com/) and they are building one with a custom curve designed for my engine specs. That should be here in the next couple of days and we'll see if that resolves the problem.
Here's the inside of the old HEI:

 Reply With Quote



