


Results 501 to 520 of 573
-
09-11-2016 #501
 Registered User
- Join Date
- Jan 2014
- Location
- Austin, TX
- Posts
- 667

Great build! Just read through all 25 pages.....quick question, where did you get the 364 air cleaner sticker? Ive got the same motor in my '72 Suburban and have been looking everywhere for one of those stickers. Thanks!!
-
09-11-2016 #502 Registered User
- Join Date
- Jan 2011
- Location
- Boston, MA
- Posts
- 1,180
Thanks. I found a guy on ebay that makes a few styles of decals with any CID/HP combo you want. Just go to eBay and search for "Custom Air Cleaner Decal". The guy was real easy to deal with. Originally Posted by FLYNAVY53

09-11-2016 #503 Registered User
- Join Date
- Aug 2008
- Location
- jacksonville,fl
- Posts
- 972
Did you get to do any night time driving yet with the new projector lights?
Just tried out my new 2016 Camaro lights, hard to believe I put up with old lights for so long.
09-11-2016 #504
Registered User
- Join Date
- Jan 2014
- Location
- Austin, TX
- Posts
- 667
Awesome, thanks! One other question, do you remember what part number this K&N filters are that you're using for breathers? Im running the same valve covers and haven't been able to find anything that worked well. Originally Posted by 67rally
Thanks!
09-12-2016 #505
Registered User
- Join Date
- Jan 2011
- Location
- Boston, MA
- Posts
- 1,180
Yes, I drove back from both track days at night (event runs from 3-8pm). The new lights are a million times better. I need to adjust them as they are not perfectly level, and that probably means modifying the buckets a little more. I should have some time later this week to dial them in. Originally Posted by jlcustomz
09-12-2016 #506
Registered User
- Join Date
- Jan 2011
- Location
- Boston, MA
- Posts
- 1,180
No, they were custom made, and I still had to drill out the breather opening to get them to fit. I also had some blow by coming out the filters at high rpm, so I had to add a baffle under each breather to prevent it. Originally Posted by FLYNAVY53
02-09-2017 #507
Registered User
- Join Date
- Jan 2011
- Location
- Boston, MA
- Posts
- 1,180
It's been a while since I've done anything to the Camaro. I recently decided to do a few suspension and brake upgrades over the winter. This will include the ridetech Tru Turn setup with their drop spindles, ridetech 4 link in the rear, Viking Coilovers with 550# springs on all 4 corners, and upgrading the front brakes from the Wilwood DynaPro (6 piston, 12.19"x.81" rotor) setup to the Wilwood Aero6 (6 piston 14"x1.25" rotor). I'll also be adding a Hydratech hydroboost system, replacing the Wilwood manual master cylinder with a Wilwood power master cylinder (just a bigger bore) and adding a new prop valve. Here's where I am so far...
I pulled the hubs/rotors/calipers/coil springs/shocks/steering arms/tie rods.
My plan was to install all the new stuff as soon as I pulled the old components but now I'm trying to determine the right spring rate for my coilovers. MCB recommended 450# springs for my setup and intended use, but Don is doing the same coilovers, and his guy recommended 650# springs. I have a thread here on pro-touring.com hoping to get some input before putting everything back together.
I've had the coilovers for a couple months and never thought twice about the spring rate since we went over everything before ordering, but I'd hate to install everything and then have to rip it all apart again.
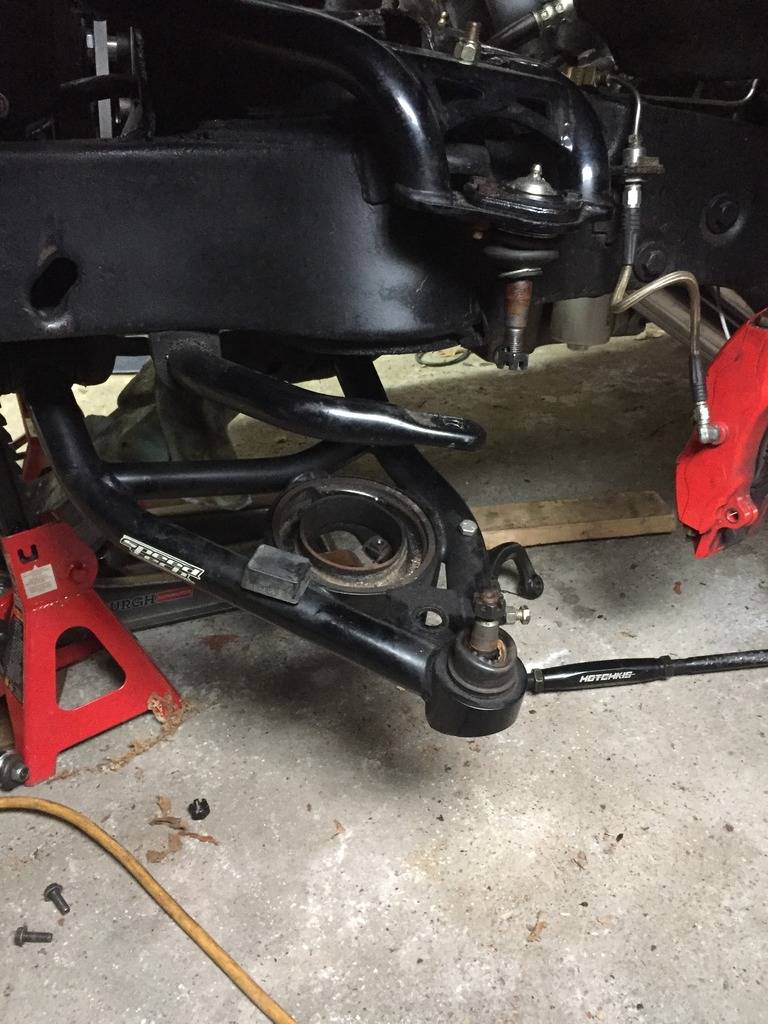
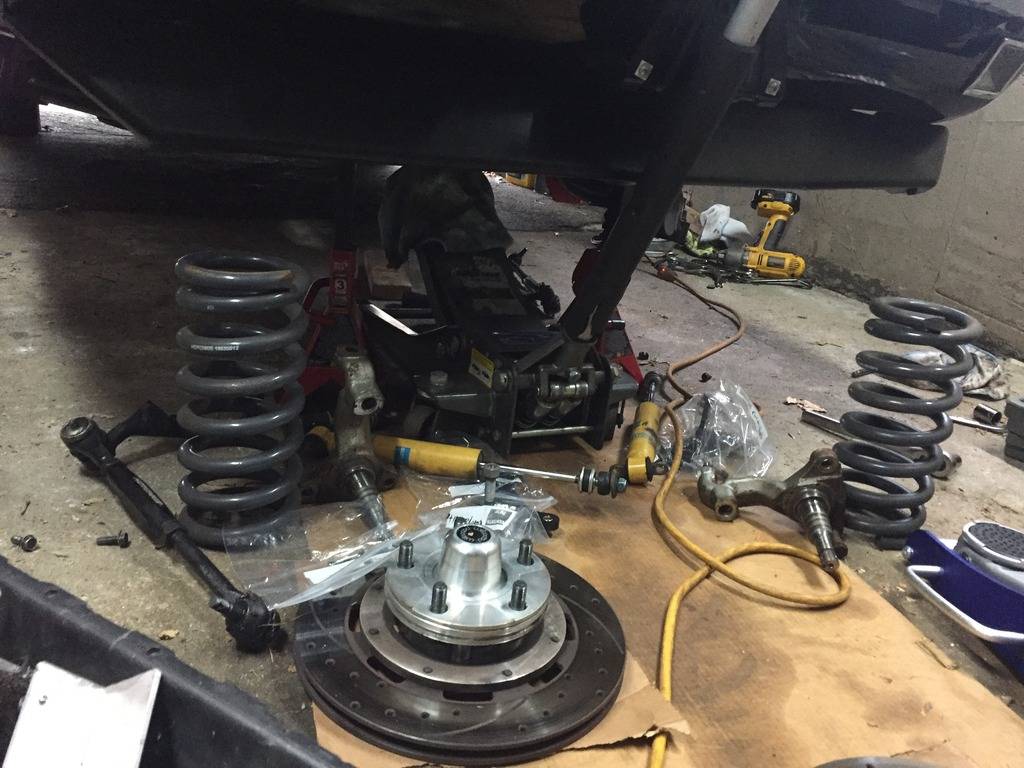
- - - Updated - - -
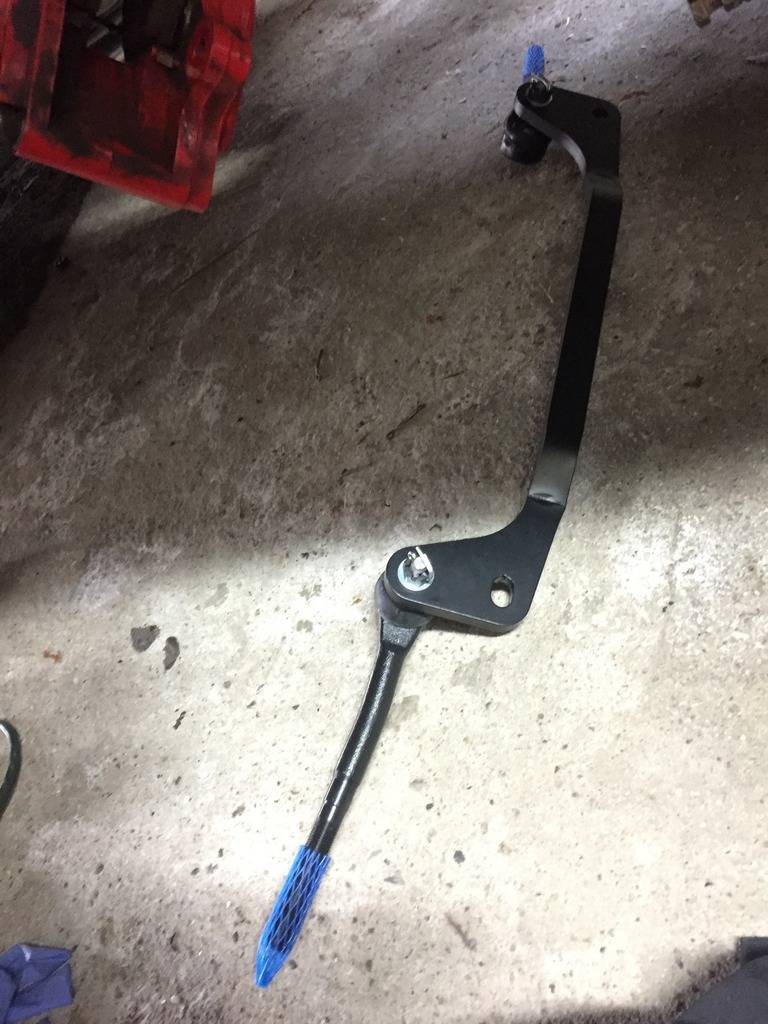
Here's the Tru Turn draglink center bracket which bolts to the existing center link. It relocates the inner tie rod assemblies up and out to minimize bump steer.
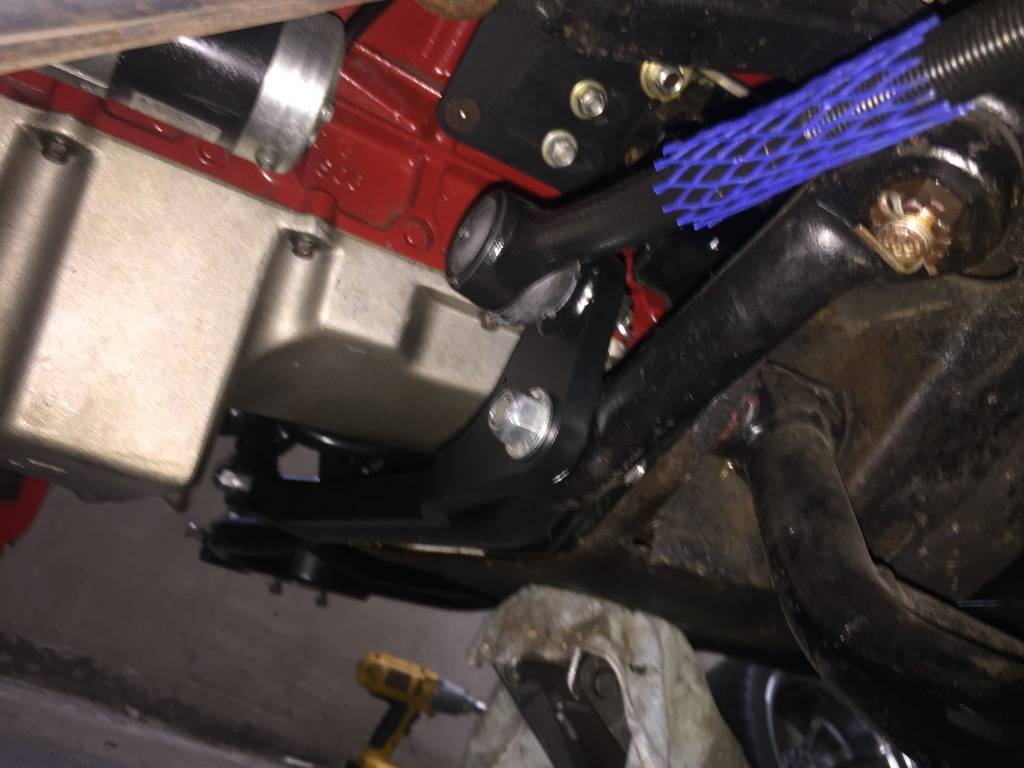
Here it is bolted up, the undercarraige could use a good washing. Sorry about the blurry photo. It was very cramped, cold and dark. I was grumpy most of the day...
I had to back my car a few feet out of the garage to work on it, fully expecting to be back to a roller by today. Since I'm changing the springs, I couldn't bolt everything back up, but with snow possible on Tuesday I didn't want to leave it like this either:
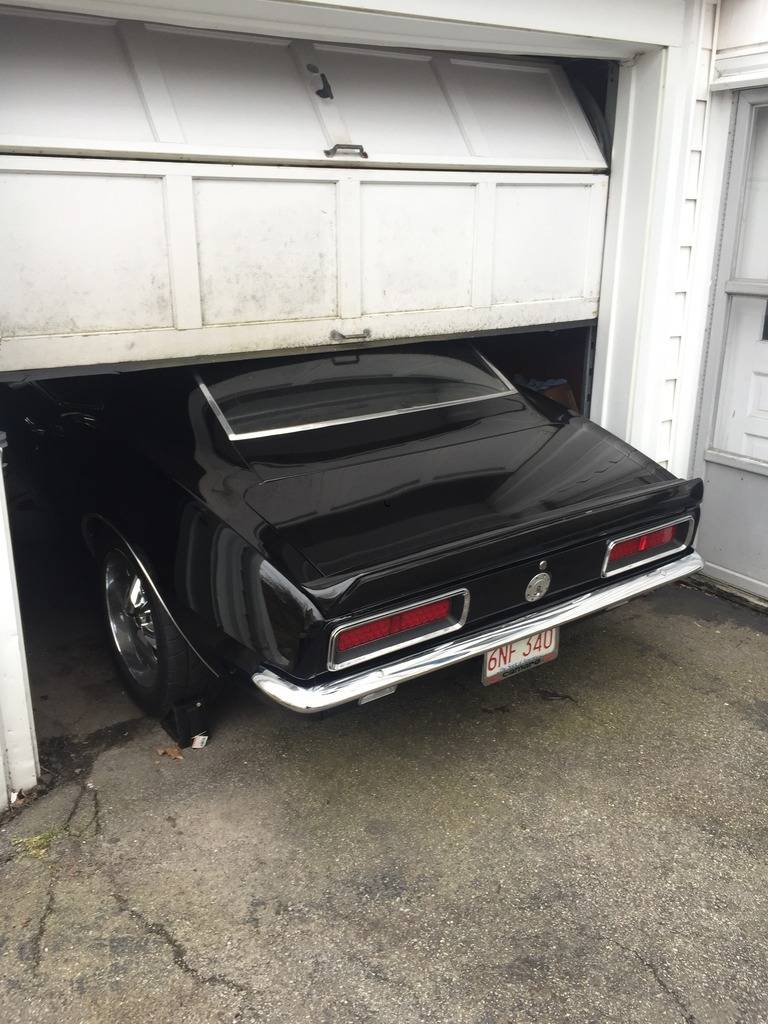
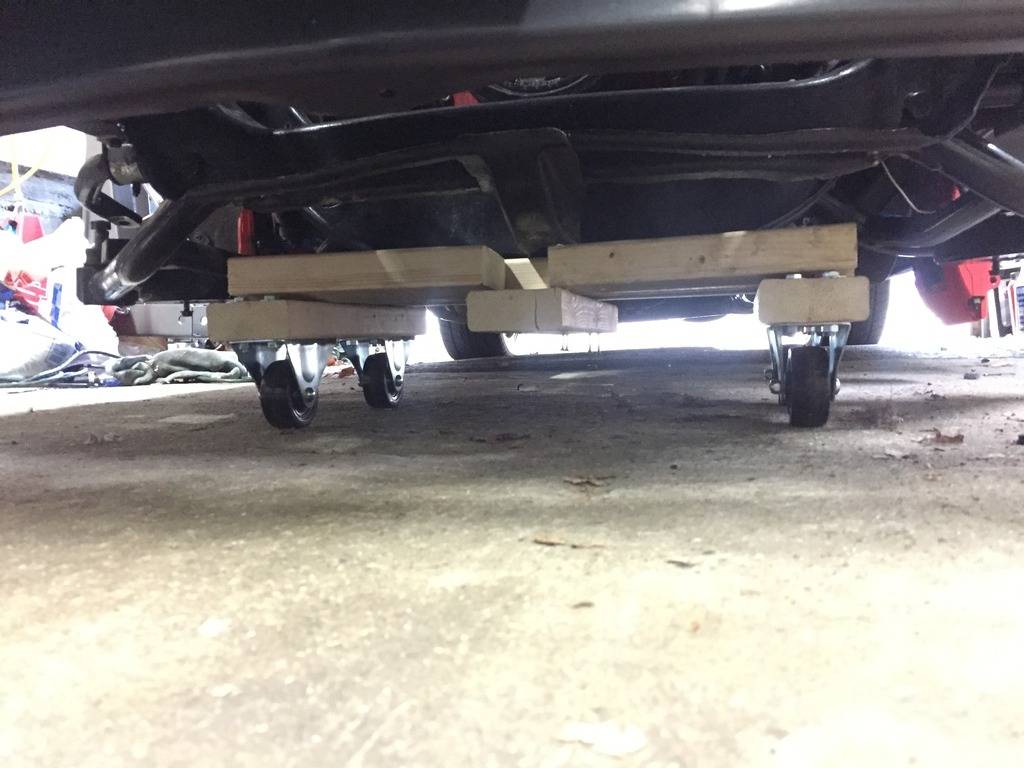
So with $16 worth of Harbor Freight wheels, and some cracked scrap 2x4's, I whipped up this nifty little dolly. Once I had driven (yup, it wouldn't push) the car back into the garage, I put it back up on jack stands. Sketchy doesn't even begin to describe how this felt!
[/URL]
02-09-2017 #508
Registered User
- Join Date
- Jan 2011
- Location
- Boston, MA
- Posts
- 1,180
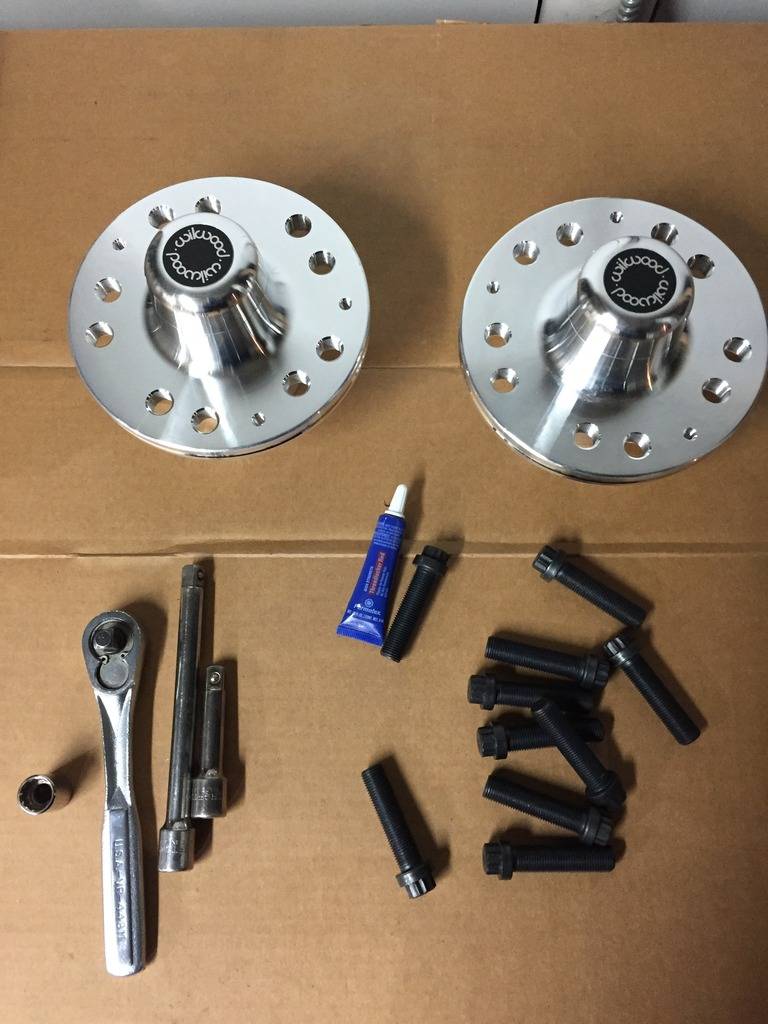
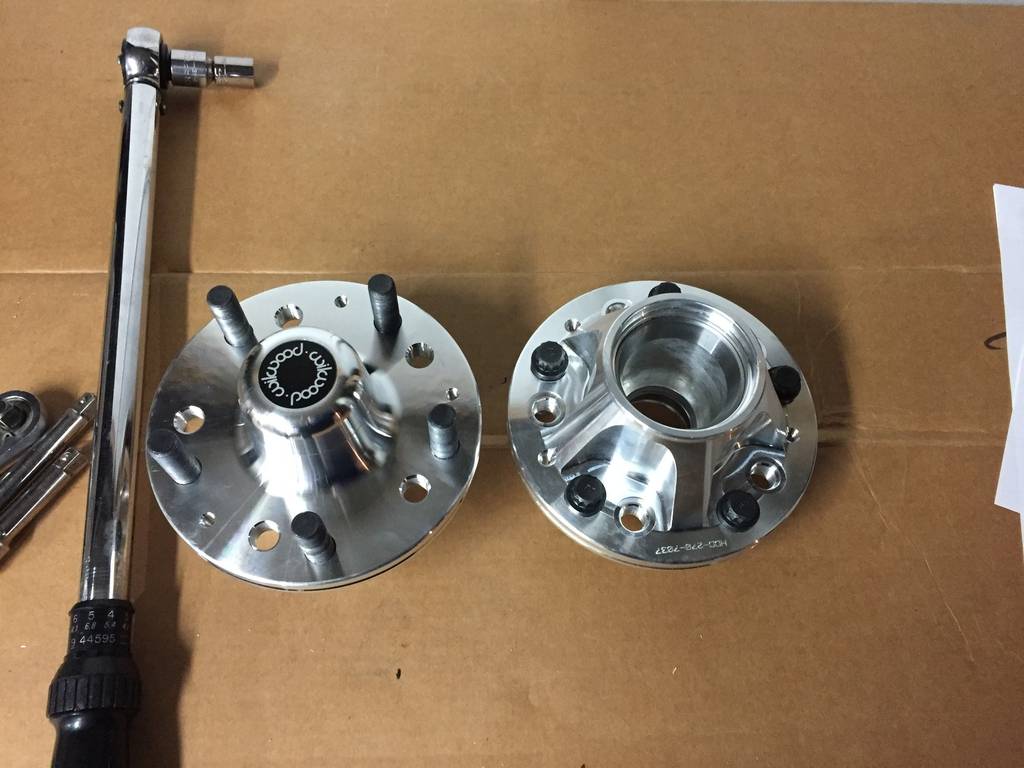
Got a little work done pre-assembling the brakes. Wheel studs are in the new hubs, lock-tited and torqued down:
Inner wheel bearings greased:
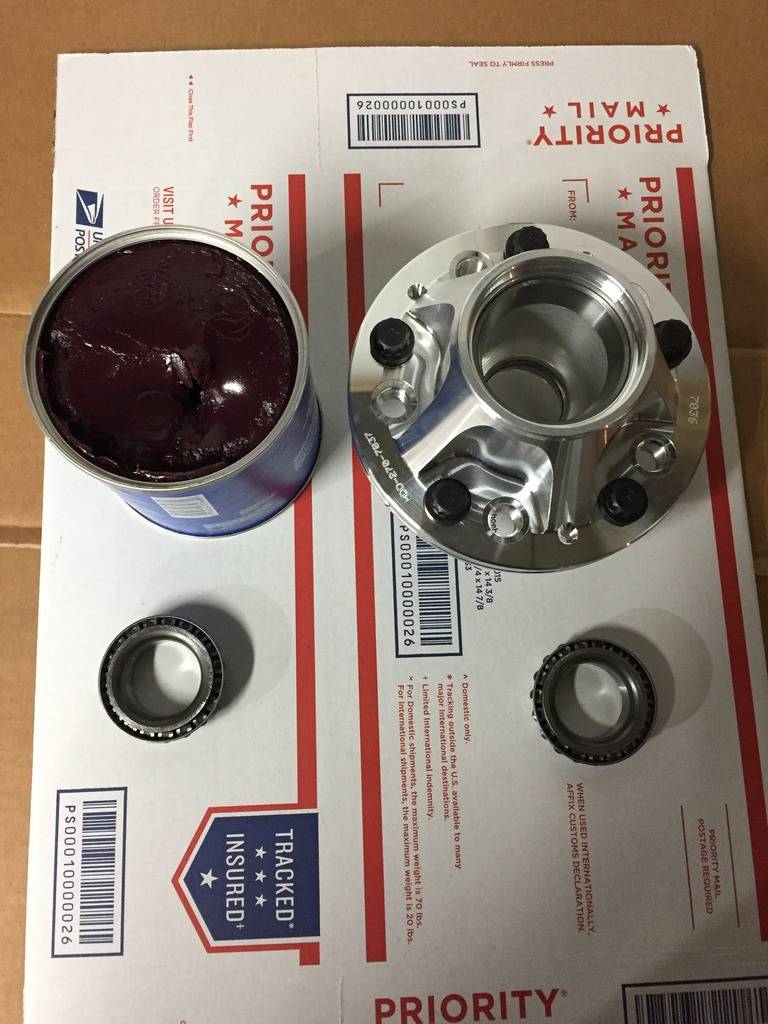
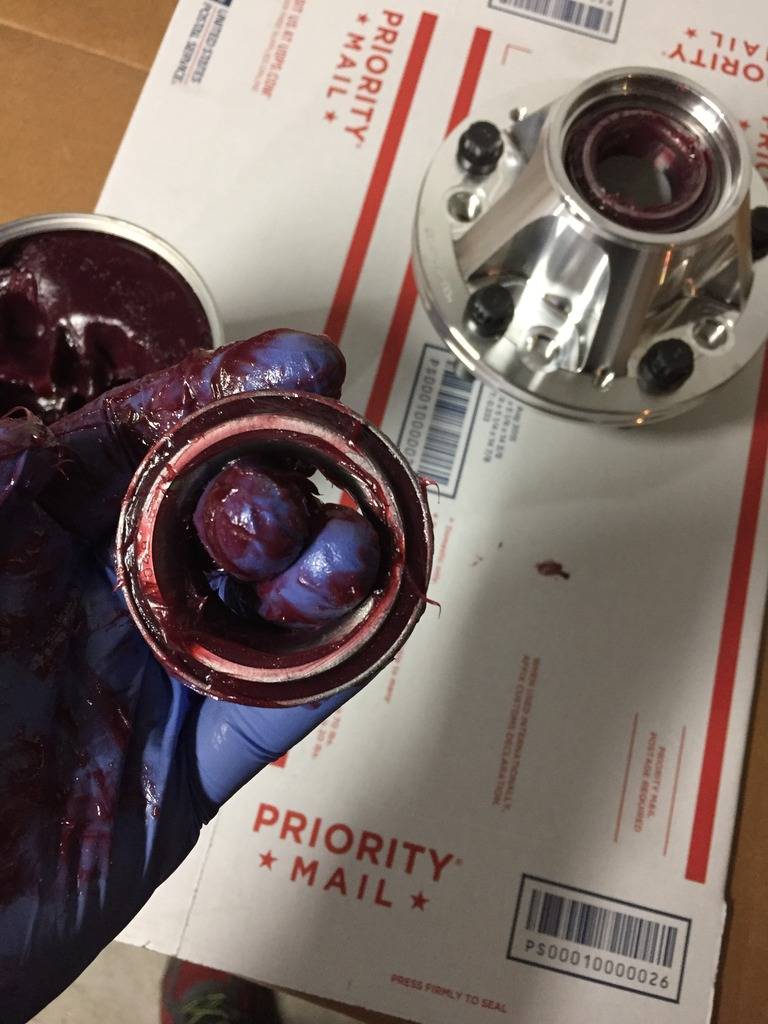
Grease seals installed:
[URL=http://s228.photobucket.com/user/modi_photos/media/Wilwood%20Safety%20Wiring/1829D36E-CFD9-4A30-896C-824E2208C2BC_zpsaa1d2bk2.jpg.html]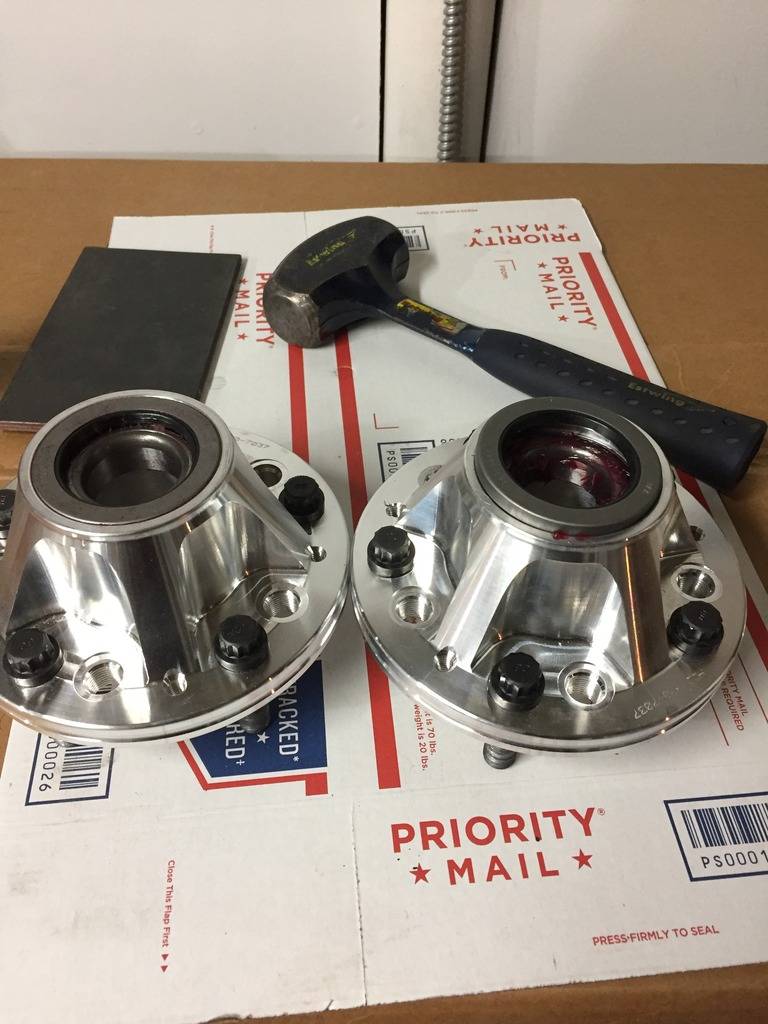
02-09-2017 #509
Registered User
- Join Date
- Jan 2011
- Location
- Boston, MA
- Posts
- 1,180
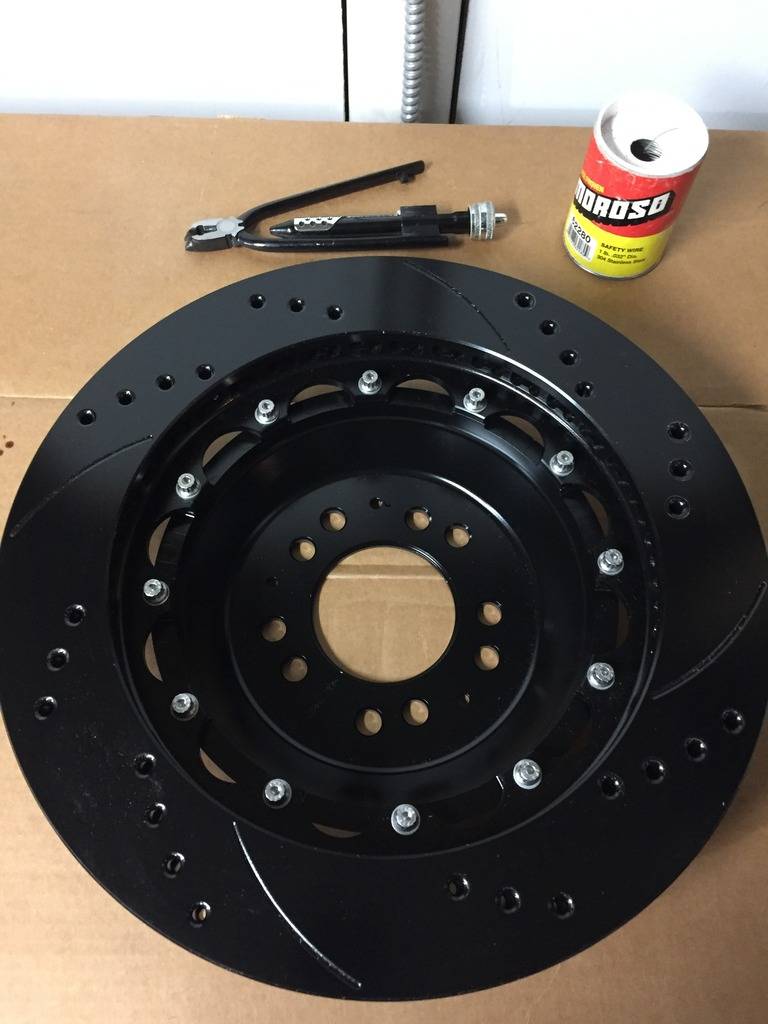
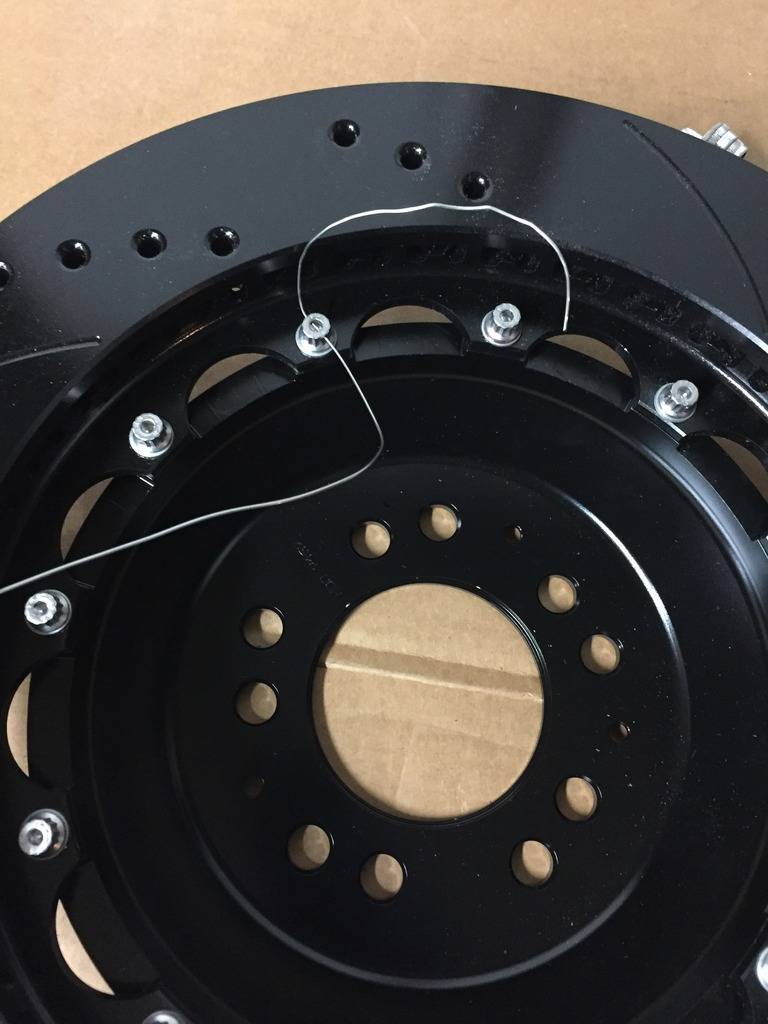
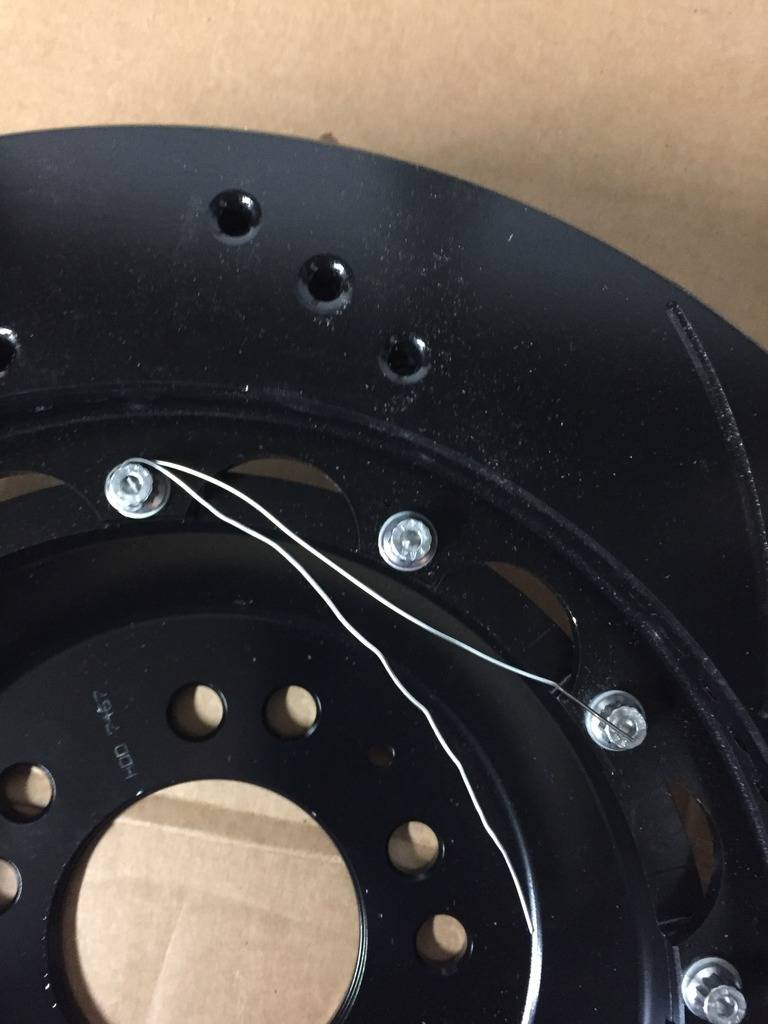
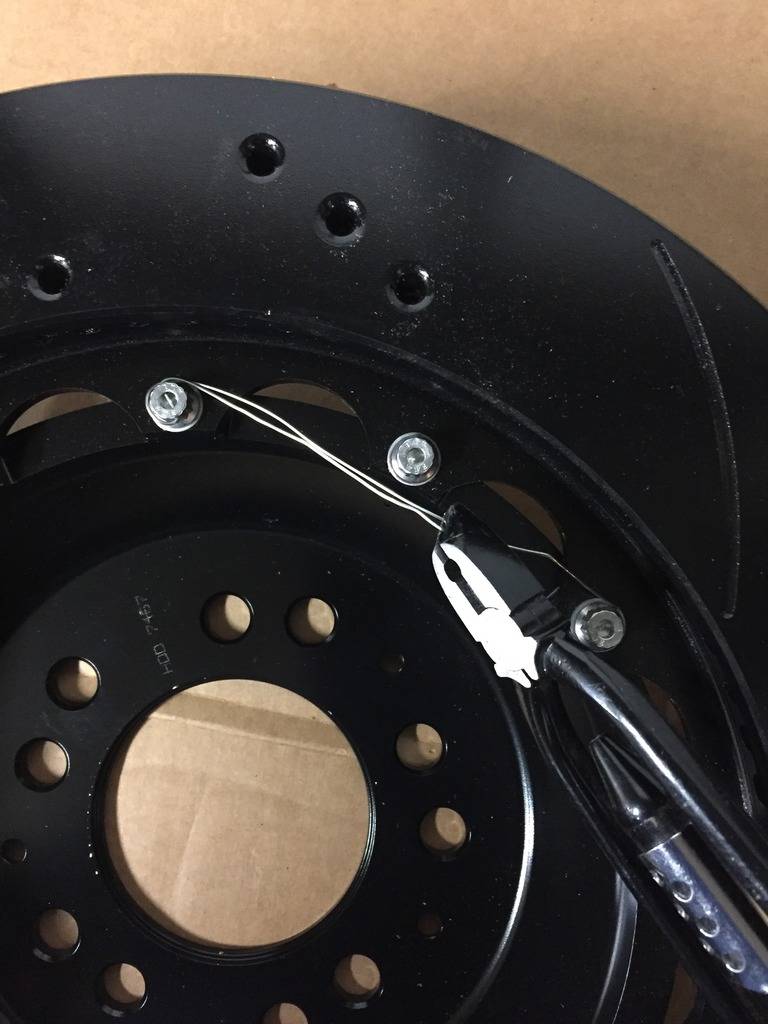
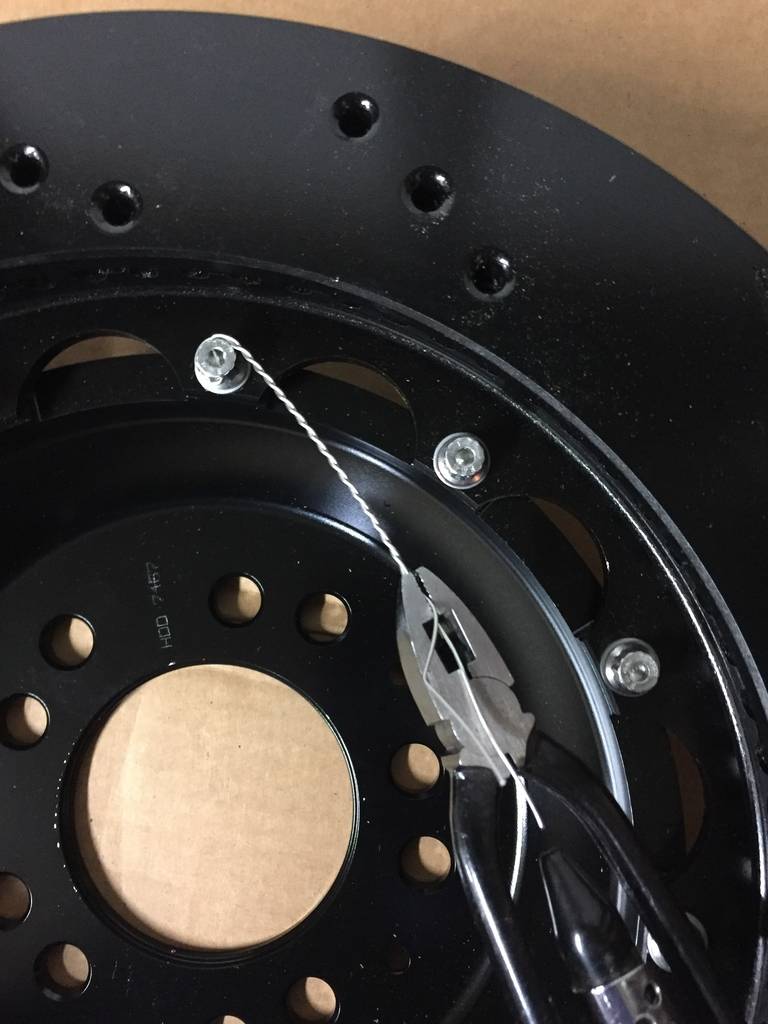
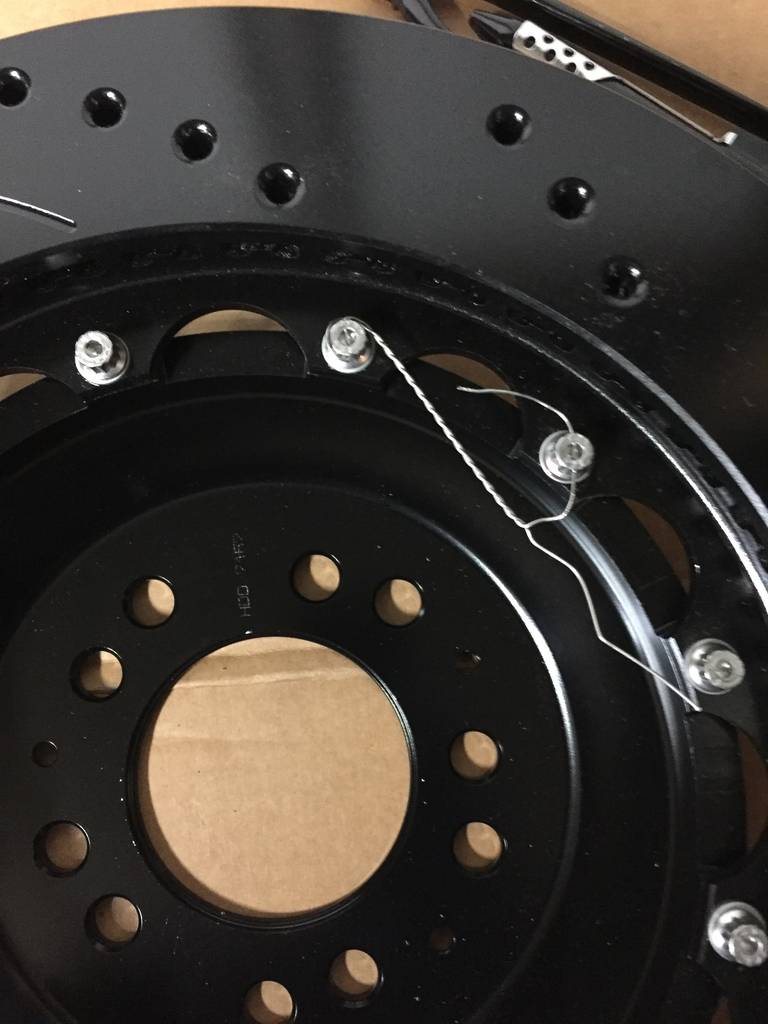
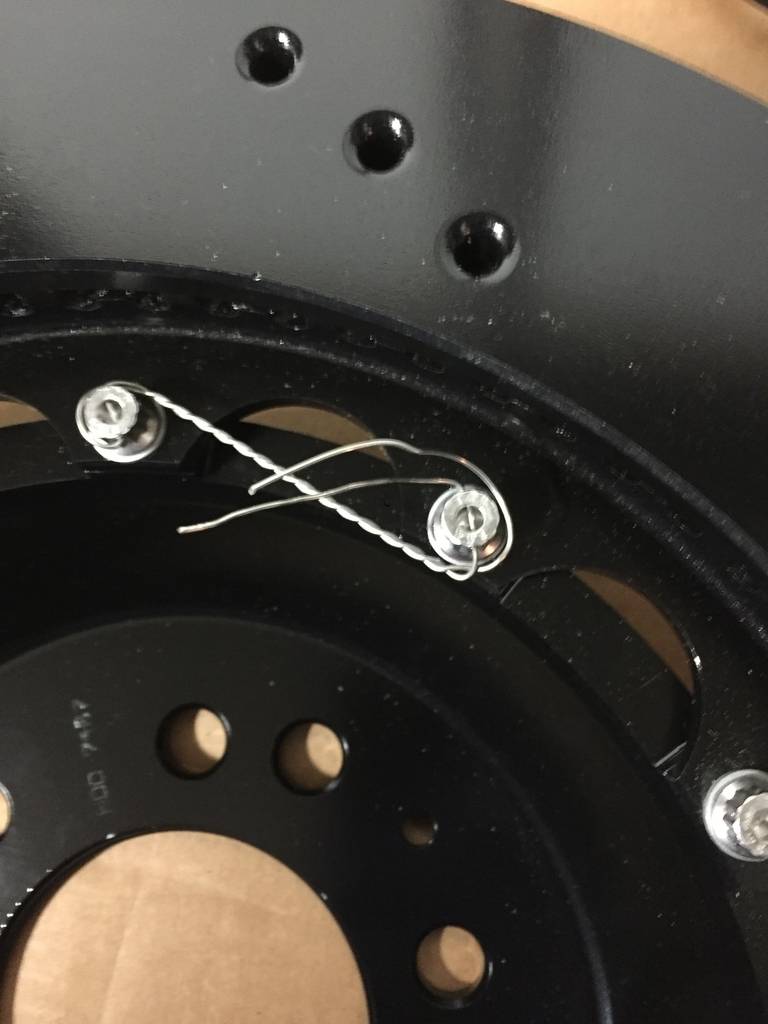
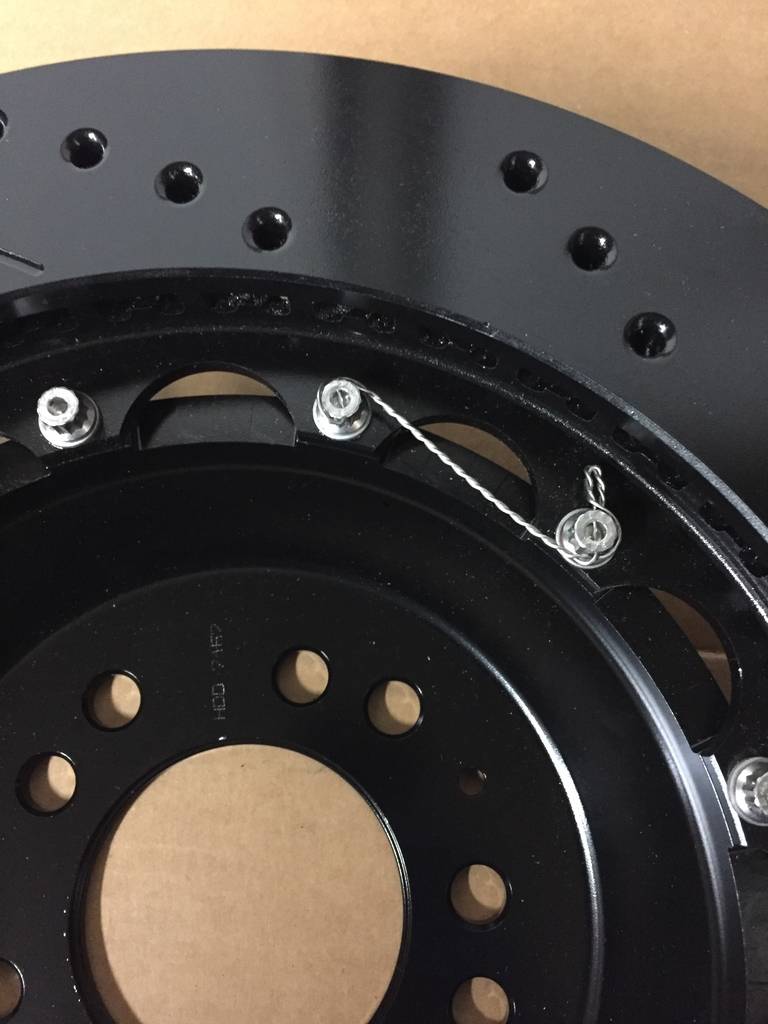
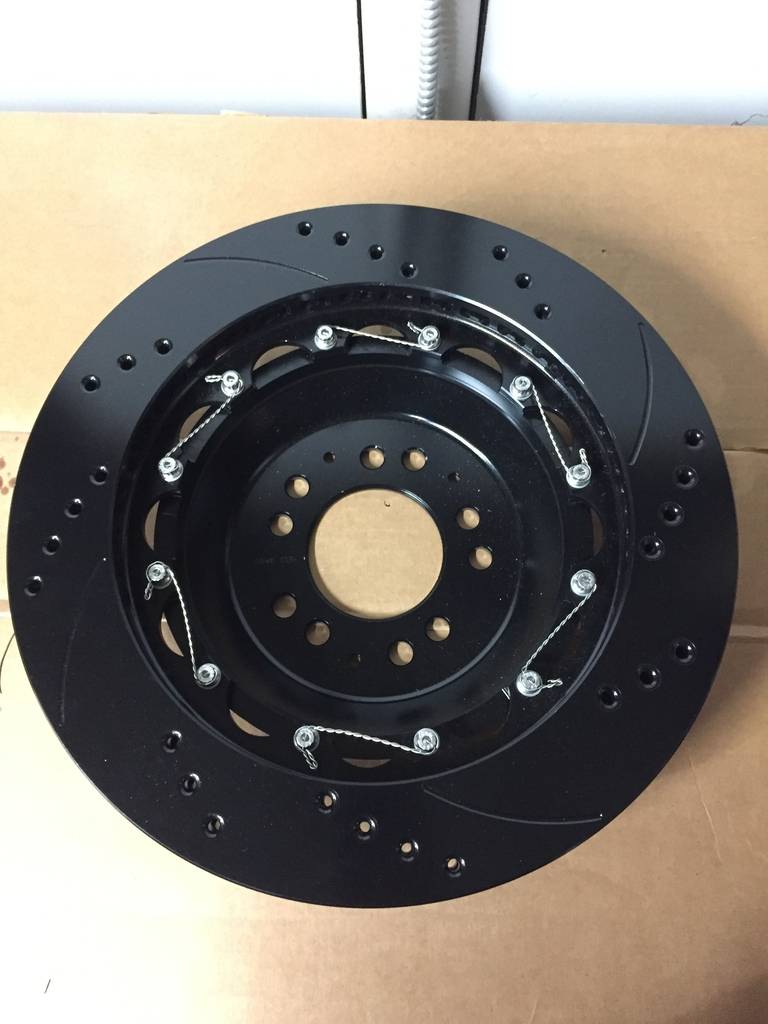
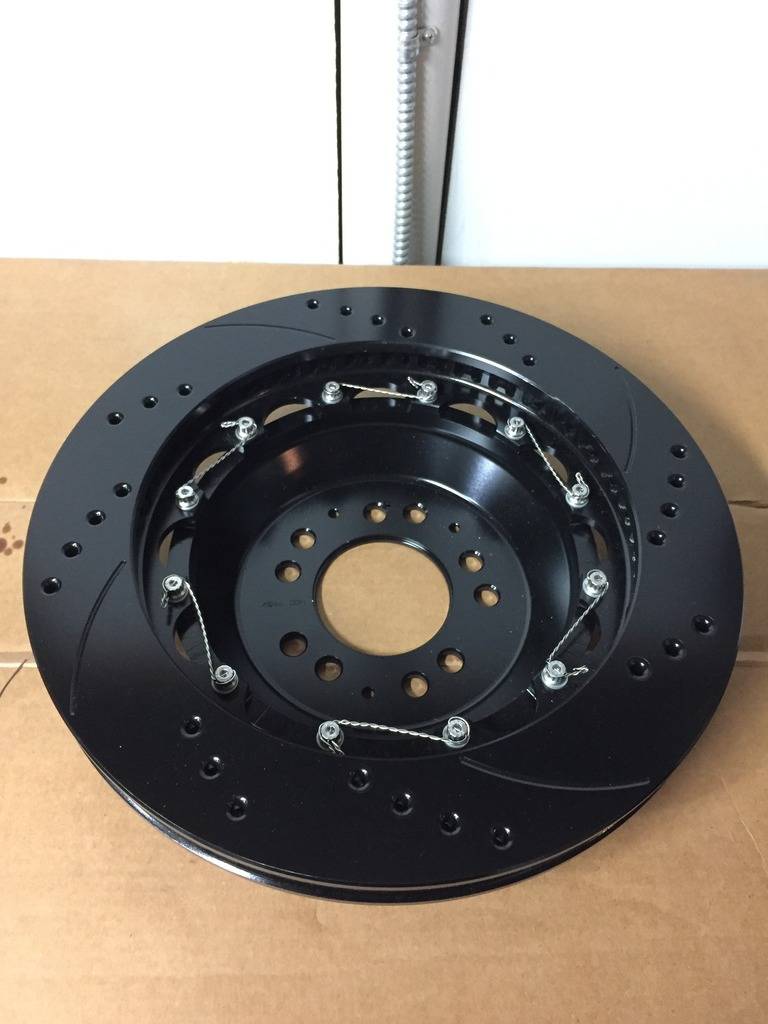
Some people have asked me about safety wiring, this is how I do it...
02-09-2017 #510
Registered User
- Join Date
- Jan 2011
- Location
- Boston, MA
- Posts
- 1,180
Made some progress. This will be picture heavy...
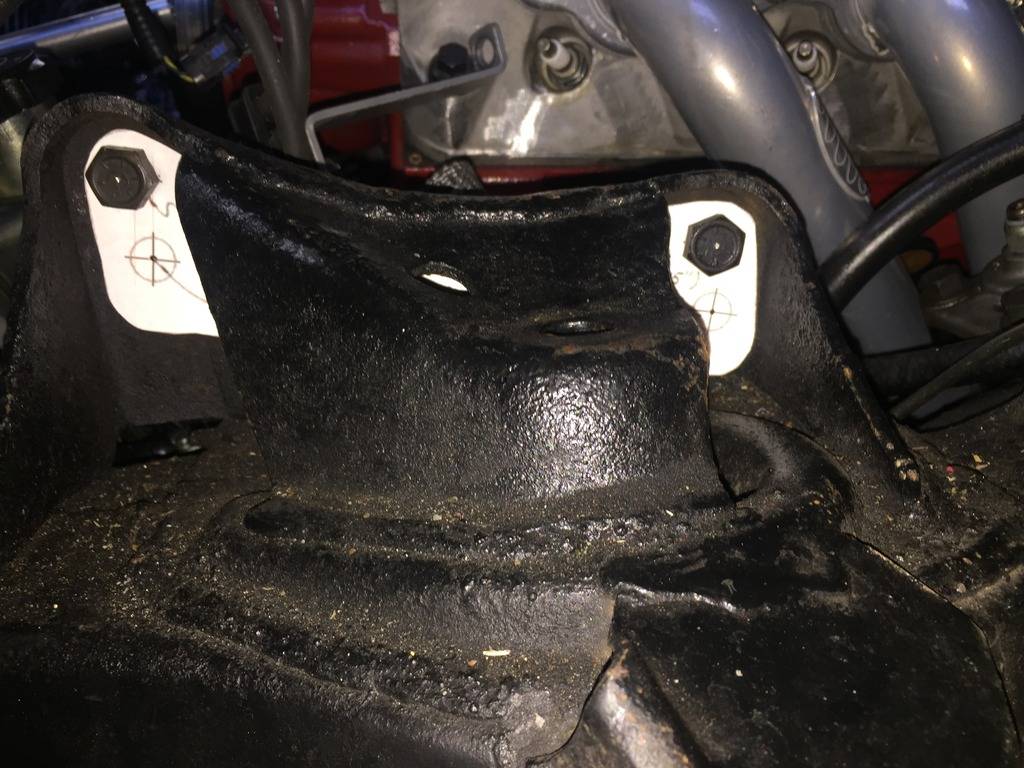
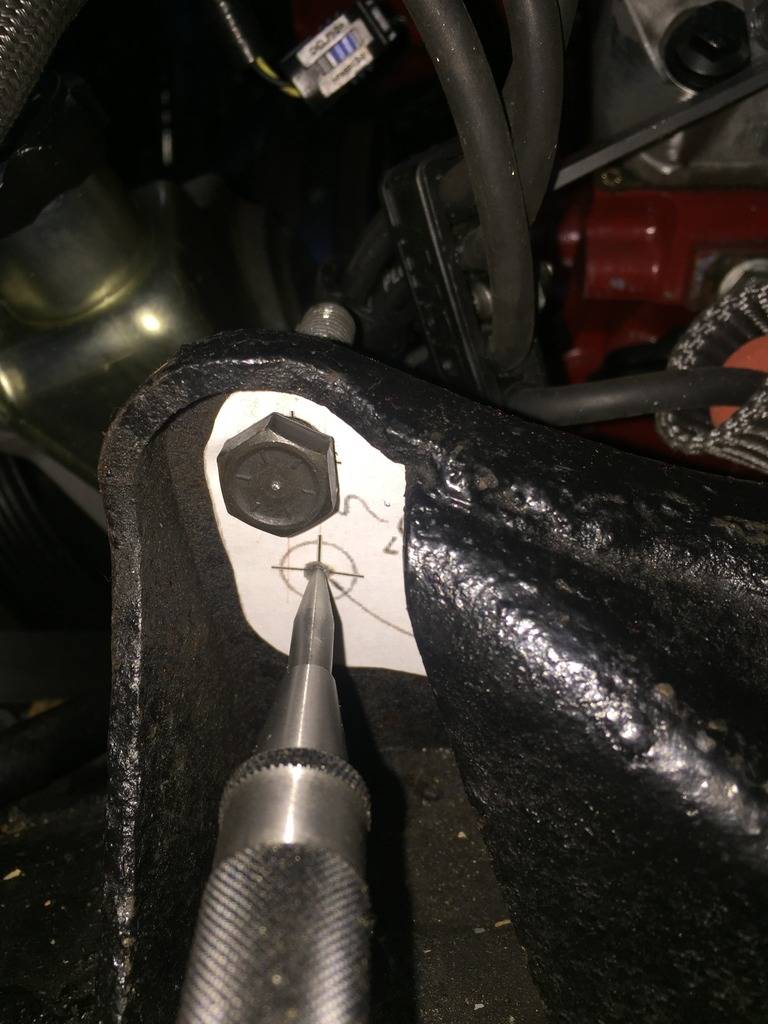
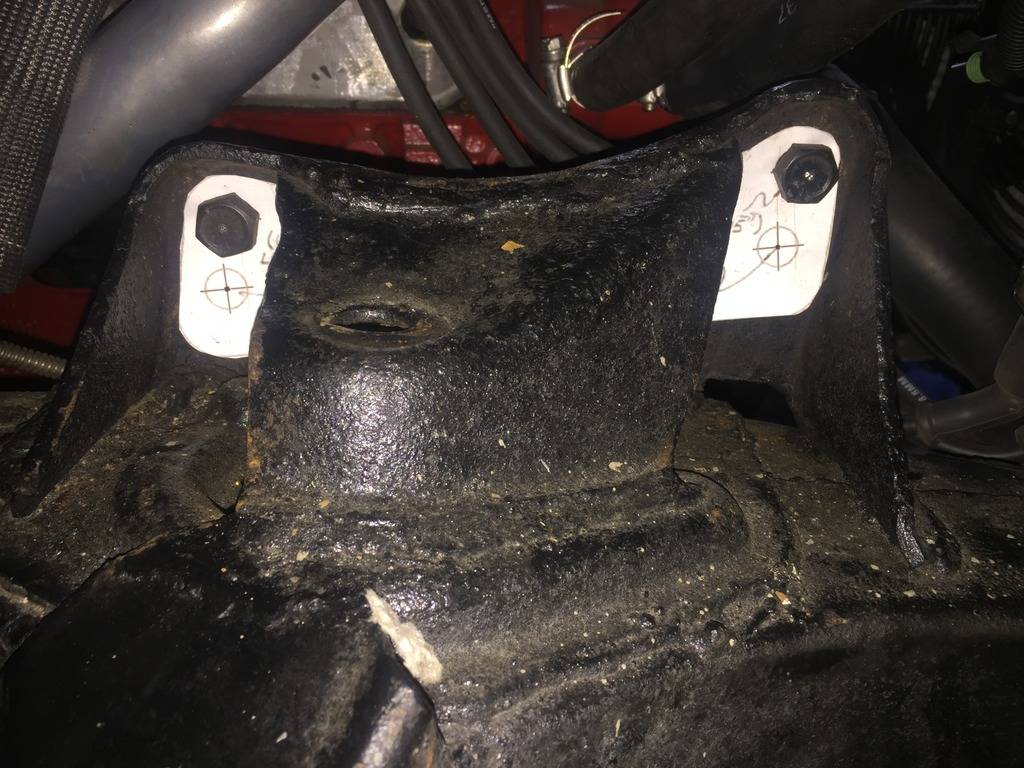
I decided to do the Guldstrand Mod while I was at it. The old school of thought was that you either did the Guldstrand Mod, or taller spindles, or taller upper ball joints. The new school suggest that you can do both the Guldstrand mod and taller spindles at the same time. Don turned me onto this, there are a few threads on pro-touring.com that discuss this. I had to remove all my accessories and brackets to gain easier access to the studs.
I printed out a few existing templates and either the hole spacing was a bit off, or the cross-hairs were fuzzy, so I recreated the current template to be more accurate. When printed, the existing holes and the new holes need to be exactly 6.5" apart. This template lowers the front hole by .875", the rear hole by .775" and moves both holes back .25"
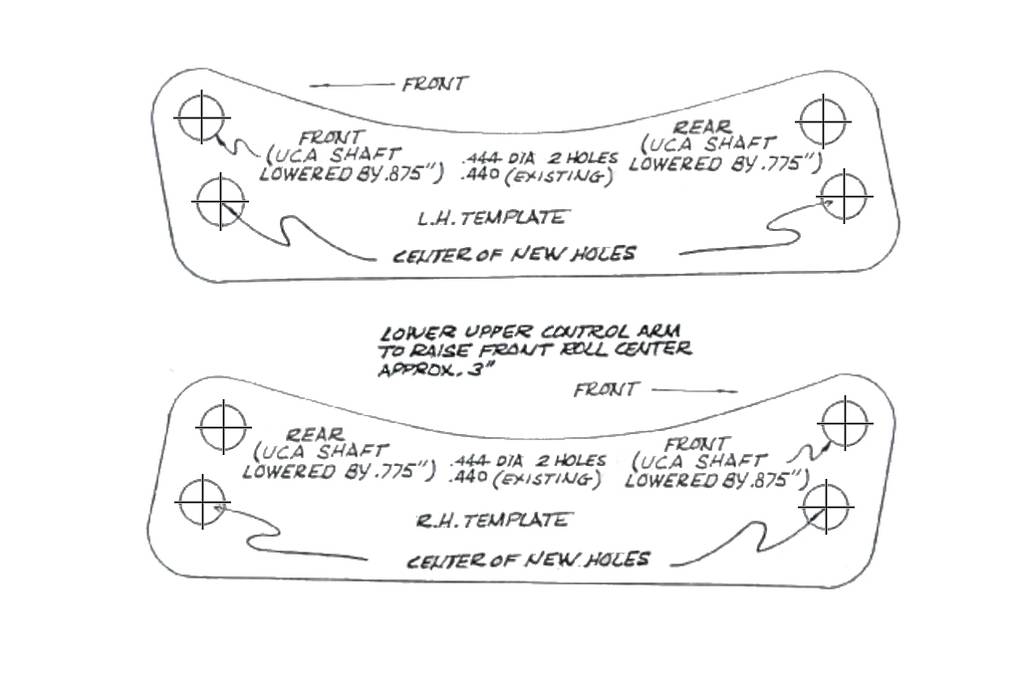
I used a ball joint press (rented free at Auto Zone) and a couple sockets to press out the existing studs:
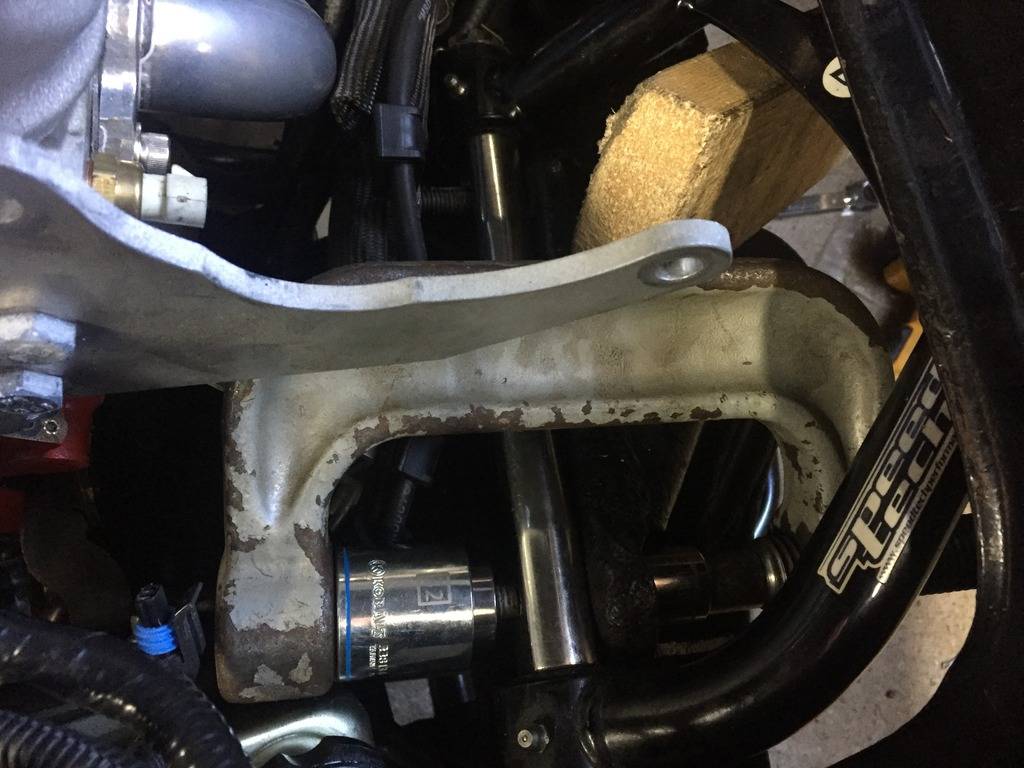
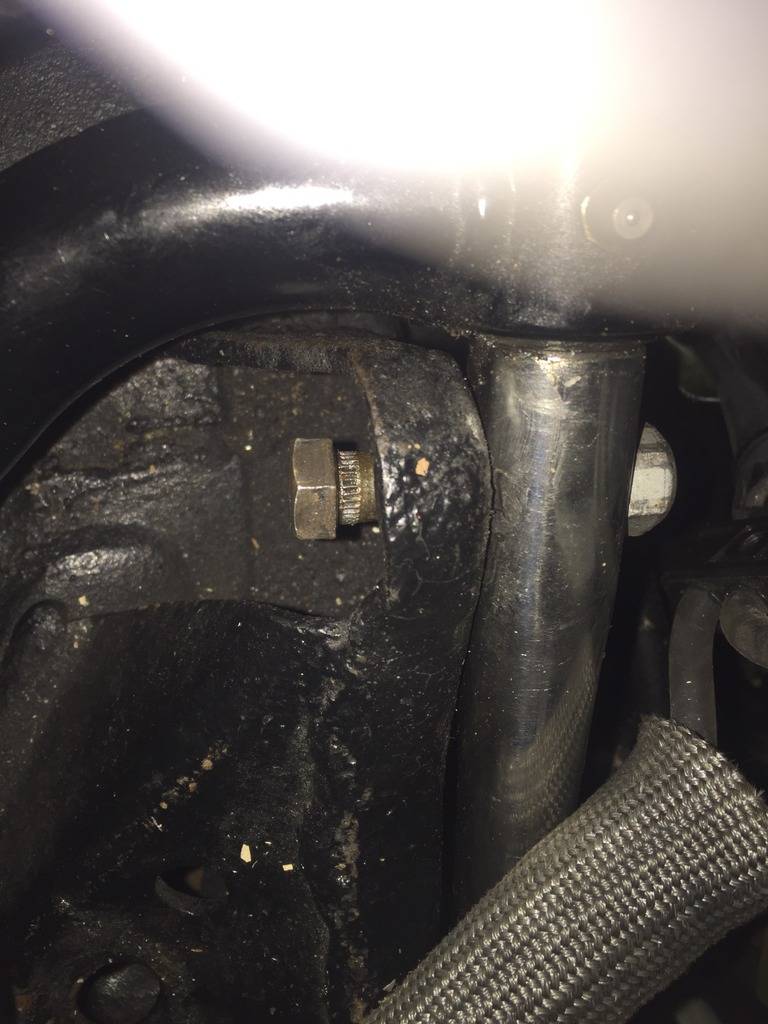
I cut the template out, cut the holes out of the template for the top studs and used the existing bolts to position the template exactly back in place(drivers side):
An auto center punch tool to mark the new centers:
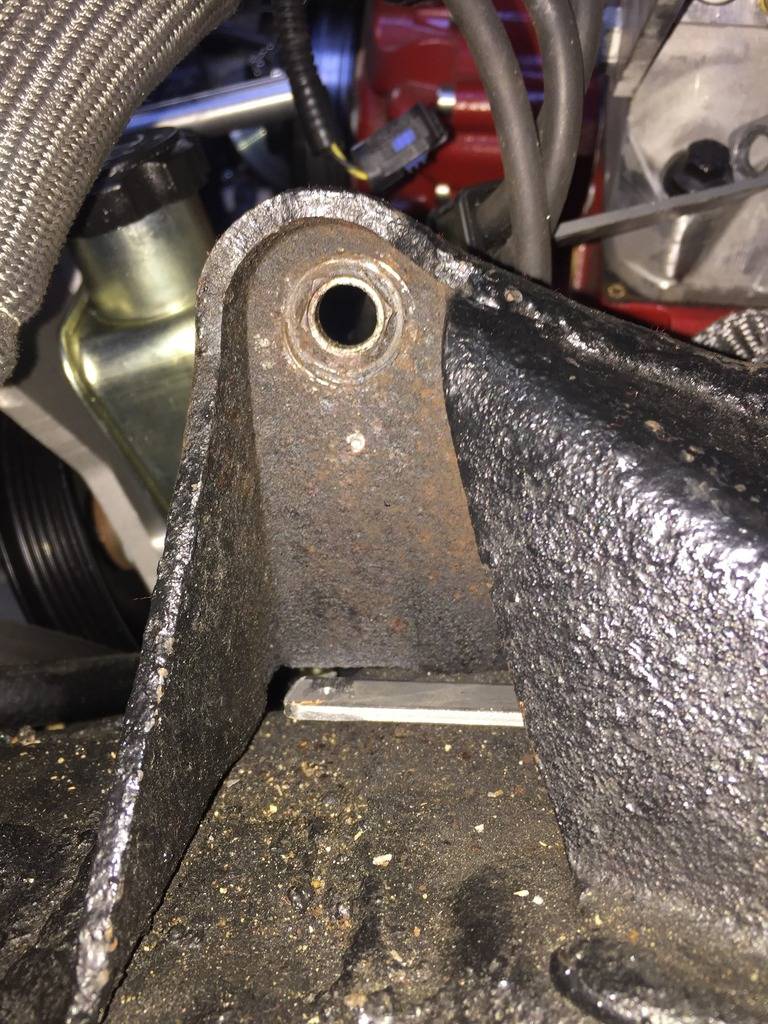
I drilled the new holes with a step drill bit (no pics). I forgot to take pics of the drivers side, here is the passenger side template and the new holes:
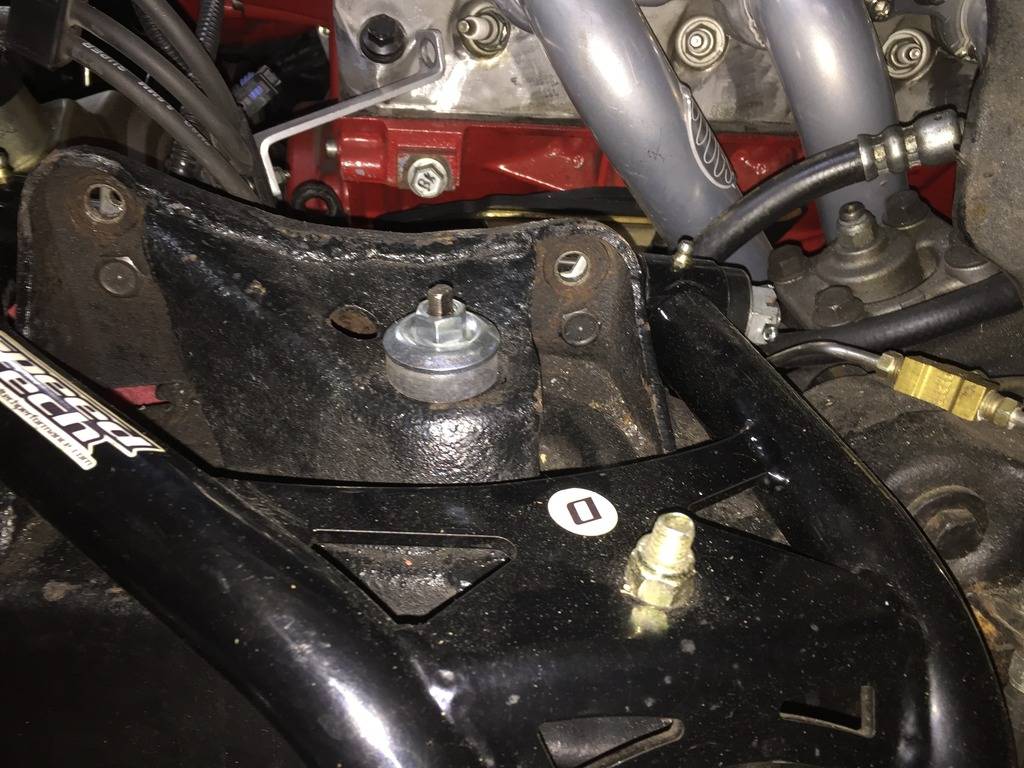
Driver side with control arm in new location:
02-09-2017 #511
Registered User
- Join Date
- Jan 2011
- Location
- Boston, MA
- Posts
- 1,180
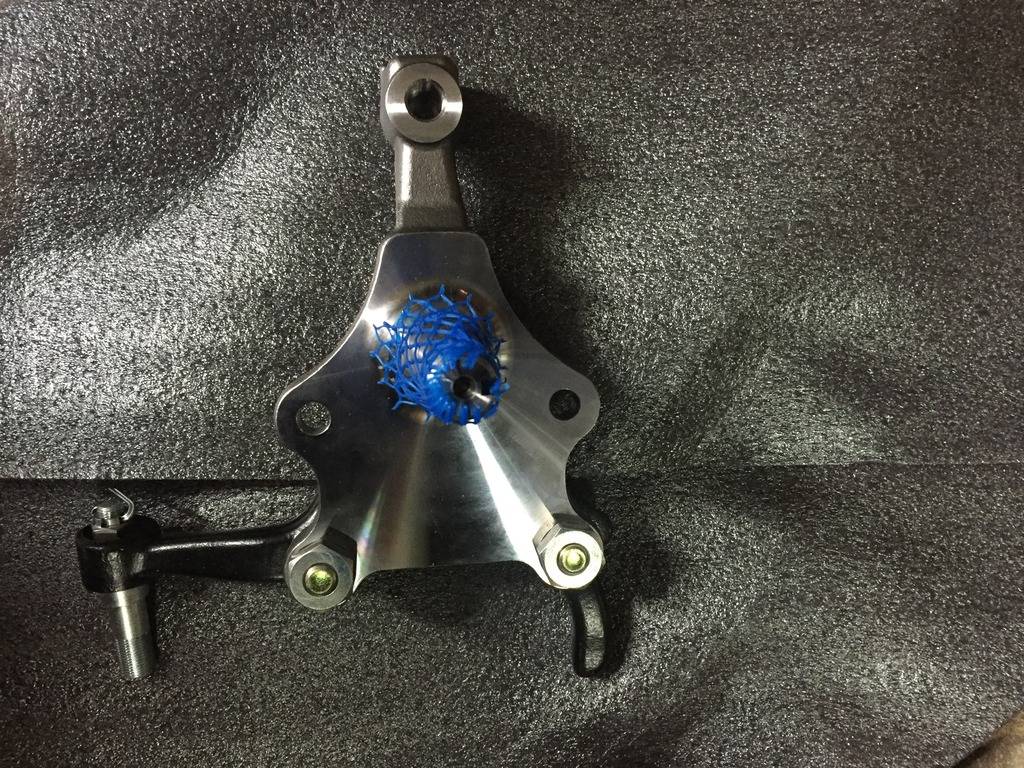
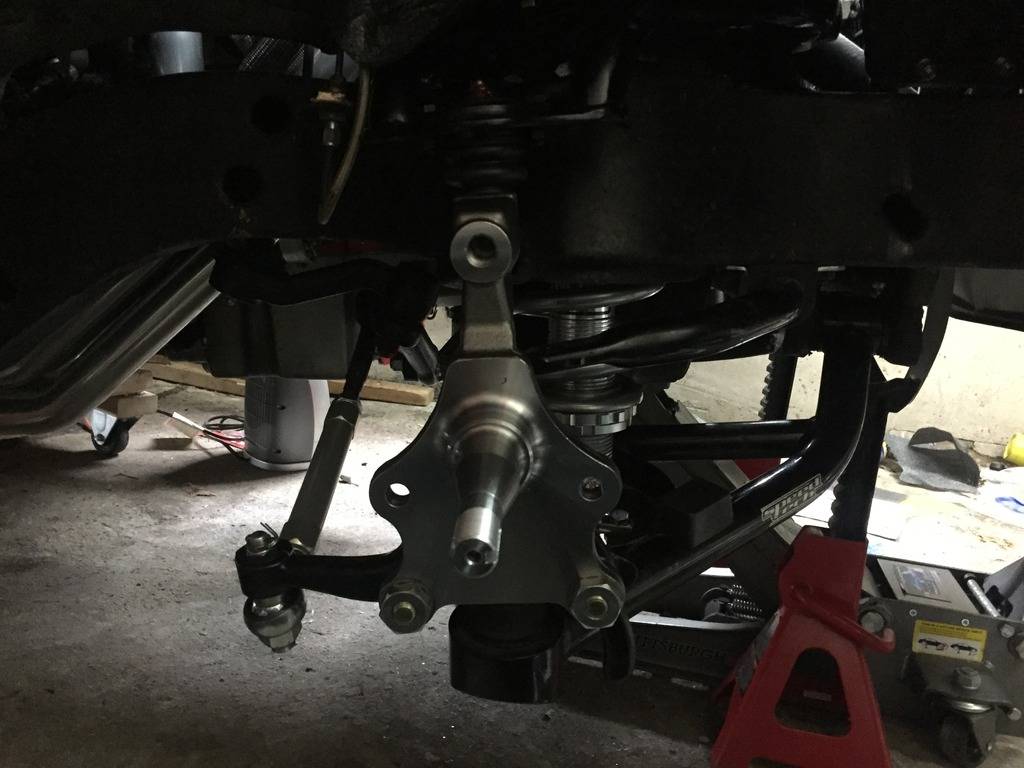
New ridetech drop spindles:
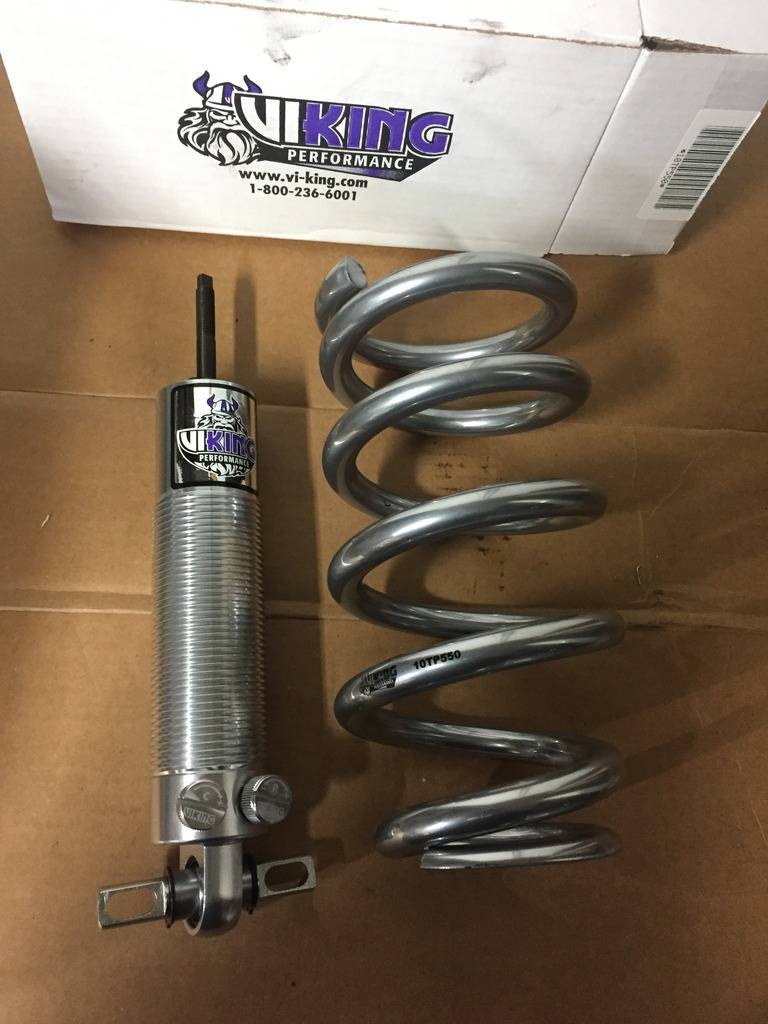
Viking Coilovers with 550# springs and double adjustable shocks:
New Wilwood Aero6 14"x1.25" rotors next to the old 12.19"x.81" rotors:
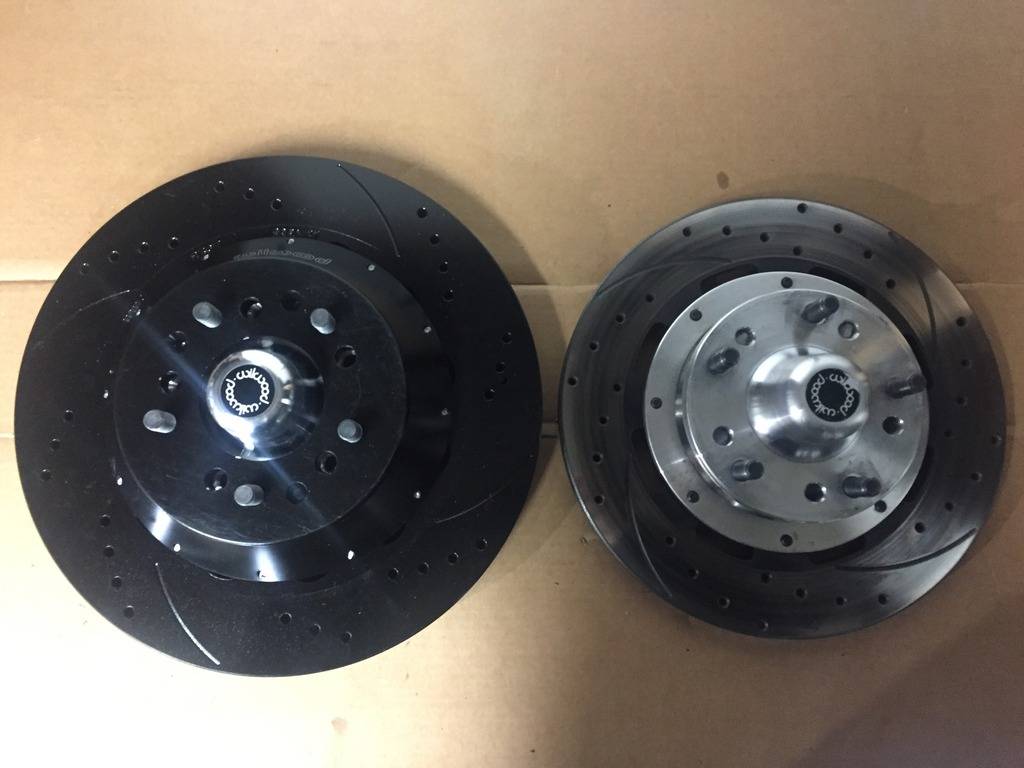
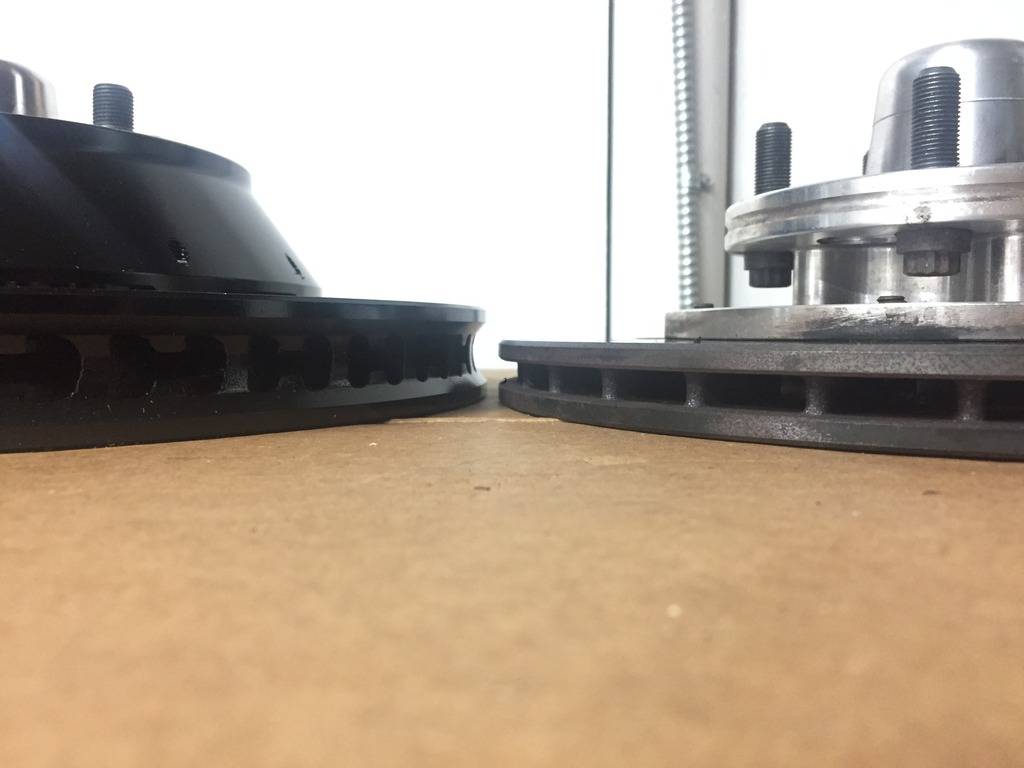
- - - Updated - - -
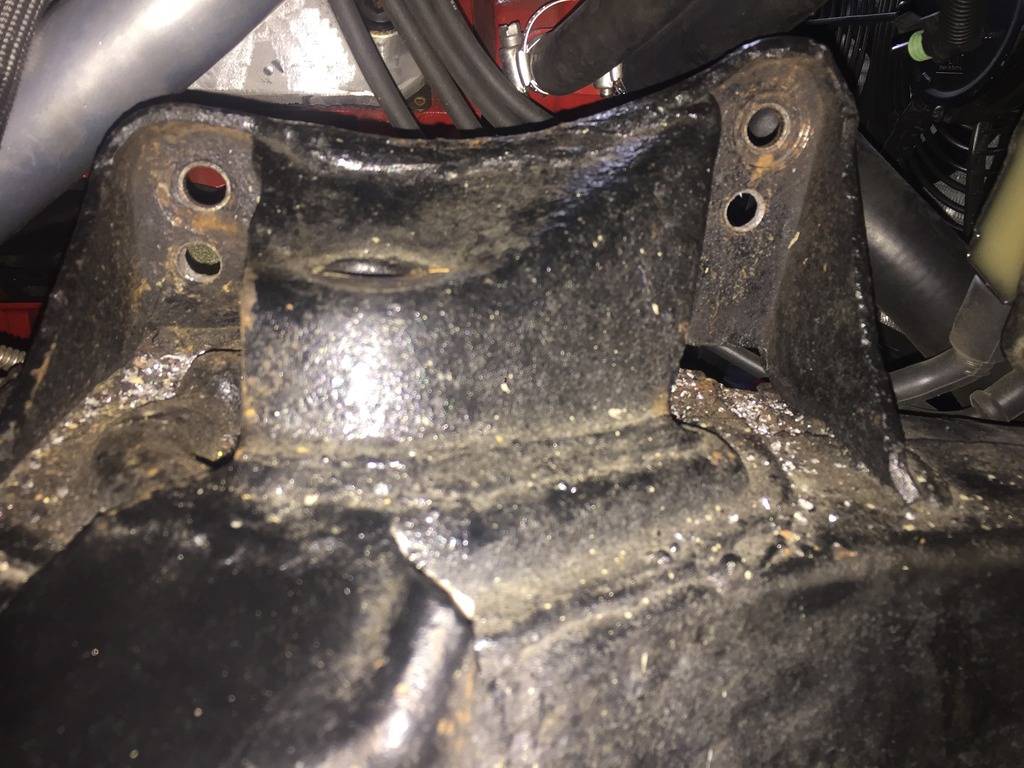
First major problem. There's not much mention of this online yet, but in the Viking instructions it does say that you need to check the spring pocket clearance as some have enough clearance and some don't. Mine don't. Passenger side:
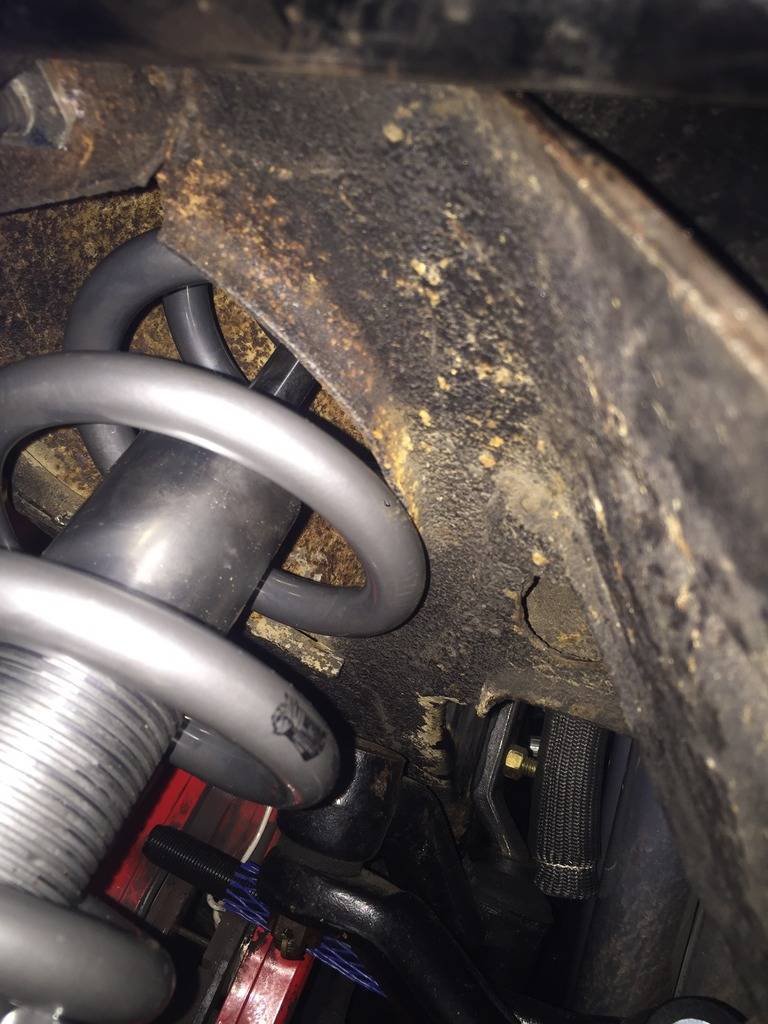
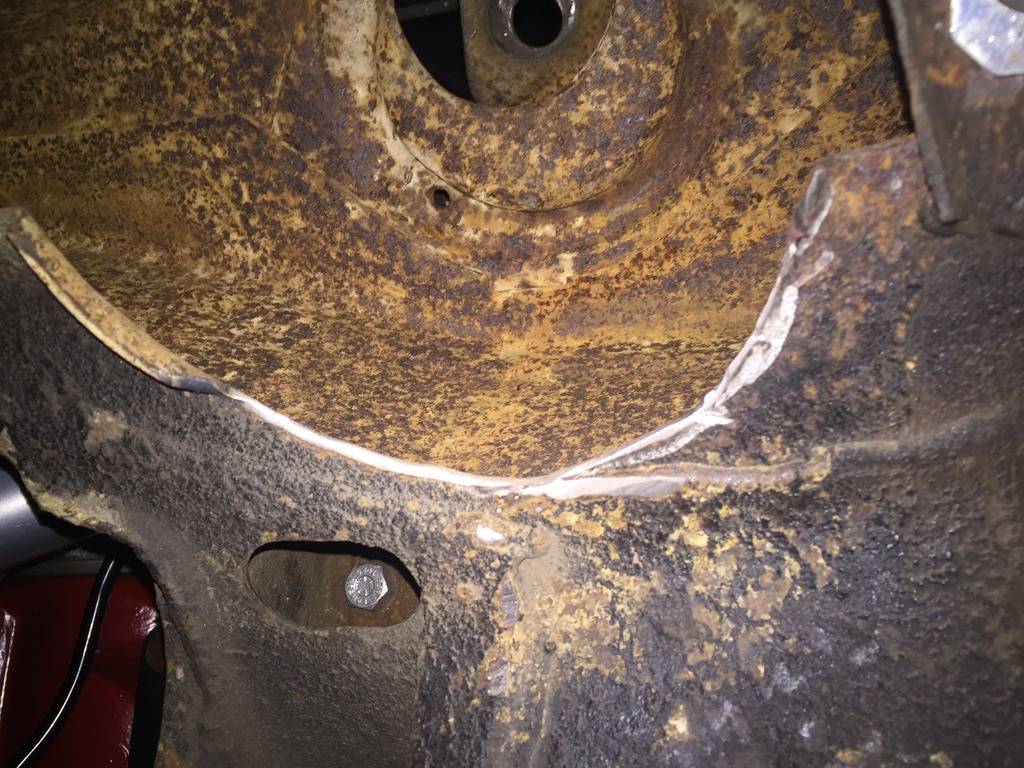
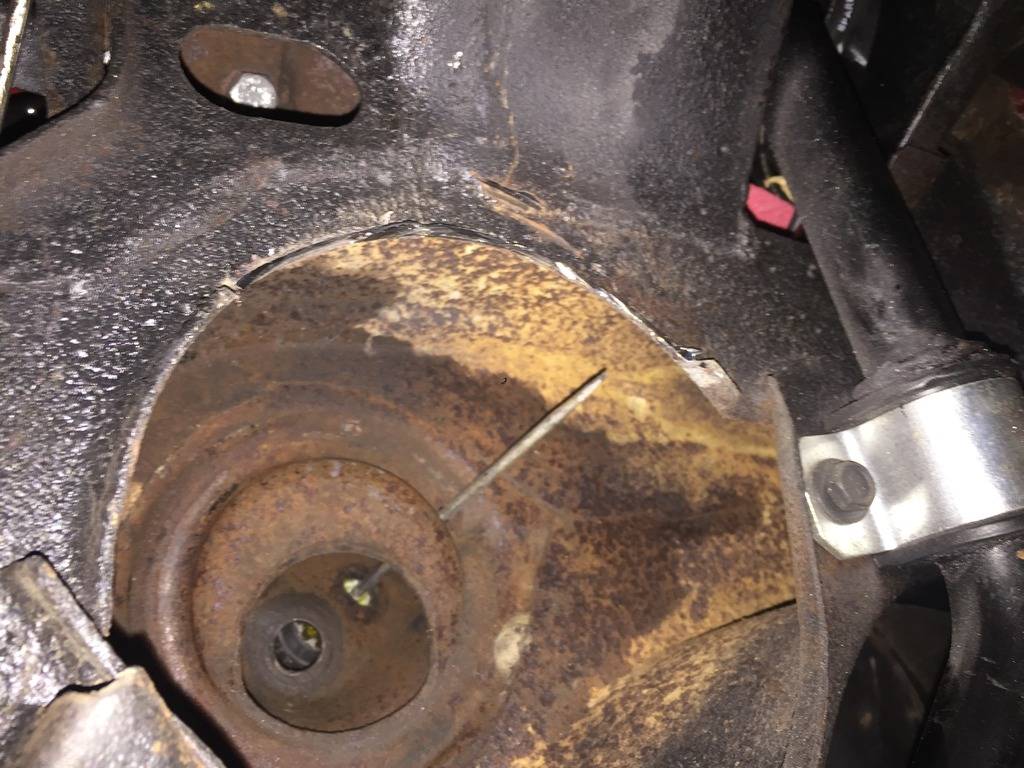
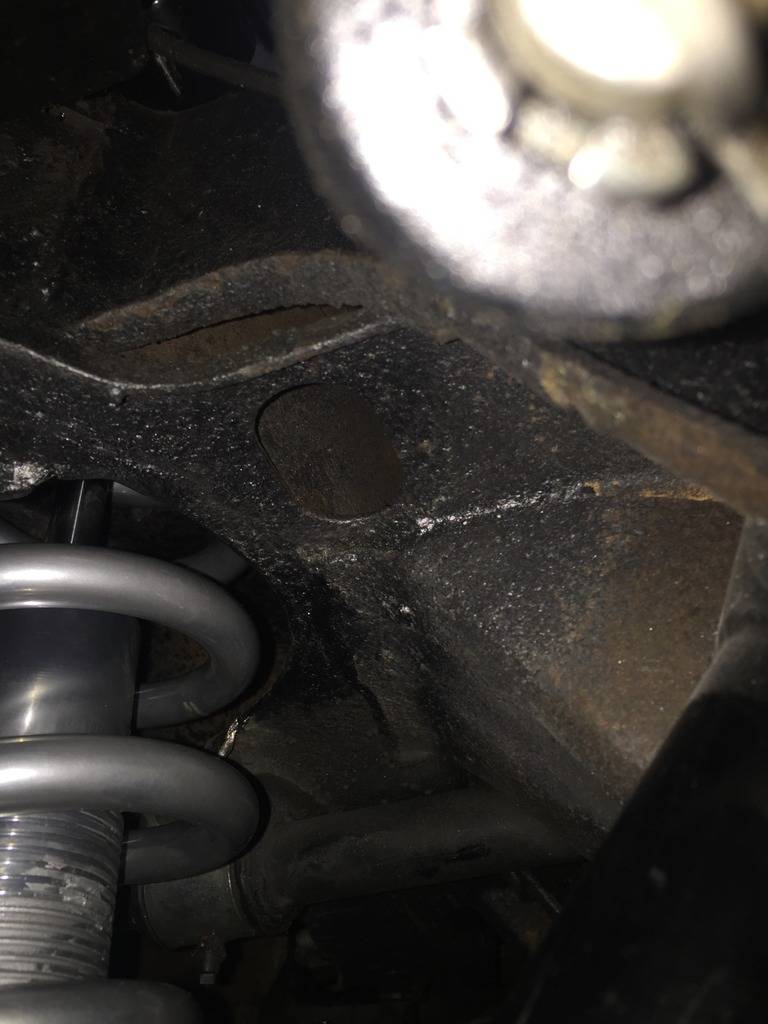
I had to trim the lip around the pocket and grind the hole opening on the engine side by about 1/4". It looks bigger, but that's silver sharpie in the pic. Ignore the rust inside the subframe. I did. Actually I sprayed it with rust converter before final assembly.
Viking Coilovers installed on passenger side:
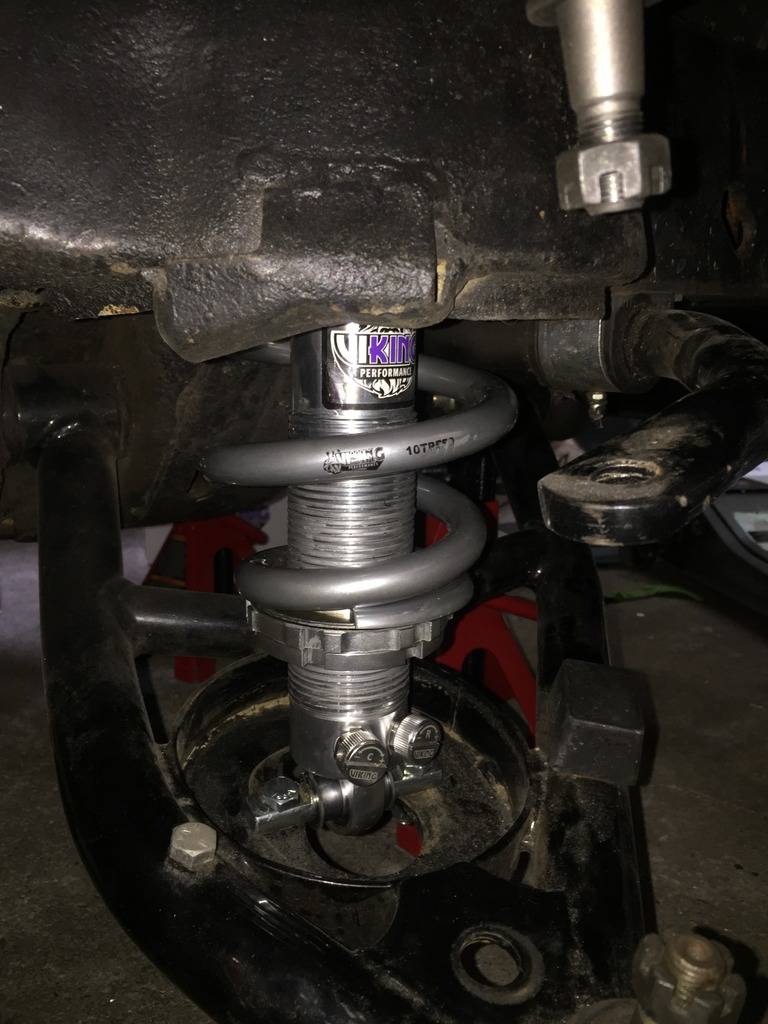
Same issue on the Drivers side:
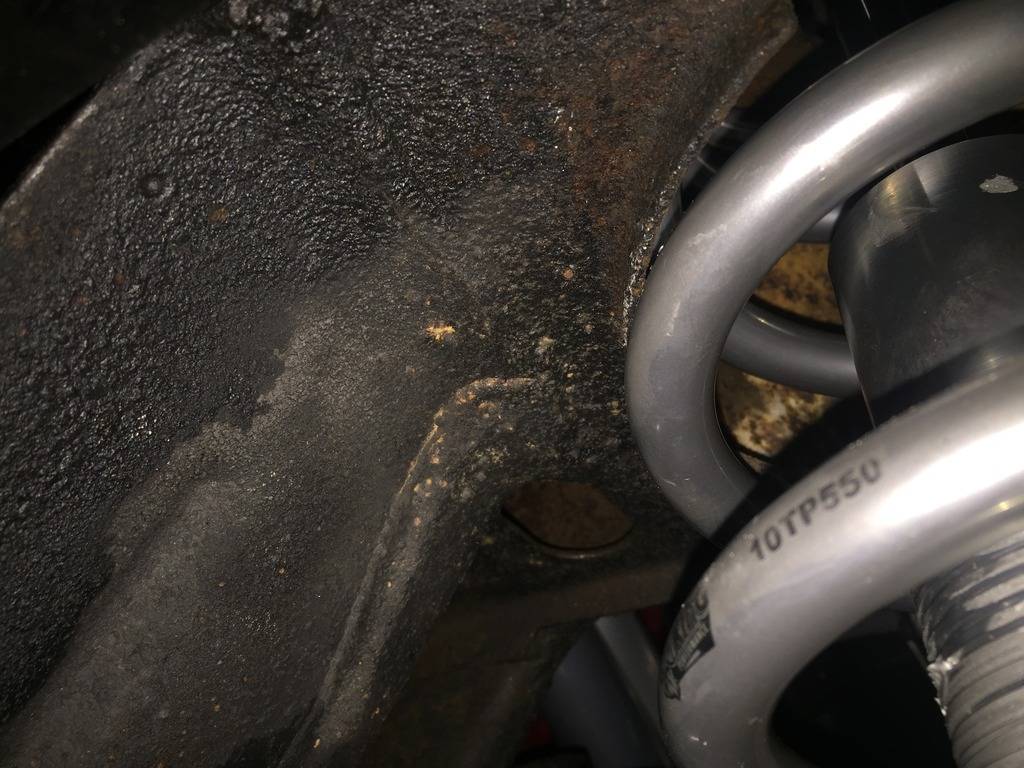
Trimmed it the same. You can see a screwdriver poking down through the top where I indexed the spring and it did not help:
Here it is with clearance:
Drivers side installed:
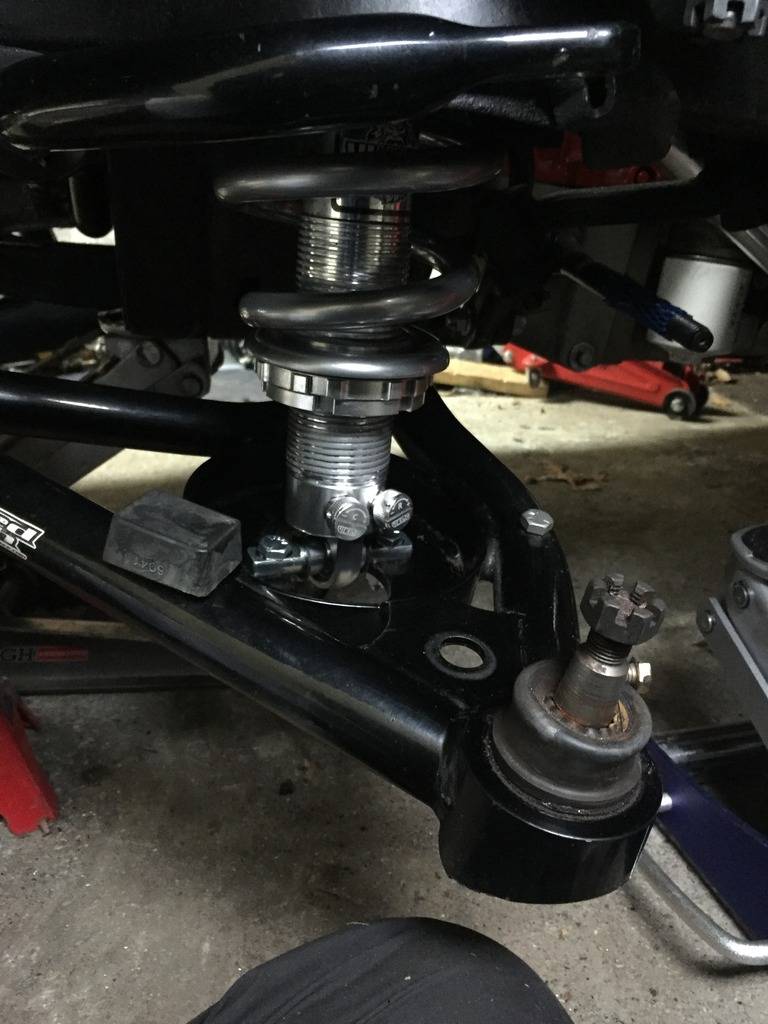
RideTech drop spindle and Viking Coilover (drivers side):
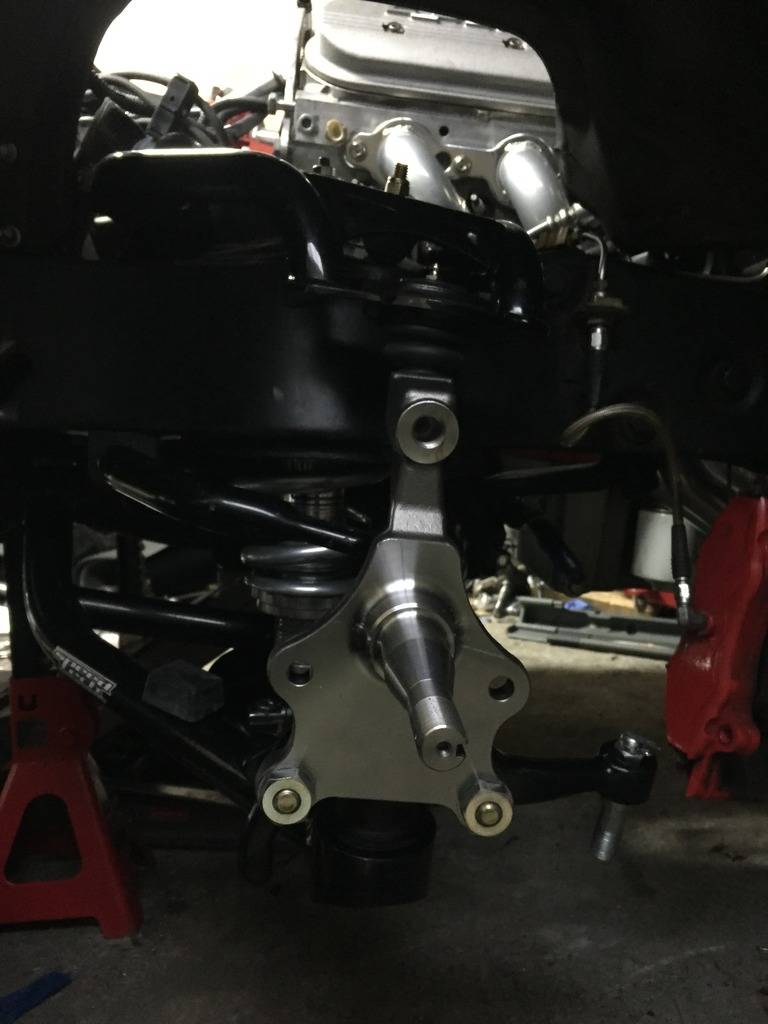
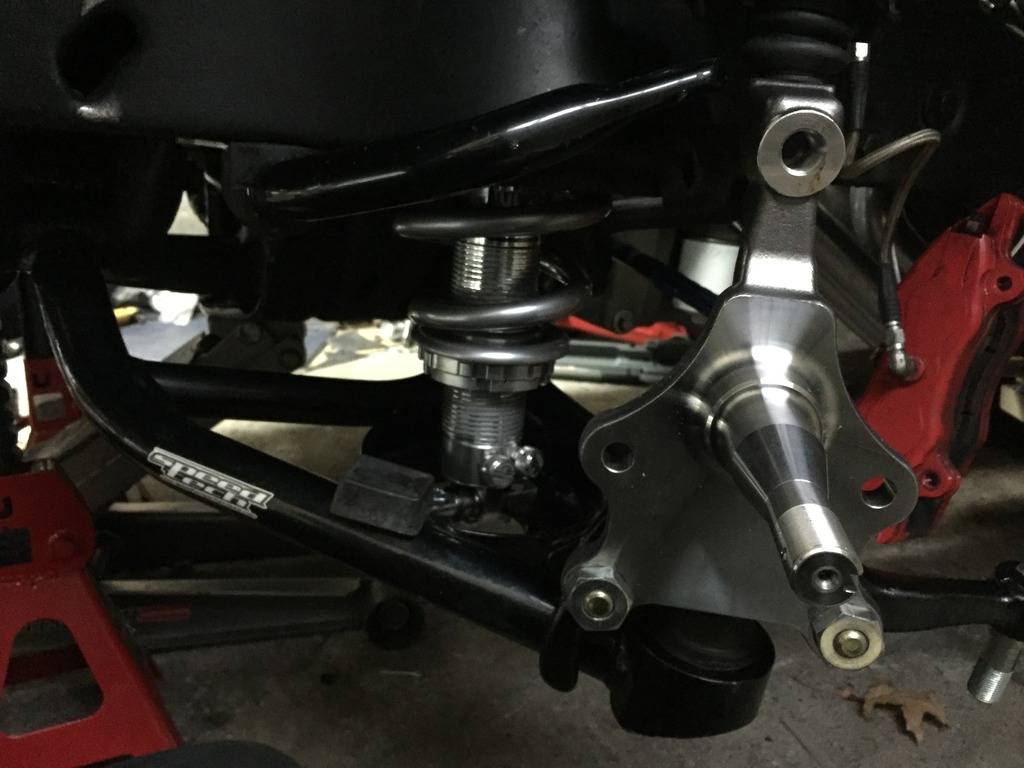
RideTech Tru Turn installed and torqued to spec (passenger side)
02-09-2017 #512
Registered User
- Join Date
- Jan 2011
- Location
- Boston, MA
- Posts
- 1,180
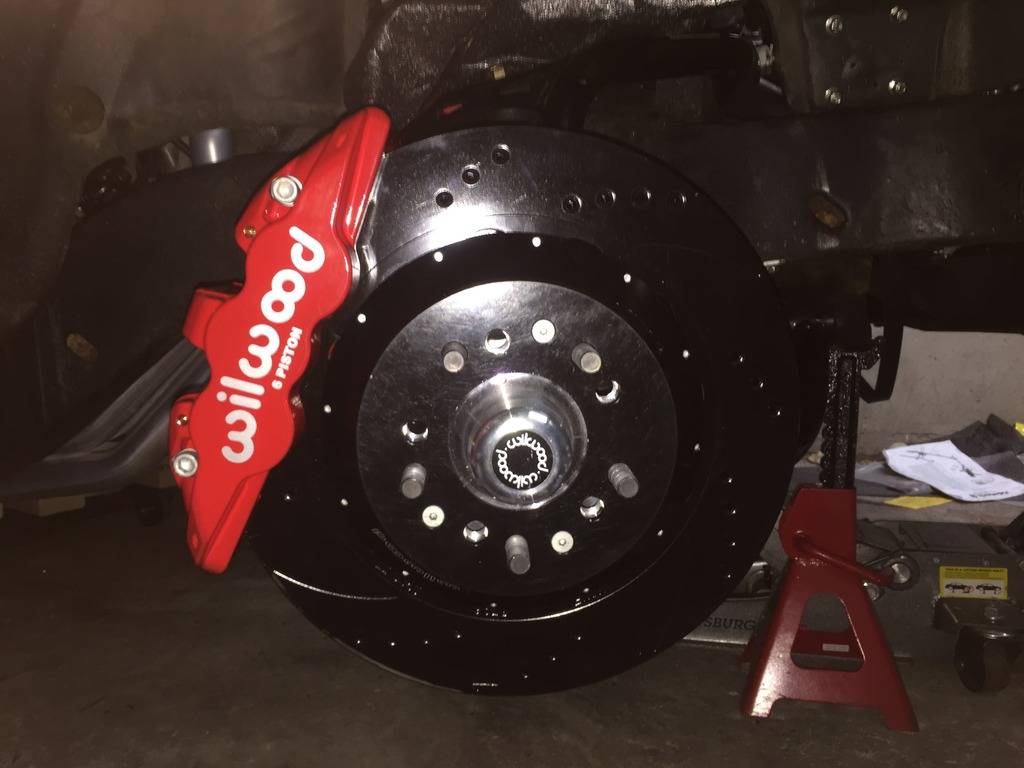
Onto the Wilwood Aero6 install. First issue was that the bracket bolt that attaches the bracket to the spindle was designed for a stock spindle where the bolt would pass through the spindle and the steering arm both. With the drop spindles, the steering arm is attached to the lower bolt holes. The caliper bracket attaches to the upper holes, so the 3" bolt is too long, and the threads don't start soon enough. Looking down from above on passenger side:
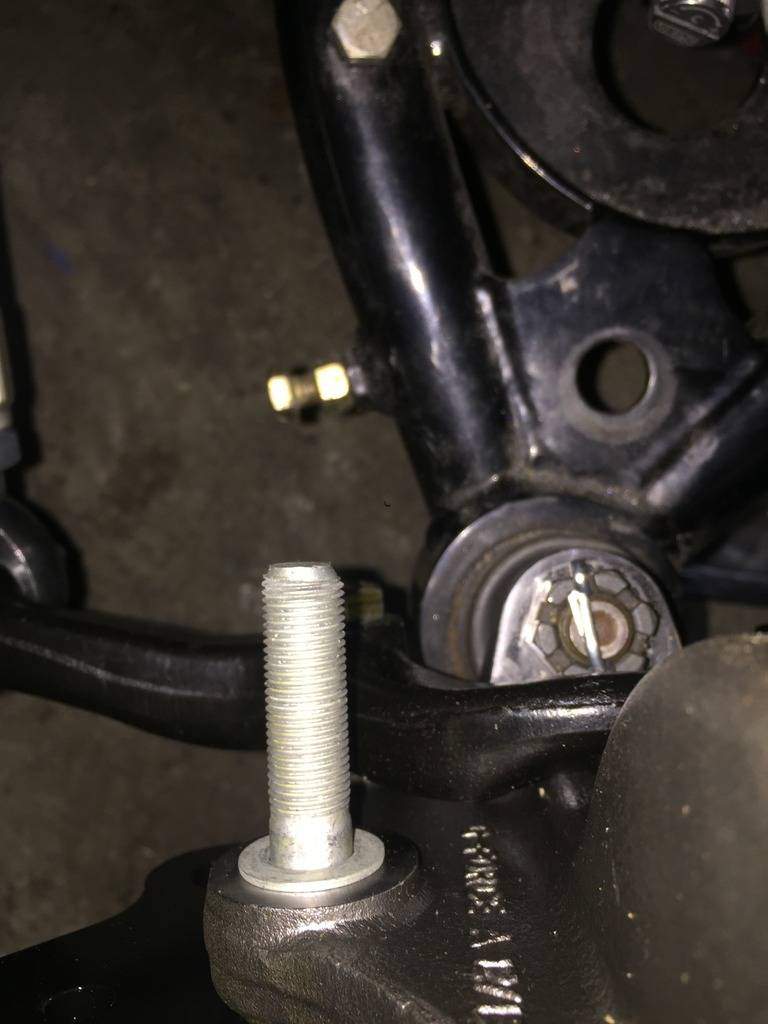
Quick trip to the hardware store for some 2" long grade 8 bolts, nuts and lock washers:
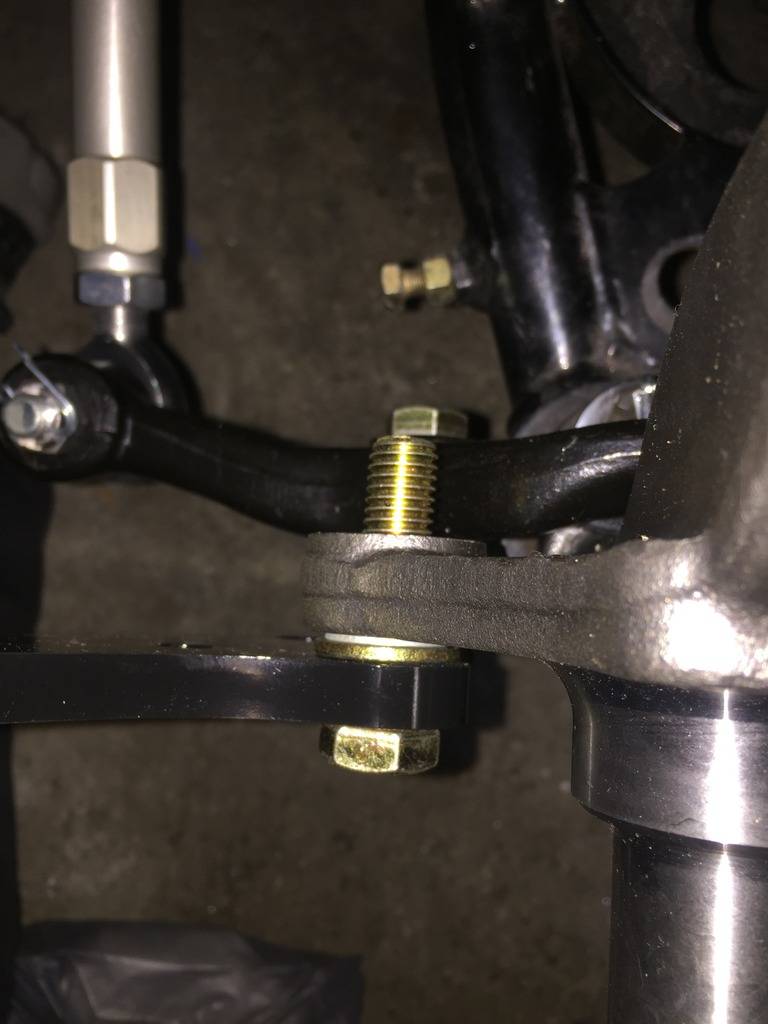
Bracket is bolted to the spindle, and the caliper bracket is mounted to the radial caliper bracket is mounted to that:
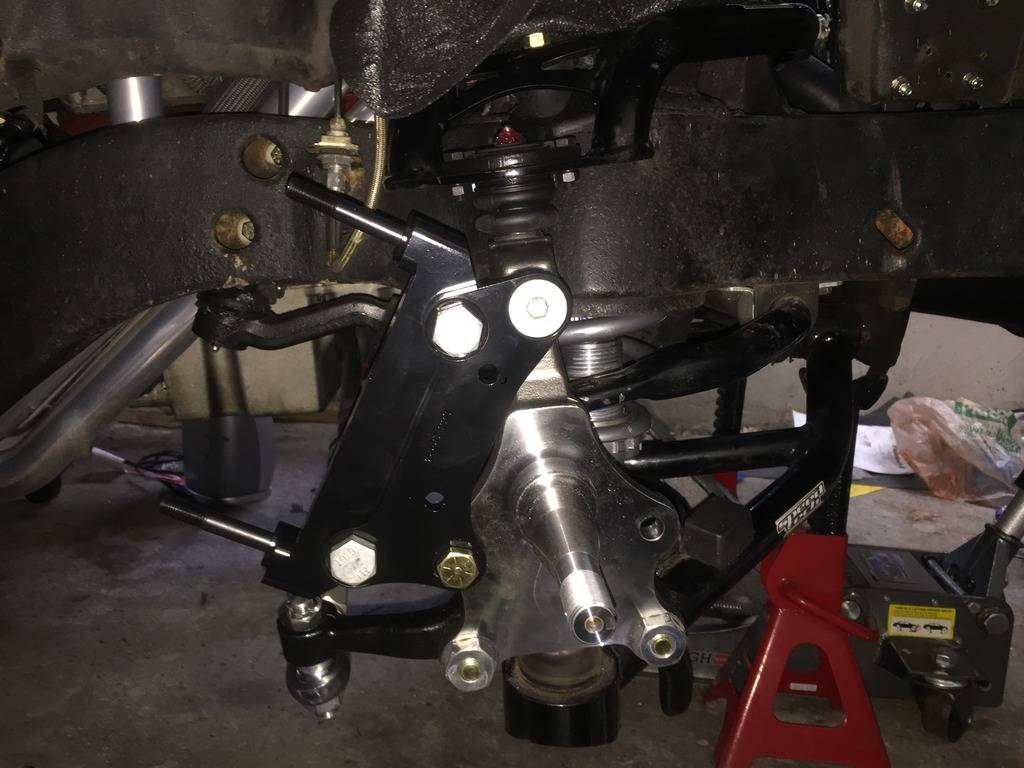
New hub installed:
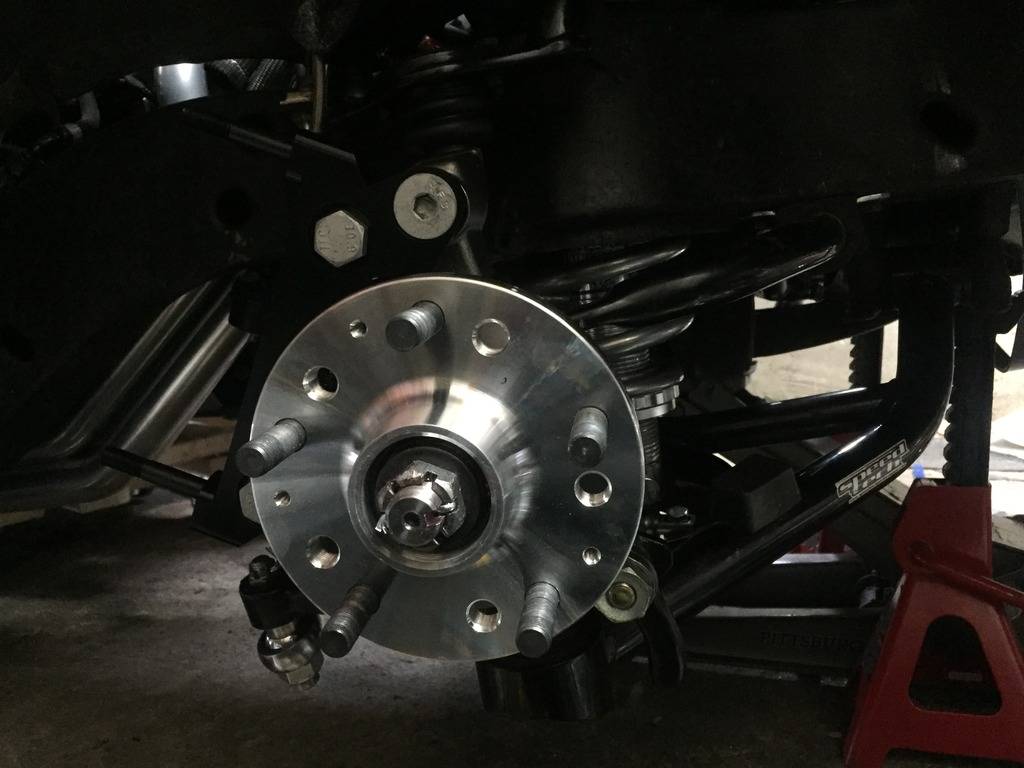
Rotor installed:
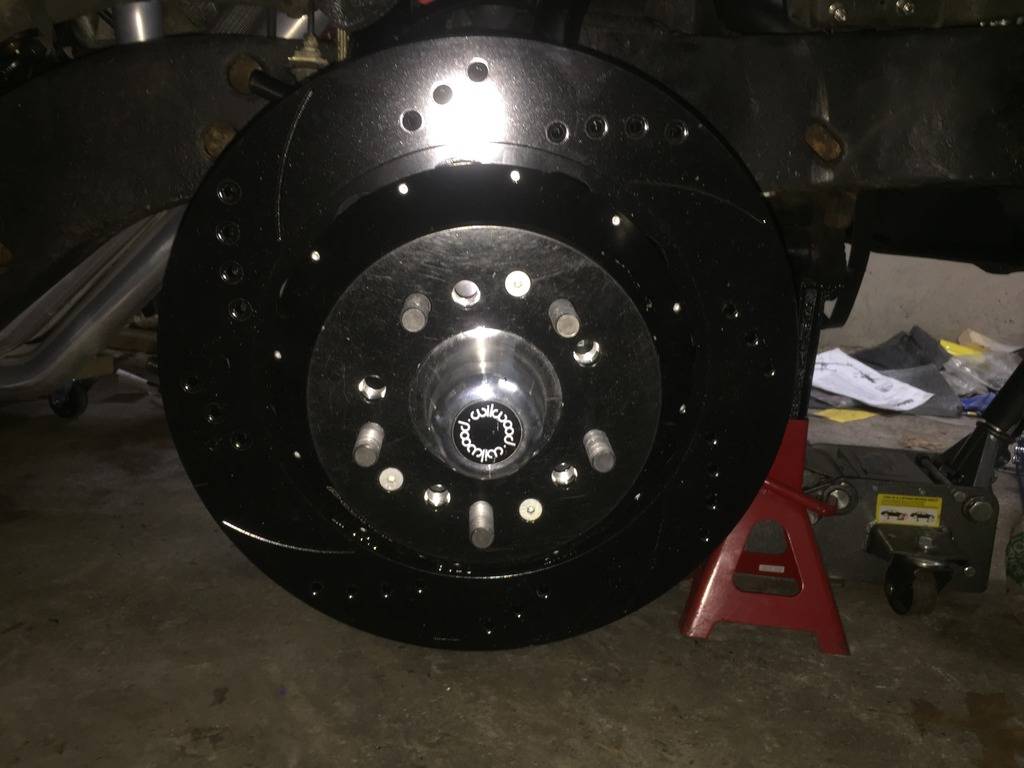
Lots of shimming and re-shimming to to get the caliper dead centered on the rotor:
02-09-2017 #513
Registered User
- Join Date
- May 2015
- Posts
- 254
Your safety wire job is much better than the guy that did it previously. Good job!

02-09-2017 #514 Registered User
- Join Date
- Apr 2005
- Location
- Chicago
- Posts
- 2,788
Nice to see your back at it and nice job on the saftey wire.
Quick question. I see your using Ride Tech Tru-Turn, Speed Tech Control Arms and Viking Coilovers are all of the bits and pieces compatible with each other ?marty-mj
GarageScene.net High Speed Welding KDHotrods RecoveryRoomInteriors WegnerAutomotive Autometer Ride-Tech
02-09-2017 #515
Registered User
- Join Date
- Jan 2011
- Location
- Boston, MA
- Posts
- 1,180
SpeedTech sells the Viking coilovers to go with their control arms, and I don't see any reason the TruTurn wouldn't be compatible. It doesn't attach to the control arms directly, it connects to the ridetech spindles. Originally Posted by syborg tt
02-09-2017 #516 Registered User
- Join Date
- Dec 2005
- Location
- Maryville, TN
- Posts
- 844
Great build man! Love the progress
02-10-2017 #517 Registered User
- Join Date
- Aug 2006
- Posts
- 381
Great upgrades man and always good to see some project updates. As far as compatibility of parts is concerned, you could refere to Blake at Speedtech. He is very helpful and will guide you to right direction 👍🏻 Originally Posted by 67rally
72 Camaro RS:SOLD
68 Camaro:
LS6 Engine,Tremec TKO 600,5 Speed
Complete Speedtech Subframe Kit,Speedtech Torque Arm, 9" Rearend from Strange, Wilwood Brakes, Minitubbed, Hotchkis Subframe Connectors
02-10-2017 #518
Full Blown G-Machiner
- Join Date
- Aug 2004
- Location
- Boston MA
- Posts
- 686
Looking sharp! Lets go for a ride come spring.
1967 #s RS
02-10-2017 #519
Registered User
- Join Date
- Apr 2005
- Location
- Chicago
- Posts
- 2,788
I didn't know Speed Tech they sold Viking coil overs. I really liking what Speed Tech is doing as after talking with Tom Argue I am convinced they know what they are doing. He is trying to convince me to do another project with all of there stuff. I may work on a 70 Formula next and give there stuff a try. Originally Posted by 67rally
marty-mj
GarageScene.net High Speed Welding KDHotrods RecoveryRoomInteriors WegnerAutomotive Autometer Ride-Tech
02-10-2017 #520
Registered User
- Join Date
- Aug 2008
- Location
- jacksonville,fl
- Posts
- 972
Nice new hardware there Brent. As far as mixing brands, I'm gonna get speedtech's front control arms rather than ridetech's to go with my airride shockwaves. No harm in mixing certain components from different companies to get what you want.
I know everyone can have their different opinions on things like spring rate And other factors can affect what's best for you.
With weaker swaybars you need stiffer springs for anti roll resistance. Stiffer is of course less comfortable for street driving and at some point can give you less traction on bumps. Stiffer does help nose diving in braking.
Softer springs with stiffer swaybars is generally said to give a better street ride.
That's just a little general common knowledge from my peabrain. I think 550 rate springs is a good starting point.

 Reply With Quote





