


Results 1 to 9 of 9
Thread: 1967 Mustang Coupe in Texas
-
08-23-2010 #1
 Registered User
- Join Date
- Feb 2010
- Location
- Central Texas
- Posts
- 78

1967 Mustang Coupe in Texas
I've read on this site for a few months now. I'd originally decided to restore my Mustang to original condition. However, I recently changed my mind to more of a pro-touring route. I've not done too much to the car yet so the change in direction should not be too costly.
Here are a couple of pictures of my car.
-
08-23-2010 #2 Registered User
- Join Date
- Mar 2009
- Location
- overseas
- Posts
- 3,434
welcome aboard! very nice & clean mustang
 Kevin S. (overseas in Germany)
1963 Chevrolet Impala 2d ht Coupe
www.CruznArt.com
CRUZN - Automotive Artworks
08-23-2010 #3 Registered User
- Join Date
- Apr 2009
- Location
- san diego
- Posts
- 5,101
cool welcome!
My build thread: https://www.pro-touring.com/showthre...ing&highlight=
The mustang build thread: https://www.pro-touring.com/showthre...el)&highlight=
08-26-2010 #4
Registered User
- Join Date
- Jan 2008
- Location
- Juneau Alaska
- Posts
- 96
Welcome. Lots of nice 67-68 mustang coupes on here.
68 Mustang Coupe
392 Stroker
TKO600
on and on...
12-22-2011 #5
Registered User
- Join Date
- Feb 2010
- Location
- Central Texas
- Posts
- 78
After my last post, I decided to take on the next project in my rolling restoration. I call it a rolling restoration as I have to be able to drive it between projects or it starts to bother me. The task of restoring the car then starts to feel like a never ending job rather than a hobby I enjoy.
I really wanted to refinish the dash as it is was detracting from the look of the interior. As you can tell in the previous pictures, someone replaced the dash bezels with the woodgrain version from a '68. I started stripping the dash with the plan to switch to the stock '67 bezels and a set of Autometer gauges.
After removing all the dash components, I decided it would be a waste to refinish the dash at this time. I need to replace the floorboards but I've been delaying the project as I don't have much welding experience yet. If I took on the project later, I'd no doubt just end up messing up the dash in the process. As a result, I decided to go ahead and replace the floor and then finish the dash afterwards.
The only portion of the floorboard without significant rust holes was the passenger rear floorboard. The previous owner broke the driver window regulator so it would not roll up. This did not bother him and he continued to park it outside. This caused all the rust but at least it is isolated to the floorboards.
Here are a few pictures of the rust damage when I started.
This is during the removal of the floors.
12-22-2011 #6 Registered User
- Join Date
- Apr 2011
- Location
- BC, Canada
- Posts
- 84

Im pulling my carpets off soon, and that exactly what Im hoping not to find lol, but Im prepared to cut if it is haha

12-22-2011 #7
Registered User
- Join Date
- Feb 2010
- Location
- Central Texas
- Posts
- 78
I finished replacing the floorboards using a Dynacorn full floor. The toe boards needed to be replaced on both sides. Additionally, I added Tinman subframe connectors while the floor was removed. I chose the Tinman subframe connectors as they have somewhat of a stock look versus those made from tube steel.
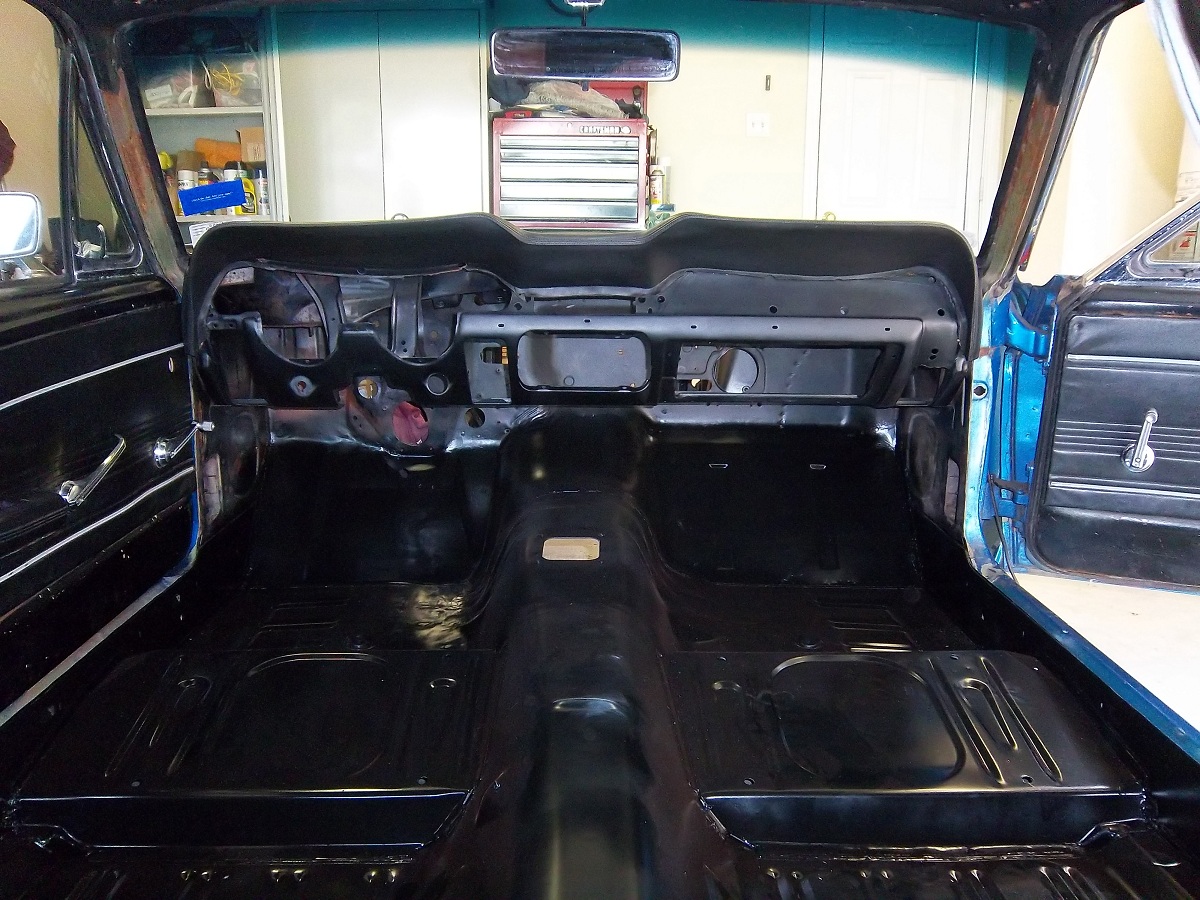
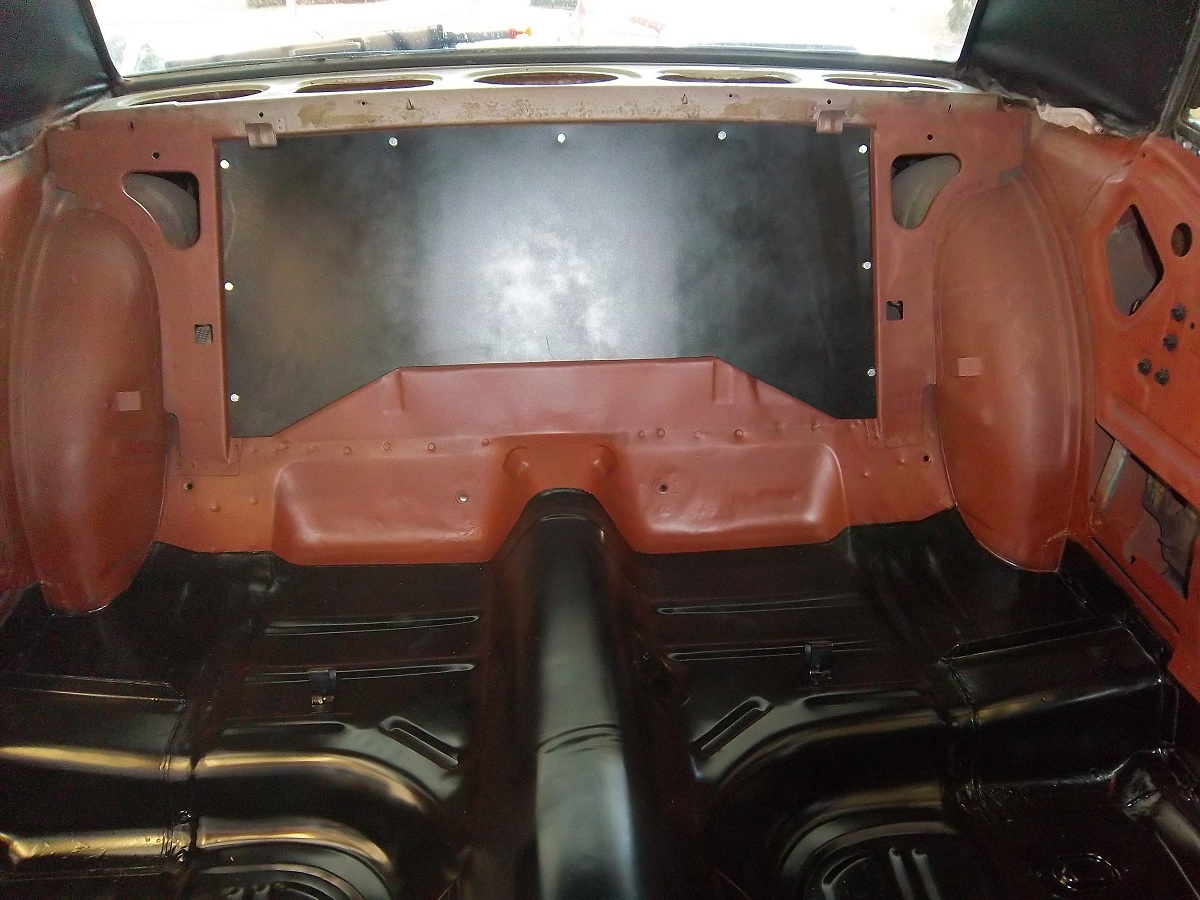
The interior floors are just painted with standard rattle can spray paint. The underside has all the seams covered with 3M seam sealer followed by a bedliner which does not have much texture. The appearance in the following picture looks splotchy but it is just because the picture was taken while it was still drying.
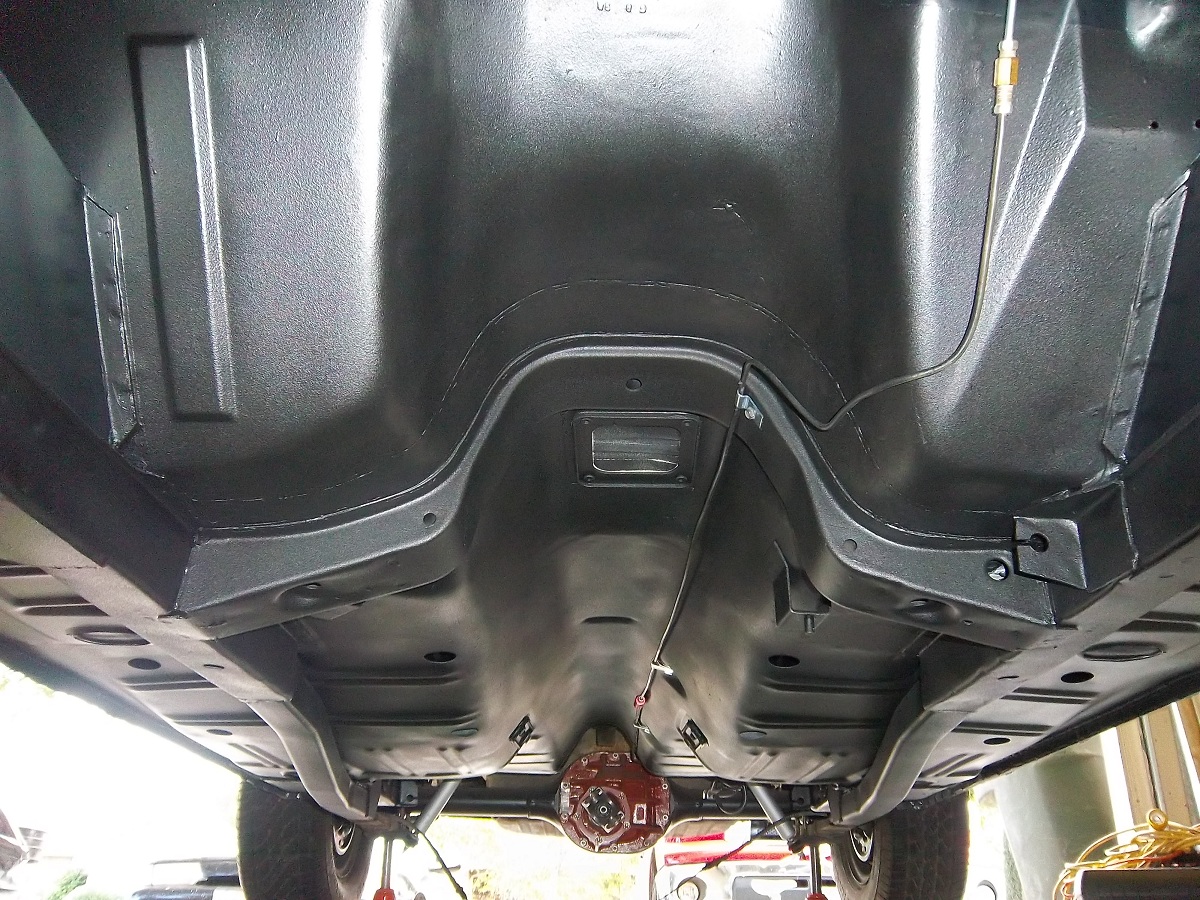
I'm feeling much better about my welding abilities after this project. As with everything, this took much longer than I expected.
12-22-2011 #8
Registered User
- Join Date
- Feb 2010
- Location
- Central Texas
- Posts
- 78
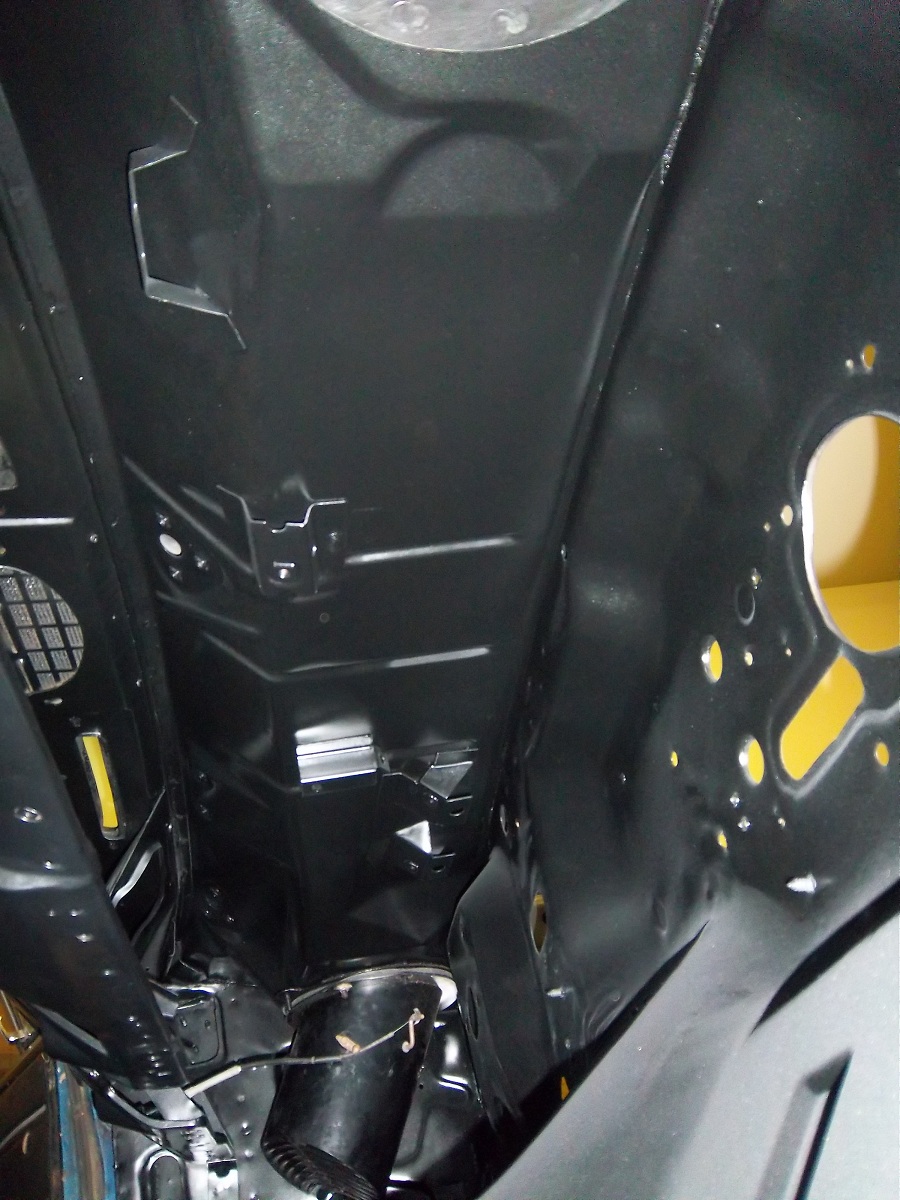
The final picture in my last post is of the undercarriage from the engine compartment. I ended up removing the engine in order to clean the underside of the toe board welds. Additionally, it gave me greater clearance to undercoat the floorboards. While the engine was out, I thought I'd replace the cam and then the project expanded beyond belief. I'll post a little more on this in the future.
After completing the floorboards, I stripped the area behind the dash. This was a big pain but turned out great. The dash is welded in place so you don't have much space to work in and much of the metal was lightly covered in surface rust. The end result...
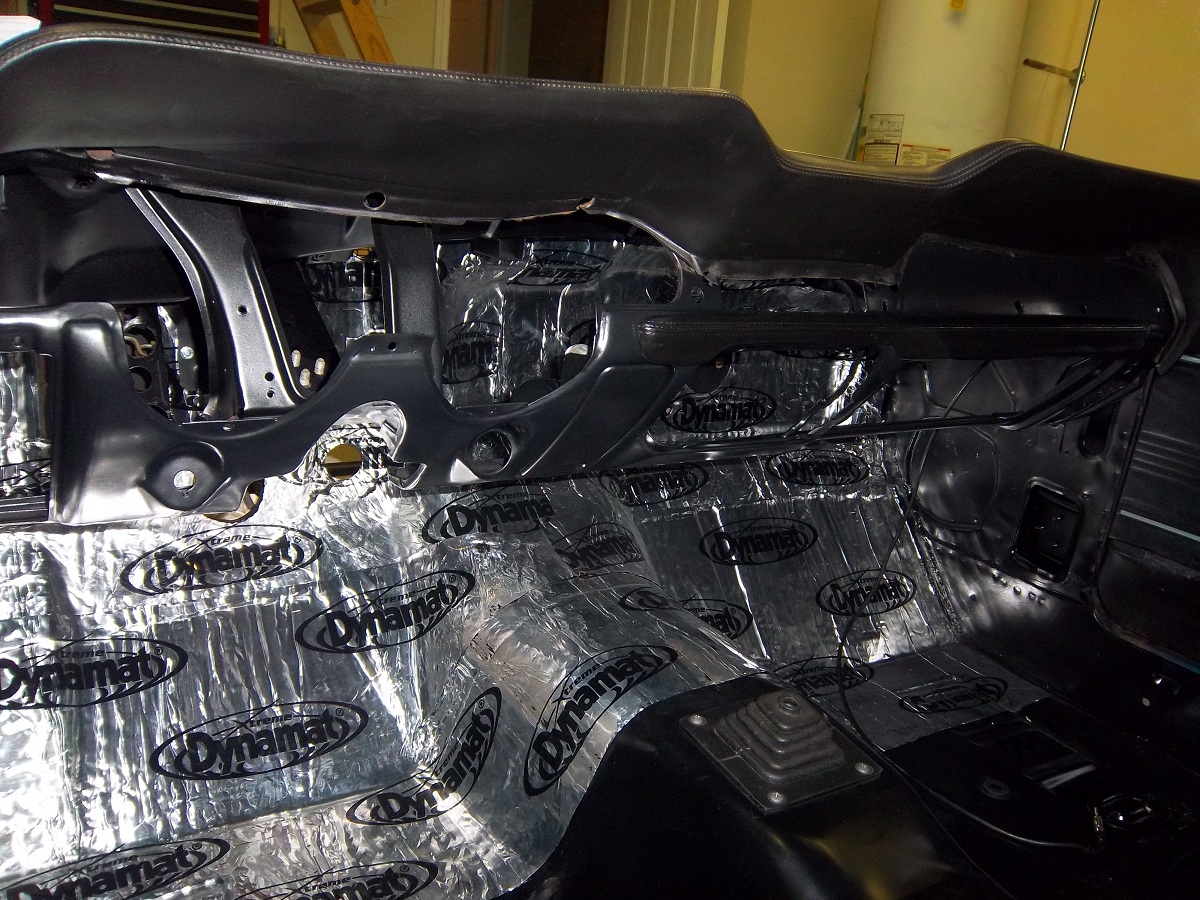
I decided to install some Dyamat and covered the firewall and front floorboards. Here is a picture of it during the installation process.
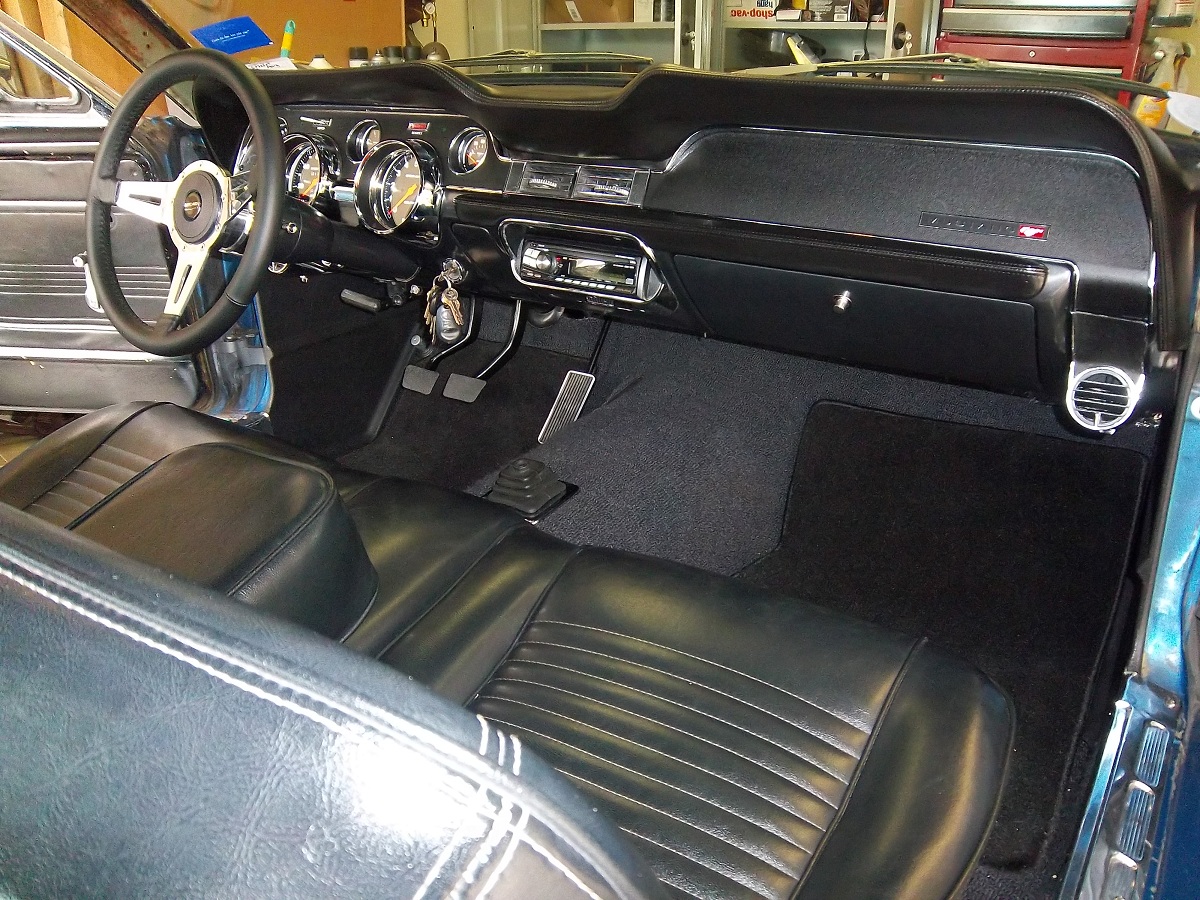
This is a picture after the interior has been installed. Unfortunately, I can't drive it yet as my engine is still at the machine shop.
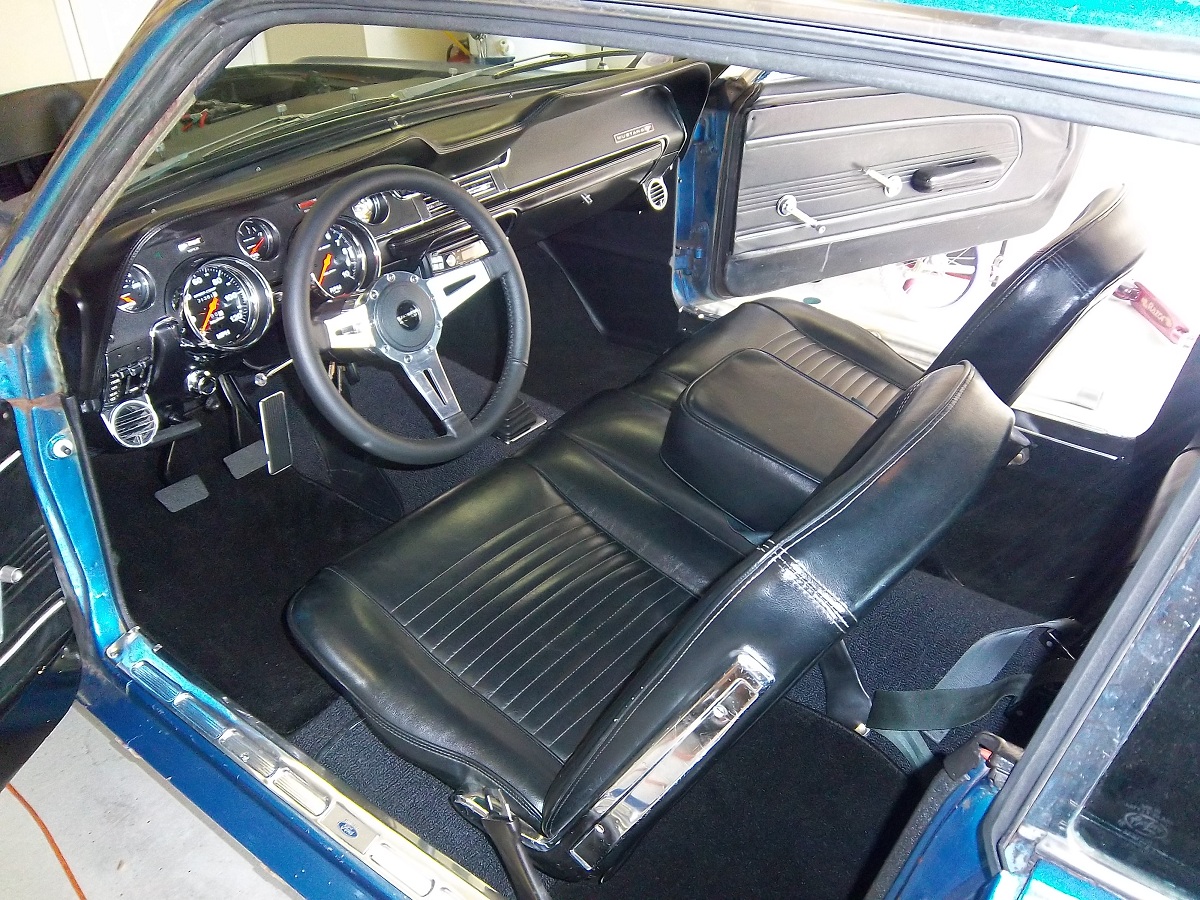
The instrument cluster is something I built using a stock bezel and a collection of Autometer gauges. It turned out really nice.
12-22-2011 #9
Registered User
- Join Date
- Feb 2010
- Location
- CO (orig. NY)
- Posts
- 140
Nice ride! Welcome. You may want to post the above writeup and pics in the projects section.
Awesome car though! What else is in store?

 Reply With Quote


