

Results 1 to 5 of 5
-
06-17-2011 #1
 Registered User
- Join Date
- Nov 2006
- Posts
- 867

2nd Gen Camaro Autometer Gauge Bezel Build - Part 2
I started by hacking a mint instrument panel to get a perfect template, it paid it's dues!!
After tracing the template out onto the ABS panel, I cut out the new bezel. I marked the two bends. I just used a regular mailing tube, 2" I'm guessing, and marked a straight line on it and taped it to the work table.
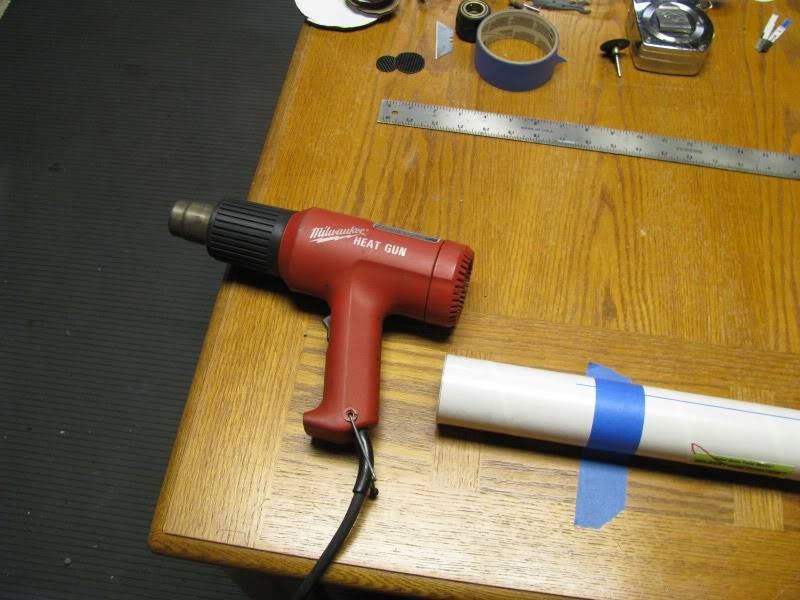
I held the heat gun about 2" above the ABS, moving it back and forth across it's width, being sure to not leave it in one place to avoid melting. The heat will eventually be enough that the ABS will fall over the tube!
Check your bends against the original......
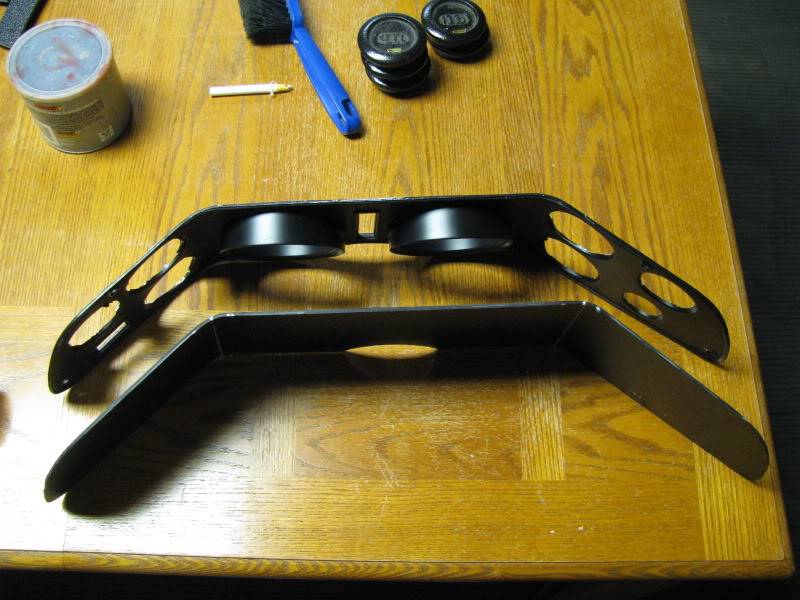
Then I marked the holes per the layout that I wanted and cut the holes with a holesaw. For 2 1/16" gauges use a 2" saw, and the 5" Speedo/Tach use a 4 1/2" saw.
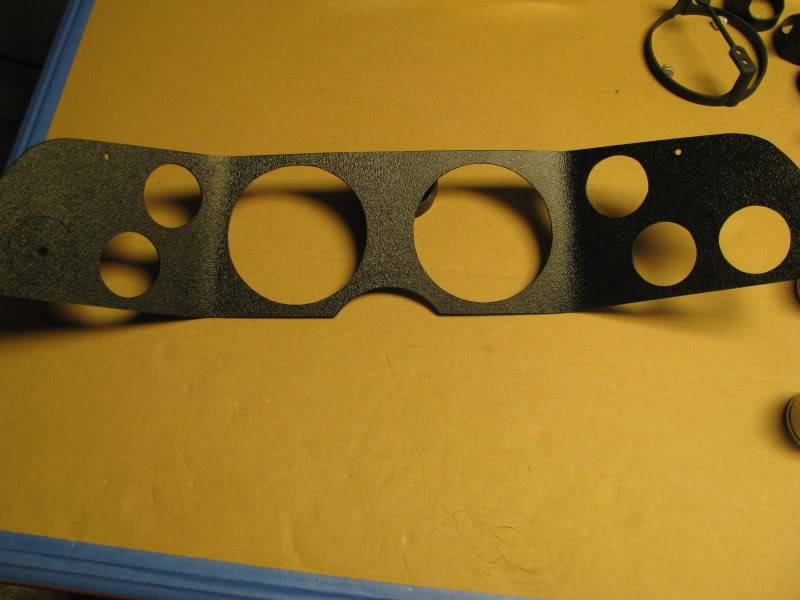
You will have to open up all of the holes to fit the gauges. The body of the gauge is tapered, the back is smaller than the front of the gauge. Be careful not to open them up too far!
Here is a test fit........
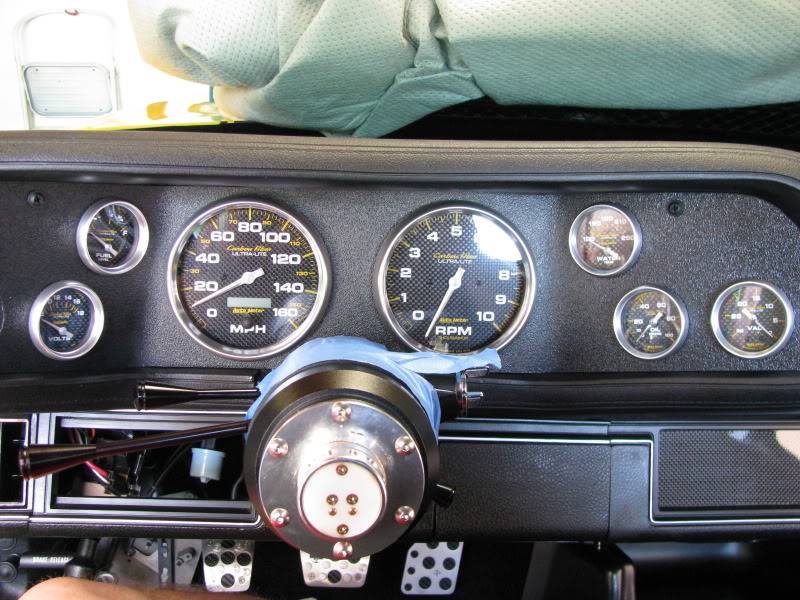
I used a premade gauge harness by Painless, it's a very good piece, it's well made, and saved a ton of time. http://www.summitracing.com/parts/PRF-30302/
I marked all of the wires on the stock instrument harness (see http://www.nastyz28.com/forum/showthread.php?t=148920 ) and about 3" back cut all of the wires. Then I crimped on all of the pins that make up the Painless main connector. The other 2 pin connector is from the sender on my Tremec TKO600 trans.

Marked all of the wires on the harness, laid them out according to where each gauge was, and connected them all up
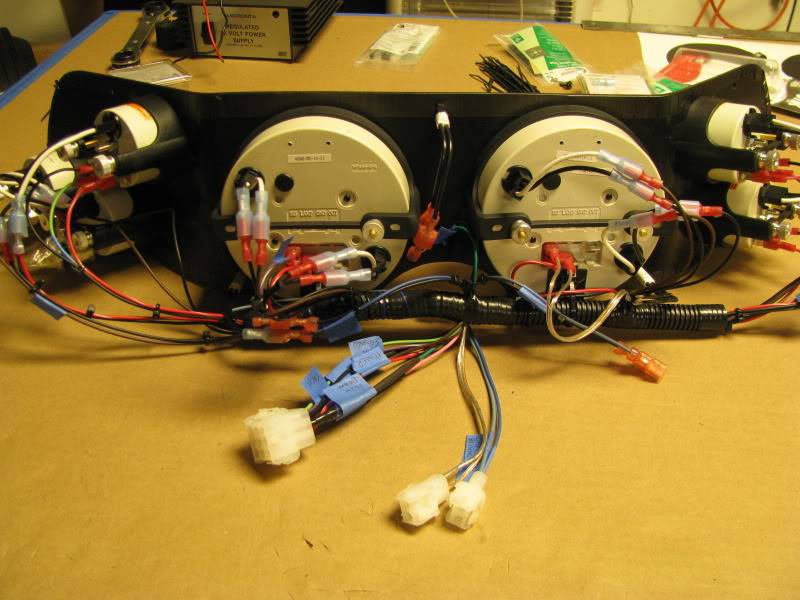

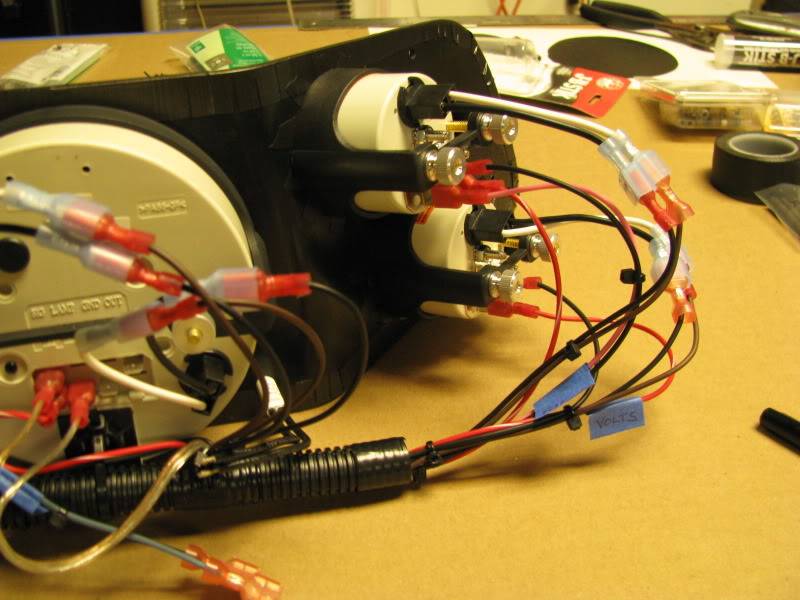
I also added my DSE Selecta-Speed wiper motor switch ( that's the big harness on the right). I have to tell you that the customer service at Autometer is second to NONE. I called them and told them about the gauge package I was putting together and asked if I could buy a bezel for a 2 1/16" gauge. The guy said we don't sell them, but I'll send you one.....FREE. The box came a couple days later, with TWO bezels in it!!! If you look on the left side of the bezel you'll see the switch, with the bezel surrounding it (looks like one of the gauges), it really blends in with the real carbon fiber background that I made up. The turn signal indicators, and high beam indicator are Painless LED's http://www.summitracing.com/parts/PRF-80205/
-
06-20-2011 #2 Registered User
- Join Date
- Dec 2009
- Location
- St. Louis, MO
- Posts
- 193
Looks good...I might have to "borrow" your idea as I have too have been looking to update the look of my cluster.
Thanks.Tim
1972 Camaro
06-20-2011 #3 Registered User
- Join Date
- Aug 2004
- Location
- Rustburg, Virginia
- Posts
- 3,436
Scott,
Are you a CB or HAM talker?....in the last pic, I spy a 12v power supply like I used to power my mobile units with for indoor use.
Back on topic, gauge cluster looks great. What did you cover the face with? At first glance I thought you used a wrinkle paint, but in the pics from the backside, it appears you covered it with a thin material of some sort.1970 RS/SS350 139K on the clock:
89 TPI motor w/ 1pc rear seal coupled to a Viper T56 via Mcleod's modular bellhousing w/ hydraulic T/O bearing from the Viper, 12 bolt rear w/ 3.73 gearing, SC&C upper control arms, factory lowers with Delalums, C5 brakes at all four corners, Front Wheels 17x8's with Sumi 255/40/17 and Rear Wheels 17x9's with Sumi 275/40/17.
Brief description of the work done so far can be found here: http://www.nastyz28.com/forum/showthread.php?t=112454
07-02-2011 #4
Registered User
- Join Date
- Nov 2006
- Posts
- 867
Sorry it took so long to answer John!! Originally Posted by John Wright

CB? are you stuck in the 70's? LOL ...... no the power supply was used to test the LED bulbs and make sure of the proper polarity for the bulbs in the gauges.
What you thought was wrinkle paint is the raw haircell side of the ABS base material. You are correct, I did cover it with 3M Di-NOC in a black brushed aluminum.
07-03-2011 #5
Registered User
- Join Date
- Jan 2010
- Location
- Somewhere out there
- Posts
- 283
Ahhh.....nice. I didn't know you made it out of ABS yourself.
I'm just curious how you got the bends to be just right with the heat gun over the 2" roll on the table.
Did you line it up so that you'd get it perfectly on the first failing or did you have to do it a few times??
The angle of the bend is what I'm asking about......
Where'd you get the ABS from ?? I need to make one for my 442 actually.
What paint did you use on it too ?? Looks cool.

 Reply With Quote


