Results 61 to 80 of 172
Hybrid View


-
06-25-2011 #1

 Registered User
- Join Date
- Jul 2010
- Location
- OREGON
- Posts
- 364

You guys have some serious skills keep up the good work..
-
06-25-2011 #2
 Registered User
- Join Date
- Feb 2005
- Location
- Sydney, Australia
- Posts
- 1,797

I agree...some serious skills on show there....love the redesign on the car.
Regards,
Leigh
Sydney, Australia
1971 Firebird 455
https://www.pro-touring.com/showthre...Project/page27
-
06-25-2011 #3
 Registered User
- Join Date
- Feb 2011
- Location
- CA
- Posts
- 255
I suspect MAGIC! Super nice work guys.
On another note..........is that AC bracket yours or? I am looking for lower passenger tight hugging one like you have pictured?
-
06-25-2011 #4
 Registered User
- Join Date
- Mar 2010
- Location
- Rochester NY
- Posts
- 403
Wow - I hope I get to see this in person some day!
Don
Grace - 67 Camaro daily driver with upgrades along the way.
https://www.pro-touring.com/showthre...-Camaro-Driver
-
06-26-2011 #5
Registered User
- Join Date
- Dec 2007
- Location
- Mundelein, IL
- Posts
- 148
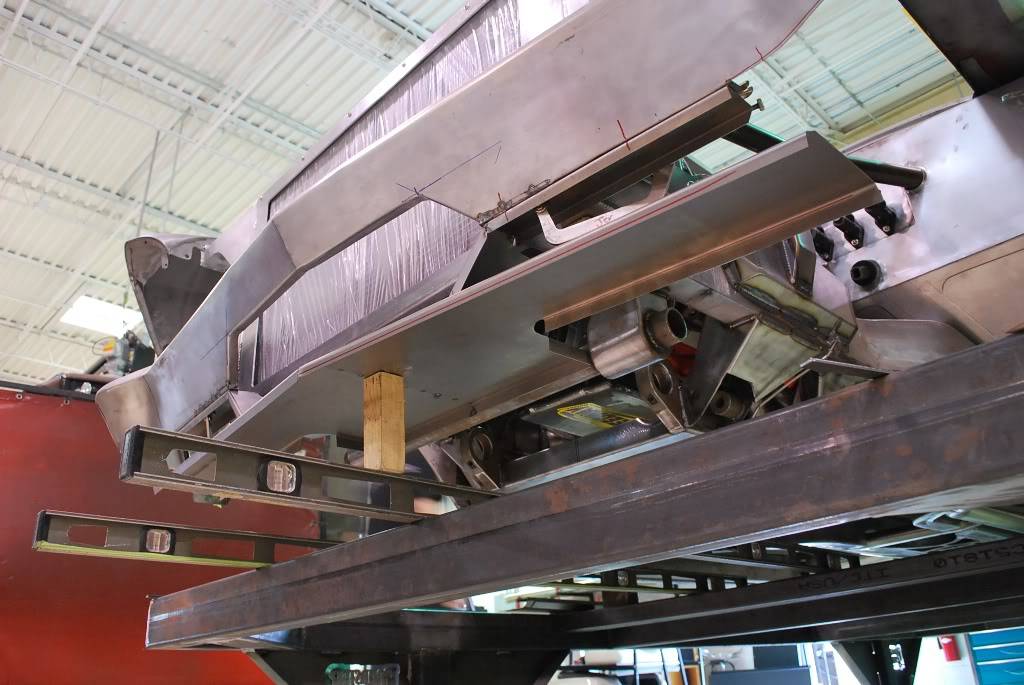
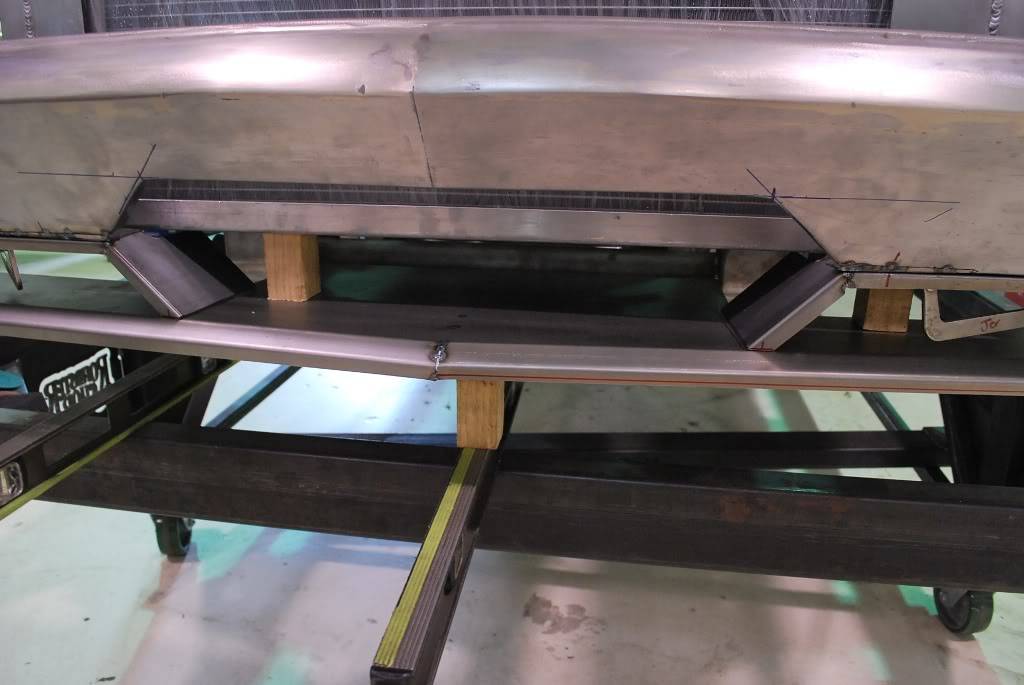
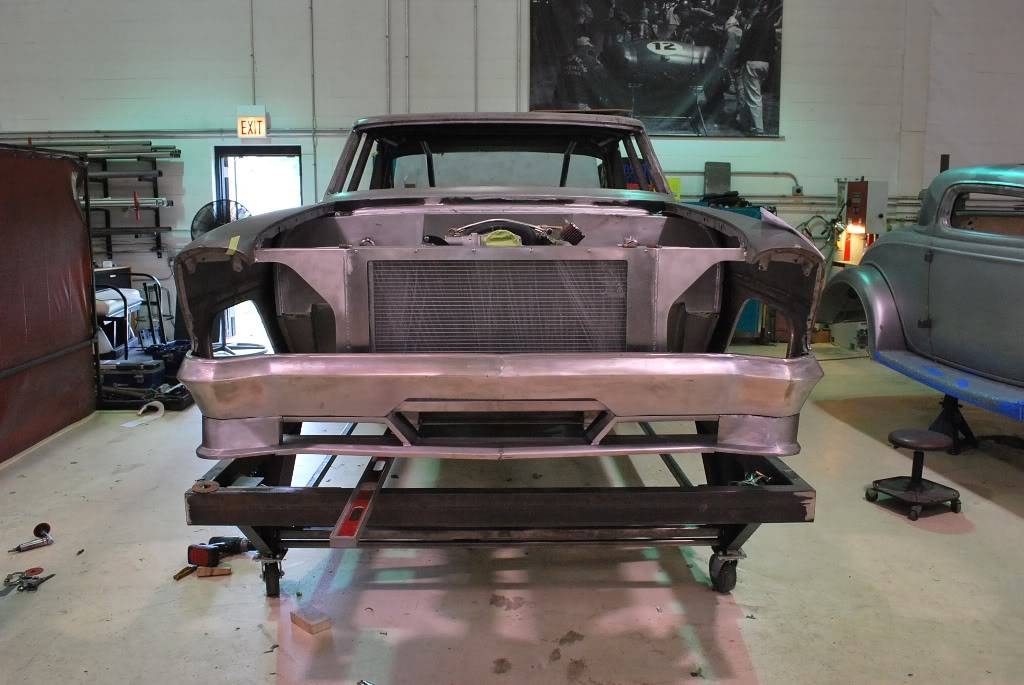
Fab work on the front bumper and lower splitter.
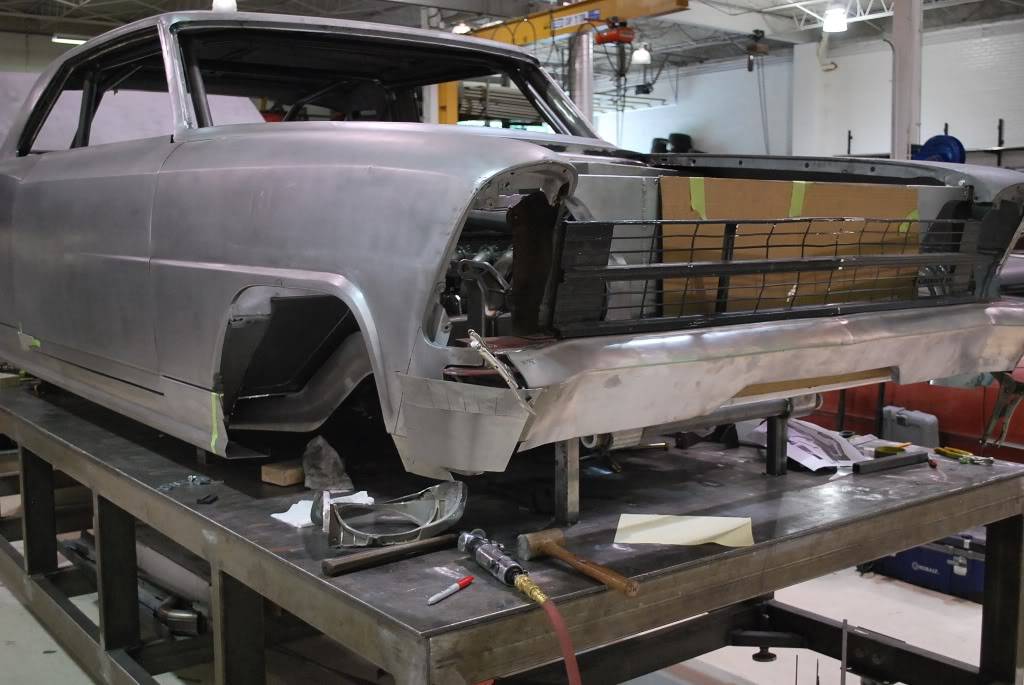
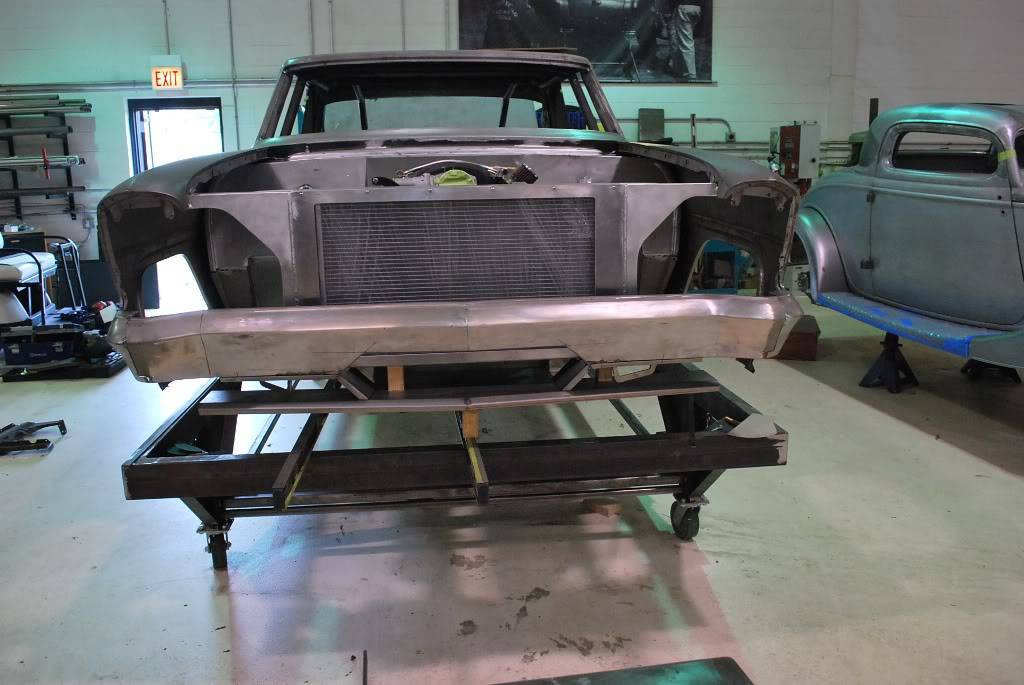
Fabbed new bumper ends to follow the shape of the headlights, and tuck tight to the fenders.
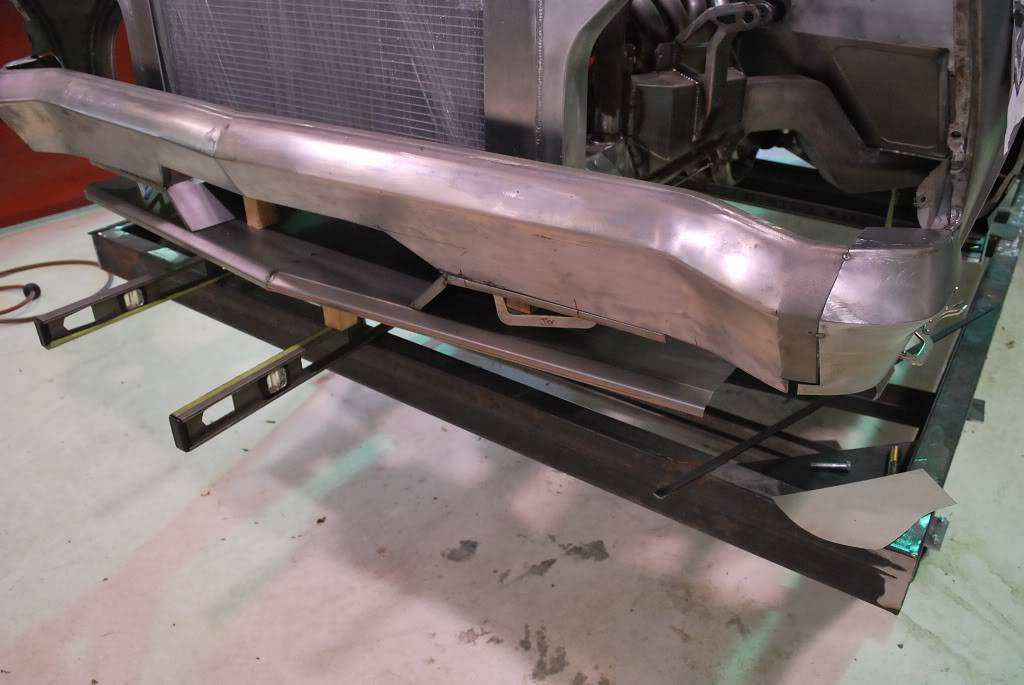
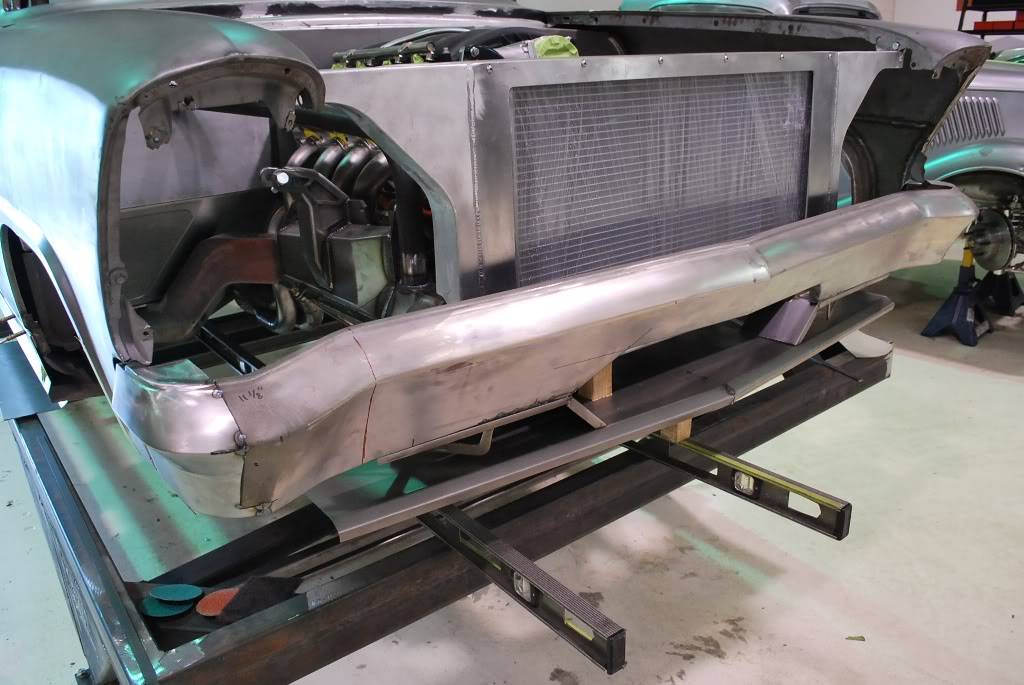
Underside of the front splitter
-
06-26-2011 #6
Registered User
- Join Date
- Dec 2007
- Location
- Mundelein, IL
- Posts
- 148
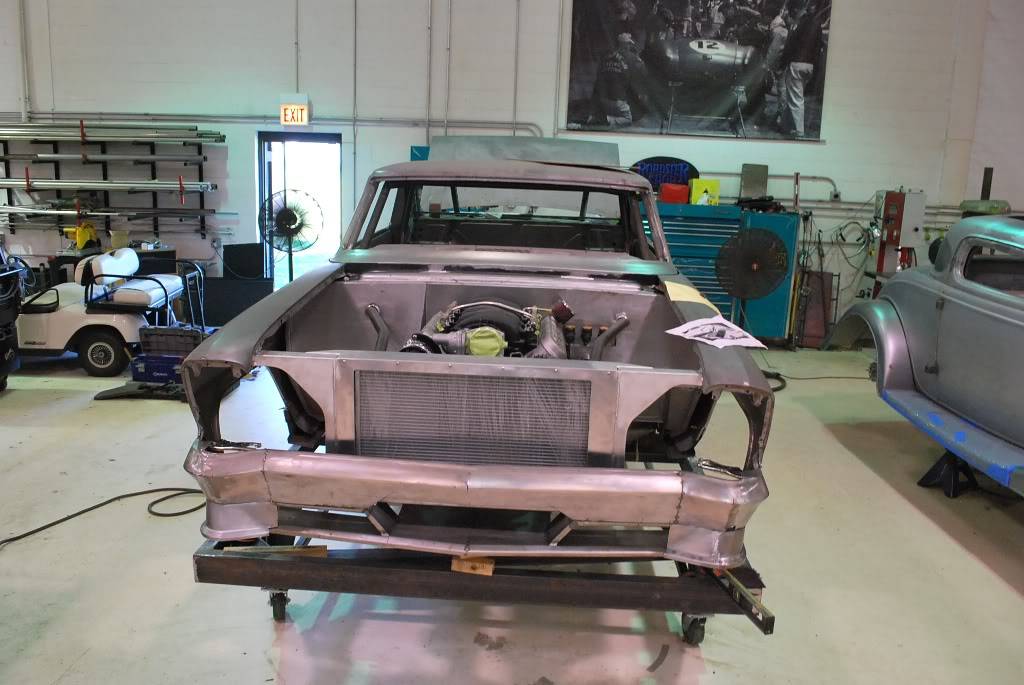
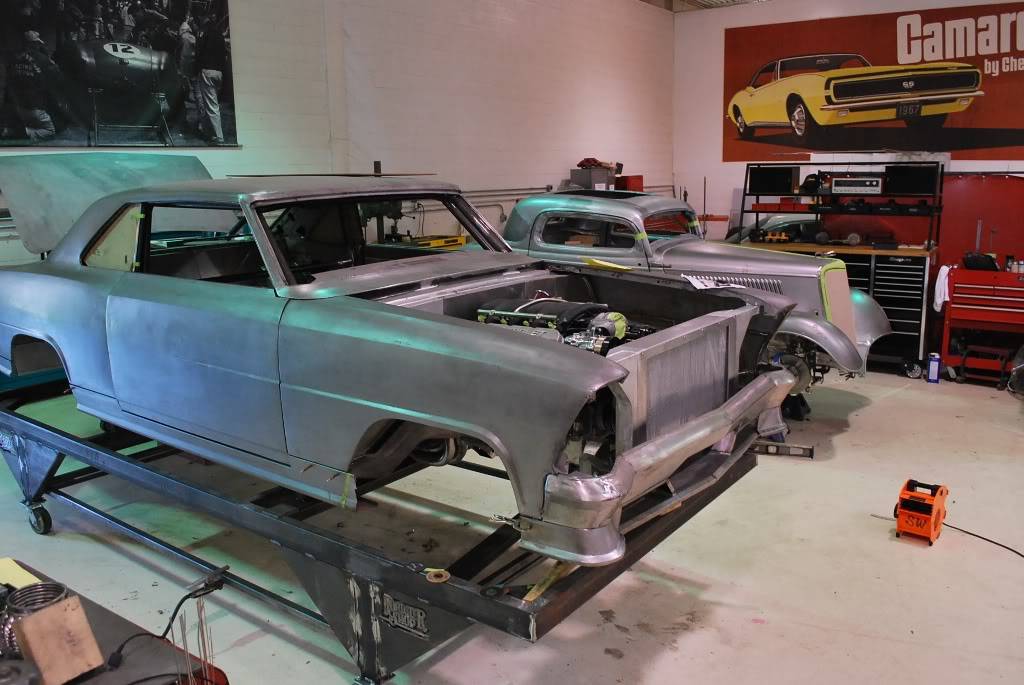
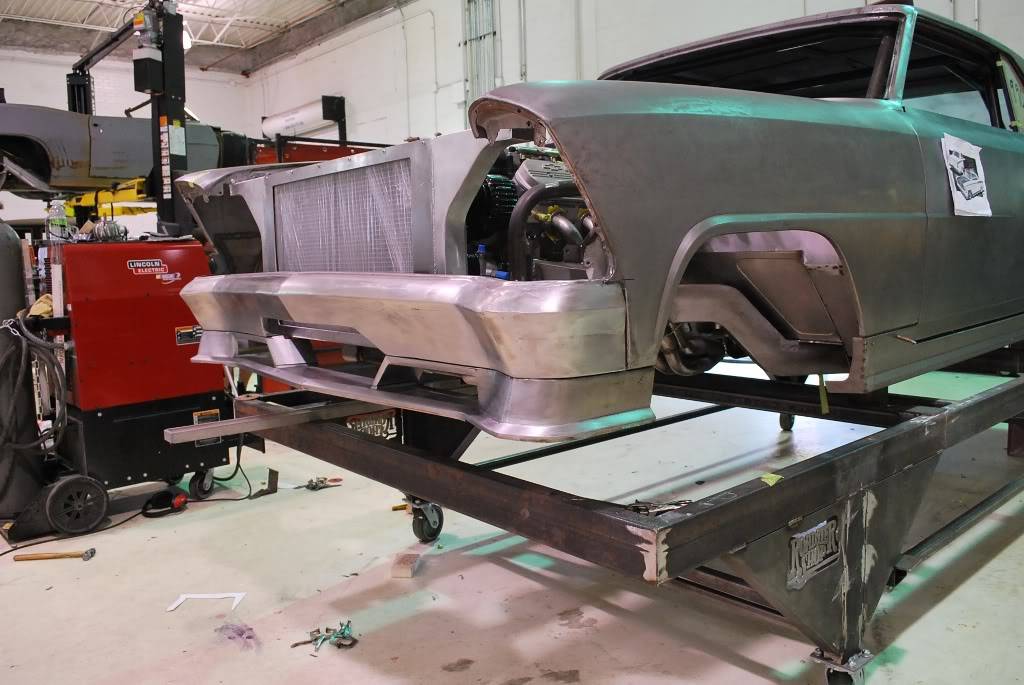
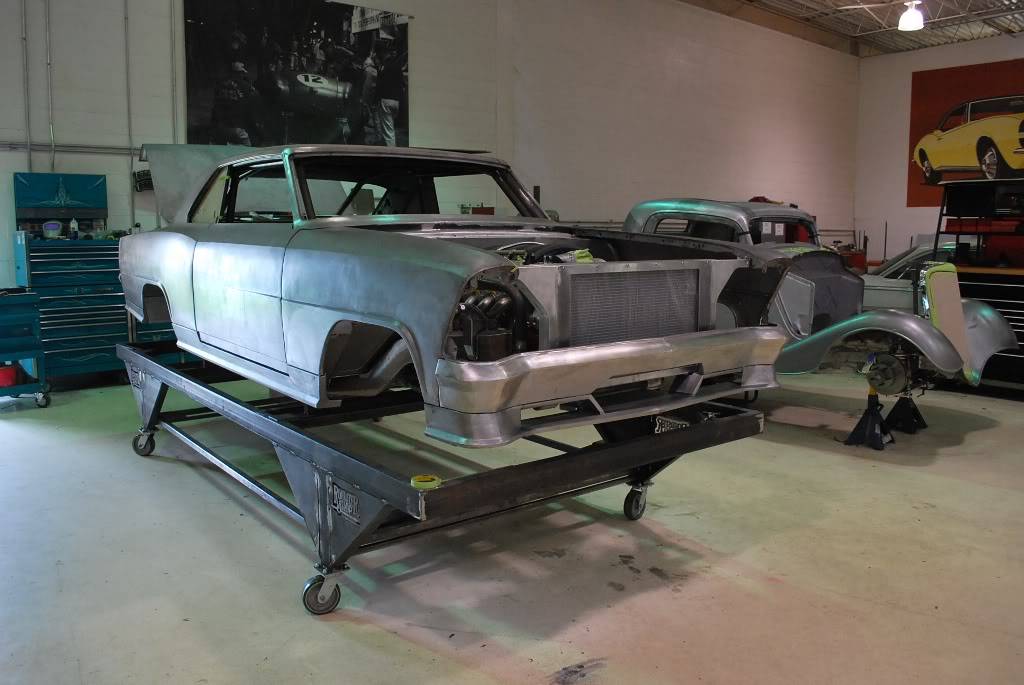
Further progress on the lower splitter.
Fabbed the corner pieces to match the shape of the bumper.
-
06-26-2011 #7
Registered User
- Join Date
- Dec 2007
- Location
- Mundelein, IL
- Posts
- 148
Thanks all!
Baddride - it is a Billet Specialties Tru-Trac serpentine system.
Mr. Quick - Sorry i missed your first question. Going to the narrower track width does not change much. We use a different rack with a different mount positioning. The roll center slightly changes, but everything else stays constant.
-
06-26-2011 #8
 Registered User
- Join Date
- Nov 2006
- Location
- Ma.
- Posts
- 5,560
It looks great, I can't wait to see more.
Wayne
Car FINALLY home !!!!!! lol
Project FNQUIK https://www.pro-touring.com/showthre...ghlight=FNQUIK
-
06-28-2011 #9
Registered User
- Join Date
- Dec 2007
- Location
- Mundelein, IL
- Posts
- 148
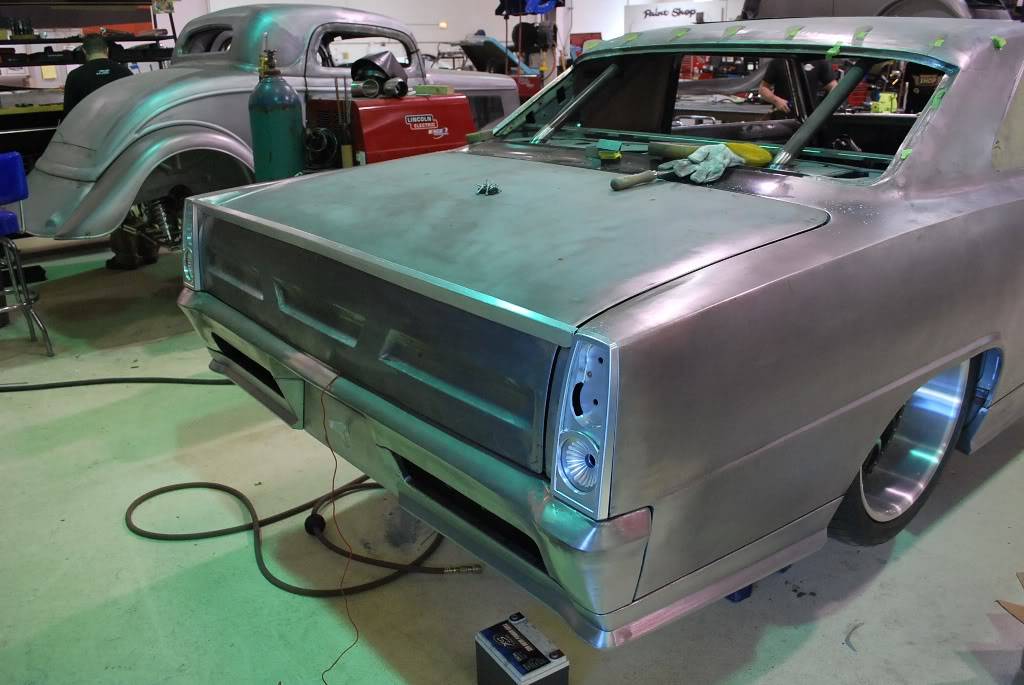
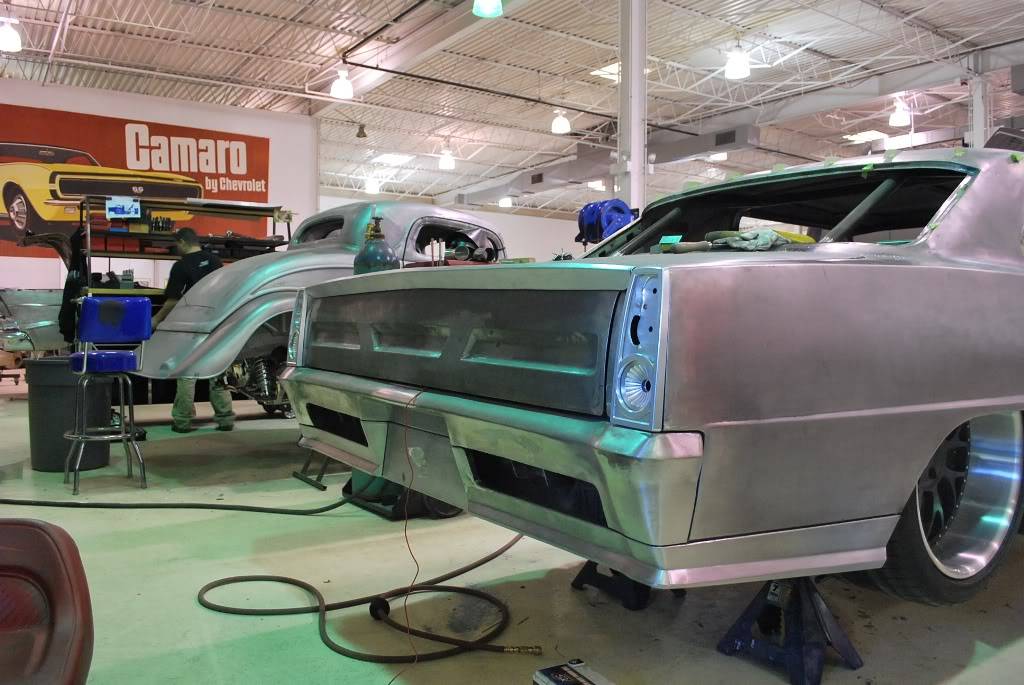
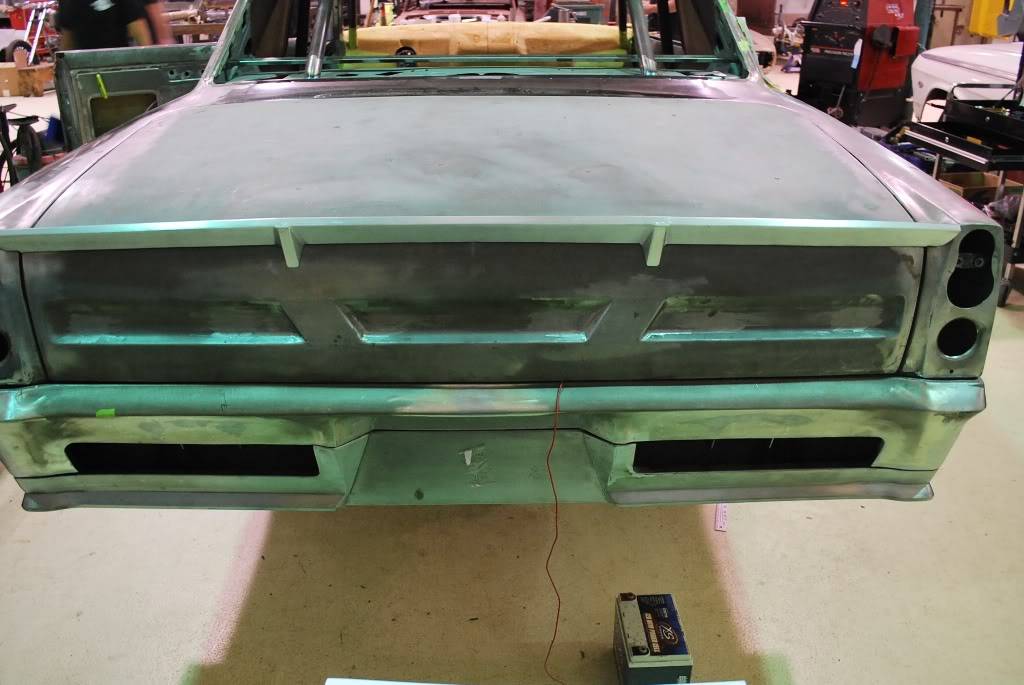
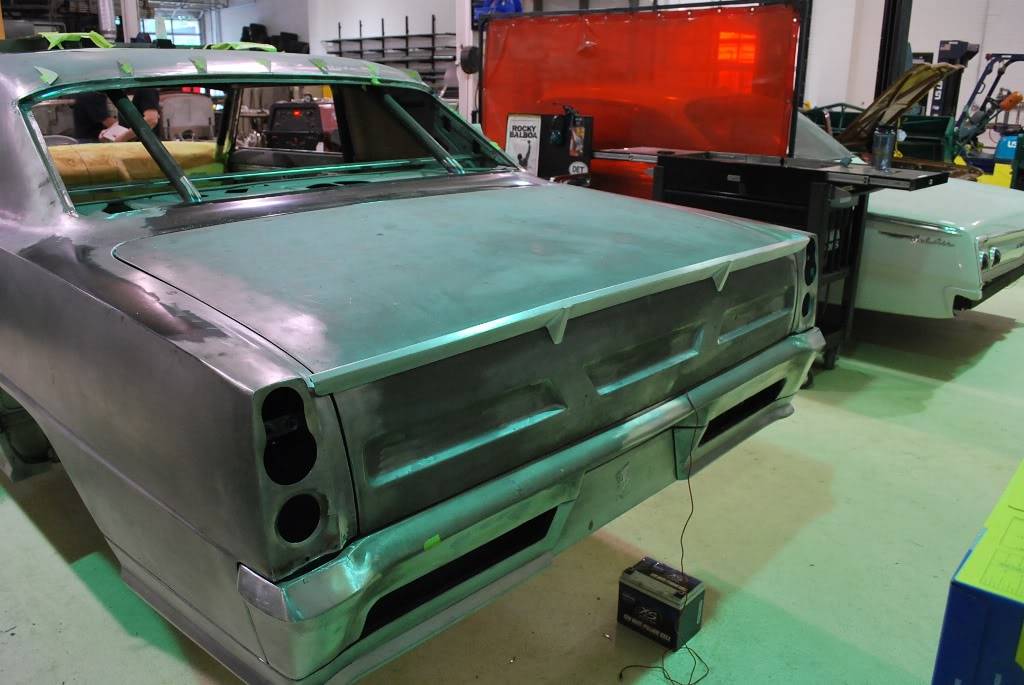
Here is a little more work on the rear of the car. Fabbed a rear lip spoiler and wrapped the lower quarter extensions into the bottom of the bumper. Also a preview of the custom billet tail lights.
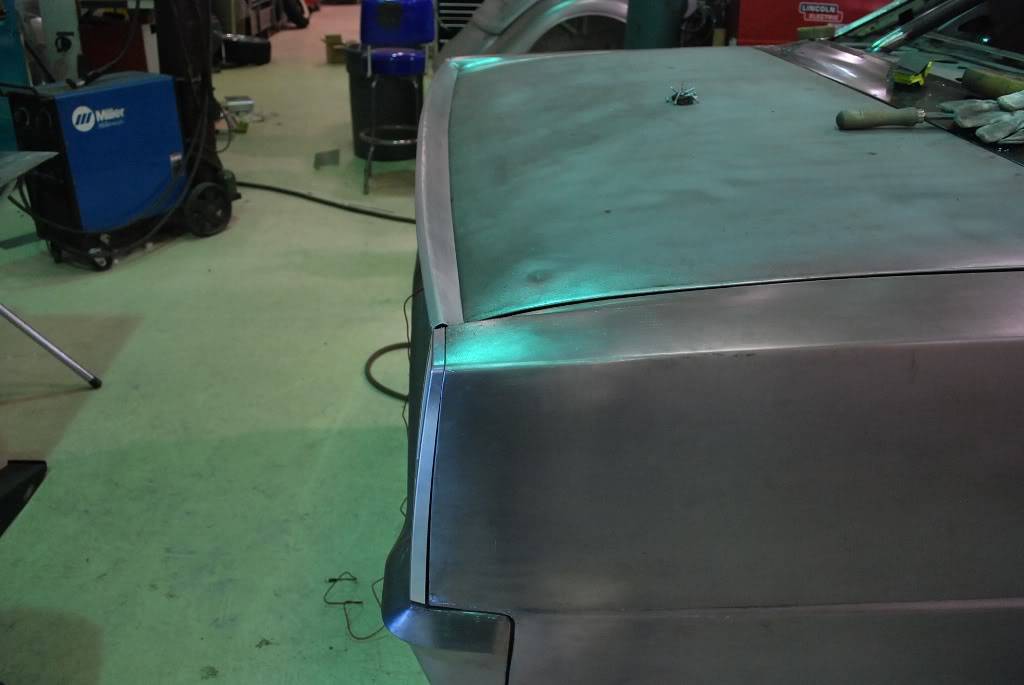
Added small accent mounts to the back side of the rear spoiler
-
06-28-2011 #10
 Registered User
- Join Date
- Sep 2007
- Location
- Buford, GA
- Posts
- 923
You guys are masters of metalwork. I'm SO jealous. My dream Nova looks very similar to this project.
However, I've got a couple of opinions...and please don't take these the wrong way. Just wanting to help while I sit here in the peanut gallery.
Something about the front spoiler inlets isn't right. I believe it's the vertical / square "outside" edges of the openings. I think I can see that you guys were trying to "follow" the sides of the spoiler in that it is straight up and down...but it just doesn't look right. It needs some sort of angle - not sure which way I would lean it, but it needs something. It's this picture below where I really see it.
Next on my list is the insets on the deck lid. Clearly there's a theme with all these vents and inlets...and obviously they're carrying over here. But they almost look like the "shinoda" body kits that guys put on their Civics. I can't explain it. Just with all that SWEET custom fab work back there, those little insets just don't do it for me.
Lastly, those are some freakin sweet billet tail lights. But they're too square on the bottom. Damn, I'm a picky S.O.B.
Okay, so I just slipped on my flame suit. Hate that I have to put this disclaimer, but, again, I'm not here to criticize or poke - just wanting to give some [hopefully] constructive criticism and maybe something to think about. Hell, a fresh set of eyes looking at the same thing we look at day-in and day-out sometimes brings out those things that we overlook just due to seeing it on a daily basis.
Again, this car is sweet as hell and truly is a work of art. I hope my future Nova project is one tenth as bada$$ as this one. Keep up the updates, I'm loving them.Adam
1985 S10 - LT1 + T56
1964 Chevy II 4-Door - LS1 + T56
-
06-28-2011 #11
 Registered User
- Join Date
- Apr 2007
- Location
- Utah
- Posts
- 533
Amazing body work. Great job.
Sam
Northern UT.
'68 Camaro "Bodacious"
'56 210 2dr "Buckshot"
-
06-29-2011 #12
Registered User
- Join Date
- Dec 2007
- Location
- Mundelein, IL
- Posts
- 148
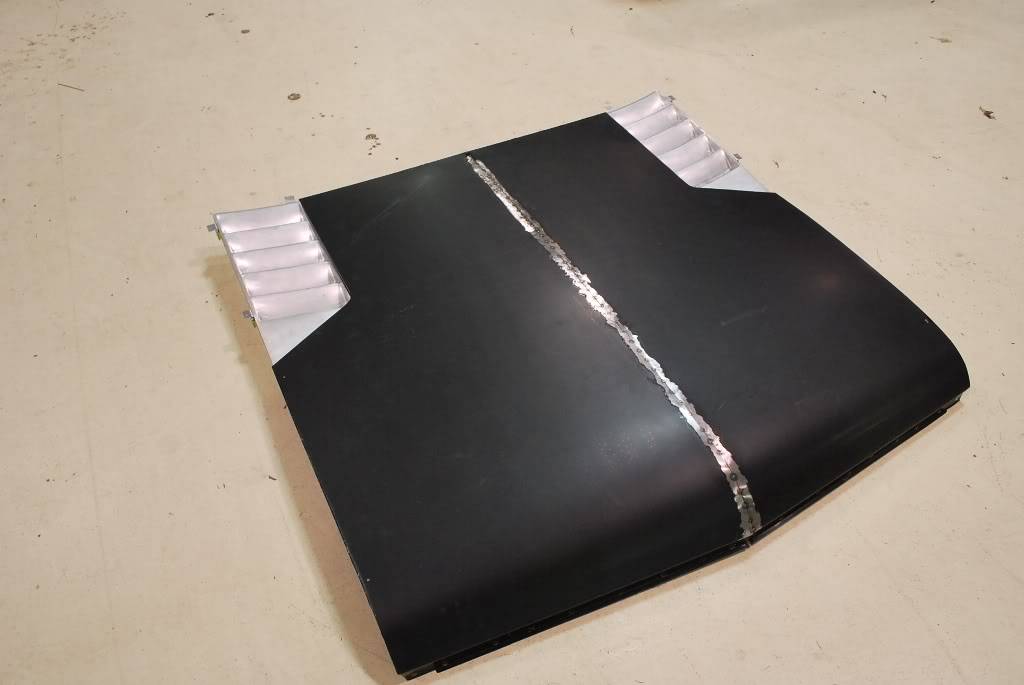
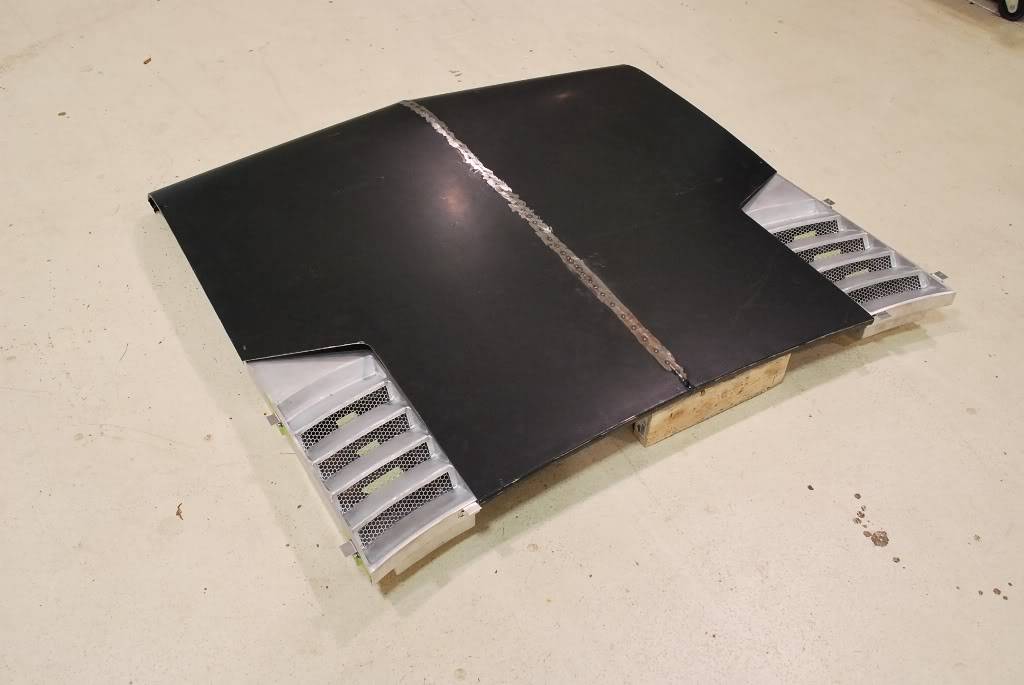
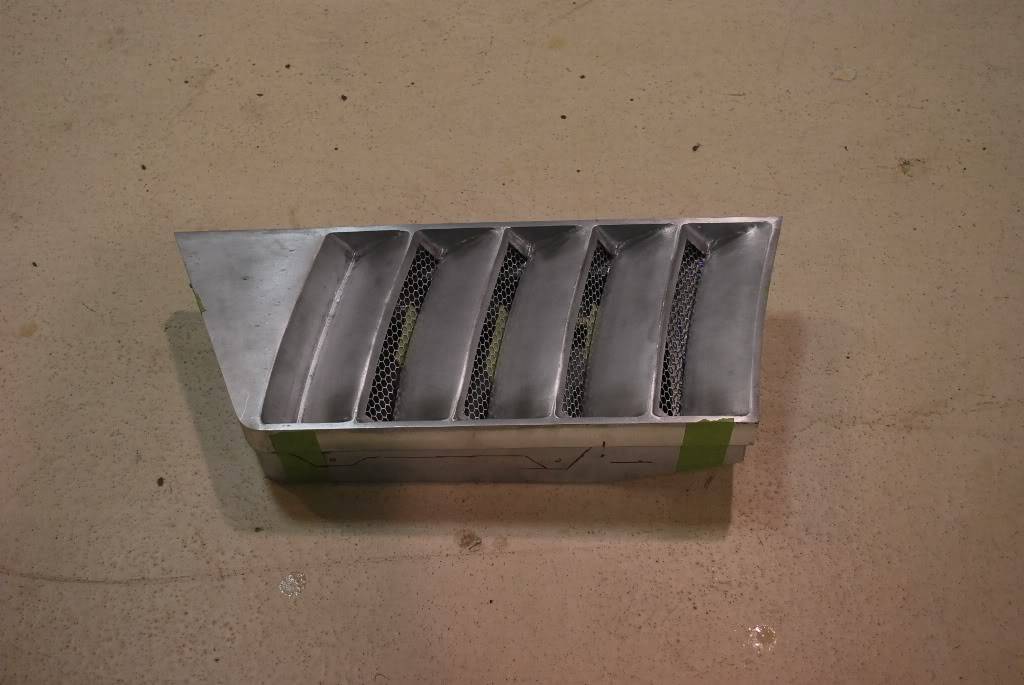
Fab work on the hood:
We really liked the way the flat hood looks on these cars and wanted to keep that feel, but add some detail to it.
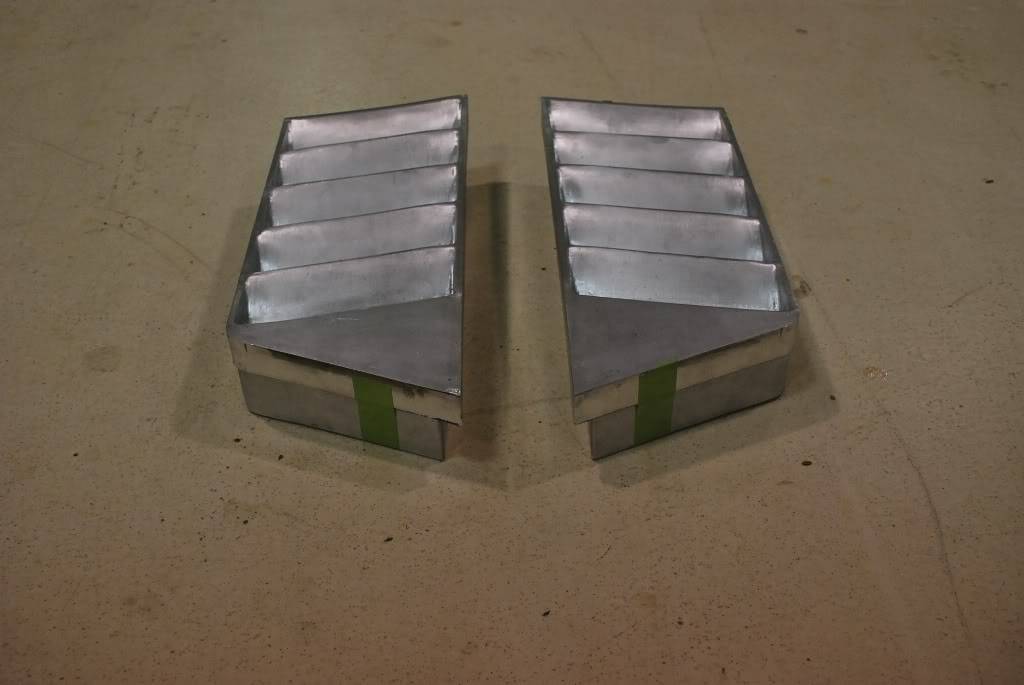
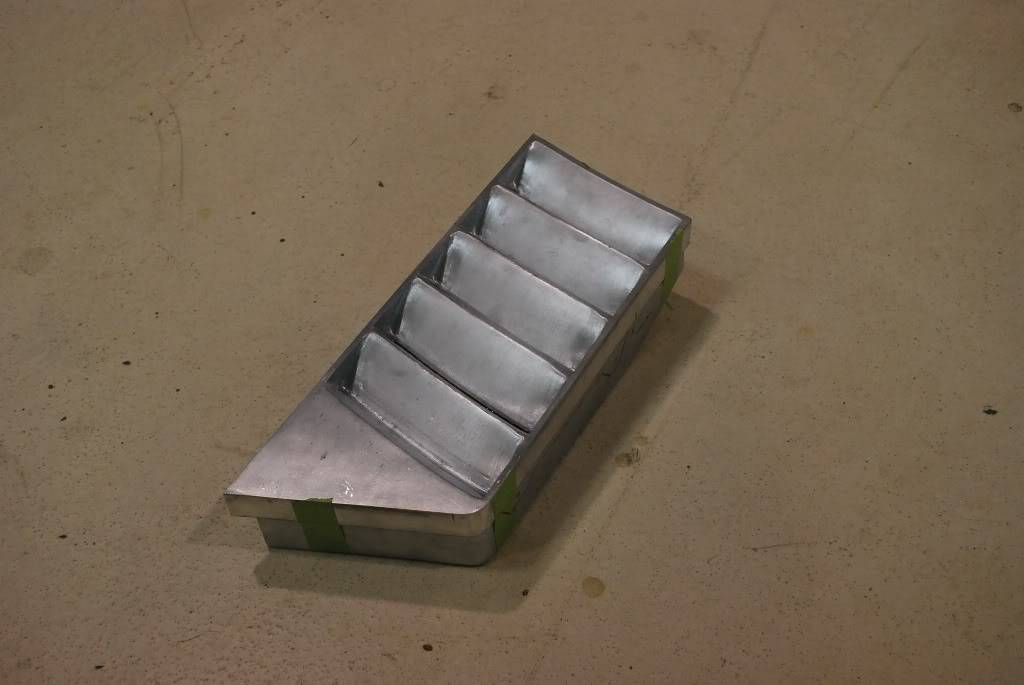
We again removed the body line from the center of the hood to give it a cleaner look than stock. We fabbed 2 air boxes that fit in the corner of the hood and remain flat when the hood is opened.
-
06-29-2011 #13
Registered User
- Join Date
- Dec 2007
- Location
- Mundelein, IL
- Posts
- 148
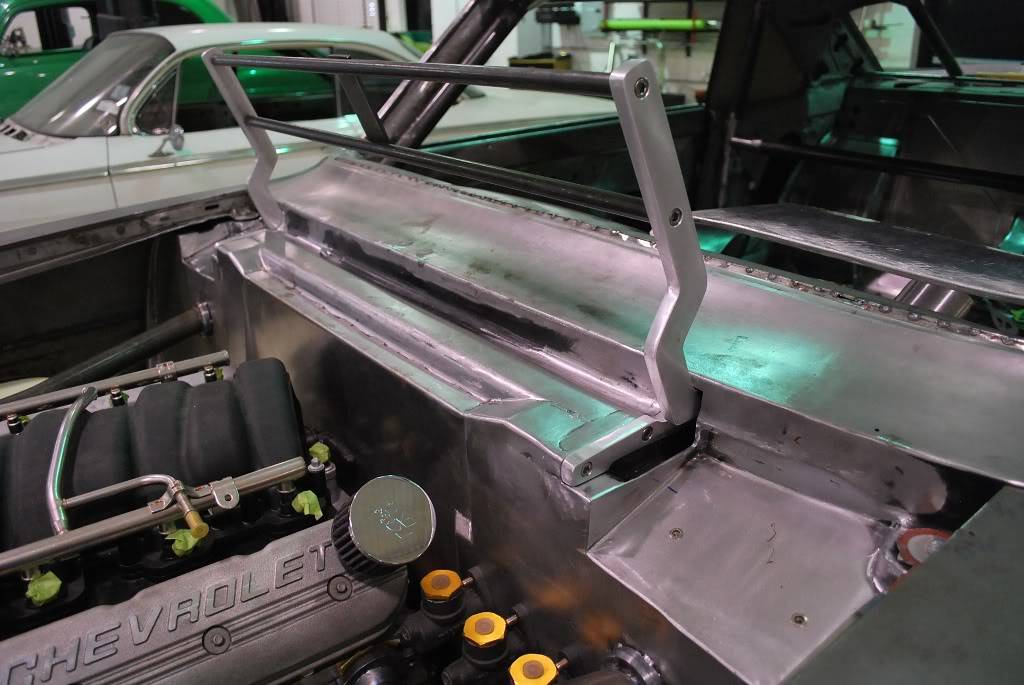
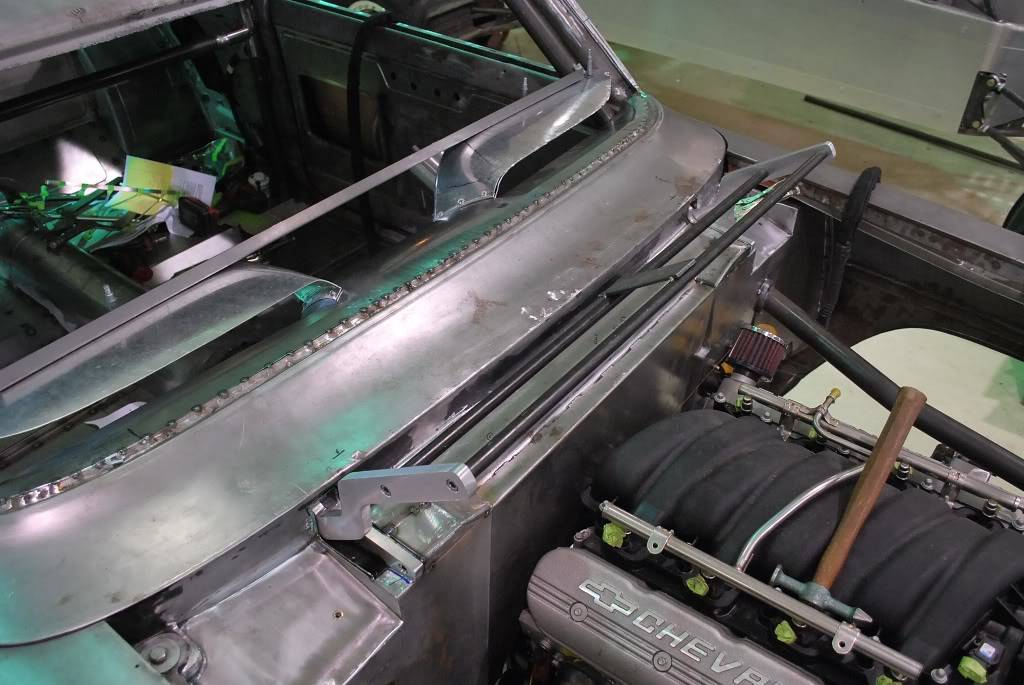
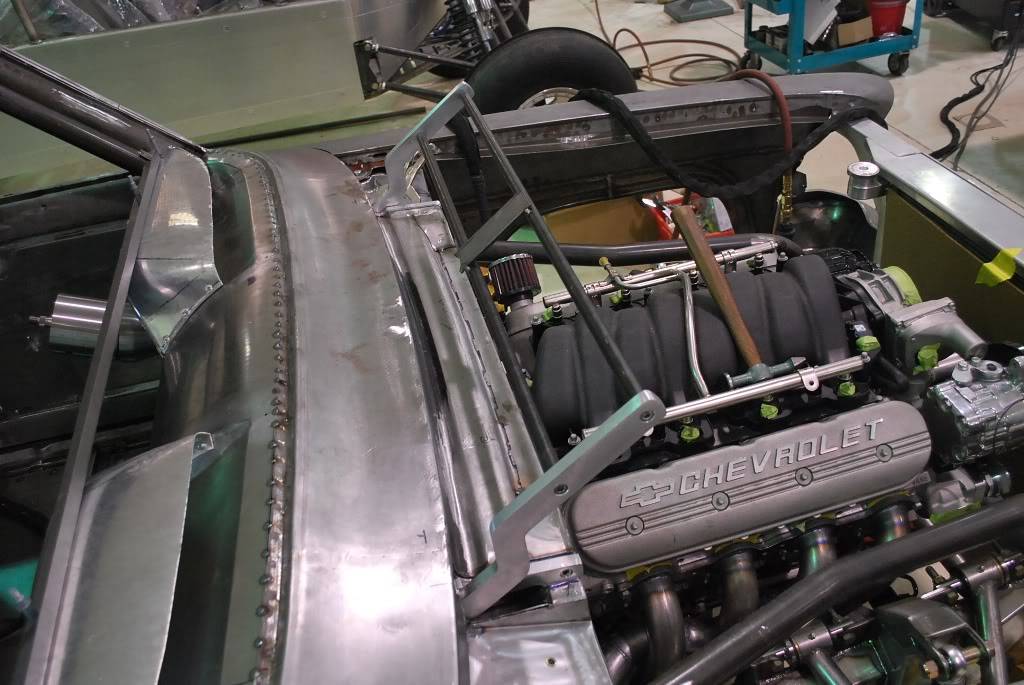
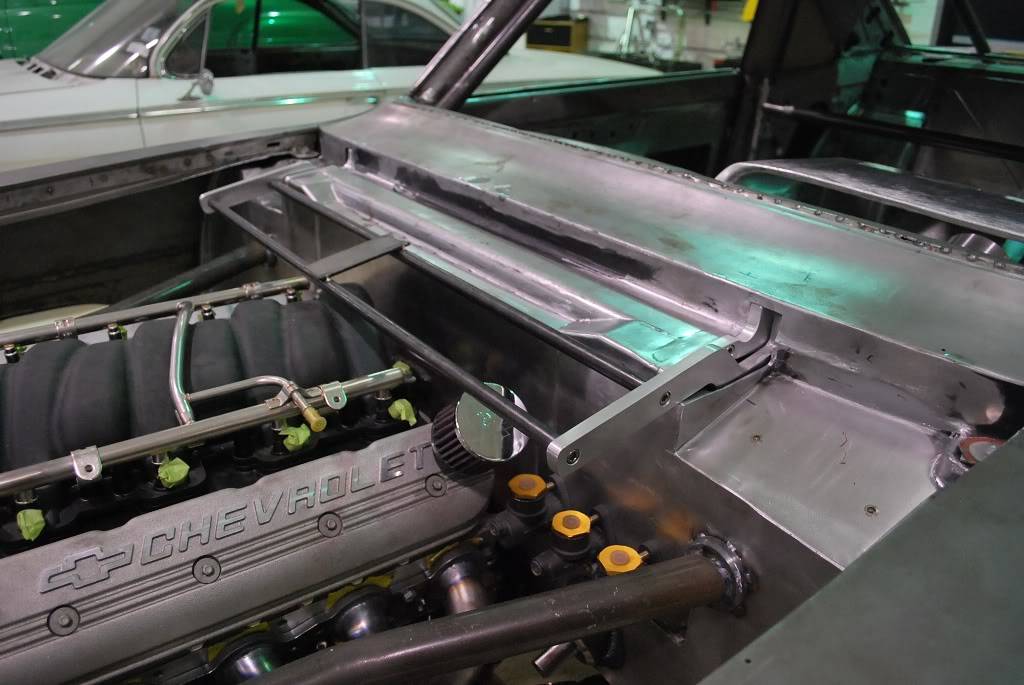
Since the air boxes are staying stationary, we needed to then fab new hood hinges since the air boxes were int he stock hood hinge location.
-
06-29-2011 #14
Registered User
- Join Date
- Dec 2007
- Location
- Mundelein, IL
- Posts
- 148
A few shots of the air boxes in place
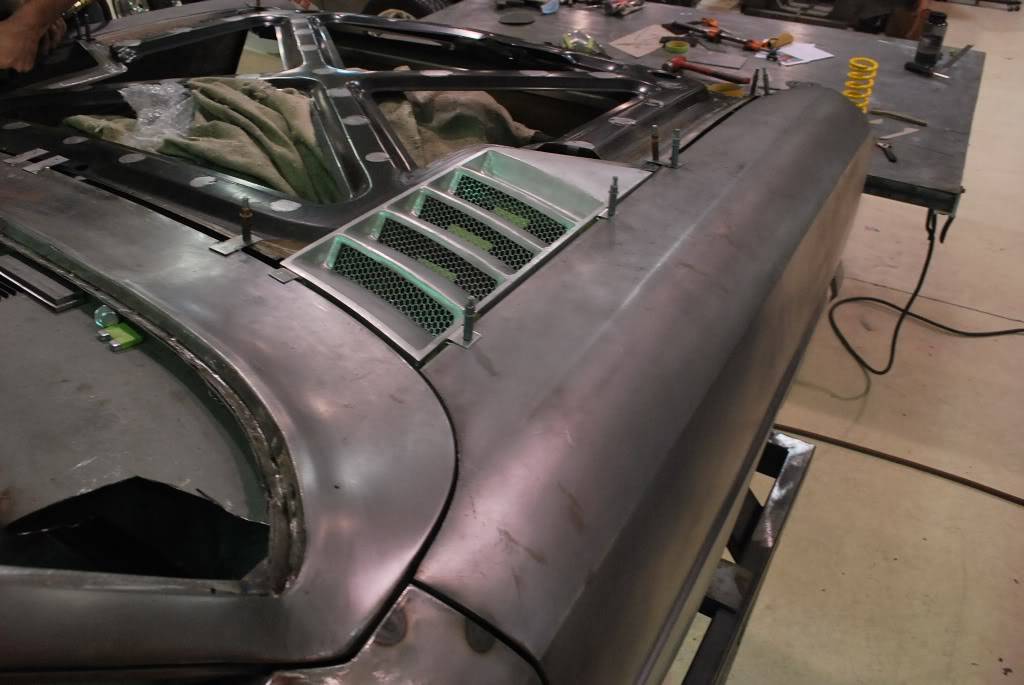
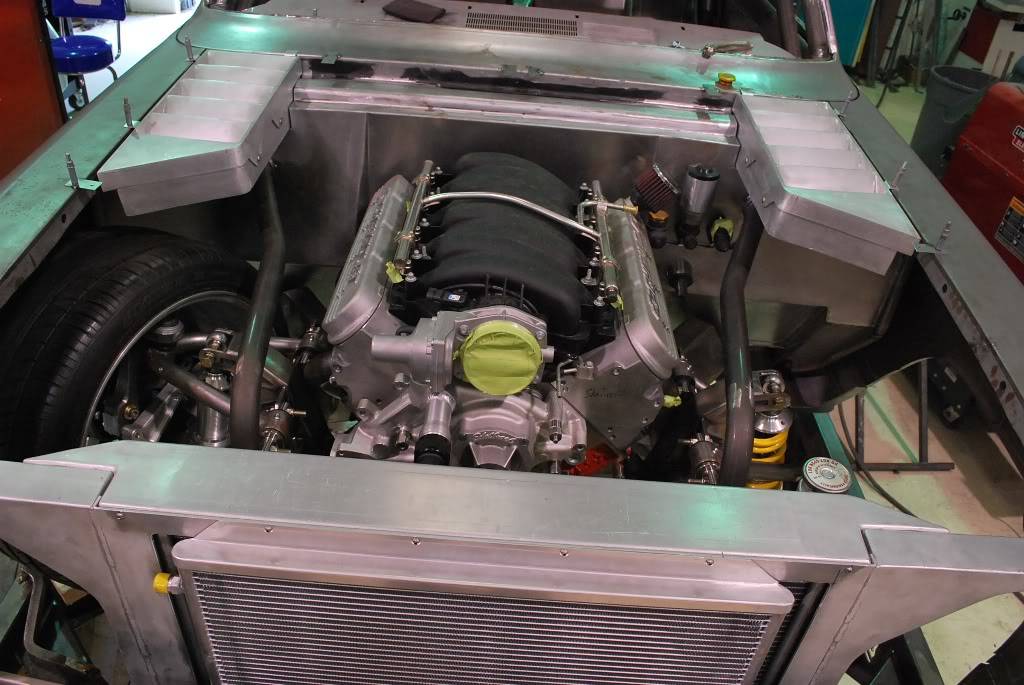
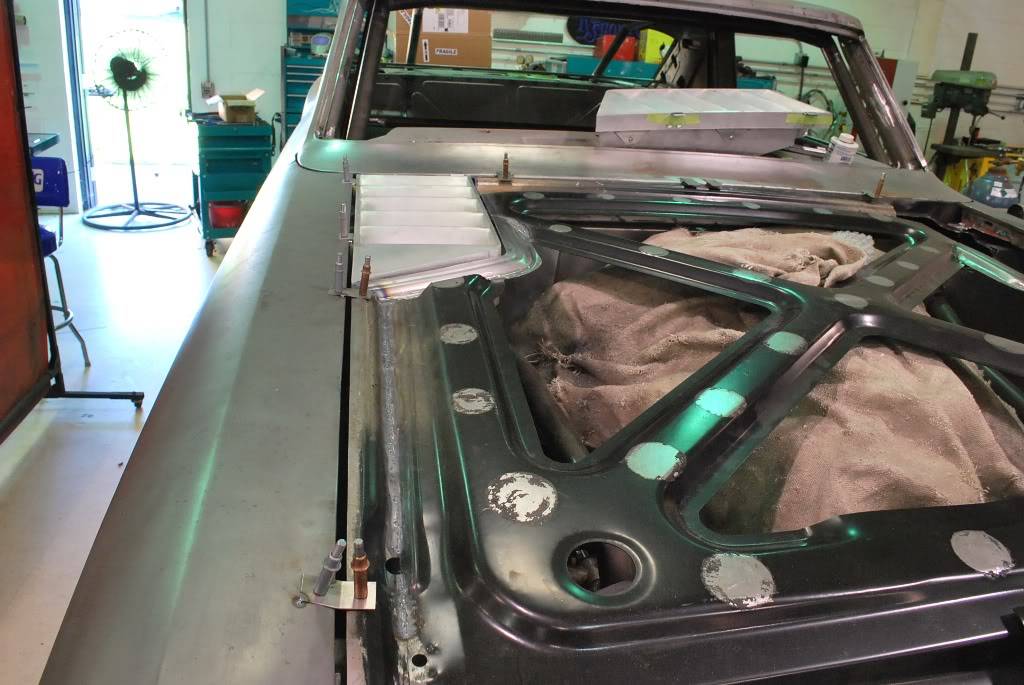
Re-design on the hood inner structure to add more strength and work with the new configuration.
-
06-29-2011 #15
Registered User
- Join Date
- Dec 2007
- Location
- Mundelein, IL
- Posts
- 148
Hector, the lower portion of the spoiler was not completed in this picture and has since been changed to flow with the lines of the car better. I don't know what to tell you on the rear body panel... we like it and so does the customer. Can't please everyone. The tail lights have to be square at the bottom in order to line up with the bumper and the quarter pane.
-
06-29-2011 #16
Registered User
- Join Date
- Sep 2007
- Location
- Buford, GA
- Posts
- 923
Very cool - I can't wait to see what you've done with it. Originally Posted by ROADSTER SHOP

Ha! That's a very true statement! Hopefully my comments didn't hurt any feelings! Originally Posted by ROADSTER SHOP
I think maybe it's the lower corners that don't follow the contour of that corner of the bumper as it curves toward the front that are throwing me off. Again, something to think about IF you could maybe touch them up a bit. Being billet, I don't know that it will allow any adjustment. Originally Posted by ROADSTER SHOP
Okay, I'm done...but one last comment to say that the vents are just amazingly cool!! Keep 'em coming!!Adam
1985 S10 - LT1 + T56
1964 Chevy II 4-Door - LS1 + T56
-
06-29-2011 #17
Registered User
- Join Date
- Feb 2011
- Location
- Chico, CA
- Posts
- 203
Nice work! Its pretty amazing what you can do with sheet metal. I am lucky if I keep it straight, let alone modify it! Beautiful car, can't wait to see the rest of it come together!
Jeff
-
06-29-2011 #18
Pro-Touring Veteran
- Join Date
- Nov 2006
- Location
- Washington, MO
- Posts
- 2,363
I'm just blown away - such amazing design and fabrication right there. Wow.
-
06-29-2011 #19
 Registered User
- Join Date
- May 2011
- Posts
- 301

Wow that is really good looking high quality metal body work!!
-
06-29-2011 #20
 Registered User
- Join Date
- Jun 2011
- Location
- St. George, Utah
- Posts
- 1,629
Fantastic design going on. The lower rocker mods tie in perfectly to the new character lines above the wheel openings and the indents in the lower doors, pulls all of the car's profile lines in together. From the photos with that main body line gone it almost looks like the rear 1/4s buldge out a bit accentuating the width of the rolling stock. Wheel opening lines make it look like it's going 160 even though it's sitting still, great play on the 69 Camaro or early 30s streamlined design cues, whichever was your inspiration. The outer lines in the splitter follow the vertical lines in the bumper opening, but if you made changes looking forward to seeing what you came up with. Love the smoothed bumper ends.
Trick idea for the air boxes! Is this a twin turbo car with the boxes as intakes?

 Reply With Quote