


Results 41 to 60 of 215
Thread: Project "BLUE PEARL"
-
07-07-2011 #41

 Registered User
- Join Date
- Aug 2007
- Location
- Tennessee
- Posts
- 499

Today we worked on the rear axle. We wanted something with disk brakes, 3:73 or 4:10 posi and a good spline count. I also need something around 56"or 57" wide from WMS to WMS. So for this project we are going with a 8.8 explorer. The one we picked up has a 4:10 posi with disk and 31 splines. Only down side is it's 59.6" WMS to WMS and C-Clips to hold the axle's in but its disk so o well. I know most people around here love there 9" but I have beat on the 8.8's and love them. I also know its easier to change the gears out on the 9" but come on 8.8's are not that bad. So moving on (I like being outside the box...lol). I will be cutting the axle down 3" to center it in the car and this will give me 56.6".
Here are my steps and just how I like to do it.
Tear down what fun.
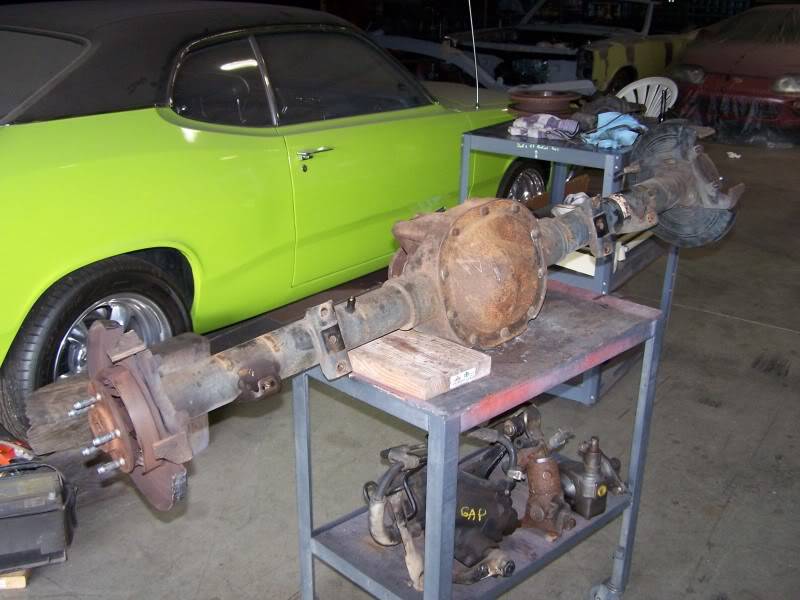
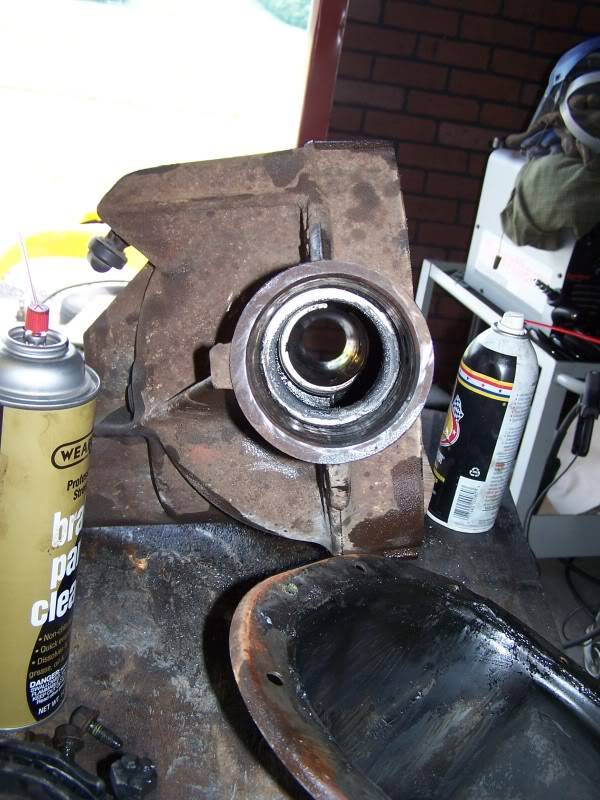
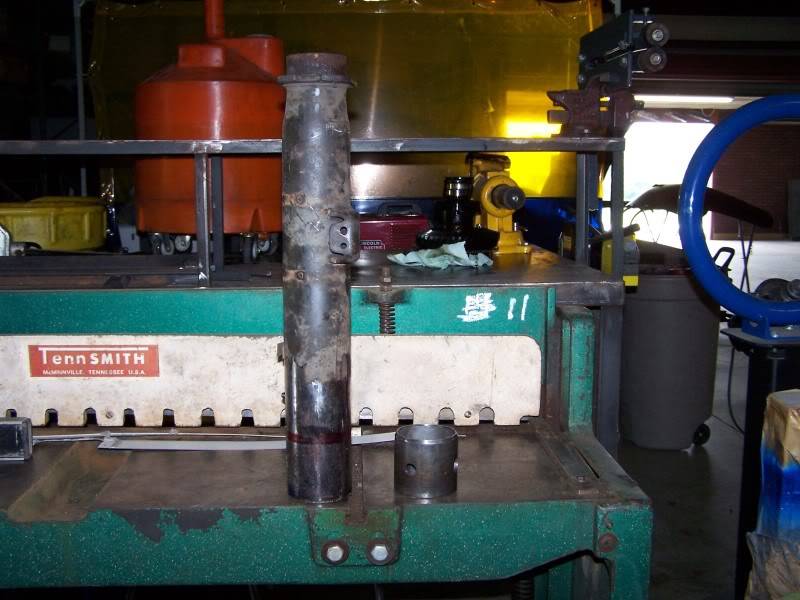
Next was drilling out the plug welds and pulling the axle tube out after I mark all my straight lines. I do this so I dont have to cut the axle and try and get the tubs lined back up and weld because it can move. So I find it easier to take it out and then cut your 3" off. Then press the axle back in and check all your line's.
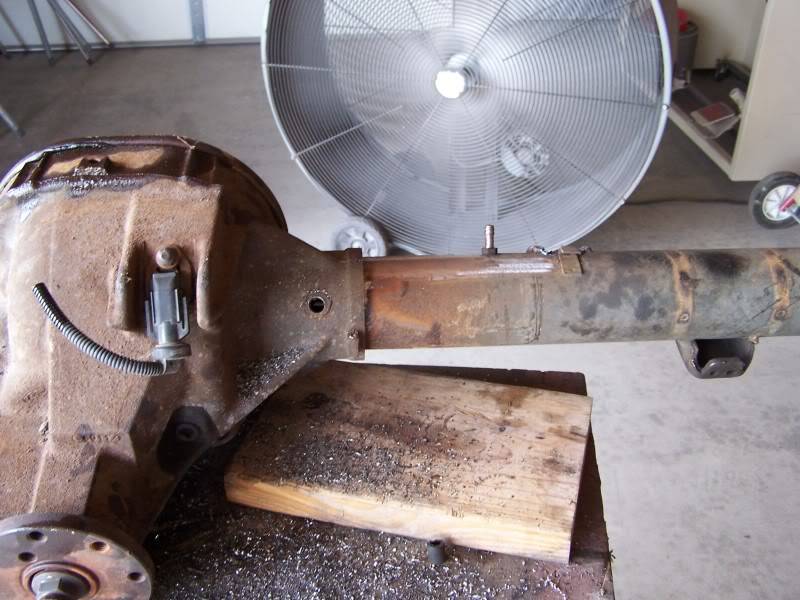
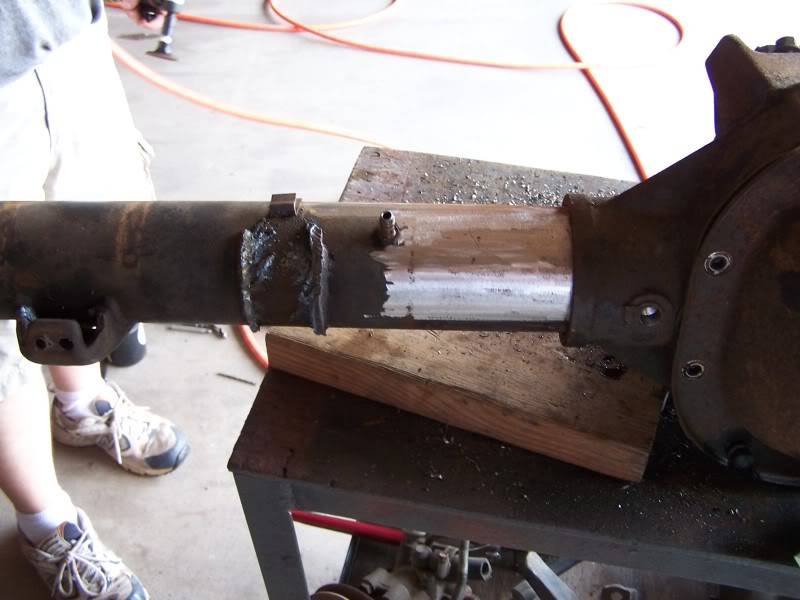
Here you can see its how it came out.
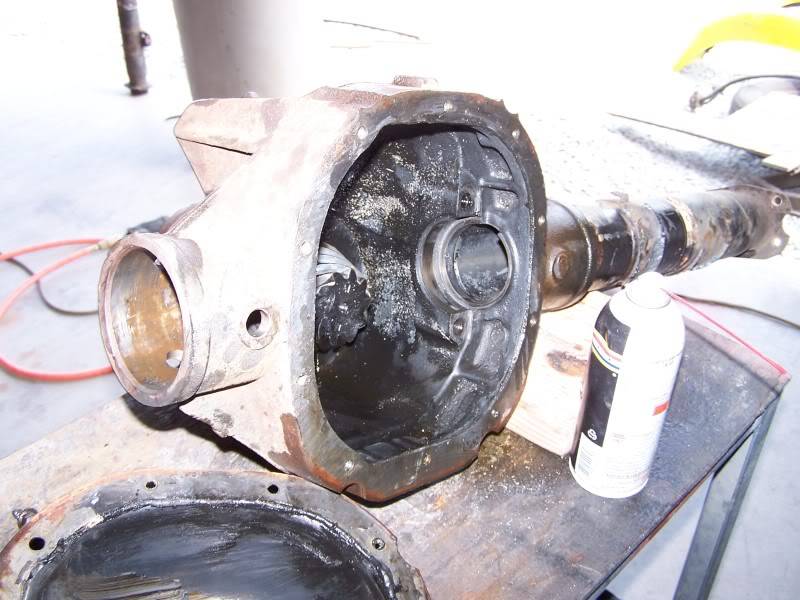
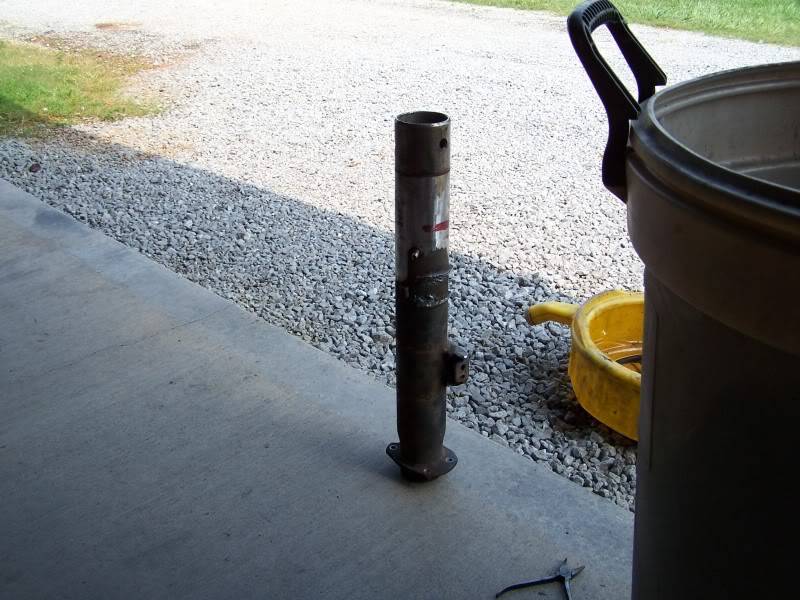
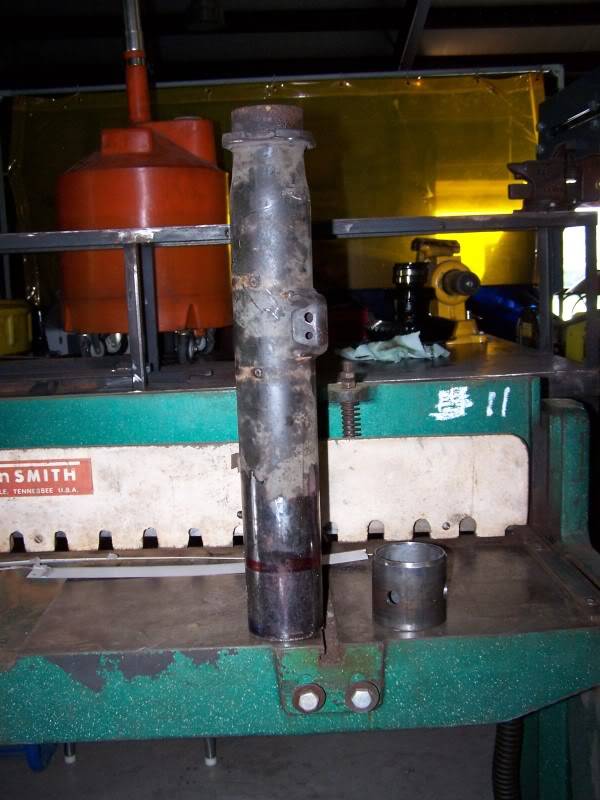
Next was to cut the 3" off. Tomorrow I will reinstall and weld the tubs all the way around and weld the plug welds up.
-
07-07-2011 #42 Registered User
- Join Date
- Nov 2006
- Location
- Ma.
- Posts
- 5,569
Good way to do it , no dealing with welding the ends back on later. It looks like the tubes go in plenty to keep them straight.
Wayne
Car FINALLY home !!!!!! lol
Project FNQUIK https://www.pro-touring.com/showthre...ghlight=FNQUIK
07-14-2011 #43
Registered User
- Join Date
- Aug 2007
- Location
- Tennessee
- Posts
- 499
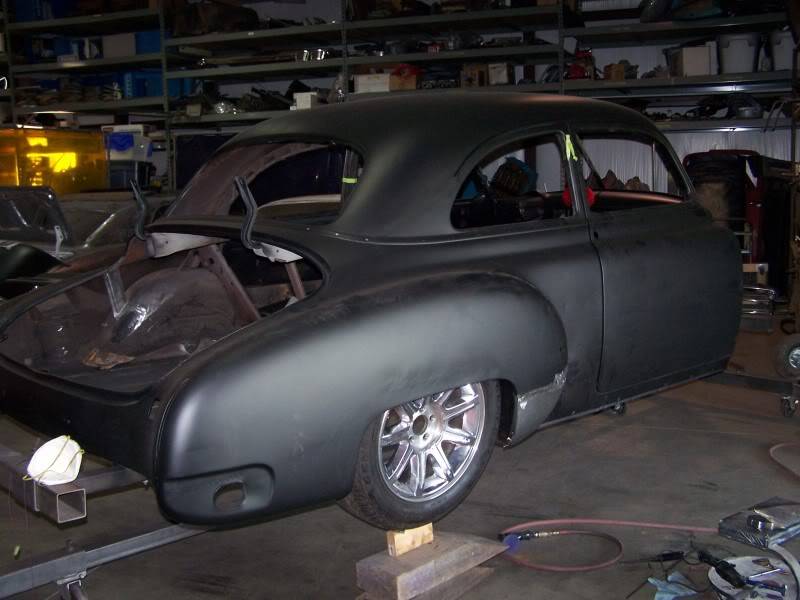
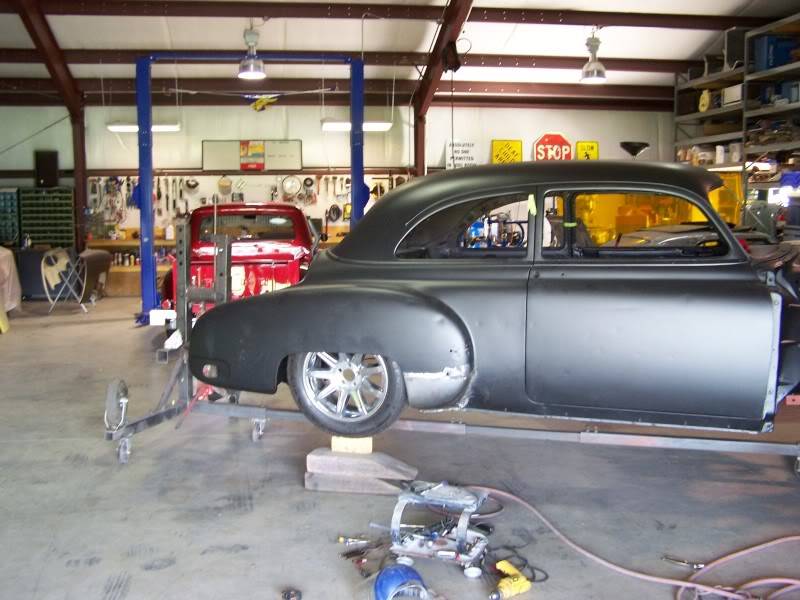
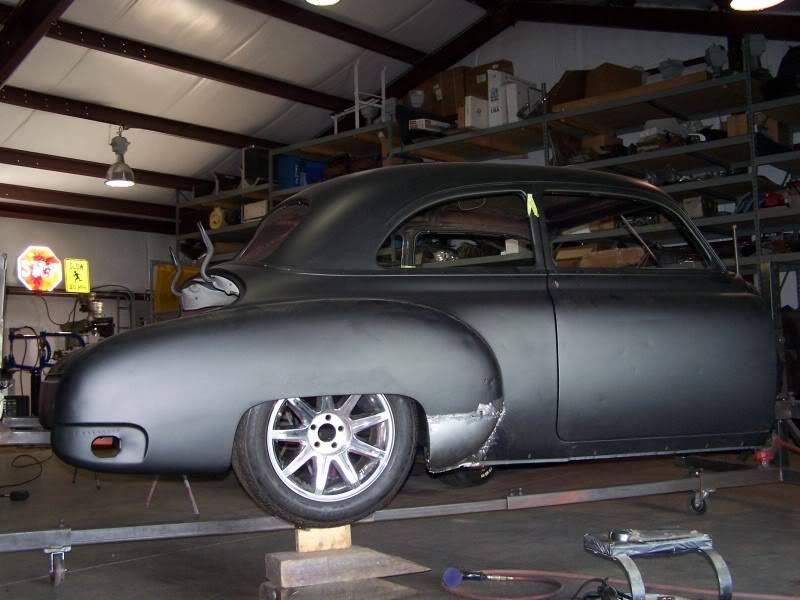
I was working on the qt's today and I thought its would be kewl to see what a 18" wheel would look like under the car. I dont think we will go any bigger then 18" but I do know it will have a nice lip. Any ways just a fun pic.
07-14-2011 #44
Registered User
- Join Date
- Nov 2006
- Location
- Ma.
- Posts
- 5,569
I wasn't sure how it would look but it really fills the wheel well. It looks good on there.
Wayne
Car FINALLY home !!!!!! lol
Project FNQUIK https://www.pro-touring.com/showthre...ghlight=FNQUIK
07-24-2011 #45
Registered User
- Join Date
- Aug 2007
- Location
- Tennessee
- Posts
- 499
Still moving on the 50 chevy, it's that slow stuff now. I was looking at a spot on the door I did not like so I cut it out. Im glad I did because I found some hidden rust that needed to be taken care of. I treated everything in the door and then replace what I cut out with new metal.
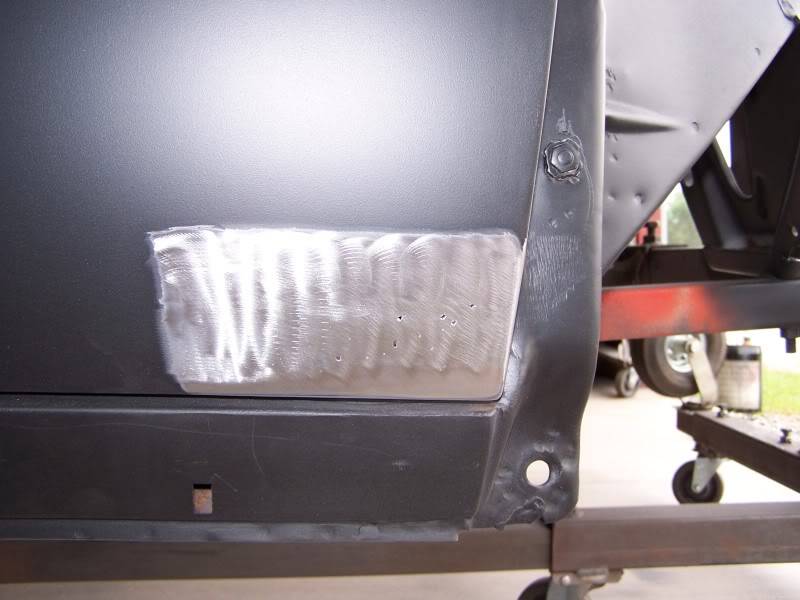
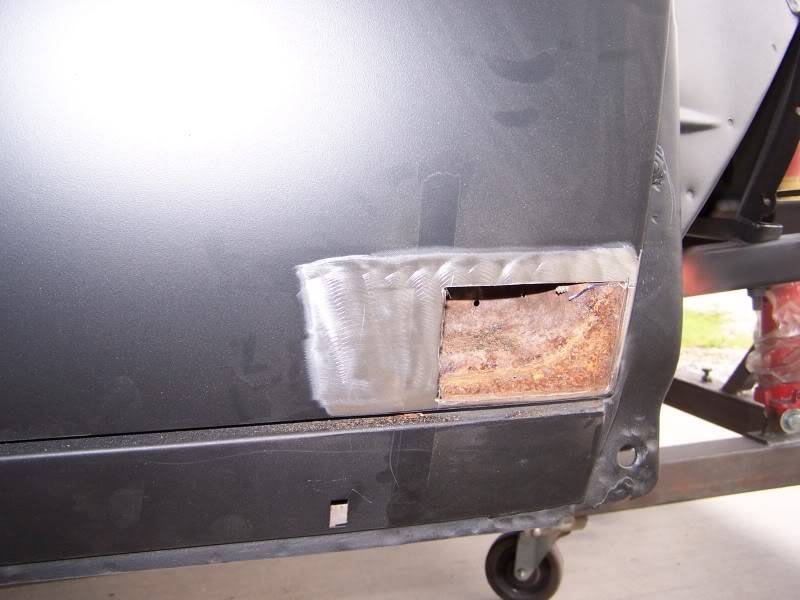
I also had a lead seam under the door that had a place I didnt like so I removed all the lead and welded the gap up.
RUST BEHIND LEAD
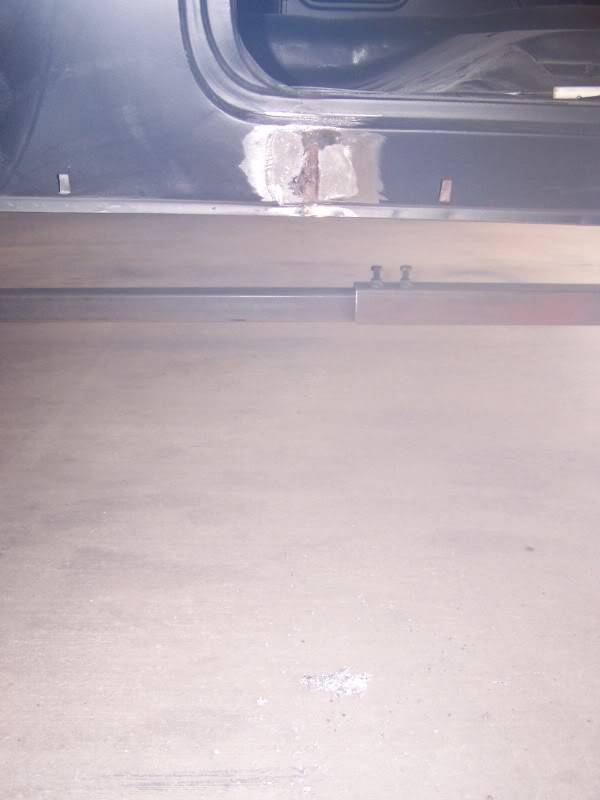
GROUND OUT
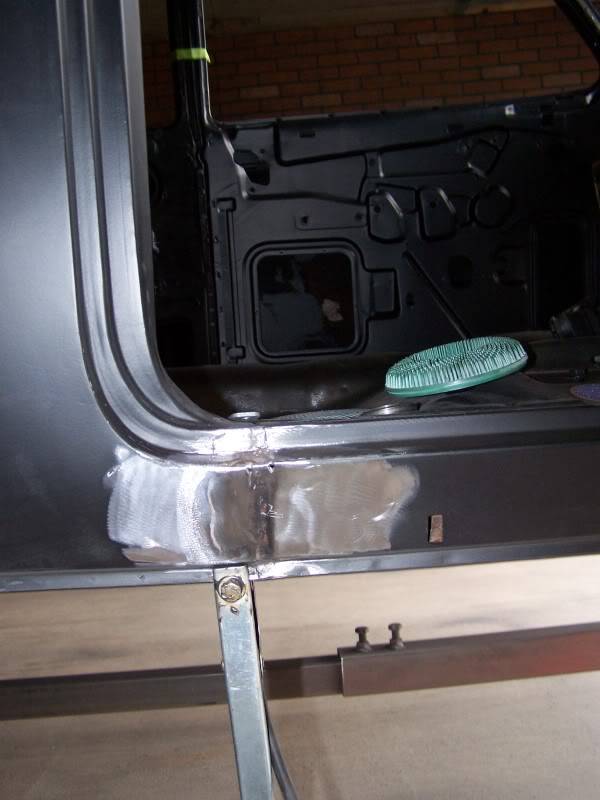
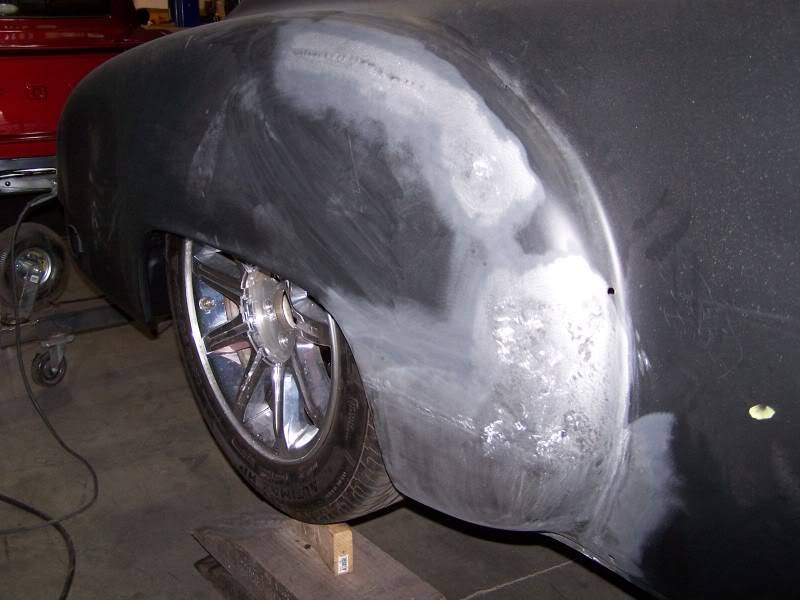
I finished welding the patch in and filling all the holes we will not be needing, now I'll move to the other side and I can move on to block sanding.
07-25-2011 #46
Registered User
- Join Date
- Aug 2007
- Location
- Tennessee
- Posts
- 499
Hey guys I wanted to pick your brains. Im getting ready to set up the fuel system for the 50 and Im looking at a new tank they have for the car. It's a new POLYETHYLENE styl tank and is already set up for a Intank pump. I just wanted to ask you guy's if you think a 190 liter per hour pump. is ok or would you go with the bigger kit they have, its a 250 liter per hour pump. I dont see our customer adding anything down the road (he likes stock) but just wanted to get your alls in put. I'll be running the corvette filler/reg on a stock 04 GTO ls1, do you guys run ADJUSTABLE FUEL PRESUURE REGULATORS with your setups stock or just let the corvetter filler do the work?
07-27-2011 #47 Registered User
- Join Date
- Jan 2009
- Location
- Chattanooga, TN
- Posts
- 291
Great advice! You mentioned several things I hadn't thought of or had been trying differently. I'll give them a go and see how it works out! Thanks so much!
Stephen S.
1967 Ford Mustang 4.7L, T5
07-27-2011 #48
Registered User
- Join Date
- Aug 2007
- Location
- Tennessee
- Posts
- 499
No problem. Originally Posted by MSTSFabbed

08-02-2011 #49
Registered User
- Join Date
- Aug 2007
- Location
- Tennessee
- Posts
- 499
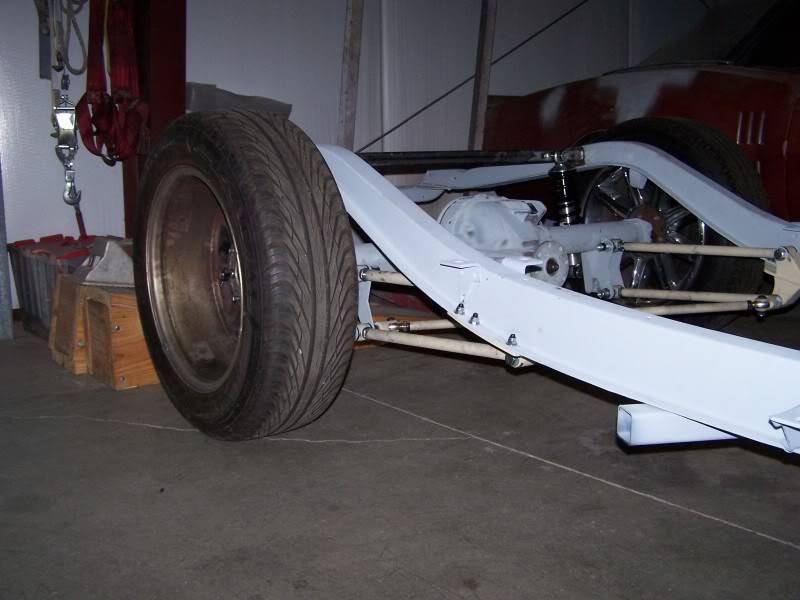
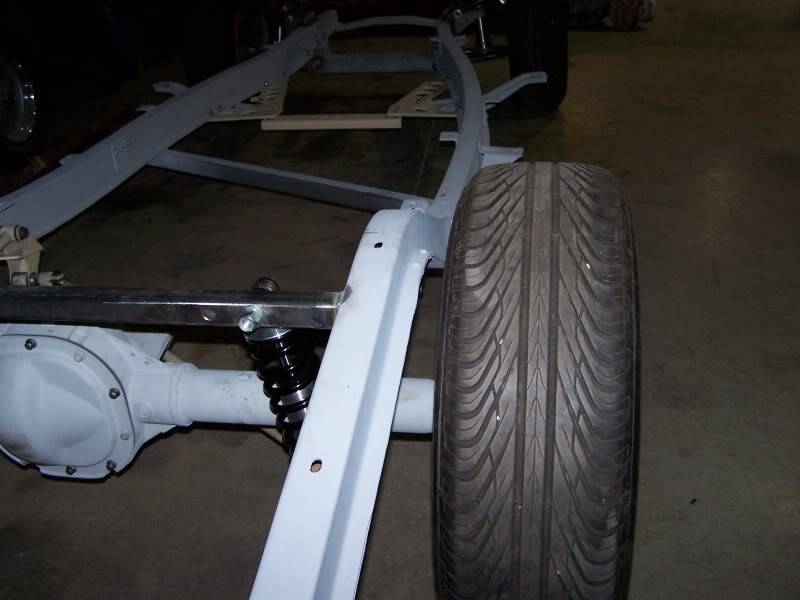
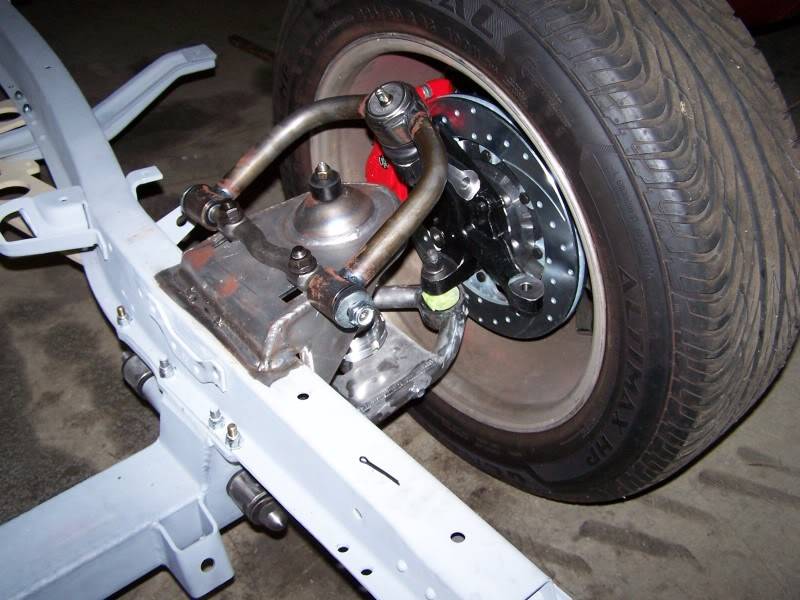
Well I got the frame as a roller today. I finished welding the 4 link bar on the back and the top hat's for the control arm's are done. I put my 300c wheels on for rollers to see how it would look with 18's on it. I didnt have a deep wheel to mock up the back with the Narrowed rear axle so I turned the 300c wheel around and put it on just to see the deep off set. I know its not pretty but I think when the customs wheels are done its going to look bad a$$. O and the wheels are just 7 1/2 wide and there is more room to spare for a wider lip in the back!!. So what do you guys think so far?
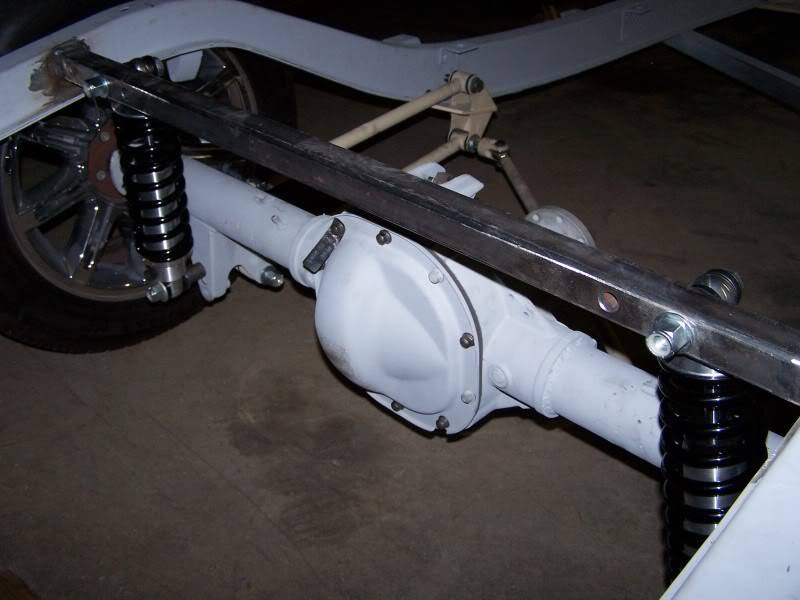
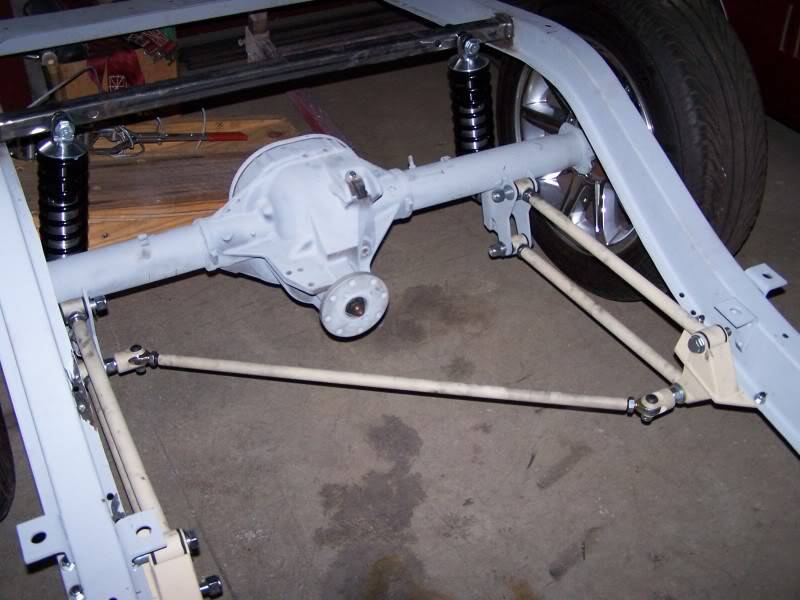
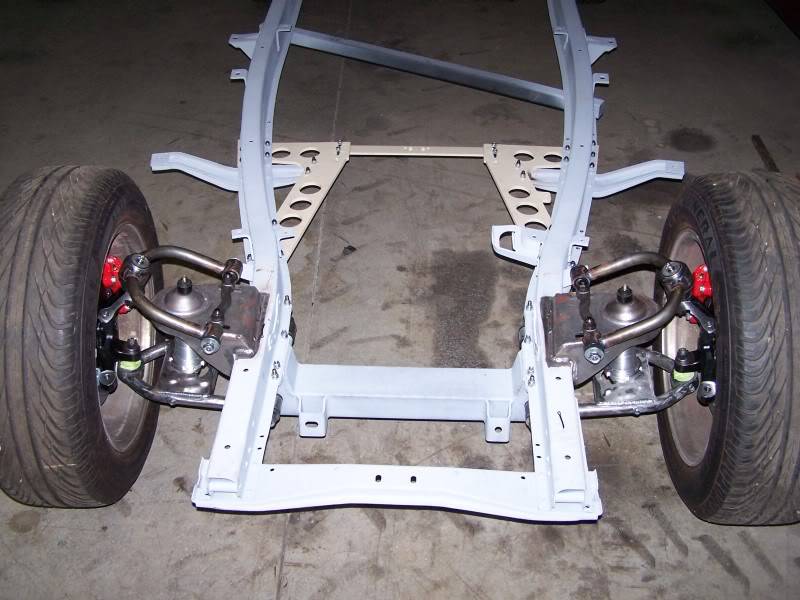
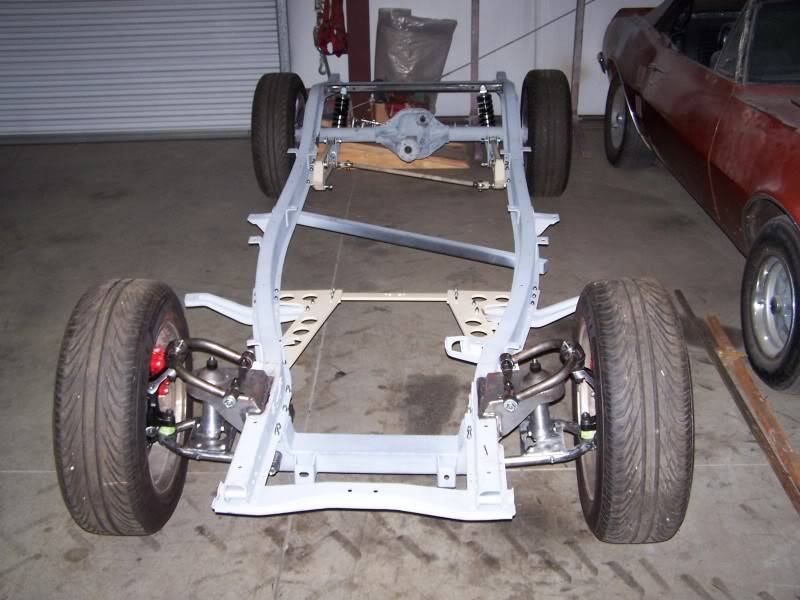
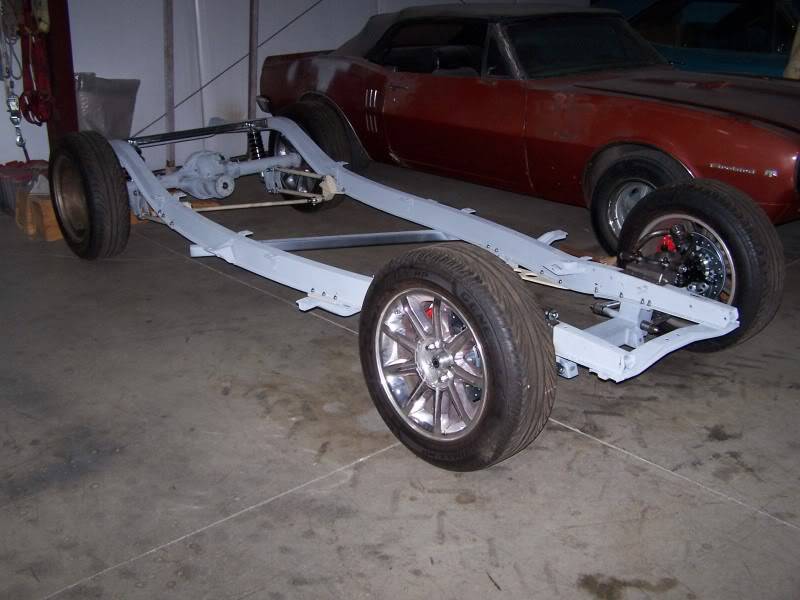
I know the wheels are dirty..lol
08-11-2011 #50
Registered User
- Join Date
- Aug 2007
- Location
- Tennessee
- Posts
- 499
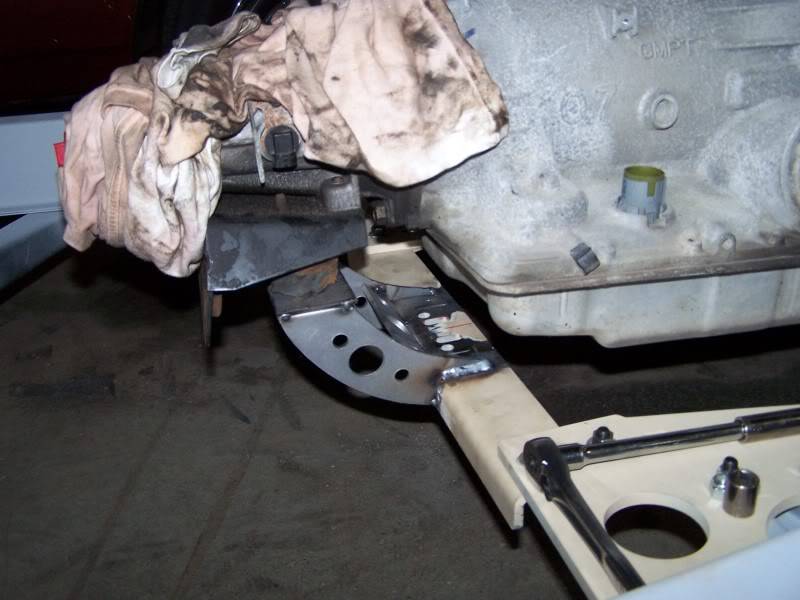
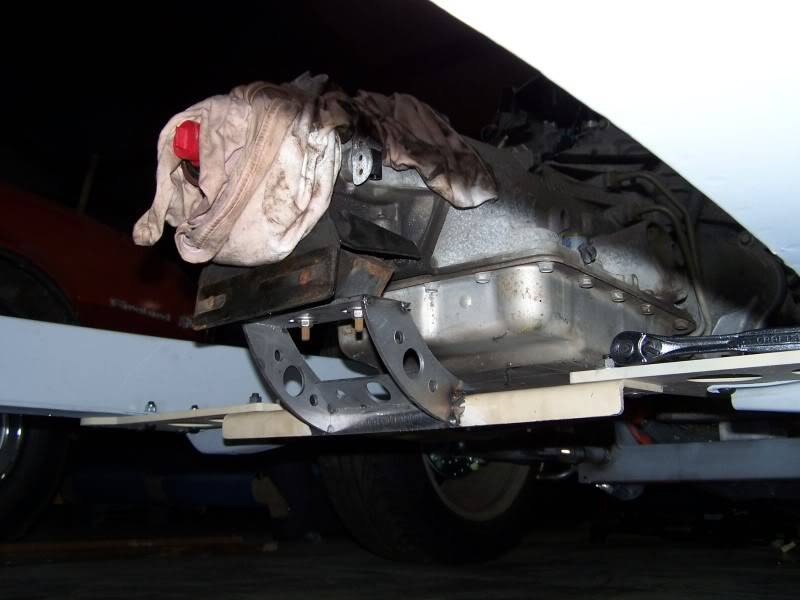
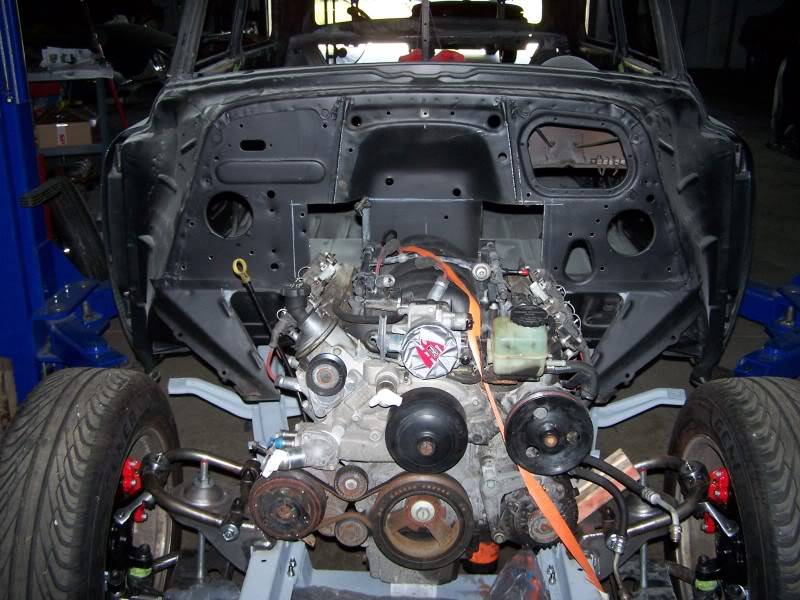
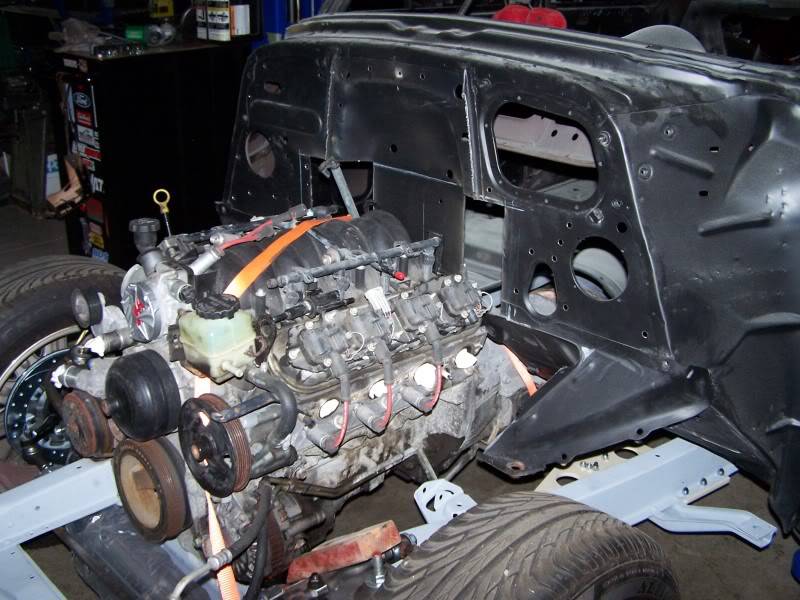
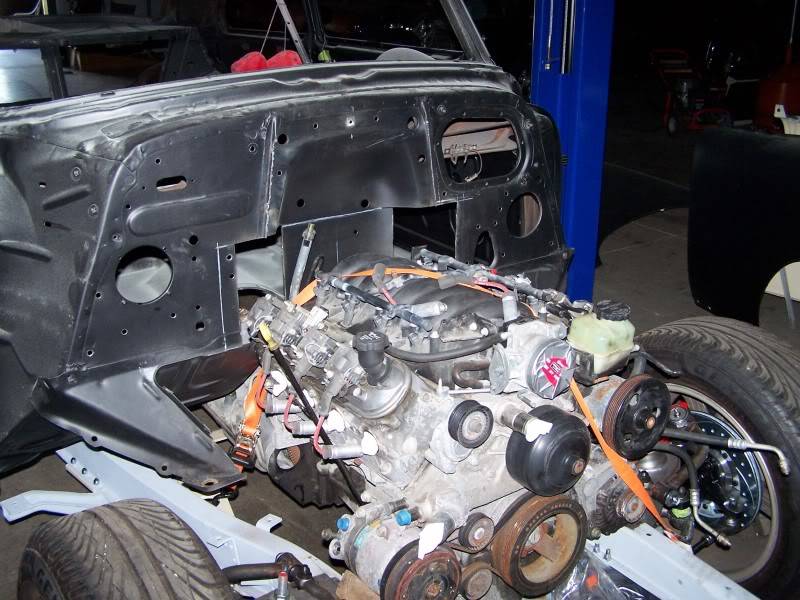
Well now that I’m back In town I can get back to work on the 50. I set the ls-1 in the car and didn’t like how the mounts placed it so I’ve been making my own. I have pushed the engine back about 2" and raised it 1" to clear the stock oil pan and so I can keep the A/C and Alt In the stock locations they came in. I want them low so I can build a custom engine cover later. This also keep everything from being too low to the ground that way if we do air ride later its already up and out of the way for a full frame drop. Ok moving on to my custom trans mount.
First I cut out some plates to weld to the TCI cross member I have. I don’t have a CNC so everything is done by hand wish I had one!!
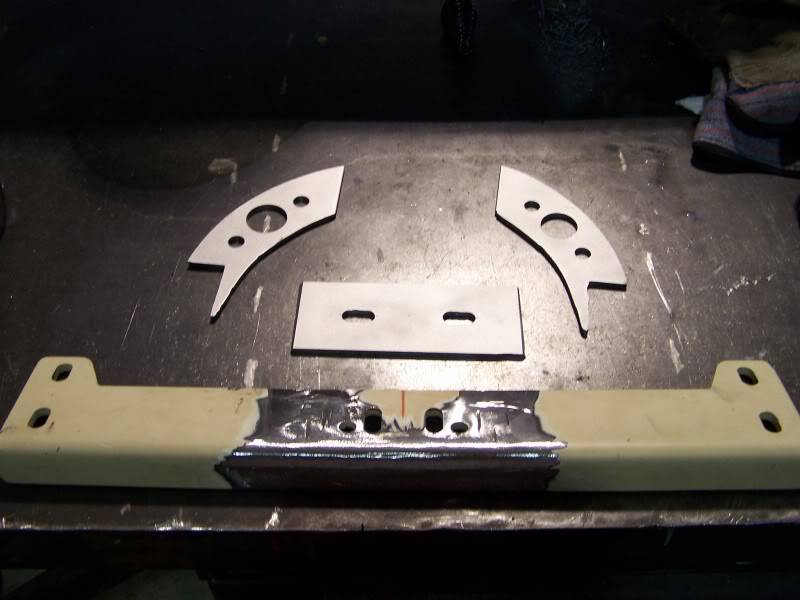
Then made sure is was square and tacked together.
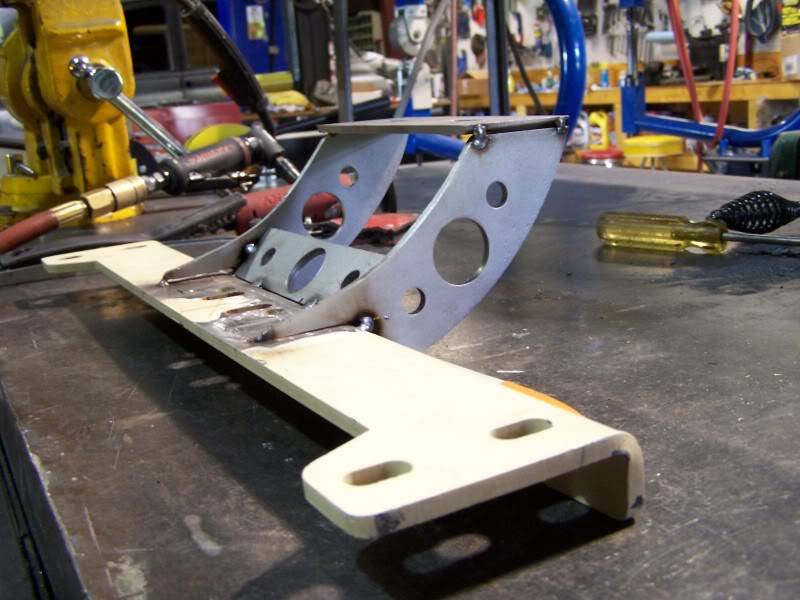
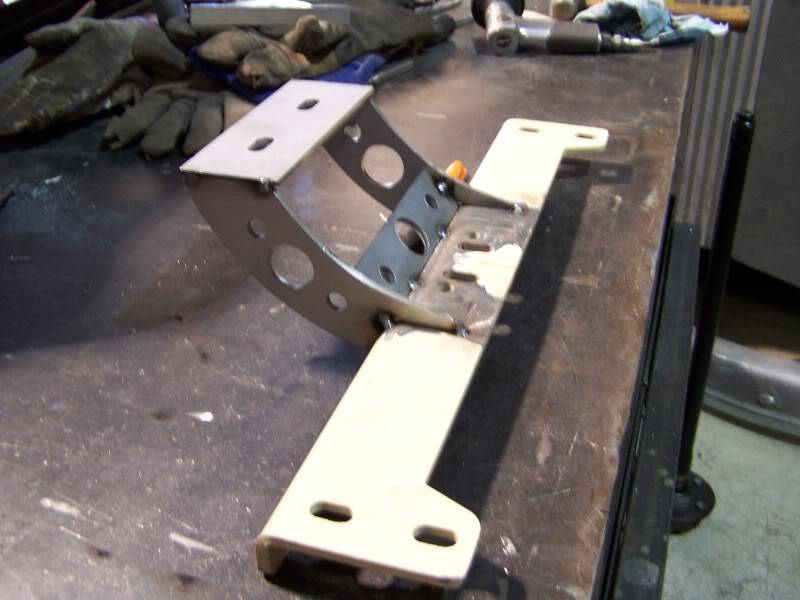
Maybe not the way most would do it but it clears the pan and was dead on.
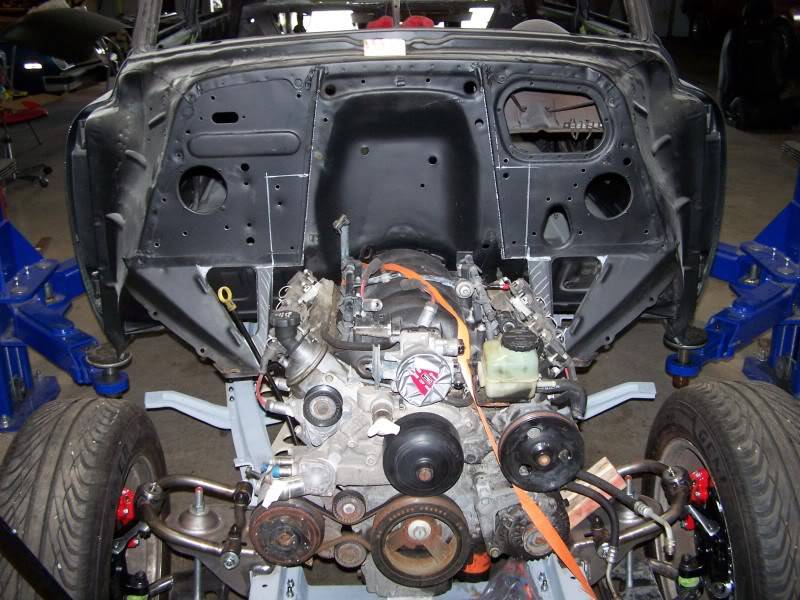
Now that the engine was center I wanted to set the body down to see what or how much I was going to need to cut out of the fire wall and the trunk. As you can see in the pictures it needs alot of cutting, 9" up from the bottom and 10" from center of fire wall out on both sides.
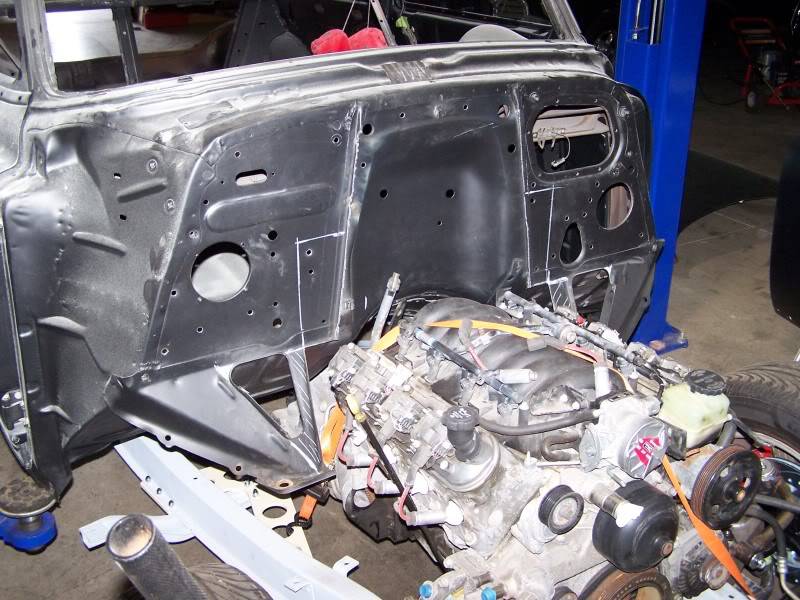
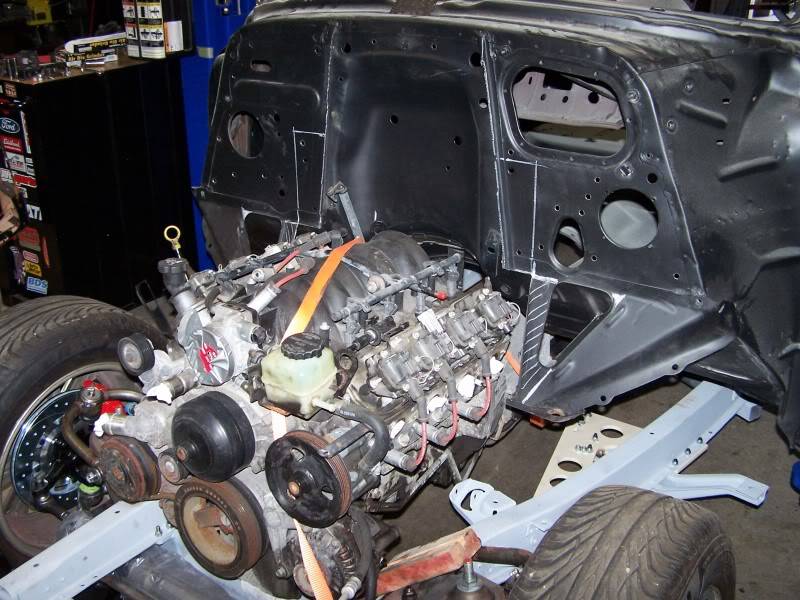
Same for the rear, I need to cut 2" up In the trunk to clear the Coil over cross member I Installed and remove the spare tire area.
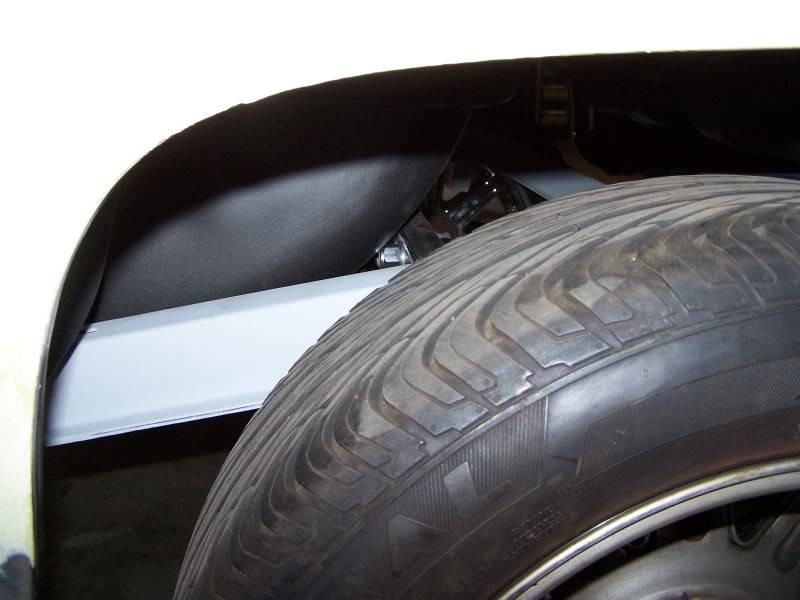
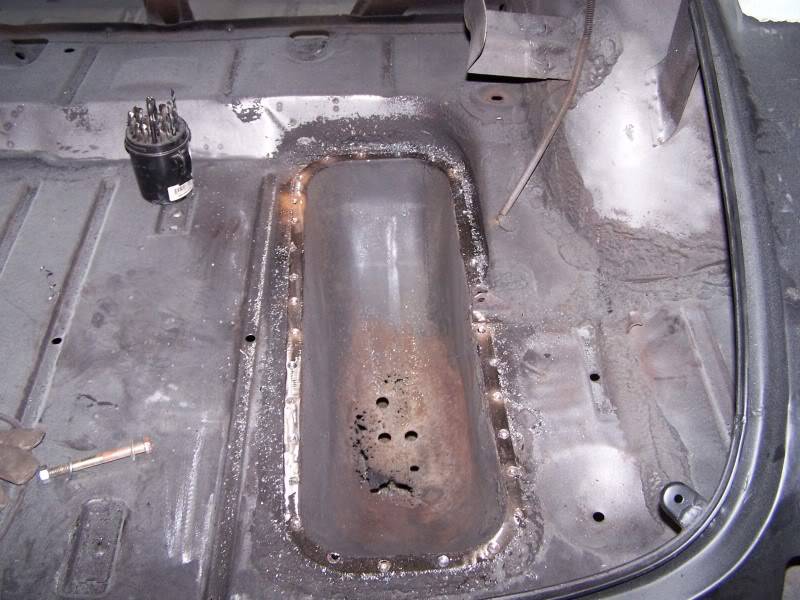
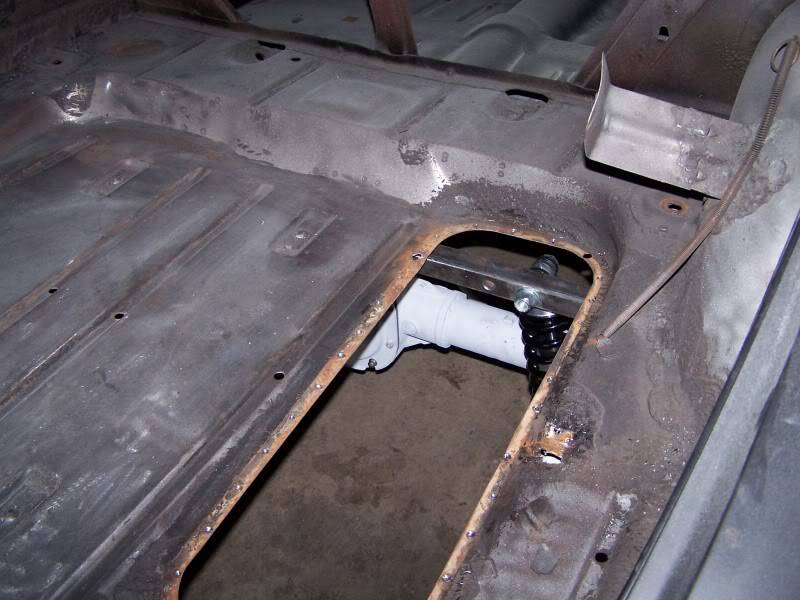
I still have more to cut tomorrow but you can see how its starting to come together. After I get the engine to fit I will build a custom fire wall around the engine.
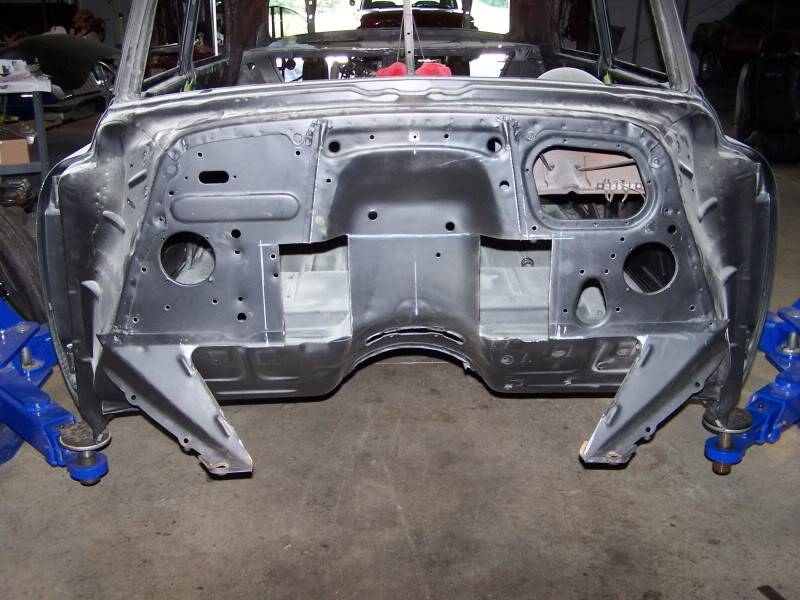
08-12-2011 #51
Registered User
- Join Date
- Nov 2006
- Location
- Ma.
- Posts
- 5,569
Nice progress it looks good!
Wayne
Car FINALLY home !!!!!! lol
Project FNQUIK https://www.pro-touring.com/showthre...ghlight=FNQUIK
08-14-2011 #52
Registered User
- Join Date
- Aug 2007
- Location
- Tennessee
- Posts
- 499
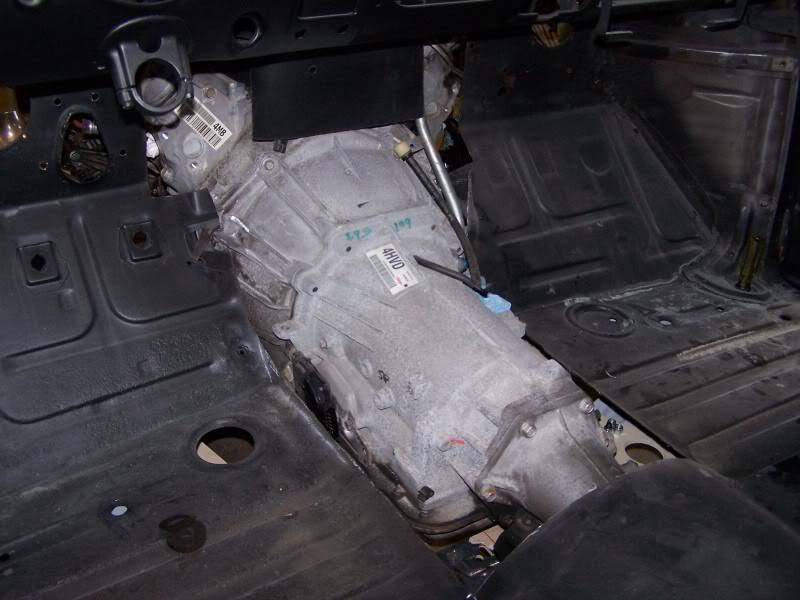
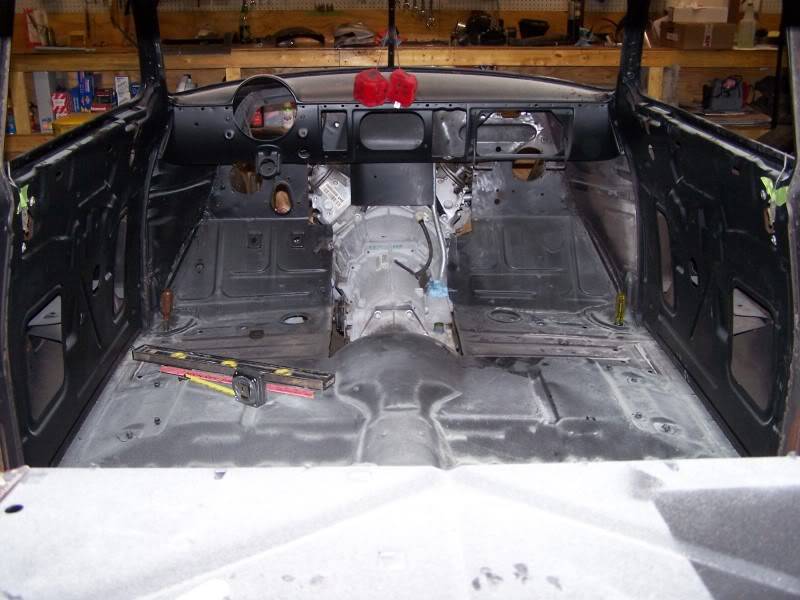
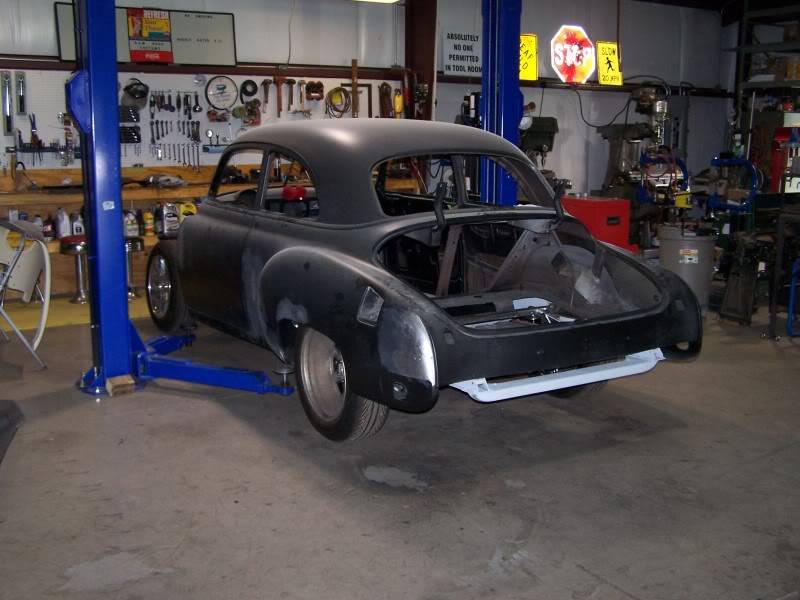
Thanks Motown, seems like it takes all day to cut and fit. I did get the body down on the frame after cuting out the floor. So far Im happy with how the LS-1 fits.
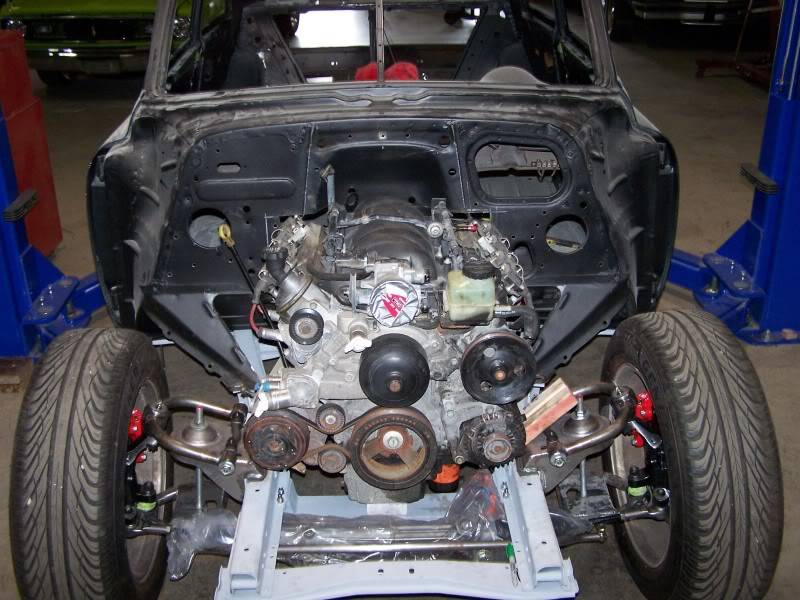
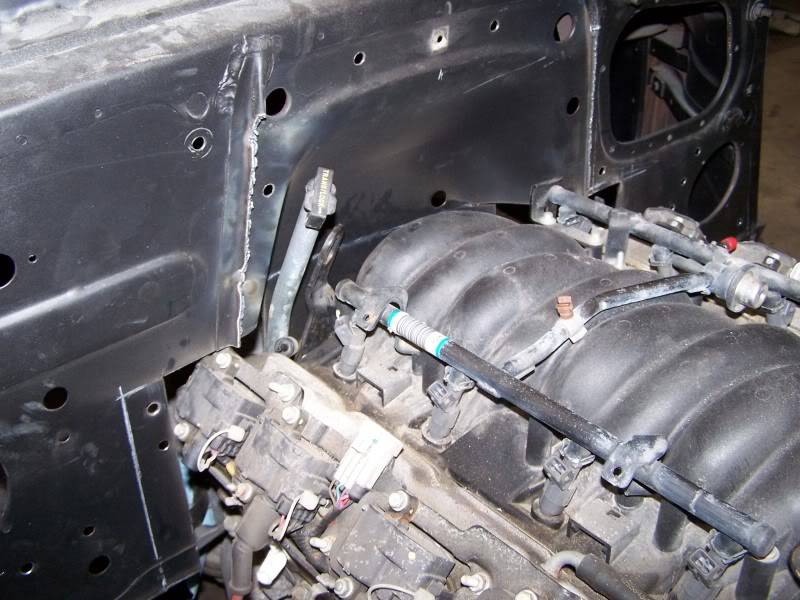
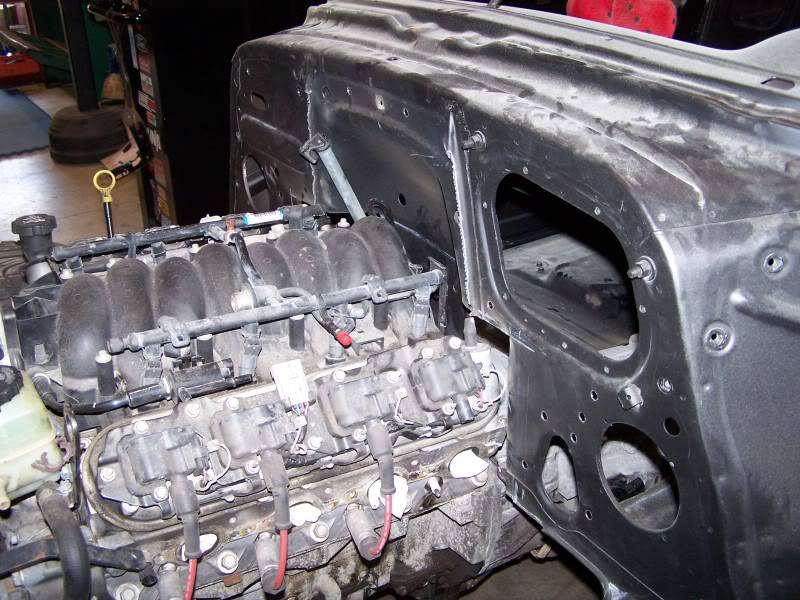
I had to take out most of hump to get the 4l60E to fit but I knew that I would have to do this because of moving the engine.
08-14-2011 #53 Registered User
- Join Date
- Jul 2010
- Location
- OREGON
- Posts
- 365
Motor looks great sitting in there cant wai to see what you come up with for the firewall.
08-17-2011 #54
Registered User
- Join Date
- Aug 2007
- Location
- Tennessee
- Posts
- 499
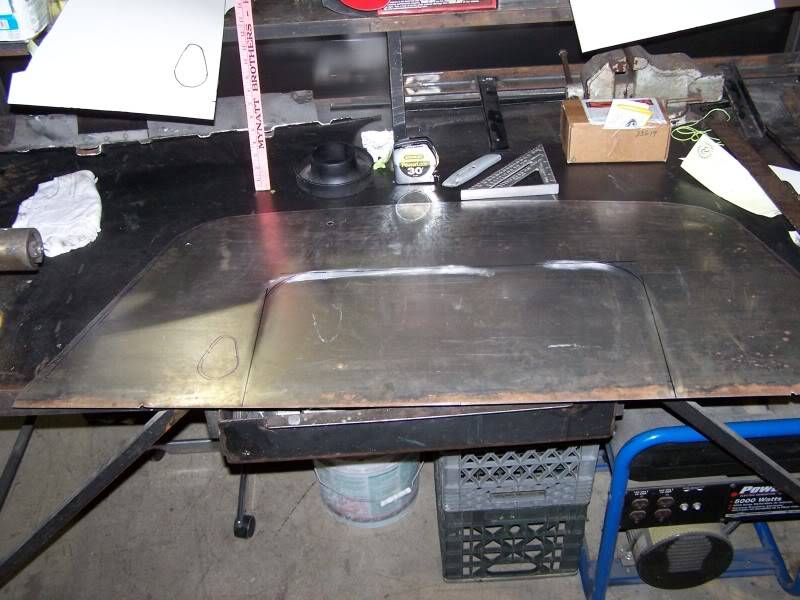
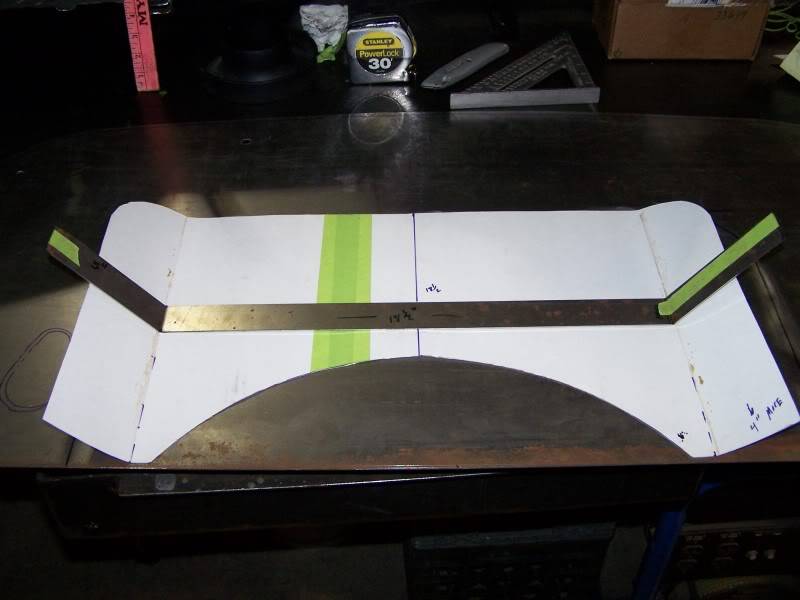
Well I was going to go wild with the firewall but I think Im going to go with a clean look. The outside will be clean and smooth so heres what I have started with for under the hood. My plain is to hide as much as I can so Im trying to keep things close.
My templets and metal cut out.
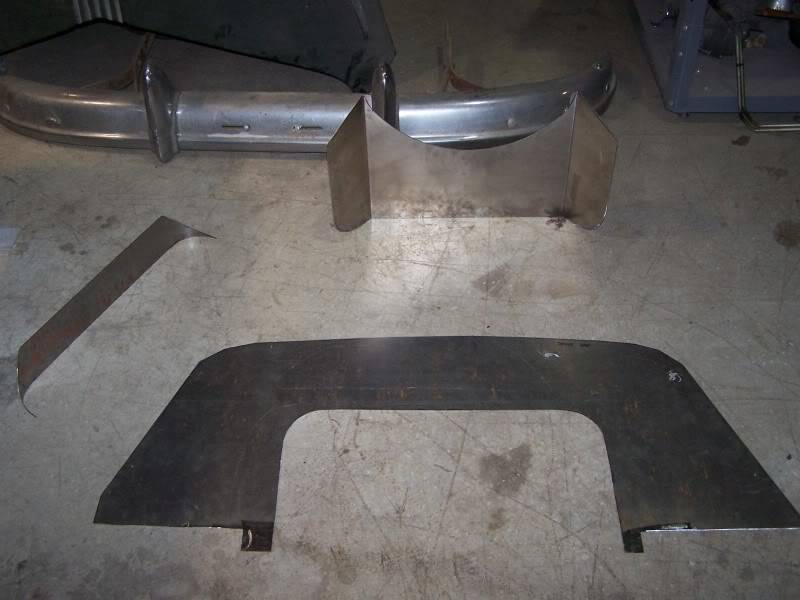
Here you can see Im starting to tac things together.
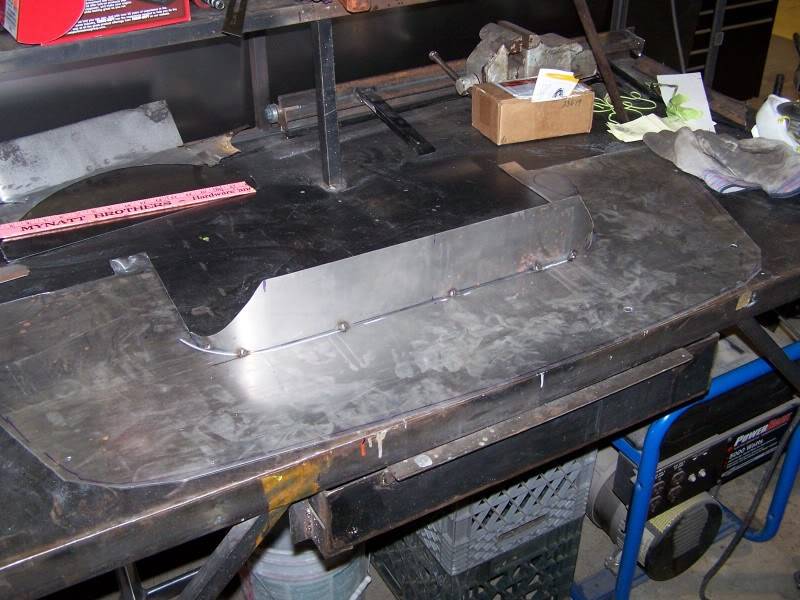
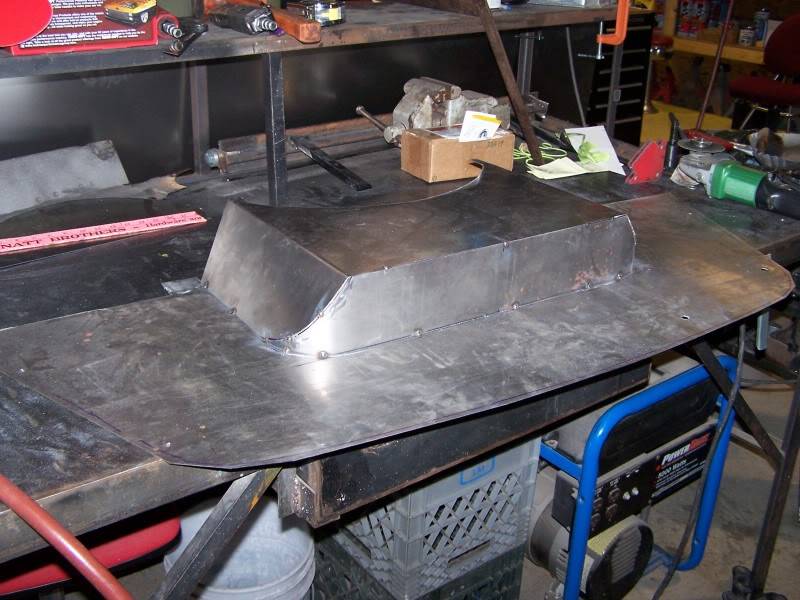
Here is the mock up, I think its going to work great but after its all done nobody will get too see it...lol
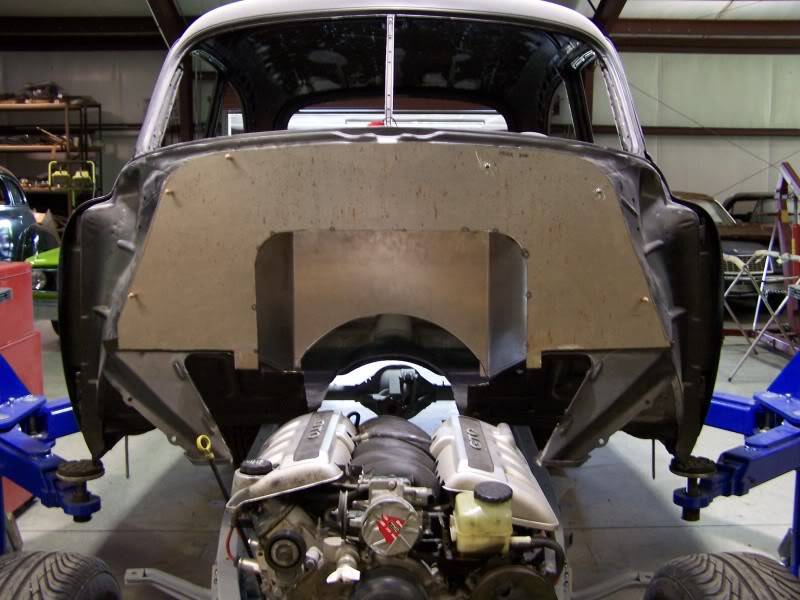
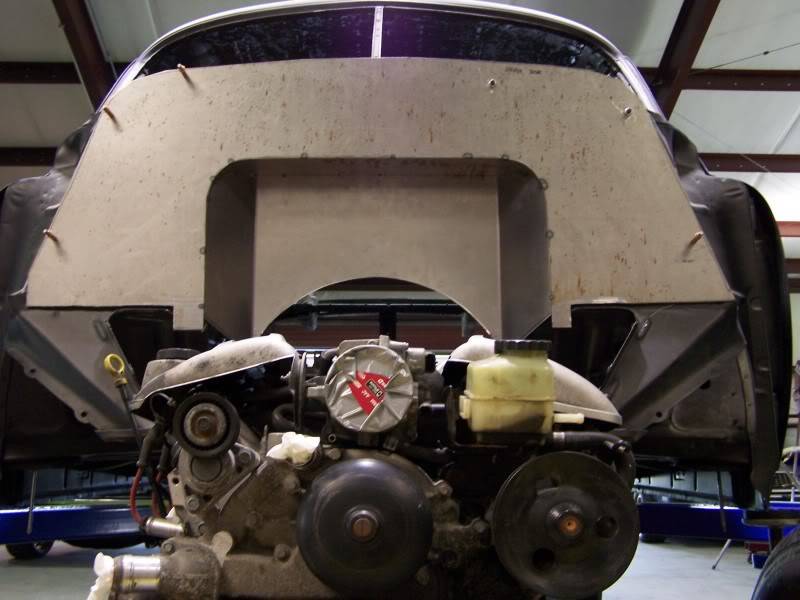
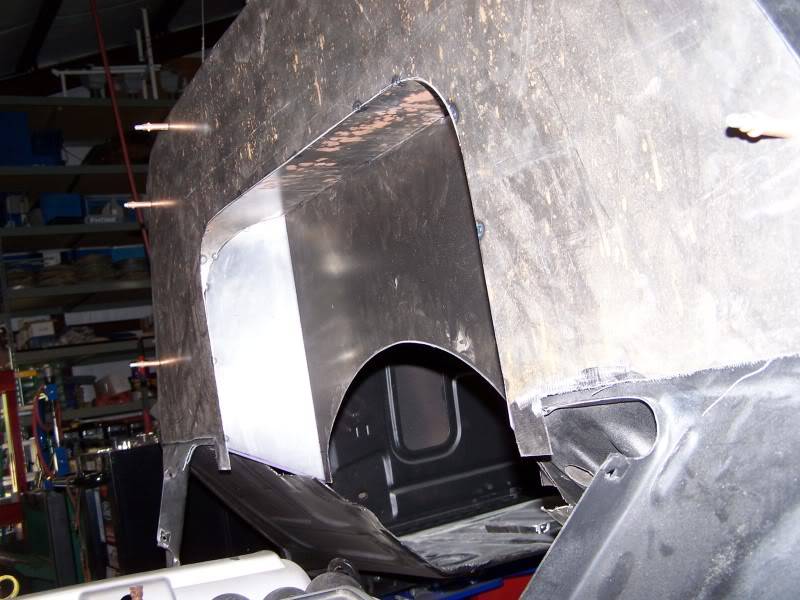
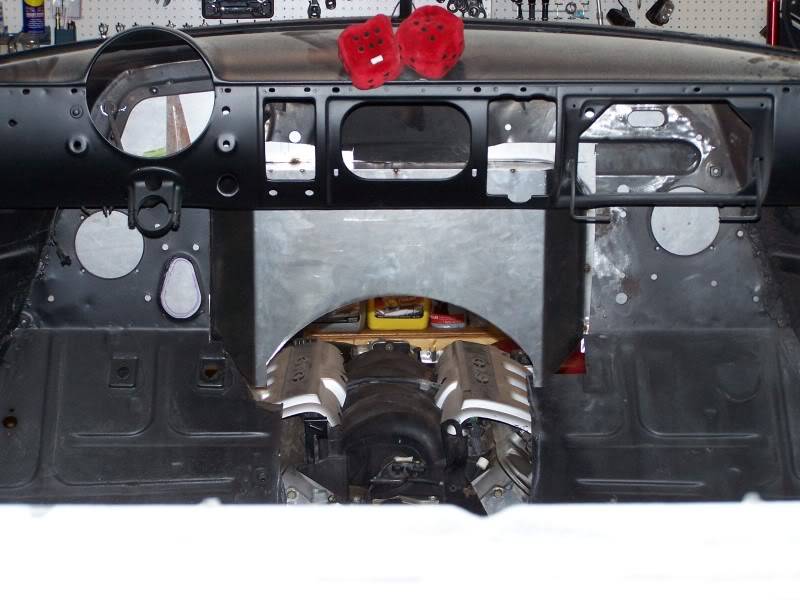
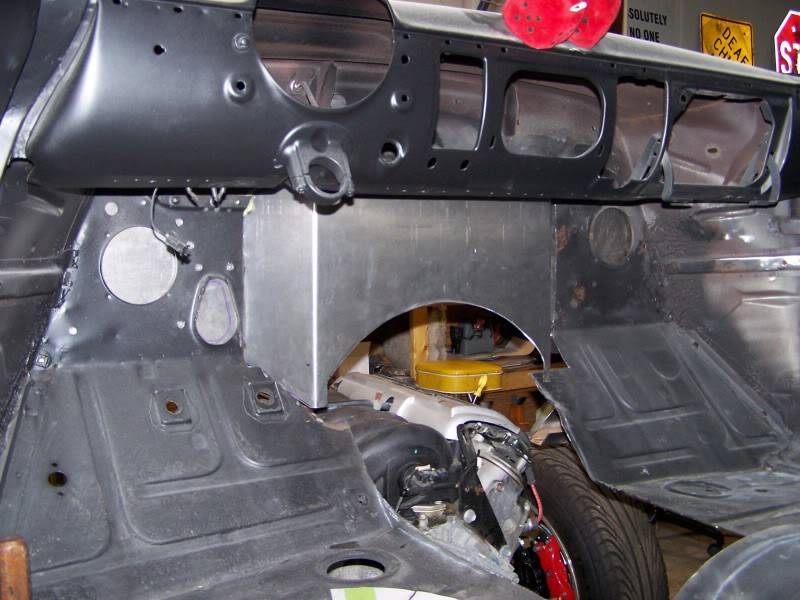
Here it is with the body down on the engine.
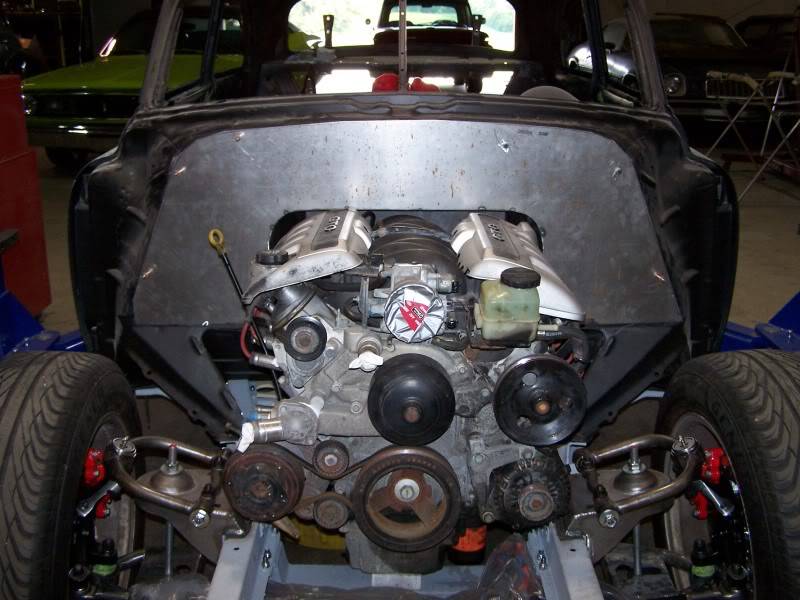
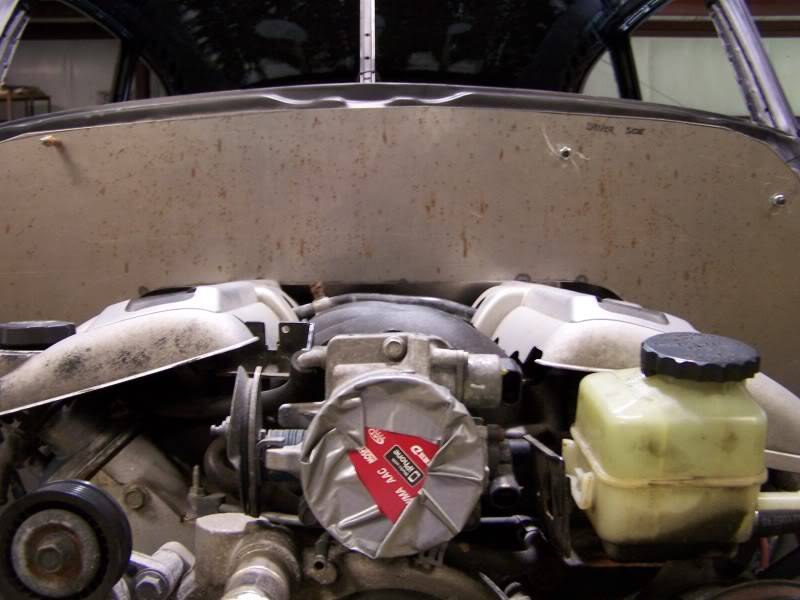
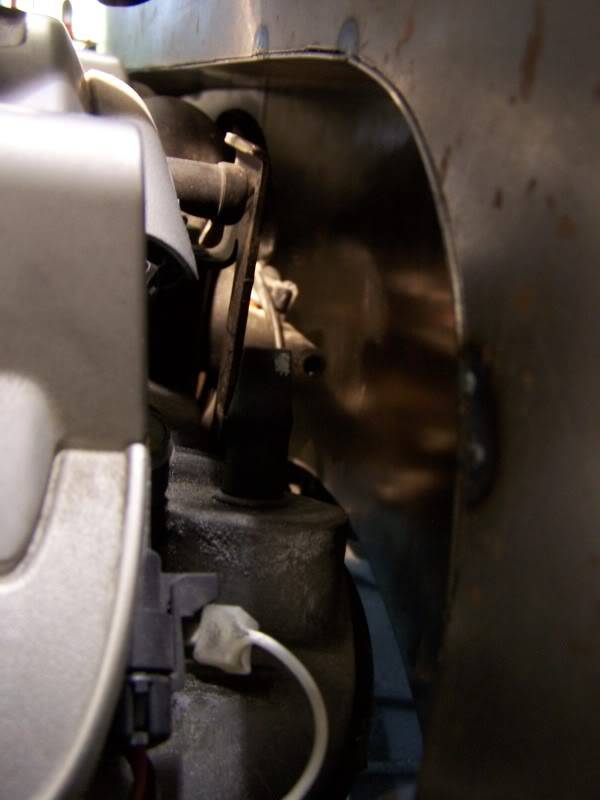
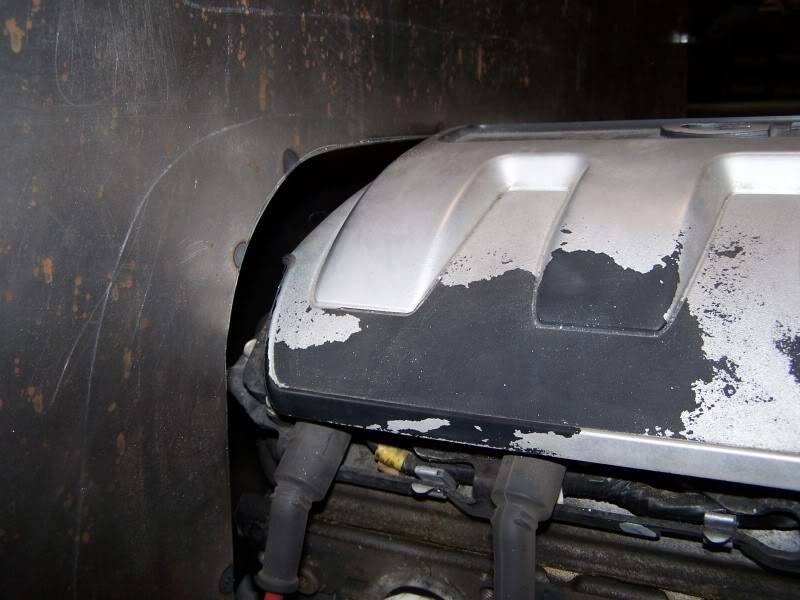
Tomorrow I'll start the trans tunnel.
08-17-2011 #55
Registered User
- Join Date
- Nov 2006
- Location
- Ma.
- Posts
- 5,569
Its going to be nice and clean looking.
Wayne
Car FINALLY home !!!!!! lol
Project FNQUIK https://www.pro-touring.com/showthre...ghlight=FNQUIK
08-18-2011 #56
Registered User
- Join Date
- Jul 2010
- Location
- OREGON
- Posts
- 365
Very classy looking and it does not look like it ate up alot of foot room...
08-18-2011 #57
Registered User
- Join Date
- Aug 2007
- Location
- Tennessee
- Posts
- 499
Thanks, Thats one of the main things I have been fighting with is the foot room. I think its going to work out pretty good. Only thing that sucks is I have to make a new trans and drive shaft tunnel. I guess thats the price I pay for using a 4l60E and moving it up 1" to keep of off the ground. I should have some new pictures tomorrw of the new tunnel. Originally Posted by FRENCHBLUE72
08-23-2011 #58
Registered User
- Join Date
- Aug 2007
- Location
- Tennessee
- Posts
- 499
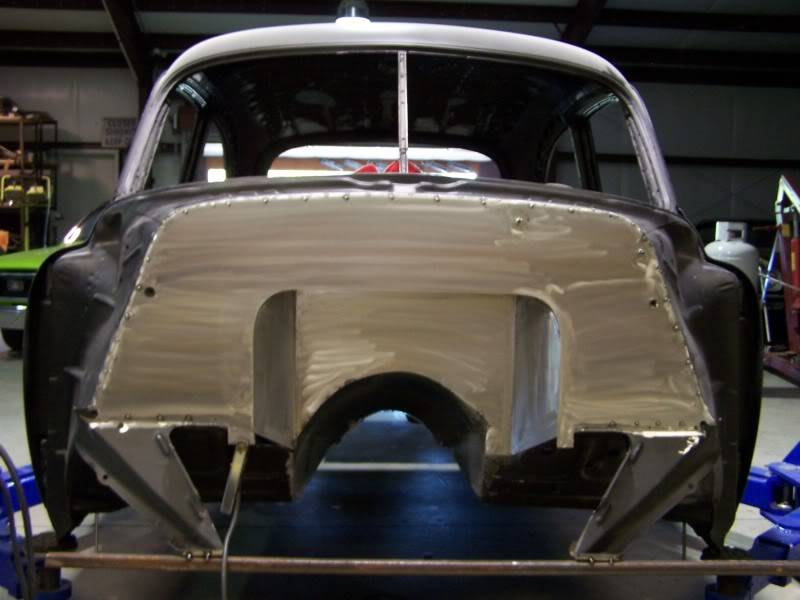
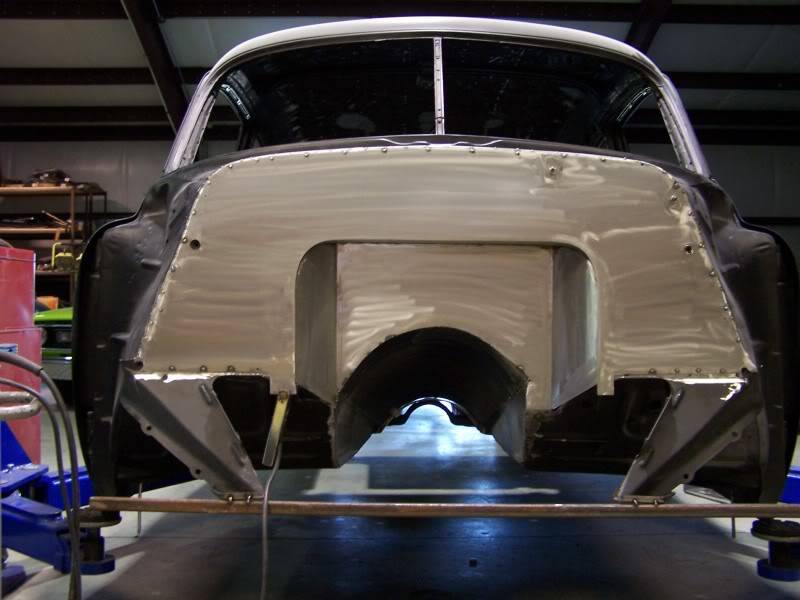
Almost got the firewall and new trans tunnel done. One of the big things is trying to keep room on the driver side for the gas pedal. I made the tunnel kick in some when it gets to the firewall so that the owners foot can rest easy on the pedal.
Here you can see the new trans tunnel to clear the 4l60e and driveshaft. I made sides then the top.
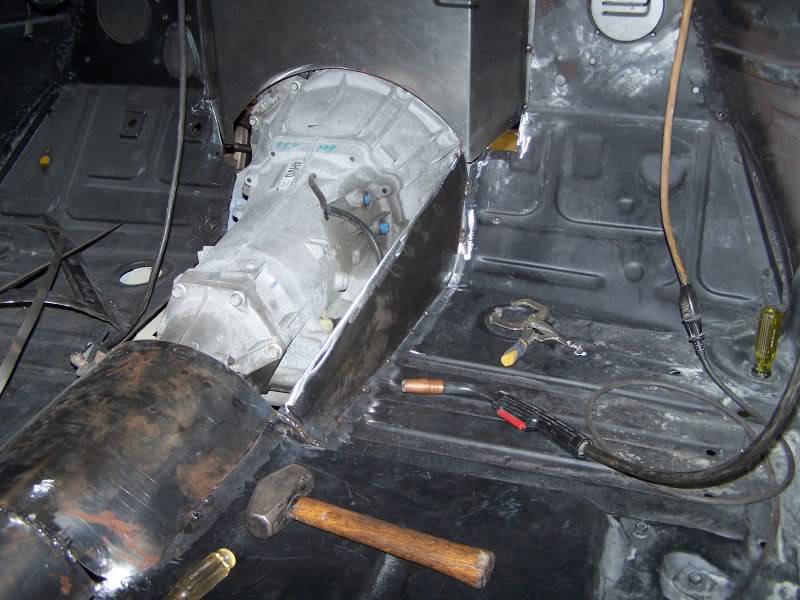
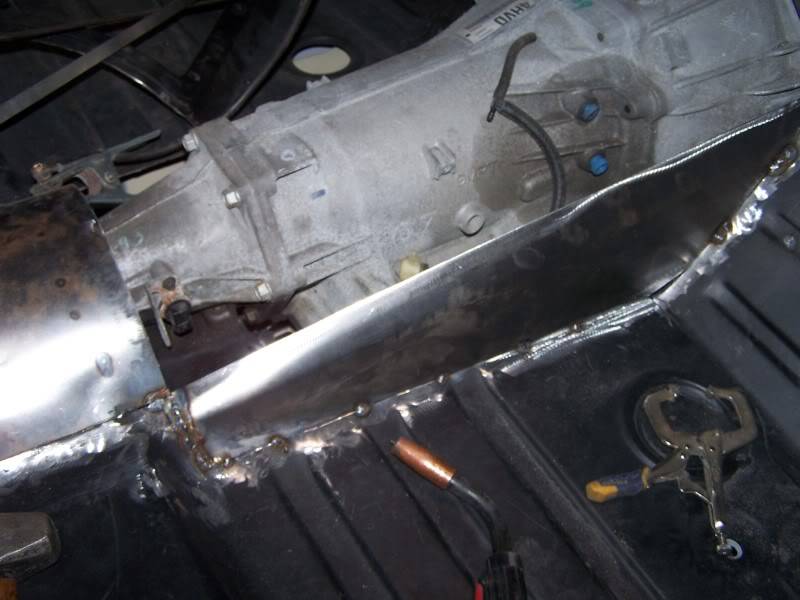
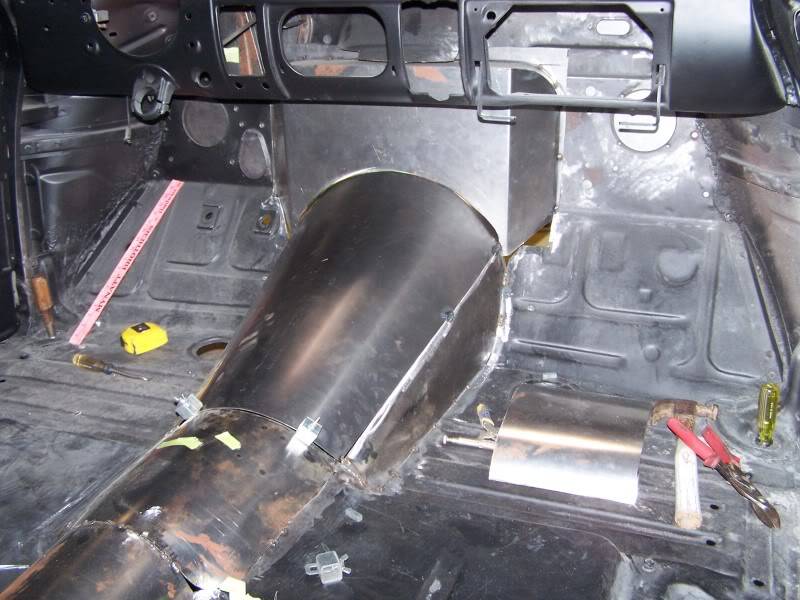
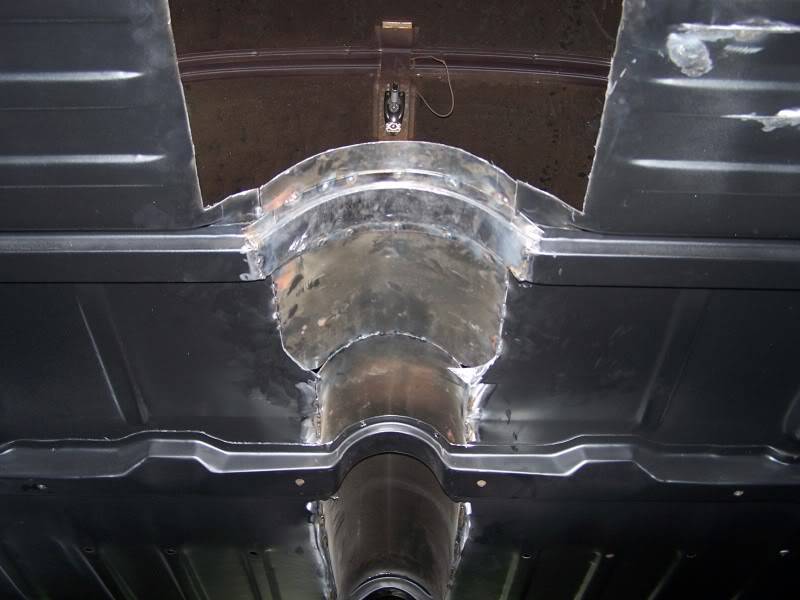
As you can see we also have to move the Floorbrace up.
Next I went back and finished cutting out the firewall now that I have my colunm marked and the holes for my Inner fenders.
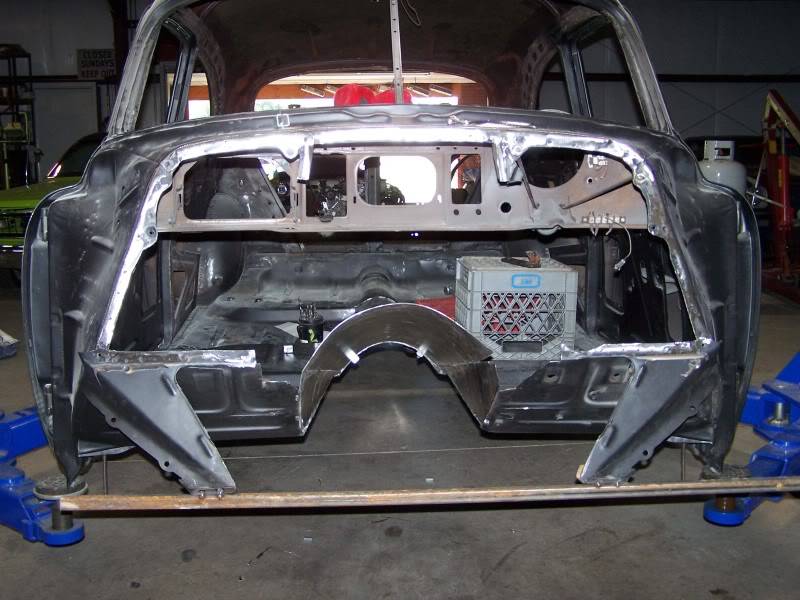
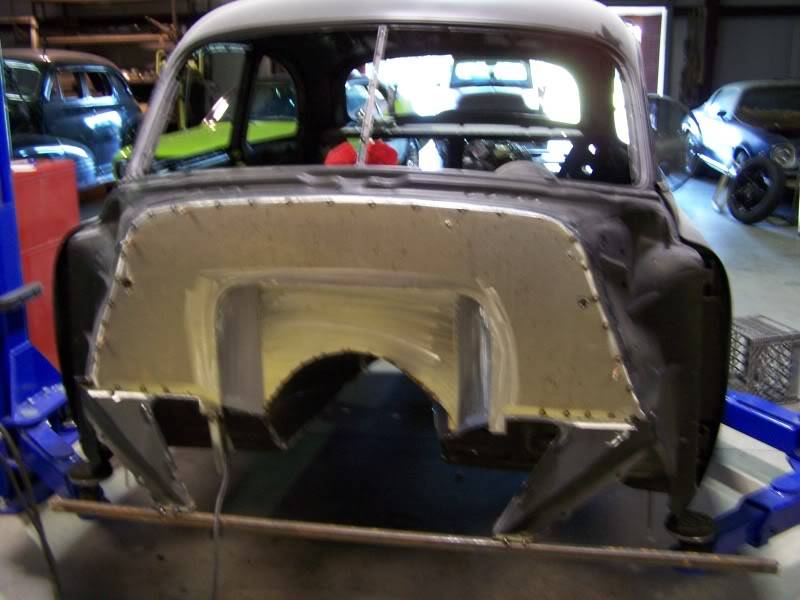
Here if you look you can see were I had to tuck the driver side in then roll the metal back up to meet the tunnel. I did this to add more foot room for the gas pedal. I dont like things uneven but I like comfort more. I think In the end I'll like the room more.
08-23-2011 #59
Registered User
- Join Date
- Nov 2006
- Location
- Ma.
- Posts
- 5,569
It looks great nice and clean. He'll appreciate that room a lot more then it being equal. Plus when the engine is in you won't see it anyway.
Wayne
Car FINALLY home !!!!!! lol
Project FNQUIK https://www.pro-touring.com/showthre...ghlight=FNQUIK
08-26-2011 #60
Registered User
- Join Date
- Aug 2007
- Location
- Tennessee
- Posts
- 499
Thanks man, Yea the owner came by today and loved it. He has even decide to go with buckets and a custom center console. So I’m happy too. Originally Posted by Motown 454
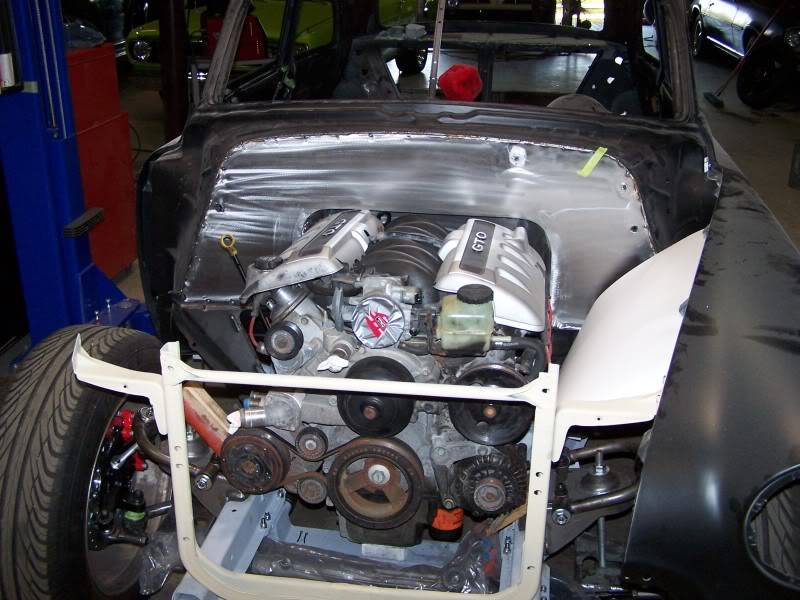
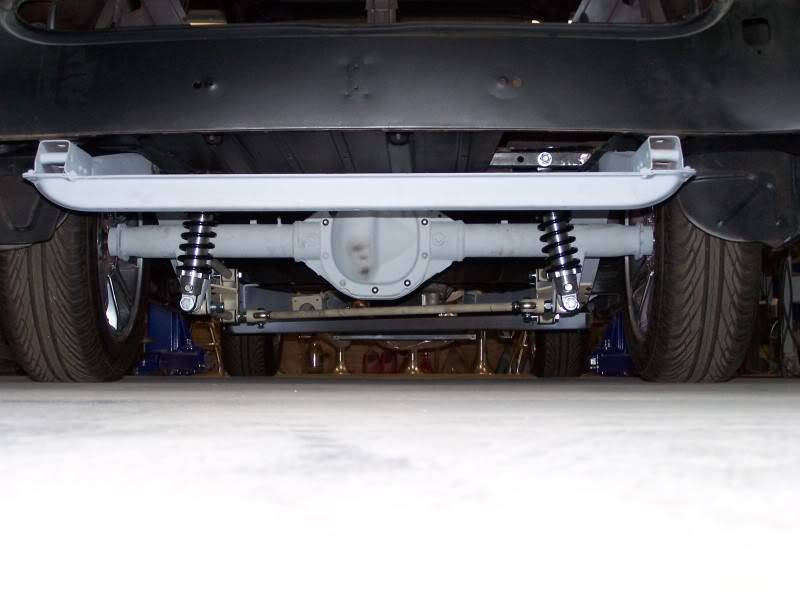
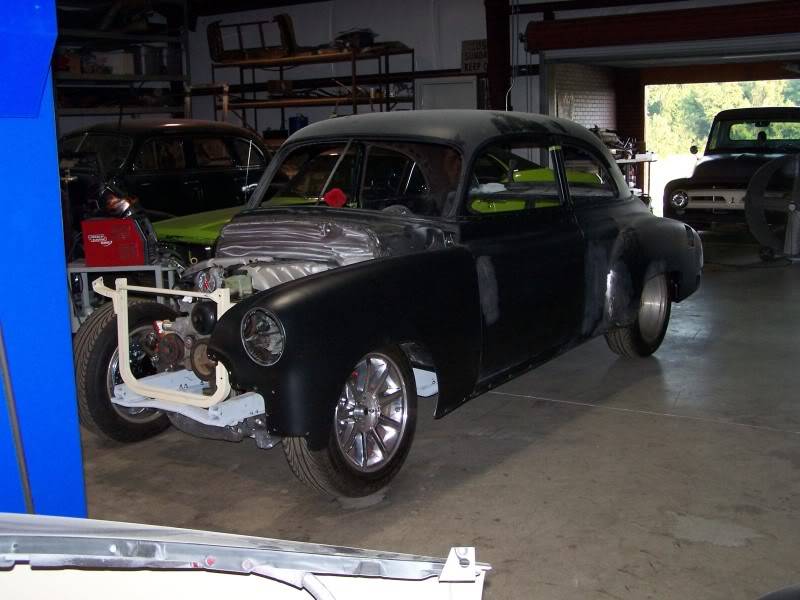
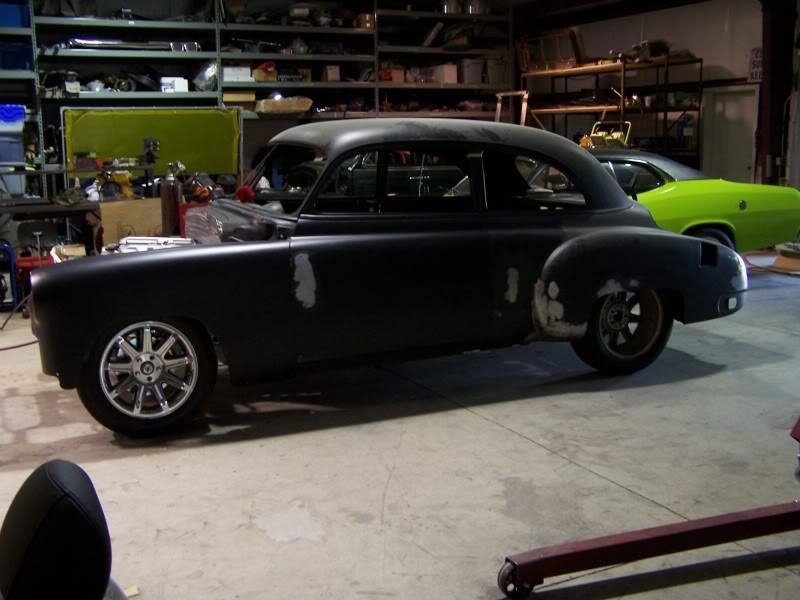
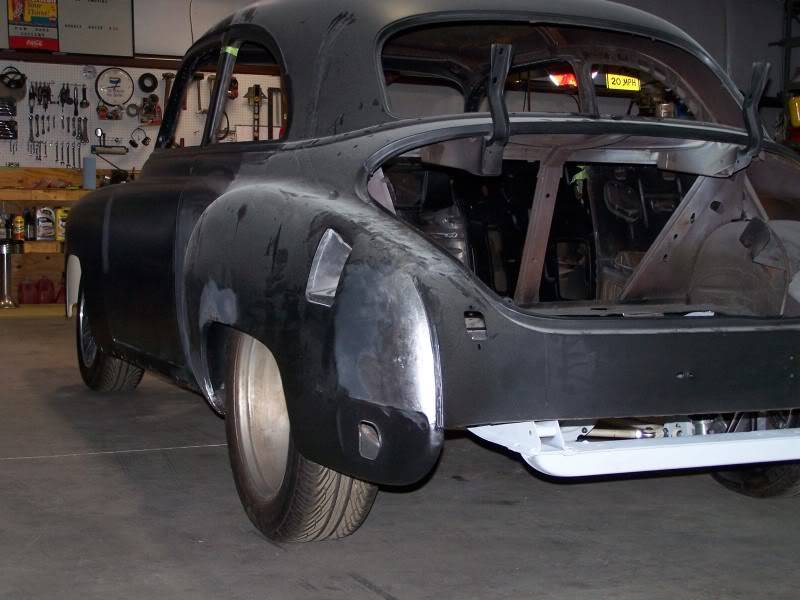
I finished welding the firewall up and the tunnel so I was able to sit the body back down. I didn’t like how the TCI 4 Link had the axle center line back so I redid the bars and moved the rear up 3/4", Made a big deferent’s . I also put a fender on just to get a ideal of how I want to do my Inner fenders. I’m looking forward to making the Inners and the Engine Covers.

 Reply With Quote


