

Results 21 to 38 of 38
Thread: Varishock installation
-
04-24-2011 #21

 Registered User
- Join Date
- Aug 2008
- Location
- Pgh, PA
- Posts
- 2,177
Made room in my mailbox.
Also, a few other things.
First of all, I made a comment about the Varishock design I should be more clear about. The unit itself from a design and quality perspective seems excellent and well beyond anything I could ever do. Hopefully performance will mirror my first impressions. My comment was really just about the bushings. The only way I was able to get the lower cantilever assembly together on my rear shocks was to send the hard edges off. Even then it required some fancy vice support, being very careful to not damage or scratch up the shock. Those bushings really ought to have a beveled leading edge. That, and the documentation, I'm not so crazy about. Also, I wish the adjustment knobs had a bit more protruding surfaces so that when a coil obstructs the center and you can't use the tool, it would be easier to get a firm grip with the tips of your fingers. Seems obvious to me that many people won't have much access. To be honest, the front installation and subsequent concerns over being able to really get to the adjusters made me wonder if I didn't screw up, and should have just installed coil-overs.
Also, now that I've mounted the wheels back on it appears as though I maybe can adjust the fronts with the wheels still mounted, though it will be very very difficult.
Finally, I'm very embarassed to say that I expected it to take about an hour total to install these things, and it took many times longer than that.
 '66 GTO Vert Project "Red Ink", 462ci of stroked pontiac power, TKO600, SC&C Stg II+, Tubular lowers, Currectrac Rear suspension, Moser 12bolt w/Truetrack, Wilwood Master and discs all around, too much fun for words...
-
04-25-2011 #22
Registered User
- Join Date
- Aug 2008
- Location
- Pgh, PA
- Posts
- 2,177
OK, as promised here's a quick primer on my experiences installing the Varishock Bolt-In double adjustable shocks. I'm running the SPC springs, Howe tall ball joints, SPC "race" adjustable upper control arms, SPC tubular lower control arms, Hellwig tubular front sway bar, Wilwood 14" 6 piston front and 12.2" 4 piston rear brakes, Moser crate 12 bolt rear end, Currie Currectrac rear upper and lower arms. Rear sway bar (Spohn 1") removed in preparation for installation of the enroute Hellwig tubular adjustable unit (expected in this week). Bilstein shocks removed, front and rear. On the front, using one flat spacer and one aluminum spacer.
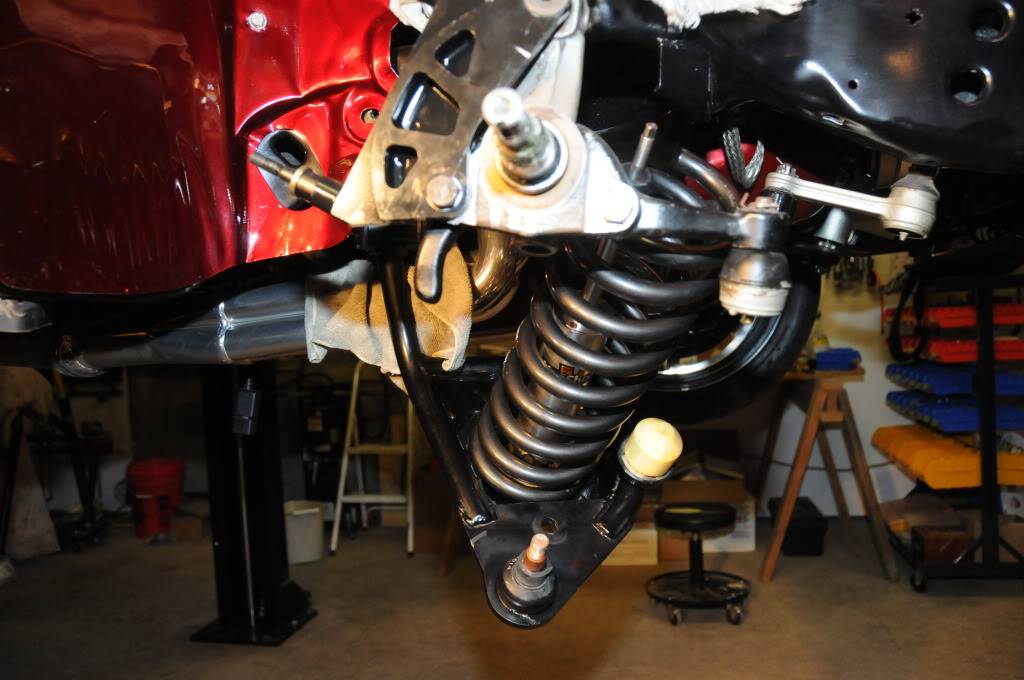
Here's the passenger side ready for installation. Caliper, hub and rotor removed.
This is the first spacer, which gets installed at the bottom of the LCA spring pocket
Both first spacer and aluminum spacer seated in the spring pocket of the LCA.
Here you see the shock mounted in the LCA without any springs. Note how "deep" those 5/16-18 bolts are. When I droppedthe spring around the shock, I just couldn't see a good way to be able to secure those bolts and tighten them if the spring was in place, which is why I elected to mount the bottoms first.

Drop the spring over the shock and into the pocket. Make sure that the top of the spring is properly indexed into the upper pocket.
Next problem was two-fold. With those spacers, there's no way the LCA can be pushed up enough manually to seat the ball joint into the spindle. Ordinarly I use 1/2" all thread with large washers and a bracket I made to go where the shock normally goes, and pull the control arms together. However, since the shock must be inside the LCAs first in this case, that's not an option. Had to support the LCA from underneath and lower it, pushing the LCA up, guiding the ball joint into the spindle. The second problem is that the shock itself needs to have the upper shaft go up and through the upper mount hole - but there are 2 issues. First, at rest it isn't aligned. You need to pull it "forward" to line it up with the hole. Furthermore, the shaft is about 1.5" too short, so as you're compressing the LCA up, you need to keep the coil spring aligned correctly, keep the ball joint aligned with the spindle, AND align the upper shock shaft with the mounting hole - for which you are primarily blind.
Installed configuration:
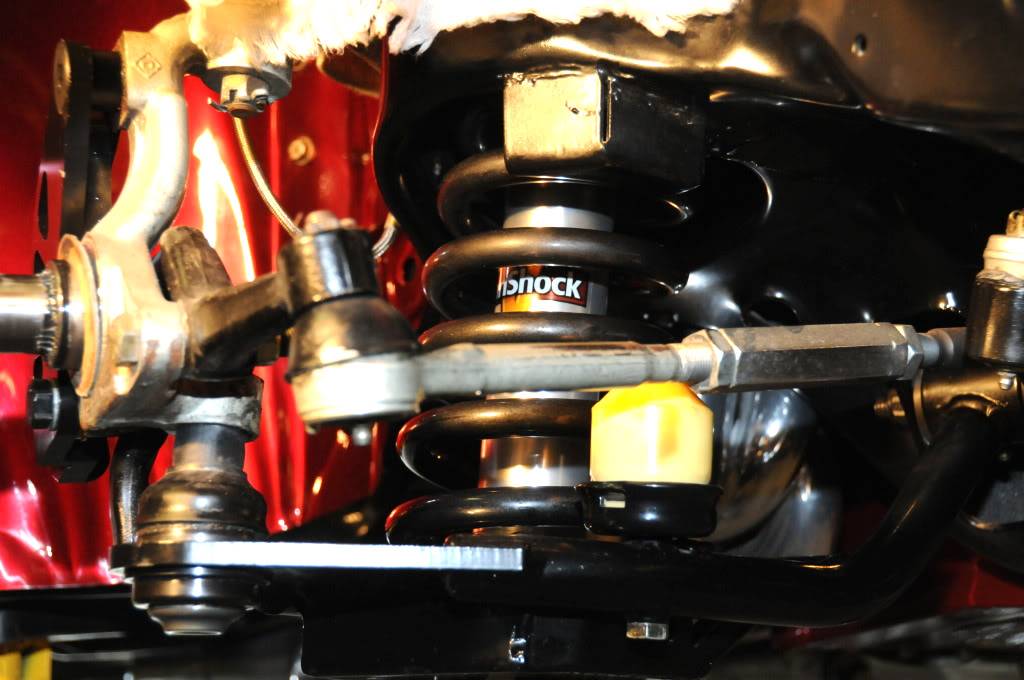
With the brakes back on - you can see the rotor (out of focus and fuzzy) to the right. Note the two adjustment knobs. This is the drivers side, and the dampening knob is the real "hard" to get to one. The rebound isn't as bad. The passenger side is just barely a hair better.
Then for the rear, which I though would be far easier. First of all, I realized that the upper bolts securing the eyelets to the frame crossmember had almost no clearance above them. On the drivers side I also had the pleasure of having the hard stainless fuel supply and fuel return lines right next to it, in the way of course. On the passenger side, I had mounted my fuel pre-filter nearby which also ended up getting in the way. I could have removed the exhaust which would have made a little more room, but obviously not anything in terms of vertical clearance.
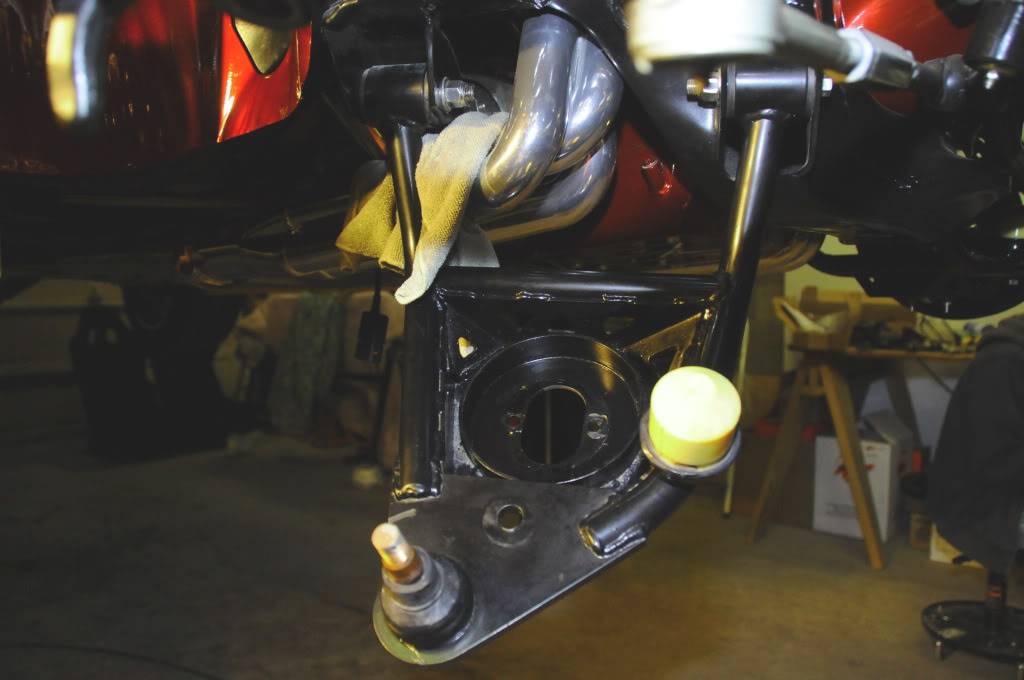
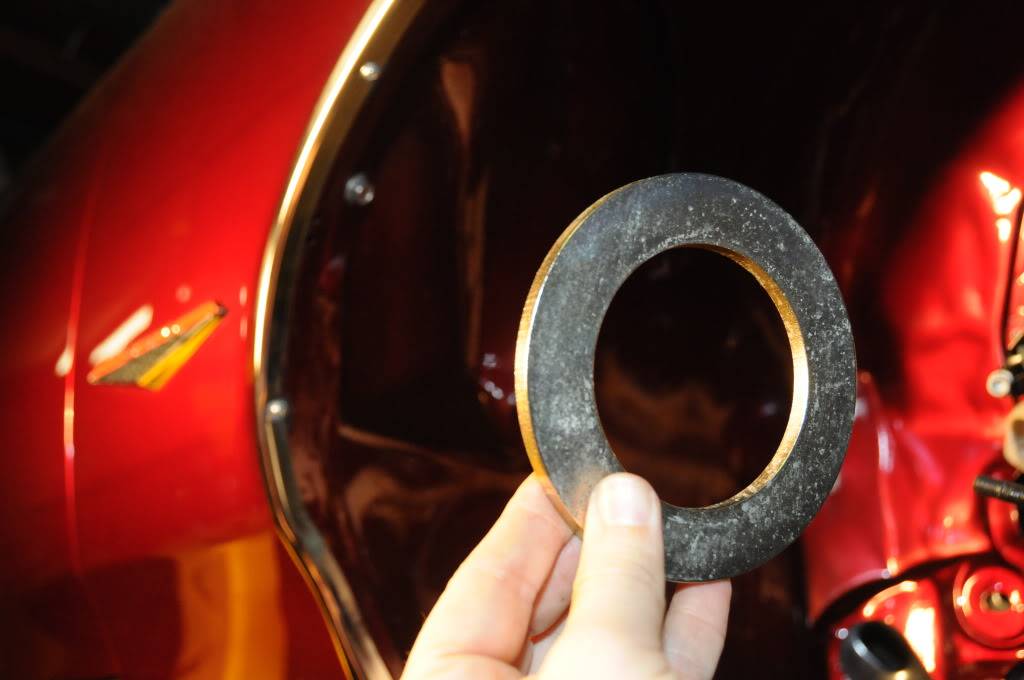
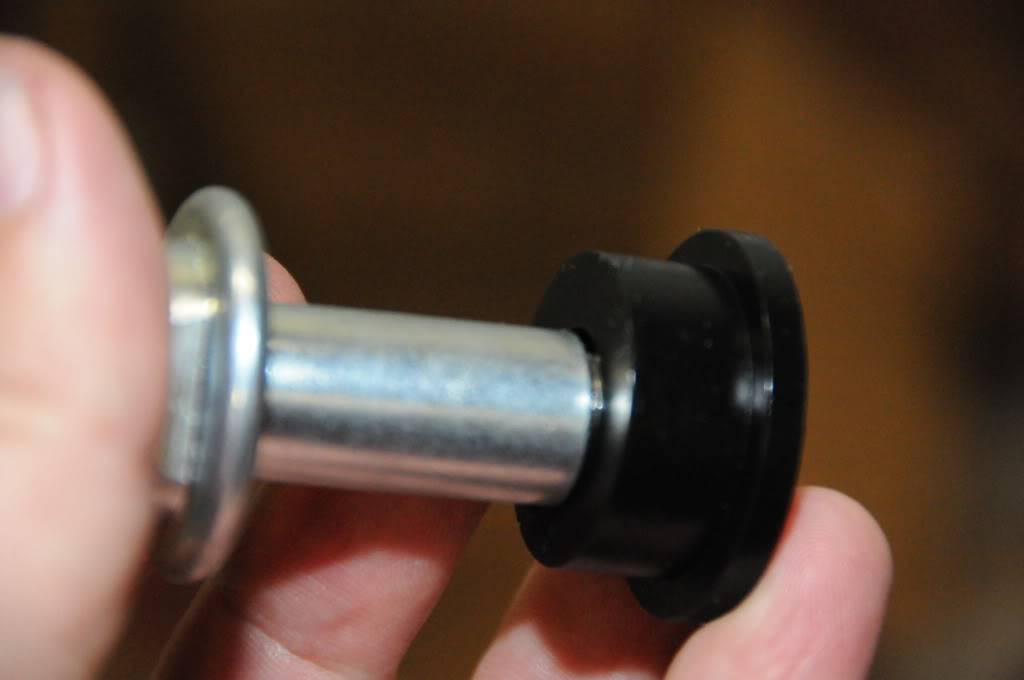
For assembling the shocks, in the pic below you seen the cantilever bolt and one of the poly bushings. The non-threaded part of the cantilever bolt is .624" outside diameter. The poly bushing is .578 inside diameter. Both have sharp 90deg edges on them. Then, the ouside diameter of the bushing is 1.133" and the inside diameter of the lower shock mount is 1.117". But that's really not accurate. Because when you have the cantilever pins in the bushing, it expandes the outside diameter quite a bit. And again - both the OD of the bushing and the ID of the lower shock mount are 90deg "sharp" edges. After struggling with this, I lightly sanded both the ID and OD edges of the poly bushings to allow them to lead in the shock mount.
After that, it was simply an exercise of trying to get and hold nut/bolt in the very limited space above the rear crossmember to tighten it.
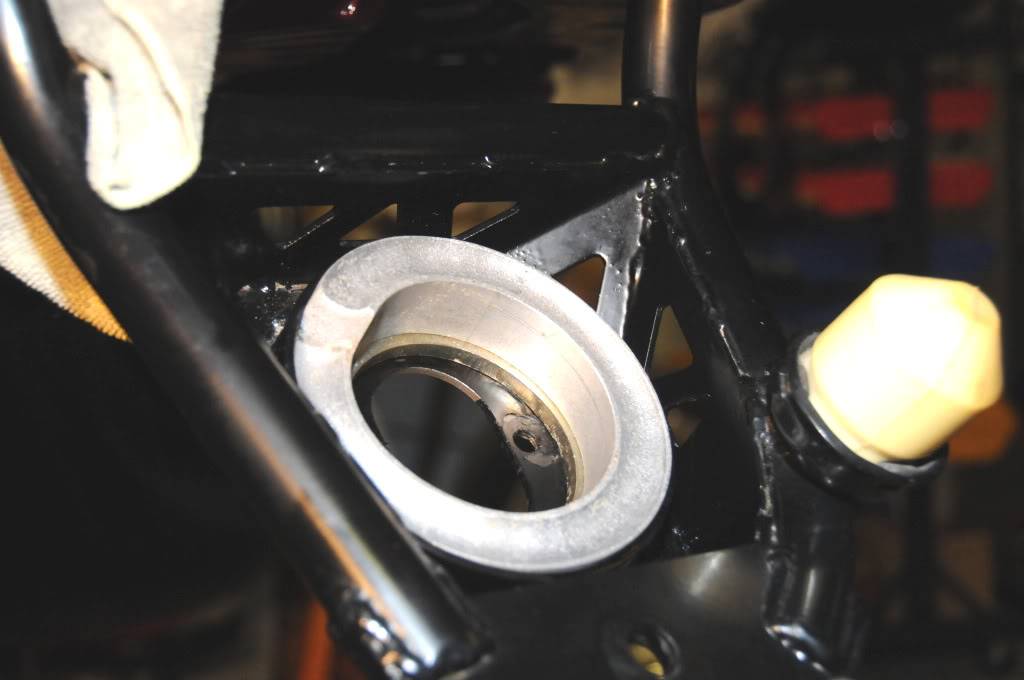
Finished product - not yet wiped down...

And very fuzzy pic of the inside - sorry for the poor pic quality.
 '66 GTO Vert Project "Red Ink", 462ci of stroked pontiac power, TKO600, SC&C Stg II+, Tubular lowers, Currectrac Rear suspension, Moser 12bolt w/Truetrack, Wilwood Master and discs all around, too much fun for words...
04-25-2011 #23 Registered User
- Join Date
- Nov 2008
- Location
- Templeton, CA
- Posts
- 561

Looks great. Thanks for the pics. I'll keep that rear shock thing in mind when it comes time to do mine.
Robert
My sloooow build thread...https://www.pro-touring.com/showthre...hlight=Orngasm
"If happiness is in your destiny, you need not be in a hurry."
If I can only convince myself of this!
04-25-2011 #24
Registered User
- Join Date
- Nov 2008
- Location
- Lake Oswego, OR
- Posts
- 612
How low is the front end now?
Lee
1966 Cutlass
The difference between truth & fiction: fiction has to make sense.
Build Thread:
https://www.pro-touring.com/forum/sh...ad.php?t=64470
04-25-2011 #25
Registered User
- Join Date
- Apr 2006
- Location
- Huntington Beach, CA
- Posts
- 2,420
Maybe I'm missunderstanding but I didn't see a pic that matches this description and it would be the one I'm most interested in. It is curious that these adjustable shocks may be so difficult to adjust if not in a coil over format. Originally Posted by wmhjr
 Please Subscribe to the AutoXandTrack YouTube Channel
Autocross and track blog about running autocross and track events with pro touring cars
04-25-2011 #26
Registered User
- Join Date
- Aug 2008
- Location
- Pgh, PA
- Posts
- 2,177
Sorry - you're right. Here it is. Originally Posted by Chad-1stGen
Hard to see, but:
This is a better pic. The dampening adjustment knob (on left) is actually even harder to get at than it looks.

Hope this helps....'66 GTO Vert Project "Red Ink", 462ci of stroked pontiac power, TKO600, SC&C Stg II+, Tubular lowers, Currectrac Rear suspension, Moser 12bolt w/Truetrack, Wilwood Master and discs all around, too much fun for words...
09-05-2011 #27 Registered User
- Join Date
- Jan 2009
- Location
- NYC
- Posts
- 121
i also had a real pain installing them i have single adjustable varishocks i knew nothing about indexing the front springs i just rotated them where i thought was best to get to the adjuster still did not help is that a problem that there not indexed i am going to try again by compressing the springs with clamps so i can rotate them i do wish the mounting was closed eyelets instead of slots it would have been a bit easier to get the bolts to stay put as far as the rears they are tight against the exhaust i used a press to put the bushings in at least that was easy they do feel a bit better than the bilstiens but i will never change them again
yes it does have positraction
09-06-2011 #28
Registered User
- Join Date
- Aug 2008
- Location
- Pgh, PA
- Posts
- 2,177
Front springs in particular need to be properly indexed. There is a pocket for the end of the spring pigtail. If it's not indexed correctly, it effectively lengthens the spring in the pocket.
'66 GTO Vert Project "Red Ink", 462ci of stroked pontiac power, TKO600, SC&C Stg II+, Tubular lowers, Currectrac Rear suspension, Moser 12bolt w/Truetrack, Wilwood Master and discs all around, too much fun for words...
09-06-2011 #29
Registered User
- Join Date
- Sep 2009
- Posts
- 25
Hi wmhjr
I am not trying to be a wiseass but you should have gone with the coilover varishocks. You have control arms that will allow you to use them and it make adjustments and spring changes easy. I tried to get shockwaves and multiple brands of coilovers to work in my 60 and finally found the varishock, It was the only one with the proper dimensions to fit. I had the same problem with tight bushings but if you use some energy suspension poly lube they go on alot easier.
09-06-2011 #30
Registered User
- Join Date
- Aug 2008
- Location
- Pgh, PA
- Posts
- 2,177
Thanks and not taking it as wiseass, but there was a reason I didn't go with the coilover. Suspension travel. There is measurably less suspension travel with the coilovers than with the coil/shock combination. Not picking on the Varishocks in any way - and am not saying that there is anything wrong with them (the coilover bolt-in model) whatsoever. Just that when you look at effective shock travel I decided (after talking QUITE a while with Marcus) that since my spring rate was where I wanted it, my height was where I wanted it, and the only thing I wanted to change was damping and rebound, the bolt in double adjustable was optimal for my use. BTW, I'm saying this in reference ONLY to the "bolt in" Varishocks for the 1st Gen A-body compared to the traditional coil/double adjustable varishock, and NOT comparing coilovers in general. IF I were running an Alston, Schwartz or Roadster shop chassis rather than an actual A-Body frame, I'd have coilovers. Originally Posted by 11thhourfabrication
Hope this makes sense.'66 GTO Vert Project "Red Ink", 462ci of stroked pontiac power, TKO600, SC&C Stg II+, Tubular lowers, Currectrac Rear suspension, Moser 12bolt w/Truetrack, Wilwood Master and discs all around, too much fun for words...
09-06-2011 #31 Registered User
- Join Date
- Sep 2007
- Location
- Southern California
- Posts
- 566
wmhjr, Originally Posted by wmhjr
Did you try a screwdriver handled ball driver (bondhus) like
http://www.amazon.com/Inch-Hex-size-.../dp/B001AJK5SC?
That is what I use to adjust my front varishocks and the size is 7/64". Because of the ball tip you can get at the allen in the center of the knob to turn it.
09-07-2011 #32
Registered User
- Join Date
- Jan 2005
- Location
- Enfield, CT
- Posts
- 423
I can see where it would be difficult. With my QS1s, I can usually get a finger in between a coil, and another up past the bottom of the shock through the hole in the bottom of the LCA. But just barely. I don't know how you would get to an additional knob in a different location like on a QS2.
'67 GTO - LS3, 4L60E, SC&C AFX Package, KORE3 C6 Z06, Boyds PT-09s
https://www.pro-touring.com/showthre...7-GTO-LS3-Swap

09-07-2011 #33
Registered User
- Join Date
- Aug 2008
- Location
- Pgh, PA
- Posts
- 2,177
I can do that on the passenger side, but not with one of the knobs on the drivers side. The spring is just indexed to the perfectly wrong alignment, but that's where it needs to be. I can get my finger tips in to adjust them so it's no big deal, but I've passed along my ideas for how to improve the design to Alston. Originally Posted by Roadbuster
'66 GTO Vert Project "Red Ink", 462ci of stroked pontiac power, TKO600, SC&C Stg II+, Tubular lowers, Currectrac Rear suspension, Moser 12bolt w/Truetrack, Wilwood Master and discs all around, too much fun for words...
09-07-2011 #34
Registered User
- Join Date
- Aug 2009
- Location
- Central California
- Posts
- 132
Did you think about notching the lower control arms so the shocks could be installed from the from the bottom (http://cachassisworks.com/Attachment...99-031-203.pdf? I will be running the SPC Upper and Lower Control arms with the Varishocks.
09-08-2011 #35
Registered User
- Join Date
- Aug 2008
- Location
- Pgh, PA
- Posts
- 2,177
I thought (briefly) about it. I also talked directly to Alston and to Mark Savitske. Both indicated that I should NOT do that with the SPC lower arms. I have some ideas as to what I'd do again - I'd make an adapter plate. However it's not important enough for me to rip the front end apart to do it now. Note that in that PDF, those are stock LCAs. The SPC unit is MUCH thicker and frankly, you never know what changes you'll make in the future. I would be very unhappy to cut them up and find out later that a future front suspension mod required the notches to not be there :( Originally Posted by cspecken
'66 GTO Vert Project "Red Ink", 462ci of stroked pontiac power, TKO600, SC&C Stg II+, Tubular lowers, Currectrac Rear suspension, Moser 12bolt w/Truetrack, Wilwood Master and discs all around, too much fun for words...
09-08-2011 #36
Registered User
- Join Date
- Jan 2009
- Location
- NYC
- Posts
- 121
ok so i originally indexed them in the spacer plate i did not know thats what they called it it was a real $%#CH to install
yes it does have positraction
09-08-2011 #37
Registered User
- Join Date
- Aug 2009
- Location
- Central California
- Posts
- 132
Originally Posted by wmhjr
Bummer, sounds like I will need to do what everyone else has done too! I hope nothing goes wrong with the shocks, not looking forward to dropping the control arms. I would be interested in hearing about your adapter plate idea.
09-09-2011 #38
Registered User
- Join Date
- Aug 2008
- Location
- Pgh, PA
- Posts
- 2,177
Chris, here is what I was thinking of.
Machine a round adapter plate that would go between the lower control arm pocket (machined to the same OD spec) and the lower shock mount. Countersink two grade 8 bolts from under the adapter, securing through the lower shock mount (on the shock). The height of the adapter would not create a travel issue as the shock (fully extended) is actually slightly short as it is, and at full extension like when the car is on a 2 post lift, the shock shaft is limiting travel to begin with.
Then drill and tap two holes on the bottom of the adapter, so that you could assemble the shock to the adapter, mount the shock in the upper perch, then raise the lower control arm and compress the spring, just allowing the assembly to slide into the pocket of the lower control arm, then run the bolts in from the bottom. I would probably machine a lead, or angle on the bottom outside edge of the adapter to allow it to guide easily into place in the pocket as the lower arm raises.
Don't know if I'm over-thinking this, but it makes sense to me.'66 GTO Vert Project "Red Ink", 462ci of stroked pontiac power, TKO600, SC&C Stg II+, Tubular lowers, Currectrac Rear suspension, Moser 12bolt w/Truetrack, Wilwood Master and discs all around, too much fun for words...

 Reply With Quote


