

Results 1 to 10 of 10
-
01-16-2011 #1

 Starting The Transformation
- Join Date
- Dec 2004
- Location
- Phoenix, AZ
- Posts
- 253

Vintage Air Install - Help Needed
As mentioned in the title, I am working on a case-study of doing an A/C install as bass-ackwards as possible.

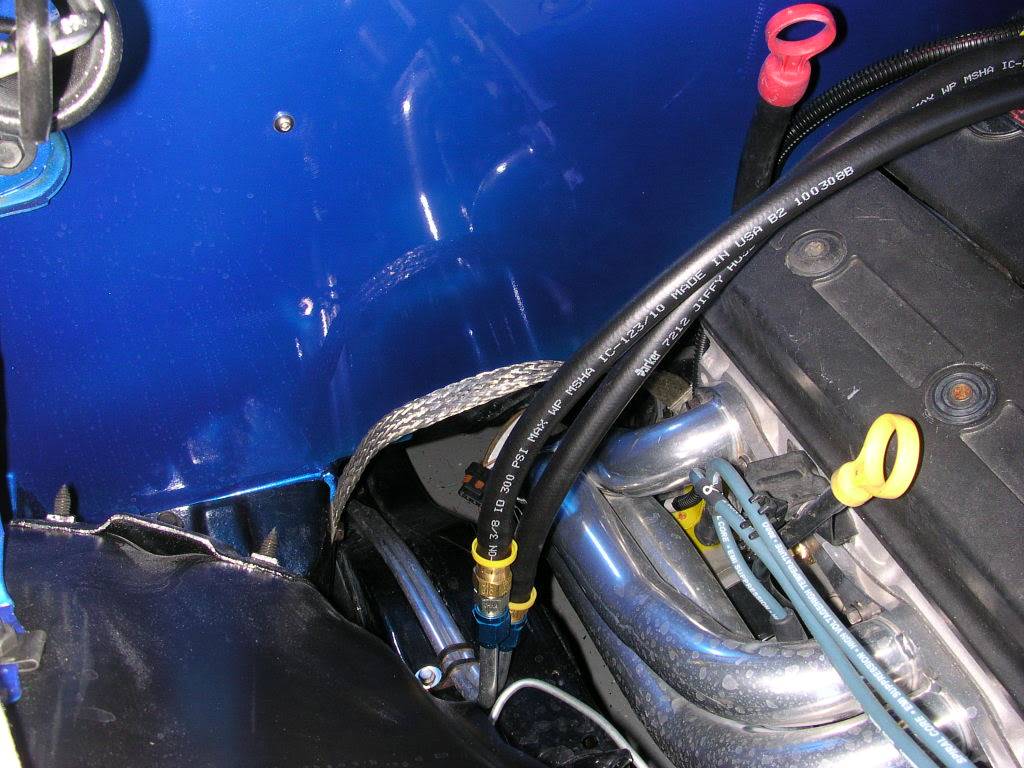
Before purchasing my A/C system, I had the firewall on my 70 Chevelle smoothed and painted. Now that I'm working to install the A/C (Gen IV vintage Air from Prodigy), I am lacking an apparent way to secure the evaporator case on the forward side without putting new holes through the firewall; the upper bracket is already installed. Looking it at it from the back-side (attached photo), I am sure that I could make some modification(s) to the mounting bracket, but am not coming up with a good location for securing the bracket to.
If anyone has dealt with this problem, or has an idea/solution for resolving my poor planning issues, it would be much appreciated.
-
01-16-2011 #2
Banned
- Join Date
- Aug 2003
- Location
- Orlando, FL
- Posts
- 8,745
Welding a stud before the firewall is painted is the best. but when the firewall is painted already, Michael often puts a bracket from the evaporator to the floor pan just below the firewall
01-16-2011 #3 Registered User
- Join Date
- Jul 2006
- Location
- Phoenix
- Posts
- 467
I was in exactly the same dilemma when I went to install mine with a smoothed and painted firewall. Here is what I did. A bit overkill but it's rock solid and I did it so I had
the option of mounting other stuff to the tubing bracket I built and I plan to make a close out panel below the glove box so you can't see anything. It would be fine I think
with the bracket on the front part of the evap case (between it and the firewall) down to the toe board and then the bracket across the top. You wouldn't see anything from
the engine side of the firewall that way and you cold leave off the thing I made out of round tubing you see in the pics that's between the glove box and firewall.
https://www.pro-touring.com/showthre...nit&highlight=Erik
https://www.pro-touring.com/showthre...without-a-name
Camaro LS2, T56, 12 bolt, C6 Z06 brakes, Rushforth Super Spokes, ATS Spindles
2006 Chevy Trailblazer SS
01-17-2011 #4
Registered User
- Join Date
- Dec 2002
- Location
- Philadelphia/New Jersey
- Posts
- 111
Im thinking you could probably use one of the 3m panel adhesives to glue a bracket to the firewall.
Sika also makes a panel glue that stays flexible.
That stuff is great I have glued panels onto the sides of Buses at work and 4yrs later still tough to get off have to use a forklift to pull it.
Just an idea.
01-17-2011 #5
Banned
- Join Date
- Aug 2003
- Location
- Orlando, FL
- Posts
- 8,745
You could panel bound a stud if you welded the stud to a 3 X 3 piece of flat material and glued that to the firewall
01-17-2011 #6
Registered User
- Join Date
- Oct 2008
- Location
- Durham,NC
- Posts
- 664
I have done same thing there on my Chevelle and what I came up with is to fit it how you want it to sit mark it and then take it out and weld and stud in place.
01-17-2011 #7 Registered User
- Join Date
- Apr 2002
- Location
- North Central Texas
- Posts
- 720
This is what I was thinking after reading the original post. In the picture you posted there is a ledge where the firewall and the floor pan meet. I would put a couple of holes in the ledge and fab a bracket from that to the evaporator and bolt it in. Originally Posted by ProdigyCustoms

01-17-2011 #8 Registered User
- Join Date
- Dec 2005
- Location
- Dublin, CA
- Posts
- 502
I drilled one hole and used a single stainless allen button head bold with stainless washer. On the inside it has a nylon spacer with nyloc nut. For the upper backet I used the same button head bolts through the cowl.
 Brent
Brent
1971 Camaro, LT1, 4L60E
01-18-2011 #9
Starting The Transformation
- Join Date
- Dec 2004
- Location
- Phoenix, AZ
- Posts
- 253
All -
Thank you very much for the responses and suggestions. Since the firewall is black, and it will be very difficult to see any bolt through the junction at the firewall & toe board, I think I will try with the bracket and button-head (black) allen bolt. I will post pictures after I get this fabbed up (hopefully later today).
Thanks again.
~ Jason
01-18-2011 #10
Full Blown G-Machiner
- Join Date
- Dec 2005
- Location
- Coolidge, GA
- Posts
- 988
I also just went through this on my 67 Chevelle, fully shaved and painted firewall. I drilled a 3/8" hole in firewall for bottom bracket and used a polished stainless 3/8 button head hex head bolt with polished washer on outside. Then also had to drill a 1/2" hole in toe board area for drain line to pass through

 Reply With Quote


