

Results 1 to 20 of 36
Thread: Flip - '69 Firebird Build
-
09-28-2010 #1
 Registered User
- Join Date
- Jul 2010
- Location
- Detroit, MI
- Posts
- 62

Flip - '69 Firebird Build - Coverup Special.
First time doing a build thread so bear with me. I bought a 69 firebird a few months back and spend that time getting it driveable. I rewired it with MAD electical's new system, installed a new edelbrock carb, manifold and air cleaner and a few other odds and ends. Ran great but I hated the way it rode and it sounded like it was going to shake apart. Thus I bought a full DSE suspension for it and started digging in the other day. This is what I found and the work that ensued. Whoever had the car before me did almost as much work to cover up the damage than what it would have been to do it right. They were good, I give them that. Keep in mind I am 22 and doing all of this in my 1 car garage in my apartment. Here it is...


I did some more work tonight and found some other big holes. I will post them in the morning when I get a chance to take some photos. Looks like I'll be doing under seat pans, trunk pan. inner rear wheel wells, frame rails, and probably the tail panel. Basically the whole rear half of the car. Will I need to brace the car to keep it true as long as the quarters stay on?1969 Firebird
Champagne taste and a Kool-aid budget...
-
09-28-2010 #2 Registered User
- Join Date
- May 2002
- Location
- Northern California
- Posts
- 10,716
looks good but finding rot always sucks. Nice that everything is there,.
vinceMrQuick ΜΟΛ'ΩΝ ΛΑΒ'Ε
09-29-2010 #3
Registered User
- Join Date
- Apr 2010
- Posts
- 364
Nice!! Good to see another 69 bird on here. I salute you for doing it at your apt. complex as well. I always hated picking up my tools every time I needed to run to the auto parts store and pick something up.
Make sure you lock that garage up tight though. Apartments are breeding grounds for would-be thieves.
09-29-2010 #4
Registered User
- Join Date
- Jul 2010
- Location
- Detroit, MI
- Posts
- 62
Need some help. I cannot get the front leaf spring mount off. I believe they are J-nuts and since the locking mechanism is rotted I think the nuts are just spinning on me between the floor pan and the mount. Should I just leave them hanging until I cut out the pans?
1969 Firebird
Champagne taste and a Kool-aid budget...
09-29-2010 #5 Registered User
- Join Date
- Oct 2009
- Location
- Amherst, OH
- Posts
- 524
You could cut access holes and just weld them back up when you're done. That's what the previous owner of our '69 convertible project did...
09-29-2010 #6 Registered User
- Join Date
- Mar 2009
- Location
- overseas
- Posts
- 3,434
nice project! good luck with
 Kevin S. (overseas in Germany)
1963 Chevrolet Impala 2d ht Coupe
www.CruznArt.com
CRUZN - Automotive Artworks
09-29-2010 #7
Registered User
- Join Date
- Jul 2010
- Location
- Detroit, MI
- Posts
- 62
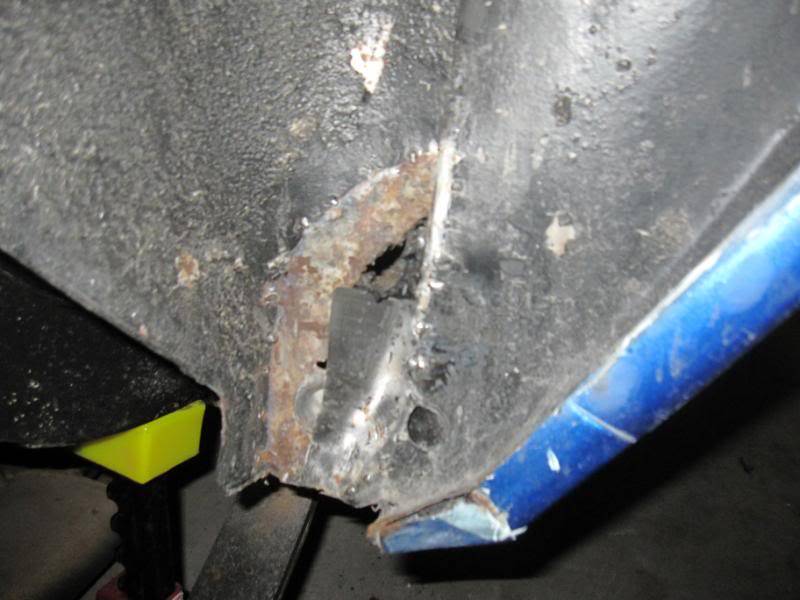
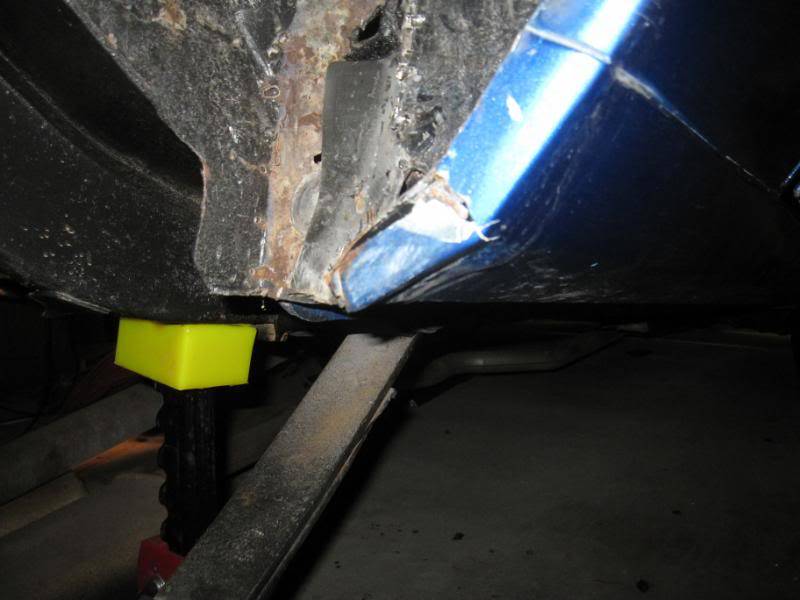
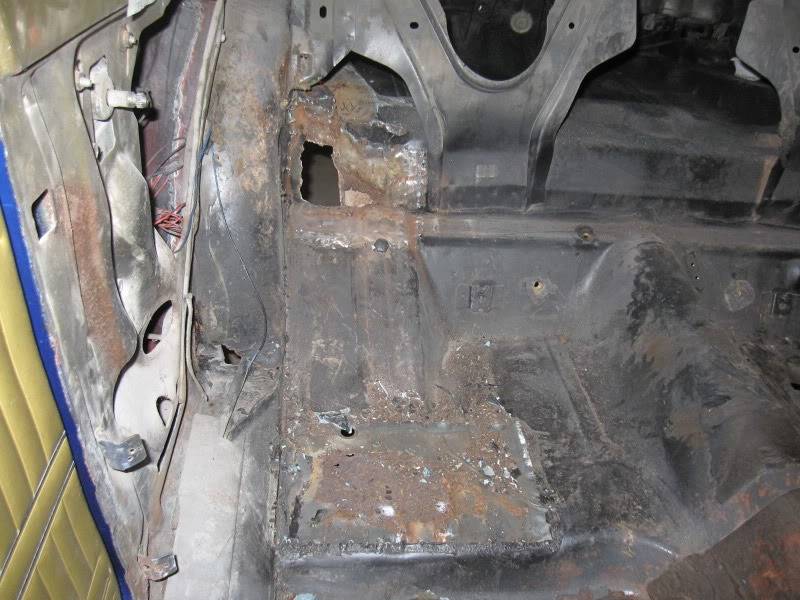
Here is a little bit more of what I am working with. I understand that I need essentially a whole new rear section of the car, save the quarters. The tail panel looks nice but it is filled with bondo and about a 1/2 inch thick...no kidding. What is it gonna take to do this? Does anyone know of a build thread I can follow? Should I mini tub it while I am at it? Would that be harder than normal replacements? Can I save the tail panel for a later date or should I just go ahead and do it the right way now? If I remove all this will the car twist? Give me some feedback and ideas of where to go from here and how difficult it will be. I can grind, weld, wrench and wire. How bad?
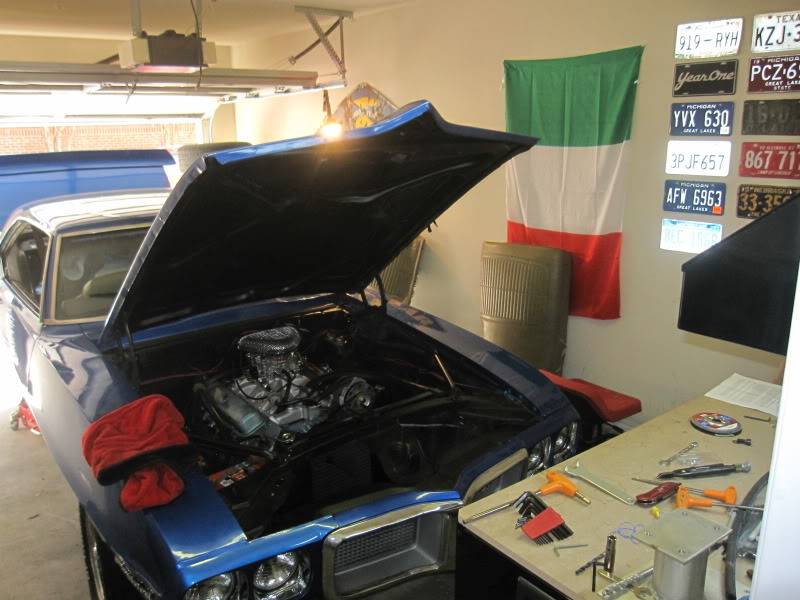
Here is the engine bay wired with MAD's new system. Still need to wrap or loom them. Not sure which route to go...

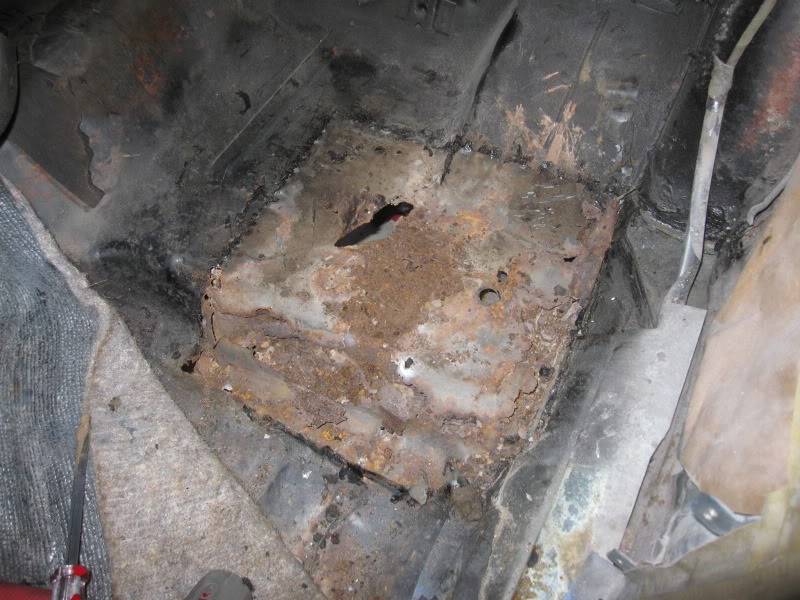
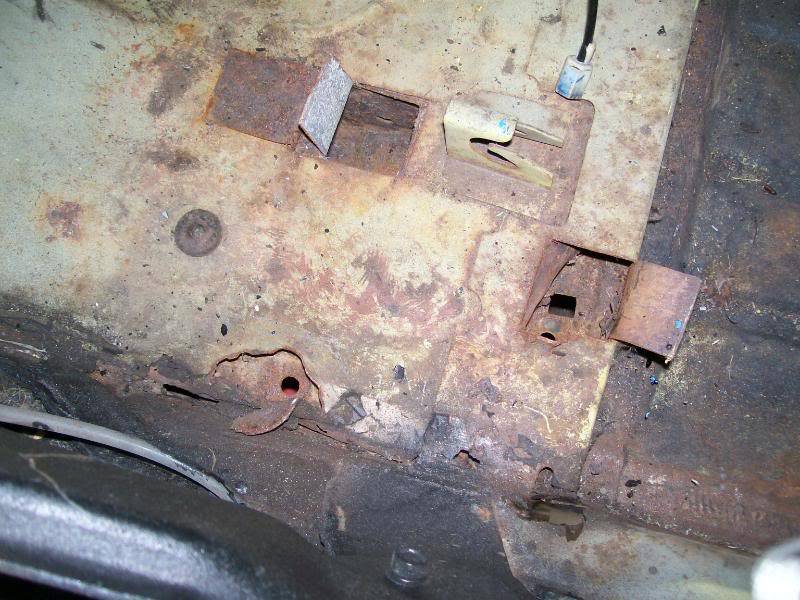
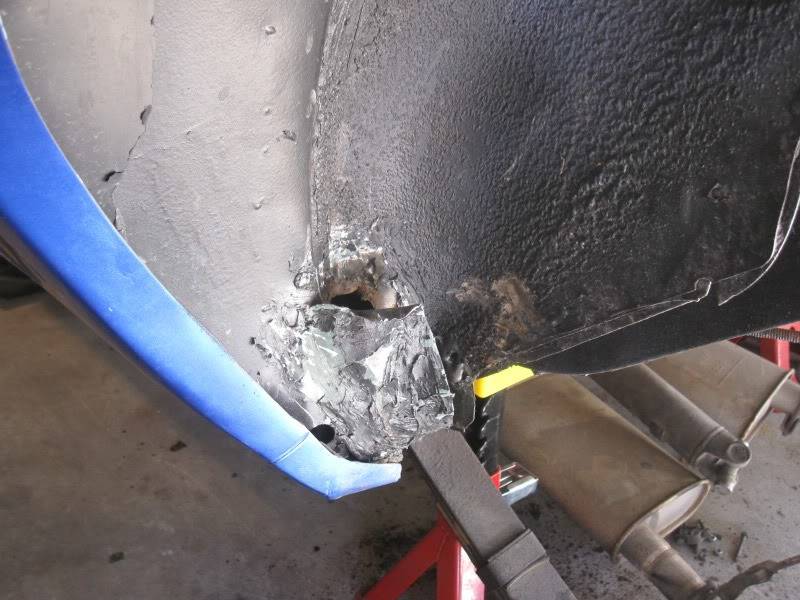
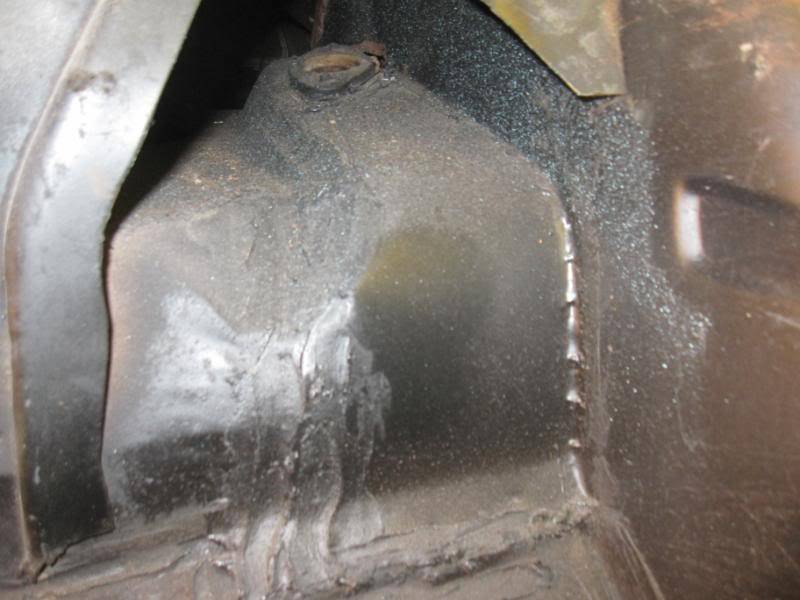
This is the sneaky patch panel that showed up when I removed the seat. The mufflers blocked it from below as well.

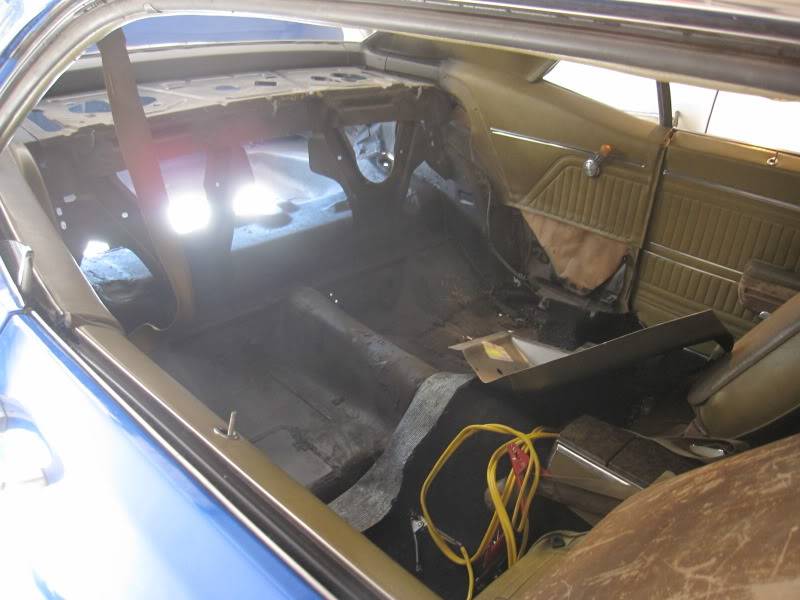
Interior as it sits
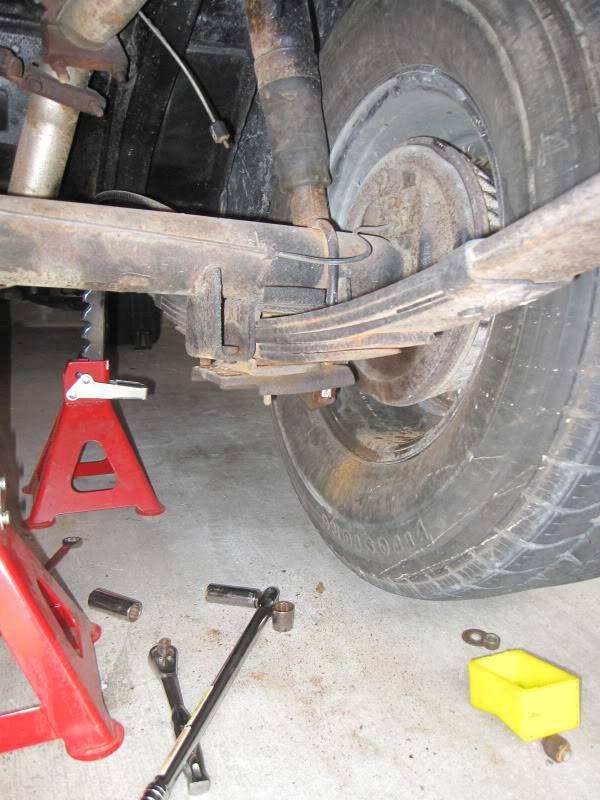
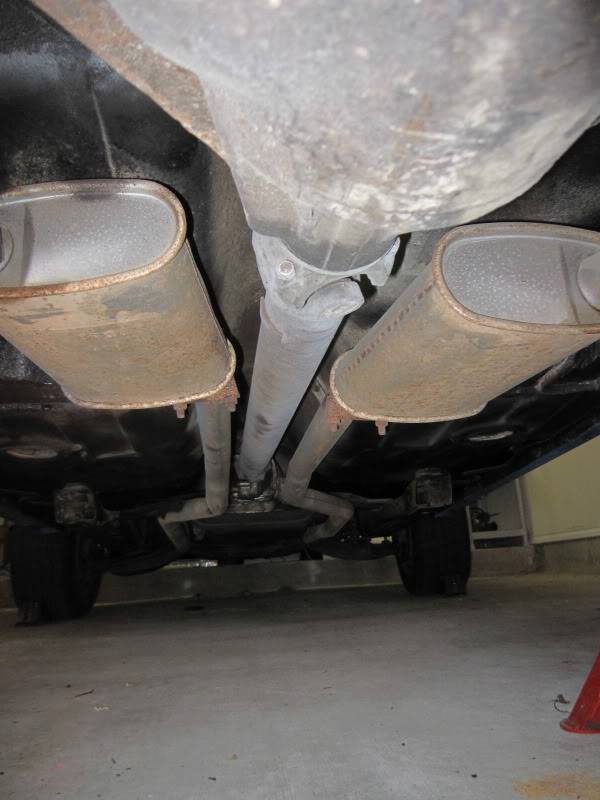
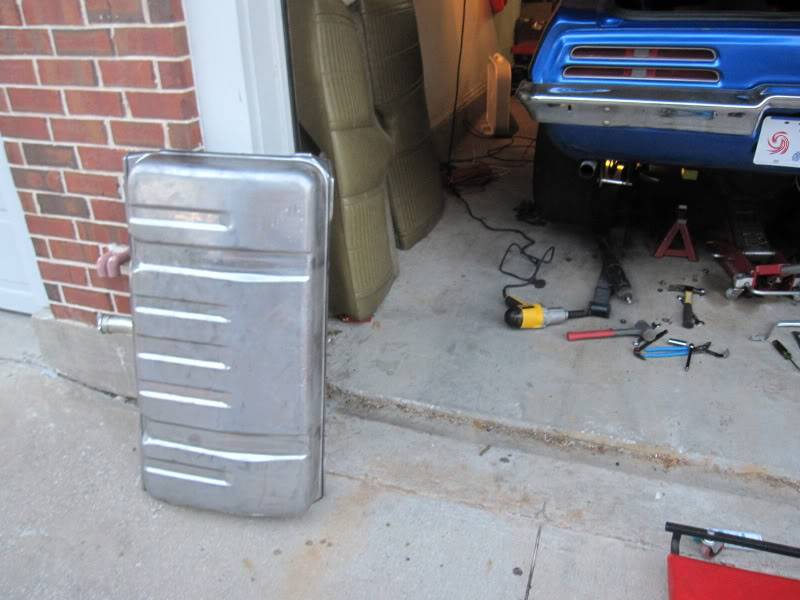
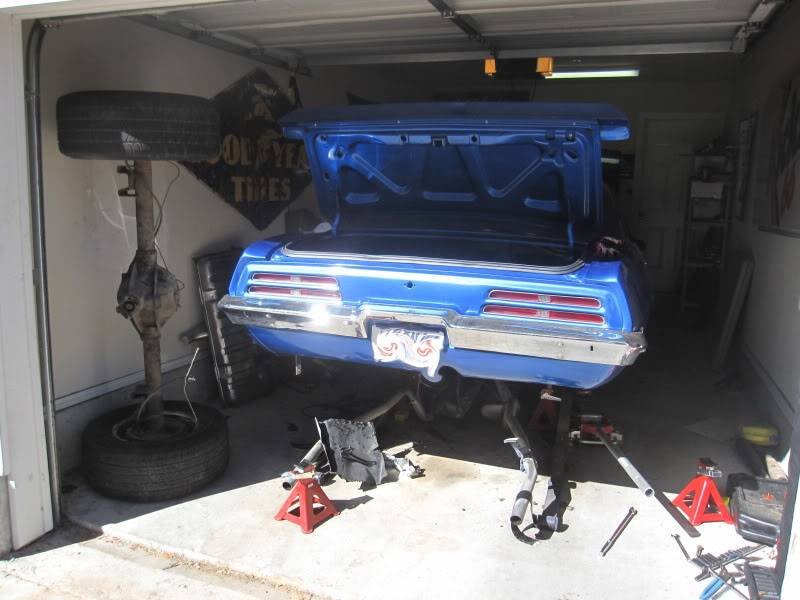
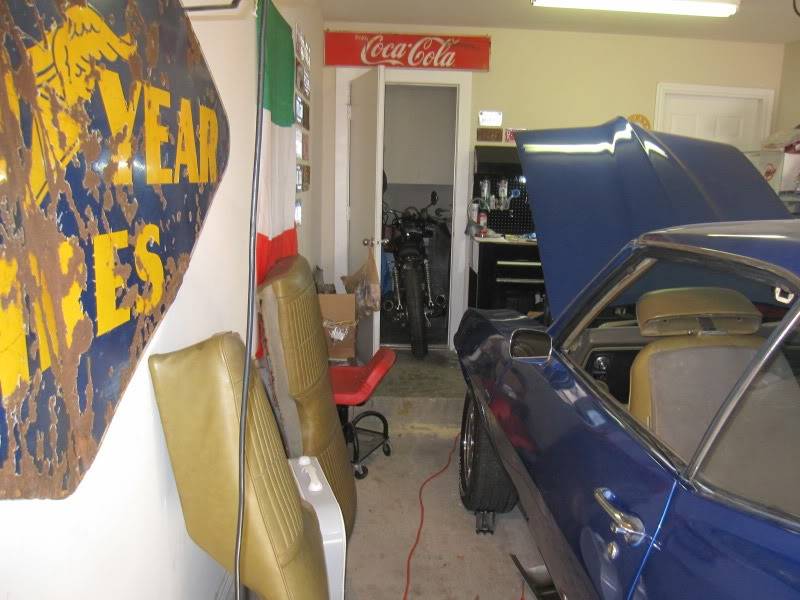
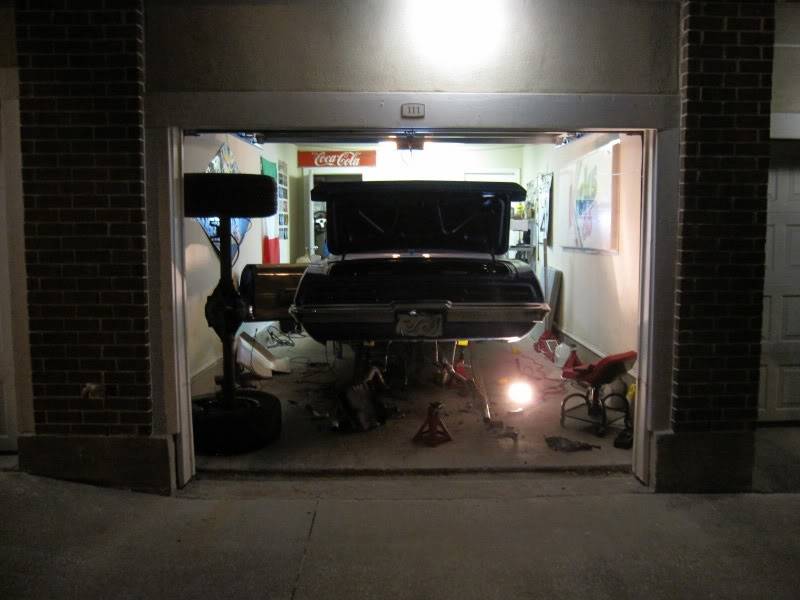
My garage. As you can see I am really working with limited space. The rear end is out and I am having issues getting the exhaust out without cutting. I need to do something with brake and fuel lines as well before I can hack into the floor.
How it looked when I got the car. Looks solid as can be doesn't it?

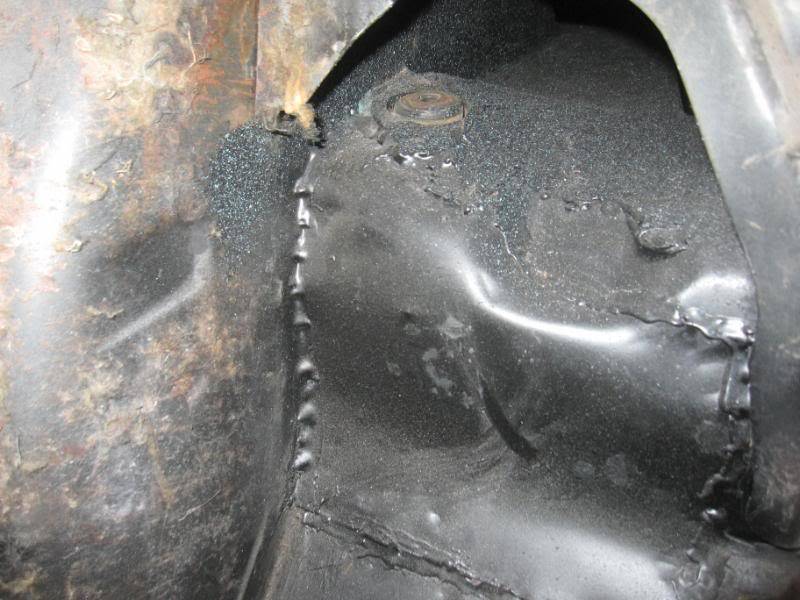
With a little hammer work this is what I found.

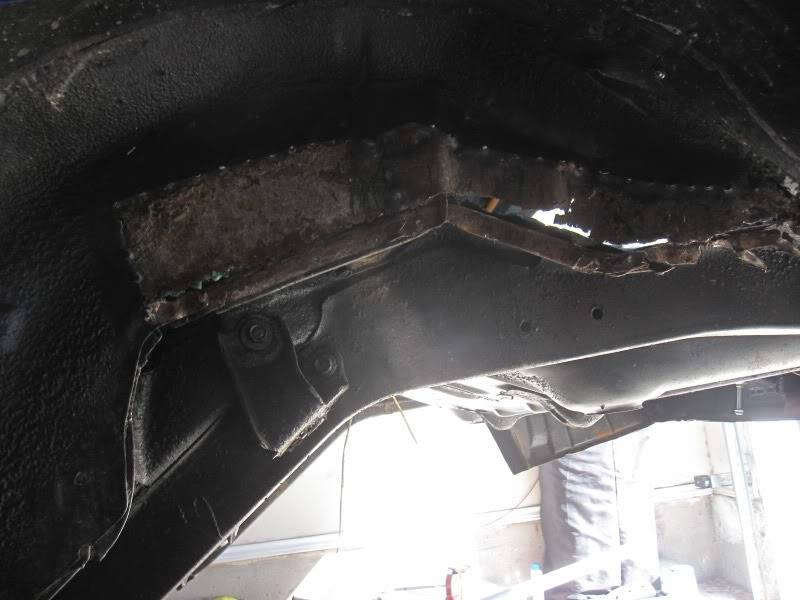
Some smaller holes from the old screwdriver and hammer rust test in the trunk pan.

Front of the rear wheel well.
From the inside of the wheel well under the removed patch panel.
Small space.

 1969 Firebird
Champagne taste and a Kool-aid budget...
09-29-2010 #8
Registered User
- Join Date
- May 2009
- Location
- Minnesota
- Posts
- 615
To get the front spring pocket bracket out you will need to grind the heads off of the three bolts. The j nuts inside break all the time. I would order a new leaf install kit. I also went one size bigger on my u bolts and put two on each side and disposed of the t bolts. You can look through my thread and see if that helps at all.
https://www.pro-touring.com/forum/sh...ad.php?t=56435
09-29-2010 #9
Registered User
- Join Date
- Mar 2009
- Location
- Houston, TX
- Posts
- 1,197
Like 68400bird said, if you don't want to cut the floor. But careful of aftermarket j-nuts, see the link from camaros.net for additional details. Those after market j-nuts are known for breaking while you tighten the bolt, then back to square one.
http://www.camaros.net/forums/showthread.php?t=83635
After reading through the thread, I ended up ordered mine through the local Chevy dealer. In fact just picked up the j-nuts today.Tu Ho
Firebird V2-LS swap
09-29-2010 #10 Registered User
- Join Date
- Feb 2006
- Location
- Wisconsin
- Posts
- 546
My 69 Firebird just got finished and we have an extensive build thread at V8TV. They go into floor and trunk floor replacement and other info you may find helpfull. Good luck. 1969 Firebirds kick a$$. Here is a link. Grab a bag of chips and a drink and crawl through the thread.
Steve
http://www.v8tvshow.com/forum/index....ic,2383.0.html
1968 Firebird. Owed and operated since 1981. 455 5 speed 4 link mini-tubed ect.....
09-30-2010 #11
Registered User
- Join Date
- Aug 2004
- Location
- Rockford, MN
- Posts
- 278
Glad to see another '69 in the works!
I also cut access holes for my spring perch j nuts. Might as well do the floors though if you can at the same time. You're in luck that they make a new tail panel finally for the birds now. Looks like you might as well do the mini-tub, at least it'll give you options for expansion in the future. If I were to do it over I would have. It is more work, but there are quite a few helpful threads on it around the web. Good luck! Keep us posted!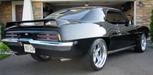
1969 Firebird, Black, Parchment Arizen interior, Poncho 383 (4" crank), Kauffman heads, TKO600, Moser 12 bolt, Wilwoods, DSE, Speed Tech, Koni, Hotchkis, GW, 18" TTI's, VA Gen IV, etc.
09-30-2010 #12
Registered User
- Join Date
- Jul 2010
- Location
- Detroit, MI
- Posts
- 62
Josh, I was contemplating either doing a narrowed moser 12 so I can get that deep dish look or doing a tub for real. It looks like I may tub it but how do you like your rear end? Any photos of your car finished? I'd love to see the interior etc. Originally Posted by Josh69
 1969 Firebird
Champagne taste and a Kool-aid budget...
09-30-2010 #13
Registered User
- Join Date
- Jul 2010
- Location
- Detroit, MI
- Posts
- 62
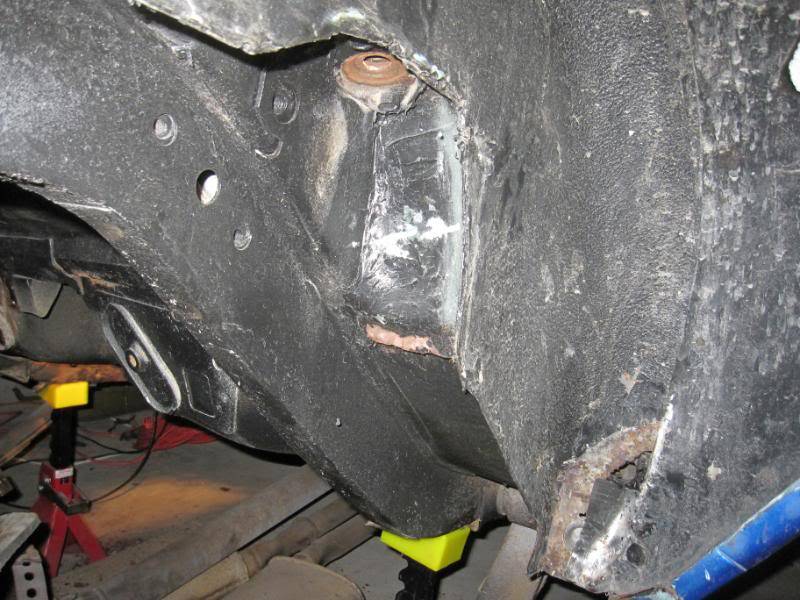
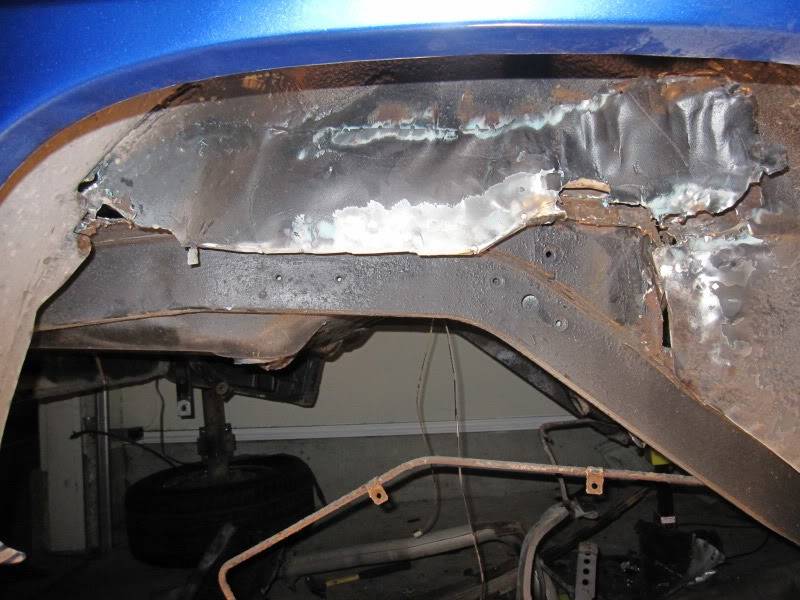
Found some more patch panels. Does the full trunk pan replacement even cover this spot or is there some custom metal shaping in my future? This is under the rear package tray looking toward the rear.
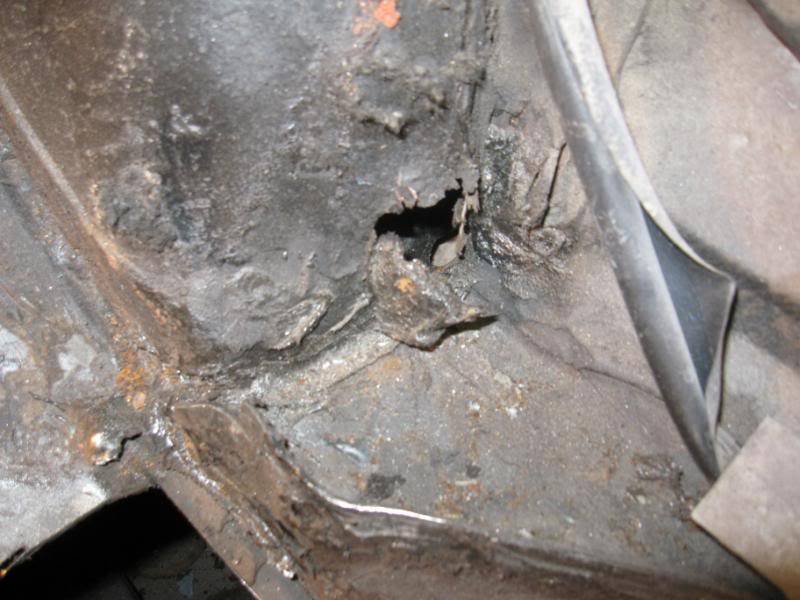
Some other bad spots. Specifically the rear wheel well just behind the rockers and the spot just in front of the shock mount.
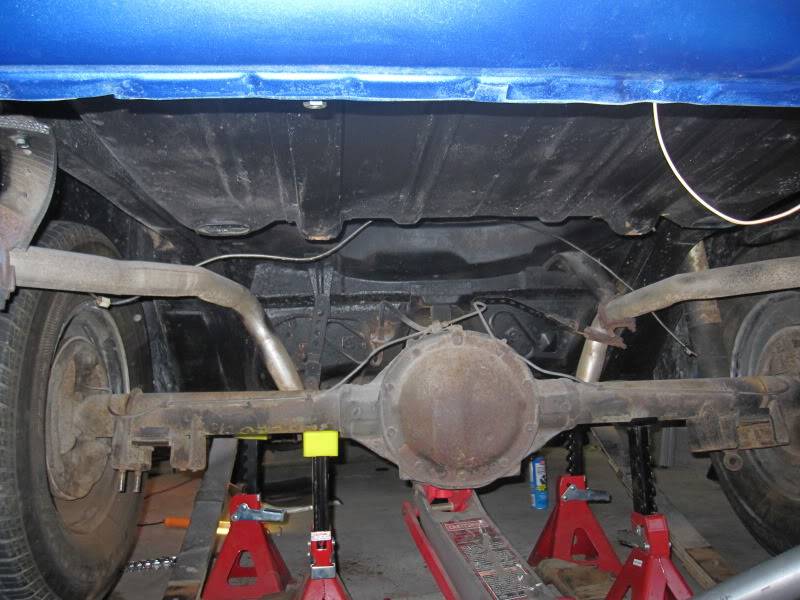
I finally started cutting out one of the rear seat pans. It was a bit tough to find the spot welds. I need to get a spot weld cutter to make my life a bit easier. A compressor and air tools would be nice too but since I live in an apt the neighbors would probably frown on that noise. One question I have is where to put the jack stands now since I will be removing the rear frame rails??

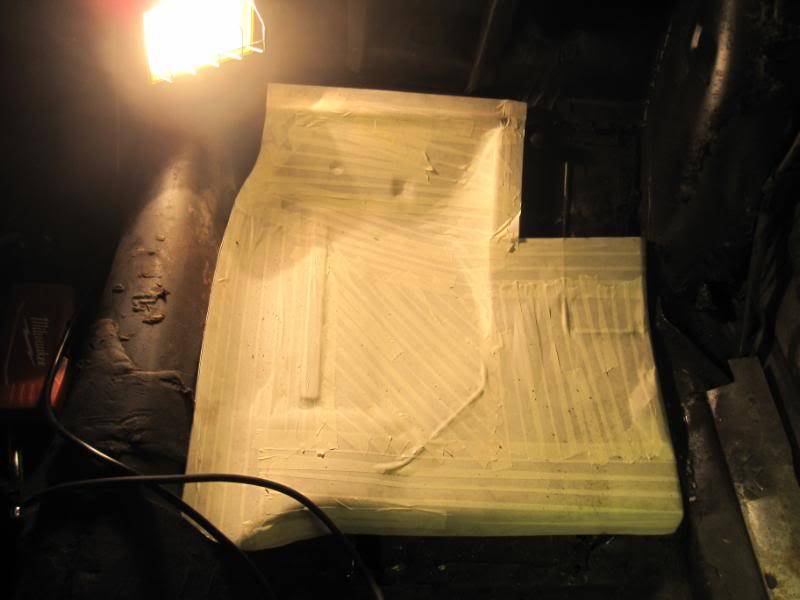
I was going to use the masking tape template trick to cut the hole but since one side of it is welded to the rocker or pinch or whatever that it won't transfer. Also I don't think I really need to use the whole replacement panel. I was thinking of just using the part that matched what I had already cut out. Is this wise? What would you all recommend?
Also, there is rot farther forward than the panel goes so I will have to fab something up to go in between. Any tips tricks or ideas?
 1969 Firebird
Champagne taste and a Kool-aid budget...
09-30-2010 #14
Registered User
- Join Date
- Feb 2006
- Location
- Wisconsin
- Posts
- 546
Floor replacement
http://www.youtube.com/watch?v=X1peg...eature=channel
Trunk floor
http://www.youtube.com/watch?v=aegbKrp_m5o
1968 Firebird. Owed and operated since 1981. 455 5 speed 4 link mini-tubed ect.....
10-01-2010 #15
Registered User
- Join Date
- Jul 2010
- Location
- Detroit, MI
- Posts
- 62
I watched those in your thread and they were a great help. I gathered some good ideas. Thanks! Originally Posted by Steve Firebird
1969 Firebird
Champagne taste and a Kool-aid budget...
10-01-2010 #16
Registered User
- Join Date
- Aug 2004
- Location
- Rockford, MN
- Posts
- 278
My build thread is here: Originally Posted by CarQz17
http://www.lateral-g.net/forums/show...highlight=sr71
Still working on decent pictures. I can say I love the rear-end. No noise, nice and smooth, the Detroit Tru-Trac does the job. I got my set-up through Frank at Prodigy, I would for sure use him, he can help with the details. Mine is narrowed up as far as can be with leaf mounts in stock location. Mine looks tubbed in person, without getting on your hands and knees, you wouldn't know it's not with the dish I have. Moser actually messed up and made mine narrower than we wanted, so I have to use spacers...though I could technically add a wheel with even more dish in the future, but I won't bother until if/when I tub it.
1969 Firebird, Black, Parchment Arizen interior, Poncho 383 (4" crank), Kauffman heads, TKO600, Moser 12 bolt, Wilwoods, DSE, Speed Tech, Koni, Hotchkis, GW, 18" TTI's, VA Gen IV, etc.
10-01-2010 #17
Registered User
- Join Date
- Sep 2010
- Location
- Dallas, TX
- Posts
- 11
Nice 69 Firebird !
10-01-2010 #18
Registered User
- Join Date
- Jul 2010
- Location
- Detroit, MI
- Posts
- 62
This is a random question, but when you do a mini-tub job, where do you mount the shock?
1969 Firebird
Champagne taste and a Kool-aid budget...
10-05-2010 #19
Registered User
- Join Date
- Jul 2010
- Location
- Detroit, MI
- Posts
- 62
Nevermind I searched..
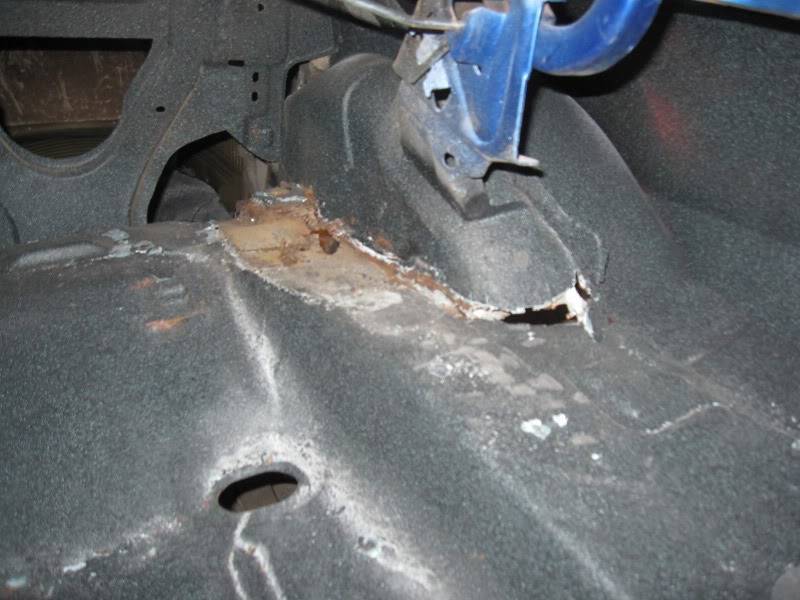
Anyway. Here is the latest update. Haven't had much time to work on the bird but tonight I had some time to tear more patch panels out. There are still two more to go.
Inside passenger side. I think I may be able to get away with leaving the trunk pan in as long as I mini tub the car. I may have to fabricate some small pieces to close out the rest. What do you all think? Cheap?
Closer. Just below the rear shock mount.

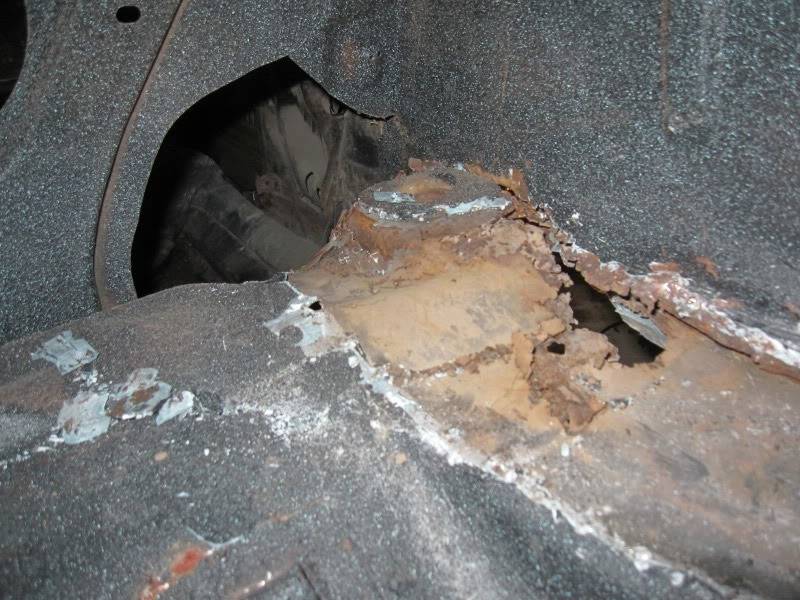
Passenger side wheel well almost done with the tear down.
Rear view of the passenger side. This will give you a better view of the damage and how well the mini tub will work.
Close up.
The aftermath. I need to find somewhere to put that rear end. Any Ideas?
I bought a little 110 MIG the other day. It is the Lincoln version. I got it all set up last night but need to get an extension cord to handle the amperage before I can test her out.
Soon I will get the tail panel stripped to see what I am dealing with there. I want to strip the trunk pan as well. I have a feeling they are covering up something there as well.
My next purchase needs to be some eastwood butt weld clamps and some POR 15 to cover the top side and the welds of the leaf spring reinforcement before I cover it back up with the floor pan.1969 Firebird
Champagne taste and a Kool-aid budget...
10-05-2010 #20
Registered User
- Join Date
- Jul 2010
- Location
- Detroit, MI
- Posts
- 62
What should I hit the panels with after they are cleaned up?
1969 Firebird
Champagne taste and a Kool-aid budget...

 Reply With Quote


