


Results 1 to 20 of 26
-
05-24-2010 #1
 Registered User
- Join Date
- Apr 2009
- Posts
- 55

The Great Chevelle Reunion, 70 Chevelle Project
So I am one of the lucky guys who can say "I still have my first car". I can't believe it has been 11 years since I got my Chevelle. Thanks to a lot of reading, some free weekends and Lots of help from my brother and and a great friend Andy my car would not be were it is today. But I don’t even come close to having a 1/4 of the knowledge or experience most of the projects I see on here do. I am just amazed at the talent and projects that I find on here. I have posted a few times with some problems and such in the past but am now going to offically going to start my own Project thread.
So I am not really sure why I have not formally introduced myself to all you guys here sooner? Hmmm? My car is currently about 240 miles away from me. I have been living in Providence RI for about 3 years now. I took the plunge as a hungry Product and Industrial Designer Looking for a new job out of school but am now happy and pleased to call providence RI home. But I am sorry to say my car is currently sleeping in my parents garage in Philadelphia area. I have yet to be able to afford the cost shipping, driving and or the hefty storage fees for a place to keep it and work on it.
So this is about the adventure of being reunited with my Chevelle, and some smaller weekend projects on her along the way.
So for the car and the direction of where it is going,
When I first built the car I was going toward a street-strip car, but in the last 2-3 years changed direction to more of a pro-touring theme. But my main goal is to drive this car, which sadly i must say i don't get to do much.
Current Projects
1- Dash, Replacing the current sweep dash with an SS dash with autometer gauges.
2- Researching and preparing for new suspension mods. Thinking of going with the SC and C Stage 2 plus kit. But still trying to choice what shocks and spring to go with? Do you guys have any thoughts on this?

First Day i Put my New Wheels on the car this winter! Sorry i had not even gotten the center caps yet. Now i just need to lower this thing!

-
05-24-2010 #2
Registered User
- Join Date
- Apr 2009
- Posts
- 55
Dash Update
So before i left work today i managed to head into the shop and snap some quick pictures of the new dash i am building for the car. I am exciting to be removing the old sweep dash and replace with this new SS style dash so i might actually have a fuel gauge that works!!
Sorry for the smaller pictures, Just used the Iphone for these...
First Gauages mounted in the housing.
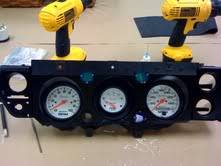
Test fitting the Housing to the new dash.

Some of the Mounting Brackets out of ABS plastic to mount the autometer gauages into place.
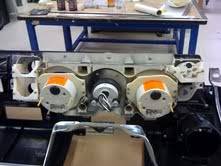
I wanted to hide the modern radio and not cut up my new dash so put it inside the glove box. I also mounted a trans Temp gauge ( will remove it once i go to a manuel), electric fan switch, and Radio. To make this pannel I made quick ai. file and had a local laser cutting guy cut it out some thin stock for me. Thanks BUD!

05-25-2010 #3
Registered User
- Join Date
- Oct 2008
- Location
- Durham,NC
- Posts
- 664
Nice work and great car! Mind showing more on the backside of gauges with info? Now to the suspension what is your budget first off,how much time beating verus driving it on the road? I don't think you can go wrong with SC&C great products.You can find some great info on Team Chevelle (Chevelles.com) in pro-touring section or suspension. Great looking car you got making me jealous! Brandon
05-25-2010 #4
Registered User
- Join Date
- Apr 2009
- Posts
- 55
Thanks so much Brandon!!
Here is some more info on the Gauges….
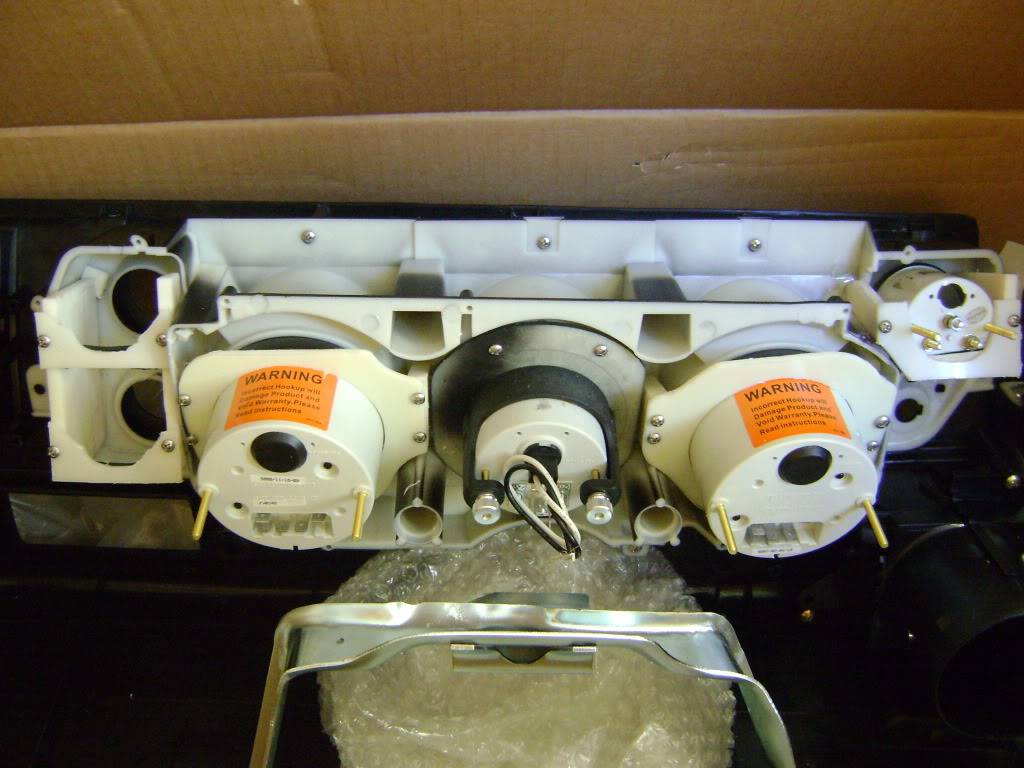
I added some better pic’s to help show how I attached the gauges to the housing. For a material I used ABS plastic because the housing was made of ABS as well so it was perfect for solvent Bonding them together and then following that bond screws to hold them into place. All of the gauges that are placed in the housing except the center fuel level gauge are pressed against the back of the housing unlike the traditional method of dropping them into the holes. (The only one I dropped in was the fuel level center gauge). I made brackets to put pressure against the housing holding the gauges in place.

So I was hoping to keep my first round of work to under 2k for shocks, springs front upper control arms and maybe rear upper control arms. These seem to be the big weak point in the traditional A body suspension. I will be doing 95% of my driving on the road just driving around. 5% Auto Cross and Drag Strip.
So this is what I was thinking for my suspension mods…
Shocks – IAS edelbrock
Springs – APC (pro-Touring Spring)
Front Upper Control Arms – Stage Two Plus Kit from SC& C
Rear Upper Control Arms – Currie
Things I am still on the fence about are how to get the car at the proper ride height and if I do the edelbrock shocks or the Varishocks. The Varishocks just do not seem worth my money for the type of driving I do.
So I think the car is really in need lowering and I think it will looks tons better!
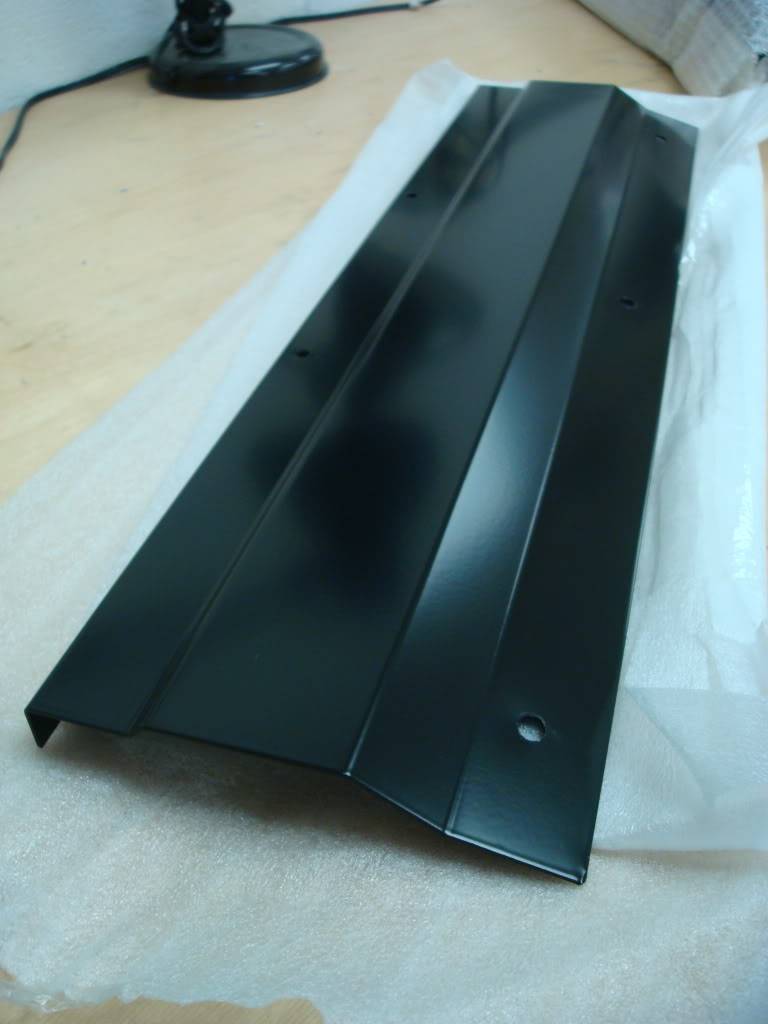
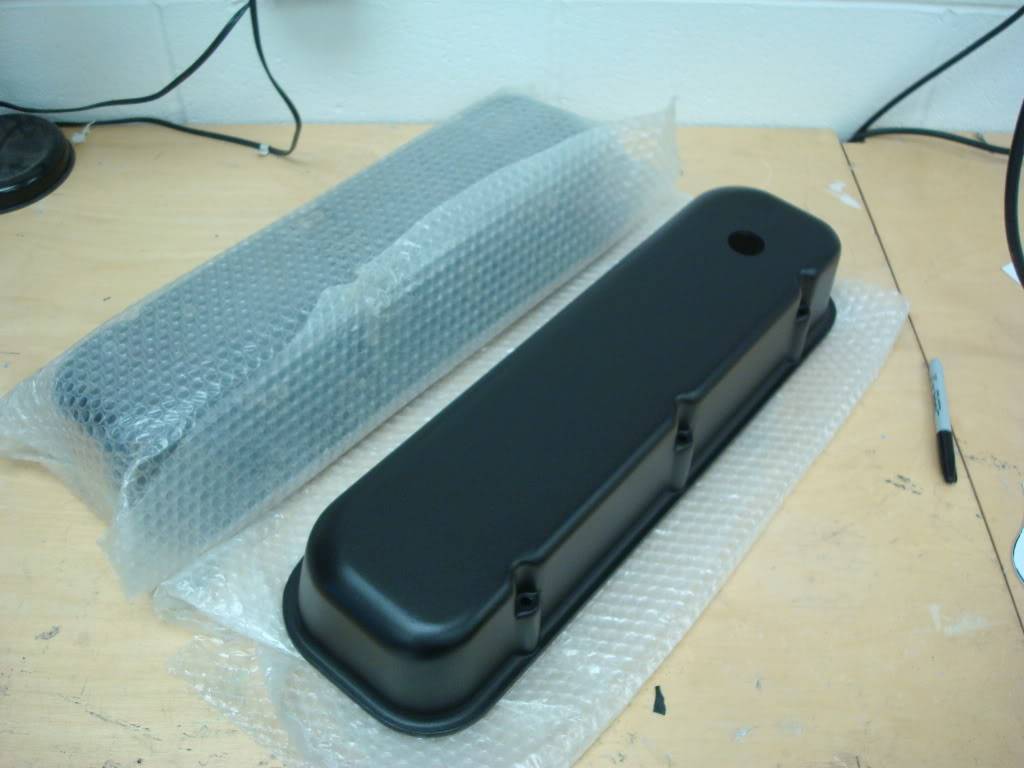
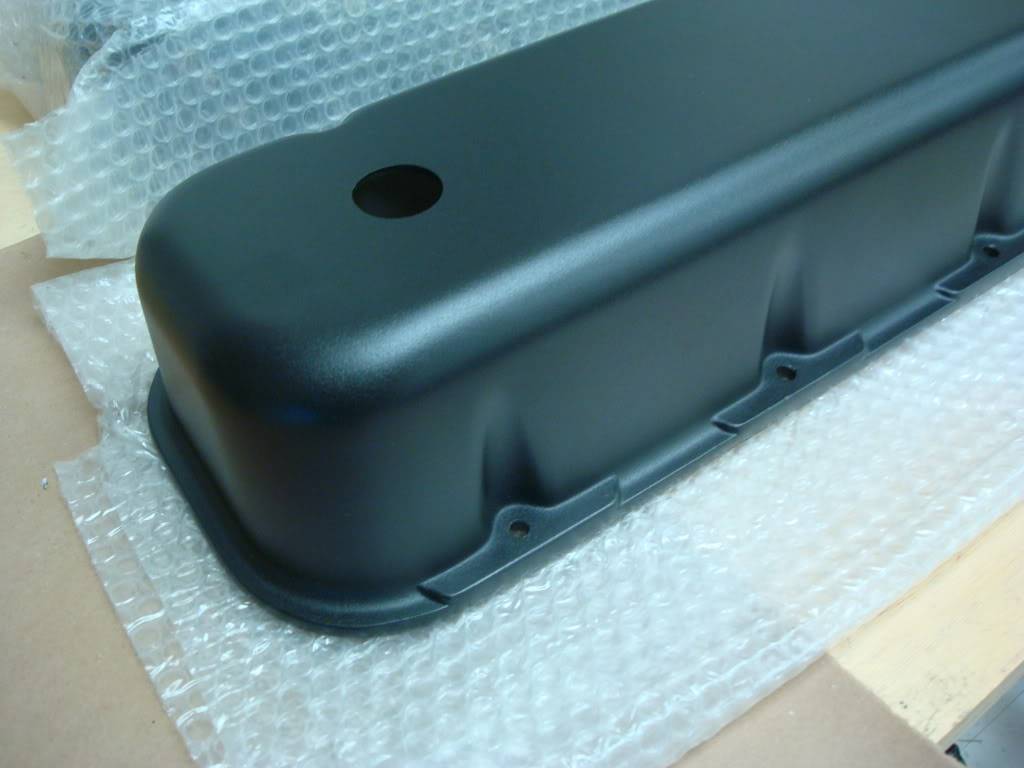
Today I got a special delivery of some parts that I had powder coated. I did my valve covers in a black wrinkle coating and I made a top rad support cover which I powder coated in a semi gloss. Just want to share them with everyone. I am really happy with how the Rad support turned out!

05-25-2010 #5 Registered User
- Join Date
- Dec 2007
- Location
- Carlsbad, Ca
- Posts
- 1,213
id look into a single adjustable shock for the front and rear. afco, varishock etc....
stage 2 kit is a good place to start on the front. if your lowers arent cracked just keep them. the curries are awesome for the rear, and then all you really need is a set of marks sway bars and a steering box and youre set.Tim
The WidowMaker: Garage Built 70 Chevelle
Special Thanks To: Rushforth Wheels, MuscleRodz, Kore3 & SC&C
Build Thread Link
05-25-2010 #6
Registered User
- Join Date
- Oct 2008
- Location
- Durham,NC
- Posts
- 664
Now all you need to do is make a set of templates of those gauge pieces and mail them to me.

I say go with the better shock,stage 2 kit and set of good springs with currie upper and lowers.
05-25-2010 #7 Registered User
- Join Date
- May 2006
- Location
- Rhode Island
- Posts
- 676
those rims are sweet, nice chevelle!!!!
05-25-2010 #8 Registered User
- Join Date
- Aug 2007
- Location
- NC
- Posts
- 193
Man that looks good I'm thinking of something similar to the corvans setp but I lik the idea of leaving the dash the same
05-26-2010 #9
Registered User
- Join Date
- Apr 2009
- Posts
- 55
Thanks Guys!
Brandon – That’s why I did it out of plastic, just sand a little till I get it right. Hmmm I might actually have some cardboard templetes. I made at least 3 of them till I got it right. I will dig around and see if I can find them for you.
Rene P – Thanks Man! Thanks to Jon because they are New Gens from Drivers Inc. They look even better with center caps!
MIGOAT - Yeah, that’s the reason I went this way, I really wanted to do the SS dash because I think the original designers did a better job than corvans.
05-26-2010 #10
Registered User
- Join Date
- Oct 2008
- Location
- Durham,NC
- Posts
- 664
SS dash is always better in my book in a Chevelle. That would be GREAT if you had a set of extra templates laying around you can spare. Brandon
05-27-2010 #11
Registered User
- Join Date
- Sep 2009
- Location
- tampa fl
- Posts
- 184
i want to see some underhood shots.. very nice car
05-28-2010 #12
Registered User
- Join Date
- Apr 2009
- Posts
- 55
Next time i am at home with the car i will take some under the hood shots for sure!
Promise to look tomorrow for those templates Brandon.
Does anyone have any experience with any of the DSE stuff? I see they now sell they stuff in parts not just kits. Does anyone have any experience and know if i will have any issues with having the DSE Coilovers up front and the Varishock with the DSE drop springs in the rear?
05-31-2010 #13
Registered User
- Join Date
- May 2010
- Posts
- 1
Man this is sweet. Love it! Originally Posted by Idesigner

05-31-2010 #14 Registered User
- Join Date
- Jul 2007
- Location
- So Cal
- Posts
- 263
Those are nice wheels. Are teh New Gens? Also what size are your tires?
Thanks,Tom
1969 Chevelle
06-01-2010 #15 Registered User
- Join Date
- Sep 2007
- Location
- Thehoodstock,GA
- Posts
- 793
Those wheels look really good on your car.
Love the radiator support and valve covers. Looks like whoever did the powder coating did a really good job.
Keep up the good work!MarkK
06-04-2010 #16
Registered User
- Join Date
- Apr 2009
- Posts
- 55
First of all, thanks guys for all the nice complements! I am sorry i have no posted in lately but i have been working to much. (Don't we all) But i am going to be starting my suspension work real soon!
tom_a - Yes they are the New Gen Wheels from Jon at driverz Inc. It took a lot of time for me to figure out which wheel to put on the car. I was back and fourth on a lot of different wheels. But I think the Decenio is a great design for me that balances a old school retro look in a newer style in an 18 inch wheel. they really set it off. I wish it was lowered more but i am working on that right now.
The rear Tires are The Nitto Drag Radial 305/40 R18 Front are Nitto 555 275/35 R18.
06-05-2010 #17
Registered User
- Join Date
- Apr 2009
- Posts
- 55
So here is an update to my current dash project.
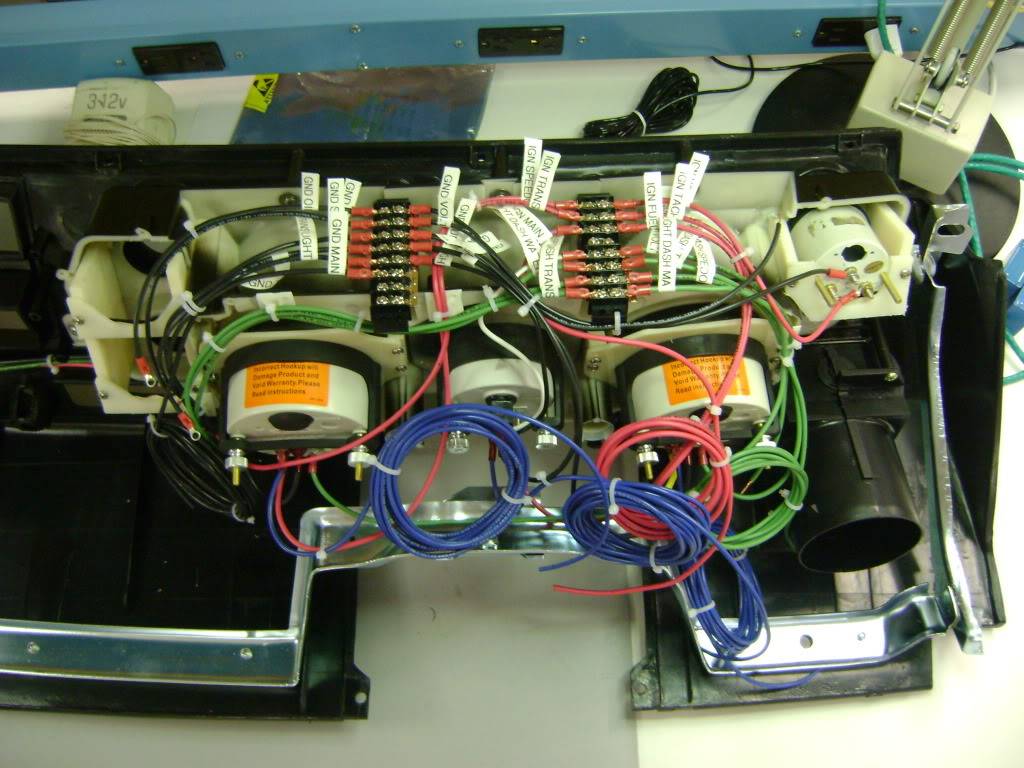
I finished making the mounts to attach the gauges to the housing last weekend so today i took on the wiring part of this project. This is really my first time doing a major wiring job like this, i was pretty nervous and kept calling my brother for his guidence.
This morning started with a trip to Nerd Shack to get all the parts i needed and here is what i ended up with. That P-Touch left blisters on my thumbs. I tired to make sure I left plenty of wire for the senders and main hook ups. I also ran all the wires over to the gloove box for my trans temp gauage.
Let me know if you see any problems?
Thanks!
Tom
06-06-2010 #18
Registered User
- Join Date
- Dec 2004
- Location
- connecticut
- Posts
- 24
have a 70 also and an extra dash. got pics from the front? thanks
06-08-2010 #19
Registered User
- Join Date
- Feb 2010
- Location
- Ft. Worth Tx
- Posts
- 11
gauges
I have a 71 Chevelle and Ive been trying to figure out how to do exactly whaat you did with my gauges. I didnt want the covans look. I bought the Auto Meter Designer Black ones but they dont fit in the bezle ribht I dont remember what size mine are.
What size are your gauges and where do you fing ABS plastic and bonding solvent?
06-09-2010 #20
Registered User
- Join Date
- Apr 2009
- Posts
- 55
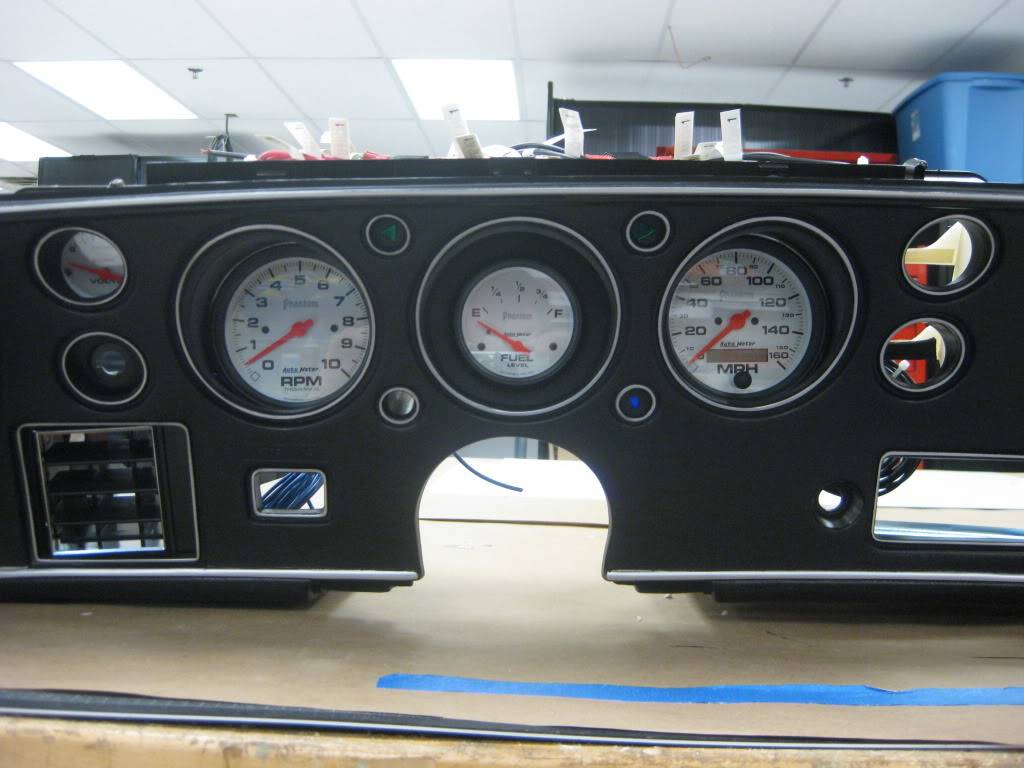
70SS98SS - Here is a picture of the front looking at the gauges.
Lambskin71 - The two larger gauges are 3 3/8 and all the smaller ones are 2 1/16. and yes yeah they will not fit into the bezel, all of the gauges need to be pushed up to the back of the bezel from behind the gauge. You then need a material to keep pressure against them to keep them secured in place.
You don't need to use ABS plastic or Bonding solvent. It is just what I had around. Aluminum and screws would be another good choice. But the solvent bonding liquid is called MEK, you can get it at home depot and I am sure you can get any thickness of ABS you need at mcmaster-carr.

 Reply With Quote


