


Results 1 to 20 of 23
-
04-17-2010 #1

 Registered User
- Join Date
- Jun 2009
- Location
- Central FL
- Posts
- 1,231
Alright, so I bought my project Camaro today!
The car I made my last post about, I finally bought today, towed it home and put it at my Grandma's house. It's a Yellow with black stripes 1968 Camaro with a 400 small block out of a 78 truck and a 4 speed manual.
I had another guy come and look it over before I bought it, had the engine started to make sure it ran, everything went well. So now I begin the process of finishing up the car and making it run.
So far I've found this is what needs to be installed:
Header Panel
Cowl Panel
Door Locks and Latches
Windows
Gas Tank
Radiator
Valve covers need to be bolted on
Wiring needs completion (99% sure I'm going with American Autowire Kit with grounds)
Driveshaft
Headlights
Interior
Gauges
Taillights
Pics:
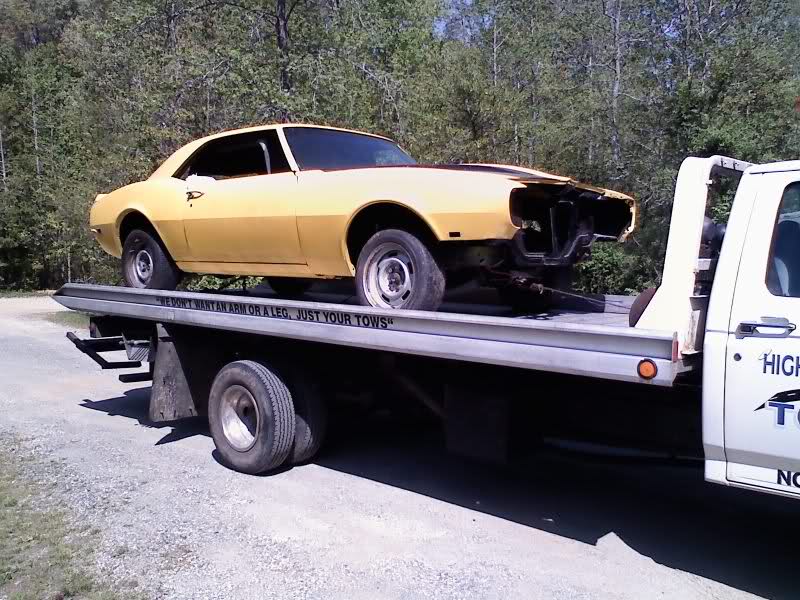
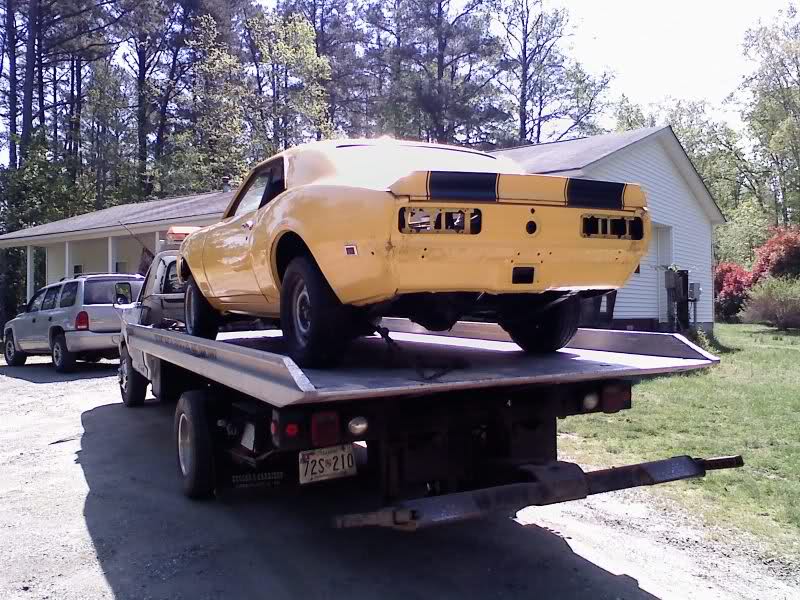
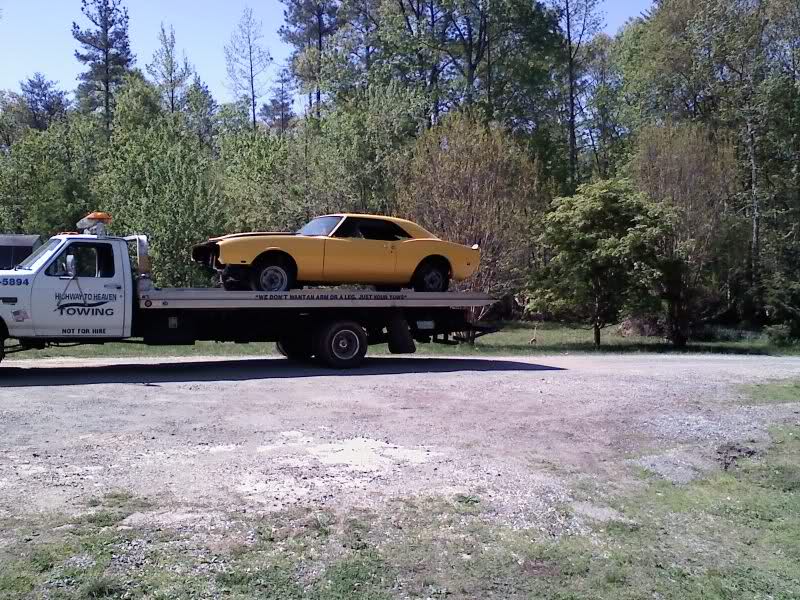
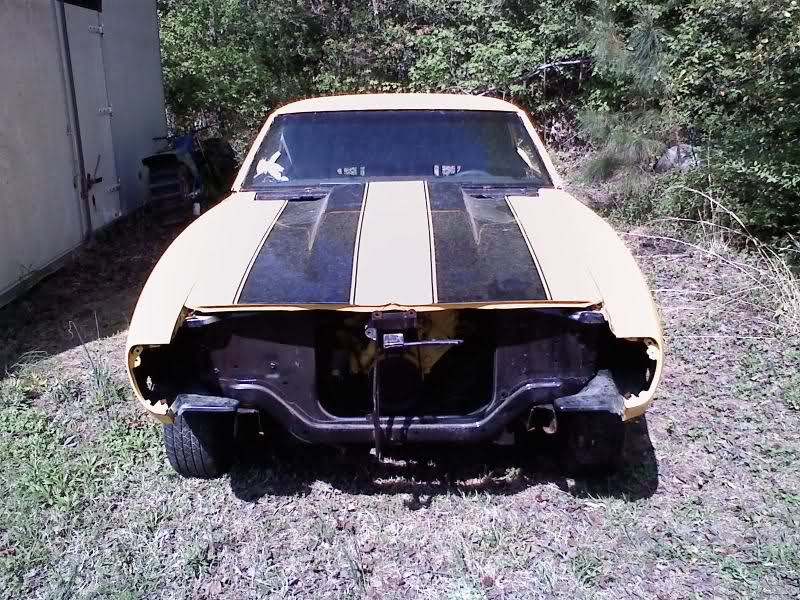
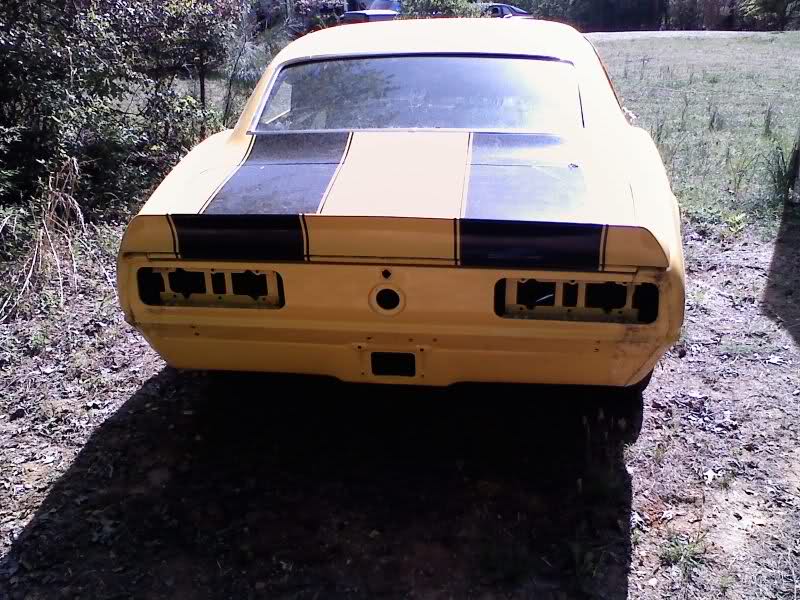
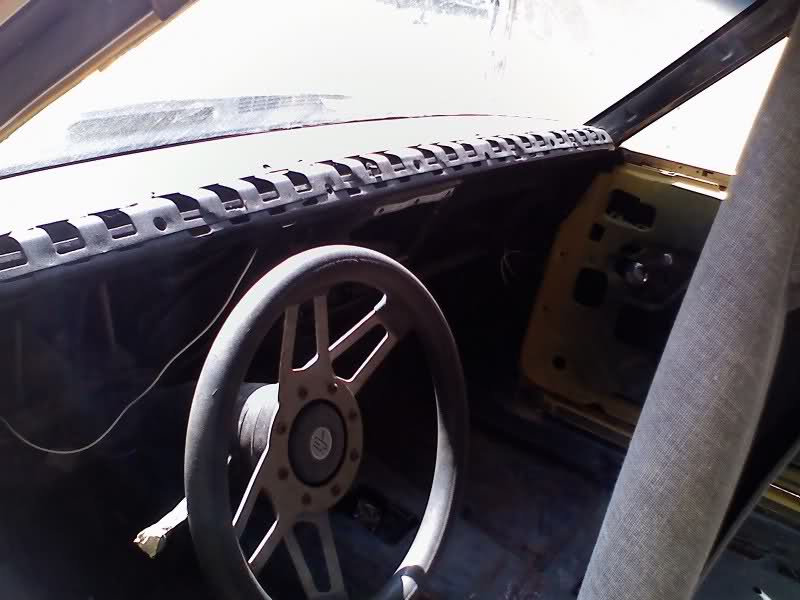
Sorry for the craptacular pics, they're from a cell phone.
Any recommendations on what I should start working on first?
EDIT: Forgot to add, there is ZERO rust on this car. When I got home I went over it with a fine tooth comb and couldn't find any.Dan
-
04-17-2010 #2 Registered User
- Join Date
- May 2002
- Location
- Northern California
- Posts
- 10,716

depends on your plans for the car and most importantly your budget.
Key to any good build is STICKING TO YOUR PLAN.
I know things change but try to keep a basic over view plan to keep.
looks pretty good.
VinceMrQuick ΜΟΛ'ΩΝ ΛΑΒ'Ε
04-17-2010 #3
Registered User
- Join Date
- Jun 2009
- Location
- Central FL
- Posts
- 1,231
I actually just meant putting it back together, I've never done this before, so I'm not sure where to start. Originally Posted by MrQuick

I was thinking about doing the doors first so the car is sealed up.Dan
04-18-2010 #4
Registered User
- Join Date
- Aug 2009
- Posts
- 352
Congrats! Pretty good looking lil Camaro.
I would get the doors together. You got to get it sealed up.
Then I would get all the mechanicals and wiring finished.
That way you can move it on it's own power.
04-18-2010 #5 Registered User
- Join Date
- Mar 2009
- Location
- overseas
- Posts
- 3,434
looks good! good luck with the project
 Kevin S. (overseas in Germany)
1963 Chevrolet Impala 2d ht Coupe
www.CruznArt.com
CRUZN - Automotive Artworks
04-18-2010 #6 Registered User
- Join Date
- Mar 2010
- Location
- Rochester NY
- Posts
- 404
1st - NICE SCORE
 that car looks like it's at a perfect place to have fun and make it your own without the guilt of replacing perfectly good parts in the spirit of upgrades.
As far as the build goes, my $.02 ......
1) don't get in a hurry - it takes time and it seams to me that everything gets all flubbed up when people get in a hurry
2) figure out what you want to do with it - are you planning on any upgrades in the near future? suspension, gears, ect
3) put it on paper and make a list
4) from that list start gathering parts - i wouldn't focus on what's 1st on the list but keep an eye out for all of it so you can pick up deals when you can - it seams like when you need something you ALWAYS end up paying top dollar - if you start looking now for the interior parts although it may be 12th on you list you may come across them on a good deal instead of paying retail when you need them and can't find them anywhere else.
just from the pictures and you short list, my list would look something like this...
1-seal up the interior - clean up all the metal, paint and then sound deadener of you choice
2-wiring
3-drive line - get it running - Gas Tank, Radiator, Valve covers, Drive shaft, ect
4-body panels -Header Panel, Cowl Panel, Door Locks and Latches, windows, ect
5-interior and finishing touches -Headlights, Interior, Gauges, Taillights
6-insert key and have funDon
Grace - 67 Camaro daily driver with upgrades along the way.
https://www.pro-touring.com/showthre...-Camaro-Driver
04-18-2010 #7
Registered User
- Join Date
- Jun 2009
- Location
- Central FL
- Posts
- 1,231
I like that list, I'm going to work with that, though, I'm going to hit the windows today, because I'd like to not need to worry about stuff getting in. Originally Posted by Dons67
For wiring, I'm going with a kit, but I'm stuck, what's the difference between these 2?
http://www.americanautowire.com/67-68camaro.html
http://www.americanautowire.com/powerplus20.html
Planned upgrades are as follows: C5 Brakes, Power Steering (Used Iroc box and new pump), and wheels. I have a Excel sheet worked out of my total budget, split between areas and these came out to the most budget friendly, but useful items for the areas.
Small budget build Dan
Dan
04-18-2010 #8 Registered User
- Join Date
- Jul 2006
- Location
- Lake Tillery NC
- Posts
- 841
Nice Project! Looks like a good starting point. Just my .02, I would get it running and enjoy it as you build. Do your upgrades in stages, I wish I would have with my 69 Camaro. It has been apart almost 5 years. I have a budget 68 Camaro that has some of the same things you talked about. The C5 stuff works great as well as the IROC box. Follow the link in my signature it has some of the things I did to my 68.
Michael Tucker
Project "Trouble" 1969 Camaro DSE subframe, quadrilink, 13" wilwood brakes, Rated X Rushforths, LS2/T56
1968 Camaro
04-18-2010 #9
Registered User
- Join Date
- Mar 2010
- Location
- Rochester NY
- Posts
- 404
i haven't researched the wiring yet - that's 2 years out for me, right now i'm going through the car as it's in a very road worthy daily driver status so i'm going completely opposite from your build. as a result wiring is last when it gets taken all apart for paint. Originally Posted by Vicinity
by the looks of it the less expensive kit is a universal type where you use the pigtails and switches you may or may not currently have and have to do a lot of "finish work". the more expensive kit appears to be a complete kit, right down to the switches for your wipers and pigtails to plug the light bulbs into, it also looks like it is specific to your car so everything goes in stock locations and would probably be a lot easier for someone who has never wired a car before.
analogy - kit 1 is all the pieces to put a dinning room table together, the 2nd gives you the chairs, screws and sand paper to finish the set and you just add stain or paint
you may want to look into the forums for electrical threads to help chose a great kit, try to find which kits the builders are using and make sure the one you choose isn't the one kit that nobody would use - remember you only want to do the electrical work once as most of it is covered up by everything under the sun, you want to save money where you can but having electrical problems as a result of saving $100 on a wiring kit wouldn't be worth it to me.Don
Grace - 67 Camaro daily driver with upgrades along the way.
https://www.pro-touring.com/showthre...-Camaro-Driver
04-18-2010 #10
Banned
- Join Date
- Aug 2003
- Location
- Orlando, FL
- Posts
- 8,745
As said by others. Don't touch it without a build plan, budget and schedule. need to coordinate the cash flow and time to work on the project.
Almost always start with the body, but susension may be a part of your body and fab work.
04-18-2010 #11
Registered User
- Join Date
- Jun 2009
- Location
- Central FL
- Posts
- 1,231
Reading it now! How did you mount the C5 brakes? With a spindle and the bracket? Or did you got AFX? I can't make up my mind. Originally Posted by Tucks69
You make a good point. I was kind of assuming the more expensive one was probably a better route and came more "ready-to-go". Originally Posted by Dons67
I don't have too much of a build plan, but I don't plan to do much to it right now. I'm going to hit the wiring, brakes and I want power steering, and that's probably all til the end of summer. Originally Posted by ProdigyCustoms
By the way, I'm probably gonna have to email you later to see if you have any GP's on American Autowire kits going on now
Today was pretty productive, since I know where I need to start, I managed to get a fair amount done. I got both door latches installed, and I got all the window tracks installed. I also threw in some spare sound deadening I had in my closet, it makes the doors feel SO much firmer and solid.
Tomorrow, I'm going to try to install the windows, or at least one of them.
Oh, and I found the original keys!Dan
04-18-2010 #12
Registered User
- Join Date
- Jul 2006
- Location
- Lake Tillery NC
- Posts
- 841
I used the stock drum spindle, turned the hubs down and installed longer wheel studs. Speed Tech Performance makes a adapter bracket ( # F6769BAC5) to fit the spindle. You use the c4 rotor and the c5 caliper and abutment. Touring Classics called a Hybrid Conversion. My 17 inch Tourqe Thrust fit with no problems. I used Kore 3 rear kit.
Michael Tucker
Project "Trouble" 1969 Camaro DSE subframe, quadrilink, 13" wilwood brakes, Rated X Rushforths, LS2/T56
1968 Camaro
04-18-2010 #13
Registered User
- Join Date
- Jun 2009
- Location
- Central FL
- Posts
- 1,231
Ah, I see. I was wondering how you got C5 brakes under those TTs, lol. This is a LOT cheaper than getting the ATX spindle, I think I might go this route. Thanks, man. Originally Posted by Tucks69
Dan
04-20-2010 #14 -Moderator-
- Join Date
- Jul 2001
- Location
- Detroit, Michigan
- Posts
- 6,854
Dan...moving this to the 'Project Updates' forum.
Now you're official.
Good luck with it!1968 Pro-Touring Camaro LS1
Project: Next Year
- Start date; June '01
- Completion; Sometime next year or the year after.....
04-20-2010 #15
Registered User
- Join Date
- Jun 2009
- Location
- Central FL
- Posts
- 1,231
Haha sweet, thanks Tony! Originally Posted by trapin
Update, I've installed my quarter windows but they are extremely difficult to roll up, infact, it's impossible with a handle and I have to use pliers, and it's still very hard to do. Anyone know what's wrong?Dan
04-20-2010 #16 Registered User
- Join Date
- Nov 2006
- Location
- Ma.
- Posts
- 5,569
Nice project good luck with it.
Wayne
Car FINALLY home !!!!!! lol
Project FNQUIK https://www.pro-touring.com/showthre...ghlight=FNQUIK
04-21-2010 #17
Registered User
- Join Date
- Jun 2009
- Location
- Central FL
- Posts
- 1,231
In addition to this, I've found a stripped nut on the quarter rail adjustment bolt. This seems like it's going to be a pain to get these windows working. Originally Posted by Vicinity
Anyone know where I can find something about installing windows (front and back) like a write up or something?Dan
04-21-2010 #18
Registered User
- Join Date
- Mar 2010
- Location
- Rochester NY
- Posts
- 404
Originally Posted by Vicinity
i found a really nice write up that may help you on the windows on one of the camaro forums --- install is easy, it's the adjustment that can be a pain in the backside
http://www.camaros.net/forums/showthread.php?t=166100Don
Grace - 67 Camaro daily driver with upgrades along the way.
https://www.pro-touring.com/showthre...-Camaro-Driver
04-21-2010 #19
Registered User
- Join Date
- Jun 2009
- Location
- Central FL
- Posts
- 1,231
Originally Posted by Dons67
I saw that yesterday, I guess I don't understand. The 68 windows have the rollers on the window, but trying to get the window down between the door skin and inner door is impossible because the rollers make the glass too thick to fit. I think the quarter doesn't roll up because the stripped nut pushes an adjustment bolt out too far, making the window crank up at an awkward position.
I hope I'm clear enough.Dan
04-21-2010 #20 Registered User
- Join Date
- Feb 2010
- Location
- mason city iowa
- Posts
- 119
it looks nice

 Reply With Quote


