Results 21 to 40 of 89
-
03-16-2010 #21

 Registered User
- Join Date
- Oct 2004
- Posts
- 394
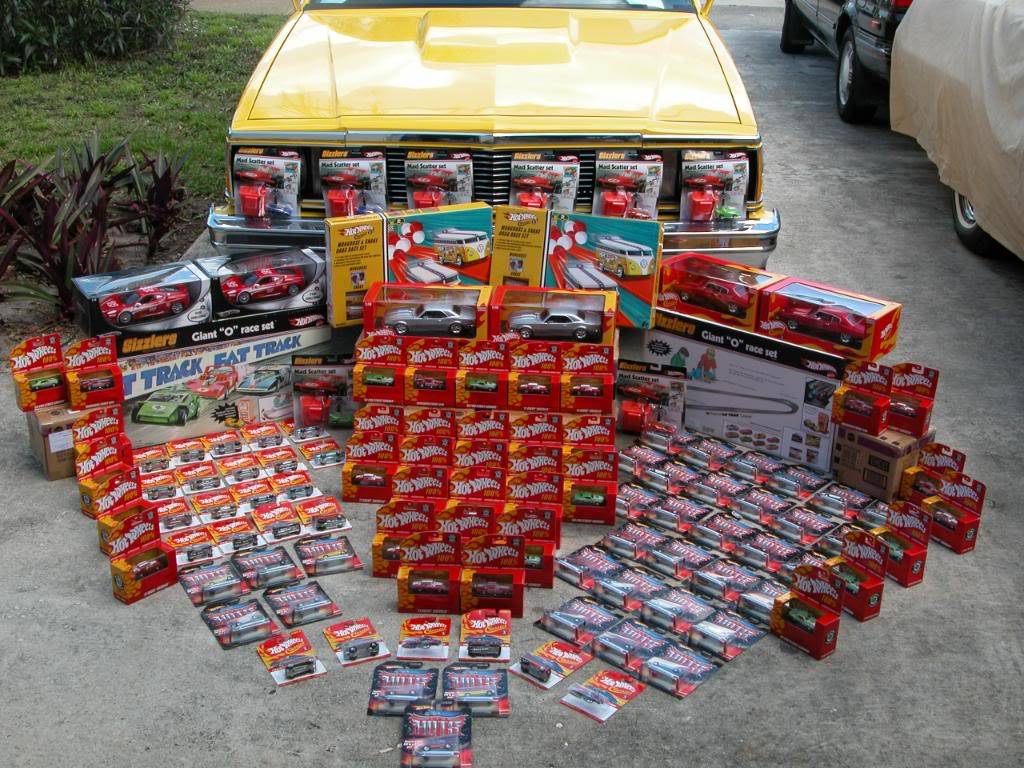
Congrats on all the loot you won!
You could have a second career as a product-set-up-guy. Your pictures are awesome........nice job!
-
03-20-2010 #22 Registered User
- Join Date
- Mar 2007
- Location
- Florida
- Posts
- 2,391
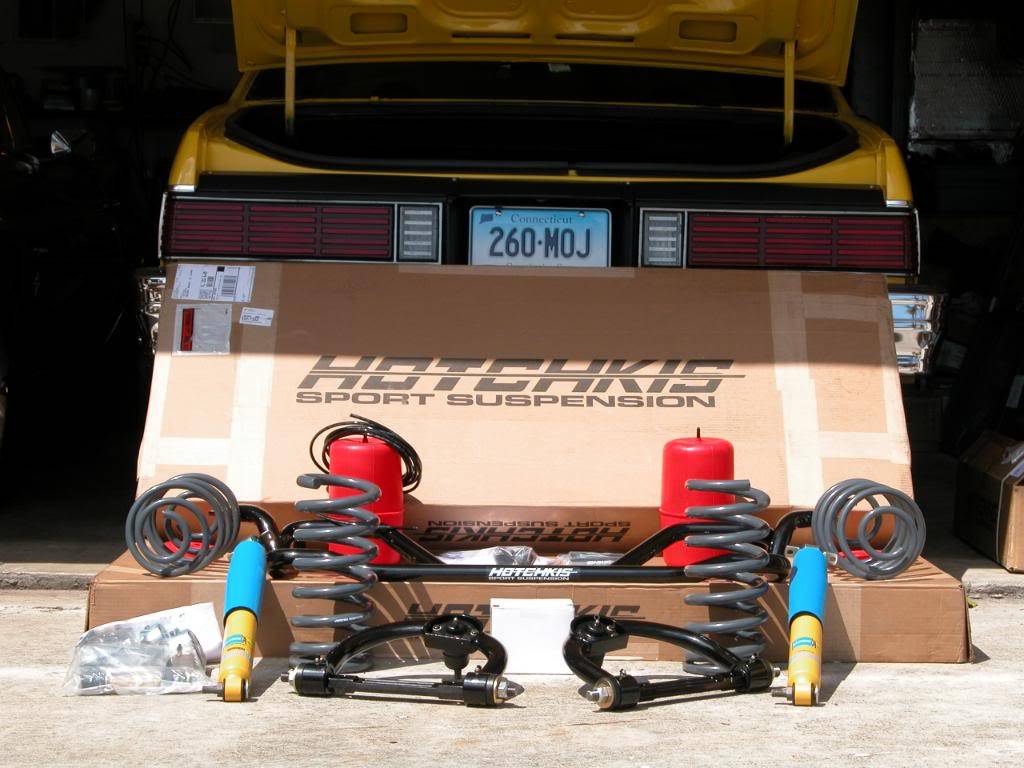
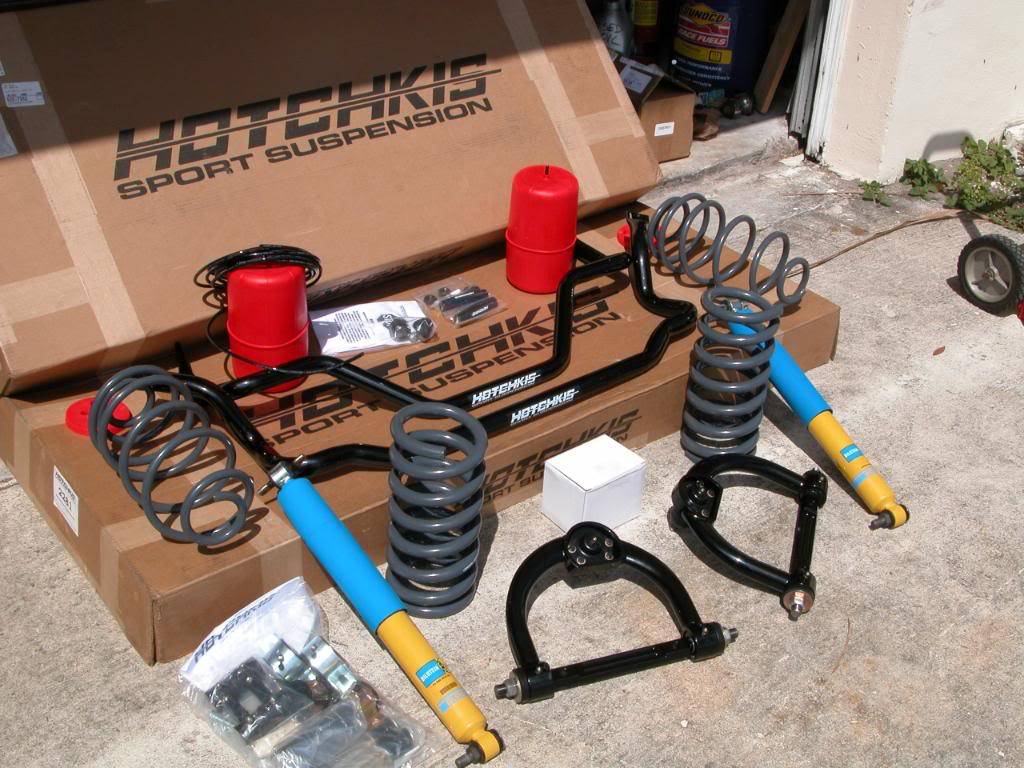
 Thanks! Set-up-guy for hire!!!! I need a 1st career right now! LOL I gave up my old life as a retail store owner of 30 years to move south and fullfill a car guy dream of being close to a lot of tracks while being able to use the cars year round. I started the process before the economy tanked. You can imagine the rest. Thats why this project is being done on a shoestring budget. So without any further depressing info, here's my latest product-set-up!
 Originally Posted by ZuperZport

The Hotchkis products have been arriving. Just a few more parts and I'll be ready to start the suspension transformation. Worked on the interior today getting it back together. It's a shame the rollbar deal didn't work out and I had to cut it all out. Now I have solid back seats without a bar, not the safest combo. I'll also have to put something in for seatbelts since there isn't a harness bar anymore. I removed the last couple stubs of the rollbar tubing today and started putting the carpet etc. back in. It's been apart so long I had forgotten about the clips that had broken taking it apart. I'll have to chase down some interior trim clips screws and other fasteners this week. Here's the Hotchkis goodies I've recieved so far.
03-21-2010 #23 Registered User
- Join Date
- Mar 2009
- Location
- overseas
- Posts
- 3,434
very nice parts! I'm also looking for these for my MC
 Kevin S. (overseas in Germany)
1963 Chevrolet Impala 2d ht Coupe
www.CruznArt.com
CRUZN - Automotive Artworks
03-21-2010 #24
Registered User
- Join Date
- Mar 2007
- Location
- Florida
- Posts
- 2,391
Talk to Frank at Prodigy Kev, he sells Hotchkis and deals with overseas guys all the time.
03-21-2010 #25
Registered User
- Join Date
- Mar 2007
- Location
- Florida
- Posts
- 2,391
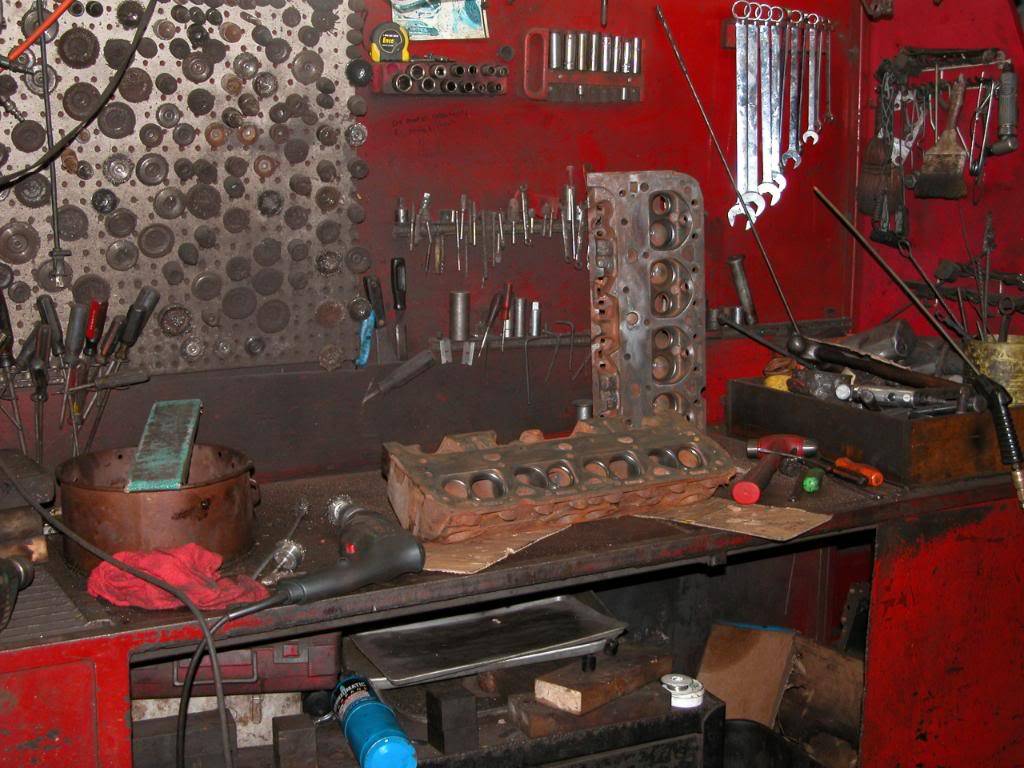
I worked at the machine shop for a few hours tonight cleaning customers heads after they came out of the washing machine. After I was done with the regular work I gave my '73 993 castings a quick once over with a wire wheel so we could magnaflux them when we did the customers heads.
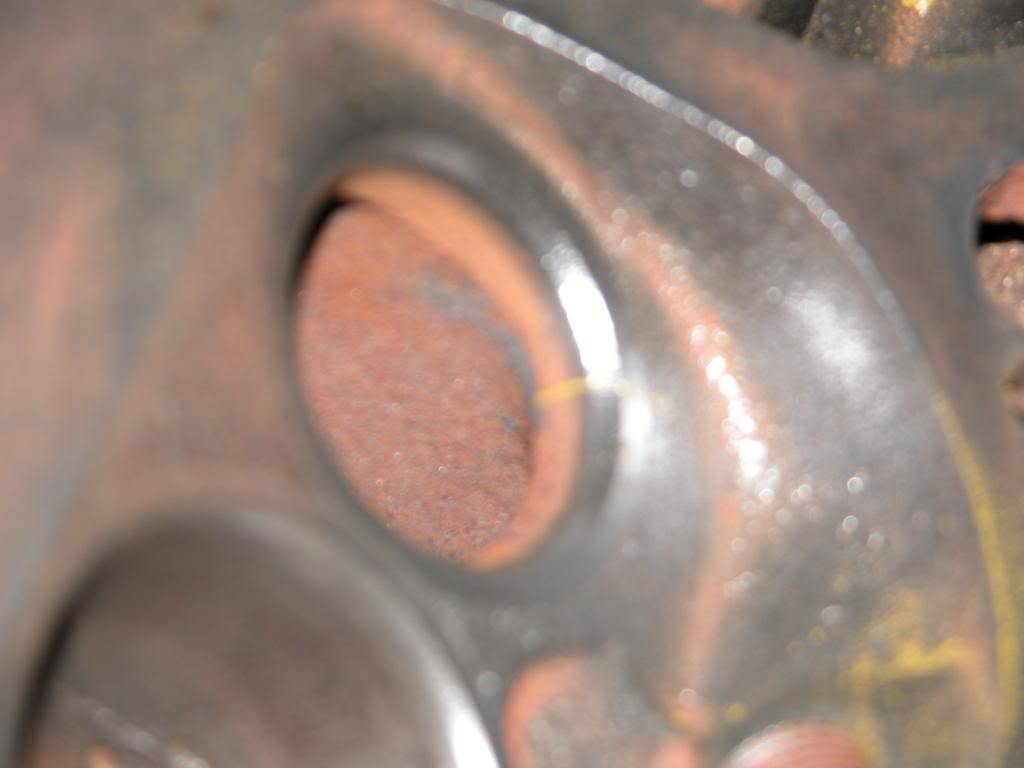
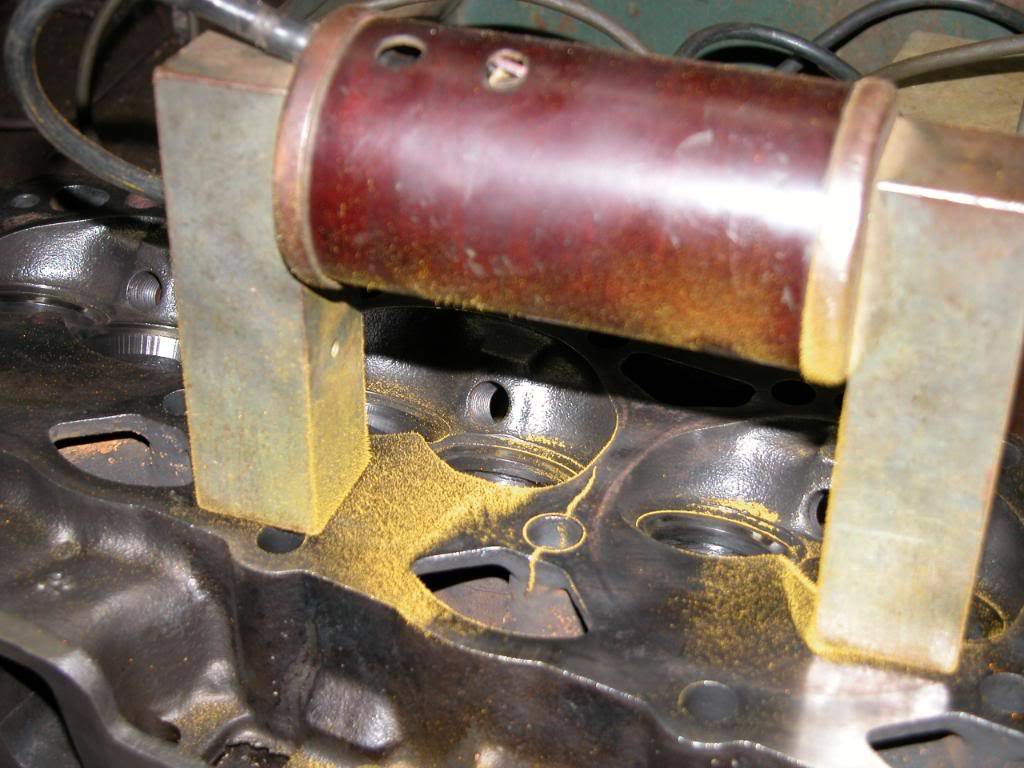
A couple of the customer heads I was cleaning up were lightweight castings which tend to crack between the middle chambers. Two of the heads had already been repaired in the past by another shop and will be repaired again. The customers heads had easily visable cracks so it made it nice for me to take pics showing how magnafluxing works.
First pic: My workspace. OK new guy, here's a bunch of heads, a drill, and a bunch of wire wheels, scrapers and other various implements to clean heads. Make um pretty! In the pic are my heads, no they haven't been cleaned yet. Just wire wheeled enough for magnafluxing in the chamber areas.
Second pic: Bad news for me. One of my heads has a small crack by an exhaust valve. The pic's out of focus but you can see the line. We'll have to make a decision to pin the crack and install a new valve seat or seek another head or pair of heads. Good thing we checked them before washing and thoroughly cleaning them.
Third pic: For those who never witnessed Magnafluxing this is how its done. Electromagnet is located so the area you want to test is located between the posts. Then some "magic dust" (in my best Cheech impersonation) is puffed ofer the area to be checked and the dust jumps right to the crack. Even if the crack is very small (like the one on my head) it will show right up. The crack in this pic was easily seen by the naked eye but it made for a nice easy pic to display the process. The lightweight head in the pic had been sleeved for the bolt hole previously so thats why theres a circle of magic dust around it. The dust knows it as a crack. This head will be pinned to repair the crack. If the opportunity arizes to get pics of "pinning" sometime I'll get some.
03-22-2010 #26 Registered User
- Join Date
- Dec 2009
- Location
- El Dorado Hills
- Posts
- 1,645
John, congradulations on winning the Grand Prize, I will be looking forward to following this thread.

Gaetano Cosentino
Dont Drive Faster Than Your Angels Can Fly
03-23-2010 #27 Registered User
- Join Date
- Aug 2004
- Location
- Rustburg, Virginia
- Posts
- 3,436
Re: magnetic partical testing(magnafluxing)
Be sure to orient the legs of your probe 90° to the direction that you have already inspected to make sure that there are not any other cracks hiding from you.1970 RS/SS350 139K on the clock:
89 TPI motor w/ 1pc rear seal coupled to a Viper T56 via Mcleod's modular bellhousing w/ hydraulic T/O bearing from the Viper, 12 bolt rear w/ 3.73 gearing, SC&C upper control arms, factory lowers with Delalums, C5 brakes at all four corners, Front Wheels 17x8's with Sumi 255/40/17 and Rear Wheels 17x9's with Sumi 275/40/17.
Brief description of the work done so far can be found here: http://www.nastyz28.com/forum/showthread.php?t=112454
06-11-2010 #28
Registered User
- Join Date
- Mar 2007
- Location
- Florida
- Posts
- 2,391
Ummmm...... Ya, crackheads......there're everywhere. Anyway....
Been a while, so I'm going to bring this thread up to date. I've been working several nights a week and one or two days on the weekends at the machine shop. Learning a lot, and it helps them out to have me doing a lot of the "grunt" work.
I've been on hold with the Malibu suspension upgrade due to waiting on parts for another project that has to be done first. However I've been getting things ready to build the new engine for uncaged. I found another 993 head in the shop to use as a replacement for my cracked one and cut them both for screw in studs.
I figured I'd post up a little exercise on how to replace pressed in rocker arm studs with screw in ones that guide plates and hotter cams can be used with. I know there's lots of guys here who know much more than I ever will about this stuff but for the young guys learning and those new to the car hobby this may answer some questions.
The first step is to solidly mount the head to the drill press table so you can work on it without smashing your foot.
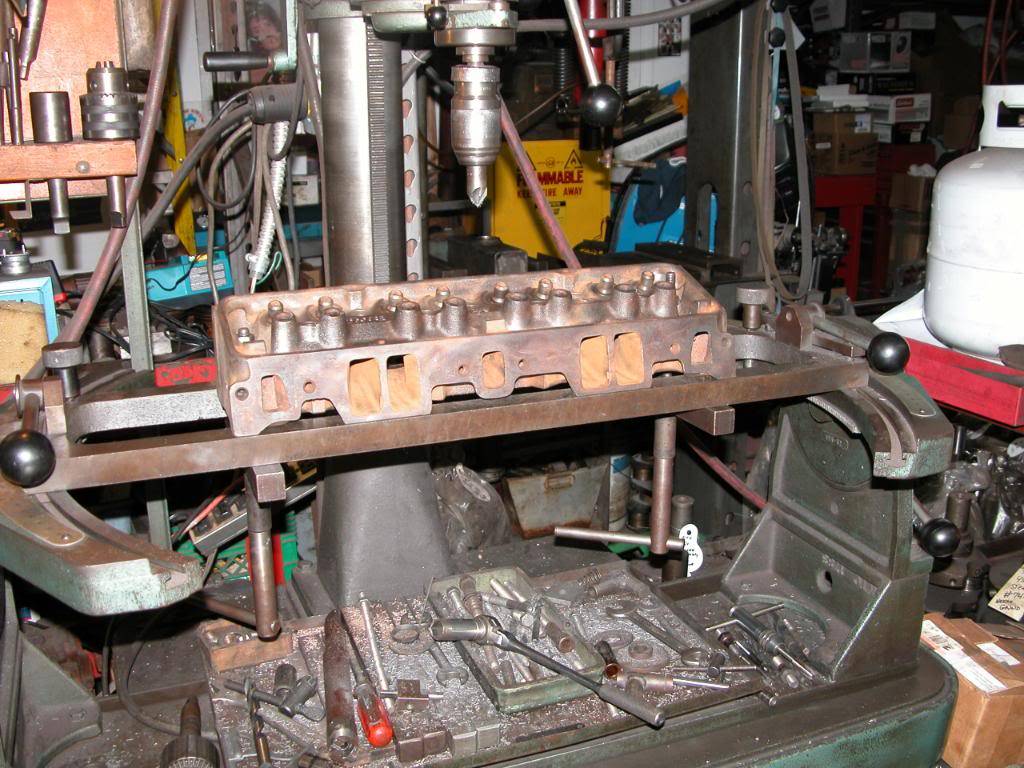
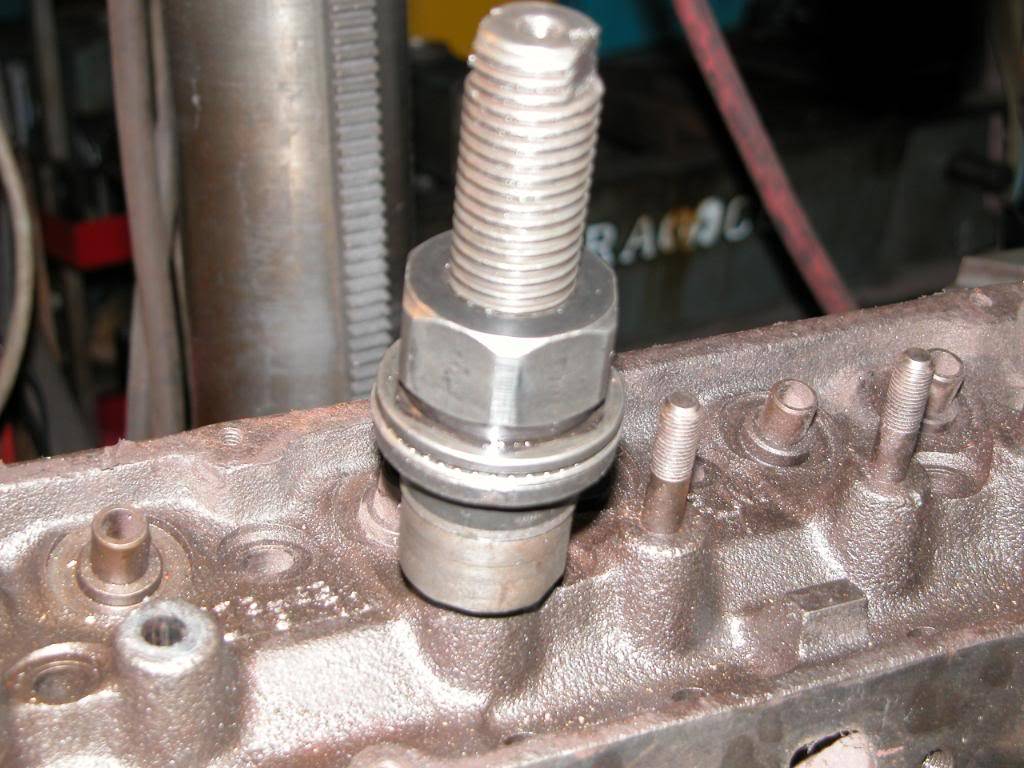
The next step is to remove the pressed in studs. There's an old fashioned tool (pictured) I'll be using, and a newer style (real expensive) power tool I wish I was using. After soaking the studs with penetratring fluid and tapping (banging) the studs with a hammer and brass drift, 2 big wrenches are used on the tool to draw the stud out of the head. Lots of muscles needed!
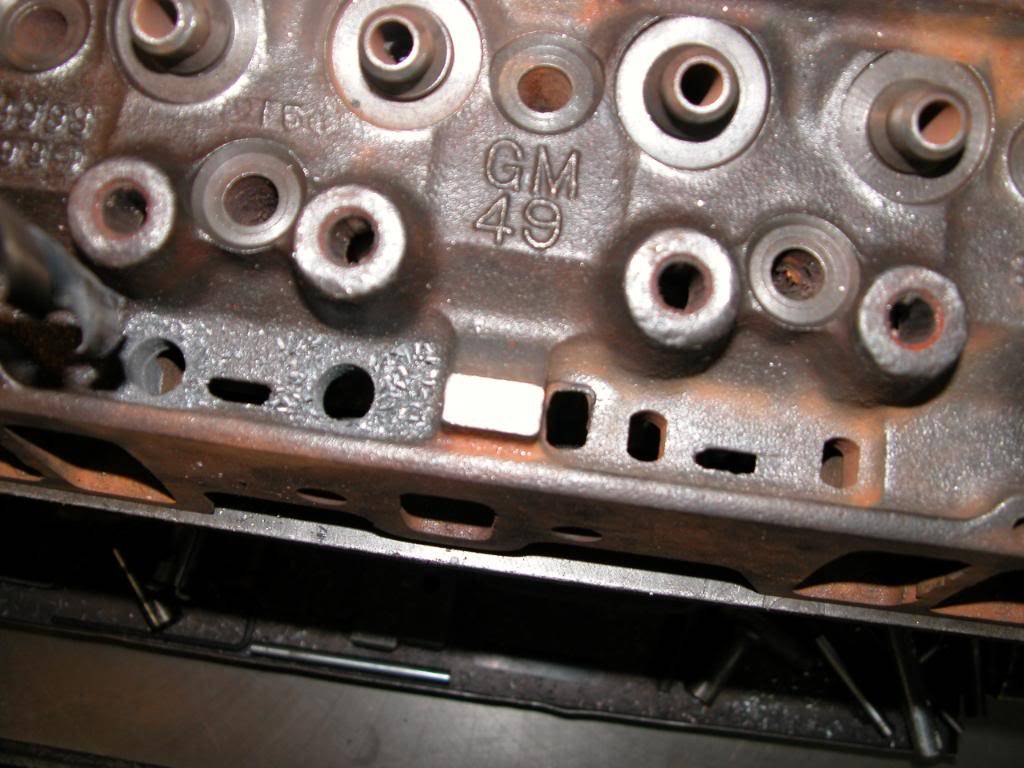
Next the holes for oil drainback are drilled out to increase flow. No need for the holes to be perfect so just line them up pretty straight and drill. You can see the holes on the left of the pic below have been drilled and the oval holes on the right are next.
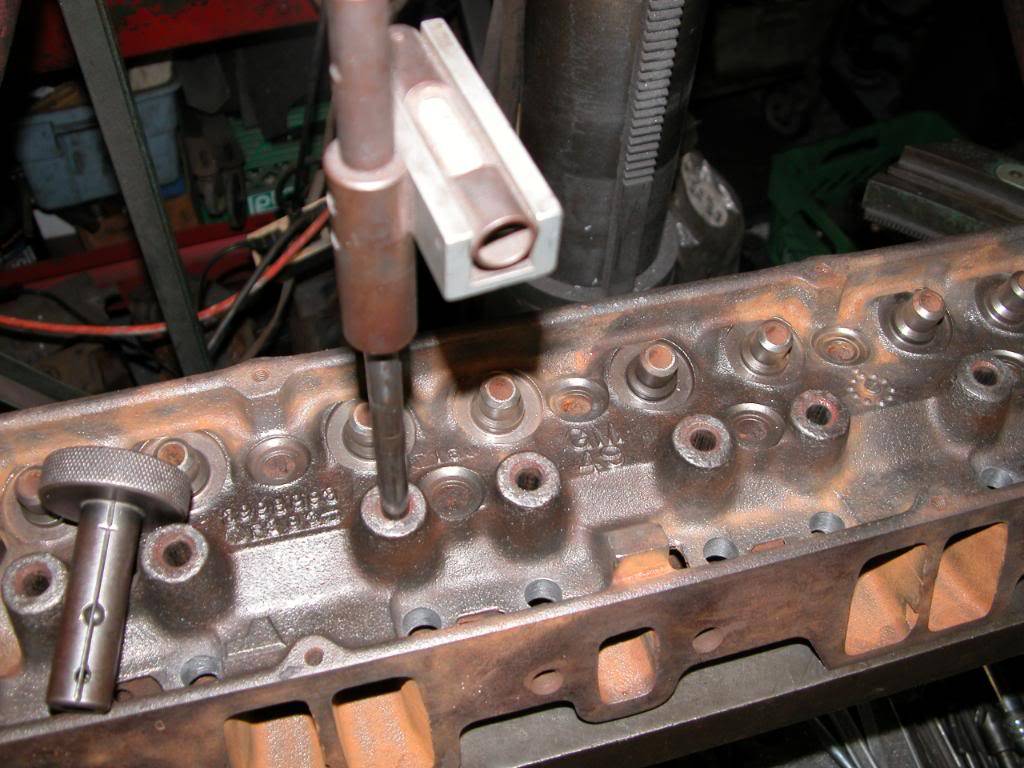
The next step is to get the stud holes aligned with the drill press. The stud holes need to be aligned with the drill press so the holes will remain straight and the rocker arm studs will all be perpendicular to the original stud bosses. This is done by inserting a straight rod which a level can be attached to into the stud hole then adjusting the work table till the level is correct so the hole in the head for the stud will line up perfectly straight with the drill bits and other cutting tools used in the drill press.
06-11-2010 #29
Registered User
- Join Date
- Mar 2007
- Location
- Florida
- Posts
- 2,391
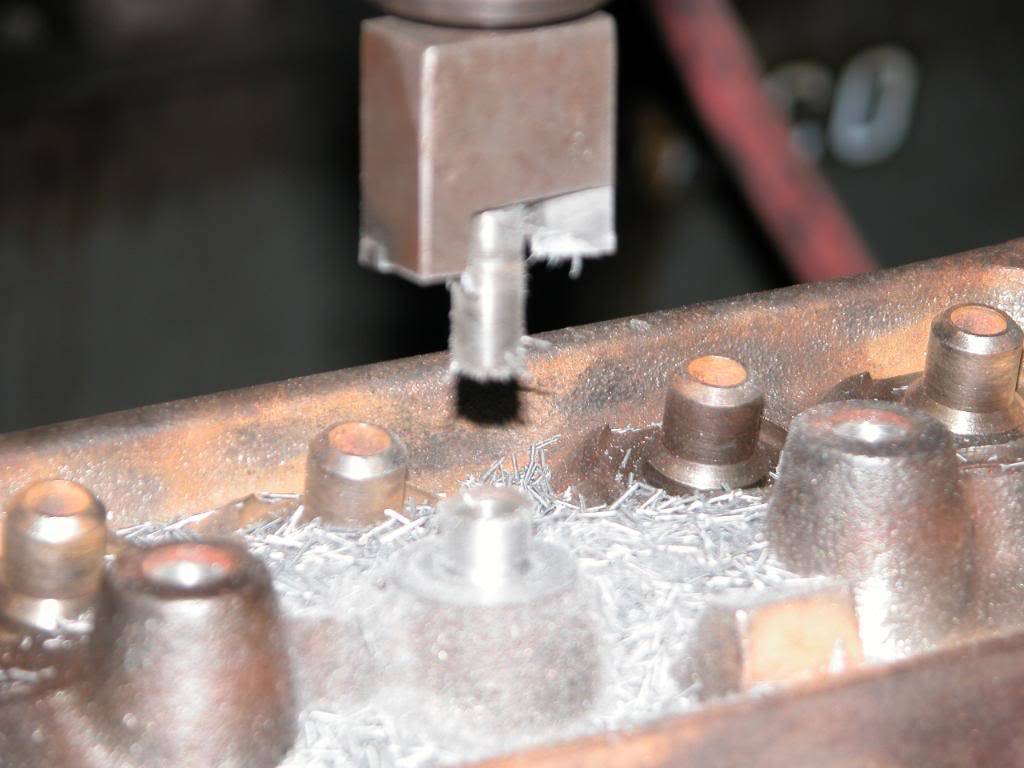
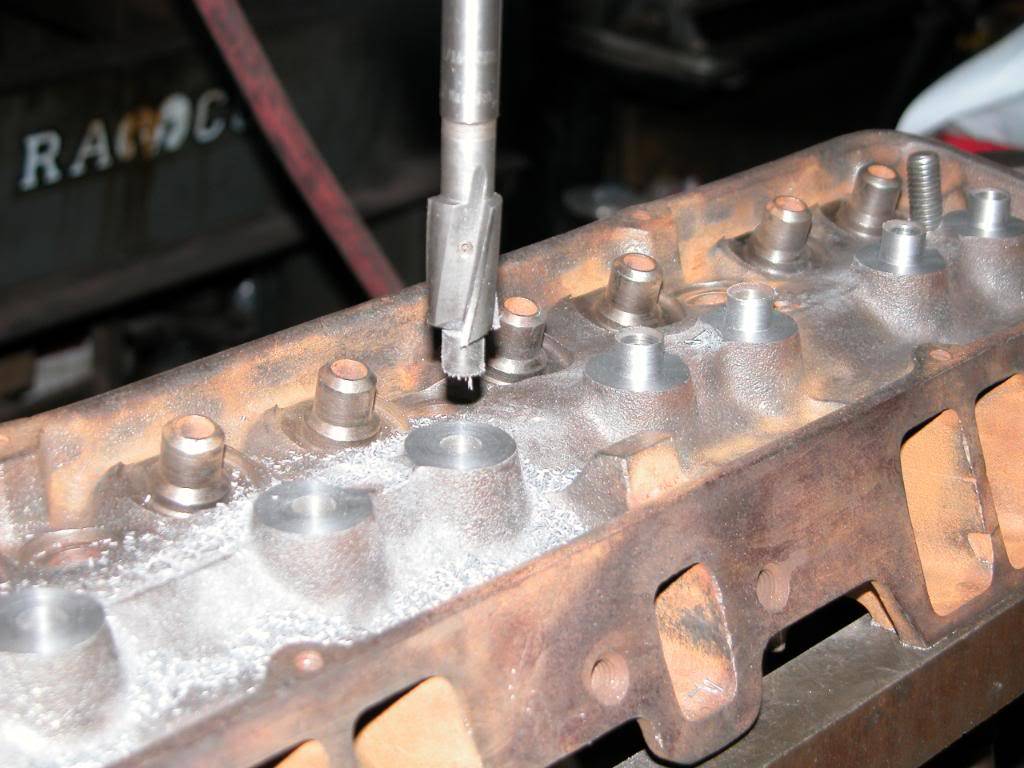
The highest cast stud boss is located by using a straight edge across the top of all of the stud bosses. Then a tool which is set to account for the thickness of the base of the "screw in" stud (the nut part) and the spring seats is used to cut down the casting. The tool automaticly stops cutting at the preset depth. Once the first one is cut the drill press is set so that it will not allow the other bosses to be cut lower even though their original "top" is not as high as the first one is. Follow? This way the guide plates will all be level and the studs will be level. This is much more acurate than the factory setup. Below is the cutting tool used to cut the stud posses down.
After the bosses have been cut the remaining part used to "guide" the cutting tool must also be removed so a different cutting tool is used to remove the remaining metal till it's flush. There is no preset stops involved in this procedure. It's up to the machine operator to make it perfect. Which of course I did as shown in the photo below. LOL
06-11-2010 #30
Registered User
- Join Date
- Mar 2007
- Location
- Florida
- Posts
- 2,391
Once the stud bosses are cut down the hole for the stud is chamfered with a tool in the drill press. This makes it easier to line up the tap which will cut the threads.
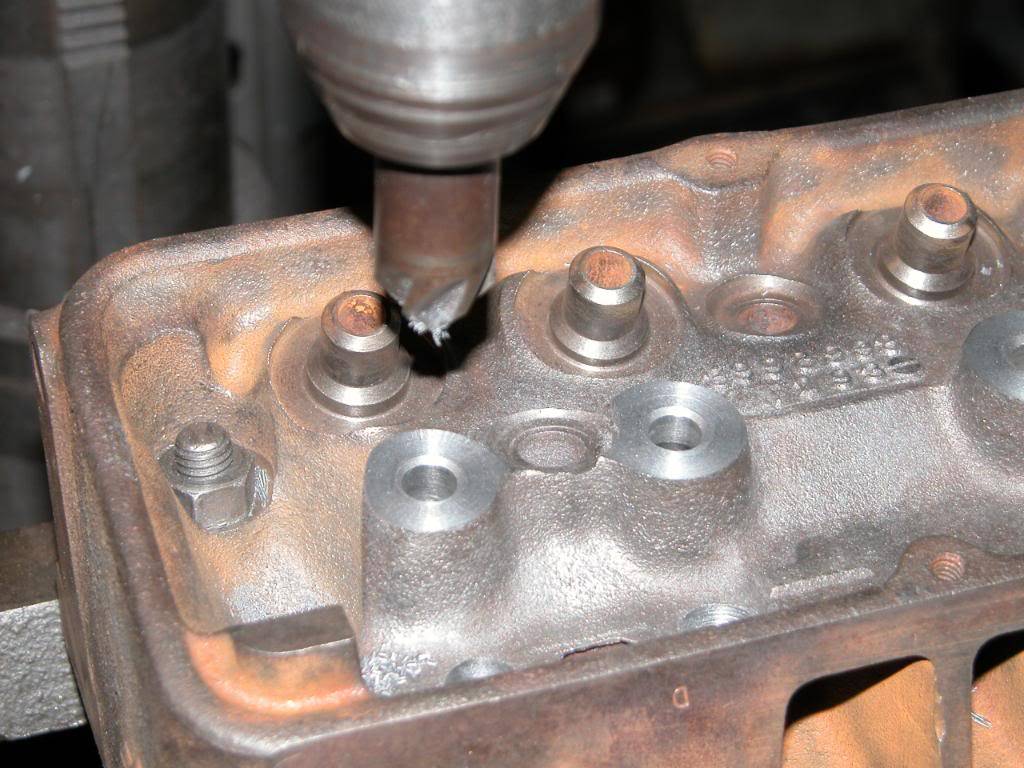
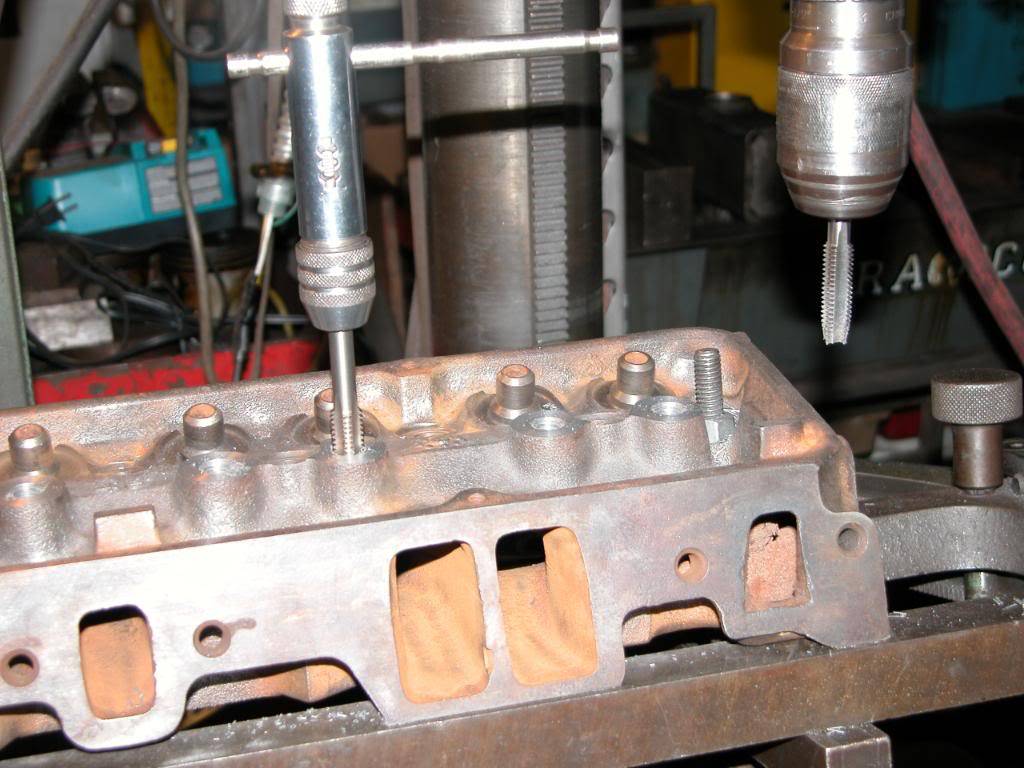
Then a tap with the correct threads to match the screw in studs is used in the drill press to cut most of the threads. After checking the depth of the stud hole we decided to cut the last few threads by hand with a bottoming tap so as not to risk injury to the heads. Both tools are shown in the pic below.
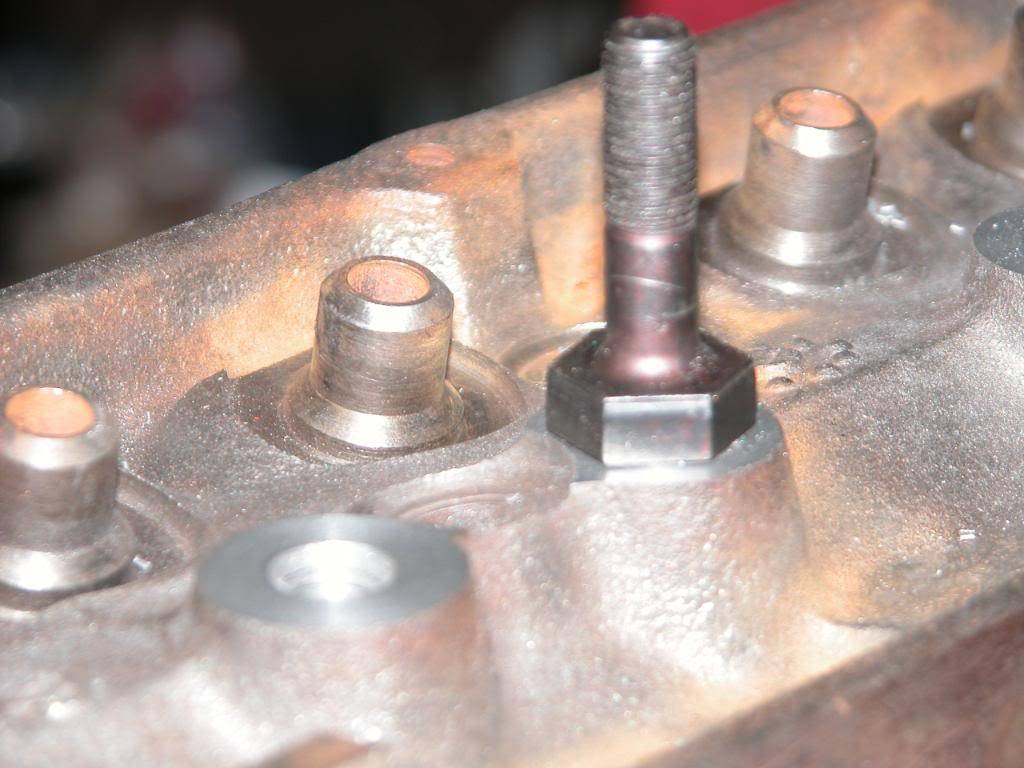
A screw in stud like the ones that will be installed during final assembly is used to check all the holes and make sure everything is good. Then take this head off the table, get the other one, and start all over!! LOL
06-11-2010 #31
Registered User
- Join Date
- Mar 2007
- Location
- Florida
- Posts
- 2,391
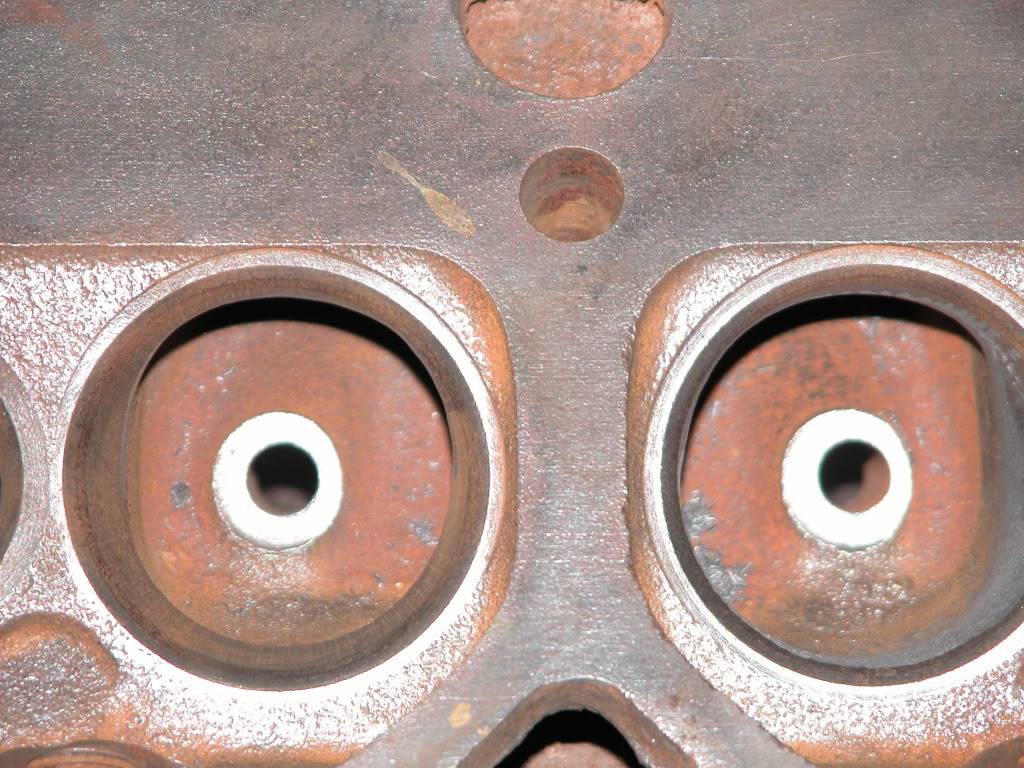
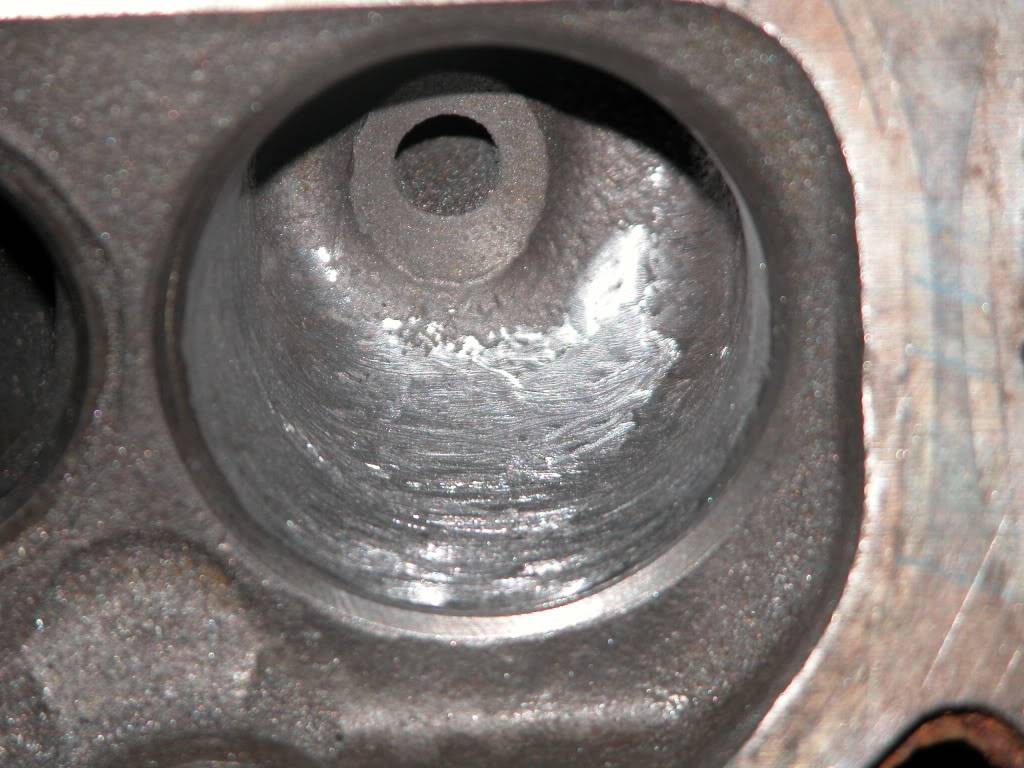
Next up is some mild port work to blend in the bowls. A carbide tipped grinder is used to remove enough metal to get rid of extra material that disturbs flow to the valves under the seat area. In the first pic the intake on the right has been ground while the left is untouched. The second pic shows a closer look before a grinding stone is used to smooth out the rough surface left by the carbide bit and the original factory casting.
06-11-2010 #32
Registered User
- Join Date
- Mar 2007
- Location
- Florida
- Posts
- 2,391
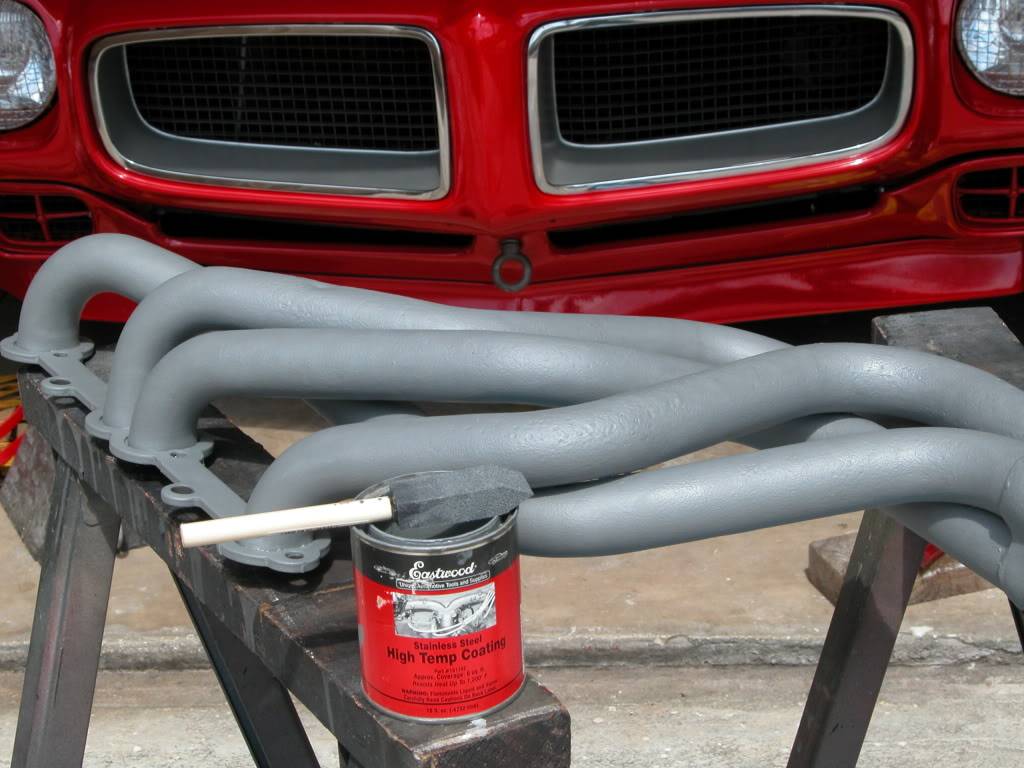
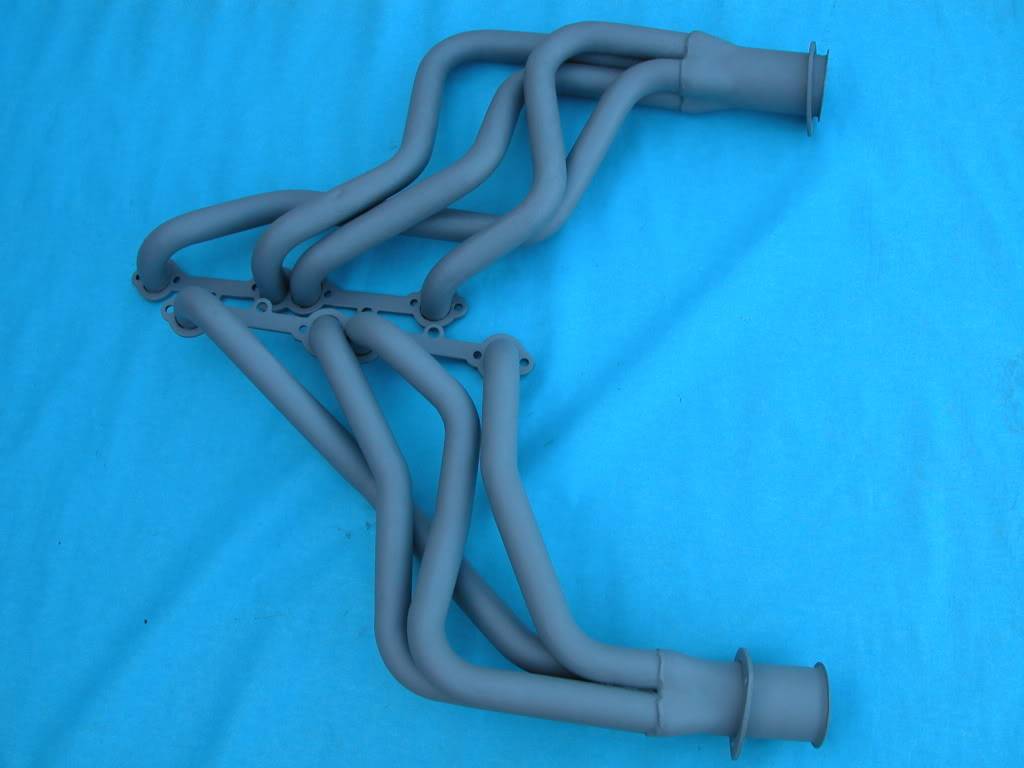
Since I'm on a "no budget" sort of build up here, I made a deal to clean up a set of BBC headers for someone in exchange for a set of SBC headers that should fit the malibu. Both sets of headers were rusty from neglect but with some elbow grease I think they look pretty good and will work out fine for my application.
Here's "my" headers with one wire wheeled to get the major stuff off. After this pic I took them to the shop and sand blasted them to clean them up some more and get into the nooks and crannies the wire wheel couldn't get. I did one at a time so I could get pics of the full effect some cleaning and paint can have with a before and after pic at the end.

Next up was some Eastwood stainless steel high heat paint. Choice of paint was due to it being the only high heat paint I had hanging around and the lack of a budget. Oh ya, I cleaned the insides as well with wire brushes.

06-11-2010 #33
Registered User
- Join Date
- Mar 2007
- Location
- Florida
- Posts
- 2,391
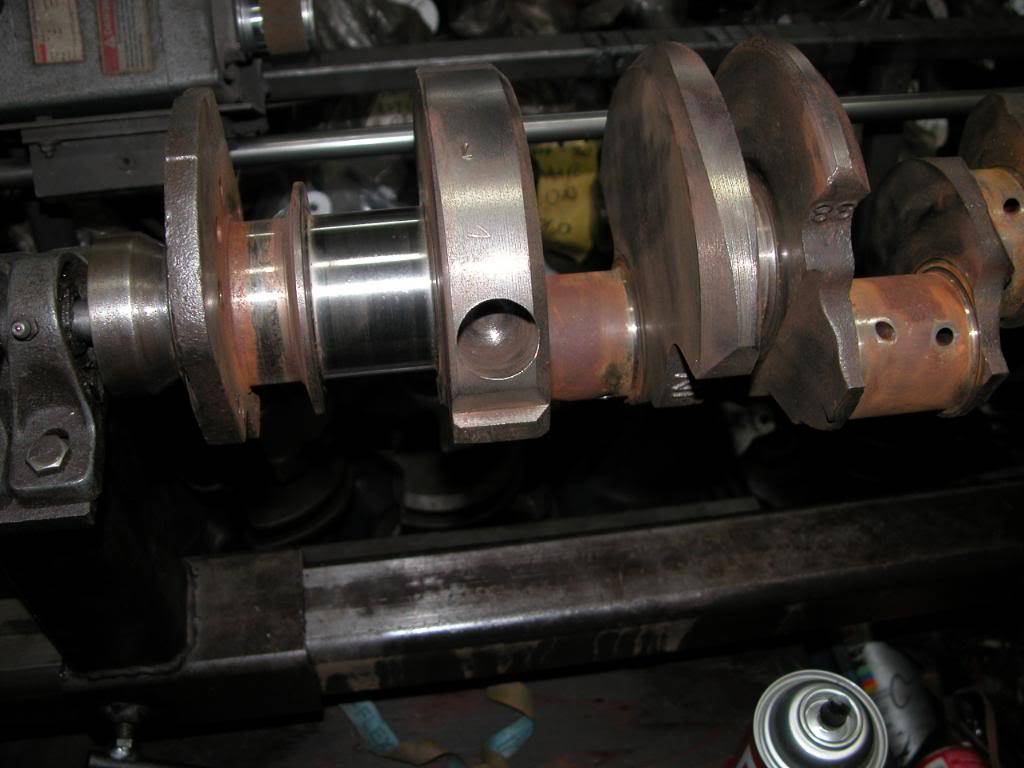
Since I'm finally bringing this thread up to date I also got started on the crank for the 357 going in the Malibu.
In this pic the crank is set up in a machine that will slowly rotate the crank. I took the pic after I started cleaning one of the bearing surfaces so you could see the difference after a little cleaning. The crank had been left standing with no protective oil on it and started to rust. Totaly my fault, I just forgot about it the past couple years because I was busy with other things and it's humid where I live.
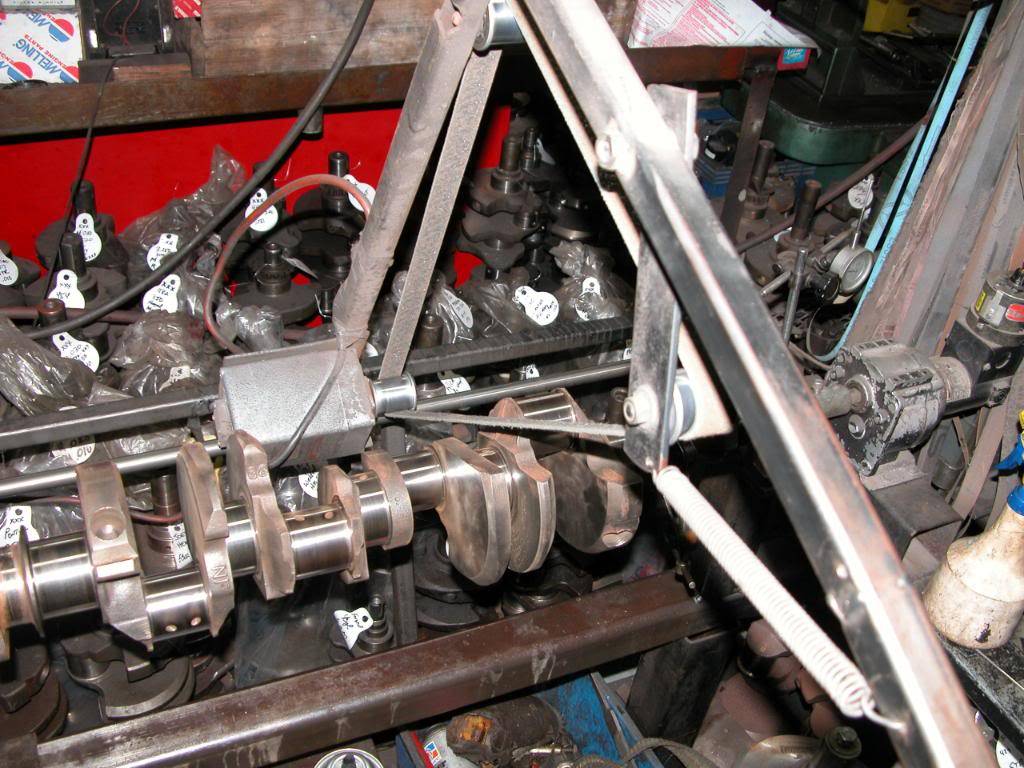
In this pic the machine with the belt on it is used for cleaning, sanding, and polishing the bearing surfaces. In the pic there's a velcro belt on and I'm using it to clean the rust off the surfaces.
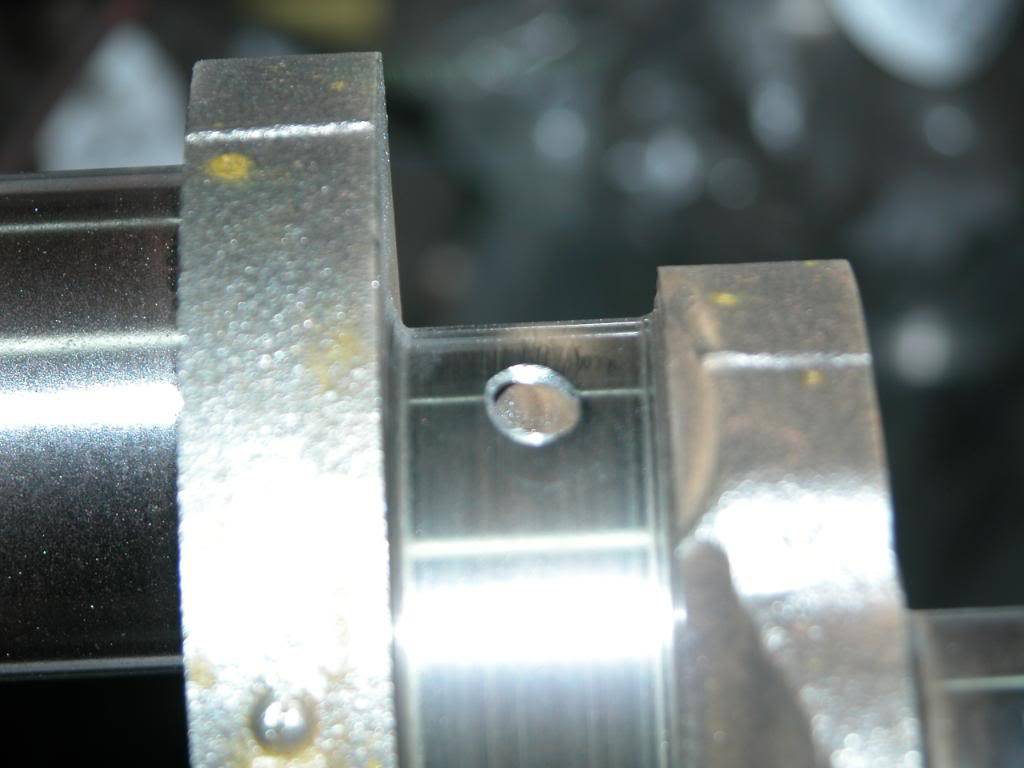
This pic shows an oiling hole I've chamfered with a grinding stone to provide better oiling to the bearings. Since the oiling holes are on an angle, the hole is opened up a little on the side the oil is coming from to provide that side of the bearing better lubrication. The chamfered edges will be rounded a little more with a very small round file by hand to smooth the sharp edges before more work is done to the crank.
06-11-2010 #34
Registered User
- Join Date
- Dec 2009
- Location
- El Dorado Hills
- Posts
- 1,645
Must be nice having that equipment at your disposal. Bout time you got started on that car.
Gaetano Cosentino
Dont Drive Faster Than Your Angels Can Fly
06-12-2010 #35
Registered User
- Join Date
- Mar 2007
- Location
- Florida
- Posts
- 2,391
Yes it is nice to have all the equipment. But the best thing is having an experienced machinist to teach me. Things should start coming together pretty soon. Like any project all the work is in the prep.
06-12-2010 #36
Registered User
- Join Date
- Dec 2009
- Location
- El Dorado Hills
- Posts
- 1,645
Awesome thread by the way, appreciate you taking the time to post your steps in detail.
Gaetano Cosentino
Dont Drive Faster Than Your Angels Can Fly
06-12-2010 #37 Moderator / Pro-Touring.com Sponsor
- Join Date
- Apr 2001
- Location
- San Jose, CA
- Posts
- 4,210
That's fricken cool! I knew I should have entered! DOH! Originally Posted by NOT A TA
Congratulations! Nice product shots too!
Tony Huntimer
RaceHome.comLast edited by TonyHuntimer; 06-12-2010 at 10:33 AM.
@Camaro.Family Camaros
1967 #QuickChangeCamaro - SpeedTech Suspension LS1/T56
1967 #CFBee - SpeedTech Suspension SuperCharged LS3/T56
1969 #TaxReturnCamaro Art Morrison Suspension 496/T56
1986 #IROCdaily - Stock IROC
06-12-2010 #38
Registered User
- Join Date
- Mar 2007
- Location
- Florida
- Posts
- 2,391
I gave away almost all of the Hot Wheels stuff. My bud that took the pic I used for the contest, workers at my local tire, paint, parts, and machine shops as well as friend that helped me get the Firebird project going almost 20 years ago, a family member, and a couple Hot Wheels fanatics on a forum I frequent all got goodie boxes. I only kept a couple for myself. It was fun giving them out! And they all loved getting them. Originally Posted by TonyHuntimerRaceHome
06-12-2010 #39
Registered User
- Join Date
- Oct 2008
- Location
- Mesa, AZ
- Posts
- 103
very cool of you to do that. thats neat to do for your friends. Chaz
chaz selby
06-16-2010 #40
Registered User
- Join Date
- Mar 2010
- Location
- Richmond, CA
- Posts
- 108
now thats what i like to hear and see. you sharing the love giving out gifts will only bring you good karma. this build should be really nice....i would have went crazy if i had a complete hotchkis deal like that.
83 Cutlass 96 LT1, 52mm TB, Electric WP,TH350, Hotchkis sways front/rear poly bushings 8.5 10 bolt 3.73's posi, boxed adjust rear arms, dual cat-back exhaust 2.5" x-pipe 40series
http://www.cardomain.com/ride/2540200

 Reply With Quote