


Results 121 to 140 of 173
Hybrid View


-
05-19-2010 #1

 Registered User
- Join Date
- Apr 2005
- Location
- IN/MI border
- Posts
- 1,920

Awsome! Those wheels fit that car nicely.
-
05-19-2010 #2 Registered User
- Join Date
- Oct 2009
- Location
- Copperas Cove, TX
- Posts
- 325
Topher- Its carb'd for now. Stage 3 Nightmare will have an LS/6spd swayp.
Thanks Buddy. I'm hoping they will fill the wheel wells a bit better when all the weight is on it.Andy McCatherine
1982 Monte Carlo SS (clone)
11-14-2010 #3 Registered User
- Join Date
- Sep 2009
- Location
- lindenhurst ny
- Posts
- 86
Hey Andy looking good. Iceman make a crossmember that is very light and looks great too. http://www.maliburacing.com/iceman/ I bought one about a year ago. good luck with your ride
Iceman (Rick please call 417-476-3340 10 am – 10 pm central time U can call him for more info
later Rob
05-20-2010 #4 Registered User
- Join Date
- Mar 2009
- Location
- overseas
- Posts
- 3,434
looks great Andy! keep up good work!
Kevin S. (overseas in Germany)
1963 Chevrolet Impala 2d ht Coupe
www.CruznArt.com
CRUZN - Automotive Artworks
05-20-2010 #5
Registered User
- Join Date
- Oct 2009
- Location
- Copperas Cove, TX
- Posts
- 325
Thanks Kevin. Lets see some updates on your Monte!
Andy McCatherine
1982 Monte Carlo SS (clone)
05-20-2010 #6
Registered User
- Join Date
- Mar 2009
- Location
- overseas
- Posts
- 3,434
yeah very soon

 Kevin S. (overseas in Germany)
1963 Chevrolet Impala 2d ht Coupe
www.CruznArt.com
CRUZN - Automotive Artworks
09-16-2010 #7
Registered User
- Join Date
- Oct 2009
- Location
- Copperas Cove, TX
- Posts
- 325
Wow, Talk about bringing this one back from the dead. Almost four months...
I have gotten alot of work done to Nightmare in those four months, but not nearly as much as I should have.
I got the front nose and headlights back on the car. The nose has a few spider cracks in it and it doesn't really want to line back up with the fenders but its the best I can do for now.
I've gotten the calipers bolted up, most of the wiring sorted out and cleaned up, I made a plate to mount my MSD stuff to, installed the dash and gauge pod, dropped in the radiator and fans, and installed all of the brake lines. I still haven't sent the transmission off to the trans shop yet or had my driveshaft shortened.
Sorry for the lack of any pictures, but I'll have some up this Sunday. I just thought I'd put something up here to let you guys know this project is still going.Andy McCatherine
1982 Monte Carlo SS (clone)
09-23-2010 #8
Registered User
- Join Date
- Oct 2009
- Location
- Copperas Cove, TX
- Posts
- 325
I apologize for being slow with the pictures, life has just gotten in the way recently.
Here are some pictures I took back in August when my brother and I rolled the car out to clean the shop up a little bit.
I can't wait to get that "Nightmare" off the hood and spoiler...
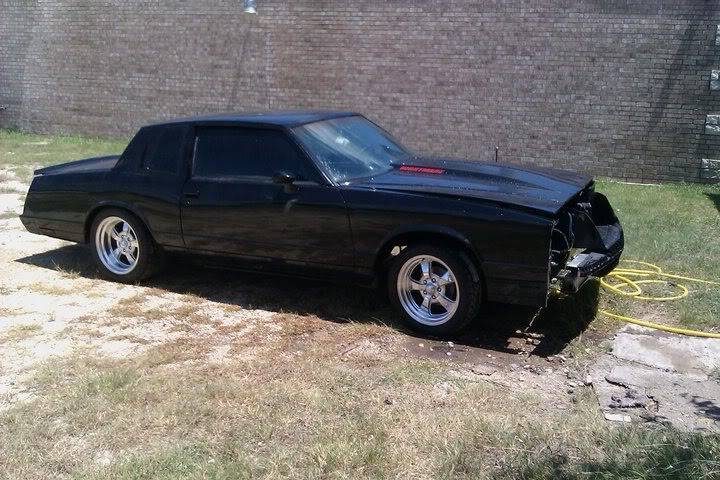
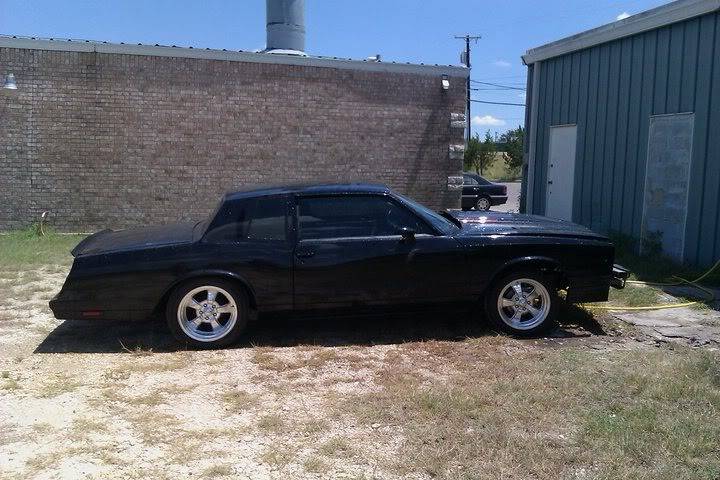
The rear isn't really this low, the driver side tire is just in a hole..
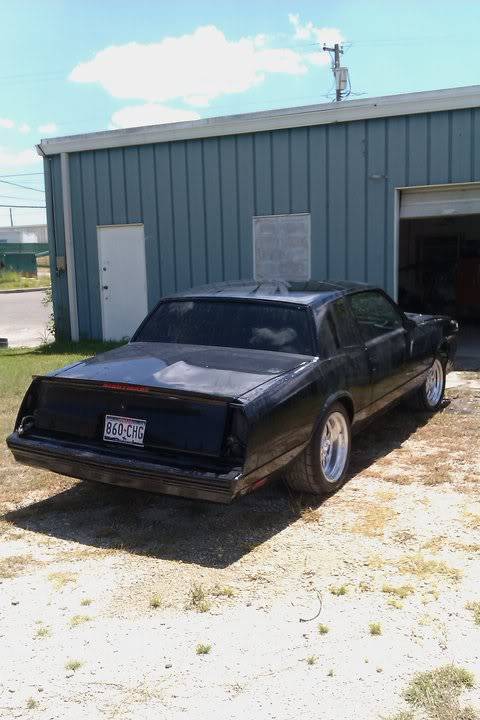 Andy McCatherine
1982 Monte Carlo SS (clone)
09-25-2010 #9
Registered User
- Join Date
- Jan 2005
- Location
- Ocala, FL
- Posts
- 34
Hey... great work on the Monte. I only just got srated here after being a member for over 3 years. Just go into a 1987 Caprice classic. I briefly skimmed through the build and noticed the issue with the sway bar. I wondered if you got that all straightened out? I had a 2000 S-10 Xtreme and when i installed new sway bar links...I pulled a rookie move and installed the sway bar UPSIDE DOWN!!! D'OUH!! I also had an issue with the threads pulling out and had a local welding shop fill up the hole and rethread for me. Great work. Keep it up. Sorry about the area you work in... I lived in Downtown Clearwater, FL for a 6 month period and there was a crack house 3 doors down so I can relate to worries about theft. Im glad to be back in Ocala, FL for now.
09-26-2010 #10
Registered User
- Join Date
- Oct 2009
- Location
- Copperas Cove, TX
- Posts
- 325
Motor City Impala,
Thanks for the compliment on the Monte. I'd like to see this Caprice you have, post a build thread with some pictures! I did get the issue with the sway bar figured out, I just put in a larger self-tapping bolt in. IF it doesn't hold I'll weld a plate to the frame with nuts welded to the other side.
On the note of the area that our shop is in, its actually gotten alot worse recently. My cousin (in his 30's) left the shop and stopped at the gas station on the corner the other day to get a 6 pack and some cigarettes, as he was walking out he was told by some guy sitting outside to give him the beer and cigarettes. My cousin told the guy to bug off, and the guy came at him. My cousin left with only a small cut under his eye, the other guy didn't fair so well. Also, the lot that butts up to our shop is used by a local repo man, who I know through my work in my hometown, and he told me the other day they had several of their vehicles burglarized last week. The police in this town are really great folks and do their best to keep an eye out, but they have lots going on in this town. I will say that they're response time is always very speedy.Andy McCatherine
1982 Monte Carlo SS (clone)
10-12-2010 #11
Registered User
- Join Date
- Oct 2009
- Location
- Copperas Cove, TX
- Posts
- 325
Update time....
I have been getting alot done to the Monte lately, the motor is almost all together, the MSD boxes are mounted, they just need to be wired, the trans is being rebuilt as we speak... SO progress is good there.
This update I thought I'd share with you a little story about sunday night (10-10-10). If some of you recall, I work nights and my nights off are sundays and mondays. I usually work at the shop from late evening until early hours of the morning. This sunday though I took out a girl we went and ate dinner and went to the movies, when we got out of the movies I decided to run by the shop real fast and replace a headlight bulb in my truck. Good thing it was burned out. I pulled up to the shop to find an old Dodge Dakota parked at the end of our lot, right next to the wrecker/repo lot that is connected to our property. The truck looked strange, I blocked it in with my truck, went and let Ashley in the shop and came back out to check the truck out further. When I walked up to the truck, both windows were down, the hood was hot and there was a cold drink in the cupholder. (If you keep up with this thread you know we have all kinds of problems with thieves. The wrecker lot next door just got hit last week.) I then walked back into the shop, grabbed a pry bar and called my Dad to ask if he knew the truck he said he didnt. When I walked back out to the truck I noticed a few more things, tools in the back, a floor jack, 4-way, in the seat was a battery powered screw gun(used to take the sheetmetal off the buildings when they break in) two sets of binoculars, two flashlights, a halloween mask and misc screwdrivers etc. I called the police and wrote down the tag number, and the DIFFERENT tag number that was on the registration sticker, both inspection and registration sticker were taped to the windshield and appeared to be scraped off another car.
The police arrived as well as my cousin Michael, the body man that sub-leases half our shop, the tow company that owns the lot next door and the repo company. The police told us that since it was on our property we could do a private property tow, the wrecker driver didnt even hesitate and hooked the truck up, turns out wheels that appeared to be off his s-10 that was in the lot last week were in the back of this truck. They took the truck to a different lot across town. The officer that responded thinks I scared the owner of the vehicle off, it appears that he had entered the lot next door through a hole cut in the fence. The individual probably heard me pull up and ran into the trees that line the alley. The police were great and let us know they'd be doing lots of extra patrol on our alley, and they will pass all of the info we gave them onto investigation to see if this is linked to all the shop burglaries in Killeen.
Sorry that was so long, I thought it was a good story share, I'm glad we got their truck, maybe they'll try to go pick it up or something....Andy McCatherine
1982 Monte Carlo SS (clone)
10-12-2010 #12 Registered User
- Join Date
- Mar 2009
- Location
- San Antonio, TX
- Posts
- 1,635
Dang Andy! That was being in the right place at the right time.
I bet there will be a follow-up story on the impounded truck, there are probably a lot of loose ends the cops will turn into leads.
Glad to see an update on your project, get that bad-boy up and running and get it home - soon.
Also, take Ashley for a steak dinner, she's a good luck charm!Dave
84 Monte SS - just a few bolt-ons
10-12-2010 #13
Registered User
- Join Date
- Oct 2009
- Location
- Copperas Cove, TX
- Posts
- 325
Getting it home is our number one priority right now, we are looking at building a new shop in Lampasas so we wont have to worry about all of this so much. I'm going to have to take Ashley out again for sure, she was great about the whole thing and didn't seem to mind all the time it took to sort it all out that night. Picture updates coming so stay tuned! Originally Posted by mc84_zz4
 Andy McCatherine
1982 Monte Carlo SS (clone)
11-12-2010 #14
Registered User
- Join Date
- Oct 2009
- Location
- Copperas Cove, TX
- Posts
- 325
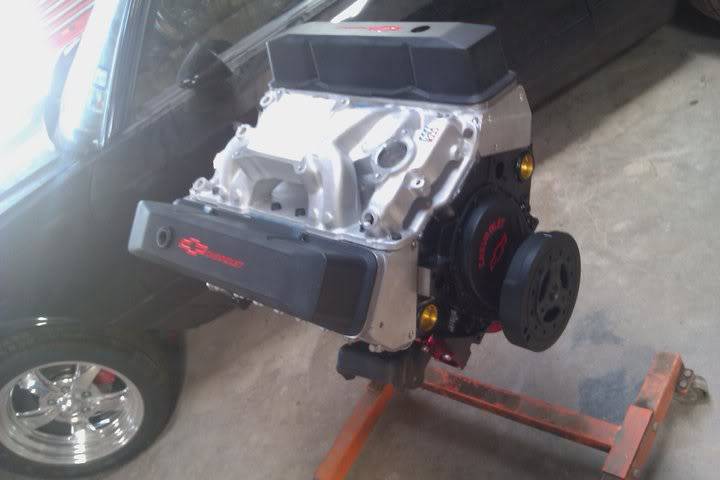
Wow, I have REALLY been slacking on the updates. In the past month or so I have gotten most of the engine bay put back together, the MSD wired in, most of everything else wired in, the front end back on and mostly together, most of the interior back in, and my father and I put the 383 together minus the carb.
I have been having a few issues with the fuel pressure regulator and the fittings. I bought the correct -6AN fittings for my Pro-Comp Fuel pressure regulator, but the fittings (Russell) don't seem to want to screw in all the way. I also tried the Summit brand fittings, and I think an Earl's? Any insight on this? Are they supposed to stick this far out? They are super tight at this point, and they aren't bottoming out, they just don't look correct to me. Heres some pictures:


Another issue I have noticed is the driver side rotor, being difficult to turn. I have the caliper and pads bolted up, and it takes both hands to turn the rotor with wheel off the car. Is this normal? Its like the pads are dragging on the rotor. The passenger side does not do this, I wasn't sure if this would go away after the brakes were bedded in or if I have something messed up here, the calipers came pre-collapsed so I don't think that has anything to do with it. Also, when I take the wheel off the car there is "oil" between the rotor face and the wheel mounting piece. It seems to be leaking from the wheel bearings, I used brand new high temp wheel bearing grease. Why would this leak? Is it normal? Thanks in advance for any help with these issues...
On to the other pics:
First the motor pics, apparently somewhere along the line I lost the ones on my camera, so the ones on my phone will have to do. I'll take better ones soon!
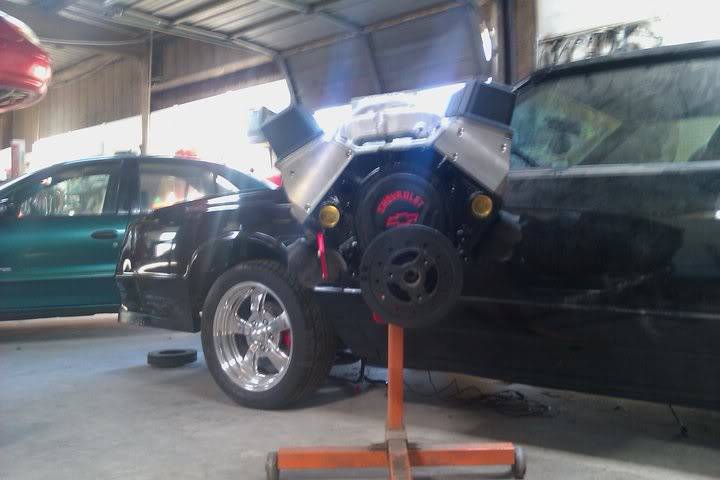
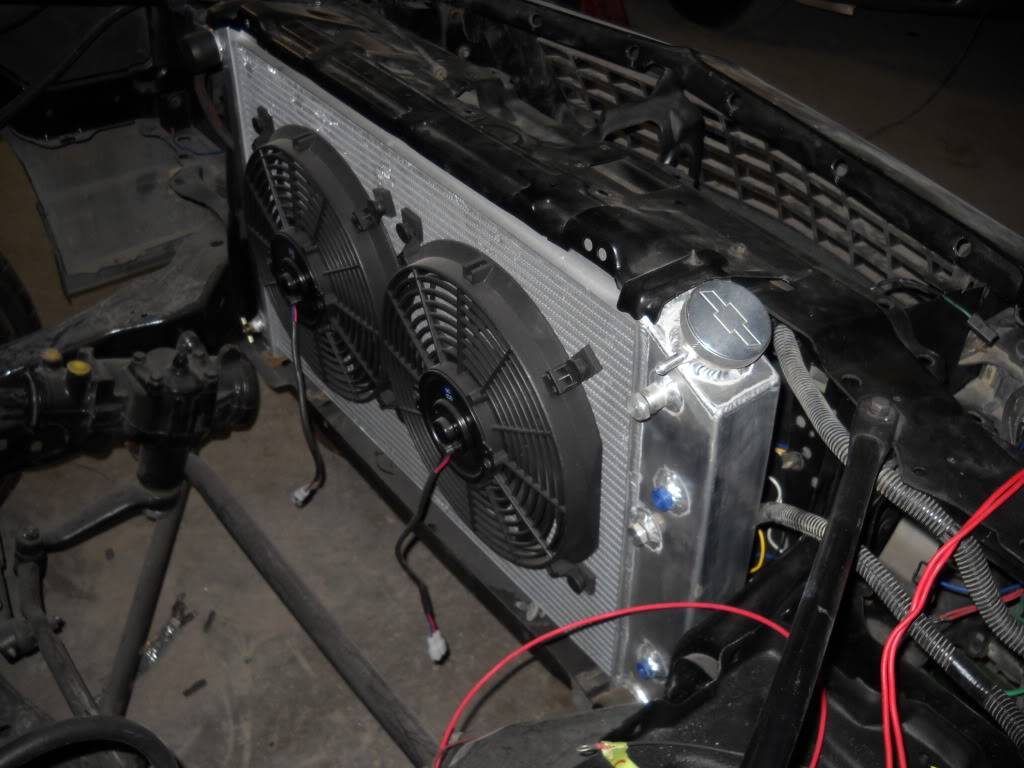
I never showed pictures of my new aluminum radiator/ fans all bolted up so here ya go:
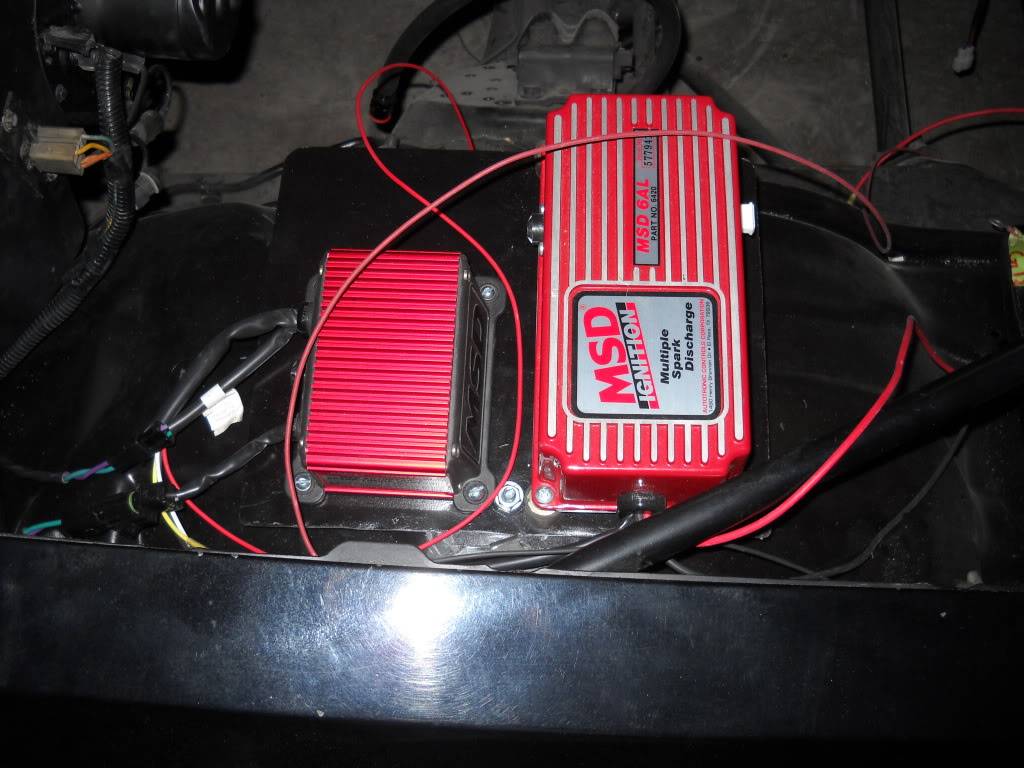
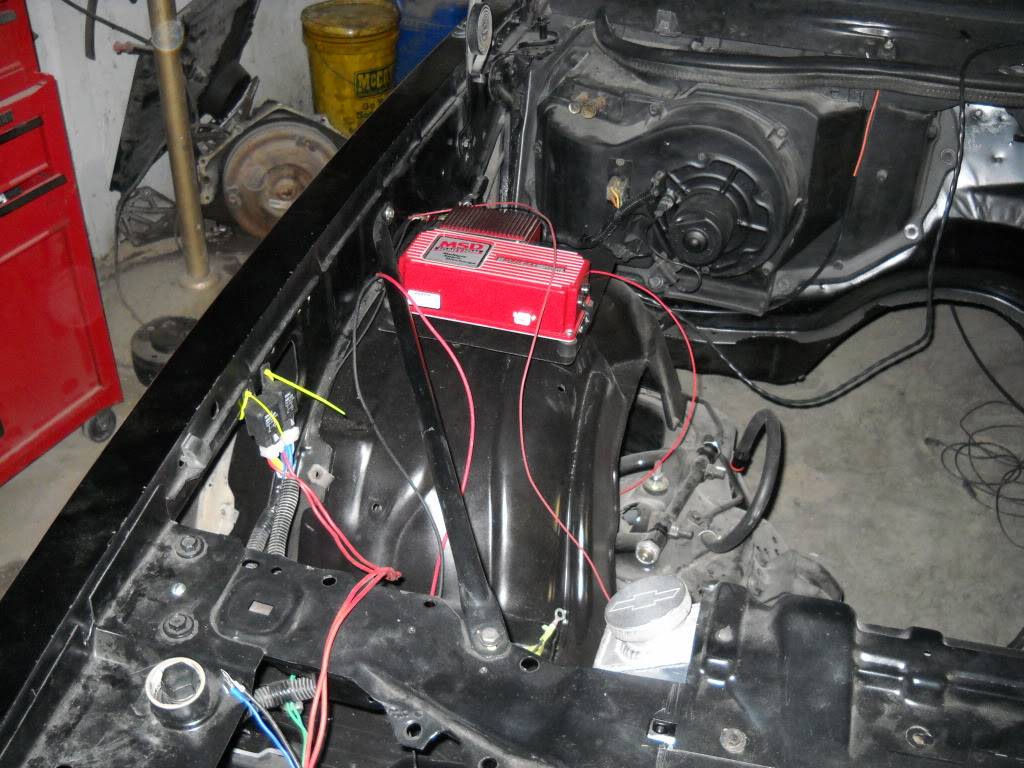
My MSD boxes all mounted up. (6AL, and Adjustible timing control) I made the mount plate out of aluminum, trial and error kind of thing, first try at making something out of sheet metal. I thought it turned out pretty nice. Let me know what you think.
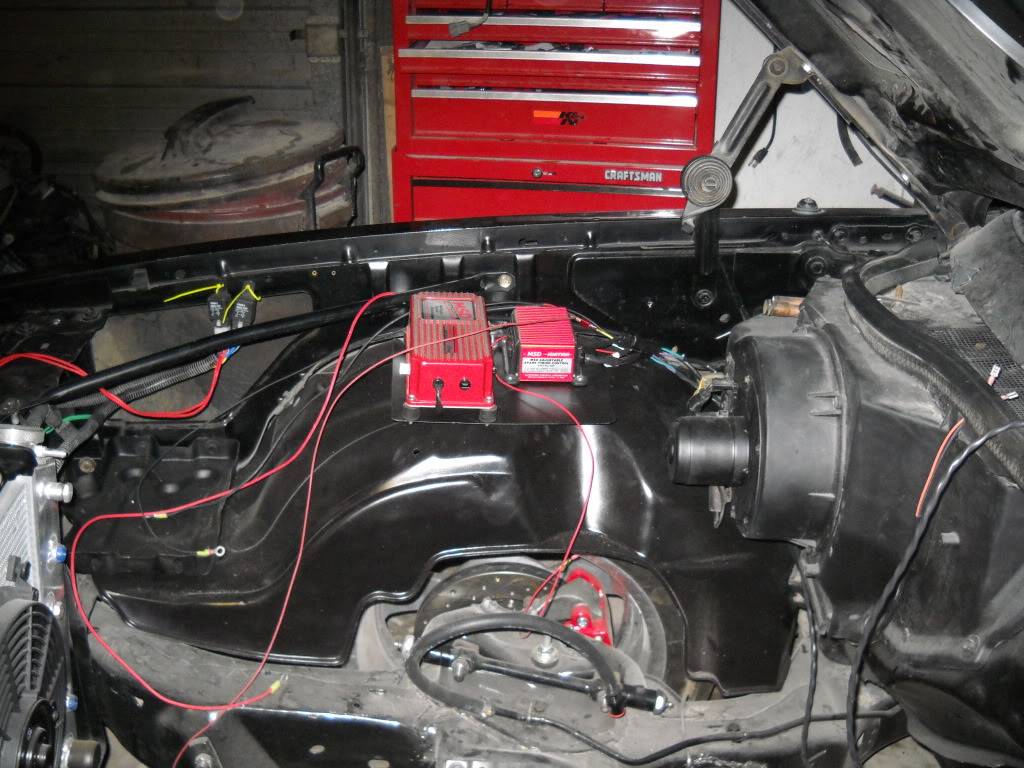
I recently got my 700R back from the trans shop. Heres the before pic:
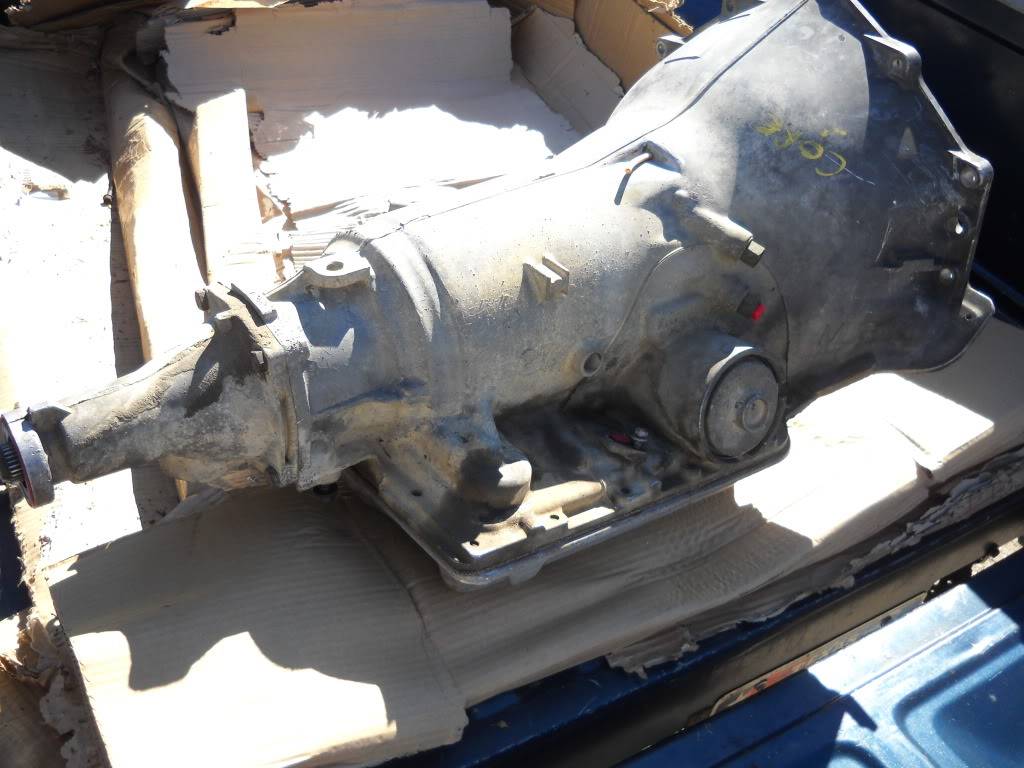
Let me know what you guys think! Any help with my issues would be greatly appreciated!Andy McCatherine
1982 Monte Carlo SS (clone)
11-13-2010 #15 Registered User
- Join Date
- Feb 2009
- Location
- muggy midwest
- Posts
- 533
Andy...you need to use the Aeromotive fittings-they are different from what everyone else uses-probably to make some extra money on fittings is my guess. But, Aeromotive stuff uses straight (not tapered) pipe threads with o-ring seals. Way back in your thread you mentioned the rear not being centered. With all the body offs I've done on gbodies, I can tell you it's the body not sitting centered on the body bushings. Plus, years of use allow them to flex and smash. I didn't notice it but I hope with as tight of a fit your rear tires are that you swapped out the factory rubber ones for poly ones. And, you should replace all suspension bushing with poly or delrin so that the car does not flex...under extreme cornering, factory rubber bushings aint gonna cut it. I'm building a couple of cars now and what I do on pt gbodies is to cut out the factory body mounts and make new ones only much more stout. If you cut open a body mount location on a shell you'll notice how there is a locating nut welding to a piece of steel in a parallelogram shape-it allows some adjustment to align the body bolt through the frame. The only thing that locks in in place is a couple of small steel tabs tacked inside the mount pocket on opposite sides of the nut adjuster. That's why when you start to loosen or tighten, you feel it give or slide a bit before actually turning the bolt. For extreme road racing this style of body to frame security is simply not acceptable. You have a situation where the mount can slide side to side and all it does is tear up the mount, warp the body mount opening in the frame, and finally causing tire/frame interference and the whole time you end up thinking it's the rear-end. I build my own rear frame brace similar to the Kirban one in the front but I tie the rear rails together too. Here's how I strengthen gbody frames:
1.) box the center frame sections in and relocate lines to the outside of the boxed section towards the inside of the car.
2.) brace the front frame AND rear frame rails.
3.) install a g-force x-member
4.) install my own body mounts (requires some welding and a lot of patience)
5.) I install my own version of the ZR2 truck panhard bar in the rear for less body roll
I set it all up so the body sits as square as possible on the mounts and usually I have to grind off/re-weld a couple mounts several times before finally getting it dead-on. I've thought about building body mounts that replace the factory ones on the car and incorporate alignment studs that self-center once lowered on the frame. I have to also get the completed rear-end assembled and bolted in with the wheels/tires I plan to run to make sure the body is 100% square on the frame. I've always liked the SS Montes...that's my next build too. I've got a 79 to finish and an 80 Cutlass before that tho. Nice car Andy, keep it up!"...if at first you don't succeed, try again.
If you still don't succeed, then quit-no sense being a damn fool about it..."
-W.C. Fields
HARNESSWORX
(formerly gmachinz)
11-14-2010 #16
Registered User
- Join Date
- Oct 2009
- Location
- Copperas Cove, TX
- Posts
- 325
Thanks so much for the insight on the fittings, and the body being uncentered! I have no replaced the body bushings, but all of the suspension are poly. I plan on doing body bushings at a later date when I actually swap this frame out with the one I plan on modifying. When I go to build the modified frame all of that info will really come into play. I don't plan on doing anything toooo extreme with the car for right now. I was on MCSS.com and read up on that rear brace a LONG time ago, and I had planned on building one for mine. Did you just use square tubing to do yours? Originally Posted by H2Ogbodies
Andy McCatherine
1982 Monte Carlo SS (clone)
11-15-2010 #17 Registered User
- Join Date
- Dec 2006
- Location
- oshawa ontario
- Posts
- 1,607

Monte SS.....one of the nicest looking cars GM ever built....nice car!
Nascar 69 Chevelle project, 1999 Hutch Pagan Nascar chassis, 69 Chevelle body,700hp, Penske's, slicks, roadrace track day https://www.pro-touring.com/showthre...le-Cup-project
89 Iroc 406 Fitech 5 spd
01 chevy 2500HD 4x4 8.1 Allison
31 Scarab 2 x 454
11-15-2010 #18
Registered User
- Join Date
- Oct 2009
- Location
- Copperas Cove, TX
- Posts
- 325
Thanks Rob and Shortrack!
Andy McCatherine
1982 Monte Carlo SS (clone)
11-15-2010 #19 Registered User
- Join Date
- Dec 2006
- Location
- Out of the Burbs of Detroit to SoCal, then onto my ancestral homeland, the woods of Cascadia
- Posts
- 1,753
Andy-
You may want to revisit the electric fan mounting . While those pull through the core compression deals kind of work with downflow radiators, they can saw through the radiator tubes on a crossflow. And you haven't lived until you've JB welded patches in a radiator tubes outside of a Denny's in the middle of rural Utah at 12:30 in the morning. Particulary with the locals bugging you asking how fast the car goes. ("Not very fast with no radiator in it")Greg Fast
(yes, the last name is spelled correctly)
1970 Camaro RS Clone
1984 el Camino
1973 MGB vintage E/Prod race car
(Soon to be an SCCA H/Prod limited prep)
11-15-2010 #20
Registered User
- Join Date
- Feb 2009
- Location
- muggy midwest
- Posts
- 533
On my rear brace, I wasn't sure where I wanted it exactly so I made it adjustable. I built my from solid steel round stock-I had the ends machined to accept 5/8 left and right heim-ends. Then I built brackets to mount them. The rear bar attached to the rear end lower shock bracket on the drivers side and the frame on the passenger side. If you look underneath say, a 2000 Chevy ZR2 pickup you'll see what I am talking about. It eliminates body roll on cornering almost completely. There are other mods of course but this is something that works for me. I wanted a very stable platform when cornering to let the tires dig a bit and really let the front end cut into the corners. Again, this is where rubber OEM bushings really let themselves be known and not in a good way.
"...if at first you don't succeed, try again.
If you still don't succeed, then quit-no sense being a damn fool about it..."
-W.C. Fields
HARNESSWORX
(formerly gmachinz)

 Reply With Quote


