


Results 221 to 240 of 530
Thread: Blue My Mind, 1972 Ford Maverick
-
04-22-2013 #221

 Registered User
- Join Date
- Oct 2009
- Location
- CT.
- Posts
- 742
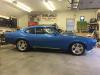
I don't usually have the time during the week to go out and get work done in the garage. But tonight I went out for an hour to install the new pins and bushings in the hinges. While at it I bolted them on and then hung the door. No easy task all by yourself! I got it adjusted best I could for gaps. I can't worry too much about the front until I hang the fender. So far though, I am happy!

Glenn
1955 Chevy BelAir
1951 Chevy 3100
1987 Chevy Silverado
My last project....
https://www.pro-touring.com/threads/...my-72-Maverick!!
-
04-27-2013 #222
Registered User
- Join Date
- Nov 2005
- Posts
- 257
Top notch work!!!!!
Killer Comet
-
04-28-2013 #223
Registered User
- Join Date
- Oct 2009
- Location
- CT.
- Posts
- 742
 Originally Posted by streetrod77

Thanks!
Glenn
1955 Chevy BelAir
1951 Chevy 3100
1987 Chevy Silverado
My last project....
https://www.pro-touring.com/threads/...my-72-Maverick!!
-
04-28-2013 #224
Registered User
- Join Date
- Oct 2009
- Location
- CT.
- Posts
- 742
Lately I feel for every step forward I go at least one back, maybe even two!
I find it very funny how these Mavericks are put together. From one side to the other there really was no constancy in quality. When I last updated I had installed the skins and had already hung the drivers door back in place. Yesterday with the aid of my father I got the passenger door back on. What a mess. The driver door fell in place with beautiful gaps, while the passenger side needed plenty of massaging.
Here is the door hung in place....
Oh yeah, before I forget, here are a couple shots of the hinges with the new bushings and pins installed. The great thing here is that once everything is adjusted, I can just pull the pins and paint the doors, then slide the pins back on and have perfect alignment again with ease.
So I absolutely hate the door gaps, no way I can live with them. Too wide at the fender and way too much at the door/quarter/ rocker area.
Here is the door off the car again and the edges ground to bare metal.
Front door edge welded up for a better door to fender gap.
The bottom edge near the quarter actually needed a .25" added to the bottom! This will be welded solid, but here I rehung the door to check fit. I had the door on and off six times during this entire process.
Front door to fender edge all welded for a better gap.
This is the only welding that needs to be done, even with the panel bonder from 3M. Without doing this there is too much flex, or movement with the window frame.
So all this was one days work. I went to a car show today in my 32. I needed a change of scenery.
Glenn
Glenn
1955 Chevy BelAir
1951 Chevy 3100
1987 Chevy Silverado
My last project....
https://www.pro-touring.com/threads/...my-72-Maverick!!
-
05-05-2013 #225
Registered User
- Join Date
- Oct 2009
- Location
- CT.
- Posts
- 742
I didn't get that much done this weekend. There was a car show in New York that I went to on Saturday. My dad and I drove out together and had a nice two hour (each way) cruise in the 32.
Today I had to clean up in the garage. It was a huge mess. It is so hard to keep everything organized when doing this type of work. What I did do was assemble the cars sheet metal and check everything for fit one more time. I still need to play with the hood and fenders a little on the driver side, but all in all not bad.
The nice part of doing all this today was getting the car outside and taking a look at it from a distance. Sometimes when doing all this you really need to step back and make sure it looks right. And that is hard to do inside the garage.
Glenn
1955 Chevy BelAir
1951 Chevy 3100
1987 Chevy Silverado
My last project....
https://www.pro-touring.com/threads/...my-72-Maverick!!
-
05-05-2013 #226
 Registered User
- Join Date
- Mar 2009
- Location
- overseas
- Posts
- 3,434

looking good!!
 Kevin S. (overseas in Germany)
1963 Chevrolet Impala 2d ht Coupe
www.CruznArt.com
CRUZN - Automotive Artworks
-
05-06-2013 #227
 Registered User
- Join Date
- Oct 2011
- Location
- Katy, Tx
- Posts
- 309
Looking GOOD!
-
05-06-2013 #228
 Registered User
- Join Date
- Nov 2006
- Location
- Ma.
- Posts
- 5,560
X 2 Looking good!
Wayne
Car FINALLY home !!!!!! lol
Project FNQUIK https://www.pro-touring.com/showthre...ghlight=FNQUIK
-
07-14-2013 #229
Registered User
- Join Date
- Oct 2009
- Location
- CT.
- Posts
- 742
It's been a while, time to catch up here.......
I do appreciate all the positive feedback. Thank you all for the support and kinds words throughout this project.
Today I spent a little while going over some parts I have recently picked up.
Here are the 13" drilled and slotted rotors that are going on all four corners of the car. Also in the pictures is the new aluminum hub for the front spindle and the front caliper. I am going to have the calipers powder coated soon.
I also spent quite a bit of time aligning the nose to my satisfaction. Once I got the best out of it I had to apply some West Systems six10 epoxy based two part filler to the sides of the hood to fill in the gaps a little. I love this hood, and I am sure on most Mavericks it fits great, but for some reason on my car the side gaps weren't to my satisfaction. Good for me I planned on painting the hood anyway. This product, once cured, can be sanded down and shaped. Another coat may be needed, but if not I can prime over it and it will be almost indestructible.
While getting the hood and fenders all lined up, I also installed the hood latch assembly and striker. I don't have the original hood stops, and I am not sure I would have used them if I did anyway. So instead I bought four of these custom polished puppies.
I used two of them for the front of the hood, and the last pair here for the trunk lid. I love the adjustability of them.
I am hoping to get a few hours in the garage tomorrow while my wife is at church. She is cool with that as long as I am ready to head over to my in-laws by noon for and early Mothers Day meal.
Glenn
Glenn
1955 Chevy BelAir
1951 Chevy 3100
1987 Chevy Silverado
My last project....
https://www.pro-touring.com/threads/...my-72-Maverick!!
-
07-14-2013 #230
Registered User
- Join Date
- Oct 2009
- Location
- CT.
- Posts
- 742
I didn't get a ton done today. With it being Mother's Day and all. I did get a couple hours to go out and sand down the edges of the hood where I had applied the West System's six10 Epoxy.
Here you can see the results of it with much better gaps. More to my liking now. I still have a little more to do, but I am feeling better about the hood lines now.
Glenn
1955 Chevy BelAir
1951 Chevy 3100
1987 Chevy Silverado
My last project....
https://www.pro-touring.com/threads/...my-72-Maverick!!
-
07-14-2013 #231
Registered User
- Join Date
- Oct 2009
- Location
- CT.
- Posts
- 742
I have to tell you, it is much harder getting things done during the nice weather than it is when it's cold during the winter months. I have resolved to the fact that this car will not be painted before our vacation last week of July as I had hoped. Too many other things to do when it's nice out....
Yesterday we went to Brimfield Antique Fair in Brimfield, Mass. If you are not from around here then I couldn't begin to describe the size and magnitude of this event. Some car stuff, but mostly anything you could imagine that is old for sale. Huge is all I can say. We walked for roughly 6 hours and I think we only saw 1/3 of the show.
Today I was working hard in the garage. With the front end still on I continued to fit the hood to the fenders and to the cowl.
Here is where I started....
I applied some filler across the panels to get a perfect horizon across the tops of the hood, fender and cowl......
Glenn
1955 Chevy BelAir
1951 Chevy 3100
1987 Chevy Silverado
My last project....
https://www.pro-touring.com/threads/...my-72-Maverick!!
-
07-14-2013 #232
Registered User
- Join Date
- Oct 2009
- Location
- CT.
- Posts
- 742
I have been playing with the Maverick, but not much that can be seen in pictures. More sanding and metal work fitting gaps to my standards. It is all so time consuming to do. At the same time there is so many other things to do when the weather turns nice. That is one reason I like the winter when there is a project at hand. I can turn up the heat in the shop and lock myself in without any distractions. My plans for paint by end of July are gone, right now hoping by end of Summer. I did send the bumpers out for chrome. Should get them back in August.
In the meantime I have done a few things to my 32. Small changes. Swapped out the mirrors, then over the weekend I took off the hood top and flamed the underside. Looking for something different without taking up too much time. Did the entire thing in six hours from start to finish.
I laid out one set first and masked them off, these will stay yellow which will create a negative flame......
Then taped out another set, and masked them off for the positive flames....
Here they are all masked for paint.....
This is how they look all painted.....
And on the car....
At a car show today.....
I know, I know........ back in the garage on the Maverick. Right?!?
Glenn
Glenn
1955 Chevy BelAir
1951 Chevy 3100
1987 Chevy Silverado
My last project....
https://www.pro-touring.com/threads/...my-72-Maverick!!
-
07-14-2013 #233
Registered User
- Join Date
- Oct 2009
- Location
- CT.
- Posts
- 742
I have not gotten as much done on the Mav as I had hoped. I know, broken record here, right? I have been doing a few things to my 32 for the summer shows.
Anyway, yesterday I gathered up a bunch of parts to take to get powder coated.
I then took the driver door that I had stripped the 70's factory primer off of, then sanded the DP epoxy on the rest of the door. Now it is time for a few coats of fresh epoxy.
Bare metal outer skin.....
Sanded epoxy.....
Ford logo. I masked off the center so I didn't fill it with primer. I sprayed two coats like this, then pulled the tape and applied open more coat over it.
All primed.....
And lastly the Ford logo with primer on it now shows how it will look after some sanding and paint.
Back in the garage ready to be hung for final blocking and minor body work....
Glenn
1955 Chevy BelAir
1951 Chevy 3100
1987 Chevy Silverado
My last project....
https://www.pro-touring.com/threads/...my-72-Maverick!!
-
07-14-2013 #234
Registered User
- Join Date
- Oct 2009
- Location
- CT.
- Posts
- 742
I have been away from the car for a couple weeks. Other things to do with the family and the local Goodguys event was last weekend. Now I am back to it.
The first thing I did this morning was hang the drivers door again and see where I stood:
I then sanded the door down and ran a coat of filler across the seems for a better look. This is after the first quick coat was sanded, sorry for the slightly blurry shot.
Second and final coat done and fixed a small dent in the door skin:
Mirror holes drilled and bolted in place, also sanded them down and they will be ready for final primer.
This may look like a lot of filler, but it is actually really thin, most of it hit the floor in the form of dust.
Final shot includes the fender all sanded and body work on it all done, except for the front side light area. I will do that next weekend. This side of the car is now ready for more primer. I will pull the fender and door and prime them off the car.
I also spent some time making some adjustments to the front lip of the hood so the the front molding will fit. This area was too thick and too low for the molding to fit properly up against the bottom of the hood. It now fits like a glove. The hood is now almost ready for primer as well.
Til next time...........
Glenn
1955 Chevy BelAir
1951 Chevy 3100
1987 Chevy Silverado
My last project....
https://www.pro-touring.com/threads/...my-72-Maverick!!
-
07-14-2013 #235
Registered User
- Join Date
- Oct 2009
- Location
- CT.
- Posts
- 742
I took the hood, left front fender, custom front valance, drivers door, spoiler and end caps to the booth for some high build epoxy primer. Today I brought all the parts home and installed a few nuts and bolts to hang the parts. I like block sanding with the parts bolted down and stable instead of moving around on a scissor stand. Plus it was nice to see the car this way.
Parts in the booth ready for primer.....
And here all primed up......
And here bolted back together......
Glenn
1955 Chevy BelAir
1951 Chevy 3100
1987 Chevy Silverado
My last project....
https://www.pro-touring.com/threads/...my-72-Maverick!!
-
07-14-2013 #236
Registered User
- Join Date
- Oct 2009
- Location
- CT.
- Posts
- 742
Today I took the lower valance off and mounted the driving lights. Slid the valance back into place for a couple pictures.
I needed to check for clearance between the lights and the radiator support, I am good there thankfully. Also, wanted to make sure they fit properly. I am not really happy with that. Aftermarket lights bolted to an aftermarket Camaro valance means things don;t lie up well. I am going to make a new mount for the lights for a better fit, but all in all I am very happy with the look.
Glenn
1955 Chevy BelAir
1951 Chevy 3100
1987 Chevy Silverado
My last project....
https://www.pro-touring.com/threads/...my-72-Maverick!!
-
07-14-2013 #237
Registered User
- Join Date
- Oct 2009
- Location
- CT.
- Posts
- 742
I have a friend building a Model A pick up hot rod that I promised when he had it ready for paint I would do it, no matter what I was in the middle of I would take care of him. Well, that time has come.
So I have spent all day today getting a few things cleaned up, removed all the body panels and masked up the shell so I can put it in primer once again. I feel better having it sit for a month in primer than open sanded primer and exposed body filler. Tomorrow I will load it into my trailer and haul it to the booth for three coats of high build epoxy, run it through a bake cycle and then drag it home. Tuesday evening I will reassemble all the body panels so the car will be whole again. It takes up less space that way.
Glenn
1955 Chevy BelAir
1951 Chevy 3100
1987 Chevy Silverado
My last project....
https://www.pro-touring.com/threads/...my-72-Maverick!!
-
07-14-2013 #238
Registered User
- Join Date
- Oct 2009
- Location
- CT.
- Posts
- 742
As I had planned I loaded the car in my trailer yesterday late in the afternoon. This morning I made my way over to the booth I use. Unloaded the car, blew it off one final time then straight into the booth for three coats of primer.
Here is the car shell all ready for its coatings of primer......
I also primed the trunk lid.....
As well the rear spoiler.....
Three coats of primer and a 45 minute bake session and I loaded it right back into the trailer for the ten minute ride home. I left the house at 8:30 and was home at noon.
Here it is right after unloading it in my driveway......
Detail shot of my home made reveal around the shaved drip rails....
Glenn
1955 Chevy BelAir
1951 Chevy 3100
1987 Chevy Silverado
My last project....
https://www.pro-touring.com/threads/...my-72-Maverick!!
-
07-14-2013 #239
Registered User
- Join Date
- Oct 2009
- Location
- CT.
- Posts
- 742
So I wasn't going to put this together until mid week, but when the adrenalin gets going you just have to roll with it sometimes!
Add to that the primer being baked and hard as can be already.... well I just started putting it all together. 90 minutes later this is how it looked. I then dragged it back outside for some pictures.....
I haven't spoken much about this spoiler. I have shelved the raised spoiler I was making for a while. I hope to get back to it, but for now this is what I came up with, much more subtle but still with my flair and style.....
I love seeing the lines in this picture. I worked very hard to get them to look like this.....
I know some have made comments about not liking the mirrors I chose, But I think they look good. Especially now that they are the same color as everything else.....
Now that I see the entire car in primer I can see things that need to be fixed. It gets hard with sanded primer and sanded body filler to catch all the little things. Now that I can really "see" everything I have some repairs to make here and there.
I still have to finish the passenger door and front fender as well. But it looks like this is as far as I will get on this project for a month roughly.
That is it for now, thanks for watching.
Glenn
1955 Chevy BelAir
1951 Chevy 3100
1987 Chevy Silverado
My last project....
https://www.pro-touring.com/threads/...my-72-Maverick!!
-
07-14-2013 #240
Registered User
- Join Date
- Nov 2011
- Posts
- 89
Great work! I always like to see something different.


 Reply With Quote





