Results 1 to 20 of 541
Thread: 1971 Firebird455 - Project
-
09-23-2009 #1

 Registered User
- Join Date
- Feb 2005
- Location
- Sydney, Australia
- Posts
- 1,797

1971 Firebird455 - Project
Someone in another thread suggested I post up about my project car.....so here goes -
Picked up one of my all time favourite cars, a small back window early 2nd generation Firebird (1971). My plans for the car are a pro-touring influenced resto-mod - working to a budget here, so I'm afraid you won't see a lot of the real bling stuff that is available for these cars.
Since I was able to pick up a Formula hood (one of the best looking hood designs of all time) I'm going to externally style the car as a 71 Formula 455. Interior will be clean and simple, black leather, Corvette seats, Trans Am dash with aftermarket guages.
Suspension will be more a refinement of the original system than a whole new approach, with lots of parts from Pro-Touring F-body.com. Additional body/frame bracing, solid body mounts, Koni shocks, 17 inch wheels etc. Brakes are the 1LE late 3rd gen disc conversion for the front with drilled and slotted 12" rotors and a larger diamter GM finned drum set for the rears (yeah, I know...drums...rear discs aren't on my budget list at this stage).
Car is very clean and straight....although I have to undo some work previously started on a RHD conversion (the steering mods are really "something" to see...lol) ....the car will be LHD. I'm in Australia, which explains the right hand drive conversion mess....lol.

Going to use the Formula hood on the Firebird and hook up the Ram Air.....very cool stuff.
Last edited by LeighP; 09-23-2009 at 05:52 AM. Reason: additional information
-
09-23-2009 #2
Registered User
- Join Date
- Feb 2005
- Location
- Sydney, Australia
- Posts
- 1,797
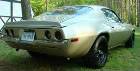
Need to take some better pics of the car, I think....this is where and as I found it.
So far I've pulled off the front sheet metal, cleaned the years of dust off the car and cleaned everything out of it. Its up on stands now in the garage....the underside of the body has been painted gloss black (that'll do....not right for a resto, but OK for me) and the trunk is clean and painted...though I'll have to go over that with trunk spatter paint etc, its been sprayed in a dark metallic purple by some 90's era owner...
09-23-2009 #3
Registered User
- Join Date
- Feb 2005
- Location
- Sydney, Australia
- Posts
- 1,797
I got into cleaning the fuel tank the other day...since it was sitting on the floor right in my way. About 1/4 inch of undercoating and at least two coats of different red paint....what a mess. Who'd have thought a nice clean tank was hiding underneath? I took it down to get repaired ..the neck has come loose from the tank.
09-23-2009 #4
Registered User
- Join Date
- Feb 2005
- Location
- Sydney, Australia
- Posts
- 1,797
Finished off the fuel tank this afternoon befoe going to work. I've had the tank down to a radiator shop for a clean out and repair the filler neck which had come loose...they also soldered the vent tubes again just to be sure.
Was going to get it painted professionally, but I'm trying to conserve $ for parts so I thought I'd just clean it up and clear the metal to protect it. Polished the tank with a metal polish paste first, then a fine liquid metal polish and steel wool. Came up pretty clean and nice...can't get a couple of marks off where the tank straps sit, but they'll be covered when its installed. Sprayed with clear coat paint.
Tested the sender unit, there was a short somewhere. Disassembled it, added a little new insulation and bingo, working sender.
Ordered new rear inertia reel seat belts, but the ones I chose were not really going to work when they turned up and I got a good look at them....so I've re-ordered some others that should work much better. Lucky the parts guy at the local dealer is helpful. 8)
09-23-2009 #5
Registered User
- Join Date
- Feb 2005
- Location
- Sydney, Australia
- Posts
- 1,797
I've made up a cardboard version of the top backseat belt upper mount for a guy I know to fabricate (I can't weld to save my life, lol)....I need two of them to mount the inertia reels into the rear parcel tray like a late model car (sit down almost flush). I'll have them back next week.
Restored the handbrake mechanism, made up the bottom stud to mount it and redrilled the holes in the firewall where they'd been previously welded up....all mounts nicely. Cleaned up and painted the wiper regulator arms etc...they'd been painted with the awful purple metallic paint that got sprayed over everything attached to the firewall (firewall is now all stripped of parts ready for painting).
Now I'm working on the seat tracks....they were rusted and stuck solid, so I'm in the process of sandblasting, painting and reassembly...hope I get them back together right, lol.
09-23-2009 #6
Registered User
- Join Date
- Feb 2005
- Location
- Sydney, Australia
- Posts
- 1,797
Ok...so the seat tracks are all done. (Grrrrrrr....deceptively simple things that take hours to get working again after you pull them apart...lol). They were rusted solid, now they're back in the car temporarily so I can make adapter plates to mount the seats.
I've mocked up a seat roughly in position then sat in it......I estimate it'll give me over an inch of extra head room...which is good, I'm 6'3".
The seats are late 4th gen Corvette seats I picked up off ebay super cheap some time back.....just what I want to hold me in the seat a bit better than the stock ones do.
I'll be working on having these mounted this weekend and then its on to the heater/demister.....none of the stock heater system remains.
09-23-2009 #7
Registered User
- Join Date
- Feb 2005
- Location
- Sydney, Australia
- Posts
- 1,797
Well, seats are now mounted in the car. I'm very happy with how they've worked out. I've got an extra 2" of head room over the stock seats in my 77 T/A and the seat back measures pretty close to the same distance from the dash as my 77 seat does. In the 77, I've moved the drivers seat back 3". In this car, because the seats are a bit thinner in the back, I've only moved the drivers seat back 2" more than the passenger side seat.....gives me some good leg room. I can tell you though, I'm going to have to go easy on the underlay beneath the seats....I've got them set so low that the seat pan just clears the floor.....maybe just enough room for carpet...lol.
here you can see the leg room....heaps. :-D
next its onto the heater/demister
09-23-2009 #8
Registered User
- Join Date
- Feb 2005
- Location
- Sydney, Australia
- Posts
- 1,797
Heres the pics of the heater...modified to suit the application. I've cut a couple of the outlets off, sealed up with sheetmetal and urethane adhesive. The pics show how it'll sit in the car...the hose over the top will supply demist air. The top vent on the RH side will supply the passenger dash vent, the lower vent will flow on the passenger footwell. Luckily, I don't need heat on my side...this is mainly to keep the girlfriend happy (heat) and the registration authorities happy (demister). Heater is from some small japanese car, no idea what model, lol. I wasn't going to use the stock system as I've gone for a smooth firewall. (sorry for the out of focus pic...oops)
09-23-2009 #9
Registered User
- Join Date
- Feb 2005
- Location
- Sydney, Australia
- Posts
- 1,797
As part of the change back to left hand drive I mentioned before, I'm using a 75+ subframe in my 71 model. This means, among other things, that I need to cut some new rear mounts as the yare in a different position on an early car.
I cut the holes this morning in the rear of the chassis for the early body mount locations.
I'm using solid body mounts andI noticed the doubled section of the frame where the two sides overlap forms a high point around the body mount area....this wouldn't matter when using rubber mounts as the rubber would flex around it. Solid mounts have no give, so the lower bush holds the whole bushing assembly at a slight angle, lessening the contact area of the bush with the chassis and also side loading the bolt and body mount nut etc...causing unnecessary loads on the floor and mount. I cut a small rebate into the edge of the lower bushing to allow it to sit straight against the chassis rail.
1. New holes cut
2. Incorrectly seated body bushes due to the lower bush sitting on the inner surface of the double section of rail.
3. Rebate cut into edge of lower bushing
4. Correctly seated lower body bushing
Last edited by LeighP; 09-23-2009 at 05:44 AM. Reason: spelling
09-23-2009 #10
Registered User
- Join Date
- Feb 2005
- Location
- Sydney, Australia
- Posts
- 1,797
Car is off next week to the panel shop for some work, and I'm waiting on parts I've got coming from the US.
Just keeping busy doing some cleaning up and painting small parts etc.
09-23-2009 #11 Registered User
- Join Date
- Aug 2004
- Location
- Rustburg, Virginia
- Posts
- 3,436

Nice project!..keep up the good progress.
1970 RS/SS350 139K on the clock:
89 TPI motor w/ 1pc rear seal coupled to a Viper T56 via Mcleod's modular bellhousing w/ hydraulic T/O bearing from the Viper, 12 bolt rear w/ 3.73 gearing, SC&C upper control arms, factory lowers with Delalums, C5 brakes at all four corners, Front Wheels 17x8's with Sumi 255/40/17 and Rear Wheels 17x9's with Sumi 275/40/17.
Brief description of the work done so far can be found here: http://www.nastyz28.com/forum/showthread.php?t=112454
09-23-2009 #12 Registered User
- Join Date
- Jun 2005
- Location
- Greenwood, SC
- Posts
- 2,314
leigh!!
didn't realize you were over here! Looks like a great project, sir--keep us updated, I know what you end up cooking up will have that aussie-awesome flair!
09-23-2009 #13
Registered User
- Join Date
- Feb 2005
- Location
- Sydney, Australia
- Posts
- 1,797
lol...all roads lead to Pro-Touring.

09-23-2009 #14
Registered User
- Join Date
- Oct 2004
- Location
- stanwood, wa
- Posts
- 324
Been watching over on performance years. Good to see another 2nd gen over here.
10-01-2009 #15
Registered User
- Join Date
- Feb 2005
- Location
- Sydney, Australia
- Posts
- 1,797
Well, car is off to the body shop tomorrow morning. Its down off jack stands and ready to push on the tilt tray.
Plans are -
fix the firewall so its back to left hand drive configuration
repair any rust issues around the front and rear screen
fit the custom rear seat belt mounts into the rear parcel tray
paint the dash top and the firewall and around the front and rear windows
Then its back home for me to play with it for a while......and spend more money....
I'm off on holidays for a little while, knowing panel shop guys, it'll still be in the shop when I get back, so I'll get some pics of the work in progress.
10-01-2009 #16
Registered User
- Join Date
- Nov 2008
- Posts
- 29
nice project, ill definatly be keeping an eye on this.
10-01-2009 #17 Registered User
- Join Date
- Jun 2007
- Location
- St. Pete FL
- Posts
- 934
"Picked up one of my all time favourite cars, a small back window early 2nd generation Firebird"
Ya, I couldn't agree with you more
Cool project & look forward to the updates!!!HELP!!!
1973 TA 4 spd #'s match red/white = STOLEN
https://www.pro-touring.com/threads/...55#post1106255
10-18-2009 #18
Registered User
- Join Date
- Feb 2005
- Location
- Sydney, Australia
- Posts
- 1,797
Well, car is still sitting in the body shop....no surprise there I suppose.... :roll:
While its gone, I was looking at some instruments...the AU Dollar being good against the greenback....
Just got a reply for a quote on my new gauge set....I'll be calling the guy and ordering them while the Aussie dollar is doing well against the US $.
They're Classic Instruments - Moal Series (designed by Steve Moal)....they are built to resemble classic aircraft instruments, I just love the look of them. I'm also adding a black/white faced clock with the same bezel since I have the extra hole already in the dash facia....I'm using the A/C vent holes for instruments. The fake "adjustment" knobs on the speedo hold LED lights for the turn signals and high beam.

Can't wait to get these so I can modify my dash facia and then send it off to a guy I know in the US who restores them......should look great!
10-18-2009 #19 Registered User
- Join Date
- Feb 2008
- Posts
- 118
Awesome project!
Cheers to seeing another Aussie here as well. I *really* should post up some pics of my XB Coupe PT project.Matt Barr.
11-01-2009 #20
Registered User
- Join Date
- Feb 2005
- Location
- Sydney, Australia
- Posts
- 1,797
Love to see those pics, Matt!
Well, seems theres no power on earth to get a body shop to move any faster than they want to...lol.
My car is slowly being worked on...I'd hoped to have it back some time ago.
On the plus front, stacks of parts have finally arrived.....all I'm waiting on is the suspension, a DSE selecta-speed wiper kit and some other bits and pieces to finish the head lights off.
While I'm waiting for the car to come home, I bought a small grinder unit and converted it to a buffer so I could clean up trim etc. Tried it out on the grill surrounds, and they came out pretty nicely....so I continued on and finished the grills off. A combination of silver and charcoal grey looks "factory"...not sure if its correct, not that I care since this is not a "restoration".
The original grill badge fell to pieces when I pulled it off the grill. I picked up the trunk lid PONTIAC script from a G8 and made a bracket to hold the script....I'm going to use this script on the tail panel as well.
I can't believe I was lucky enough to get two undamaged grills with this car when I bought it....they just looked very average indeed. Much better now.Last edited by LeighP; 11-01-2009 at 11:29 PM. Reason: spelling

 Reply With Quote