

Results 61 to 80 of 329
Thread: '72 Duster "AERO DUSTER"
-
02-06-2010 #61
 Registered User
- Join Date
- Aug 2007
- Location
- Albemarle, NC
- Posts
- 1,151

swap the bushings to the front side of the blar, and move the mount up a hair. makes the end of the arm anggle much more effective. also, you will notice the mounts moving and flexing in a little while. slight welding will fix this.
lastly, keep an eye on the lower radiator hose to the sway bar mount tab. some cars rub.
all this info came from ADDCO when one of their engineers and i tweaked the front sway bar to clear the 73up disc swap.
install the rear nex. except for the bracket design, theyre a great addition.
the brake dive is due to a few factors.
1. weak shocks.
2. stock t-bars are pretty soft.
3. bad LCA bushings.
hope that helps.Michael Crawford
1970 plymouth Duster back under construction:
https://www.pro-touring.com/showthre...uring-makeover
1987 GMC S15 https://www.pro-touring.com/showthre...ct-drivabeater
-
02-07-2010 #62
 Registered User
- Join Date
- Nov 2008
- Location
- TN
- Posts
- 954
About the position: I wanted to mount it farther forward and up for better ground clearance, But as you said it was hitting the lower rad. hose. Also the arms themselves are not long enough to reach the mounting links. Do you have some pictures? Because the ones I had weren't very good and I couldn't see what was going on. Also the car has a V8 k-frame would that effect anything? Originally Posted by dusterbd13

I would say all three of those things are effecting the dive. The Shocks are origional from what I can tell so they are pretty old and have 74,000 miles on them. And I'll replace the LCA bushing when I pull it apart for the disc swap. Also this is my daily driver so I'm trying to not pour a bunch of money in it right now. So I'll probably have to stay with the stock t-bars. I'm trying to keep my money for my other build-up while I drive this one.
Thanks for the help!
BenjaminBenjamin
Twin Dusters
'72 Plymouth Duster "Aero Duster" project
'72 Plymouth Duster "Daily Duster" project
https://www.pro-touring.com/showthre...RO-DUSTER-quot
-
02-07-2010 #63
Registered User
- Join Date
- Nov 2008
- Location
- TN
- Posts
- 954
Well... Not exactly how I was hoping to start my week... I start up my car to go to church and the water pump starts barfing fluid everywhere! Just great! Hope to have it going again by Tuesday.
Benjamin
Twin Dusters
'72 Plymouth Duster "Aero Duster" project
'72 Plymouth Duster "Daily Duster" project
https://www.pro-touring.com/showthre...RO-DUSTER-quot
-
02-08-2010 #64
Registered User
- Join Date
- Nov 2008
- Location
- TN
- Posts
- 954
Whew! Thank God! It wasn't the water pump! It was the radiator cap leaking down to the fan and at first look it looked like the water pump! So Happy I don't have to fix that tomorrow!
Benjamin
Twin Dusters
'72 Plymouth Duster "Aero Duster" project
'72 Plymouth Duster "Daily Duster" project
https://www.pro-touring.com/showthre...RO-DUSTER-quot
-
02-12-2010 #65
Registered User
- Join Date
- Nov 2008
- Location
- TN
- Posts
- 954
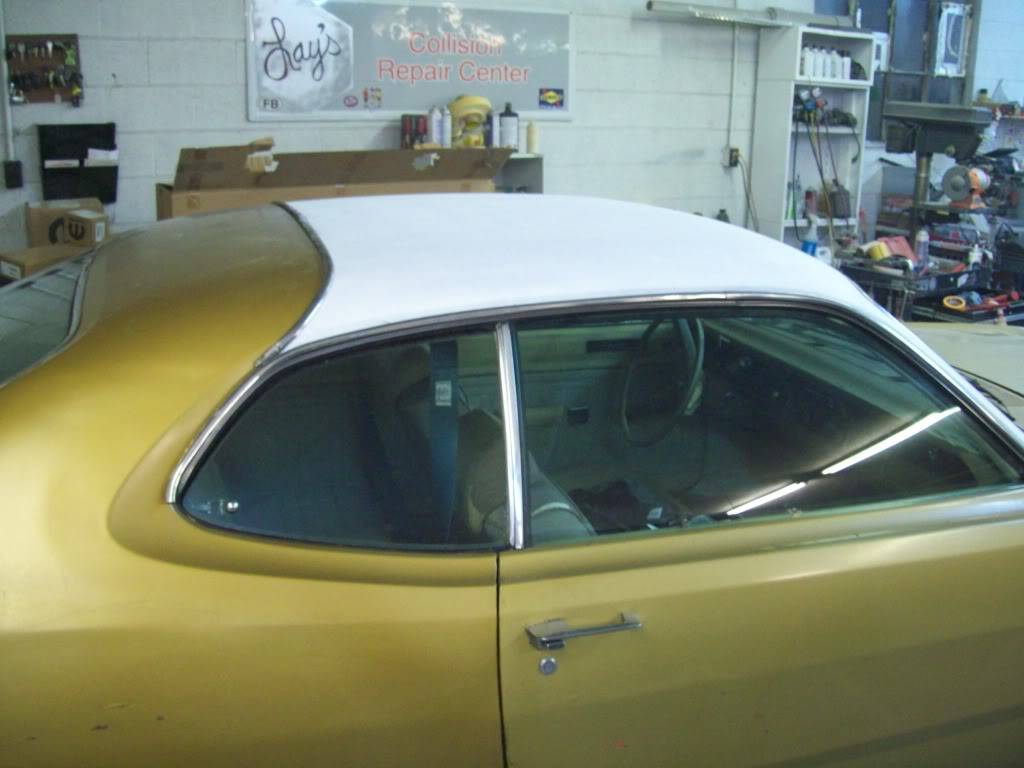
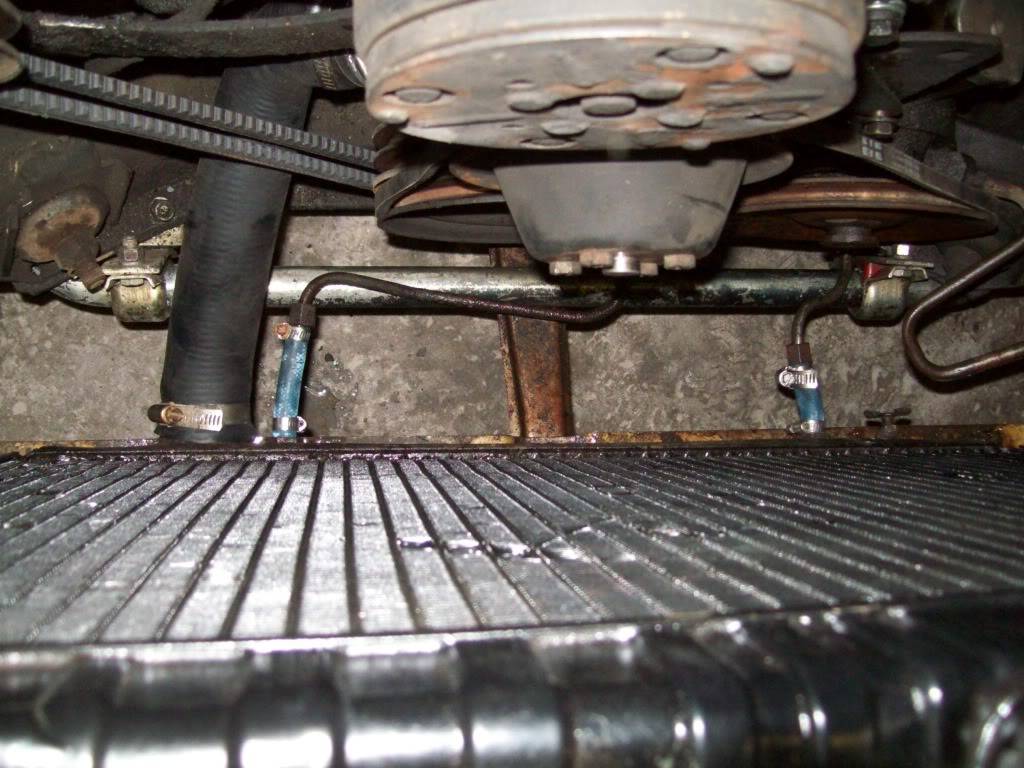
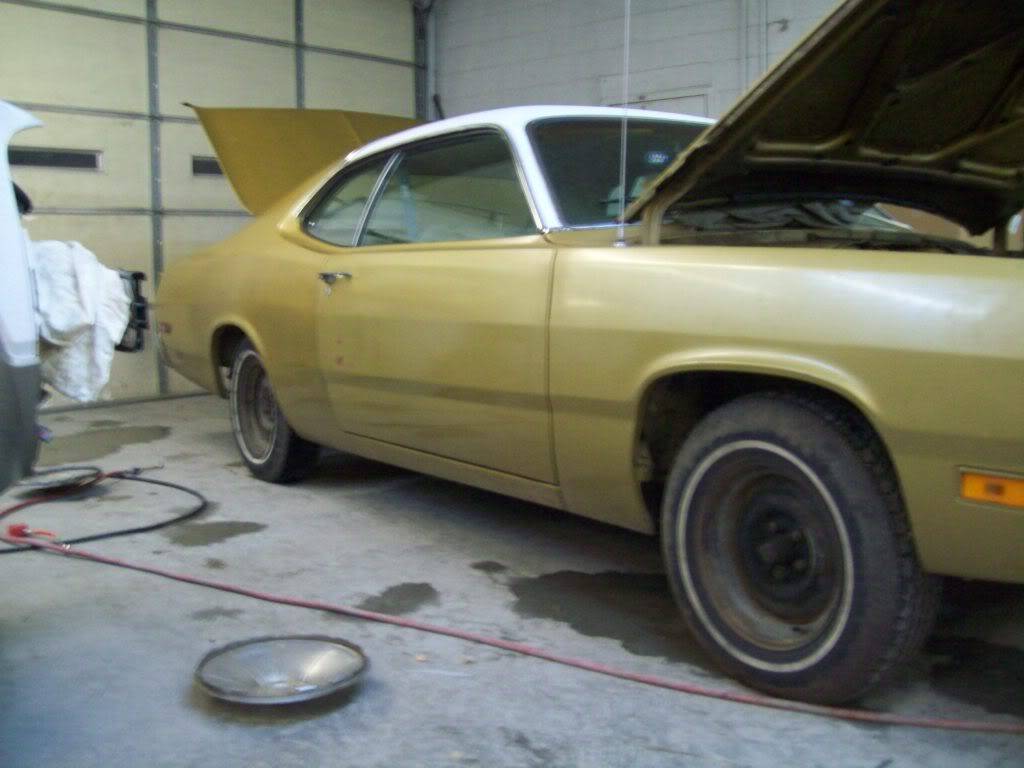
I got a lot of stuff done tonight. I got the swaybar mount problem fixed. I had to do some clearance grinding and slot the mounting holes to make the swaybar fit.
front view:
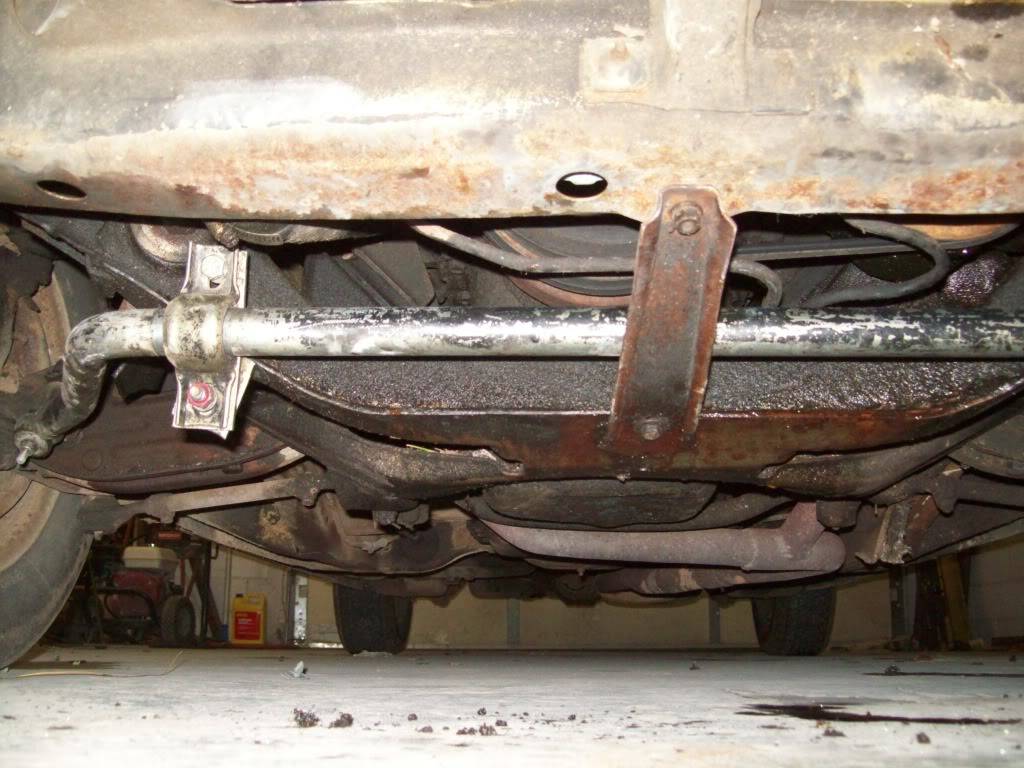
Side view:

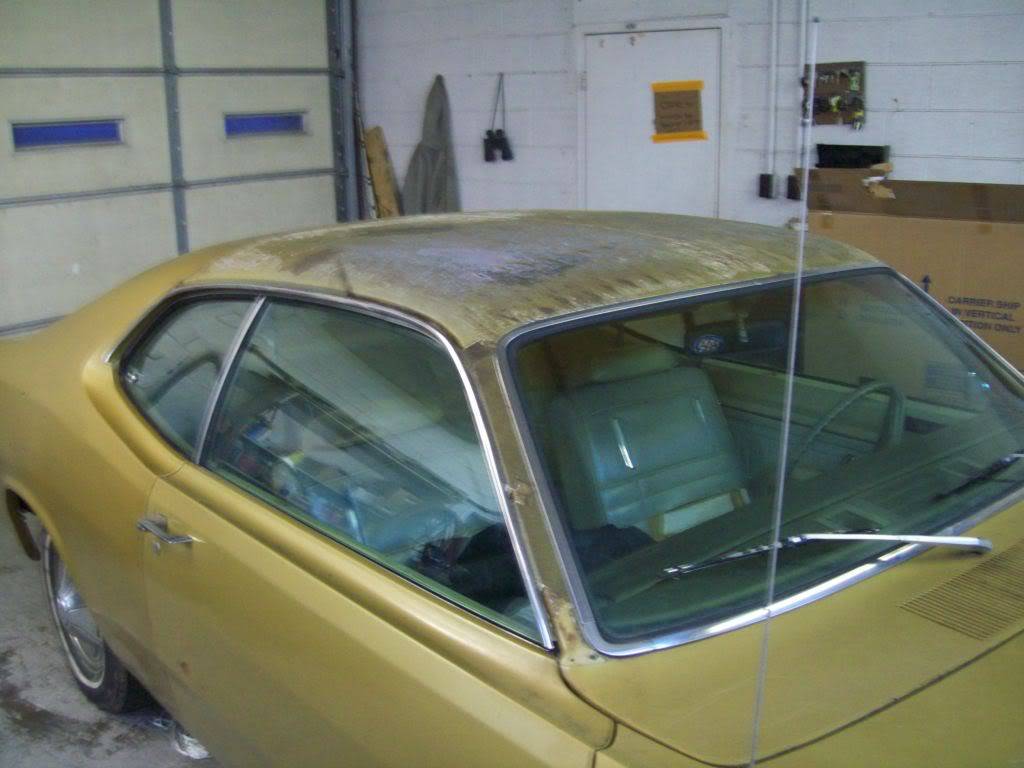
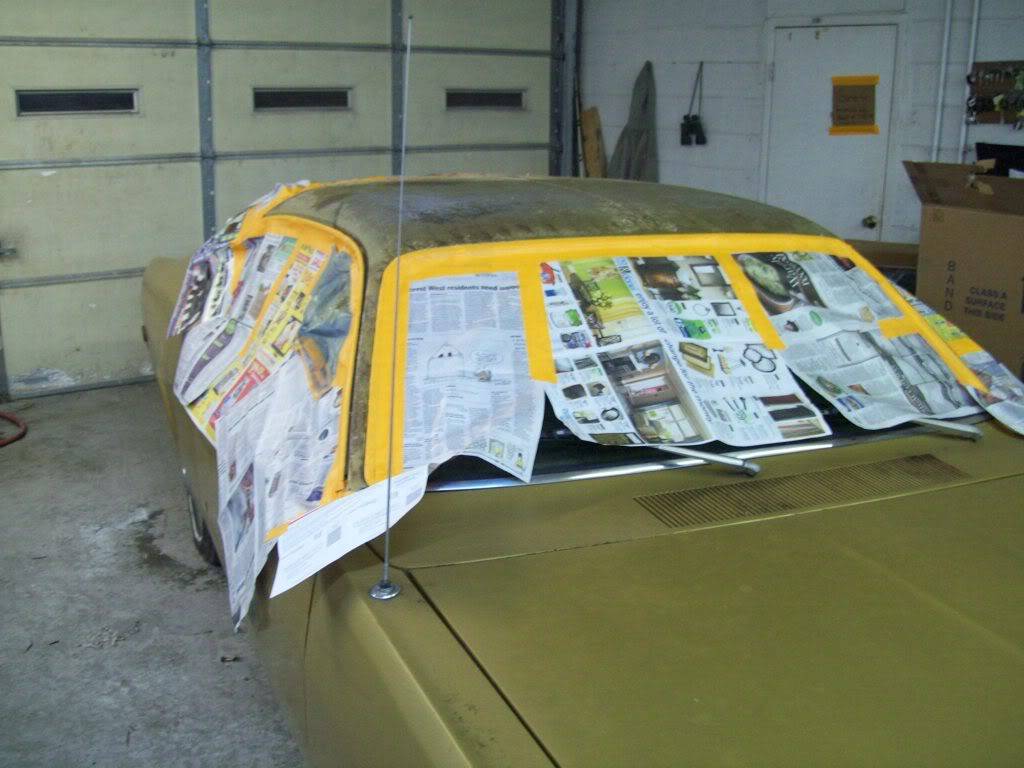
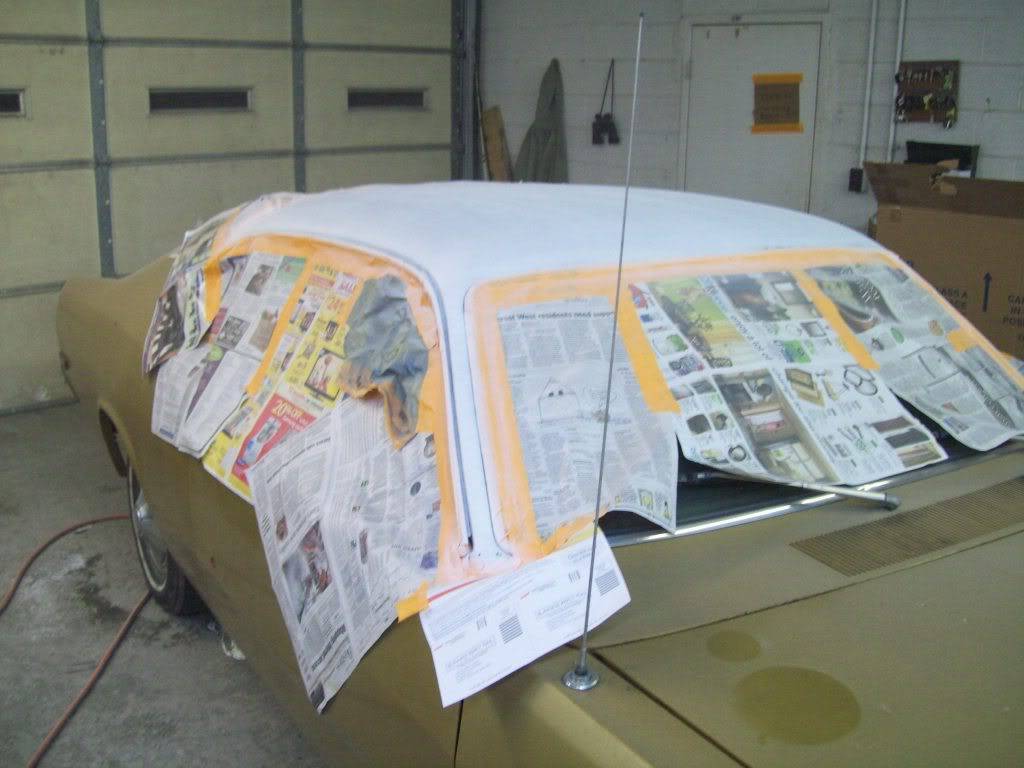
I also made a "$2 vinyl top" to make the top where the old vinyl top used to be.
Here is a pic of the top before I started:
Taped up and ready to go:
Done:
Untaped and trim on! Finished!:
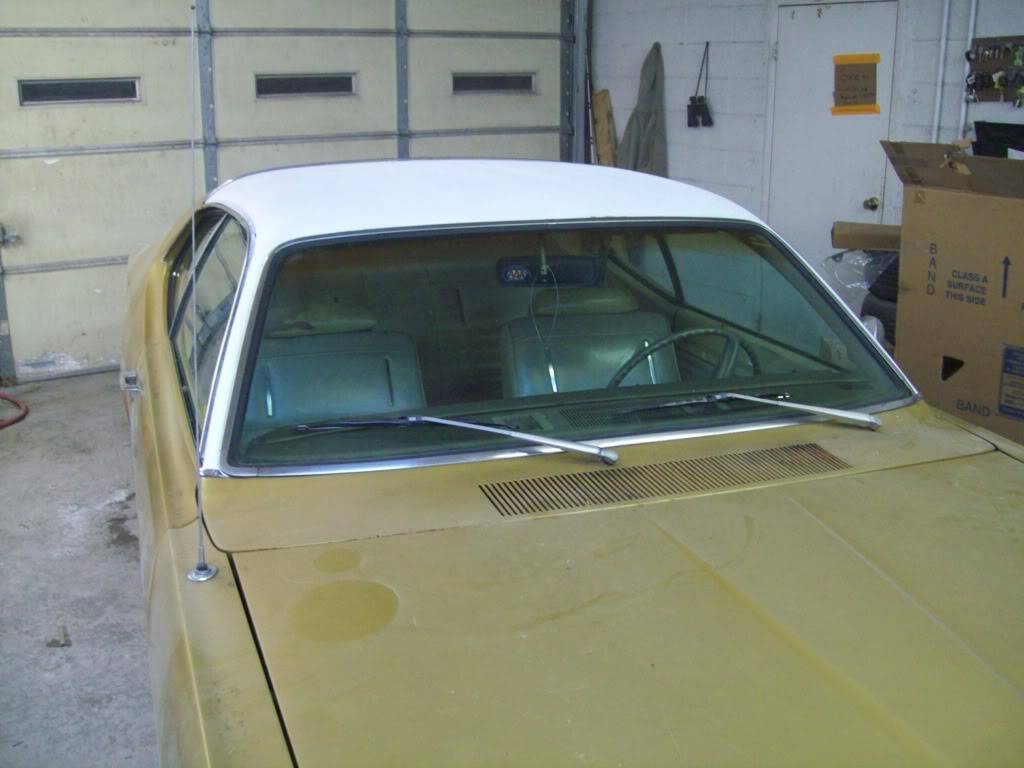
Side view:
Thanks again for looking!
BenjaminBenjamin
Twin Dusters
'72 Plymouth Duster "Aero Duster" project
'72 Plymouth Duster "Daily Duster" project
https://www.pro-touring.com/showthre...RO-DUSTER-quot
-
02-13-2010 #66
 Registered User
- Join Date
- Aug 2004
- Location
- Erwin,TN
- Posts
- 425
Looking good!!
-
02-22-2010 #67
Registered User
- Join Date
- Nov 2008
- Location
- TN
- Posts
- 954
Trouble!
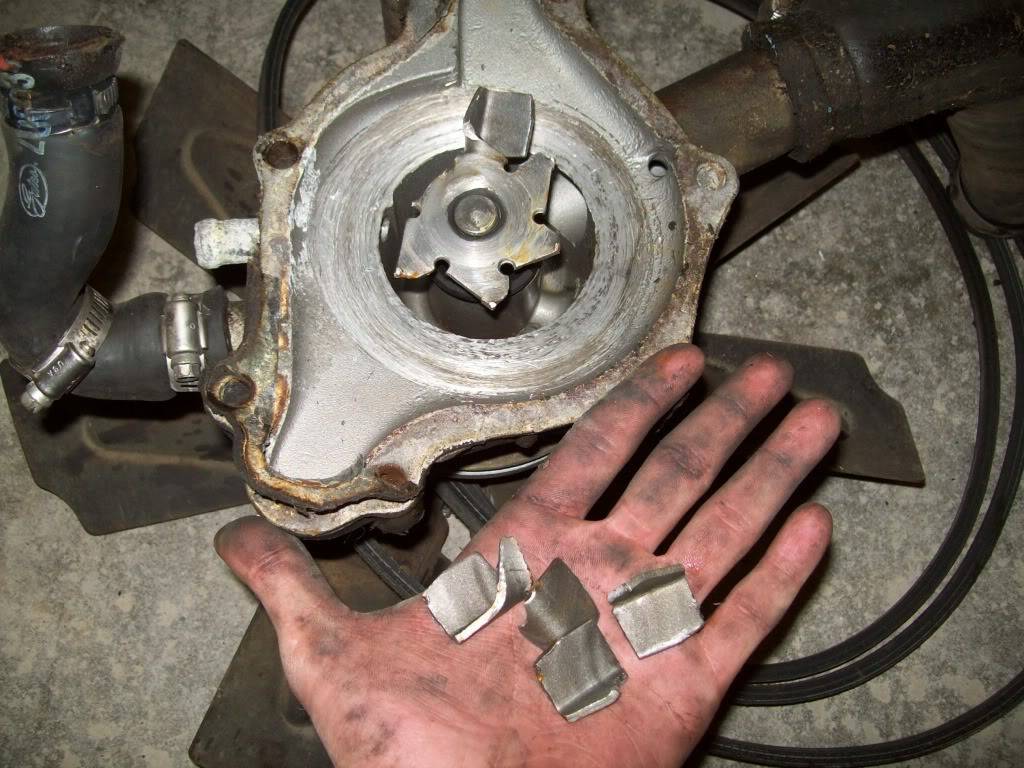
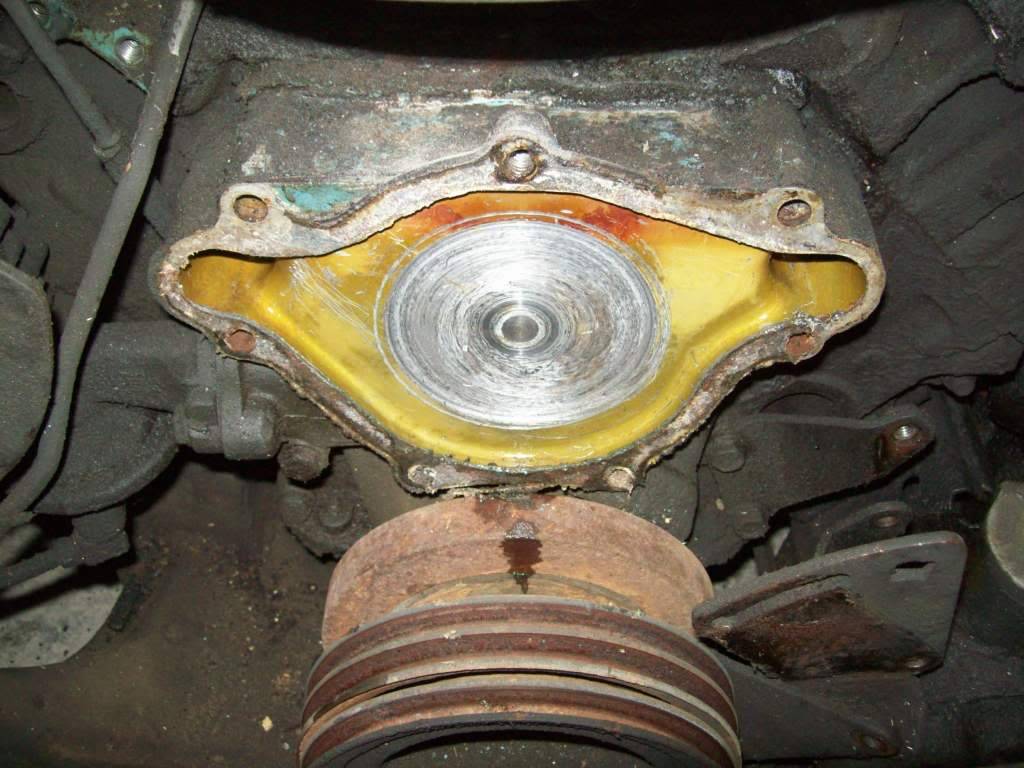
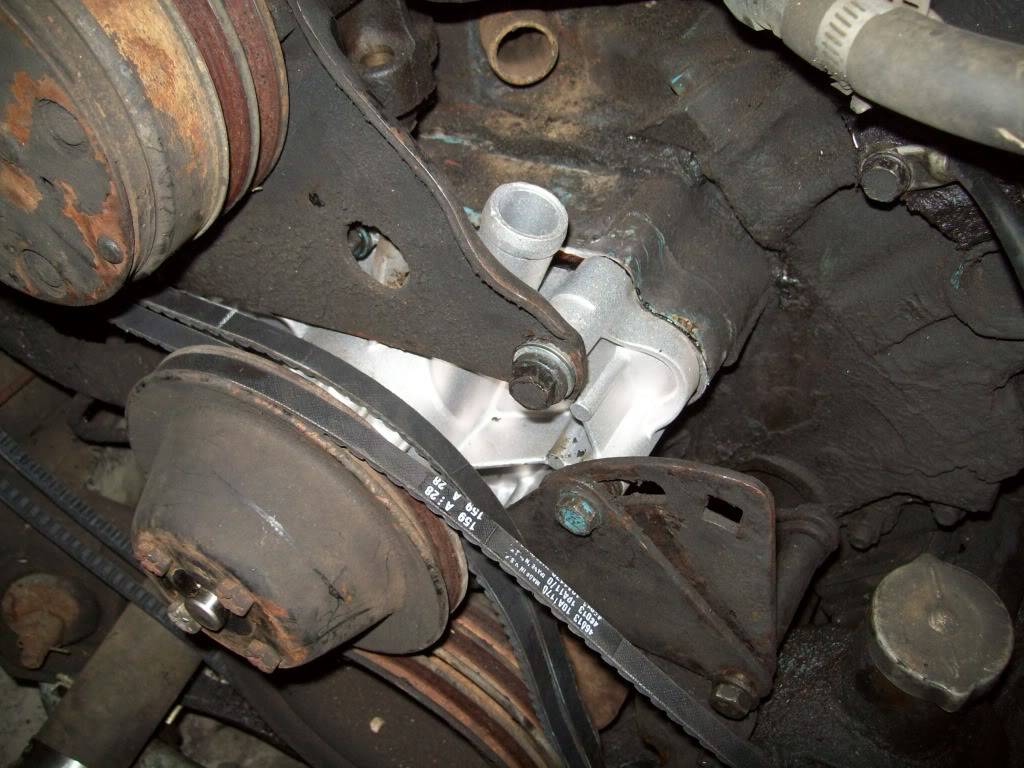
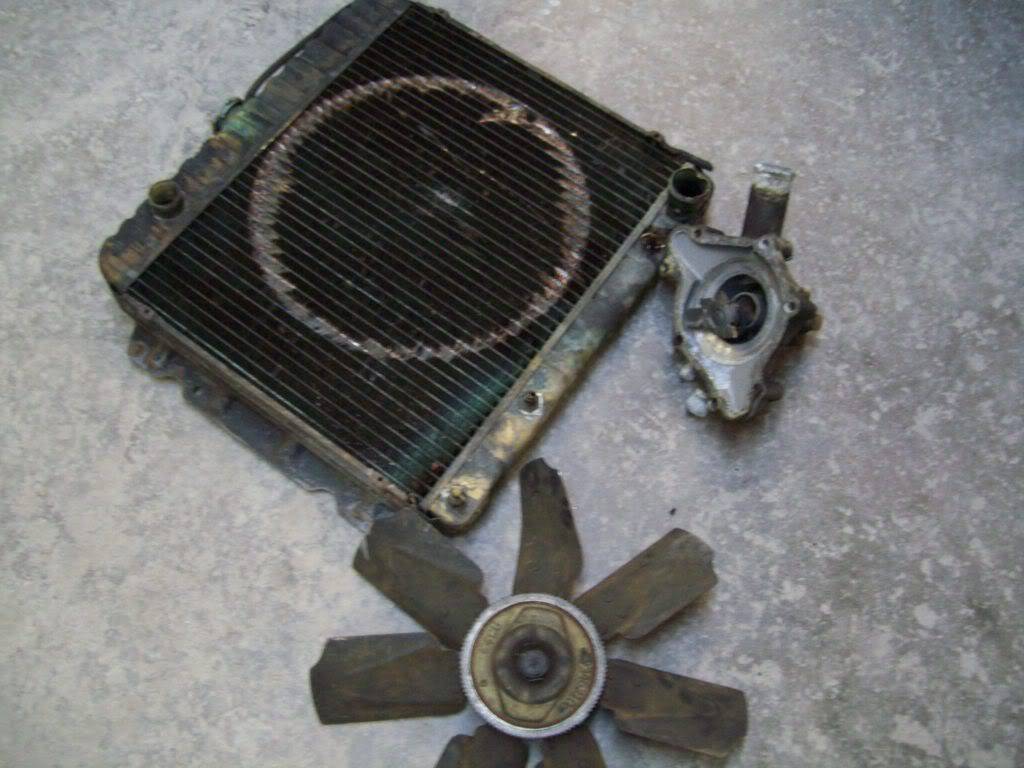
VERY Interesting day/night. On Thursday I get to school for class and look at my car only to find it is puking coolant out the water pump! So after class I get a couple of gallons thinking I can at least limp it to work (where I'd fix it Friday)... No such luck! So there I am.. Sitting in a cloud of steam so thick that the only way... I can tell weather the stoplight changed is that the cloud changed colors! I get it across the intersection and into a parking lot and shut it off, Time: 11:14pm. I hike an 1/8th of a mile till I find a trucker with a cell phone. Then wait, pace around, etc. till the tow truck finds me, Time: 12:45 am. Get back to the shop,Time 1:53 AM. Go to a friend house to crash Time: 2:45 am. spend a rough night on the couch and up in the morning at 6:15 for work! After work on Friday I started to fix my Duster and found out the damage was even worse than I thought. the fan had totally hacked up the radiator when the water pump went out. I fixed everything else Friday and found the radiator Saturday. Got it Sunday and hope to have it fixed by Tuesday. Now for pics!
The play in the pump:
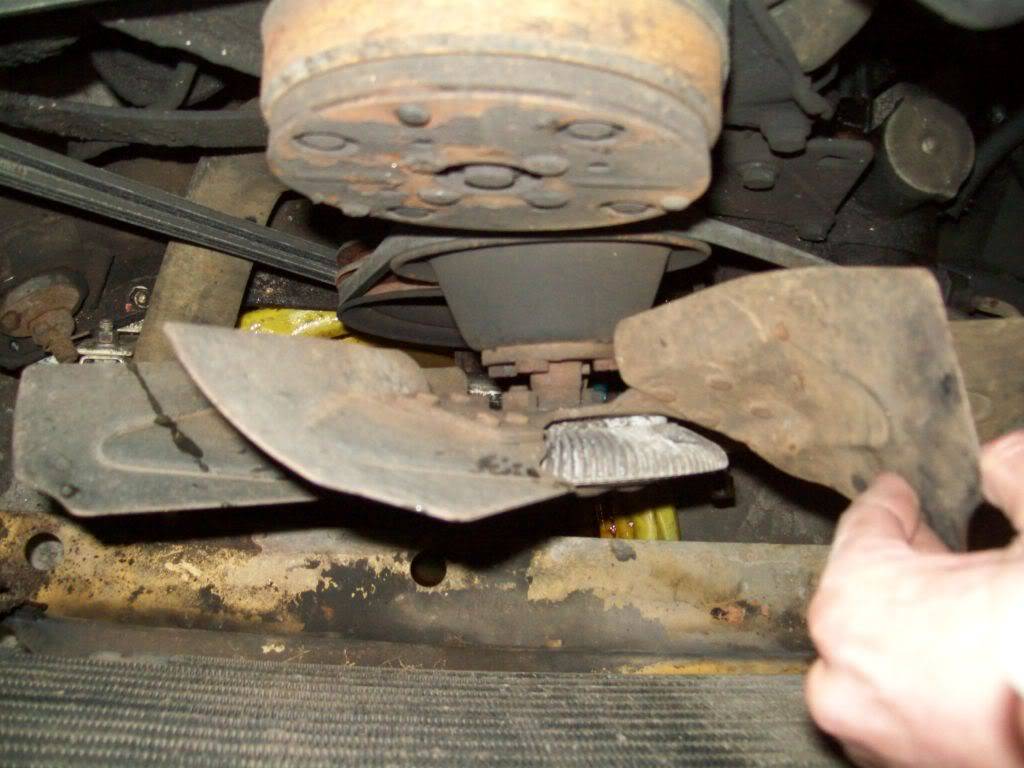
The radiator:
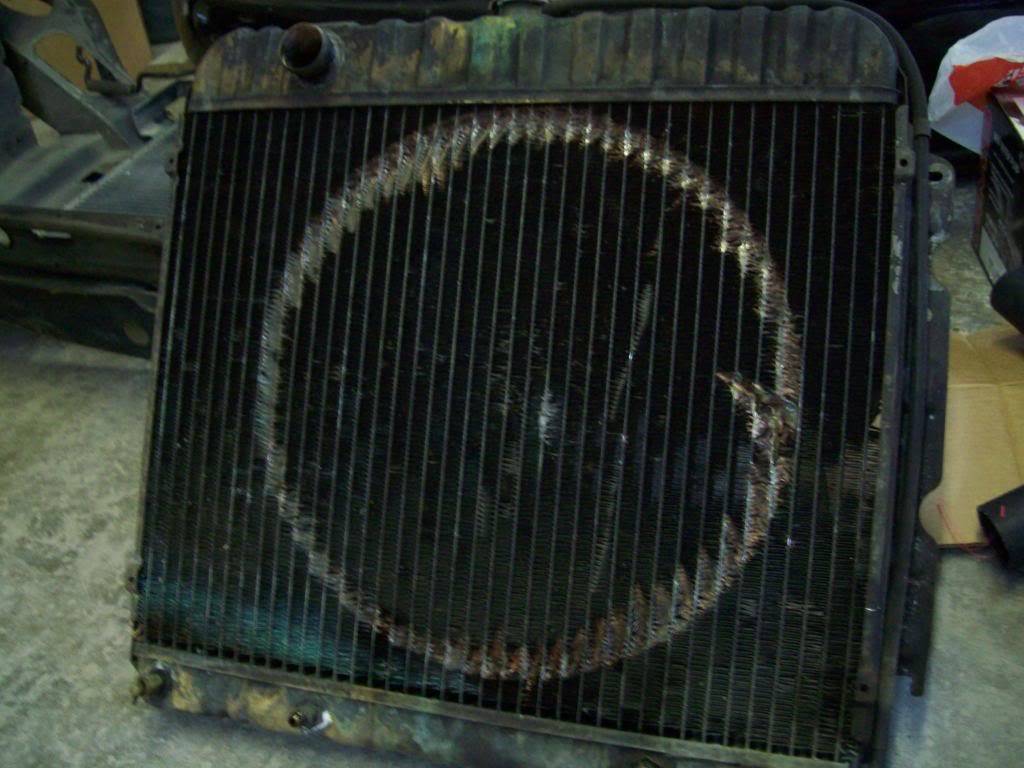
The water pump:
Timing cover:
New pump on:
All the carnage!:
 Benjamin
Twin Dusters
'72 Plymouth Duster "Aero Duster" project
'72 Plymouth Duster "Daily Duster" project
https://www.pro-touring.com/showthre...RO-DUSTER-quot
-
02-24-2010 #68
Registered User
- Join Date
- Nov 2008
- Location
- TN
- Posts
- 954
more cooling system stuff...
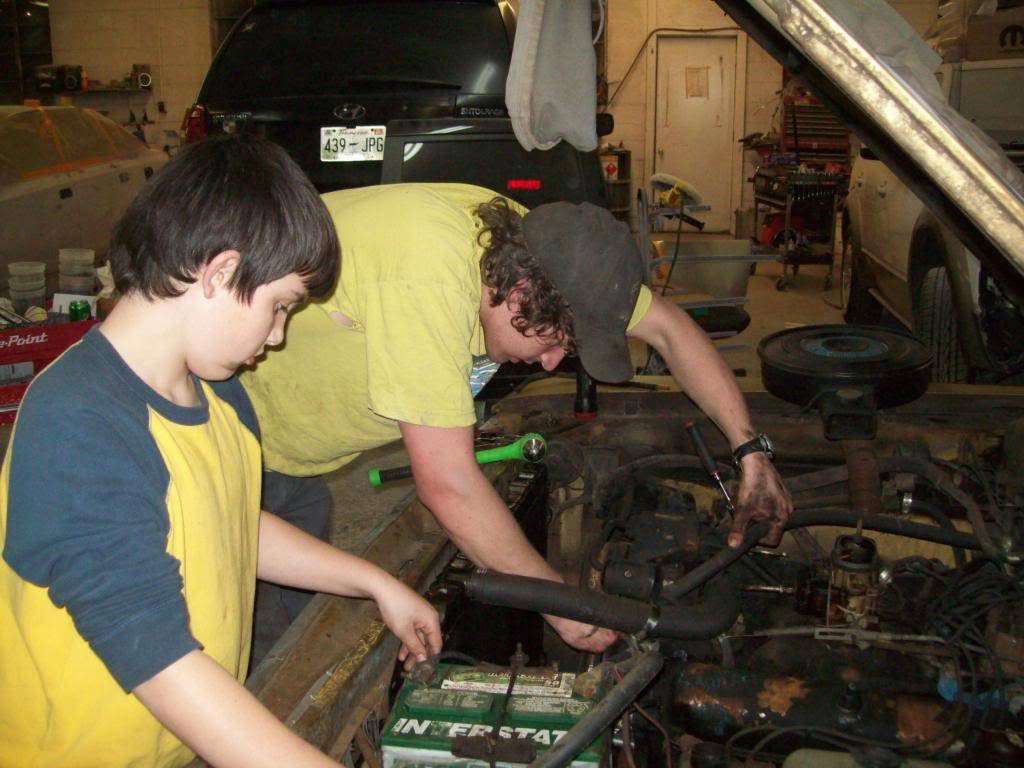
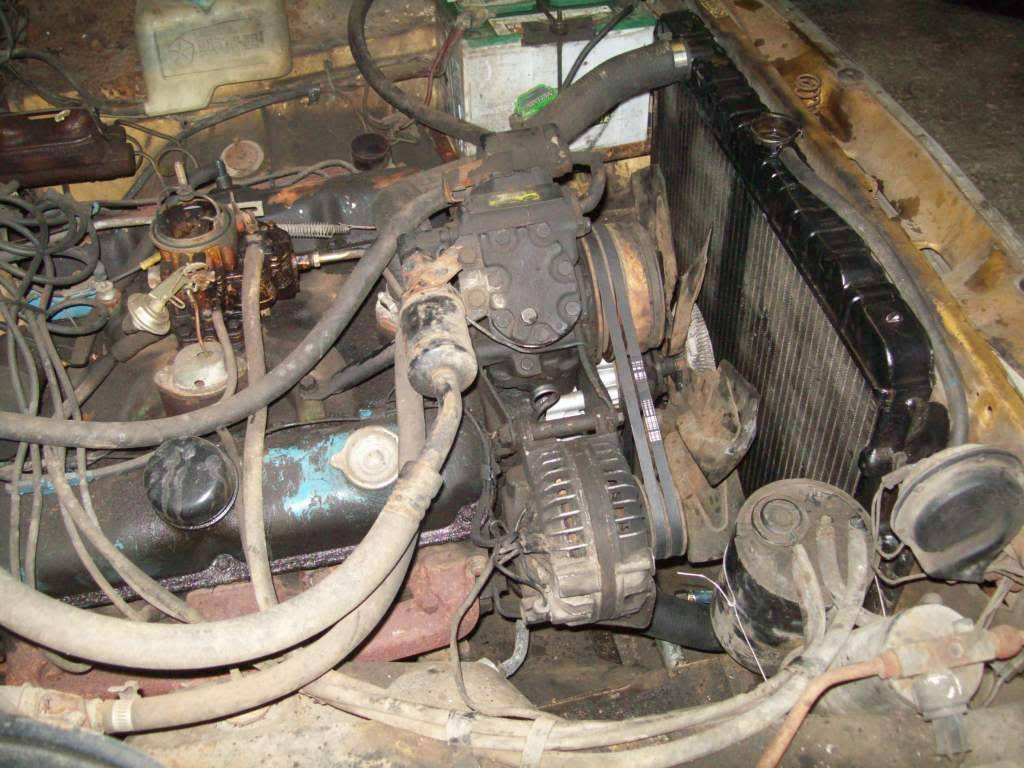
Ok, I got everything buttoned up last night and drove it to school this morning. Everything seems to be working great! I just need to add a little more trans fluid because it isn't shifting quite right. As you might notice in the pictures, the radiator is not the stock size. It is out of a later model dodge truck. And it is a lot bigger! Wider and taller. In case you are wondering, not it doesn't fit without a little bit of massaging. I had to bend the edge of the battery box so that it would physically slide in between the frame rails(it is a press fit type deal). And then it hit the hood support with the cap. even with the radiator sitting on the core support. Noting that a large ball-peen hammer wouldn't fix! on to the pics!
Mounts ( the A/C condenser bolts are behind the radiator, you have to put them in first):

View down the radiator with everything but the fan:
Me showing some kid that came into the shop how it is done! haha:
All buttoned up... Before I washed it:
Thanks again for looking!Benjamin
Twin Dusters
'72 Plymouth Duster "Aero Duster" project
'72 Plymouth Duster "Daily Duster" project
https://www.pro-touring.com/showthre...RO-DUSTER-quot
-
02-25-2010 #69
 Starting The Transformation
- Join Date
- Jan 2010
- Location
- Tornado Alley, OK
- Posts
- 378
Awesome
I like the '72 Duster...Jorge
www.estrada-armory.com
-
02-26-2010 #70
Registered User
- Join Date
- Nov 2008
- Location
- TN
- Posts
- 954
I got a lot more work done on my Duster (the driver) I added more air pressure to the tires which really helped the turn-in and responsiveness with surprisingly little ride penalty.
I Tested some new wheels...
I re-routed some vacuum and vent lines under the hood for a cleaner look and more room. Although I still haven't figured out where to put the horn that I had to take out to fit the new radiator so I have a single tone horn for the time being.
One last thing. I took the hubcaps off and can't decide which way I should leave it. Muscle car with the steelies or "grandma" with the caps? Feel free to vote!
Trial wheels (not mine so I couldn't clearance them to fit and they would need spacers to fit right):
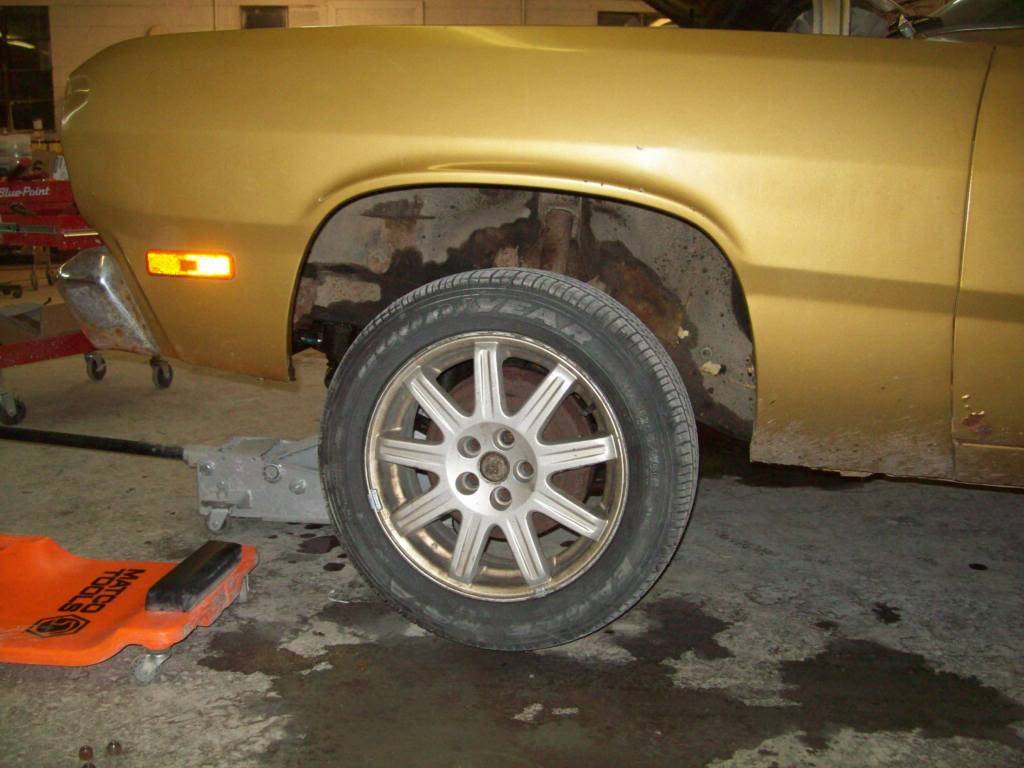
As she sits:
As she sits rear:
With hubcaps:

Without hubcaps:
The color that I would love to paint my other duster but can't afford it and I really cannot decide what color I want it:
Thanks again for looking all!
BenjaminBenjamin
Twin Dusters
'72 Plymouth Duster "Aero Duster" project
'72 Plymouth Duster "Daily Duster" project
https://www.pro-touring.com/showthre...RO-DUSTER-quot
-
02-27-2010 #71
 Registered User
- Join Date
- Mar 2009
- Location
- overseas
- Posts
- 3,434
yeah I like that orange color!!
Kevin S. (overseas in Germany)
1963 Chevrolet Impala 2d ht Coupe
www.CruznArt.com
CRUZN - Automotive Artworks
-
02-27-2010 #72
Registered User
- Join Date
- Nov 2008
- Location
- TN
- Posts
- 954
If I remember right it is $320 a quart... I need a gallon and a half minimum... So I'm considering a different color. Originally Posted by Swoosh
Benjamin
Twin Dusters
'72 Plymouth Duster "Aero Duster" project
'72 Plymouth Duster "Daily Duster" project
https://www.pro-touring.com/showthre...RO-DUSTER-quot
-
03-01-2010 #73
Registered User
- Join Date
- Nov 2008
- Location
- TN
- Posts
- 954
Update!
I got my new(used) shocks in the mail Saturday... I'll put them on soon. Should make quite a difference.
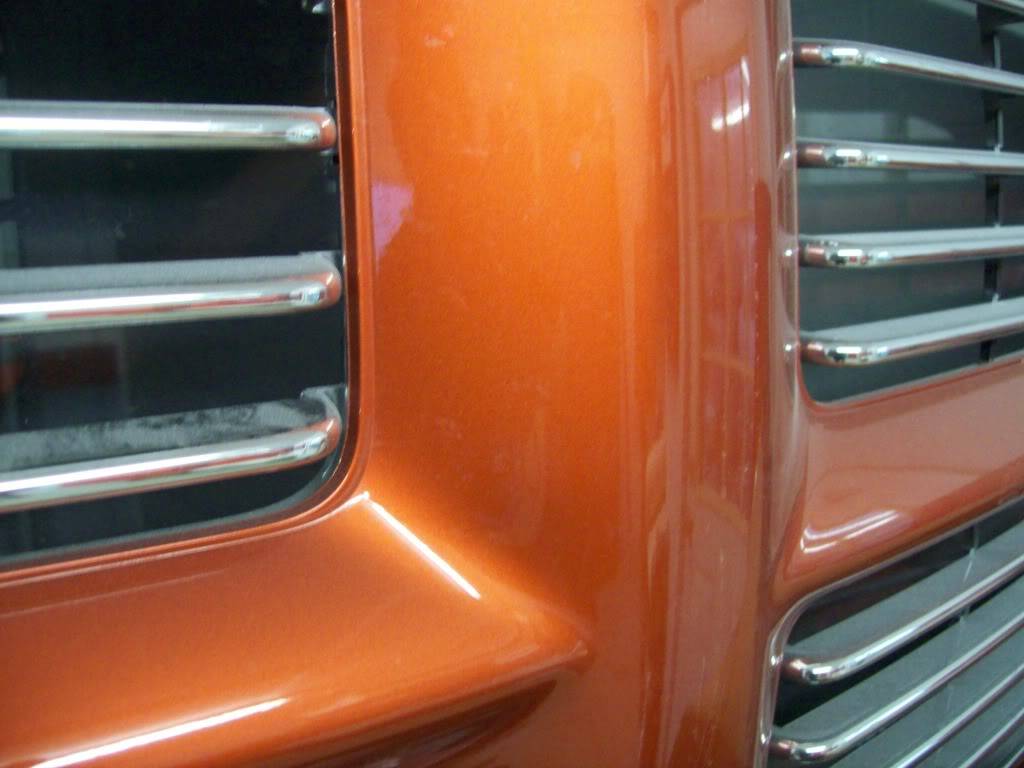
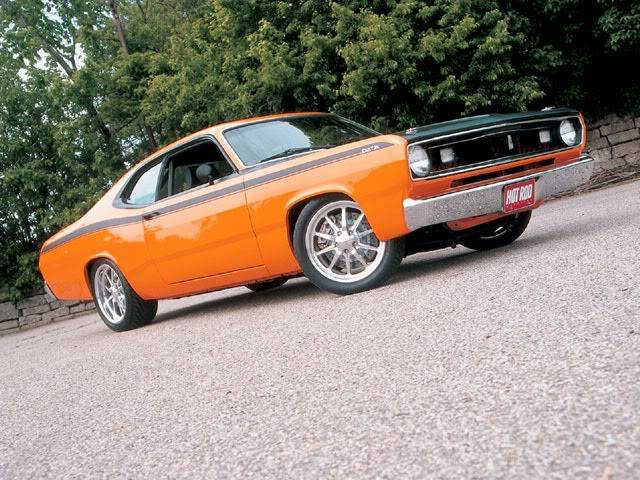
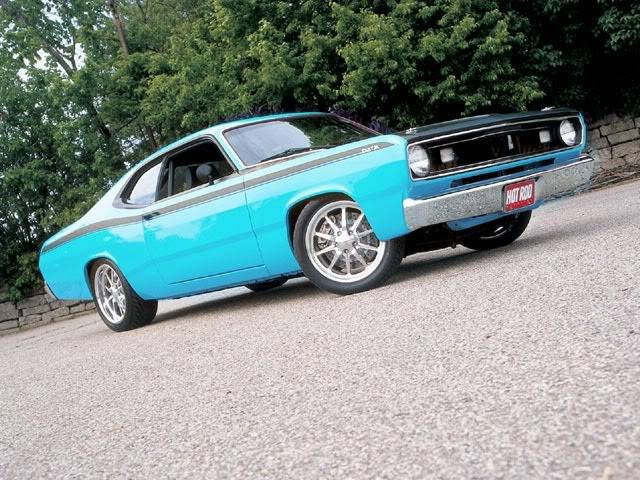
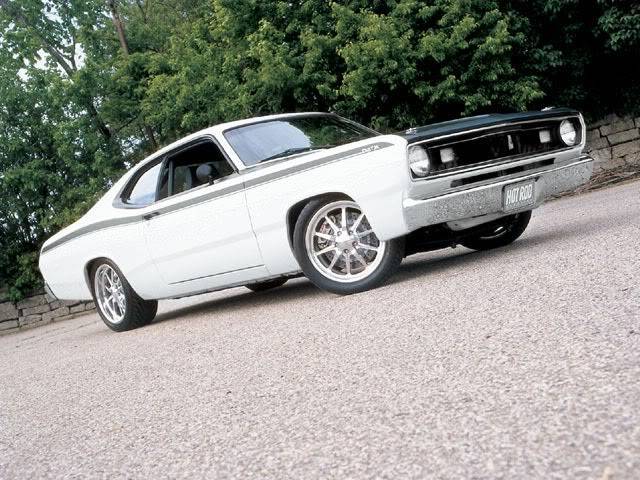
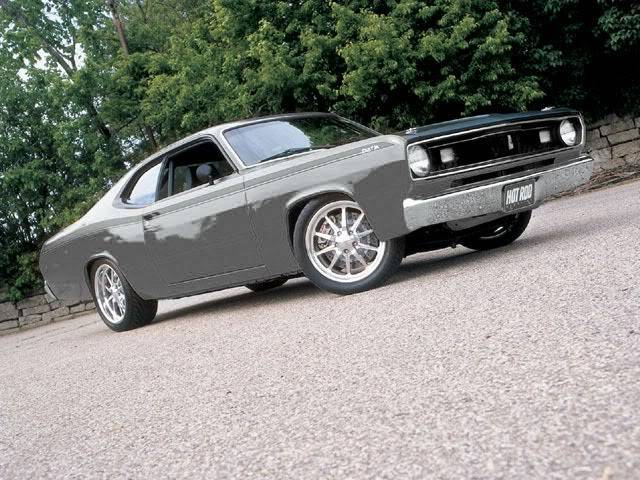
I was experimenting with different colors and I came up with these:
This is close to the new "Go mango" available on the new daytona truck. And VERY expensive, But also very Beautiful!
This was supposed to be silver.. But it came out more of a dove grey. Still quite nice.. and cheap.

This is sorta a "hopped-up" petty blue.
So? What do you think?Benjamin
Twin Dusters
'72 Plymouth Duster "Aero Duster" project
'72 Plymouth Duster "Daily Duster" project
https://www.pro-touring.com/showthre...RO-DUSTER-quot
-
03-01-2010 #74
Registered User
- Join Date
- Aug 2007
- Location
- Albemarle, NC
- Posts
- 1,151
had a petty blue duster once. it was neat, but too much blue. two tone it semi gloss black like the 71 340 cars, and it would work.
friend of mine had a white 72 twister with all the stripes and a black vynl top. good color as well.
stay with a basic color. easier to touch up, cheaper to buy, and goes better with the body style of our cars.Michael Crawford
1970 plymouth Duster back under construction:
https://www.pro-touring.com/showthre...uring-makeover
1987 GMC S15 https://www.pro-touring.com/showthre...ct-drivabeater
-
03-01-2010 #75
Registered User
- Join Date
- Nov 2008
- Location
- TN
- Posts
- 954
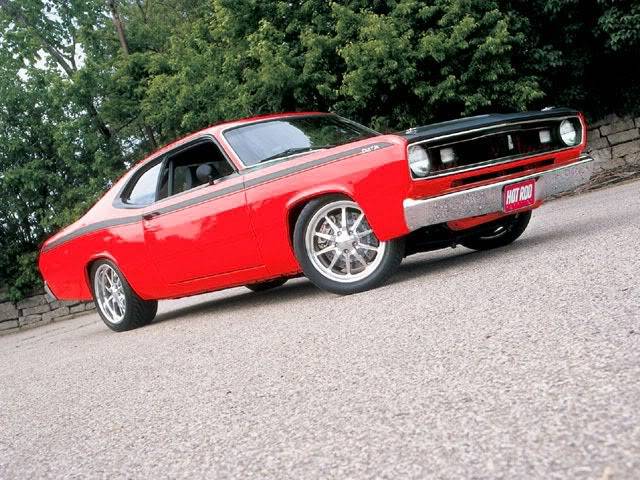
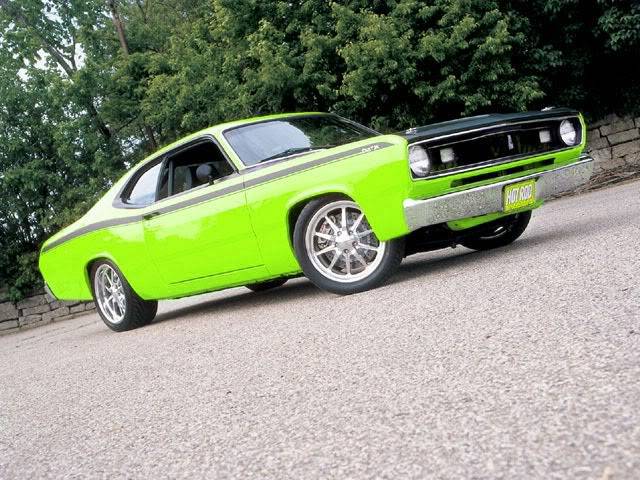
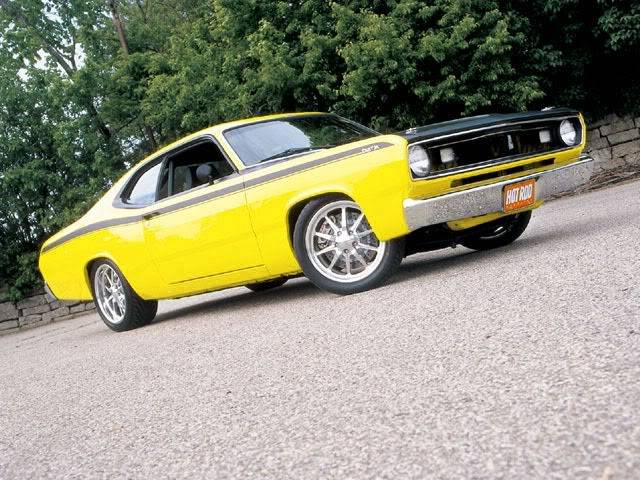
More colors
White:
Graphite:
Red:
Sublime:
Yellow:
 Benjamin
Twin Dusters
'72 Plymouth Duster "Aero Duster" project
'72 Plymouth Duster "Daily Duster" project
https://www.pro-touring.com/showthre...RO-DUSTER-quot
-
03-01-2010 #76
Registered User
- Join Date
- Jun 2009
- Location
- Pensacola Fl
- Posts
- 154
like the graphite or blue. You have a lot of work ahead of you before you get to color!
-
03-01-2010 #77
Registered User
- Join Date
- Nov 2008
- Location
- TN
- Posts
- 954
Originally Posted by rrstroker71
Yes I do... But I like to have everything planned out WAY in advance so I can find the stuff I need at better prices. And because I like to know everything way in advance!
Benjamin
Twin Dusters
'72 Plymouth Duster "Aero Duster" project
'72 Plymouth Duster "Daily Duster" project
https://www.pro-touring.com/showthre...RO-DUSTER-quot
-
03-03-2010 #78
Registered User
- Join Date
- Nov 2008
- Location
- TN
- Posts
- 954
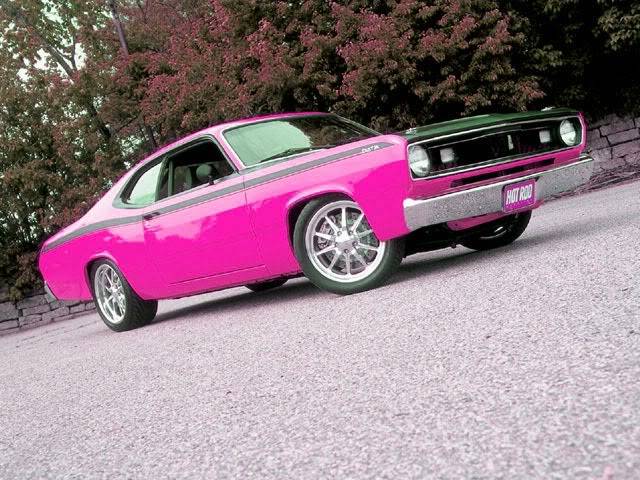
We can't leave this out...
 Benjamin
Twin Dusters
'72 Plymouth Duster "Aero Duster" project
'72 Plymouth Duster "Daily Duster" project
https://www.pro-touring.com/showthre...RO-DUSTER-quot
03-05-2010 #79
Registered User
- Join Date
- Nov 2008
- Location
- TN
- Posts
- 954
Sorry! I didn't even see this post till I was skimming through tonight. Originally Posted by dusterbd13
I like petty blue but I don't want to do a really common color as I want it to stand out from all the other dusters.
My only concern about the white is that it might be overpoweringly bright in the sun. Also it is hard to spray "wet" without running it because you can't see the clear.
But whatever I do will be two-tone with the semi-gloss black like the 71 340 cars.
Thanks for your input!
Benjamin
Oh yeah! I got all my swaybar problems sorted out. Thanks for the tips.Benjamin
Twin Dusters
'72 Plymouth Duster "Aero Duster" project
'72 Plymouth Duster "Daily Duster" project
https://www.pro-touring.com/showthre...RO-DUSTER-quot
03-05-2010 #80
Registered User
- Join Date
- Nov 2008
- Location
- TN
- Posts
- 954
Work...
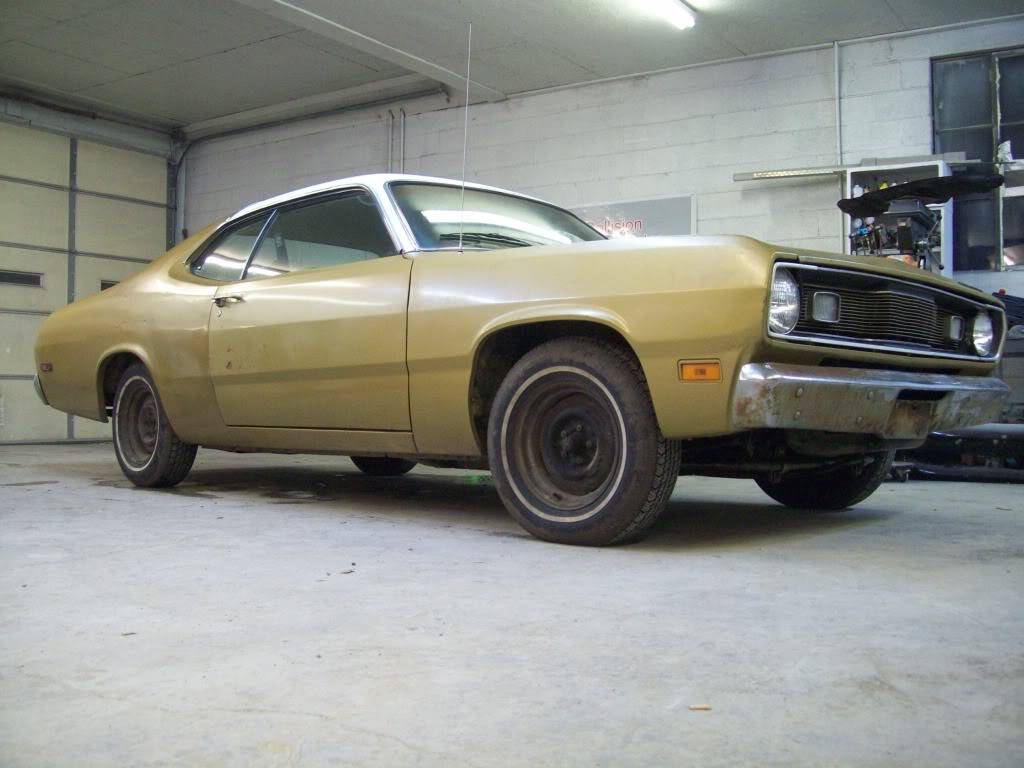
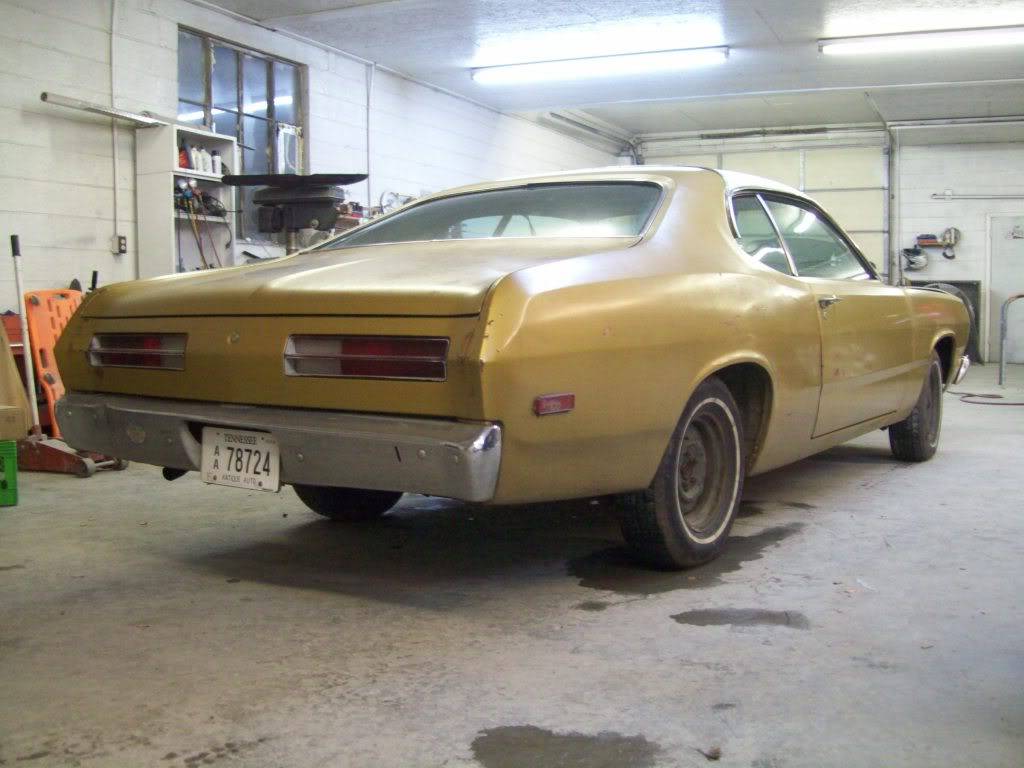
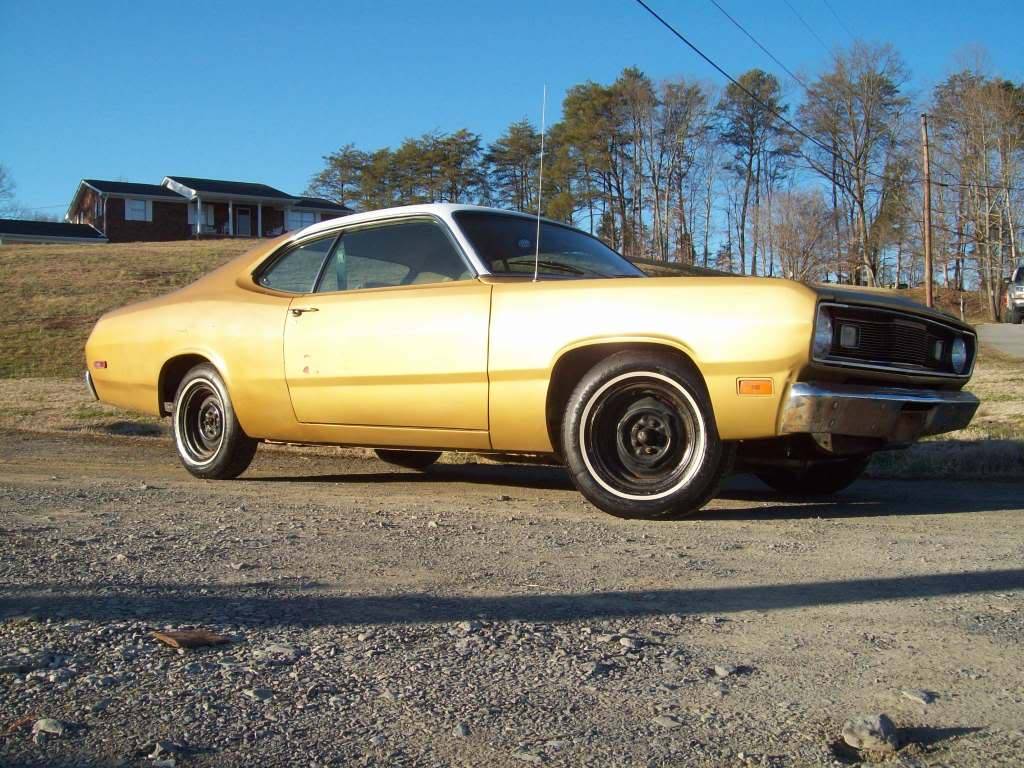
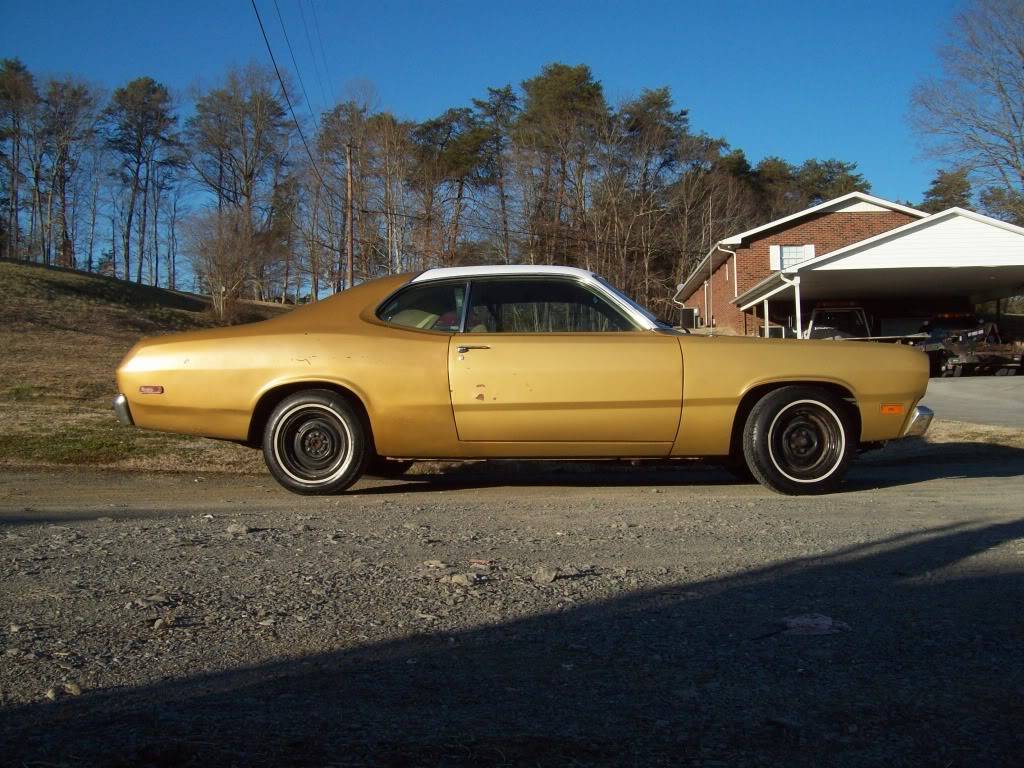
I got some more done with my Duster today. I got it all washed, cleaned, and shined inside and out. I also took some pictures (see below). I fixed a problem with my swaybars fixed, a bolt had fallen out. And most importantly I redneck corner-weighted it by adjusting the torsion bars. I say redneck because I have no corner scales. So I did it with heights. it was way off. The wheelwell lip to ground measurements came out to 26" left F/R, and 25 7/8" right F/R. Which should help counteract the extra weight on the drivers side (me, the battery, etc). I didn't notice any difference but I got stuck behind some slow people on the way home so I couldn't give it a fair shake.
Pictures!!!
 Benjamin
Twin Dusters
'72 Plymouth Duster "Aero Duster" project
'72 Plymouth Duster "Daily Duster" project
https://www.pro-touring.com/showthre...RO-DUSTER-quot

 Reply With Quote


