Results 1 to 16 of 16
Thread: 1969 Ford Torino GT Fastback
-
01-05-2009 #1
 Registered User
- Join Date
- Dec 2008
- Location
- Toronto, Canada
- Posts
- 189
1969 Ford Torino GT Fastback
Although I haven't gotten to the point of it being a g-machine, that is the plan for the long term, so I thought I would post the progress thus far.
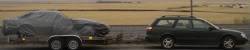
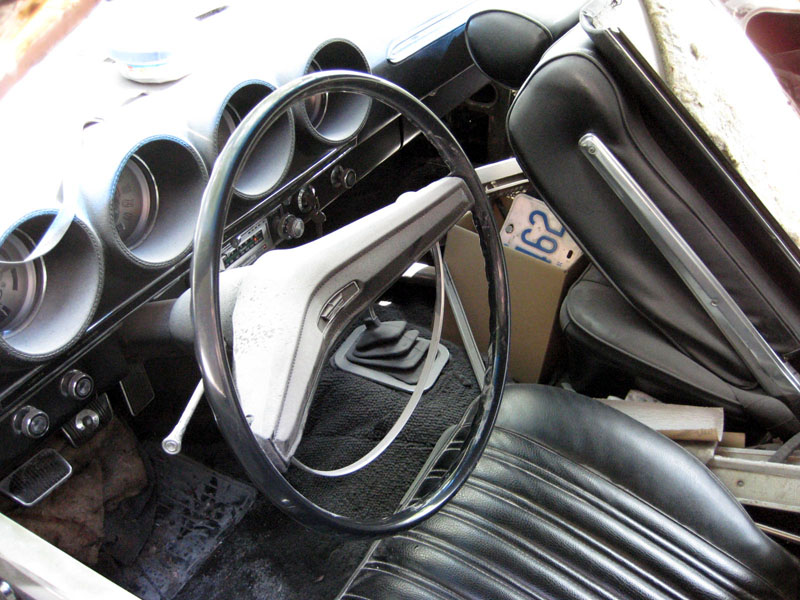
After a failed experiment trying out a Mopar, I returned to my true love in 2007 when I bought a '69 Torino GT fastback. 351W, 4 speed and black bucket interior, it had all the options I was looking for in a musclecar. I got it from the second owner in Michigan, where it had spent its whole life. So, naturally, it needed some body work.
According to the second owner, the original "Black Jade" car had been merged with an "Arctic White" car at some point 10 years ago due to accident or rust. The original owner did it so he wasn't sure. The second owner picked the car up at an estate sale about a year before I got it after the original owner passed away.
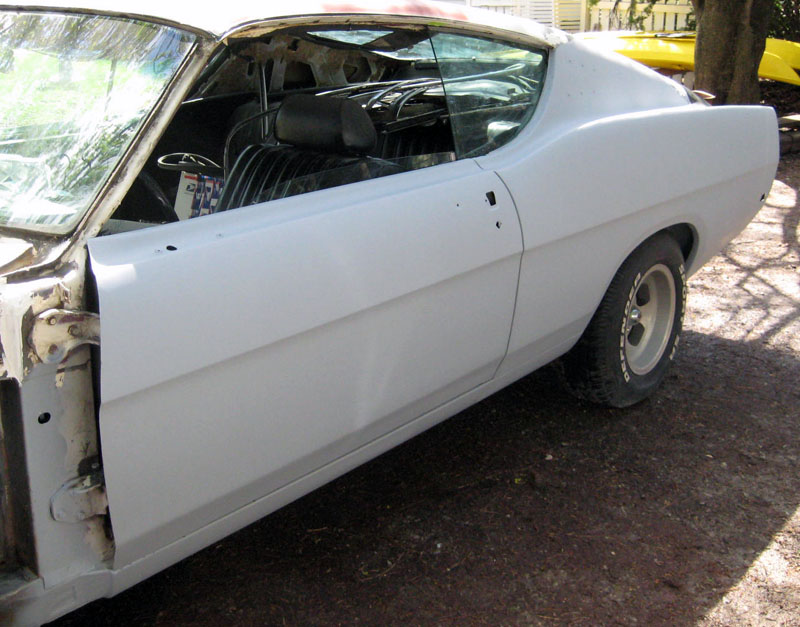
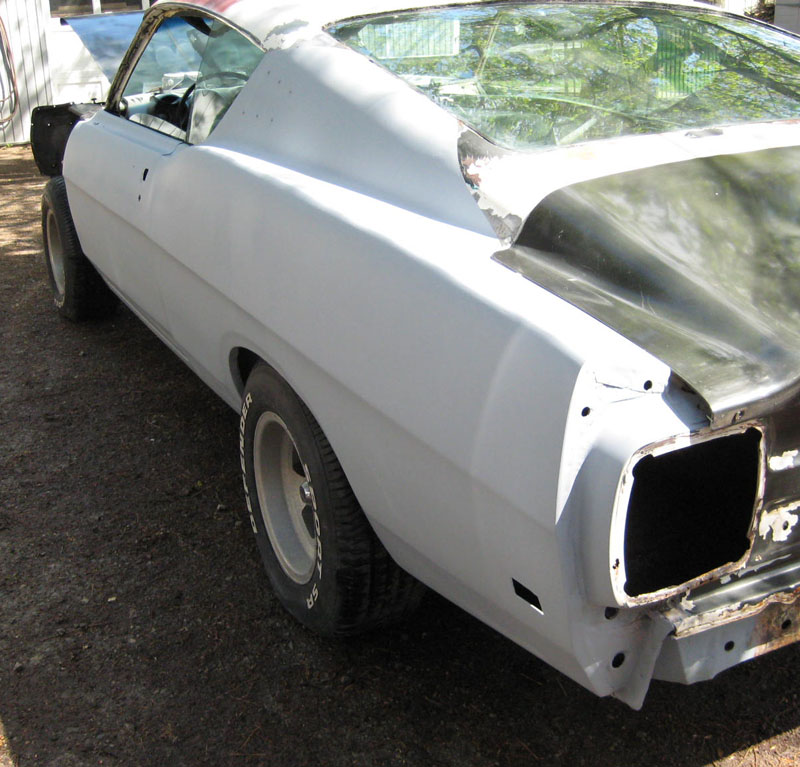
Unfortunately, the original owner had been a cheap ******* and got Maaco or some other blow-n-glo shop to do the repaint on the car, so now the paint was peeling off in big chunks due to zero prep work.

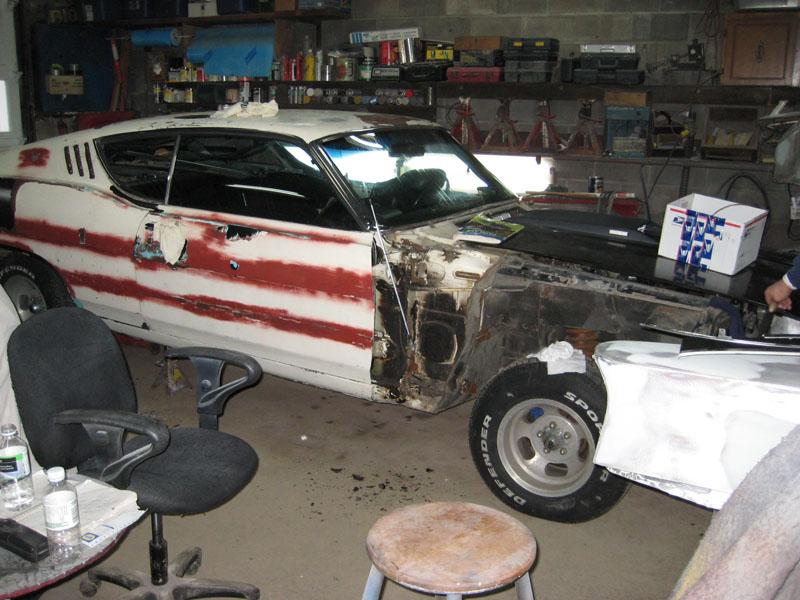
Those white spots around the rockers are where the paint is peeling off.
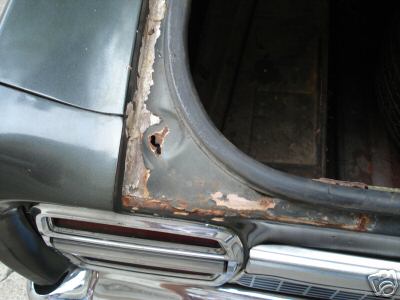
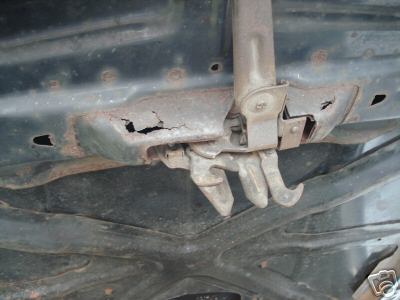
In terms of rust, there was some in the quarters on both sides, in the trunk lip and in the hood latch area.
Not in the pictures is the trunk lid, which is basically junk.
Other than that, the body was solid - the doors and rockers are good, the fenders are good, the torque boxes are fine. There's a bit of surface rust in places but nothing a wire wheel can't handle.
Once we started taking it apart and stripping the paint, it was obvious that the car has led an interesting, accident-filled life!
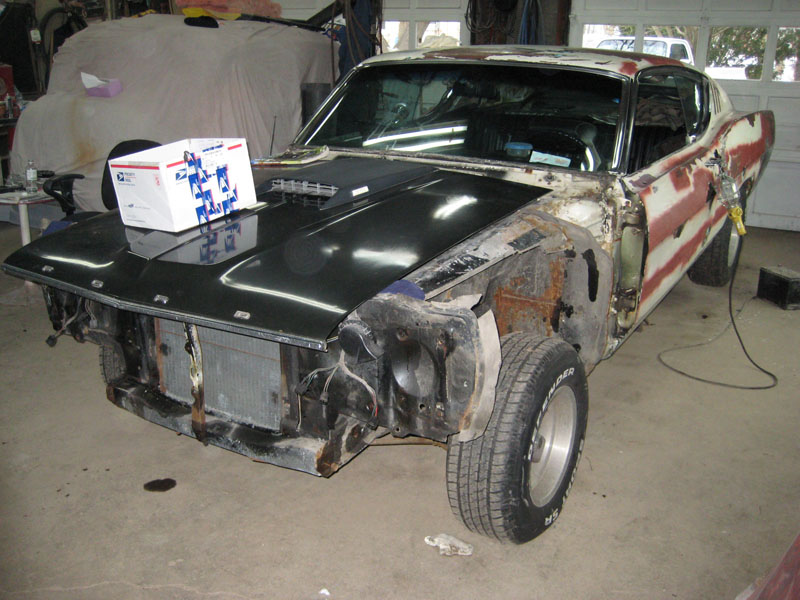
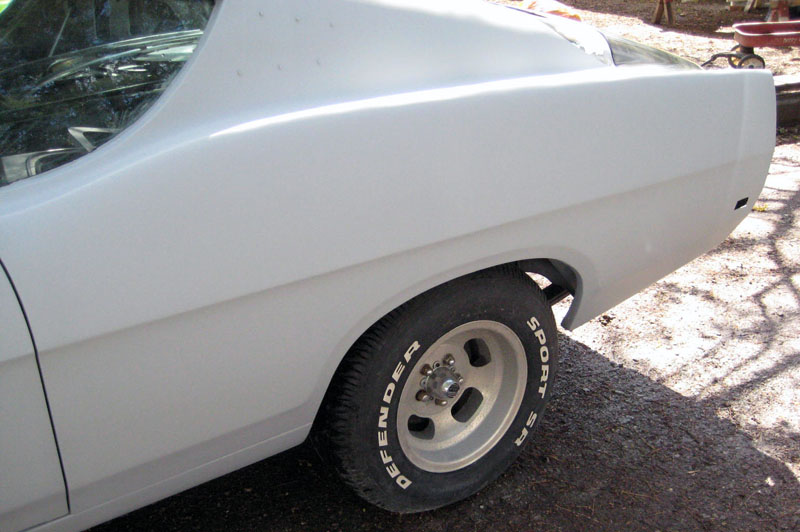
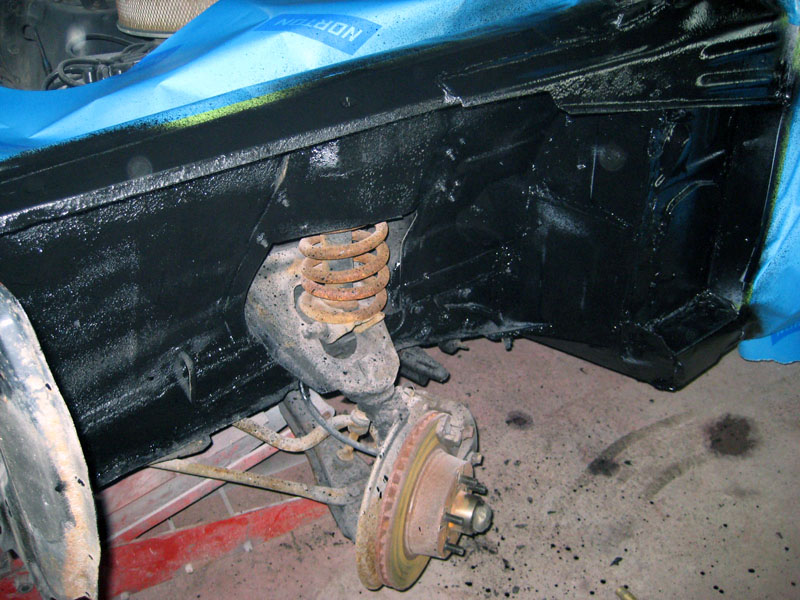
At some point, both front wheels had been bashed into the body with enough force to put some small ripples into the main body! But there's no frame damage and no evidence of it in the a-arms or the suspension at all. If you look closely, you can see the impact point. Also, the car looked like a strip of bacon.
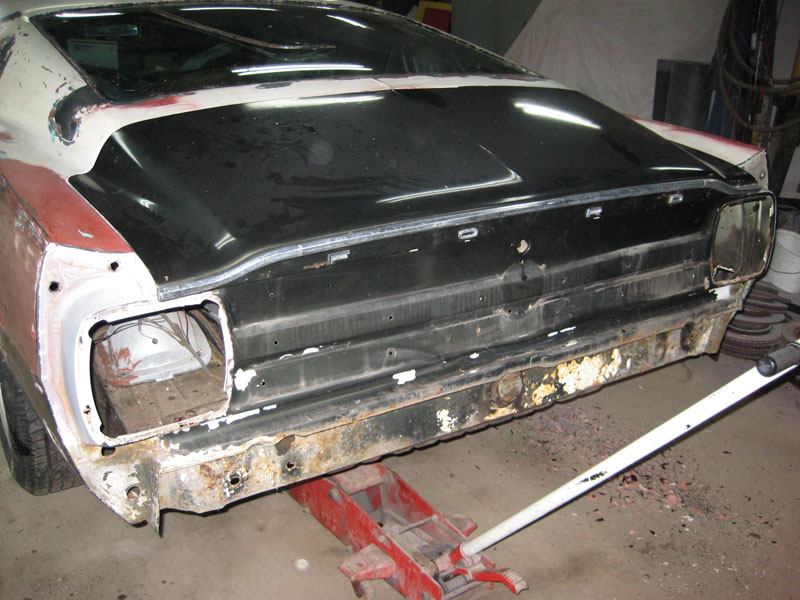
Additionally, at some point it had been hit hard enough in the rear end to make the tail panel as wavy as the Atlantic ocean, and slightly ripple the roof! It's hard to see in this photo, but there isn't a straight line on that panel.
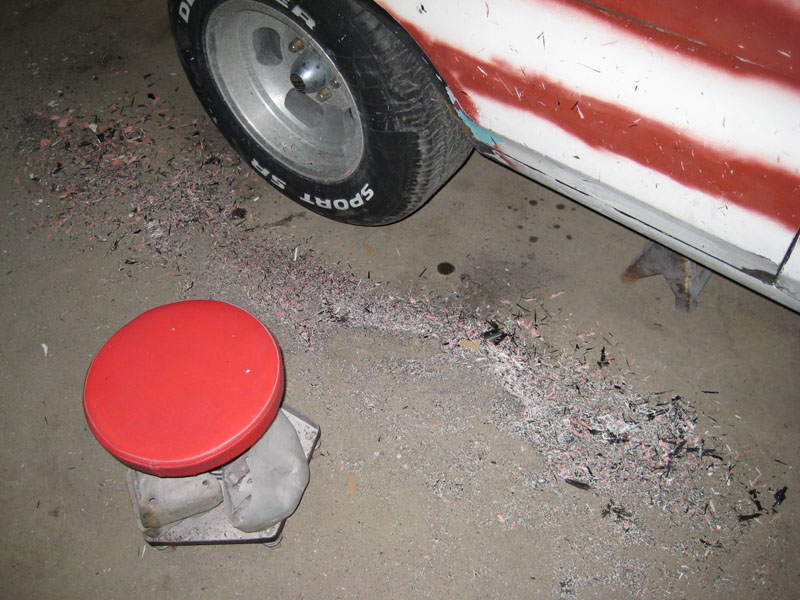
So, I bought a new trunk lid, rear panel and hood. Could be worse, it could need doors, rockers, etc. As for the paint, it's so poorly applied we removed it with a razor blade! It took me about 5 hours to strip the quarter panel to this point using the blade.
Lots of shavings!
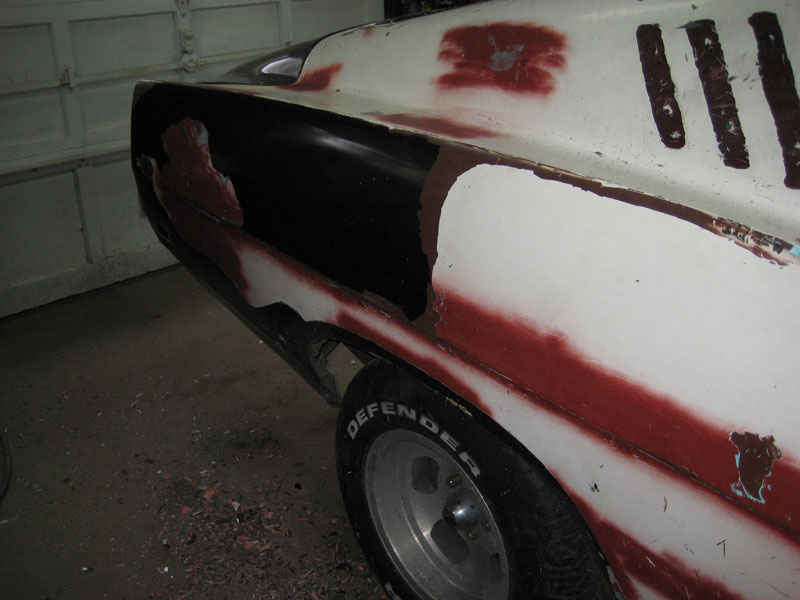
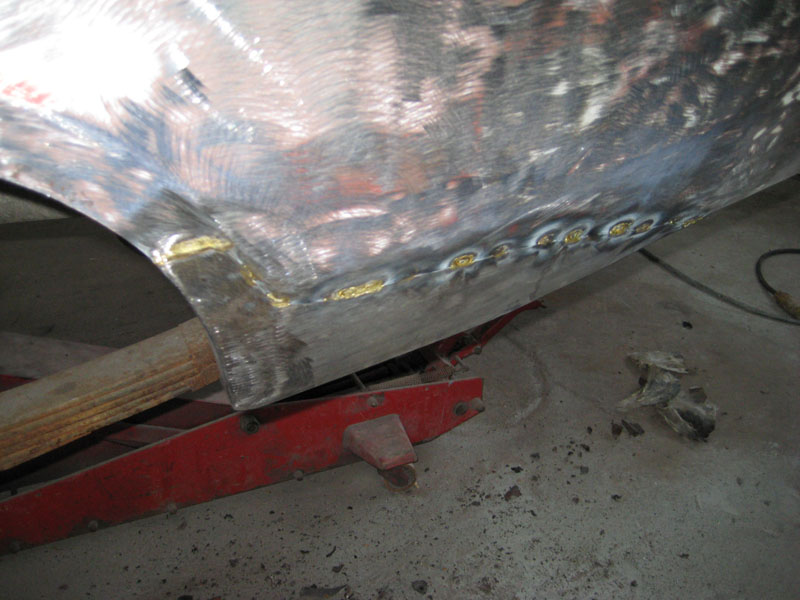
Here's the start of the quarter rebuild. I know there are patch panels available for this, but it's actually cheaper to have the body guy build them from scratch! However, the other side is so bad it's better to get the patch.
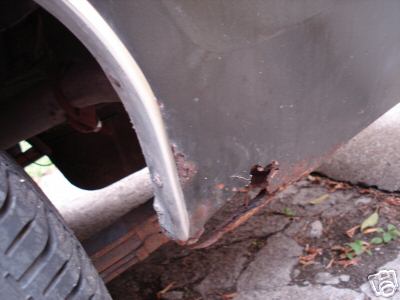
I started cleaning up inside the fenders, since there is a bit of rust due to the damaged seam seals from the bizarre corner hits behind the wheels. They were hit pretty hard! You can see the bent lip and some of the wrinkles in this photo.

Thankfully, the rest is fairly rust free and straight. But this car has seen quite a few accidents over the years.
The driver's quarter and door have had all the major work done and have been sprayed with 3 coats of high fill two part primer. This is different from the enamel based stuff you buy in cans in that it is used in a similar manner to spot putty - to fill scratches and sanding marks.
-
01-05-2009 #2
Registered User
- Join Date
- Dec 2008
- Location
- Toronto, Canada
- Posts
- 189
It still needs final block sanding and some smoothing, but you'd never know that quarter was a cheese factory when it started. There was a dent with a 1/4" of bondo in it! All that sanding makes things dusty.
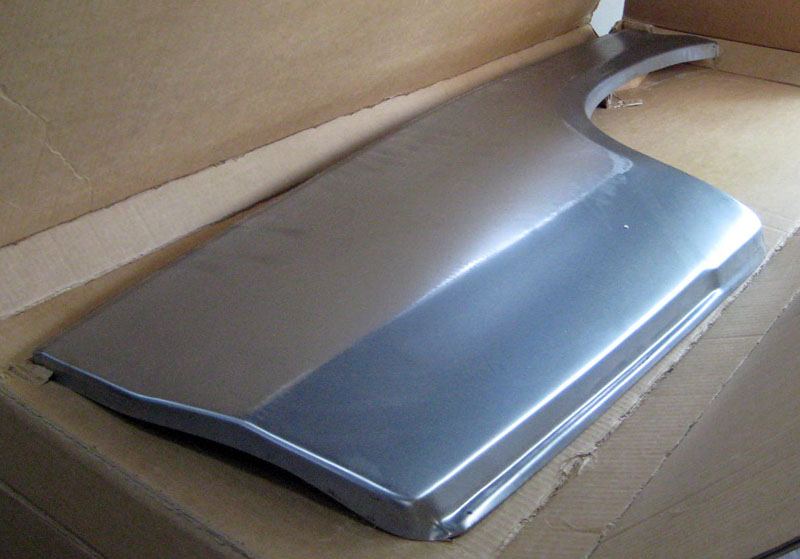
Here is the new hood from Arizona. It will require clean up but the old one is bent at the hinges and rotted out in the latch area, so this southern one is way better. It turned out to also have been in an accident, but at this point, you work with what you have.
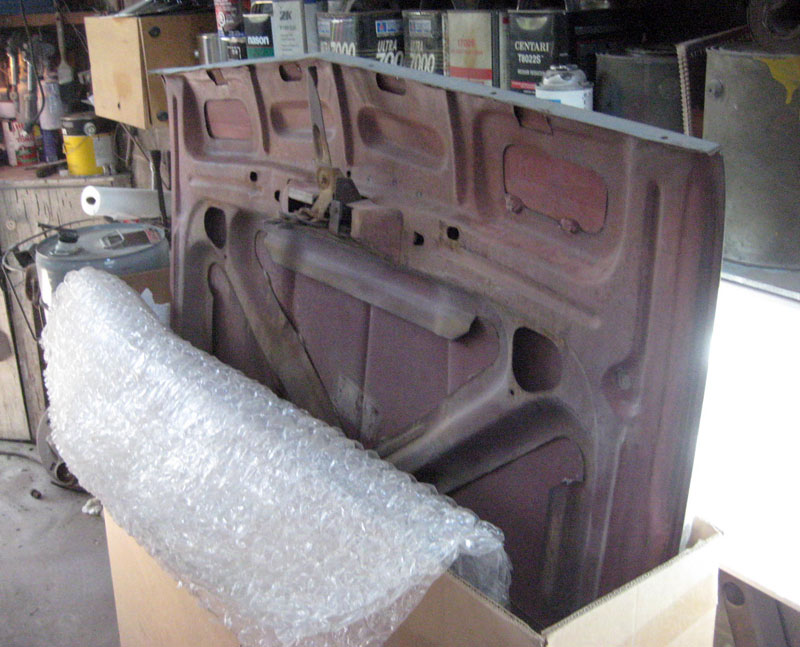
New trunk lid, also requiring work. But the old one is held together with rust and bondo, so into the bin it goes!

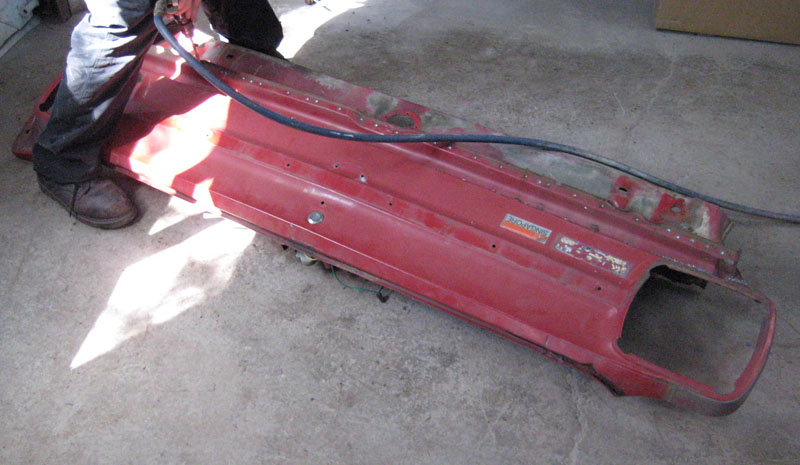
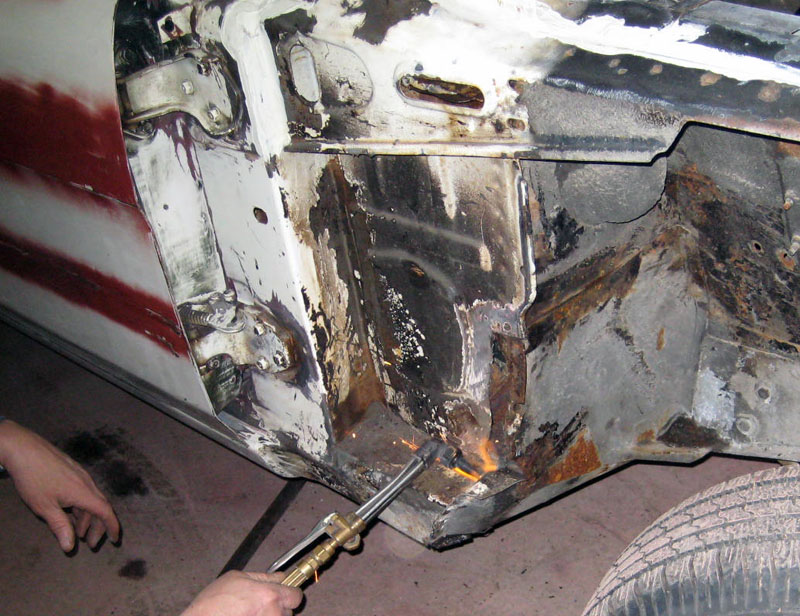
New tail panel, same reasons as above. Here we are drilling out the spot welds to get just the piece we want.
In a strange coincidence, all three bits, from three different cars, from three different locations in the US, are all the same ugly red. Did they paint a lot of Torinos orange-red or something? I thought they were all "Black Jade" judging from the photos I see online.
Finally in the new panel department, a skin from Auto Krafters for the passenger quarter.
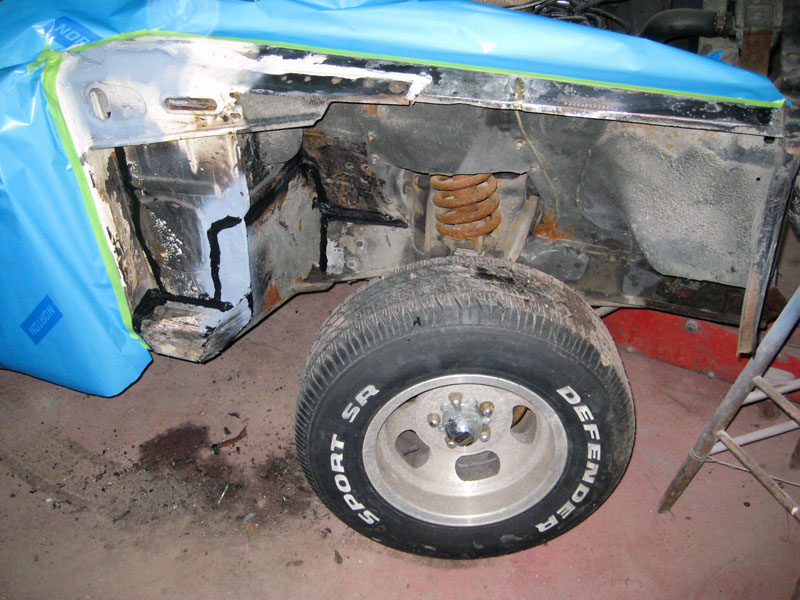
I cleaned up and undercoated the inner fender areas on both sides, and undercoated the fenders. Now that this is done, the fender can be reinstalled for final block sanding on the driver's side.
First though, have to fix the rusty spots.
Then prime it up. Looks a lot better one colour!
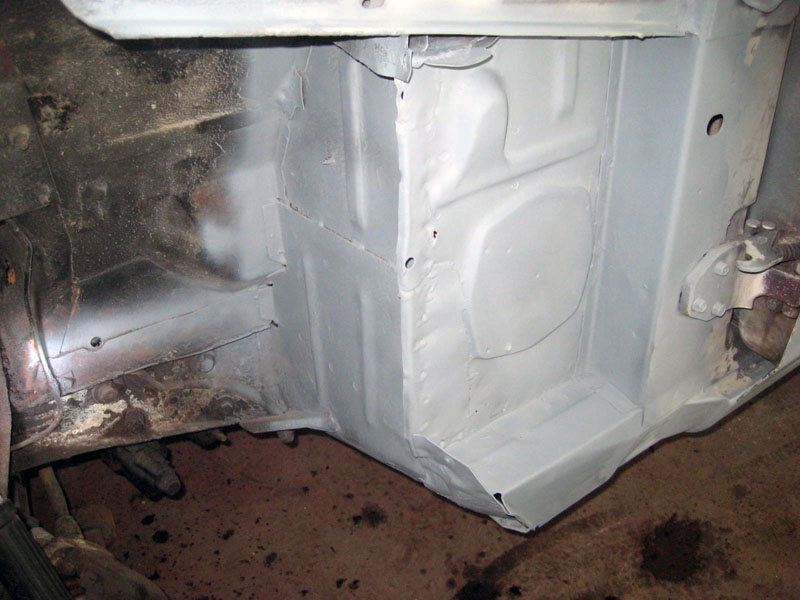
Time for some seam sealer! Now water won't get in and do it's thing again.
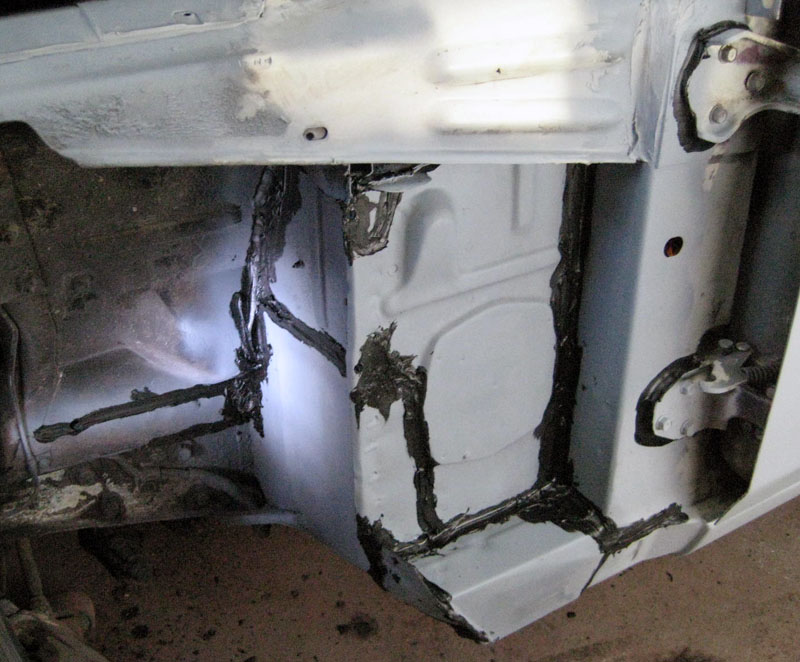
Finally, two coats of undercoating to make sure the car lasts another 40 years.
01-05-2009 #3
Registered User
- Join Date
- Dec 2008
- Location
- Toronto, Canada
- Posts
- 189
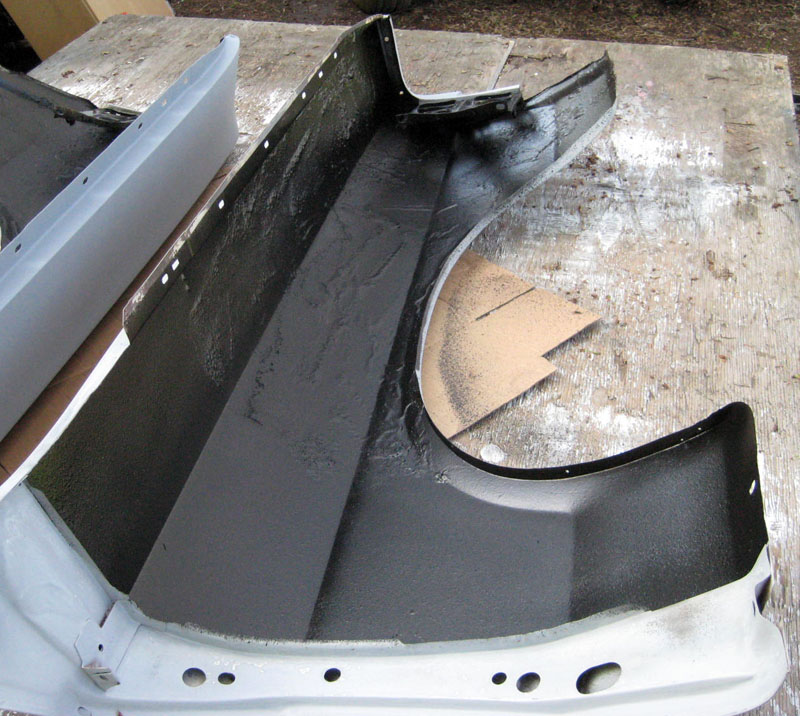
Same thing on the other side. Fix the rust, prime, seal, undercoat.
Then the fenders. Prime with a special rust primer, then undercoat. The lumpy parts are the original undercoating that I didn't bother to scrape off, since no one sees it.

Lastly, we started on the cowl cleanup.
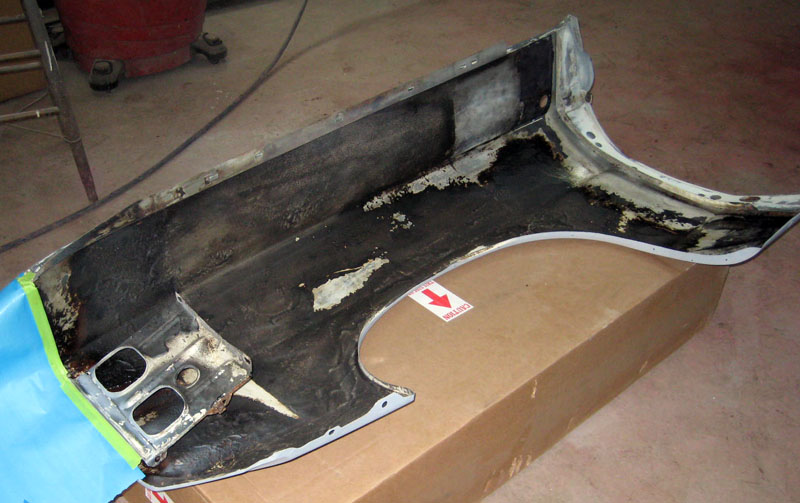
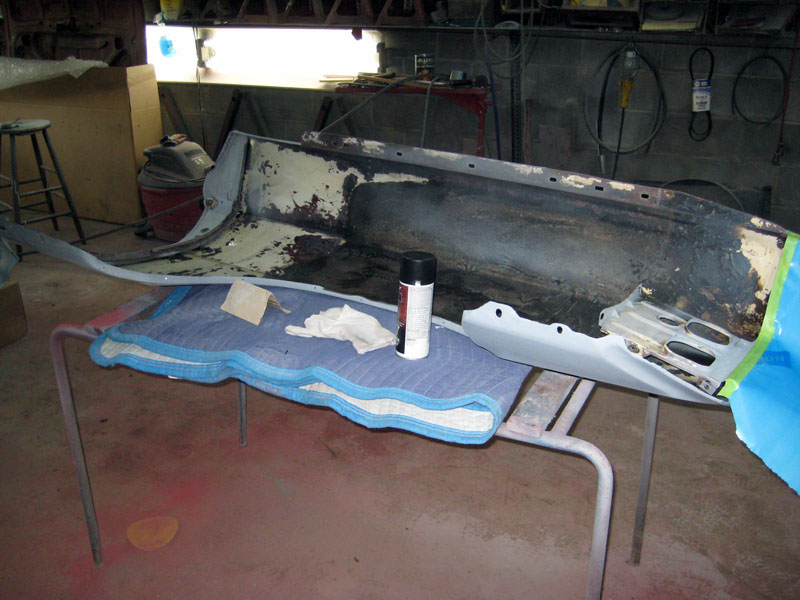
Removed the rear light panel that was wavy like the ocean and prepped it to receive the "new" panel.

The replacement was way better but had still been hit at some point. Is there a Torino in existence that hasn't been in an accident?
Closer look at the back.
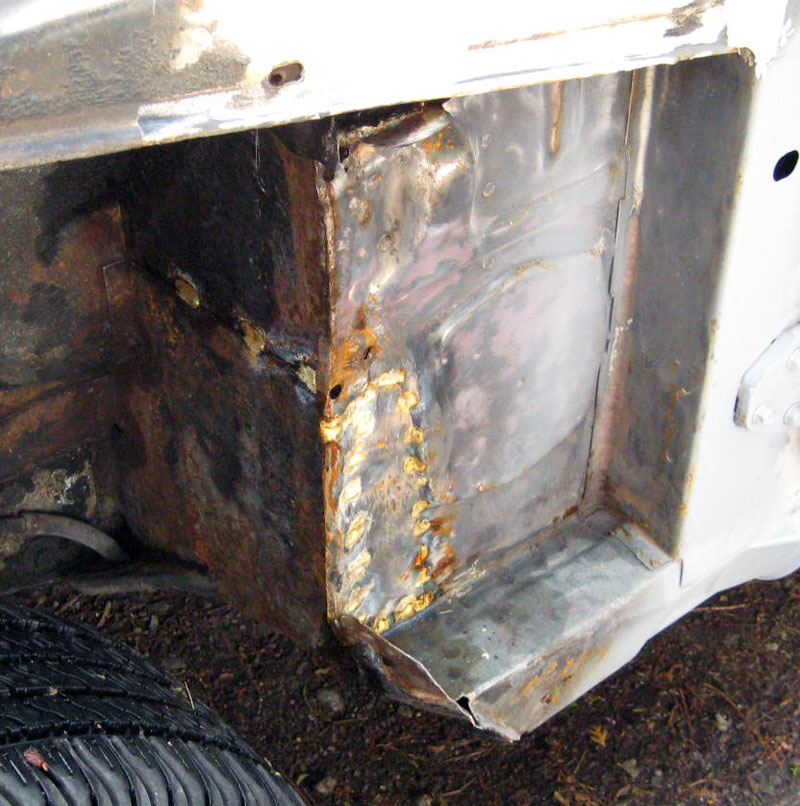
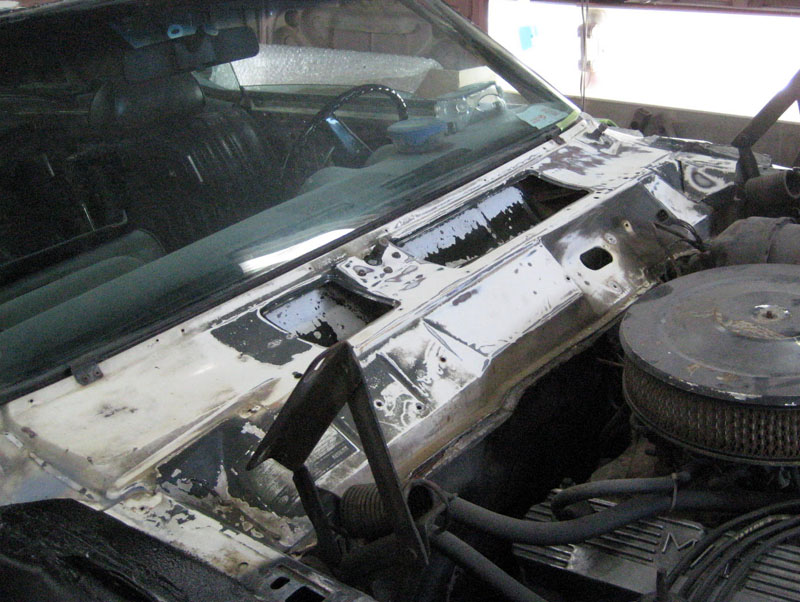
While that was going on out back, it was time for me to start cleaning up this lump of crap.
Tada! All clean! It might not look much different in the photo but all the grease and gunk is gone. I used a special metal cleaner on the intake that fizzed and stank to high heaven but it removed decades of oil and gas stains. It's not perfect but it's way better.
01-05-2009 #4
Registered User
- Join Date
- Dec 2008
- Location
- Toronto, Canada
- Posts
- 189
The "new" back panel installed and test fitted with the tail light.
Also test fitting the side marker lights and the Torino badge. Normally I would shave the badges but these ones look good!
Time to paint! I covered up everything that I didn't want Ford Blue.
That engine enamel sure comes out shiny! I covered every square inch of the thing. It looks lighter in the photos than it really is.
While it was drying, I decided to take a few minutes and start the first coat on the engine compartment.
Lookin' good! The engine compartment is all done!
Well, not completely done, but done enough that it's running again. The battery is now in the trunk and all the new wiring is in.
Aluminum radiator too.
Also, all the windows have been removed, the rust fixed, and the windows put back in and sealed up.
This used to be a big rust hole. All fixed!
01-05-2009 #5
Registered User
- Join Date
- Dec 2008
- Location
- Toronto, Canada
- Posts
- 189
Dumped that external regulated alternator for a 3-wire GM one.
We test fitted the rear trim to make sure it fit. It didn't! The tail panel we installed had holes that were over an inch off center, and we had to
add holes for the lower trim. But in the end it all lines up.
We also finished off the brakes. Turns out the master cylinder was faulty anyway, so good thing I took it all apart to paint.
Finally, the front end is starting to go back together.
What I didn't get a photo of was the left side headlight bucket I completely stripped and repainted, and the work I started on with the grille. Turns out what I thought was a perfect grill has two mounting tabs broken off and a nasty crack in the middle from some collision who know how long ago. Plastic welding, sanding and painting to fix that, and hopefully fixing and straightening the dents in the chrome.
One nice thing is that my custom sized Cragar S/S wheels arrived! These are the new all-aluminum 17" version.
I was worried that they would lose the classic Cragar look going from 15" to 17" but they didn't. Plus I got the 3-spoke knock-offs so they'll fit the 70's aesthetic I'm going for. They need some more polishing and then they'll be Zooped to protect them.
The camera flash really highlights the difference between chrome and aluminum!
I repainted one of the headlight buckets. Still hanging.
All the time spent on the wheels meant I only had time to do one valve cover. Which one do you think it is?
The "new" hood I bought still needs a bit of work - it was hit at some point in the past 40 years in the front, so there's some straightening needed.
Also I'm finally getting around to fixing the grill. It was slightly cracked and needed gluing, and I painted it black.
Back too!
Overall shot of the progress.
01-05-2009 #6
Registered User
- Join Date
- Dec 2008
- Location
- Toronto, Canada
- Posts
- 189
Installed the fan too.
I spent most of one day grinding off the paint and minor surface rust on the hood.
The original gas pedal was hinged on the engine compartment side of the firewall and also for some odd reason had an automatic kickdown attachment. Plus it was a mechanical linkage that had a lot of slop in it, and took up a lot of space. It had to go. The only way to get it out was to cut it out!
Here's what was left.
For a replacement, I found a pedal assembly from a Jeep Cherokee on ebay for $1 plus $3 shipping. The internet is great. In order to swap the original pedal to this one, I had to grind down the sides, drill out the hole and tap it to the screw size. Came out pretty good and it mounts up like the original.
I painted it black and while it was drying, we cut the Lokar throttle cable to length and modified an $8 throttle cable bracket to fit the cable. The gas pedal action is so smooth now, and there's way less clutter in the engine bay.
After that, I put the driver's side headlight assembly back together. Here's the cleaned and painted one next to the passenger's side so you can see the difference. After I took the photo I got the other one apart, cleaned and painted.
The replacement hood I bought was rust free, but was involved in an accident at some point in the past. I'd prefer a perfect one but beggars can't be choosers. The Torino hoods are also notoriously weak at the hinges, so to combat both problems, we installed some extra bracing on both sides that should prevent any further buckling. Maybe one day in a few years I'll find a perfect hood to replace it.
The springs in the car were torched at some point in the past, so they needed to be replaced. Also, the car sits way too high in the front, so I bought some 2" drop springs.
Blech! Rusty crap! But at least it was well greased.
I plan on replacing all of this stuff next year, so I didn't bother cleaning it up much, and just blasted it with black to prevent further rusting.
The rear emblem fell off ages ago, so I cleaned off the remaining goo. Surprisingly shiny!
01-05-2009 #7
Registered User
- Join Date
- Dec 2008
- Location
- Toronto, Canada
- Posts
- 189
One repro emblem later, good as new.
From any angle!
The original hood is long gone and it's been at least 6 months since there's been one on the car. Finally, time for a test fit!
Fits perfect! Too bad it has to come off for more work. The repainted and oiled hinges work good too.
Forgot to snap a photo of the other side, but here it is after drilling the holes for the hood scoop. The hood is originally for a '68 so there's no cut out for the fake scoop, which is probably for the best to avoid dirt and water getting into the engine compartment.
I will post more as it progresses.
01-05-2009 #8 Moderator / Pro-Touring.com Sponsor
- Join Date
- Apr 2001
- Location
- San Jose, CA
- Posts
- 4,210

The project looks cool. Keep up the good work saving a classic.

Tony Huntimer
RaceHome.com@Camaro.Family Camaros
1967 #QuickChangeCamaro - SpeedTech Suspension LS1/T56
1967 #CFBee - SpeedTech Suspension SuperCharged LS3/T56
1969 #TaxReturnCamaro Art Morrison Suspension 496/T56
1986 #IROCdaily - Stock IROC
01-05-2009 #9
Registered User
- Join Date
- Jul 2008
- Posts
- 31
nice work, love the pics
01-05-2009 #10 Registered User
- Join Date
- Nov 2008
- Location
- iceland
- Posts
- 1,859
 The project looks cool.
 Originally Posted by Swiftandswank
 Bjarni B
My Chevelle project The Awakening
http://www.1971chevelle.net/

http://www.kvartmila.is/smf/index.php?topic=27028.0
CHEVY POWER RULES!
01-06-2009 #11 Registered User
- Join Date
- Apr 2005
- Location
- dayton, oh
- Posts
- 952
great project. nice work!
01-06-2009 #12 Registered User
- Join Date
- Aug 2007
- Location
- Snohomish,Wa.
- Posts
- 364
Nice work, and a cool project. What is involved with changing over to the GM alternator?
Roger
01-06-2009 #13 Registered User
- Join Date
- Nov 2008
- Location
- Iceland
- Posts
- 896
More Power of course Originally Posted by 72tunaboat
nice work keep it up
01-06-2009 #14 Registered User
- Join Date
- Aug 2007
- Posts
- 156
Hey nice work I have seen your car over at Torinocobra.com as well welcom to Pro-Touring.
I like what you did with the hood I think I may do something like that with mine to so it doesn't bend I payed $250 for a good sothern hood I would like to keep it nice.
Nice work on the rear pannel as well not an EZ job.
Keep the updates coming.
01-06-2009 #15
Registered User
- Join Date
- Dec 2008
- Location
- Toronto, Canada
- Posts
- 189
It was super easy. I went with a 3-wire instead of a 1-wire because it doesn't require you to rev it up to activate. Originally Posted by 72tunaboat
The original regulator was removed, and we used the wiring from it to run ignition power to the internal regulator, which was coming to the old regulator. Then power right to the battery terminal on the starter solenoid. The ALT dash light even works!
Also, the GM alternator doesn't have the long mounting arm, so we had to make an extension, but otherwise it bolts right up.
Thanks everyone for the kind words!
01-06-2009 #16
Registered User
- Join Date
- Dec 2008
- Location
- Toronto, Canada
- Posts
- 189
I'd recommend having the plates welded in over rivets, just for visual sake. It kinda looks hillbilly to me but the body guy refused to weld them because he felt you needed access to the clips under there. Originally Posted by MZ 500
It's being painted black so I hope the rivets are less noticeable.

 Reply With Quote