Results 1 to 18 of 18
Thread: My LS1 e-brake setup
-
07-13-2008 #1

 Registered User
- Join Date
- Apr 2007
- Location
- Huntsville, Tx
- Posts
- 481

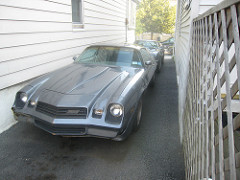
My LS1 e-brake setup
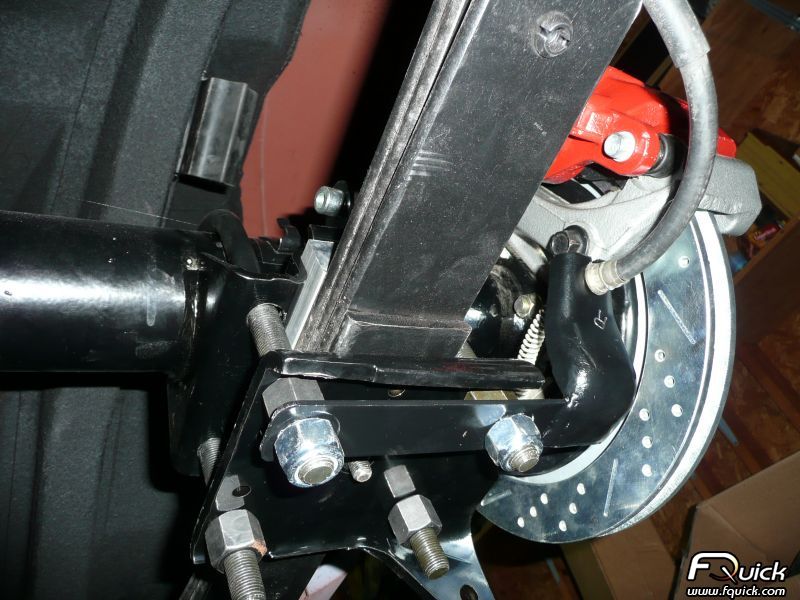
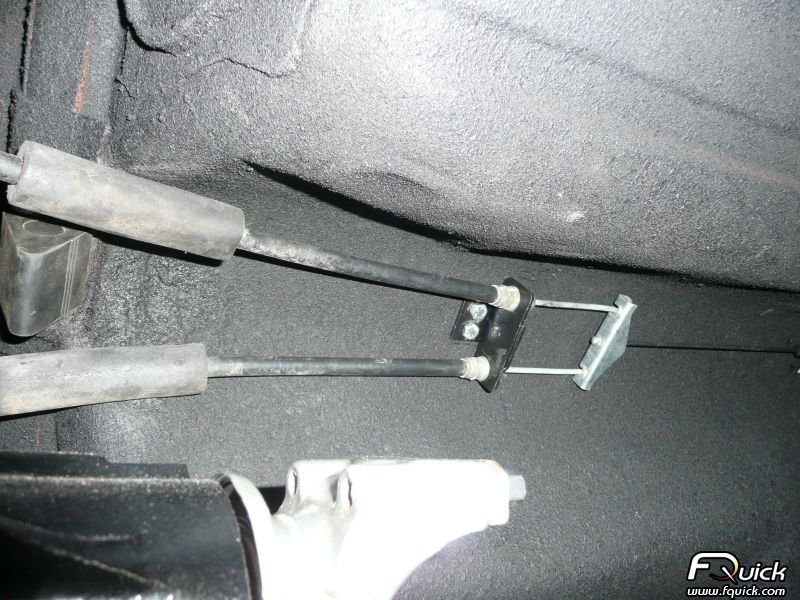
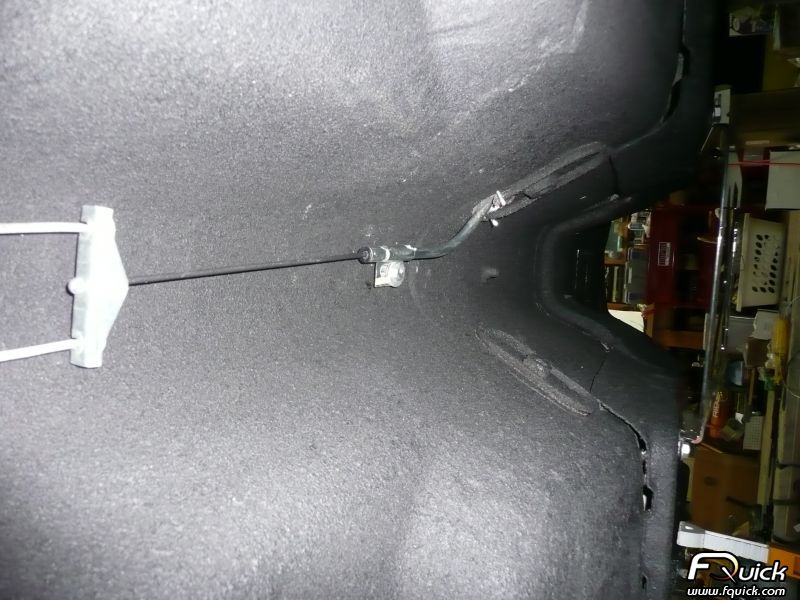
Thought I would share how I setup the LS1 e-brake cable on my 69 bird. I used two left side calipers and brackets. This allowed me clear the shock on the passenger side. I then flipped the e-brake lever so it would pull from the rear like the driver side. Routed the cables up to the trans tunnel and fabbed a bracket to hold the outer cable sheaths. I then connected the cable to the gto e-brake cable mechanism. It worked out pretty well, nice and neat and the brakes are rock solid.
This the routing of the e-brake cables

Sam
69 Firebird convertible T/A pro-touring custom, Now LS1/T56 six speed, 3:42 Eaton posi, 18" Iforged wheels, 04 GTO interior.
www.fquick.com/SamHatco
Jack of all trades, master of none.
-
07-13-2008 #2 Registered User
- Join Date
- May 2002
- Location
- Northern California
- Posts
- 10,716
nice set up Sam.
MrQuick ΜΟΛ'ΩΝ ΛΑΒ'Ε
07-14-2008 #3
Registered User
- Join Date
- Sep 2007
- Location
- Denver
- Posts
- 325
Nice job. I assume this is the in-the-rotor type ebrake setup? I am planning the same setup and didn't think there was an available adapter plate except with a Kore3 package deal. If you know how to accomplish this I'd love to hear how you did it....and what kind of bearing ends you have on that nice new shiny diff. that you got to work .
07-14-2008 #4
Registered User
- Join Date
- Apr 2007
- Location
- Huntsville, Tx
- Posts
- 481
Yep. This is also a stock 8.5 10 bolt, with 3.42 posi. Its used on the camaro also. I purchased some adapter plates from BRP hotrods to center the calipers over the rotors. I believe the adapter plates moved the calipers out about .25 inch from the end of the axle housing. Originally Posted by Denvervet
Sam69 Firebird convertible T/A pro-touring custom, Now LS1/T56 six speed, 3:42 Eaton posi, 18" Iforged wheels, 04 GTO interior.
www.fquick.com/SamHatco
Jack of all trades, master of none.
07-15-2008 #5
Registered User
- Join Date
- Apr 2007
- Location
- Huntsville, Tx
- Posts
- 481
Billy, Originally Posted by billybobdupree
Thanks for the compliments. The cables I used came from an '02 trans am rear end as did the calipers, brackets and other hardware. I used the BRP Hot Rods adapter plate that centers the caliper over the rotors. I have the Carshop motor mounts (plenty of clearance at the firewall), S&P modified oil pan, hooker headers, and factory ps box. Hopes this helps. Buy the way you need to empty your mail box, couldn't reply to this message by pm.
Regards,
Sam69 Firebird convertible T/A pro-touring custom, Now LS1/T56 six speed, 3:42 Eaton posi, 18" Iforged wheels, 04 GTO interior.
www.fquick.com/SamHatco
Jack of all trades, master of none.
07-15-2008 #6 Registered User
- Join Date
- Oct 2004
- Location
- Orlando, Fl
- Posts
- 1,229
Sam, Originally Posted by SamHatco
Just for clarification purposes, you flipped the ebrake lever within the backing plate on the passenger side?
Thanks,
Nick
07-15-2008 #7 Registered User
- Join Date
- Sep 2005
- Location
- League City, TX
- Posts
- 707
07-16-2008 #8
Registered User
- Join Date
- Apr 2007
- Location
- Huntsville, Tx
- Posts
- 481
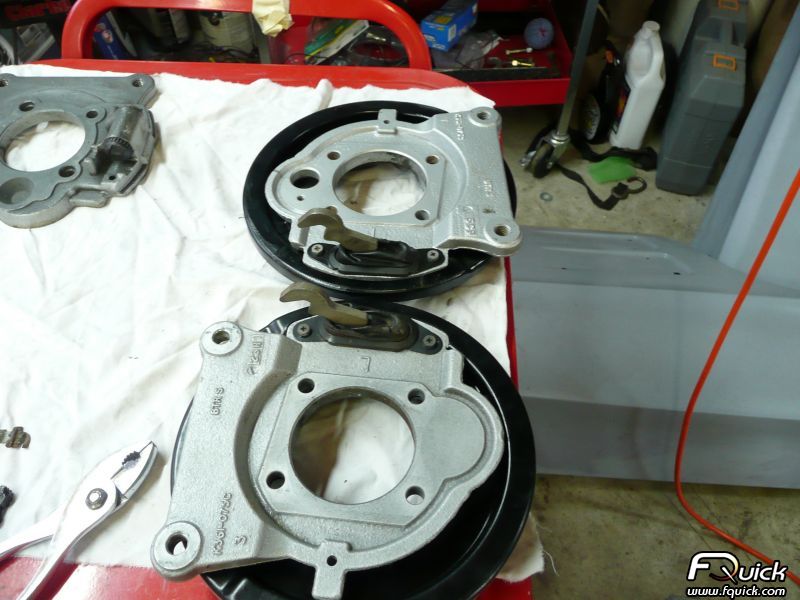
Nick, yes I did. I have receive several e-mails on how I got the left side caliber brackett to pull from the rear when its placed on the right side of the axle. Here are a few pictures on how I did it.
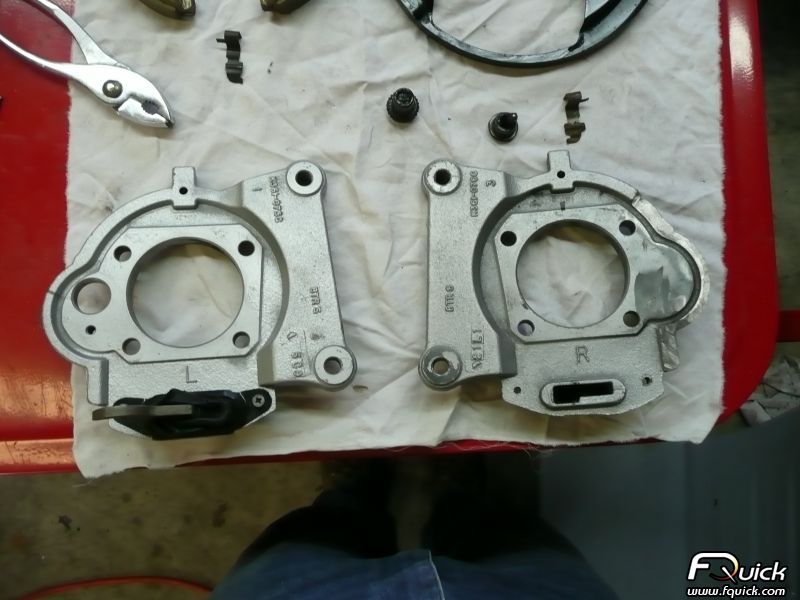
If you look in the following picture you'll see a L & R backing plate. Just above them are the adjustment barrell retaining clips and an adjustment barrell.
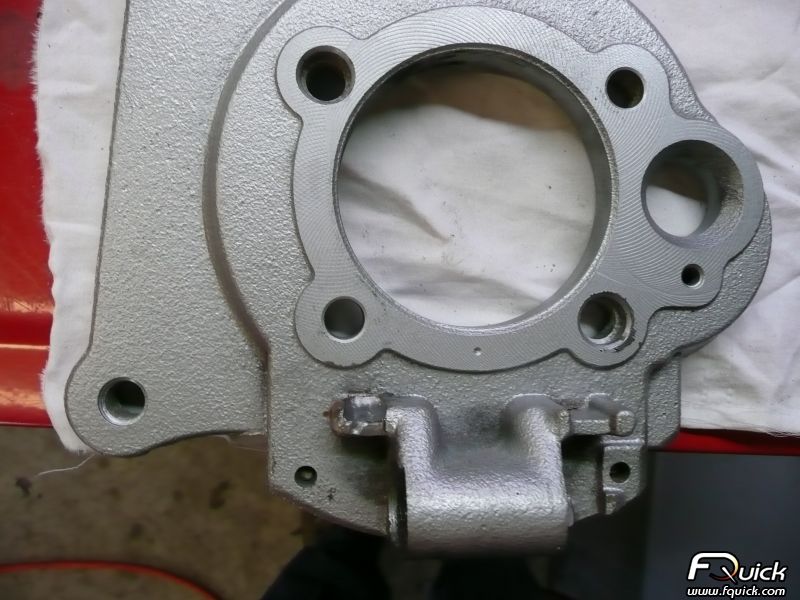
On the Left backing plate I ground down the left ear of backing plate e-brake to accept the adjustment clip:
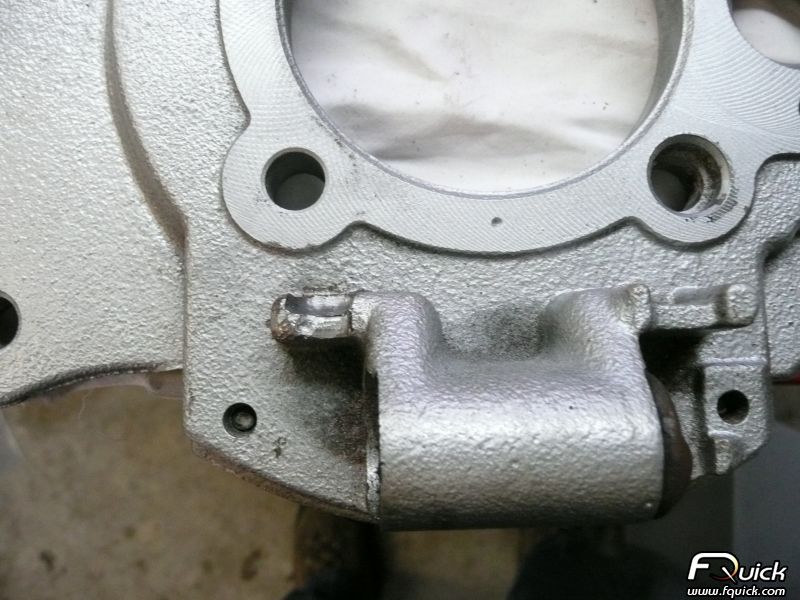
Here is a closup of the area I ground down to accept the clip:
This is a picture of the left and right adjustment retaining clip:
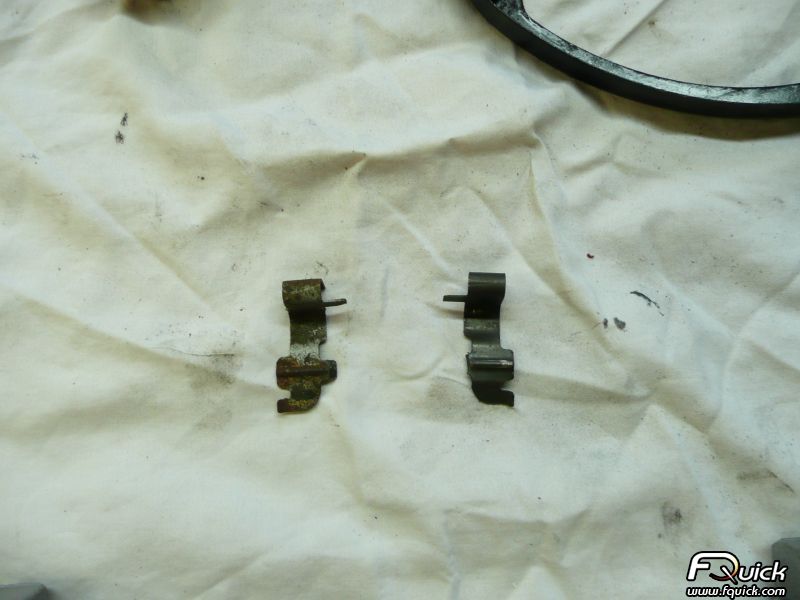
By flipping the lever and reversing the pins from back to front the lever will now engage the e-brake properly. Don't forget to put grease in the barrell that holds the pin and lever.
Hope this helps.
Sam69 Firebird convertible T/A pro-touring custom, Now LS1/T56 six speed, 3:42 Eaton posi, 18" Iforged wheels, 04 GTO interior.
www.fquick.com/SamHatco
Jack of all trades, master of none.
07-16-2008 #9 Registered User
- Join Date
- Dec 2005
- Location
- Dublin, CA
- Posts
- 502
So, you actually had to have two lefts and one right in order to make this work?
Brent
1971 Camaro, LT1, 4L60E
07-16-2008 #10
Registered User
- Join Date
- Apr 2007
- Location
- Huntsville, Tx
- Posts
- 481
Well, like I said before I got the brakes off of an 02 trans am axle, so I started with a left and right bracket. I needed another left hand bracket because there is clearance issues with the shock on the passenger side. Driver side shock is on the rear of the axle and passenger side shock is on the front of the axle. A left and right caliper bracket mount the calipers to the front on 4th gen f-bodies, so I purchased another left hand bracket from a junk yard for $25.00. This placed the caliper on the rear of the axle on the passenger side when you mount it. If you don't have the brake adjustment barrell clip you can get them from the dealership. I think they are less than $10.00. The actual lever will work both ways.
Sam69 Firebird convertible T/A pro-touring custom, Now LS1/T56 six speed, 3:42 Eaton posi, 18" Iforged wheels, 04 GTO interior.
www.fquick.com/SamHatco
Jack of all trades, master of none.
07-16-2008 #11
Registered User
- Join Date
- Dec 2005
- Location
- Dublin, CA
- Posts
- 502
The clip is what I was referring too, thanks. I have the brakes installed, just have not done the cables yet. I had planned on running them from both directions using a Lokar cable, but this might be a better looking setup.
Brent
1971 Camaro, LT1, 4L60E
10-02-2008 #12
Registered User
- Join Date
- Feb 2008
- Location
- Staten Island, New York
- Posts
- 367
very cool set up
11-22-2008 #13 Registered User
- Join Date
- Jun 2007
- Location
- St. Pete FL
- Posts
- 934
Sam,
I see you have a 8.5 GM 10 bolt. Do you know the year of it or what it came off?
Did you have to modify the LS1 rear brackets any to get them to fit on the rear housing or just pull the axle & put in the BRP plate?
Do you have any pics of just them on without the rotors on yet?
Great work on everything!!!HELP!!!
1973 TA 4 spd #'s match red/white = STOLEN
https://www.pro-touring.com/threads/...55#post1106255
12-01-2008 #14
Registered User
- Join Date
- Apr 2007
- Location
- Huntsville, Tx
- Posts
- 481
Cdoggy,
This is the rear end that came on the car. I ran the numbers on the axle and it appears to be a corporate 8.5 10 bolt
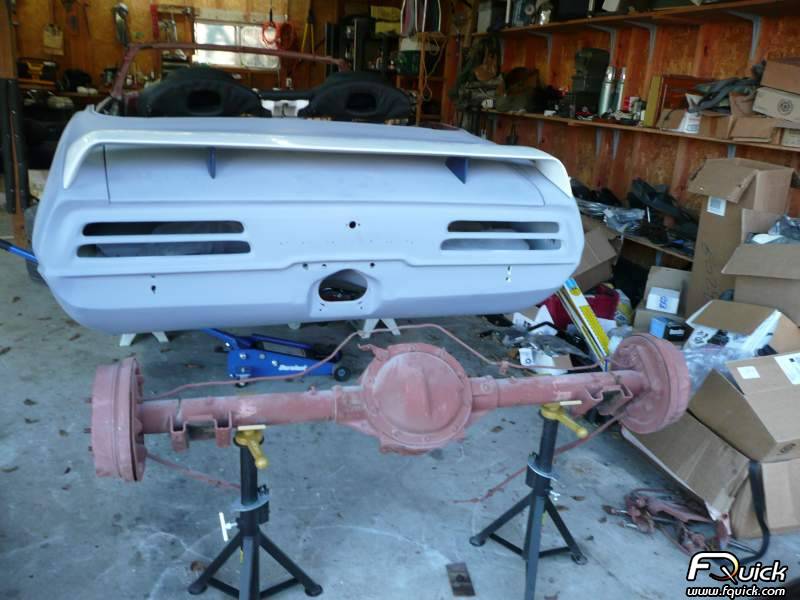
This is the after shot of the rear end with brakes. I had the axle powder coated before I installed the 3.42 gear set and assembled the brakes. All I had to do is pull the axles and insert the BRP adapter plate. It was a complete bolt on installation.

Hope the helps
Sam69 Firebird convertible T/A pro-touring custom, Now LS1/T56 six speed, 3:42 Eaton posi, 18" Iforged wheels, 04 GTO interior.
www.fquick.com/SamHatco
Jack of all trades, master of none.
12-01-2008 #15
Registered User
- Join Date
- Feb 2008
- Location
- Staten Island, New York
- Posts
- 367
nice
12-01-2008 #16
Registered User
- Join Date
- Jun 2007
- Location
- St. Pete FL
- Posts
- 934
Excellent! What did that posi cover run you BTW? I was thinking about getting the one from Jeggs for $150 but I like yours

Also, what are you doing about your VIN since you had to cut away the dash to fit the GTO dash in there? I am about to do the same.HELP!!!
1973 TA 4 spd #'s match red/white = STOLEN
https://www.pro-touring.com/threads/...55#post1106255
12-02-2008 #17
Registered User
- Join Date
- Apr 2007
- Location
- Huntsville, Tx
- Posts
- 481
I believe I paid the same amount for my cover. I plan on reinstalling the vin when I finish the dash. Same location or on the A pilar.
Sam69 Firebird convertible T/A pro-touring custom, Now LS1/T56 six speed, 3:42 Eaton posi, 18" Iforged wheels, 04 GTO interior.
www.fquick.com/SamHatco
Jack of all trades, master of none.
12-02-2008 #18
Registered User
- Join Date
- Jun 2007
- Location
- St. Pete FL
- Posts
- 934
I would like to keep it in the same location as well but not real sure how to do it with the GTO dash I am going to use as well.
HELP!!!
1973 TA 4 spd #'s match red/white = STOLEN
https://www.pro-touring.com/threads/...55#post1106255

 Reply With Quote