

Results 141 to 160 of 248
Thread: Our F85 Power Tour Project
-
08-05-2014 #141

 Registered User
- Join Date
- Jul 2012
- Posts
- 48

Nice job!
-
08-18-2014 #142 Registered User
- Join Date
- May 2001
- Location
- Mesa, Az.
- Posts
- 1,434
Lower Mounts
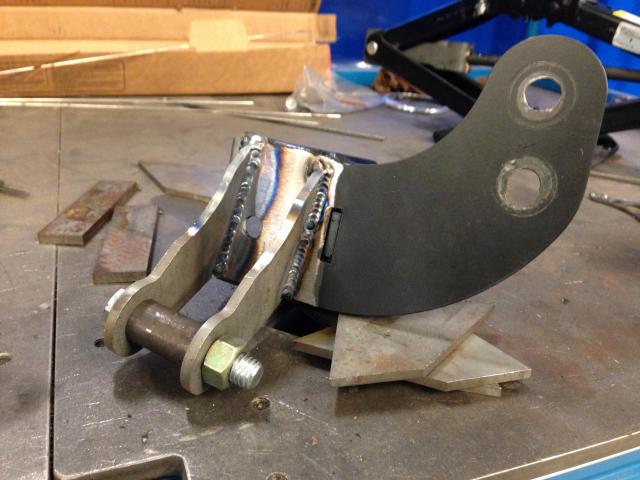
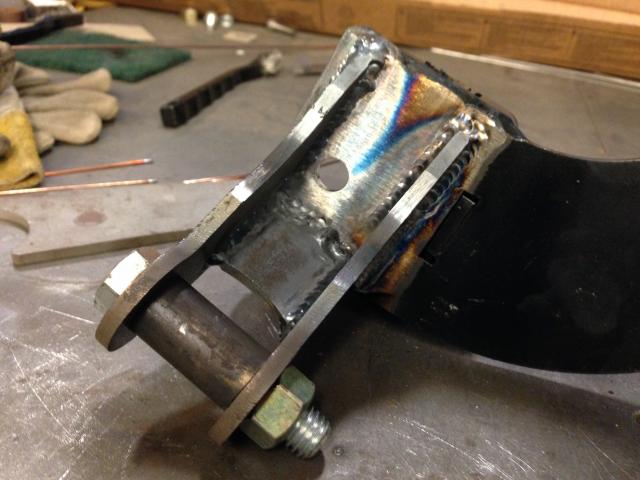
Well it was bound to happen. I did ask Ride Tech when I ordered the rear coil-over kit what the ride height length of the shock was and they told me 15". Great! That's what mine is too. However I had a feeling something wasn't going to be right because of how low our car is. We've all seen the C notches and the ride height. So, after modifying the upper mounts I quickly bolted on the lower mounts and the first thing I noticed is that my brake lines were now too short. Hmm.. Well, after doing some more measuring I found that the upper mount was now dropping the shock about 1.5" and now the axle housing the same amount, and subsequently raising the car the same amount. After a quick email to Darren at Ride Tech he offered to swap the shocks for shorter ones. That was a great offer however then I would be giving up shock travel as well as I don't think the shock would then go long enough to get the wheel and tire off the car. Because not only would the stroke be shorter it has less stroke as well.
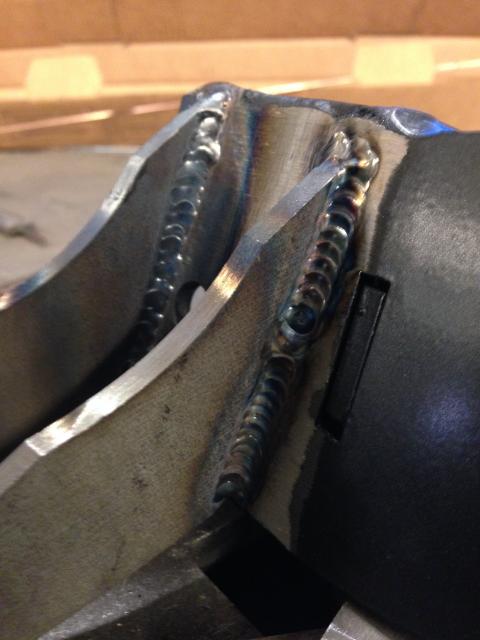
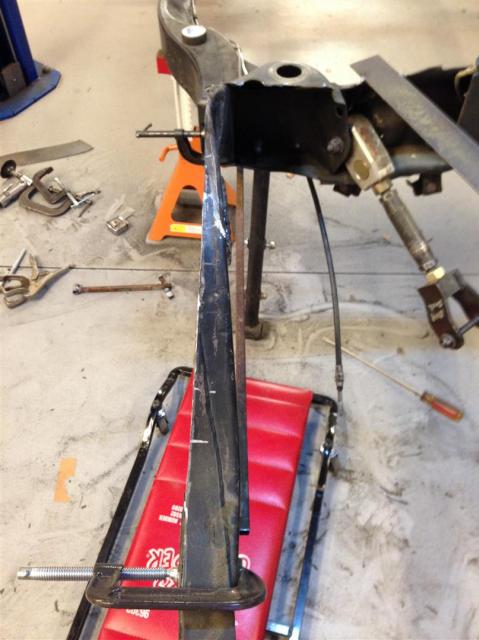
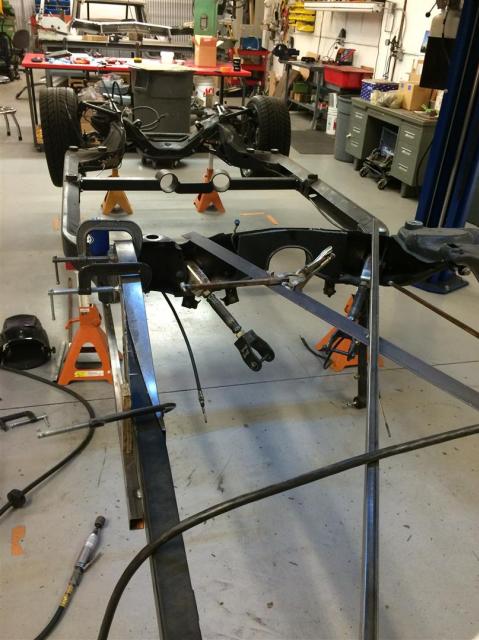
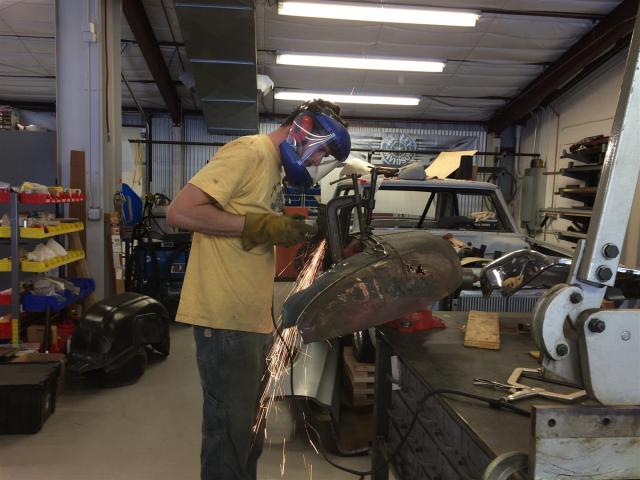
So in the end I decided to rework the lower mounts as well. First thing I did was put them in the band saw and get the original mounts cut off. Once they were nice and flat we reinstalled them and set the car at ride height. This way everything would be nice and straight at ride height including the heim joint. Don't think this is really necessary but hey if your there building it from scratch might as well get it right? Here are some pictures of the new lower mounts.

 Phillip
64 Studebaker Daytona Twin Turbo- http://bit.ly/1SgxQ0g
65 Cutlass F-85 - http://bit.ly/1W4lJm4
08-18-2014 #143
Registered User
- Join Date
- Jul 2012
- Posts
- 48
Nice welds
08-19-2014 #144
Registered User
- Join Date
- May 2001
- Location
- Mesa, Az.
- Posts
- 1,434
Put the car back on the ground and everything clears and works well with the coil overs. So, we pulled the T56 to begin disassembly. Hoping to find out what the hell is vibrating last and for all.
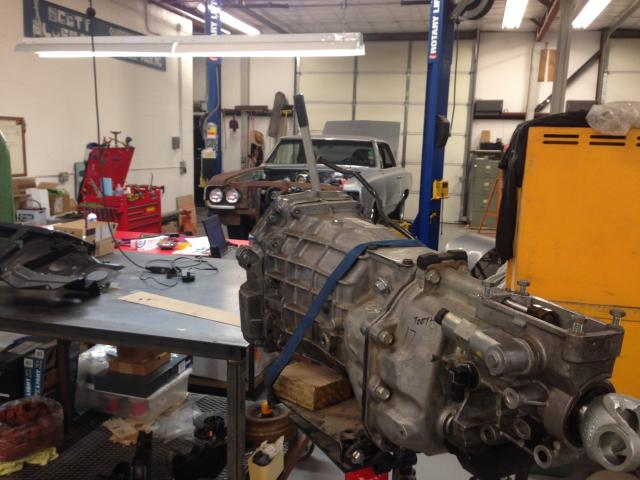
I found a few guys on LS1 Tech that have fought the same battle so we are going to investigate a little further down the trans road.. Here is a link.
http://ls1tech.com/forums/manual-tra...vibration.htmlPhillip
64 Studebaker Daytona Twin Turbo- http://bit.ly/1SgxQ0g
65 Cutlass F-85 - http://bit.ly/1W4lJm4
09-19-2014 #145 Registered User
- Join Date
- Mar 2013
- Posts
- 308
Wow... you are at it again. Did you get it painted after the accident? If you were in Ky, I would have you build me a set of brackets for my rear coilovers I will be getting.
09-21-2014 #146 Registered User
- Join Date
- Jan 2006
- Posts
- 1,747
My T56 has the same problem - thanks for posting a link to the possible solution. Originally Posted by PhillipM

Last edited by GeoffP; 09-21-2014 at 12:19 PM.
GeoffP
68 Camaro - LS1/T-56
09-21-2014 #147
Registered User
- Join Date
- May 2001
- Location
- Mesa, Az.
- Posts
- 1,434
Just an update. Took the trans apart and our 5/6 gear is nice and tight. So we are looking at the rear axle again. We've got a problem with the differential spider gears coming loose so that could be a clue.
Phillip
64 Studebaker Daytona Twin Turbo- http://bit.ly/1SgxQ0g
65 Cutlass F-85 - http://bit.ly/1W4lJm4
10-25-2014 #148
Registered User
- Join Date
- May 2001
- Location
- Mesa, Az.
- Posts
- 1,434
Just a small update. Working on the F85 but progress is definitely slow. Have quite a few other projects that we're toying with now as well. Either way, it's coming along!


 Phillip
64 Studebaker Daytona Twin Turbo- http://bit.ly/1SgxQ0g
65 Cutlass F-85 - http://bit.ly/1W4lJm4
10-25-2014 #149 Registered User
- Join Date
- May 2011
- Posts
- 311
Looks real good Phil, I'm still chug-a-lugin along with mine.....Someday I hope my welds will somewhat like yours-those are a work of art.
64 F-85 post car Resto-Mod project-my RV when I retire
11-29-2014 #150
Registered User
- Join Date
- May 2001
- Location
- Mesa, Az.
- Posts
- 1,434
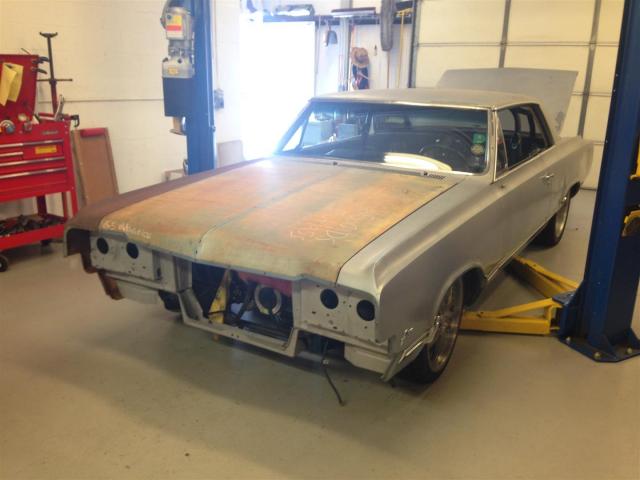
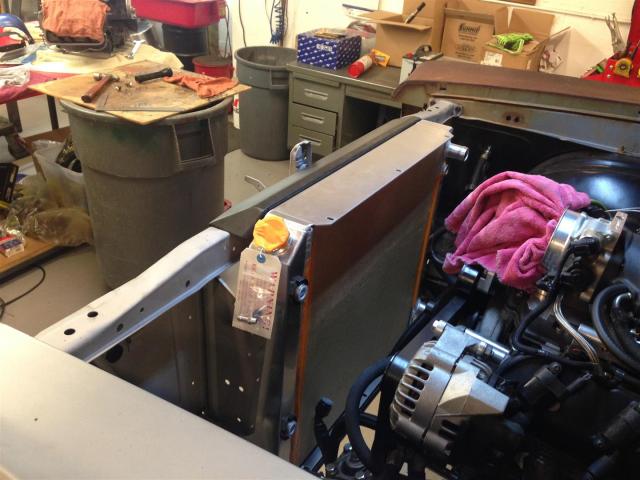
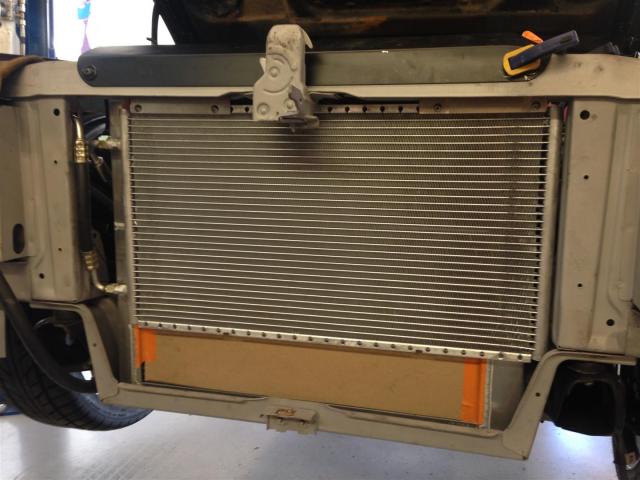
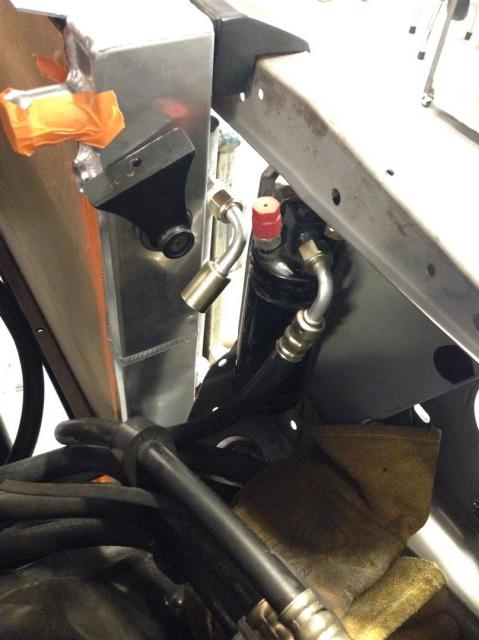
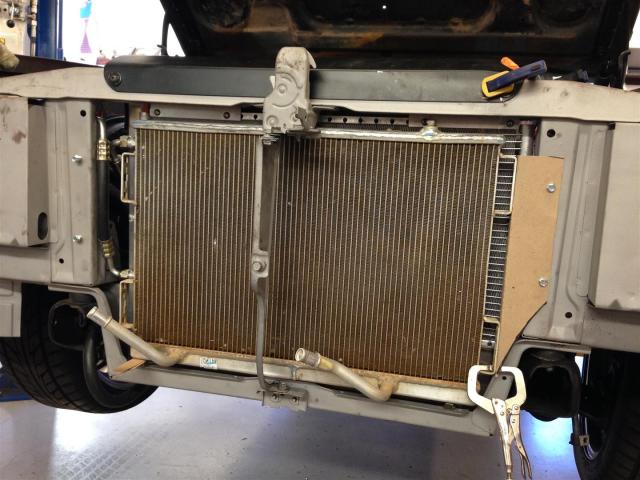
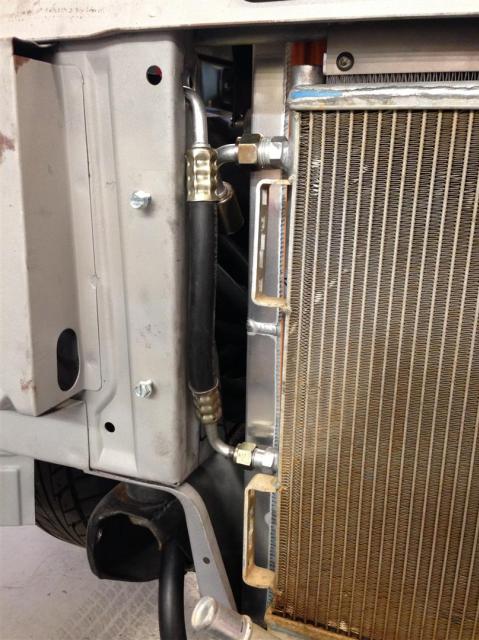
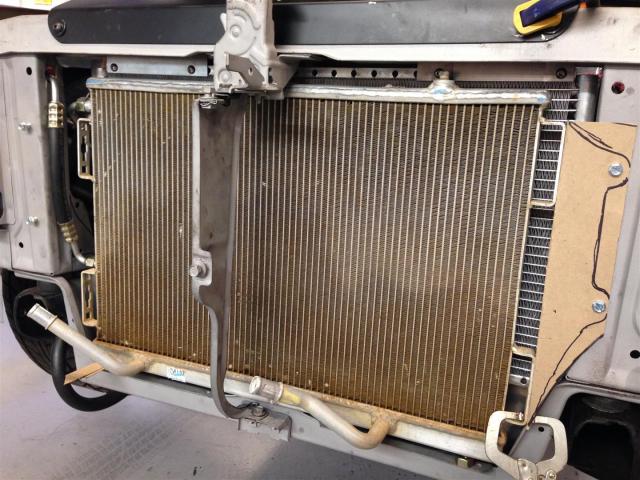
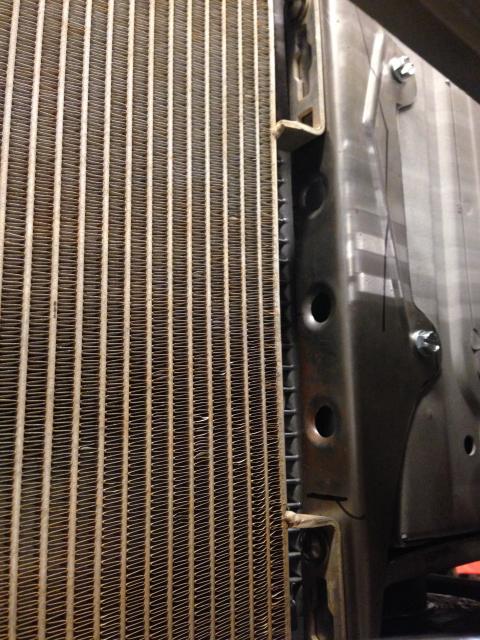
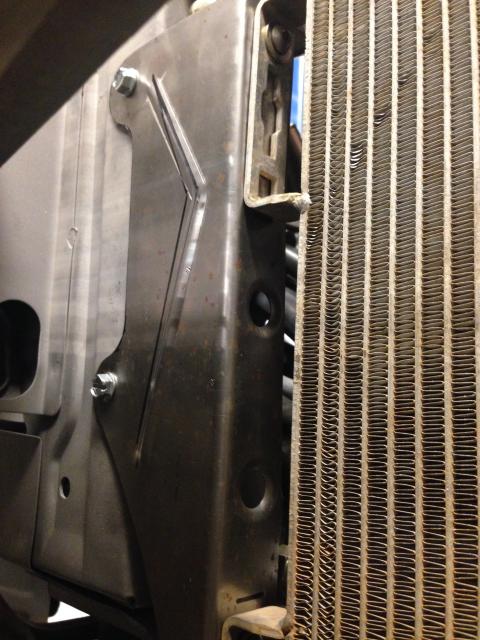
Finally got the lift cleared off so we can work on the F-85 some more. I got the AC condenser mounted as well as getting a good idea on the intercooler mounting. AC condenser is the largest that will fit, that's for sure. It's from Vintage Air. The intercooler is out of a Cobalt SS. Still have a lot of finalization to do but thought you guys would like to see where we're at.
 Phillip
64 Studebaker Daytona Twin Turbo- http://bit.ly/1SgxQ0g
65 Cutlass F-85 - http://bit.ly/1W4lJm4
12-02-2014 #151 Registered User
- Join Date
- Aug 2004
- Location
- Mapleton, IL.
- Posts
- 252
Wow Phillip you have been through a lot with that car. Looks nice and the stance is cool. Where did you get the radiator mounts? I have to tackle that before long and have been looking for ideas. The trans tunnel looks good. Wish I had seen this when I was working on mine. I really like the houndstooth interior as well. I have been looking at the Scat Procar seats in houndstooth.
Mark
Current project 1963 Chevy II
https://lateral-g.net/forums/showthread.php?t=58772
1964 Buick Skylark
Build thread https://www.pro-touring.com/threads/...t-budget-build
12-04-2014 #152
Registered User
- Join Date
- May 2001
- Location
- Mesa, Az.
- Posts
- 1,434
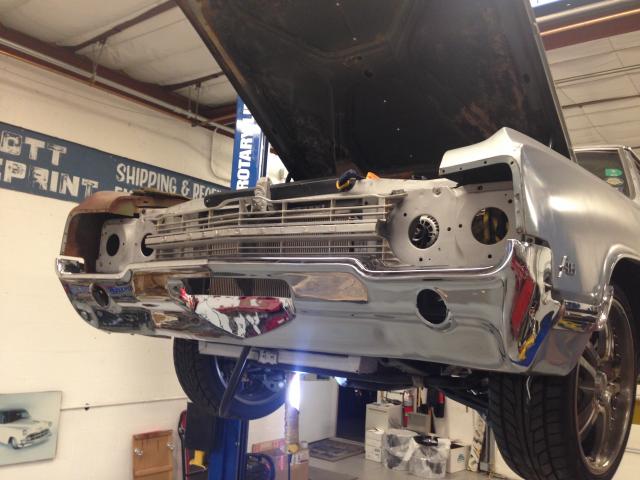
Thanks Mark. The trans tunnel is one of those things that people are afraid to do but once you make the cuts you're free to run much better transmissions. As for the seats we had purchased those for a Camaro project but I agree, I think they look pretty good in the cutlass. Originally Posted by 64G-lark
Here are some more updates. Finished the mounts for the intercooler and we rough fit the front bumper.
 Phillip
64 Studebaker Daytona Twin Turbo- http://bit.ly/1SgxQ0g
65 Cutlass F-85 - http://bit.ly/1W4lJm4
12-09-2014 #153
Registered User
- Join Date
- Dec 2014
- Posts
- 35
Im guessing the A/C bracket you were running on the 455 was a custom piece? My OEM A/C bracket will not fit with my valve covers on my 468.
12-13-2014 #154
Registered User
- Join Date
- May 2001
- Location
- Mesa, Az.
- Posts
- 1,434
Originally Posted by 71CUTTYS
Yes it was a hand made piece. I've got a lot of photos of it. Pm me if you like close ups.Phillip
64 Studebaker Daytona Twin Turbo- http://bit.ly/1SgxQ0g
65 Cutlass F-85 - http://bit.ly/1W4lJm4
12-17-2014 #155 Registered User
- Join Date
- Dec 2011
- Posts
- 120
I purchased the Olds Engine from Paul, I have that bracket and as a matter of fact will not be using it, I have switched over to a serpentine set up Originally Posted by 71CUTTYS
1965 442 "Project Old Mobile"
01-29-2015 #156
Registered User
- Join Date
- May 2001
- Location
- Mesa, Az.
- Posts
- 1,434
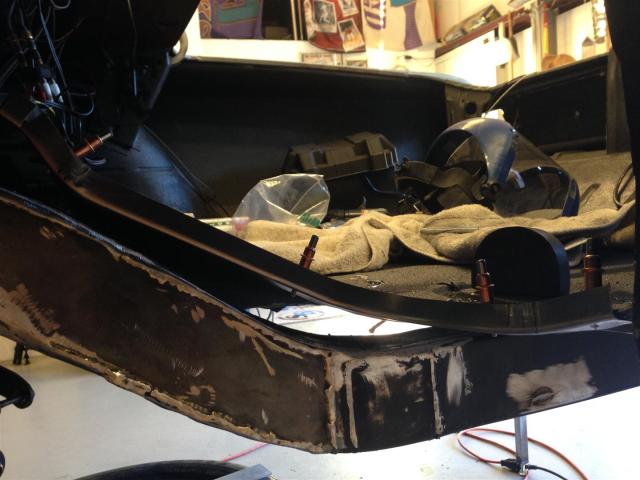
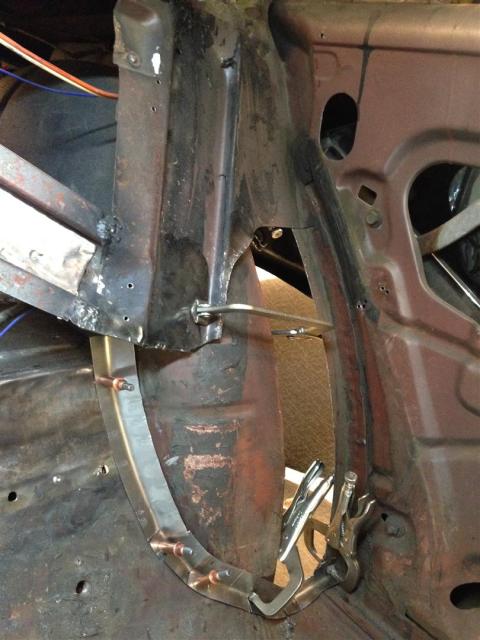
I've been working on mini tubbing the Olds using one of the ABC performance kits. So far I am glad that I purchased the kit as it has definitely saved a lot of time and energy. I have noticed differences on the BOP frame vs. the frames they show in their instruction manual. Not huge differences but enough to make me rework a few things. Here are a bunch of photos i've taken along the way. I've pretty much got the drivers side tacked all together. Also note that I'm redoing the C notch as well.
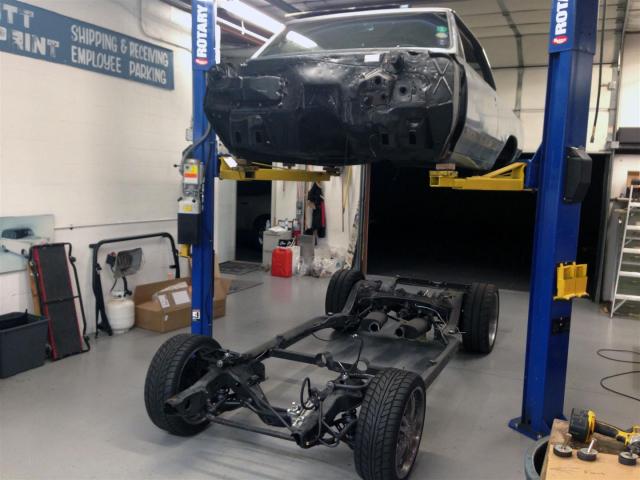


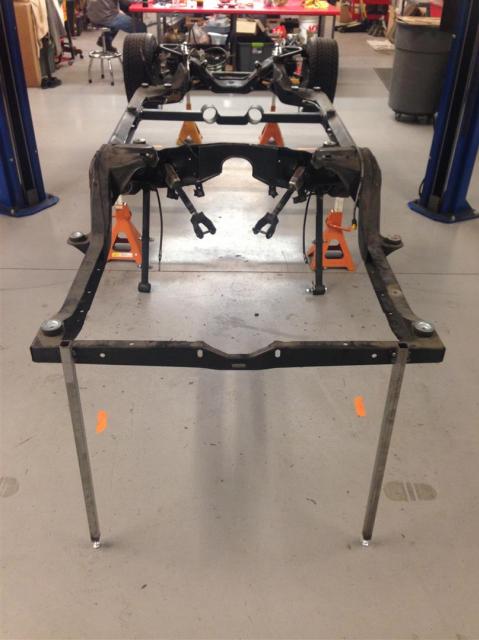


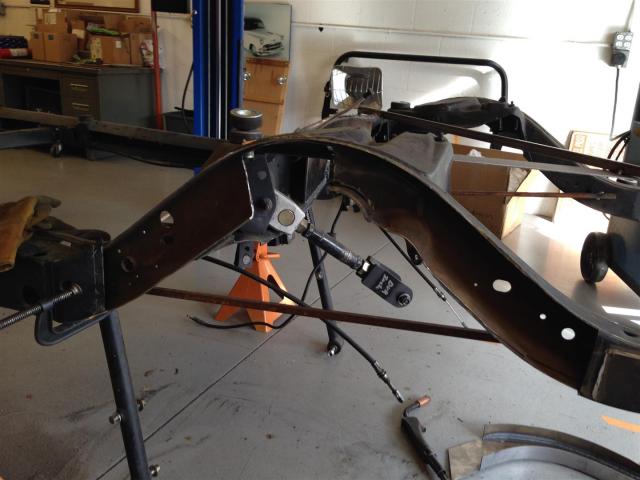

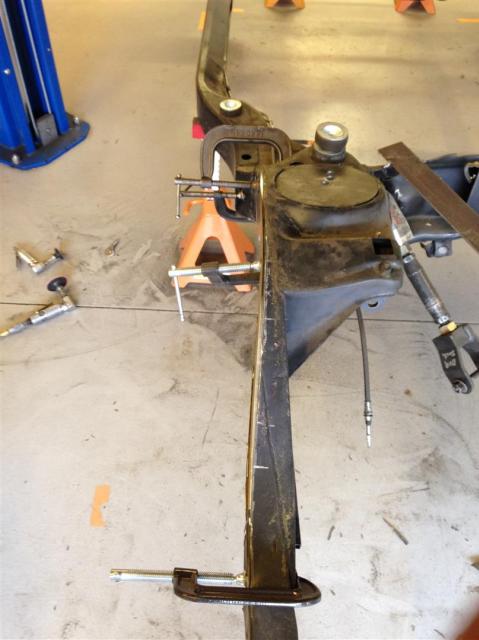

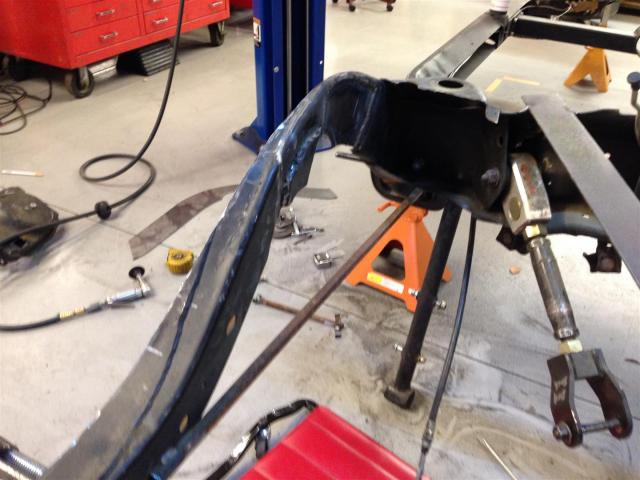
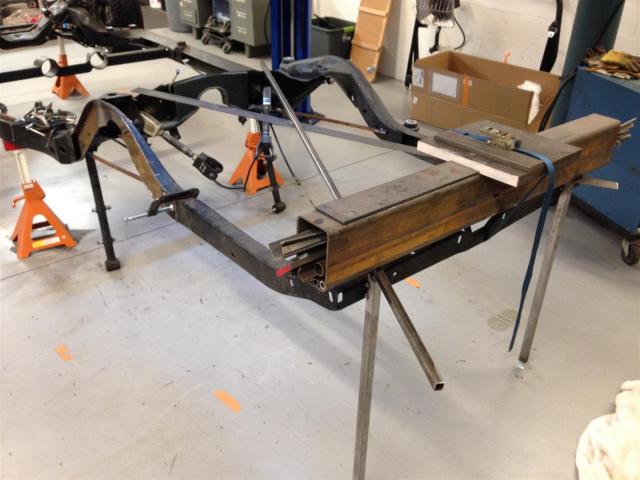
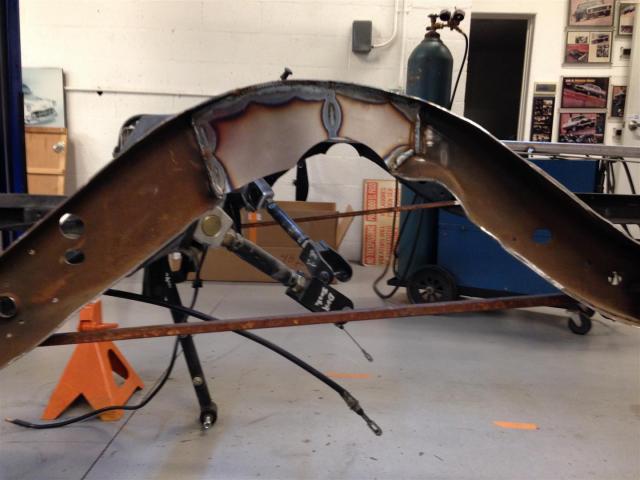
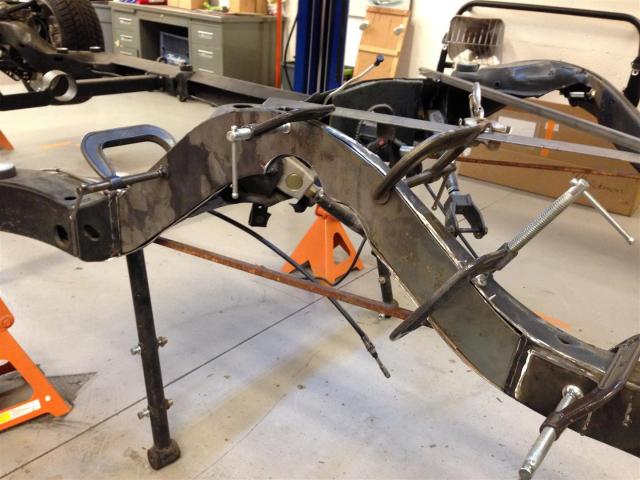

That's where I'm at right now.Phillip
64 Studebaker Daytona Twin Turbo- http://bit.ly/1SgxQ0g
65 Cutlass F-85 - http://bit.ly/1W4lJm4
01-30-2015 #157
Registered User
- Join Date
- May 2011
- Posts
- 311
Moving along well Phil great welds! I'm just about done wiring everything and may put the dash in next week or so.
64 F-85 post car Resto-Mod project-my RV when I retire
02-26-2015 #158
Registered User
- Join Date
- May 2001
- Location
- Mesa, Az.
- Posts
- 1,434
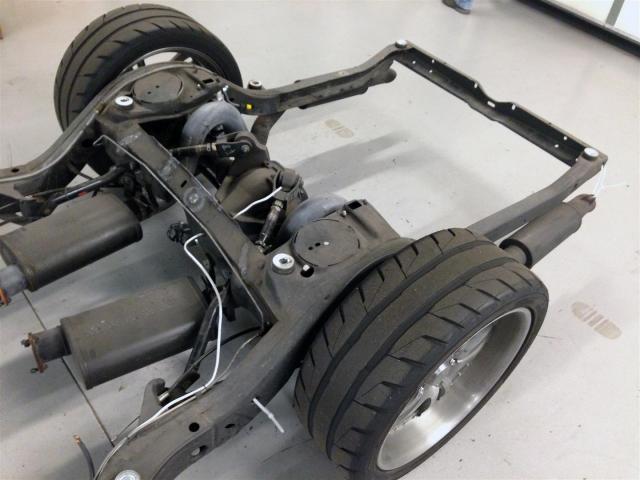
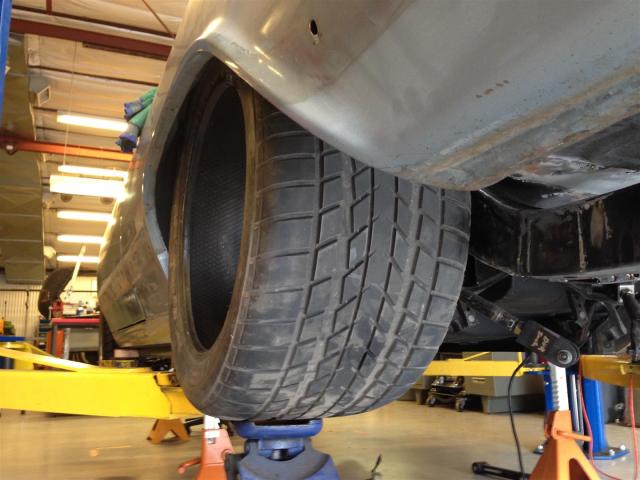
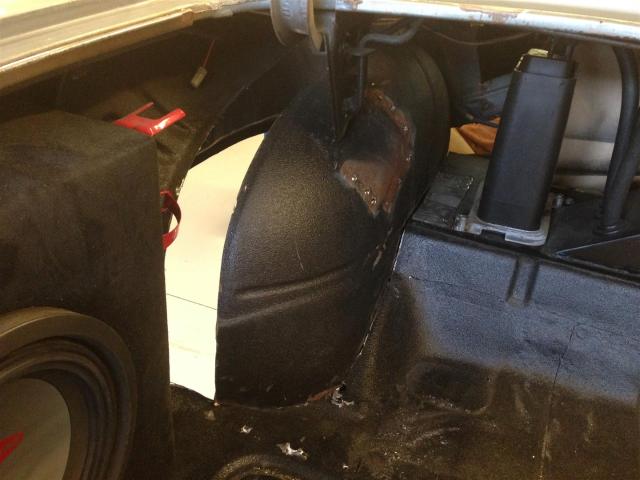
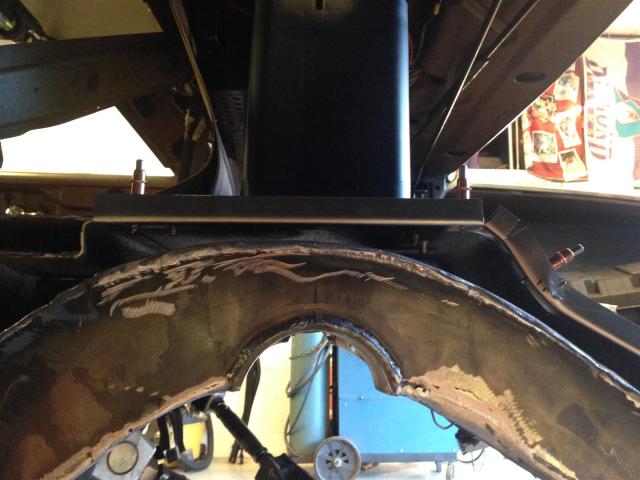
We're plugging away on the Olds trying to finish up this mini-tub project so we can send the car out and have it blasted. Basically the frame portion of the project is done. It took me right at 20 hours to do the labor. I could probably shave about 5-6 hours off of that if I did it a second time. If you are thinking of doing this PM me and I can send you some "pointers" that aren't in the instructions. Also took a little longer because I re C-notched the car at the same time. Last night we started cutting out the drivers side wheel tub after removing the trunk side body mounts. We had to stop and remove some dynomat so I took the opportunity to mock up an 18x12 and a 315 tire just for some inspiration. Since we don't have the inner tub out all the way the tire doesn't quite go in like it will. But it was still nice to get an idea..
Phillip
64 Studebaker Daytona Twin Turbo- http://bit.ly/1SgxQ0g
65 Cutlass F-85 - http://bit.ly/1W4lJm4
02-26-2015 #159
Starting The Transformation
- Join Date
- Jan 2015
- Location
- Charlotte, NC
- Posts
- 309
she's looking right!
03-05-2015 #160
Registered User
- Join Date
- May 2001
- Location
- Mesa, Az.
- Posts
- 1,434
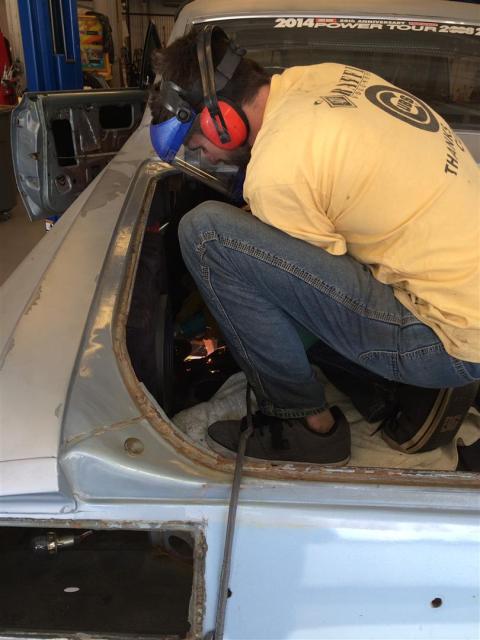
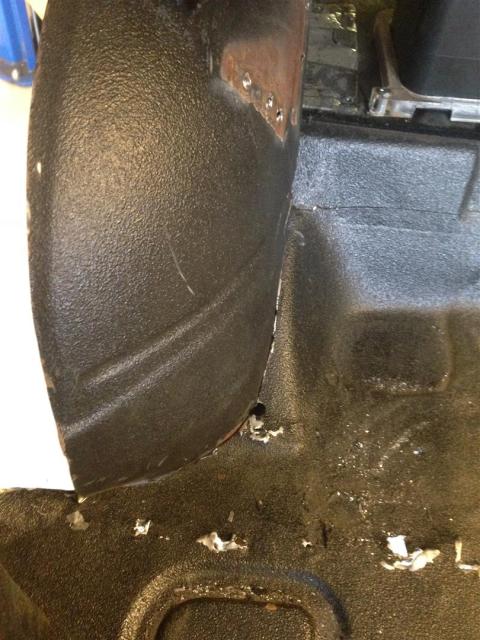
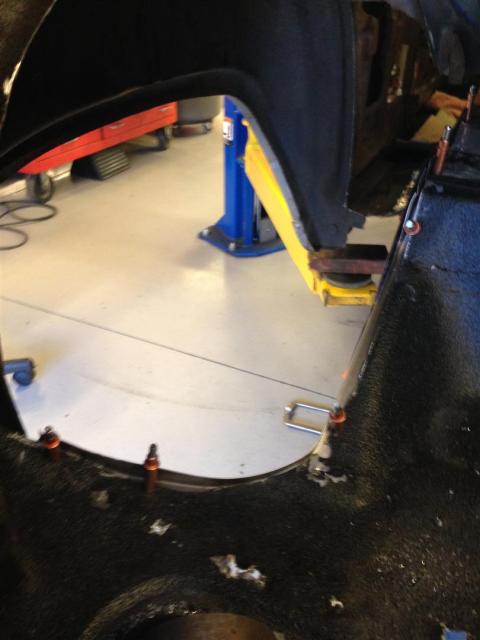
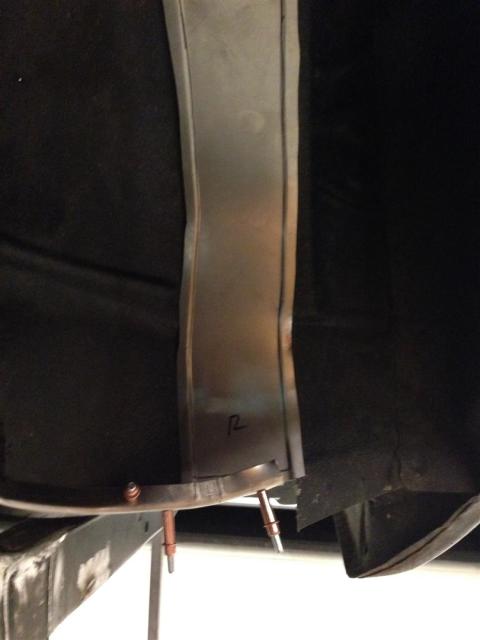
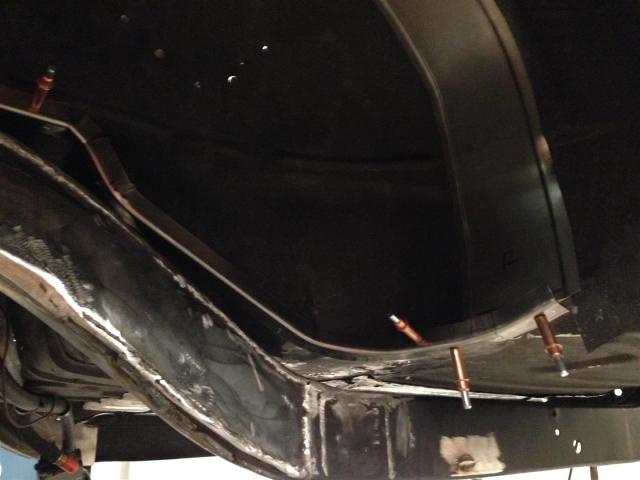
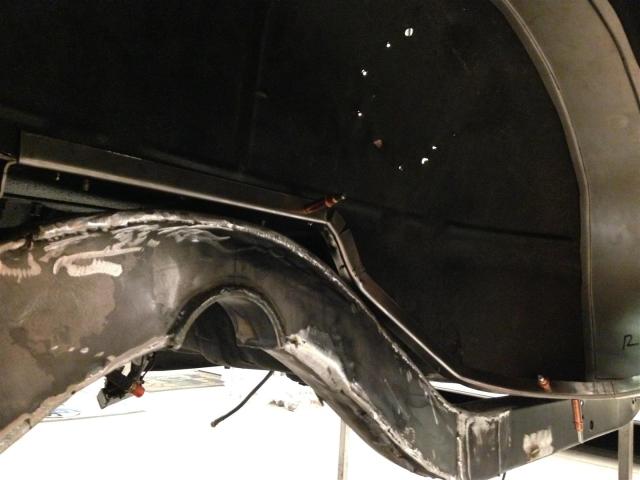
I've been working away on the driver's side wheel tub. I decided to trim off the original transition and to just build a new one. I plan to plug weld it to the body and the tub to it. I also started mocking up the filler strip. It's a 3" strip with 1/2" on either side to plug weld. I think I might leave a little more room on the next one or perhaps make a replacement for this one.. We'll see. Here are some pics of where I'm at so far.. Thanks for looking!
Phillip
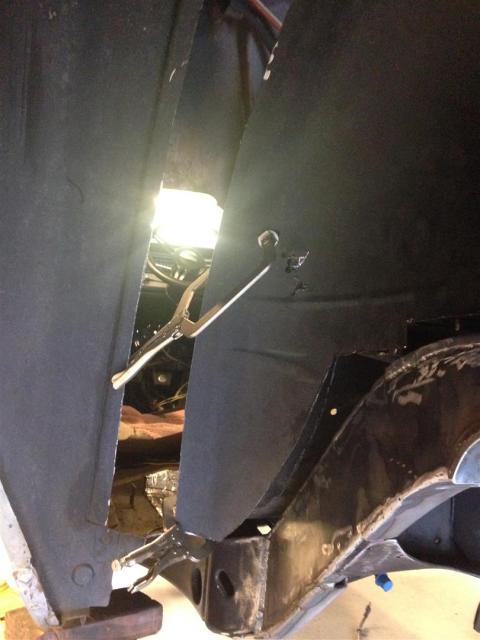
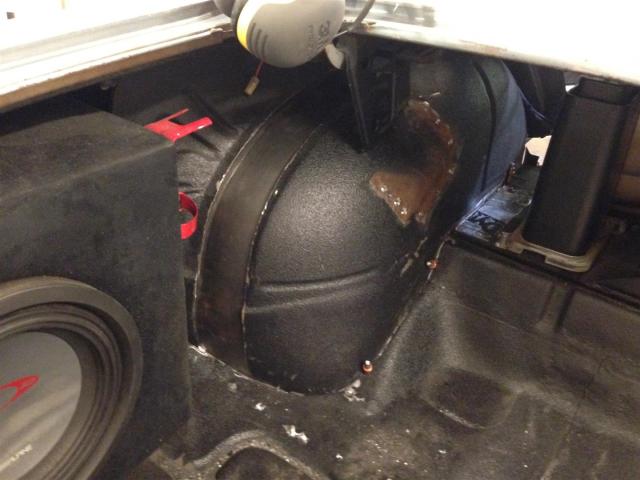
Now that the wheel tub is removed I can slide the 315 all the way under the car. This is a mock up tire and measures 12.5" bulge to bulge.


I ordered some more Clecos to help with the project as about 3/4 of my stock is currently holding the tail end of my Studebaker together! Ha-ha. Either way. Thanks for looking guys.Phillip
64 Studebaker Daytona Twin Turbo- http://bit.ly/1SgxQ0g
65 Cutlass F-85 - http://bit.ly/1W4lJm4

 Reply With Quote


