


Results 1,241 to 1,260 of 2412
Thread: $5000 budget Mustang
-
08-24-2010 #1241
 Registered User
- Join Date
- Dec 2004
- Posts
- 333
>now carbon fiber, to do it the right way, not so much.
CAn you expound ? I have heard that
1) CF is more delicate when handling and cutting
2) it tends to curl up at the edges while curing, especially in mold less construction.
Why else would it be more difficult to work with ? You don't have to vacuum bag it except to cure problem #2. I'd be interested in your experiences.
-
08-24-2010 #1242 Registered User
- Join Date
- Apr 2005
- Location
- dayton, oh
- Posts
- 952
ok, well, I must admit I've never used CF. but I did stay at a Holiday Inn Express last night. Originally Posted by preston

here's what I've gathered:
- the dry fabric itself is very hard to deal with. you need to tape everywhere you cut so the fabric doesn't fray
- FG can use poly resin versus CF must use epoxy resin. epoxy is actually better, but harder to deal with
- IMO, to do CF right is to vacuum bag it. otherwise you've just got a fiberglass part that has a pretty black pattern. that means extra equipment and more work
- it's a lot more expensive, which makes screw-ups expensive
08-24-2010 #1243 Registered User
- Join Date
- Jul 2008
- Location
- Dallas, TX
- Posts
- 260
Well, if you want to make something out of carbon fiber and you're going to paint it, I'd imagine aligning the weave isn't as critical. Many CF hoods and other parts are fiberglass reinforced, so essentially they use the CF as decoration. To make a CF part truly light weight requires more than just brushing on resin and adding layers like we'd do with fiberglass... It can be done, but a lot of the weight would be because of excess resin.
Aren't production CF parts made of that impregnated cloth that has the resin in it or something, reducing the amount of resin needed?'69 Chevelle - LQ4/T56
'71 GMC SWB Fleetside - LM7/AR5
08-24-2010 #1244
Registered User
- Join Date
- Dec 2004
- Posts
- 333
Yes, high quality CF is made with pre-preg which has the resin already impregnated in it with the correct amount. However to cure it requires an autoclave which is an oven that also creates atmospheric pressure, so it is out of reach for most peopl especially on automotive scale parts. Even a small autoclave is probably a bit spendy. I believe parts going in the autoclave still require some bagging or absoprtion ply too, so its not as easy as just laying it down.
08-24-2010 #1245 Registered User
- Join Date
- Apr 2009
- Location
- san diego
- Posts
- 5,101

I am a test/design engineer for a aerospace company. i have done the composite layup classes so I know how they are built. This way I know how to design something from CF that can be manufactured.
We use prepreg and dry cloth. But we vaccuum bag all parts in an autoclave. The resin cures around 300F. The aligning of weave is to ensure a uniform stiffness across a part that is larger than the width of a roll of CF.
If you want to know something specific ask me.My build thread: https://www.pro-touring.com/showthre...ing&highlight=
The mustang build thread: https://www.pro-touring.com/showthre...el)&highlight=
08-24-2010 #1246 Registered User
- Join Date
- Dec 2005
- Location
- Maryland
- Posts
- 1,863
Its all mute for us regular guys any way, to build a one off part in carbon would cost more then I'd be willing to pay. A buddy gave me a roll of glass matting, so I shouldn't have more then $150 in the thing.
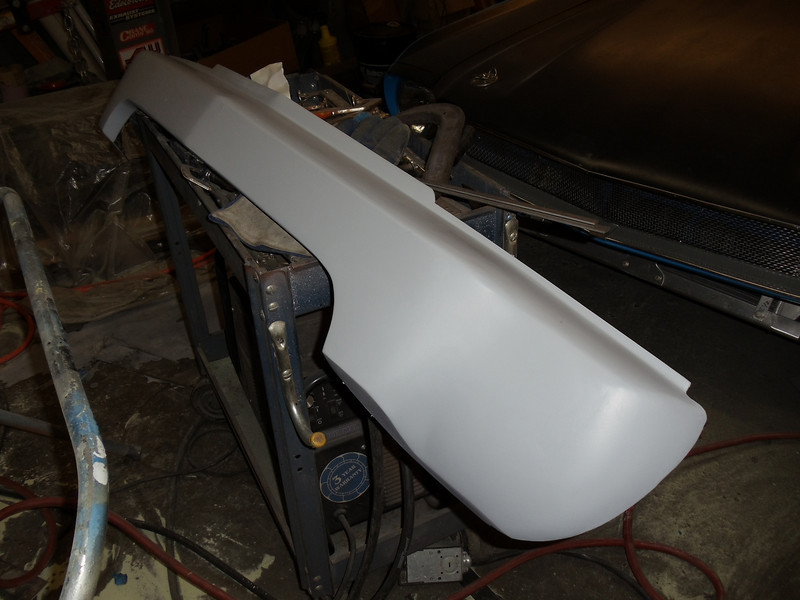
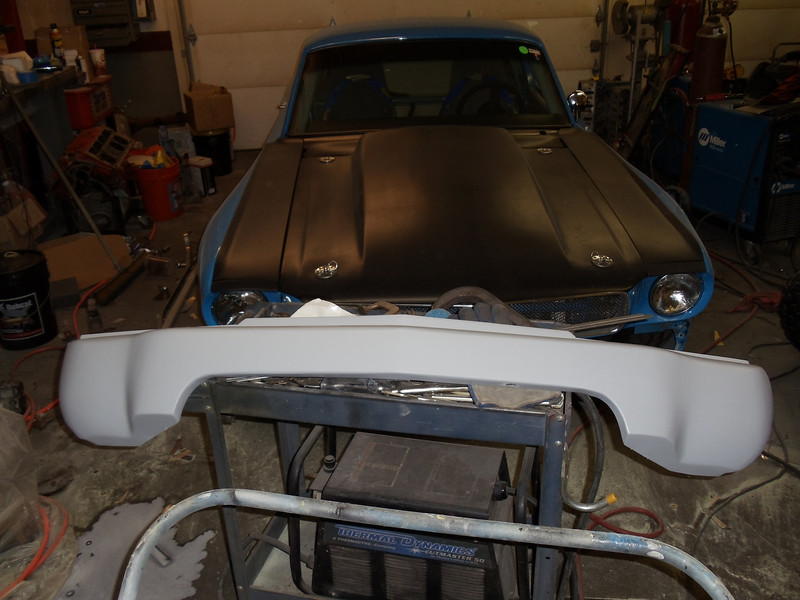
Got most of the sculpting done, have to refit it to the car again, prime it a couple more times, and start spraying gelcoat, and laying fiberglass. I'll let you know how bad it is. Ron
 Ron Schwarz
08-24-2010 #1247 Registered User
- Join Date
- Aug 2008
- Location
- new braunfels, tx
- Posts
- 545
that steel part looks great! how much does it weigh? how much weight can you hope to drop w/ a fiberglass version?

08-25-2010 #1248
Registered User
- Join Date
- Dec 2005
- Location
- Maryland
- Posts
- 1,863
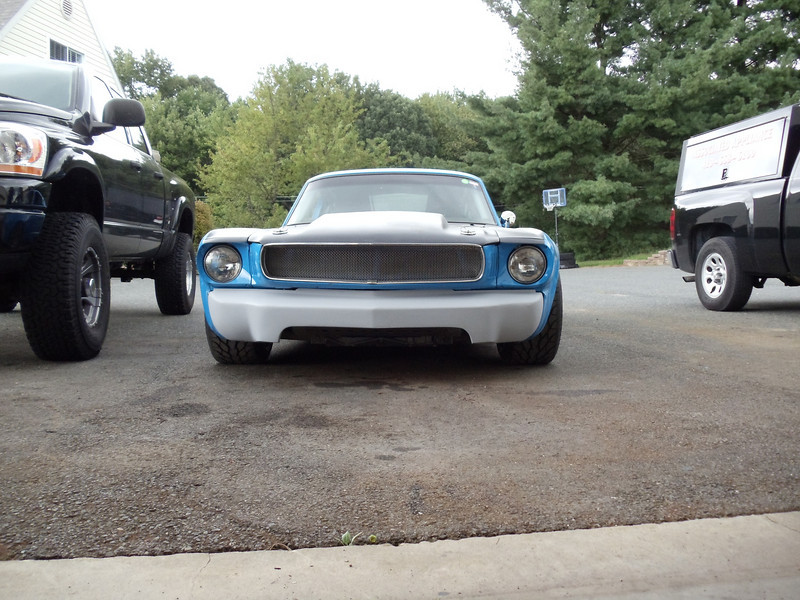
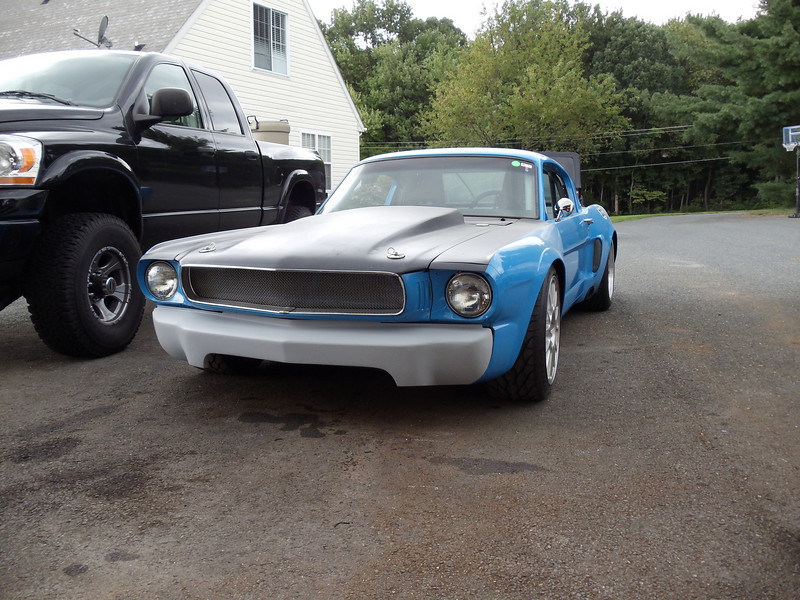
I knew the bumper was just going to be a plug for the fiberglass mold, so I built it out of metal out of my scrap barrel. Its just tacked together, so I really can't use this as a finished part. The bumper probably weighs between 15 - 20 lbs. I would think the glass part will be half that.
Ron Schwarz
08-25-2010 #1249
Registered User
- Join Date
- Jun 2010
- Posts
- 38
Dayum! That looks awesome.
08-25-2010 #1250 Registered User
- Join Date
- Aug 2004
- Location
- Rustburg, Virginia
- Posts
- 3,436
+1 great job...."AGAIN!", Ron. You just keep on hitting the big home runs. Can't wait to see the finished deal w/ splitter and all attached. Originally Posted by Dan S.
1970 RS/SS350 139K on the clock:
89 TPI motor w/ 1pc rear seal coupled to a Viper T56 via Mcleod's modular bellhousing w/ hydraulic T/O bearing from the Viper, 12 bolt rear w/ 3.73 gearing, SC&C upper control arms, factory lowers with Delalums, C5 brakes at all four corners, Front Wheels 17x8's with Sumi 255/40/17 and Rear Wheels 17x9's with Sumi 275/40/17.
Brief description of the work done so far can be found here: http://www.nastyz28.com/forum/showthread.php?t=112454
08-25-2010 #1251
Registered User
- Join Date
- Dec 2005
- Location
- Maryland
- Posts
- 1,863
Yeah, well the fiberglass part isn't made yet. The jury is still out on the homerun, it may end up being a strike out. Ron
Ron Schwarz
08-25-2010 #1252
Registered User
- Join Date
- Apr 2009
- Location
- san diego
- Posts
- 5,101
How many layers of fiberglass are you going to use? I would guess with 2 layers that bumpers weighs in at 5-7 lbs. Unless you use too much resin.
My build thread: https://www.pro-touring.com/showthre...ing&highlight=
The mustang build thread: https://www.pro-touring.com/showthre...el)&highlight=
08-25-2010 #1253 Registered User
- Join Date
- Mar 2009
- Location
- overseas
- Posts
- 3,434
looks awesome!!!
Kevin S. (overseas in Germany)
1963 Chevrolet Impala 2d ht Coupe
www.CruznArt.com
CRUZN - Automotive Artworks
08-25-2010 #1254
Registered User
- Join Date
- Dec 2005
- Location
- Maryland
- Posts
- 1,863
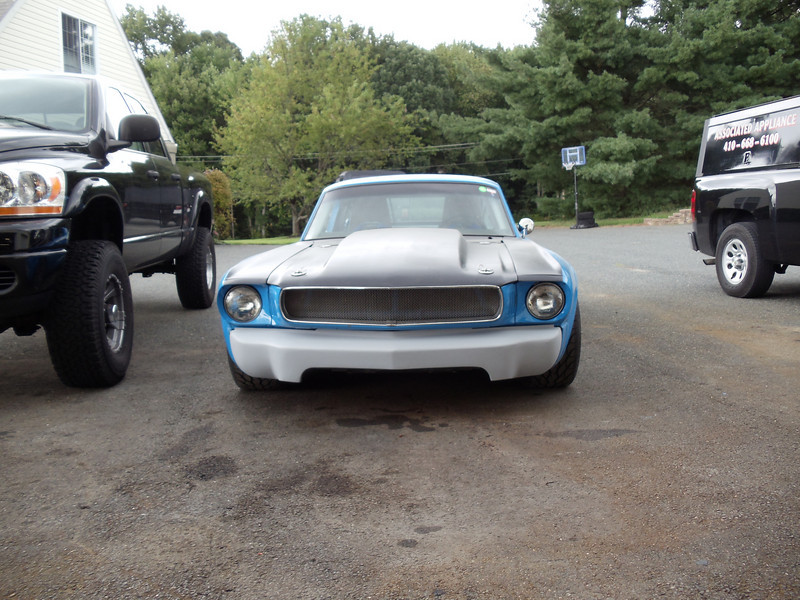
I will probably use 2 layers for the part, and 10 or so to make the mold.
 Ron Schwarz
08-25-2010 #1255 Registered User
- Join Date
- Nov 2007
- Location
- Lafayette, LA, USA
- Posts
- 485

So did you start with the original bumper and add too it or build the whole thing from scratch? It was kind of to tell from the previous page pictures.
Life's journey is not to arrive at the grave safely in a well preserved body, but rather to skid in sideways, totally worn out, shouting - Holy cow - what a ride!!!
See my build
Jason
08-25-2010 #1256
Registered User
- Join Date
- Mar 2009
- Location
- overseas
- Posts
- 3,434
like a glove
 Kevin S. (overseas in Germany)
1963 Chevrolet Impala 2d ht Coupe
www.CruznArt.com
CRUZN - Automotive Artworks
08-26-2010 #1257
Registered User
- Join Date
- Dec 2005
- Location
- Maryland
- Posts
- 1,863
Yes, the top is a cut down peice of the original front bumper off the car. Seems kind of boring without the splitter and strut rods. Still have to finish the ends to fit the car,but it is pretty close.
Ron Schwarz
08-26-2010 #1258 Registered User
- Join Date
- Dec 2007
- Location
- Lombard, IL
- Posts
- 545
I’m nostalgic and like all the old muscle car styling. When you first talked about changing the bumper, my first reaction was: NOOOOO! I love the old Shelby bumper with the chunk missing! I thought: you can’t do better than the tough guy look of the Shelby bumper……or so I thought
But once again, you’ve somehow improved that car.
That looks really cool, so far. I can’t wait to see the finished product.
Your project thread is one of my favorites on the site, and one of a handful of reasons I go to the Motor State Challenge.Dan
1971 Chevelle Maliboo Convertible 496/4L80E
1956 210 2 door Sedan 8-71 blown 468/T400
08-26-2010 #1259 Registered User
- Join Date
- Nov 2008
- Location
- TN
- Posts
- 959
I can hardly wait to see it with the splitter and the strut rods!! Looks Mean! And not cookie-cutter like a shelby style! Even though they do look nice.
Benjamin
Twin Dusters
'72 Plymouth Duster "Aero Duster" project
'72 Plymouth Duster "Daily Duster" project
https://www.pro-touring.com/showthre...RO-DUSTER-quot
08-26-2010 #1260
Registered User
- Join Date
- Apr 2005
- Location
- dayton, oh
- Posts
- 952
nice work so far Ron!
have you thought about how you're going to attach the FG bumper? you might need to fab some brackets while you're at it

 Reply With Quote


