


Results 181 to 200 of 261
Thread: First-Gen S10 Corner Carver
-
01-04-2014 #181
 Registered User
- Join Date
- Jul 2012
- Location
- Iowa
- Posts
- 399

Its been a long time since ive read thru your thread. Why are your headers in such a goofy spot? It almost looks like your engine is off set to the passenger side. Good work on the gas tank,Ive been spending alot of time thinking about how to do this on my s10 and Im going to have to steal a few of your ideas.
Miles Boyer
The car hobby is dangerous,if the speed doesn't kill you, the cost of parts will.
91 V8 S10
88 Cutlass Pro-Tour
97 Chevy lifted Z-71
96 Corvette
-
01-05-2014 #182
 Registered User
- Join Date
- Sep 2006
- Location
- New York, NY
- Posts
- 458
I used these mounts:
http://www.jagsthatrun.com/Pages/Par...onvsnMnts.html
If you look earlier in the thread you can see pics of the original exhaust I did and it is possible to get it routed without having to clearance the frame or body. It's just a straighter shot that I have now.
-
01-31-2014 #183
Registered User
- Join Date
- Sep 2006
- Location
- New York, NY
- Posts
- 458
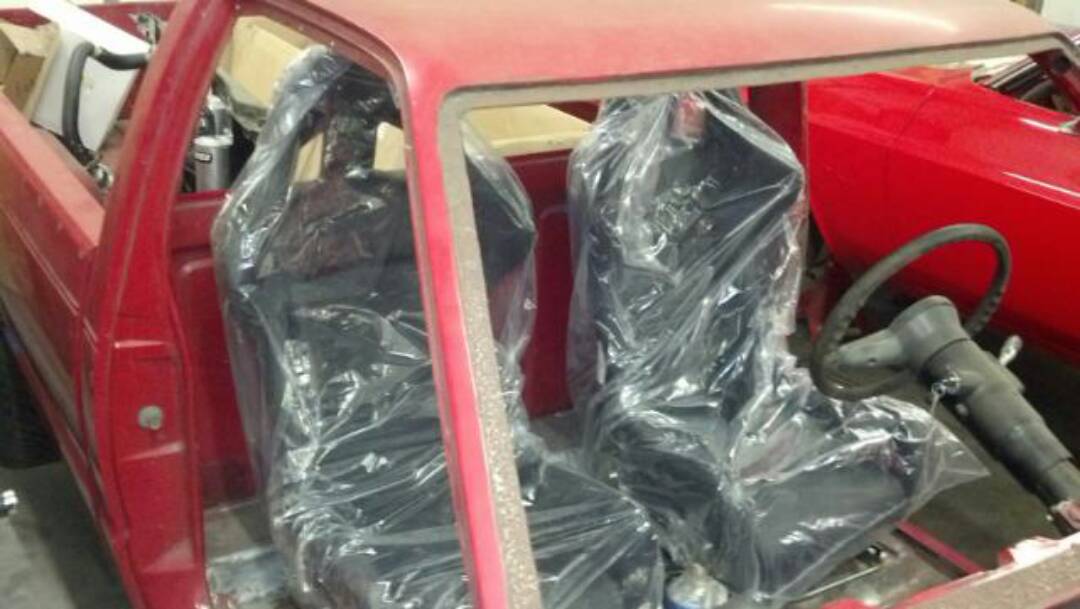
Cobra Suzuka (wide version) seats arrived. Custom ordered in black vinyl and without logo.
Installed with Planted aluminum side brackets and Cobra sliders. The planted side brackets were much cheaper than the competition and look to provide a great range of adjustability. The sliders needed an extra hole drilled into them and the grab handle was too narrow, so Randy bent up a piece of 4130 to replace the grab handle.

-
01-31-2014 #184
 Registered User
- Join Date
- Apr 2005
- Location
- Chicago
- Posts
- 2,788
I really like those seats.
marty-mj
GarageScene.net High Speed Welding KDHotrods RecoveryRoomInteriors WegnerAutomotive Autometer Ride-Tech
-
02-21-2014 #185
Registered User
- Join Date
- Sep 2006
- Location
- New York, NY
- Posts
- 458
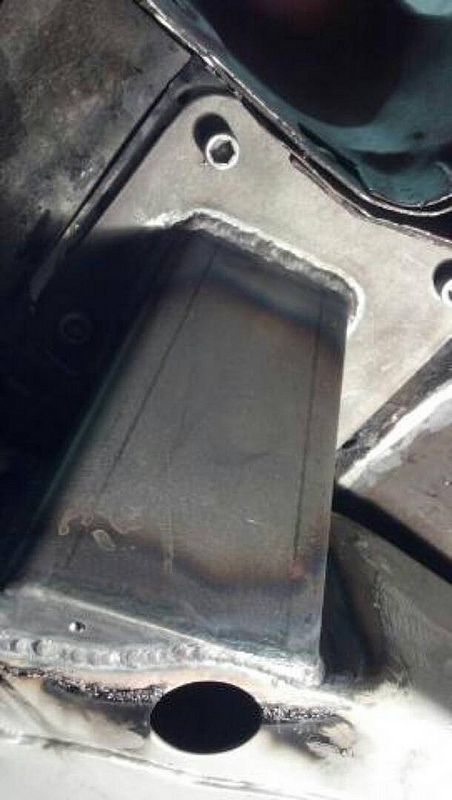
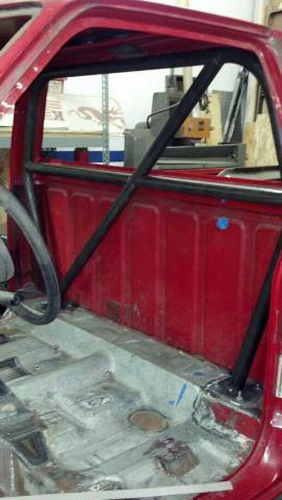
From the factory, the cab is mounted on rubber bushings that support sheet metal standoff boxes welded to the underside of the cab floor. Unfortunately, the rubber bushings are exactly where the landing points of the roll bar main hoop and door bars should be.
In order to weld in a roll bar that can bolt to the frame, those standoff boxes were cut off so the cab floor is flat in that area (but still multiple layers of sheet metal). A plate is welded to the top side of the floor with perimeter bolt holes. New cab mounts were welded to the frame with matching plates so that the cab may be bolted to the new mounts. The roll bar will then be welded to the plates on the top side of the cab floor.
Rear cab mount:

Front cab mount:
Roll bar:
04-30-2014 #186
Registered User
- Join Date
- Sep 2006
- Location
- New York, NY
- Posts
- 458
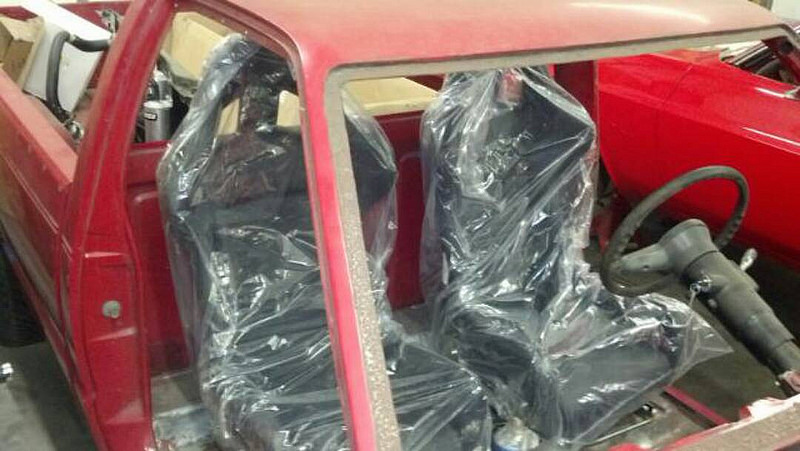
Cobra Suzuka seats (black vinyl) mounted on sliders:
Door bars have enough room so that they don't get in the way of elbows:

Rear bars can be unbolted with the tube junction and a plate in the bed to allow the bed to be removed:

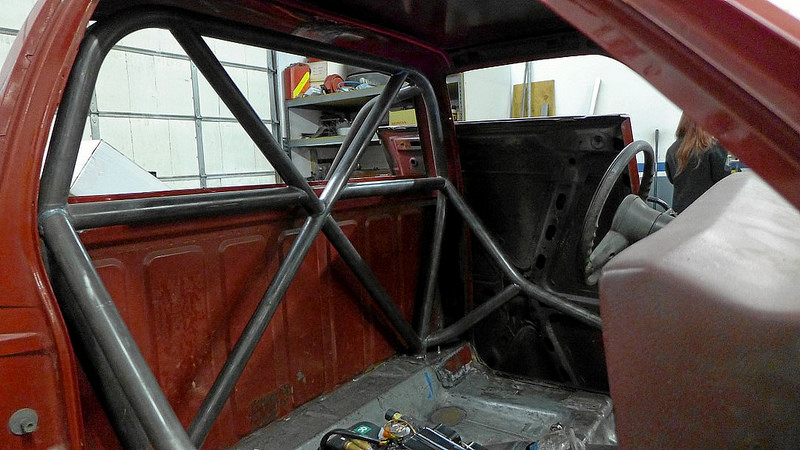
Roll bar finished:
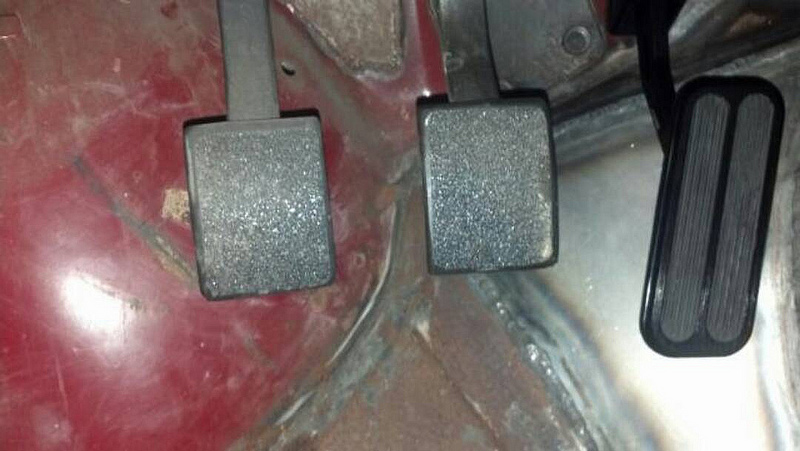
Throttle pedal mounted:
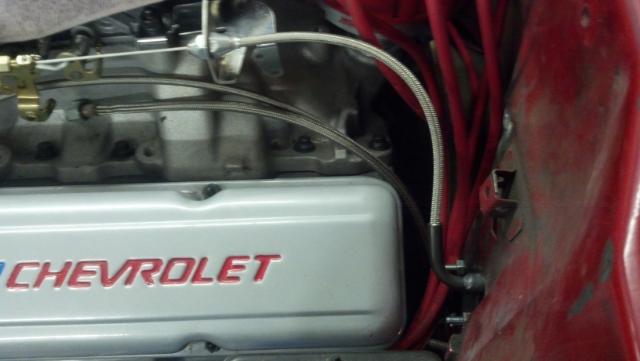
Throttle cable:
Air conditioning compressor and clearanced valve cover:

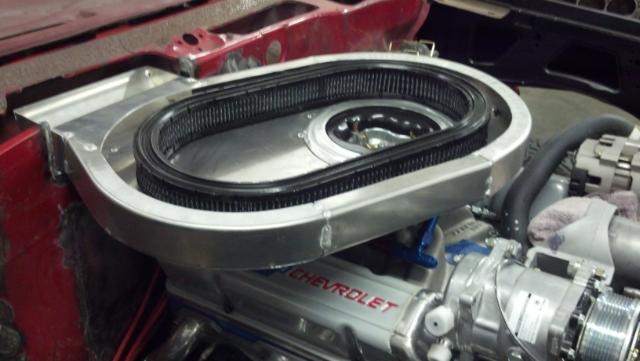
Cowl air box and air flow director carb insert:
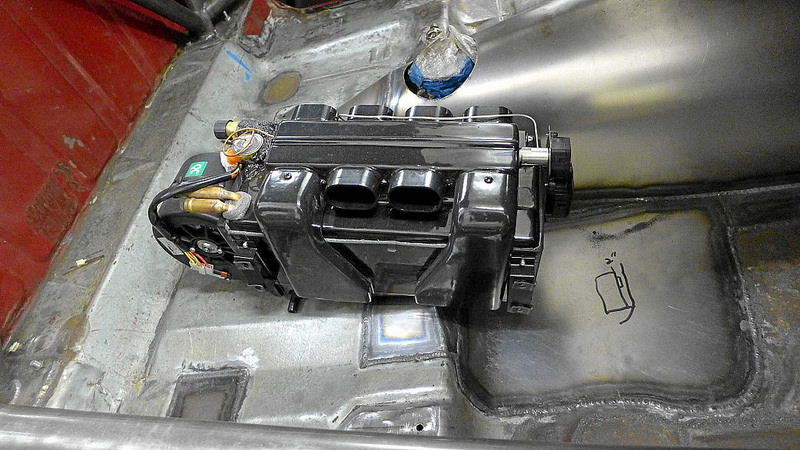
Air conditioning compressor to be mounted behind glove box:
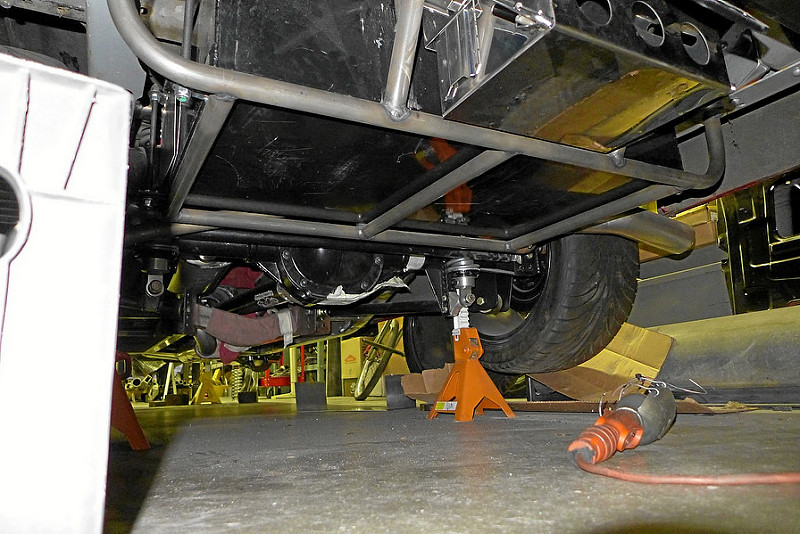
Carbon fiber driveshaft with CV front joint and 1350 u-joints, shot also shows exhaust exit:

Sway bar arms mocked up:

04-30-2014 #187
Registered User
- Join Date
- Apr 2005
- Location
- Chicago
- Posts
- 2,788
Looks awesome.
If you put Sonoma GT cladding (which I may donate when you get closer to completion) this would trump Syborg tt for suremarty-mj
GarageScene.net High Speed Welding KDHotrods RecoveryRoomInteriors WegnerAutomotive Autometer Ride-Tech
05-01-2014 #188
Registered User
- Join Date
- Sep 2006
- Location
- New York, NY
- Posts
- 458
I'd love some cladding, then I could get some wider tires under there! I think the syclone guys are fitting 315s in the back without notching the frame or doing a backhalf. Would need to do alot of work to the bed pieces though to make it fit the longbed. More like a phase 2 type of project.
You probably saw some familiarity in the door bars, I just showed Randy pictures of Syborg's door bars to copy.
05-22-2014 #189
Registered User
- Join Date
- Sep 2006
- Location
- New York, NY
- Posts
- 458
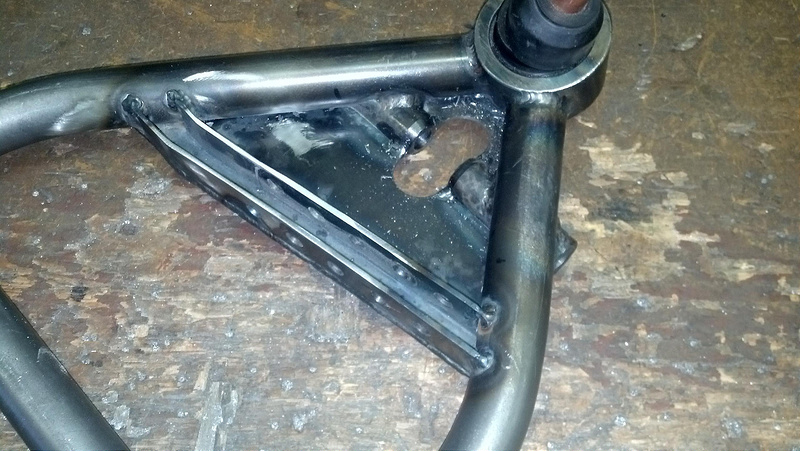
Sway bar arm:

Lower a-arm gusseted and with sway bar tabs adjustable for rate.
07-09-2014 #190
Registered User
- Join Date
- Sep 2006
- Location
- New York, NY
- Posts
- 458
A minor update, getting closer to driveable. The plan is to make the truck fully driveable, test drive it, make any necessary modifications, and then take it all apart for powdercoating and paint before final re-assembly. Items remaining to be installed before test drive and paint:
Brakes
3/16" hardline
Front MC to line lock to front calipers
Rear MC to rear proportioning valve to rear calipers
In-cabin Wilwood remote adjuster for balance bar
In-cabin Wilwood proportioning valve
Lokar handbrake and cables
New brake cooling duct backing plates (current LG Motorsports ones would force an unworkable hose routing)
Fuel
1/2" hardline feed and return
PTFE flexline around pump and fuel log (maybe used BMRS lines)
Fuel tank to 100 micron filter to Weldon A600-A inline fuel pump to fuel log
Fuel log to Weldon A2040 return regulator to tank
Fuel tank vent system to be determined (rollover vent or air/liquid separator or charcoal canister system)
Fuel tank filler (looking for ideas on a filler location, currently thinking behind taillight)
Wiring
install Summit Racing wiring harness and master disconnect
Steering
install rebuilt tilt column (replacing non-tilt column and adding delay wiper and cruise control)
NRG short hub adapter (GM spline to momo bolt pattern)
Works Bell GTC quick release tilt (for easier entry/exit)
Momo Mod 78 350mm leather steering wheel
Miscellaneous
Rear differential vent
Fire extinguisher system
Core support and fenders mocked up
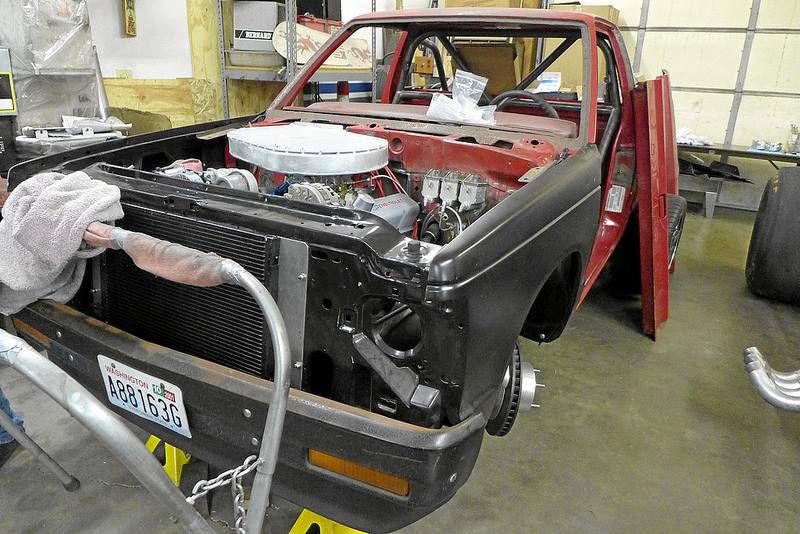
You can see a peek of the new carbon fiber driveshaft here
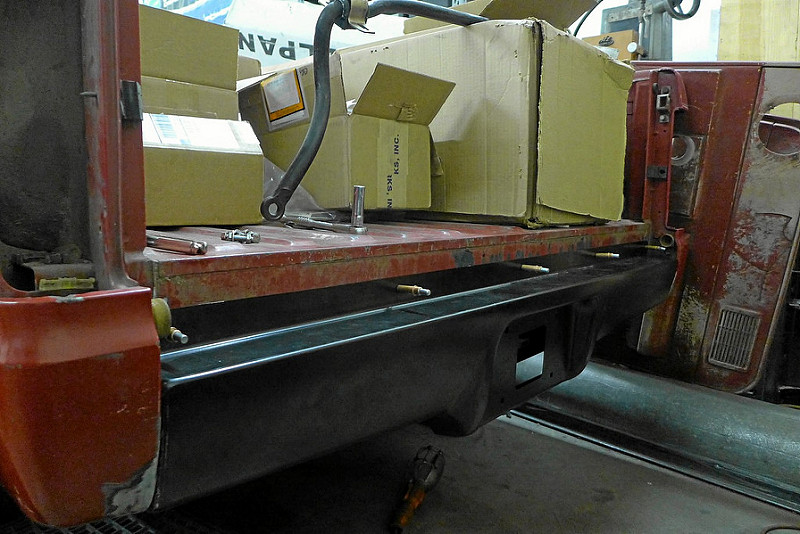
Roll pan mounted
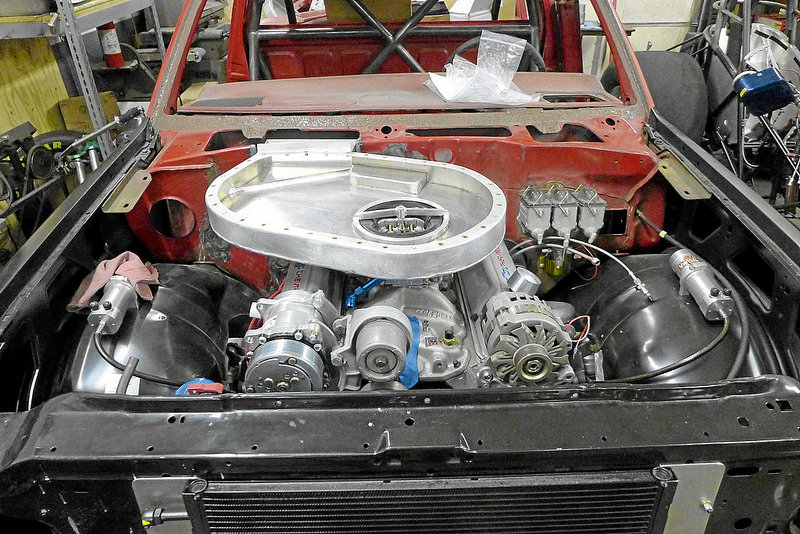
Cowl air pan version 2 (first version was a bit too thin and warped after welding). It will be covered on top with a clear lexan sheet.
Shot of the front suspension with the inner fenders installed. The brake cooling duct will likely not work, so Randy is looking for another solution that clears the tires at all steering angles and suspension travel.

07-09-2014 #191
Registered User
- Join Date
- Apr 2005
- Location
- Chicago
- Posts
- 2,788
Draw the air in through the frame rails and dump it out right at the hub as it's much easier to route then trying to clear everything with the tubing.
 Originally Posted by jerome
 marty-mj
GarageScene.net High Speed Welding KDHotrods RecoveryRoomInteriors WegnerAutomotive Autometer Ride-Tech
07-11-2014 #192 Registered User
- Join Date
- Jan 2008
- Location
- Charlotte
- Posts
- 1,295
Where is that swaybar arm from?
The part that has the adjustable holes in it - and the splined end and the pinch bolt in it.
The Pfadt arms on my setup are taking a dump (cant replace them as they are out of business) - and that is a very similar design there...2005 LeMans Blue Corvette w/ T56 & Z51 & C6Z06 Brakes, Build Thread: https://www.pro-touring.com/showthread.php?64496
2005 GMC Sierra 2500HD LLY / Allison
2014 Chevy SS LS3 / 4 Door
07-11-2014 #193 Registered User
- Join Date
- Nov 2006
- Location
- Ma.
- Posts
- 5,569
Nice project I like the air box.
Wayne
Car FINALLY home !!!!!! lol
Project FNQUIK https://www.pro-touring.com/showthre...ghlight=FNQUIK
07-12-2014 #194
Registered User
- Join Date
- Sep 2006
- Location
- New York, NY
- Posts
- 458
Thanks for the suggestion, we're looking into it. Good idea, hope we have room there to do it. Originally Posted by syborg tt
They are steel arms from Speedway Engineering, which is the source for most aftermarket companies' sway bar parts. You'll need to bend them to fit and then drill the holes. I believe that specific arm is a 30 degree bend. Originally Posted by bonecrrusher
09-27-2014 #195
Registered User
- Join Date
- Aug 2012
- Posts
- 30
glad to see youre still keeping this thing going jerome. i have been lured back to this thread from searching google for exhaust terminator boxes installed in an s10. its crazy how similar our builds are, you just have more $$ than i, or they would be just about identical
 . im trying to figure out the best placement and packaging, but i cant decide any of that until i get my secondary length figured out. what data does pipemax need? worth the money? or would you mind running a sim for me?
12-03-2014 #196
Registered User
- Join Date
- Sep 2006
- Location
- New York, NY
- Posts
- 458
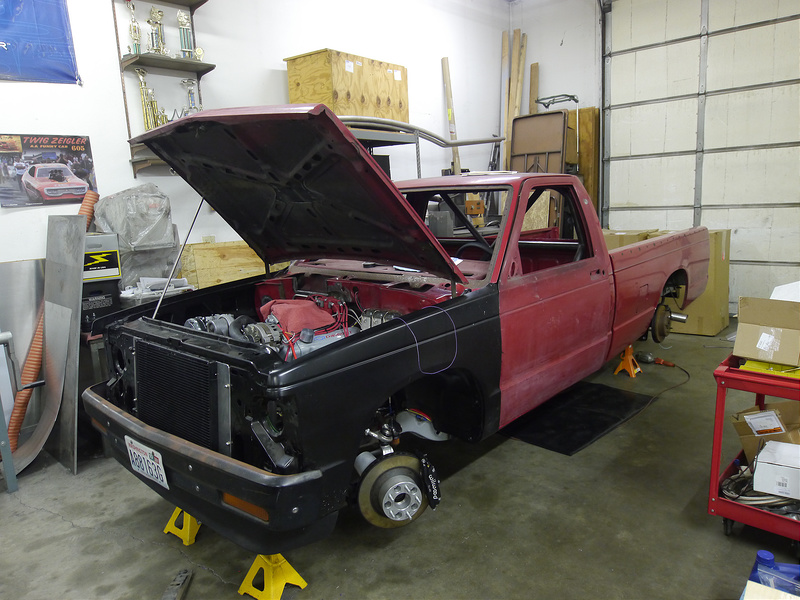
Fuel system done, wiring mostly done. Next step is finishing up some of the remaining fabrication:
Gas filler
Brake cooling ducts
A/C and heat plumbing
After all the cutting and welding is done, the plan is to rough fit the body and test drive it for a while before doing a complete teardown for chassis powdercoating and paint/body before final assembly
Video of first start:
12-03-2014 #197 Starting The Transformation
- Join Date
- Sep 2008
- Location
- Sacramento, CA
- Posts
- 410
I like it.
Carl Ogren - Sales and Tech
Email us to get your Chassisworks/TCP Equipped vehicle featured on Facebook!
Chris Alston's Chassisworks - Phone: 888.388.0297 ext 247
Chassisworks - TCP - Varishock - Component Drive Systems - KP Components
12-21-2014 #198
Registered User
- Join Date
- Aug 2007
- Location
- Albemarle, NC
- Posts
- 1,152
which frontccessory drive is that? and what did you need to do to make the sanden compressor firt it?
Michael Crawford
1970 plymouth Duster back under construction:
https://www.pro-touring.com/showthre...uring-makeover
1987 GMC S15 https://www.pro-touring.com/showthre...ct-drivabeater
12-22-2014 #199 Registered User
- Join Date
- Oct 2011
- Location
- Katy, Tx
- Posts
- 309
Very nice build. I wanted to do something like this with my 1st gen Ranger. Other projects have gotten in the way.
12-22-2014 #200
Registered User
- Join Date
- Sep 2006
- Location
- New York, NY
- Posts
- 458
I pulled it from a junkyard from an 80s truck SBC or 4.3L v6 (forget which), but it's also available new from GM. Originally Posted by dusterbd13
Vintage Air and Classic Auto Air both have brackets that fit them to the GM serpentine system. They should be able to give you the part number if you call, but let me know if you're having trouble finding it, I can dig it up.
Another batch of photos from the same time as the video update:
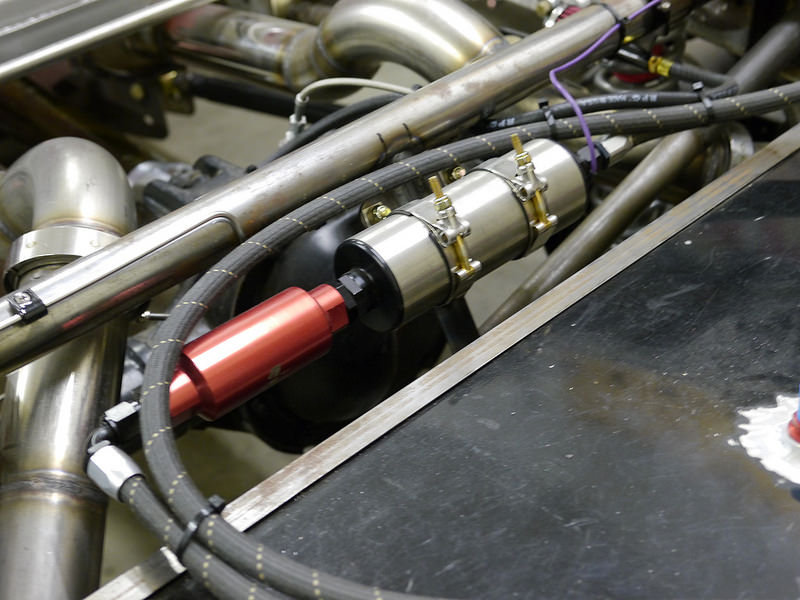
Weldon A600-A fuel pump, Aeromotive filter, Goodridge 910 teflon hose
Bumpstop added to front suspension, brake ducts still need to be figured out

Power steering hoses made

Remote starter solenoid only activates starter cable when cranking, 3-pack of MEGA/AMG fuses from battery to alternator charging cable, main harness power, and starter solenoid
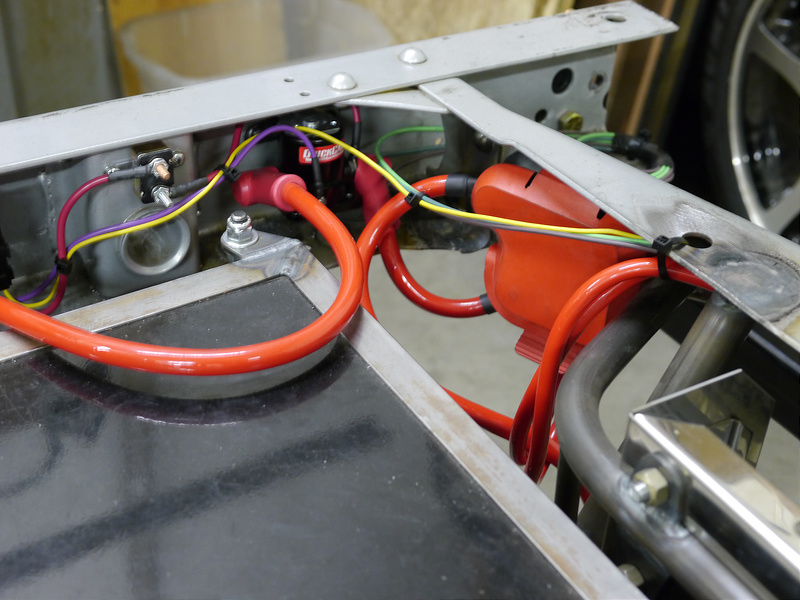
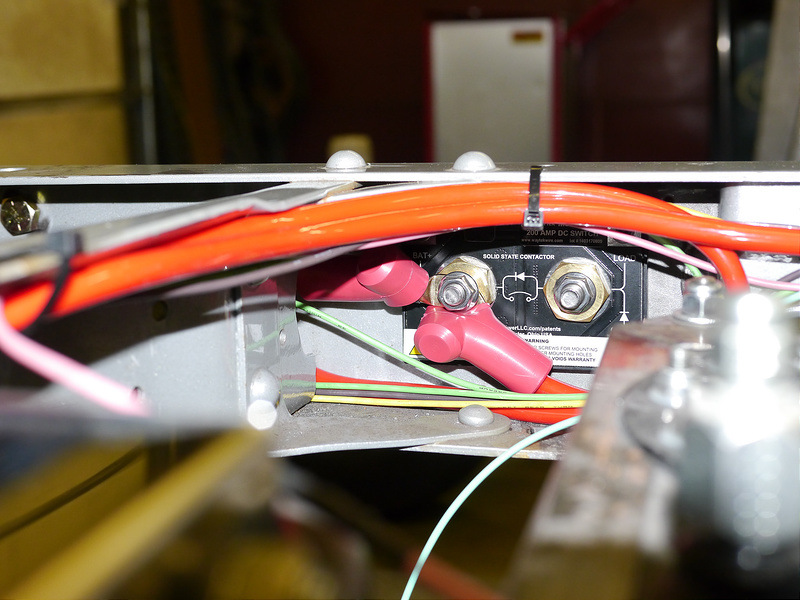
Battery cutoff switch. Solid state and can use any switch to trigger (currently bypassed, but will include a switch at rear of vehicle for safety workers as well as one in the cabin for emergency shutdown). It shuts down the main feed from the battery to the wiring harness. The alternator is fed back to the battery and does not get cut, allowing the alternator to safely spin down into the battery, but not keep the engine running since the battery to main harness is cut.
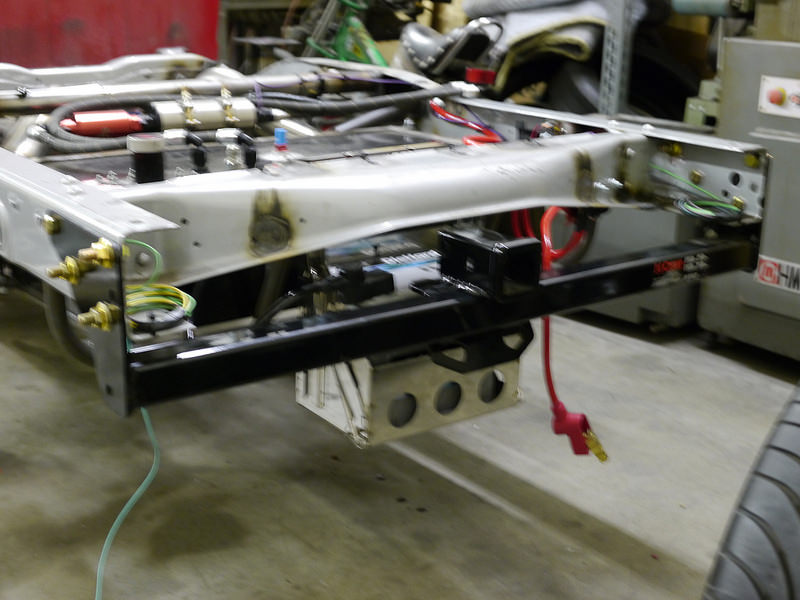
Sears Platinum AGM battery in dropdown battery tray (shown at lowest position). I believe these are rebranded Odysseys. Hitch may come in handy at some point. It will exit the roll pan behind the license plate and also protects the battery.
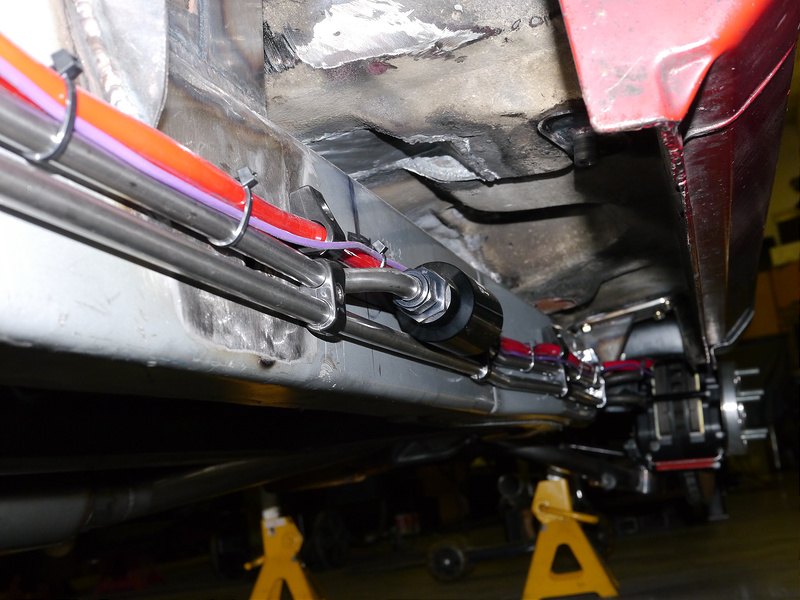
Stainless fuel lines, starter cable and Aeromotive filter running up the passenger frame rail. I will need to move these lines inside the frame rail, at least in the tire area for safety reasons in case of a blowout or a side impact.
Summit fuse panel mounted in driver footwell

Aluminum dash panel, VDO gauges, tilt column
NRG short hub adapter (GM spline to momo bolt pattern)
Works Bell GTC quick release tilt (for easier entry/exit)
Momo Mod 78 350mm leather steering wheel

Driveshaft Shop carbon fiber driveshaft (front CV joint not shown, rear is 1350 companion flange)

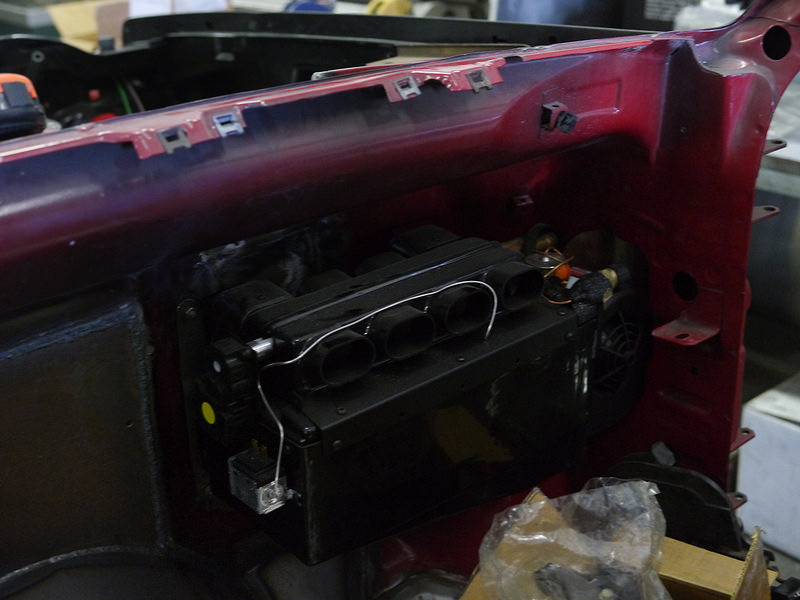
Classic Auto Air Street Rod Cooler
We put the bed on
Will be frenching this into the side of the bed


 Reply With Quote


