Results 601 to 620 of 862
Thread: The BAD AST Project - Faze II
-
04-06-2013 #601

 Registered User
- Join Date
- Mar 2004
- Location
- Mid-Michigan
- Posts
- 2,764

Thanks Wayne! Appreciate the comments!
It's a quiet weekend around our neighborhood. This is the 6th anniversary of my brother-in-law's death in a car accident while visiting his brother in Tennesee. The accident was 6 years ago today and he died early on the 7th. Just keep in mind that life is short, don't take anything for granted and give your loved ones a hug... You never know what can happen.
We got a bit more done on the enclosure today. Actually we got quite a bit done. All of the frame work for the enclosure is in and we got the two outboard ends of the top made.
Last week saw both top bars done and we had mocked up the rear pencil braces.
Today we made the front and rear pencil braces out of some 1/2" square tubing I had laying around.
We made some "feet" out of 16ga sheet, cut some 45's on the tubes and welded the feet on.
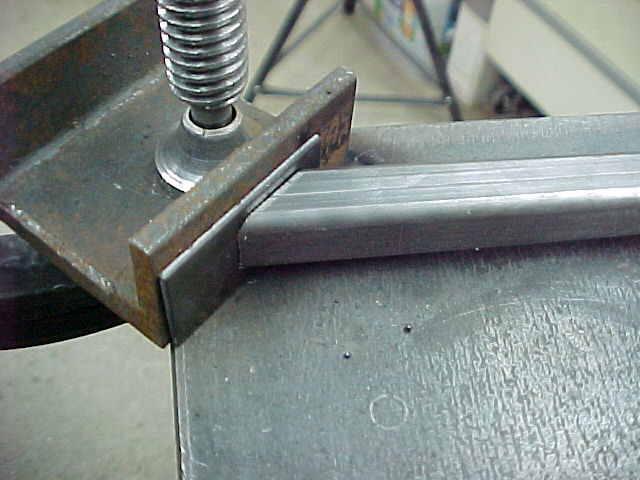
After we got the floor feet on we cut the tubes to length and welded on another foot to bolt the brace to the bottom of the cross bar.
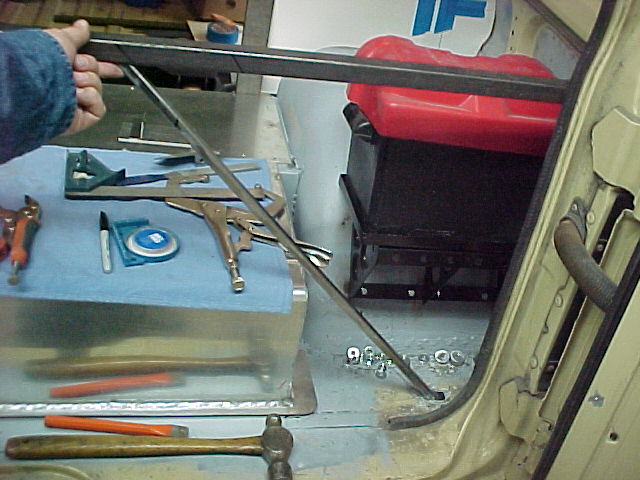
Two braces bolted in.
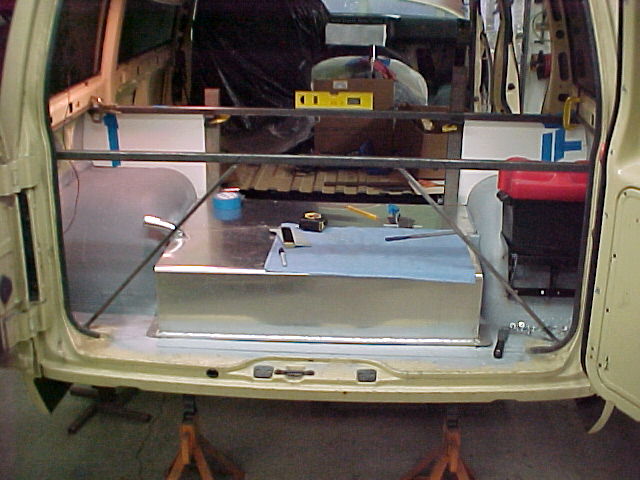
The drivers side.
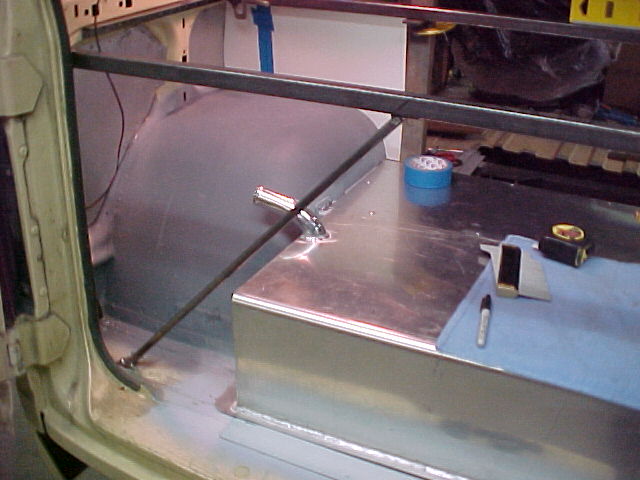
The passenger side. These little guys add a lot of support under that cross bar. You would be surprised...

You can also see in the pics that I got the front panel templates done. These fit fairly well and will seal up nicely with a little black RTV when the time comes.
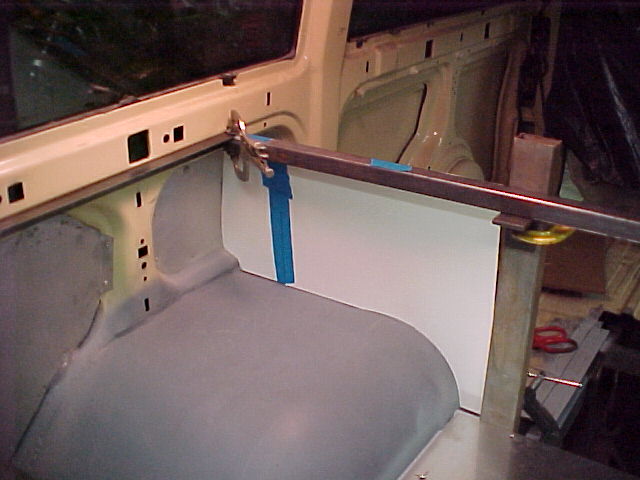
On that note, I have decided to make the enclosure panels out of the Roswell patterned Carbon Fiber. I ordered a 4 x 8 sheet of aluminum to use as a lay-up table (nice and smooth you know...).
I want the forward top corner to have a nice radius so we will bend up a length of that thin flashing on the big bender to lay the carbon fiber into to get a nice smooth finish.
We also got the forward pencil braces built and welded in the front bar and both braces. We built some feet for those also to weld to the side of the tub. We simply welded the brace to the top tube at the upper joint.
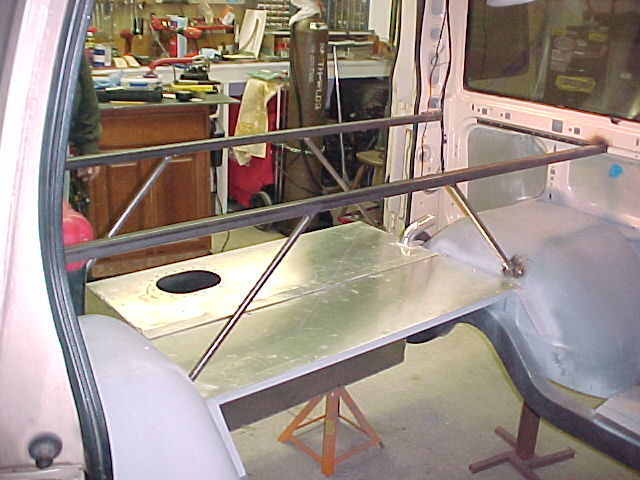
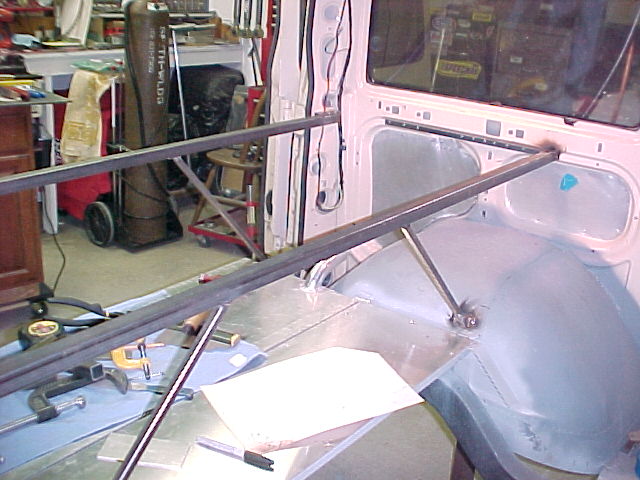
During the week I made templates for the rear corners where we had to fit the plates in and Mel cut the parts out on the stomp shear and bandsaw today.
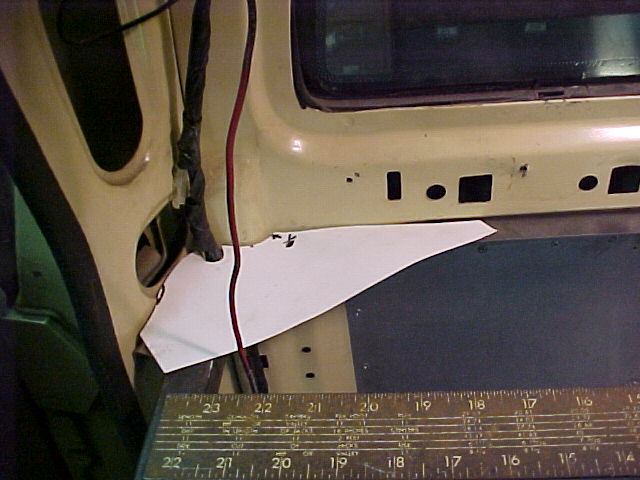
The passenger side.
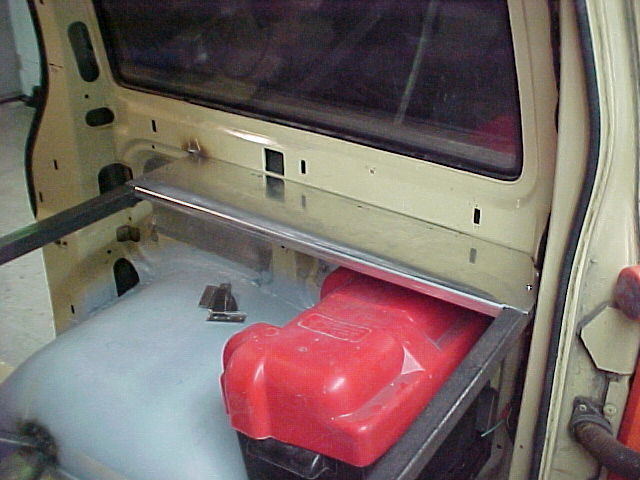
The drivers side.
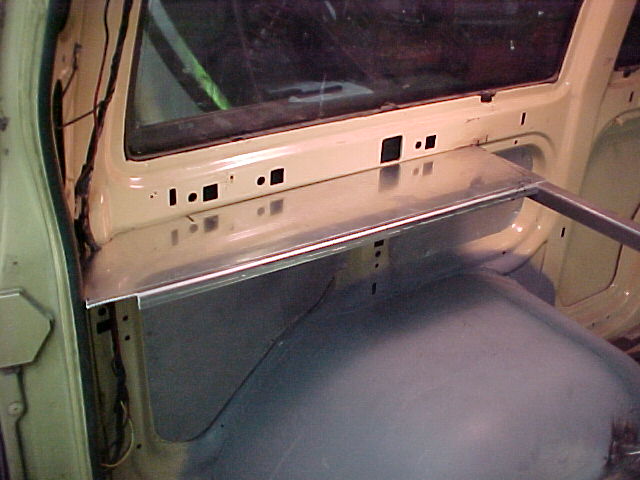
These will get riveted in once everything is painted.
I got the removable rear bars painted and put back in after Mel left. Looks pretty good and the bars are strong.
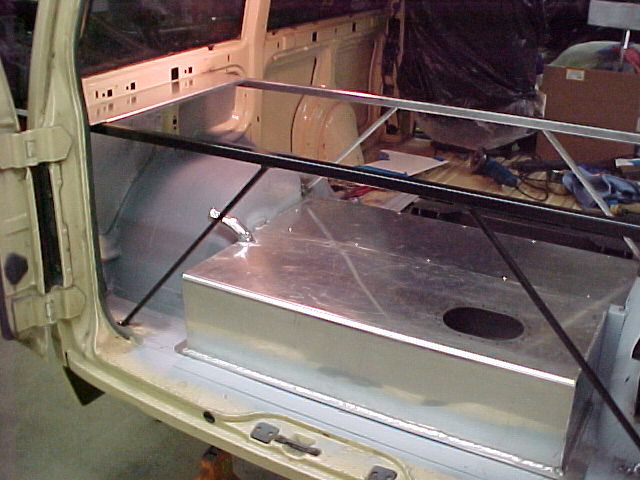
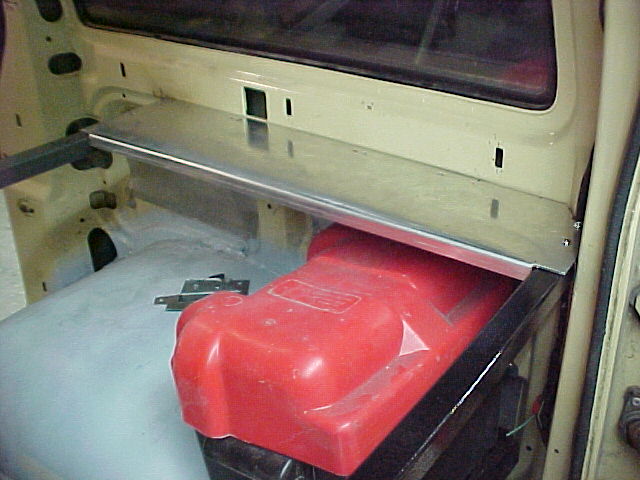
The two end panels will get covered by carbon fiber eventually...
That's it for today. Tomorrow I am replacing the water softener at my daughters house. Don't know if I'll get out on the van.
Thanks for looking
MarkMark:
"Bad Ast" Astro Van. Just because I did it... Doesn't mean it's possible...
This my Bad Ast thread...
https://www.pro-touring.com/showthre...roject-Faze-II
This is my Fotki album...
http://astroracer.fotki.com/
-
04-20-2013 #602
Registered User
- Join Date
- Mar 2004
- Location
- Mid-Michigan
- Posts
- 2,764
Got some work done on the van the past two weekends. I even got out on it one night during the week. Working on the big floor insert and rear enclosure. Tuesday it was real nice when I got home from work so I cleaned up all of the seam sealer on the floor insert and got another coat of primer on it.
I used a fiber stripping disc on the seam sealer. It cleans it up, knocks down any high spots and smooths it out when it starts to get hot.
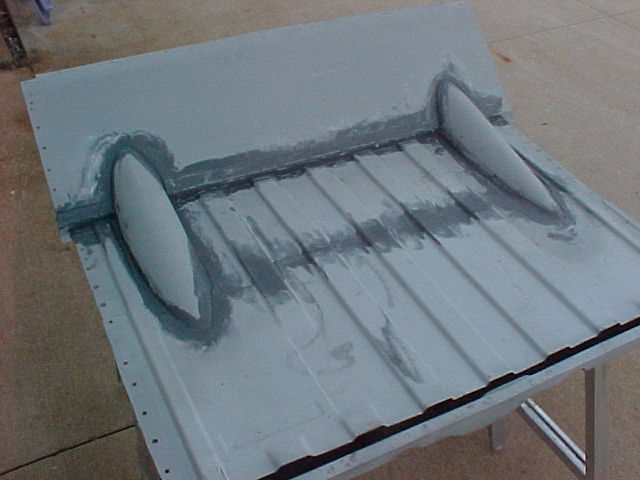
After some fresh primer this is ready to go in. The top side.
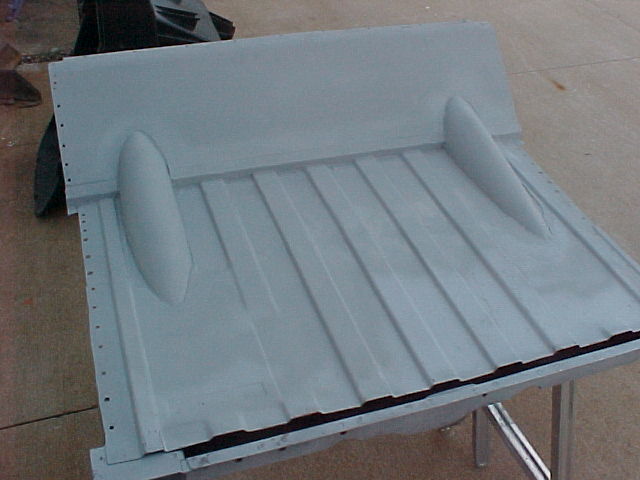
The bottom side.
 Mark:
Mark:
"Bad Ast" Astro Van. Just because I did it... Doesn't mean it's possible...
This my Bad Ast thread...
https://www.pro-touring.com/showthre...roject-Faze-II
This is my Fotki album...
http://astroracer.fotki.com/
-
04-20-2013 #603
Registered User
- Join Date
- Mar 2004
- Location
- Mid-Michigan
- Posts
- 2,764
This weekend prior Mel and I worked on the rear enclosure. I spent some time spreading seam sealer on the tubs and getting all of the joints packed. This is messy stuff.

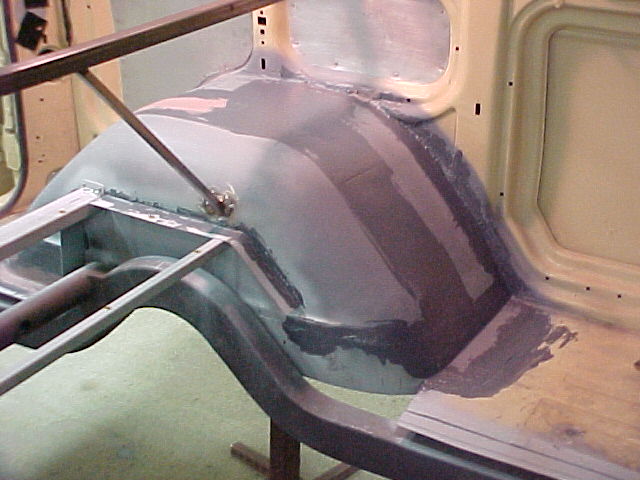
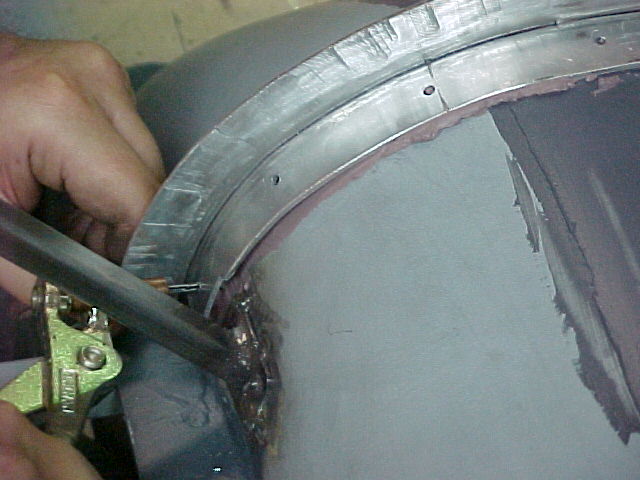
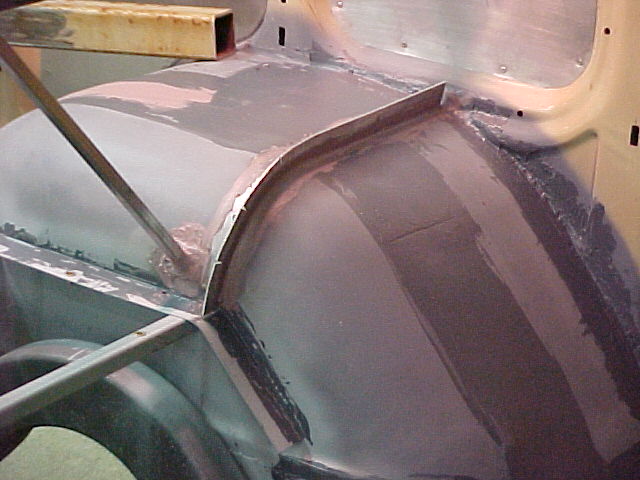
We also made up some flanges to rivet to the tubs to carry the bottom of the front enclosure panel.
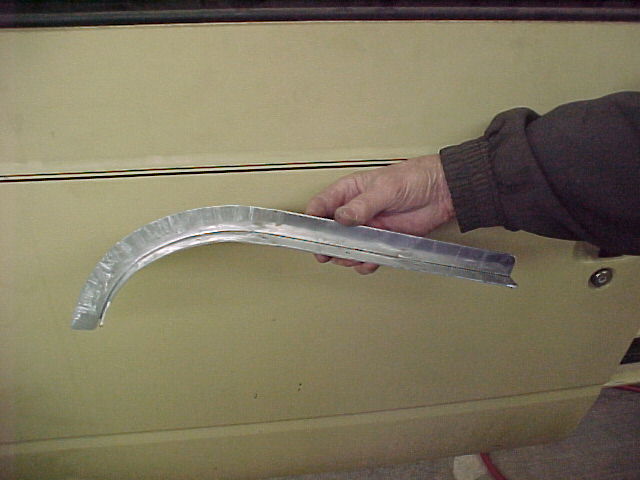
We made these out of .090 aluminum sheet. Bent them up on the 3 n 1 and ran them thru the stretcher dies to make the curve.
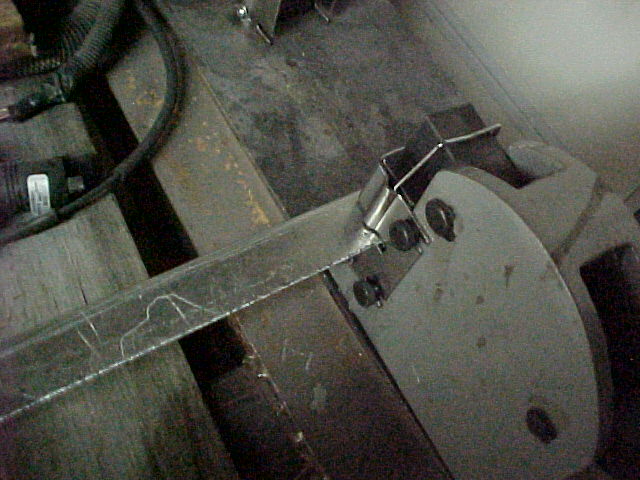
Me workin' hard...

The template...
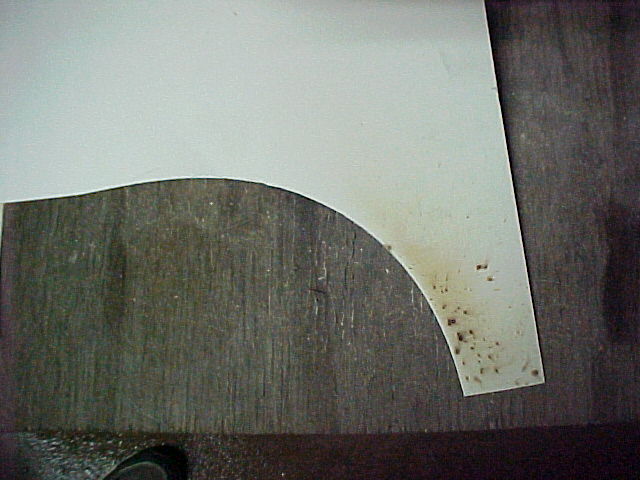
The fit...
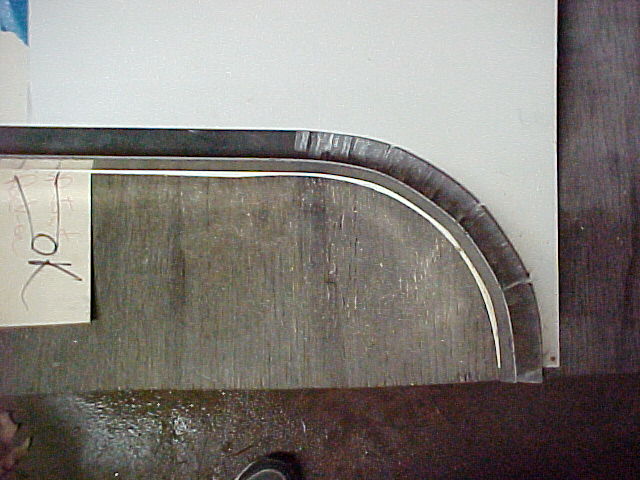
The final product...
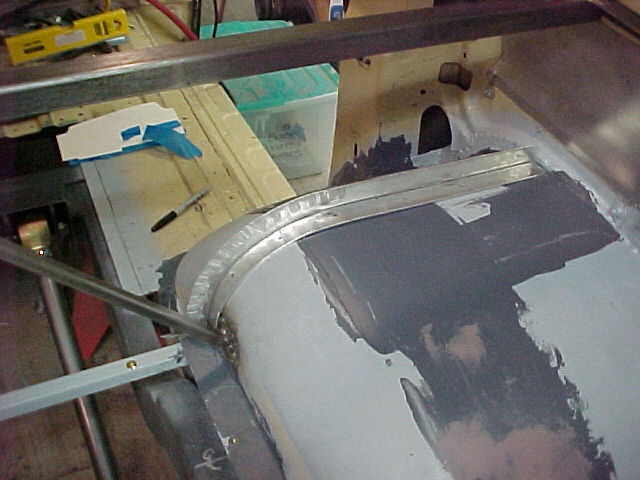
We got both sides in, seam sealed and riveted...
Trial fitting with a few clecoes
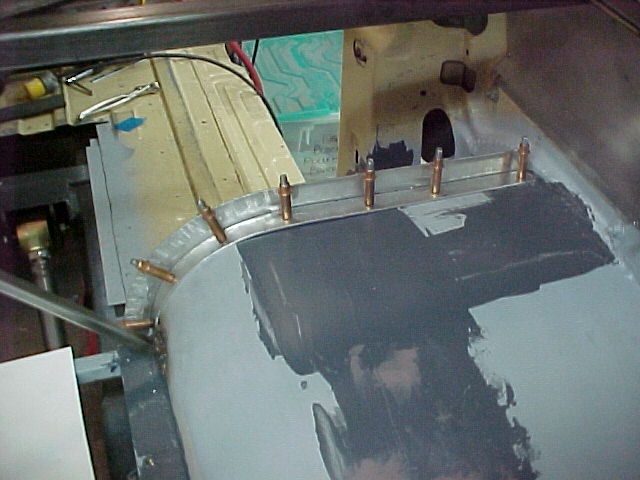
Setting them in place with a smear of seam sealer underneath. This is a clecoe going in prior to riveting.
The passenger side from the front.
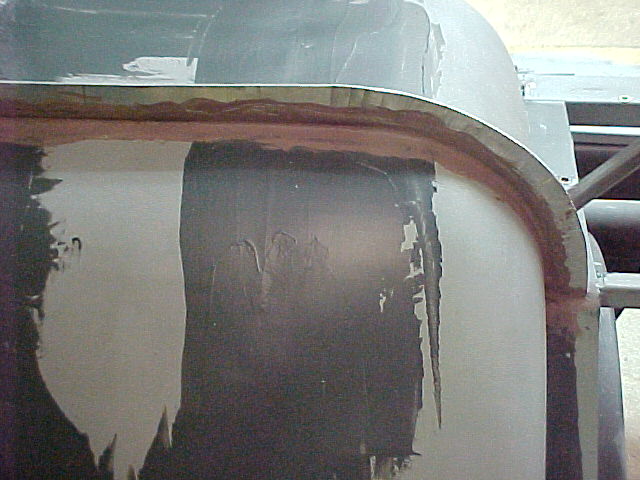
The drivers side.
Had a good day in the shop. Got a lot done and, at this point, I was hoping to be painting this stuff next weekend...

Thanks for looking
MarkMark:
"Bad Ast" Astro Van. Just because I did it... Doesn't mean it's possible...
This my Bad Ast thread...
https://www.pro-touring.com/showthre...roject-Faze-II
This is my Fotki album...
http://astroracer.fotki.com/
-
04-20-2013 #604
Registered User
- Join Date
- Mar 2004
- Location
- Mid-Michigan
- Posts
- 2,764
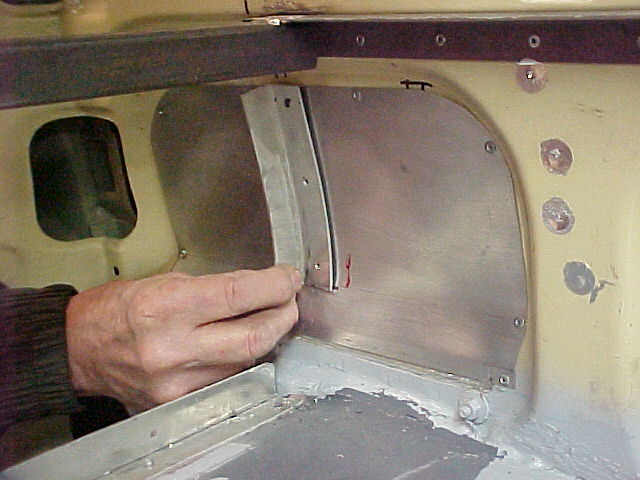
We got all of the minor brackets for the enclosure panels done today. Mel did the brunt of the work on these while I was dinking around smoothing out all of that seam sealer I put in last weekend...
Building brackets for the end panel closeouts.
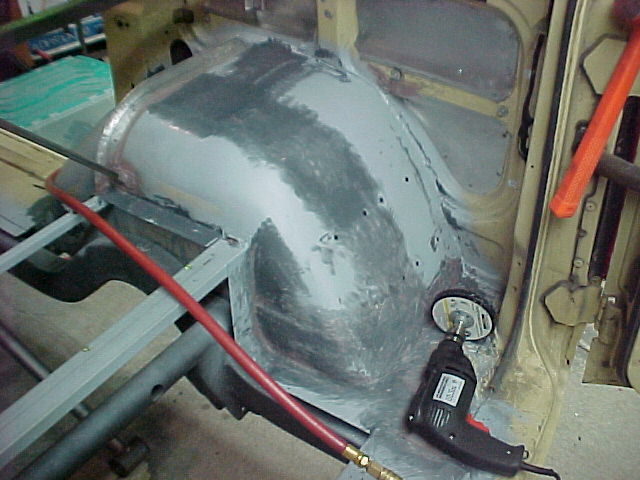
The sealer smoothed out nicely with the stripping disc. It took me a couple of hours to get them ready for paint.
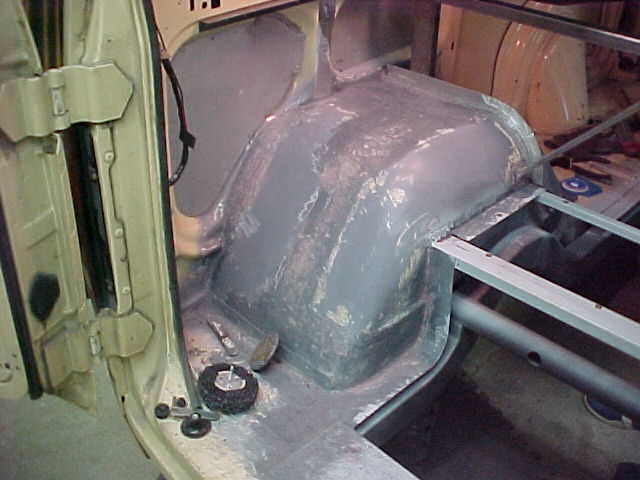
Passenger side.
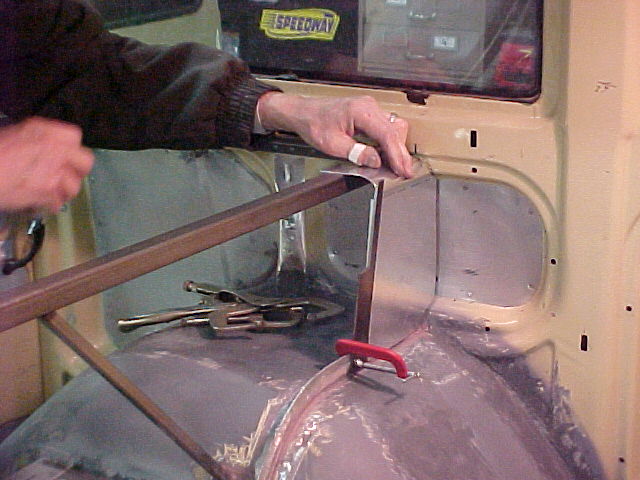
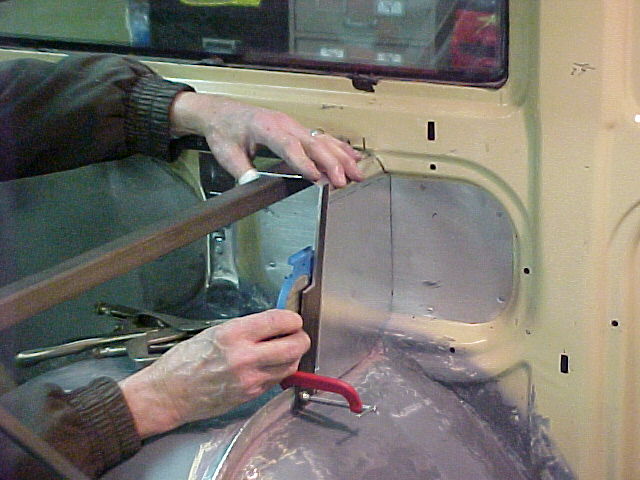
Mel got the end closures made up. We put a nice roll at the top. I think this looks so much better then sharp corners... The Carbon Fiber panels will have this same roll.
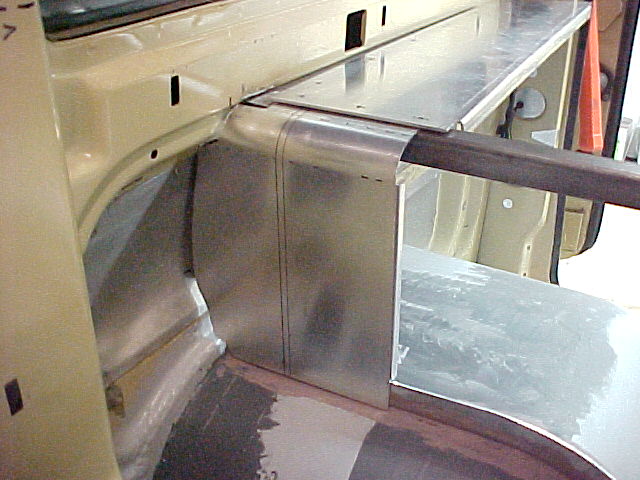
The new closeout and the top panel in place. These will get painted black before being riveted in.

From inside the enclosre. A couple of clecoes holding the pieces in.

The drivers side panel getting fabbed.
This is what paint looks like... :o
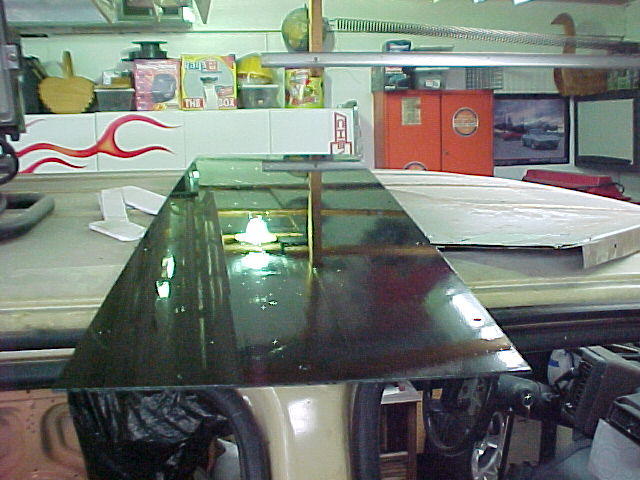
I cleaned the two top panels with some ScotchBrite and shot them with Eastwood Gloss Chassis Black.... Very Nice.
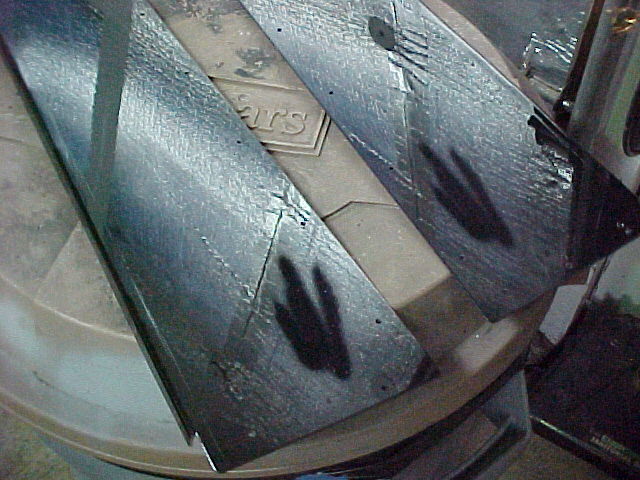
They turned out nice.

I did the same thing to the rear suspension panel.... It started snowing big fluffy flakes right after I started spraying this thing... There are a "few" boogers in the paint from the snow...
Mel had left for the day when I prepped the back for paint. Here is the passenger side ready to be sprayed.
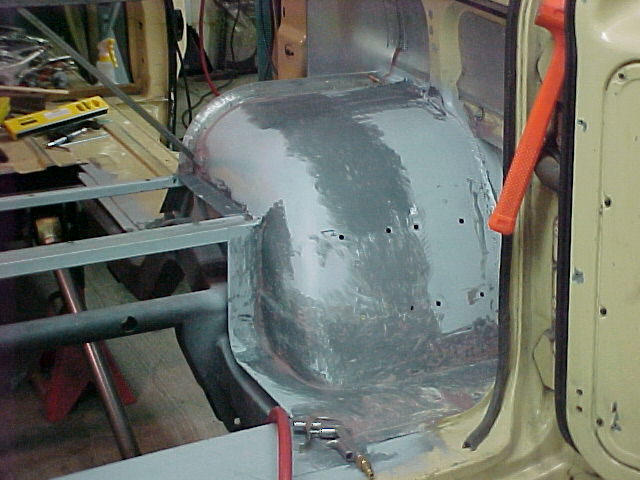
I used Rustoleum Satin Black. Mixed it with about 15% Mineral spirits and shot it thru my touch-up gun...

The paint is still wet in these pics;
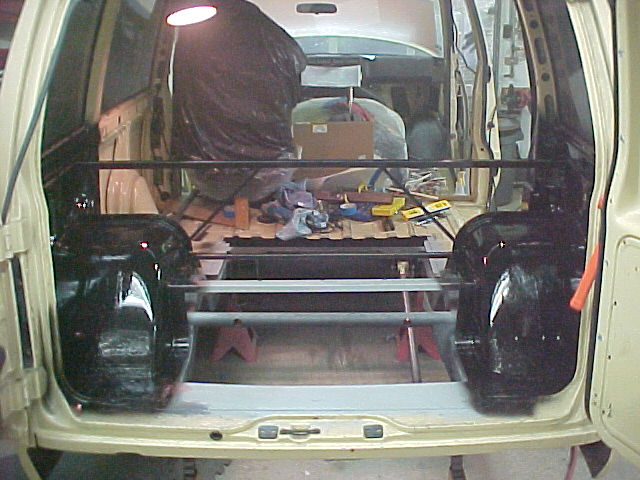
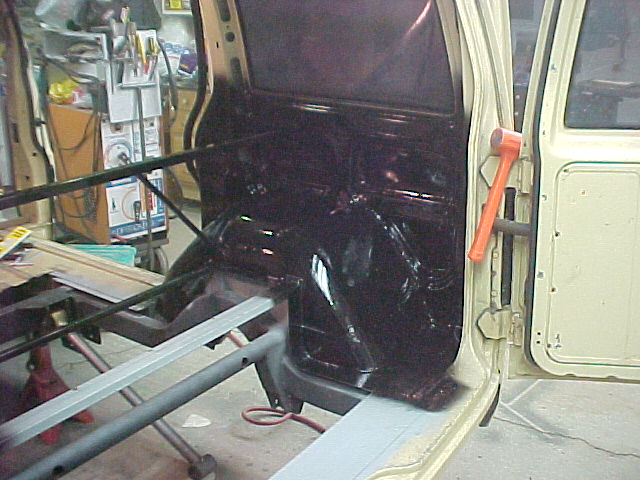
After it had cured for a a few hours... I also sat the other painted panels in place for the pics...
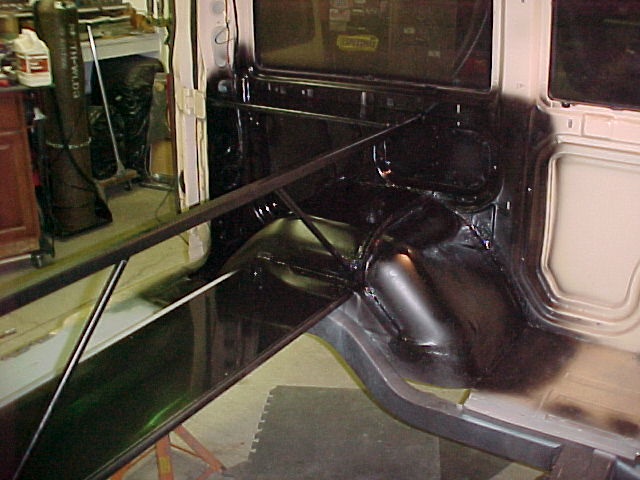

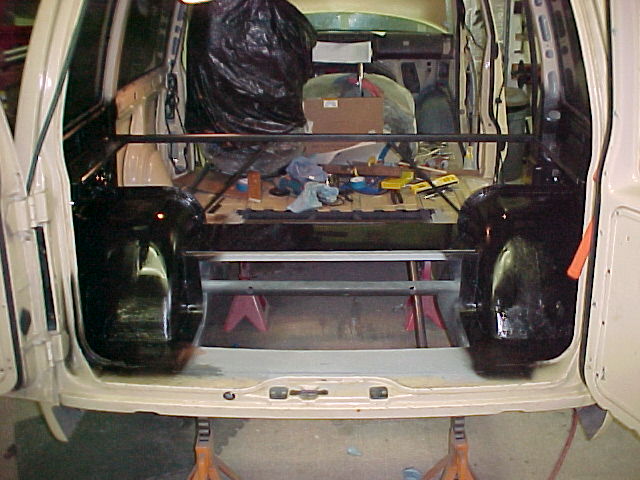
Tomorrow I will put another coat on the tubs. Any opinions on using Eastwood's Gray/Black trunk spatter paint inside the enclosure? I really don't want carpet in there but I also want it to NOT show a lot of dirt or scrapes as this will be a storage compartment for tools and such... What do you think?
MarkMark:
"Bad Ast" Astro Van. Just because I did it... Doesn't mean it's possible...
This my Bad Ast thread...
https://www.pro-touring.com/showthre...roject-Faze-II
This is my Fotki album...
http://astroracer.fotki.com/
-
04-21-2013 #605
 Registered User
- Join Date
- Apr 2001
- Location
- The Netherlands
- Posts
- 1,509

Nice, you guys made some good progress! Why do you not want to use carpet? it has it advantages....keeps the noise down and keeps loose stuff from moving around. (less rattles) I used black doormat in my trunk, its very coarse (I don't know if that is a good word in english for this) and doesnt show dirt. Also you can then use velcro to keep things in place.
-
04-22-2013 #606
 Registered User
- Join Date
- May 2009
- Location
- Elkhart, IN
- Posts
- 54
Man this thing is awesome. This is going to be a beast.
Lots of Neon's
Harley NRS
Trx250r
69 Camaro: Under Construction Small Block (Soon LSxT)
http://www.cardomain.com/id/teamvpneon
Used to be known as teamvpneon
-
04-22-2013 #607
Registered User
- Join Date
- Apr 2006
- Location
- MD
- Posts
- 232
Keep up the good work!!
-
04-22-2013 #608
Registered User
- Join Date
- Mar 2004
- Location
- Mid-Michigan
- Posts
- 2,764
Thanks Guys! Hey Martin, I am kicking around ideas for back there right now... Carpeted floor runners might be an option. I am going to look into them at the box stores. I was planning on insulation and the runner material might be a good alternative...
I have been Designing a rear sway bar for the van over the past couple of weeks. This is screen shots of my initial concept...
I modeled up the Energy Suspension bushings and rod ends. The bar routes under the fuel tank and attaches to the rear housing with the "L" shaped brackets. They will be welded to the Lower 4-Bar brackets. This is old news now so I'll post updated pics later.
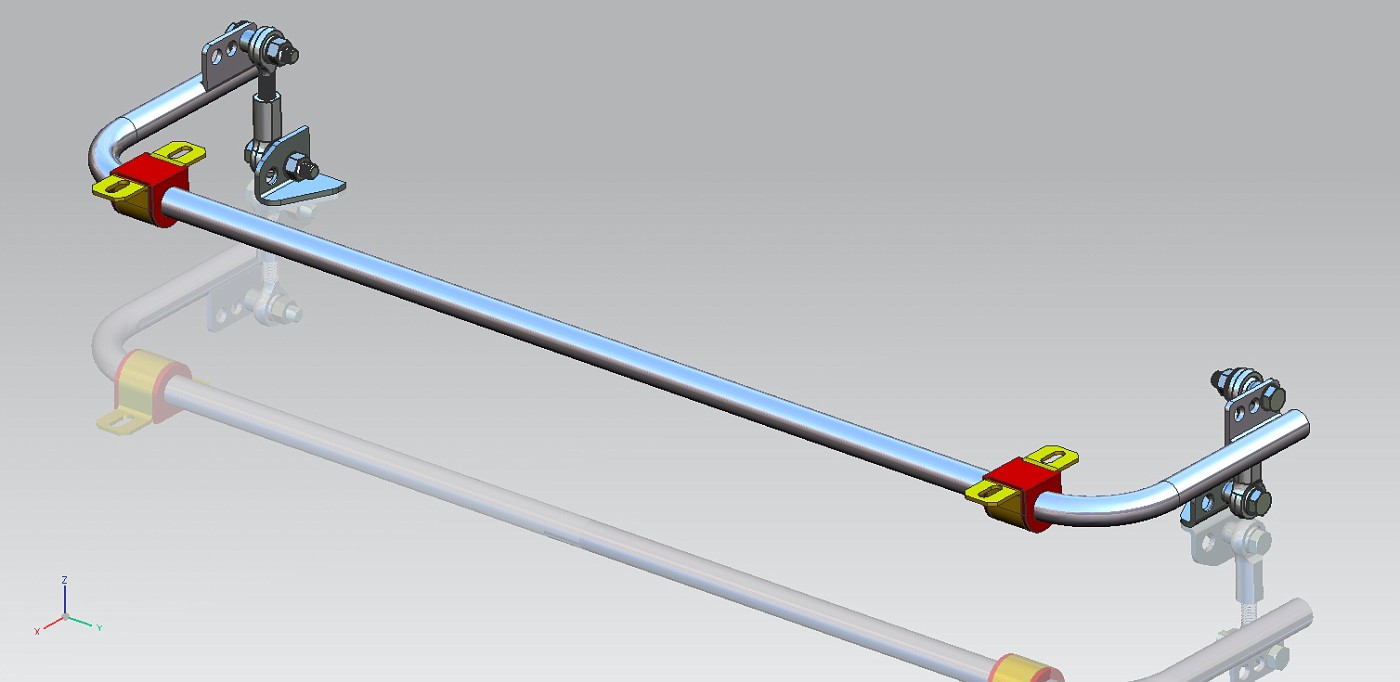

Close up of the lower bracket.

Bottom overall view.
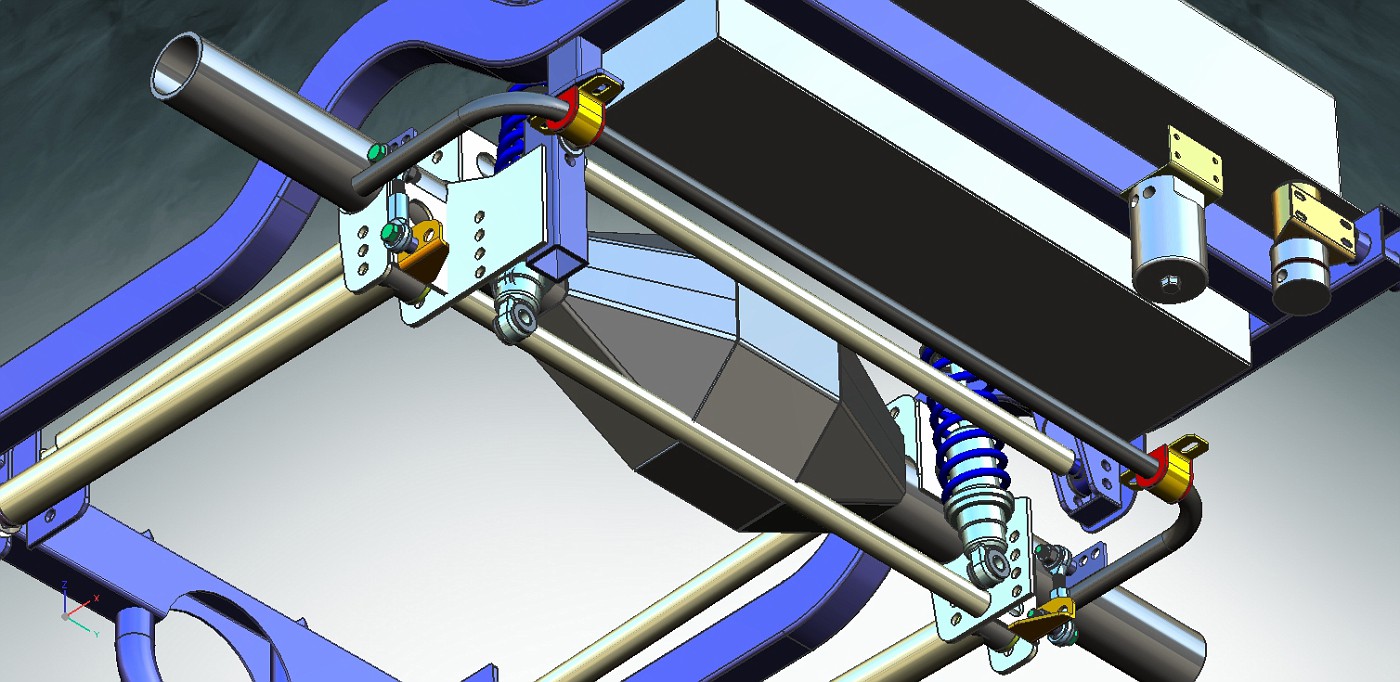
The bar uses up a bit of tire clearance at the rail but there is no other way to route it...

Last week I ordered some 1" dia. x .120 wall DOM to make the bar. I also ordered some 1 1/4 x .120 for the front bar.Mark:
"Bad Ast" Astro Van. Just because I did it... Doesn't mean it's possible...
This my Bad Ast thread...
https://www.pro-touring.com/showthre...roject-Faze-II
This is my Fotki album...
http://astroracer.fotki.com/
-
04-24-2013 #609
Registered User
- Join Date
- Mar 2004
- Location
- Mid-Michigan
- Posts
- 2,764
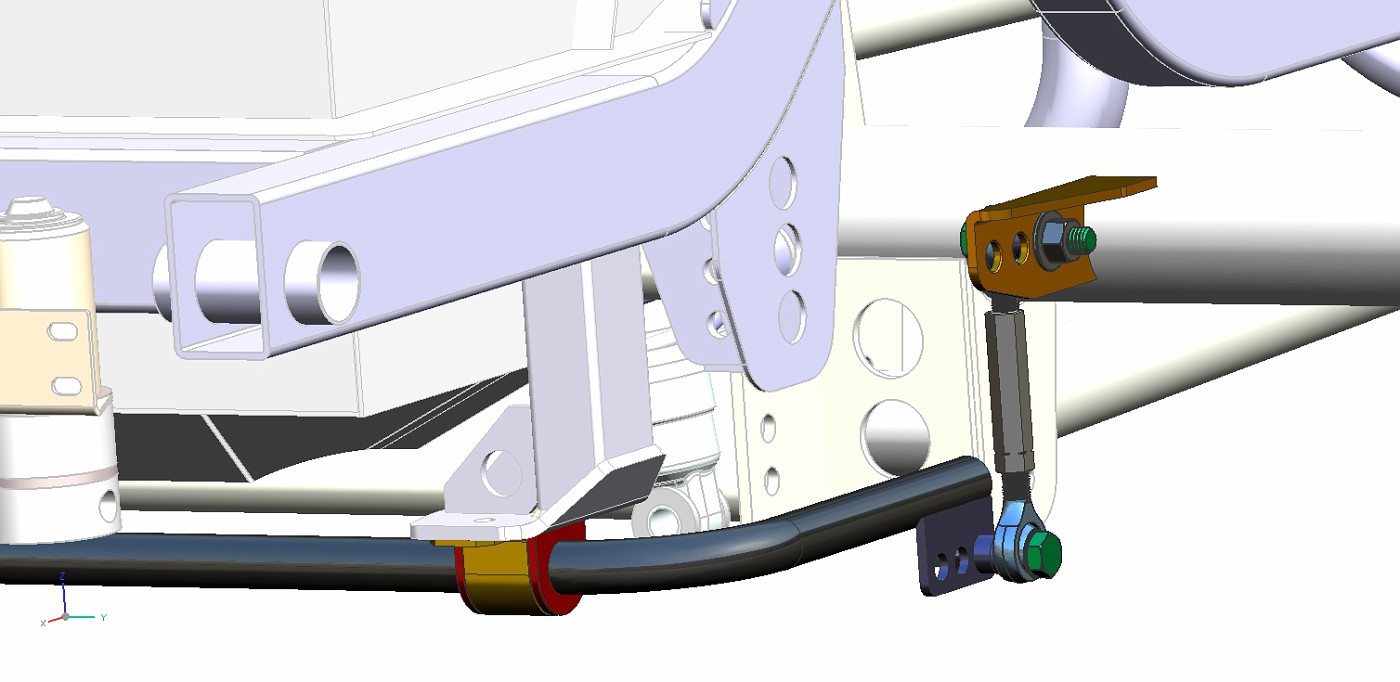
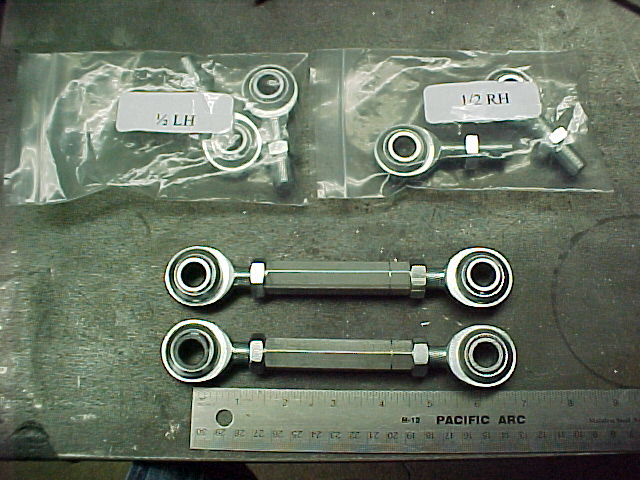
These are the final designs as it stands today. I ordered some parts from McMaster Carr and got a selection of 1/2-20 rod ends off eBay to build the end links. Now I just need to pick up the DOM tubing I will use for the actual bar.
Here are the 3D CAD pics
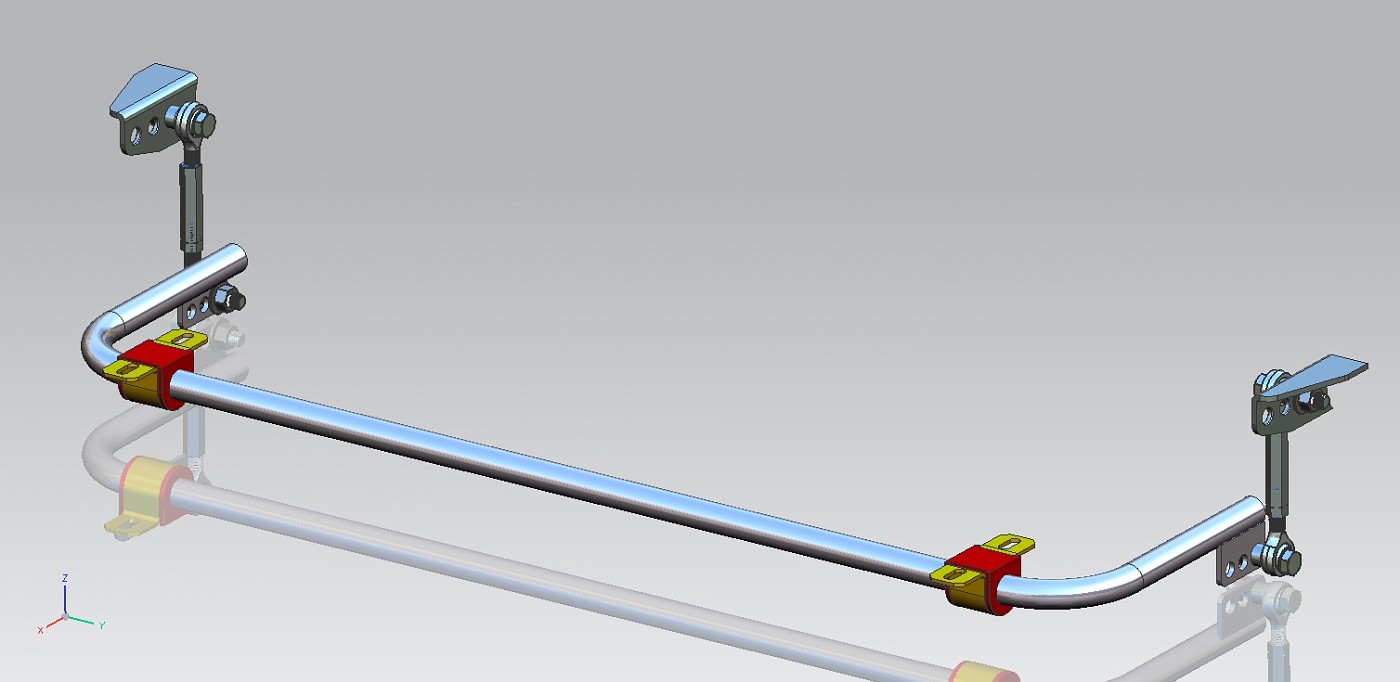
A close up of the adjusters
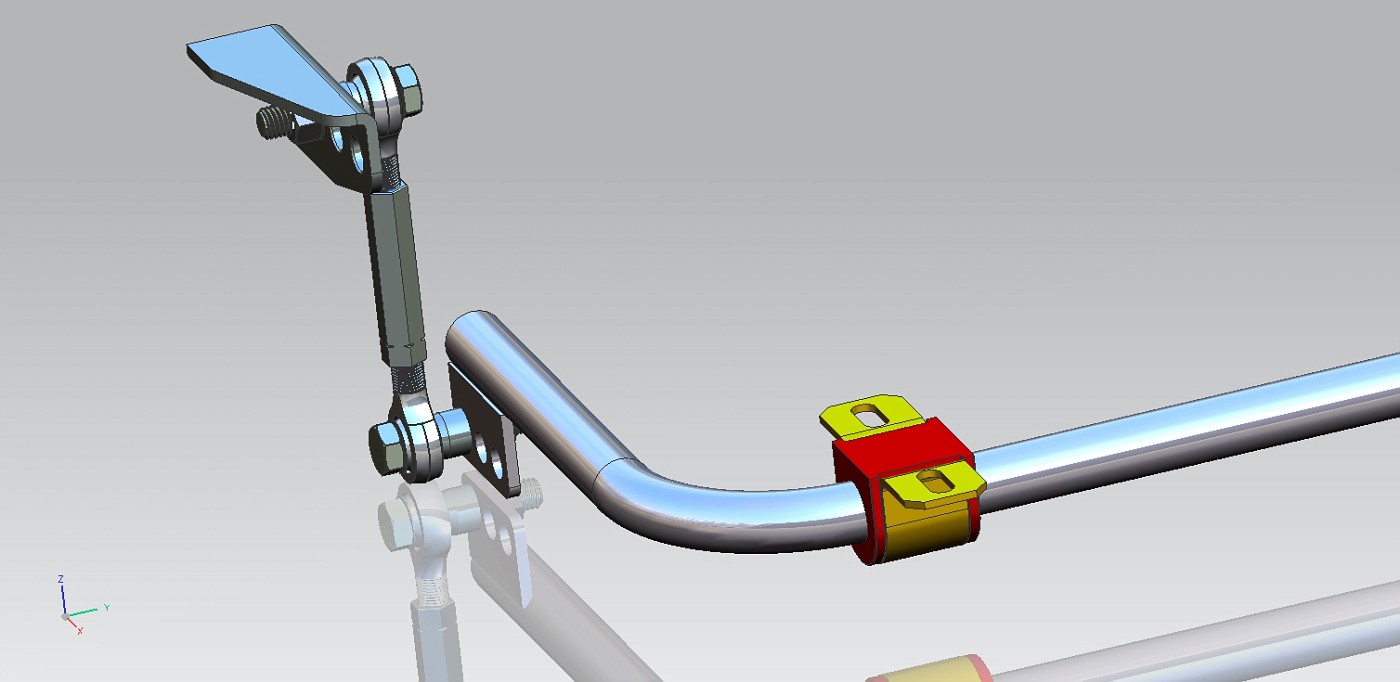
The drivers side mounting tower. The angled plate provides a little additional clearance for the bar in jounce. I have the bar ends tucked in close to the rails so i had to move the bushings inboard a bit and this created a clearance issue with the mounting plate.
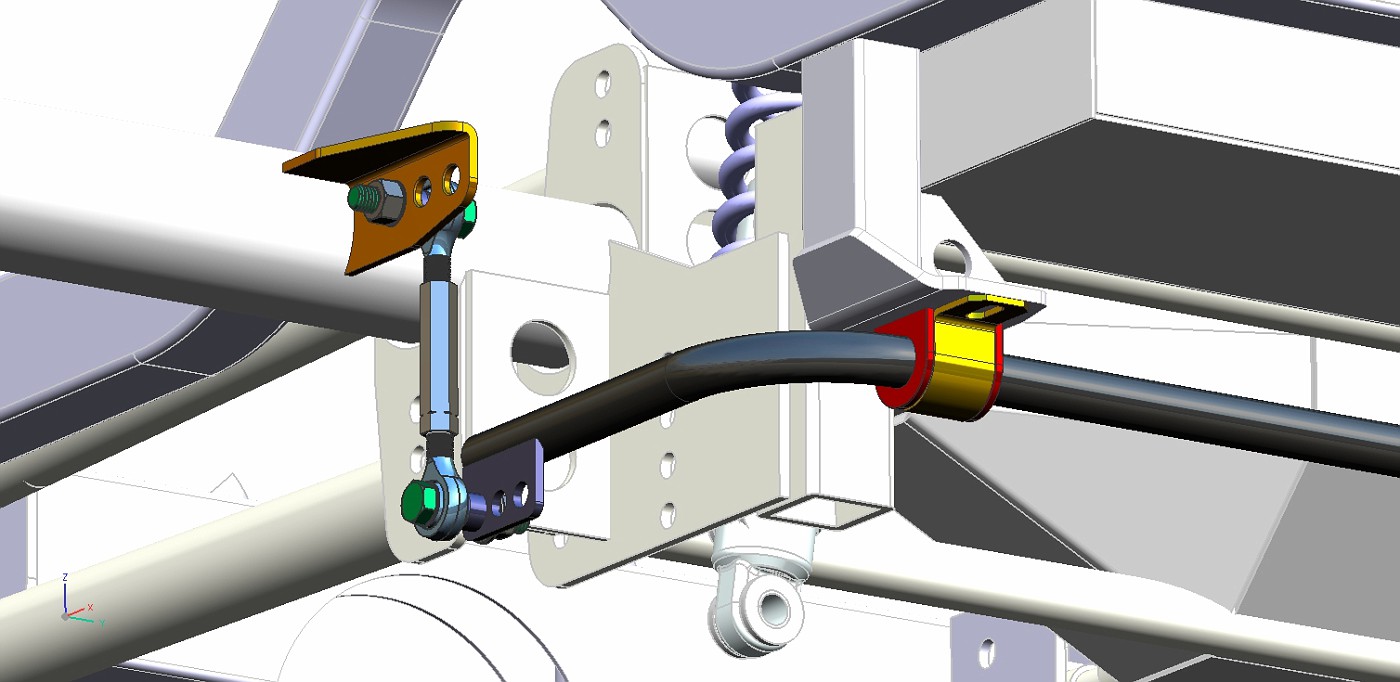
Here is the passenger side. You can see another issue with the track bar bracket. There wasn't a lot of room to get this thing packaged...
Here are the actual adjusters and rod ends...
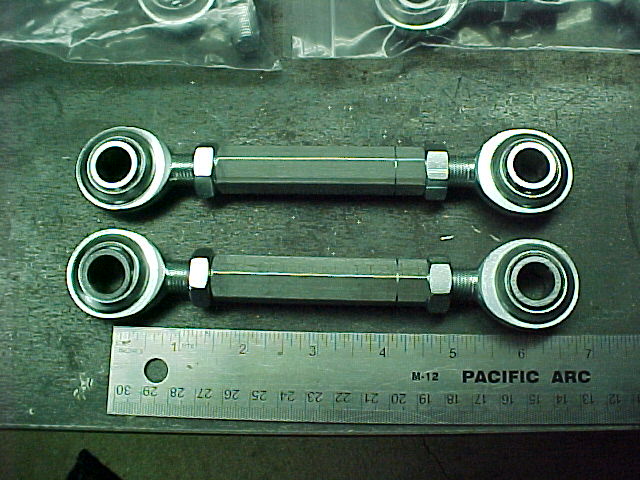
I got a very good deal on this set of rod ends from QS Components on eBay. 42 bucks and free shipping. Saved me about 35 bucks over Speedway with shipping added in.
This is enough to do the front bar also.
Thanks for looking
Mark
Mark:
"Bad Ast" Astro Van. Just because I did it... Doesn't mean it's possible...
This my Bad Ast thread...
https://www.pro-touring.com/showthre...roject-Faze-II
This is my Fotki album...
http://astroracer.fotki.com/
-
04-28-2013 #610
Registered User
- Join Date
- Mar 2004
- Location
- Mid-Michigan
- Posts
- 2,764
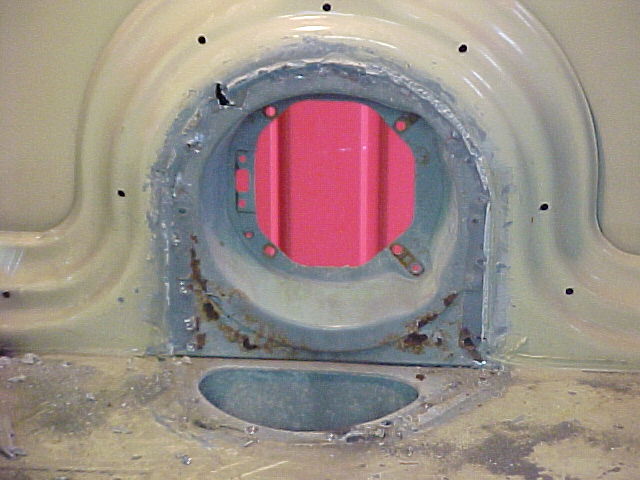
Mel and I decided to remove the old fuel filler bump on the inside of the van. This not only cleans up the interior but will make interior panel fab easier.
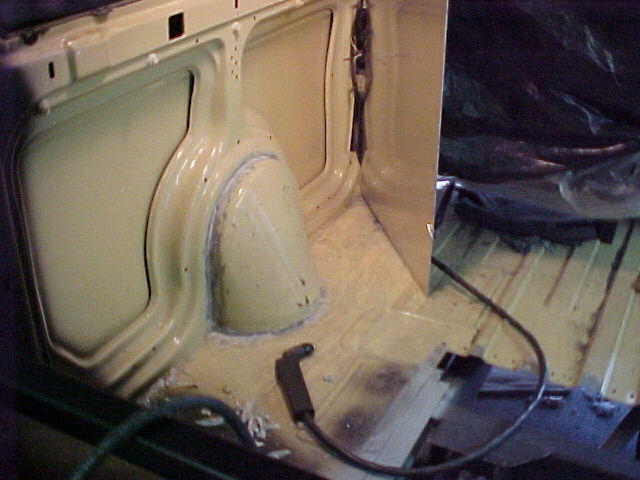
Didn't make sense to leave it as the fuel fill will be in the back now.
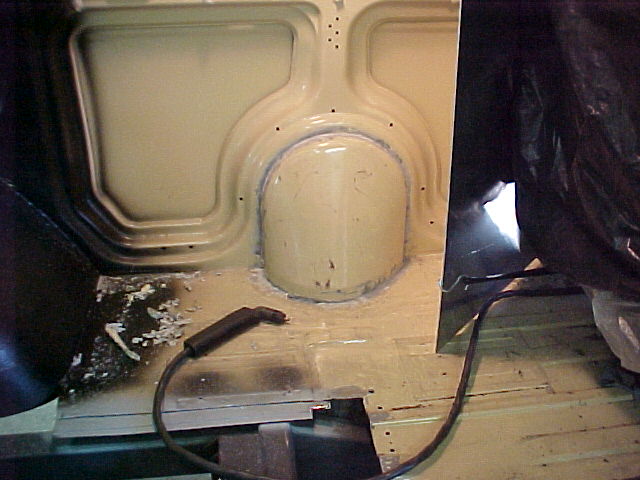
We used an air chisel to get the old seam sealer out. Couldn't get it all so using the plasma cutter was just making a mess of it. We ended up cutting it out with a cut-off wheel on a die grinder.

This left the flange spot welded to the body so we used a spot weld cutter and the air chisel to get that off.
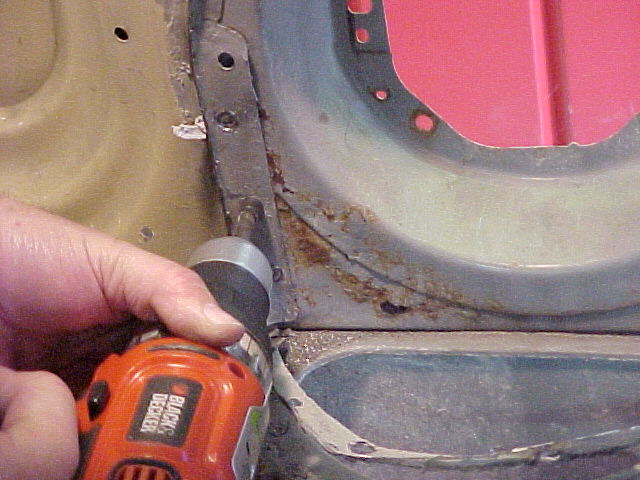

Bump is all gone...
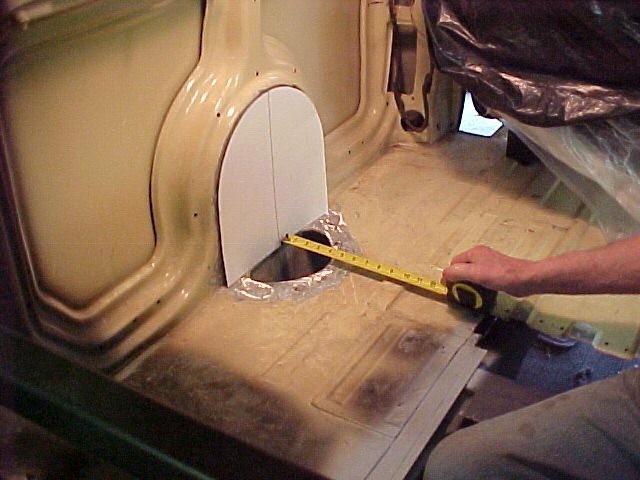
Made a pattern and cut the patch panel out of some 22 gauge.
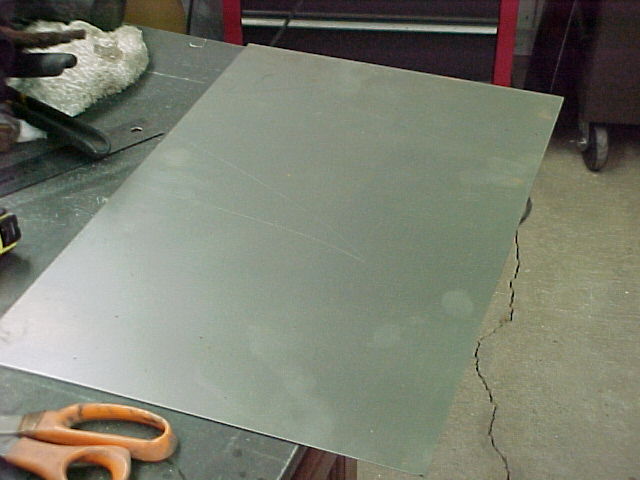
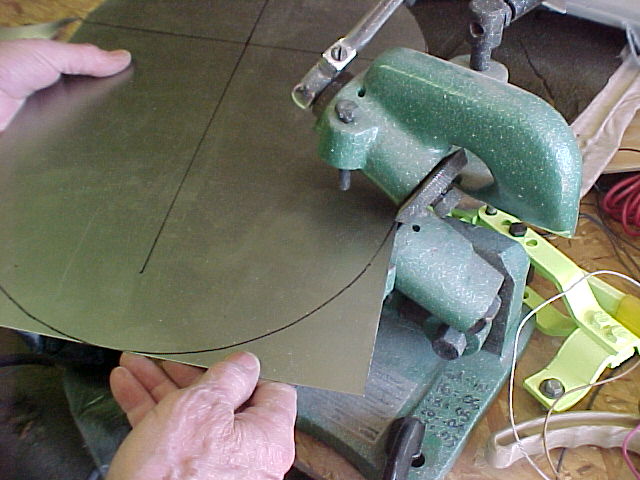
Used the rotary shear to trim off what we didn't need.

Mel laid out a pattern for spot welding and punched the holes with the "bench" punch...
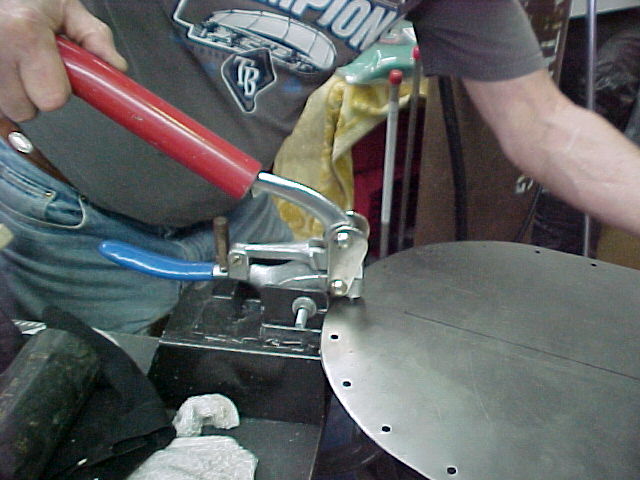
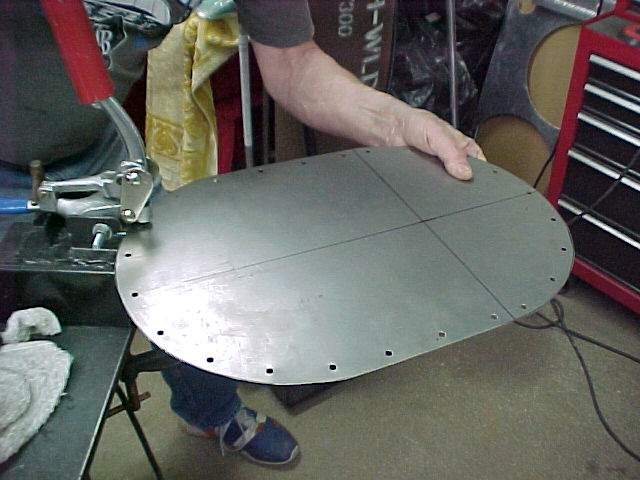
Put on a 90 deg bend in the 3 in 1 and set it place.
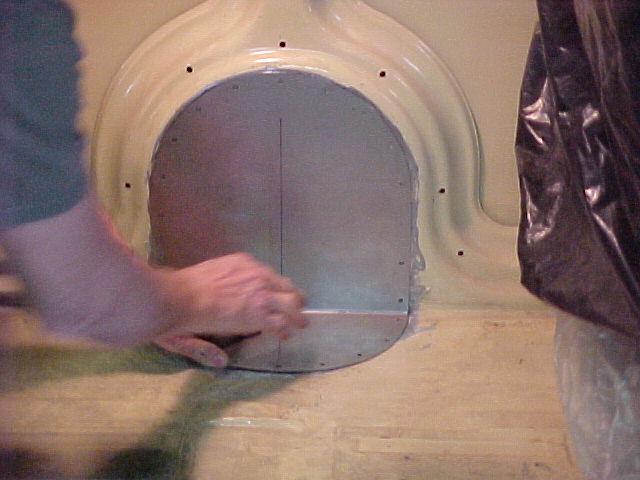
After a few welds and a touch with the flap wheel it's ready for seam sealer.

Laid in some sealer and it's ready for primer when this is cured.
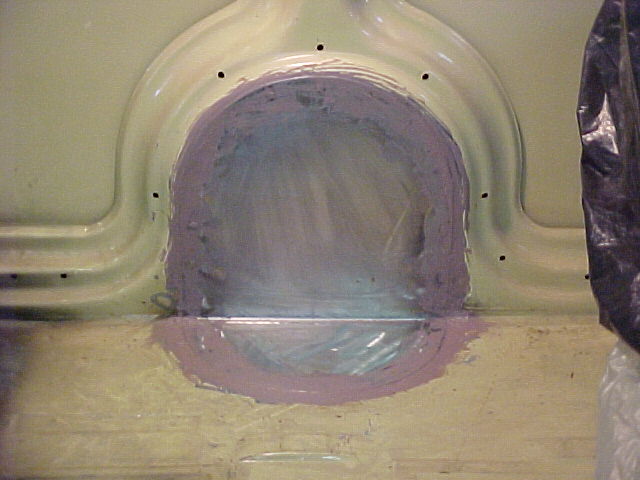
With that done I shot a few coats of the satin black on the middle floor section. This is ready to go in now.
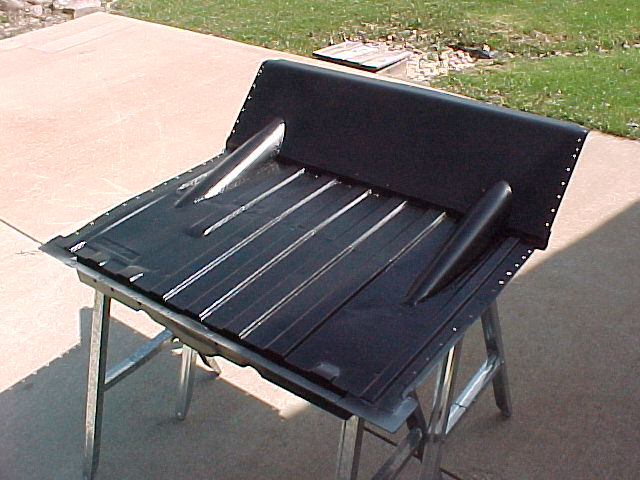
Mel and I were talking about how hard it would be to work on the back of the van with this piece installed. It's MUCH easier to work standing up then trying to do all of this on your knees...

That's it for van work. Thanks for watching...
MarkMark:
"Bad Ast" Astro Van. Just because I did it... Doesn't mean it's possible...
This my Bad Ast thread...
https://www.pro-touring.com/showthre...roject-Faze-II
This is my Fotki album...
http://astroracer.fotki.com/
04-28-2013 #611
Registered User
- Join Date
- Mar 2004
- Location
- Mid-Michigan
- Posts
- 2,764
I did a little polishing also. Got out the scotchBrite, WD40 and the White Diamond metal polish... Took the adjusters for the sway bar end links from dull to shiney in about 20 minutes...
Before

After hitting the bottm piece with the ScotchBrite and a little WD40.
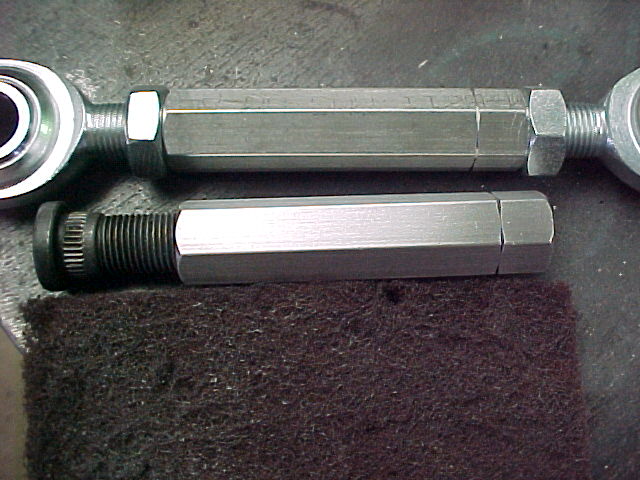
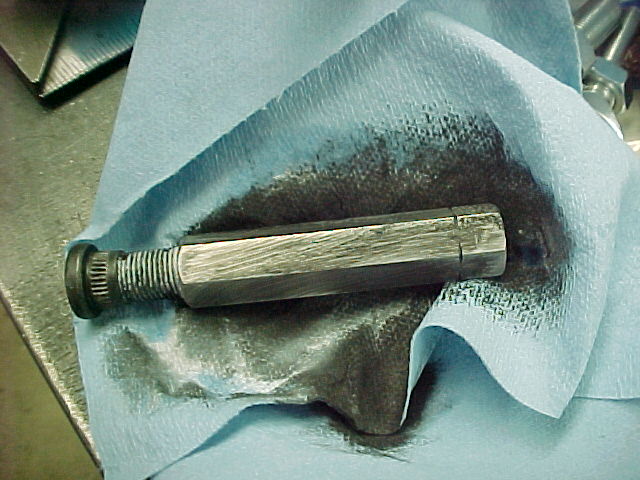
Polishing aluminum turns EVERYTHING black...
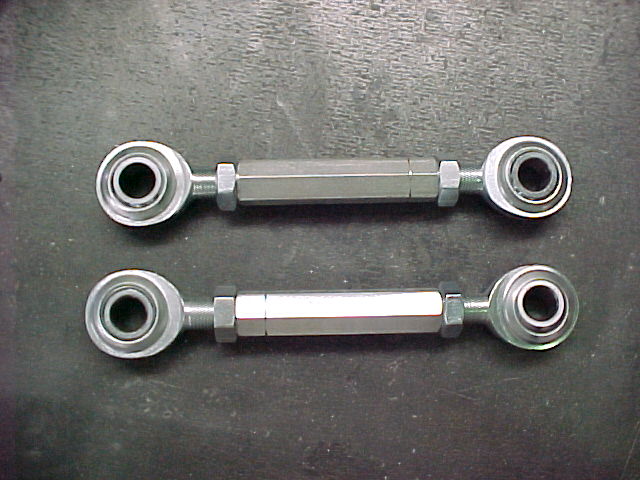
After cleaning up the polish it weas nice and shiney...

Brightened them up a bit. I'll shoot some clear laquer on these to protect them.
After all of the "fun" work was done I turned to my favorite pass time.... Ditch digging... The week my dad died we discovered the sump pump drain was not working and it was just bubbling out at the head of the drain tube (two feet from the foundation) which runs out under the yard and empties into a swail, 60 ft away...
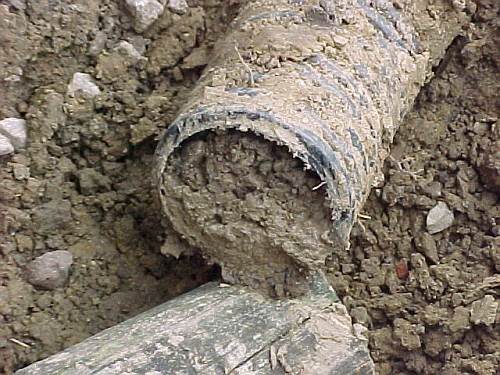
This is where the sump pump drains out of the house. The long pieces of PVC are the temporary drain I cobbled up to get the water away from the house. I have already dug up the drain tube and cut it off. It was packed full of rocks and mud... No idea how all of that junk got in there.

This is the cut off end, about 4 feet from where the PVC dumped into the tube.

Close up... no idea how this happened, or how long it has been like this...
Made the decision to dig up the whole 60ft and replace it...
That was last evening...Mark:
"Bad Ast" Astro Van. Just because I did it... Doesn't mean it's possible...
This my Bad Ast thread...
https://www.pro-touring.com/showthre...roject-Faze-II
This is my Fotki album...
http://astroracer.fotki.com/
04-28-2013 #612
Registered User
- Join Date
- Mar 2004
- Location
- Mid-Michigan
- Posts
- 2,764
I got out and got busy about 8am this morning...
My yard is made up of yellow and blue clay covered by more yellow clay. The digging wasn't too bad with the ground as wet as it is. I had this done in about a half hour.
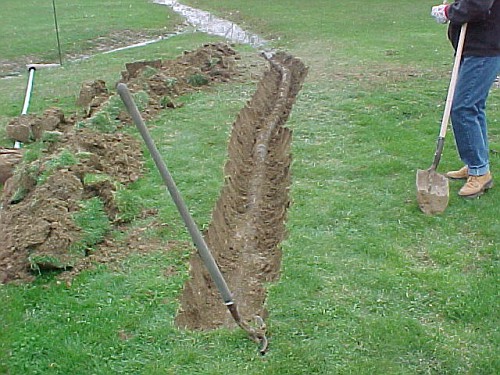
Everything was dug out by 10am or so. Didn't go to bad. Kept plugging away at it.
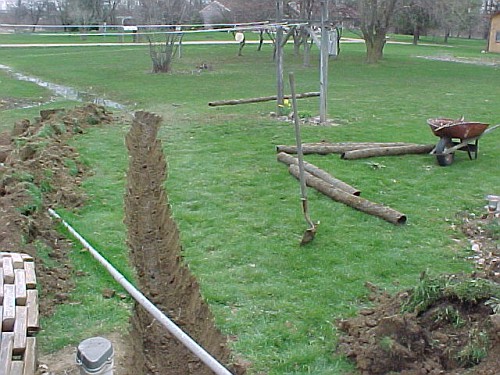
Towards the house.
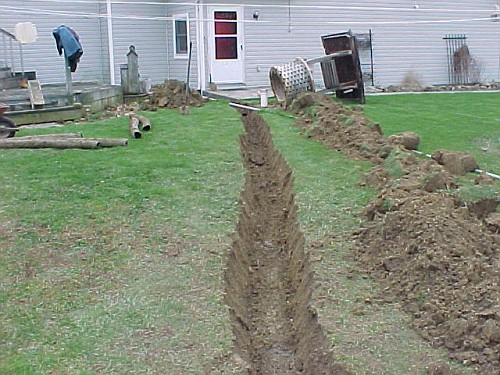
This was pretty tight working in here. You can see the downspout on the corner of the house. This ties into the drain also.
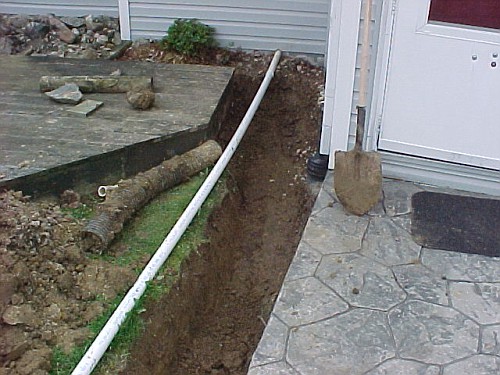
After we had it all dug out we ran into Durand and got a 100' roll of 4" currogated drain tube, a few connectors and a cap so I can seal off the "in" pipe.
I put a 45 on the end of the "in" pipe with a short section of PVC stubbed into that. Drilled a 2" hole in the cap and shoved the stub into that. Once this is buried it won't come apart. It also should keep "junk" from migrating into the tube.

Used a "Y" to connect the down spout to the main drain.
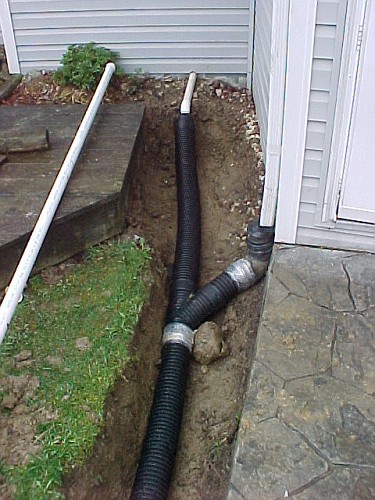
I don't like how those connectors go together always seems to be a leak point to me. I ran a heavy bead of construction adhesive around the tubes and jammed them into the connector. We then wrapped the joints with that poly stretch packaging wrap.
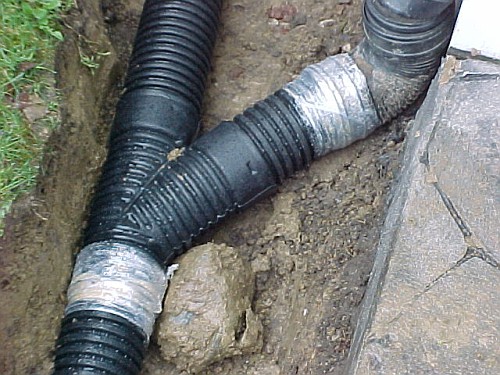
Seems to have worked well. I have been watching it when the pump runs and have seen no evidence of a leak...
What a mess... We were finishing up in the rain so back filling will happen later. I want to keep an eye on the joints anyway and there is a little more leveling we need to do so it is good.
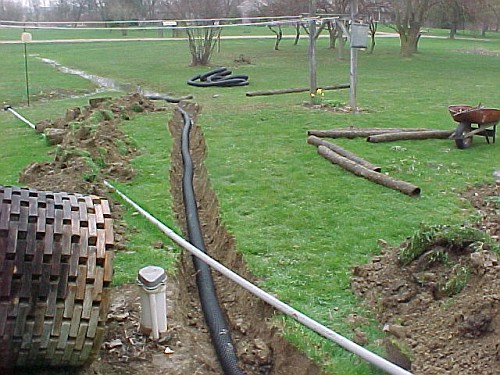
All told this took us about 5 hrs to do and that includes running to town for the parts... I was showered and having coffee at 1.
Have a nice weekend and please keep my pore blistered hands in your thoughts...
MarkMark:
"Bad Ast" Astro Van. Just because I did it... Doesn't mean it's possible...
This my Bad Ast thread...
https://www.pro-touring.com/showthre...roject-Faze-II
This is my Fotki album...
http://astroracer.fotki.com/
05-24-2013 #613
Registered User
- Join Date
- Nov 2002
- Location
- Finland
- Posts
- 209
any work on the astro?
Chris
05-25-2013 #614
Registered User
- Join Date
- Mar 2004
- Location
- Mid-Michigan
- Posts
- 2,764
Hi Chris,
Thanks for asking. Not a lot. Been real busy at work and the early hours and long drive is starting to wear on me. Have been real busy with house stuff, you know spring cleaning, yard work and a lot of honey do's.
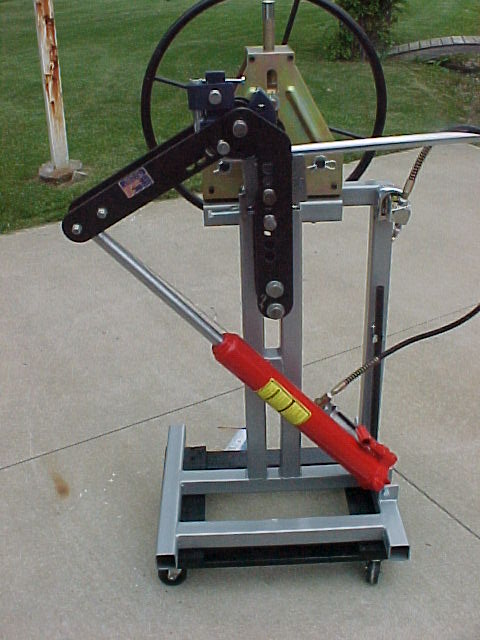
Have gotten a few things done though. Last Saturday we spent building a "bender stand". This will hold my Pro-Tools tubing bender and the HF tubing roller all in on stand. Got the plans off ebay and it went together well.
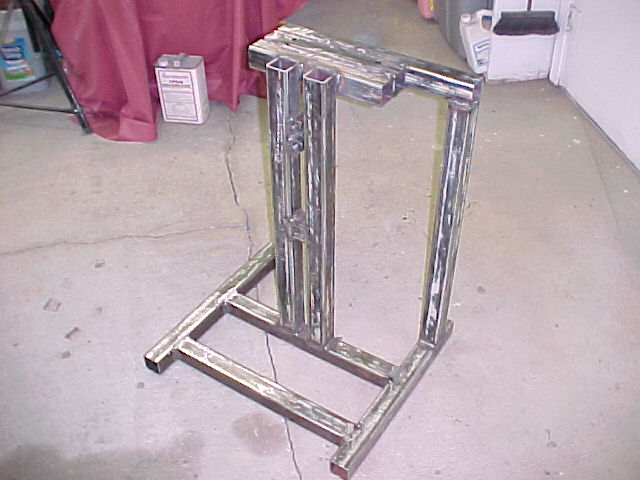
Built from reclaimed 2 x 2 x 1/8 th wall tube for a total cost of about 14 dollars...
Here it is with roller mocked up on top and a HF furniture dolly for a rolling base.
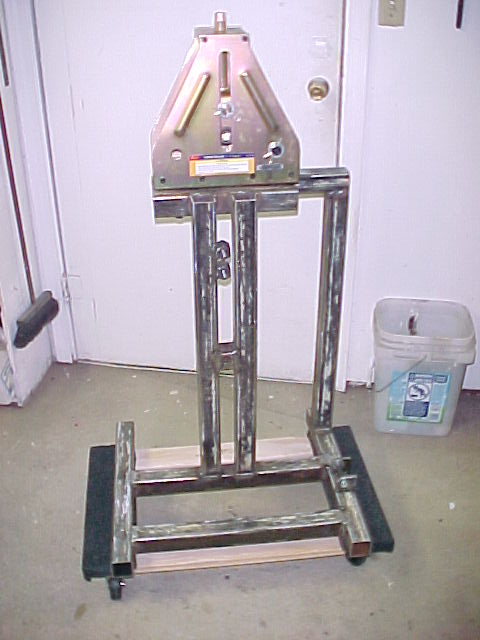
I am waiting on an air over hydraulic bottle jack I ordered to arrive so I can finish putting it together. The jack will mount to these two ears.
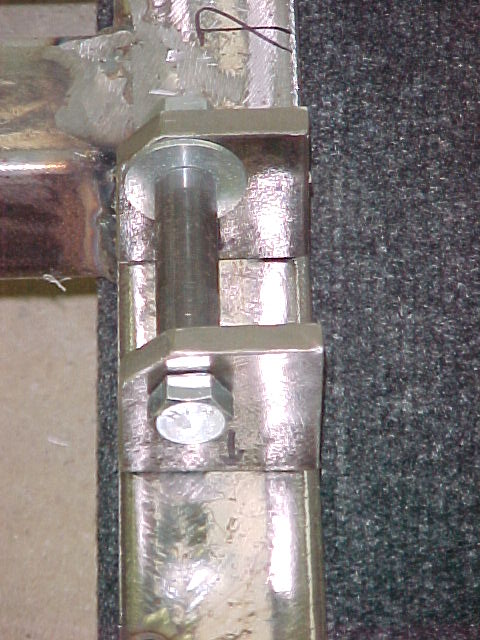
I don't want to weld them on till I have the jack so I can verify alignment to the bender.
We did get some van stuff done today.
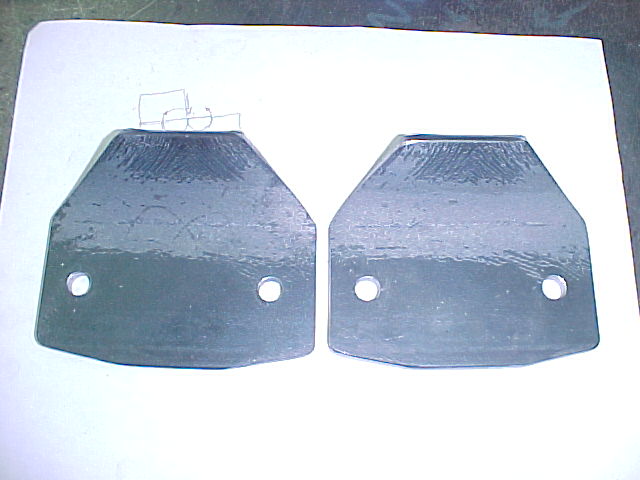
These are all of the brackets for the rear sway bar. The axle brackets. The first one made on the right and the second one (on the left) in all of it's flat plate glory....

And both of them complete. These will get welded to the housing during fitment.
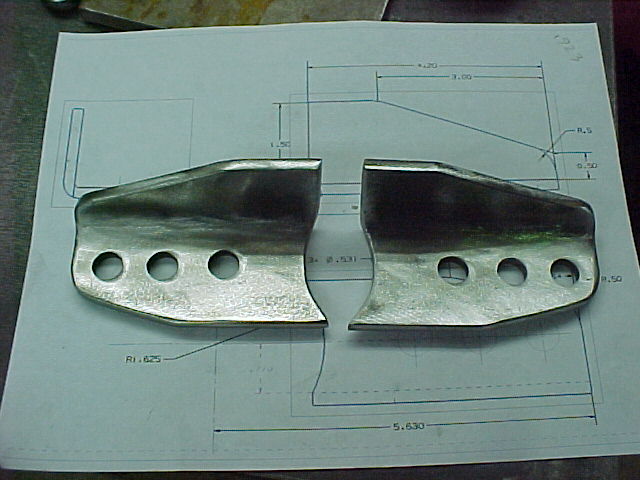

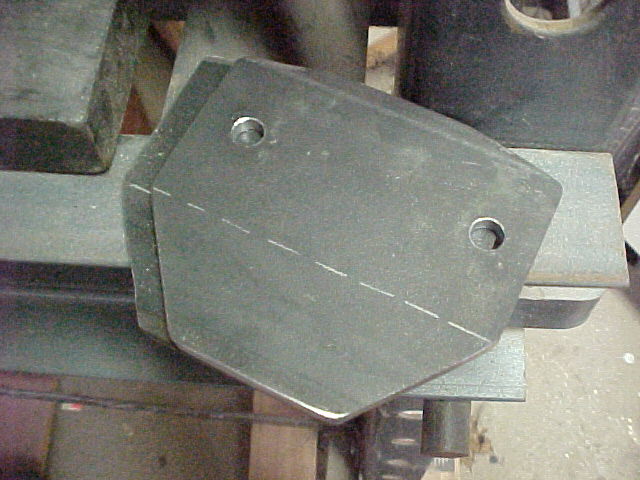
These are the frame brackets. The will carry the ES bushings out on the frame. They are being bent along the dashed line on the SWAG bender.
This is a nasty pic with the flash on. I'll get better ones tomorrow. The little brackets in the middle will get welded to the ends of the sway bar and the link will run between those and the L bracket on the axle.
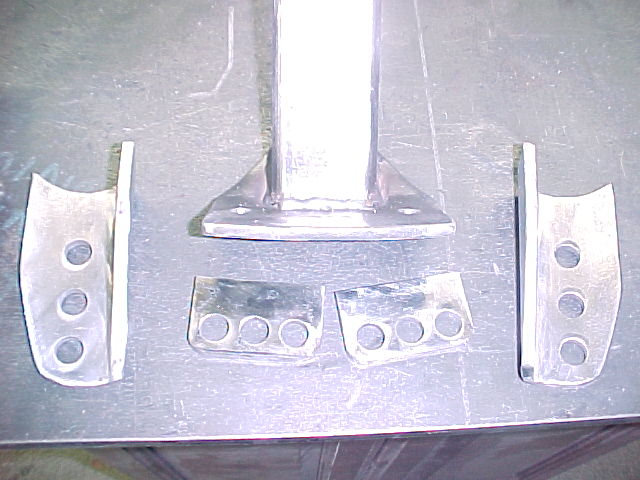
Thats about it. It's hard to believe it's been exactly two years to the day that this started... It's time to get this thing running...
MarkMark:
"Bad Ast" Astro Van. Just because I did it... Doesn't mean it's possible...
This my Bad Ast thread...
https://www.pro-touring.com/showthre...roject-Faze-II
This is my Fotki album...
http://astroracer.fotki.com/
05-26-2013 #615 Registered User
- Join Date
- Jul 2008
- Location
- ohio
- Posts
- 1,135
lol i just got done digging a 30-40 ft 18" deep ditch.....it was for electric to my pool motor......now that was fun.....not
keep the wheels a spinning and the Beavers a grinning (burt reynolds-smokey and the bandit)
06-02-2013 #616
Registered User
- Join Date
- Mar 2004
- Location
- Mid-Michigan
- Posts
- 2,764
Yes sir! Gotta love home ownership!
We've been cleaning up all week after a tornado passed about 200 yards north of my place about 8:30 Tuesday nite... Close call. Had a few trees down and the power was out for most of the day Wednesday but no damage otherwise. A few houses north of us weren't so lucky. One lost a garage and three cars and another lost most of the roofing off his two barns and the siding off the end of one. Roofs and trees seemed to be the target for this F1... That was my week...
While all of that was going on I received delivery of the Air/hydraulic bottle jack I ordered. Didn't get to do anything with it till Saturday though. I got it mocked up in the mounting plates and lined it up with bender mounted to the stand.
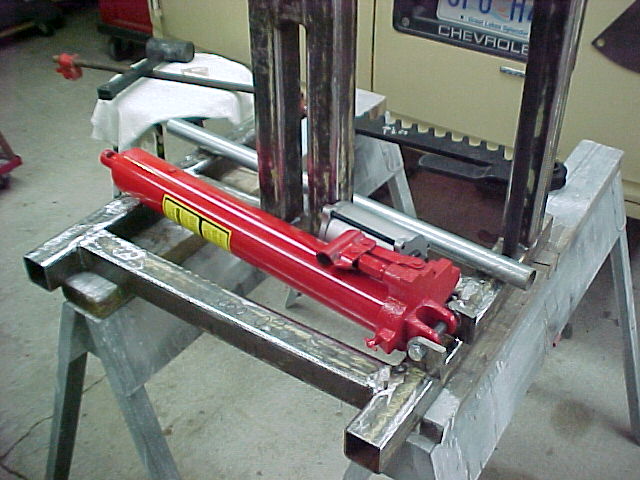
I ended up moving the plate location by 3/4's of an inch or so. Glad I waited for the jack to weld them on.

You can see here how much farther I moved the mounts as compared to the layout lines from the plans.

Had to replace one of the bender arm spacers with a smaller diameter tube that will slide through the hole in the end of the jack stem.

I used 5/8 x .058 wall as I had it and the 1/2 in bolt will slide through it.

Once I wrapped up getting the jack connected I cleaned the stand up a little with a flap grinder and degreased it for paint. I used Rustoleum Hammered Silver.
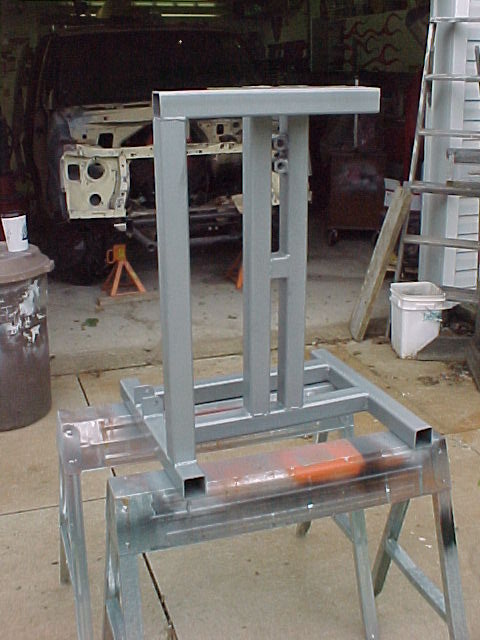
These welds were still kinda warm when I painted the stand...

Doesn't look to bad for home brew...
Mark:
"Bad Ast" Astro Van. Just because I did it... Doesn't mean it's possible...
This my Bad Ast thread...
https://www.pro-touring.com/showthre...roject-Faze-II
This is my Fotki album...
http://astroracer.fotki.com/
06-02-2013 #617
Registered User
- Join Date
- Mar 2004
- Location
- Mid-Michigan
- Posts
- 2,764
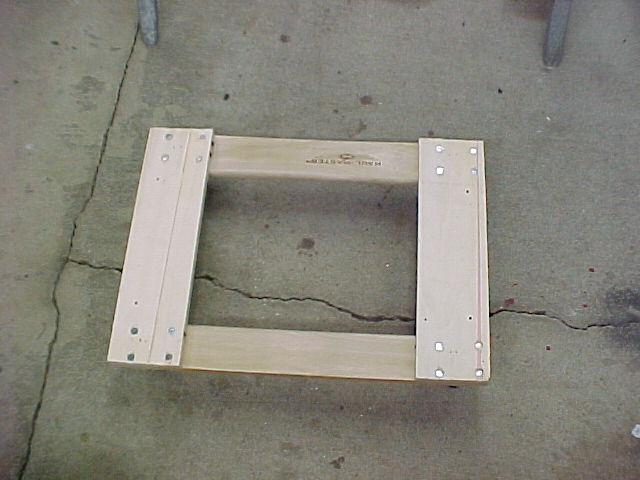
Got out and finished the stand today. The first thing I did was cut down a Harbor Freight furniture dolly.
You can see it here, sitting under the stand from when I painted it yesterday. It's a little long

I pulled off one set of casters and cut 5 inches off the length.
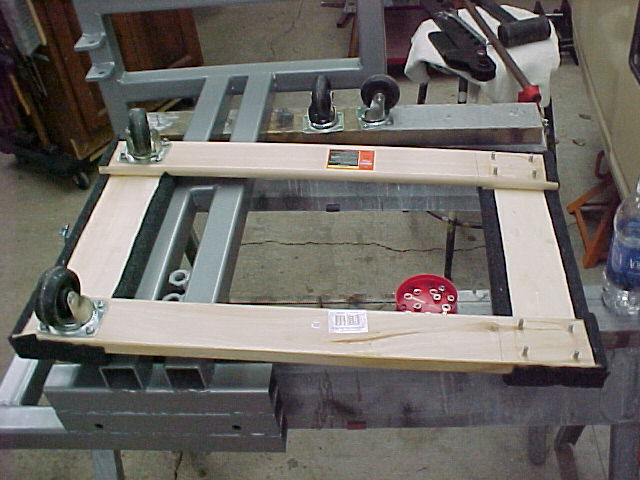
I also removed the carpet and, once the frame was back together, I painted black.
B4 paint. I used 1 1/2" long #14 screws to bolt it to the stand from underneath.
All put together and ready for a test bend.
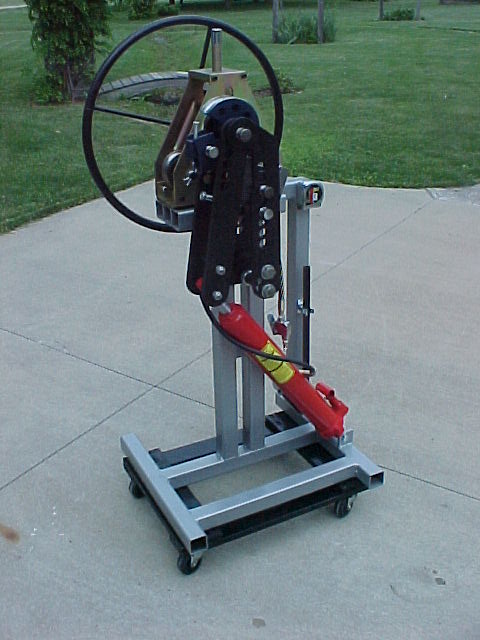
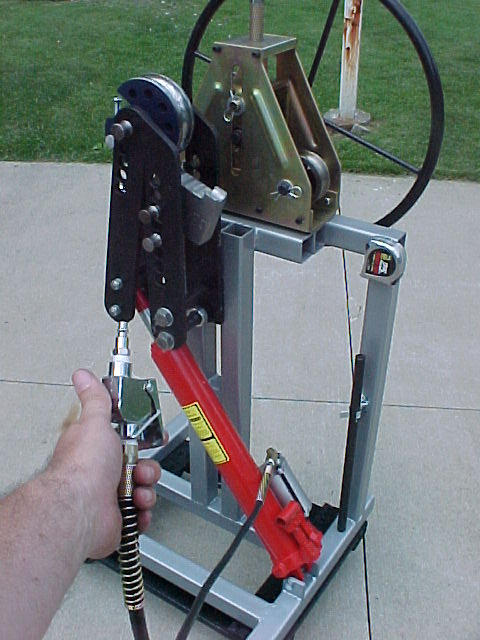
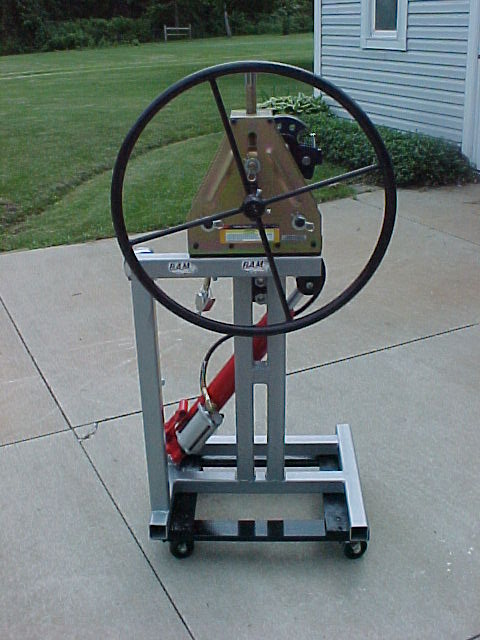
Ran a piece of thinwall 1" through the bender for a test. The jack cycles out in pulses. It doesn't shoot out real fast. it is slow and very controllable. I was concerned about how the jack would work but now have no issues with it.
About a 30 degree bend here.
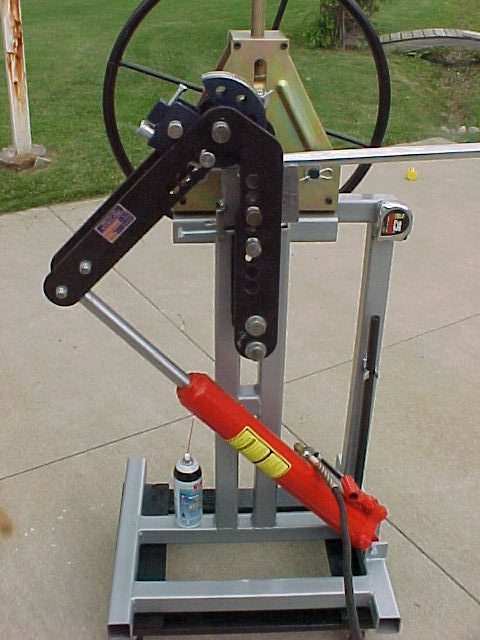
Getting upwards of 90 degrees now. I had to reset the drive pin in the die at about 60 degrees. Not any real difference then if I was using the stationary tool post other then I am taking it easy doing it... This is going to be great. Being able to use the tubing bender at any time, without having bolt and unbolt the tool post, is going to make the bender a much more versitile tool!
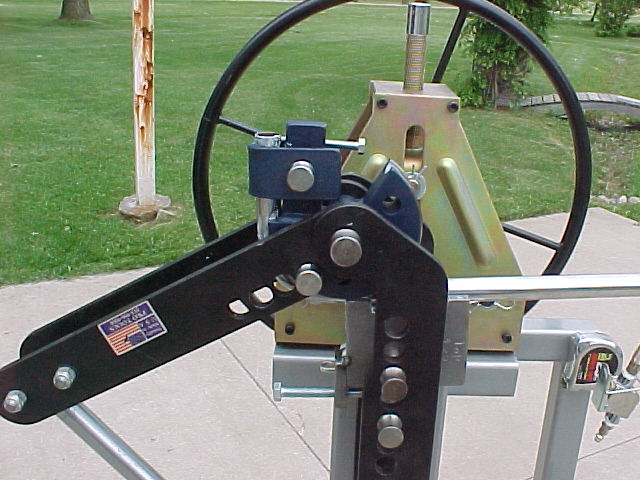
Just an overall with a piece of tubing bent to 90 degree's without breaking a sweat!
I also tried out the Harbor Freight Tubing Roller on a piece of conduit. It rolled it like it wasn't even there. I got a little heavy handed with the "down" roller and kinked it but that was my fault in going to fast.Mark:
"Bad Ast" Astro Van. Just because I did it... Doesn't mean it's possible...
This my Bad Ast thread...
https://www.pro-touring.com/showthre...roject-Faze-II
This is my Fotki album...
http://astroracer.fotki.com/
06-02-2013 #618 Registered User
- Join Date
- Nov 2009
- Location
- the dirty mitten
- Posts
- 1,217
Glad you were safe thru that storm, I was no where near it but still a lot of wind and rain.
I really wish my bender was vertical, its horizontal and takes up a lot of space when its set up just because of the swing on the tube and everything. I also like how the cylinder pulses out. I made a degree wheel for mine and get a few degrees per pulse, it is very easy to control and I can get just over 90 degrees before re-pinning. Has the roller come in handy yet besides conduit? It is a really tempting tool. What size tube can it handle? That may change my plans for my engine dog house and trans tunnel.
What material are you using for the sway bar? Are you planning to have it heat treated? I was going to use 4340 and heard to heat treat it but really have no idea who to go for for that
I also am a huge fan of QS Components. They are very helpful guys if you ever have a question and they have a lot of inventory. Really nice that they are 1 day shipping from meSteve
1968 Dodge Charger All Wheel Drive project Red Bull<script type="text/javascript" src="safari-extension://com.ebay.safari.myebaymanager-QYHMMGCMJR/5cce6da5/background/helpers/prefilterHelper.js"></script><script type="text/javascript" src="safari-extension://com.ebay.safari.myebaymanager-QYHMMGCMJR/85dc54c0/background/helpers/prefilterHelper.js"></script><script type="text/javascript" src="safari-extension://com.ebay.safari.myebaymanager-QYHMMGCMJR/85dc54c0/background/helpers/prefilterHelper.js"></script>
06-02-2013 #619
Registered User
- Join Date
- Mar 2004
- Location
- Mid-Michigan
- Posts
- 2,764
Hey Steve,
Yea, this was a close one for sure. Watching it track across the county on 12 news was a good thing. We headed down stairs as soon as the wind stopped and things started turning green... I heard it hit the trees just north of us and those are what took out the power lines. Three big oaks ended up across the road and they were a few hours getting those cleared out.
This stand will be a very handy set-up. It sure does make the bender more usable that is certain.
I haven't really used the roller for anything yet, just a test with the conduit. harbor Freights site has a lot of reviews and they were all pretty good. One guy is rolling 2" x 1/4 wall with no problems.
I am going to use 4130 Chrome Moly for both of my bars. I don't think it will need to be heat treated. One of my suspension engineers at work said it will be fine without treating.
I have gotten a few things from QS. happy with the quality and the price. No complaints here...
Have a good nite
MarkMark:
"Bad Ast" Astro Van. Just because I did it... Doesn't mean it's possible...
This my Bad Ast thread...
https://www.pro-touring.com/showthre...roject-Faze-II
This is my Fotki album...
http://astroracer.fotki.com/
07-05-2013 #620
Registered User
- Join Date
- Apr 2001
- Location
- The Netherlands
- Posts
- 1,509
Hi Mark, I am getting withdrawal symptoms.....
 I got used to an update nearly every week....what's going on? Any progress?
Martin

 Reply With Quote