


Results 481 to 500 of 862
Thread: The BAD AST Project - Faze II
-
10-12-2012 #481

 Registered User
- Join Date
- Apr 2001
- Location
- The Netherlands
- Posts
- 1,509

nice...also the first thing I thought when I saw it is you made adjusting easier.
keep up the good work!
-
10-14-2012 #482
 Registered User
- Join Date
- Mar 2004
- Location
- Mid-Michigan
- Posts
- 2,764

Yes, this will be much easier...Thanks Martin.
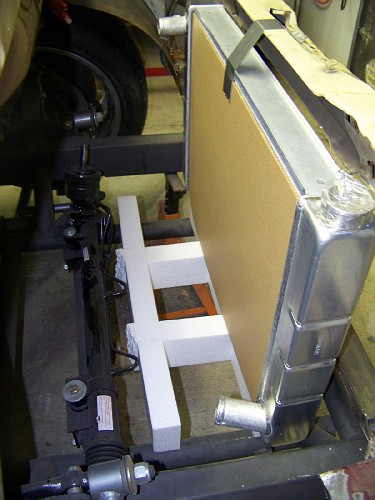
Well... The battery is back in the BACK... I mocked up the radiator, which is 19 x 31 and it drops down well into the frame. The white stuff is the foam spacers from the rad shipping box. Perfect height to set the radiator on. You can see there is no room between the radiator and the rack
THEN once I mocked up the electric fans, I had even less room. SO, the battery is in the back. I reconciled myself to that today and built a set of brackets out of foam core.

I also built a tray for the box to sit on.
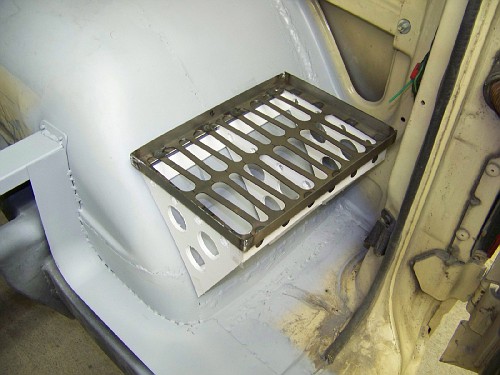
With the box in place.
Let me tell you I am not real happy with this location but there is nothing else I can do.
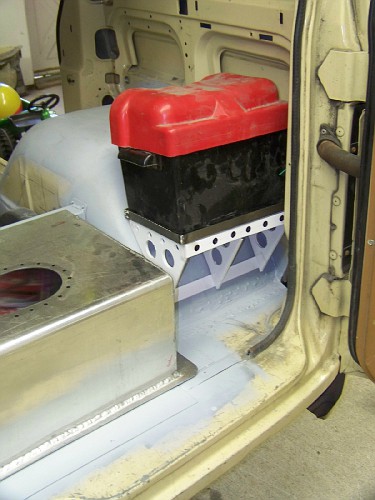
I will make the brackets out of the left over .090 aluminum from the tank.
I modeled the parts up in UG and detailed them tonight. I will start making chips tomorrow night.
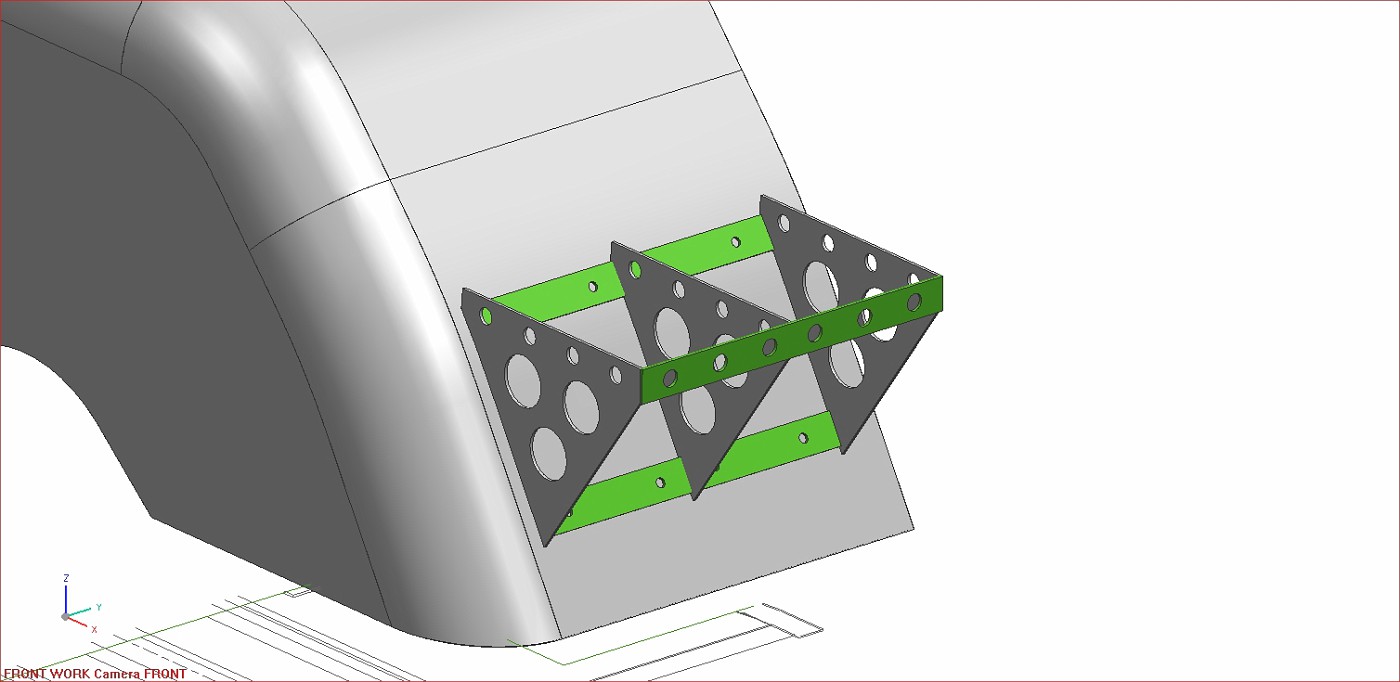
I could probably have the shop laser cut these but I need to make them with my own hands... Know what I mean?
Mel was working on the seat frames. He got all of the new mounting holes drilled and made up the spacer/washers for under the floor.
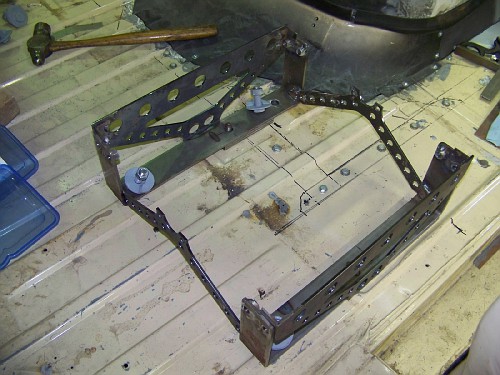
We can actually bolt the seats in now!
MarkMark:
"Bad Ast" Astro Van. Just because I did it... Doesn't mean it's possible...
This my Bad Ast thread...
https://www.pro-touring.com/showthre...roject-Faze-II
This is my Fotki album...
http://astroracer.fotki.com/
-
10-20-2012 #483
Registered User
- Join Date
- Mar 2004
- Location
- Mid-Michigan
- Posts
- 2,764
I've done a bit more design work for the van. Once I had the radiator mocked up I figured I may as well measure it up and design some brackets. I worked on the lower brackets and got those modeled and detailed Wednesday and Thursday evenings.
These will bolt to the new body crossmember that runs between the front body mounts. These are some snapshots from UG.
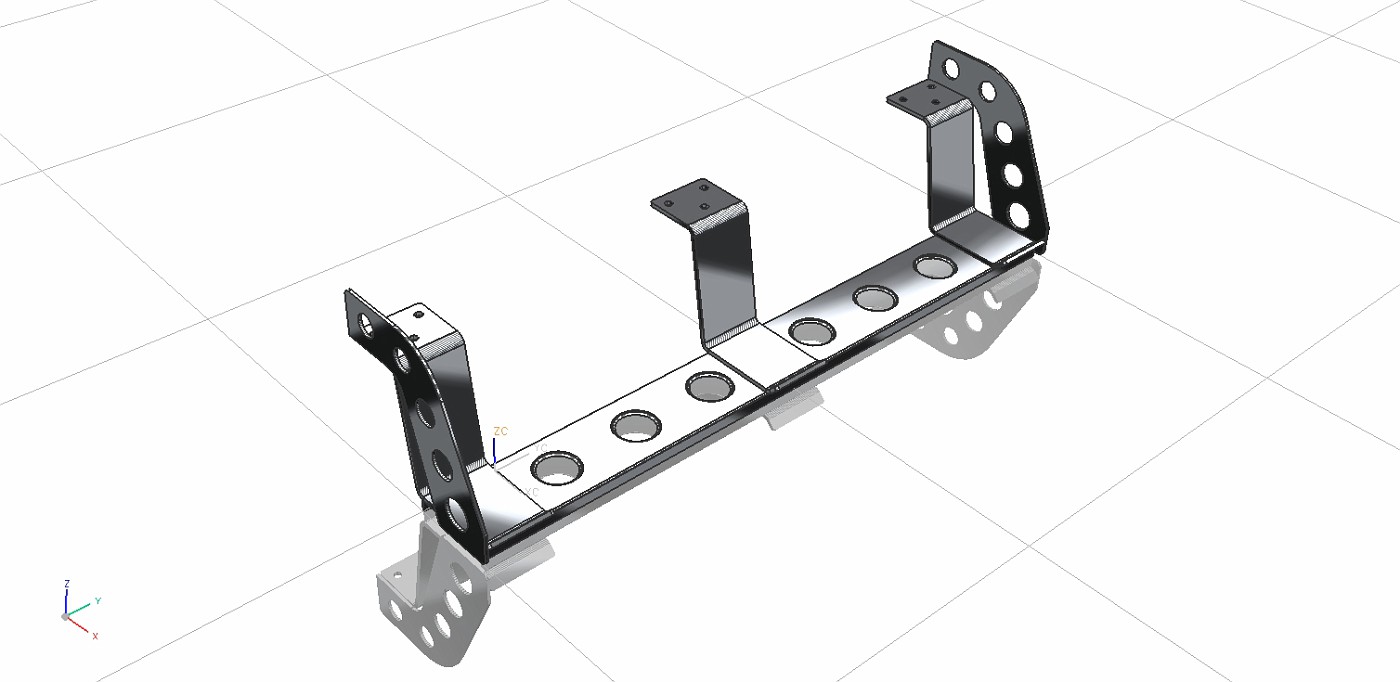
The radiator will sit on some rubber cushions in the three saddles.
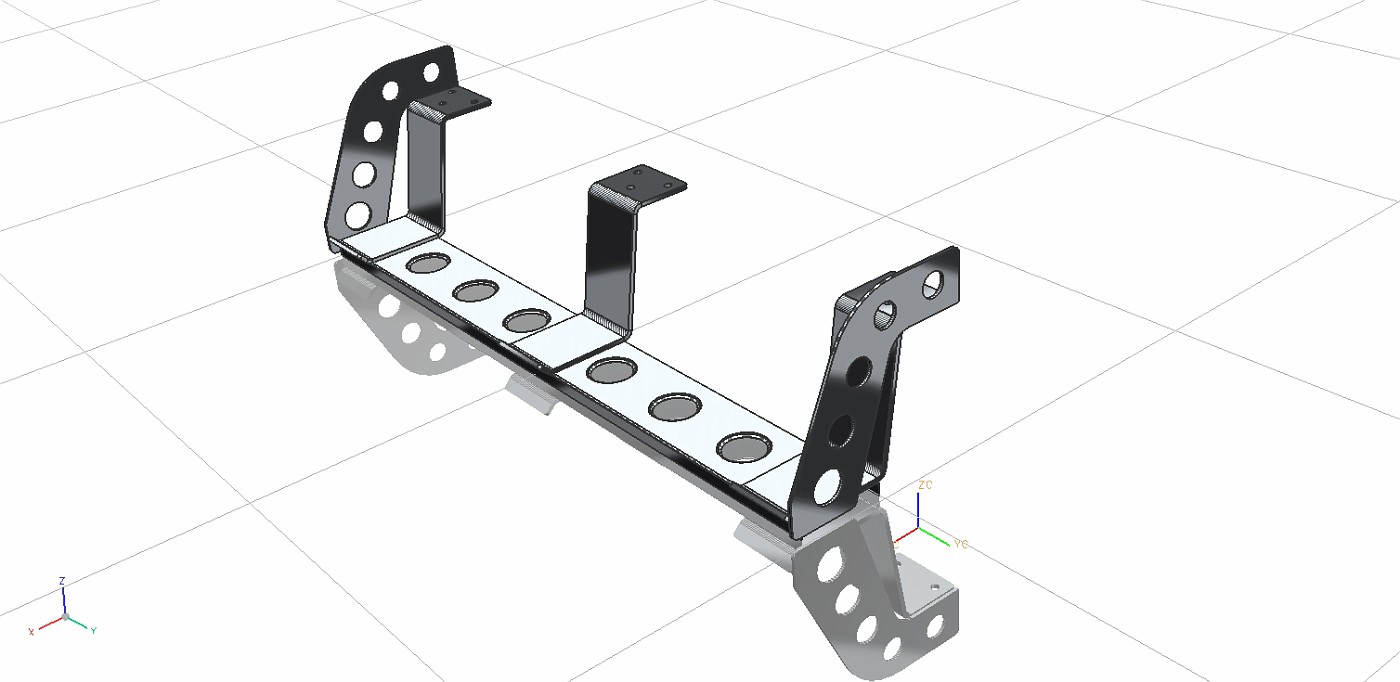
Here are a couple of pics with the radiator in place. This one is from the front. I have the trans cooler in place and will design some brackets for that shortly. I still need to get the power steering cooler modeled and get that placed before I start on the brackets.
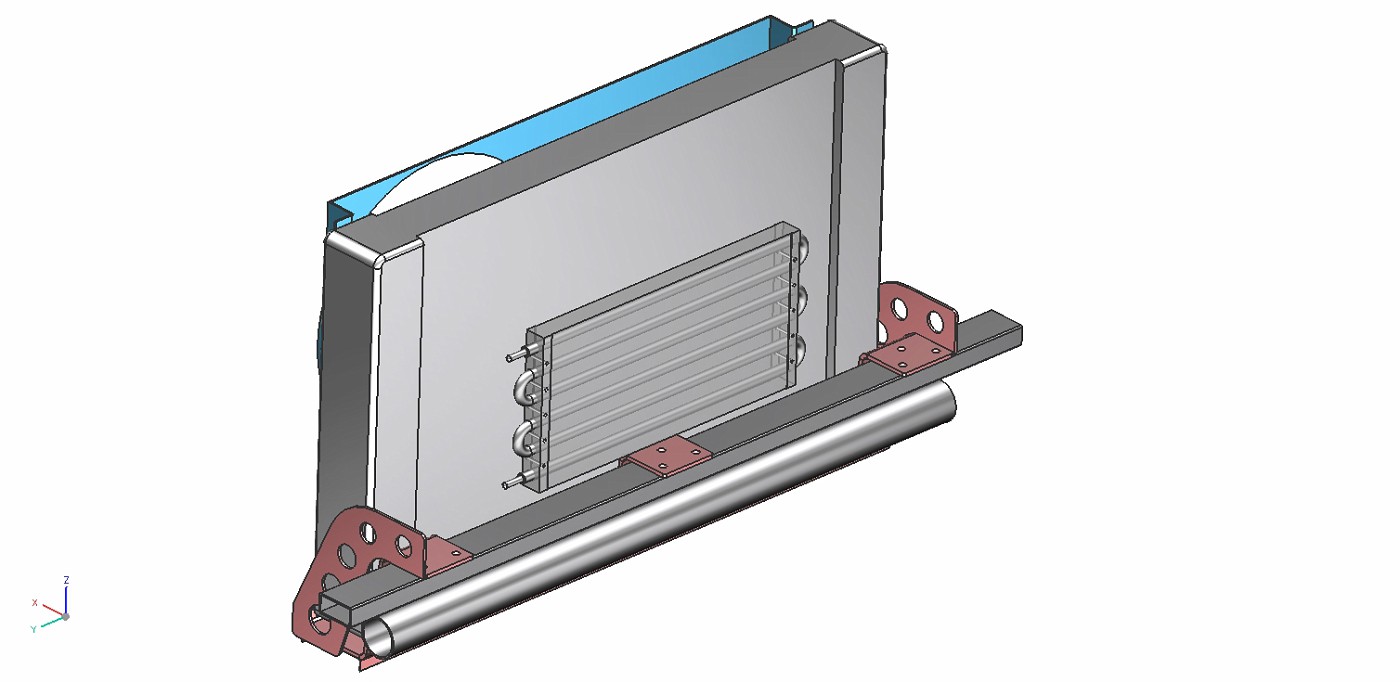
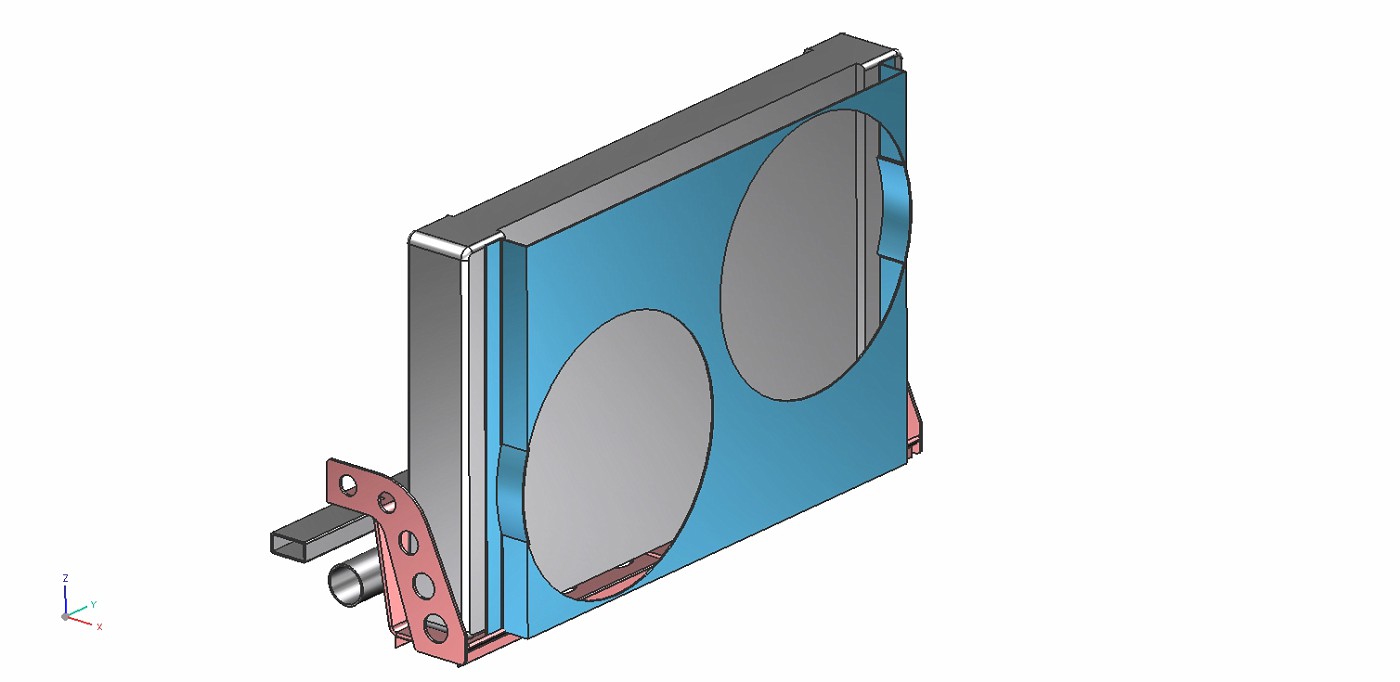
This is a rear pic. You can see the beginnings of the fan shroud design here.
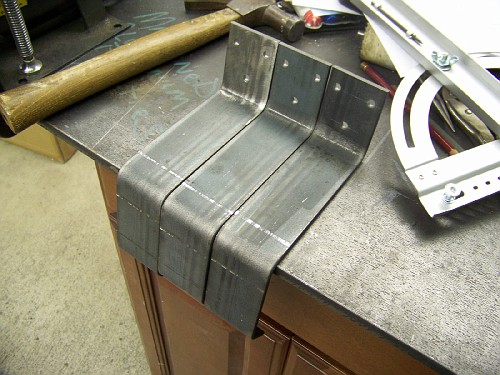
I got out in the shop this morning and got the three saddles pieces bent up and made the two end brackets.
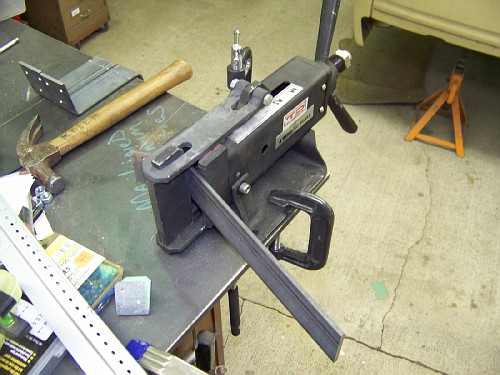
Three saddle brackets. These are made from 3/16ths x 2" steel strip stock
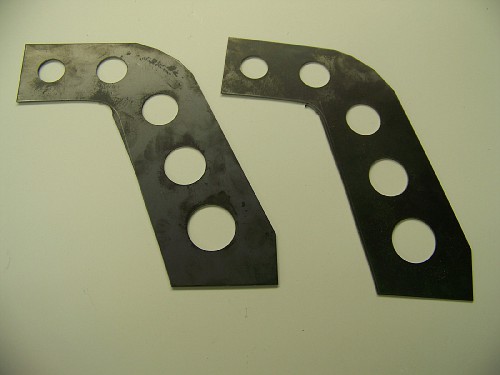
The support brackets were made from some 16 ga sheet stock.
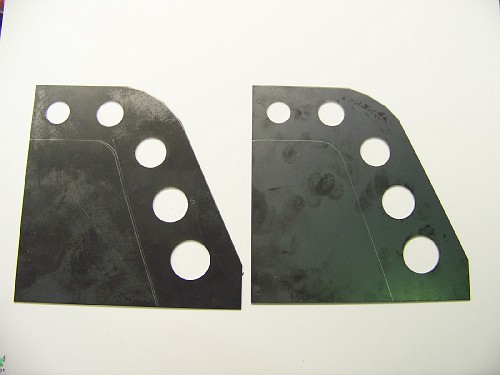
I trimmed the back with the stomp shear but had to rough out the inside cuts on the verticle bandsaw and finish up with a flap disc. The roto-broachs did a nice job cutting the lightening holes.
This is how the end pieces will weld on.
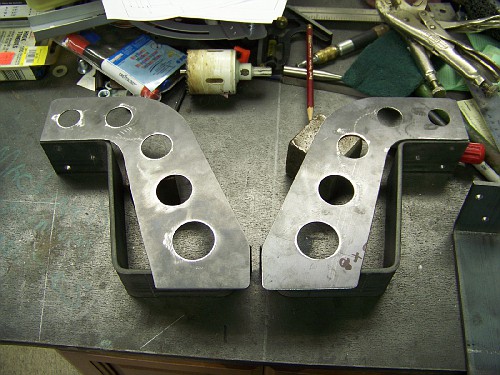
Tomorrow I will get the lower sopport piece made and hopefully sandblast all of the pieces and get them welded together. Have a shindig at the in-laws early afternoon so I will try to get out in the shop early.
Thanks for looking.
MarkMark:
"Bad Ast" Astro Van. Just because I did it... Doesn't mean it's possible...
This my Bad Ast thread...
https://www.pro-touring.com/showthre...roject-Faze-II
This is my Fotki album...
http://astroracer.fotki.com/
-
10-21-2012 #484
Registered User
- Join Date
- Mar 2004
- Location
- Mid-Michigan
- Posts
- 2,764
I got the lower panel made this morning. Cut a piece of 22ga and laid out the hole patterns for the plug welds and lightening holes.
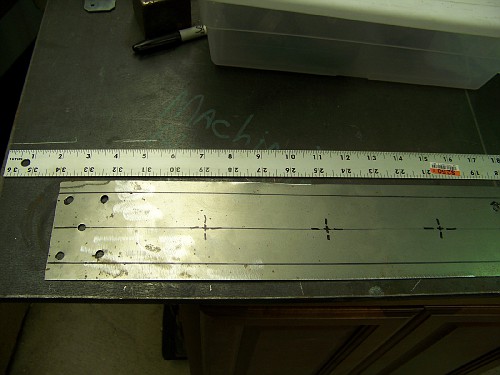
I used the bench mounted hole punch to make the weld holes and my 1 1/2" diameter rotobroach to cut the lightening holes.
I clamped the piece to the table and used the Milwaukee drill to cut them.
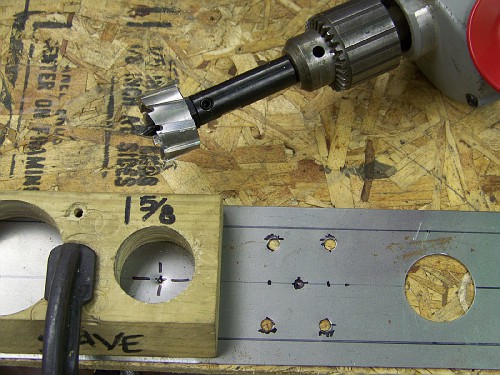
The thin sheet cut real quick and I had all six holes cut in about 10 minutes.
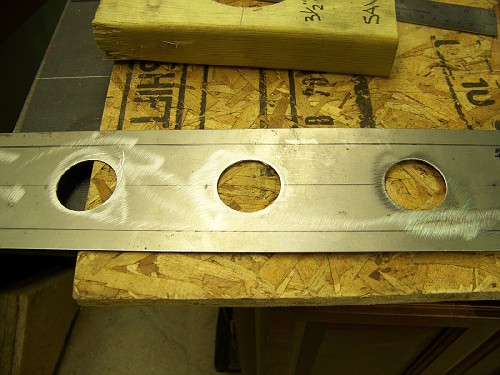
After I did a bit of de-burring I broke out the Mittler Bros. flaring tool. These are sweet!
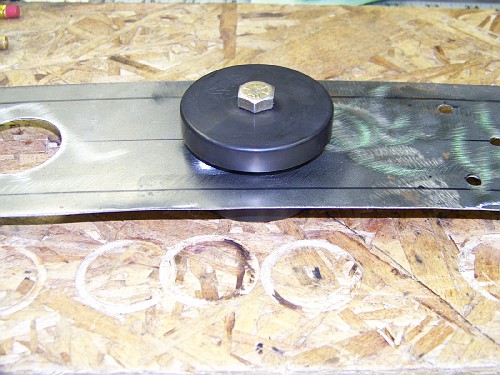
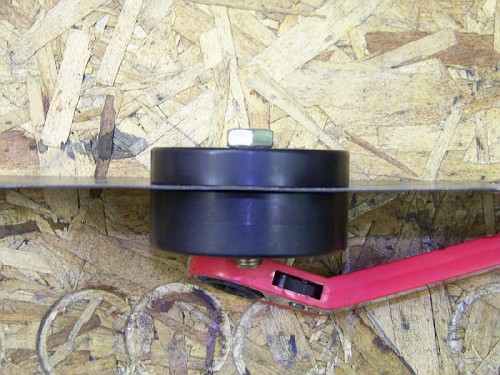
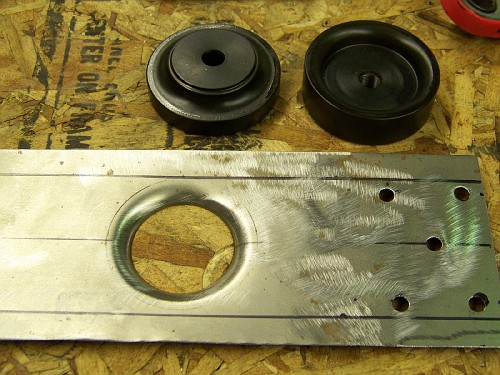
I had these all flared in just a few minutes.
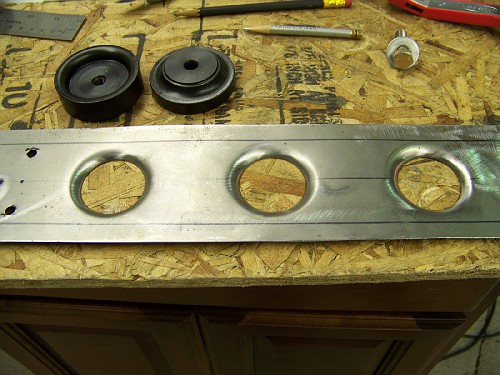
Putting on the first bend. The piece was pretty flimsy until I put this first bend in. It got pretty strong with this and even stronger with the second bend.
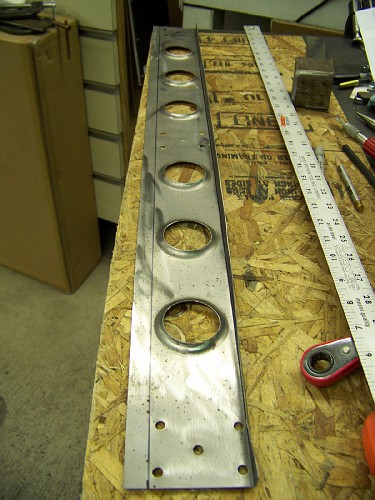
I had to sweeten up the middle of the bends with a hand seamer but it didn't take much.
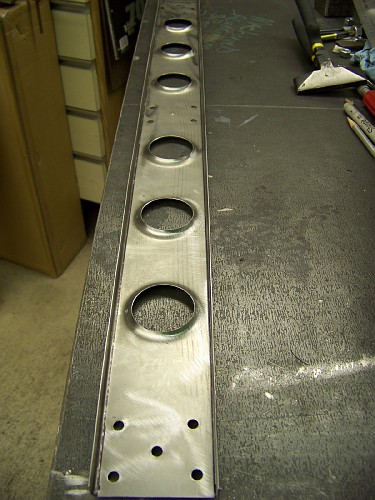
Now that all of the pieces are made I mocked them up for a look see
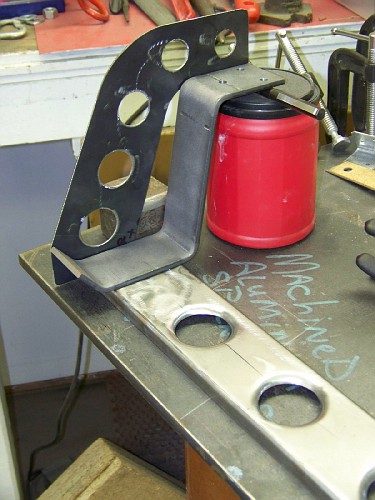
This is the right hand side
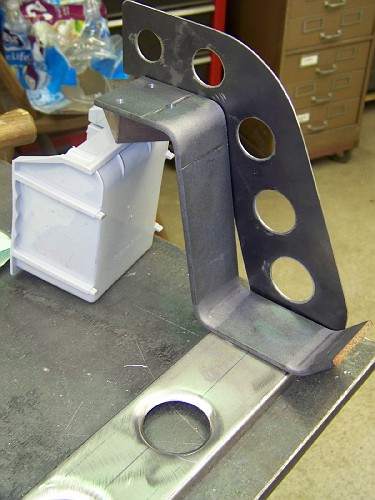
An overall shot
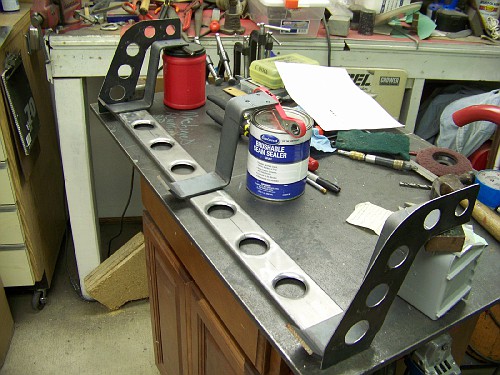
I ran out of time today so I'll get the pieces blasted tomorrow, welded together and at least a coat of primer on them. I have tomorrow off so I can play in the shop.
MarkMark:
"Bad Ast" Astro Van. Just because I did it... Doesn't mean it's possible...
This my Bad Ast thread...
https://www.pro-touring.com/showthre...roject-Faze-II
This is my Fotki album...
http://astroracer.fotki.com/
-
10-21-2012 #485
Registered User
- Join Date
- Nov 2011
- Posts
- 126
looking good!
Doug
1970 chevelle, carb'd, turbo'd 383ci with a tremec tko.
-
10-22-2012 #486
Registered User
- Join Date
- Aug 2007
- Location
- Albemarle, NC
- Posts
- 1,156
i love this project....
always gives me home spun fab ideas.
keep ot up sir!!Michael Crawford
1970 plymouth Duster back under construction:
https://www.pro-touring.com/showthre...uring-makeover
1987 GMC S15 https://www.pro-touring.com/showthre...ct-drivabeater
-
10-23-2012 #487
Registered User
- Join Date
- Mar 2004
- Location
- Mid-Michigan
- Posts
- 2,764
Thanks Guys! Appreciate the compliments!!
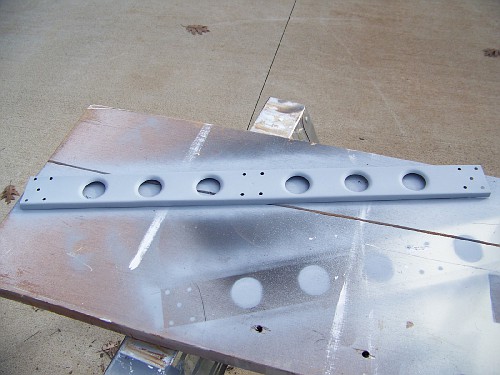
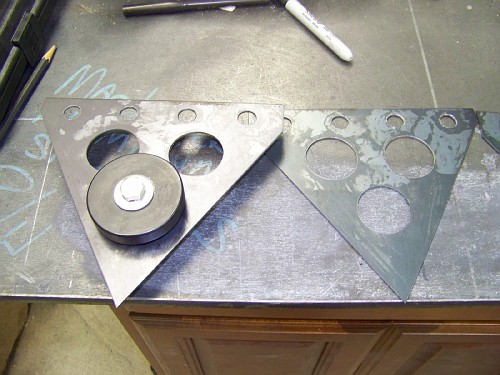
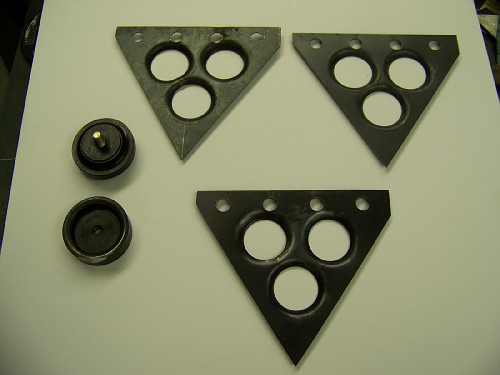
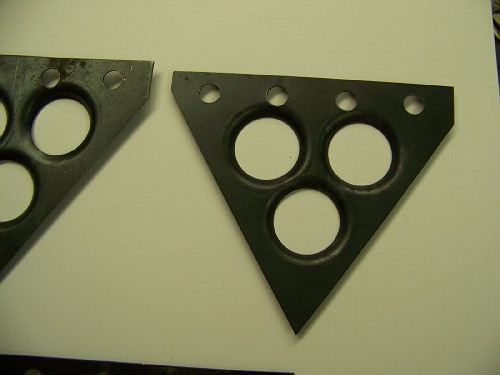
I had yesterday off and got out in the shop early. Mel came out and we hit it pretty hard. I got the sand blaster set up and ran all of the radiator brackets thru the box and got them primed with some Eastwood self-etching weld-thru primer.
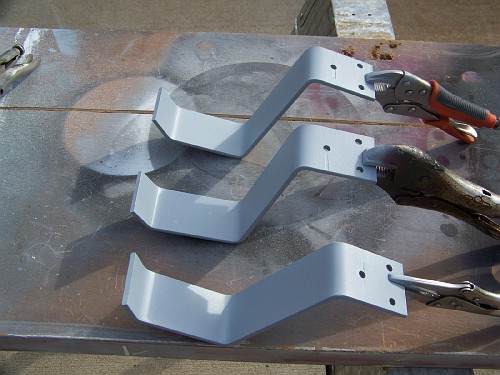
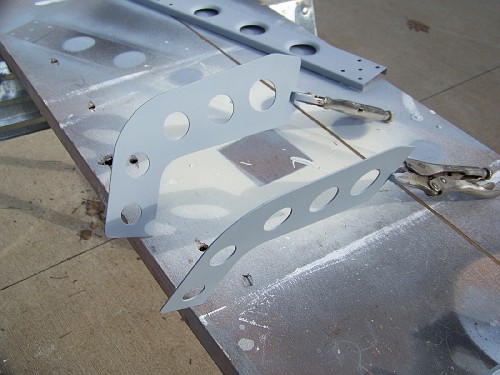
While I had the blaster set up I also ran the seat brackets thru it.
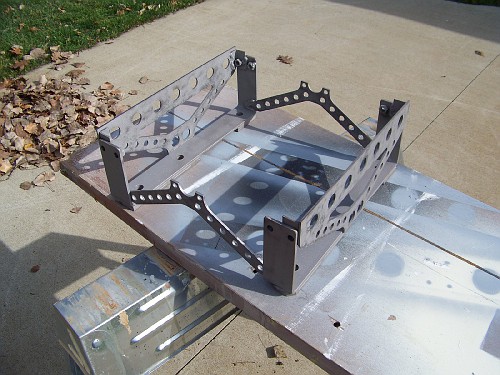
If you have ever worked with hot rolled steel you'll know that sand blasting is about the only way to clean this stuff up. A grinder will do the job but that leaves you with more finish work then it's worth. Blasting leaves a nice even surface ready for primer.
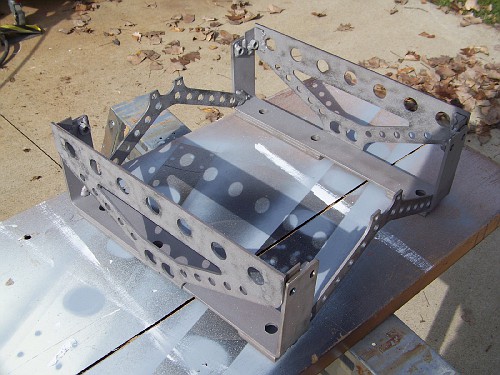
Of course, once it's blasted you have to get some primer on it. It will start rusting almost immediately if you don't...
While I was doing all of the dirty work Mel was having fun building the battery brackets...
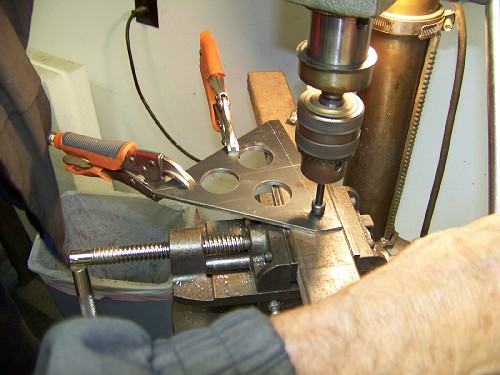
Yea, I let him do it. I'm kind of worried about him though, his eyes are bothering him, sounds like Macular Degeneration. Not good, he goes to the eye doctor Thursday.
These pieces are made from 16ga sheet.
We did all of the flaring in the arbor press. Much easier on the tooling AND our arms.
We were doing the flaring while my primer dried on the radiator brackets. Once I got back too them I jigged them up and got them welded together. I didn't take any pics while I was doing that. Things were moving fairly quickly and I didn't think to stop and snap a few...
I cleaned up the welds a bit and reprimed them and once that was ready I shot the bracket with some "Hammered" Black.
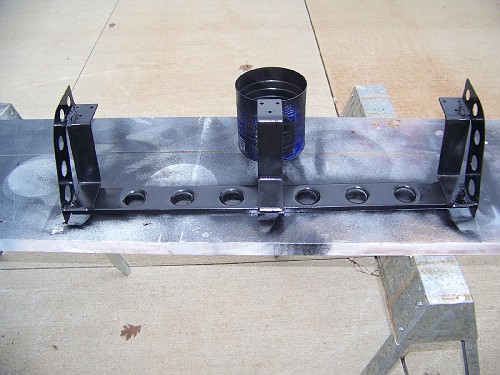
Doesn't look to bad. So sad it's buried under the radiator...
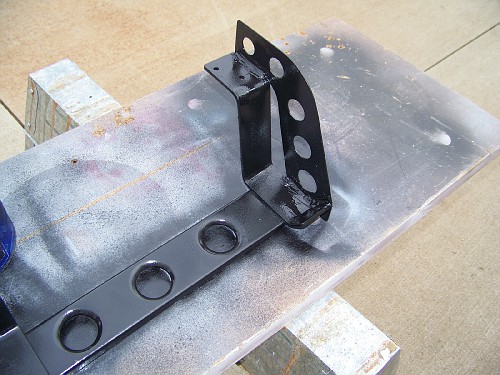
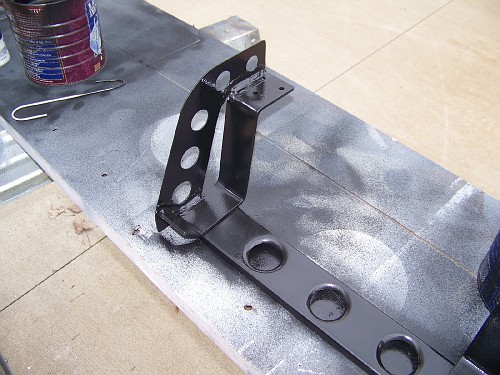
The camera died as I was going to take picks of the seat brackets all painted and the battery bracket all mocked up. I got holes drilled in the rear tub for the mounting plates and will bolt the plates in before I tack the bracket together. That way there is no second guessing as to if it will fit or not.
MarkMark:
"Bad Ast" Astro Van. Just because I did it... Doesn't mean it's possible...
This my Bad Ast thread...
https://www.pro-touring.com/showthre...roject-Faze-II
This is my Fotki album...
http://astroracer.fotki.com/
-
10-26-2012 #488
Registered User
- Join Date
- Mar 2004
- Location
- Mid-Michigan
- Posts
- 2,764
After working on the yard tractor every night this week I finally got that wrapped up last night. Pulled off the mower deck so I could replace the brake switch activator. This is a very thin stamped steel piece that pushes on a switch when the brake is depressed. The tractor won't start if this is broke and the damn thing breaks at least once a year... While I had the deck off I sharpened the blades, cleaned it all up underneath and doused it with silicone spray. The silicone really helps keep the cut grass from loading up under the deck. I have had zero problems with a plugged mower deck since I started doing this years ago. It works really well.
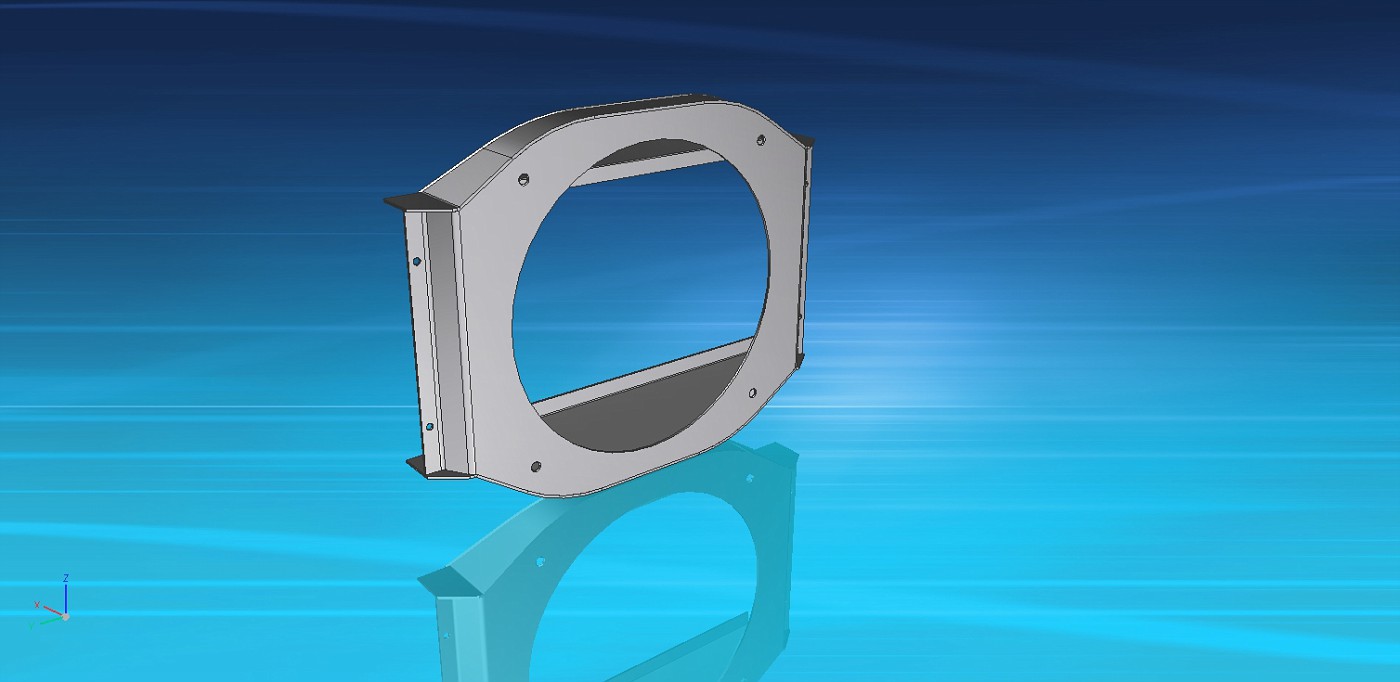
Anyway... I got that finished up early last night so i jumped on the computer and started modeling the 10" fan and designed a shroud for the trans cooler. here is a pic of the cooler in position on the front side of the radiator. I spaced the cooler out from the radiator a couple of inches to hopefully not block too much flow.
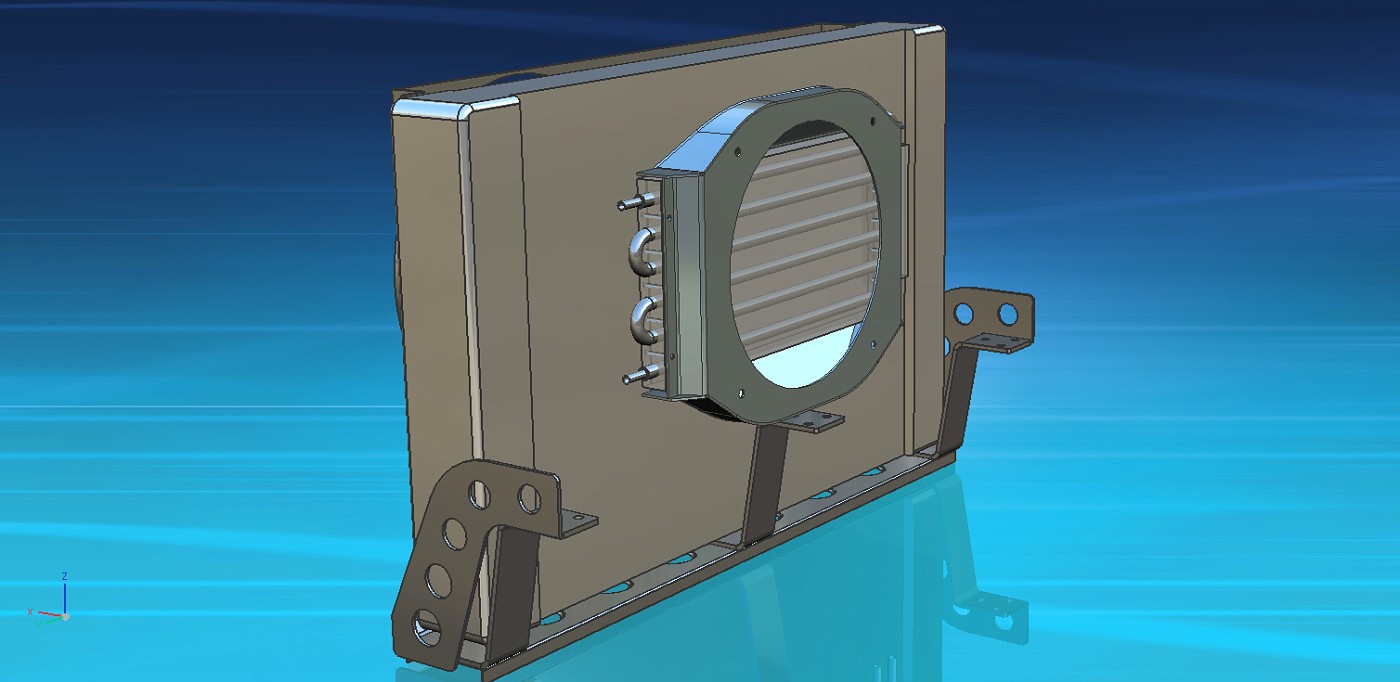
This is a pic of the shroud. Because the fan is bigger in diameter then the cooler is wide I added some closeouts at the top and bottom to help contain the air flow and direct it thru the cooler.
You can see the angled closeouts in this side view
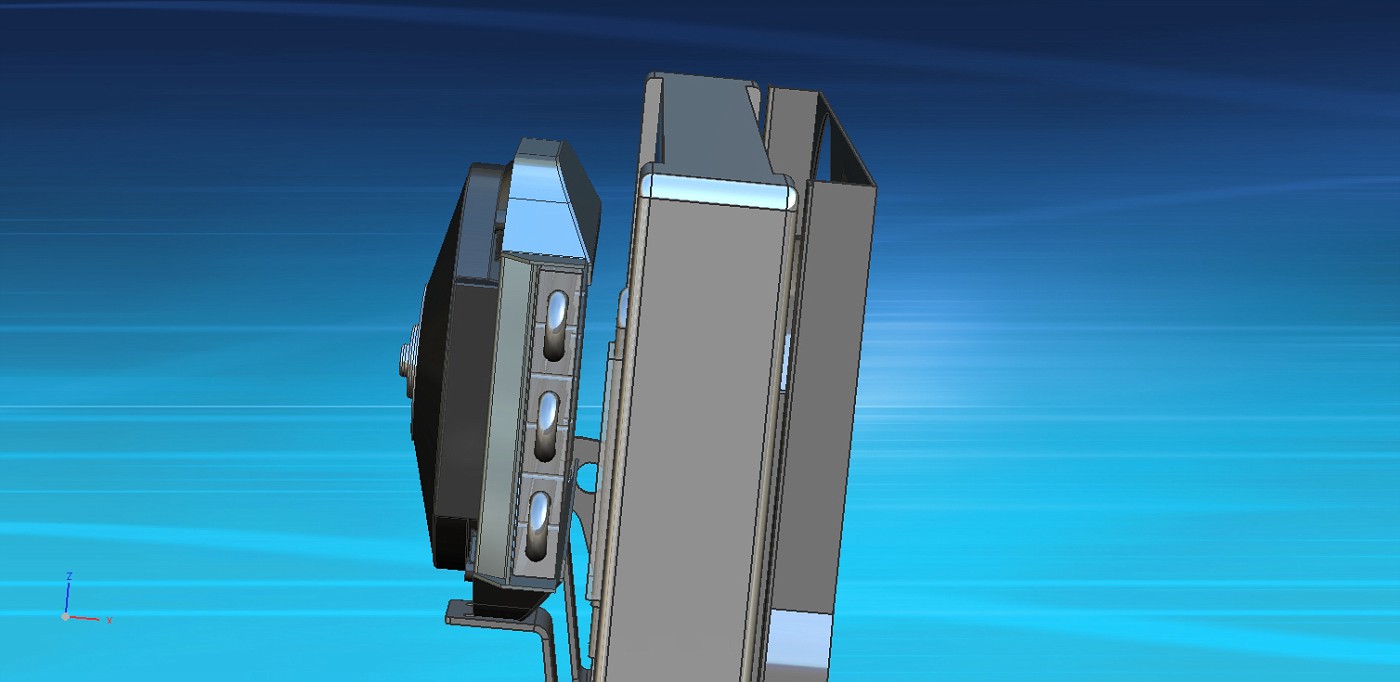
The shroud wraps around the cooler on the back side and will seal it up very well. There will be a bit of blow-by but 95& of the flow will go thru the cooler.
The fan mounting face.
Here is a shot with the fan in place.
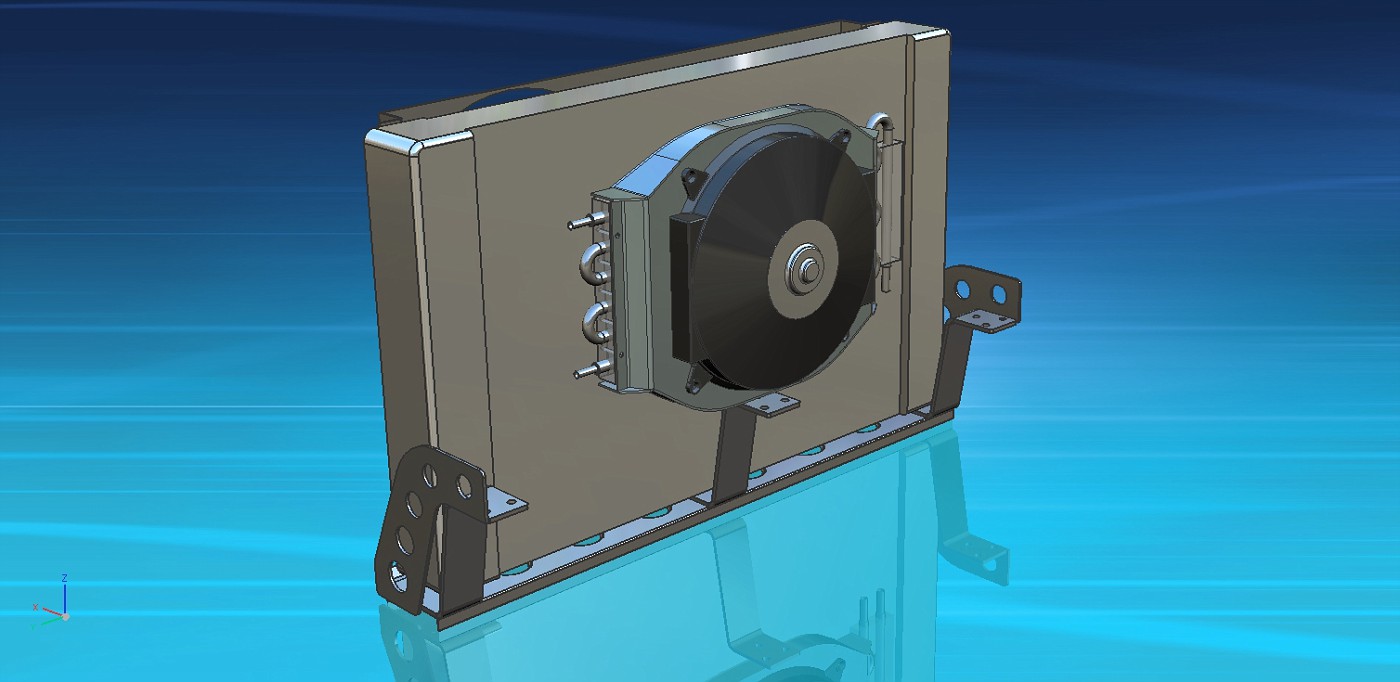
I also modeled up some verticle brackets to mount the trans cooler and shroud to the front core support. I need to verify some dimensions for those before I do the details.
I hope to get started building this stuff this weekend.
Thanks for looking
MarkMark:
"Bad Ast" Astro Van. Just because I did it... Doesn't mean it's possible...
This my Bad Ast thread...
https://www.pro-touring.com/showthre...roject-Faze-II
This is my Fotki album...
http://astroracer.fotki.com/
10-26-2012 #489 Registered User
- Join Date
- Aug 2004
- Location
- Suisun City, Ca.
- Posts
- 792
I like watching this project come together. Good fab skills.
Mike
11-03-2012 #490
Registered User
- Join Date
- Mar 2004
- Location
- Mid-Michigan
- Posts
- 2,764
Thanks Mike, appreciate the kudos. Originally Posted by mdprovee

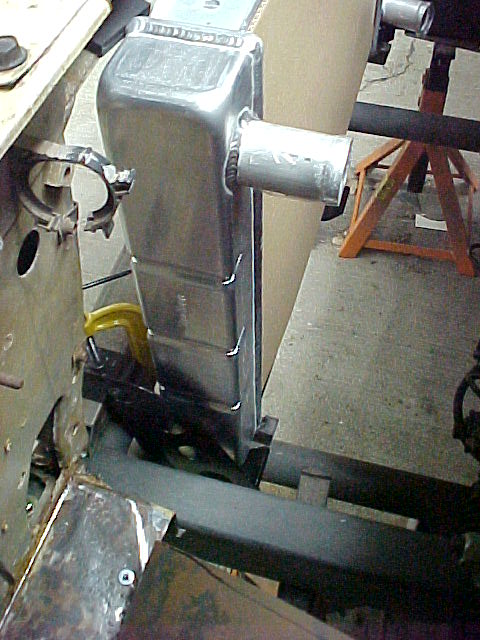
Got a bit done this morning. Mel came out and we mocked up the lower rad support. He went junkyarding yesterday and picked up a few radiator mounting rubbers. We used a couple under the radiator and cut two up for the upper mounts.
The radiator sets nicely in these two. We drilled 1/4" diameter holes in the cross-piece to hold them in place with the little rubber nipples.
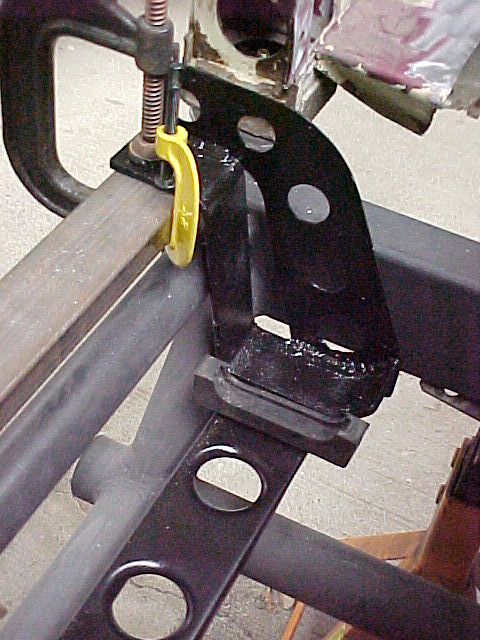
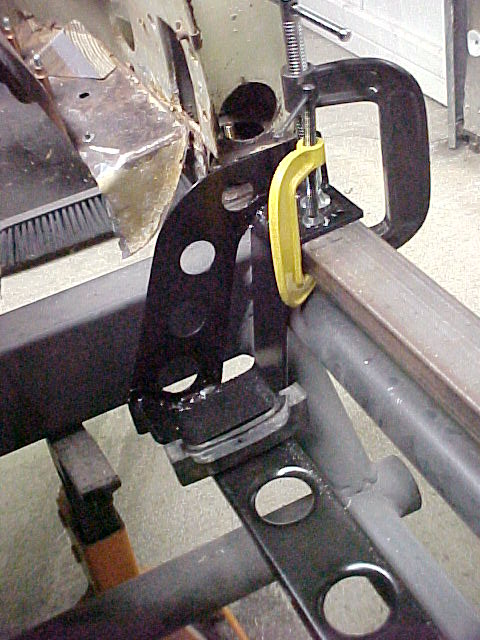
Radiator in place on the rubbers.
We cut up two rubbers to fit into the upper radiator channel.
This is the passenger side.
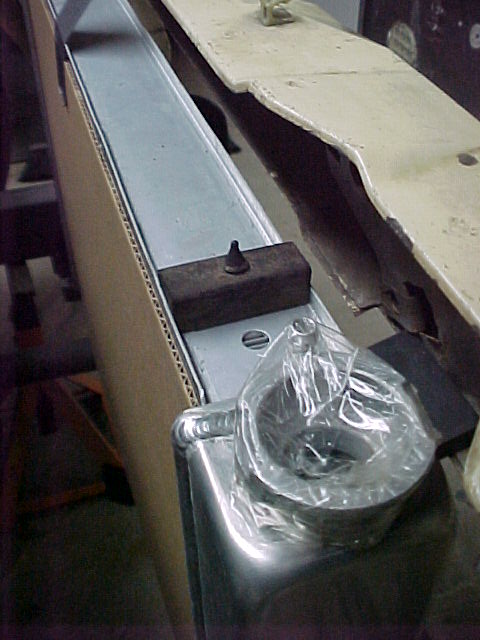
The drivers side. These will get clamped into place with upper radiator brackets.
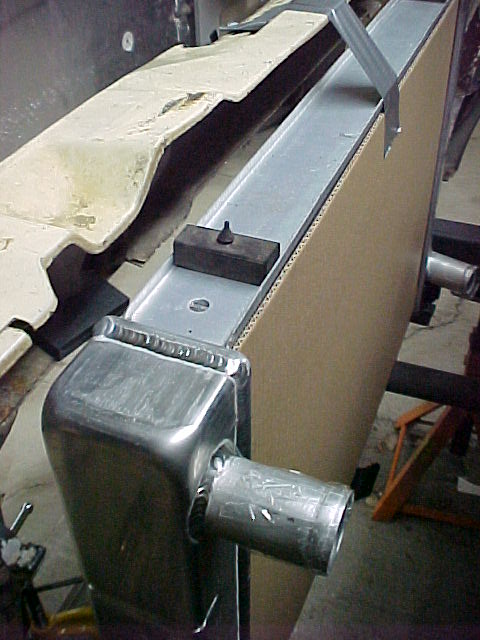
Once we had the radiator sitting at the correct height, we could design the upper radiator brackets.
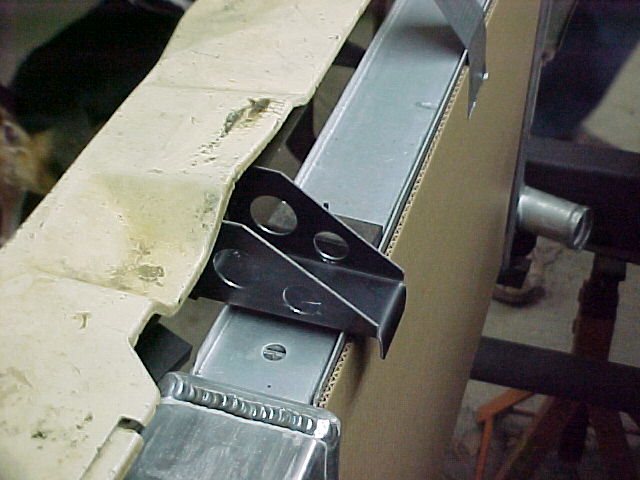
We measured everything and took into account the foam strip and shroud at the back of the radiator. We will use a piece of closed cell stick-on foam rubber to seal the upper and lower shroud flanges and this is what the upper brackets will pull into place and compress to get some clamp on the radiator. Rubber strips on the support side will give something to clamp against.
I didn't get any fab pics of the brackets... But we laid these out on some 16ga steel and stomp sheared, rota-broached and press braked them into shape.
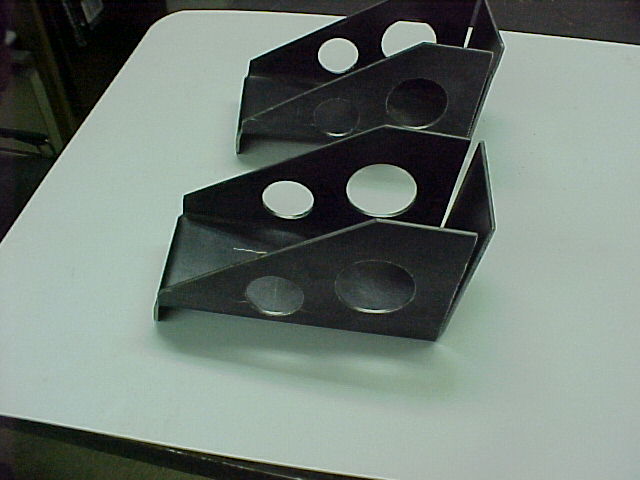
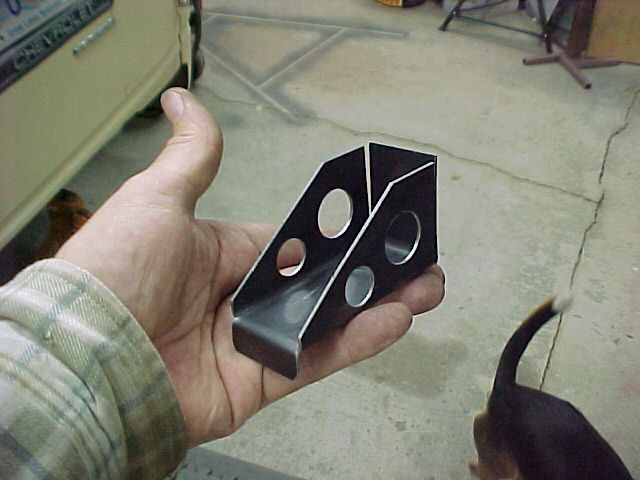
We need to pull the corners together, weld them up and drill the holes but we knocked off for the day and will get that done tomorrow.
Along with mocking up the battery bracket in the truck and getting that welded.
We will start fabbing the shrouds tomorrow also.
Mark
Mark:
"Bad Ast" Astro Van. Just because I did it... Doesn't mean it's possible...
This my Bad Ast thread...
https://www.pro-touring.com/showthre...roject-Faze-II
This is my Fotki album...
http://astroracer.fotki.com/
11-04-2012 #491
Registered User
- Join Date
- Mar 2004
- Location
- Mid-Michigan
- Posts
- 2,764
We hit it pretty hard today. Mel started setting up the battery brackets to get them welded and I started figuring out how to cut the holes in the aluminum panels for the radiator shrouds.
Here are the brackets as Mel was figuring out how to clamp this mess together for welding.
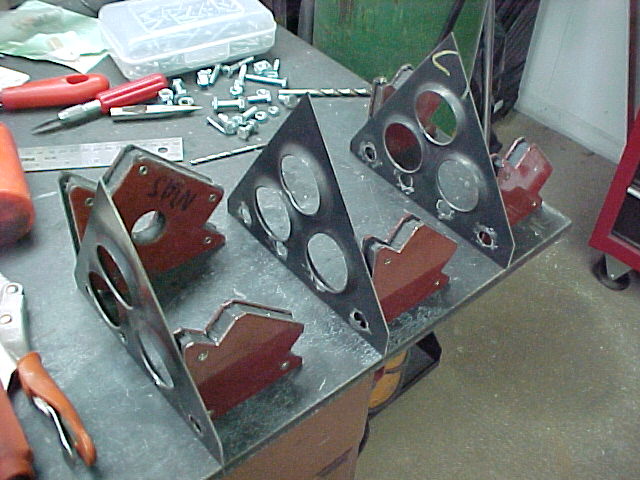
He made some small angle iron brackets to get everything clamped up. Once it was clamped up we tacked all of the pieces together so we could mock it up in the van.
Here are the tacked brackets set in place on the fender mounted straps.
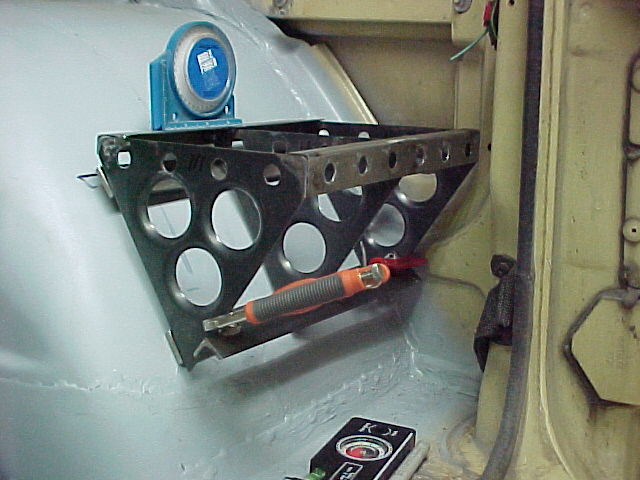
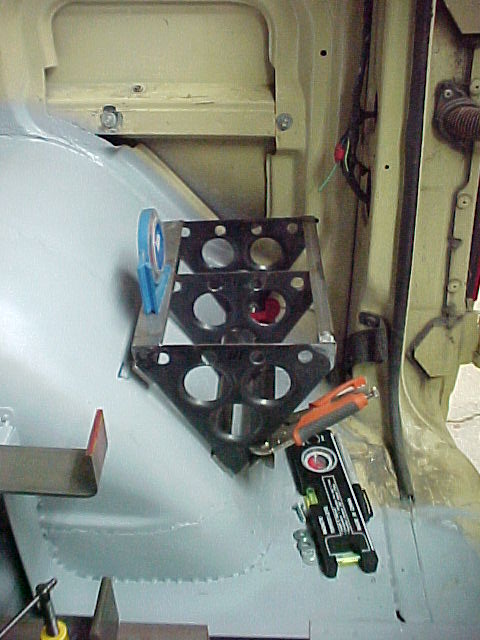
Once we got everything squared up I tacked the brackets to the fender straps.
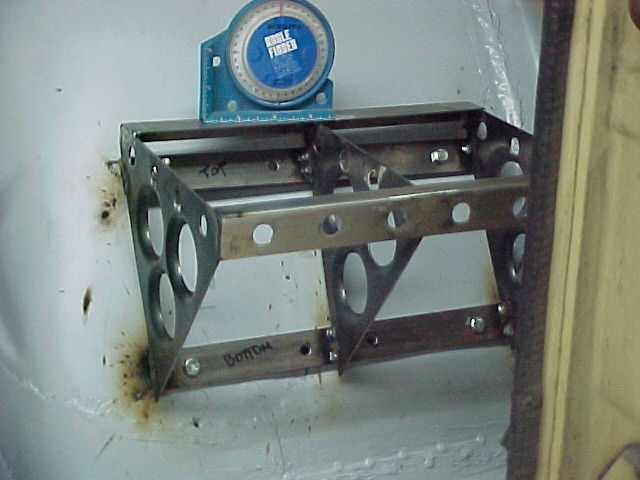
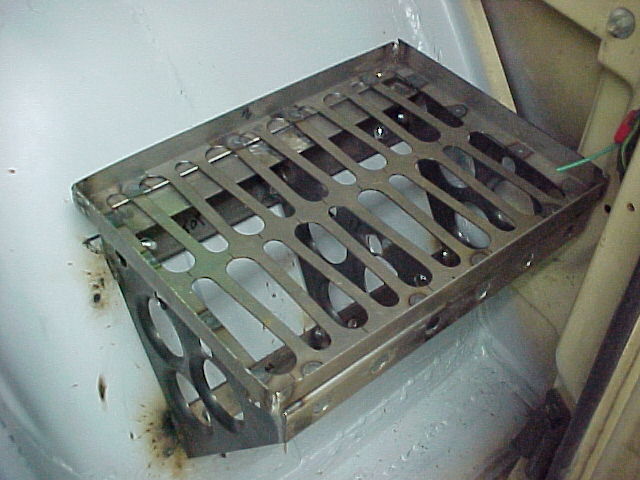
It's amazing how strong these little guys are! They shouldn't have a problem holding up a battery.
While Mel was building stuff to build stuff, I was building a top for my router table. I used a piece of 1/4" plywood and clamped it to the top of the table. I used this to spin the aluminum panels around a center hole to cut out the fan openings.
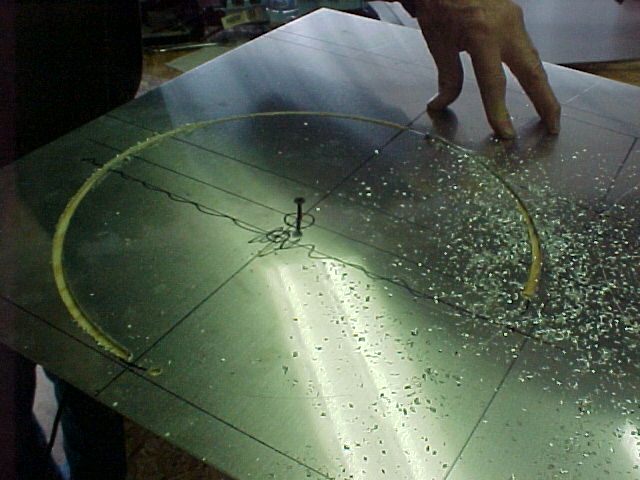
I used some Castrol stick wax to lube the 1/4" carbide cutter in the router.
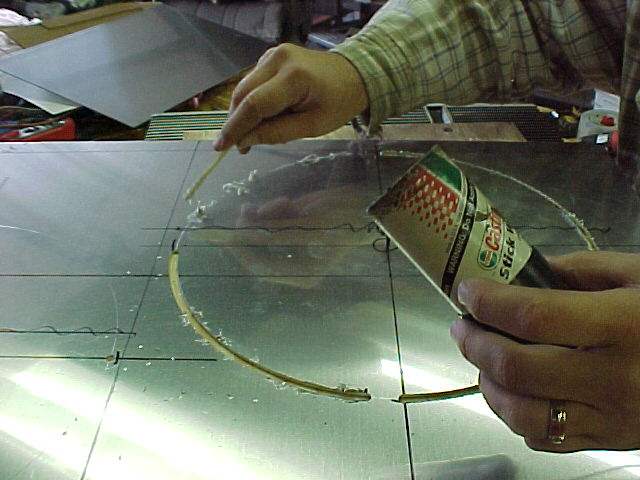
In order to "keep" the center of the hole from falling out, I had to stop short on 3 of the cuts. You can se the end of the first cut at the top of this pic. The bit is set in the next hole and the stick wax is spread on the cut line.
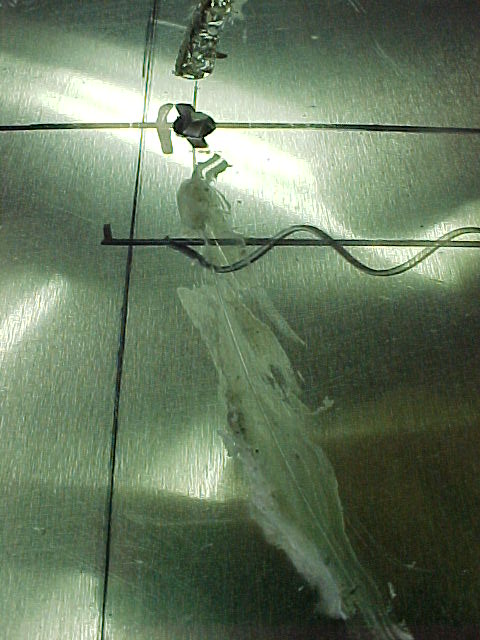
I drilled 1/4" starter holes at 4 points and ran the router up till it was a 1/2" or so shy of the next hole.
This was pretty noisey but it worked well and I got both openings in the radiator shroud cut along with the one for the trans cooler.
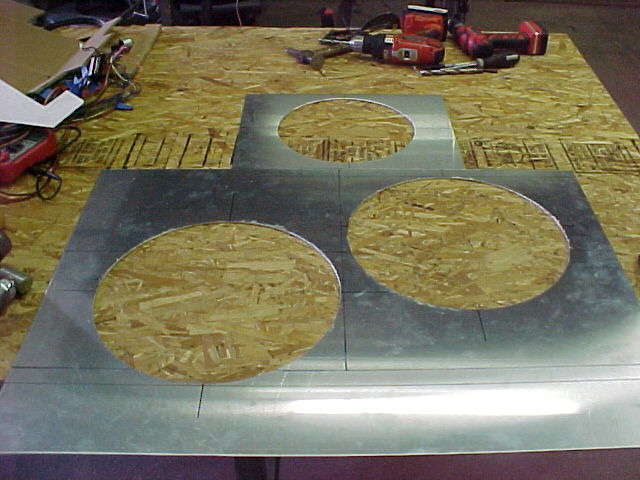
Once I got the holes cut I worked on the trans cooler shroud. I laid out the shape and bend lines and did some off hand cutting on the verticle band saw.
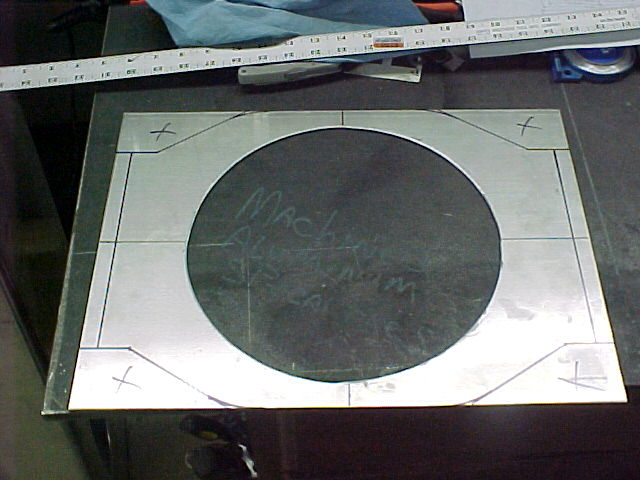
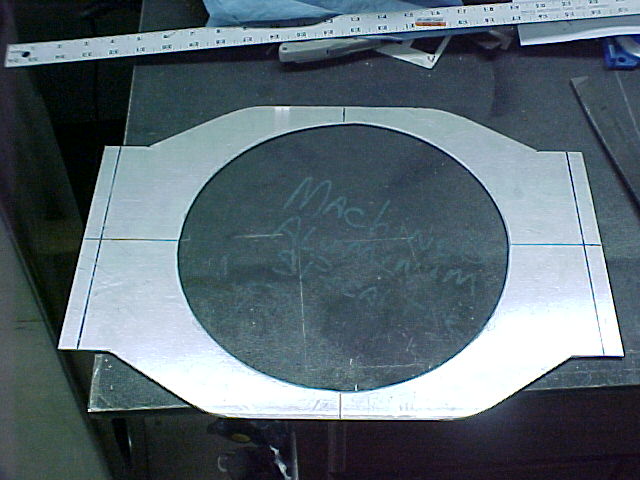
I bent the .090 aluminum in the 3 in 1 tool. It was kinda tuff but it did the job.
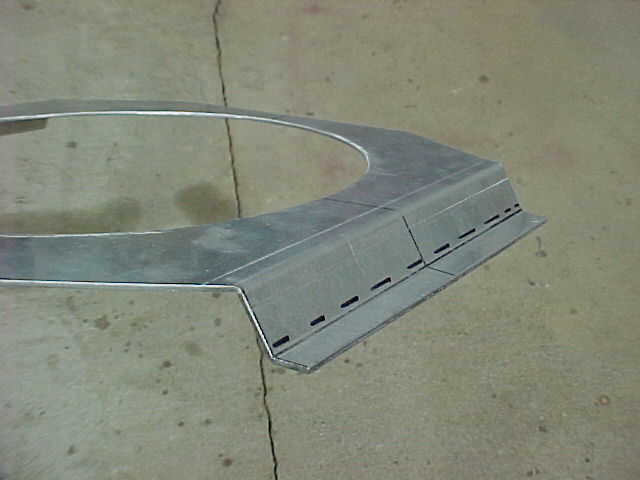
All bent up and sitting nice and flat... I like it when it comes together like planned...
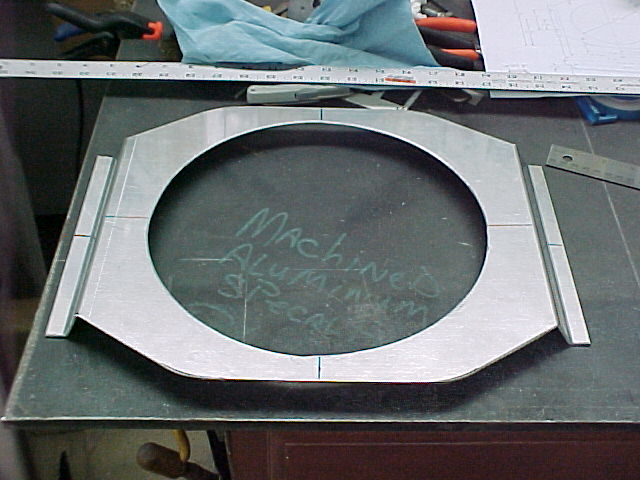
I had to set the mating components in place just to test the fit. Perfect!
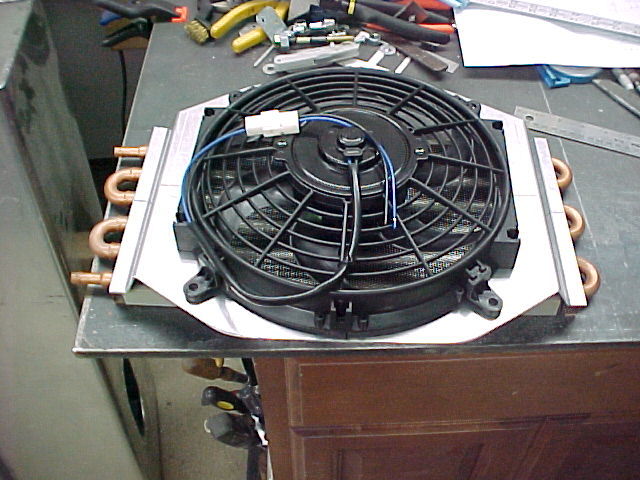
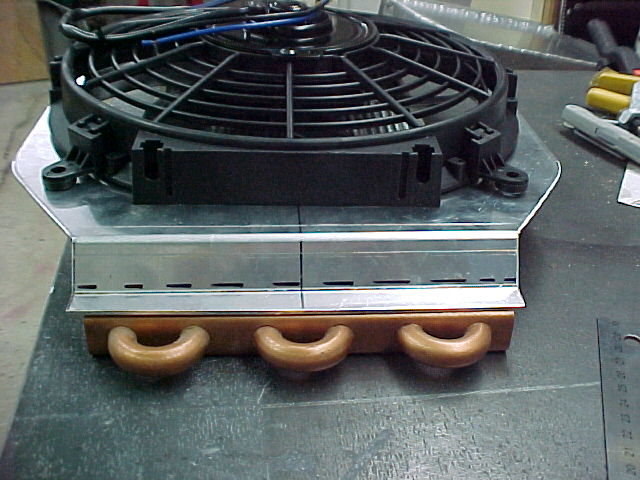
I'll try to get out in the shop after work this week to get the rest of the trans cooler shroud pieces made. They are pretty simple and shoud go quick.
Thanks for looking!
MarkMark:
"Bad Ast" Astro Van. Just because I did it... Doesn't mean it's possible...
This my Bad Ast thread...
https://www.pro-touring.com/showthre...roject-Faze-II
This is my Fotki album...
http://astroracer.fotki.com/
11-12-2012 #492
Registered User
- Join Date
- Mar 2004
- Location
- Mid-Michigan
- Posts
- 2,764
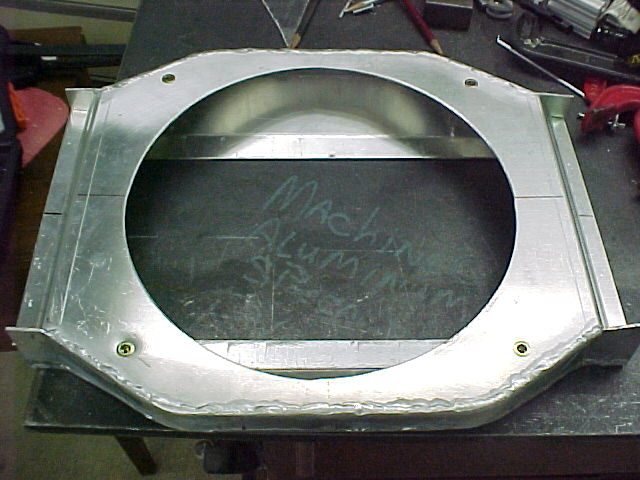
I got the trans shroud finished up this weekend. Mel worked on the battery brackets. Drilled holes for the battery tray and ran all of the pieces through the sand blaster and got them primed. I worked on the rest of the pieces for the trans shroud. These are the upper amd lower closeouts that will weld to the plate I made last weekend.
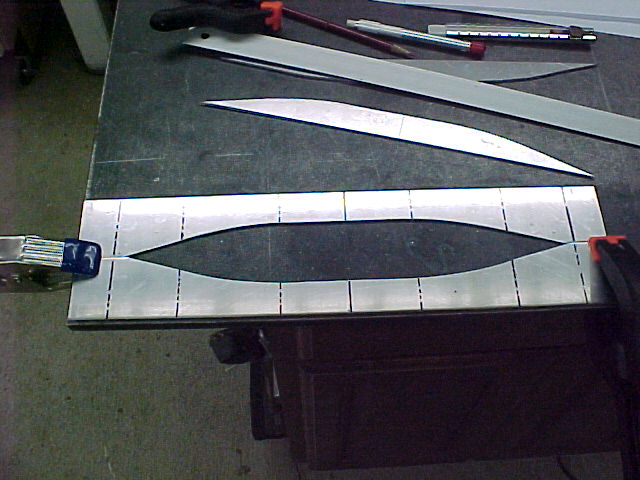
The layout lines you see in the above pic are tangent points for the bends I had to put in them.
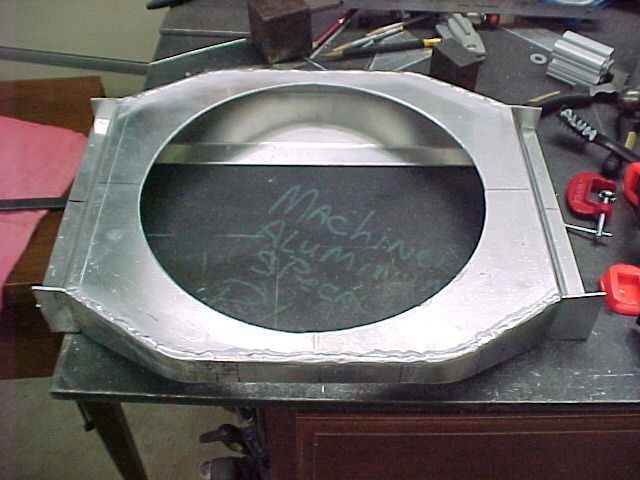
This pic is of the back plate that closes off the back of the trans cooler. It tapers out from the fan to help direct airflow thru the cooler (I hope...).
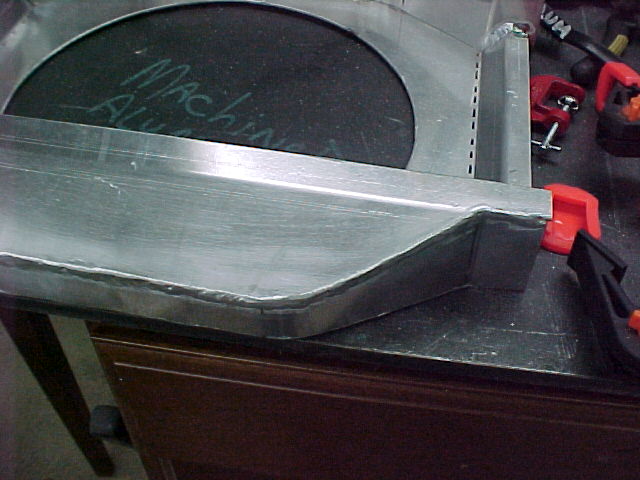
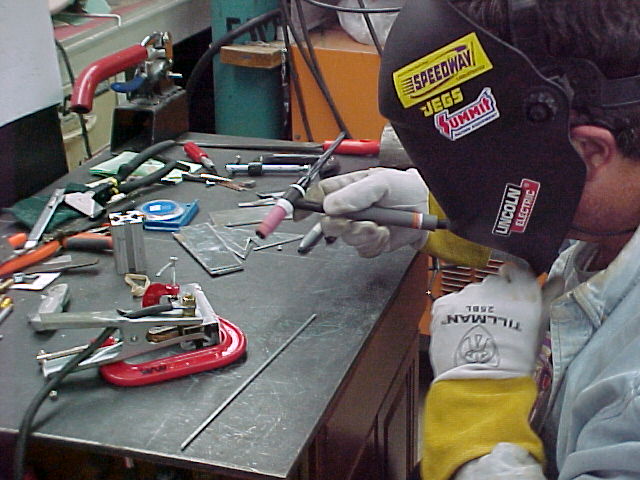
This is the first time I have done any REAL aluminum welding other then in a few classes I have taken. I was pretty leary as I hadn't done any aluminum welding with my Tig. I did a few practice beads and got back up to speed.
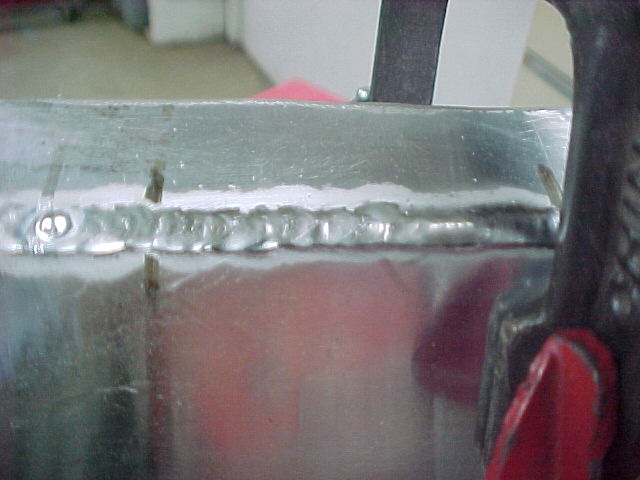
I did okay. The welds are serviceable and I only blew two holes which I filled with some 1/8th inch filler rod. By the time I was finishing up I wasn't doing to bad and actually had some okay looking beads. At least my consistancy was getting better...
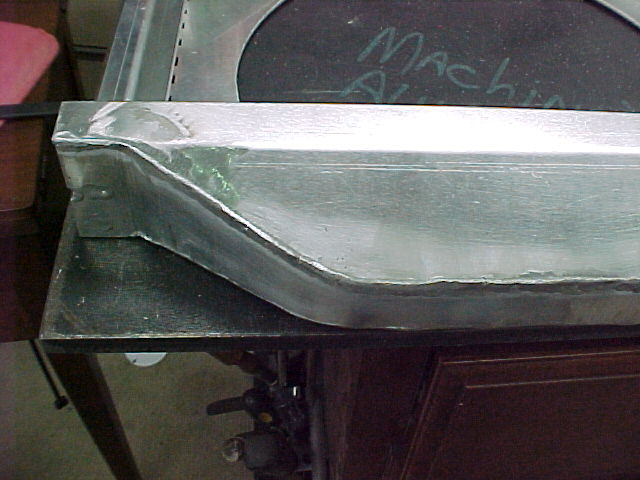
I had a few heavy spots that I sanded down but for the most part I was happy with my first effort...
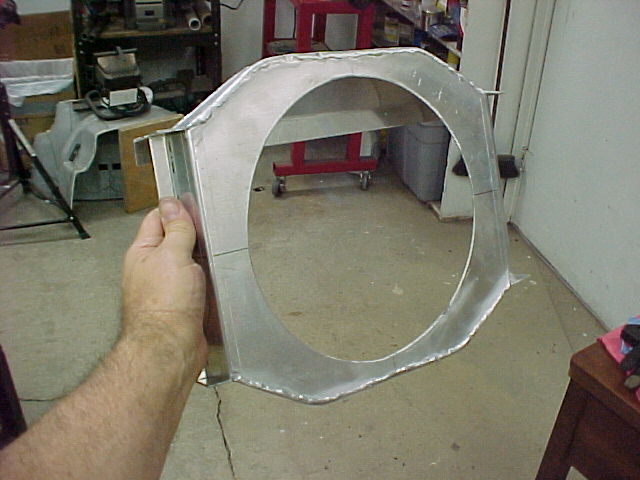
I got the fan mounted with some AVK's and mocked up the cooler for a look see....
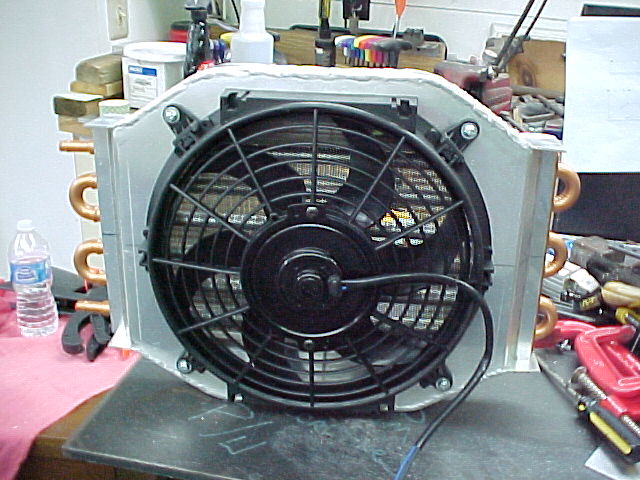
The back side
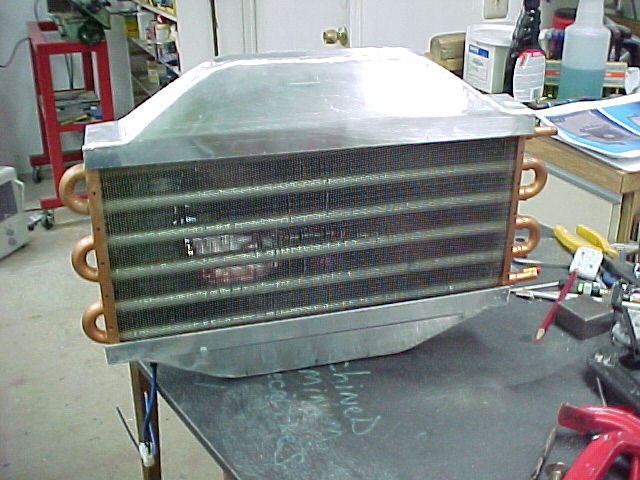
I will be picking up some black oxide button head cap screws for the real mounting bolts. I'll get the cooler mounted to the shroud also. I need to redrill the holes for the cooler. The ones pierced in the end channels are not centered well.
Thanks for looking!
MarkMark:
"Bad Ast" Astro Van. Just because I did it... Doesn't mean it's possible...
This my Bad Ast thread...
https://www.pro-touring.com/showthre...roject-Faze-II
This is my Fotki album...
http://astroracer.fotki.com/
11-12-2012 #493
Registered User
- Join Date
- Apr 2001
- Location
- The Netherlands
- Posts
- 1,509
I might have missed it...but won't you need a drain hole in the shroud? it looks like it can hold a lot of water.... however it is a great looking piece!
11-13-2012 #494
Registered User
- Join Date
- Mar 2004
- Location
- Mid-Michigan
- Posts
- 2,764
Good catch! Thanks Martin! I hadn't even thought of that. It'll happen soon! Originally Posted by Martin71RS
Mark:
"Bad Ast" Astro Van. Just because I did it... Doesn't mean it's possible...
This my Bad Ast thread...
https://www.pro-touring.com/showthre...roject-Faze-II
This is my Fotki album...
http://astroracer.fotki.com/
11-18-2012 #495
Registered User
- Join Date
- Mar 2004
- Location
- Mid-Michigan
- Posts
- 2,764
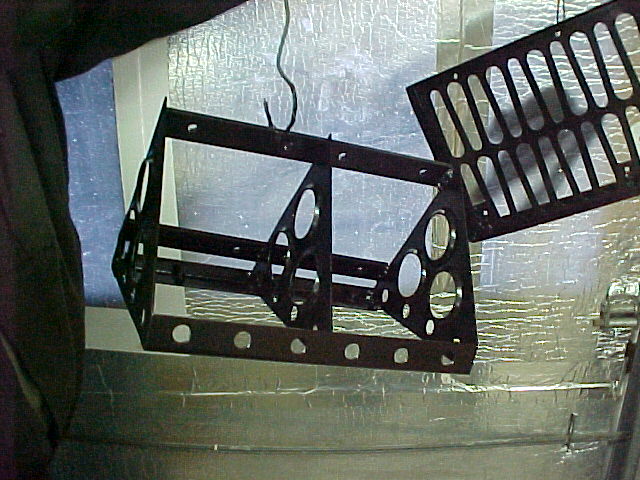
Got a lot done this weekend! Mel painted the battery brackets and they turned out great!
I spent a few hours acquanting myself with my tig welder. Playing with settings and getting to know how the pulse and freq settings affect the weld. I was starting to get the feel for it and pulled some real nice beads today. I am almost out of gas though so I need to get a new cylinder this week.
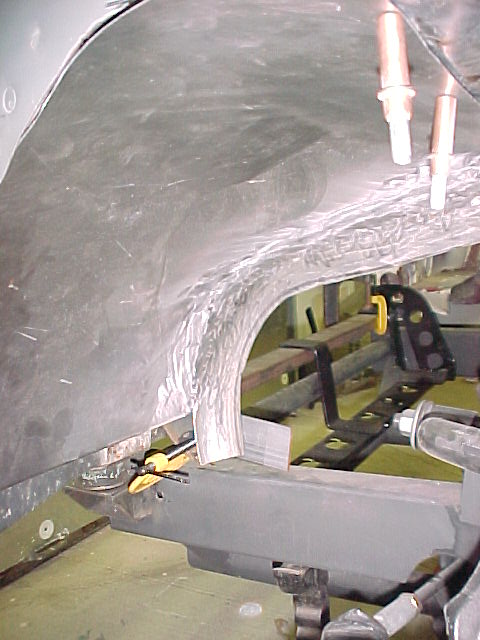
We worked on the left wheel well and got it fleshed out real nice. We ended up re-making the piece I had fabbed a month or so ago. Needed it about an inch wider and didn't want to scab in a piece.
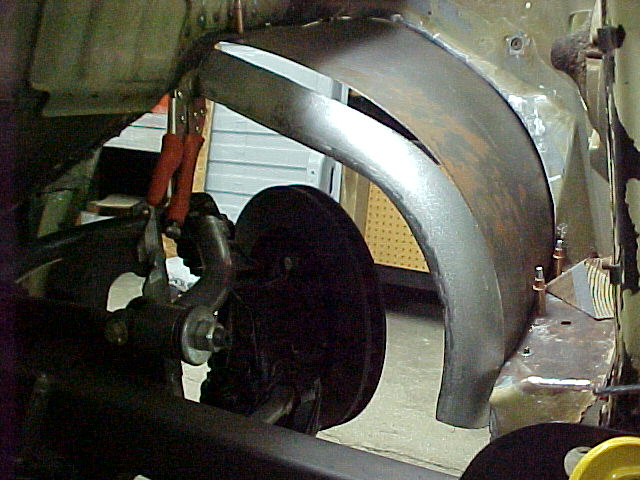
We quartered up a piece of 3" dia. muffler tubing to make the rolled edge.
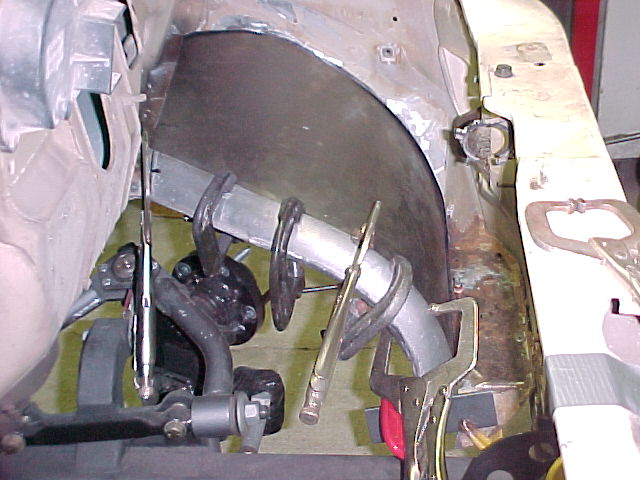
While I was playing with the welder Mel remade the pattern for the new wheel well. Here is the new piece all fit in and ready to weld to the tubing.
Here is a pic from underneath. This provides PLENTY of room for the tire at full jounce/full steer.
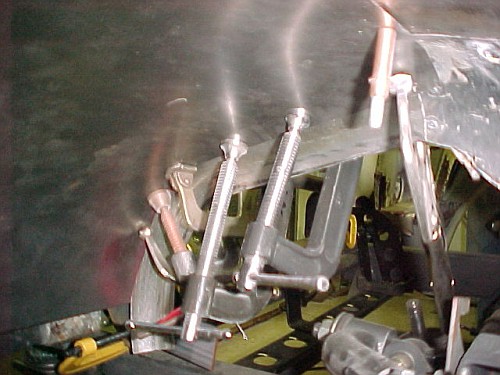
Here it is after tacking.
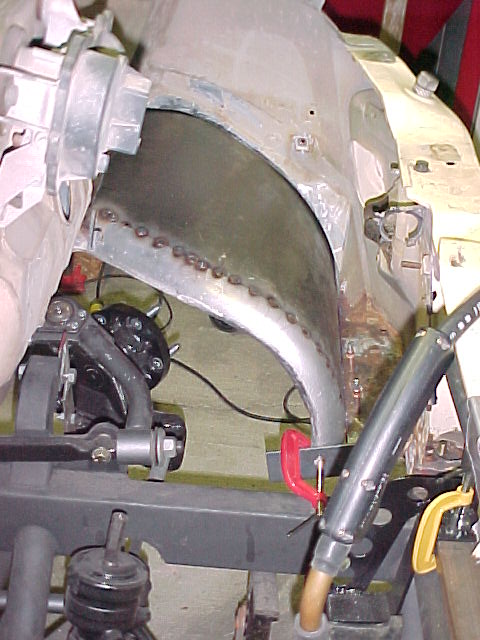
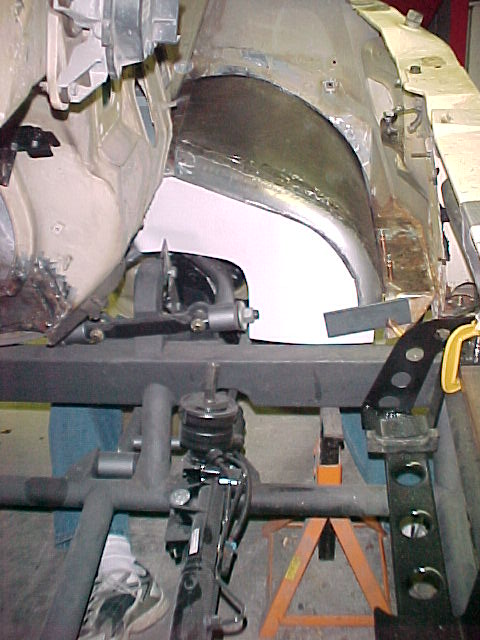
We pulled it out and finish welded it. After a bit of sanding we clecoed it back in and started making the inner skirt.
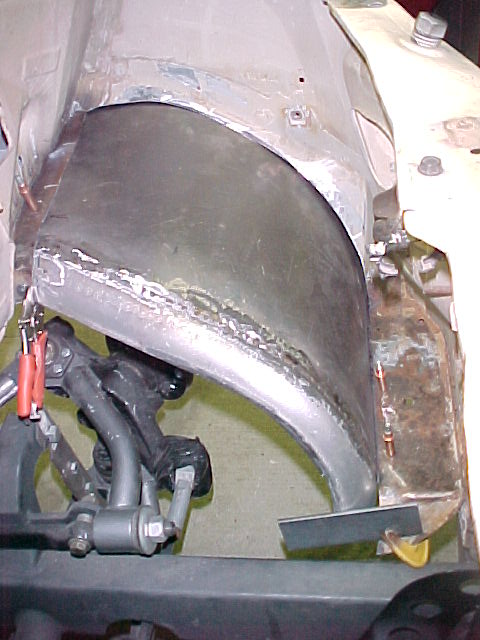
This is how it looks underneath right now.
The pattern (in white) for the inner skirt.
Mel finishing up the inner skirt in steel.
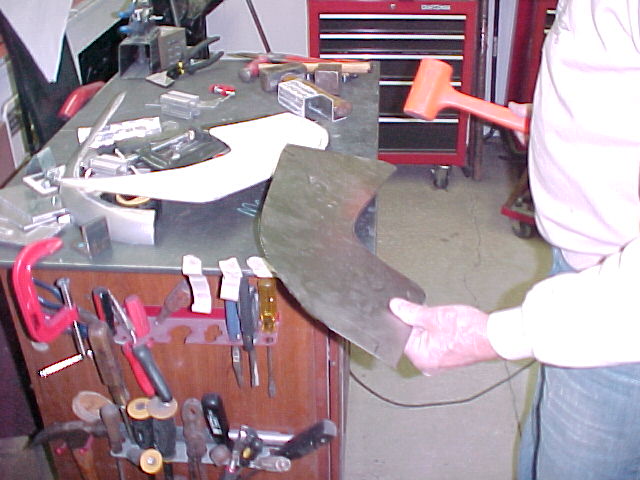
The skirt clamped in place. We have a little trimming to do yet and are planning to run a bead around the bottom edge to add some strength.
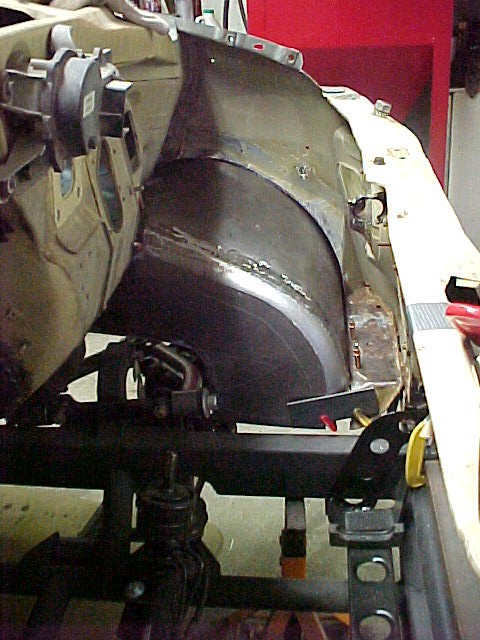
A look under the skirt...
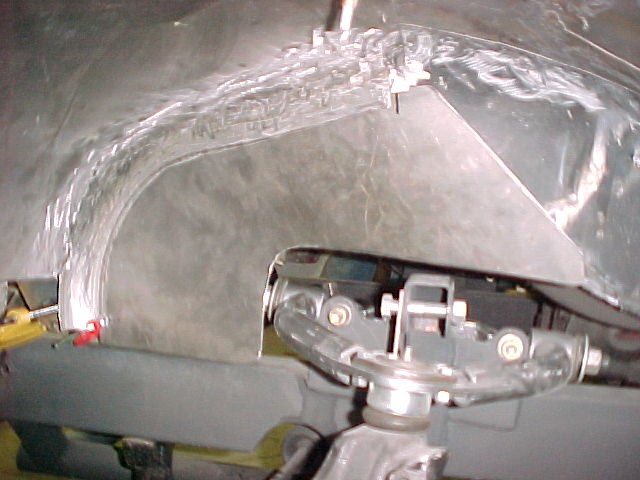
I think this looks great! Once we get the skirt finished up it will be very strong also!
Thanks for looking
MarkMark:
"Bad Ast" Astro Van. Just because I did it... Doesn't mean it's possible...
This my Bad Ast thread...
https://www.pro-touring.com/showthre...roject-Faze-II
This is my Fotki album...
http://astroracer.fotki.com/
11-18-2012 #496
Registered User
- Join Date
- Mar 2004
- Location
- Mid-Michigan
- Posts
- 2,764
While Mel was working on the wheel well stuff I was getting the fan shroud ready to weld on the flanges. I had to cut some clearance holes to go around the hose outlets. Because the holes were real close to the edge I used one of the wood blocks I cut to guide the hole saw as it cut the aluminum sheet.
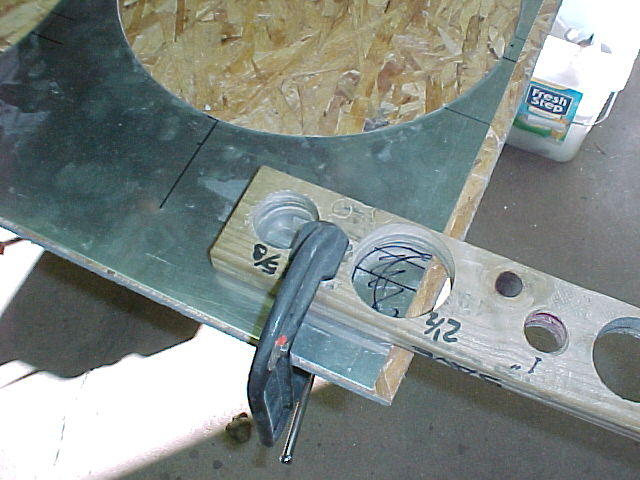
I used a 2 1/2" dia hole saw mounted in my Milwaukee 1/2" drill to cut the holes. Only took a minute.
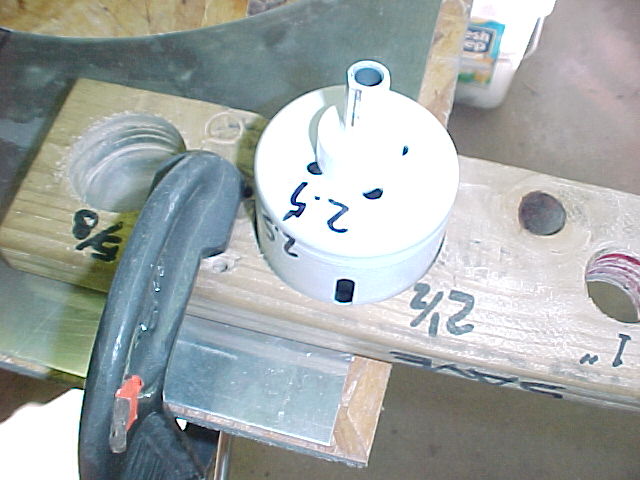
After the cut.
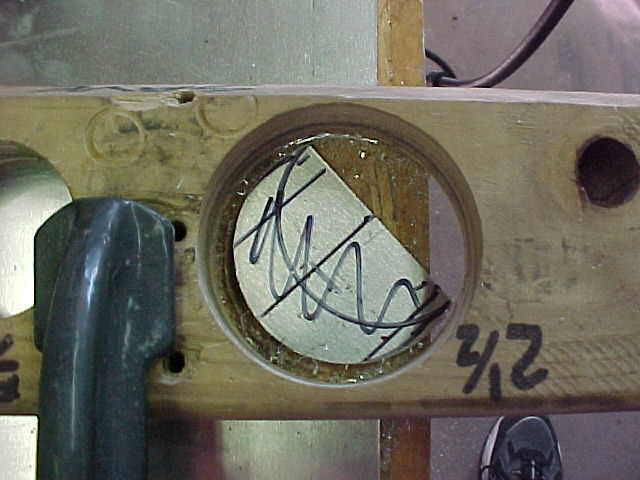
I will get the shroud welded up next weekend. AFTER I get gas... And pull a few more practice beads.
See you then
MarkMark:
"Bad Ast" Astro Van. Just because I did it... Doesn't mean it's possible...
This my Bad Ast thread...
https://www.pro-touring.com/showthre...roject-Faze-II
This is my Fotki album...
http://astroracer.fotki.com/
11-19-2012 #497
Registered User
- Join Date
- Nov 2002
- Location
- Finland
- Posts
- 209
Looks really nice! How wide will the front tires be?
This is one project that I am always waiting on new updates for
Chris
11-19-2012 #498
Registered User
- Join Date
- Mar 2004
- Location
- Mid-Michigan
- Posts
- 2,764
Thanks alot Chris! How is the hotrod scene in Finland doing?
The front tires are 275-40x17's They are on 17 x10" wheels with a 7" BS. That puts a lot of tire inboard where there was no room for them. A little cutting and welding and now there is room!
Here is another piece I am working on. I modeled up some scissor style hood hinges and the fab shop cut these parts out with the laser.
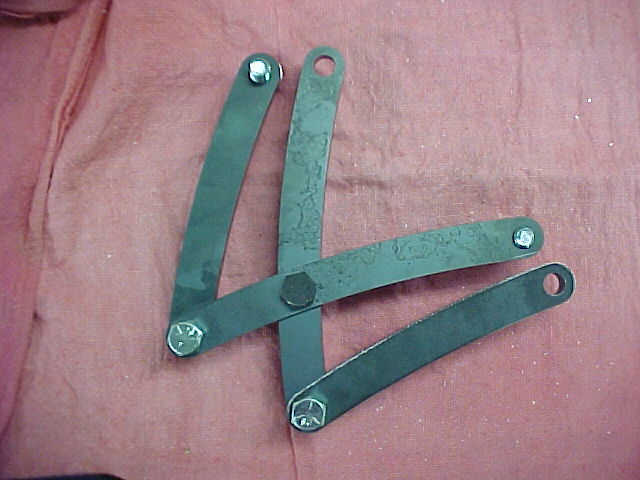
These will be for the hood. I want to put some sort of cowl scoop on the hood and extend it back to the windshield. If you know how the astro hood opens, you know I can't do that using the stock, single point, hinge.
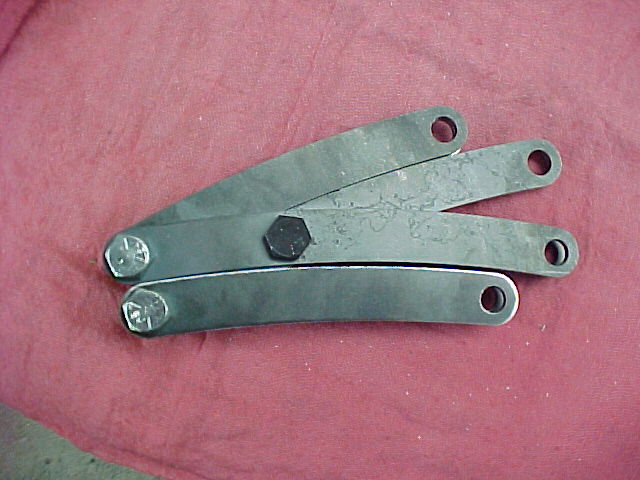
The scissor style will let the hood open more vertically and "should" keep it out of the windshield. I need to do some mock-ups to figure out positioning.
This is the hinges closed. I will make some mounting blocks to lock down the hinge pivot points and get some pics.
 Mark:
Mark:
"Bad Ast" Astro Van. Just because I did it... Doesn't mean it's possible...
This my Bad Ast thread...
https://www.pro-touring.com/showthre...roject-Faze-II
This is my Fotki album...
http://astroracer.fotki.com/
11-19-2012 #499
Registered User
- Join Date
- Aug 2007
- Location
- Albemarle, NC
- Posts
- 1,156
why not a reverse tilt hood like some of the 80's gm fwd stuff had? i remember the s10 guys were using the hinges with slight mods.
then you could seal it to the windshield with no worries?Michael Crawford
1970 plymouth Duster back under construction:
https://www.pro-touring.com/showthre...uring-makeover
1987 GMC S15 https://www.pro-touring.com/showthre...ct-drivabeater
11-19-2012 #500
Registered User
- Join Date
- Mar 2004
- Location
- Mid-Michigan
- Posts
- 2,764
Hi Mike,
That is another option, definitely. Both directions will be looked at. I can say right now the forward opening direction is probably what will happen. I don't think the new hinges will quite get the hood up enough in the rearward direction. I have to get the mounting blocks built before I can determine that.
Thanks!
MarkMark:
"Bad Ast" Astro Van. Just because I did it... Doesn't mean it's possible...
This my Bad Ast thread...
https://www.pro-touring.com/showthre...roject-Faze-II
This is my Fotki album...
http://astroracer.fotki.com/

 Reply With Quote


