


Results 441 to 460 of 862
Thread: The BAD AST Project - Faze II
-
07-01-2012 #441

 Registered User
- Join Date
- Sep 2010
- Location
- BC Canada
- Posts
- 42
Been following this for some time now. Sorry I don't comment more. I really enjoy your attention to detail and how every piece you turn into your own. Keep it up.
-
07-02-2012 #442
 Registered User
- Join Date
- Apr 2001
- Location
- The Netherlands
- Posts
- 1,509

your build reminds me of this one: http://www.project33.com/ the guy who build it was also very inventive. The cool thing is thinking up solutions for situations you will not run into while building a Camaro or any other "standard" car. Keep the updates coming :-)
-
07-04-2012 #443 Registered User
- Join Date
- Mar 2004
- Location
- Mid-Michigan
- Posts
- 2,764

Thanks guys, and yes, this is not a Camaro... There are are not many off the shelf parts for what I am doing...
Did a little bit of work today and a lot of sweating! My lord it is hot here! I would go out and work for a half hour or so and then go back into the house to cool off.
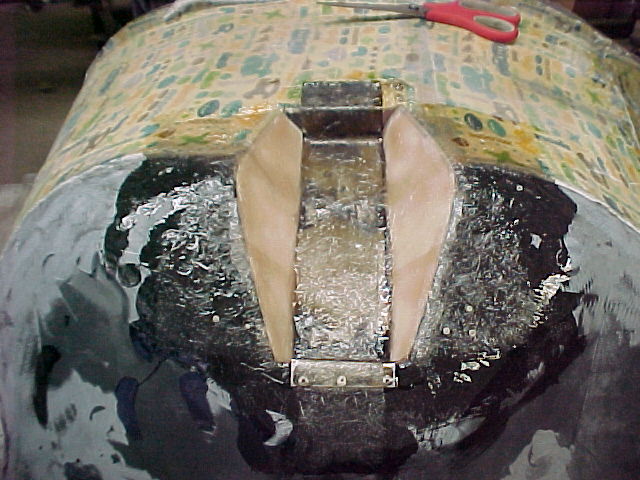
Probably not the best time to be working with fiber glass but it's got to get done. I started by cutting some thin cardboard to line the sides of the shifter pocket. I then layered in strips of glass on either side,
inside
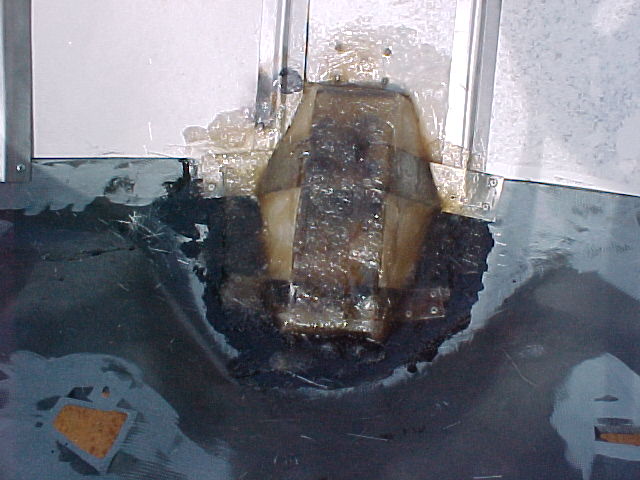
and out
After a cool down I went back out and started glassing the outside of the cover.
I got a layer added to the top. Here it is before I mixed the resin. You can see how I cut it to snuggle down into the shifter pocket.
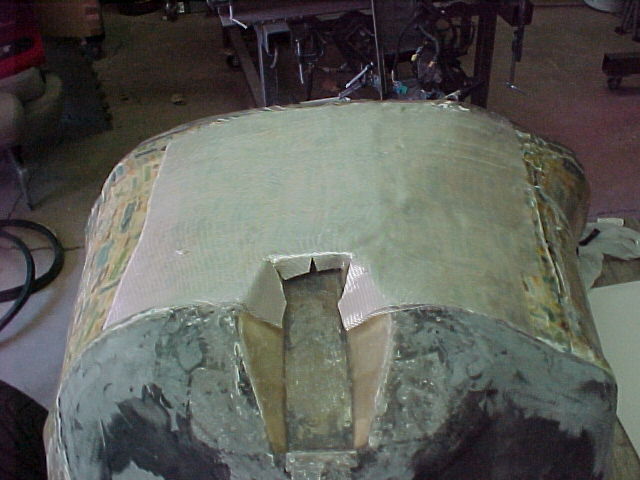
After a bit of resin it is all very clear...
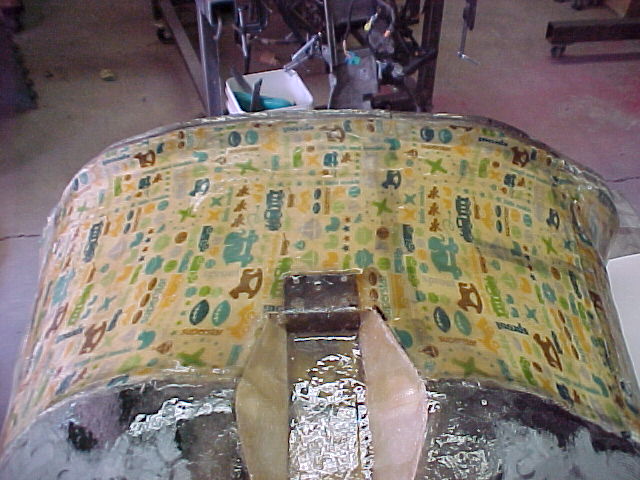
I added a layer to the inside. I had to do it it sections because it was so hot the resin was kicking very fast even when I shorted the hardener by 25%.
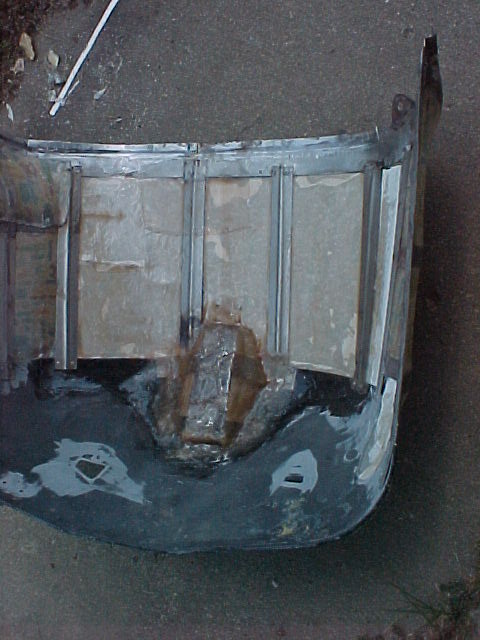
That's where I ran out of resin... I will do a bit of clean up on the inside. Other then adding some glass to the seal edge I won't do any more inside until the insulation is glued in. I will then add another layer of glass and paint it.
Tomorrow I am running up to Kawkawlin to talk to my engine guy. He has the 509 apart and wants to do some work to make it more tractible for the street.
I will pick up more resin on my way home...
Thanks for looking
MarkMark:
"Bad Ast" Astro Van. Just because I did it... Doesn't mean it's possible...
This my Bad Ast thread...
https://www.pro-touring.com/showthre...roject-Faze-II
This is my Fotki album...
http://astroracer.fotki.com/
07-06-2012 #444
Registered User
- Join Date
- Mar 2004
- Location
- Mid-Michigan
- Posts
- 2,764
Well, after meeting with my engine guy yesterday, we made a few decisions on direction for the 509. We did a lot of talking and running the numbers and felt the big heads just weren't going to work that well for what I want. I want the engine to be very drivable. With the old L88 heads and the solid roller cam it just wasn't going to be that fun to drive. I have ran "big heads and big cams" on the street and just wasn't looking forward to the loss of low end and mostly irritable street manners. Especially with the GV unit. With the gears and tires I have the RPM's at 70 mph, with the GV clicked on, will be right around 2300 hundred. Not the place to be for an engine that won't start to work till about 3 or a little more... We decide to pull the pistons (which have a nice dome) and mill off enough to get us to a 10 to 1 CR with a set of 119cc Brodix 270 heads. AFR's 265 was the other choice but they only come in a 112cc and we wanted to remove as little dome as possible to have less effect on the balance. We will also go with a Hydraulic roller cam just to keep maintenance simple. I want my wife to be able to climb in this thing. fire it up and drive it anywhere... This change will get us there... It will still be stout but it will be a lot more fun to drive.
I have a complete top end kit for sale for a BBC. L88 snowflake heads, a mild Comp solid roller cam, Crane stud girdle, RPM AirGap intake w/gaskets and all of the lifters, pushrods and hardware for the girdle. I would consider a trade if you have a set of Brodix 270's and want to go bigger...
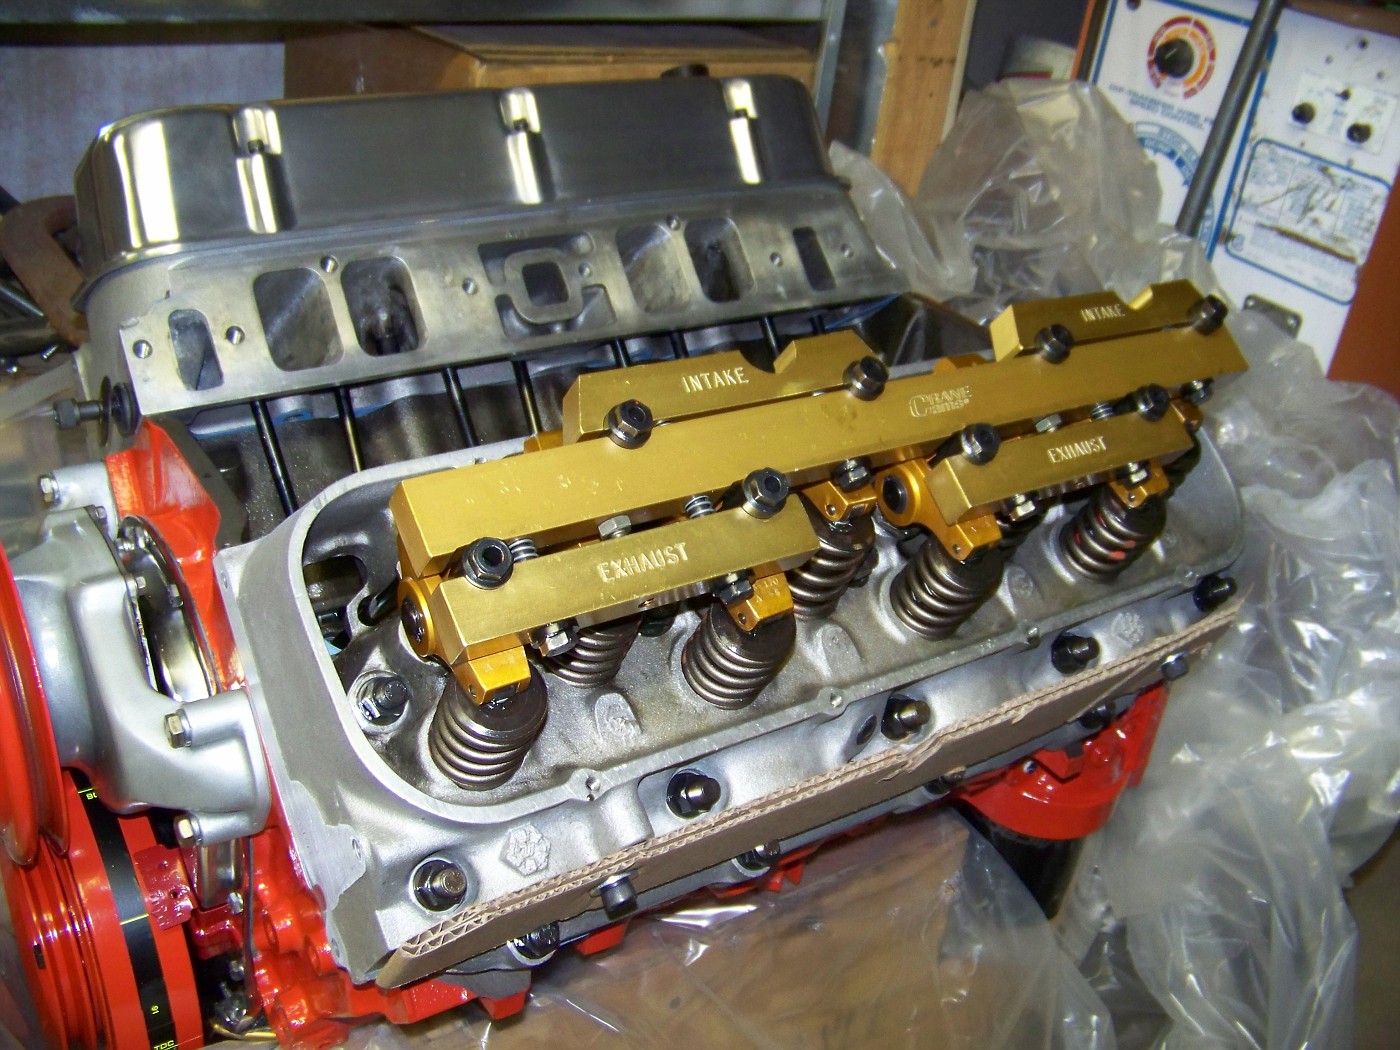
All of this came off the top of the 509 I purchased for the van.
The heads have been ported and have mild bowl work. All of the work was done by Ron Sharps when he was at Katech. They are the 124cc bowls and do not have the "C" exhaust ports. The cam was installed when I bought the engine but it was never fired. I bought the intake used.
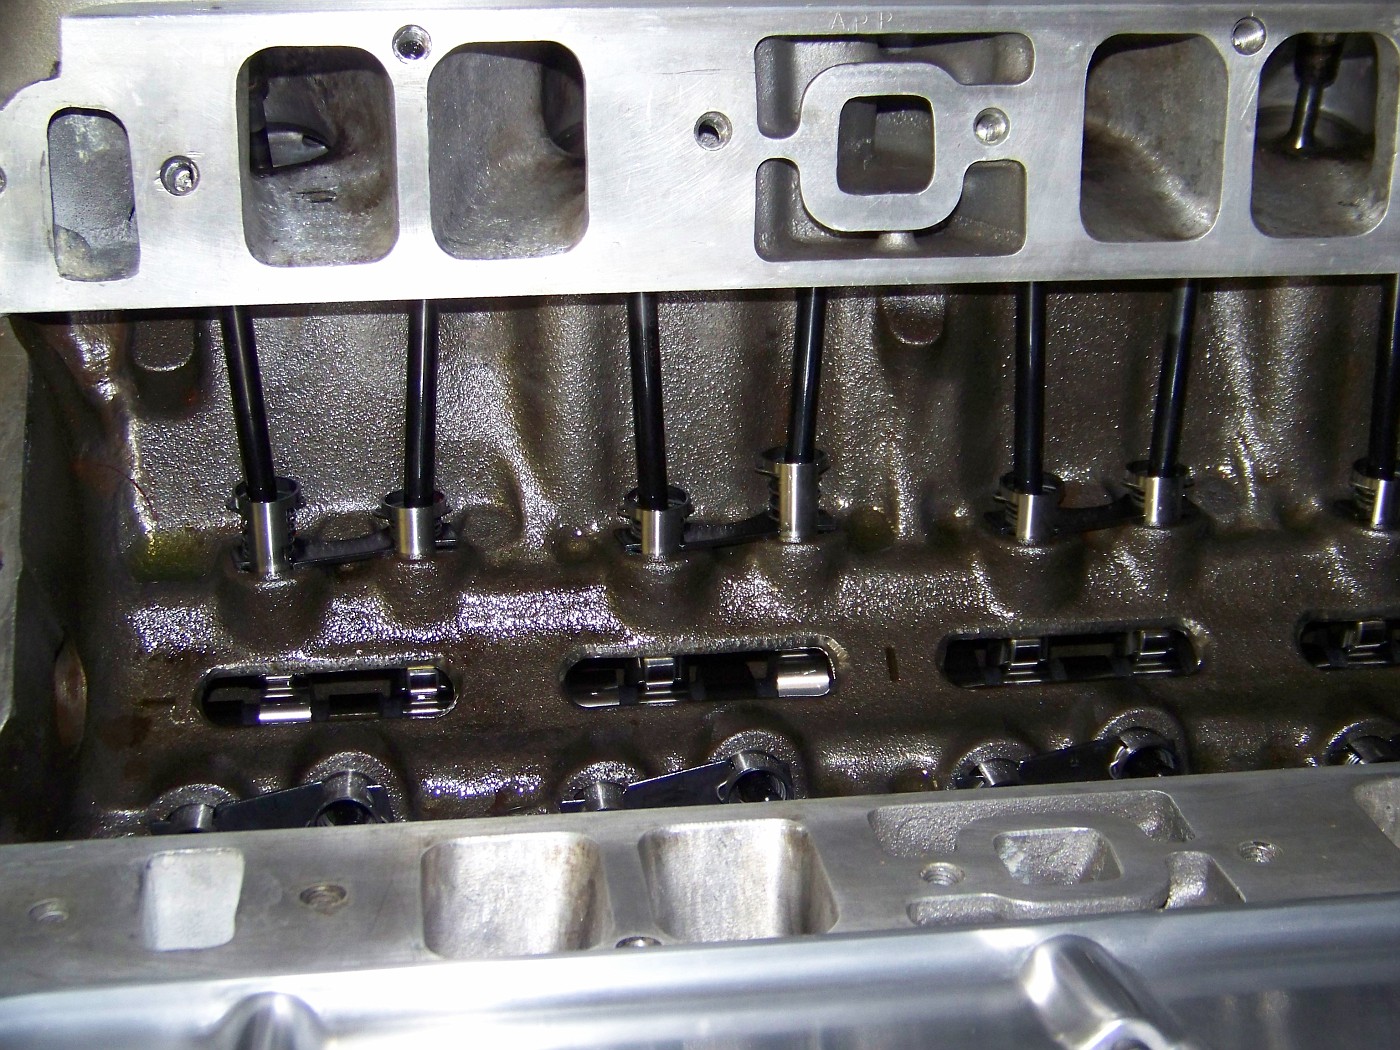
I would like to get $1900.00 out of the package. I would like to sell it as a package. If there is no interest here it will go on eBay and Craigslist next week.
If you are interested and have read this far I have the cam card and can answer any questions you may have. I do have more pictures. These are straight up good parts, no junk, I just don't need them.
Thanks for your time.
MarkMark:
"Bad Ast" Astro Van. Just because I did it... Doesn't mean it's possible...
This my Bad Ast thread...
https://www.pro-touring.com/showthre...roject-Faze-II
This is my Fotki album...
http://astroracer.fotki.com/
07-15-2012 #445
Registered User
- Join Date
- Mar 2004
- Location
- Mid-Michigan
- Posts
- 2,764
The engine parts just sold on eBay so now I can order the new heads! Very Cool!
I have been picking away at the van stuff... It's been so FREAKIN" hot here it is almost unbearable!
Last weekend I would work for a half hour and then head into the house to change my shirt and cool off. Pretty ridiculus. The yard thermometer read 108 in my back yard.
This weekend wasn't as bad but if you weren't working directly in front of the fan you were pretty uncomfortable...
Anyway, I got the doghouse pretty well along last weekend. It is all glassed and there is a skim coat of Bondo on most it to start smoothing. Really won't take much from what I am seeing...
First coat. I knocked this down with a cheese grater. Quick and leaves a good surface for skim coats.
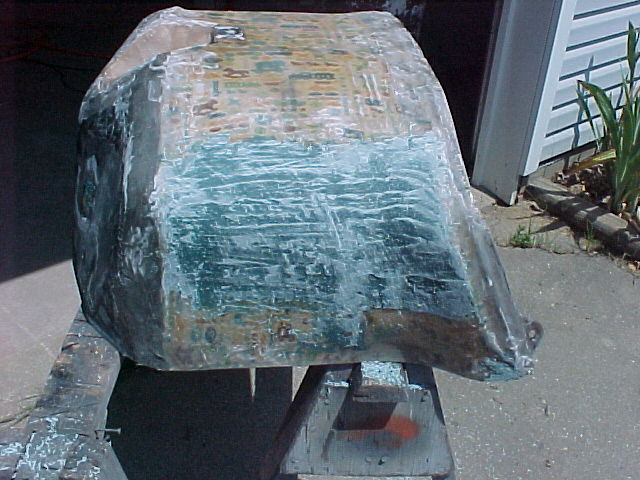
This is how it sits now. I will DA this smooth and then flow on a coat of resin to make a smooth surface for the carbon fiber.
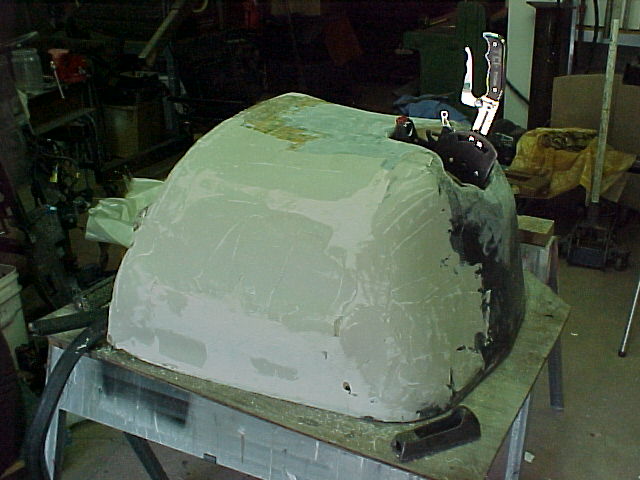
The pass. side. Not a lot of filler here. I was really surprised how well the t-shirt material worked to smooth this off during lay-up.
We worked on few things this weekend, the shifter housing, the left front wheel house and the seat mounting brackets. The seat brackets are being redesigned to better carry the "load"... Mel made a jig board that the sliders bolt to'

We decided to cut the original mounting ears off the sliders and make our own out of 3/16ths x 2" angle.
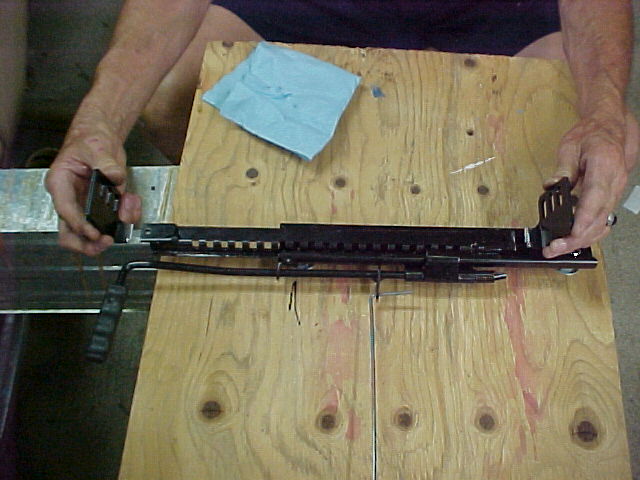
The angle will weld to the sliders and span the gap between them, essentially making the sliders one piece... I will have to order some angle, didn't have any on hand that size.
The front wheel house was pretty straight forward. Had to do some tack welding and make a piece to plug the large hole left after moving the old housinng inboard 3 inches.
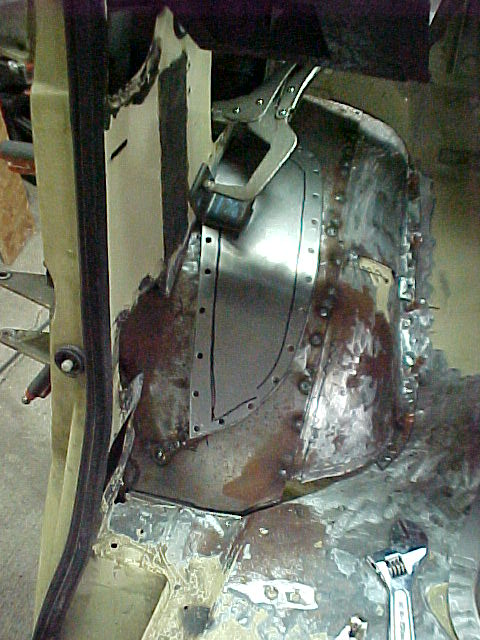
I'll clean up the surface rust before it gets welded in.
This is from underneath.
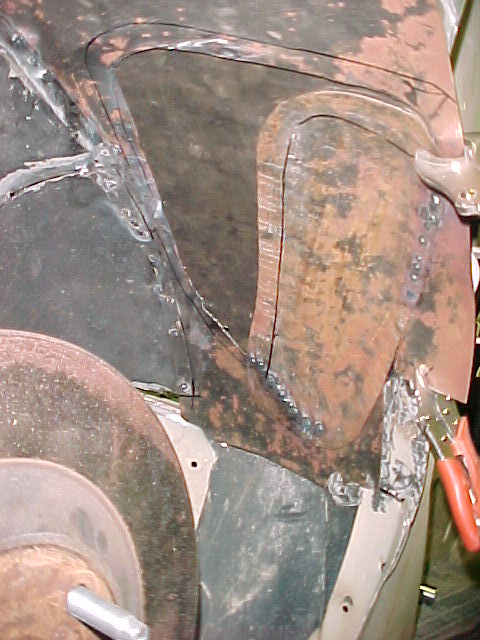 Mark:
Mark:
"Bad Ast" Astro Van. Just because I did it... Doesn't mean it's possible...
This my Bad Ast thread...
https://www.pro-touring.com/showthre...roject-Faze-II
This is my Fotki album...
http://astroracer.fotki.com/
07-15-2012 #446
Registered User
- Join Date
- Mar 2004
- Location
- Mid-Michigan
- Posts
- 2,764
I also did a LOT of work on the shifter housing this past week.
Last Sunday I made an aluminum "spine" to mimic the shape of the housing. I used the aluminum cover I got with the shifter as a study but ended up changing the shape a bit to get more closure on the handle to housing gap. The aluminum piece had a HUGEJASS hole in it so it couild be dropped over the handle... My cover is removable so I designed it to split around the handle slot which allowed me to close up that gap, aLOT.

I also made up a plate to carry the Overdive switches.

The aluminum is a scrap piece of 20thou I got from a trophy shop. They scrap out a lot of this stuff...

After I got the switches where I needed them I laid down a layer of duct tape on the doghouse to start laying up the mounting flanges
I didn't get any pics of the flange build... Things were going to quick and I didn't take the time, sorry.
After the flanges cooked off I hot glued more of that beautiful t-shirt material to the flange and the "spine". Once that was allresined up this is what I had...

I laid this all up as one piece. Much easier to get things smooth and flowing. Once it cooked I added a few layers of glass and cut out the switch window.
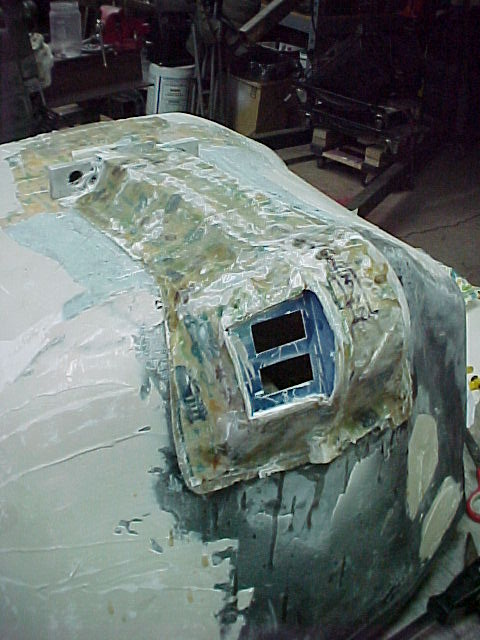
The cover was then cut into two parts. The right hand side is the biggest. I will attach the left hand (switch) side with screws from underneath so the switches will be servicable.

Here is the cover with the shifter bolted in.
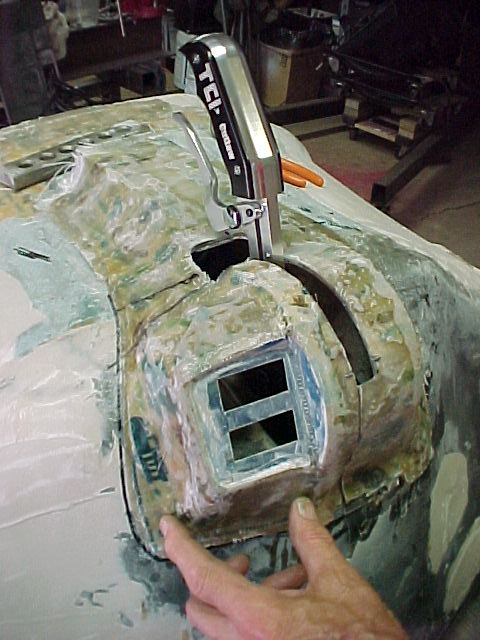
And the bolt on piece removed...
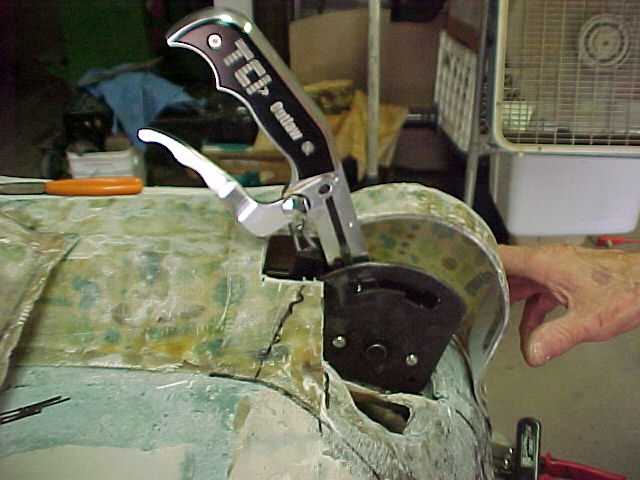
This is coming along nicely. I have glassed in flanges to support the removable piece and to close out the gap between the two pieces.
One other thing I did was a mod to the shifter itself. I plan to use a small key to make the cable removable so I drilled a small hole thru the cable pin to insert the key into.
This is the key before I drilled. It just snapped around the groove in the pin.
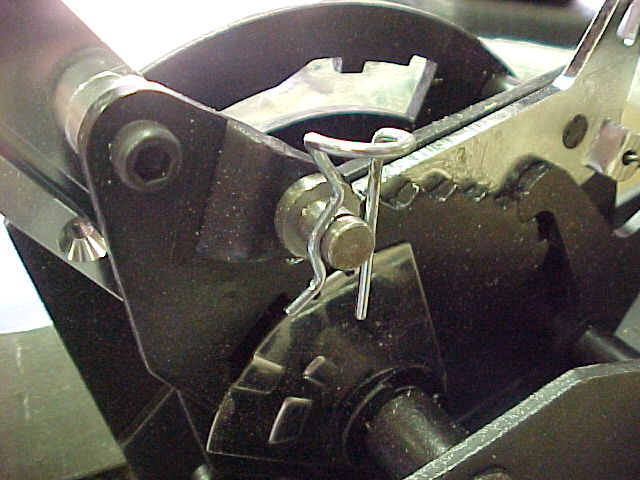
This is the fixture I made to drill the pin. A piece of 3/4 in scrap aluminum. I bored a hole in the end to slide over the pin and then drilled a hole down thru it to guiide the drill bit as I drilled the pin.
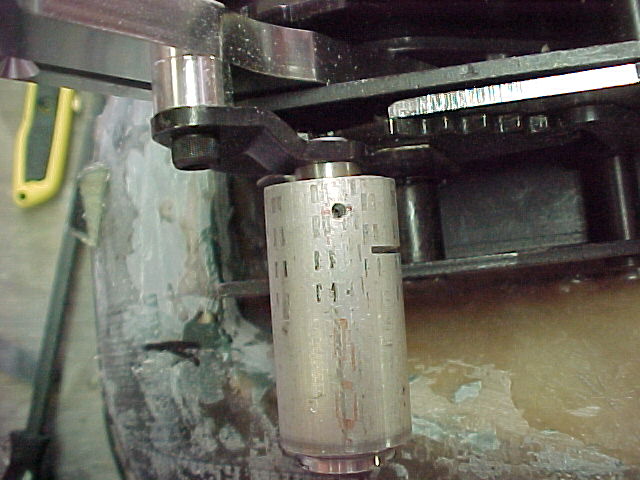
Worked slick and the pin drilled a lot easier then I thought it would.

Now I have positive retention for the key.
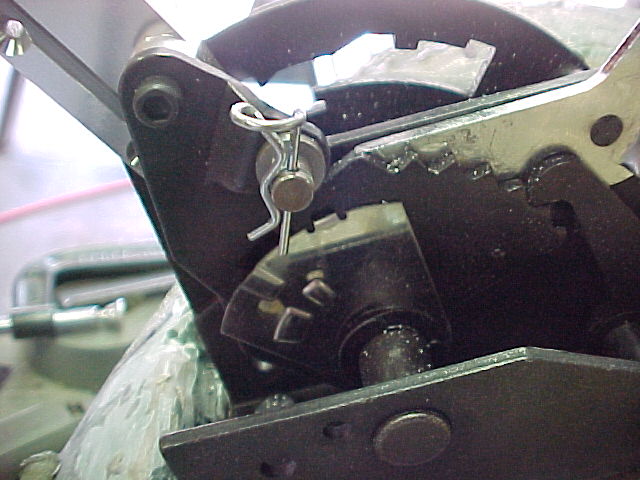
Well, that's about it... Thanks for looking.
MarkMark:
"Bad Ast" Astro Van. Just because I did it... Doesn't mean it's possible...
This my Bad Ast thread...
https://www.pro-touring.com/showthre...roject-Faze-II
This is my Fotki album...
http://astroracer.fotki.com/
07-23-2012 #447
Registered User
- Join Date
- Mar 2004
- Location
- Mid-Michigan
- Posts
- 2,764
Got a bit done this past weekend. Saturday was pretty much a lost cause. Hit a yard sale and picked up an old Sears scroll saw for 5 bucks...

It ran! I had to rewire it, put on a new switch and do a lot of cleaning and some fine tuning but she runs like a champ and I was cutting 1/4" aluminum with it Sunday morning!

Sunday was a pretty good day! Earlier in the week my wife picked up an air conditioner for the shop!
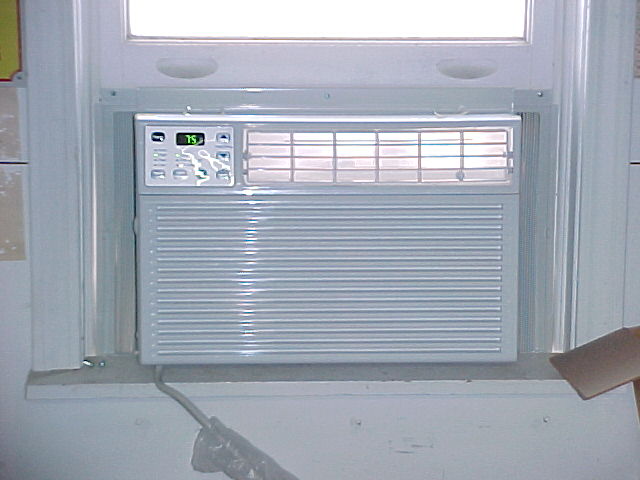
I put it in the window in the machine shop side and it does a FINE job of cooling of the man cave... Do you see what the temp is in the pic? That was at 2 or 3 in the afternoon Saturday and the thermometer outside read 88... Very nice!
We got a good start on the seat mounting frames. I was not at all impressed by the mounting tabs on the provided sliders so thet got cut off.
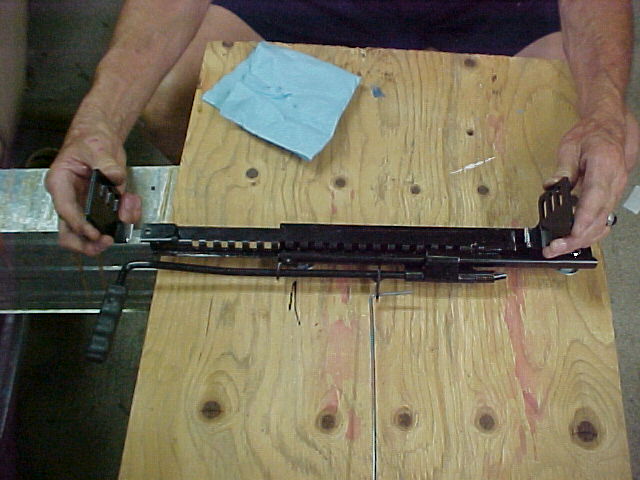
See that thin little strip of metal that we cut?
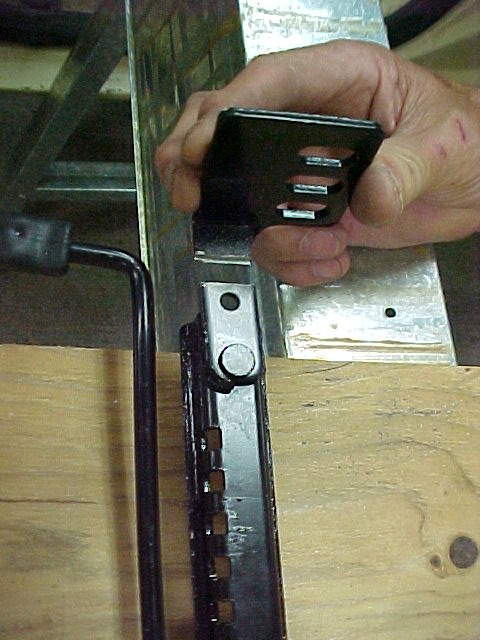
THAT is what was supporting my 270 lb bulk. And it didn't do a very good job either. I bent them just trial fitting the seats... They had to go.
We replaced them wih these... 3/16 x 2" angle. This will get welded to both sliders in leau of the pieces we just removed. Welded between the sliders on both ends.
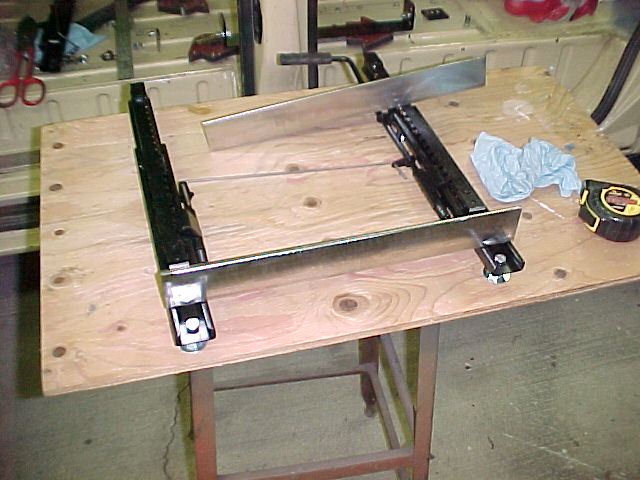
After adding some "character".

We made the floor frames from bent up 3/16 x 2" strip.
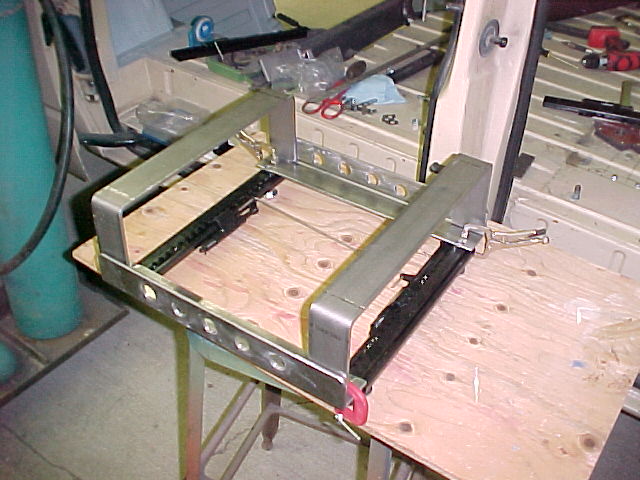
The floor frames will bolt to the angles with two bolts on each corner.
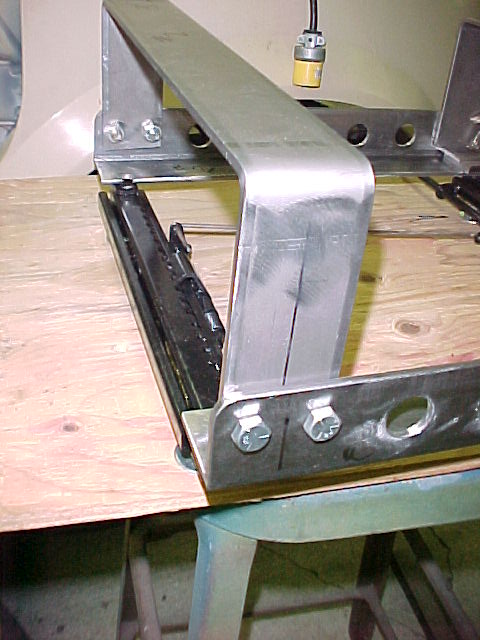
I am in the process of designing the triangulation braces. This is what I've come up with. (built out of foam core)
This is the front (I flipped the pic to get it oriented right. We are building these upside down on the jig board) The brace will weld to the floor frame on the outer ends and bolt to the front crossmember with two 3/8 in bolts.
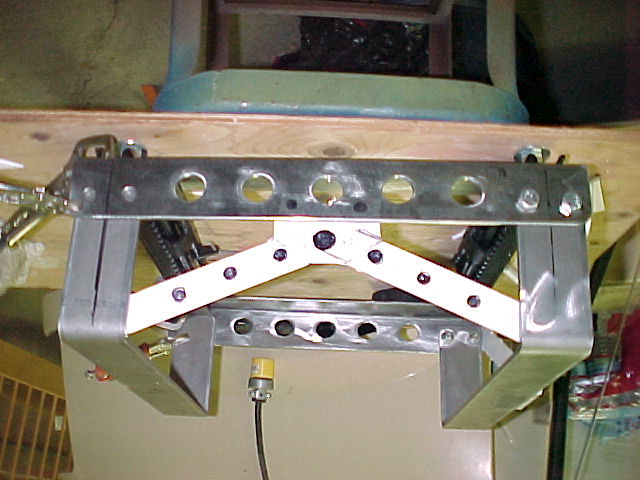
This is the side view. (also flipped) All of this will weld to the floor frame and not effect the seat.

This will made out of 3/16 x 1 and 3/16 x 2 strip.
What do you think? Too busy looking? Once everything is powder coated black I think it will look great!
Thanks for looking
Mark
P.S. The fuel tank is ALMOST DONE! My welder has been picking away at it on his breaks and during lunch. I looked it over today and all he has to finish is a couple small patches for the frame kickups and pressure test and we'll be good. It looks really good and he has done an incredible job of welding up all of that .090 with very little warpage!
I can't wait to get this thing home...Mark:
"Bad Ast" Astro Van. Just because I did it... Doesn't mean it's possible...
This my Bad Ast thread...
https://www.pro-touring.com/showthre...roject-Faze-II
This is my Fotki album...
http://astroracer.fotki.com/
07-23-2012 #448 Registered User
- Join Date
- Jul 2009
- Location
- Grand Rapids, MI
- Posts
- 1,559
NO shortage of progress there. Looking good Mark.
08-01-2012 #449
Registered User
- Join Date
- Mar 2004
- Location
- Mid-Michigan
- Posts
- 2,764
Hi Will, yea, there is progress but it seems to be taking forever to get there...
This past week we worked on a few things. The seat frames, the shifter cover and the instrument cluster. The seat frames are well on there way. Both are ready for welding and all we are waiting for are the front and side braces. I dug out a small sheet of 10 ga I will be taking to work to have all of this stuff cut out on the laser... Much faster and neater. I will also have them make a set for the rear seats for when I get around to building/adding those.
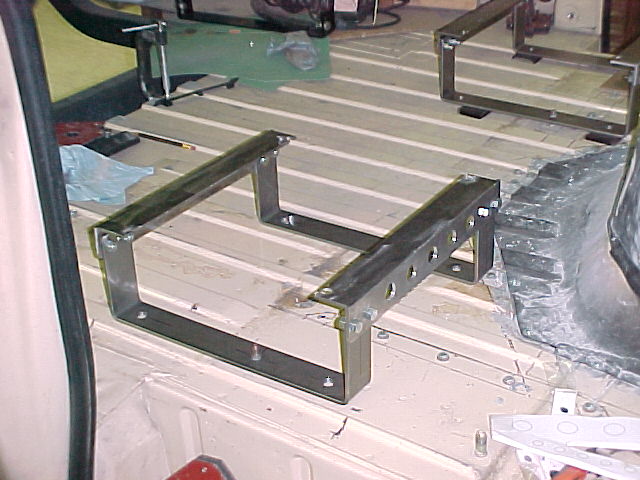
With the mockup seat brace. The front brace is laying on the floor.
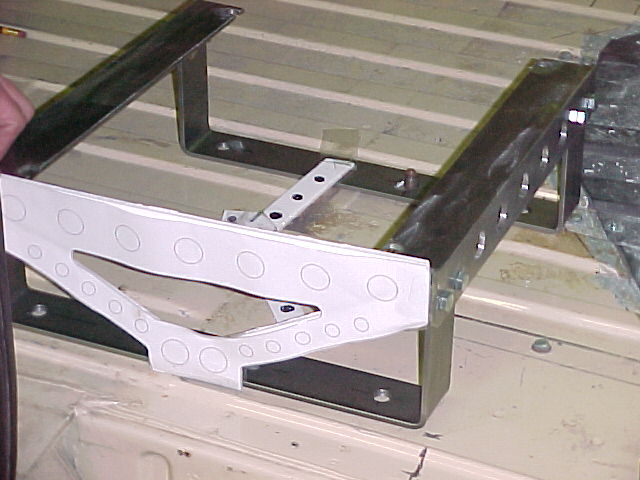
This is a rear view of the pass side.
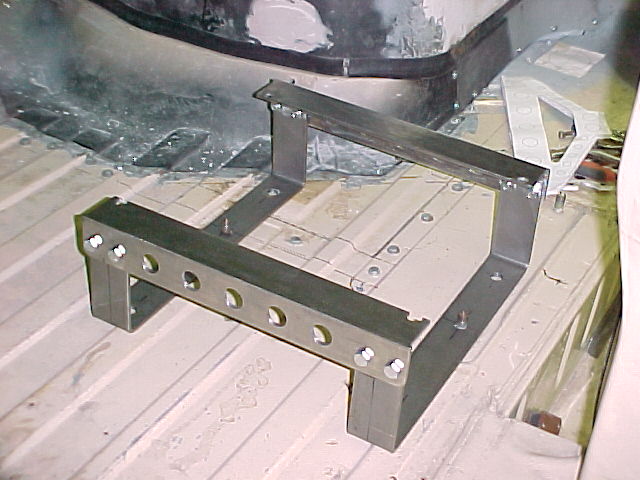
Mel did the brunt of the work on the seat frames, After we got them bent up and designed last week he has been mocking them up and drilling holes. I spent most of my time working on the shifter cover and getting that fit and smoothed and primed. It's not done by any means but it is well on it's way.
This is after a couple applications of bondo. Starting to smooth out quickly.
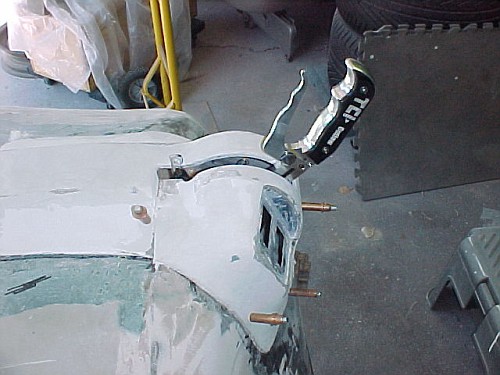
The cleco in the lower right corner is holding the two halfs together. Just to the left of the cleco is a verticle seam between the two parts... Can you see it? I think not...

The upper cleco is doing the same work but that seam is more visible because it I have sanded down thru the bondo on the removable piece to the 'glass so you can see the transition... It goes away in primer.
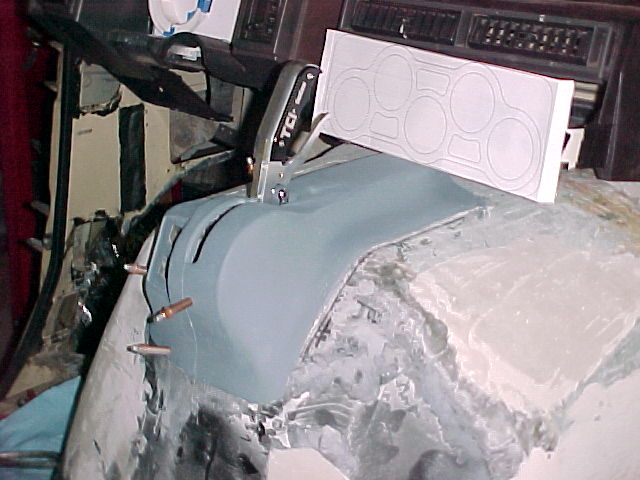

The seat braces and gage cluster face are in for laser cutting. I took in the steel for the braces yesterday. I hope to have the parts tomorrow or Monday.
Thanks for looking
MarkMark:
"Bad Ast" Astro Van. Just because I did it... Doesn't mean it's possible...
This my Bad Ast thread...
https://www.pro-touring.com/showthre...roject-Faze-II
This is my Fotki album...
http://astroracer.fotki.com/
08-01-2012 #450
Registered User
- Join Date
- Mar 2004
- Location
- Mid-Michigan
- Posts
- 2,764
I blew apart the old cluster. This sure did bring back memories! I did the initial cluster design for these back in '83-'84... I had forgotten how much **** we packed into these...
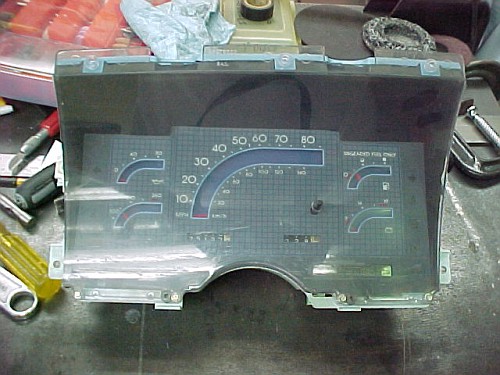
With the lens removed.
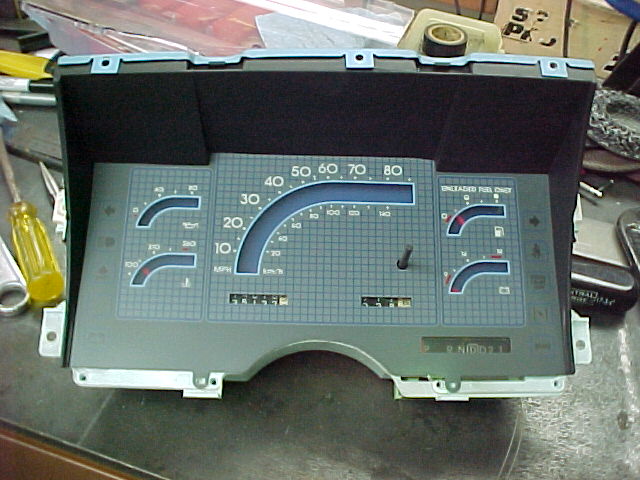
What I am going to do is remove all of the original gauges and light pipe and replace them with a flat panel and Autometers' Pro-Comp 5" speedo and tach.
Here is the back of the light pipe where all of the gauges are mounted. Once this is removed the cluster case itself is an empty shell...

I took everything off the back and used the light pipe as a pattern to make a foam board blank. I used that 5 dollar saw to cut this out...
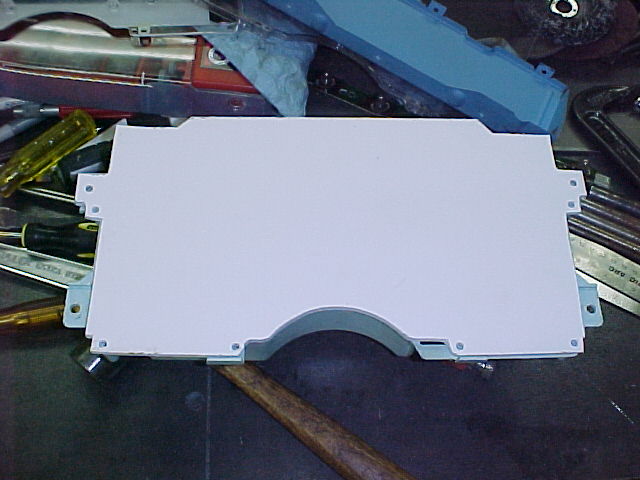
I used the scroll saw again to cut out some more foam core to make the speedo and tach. I used these to mock up the gage positions in the cluster.
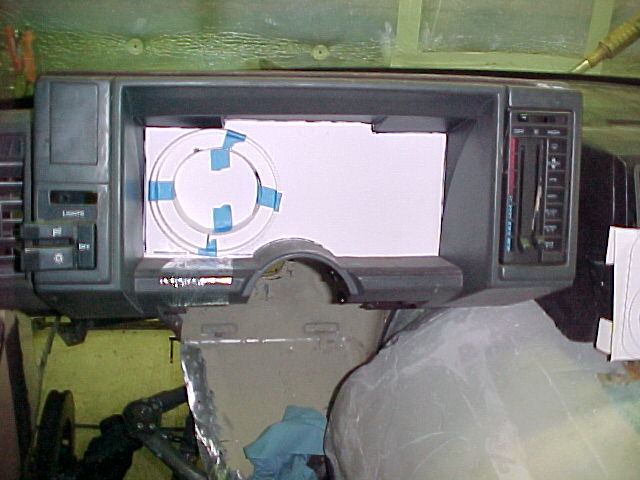
As you can tell I am not going to have a lot of room for the fuel level gage so I may make a tunnel in the upper shroud so I can push the gage higher in the cluster. there is nothing up there so there is plenty of room as long as I don't block the gage with the upper bezel.
Here is the basic layout of the instrument cluster and center stack gage cluster.
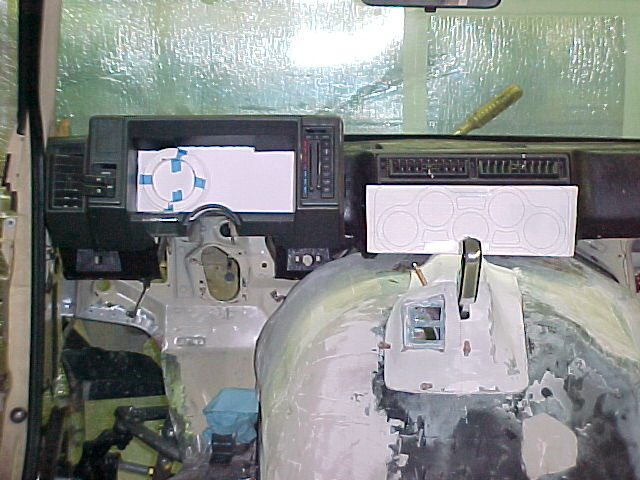 Mark:
Mark:
"Bad Ast" Astro Van. Just because I did it... Doesn't mean it's possible...
This my Bad Ast thread...
https://www.pro-touring.com/showthre...roject-Faze-II
This is my Fotki album...
http://astroracer.fotki.com/
08-01-2012 #451
Registered User
- Join Date
- Mar 2004
- Location
- Mid-Michigan
- Posts
- 2,764
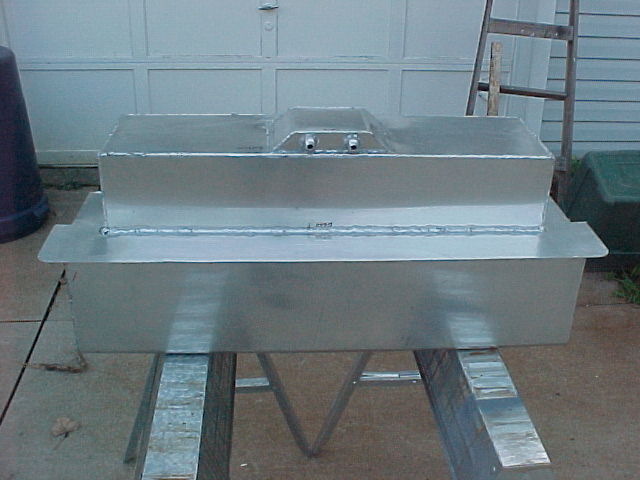
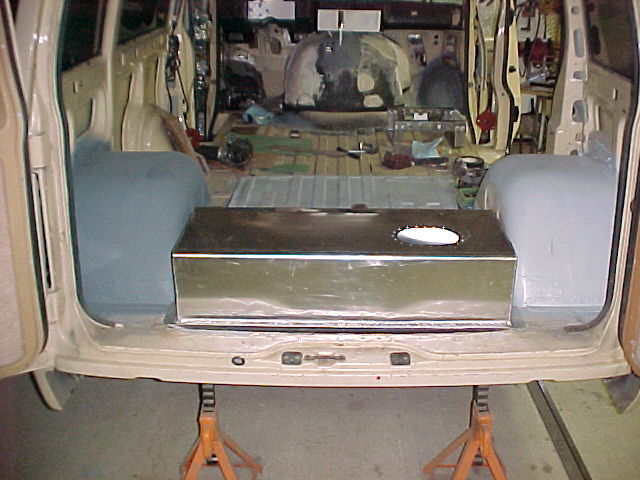
Lots going on in the Bad Ast shop this week! I brought the tank home tonight. Should be good to go after a couple of pressure testing sessions and fixing a few pinholes. Jesse did an excellant job welding this thing up. There is a bit of warpage but it is all in areas that will not be visible so it is all good.
Sitting back in the van as a one piece deal this time.
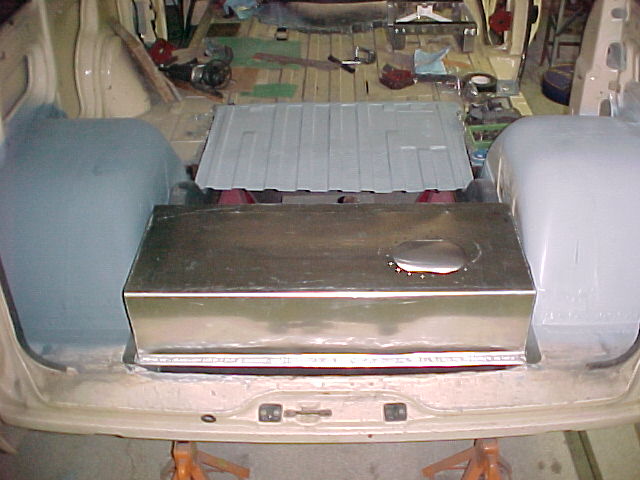
After I cleaned it up a bit. Sitting on saw horses in front of the shop.
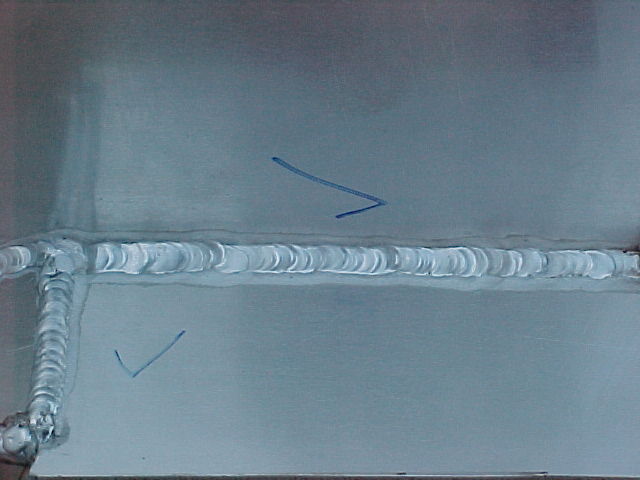
There is a butt-load of welding here. To do all of this and have only three pinholes is incredible in my book.
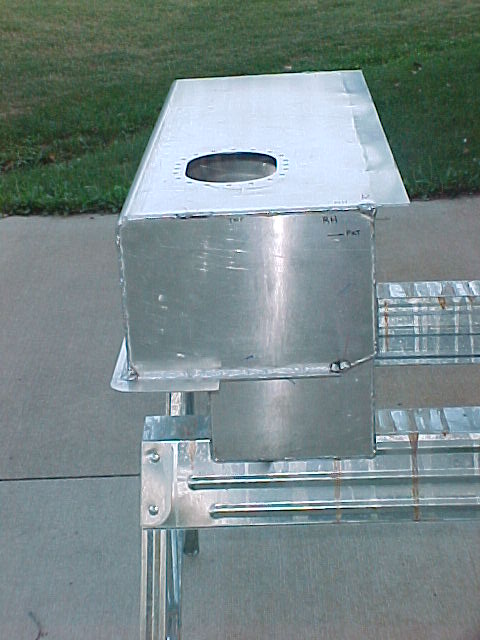
You can see a bit of warpage on this long flange. This is the upper bolt flange.
I will fill it with water and let it sit for a while to see if it weeps any.
I am thinking I will get the inside coated, just for piece of mind. Gas Tank Renu is right here in Swartz Creek so I think I will call them.
I am also thinking about having it powder coated black. What do you think?
MarkMark:
"Bad Ast" Astro Van. Just because I did it... Doesn't mean it's possible...
This my Bad Ast thread...
https://www.pro-touring.com/showthre...roject-Faze-II
This is my Fotki album...
http://astroracer.fotki.com/
08-03-2012 #452
Registered User
- Join Date
- Mar 2004
- Location
- Mid-Michigan
- Posts
- 2,764
I brought home a bunch of steel tonight.
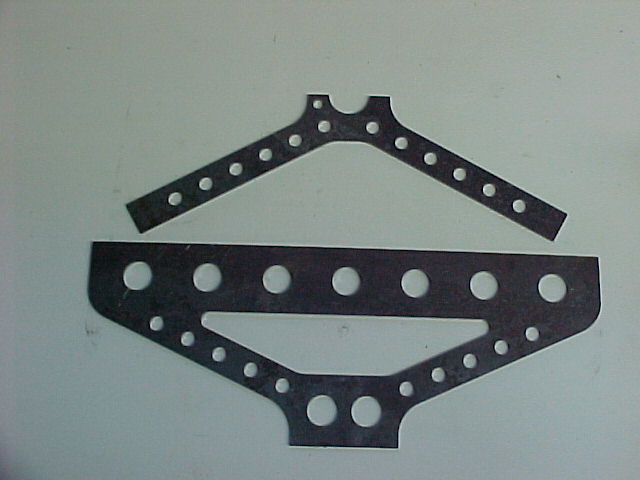
Two sets of seat frame reinforcements, the center stack gauge panel and a little box full of my Dzus handles.
The reinforcements mocked up on the frames and a box of parts.
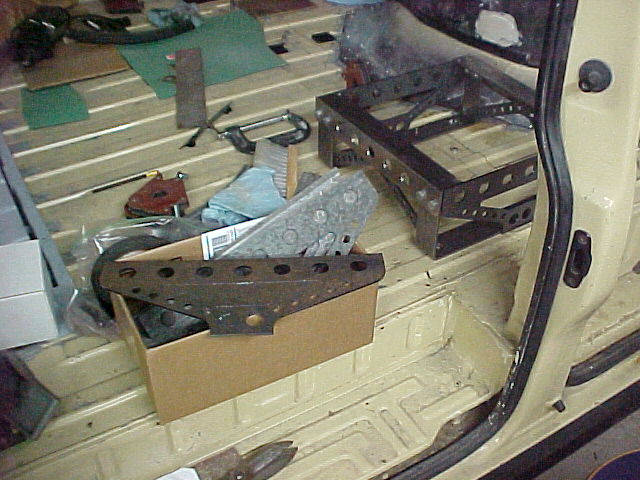
I think these will look real good when they are done.
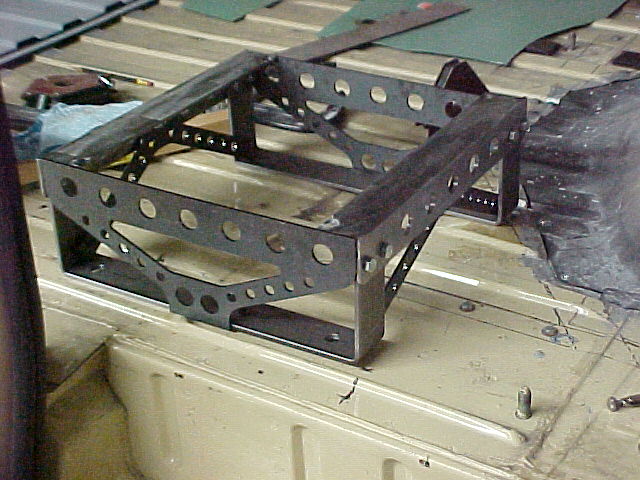
The fit on the front pieces isn't quite right as I have to do some trimming to get them where they need to be
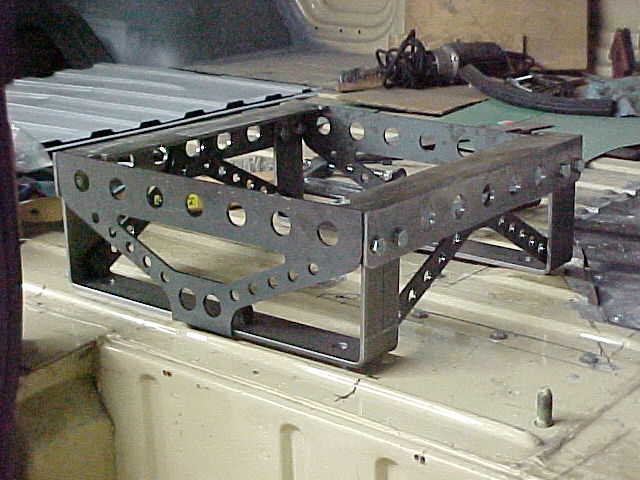
Tomorrow will see smoe complete seat frames.
The gauge panel will need some cleanup and a good polishing but it will work great.
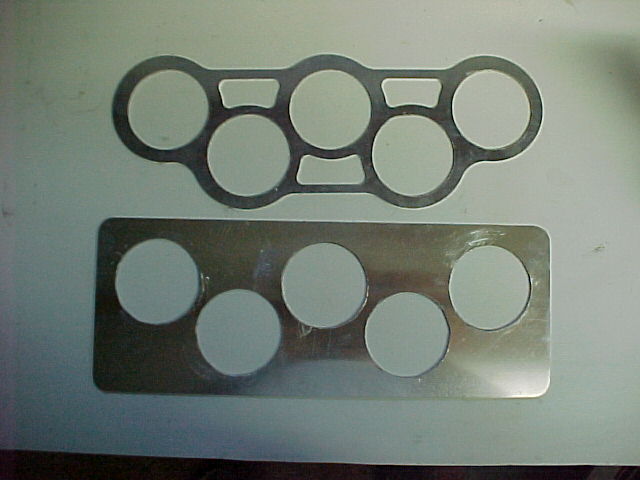
The small piece gets overlaid onto the bigger piece to give it a 3D look.
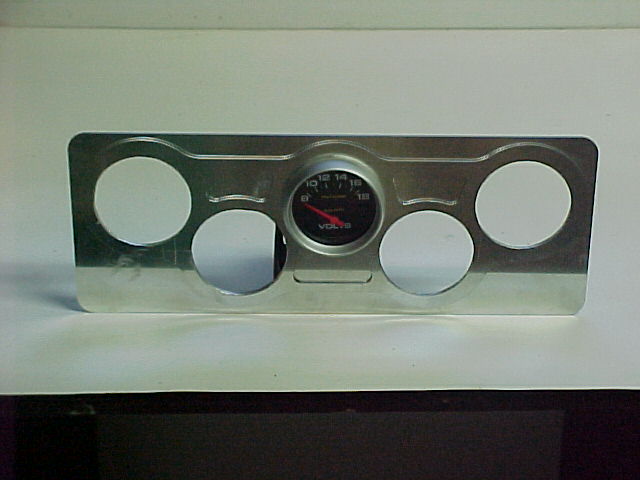
I am thinking about making CF panels to fill the "cutouts" and add some interest. I haven't decided about finish yet. Polish it, scotchbrite it or powder coat black... Have to wait and see what happens with the rest of the interior.
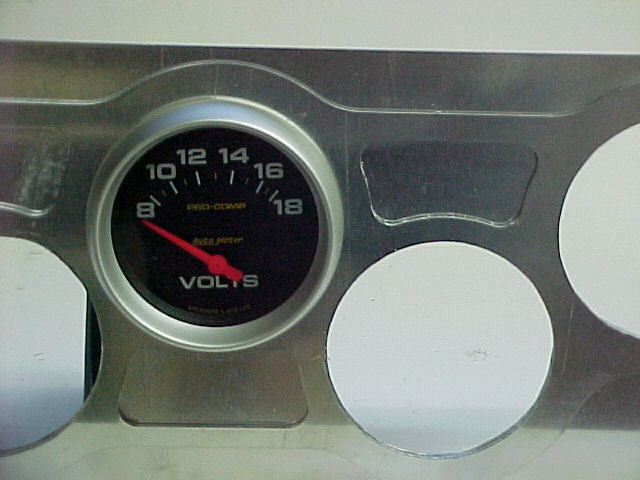
That's what I worked on tonight.
MarkMark:
"Bad Ast" Astro Van. Just because I did it... Doesn't mean it's possible...
This my Bad Ast thread...
https://www.pro-touring.com/showthre...roject-Faze-II
This is my Fotki album...
http://astroracer.fotki.com/
08-03-2012 #453 Registered User
- Join Date
- Aug 2004
- Location
- Erwin,TN
- Posts
- 425
Good looking work!!
08-04-2012 #454
Registered User
- Join Date
- Mar 2004
- Location
- Mid-Michigan
- Posts
- 2,764
Thanks FGC. Good to hear from you!
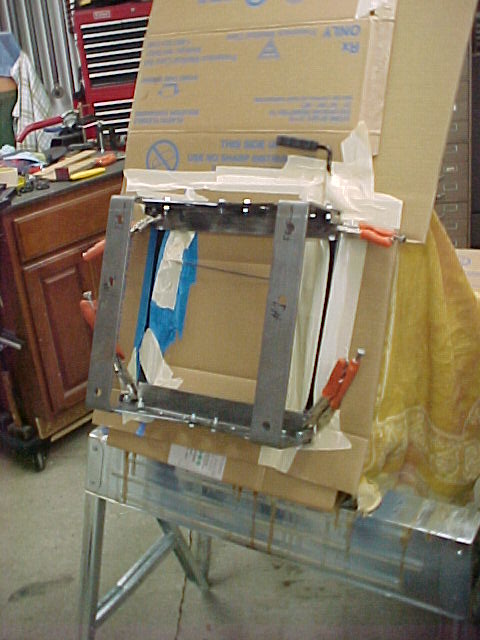
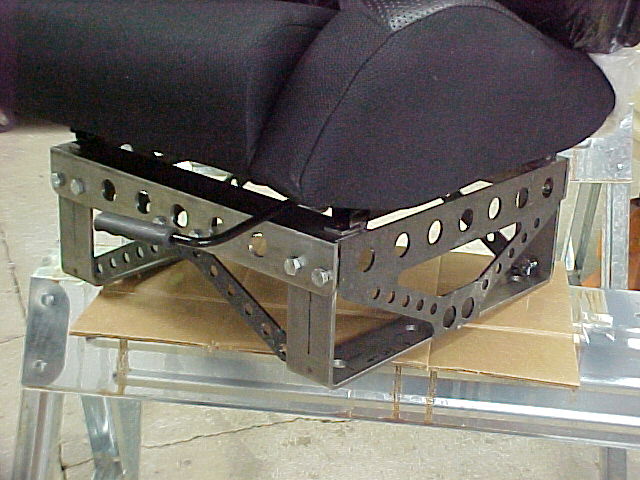
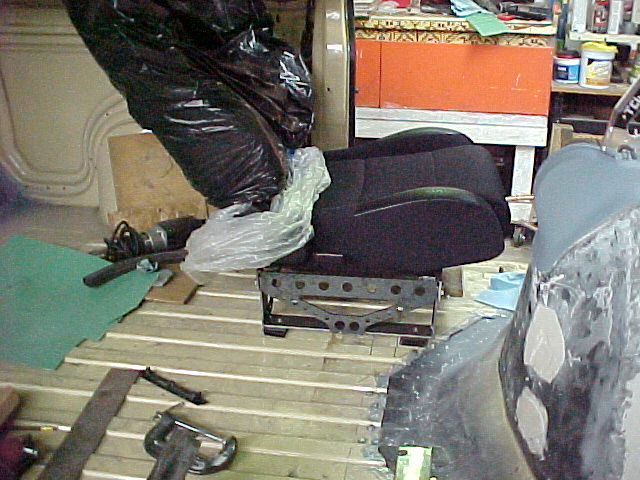
We have seat frames! Got all of the laser cut pieces fit in and tack weled today. We sure were digging that A/C unit this afternoon! Made it bearable to work out there.
Here is the seat frame all clamped up and ready for welding.
Side view.

Front view'

Everything went together great!
We decided to tack the frames up while they were bolted into the seat... I had an issue with that but Mel assured me he would keep the seats safe from spatter...
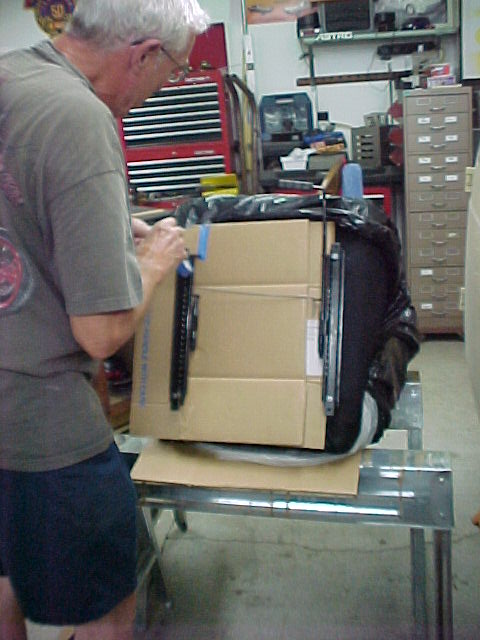
He did..
All tacked up.
Sitting in thr van. They are very sturdy just tacked. I sat in this and jimmied around a bit. No movement at all.
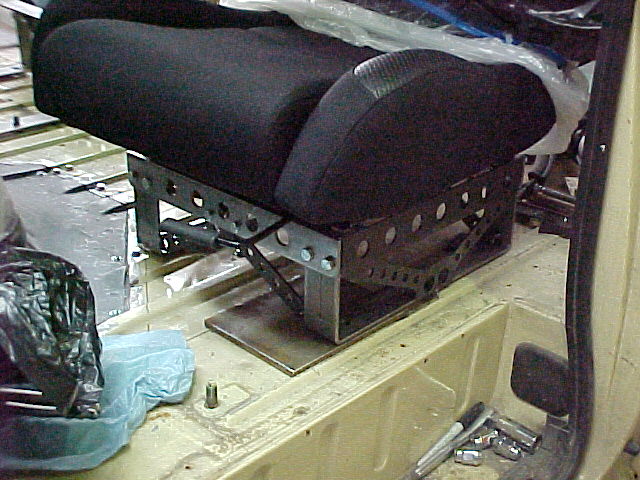
Both seat frames tack welded. We were pretty well wiped out by this time. Called it a day. I needed a shower.
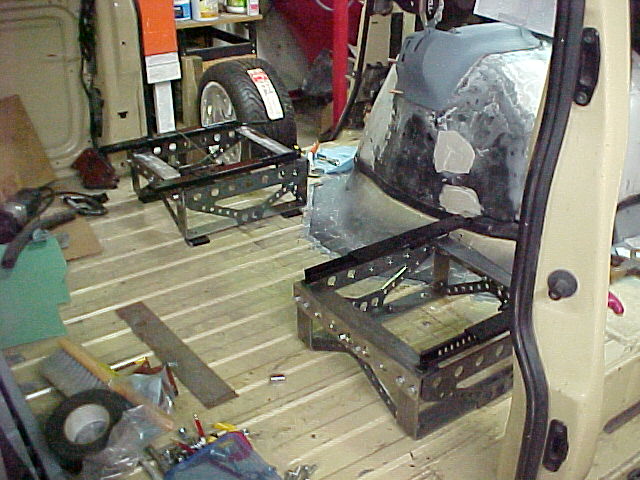

Tomorrow. Final welding and we put in that stupid left front wheel well!
MarkMark:
"Bad Ast" Astro Van. Just because I did it... Doesn't mean it's possible...
This my Bad Ast thread...
https://www.pro-touring.com/showthre...roject-Faze-II
This is my Fotki album...
http://astroracer.fotki.com/
08-14-2012 #455
Registered User
- Join Date
- Aug 2004
- Location
- Erwin,TN
- Posts
- 425
Merely being excessively nosy, but what kind of seats are those going into BadAst?
08-16-2012 #456
Registered User
- Join Date
- Nov 2002
- Location
- Finland
- Posts
- 209
looks good! can't wait for more progress pics
Chris
09-11-2012 #457
Registered User
- Join Date
- Mar 2004
- Location
- Mid-Michigan
- Posts
- 2,764
Hey FGC
The seats are Scat Procars.

Hey Chris, thanks, here is a bit of an update after almost a month...
We built an upper crossmember and have been picking away at the rear floor closeouts around the tank.
This is an overall view. The xmbr bolts in between the wells and the closeouts sweep up along the inside of the wells.
This one of the tapping plates we made to hold in the xmbr.

The other side with the 1 x 2 tubing fit in and ready to weld

These are closeups of either side of the close out panels.
Right side
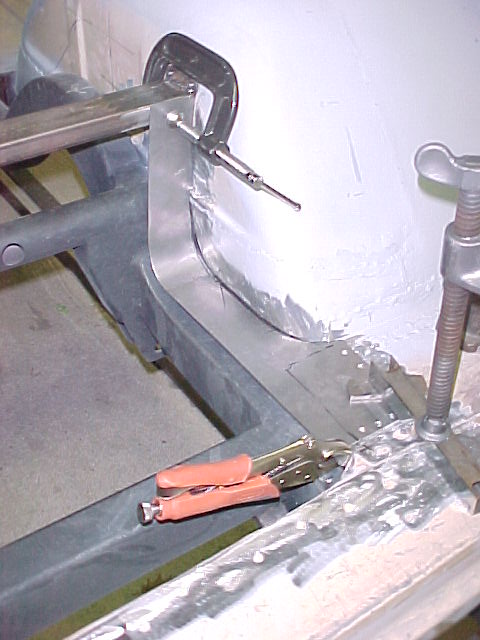
Left side

We need to make the rear filler panel yet. I won't weld any of this until that is ready.
I also got that left front wheel well welded in and primed. Haven't seam sealed it yet. Will wait and do that when I finish up the rear panels.
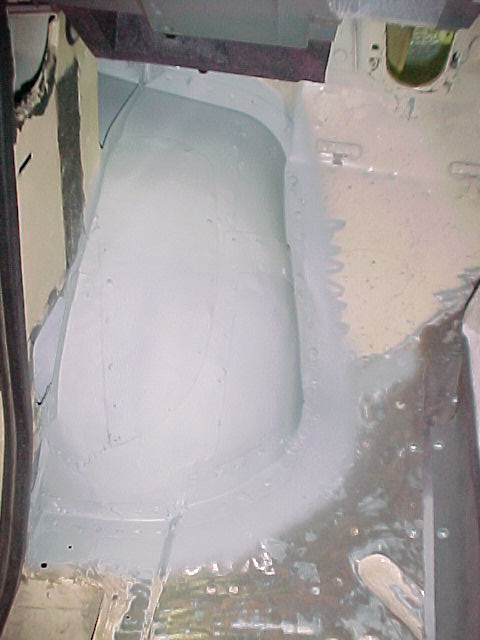
Most of this we got done in a day about a month ago. The last few weeks I have spent WORKING ON THE WIRING!!!! I'm sorry, was I yelling?
Mel has been doing some serious camping. He has a 27' trailer and has a membership at one of the camp grounds out by Davison.
The next post will touch on a bit of the wiring for this dude.
Thanks for looking.
MarkMark:
"Bad Ast" Astro Van. Just because I did it... Doesn't mean it's possible...
This my Bad Ast thread...
https://www.pro-touring.com/showthre...roject-Faze-II
This is my Fotki album...
http://astroracer.fotki.com/
09-11-2012 #458
Registered User
- Join Date
- Mar 2004
- Location
- Mid-Michigan
- Posts
- 2,764
Now! On to the fun stuff! Actually wiring isn't that bad. I kind of enjoy it. Sorting through decade old harnesses... Fingers covered with YUCK from the old tape wrap... Yummy...
Anyway, I will be combining the original '88 harness with the '95 donor harness. The '88 didn't come with power locks or windows and I will be throwing the '95 doors on Bad Ast to get those amenities.
Here are a few pics as i jumble my way through the wire jungle.
This is the '95 harness and column. I will use the '95 as the '88 didn' have tilt...
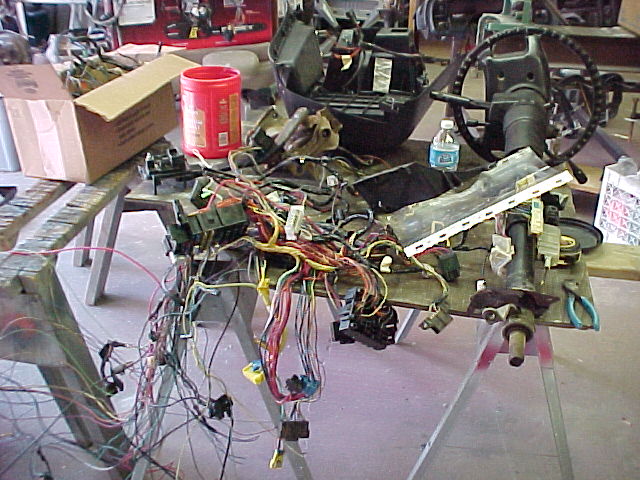
This is the '88 before i stripped off the loom and tape.

The '95 also has a lot of stuff I am not going to use. The computer wiring is not needed neither is the airbag stuff.
I am stripping all of that junk out and trying to maintain the ignition/start, neutral safety and HVAC systems. EVERYTHING is tied back into the ECM... See that pile of wire at the upper right? That's all airbag stuff I stripped out...

That's where the '88 harness comes into play. It is a little less complicated and has the HVAC stuff so I am pulling all of the power lock/window stuff out of the '95 incorporating it into the '88 junction block.
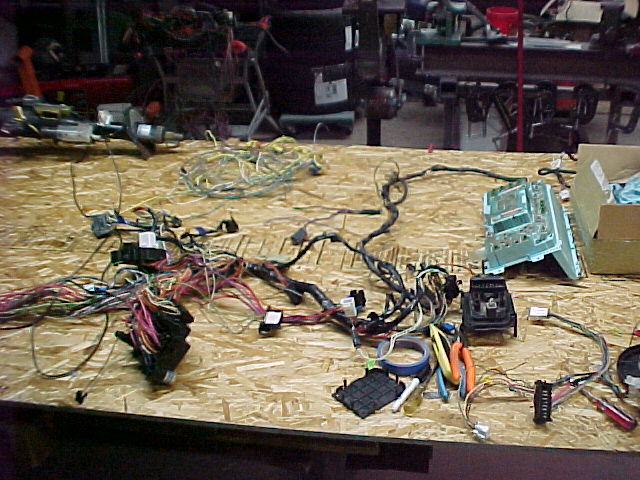
I have also traced the turn signal, hi beam and brake light circuits to the cluster connectors and will use those to power the new led's in the rebuilt cluster.
I work on it for a couple hours and I have to walk away... It all starts looking the same for some reason.
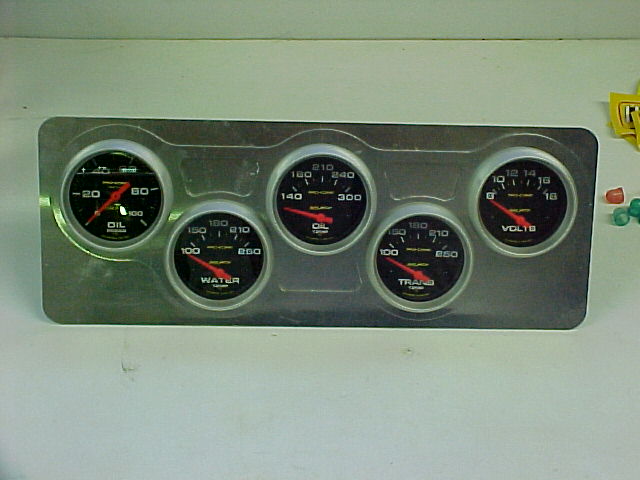
I took a break tonight and started building the center stack gauge harness.
I loaded the gauge panel.
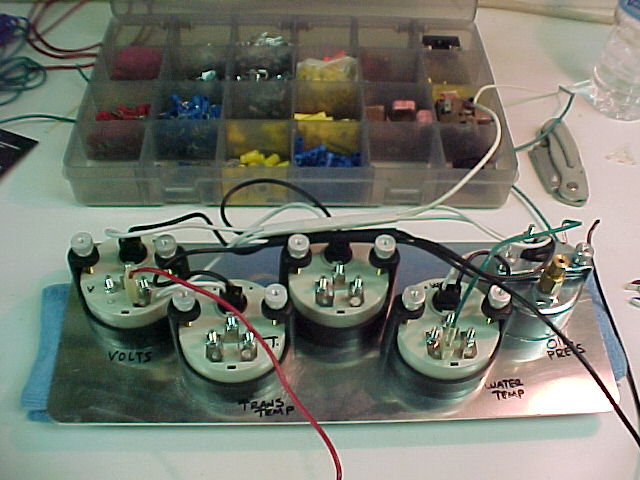
Flipped her over and labeled all of the gauges. (helps me keep things straight).

First up was tying all of the illumination bulbs and grounds together. I simply butt spliced the wires into two different circuits with a long pigtail for the remote connctor
Then I got the ignition side done. I haven't shrunk any of the heat shrink tubing yet and I will wrap everything up with cable ties when it's done. Should look pretty good.
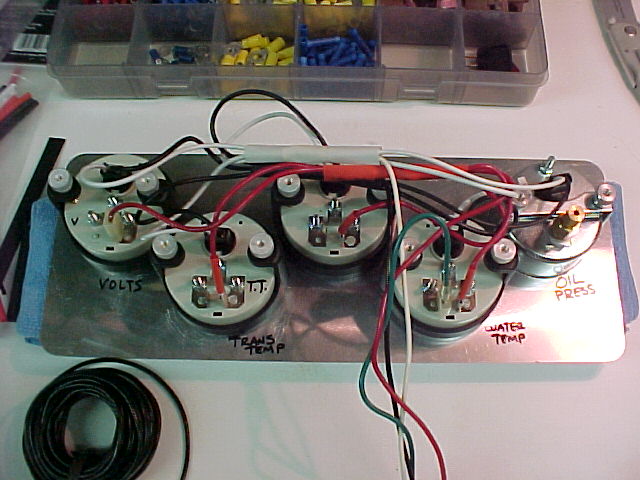
I knocked off here tonight. Tomorrow I will finish the ground side for the gauges and run the sender wires. At that point I can install one half of the 12 way molex connector I will be using and this harness will be complete.
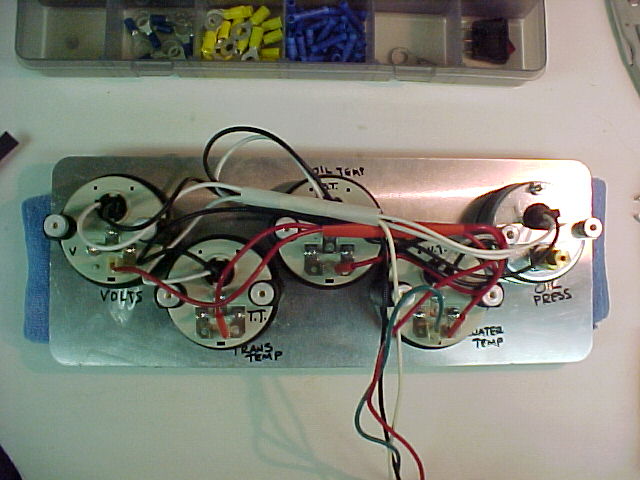
It was a good break. Got something done tonight.
MarkMark:
"Bad Ast" Astro Van. Just because I did it... Doesn't mean it's possible...
This my Bad Ast thread...
https://www.pro-touring.com/showthre...roject-Faze-II
This is my Fotki album...
http://astroracer.fotki.com/
09-11-2012 #459
Registered User
- Join Date
- Mar 2004
- Location
- Mid-Michigan
- Posts
- 2,764
Damn, I forgot to mention WE HAVE MOTOR! The 509 is home and ready to rock! It looks a little different too. It's not Chevy engine orange anymore.


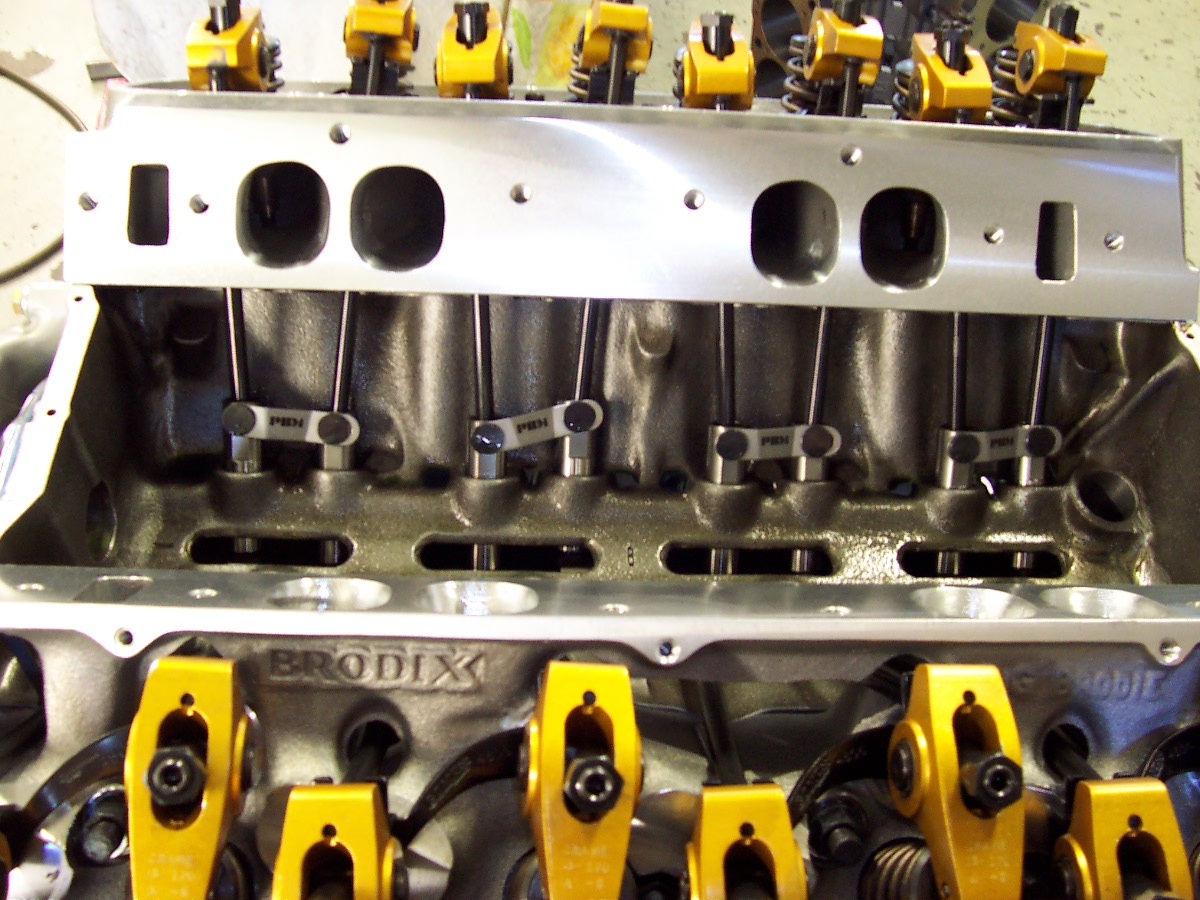
Can you see this HUJAZZ smile on my face?
MarkMark:
"Bad Ast" Astro Van. Just because I did it... Doesn't mean it's possible...
This my Bad Ast thread...
https://www.pro-touring.com/showthre...roject-Faze-II
This is my Fotki album...
http://astroracer.fotki.com/
09-13-2012 #460
Registered User
- Join Date
- Mar 2004
- Location
- Mid-Michigan
- Posts
- 2,764
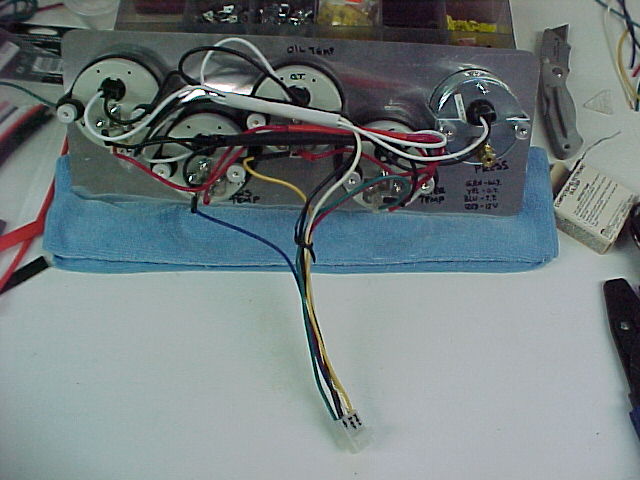
I got the Gauge cluster wired up tonight. I put 12v's to the lites and they lit up without any arcing or explosions so I was happy!
They are kind of dim. I was running them off my cheapo battery charger so they probably aren't getting a full 12.
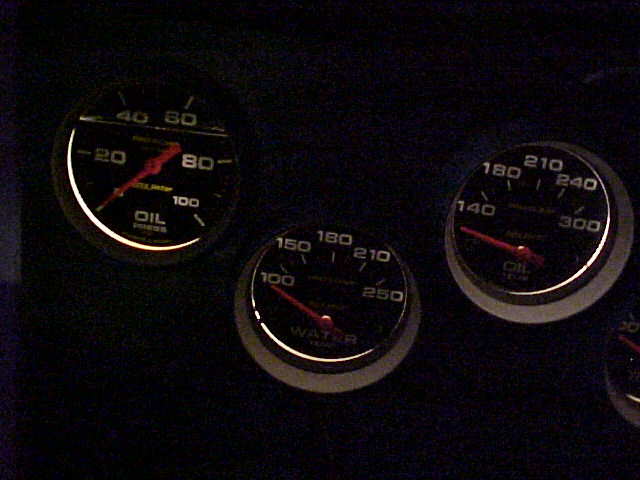
Full view
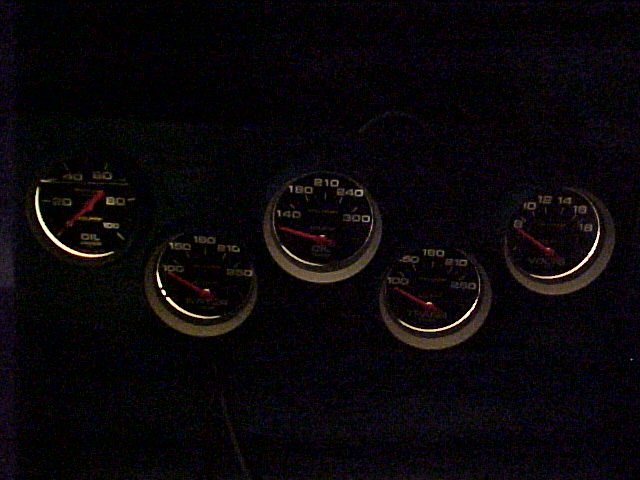
The back. I will get to the final bundling after I get the shrink tube finished. It's kind of sloopy looking right now but it'll look nice once it's all cable tied.
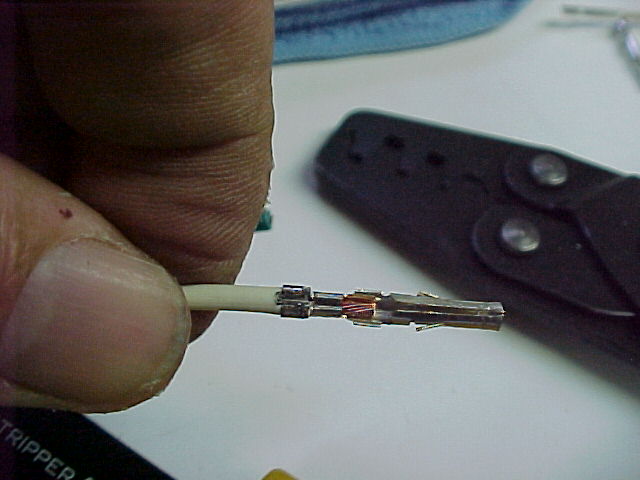
I finally got myself a good Molex style terminal crimper. This one came from Jegs.
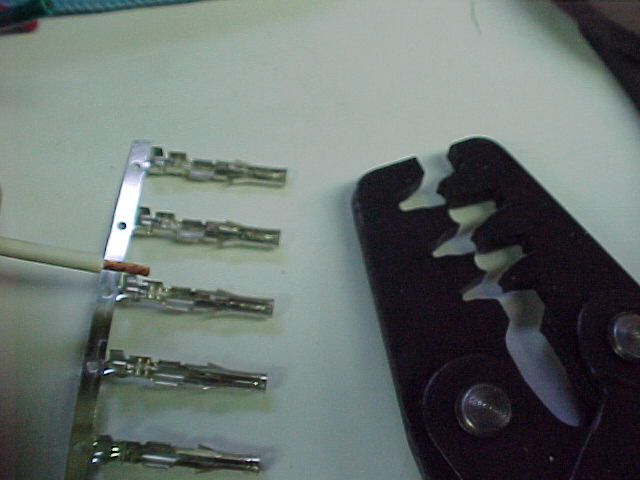
I did all six wire and insulation crimps with zero defects. These crimpers make this a no brainer, really.
First, strip the wire.
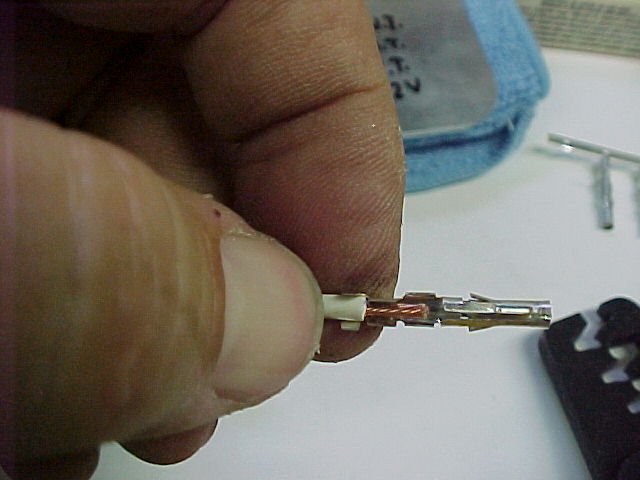
Crimp the wire side.
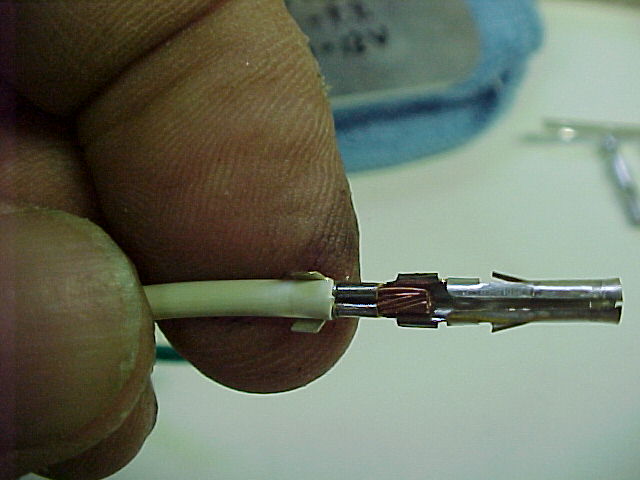
Then move to the next bigger crimp and crimp on the insulation. These are strong crimps, they aren't coming apart.
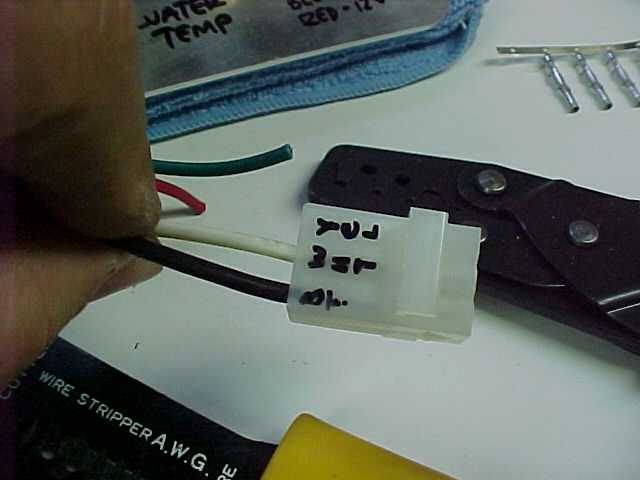
I then shoved the connectors into the housing. You can see how I labeled the connector with the wire color. Probably not necessary but it helps when planning the connections.
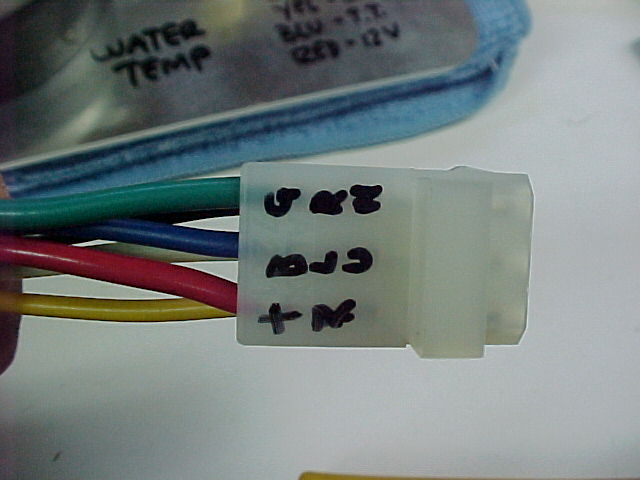
All done..
I have done a lot of wiring before so I am very comfortable doing it. I know a lot of people are intimidated by the "spaghetti"... If you want to learn more I would suggest picking up two books. Both of them are by Tony Candela and are very well written.
He touches base on all of the basics in his first book
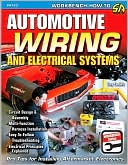
and covers some fairly in-depth projects in his second.

I have read through both of them a few times and everything I am doing here on the van I have either picked up through Tony's books or had my knowledge reinforced or changed for the better by him. The other thing I can tell you is, if you want to learn to do your own wiring, get out and do it. It's not that difficult and, with these books as reference, I think anybody could re-wire a car with little difficulty. Or just start small by tiding up all of those loose wires!
Thanks for looking
MarkMark:
"Bad Ast" Astro Van. Just because I did it... Doesn't mean it's possible...
This my Bad Ast thread...
https://www.pro-touring.com/showthre...roject-Faze-II
This is my Fotki album...
http://astroracer.fotki.com/

 Reply With Quote


