

Results 581 to 600 of 862
Thread: The BAD AST Project - Faze II
-
02-27-2013 #581

 Registered User
- Join Date
- Mar 2004
- Location
- Mid-Michigan
- Posts
- 2,764

Thanks Tom, appreciate the comments about the van and my Dad. I find the documentation helps me keep on track. If I get a little low, seeing less progress then I would like, I will go back a few pages and read through. Seeing what Mel and I have already accomplished and reading youse (sic) guys comments picks me back up.
Thanks for taking the time to skim and comment.
Mark
I got the FlexKore lines from Kore3 monday night and the 11' shifter cable from Jegs last night. Haven't been out to the shop to get pics though. Dealing with snow last night. What a mess! It is good packing stuff though. I was out building a "snowlady" last night at 10:30... Mark:
Mark:
"Bad Ast" Astro Van. Just because I did it... Doesn't mean it's possible...
This my Bad Ast thread...
https://www.pro-touring.com/showthre...roject-Faze-II
This is my Fotki album...
http://astroracer.fotki.com/
-
03-03-2013 #582
Registered User
- Join Date
- Mar 2004
- Location
- Mid-Michigan
- Posts
- 2,764
Finishing the cuts in the floor for the clearance tunnels. We cut out the rest with a cutoff wheel in a die grinder. Made pretty quick work of it.
We made a bigger cut then necessary on the drivers side just to get rid of the floor rib. That was making it difficult to get a nice flange under the floor. This will get pieced in as we weld the floor together.
Once we had the holes opened up we marked the tubes for final trimming. I ran a line about an inch outside of that one and we set up the bead roller. We formed flanges on either side of the tunnels which will get welded into the floor.

After a few trips through the tipping dies we have a flange!
A bit of grinding and fitting and the tunnels are clecoed in.
Here we are getting the back edge square and level. The flange we made last weekend needs to go here.
Setting up the level so we can clamp the floor at the right height.
We drilled 1/4" holes along the edge in the valleys to spot weld to the flange.
Once this is all welded to gether it will be really strong.
The tunnels will get trimmed off to match the plane between the top tubing and the floor flange we just welded on. Of course they will be lrft long like we did the floor flanges. We'll run the tipping dies around the ends to form a nice spot welding flange.

With all of this set up I will make patterns for the filler panel and get that made this week.
MarkMark:
"Bad Ast" Astro Van. Just because I did it... Doesn't mean it's possible...
This my Bad Ast thread...
https://www.pro-touring.com/showthre...roject-Faze-II
This is my Fotki album...
http://astroracer.fotki.com/
03-10-2013 #583
Registered User
- Join Date
- Mar 2004
- Location
- Mid-Michigan
- Posts
- 2,764
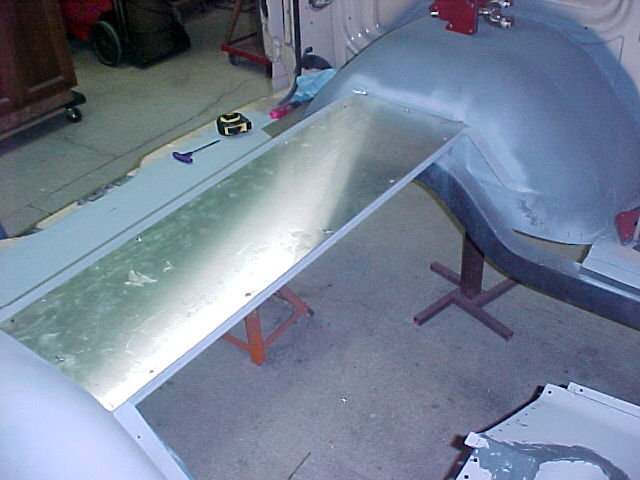
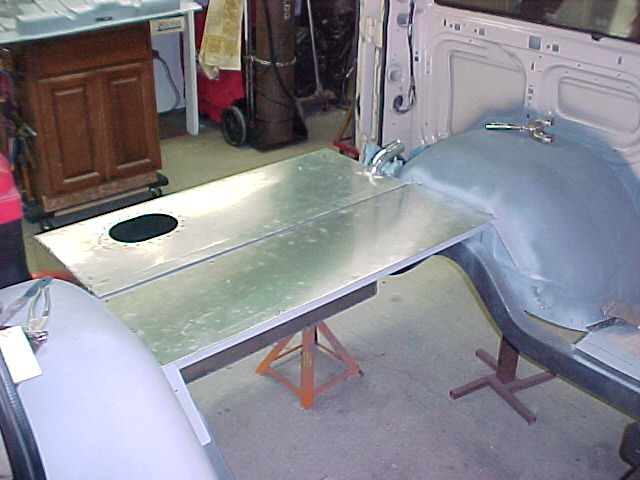
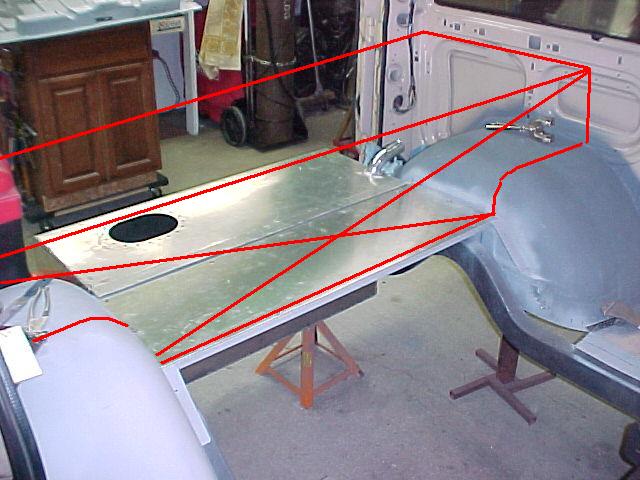
Spent today working on the floor again. I made up templates for notching the rear bulkhead panel around the clearance tunnels.


Once those were done we trimmed a sheet of 20ga to size and laid out the notches for cutting.
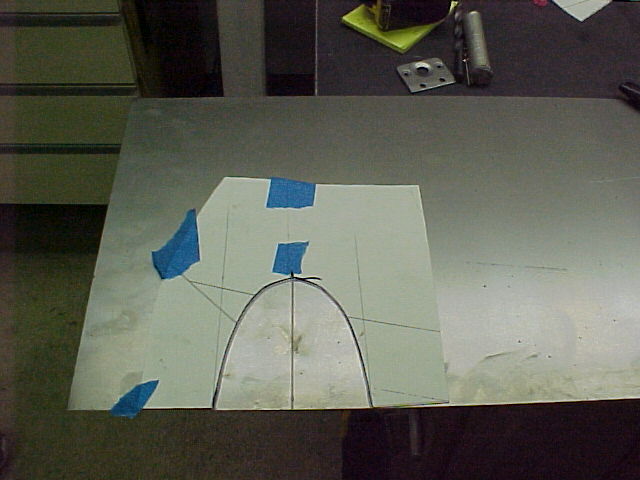
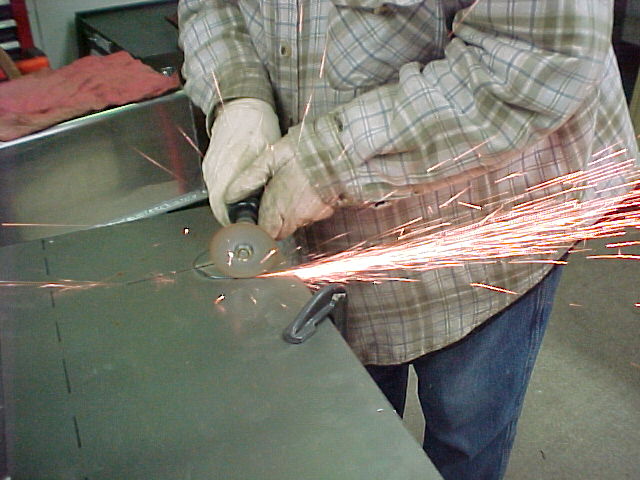
I cut them out with a die grinder and cutoff wheel and cleaned them up with a stone in the grinder.
Test fitting the panel.
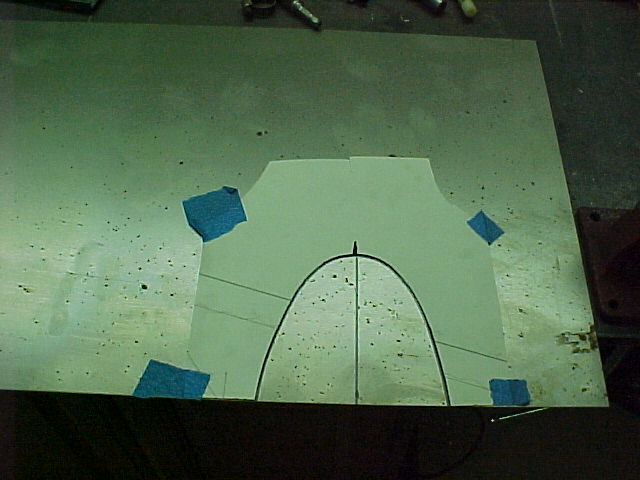
Once we did a little fitting we clecoed it in place and marked the tunnels for trimming.

Once the tunnels were marked we pulled one out and I laid out cut lines to trim to. We left it about an inch long so we could roll up a flange for welding to the floor.

After a few runs through the bead roller with the tipping dies in place we had a nice flange that only took a hammering to get flat enough to cleco in.

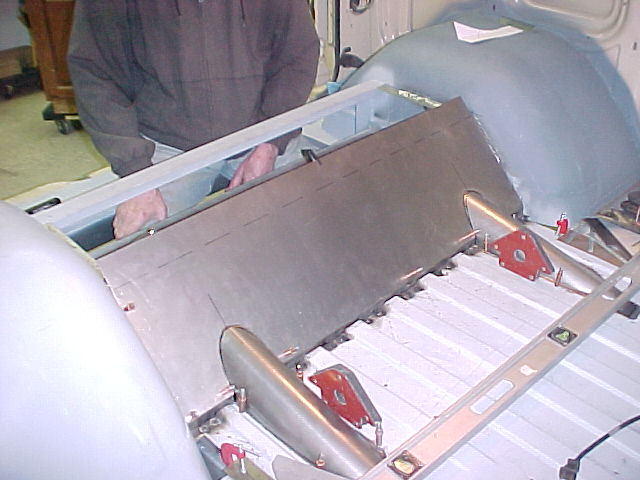
This is under the floor. We had a bit of fitting to do to get it sitting right.
Once we had everything fit together we put a couple of cleco's in the top flange and called it a day...
The fit is pretty good underneath. This will get tightened up a bit while we are welding it in.
Thanks for watching.
MarkMark:
"Bad Ast" Astro Van. Just because I did it... Doesn't mean it's possible...
This my Bad Ast thread...
https://www.pro-touring.com/showthre...roject-Faze-II
This is my Fotki album...
http://astroracer.fotki.com/
03-10-2013 #584
Registered User
- Join Date
- Mar 2004
- Location
- Mid-Michigan
- Posts
- 2,764
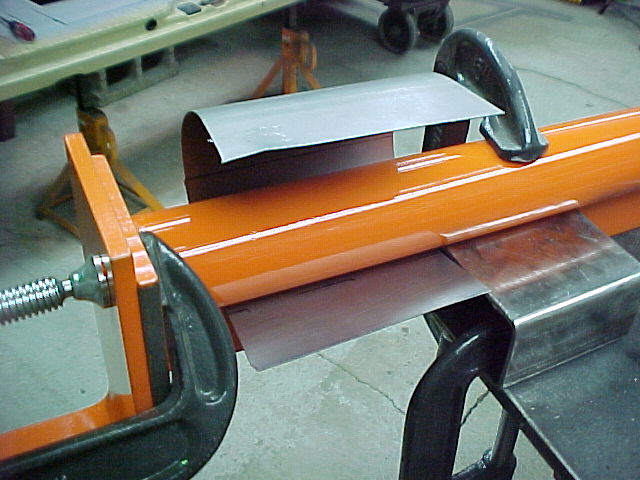
I posted this in the fab forum also but thought I should put it here for continuity.
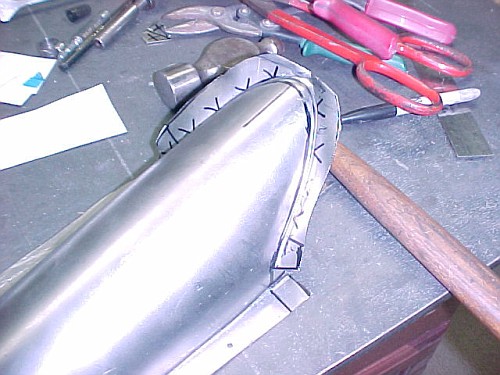
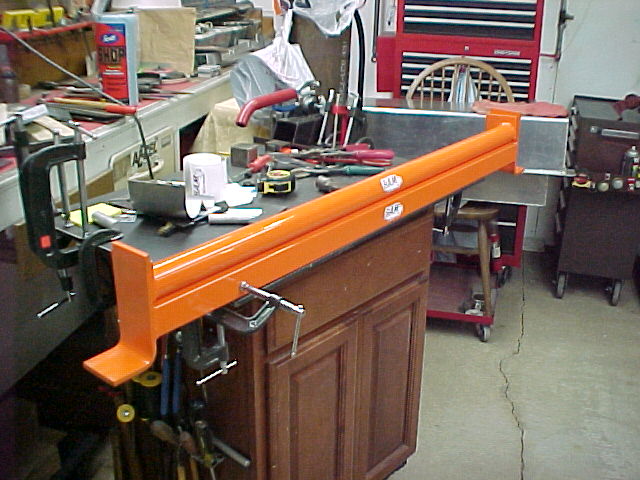
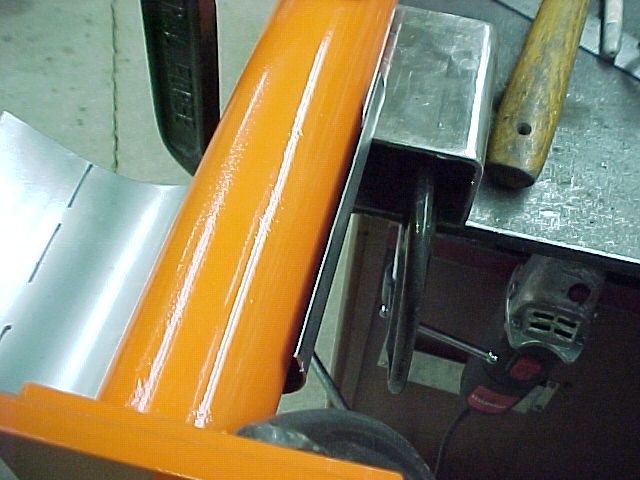
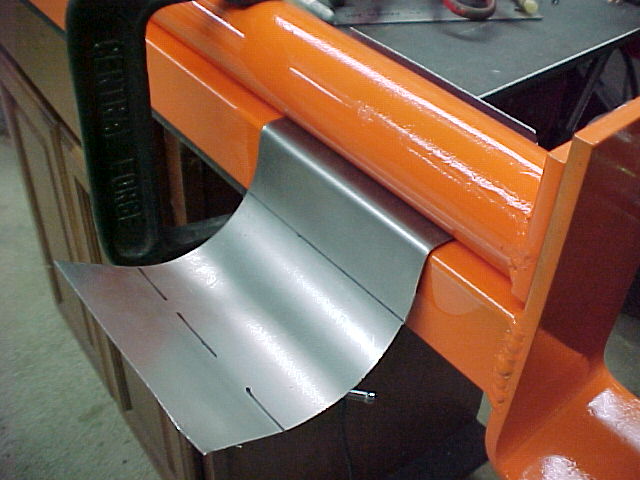
Today Mel and I made a simple sheet metal bender out of scraps I had laying around. Necessity being the mother that it is, I had to bend a panel for the van that was just under 39 inches long and the 3-in-1 is too short to do that.
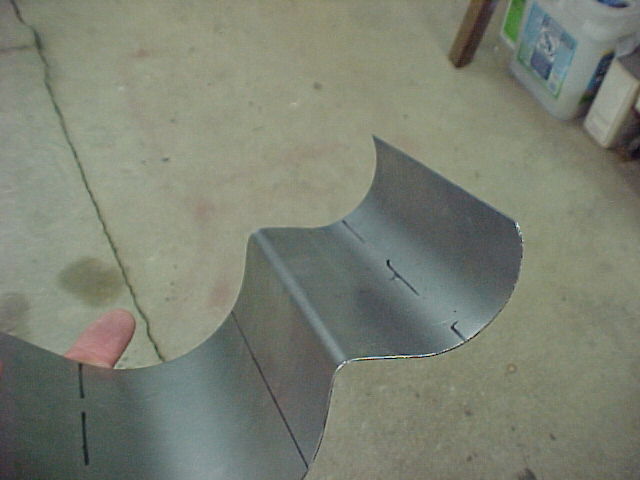
This is the panel. You can see the dashed tangent line at the top. That's where we needed a 1" radius bend.
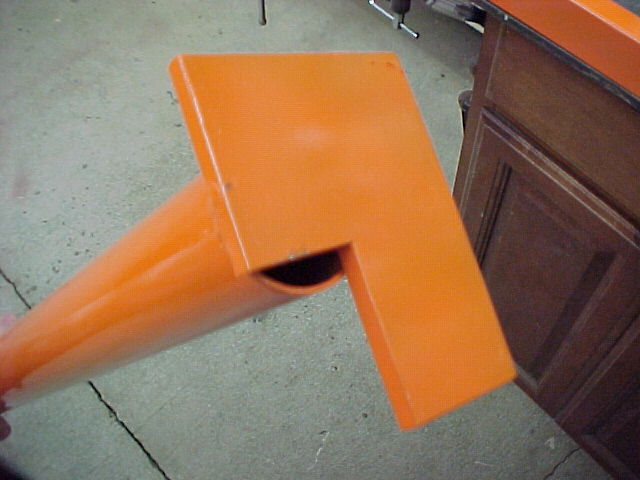
Using some 3 x 3/8ths plate, a piece of 1x2 tubing and the top tube out of an old swingset I fabbed up a simple bender that will clamp the steel in place and except a piece 48" wide.
Here you can see the 38" piece we bent for the trial. It has a short flange on one side and we just clamped it in place and hand bent it (20ga).
You can see the tube here with the bent flange at the top.

Here is the panel set in place. Very nice.
I will get some clearer pics later. Once the sheet was bent I cleaned up the bender and sprayed it gloss orange so I had to wait to let the paint dry.
This is the "top" piece. There are no bolts. It just gets C-Clamped together while I am doing the bend. Quick and easy...

The bottom half. This is a 1 x 2 rect tube welded to the two end plates. The upper half clamps in between to capture the sheet being bent. This guy will clamp to the fab bench or the jig tables.
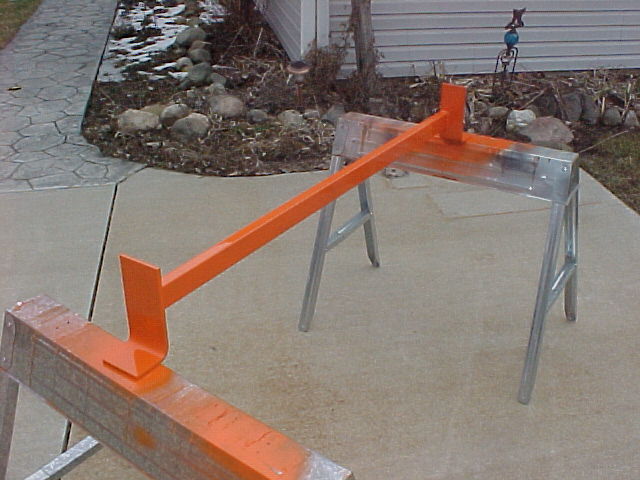
Mel and I spent about an hour making this thing. Do you know how much time it will save trying to clamp steel and round tubing together to make a long bend? A LOT!!!
MarkMark:
"Bad Ast" Astro Van. Just because I did it... Doesn't mean it's possible...
This my Bad Ast thread...
https://www.pro-touring.com/showthre...roject-Faze-II
This is my Fotki album...
http://astroracer.fotki.com/
03-12-2013 #585
Registered User
- Join Date
- Mar 2004
- Location
- Mid-Michigan
- Posts
- 2,764
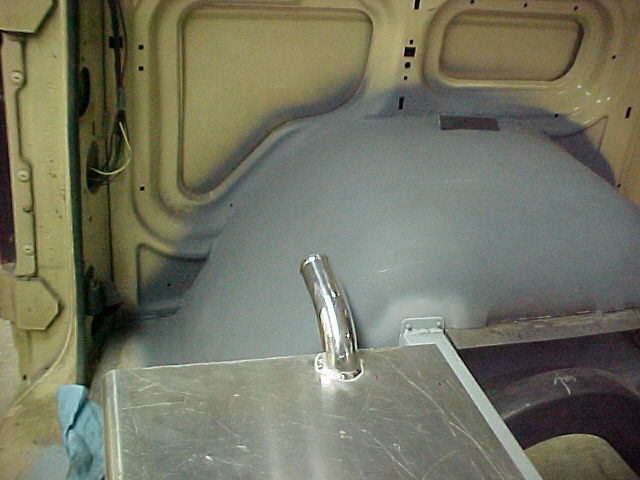
I cut up a piece of 1 1/2 inch diameter aluminum "turbo" piping to make the filler neck for the tank. I cut a hole in the top of the tank on the drivers side and took the tank in to have Jesse weld it up. I thought about welding it myself but I wanted it done right and DID NOT want to screw it up...
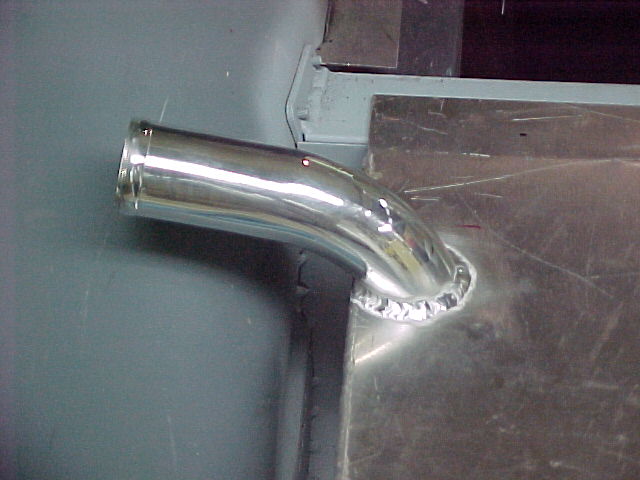
I will rebuild a fuel door at the back of the van. I am looking at options for that. Something small and round. A friend has a Fiero door he will give me so I think I will check that out.
I plan to build a box to isolate the tank from the rest of the van. It will also provide a bit of storage for tools and such.Mark:
"Bad Ast" Astro Van. Just because I did it... Doesn't mean it's possible...
This my Bad Ast thread...
https://www.pro-touring.com/showthre...roject-Faze-II
This is my Fotki album...
http://astroracer.fotki.com/
03-13-2013 #586
Registered User
- Join Date
- Mar 2004
- Location
- Mid-Michigan
- Posts
- 2,764
Got some better pics of the radius bender tonight. Here it is, assembled, clamped on the welding table.
This is one end of the top "die" if you would. The notch in the end plates clears the 1 x 2 in the lower die and lets the centerline of the tube snuggle up to the edge of the 1 x 2.
A few of the notch with the bender assembled. The round tube is centered directly over the edge of the rectangular tube.
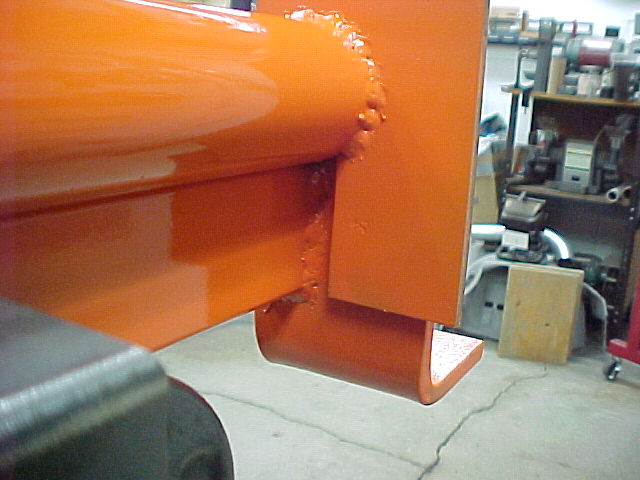
This is a cutoff from the tunnels we made. I clamped it in the bender with a C-Clamp. I'll do a little bending with this so you can see what can be done.
Bending the back edge up, around the top die. This was done by hand.
Bending the front edge down, around the rectangular tube for a sharp corner.
This is pretty cool. I'll get a lot of use out of this dude.
It will be easy to make additional top dies also. Black pipe of any diameter will make excellant dies to bend around.
Get out and build one of these things...
Thanks for looking.
MarkMark:
"Bad Ast" Astro Van. Just because I did it... Doesn't mean it's possible...
This my Bad Ast thread...
https://www.pro-touring.com/showthre...roject-Faze-II
This is my Fotki album...
http://astroracer.fotki.com/
03-16-2013 #587
Registered User
- Join Date
- Mar 2004
- Location
- Mid-Michigan
- Posts
- 2,764
Spent most of yesterday morning out in the shop. Thursday was my last day at AM General. Monday I start working back at the GM Tech Center in Warren. Anyway I had the day so I didn't want to waste it.
I needed a fitting for the '86 Chevy Power Steering return hose from the reservoir. The pump has a 3/4" tube nipple and I couldn't find a fitting to go from that to -10 37 degree flare. So I made one.
Here is the pump with a long piece of 3/4id hose stuck on it.

Inside this chunk of 1" diameter aluminum is a 3/4" OD "hose barb". You can't see it, but it's in there...

I bought a couple of -10 weld bungs from Speedway. The bung will get welded to the barb after it's turned on the lathe.
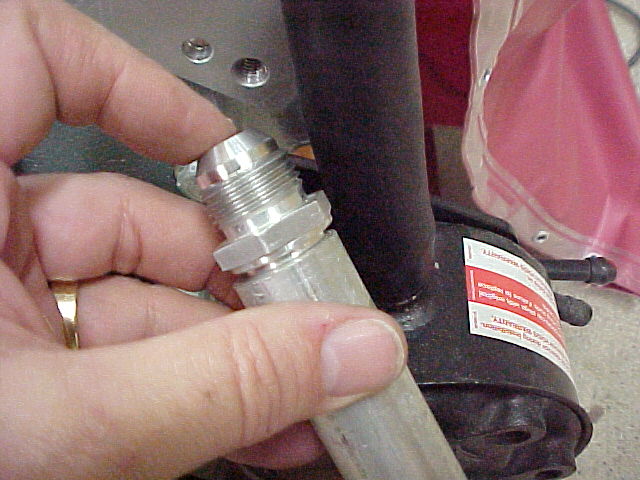
Making the hose barb. Can you see it? This was in there all along...
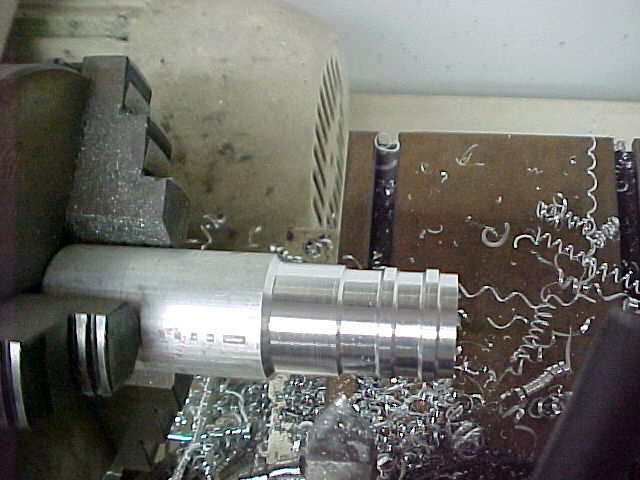
The weld bung has an ID of about .47 so I drilled the barb out to .50 to make an unrestricted path for the PS fluid.
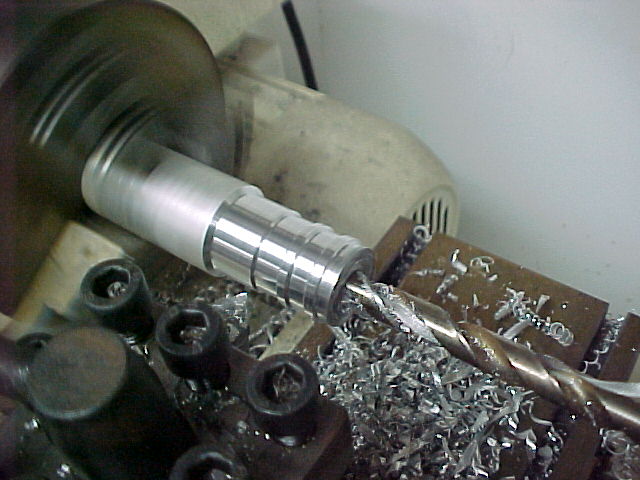
Before parting off the "barb" I added a nice chamfer to the weld joint.
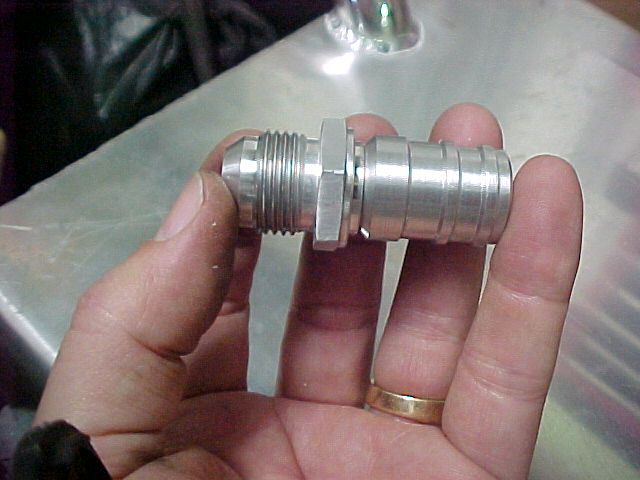
I ran a 3/8th inch bolt thru the fitting to hold everything together for welding.

After welding. I know it's not real pretty but it will do the job without leaking..

Here is the hose and fitting held in place at the pump. Just imagine there is a piece of black hose connecting them together.
MarkMark:
"Bad Ast" Astro Van. Just because I did it... Doesn't mean it's possible...
This my Bad Ast thread...
https://www.pro-touring.com/showthre...roject-Faze-II
This is my Fotki album...
http://astroracer.fotki.com/
03-16-2013 #588
Registered User
- Join Date
- Mar 2004
- Location
- Mid-Michigan
- Posts
- 2,764
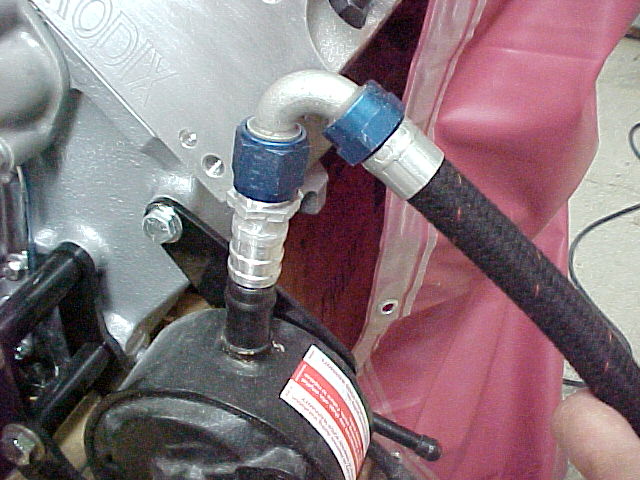
Back out in the shop this morning, I cut the piece of hose down to length and mocked up the fittings.

With the return line attached.
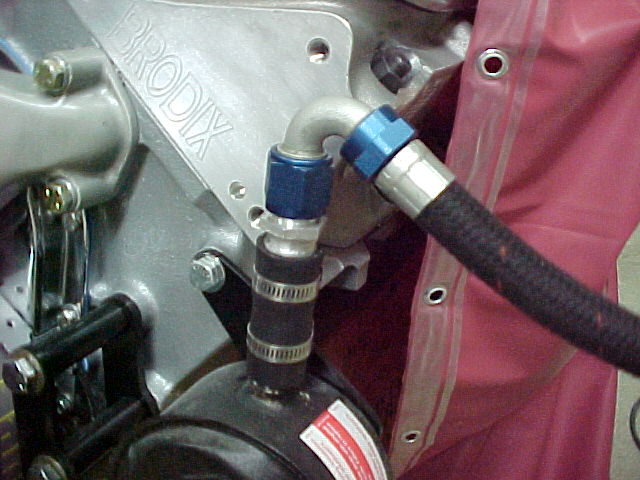
I really don't care for the naked hose clamps so I put on a couple of clamp covers I had in my stash.
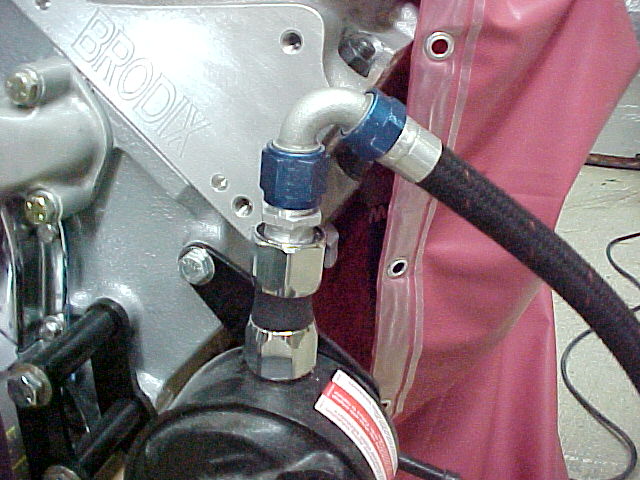
This is kinda chincy looking to me so I may come up with something to do the job a little better. I'll do a bit of cigitating on this...Mark:
"Bad Ast" Astro Van. Just because I did it... Doesn't mean it's possible...
This my Bad Ast thread...
https://www.pro-touring.com/showthre...roject-Faze-II
This is my Fotki album...
http://astroracer.fotki.com/
03-17-2013 #589 Registered User
- Join Date
- Mar 2008
- Location
- Brisbane Australia
- Posts
- 410

If there's one thing I love it's home fabbed parts.
Living in Australia trying to build a custom car with out a lathe would be about 4x the price.Hot rodder's recycle, wheres those prius' going when the tree huggers have a new fad.
03-17-2013 #590
Registered User
- Join Date
- Mar 2004
- Location
- Mid-Michigan
- Posts
- 2,764
The lathe has saved me a lot of money, just as you say. It also made me a lot when I was using it to make parts for my aftermarket model car parts business.
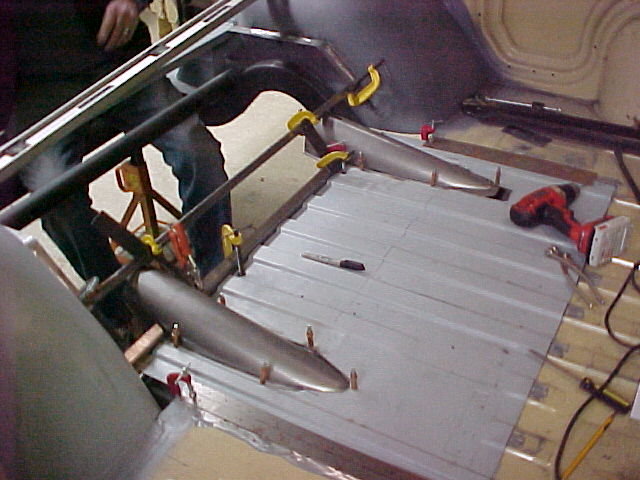
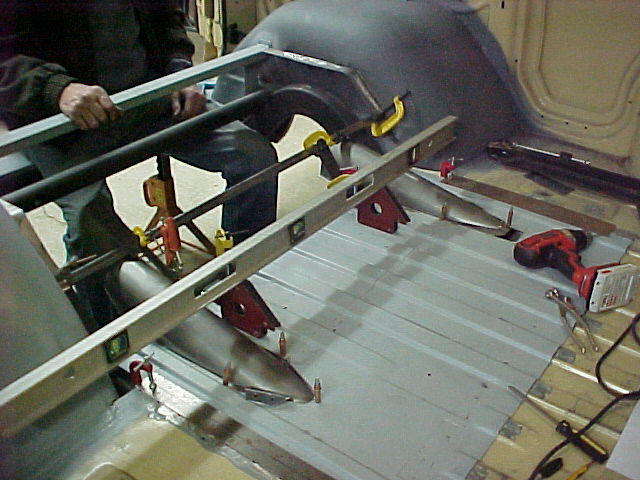
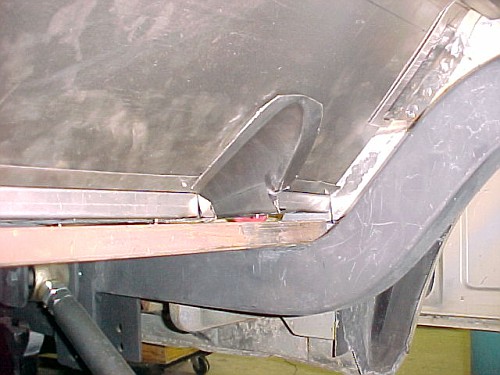
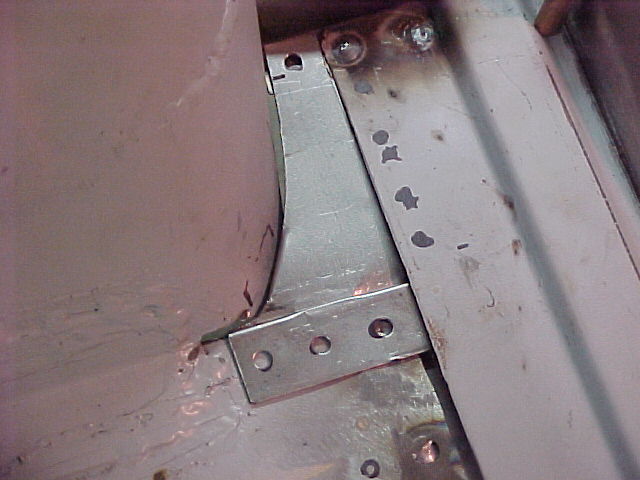
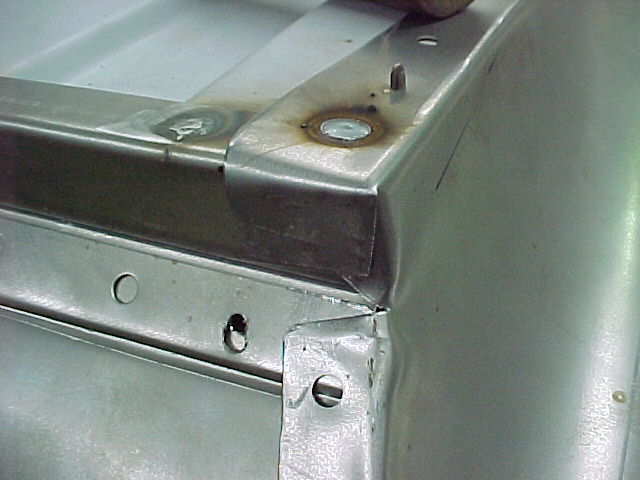
Got a lot done yesterday. Mel came out and we got busy getting the rest of the floor and clearance tunnels fabbed and ready to weld.
We put a step flange on the rear panel so it will slip under the floor flange. This added a lot of structure to the joint and it will shed water better.
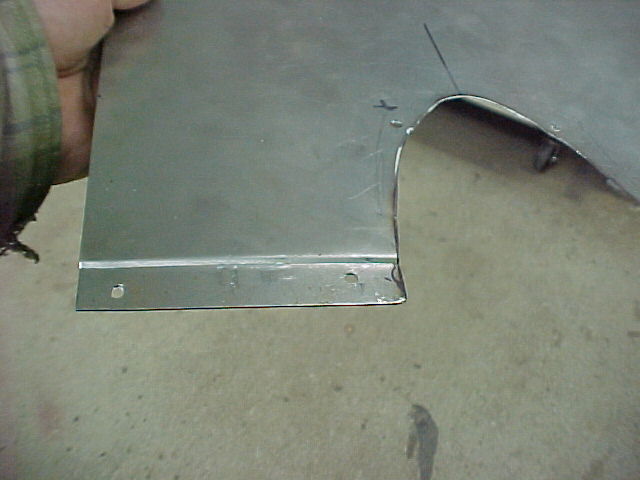
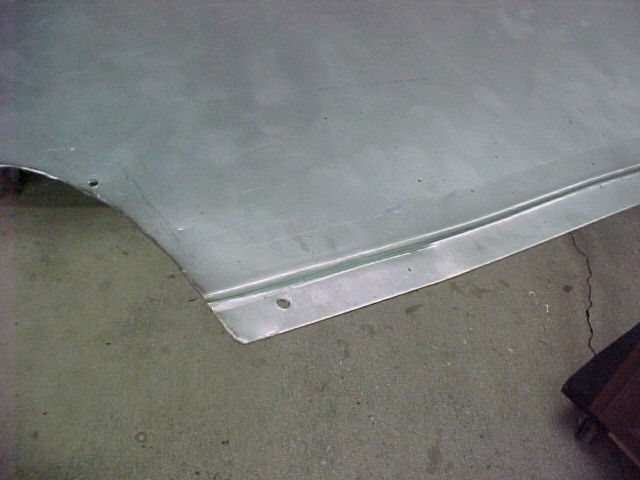
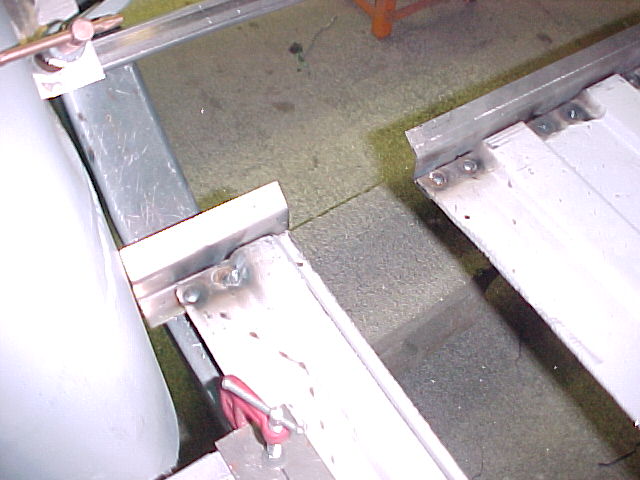
We also got a couple of small filler panles fabbed to close out the front corners of the wheel tubs.
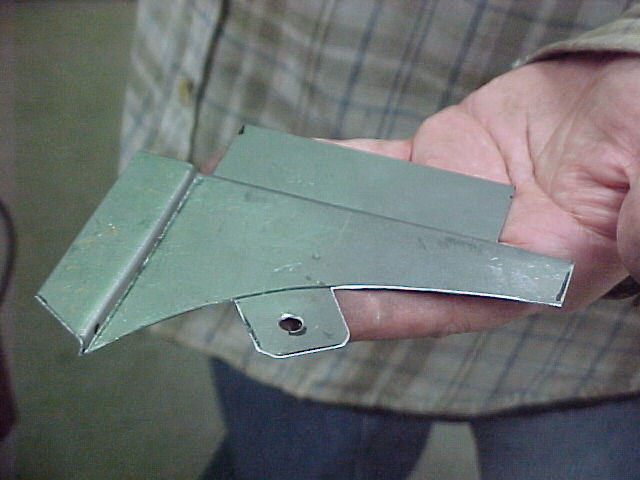
These are 20 ga with some step flanges rolled in them to slip under the floor for spot welding.
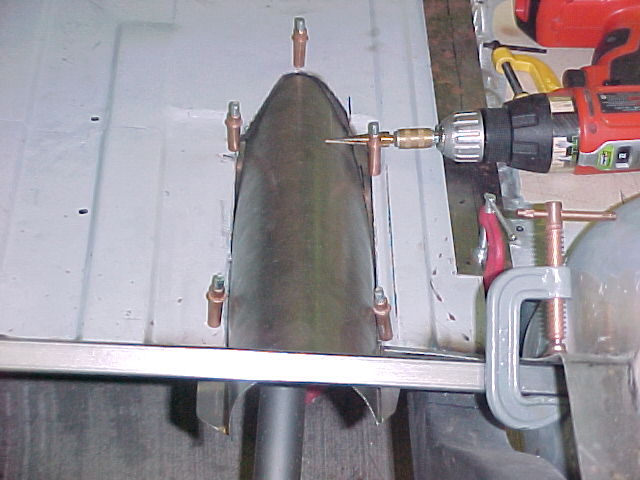
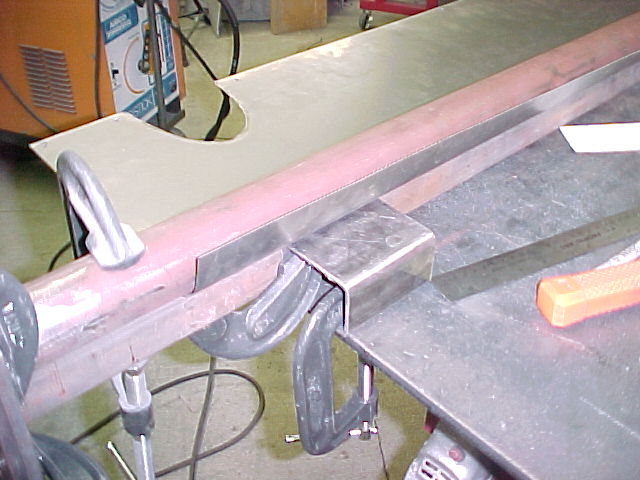
We finished up the rolled flange on the drivers side clearance tunnel and got that fit in and clecoed.
We also fit the filler panels for the sides of the floor. These were spot welded thru the floor and one edge of the old frame rail. The floor section will get welded to these (today I hope) and will help carry the floor load. This is better then just trying to butt weld the floor back together and it will be a lot stronger.

This is the new floor, all fit together and clecoed in place. I will pull this back apart today, do a little more fitting and drill the rest of the spot weld holes.
I hope to have this welded in this afternoon.
Thanks for watching!
MarkMark:
"Bad Ast" Astro Van. Just because I did it... Doesn't mean it's possible...
This my Bad Ast thread...
https://www.pro-touring.com/showthre...roject-Faze-II
This is my Fotki album...
http://astroracer.fotki.com/
03-17-2013 #591 Registered User
- Join Date
- Jan 2007
- Location
- Port Orchard, WA
- Posts
- 497
Mark, great looking metal work. My favorite part of the build is the fabrication of metal work. Awesome.
03-20-2013 #592
Registered User
- Join Date
- Mar 2004
- Location
- Mid-Michigan
- Posts
- 2,764
Thanks Lenie! I enjoy it too. Although it is getting kind of tiresome right now. Getting this floor done is about the last big job to get the tinwork finished on this one...
With that said, I set myself on fire tonight.... Just my work jacket. I was spot welding the floor together on the bench and got some molten hot magma on the coat... Got pretty busy once I figured out where the smoke and fumes were coming from. I lit the lower left half of the coat and the fumes were coming right up into my face under the helmet. I needed a new work coat anyway. I think the next one will be a little more fire resistant.
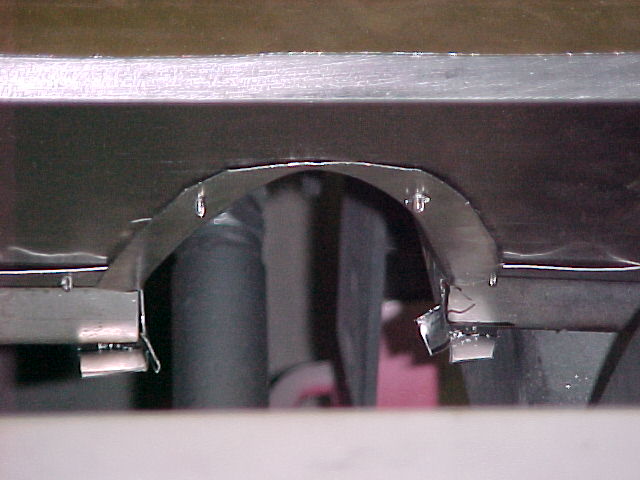
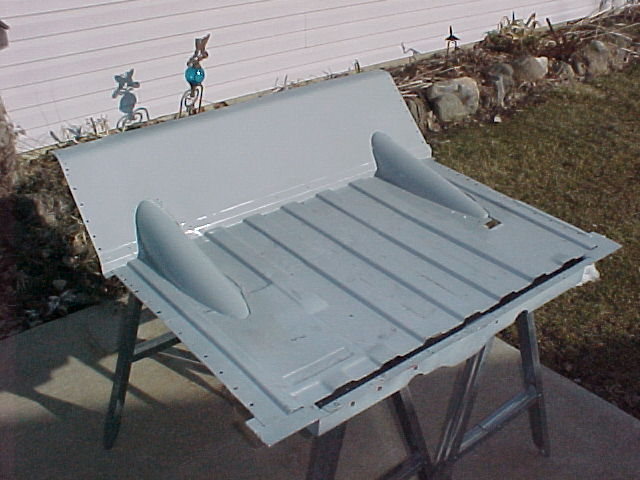
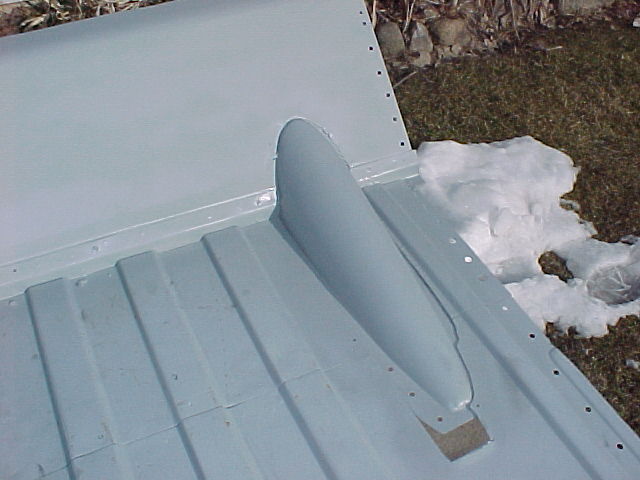
This is what I was sticking together. The floor after I yanked it out of the van.

These are the tabs on the tunnels. The left side of the pic is folded into place. The right side is just getting started.

Getting the tunnels welded in.
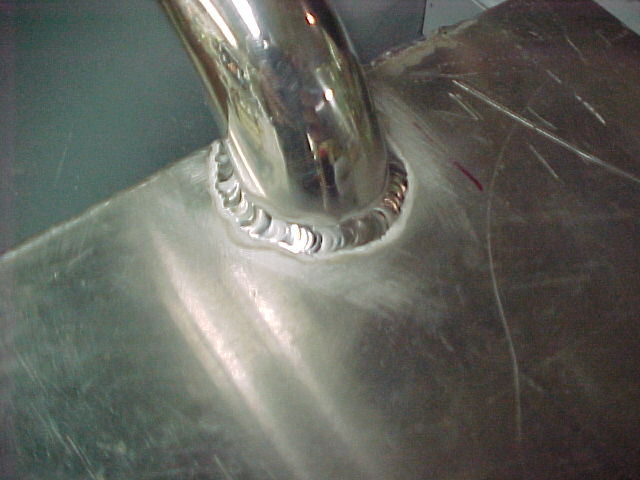
All welded and ready for cleanup.

A few of the spot welds. I had a few of these go nuclear on me. Blew holes through both panels as soon as I hit the trigger... Thankfully most of them looked like this.

Here is a closeup of one of the folded tabs. I took this before I hammer and dollied the tabs flat. They welded together very nice and will be very strong.
 Mark:
Mark:
"Bad Ast" Astro Van. Just because I did it... Doesn't mean it's possible...
This my Bad Ast thread...
https://www.pro-touring.com/showthre...roject-Faze-II
This is my Fotki album...
http://astroracer.fotki.com/
03-20-2013 #593
Registered User
- Join Date
- Jan 2007
- Location
- Port Orchard, WA
- Posts
- 497
Be careful, we had a welder burn to death here at work a couple of years ago. Again, great metal work.
03-23-2013 #594
Registered User
- Join Date
- Mar 2004
- Location
- Mid-Michigan
- Posts
- 2,764
Yesterday I got home at 3:45!!! I mentioned my job change a post or two prior. If you haven't seen my "changing jobs" thread I have left AM General and gone back into GM! GM has flex time! I am starting at 6:00 and getting out at 2:30! At that time of day traffic on I-75 is fairly lite and moving at 80mph. Doesn't take long to get home like that...
Anyway, I got home and headed straight for the shop. I wanted to get the floor welds touched up with the flap wheel and get some primer on it while it was nice enough to work outside.
I set up a couple of saw horses and got busy!

I still had a few holes to fill but this got the brunt of the work done without filling the shop with grinding dust and paint fumes...
I'll fill the hole in front of the drivers side tube tomorrow and seam seal the whole thing before it gets welded in permanently.
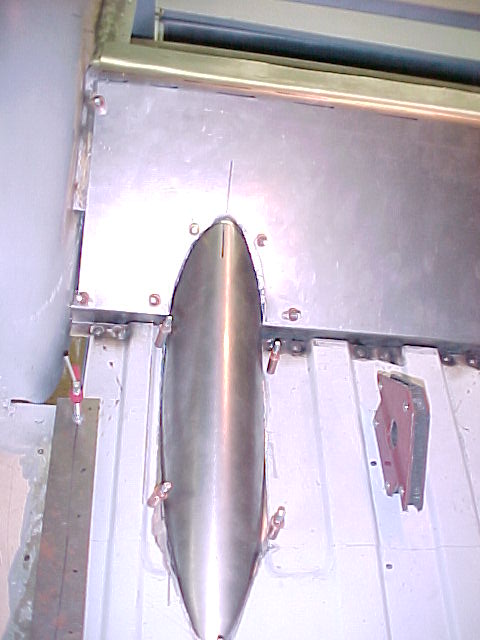
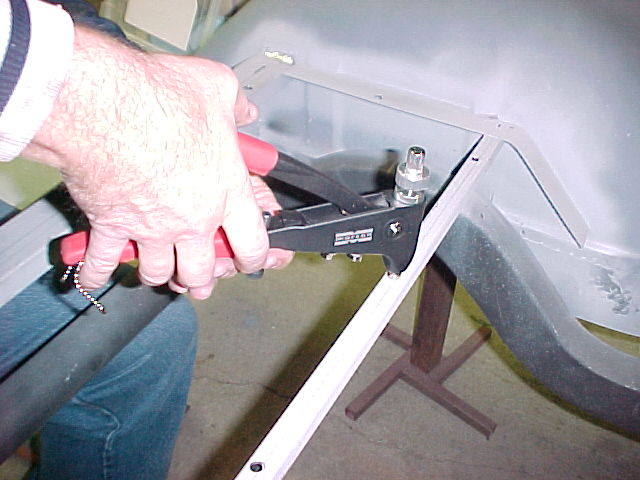
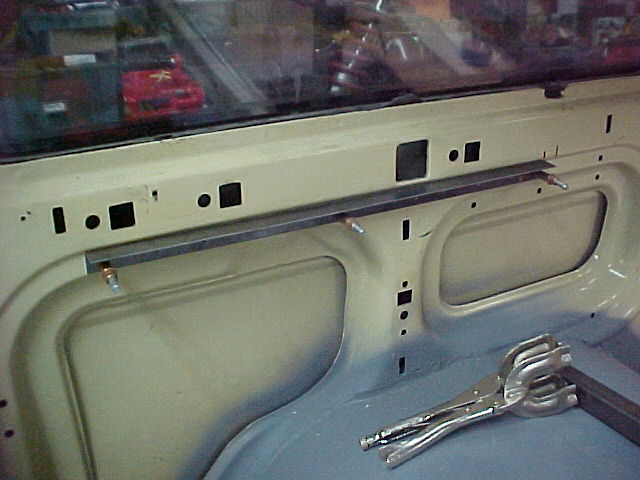
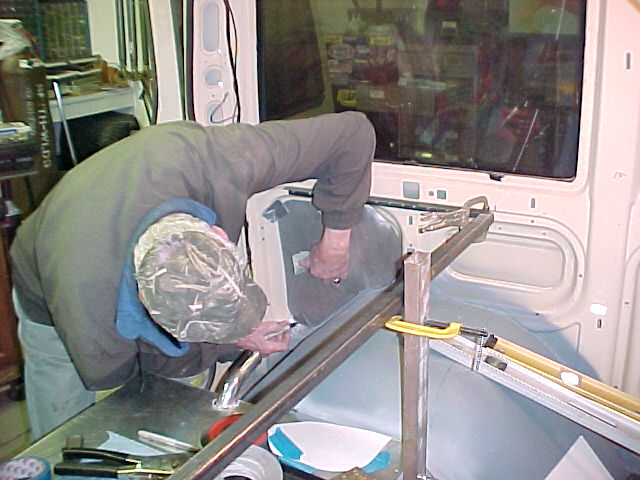
Today we got out in the shop and, while I was making the patch panel for the floor, Mel was getting the support tube for the top of the filler piece ready to weld in. That's the 3/4" sq. tube to the right in this pic. I am drilling holes for rivnuts here also.

Installing rivnuts...
Here is the floor all sealed up. I will run the D/A over this to smooth it out a little better and reprime it tomorrow.

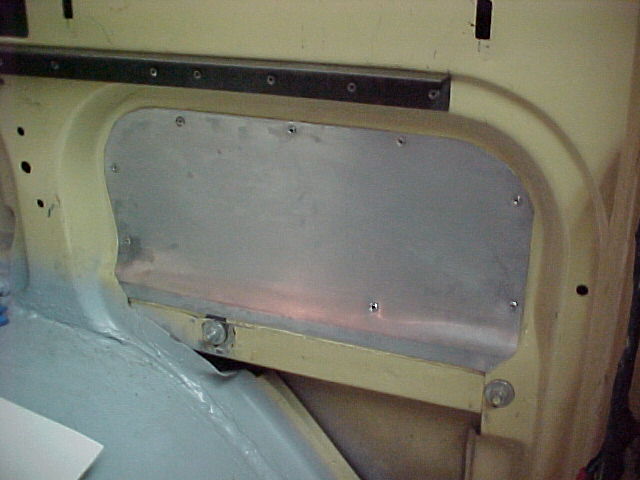
We also made the cover plate for the last big hole in the floor!!! This is .090 aluminum and will get bolted into those rivnuts I was installing.
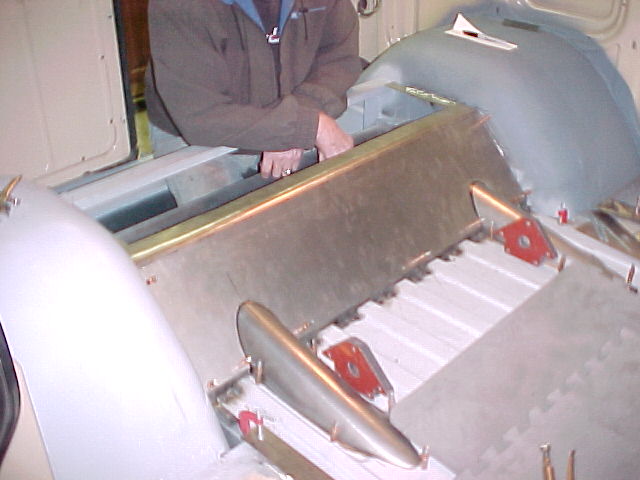
A pic with the tank set in place.

Tomorrow I will start building the enclosure/closeout for the rear section. This will keep the tank and battery separate from the interior. I will be venting this section outside the van. It will also serve purpose for tool and supply storage. A hinged lid will give easy access.
Well, there you have it. Thanks for looking!
MarkMark:
"Bad Ast" Astro Van. Just because I did it... Doesn't mean it's possible...
This my Bad Ast thread...
https://www.pro-touring.com/showthre...roject-Faze-II
This is my Fotki album...
http://astroracer.fotki.com/
03-23-2013 #595 Registered User
- Join Date
- Apr 2001
- Location
- The Netherlands
- Posts
- 1,509

great work as always :-)
I love flextime.... I do my 40hrs (minimum) and by Friday noon I'm heading home. The floor looks good already!!
03-23-2013 #596
Registered User
- Join Date
- Mar 2004
- Location
- Mid-Michigan
- Posts
- 2,764
Hey Martin,
Yea, flex time is good. I'll do the 6 to 2:30 thing for a while. Core hrs are 8:00 to 2:00 so I could come in at 5:30 and leave at 2:00. Or, like you, bank an hour a day and leave at noon on Friday. I like having the extra time in the afternoon though so I think I'll stick to five 8's for now.Mark:
"Bad Ast" Astro Van. Just because I did it... Doesn't mean it's possible...
This my Bad Ast thread...
https://www.pro-touring.com/showthre...roject-Faze-II
This is my Fotki album...
http://astroracer.fotki.com/
03-24-2013 #597
Registered User
- Join Date
- Mar 2004
- Location
- Mid-Michigan
- Posts
- 2,764
Got a good start on the enclosure today. Made the side brackets out of 18ga and got them pop riveted to the side walls. I bent them up with the Swag bender, figured out the hole pattern for the rivets and drilled those. Here's the driver side clecoed in place
Once they were clecoed I used the brackets to drill out the rest of the rivet holes.
Setting the rivets.

The passenger side all riveted in.
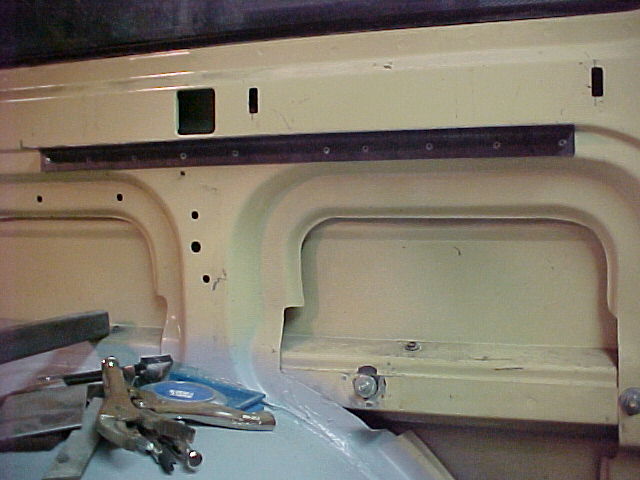
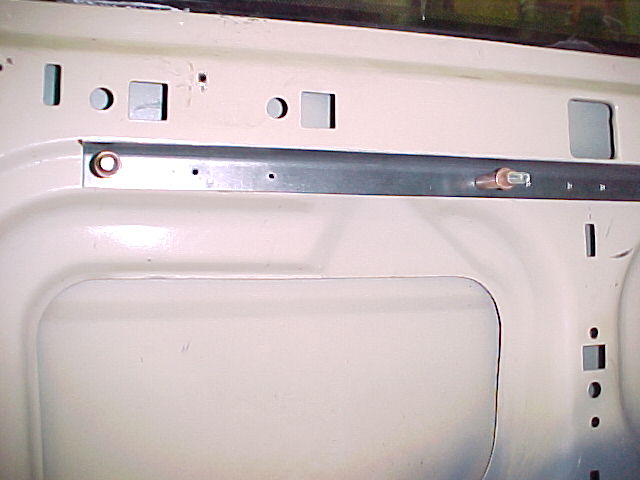
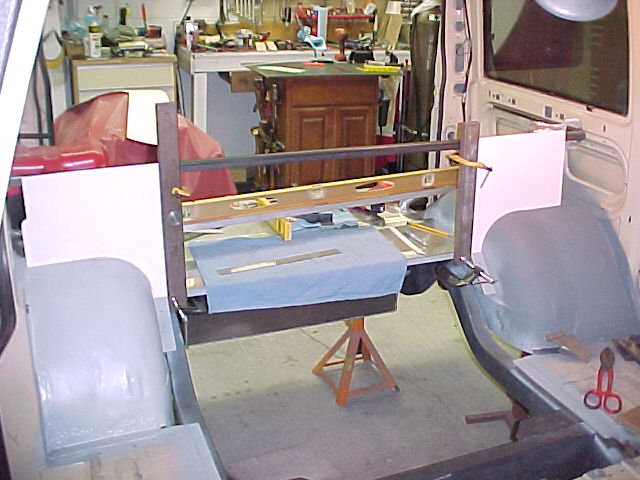
Building a support for the cross tube.
I cut the tube to length and got it clamped in place. This will be the front of the enclosure and the point where the lid will hinge from.

I'll pick away at this during the week. I have to make templates for the front of the enclosure to fit around the wheel tubs and decide if I want to make the panels out of aluminum or steel.Mark:
"Bad Ast" Astro Van. Just because I did it... Doesn't mean it's possible...
This my Bad Ast thread...
https://www.pro-touring.com/showthre...roject-Faze-II
This is my Fotki album...
http://astroracer.fotki.com/
03-27-2013 #598
Registered User
- Join Date
- Mar 2004
- Location
- Mid-Michigan
- Posts
- 2,764
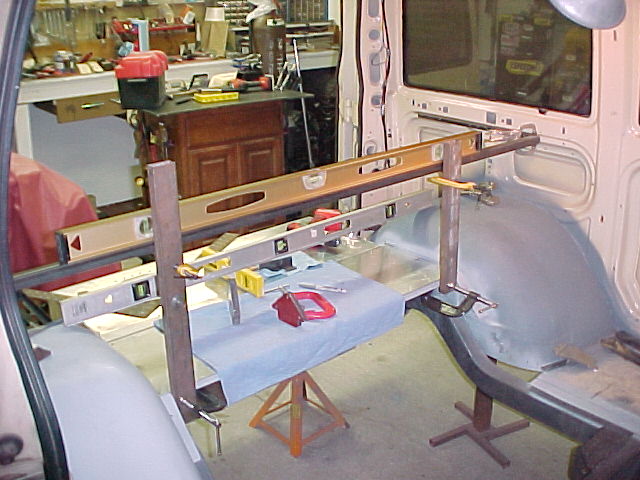
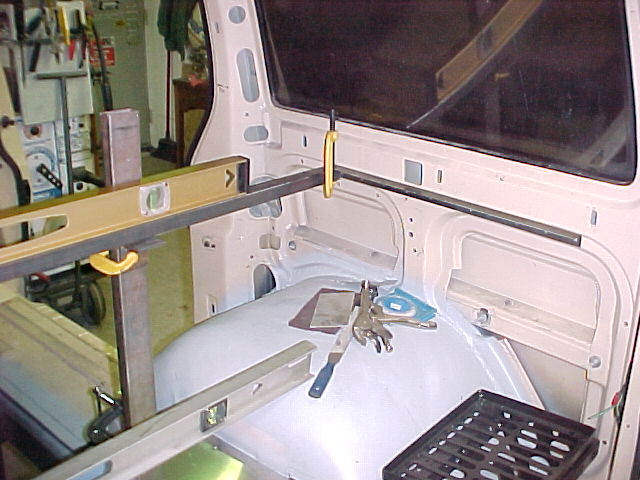
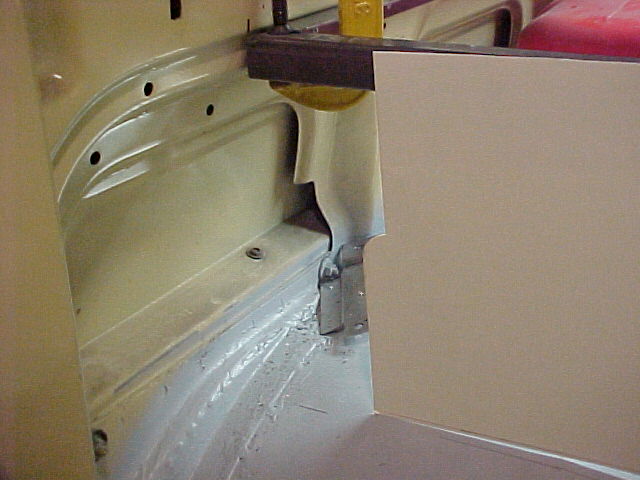
Got the templates for the wheel tub contours made tonight. Didn't take long using those flexible french curves. I dropped a line on the tubs from the upper bar and shaped the curve to that.
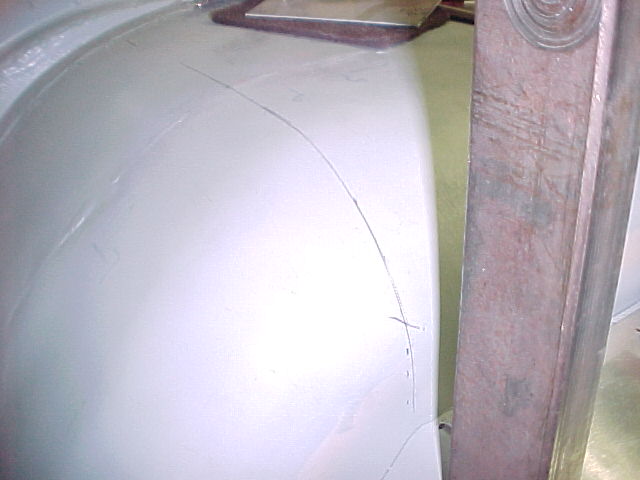
Laid out the shape on a piece of poster board and cut her out... First blush isn't bad.
Passenger side.
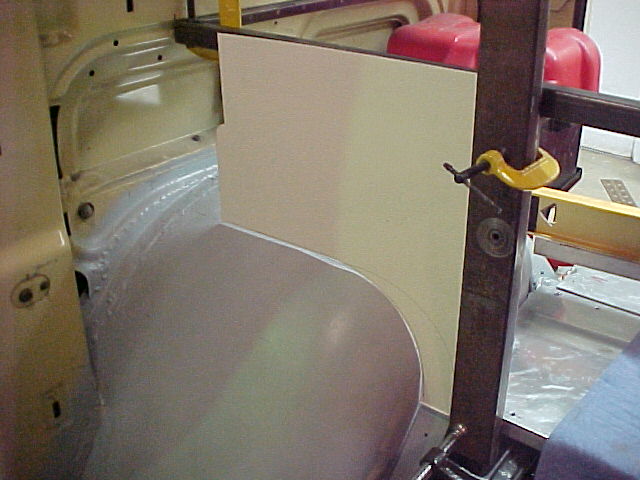
Driver side.

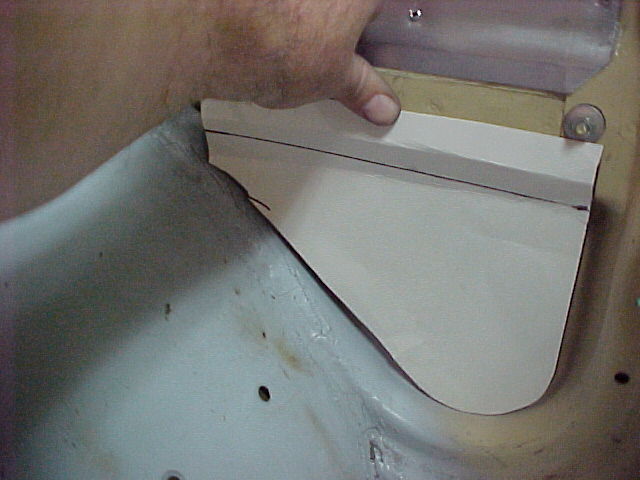
A little judicious trimming with the scissors and we had a nice fit on both sides.
Any suggestions for material? I am leaning toward .060 aluminum but 1/8th inch black ABS would work also...
I will be making cover panels for all of these pockets. Just to close off the fuel cell enclosure.

Thos will be ABS and will be screwed in.
Thanks for looking.
MarkMark:
"Bad Ast" Astro Van. Just because I did it... Doesn't mean it's possible...
This my Bad Ast thread...
https://www.pro-touring.com/showthre...roject-Faze-II
This is my Fotki album...
http://astroracer.fotki.com/
03-31-2013 #599
Registered User
- Join Date
- Mar 2004
- Location
- Mid-Michigan
- Posts
- 2,764
Worked on "closing in" the rear enclosure. Made patterns for all of the pockets and cut them out of a roll of roofing flashing I had laying around.
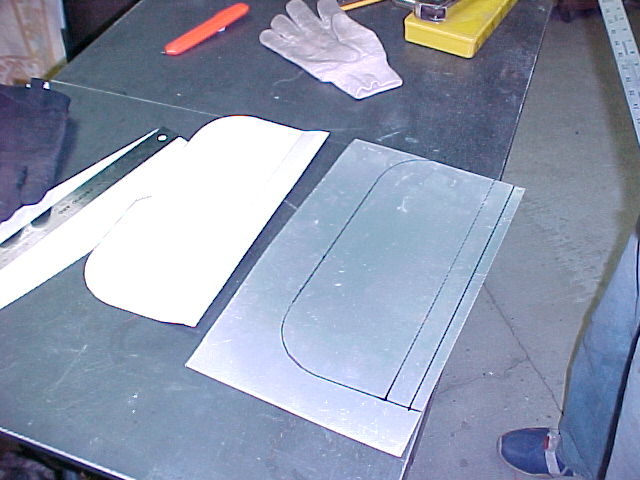
This stuff is very easy to work with and it cuts with scissors so making the real filler panels was easy.

This one had a few bends but we just bent it over the edge of the welding table.
We ran a small bead of RTV around the edge of the holes after drilling for rivets and riveted them in place.

We hit everything with scotchbrite to rough it up. I'll spray this with black epoxy primer once the rest of the enclosure is done.

Getting the final hole filled. The passenger side was a bit more of a challenge as we had to bend around the slider door track.
Putting in the bends on the table edge.

I also made up a couple of short angle brackets to carry the rear enclosure bar. These are riveted into the inside corners of the rear door pillars.
The passenger side.

The driver side
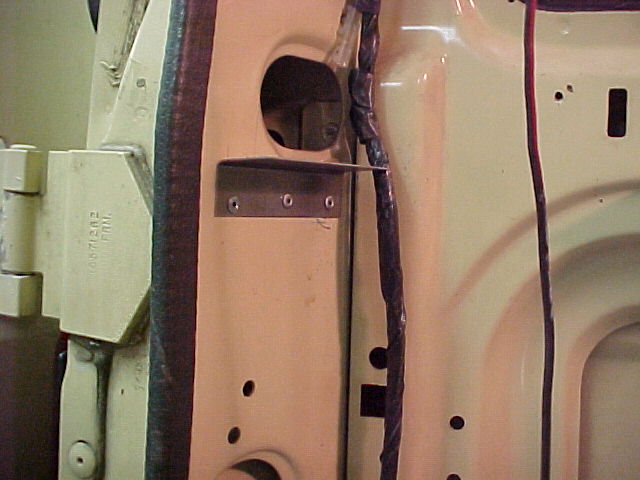
I cut another piece of 1 x 1 to length marked and drilled rivnut holes and bolted the bar in place.
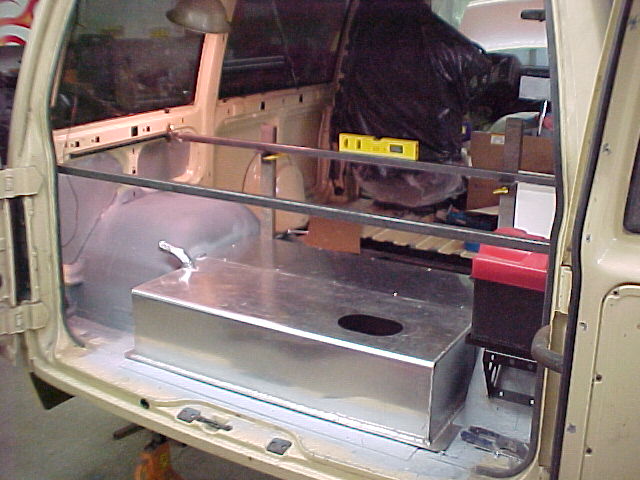


The rest of the rear enclosure will be build off this bar. I plan to have it removable for tank access.
Adding some bracing will be requisite. This will also be done at the forward bar.

Didn't get out there today. To many family things (and a nap) got in the way...
MarkMark:
"Bad Ast" Astro Van. Just because I did it... Doesn't mean it's possible...
This my Bad Ast thread...
https://www.pro-touring.com/showthre...roject-Faze-II
This is my Fotki album...
http://astroracer.fotki.com/
04-01-2013 #600 Registered User
- Join Date
- Nov 2006
- Location
- Ma.
- Posts
- 5,569
Beautiful work, It makes me feel foolish when I think of the tiny things that stump me on my build.
Wayne
Car FINALLY home !!!!!! lol
Project FNQUIK https://www.pro-touring.com/showthre...ghlight=FNQUIK

 Reply With Quote


