

Results 561 to 580 of 862
Thread: The BAD AST Project - Faze II
-
02-03-2013 #561

 Registered User
- Join Date
- Apr 2005
- Location
- IN/MI border
- Posts
- 1,919

Continuing to look great! Can't wait to see it done. I still need to drive up that way to check it out!
-
02-03-2013 #562 Registered User
- Join Date
- Dec 2005
- Location
- Birmingham, AL
- Posts
- 3,355
This has to be one of the best documented build threads around. So much work going into this and it is cool that you give us a window into the process.
Stephen
02-04-2013 #563 Registered User
- Join Date
- Mar 2004
- Location
- Mid-Michigan
- Posts
- 2,764
Thanks guys, and buddy, anytime you want to take a road trip just let me know. The shop is always open.
Stephen, I take some time to get pictures and I take some time to document but my goal here is to keep myself motivated... If I feel a bit discouraged (as I have these last couple of months) I find it helps to go back into the thread to see what Mel and I have already accomplished. We are well on the way to completion even with all of the little things still left to do. I have to remind myself that all of the big stuff is done and we are even looking at paint in a few places...
Here are a few more pics of the bracket building process from yesterday.
Drilling and tapping the little clamp brackets.
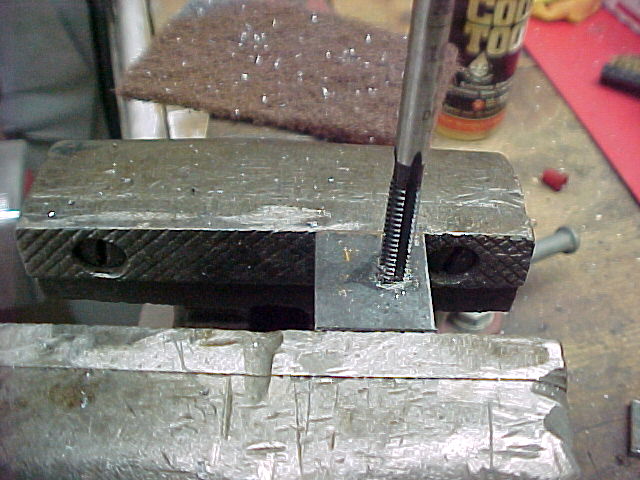
Same process for the junction block. this is an old part that I pulled out of the "parts" bin and cleaned up.

i have also gotten all of the fittings around for the Hydroboost lines. The return line was a real P.I.A. I really didn't want to use the straight barb that came on it. I wanted to get the line routed back across the van to the reservoir without a big loop of rubber hose.
The fitting on the left came with...
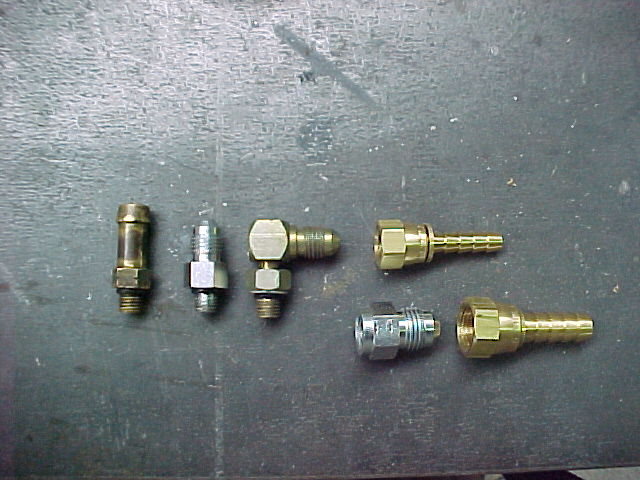
The threaded hole in the unit is a -2 (5/16-24) with an O-ring seal. Getting that to match up with the 3/8th return line required a few adapters but it worked out. I got the line pointed where I need it with a combo of to 90's and a -4 to -6 adapter.
This is a -2 to -4 90 degree.
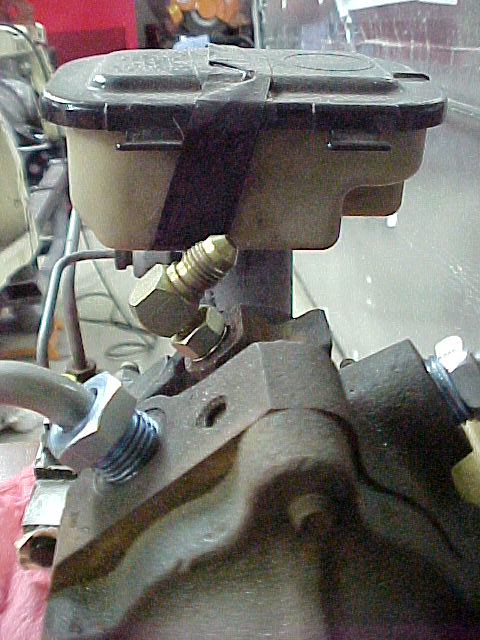
And this the -4 to -6 adapter with a 90 degree push on from Speedway. This will route the hose down along the firewall.

Thanks for following along. I plan to get brake lines ran on the diff this week and Mel and I will hit it hard next weekend.
Mark
Mark:
"Bad Ast" Astro Van. Just because I did it... Doesn't mean it's possible...
This my Bad Ast thread...
https://www.pro-touring.com/showthre...roject-Faze-II
This is my Fotki album...
http://astroracer.fotki.com/
02-04-2013 #564
Registered User
- Join Date
- Mar 2004
- Location
- Mid-Michigan
- Posts
- 2,764
I picked up some nickel alloy brake line over the weekend. This stuff is great! It bends and flares very nicely and even polishes up to a nice shine!
I ran both lines on the rear diff tonight in a little over an hour. And that included polishing one of the pieces and doing a couple flares...
Polished compared to the zinc plated stuff. I like.

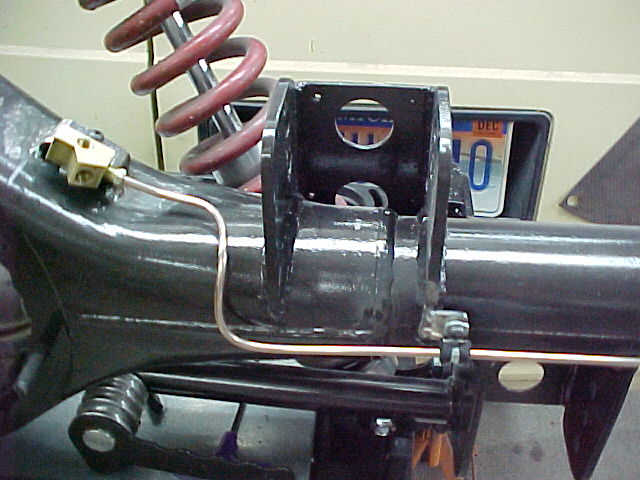
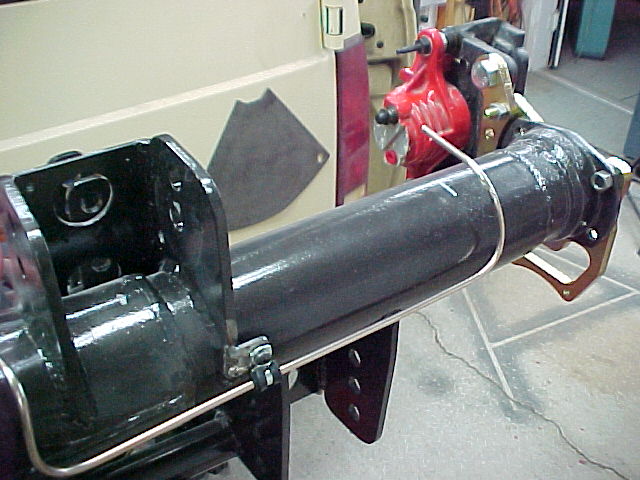
This is the drivers side going out from the junction block.
The passenger side was a little more involved but I got it done without wasting any material!
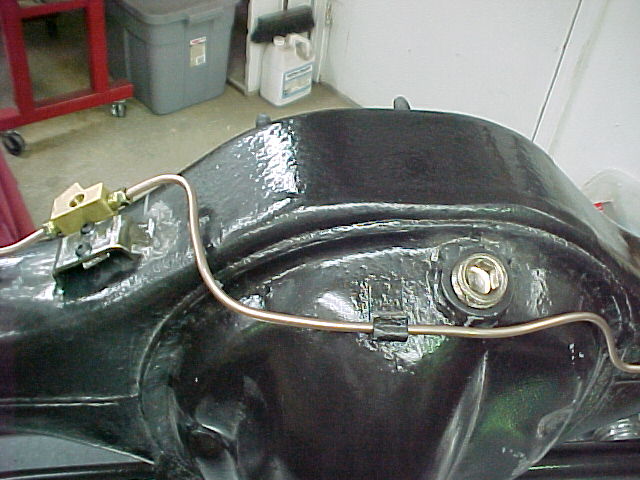
I will be making another bracket for the clamp you see in the middle of the picture.

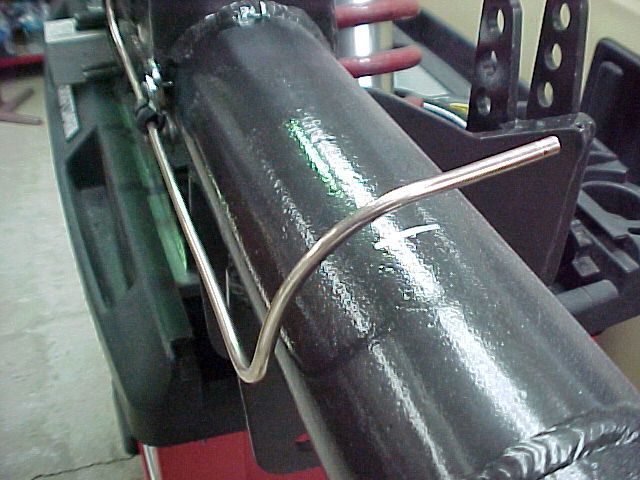
The line routes along the back of the housing until it gets to the upper four bar bracket. It then sweeps up over the tube to the front to get it away from the shock.

I know it's a circuitous route but this was the only way I could see to do it cleanly.
Both lines sweep back over the axle to the brackets for the soft line (use your imagination to "see" the brackets)
I still have to sweeten up the lines and make a couple of mounting brackets but the hard part is done and it didn't take long at all...
MarkMark:
"Bad Ast" Astro Van. Just because I did it... Doesn't mean it's possible...
This my Bad Ast thread...
https://www.pro-touring.com/showthre...roject-Faze-II
This is my Fotki album...
http://astroracer.fotki.com/
02-04-2013 #565
Registered User
- Join Date
- Aug 2007
- Location
- Albemarle, NC
- Posts
- 1,151
where did you get it? i like the looks, and my new project will probably need lines that are not catalogue material.....
Michael Crawford
1970 plymouth Duster back under construction:
https://www.pro-touring.com/showthre...uring-makeover
1987 GMC S15 https://www.pro-touring.com/showthre...ct-drivabeater
02-04-2013 #566
Registered User
- Join Date
- Mar 2004
- Location
- Mid-Michigan
- Posts
- 2,764
Check out my brake line thread Mike. This stuff works very well. It is a bit more expensive then the zinc plated stuff but well worth it in my book.
https://www.pro-touring.com/showthre...-else-use-thisMark:
"Bad Ast" Astro Van. Just because I did it... Doesn't mean it's possible...
This my Bad Ast thread...
https://www.pro-touring.com/showthre...roject-Faze-II
This is my Fotki album...
http://astroracer.fotki.com/
02-05-2013 #567
Registered User
- Join Date
- Mar 2004
- Location
- Mid-Michigan
- Posts
- 2,764
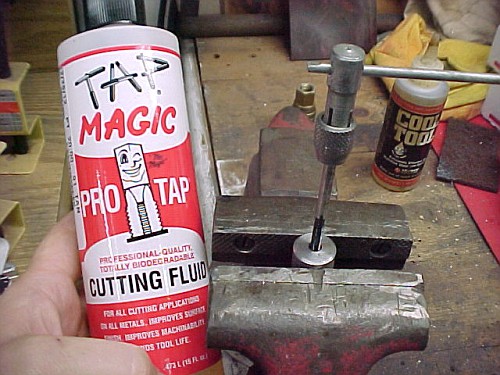
Got home from work tonight, scarfed down some dinner and headed out to the shop (after I took out the garbage...). Had this mounting boss in my head and I had to get it out...
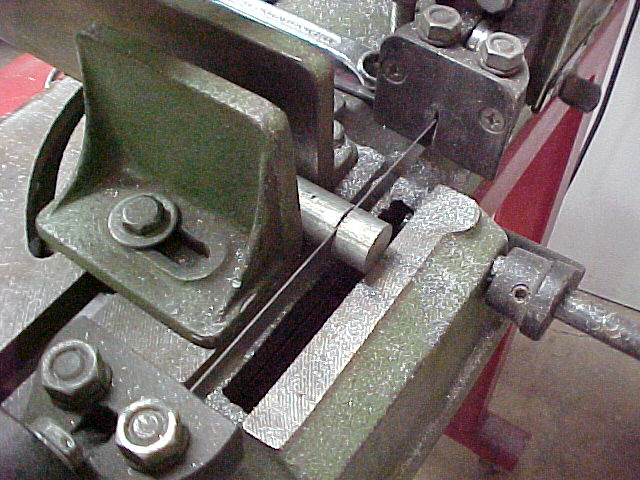
I grabbed a hunk of 3/4 dia. steel bar stock and cut off a piece about a 1/2 inch long.
Chucked it up in the lathe, ran in a center drill to get a nice chamfer and through drilled it with a #25 bit for the 10-24 tap.
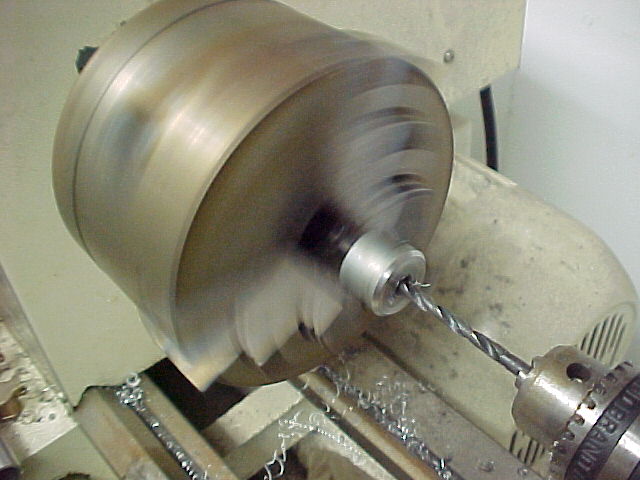
The above pic is with no flash on my Sony Mavica.
This one is with the flash...
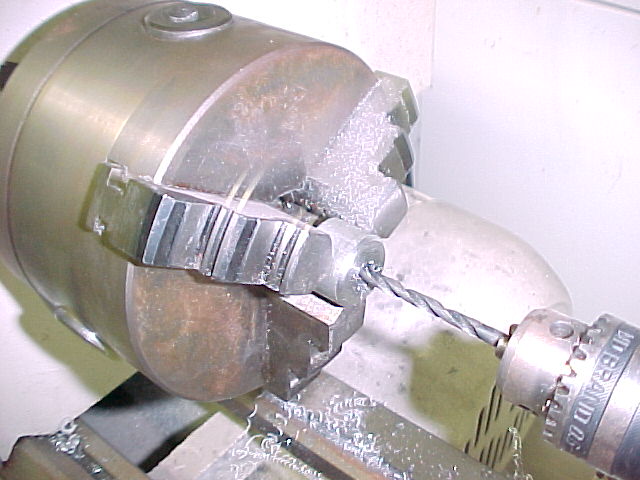
Cool.
The center drill leaves a nice chamfer to ease starting the tap. This guides the tap straight into the hole...
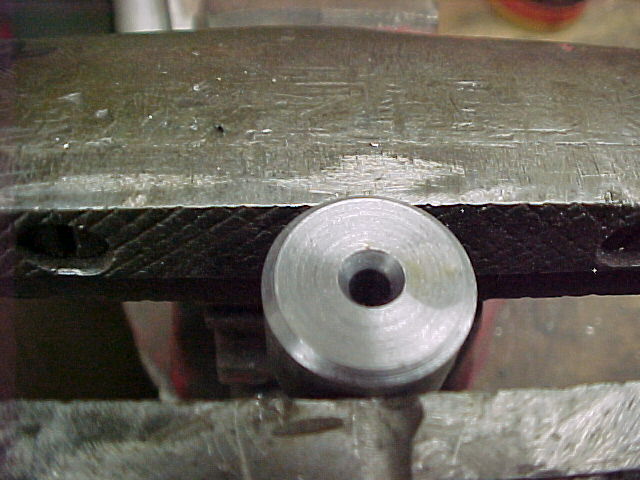
Took a few minutes to run the tap thru the block. it is a lot easier if you use a cutting fluid when drilling or tapping small holes. I use Tap-Magic and Cool Tool, both work very well on steel and non-ferrous.
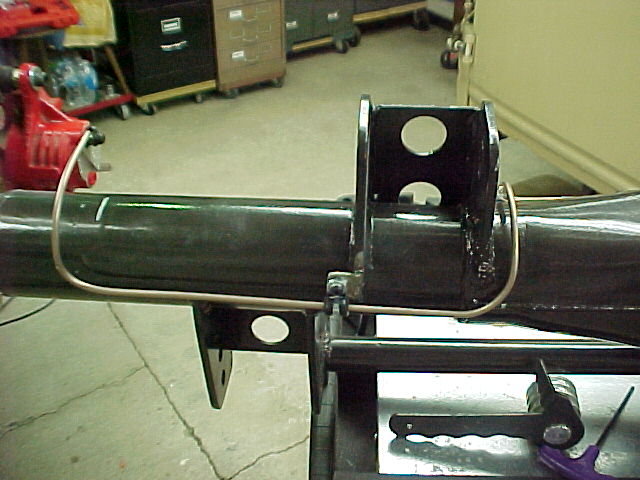
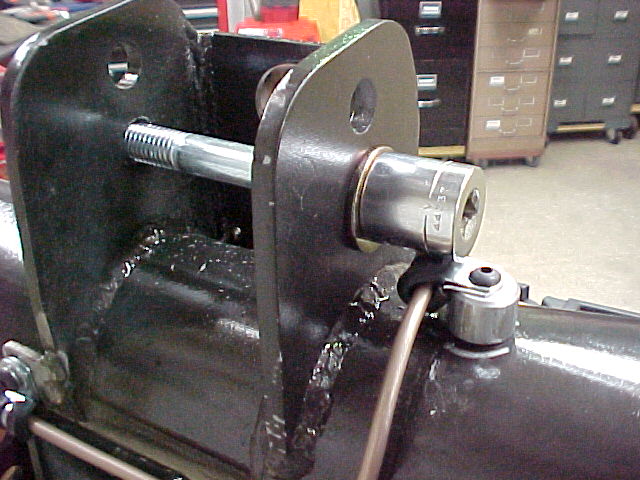
This is where I decided to weld on the boss. Locates the line in three directions and is out of the way.

I did check driver clearance to that upper control arm bolt. No worries, plenty of room. The suspension is designed to run in the top hole but you never know.
Well, that's what I got done tonight. How about you?
Thanks for looking
MarkMark:
"Bad Ast" Astro Van. Just because I did it... Doesn't mean it's possible...
This my Bad Ast thread...
https://www.pro-touring.com/showthre...roject-Faze-II
This is my Fotki album...
http://astroracer.fotki.com/
02-05-2013 #568
Registered User
- Join Date
- Aug 2007
- Location
- Albemarle, NC
- Posts
- 1,151
thanls for the brake line info. i bookmarked their site, and will be picking up some of their stuff for the new elky build.
i love the bushings/spacers. very trick, and very simple at the same time.Michael Crawford
1970 plymouth Duster back under construction:
https://www.pro-touring.com/showthre...uring-makeover
1987 GMC S15 https://www.pro-touring.com/showthre...ct-drivabeater
02-10-2013 #569
Registered User
- Join Date
- Mar 2004
- Location
- Mid-Michigan
- Posts
- 2,764
Thanks Mike, check with your LAPS before ordering from the company. They should be able to get it if they don't already carry it. Save you some on shipping...
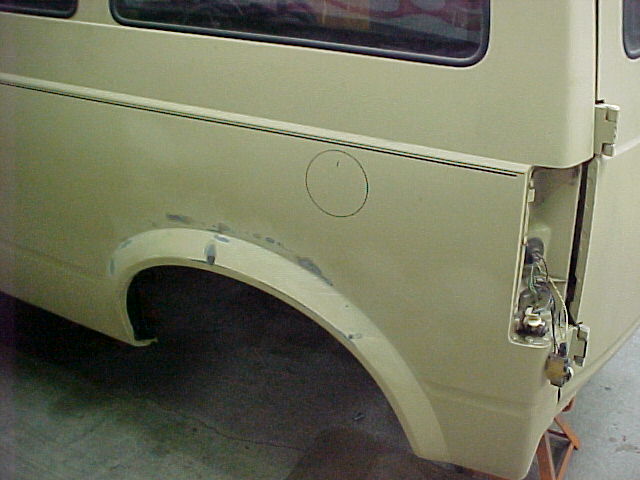
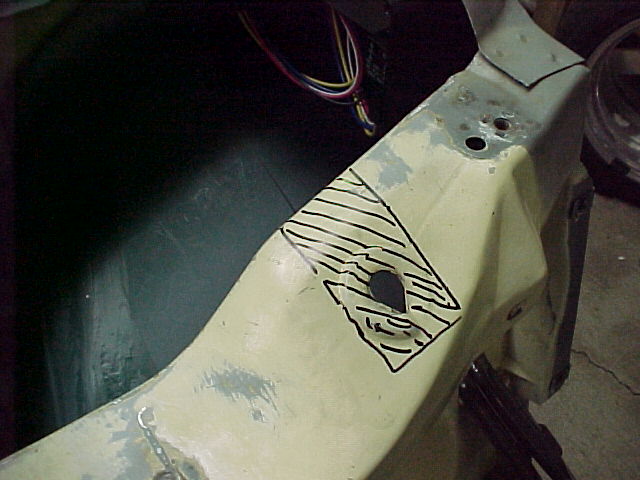
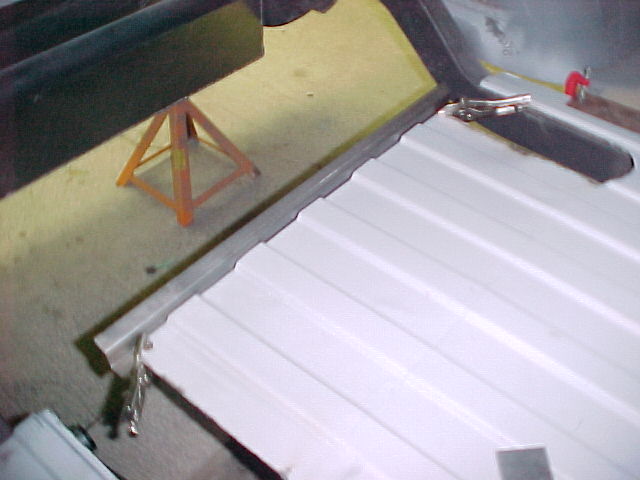
Got a bit done this weekend. More thinking and test fitting then "done" but you know what I mean. I yanked all of the fuel filler stuff out of the van and started lookig at what I am going to do to get fuel into the new tank. I cut the old fill tube up and started looking at placement.
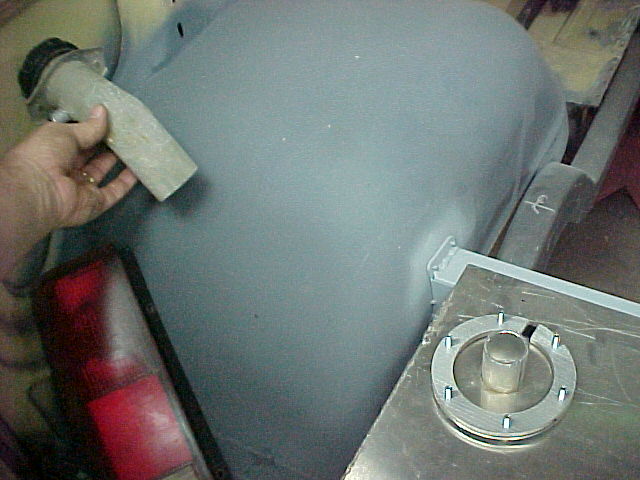
Dropping down, straight iunto the tank is the best route. The existing filler door will get filled and I'll move it to just above and a bit rearward of the wheel well.
The old location.
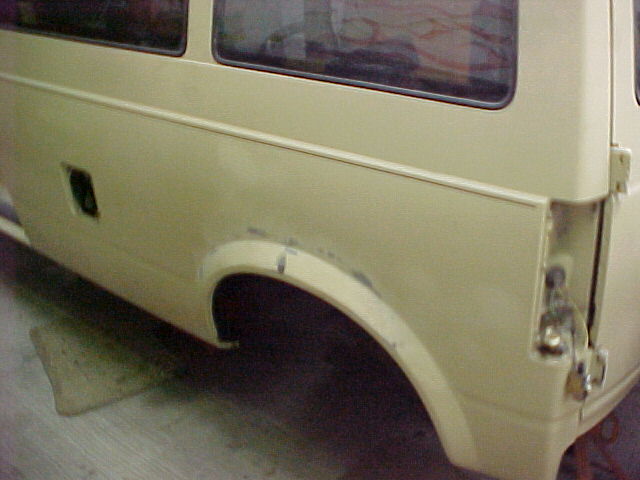
The new location. And a bit smaller...
I will probably make the new fill neck out of 2" aluminum tubing. I have that bolt in fill neck from Speedway but I think I will just weld the new tube direct to the tank and connect the two tubes with a piece of 2" fuel hose.
Mel was out and we got the relay box brackets wrapped up.
He made the plate out of a piece of .090 aluminum. He made a cardboard template and then stomp sheared and band sawed the aluminum into submission.
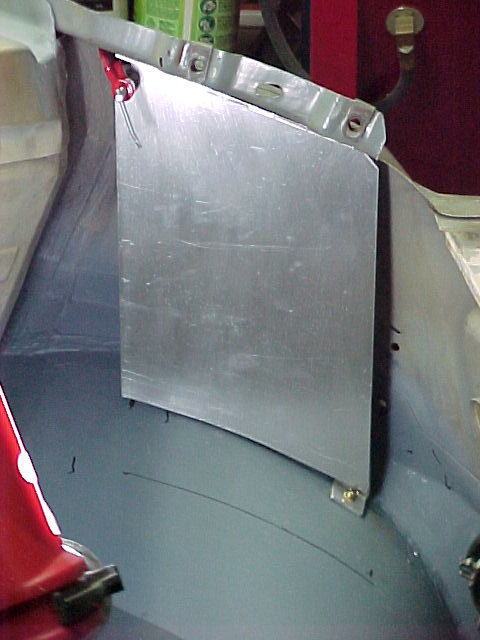
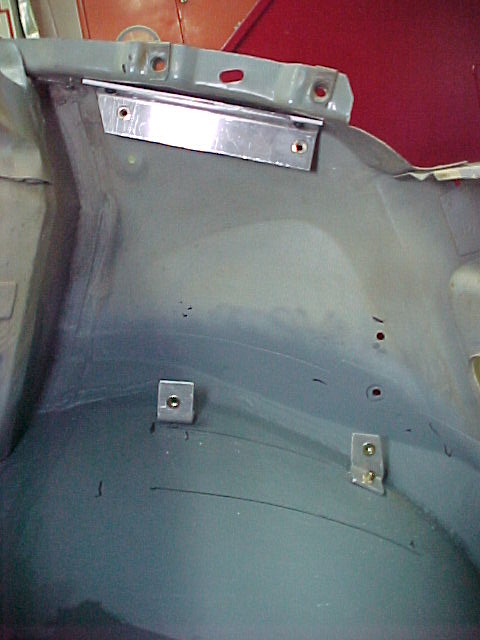
Drilling rivnut holes. The fender and wheel well mounted brackets will carry the rivnuts which will greatly simplify installing the plate
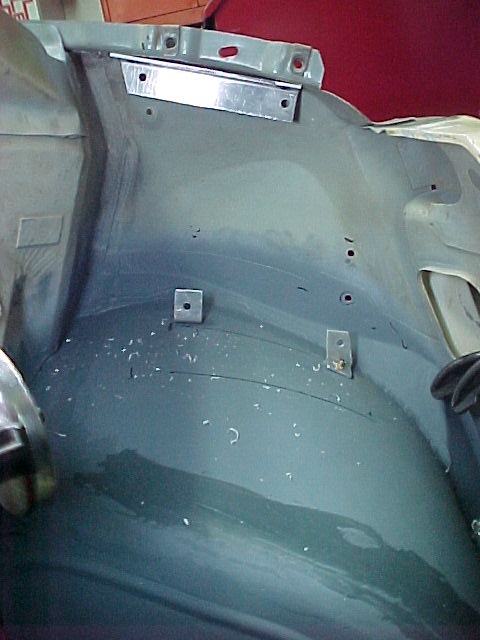
Rivnuts installed. These are for 10-32 screws.
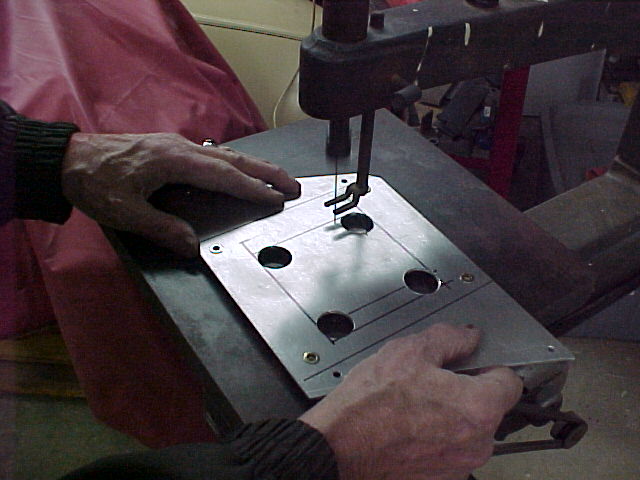
Cutting a big clearance hole in the plate so I can run wiring harnesses in thru the back. That 5 dollar scroll saw sure comes in handy.
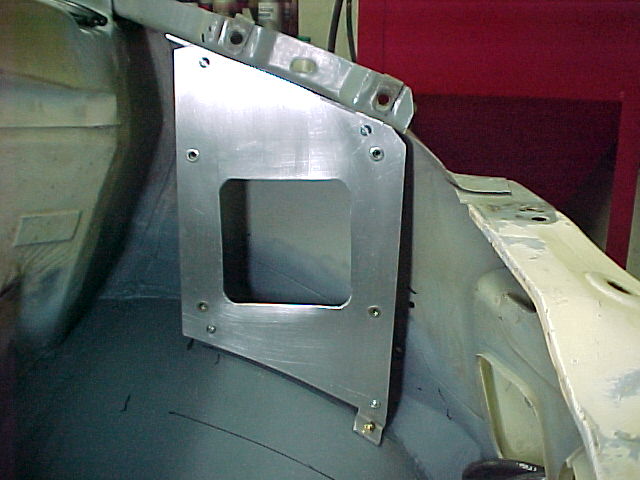
The plate mounted.
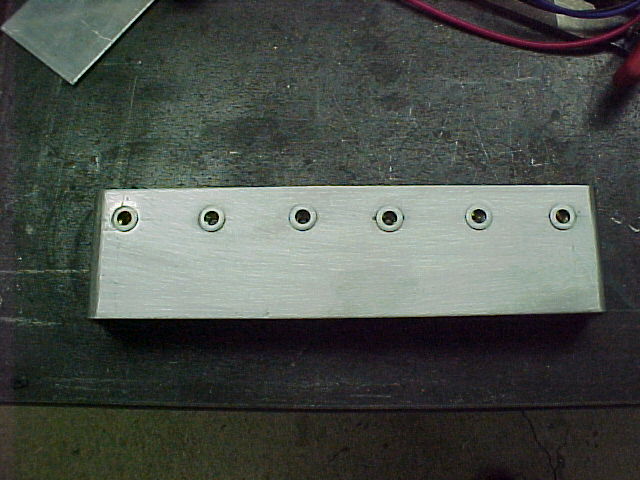
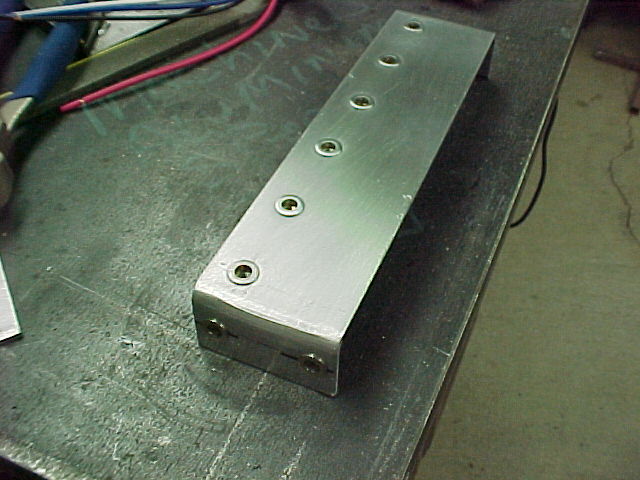
While Mel was working on all of that stuff I was fabbing a bracket to bolt inside the box to attach relays to.
I used a piece of 2" wide .090 from the scrap pile. Bent it up on both ends and installed #8-32 rivnuts so I can bolt it into the box.
I laid out the spacing so I can get 6 relays in the box.
Drilled the holes and installed rivnuts for the relays.
With a couple of relays installed and mounted to the bracket. The relays are for the three cooling fans, the back up light switch and whatever else I find I need a relay for.
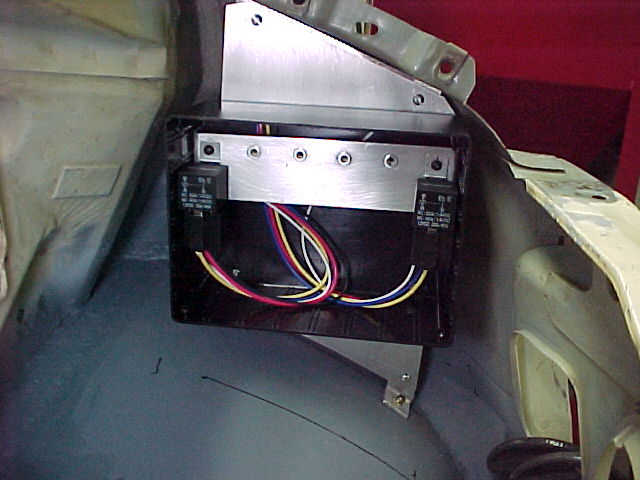
The box will get painted body color and all of the wiring will be hidden so it will just disappear into the fender.
Thanks for watching.
MarkMark:
"Bad Ast" Astro Van. Just because I did it... Doesn't mean it's possible...
This my Bad Ast thread...
https://www.pro-touring.com/showthre...roject-Faze-II
This is my Fotki album...
http://astroracer.fotki.com/
02-10-2013 #570 Registered User
- Join Date
- Apr 2009
- Location
- san diego
- Posts
- 5,101
again! nice fab work.
Last edited by Bryce; 02-10-2013 at 03:48 PM. Reason: I cant spell after half a beer.
My build thread: https://www.pro-touring.com/showthre...ing&highlight=
The mustang build thread: https://www.pro-touring.com/showthre...el)&highlight=
02-11-2013 #571 Registered User
- Join Date
- Aug 2007
- Location
- Roanoke (FortWorth) Texas
- Posts
- 786
I've got to get one of those hobby boxes. Looks nice. I just dont want to dive into rewiring my fan switch and relays.
ChrisTotal Cost Involved - Ridetech - Fatman - Total Control Products - Gateway Performance - MaverickMan Carbon
02-11-2013 #572
Registered User
- Join Date
- Mar 2004
- Location
- Mid-Michigan
- Posts
- 2,764
Thanks Bryce, thanks Chris.
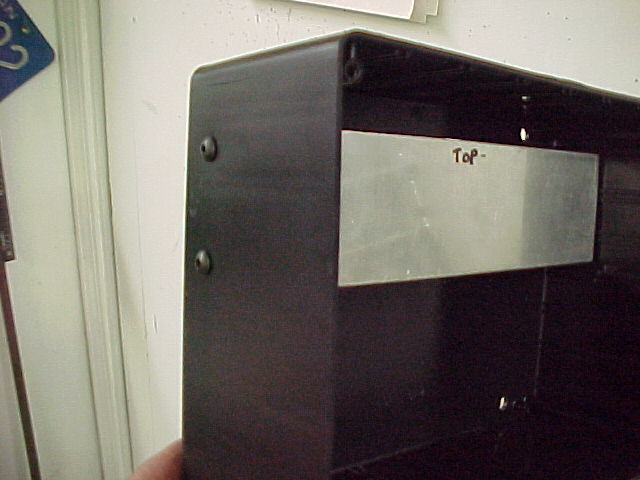
Chris, the boxes work very well. They comein a few different sizes. here is one I used in my truck to hide all of the relays for the Hi-Four headlights and driving lites.
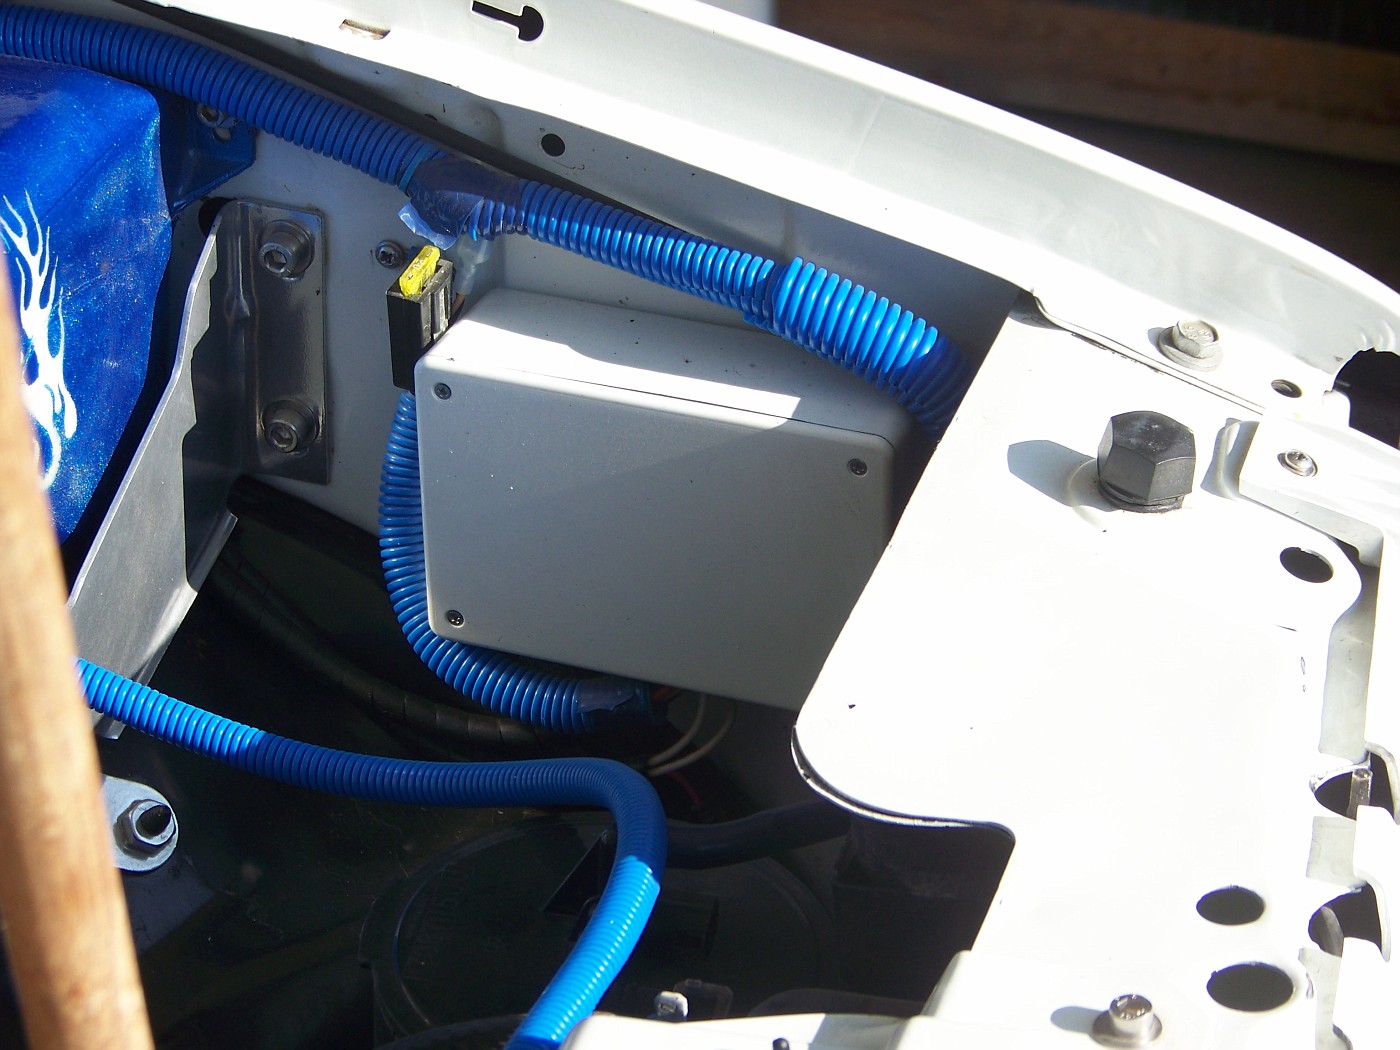
They also come with two covers. A plastic one and an aluminum one. Check them out a Radio Shack. They are very cost effect also.
MarkMark:
"Bad Ast" Astro Van. Just because I did it... Doesn't mean it's possible...
This my Bad Ast thread...
https://www.pro-touring.com/showthre...roject-Faze-II
This is my Fotki album...
http://astroracer.fotki.com/
02-19-2013 #573
Registered User
- Join Date
- Mar 2004
- Location
- Mid-Michigan
- Posts
- 2,764
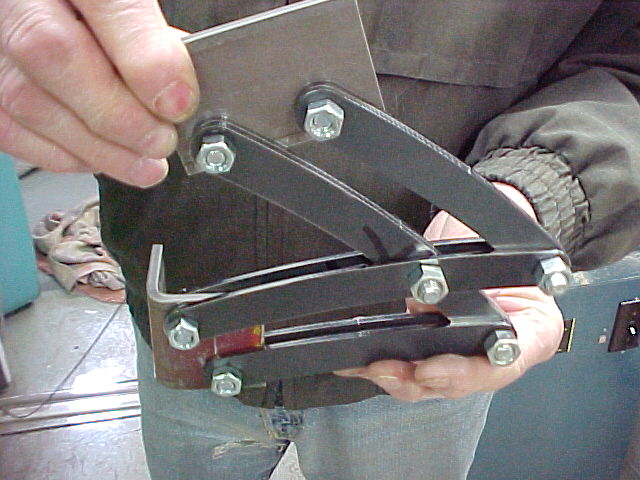
Got a lot of head scratching done last weekend. We starting mocking up the scissor style hood hinges. Mel made a couple of plates to get the ends constrained so the hinges operate properly.
Here are a couple pics I marked up in Paint to show how the hood will open forward. The hinges will mount to the radiator support in some fabbed boxes. This is with the "hood" closed.

And one with the "hood" open.
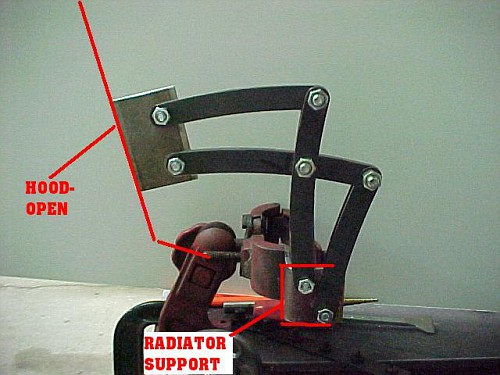
The reason for this is I want to extend the hood back to the windshield to remove the plastic wiper cowl. I also want to have the cowl hood scoop reach back to the windshield. There is no way the Astro hood will open using the stock hinge pivot points so this is my fix.
I will be building the hinge boxes where the hood bumpers live now.
Drivers side.
Passenger side. We stuck the HVAC box in to check clearances.
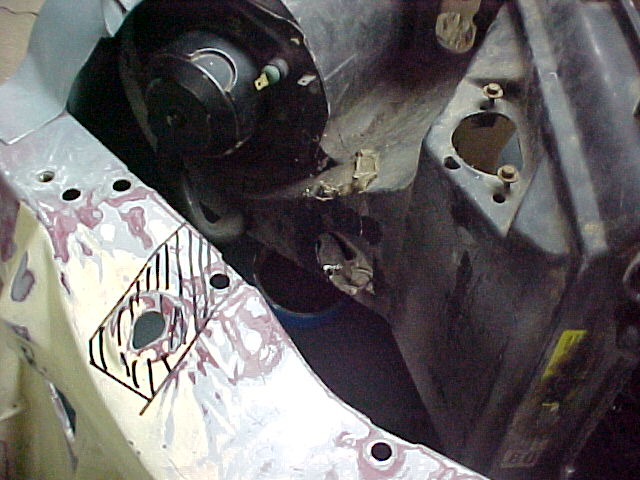
I am planning to build the hinges with nylon bearings and use shoulder screws or threaded spacers to put everything together.
We also started building the rear floor closeout that kicks up over the rear frame. We laid out a pattern on the rear wheel well and Mel bent up some 16ga. brackets we will spot weld to the tubs.
The pattern
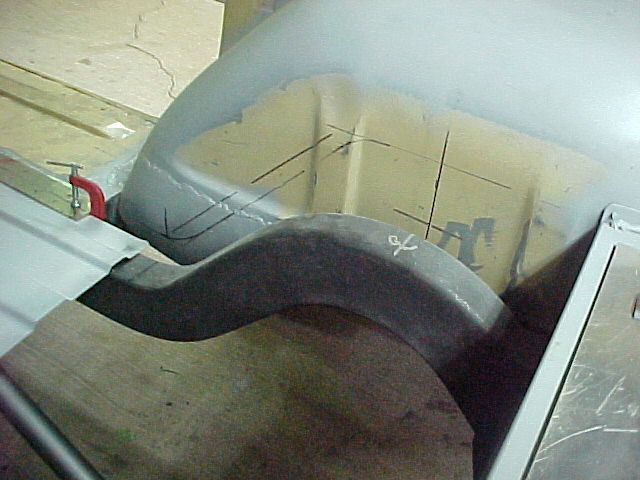
The brackets
These will get welded in approximately here on both sides. Following our layout lines.
Once these are in we will fab a strip of 16ga to weld on top of them. This strip will carry the Dzus fasteners to hold the panel in. It will be nice to have easy access to the shocks and rear diff through this panel.
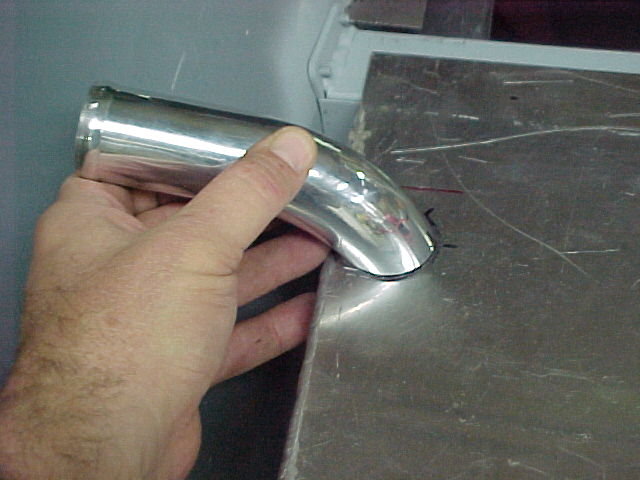
I also spent some time looking at fuel filler designs. This is the Astro filler neck I cut up for "look see" stuff. It is 2" in diameter.

I just ordered some 1 1/2" dia. mandrel bent aluminum tubing I will use to build the filler tubes. I also need to pick up some fill hose and the fuel filler I am planning to use is from Speedway. It is a flush mount with a keyed cap.
Before we knocked off Sunday we routed a light cord to measure the shifter cable required length. I figured 10 ft would do it but I will get an 11 footer just to be sure. There is plenty of room under there for cable routing so an extra foot will not hurt anything.
Thanks for following along! Hopefully next itme there will be some real work done.
MarkMark:
"Bad Ast" Astro Van. Just because I did it... Doesn't mean it's possible...
This my Bad Ast thread...
https://www.pro-touring.com/showthre...roject-Faze-II
This is my Fotki album...
http://astroracer.fotki.com/
02-19-2013 #574 Registered User
- Join Date
- Aug 2006
- Location
- Easton, PA
- Posts
- 989
I think we all wish we had a "Mel"... he does all the work!
Keith C.
02-20-2013 #575
Registered User
- Join Date
- Mar 2004
- Location
- Mid-Michigan
- Posts
- 2,764
Mel and I work well together! And you will notice I give him credit for what he does! We butt heads once in while but 99% of the time we get the job done. He lives to drill holes and make stuff. I can do all of that also but, on stuff like we were making Sunday, I just let him loose, that's what he likes to do. I do most of the design and planning and listen to Mel when he has input. Originally Posted by twosaturns

It was funny Sunday morning listening to him tell me the hinges weren't going to work... I told him we needed to constrain both sets of arms to get the hinges to function properly. He went to work and made the little brackets to do that. Once everything was bolted together the hinges worked great and he had to agree they will do the job I designed them to do.
We got a lot of planning done Sunday. With him making the little parts it leaves me open to work on the head scratching stuff. Now we have plans in place to finish the floor and fuel tank and I can get busy building the hinge boxes while Mel works on the floor stuff.
Thanks for reading along and give Mel a big thanks for all of the work he's done!
MarkMark:
"Bad Ast" Astro Van. Just because I did it... Doesn't mean it's possible...
This my Bad Ast thread...
https://www.pro-touring.com/showthre...roject-Faze-II
This is my Fotki album...
http://astroracer.fotki.com/
02-20-2013 #576
Registered User
- Join Date
- Aug 2006
- Location
- Easton, PA
- Posts
- 989
awesome that you have a good friend you can work well with. love how you solve all the little problems together. gonna watch this one all the way through! Originally Posted by astroracer
Keith C.
02-22-2013 #577
Registered User
- Join Date
- Mar 2004
- Location
- Mid-Michigan
- Posts
- 2,764
Thanks for that Keith. Mel is awesome and this project wouldn't be as far along as it is without his help. He gets bored during the week. At home right now he is building a balsa wood model of the Spirit of St. Louis....
Good News!!! I just got a shipping notice that my FlexKore Brake lines are in the mail! WOO-HOO!!! Thanks Tobin! Can't wait to get them!
I also got a box of shoulder bolts , nylon bushings and nylon washers delivered today from McMaster Carr. This stuff was ordered LAST NIGHT! It arrived on my porch this afternoon! I wasn't expecting it till Monday! Now I can work on final developement of the hood hinges. Thanks McMaster Carr!Mark:
"Bad Ast" Astro Van. Just because I did it... Doesn't mean it's possible...
This my Bad Ast thread...
https://www.pro-touring.com/showthre...roject-Faze-II
This is my Fotki album...
http://astroracer.fotki.com/
02-24-2013 #578
Registered User
- Join Date
- Mar 2004
- Location
- Mid-Michigan
- Posts
- 2,764
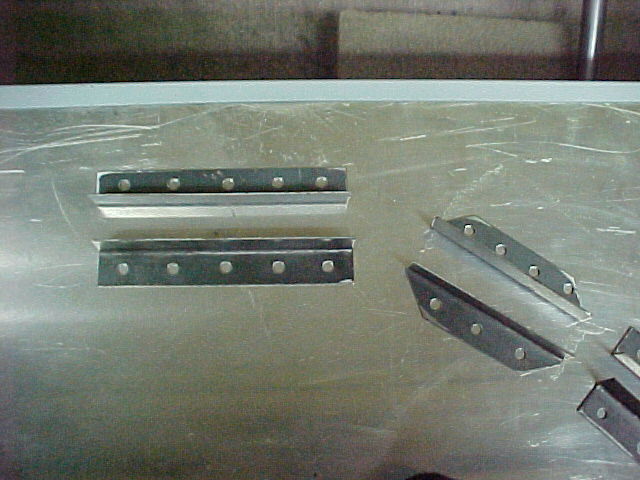
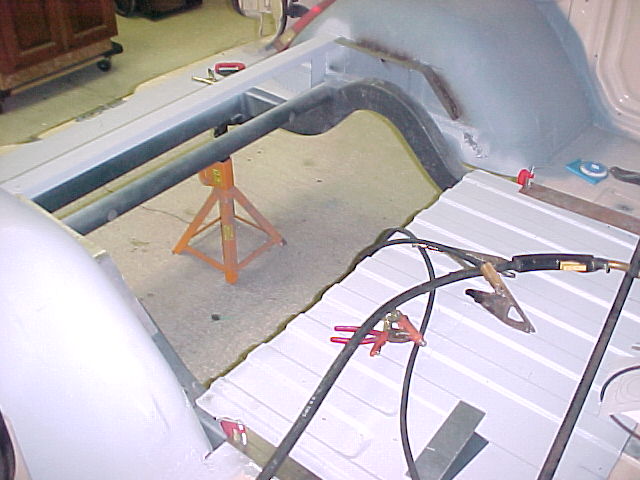
Got a lot done this weekend. Mel was out yesterday and we got the brackets for the rear closeout panel built and welded in and got the flanges made to start rebuilding the back of the floor.
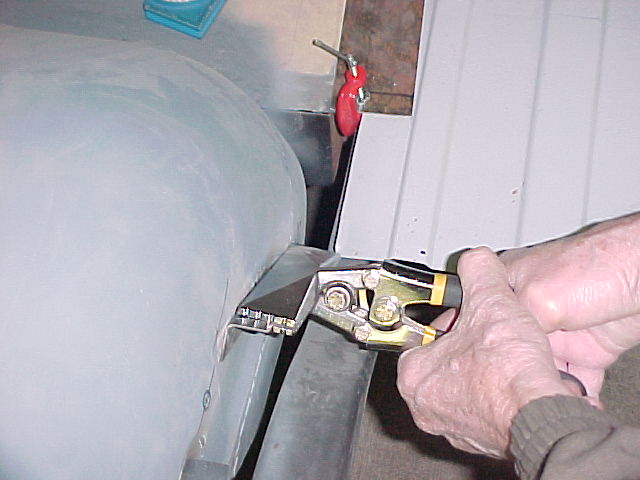
here are some pics of the rear brackets being put in. We clamped up some sheet stock to hold them for plug welding.
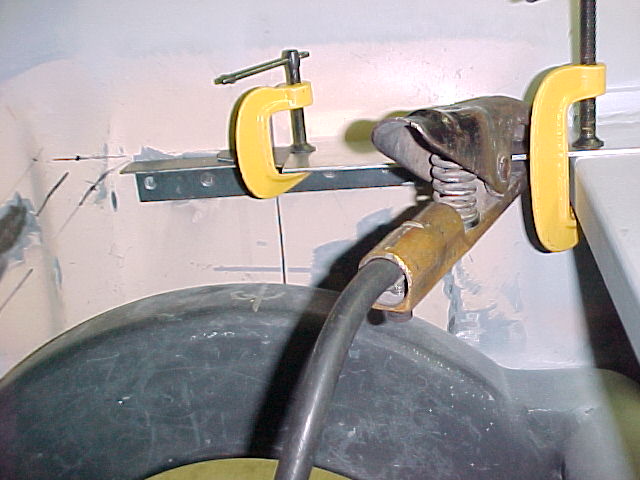
After welding. These are pretty strong even with just a few welds.
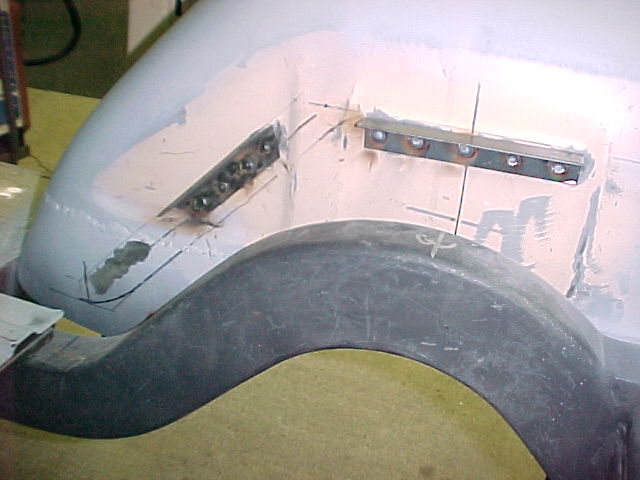
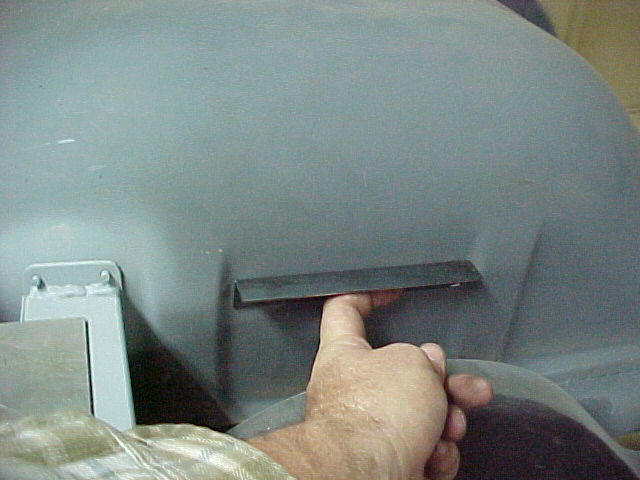
To show you how strong these are we had to do a little tweaking to bring the angles into line... This is Mel using a hand seamer on the 18ga to bend it after welding. No issues with weld strength here.
;)
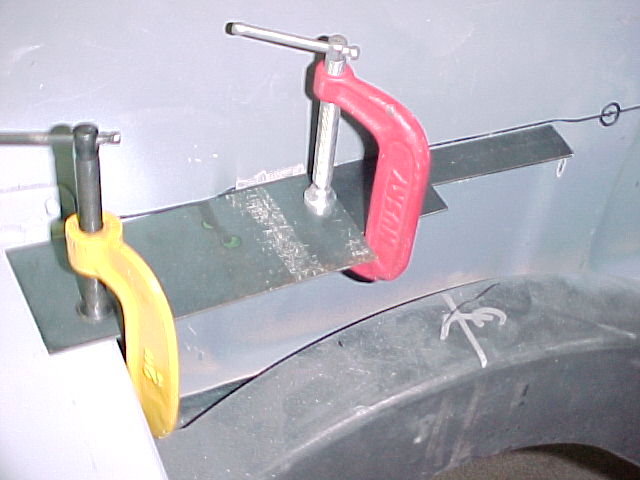
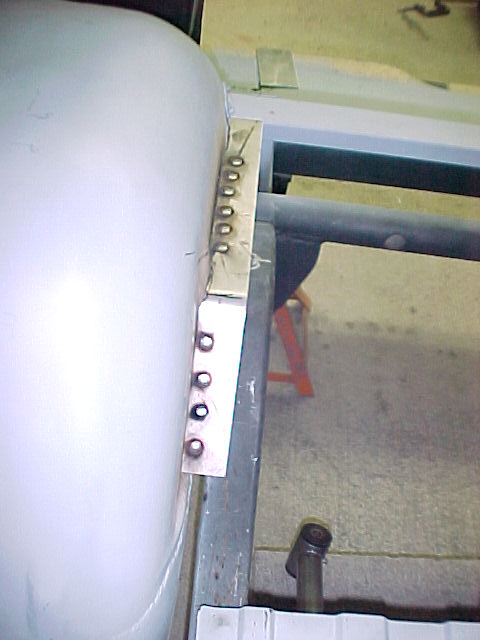
Once got those welded in we made up the actual strip that the closeout panel will get fastened too.
These are 1 1/2" wide strips of 18ga. I will drill them for Dzus fasteners after we have them finished and the panel made.
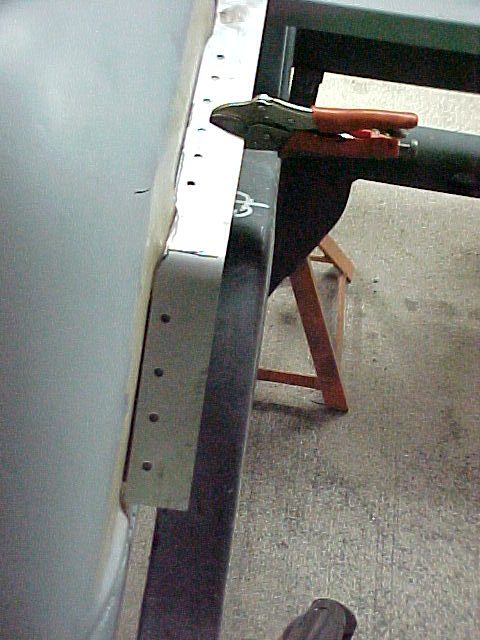
All welded in. The plug welds were nice and flush. These strips will get seam sealed to the tub after all of the fab work is done.
An over all of the area we are working on
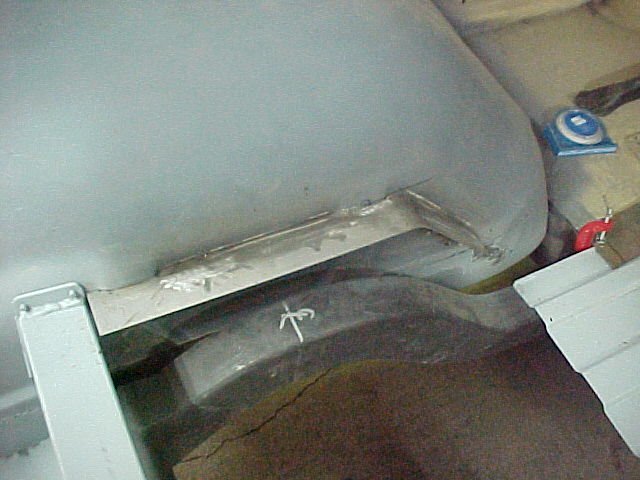
Once the welds were smoothed off with a flap disc we moved on to make the lower flange.
This is the passenger side.

And this is the drivers side. These will get the Dzus fasteners.
The upper four link bars will intrude iinto the interior by a few inches at full jounce so we cut a couple of clearance notches to give them room.
We designed a little flange to close out the back of the floor and give us something to weld the rest of the floor too.
Here is the design with some dimensions.
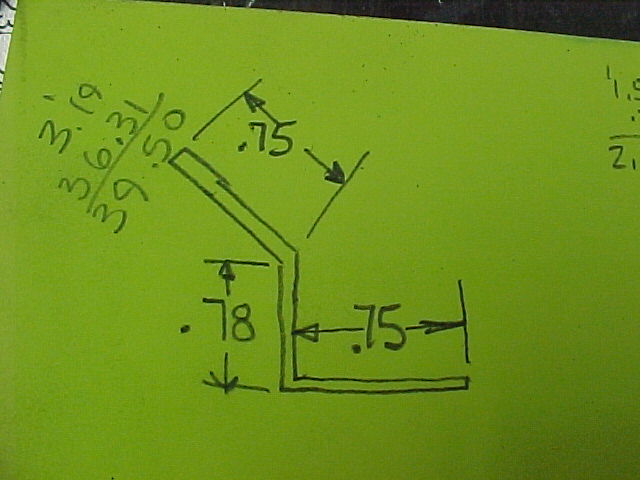
And here is the part. We bent this up out of 20ga on the 3 in 1.

This is the flange clamped in place between the suspension notches.
That's what we got done Saturday.
Thanks for looking.
MarkMark:
"Bad Ast" Astro Van. Just because I did it... Doesn't mean it's possible...
This my Bad Ast thread...
https://www.pro-touring.com/showthre...roject-Faze-II
This is my Fotki album...
http://astroracer.fotki.com/
02-24-2013 #579
Registered User
- Join Date
- Mar 2004
- Location
- Mid-Michigan
- Posts
- 2,764
I was working alone today. I got more done then I figured I would but I kept busy in between Daytona 500 breaks!
I puttered around a bit before I got to work on the van. I went thru a box of old drill bits and sharpened and sorted around 30 of them. I also put new points on a couple of worn center punches. I chucked them in the lathe and ran a carbide over them to sweeten up the points.
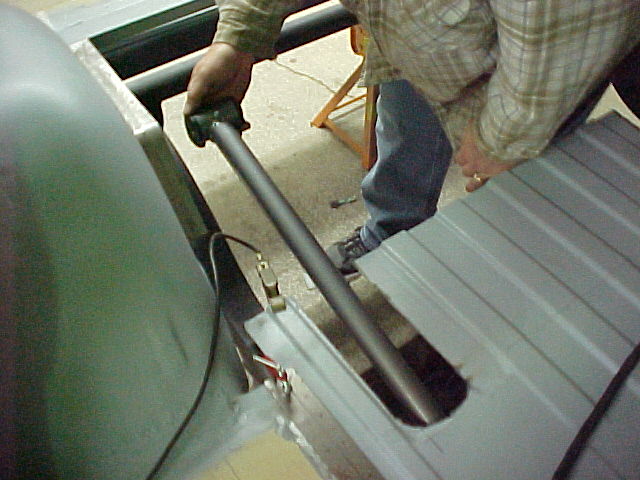
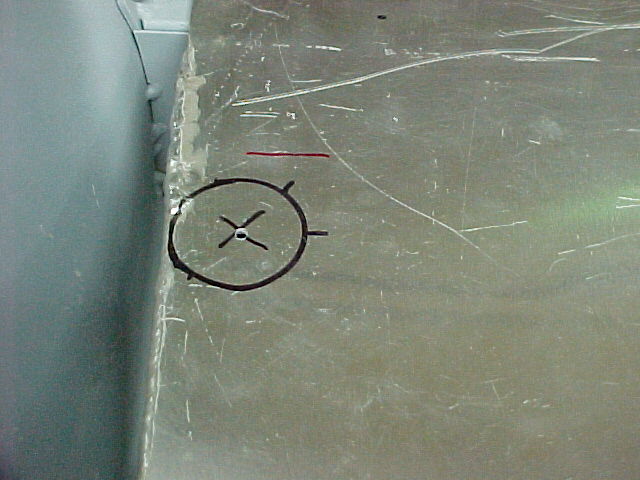
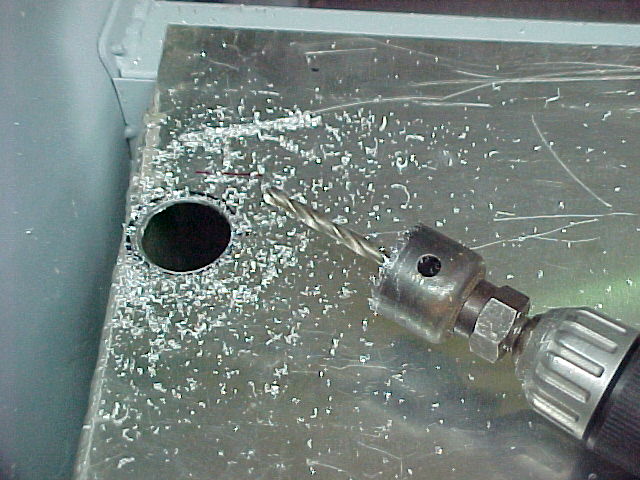
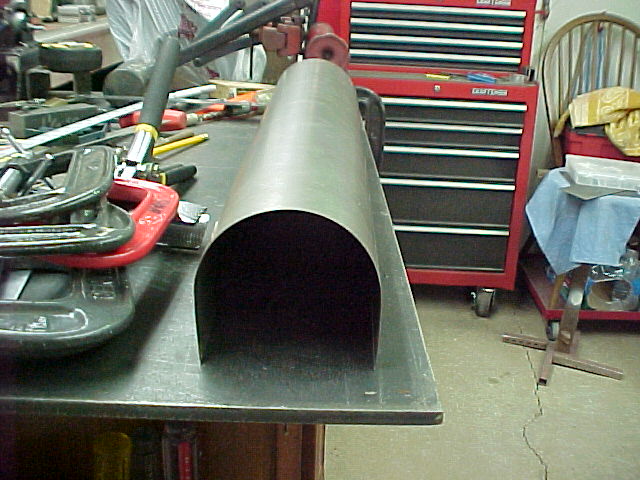
I got the 1 1/2" aluminum tubing I ordered for the fuel filler. I trimmed off the 180 degree piece to make the fill neck and cut a hole intot the corner of the tank for it.
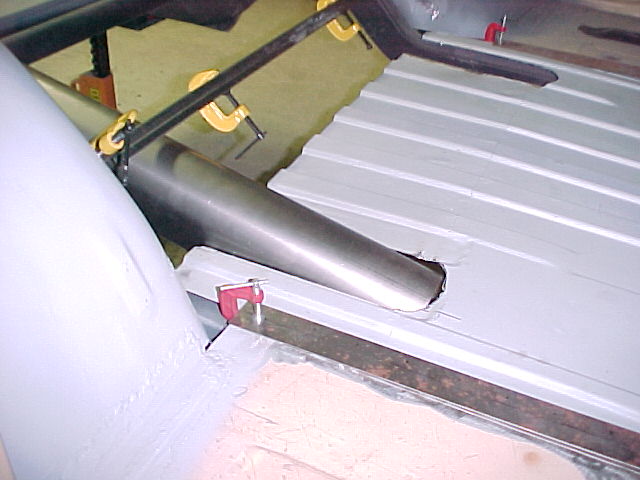
I did a bit of figuring to start making the tunnel pieces for the suspension notches. The bars come up thru the floor at about a 15 degree angle so I based my drawing on that.
The bottom edge of the cardboard is the floor. You can see the angle of the rear panel on the left and the flange is apparent at the back of the floor.
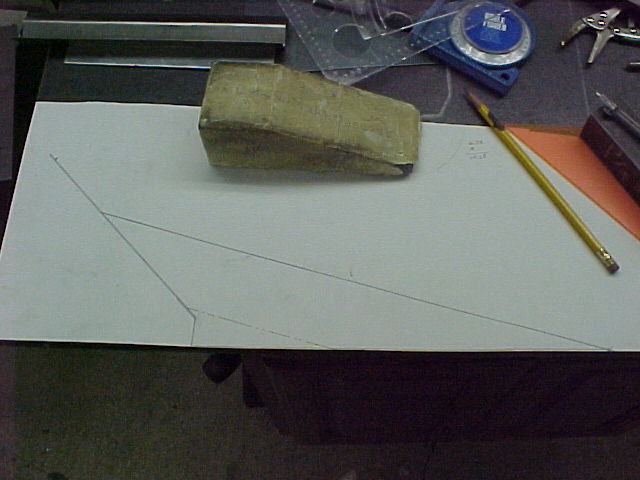
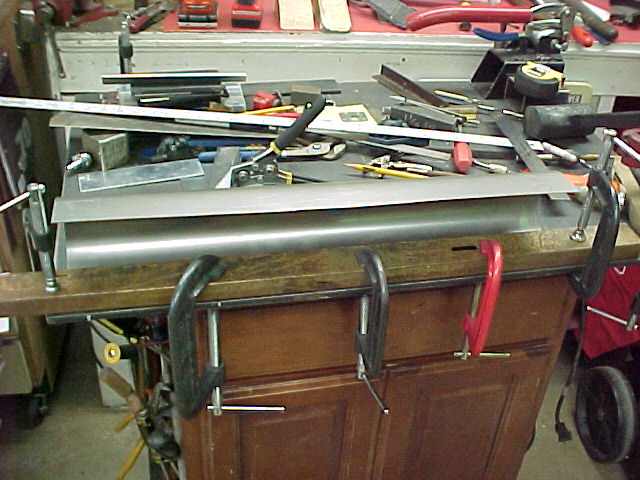
Mel and I figured a 4" wide tunnel should be plenty to clear the bars so, with this drawing and the knowledge that 1/2 the circumference of a 4" circle is 6.28", I sheared off a couiple strips of 20ga at 10" wide. That will give me a 2" deep "skirt" on either side to reach down to the floor.
This is one of the pieces with a centerline and two tangencies laid out for rolling.
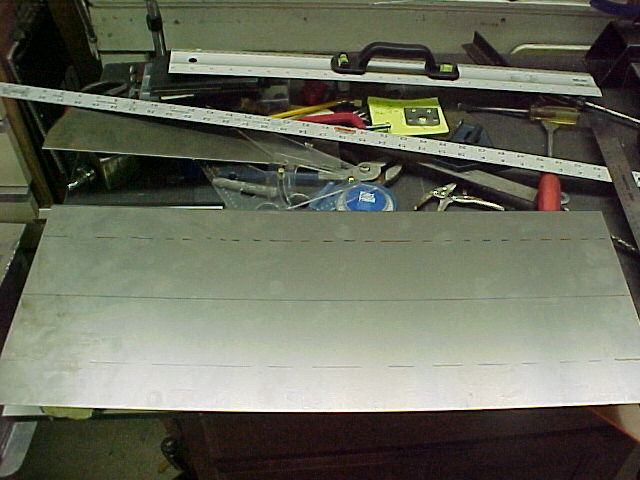
Just getting the shape started on the 3 in 1.
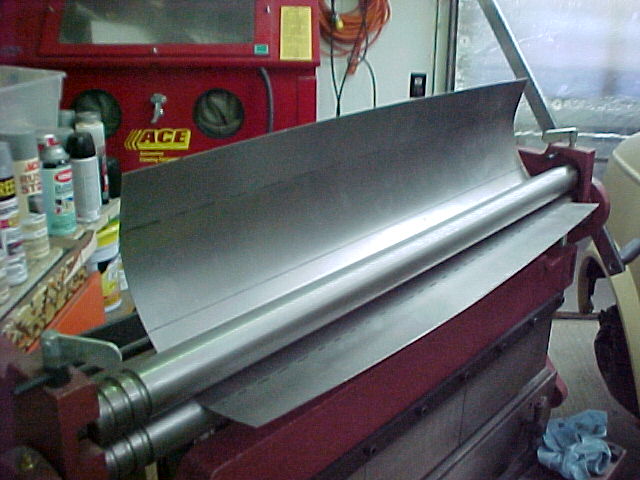
After a few trips through the rolls I had a shape that was close. I use the tangent lines as a guide for the rolls. As I roll the steel back and forth I stay inside the tangent lines. This maintains a straight skirt on either side.

After the piece comes off the rolls I need to do a little "sweetening".
Clamping the piece to the bench so I can hand bend it to straighten out the profile. That's a piece of 1 x 2 tubing clampes on the tin.
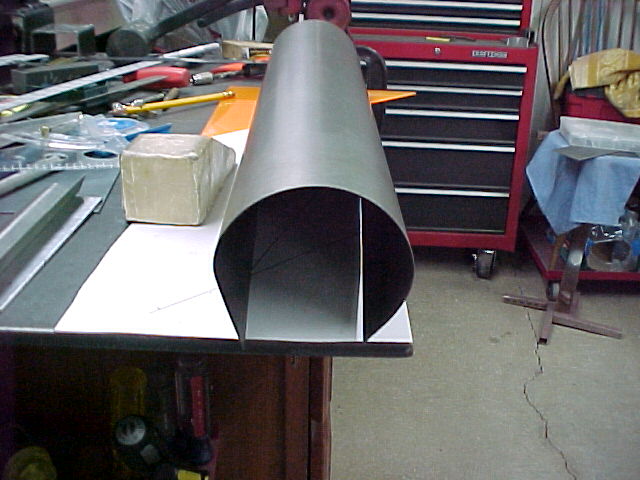
Here you can see the profile is pretty darn close. This took about 15 minutes from layout to formed piece.
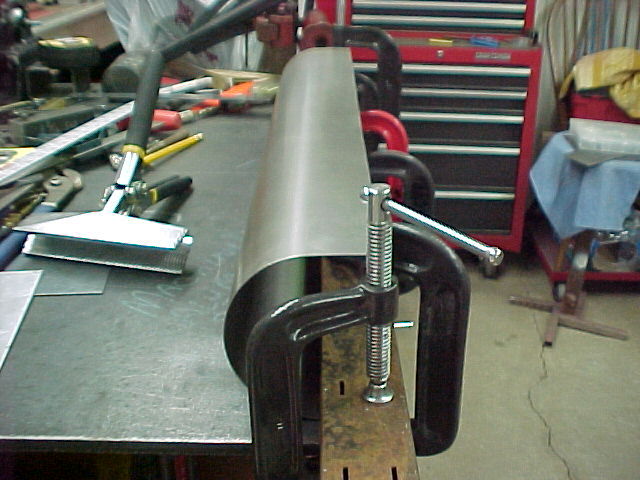
Sweet!
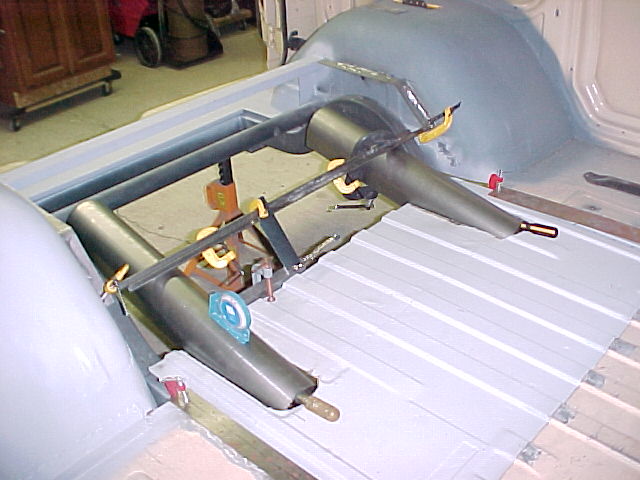
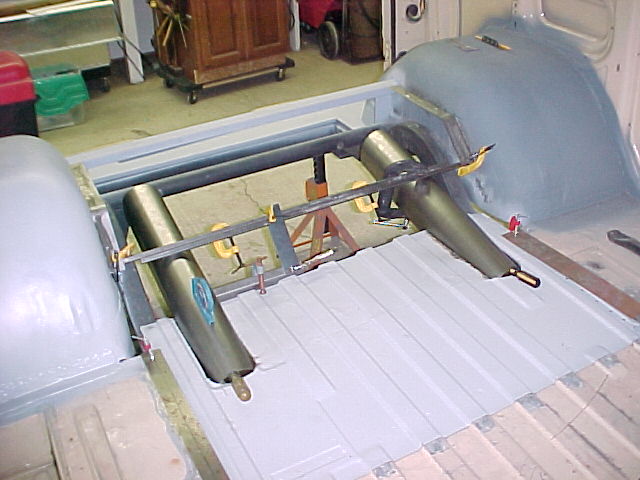
Mocked up in van. Obviously this is a bit long....
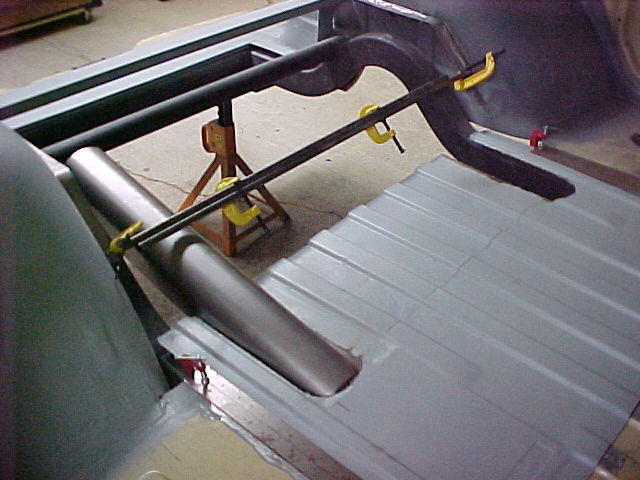
I made another tunnel and got everything mocked up before I knocked off at 4 and went in to finish watching the 500...
Well, thanks for watching. I hope to get a bit more done during the week so I'll keep you updated.
MarkMark:
"Bad Ast" Astro Van. Just because I did it... Doesn't mean it's possible...
This my Bad Ast thread...
https://www.pro-touring.com/showthre...roject-Faze-II
This is my Fotki album...
http://astroracer.fotki.com/
02-26-2013 #580 Rat Pack Member

- Join Date
- May 2007
- Location
- Mooresville, Indiana
- Posts
- 1,874
Mark,
I just spent a solid three hours "skimming" through your build thread. All I can say is TREMENDOUS!!! Thanks for spending the time to document everything you are doing. Also very sorry to hear about your Dad!
Tom
Tom Farrington
66 Chevelle hardtop (ours) https://www.pro-touring.com/showthre...PT-build-(ours)
64 Chevelle 4-dr wagon (wife's) https://www.pro-touring.com/showthre...HAUL-LONG-ROOF
The new shop build https://www.pro-touring.com/showthre...53#post1016553

 Reply With Quote


