

Results 541 to 560 of 862
Thread: The BAD AST Project - Faze II
-
12-24-2012 #541

 Registered User
- Join Date
- Jul 2011
- Location
- NC
- Posts
- 461

The BAD AST Project - Faze II
Mark- this astro is gonna be wicked! Think you will have her on the road this spring? Love the work & hope to see you at a race sometime!
-
12-26-2012 #542 Registered User
- Join Date
- Mar 2004
- Location
- Mid-Michigan
- Posts
- 2,764
I sure hope so Josh! Getting the steering straightened out and working was the last real design hurdle. Things are a bit different then initially designed but everything was easily modified to get it working. I plan to have the van drivable early this year. Spring or early summer. Don't know if it'll see any track time this year but I do plan to do some with it after the bugs are worked out. Originally Posted by diesel25lrs

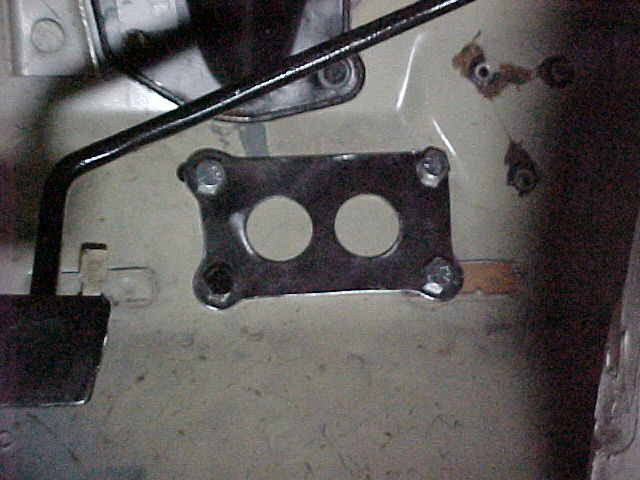
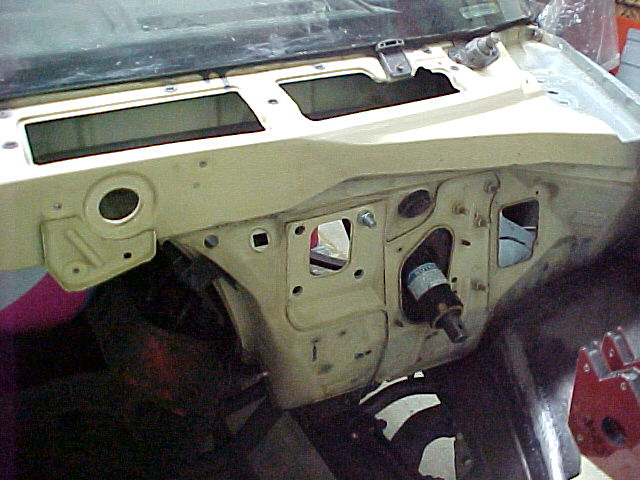
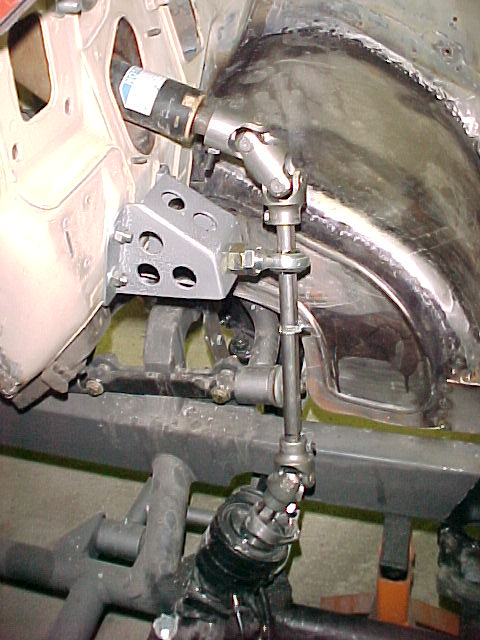
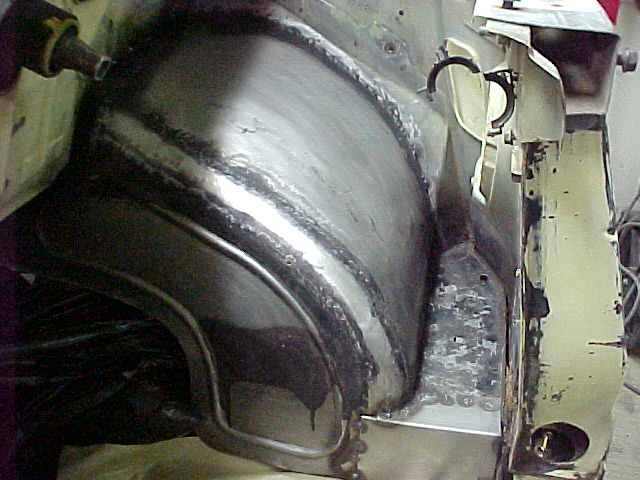
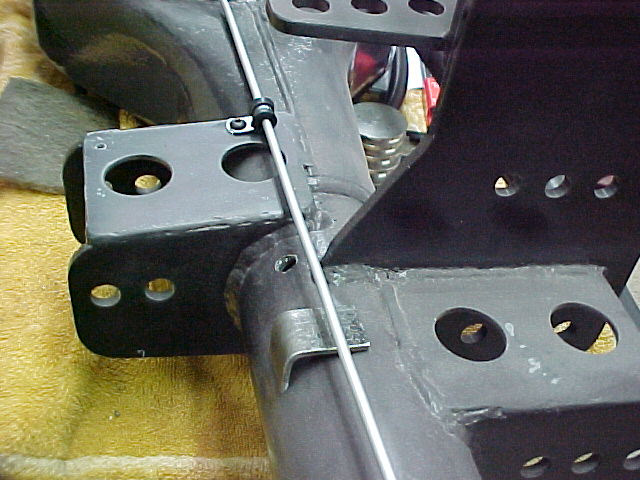
I got out in the shop early this morning. getting the support bearing lined up was on my mind. it wasn't difficult. I redrilled the mounting holes in the firewall to the inside by about 5/8th's of an inch and the steering works great!
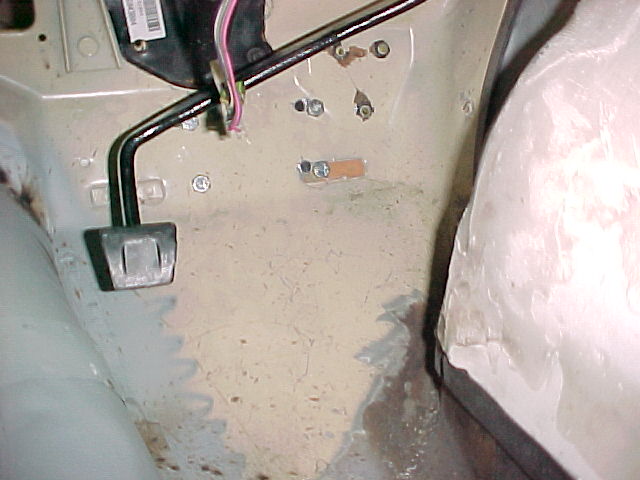
Really can't see any difference on the outside but you can see the old holes on the interior shots.
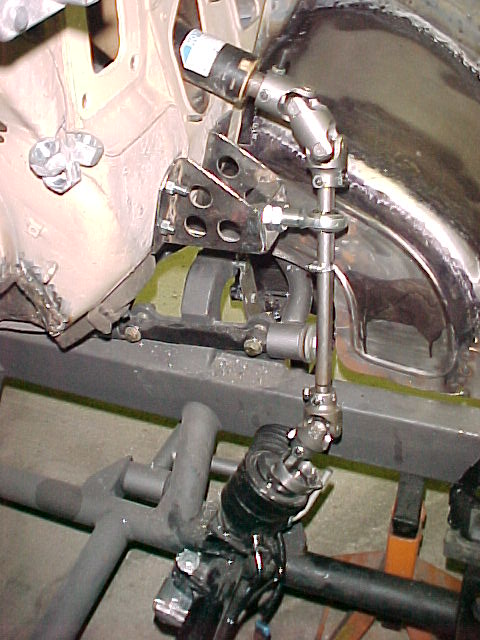
Looking a bit from the front.

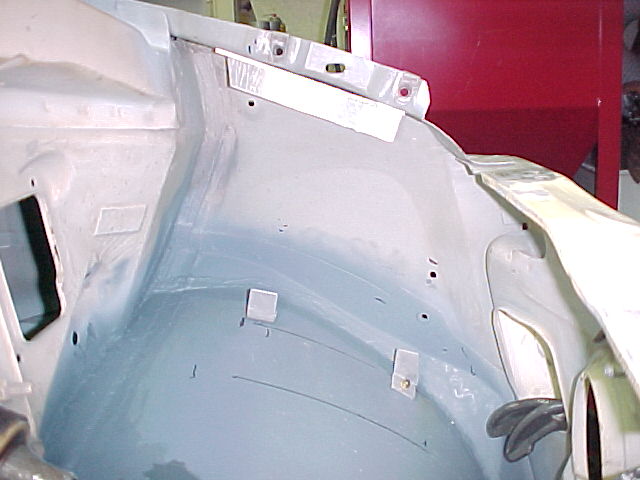
Inside shot. I am fabbing a backing plate to go in here
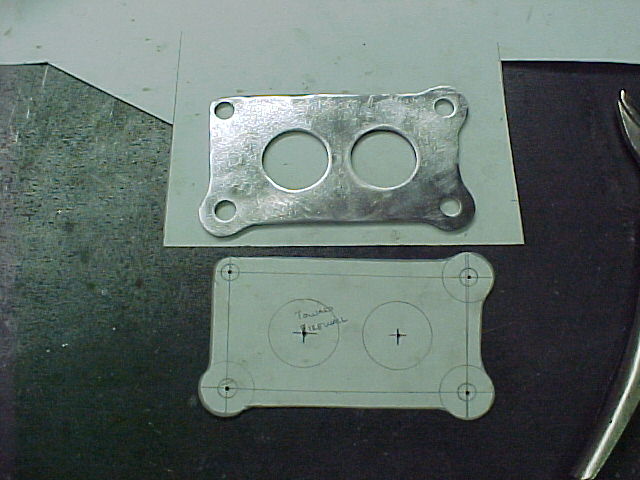
Here is the backing plate with all of the holes drilled. The pattern is the white piece and this is what the plate will look like when done.
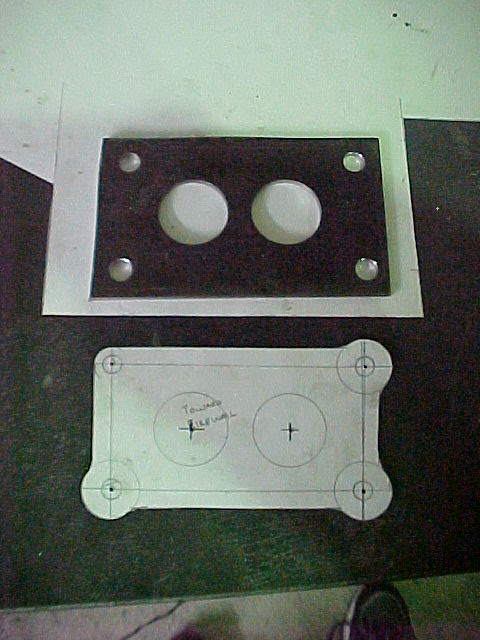
I am thinking I will add a "top" to the bracket also to triangulate the front to the back.
Thanks for the comments.
MarkMark:
"Bad Ast" Astro Van. Just because I did it... Doesn't mean it's possible...
This my Bad Ast thread...
https://www.pro-touring.com/showthre...roject-Faze-II
This is my Fotki album...
http://astroracer.fotki.com/
12-29-2012 #543
Registered User
- Join Date
- Mar 2004
- Location
- Mid-Michigan
- Posts
- 2,764
Haven't gotten much done, dad is back in the hospital. Been there since Thursday afternoon. He is having Arteriel Fibralation issues and his BP went low during dialysis Thursday. We are hoping the Dr's will get this straightened out. A bit of a setback but he is doing okay.
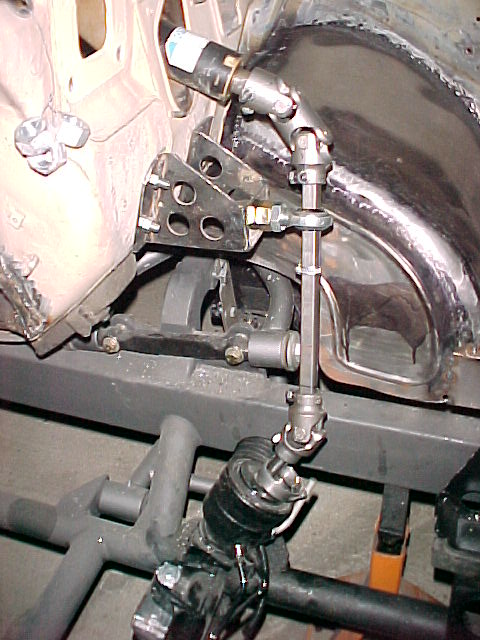
I got the backing plate finished up Thursday before the run to the hospital. I was actually bolting it in when my wife came out and told me they were taking Dad. Anyway, here are some pics. Adding this plate REALLY stiffened up the bracket. I will try to get out to the shop tomorrow to get the top plate made.
Bolted on the inside. I am going to weld some 3/8th's button head screws to the plate to simplify installation. It is a real trick getting this bolted in by myself...
I also added a full size nut on the bearing shaft. This will add structure for the threaded shaft and it also creates a double clamp load when I tighten the jam nut against it.
I'll get better pics tomorrow.
Mark
 Mark:
Mark:
"Bad Ast" Astro Van. Just because I did it... Doesn't mean it's possible...
This my Bad Ast thread...
https://www.pro-touring.com/showthre...roject-Faze-II
This is my Fotki album...
http://astroracer.fotki.com/
12-31-2012 #544
Registered User
- Join Date
- Mar 2004
- Location
- Mid-Michigan
- Posts
- 2,764
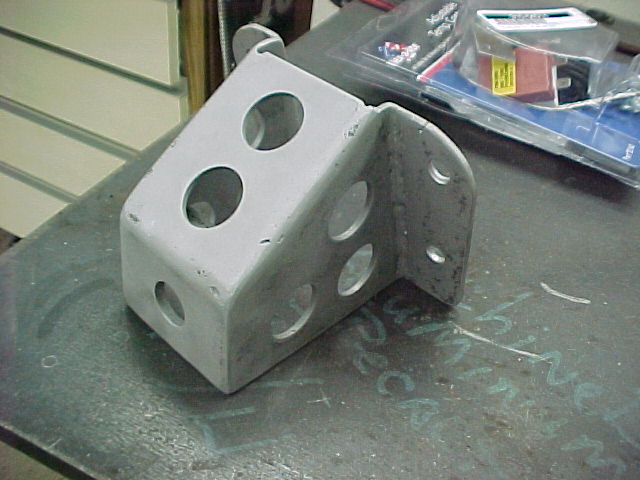
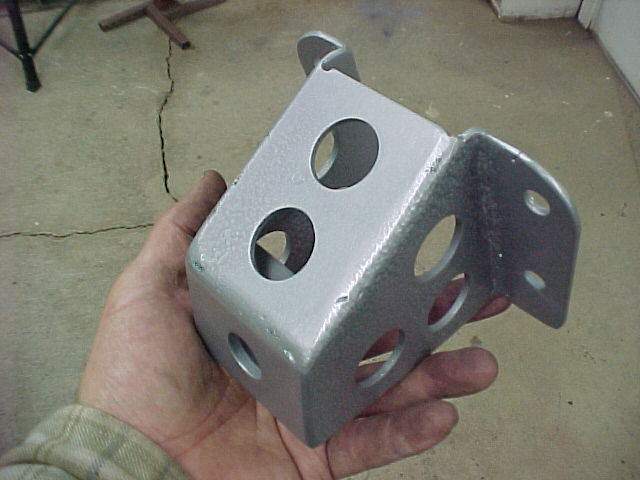
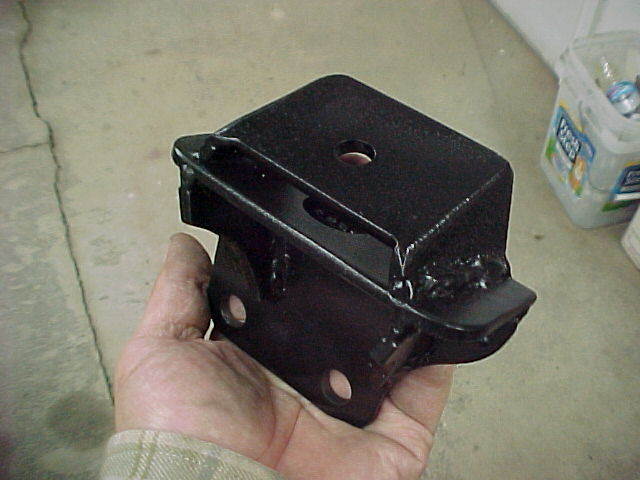
Got some work done yesterday. Mel came out and we worked on a bunch of stuff. We made the top plate for the steering shaft support bracket and got that welded up. We also pulled the modified rack brackets and ran all the brackets through the blast cabinet. here is the blasted steering shaft bracket.
After paint. I did this in hammertone silver.
The rack brackets were repainted with the hammertone black

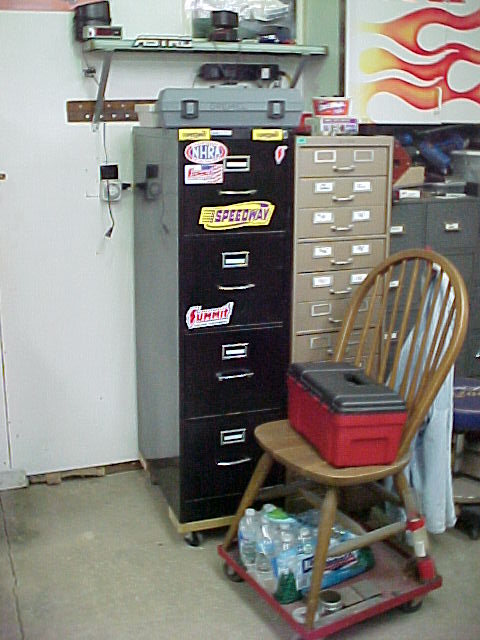
While Mel was working on brackets I made a base to put casters on a new filing cabinet I picked up at a re-sale shop.
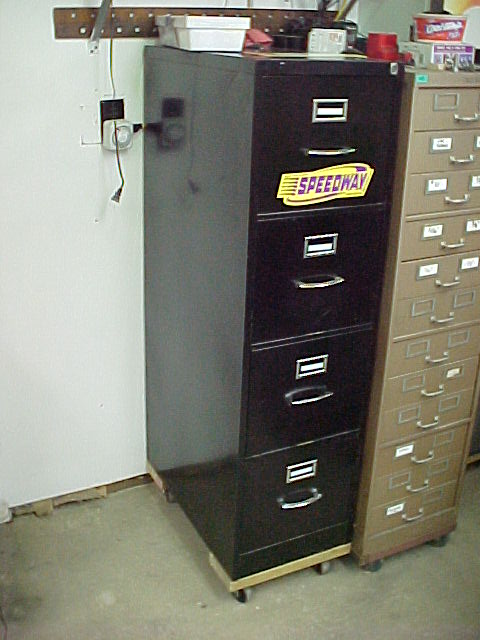
This is a nice cabinet. Full extension drawer slides and very heavy. I thought 28 dollars was a steal for this dude.
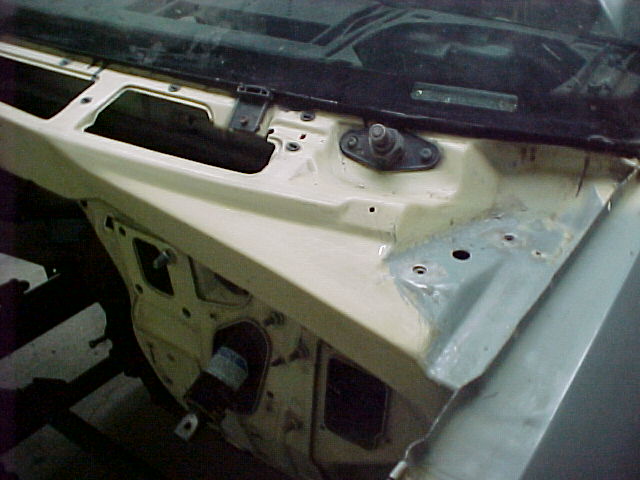
We actually started cleaning the engine compartment with thoughts of painting it bouncing in our heads... I will get the new wheel wells primed with self-etching primer and finish the seams but at least we are getting to that point!
The top of the cowl and firewall are pretty well ready for paint. We cleaned off 15yrs of grundge with degreaser and Scotch-Brite pads. Leaves a perfect surface for primer.
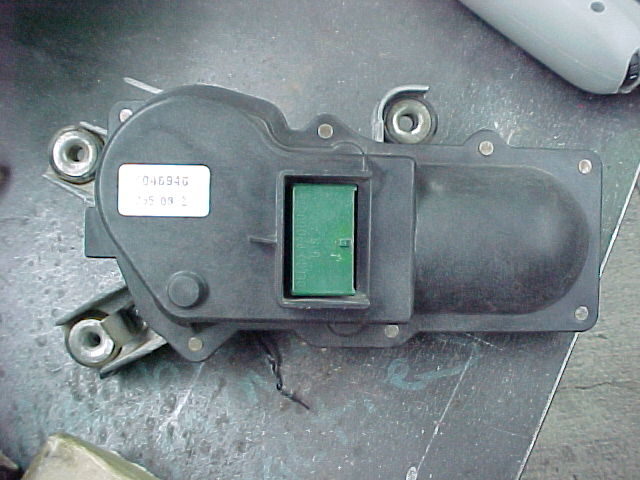
I even cleaned up the windshield wiper motor. I think this will get painted black.
We also brought the rearend in to warm up. I have some touchup work to do to it prior to assembly. I am going to try to get that done this week.

Today is my 35th wedding anniversary so I won't get much done out there today!
Thanks for looking
MarkMark:
"Bad Ast" Astro Van. Just because I did it... Doesn't mean it's possible...
This my Bad Ast thread...
https://www.pro-touring.com/showthre...roject-Faze-II
This is my Fotki album...
http://astroracer.fotki.com/
12-31-2012 #545
Registered User
- Join Date
- Mar 2004
- Location
- Mid-Michigan
- Posts
- 2,764
Spent a little time in the shop this afternoon. A couple of hours. Spent most of it cleaning out my Craftsman roll around work station (the rear end housing is sitting on it in the above post). I was using it mostly for storage but the new cabinet is getting that duty so I am turning the "work" station back into a work station...
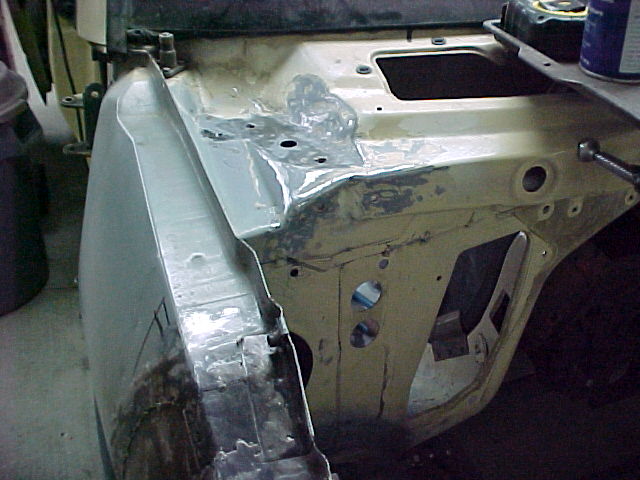
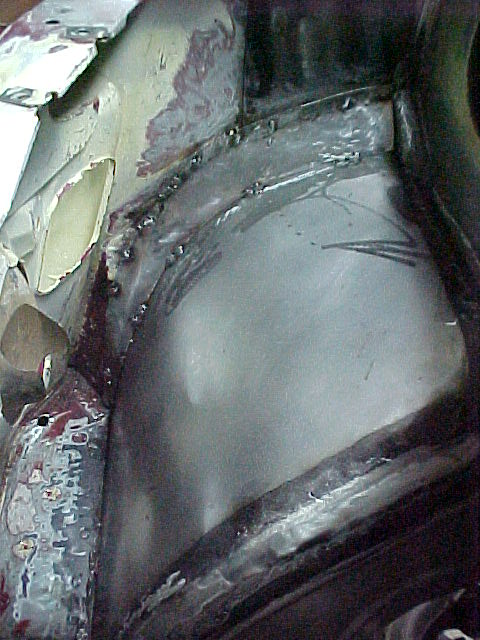
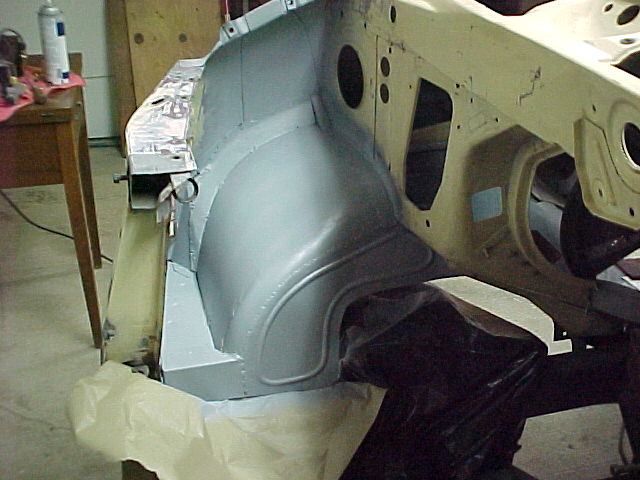
I cleaned up the outer fender that we rebuilt and threw on a coat of primer.
After the rebuild.

Now with a coat of primer. I will give this a skim coat of seam sealer after the primer is dry.
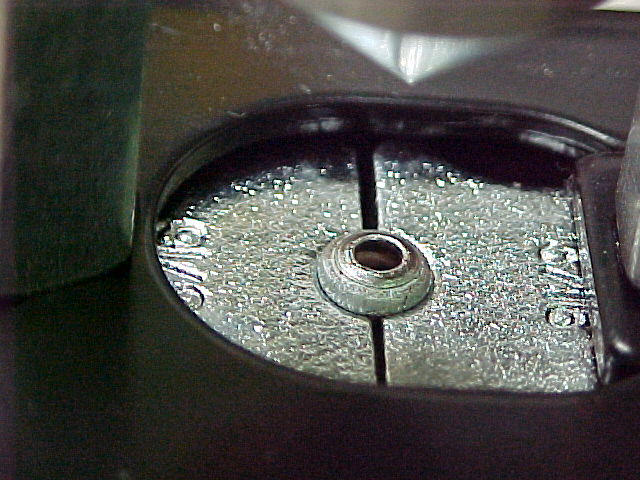
I also got out my CPP tube flaring set. I hadn't used this since I bought it to do the brake lines on the old truck so I thought I would give it a try. I bought a 25' coil of 3/15ths steel line from Speedway so I cut off a short section to experiment with.

After getting everything set up I ran the first step with the adapter die to get the "bell" shape. Seemed to do a good job with little effort, the shape was concentric.
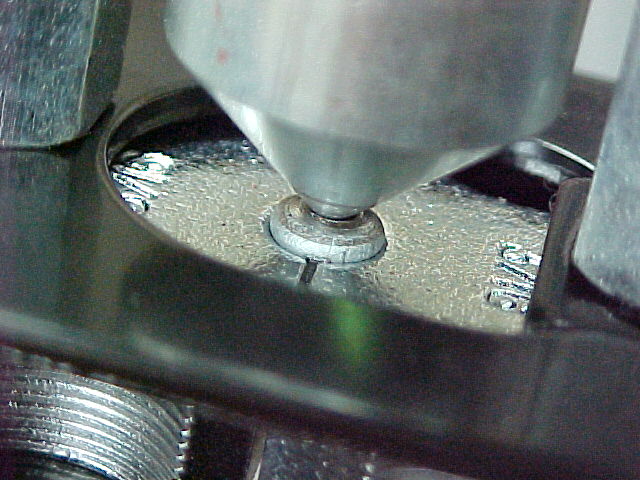
After that I ran the center down to close up the flare. Here the center is just touching the flare.
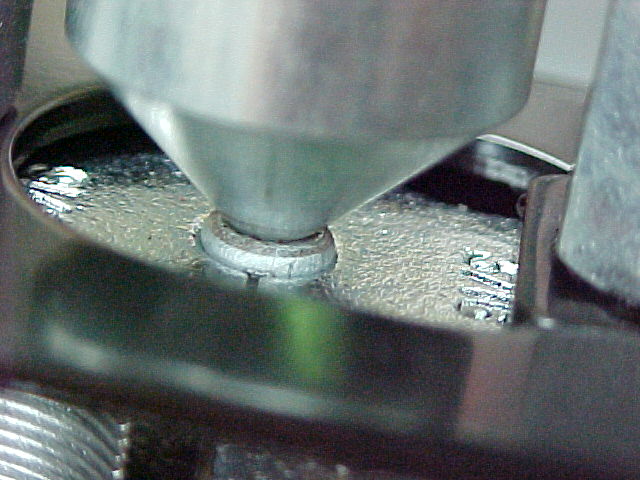
With the flare complete and the center ran all the way down.
Here is the flare with a fitting installed.
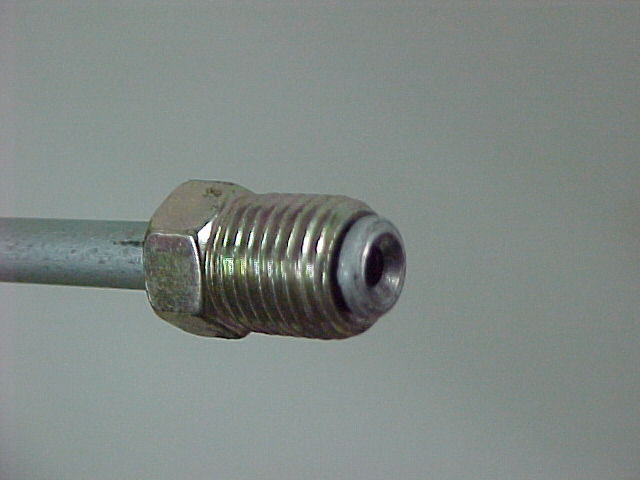
I think this tool works very well. I did another flare on the other end of this tube and it looked just like the first one. For the price I think this flaring tool is the bomb...Mark:
"Bad Ast" Astro Van. Just because I did it... Doesn't mean it's possible...
This my Bad Ast thread...
https://www.pro-touring.com/showthre...roject-Faze-II
This is my Fotki album...
http://astroracer.fotki.com/
01-08-2013 #546
Registered User
- Join Date
- Mar 2004
- Location
- Mid-Michigan
- Posts
- 2,764
Got a bit done last weekend. I am in the mock-up process with the front brakes. Measuring for brake lines and getting everything set up so I could measure for the front abutment spacers.
I am using a set of brackets I bought from a guy on the site.
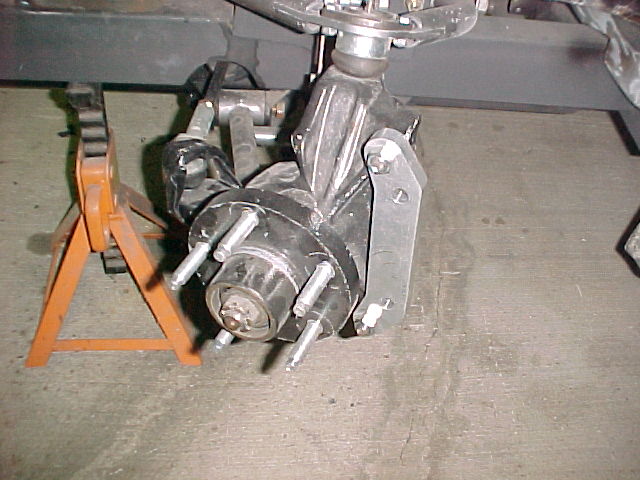
They fit okay but this combo needs an additional .22 inches to get the caliper centered over the rotor. To do this I cut a chunk of 1 1/2" diameter aluminum, cleaned it up on the lathe and bored a .563 diameter hole into it about an 1 1/4" deep.
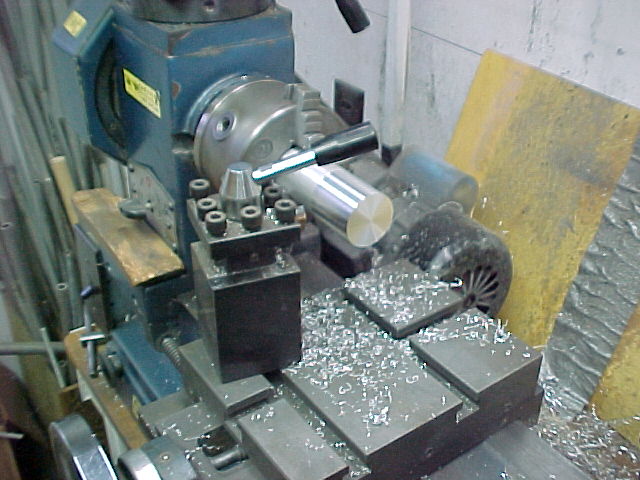
I then cut off 1/4" long slices.
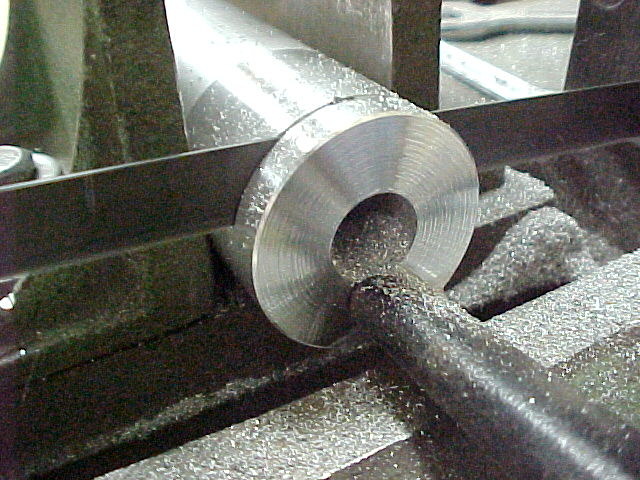
After each cut on the H/V saw I would chuck the chunk back in the lathe and face off the cut. This made sure I had one good surface to weld to the original aluminum adapter.
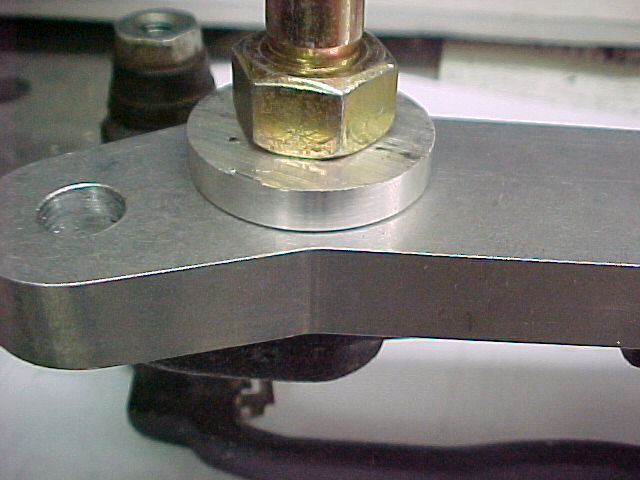
Bolted to the abutment with 14mm bolts and clamped down with a nut. Should work well enough to get them welded on. After welding I will hit them with a fly cutter in the mill to bring them down to .22 inches high.
I also worked on some brake/power steering fittings and got the painted steering bracket bolted back in to run the steering lock to lock to measure for brake lines.
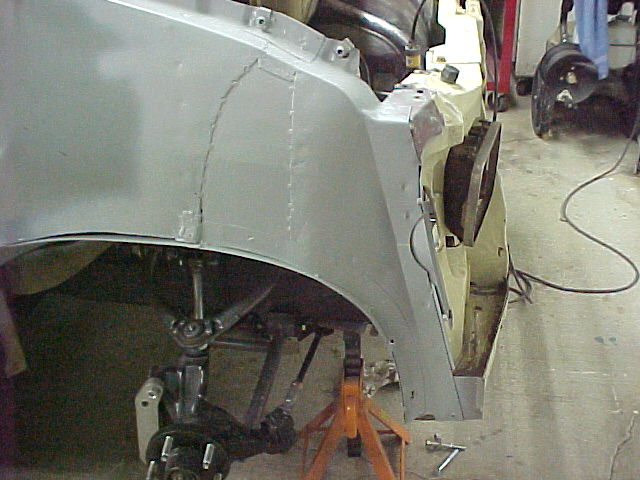
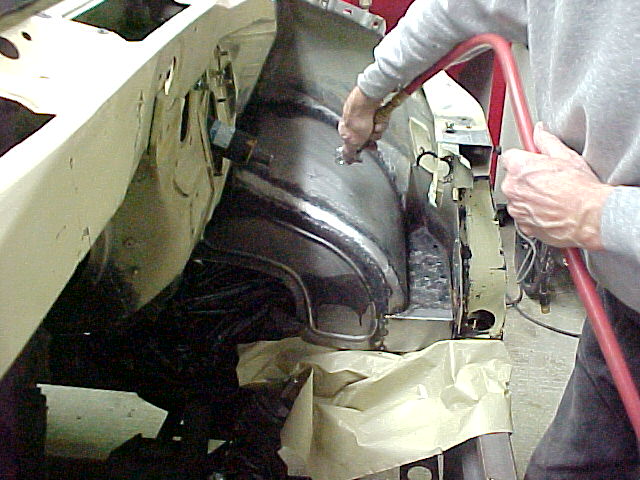
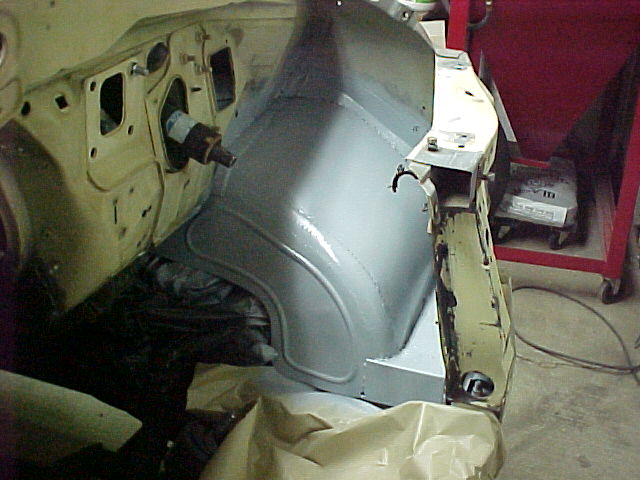
While I was monkeying with all of that stuff Mel made a little close out for the right side inner fender. This whole side was junk from an accident in a previous life and we rebuilt this entire corner. This was the last piece we needed to get the fender well wrapped up.
After we got it welded in Mel spent some time prepping the engine compartment for paint. Once we get this top coated we can actually start putting things together!
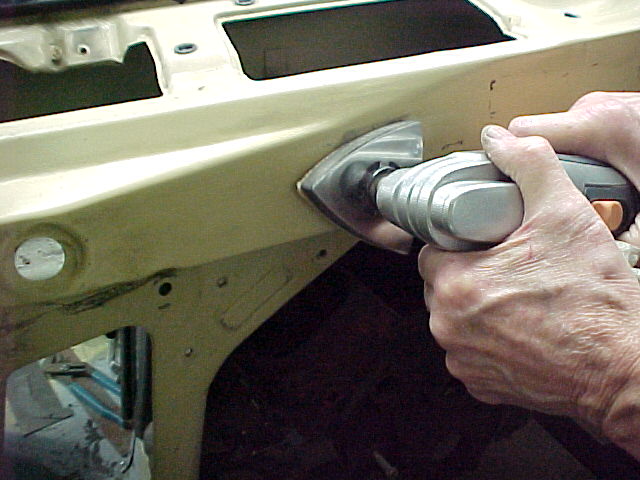
Do you have one of these little vibrator sanders? If you don't, get one... These things work great to get into those tight little corners and do a good job roughing things up for paint. ScotchBrite works well with them also.

Once we got everything cleaned up I shot some Eastwood self-etching primer on the new metal. Once I get back out in the shop I will get the seams sealed and shoot on another coat of primer prior to top coat.
That's about it. Thanks for watching!
MarkMark:
"Bad Ast" Astro Van. Just because I did it... Doesn't mean it's possible...
This my Bad Ast thread...
https://www.pro-touring.com/showthre...roject-Faze-II
This is my Fotki album...
http://astroracer.fotki.com/
01-08-2013 #547
Registered User
- Join Date
- Aug 2007
- Location
- Albemarle, NC
- Posts
- 1,151
i am sooooooo jealous of your fab skills.
i would love your advice if you pop over for a minute to the duster build of mine on just what to do with the floor and t-bar crossmember. i just cant seem to wrap my head around it.
hows your dad doing?Michael Crawford
1970 plymouth Duster back under construction:
https://www.pro-touring.com/showthre...uring-makeover
1987 GMC S15 https://www.pro-touring.com/showthre...ct-drivabeater
01-08-2013 #548
Registered User
- Join Date
- Mar 2004
- Location
- Mid-Michigan
- Posts
- 2,764
Thanks Mike, your're not doing to bad yourself on the Duster... I replied in your thread. Originally Posted by dusterbd13
And thanks for asking about Dad. He is back in the hospital but, THIS TIME, I think we got a fire lit under the doctors asses to figure out what is holding him back. So far today we have found he has a blood clot in his heart, and he may be dealing with some anxiety issues... Blood thinners for the clot and probably a low dose of Zoloft for the anxiety. We hope he responds well to both.
MarkMark:
"Bad Ast" Astro Van. Just because I did it... Doesn't mean it's possible...
This my Bad Ast thread...
https://www.pro-touring.com/showthre...roject-Faze-II
This is my Fotki album...
http://astroracer.fotki.com/
01-08-2013 #549
Registered User
- Join Date
- Aug 2007
- Location
- Albemarle, NC
- Posts
- 1,151
ill keep praying/ and thanks.
Michael Crawford
1970 plymouth Duster back under construction:
https://www.pro-touring.com/showthre...uring-makeover
1987 GMC S15 https://www.pro-touring.com/showthre...ct-drivabeater
01-09-2013 #550
Registered User
- Join Date
- Mar 2004
- Location
- Mid-Michigan
- Posts
- 2,764
No problem bud, and thanks! Originally Posted by dusterbd13
I had a friend ask about welding affects on the adapter bracket. Does anyone think this will make the parts unsafe? I know it will affect the heat treat but not sure how badly it will affect it... any advice? I am of the mind that I will just make new brackets out of steel and not worry about it.
MarkMark:
"Bad Ast" Astro Van. Just because I did it... Doesn't mean it's possible...
This my Bad Ast thread...
https://www.pro-touring.com/showthre...roject-Faze-II
This is my Fotki album...
http://astroracer.fotki.com/
01-15-2013 #551
Registered User
- Join Date
- Mar 2004
- Location
- Mid-Michigan
- Posts
- 2,764
Well... Dad passed last Thursday, the 10th, at 11:15am. His heart wasn't up to the task. He wanted no machines and to be with his family in his last time here on earth. He will be greatly missed. He was great guy and was a real character. I followed in his footsteps well.
as has my son. I want to thank all of you here that included him and his family in your prayers.
Thanks for all of your thoughts and well wishes.
If anyone is inclined we have a page set up thru the funeral home. If you would like to comment, feel free. Any thoughts at all will be appreciated.
http://www.watkinsfuneralhomes.com/f...fm?fh_id=10242
MarkMark:
"Bad Ast" Astro Van. Just because I did it... Doesn't mean it's possible...
This my Bad Ast thread...
https://www.pro-touring.com/showthre...roject-Faze-II
This is my Fotki album...
http://astroracer.fotki.com/
01-16-2013 #552 Registered User
- Join Date
- Jul 2009
- Location
- Grand Rapids, MI
- Posts
- 1,559
Sorry to hear Mark. I'm praying for you and your family. All the best.
01-16-2013 #553 Registered User
- Join Date
- Aug 2004
- Location
- Erwin,TN
- Posts
- 425
Originally Posted by astroracer
So sorry to hear about that Mark. :( :( May he rest in peace...
01-16-2013 #554
Registered User
- Join Date
- Aug 2007
- Location
- Albemarle, NC
- Posts
- 1,151
my family and i will continue to pray for you and yours as well. just know, we all care, and most of us have been there with you.
Michael Crawford
1970 plymouth Duster back under construction:
https://www.pro-touring.com/showthre...uring-makeover
1987 GMC S15 https://www.pro-touring.com/showthre...ct-drivabeater
01-16-2013 #555 Registered User
- Join Date
- Apr 2001
- Location
- The Netherlands
- Posts
- 1,509

Sorry for your loss, my condolences to you and your family....always sad when a loved one passes.
01-16-2013 #556
Registered User
- Join Date
- Mar 2004
- Location
- Mid-Michigan
- Posts
- 2,764
Thanks everyone for your thoughts and well wishes. And thank you Larry for posting on Dads obit page. Very thoughtful and very appreciated! The funeral was today and all went well. Most of the funeral details were handled by the grand kids! My oldest is 34 so they were up to the task and did well!
My wife and I have been down with the flu since Thursday evening. I took her in to emergency Friday morning and she took me in Sunday! I have known my wife for over 40 years and have never seen her that sick before... Not fun stuff. We are just now getting back on our feet.
Anyway, thank you again, I'll post back up once work resumes on the van... And it will resume, my dad told me to finish it...
MarkMark:
"Bad Ast" Astro Van. Just because I did it... Doesn't mean it's possible...
This my Bad Ast thread...
https://www.pro-touring.com/showthre...roject-Faze-II
This is my Fotki album...
http://astroracer.fotki.com/
01-28-2013 #557
Registered User
- Join Date
- Mar 2004
- Location
- Mid-Michigan
- Posts
- 2,764
Hey guys,
Things are getting back to some sort of normal around here now. We miss Dad alot, that's to be expected I guess, but we all know he is in a much better place so we are getting along.
I have been picking away at a few aspects on the van. Throttle cables, rear diff brake lines. I just got an aluminum throttle pedal from Speedway.
Here are some pics of the brake lines and attachment clips.
I drilled and tapped for #10-24 screws for the Adell Clamps.
The piece you see sitting on the axle tube will eventually get welded there. It will carry the hard line to soft line bracket. I need to get my flexlines from Tobin before I weld the pieces on.
I bent the shape to go over the punkin on an ice cream bucket...

Mel built some brackets to carry the relay box that will bolt into the drivers side fender.
This is the project box from Radio Shack. Mel is holding it about where it will mount. We need to make a mounting plate that will bolt to the box and then to the fender brackets.
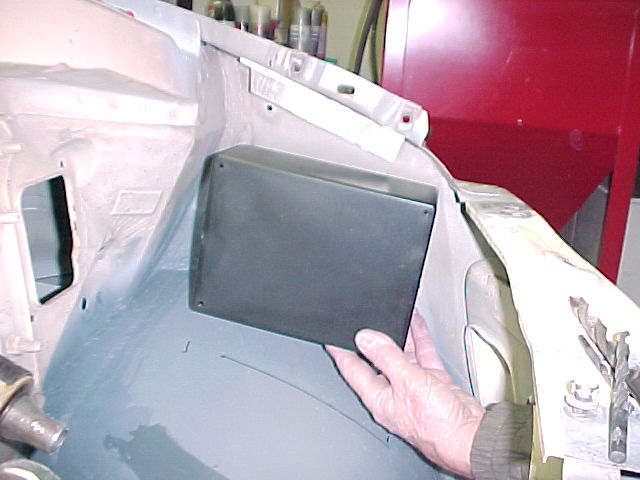
The box will get painted body color and it will house all of the fan and headlight relays.
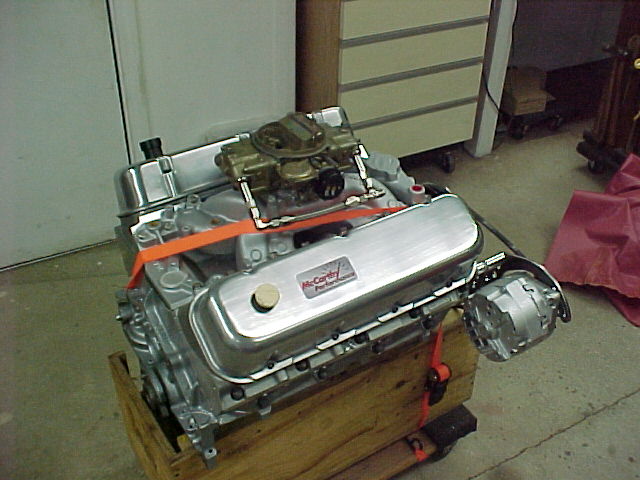
I also did a bit of mock up on the engine. Just looking at fuel lines and throttle cable routing.
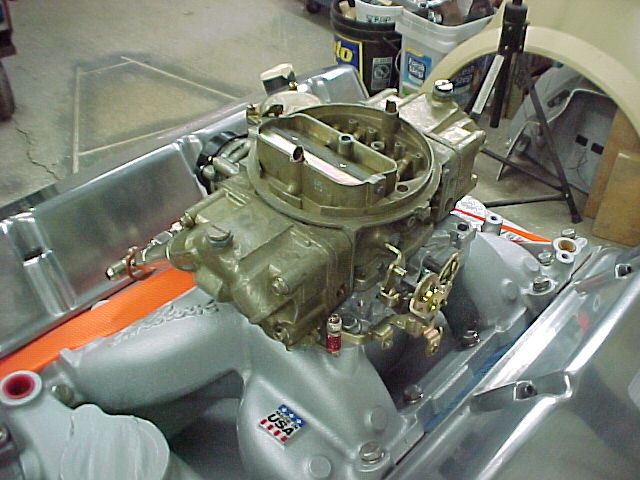
That's about it. Hopefully we'll get a lot more done in the next few weekends.
MarkMark:
"Bad Ast" Astro Van. Just because I did it... Doesn't mean it's possible...
This my Bad Ast thread...
https://www.pro-touring.com/showthre...roject-Faze-II
This is my Fotki album...
http://astroracer.fotki.com/
01-29-2013 #558
Registered User
- Join Date
- Aug 2007
- Location
- Albemarle, NC
- Posts
- 1,151
personally, i like to bring fuel lines up the back of the engine. keeps it visually cleaner. nore of a PITA to run, but worth it for form.
keep up the faith, mark. its the only way.Michael Crawford
1970 plymouth Duster back under construction:
https://www.pro-touring.com/showthre...uring-makeover
1987 GMC S15 https://www.pro-touring.com/showthre...ct-drivabeater
02-03-2013 #559
Registered User
- Join Date
- Mar 2004
- Location
- Mid-Michigan
- Posts
- 2,764
Thanks Mike, that's the plan. There is plenty of room to run the line up the back and I see no reason to have all of that extra line running forward for no reason. Originally Posted by dusterbd13
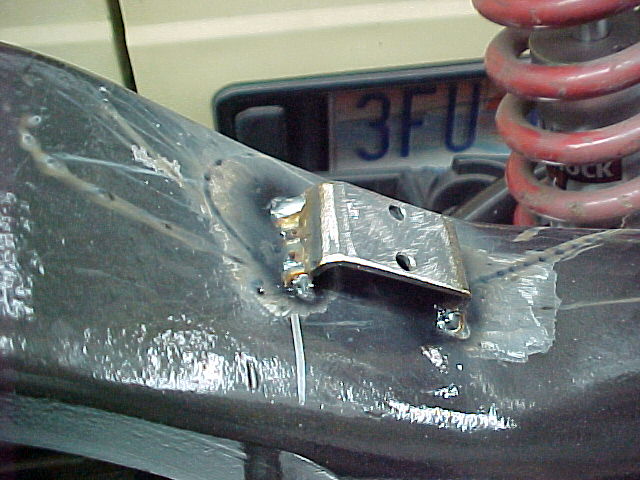
After doing some looking at my brake line routing I determined they were going to have to move... They were in the way of the coilover spring...
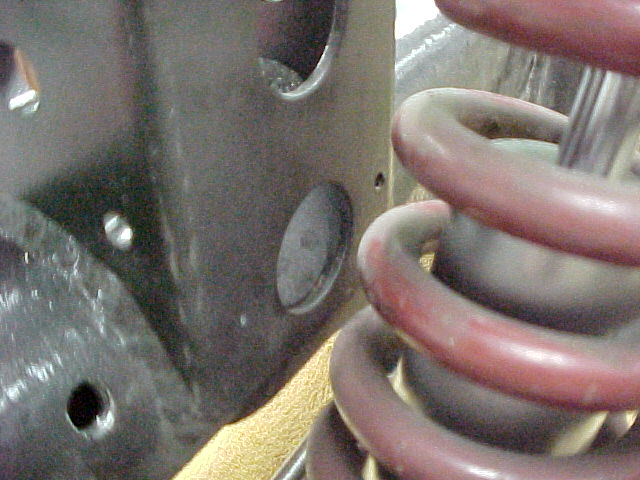
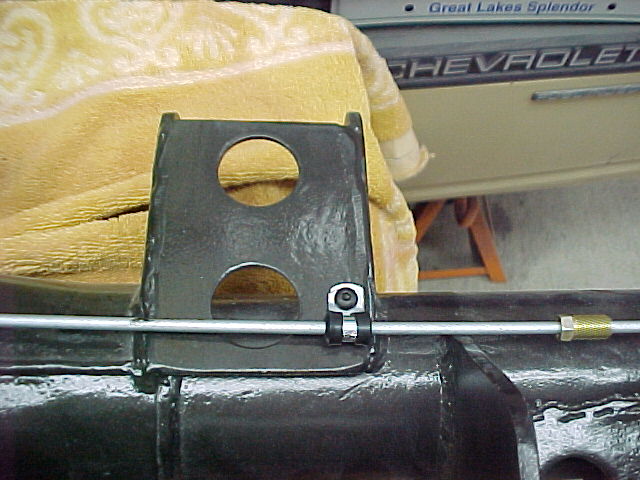
Anywho, I re-routed them to the front side of the housing. I built some new brackets to bolt the clamps to and modified a junction block to mount off to the side of the punkin.
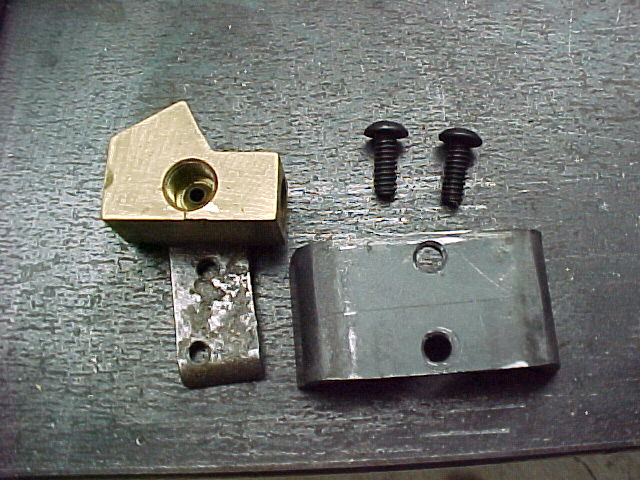
The brackets were pretty simple 7/8th's square pieces of 1/8th plate and the junction block bracket is the same stuff bent into a "U".

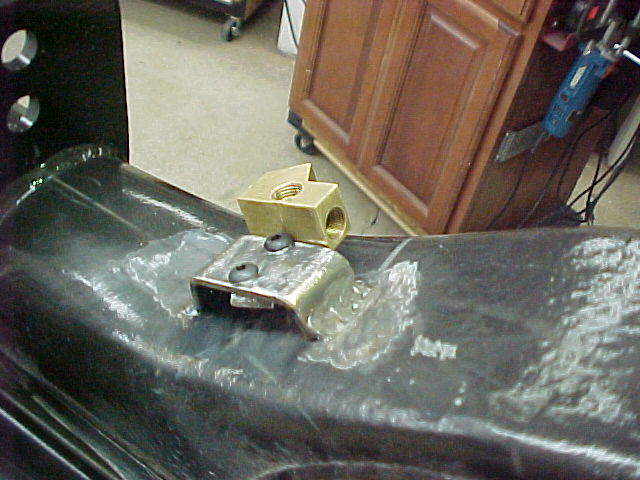
The little brackets were drilled and tapped for the 10-24 screws

The saddle bracket for the junction block got clearance holes for the screws. I modified the junction block by drilling and tapping for the screws. This will slip in under the bracket and get bolted in place.
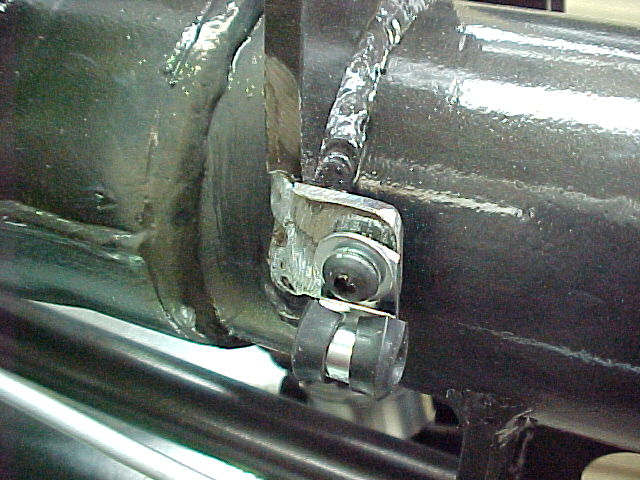
I welded the brackets to the housing and mocked up the clamps and lines.
With the block screwed in place.
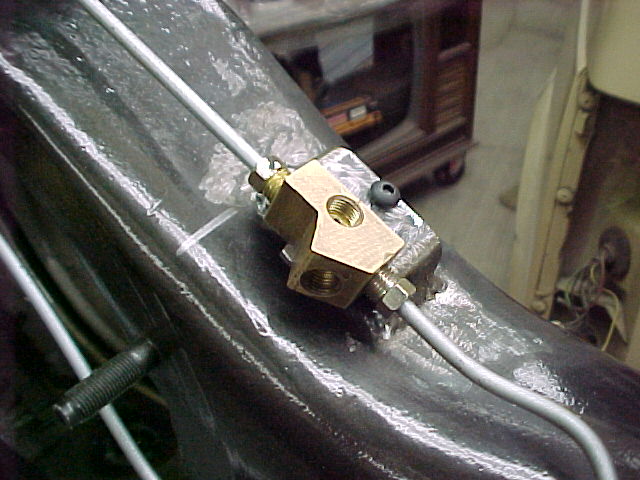
Pics of the clamps mocked up.
That will get the lines routed safely. I still have to get the FlexKore lines to finish this up.
Thanks for looking
MarkMark:
"Bad Ast" Astro Van. Just because I did it... Doesn't mean it's possible...
This my Bad Ast thread...
https://www.pro-touring.com/showthre...roject-Faze-II
This is my Fotki album...
http://astroracer.fotki.com/
02-03-2013 #560
Registered User
- Join Date
- Mar 2004
- Location
- Mid-Michigan
- Posts
- 2,764
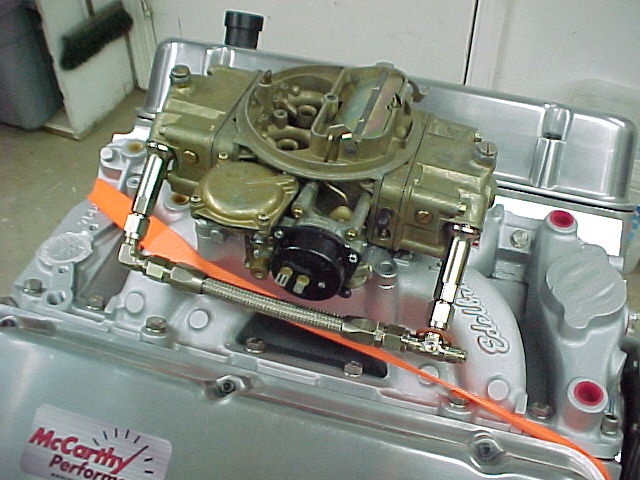
I've also been picking at the throttle cable/linkage situation. I was planning to use the Astro throttle pedal albeit a bit modified. After looking at cables (the Astro cable is a "little" short...) and getting an aftermarket cable hooked up to the GM pedal I determined it was actually cheaper to go with an aftermarket pedal. I got this one from Speedway for 35 bucks and it came with a 4' cable..
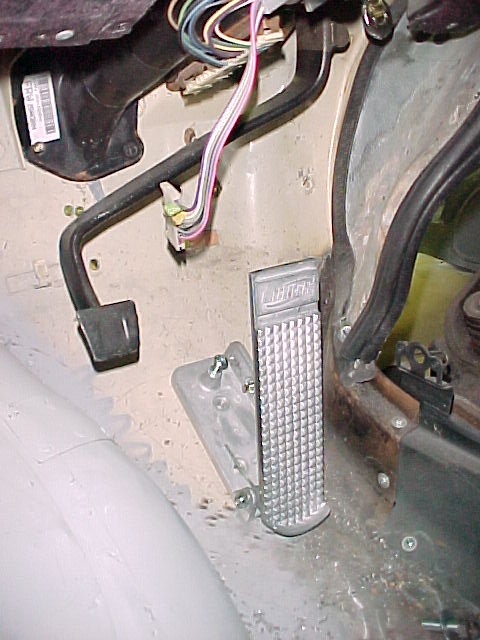
This will ease cable routing also as I can pop a hole through the side of the doghouse flange on the firewall and route the cable across the front of the engine, around the back and up to the throttle linkage on the carb.
Lots of stuff coming together, just taking some time to get back into it.
MarkMark:
"Bad Ast" Astro Van. Just because I did it... Doesn't mean it's possible...
This my Bad Ast thread...
https://www.pro-touring.com/showthre...roject-Faze-II
This is my Fotki album...
http://astroracer.fotki.com/

 Reply With Quote


