


Results 61 to 80 of 92
-
10-12-2010 #61

 Registered User
- Join Date
- Aug 2004
- Location
- Portland,Oregon
- Posts
- 599
Well I got the Roll Bar put in place its all welded in.
Im going to put some bars that go to the front but I'll put those in a bit later.
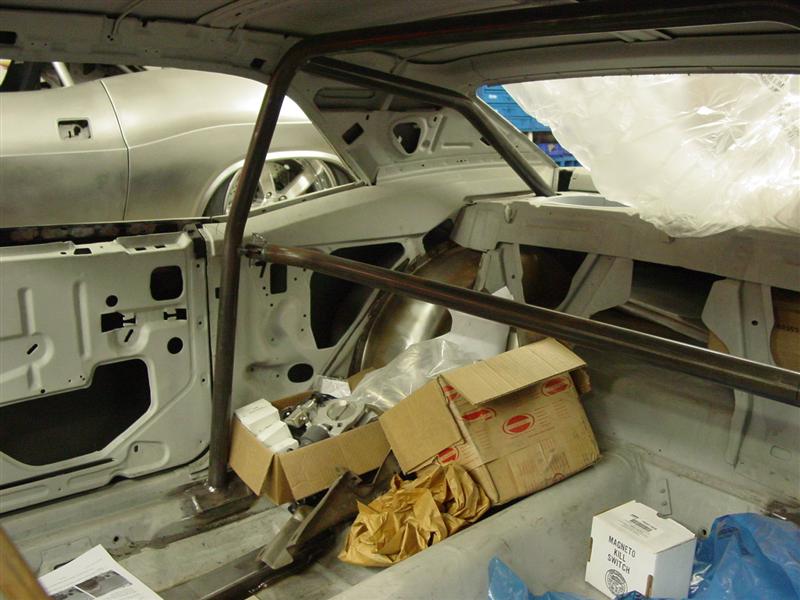
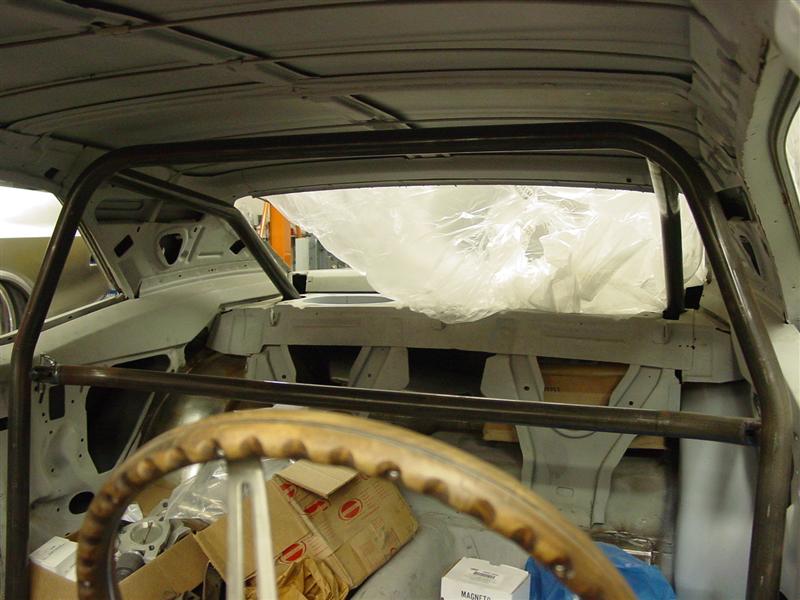
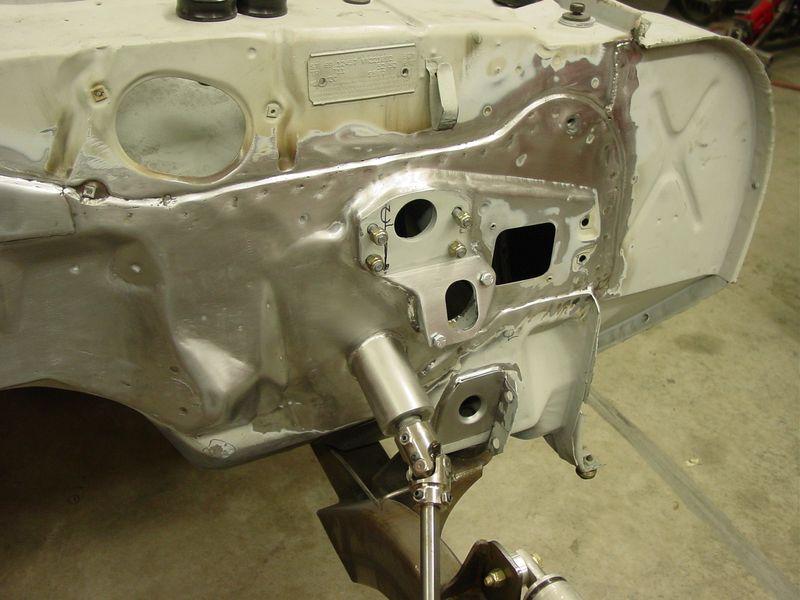
Also started working on the firewall smoothing.
You can see a hint of the rear firewall behind the rear seat taking shape also.
Also made a dimple die plate for the subframe bolt access hole.
Few more things and it will be done and on to other things.

Running a factory tilt steering column but We covered it up with a nice tube that it slips into.
Robert Braga
1969 Camaro LS2/T56 D1SC
www.automotivedesigneng.com
US Collision / Mortenson's Custom Touch / DPE Wheel / Tim Bruning / Columbia Parts Company
-
11-23-2010 #62
Registered User
- Join Date
- Aug 2004
- Location
- Portland,Oregon
- Posts
- 599
Well got a couple more things done.
I wanted a panel behind the rear seat so I came up with a few ideas and myself and Tim picked one.
BEFORE
AFTER
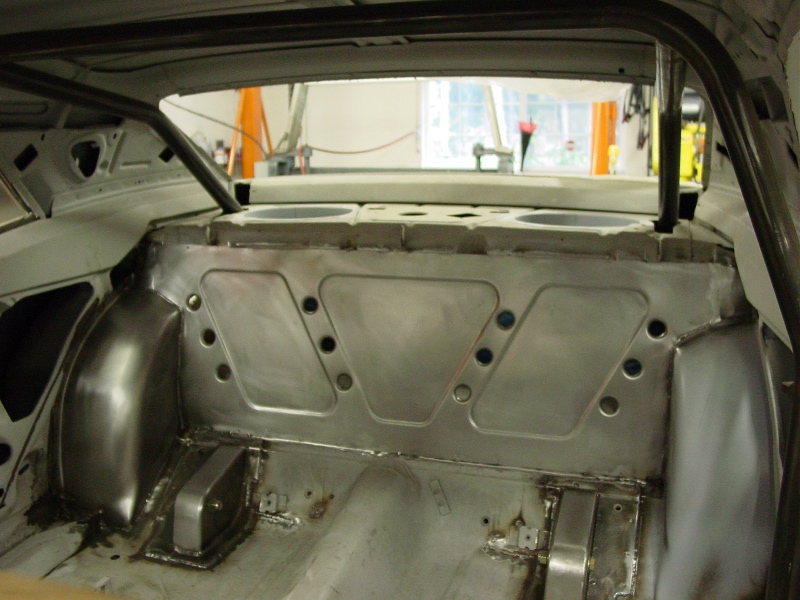
Also put the door panel on and test fit it with the seats to see what we might do for side bars.
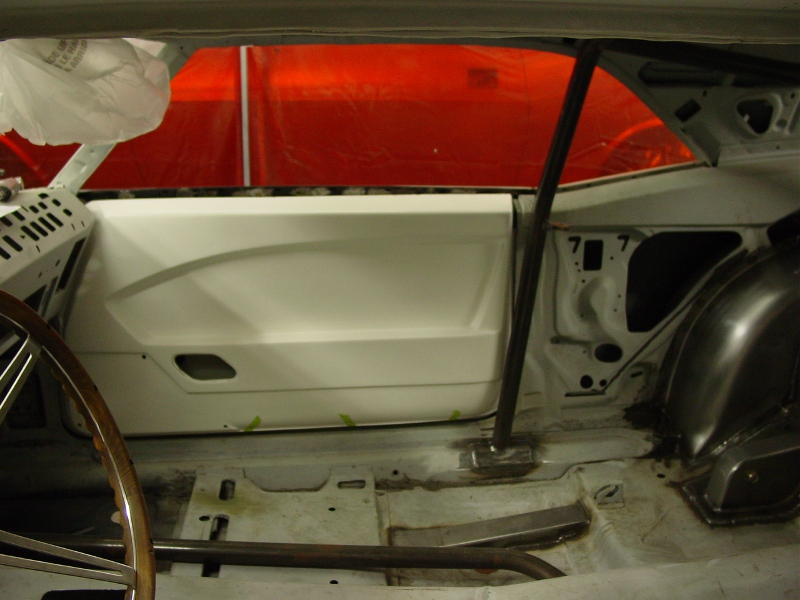
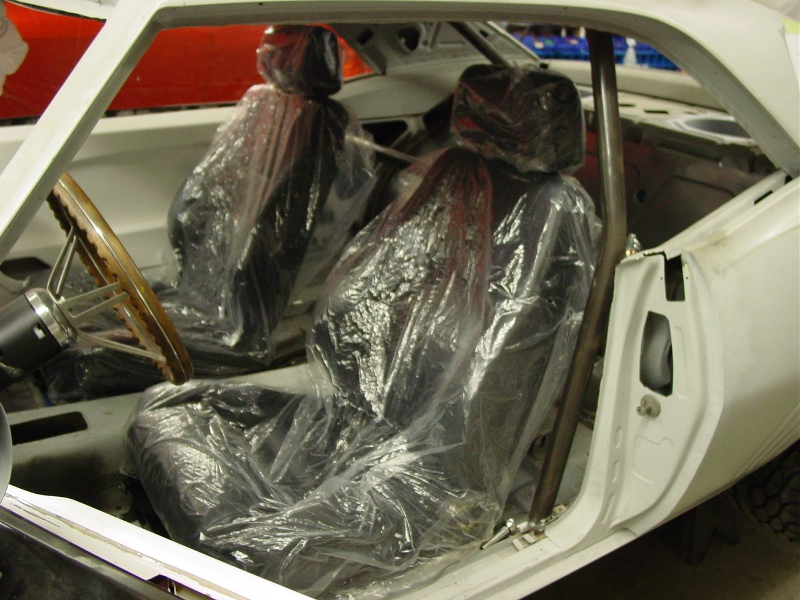 Robert Braga
1969 Camaro LS2/T56 D1SC
www.automotivedesigneng.com
US Collision / Mortenson's Custom Touch / DPE Wheel / Tim Bruning / Columbia Parts Company
11-24-2010 #63
Registered User
- Join Date
- Aug 2004
- Location
- Portland,Oregon
- Posts
- 599
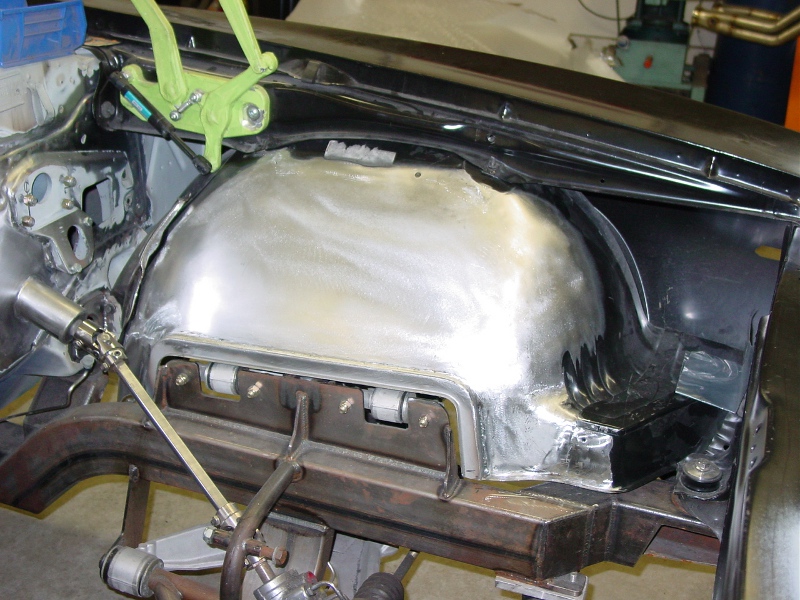
Started work on the front inner fenders also. I wanted it to match the frame better and make them a bit wider for more tire clearance.
There is no need for the control arm hole to be so big so it was brought out to the edge of the control arm mount about 3/8" clearance all the way around. Also the back side was lengthened so it covers the sub frame more, keeping some tire debris off the subframe and firewall.
Tim is real good at working metal. Shrinking, stretching, and using a big hammer he made the crown in the metal and gave the front inner fenders more tire clearance.
There will be a bit more detail in them but that will be on the next update.

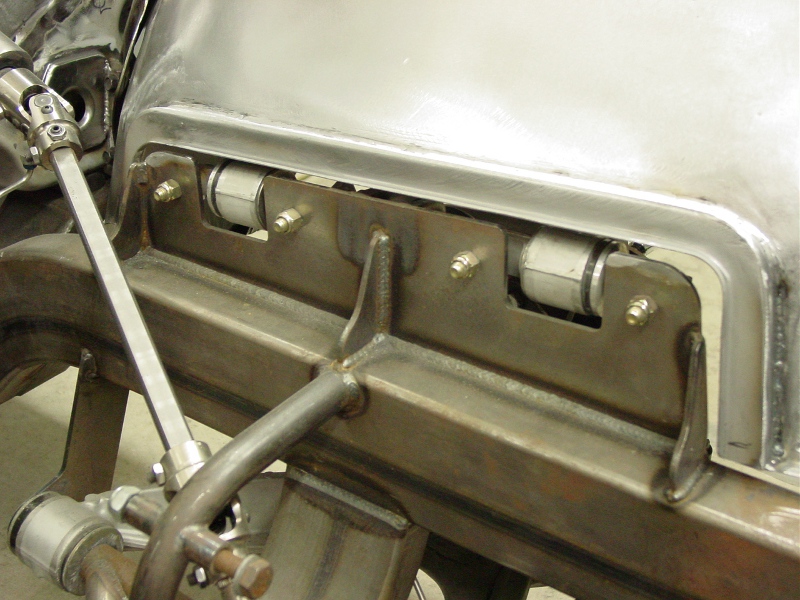
Here is the driver side almost done.
 Robert Braga
1969 Camaro LS2/T56 D1SC
www.automotivedesigneng.com
US Collision / Mortenson's Custom Touch / DPE Wheel / Tim Bruning / Columbia Parts Company
11-28-2010 #64 Registered User
- Join Date
- May 2008
- Location
- Austin, Tx.
- Posts
- 1,539

Hey Robert,
The project is lookin' great! Way to hang in there through all the "Life" stuff that comes up...
The inner fenders look awesome! I'm sure Tim could sell a few pairs of them if he just made some fiberglass molds of them...
Keep up the great job! Ray
Ray
FEW FRILLS, just BIG CHILLS!!!
1972 VW Bug (427LS/T56 Magnum/9"-3.70 gears)
18"x10-1/2" (315/30/18) Front, 18”x12" (335/30/18”) Rear
https://www.pro-touring.com/showthre...-Lady-Bug-quot
11-28-2010 #65 Registered User
- Join Date
- Dec 2009
- Location
- Fresno
- Posts
- 164
Wow I am really impressed with the work you and Tim have done. Its good to have friends that know fabrication.
11-28-2010 #66 Registered User
- Join Date
- Feb 2009
- Location
- Long island, New York
- Posts
- 668
loving it alott!! lol keep up the excellent fab work , where did u get the cage from? -Dom
Dom Buffa
69 Camaro- 2JZ /Garrett 67MM, Ls1 13" Front disc conversion, 18" ROH 3 piece Modenas
11-29-2010 #67
Registered User
- Join Date
- Aug 2004
- Location
- Portland,Oregon
- Posts
- 599
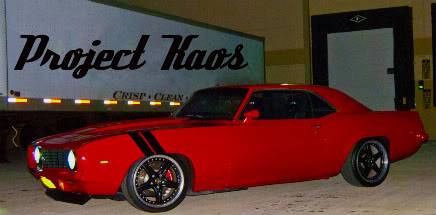
I went to the local metal place with my car trailer and got some tubing. Myself and Tim bent it up with his tube bender. Then he welded it all up. Originally Posted by 69projectKAOS
 Robert Braga
1969 Camaro LS2/T56 D1SC
www.automotivedesigneng.com
US Collision / Mortenson's Custom Touch / DPE Wheel / Tim Bruning / Columbia Parts Company
01-07-2011 #68
Registered User
- Join Date
- Aug 2004
- Location
- Portland,Oregon
- Posts
- 599
Well both inners are done now.
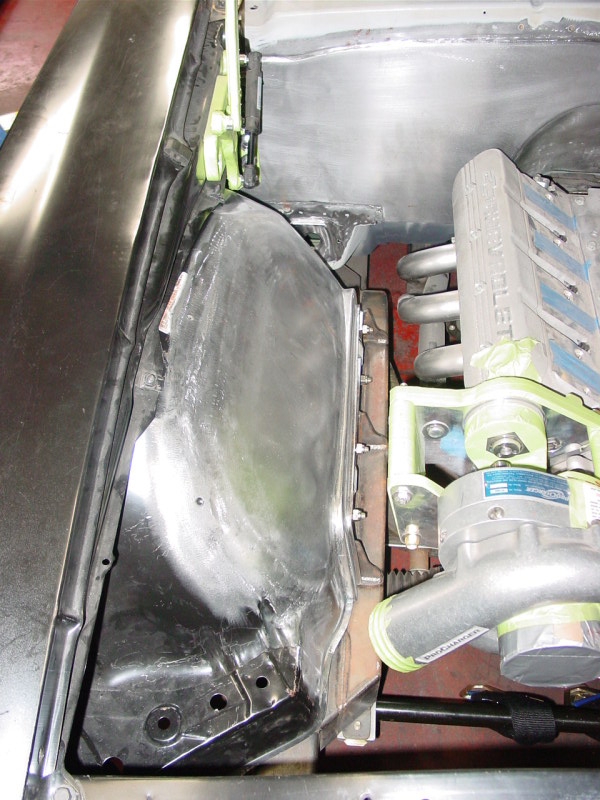
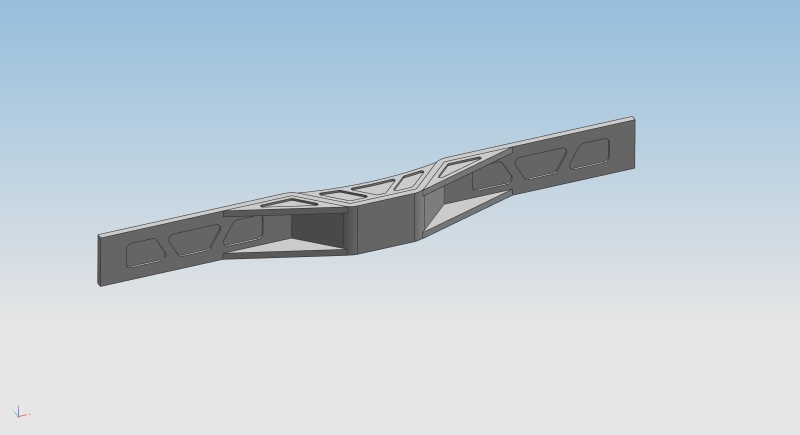
Here are some pics of the exhaust and tranny cross member, since I had a chance to get it on a lift.
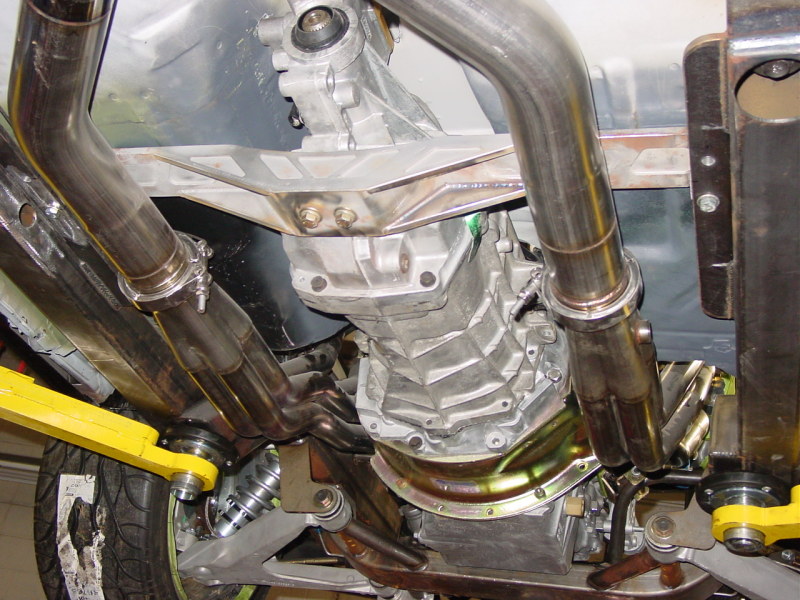

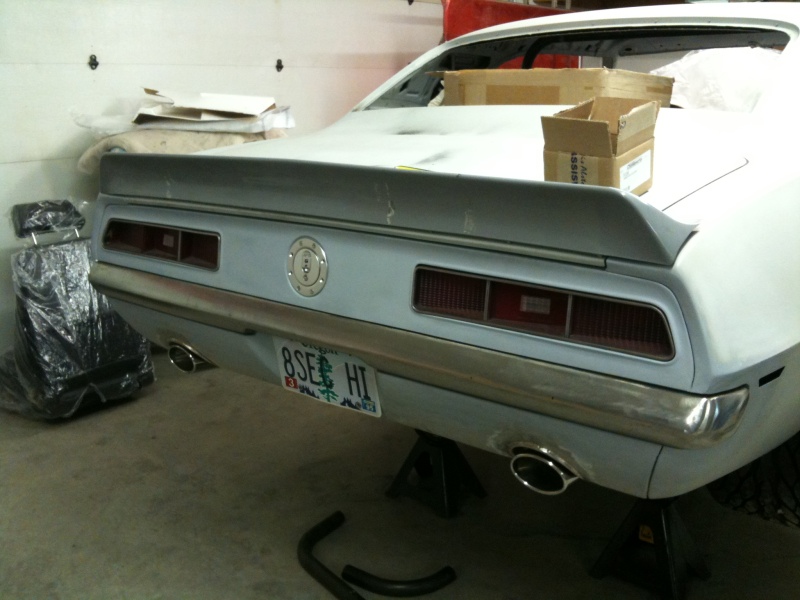
I had Stainless Works make me some mufflers that I designed. It allows the exhaust the use of the cut out or when closed, it flows thru the rest of the muffler and then out the back valance.
My neighbors are going to hate me.
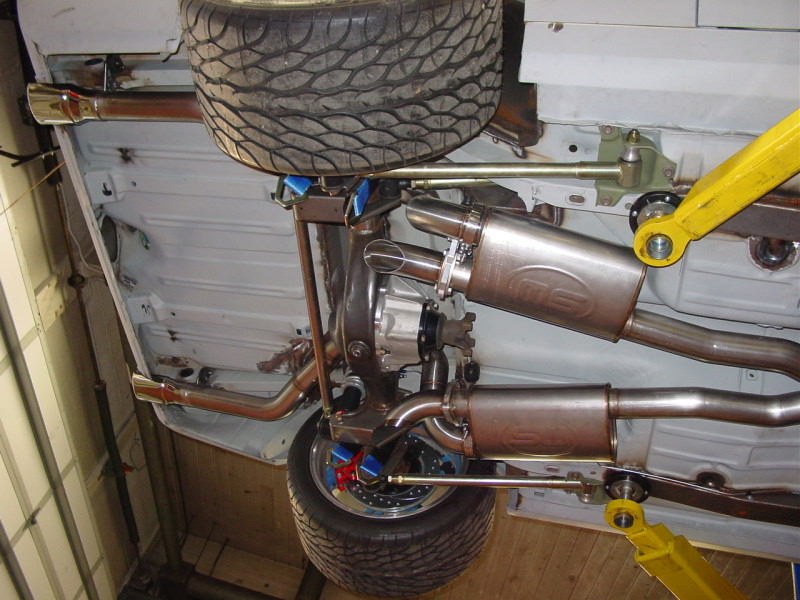
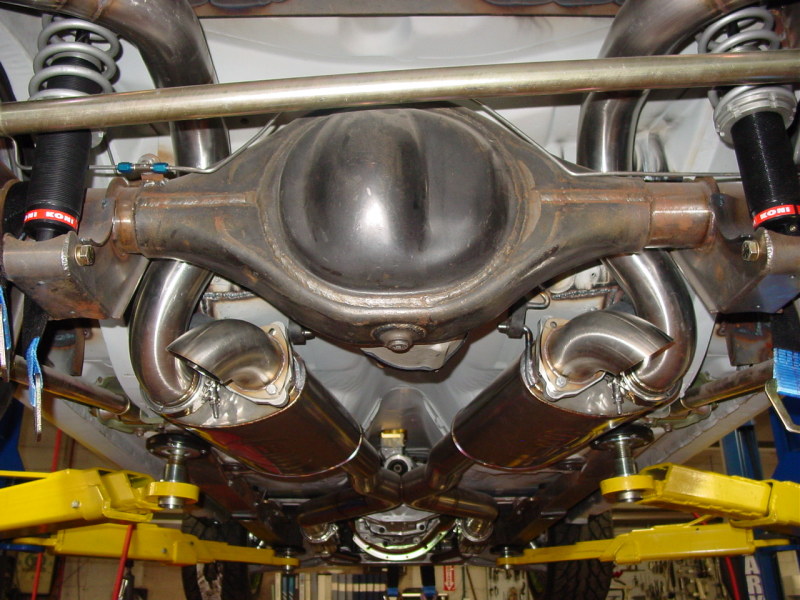
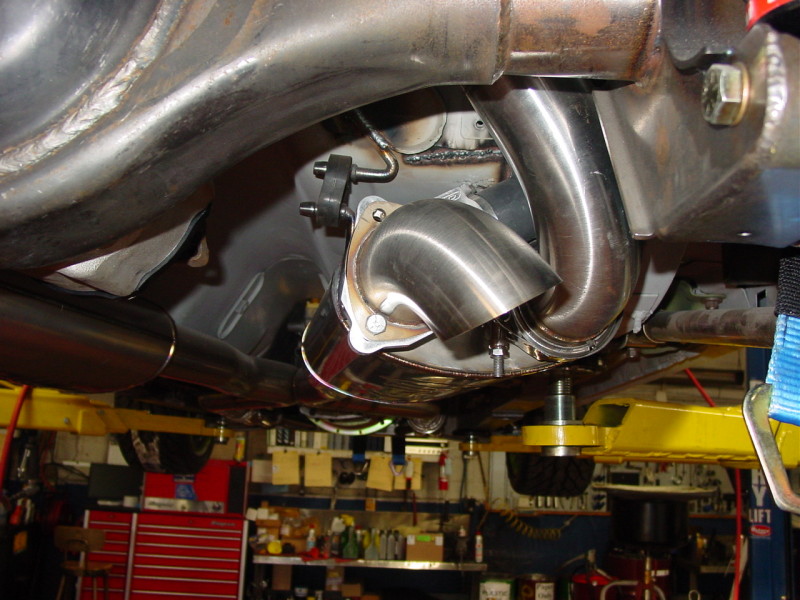
Tailpipes go thru the valance, with a nice bead around the opening.
 Robert Braga
1969 Camaro LS2/T56 D1SC
www.automotivedesigneng.com
US Collision / Mortenson's Custom Touch / DPE Wheel / Tim Bruning / Columbia Parts Company
01-07-2011 #69 Starting The Transformation
- Join Date
- Apr 2010
- Location
- Littleton, CO
- Posts
- 170
Sweet project. I like the inner wheel wells
1969 Chevy Nova - complete rebuild
01-07-2011 #70 Registered User
- Join Date
- Mar 2010
- Location
- Rochester NY
- Posts
- 404
nice project - i really like the exhaust and tail pipes - i'd be your neighbor (of course i'd want a ride)
Don
Grace - 67 Camaro daily driver with upgrades along the way.
https://www.pro-touring.com/showthre...-Camaro-Driver
01-07-2011 #71 Registered User
- Join Date
- Dec 2009
- Posts
- 1,607
Top shelf Robert. Props to you guys...
Ron in SoCal
69 Camaro in progress
http://www.lateral-g.net/forums/showthread.php4?t=31246
Used to be known as flash911
01-07-2011 #72 Full Blown G-Machiner
- Join Date
- Sep 2010
- Location
- alpine ca
- Posts
- 657
you guys do excellent work very nice really like the exhaust
john1972 NOVA SPEED TECH TORQUE ARM AND FRONT ARMS , RUSHFORTH NIGHT TRAINS, DRIVERZ INC
BUILD LINK
https://www.pro-touring.com/showthre...t-(GREY-MATTER)
03-30-2012 #73
Registered User
- Join Date
- Aug 2004
- Location
- Portland,Oregon
- Posts
- 599
Here is a small update on the engine compartment.
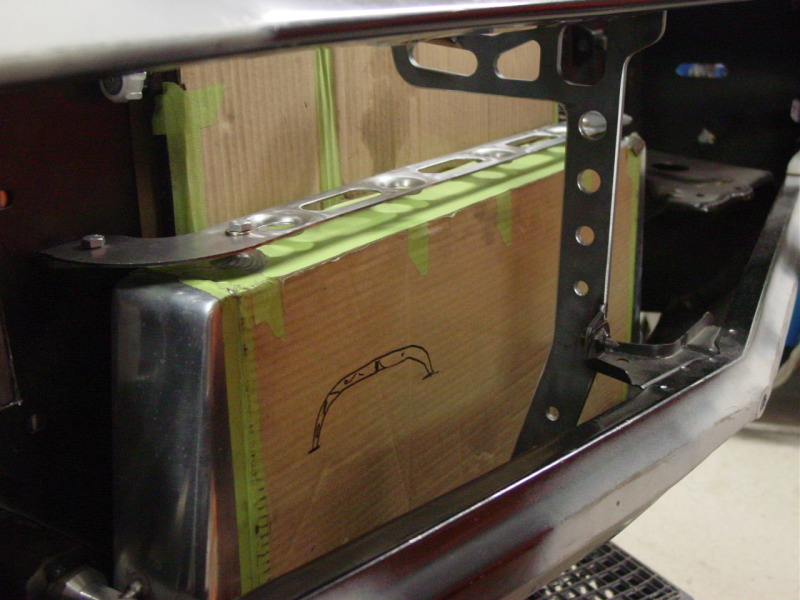
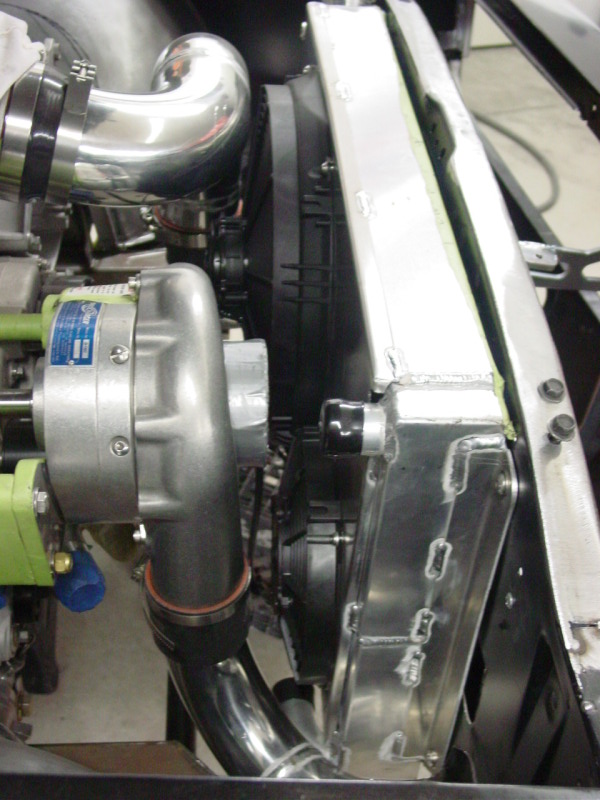
Here is a fan shroud that I had laser cut, and then Tim bent the ends up and welded to the radiator. They are Spal fans and should pull alot of hot air.

I had Tim straighten the radiator support. By straightening it we gained over an inch for the intake on the supercharger.
Also made mounts for the intercooler.
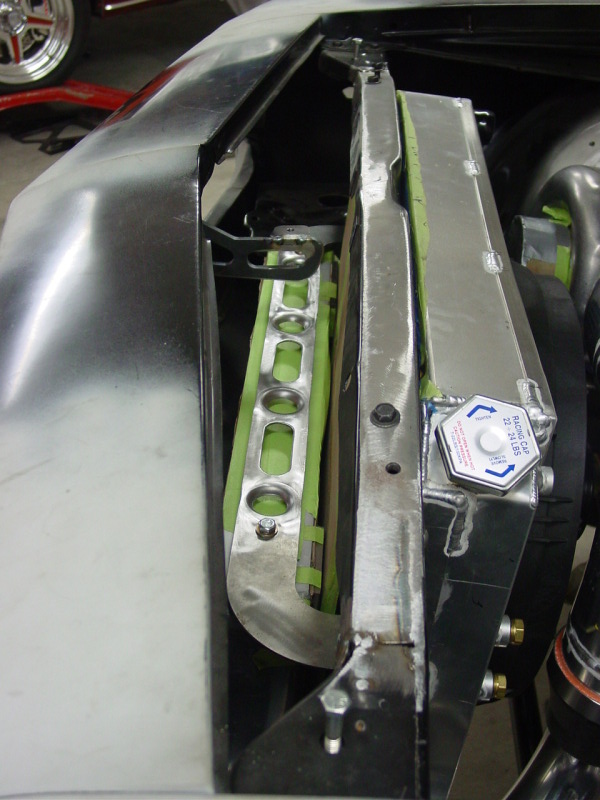
Since the radiator support was made straight the hood latch is going to get modified. I also made a new front end support and had it laser cut.
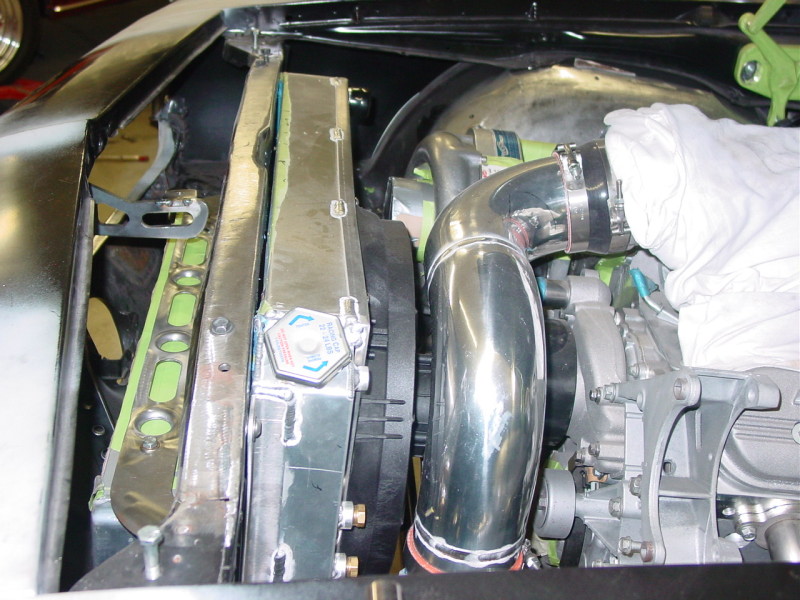
All the intercooler plumbing is now done and it looks real good. Tim is real good at laying stuff out, making sure stuff is symmetrical.
This is why I have two different size fans. The intake on the supercharger needs to go somewhere.
 Robert Braga
1969 Camaro LS2/T56 D1SC
www.automotivedesigneng.com
US Collision / Mortenson's Custom Touch / DPE Wheel / Tim Bruning / Columbia Parts Company
03-30-2012 #74
Registered User
- Join Date
- Aug 2004
- Location
- Portland,Oregon
- Posts
- 599
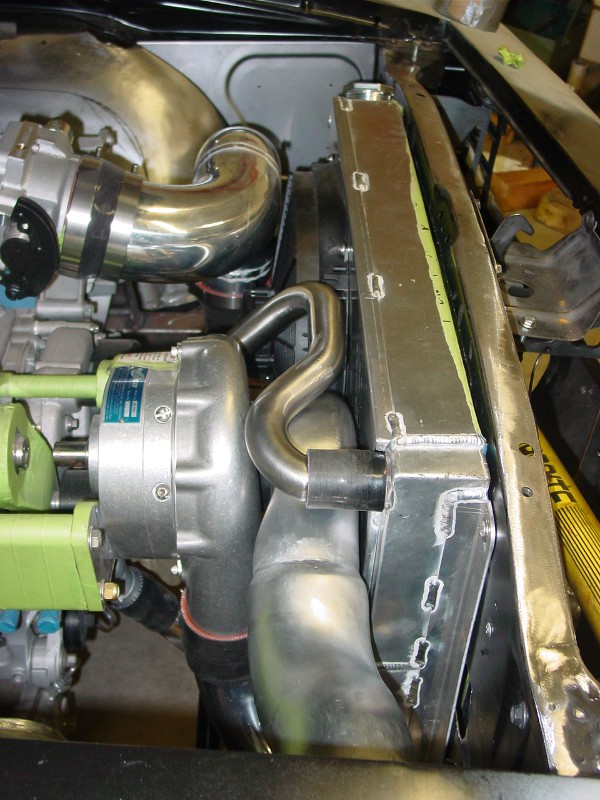
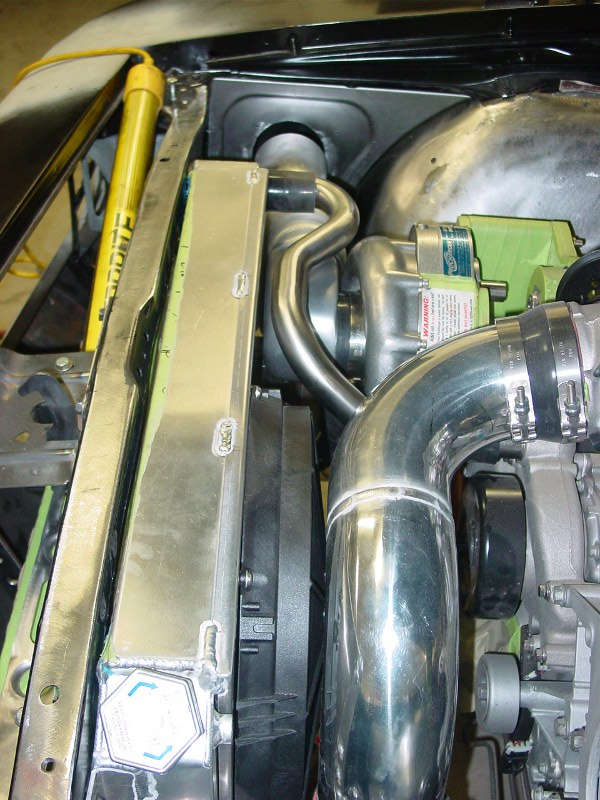
Got the intake for the supercharger and Air filter location finished. Made close out panels for both sides. Air filter will be on the other side of the close out panel.
Made some stainless hard lines for the coolant. It has to go around too many things to do it with a regular hose.
 Robert Braga
1969 Camaro LS2/T56 D1SC
www.automotivedesigneng.com
US Collision / Mortenson's Custom Touch / DPE Wheel / Tim Bruning / Columbia Parts Company
03-30-2012 #75
Registered User
- Join Date
- Aug 2004
- Location
- Portland,Oregon
- Posts
- 599
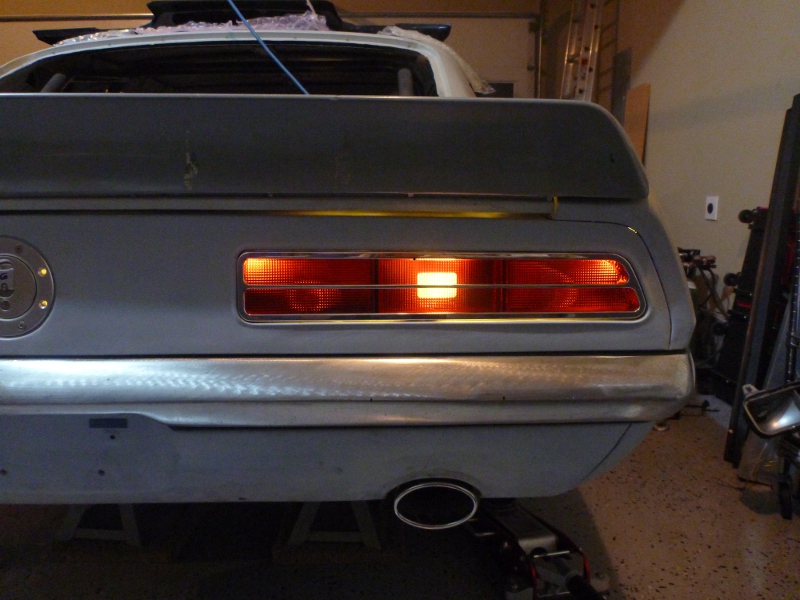
I had these tail lights made for me in April of 2010 just never got around to putting them on the car.
I decided since the exhaust runs out the back of the tail panel its too busy to have a RS reverse light. So I had the combination of the RS tail light with the back up lense.
 Robert Braga
1969 Camaro LS2/T56 D1SC
www.automotivedesigneng.com
US Collision / Mortenson's Custom Touch / DPE Wheel / Tim Bruning / Columbia Parts Company
03-30-2012 #76
Registered User
- Join Date
- Aug 2004
- Location
- Portland,Oregon
- Posts
- 599
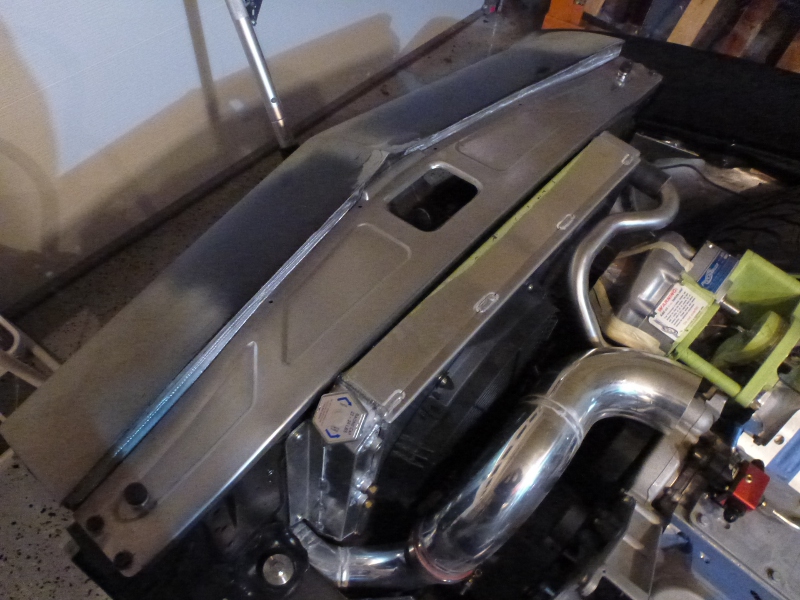
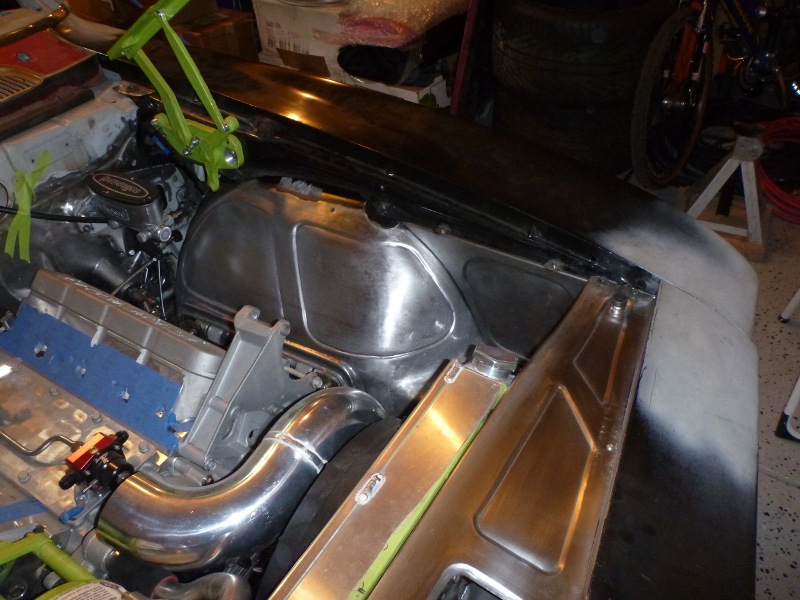
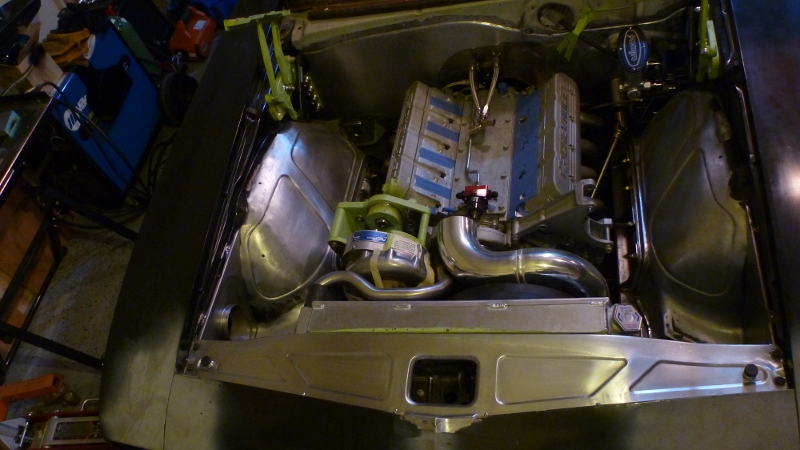
The core support close out panel is done. My inner fenders were done but I had been playing around with the idea of putting some style into them. I decided it needed to be done. It makes everything tie together. Core support and inner fenders match now as well as the side panels.

 Robert Braga
1969 Camaro LS2/T56 D1SC
www.automotivedesigneng.com
US Collision / Mortenson's Custom Touch / DPE Wheel / Tim Bruning / Columbia Parts Company
03-30-2012 #77
Registered User
- Join Date
- Feb 2011
- Location
- dallas, tx
- Posts
- 1,731
did you have to mod the trunk floor to fit the exhaust? if so any pic?
03-30-2012 #78
Registered User
- Join Date
- Aug 2004
- Location
- Portland,Oregon
- Posts
- 599
yes to get a full 3 inch exhaust without putting a dimple in the pipe you have to mod the trunk floor. I'll get a picture of the inside of the trunk soon. Originally Posted by icemanrd19
Robert Braga
1969 Camaro LS2/T56 D1SC
www.automotivedesigneng.com
US Collision / Mortenson's Custom Touch / DPE Wheel / Tim Bruning / Columbia Parts Company
03-30-2012 #79
Registered User
- Join Date
- Aug 2004
- Location
- Portland,Oregon
- Posts
- 599
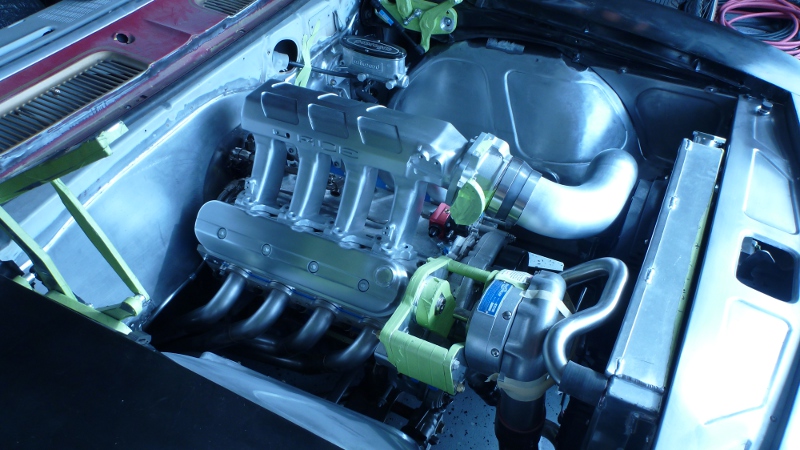
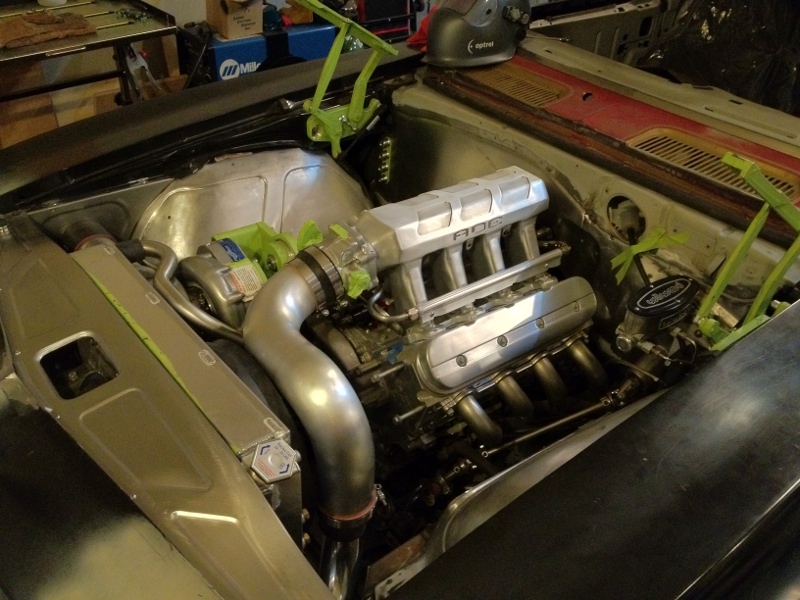
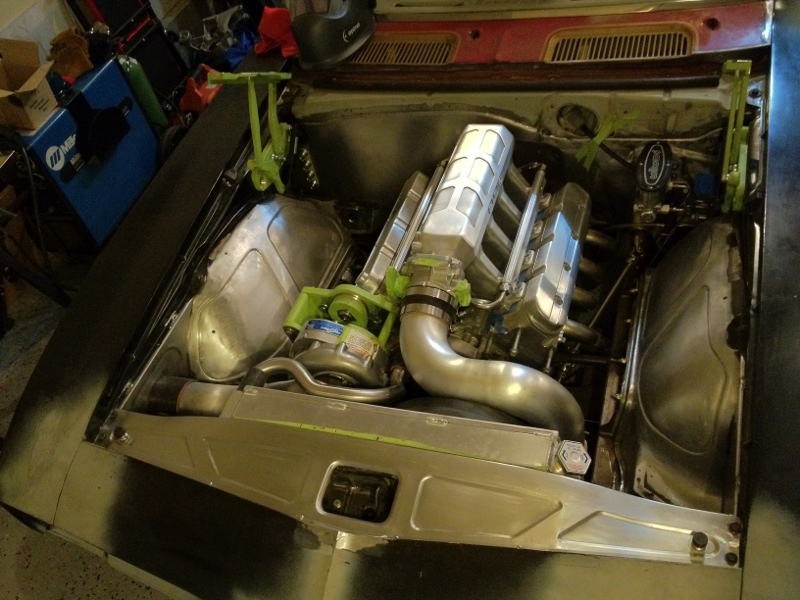
Small update.
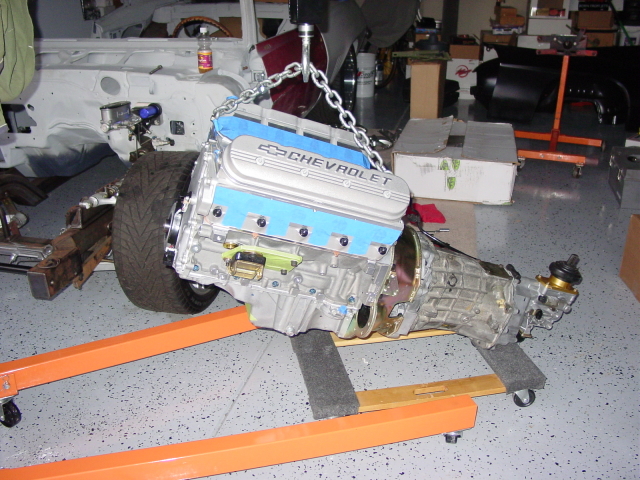
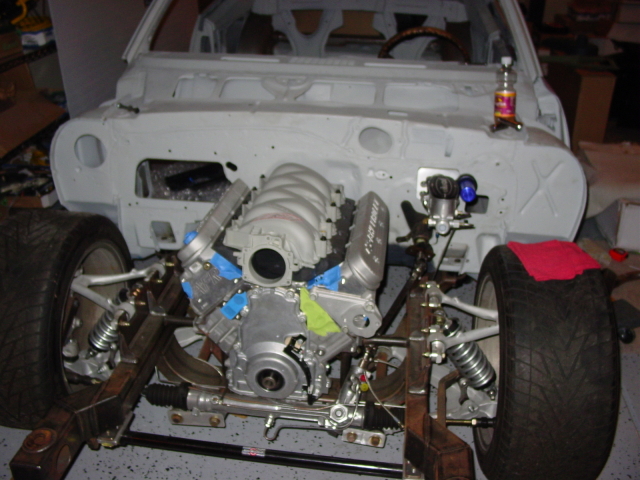
I've been working on the car in my spare time, which isn't much. I decided to remove the FAST intake and do something a bit more custom. While I was at it. I milled the Chevrolet and bowtie off the valve covers, also removed the ribs down the center of the center bolts. Since I was at it I milled the lettering off the fuel rails and cleaned them up also. Fuel lines for the fuel rails are also done.
Here is a before picture of the valve covers.
Here is a before picture of the FAST intake
Here is where I started to get creative. With a factory style intake, it just looks so short in the engine bay. I wanted to take up some of the available real estate. I also tried to tie the intake to the new inner fenders.
My photography skills are lacking. Here is the best I can do to show the outcome.
 Robert Braga
1969 Camaro LS2/T56 D1SC
www.automotivedesigneng.com
US Collision / Mortenson's Custom Touch / DPE Wheel / Tim Bruning / Columbia Parts Company
03-30-2012 #80 Registered User
- Join Date
- Aug 2008
- Location
- Huntsville Alabama
- Posts
- 188
Intake is sick! Nice work! May be a silly question but can u tell me the benefit of having this exhaust vs a cutoff or full exhaust? How is it controlled?
DMC69-69ss350

 Reply With Quote


