


Results 1 to 20 of 62
Thread: 1963 Scout 80 resto-mod
-
06-27-2024 #1

 Registered User
- Join Date
- Jul 2007
- Location
- nw phx
- Posts
- 248
1963 Scout 80 resto-mod
Pics will be slow at first, as there are customer projects in the shop that need more attention than personal toys.
Plans are:
-Slammed to the ground
-4 corner double adjustable coil overs, bags or ridetech shockwaves
-stock appearing interior/exterior
-custom doors ( no windows, solid top, possibly with later model door jambs and hinges )
-chopped top
-4 corner Wilwood big brakes
-fuel fill behind rear taillight
-Dakota Digital gauges
-full LED lighting
-custom paint, possibly silver on sides and red on top
-both full sized top and small 'truck' style top
-vintage air heat/ac
-LS powered
I'm thinking all red interior, red with painted sides and bed liner on the floors all red, same matched colors.
My seats are already covered in greyish leather. So, I'll match the leather color to the paint, and then spray the outside in that color. The outside, the seats, and the leather on the billet steering wheel will all match.
I don't want anything that sticks out or doesn't look right inside of the scout. Want to keep it looking like it came that way.
Here is a potential rending I drew up to get a visual..
...life is too short, live for today, tomorrow isn't guaranteed
-
06-28-2024 #2
Registered User
- Join Date
- Jul 2007
- Location
- nw phx
- Posts
- 248
UPS man delivered:
brakes
4 link
steering parts
coil overs
- - - Updated - - -
went and got a carpet sample.
now will go to the paint store and have it matched so we can start painting interior pieces.
The carpet is darker than GMs red
...life is too short, live for today, tomorrow isn't guaranteed
06-29-2024 #3
Rat Pack Member

- Join Date
- Aug 2002
- Location
- Waleska Ga.
- Posts
- 2,722

Sweet
Looking forward to updatesDavid Sloan
If you’re suggesting sending men with weapons of war to take my weapons of war,then I’m fairly certain that’s what’s called an act of war… and the definition of tyranny.which coincidentally is the reason for the second amendment to begin with!
https://www.pro-touring.com/showthre...ght=fun+camaro
https://www.pro-touring.com/threads/...lcamino-build!
07-04-2024 #4
Registered User
- Join Date
- Jul 2007
- Location
- nw phx
- Posts
- 248
went and got some paint matched to the seat leather and the red carpet.
Going to spray out some panels to see the color better.
- - - Updated - - -
parts have been coming in for this as well.
4 link, coil overs, although i think it will need airride, as itll be too low to steer, gauges, AC parts.. etc
I think by the end of july we should be able to spend some time on this and make it roller...life is too short, live for today, tomorrow isn't guaranteed
07-06-2024 #5
Registered User
- Join Date
- Jul 2007
- Location
- nw phx
- Posts
- 248
Might be settled on this 1956 GM color called India Ivory for the body paint color.
...life is too short, live for today, tomorrow isn't guaranteed
07-10-2024 #6
Registered User
- Join Date
- Jul 2007
- Location
- nw phx
- Posts
- 248
WE have settled on a single turbo, Gen IV 4.8, 4l80e, quick-change rear axle to move this one around.
...life is too short, live for today, tomorrow isn't guaranteed
07-12-2024 #7
Registered User
- Join Date
- Jul 2007
- Location
- nw phx
- Posts
- 248
waiting on some parts from sandblasting
...life is too short, live for today, tomorrow isn't guaranteed
07-14-2024 #8
Registered User
- Join Date
- Jul 2007
- Location
- nw phx
- Posts
- 248
thinking all the suspension/chassis will be red as well.
a mix of powder coating and paint, but I think the red will work well for this build...life is too short, live for today, tomorrow isn't guaranteed
07-15-2024 #9
Registered User
- Join Date
- Jul 2007
- Location
- nw phx
- Posts
- 248
had to adjust the rendering to better match the color of the leather on the seats
much darker, but it a better representation.
The more i look at it, the darker is sexy.
Now need to figure out a pearl to mix in with it. I think itll need a little pop to sparkle in the sun..
...life is too short, live for today, tomorrow isn't guaranteed
07-18-2024 #10
Registered User
- Join Date
- Jul 2007
- Location
- nw phx
- Posts
- 248
The ididit steering column arrived
The gauges are here
The hydroboost unit is here
The wire harness is here
-possibly going to run an aluminum driveshaft, but need to see the specs if it'll hold up to what we are planning...life is too short, live for today, tomorrow isn't guaranteed
07-27-2024 #11
Registered User
- Join Date
- Jul 2007
- Location
- nw phx
- Posts
- 248
Started working on the chassis and the body modifications needed to get this thing on Terra Firma..
The trans am wheel is just sitting there to get an idea how small 16s look
Monday ill pick up some 3x3 tubing to build the rear frame section to allow the axle to travel that high up into the wheel well.
Once that is tacked in, we'll move to the fitting the S10 suspension to the front frame rails.
Already ordered up the air ride parts needed be able to make the chassis 'lift' so in a week or two we should be able to get this chassis on the frame rack to ensure square/straightness/level etc.
...life is too short, live for today, tomorrow isn't guaranteed
07-27-2024 #12 Registered User
- Join Date
- Dec 2004
- Location
- California
- Posts
- 794
Glad to see another Scout project. I have a 79 Scout 2 that I have heavy plans for, I want to put my Scout body on a HMMWV chassis. I have everything to do it, except for the space and time. Good luck with the progress on this project.
07-28-2024 #13
Registered User
- Join Date
- Jul 2007
- Location
- nw phx
- Posts
- 248
Redid the rendering this morning, and added the Company logos for some of the parts being used on this build.
...life is too short, live for today, tomorrow isn't guaranteed
07-29-2024 #14 Registered User
- Join Date
- Jun 2012
- Location
- South Lyon, MI
- Posts
- 1,244
That body looks very clean. Good find.
Bill Harvey
Scope Creep - 1974 Nova - https://www.pro-touring.com/showthre...rit-of-America
Family Fun - 1955 Belair - https://www.pro-touring.com/showthre...hter-55-Belair
07-31-2024 #15
Registered User
- Join Date
- Jul 2007
- Location
- nw phx
- Posts
- 248
 Originally Posted by cornfedbill

Thank you. was a near perfect rust free body with minimal body work needed...life is too short, live for today, tomorrow isn't guaranteed
08-03-2024 #16
Registered User
- Join Date
- Jul 2007
- Location
- nw phx
- Posts
- 248
the new frame material is here
the main components for the air ride is here
waiting on a few replies for double adjustable shocks for front and rear
Have the general idea of the rear back half designed, just need to start cutting metal now.
Depending on Mother Nature, might have the chassis tacked together this weekend....life is too short, live for today, tomorrow isn't guaranteed
08-05-2024 #17
Registered User
- Join Date
- Jul 2007
- Location
- nw phx
- Posts
- 248
I prepped my "CAD" table and started building to scale, my rear back-half.
Using a 1:1 scale my chassis is 3x3 and I laid it out how to best be used for the bag on bars suspension and the rest of the parts that need to be inside of it.
IE fuel tank, air tank, compressors, floor bracing ect.
Once I got everything lined up to where and how it should look, fit and work, I made some templates for some CNC cut brackets for the lower 4 link bars, and the upper air bag mounts. Hopefully these are done this week. I used oval holes instead of the normal circles for ‘speed holes’.. I might use this oval theme throughout the build.
I’ll start piecing together the back half and get them all tacked together.
The front ‘s10’ suspension portion/clip/frontend needs to be clearance for the air bags, and then it can be mocked up under the front fenders to see where the frame splicing will occur. I will install the front wheels, upper/lower control arms onto the frame piece to make sure the wheels are centered in the wells. I build them so when they are aired out the wheels are centered. I don’t really care if they’re not centered when driving down the road. It’s sitting, aired out, that matters to me.
Enjoy the pics…
...life is too short, live for today, tomorrow isn't guaranteed
08-05-2024 #18
Registered User
- Join Date
- Jul 2007
- Location
- nw phx
- Posts
- 248
I prepped my "CAD" table and started building to scale, my rear back-half.
Using a 1:1 scale my chassis is 3x3 and I laid it out how to best be used for the bag on bars suspension and the rest of the parts that need to be inside of it.
IE fuel tank, air tank, compressors, floor bracing ect.
Once I got everything lined up to where and how it should look, fit and work, I made some templates for some CNC cut brackets for the lower 4 link bars, and the upper air bag mounts. Hopefully these are done this week. I used oval holes instead of the normal circles for ‘speed holes’.. I might use this oval theme throughout the build.
I’ll start piecing together the back half and get them all tacked together.
The front ‘s10’ suspension portion/clip/frontend needs to be clearance for the air bags, and then it can be mocked up under the front fenders to see where the frame splicing will occur. I will install the front wheels, upper/lower control arms onto the frame piece to make sure the wheels are centered in the wells. I build them so when they are aired out the wheels are centered. I don’t really care if they’re not centered when driving down the road. It’s sitting, aired out, that matters to me.
Enjoy the pics…
...life is too short, live for today, tomorrow isn't guaranteed
08-05-2024 #19 Registered User
- Join Date
- Sep 2009
- Posts
- 2,996
Looks like a fun project! I'm planning a 4 link project for one of my next upgrades. Are you buying a kit for your rear suspension, or are you scratch building it? If scratch, what calculators did you use to come up with the bar lengths, and etc.
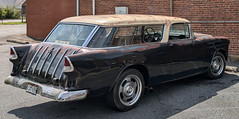
1955 Nomad project LC9, 4L80e, C5 brakes, Vision wheels
1968 Camaro 6.2 w/ LSA, TR6060-Magnum hybrid and etc SOLD
1976 T/A LS1 6 Speed, and etc. SOLD
Follow me on Instagram: ryeguy2006a
08-05-2024 #20
Registered User
- Join Date
- Jul 2007
- Location
- nw phx
- Posts
- 248
Originally Posted by ryeguy2006a
i build all my own since like 2004.
bottom bars figure out a good length that fits your chassis.
top bars are about 70% the length of the lower
Thats the easy part.
The rest is your pinion angle, and if youre going triangulated, parallel, pan hard bar, watts link etc.
And then coil over, air ride, hydraulics.
there is so much info on the net, it just takes a bit or research...life is too short, live for today, tomorrow isn't guaranteed

 Reply With Quote


