


Results 1 to 17 of 17
-
07-13-2026 #1
 Registered User
- Join Date
- Aug 2007
- Location
- Albemarle, NC
- Posts
- 1,170

the trash am: 1981 firebird grm challenge build and drivabeater
Not quite sure where to start this one. It’s a build thread with a back story…..
Ill start at back story. if you just want build thread, skip ahead. Or, in all honesty, with the rambling nature of most my posts, you may want to skip this thread entirely. Up to you!
Anyway, I’ve always kinda wanted a firebird/trans am. Second gen to be exact. In high school, my first serious girlfriend had an uncle who was locked up. Behind her trailer he had left his 76 formula 400. Yellow, window louvers, all the stickers and spoilers. Looked like this, only abandoned in a trailer park.
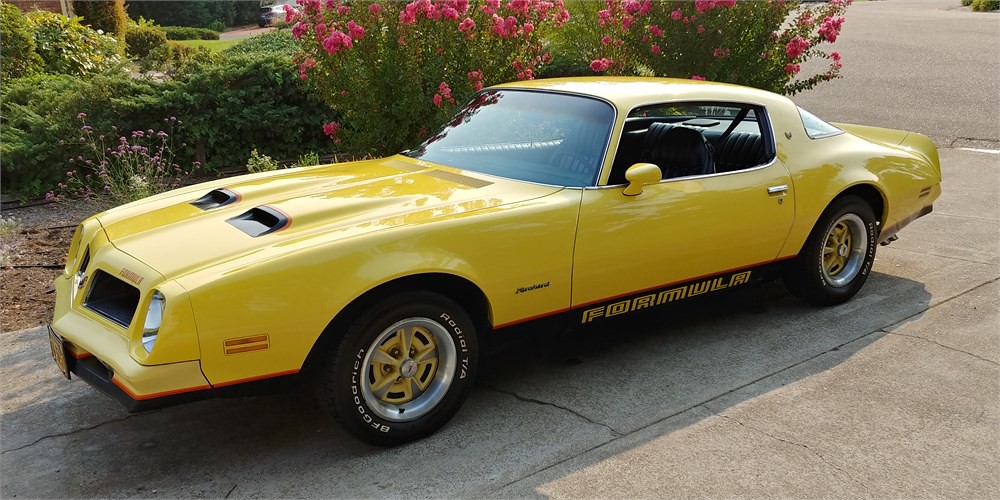 3442f631-9788-449e-b8c8-14b410e87a19_largesize by Michael Crawford, on Flickr
Theres some good memories of being a 16 year old mopar guy in that trailer park….
Anyway, down the road was a 79-81 trans am, similar shade of yellow. Fat cragars hanging out the rear wheelwells, side pipes, purple window tint, window louvers, and a for sale sign. I tried for month to get ahold of the guy with no answer. God that car was awesome.
Anyway, always wanted to find a later second gen. not a nice one, a scruffy trailer park rat like the ones from my youth. A drivabeater like the cars I’ve traditionally built would suffice as well, just in a slightly different cosmetic vein.
A few months ago, Kevin offered up his numbers matching 71 formula firebird to me.
https://grassrootsmotorsports.com/fo.../285072/page1/
after a lot of soul searching, I’ve decided that its time to move that car on. It deserves a full resto, not a rat-so.
Part of that soul searching made me realize that I’ve never actually DRIVEN a second gen f body. That may present a problem. Im not sure if I want to own one in reality, or just in my mind.
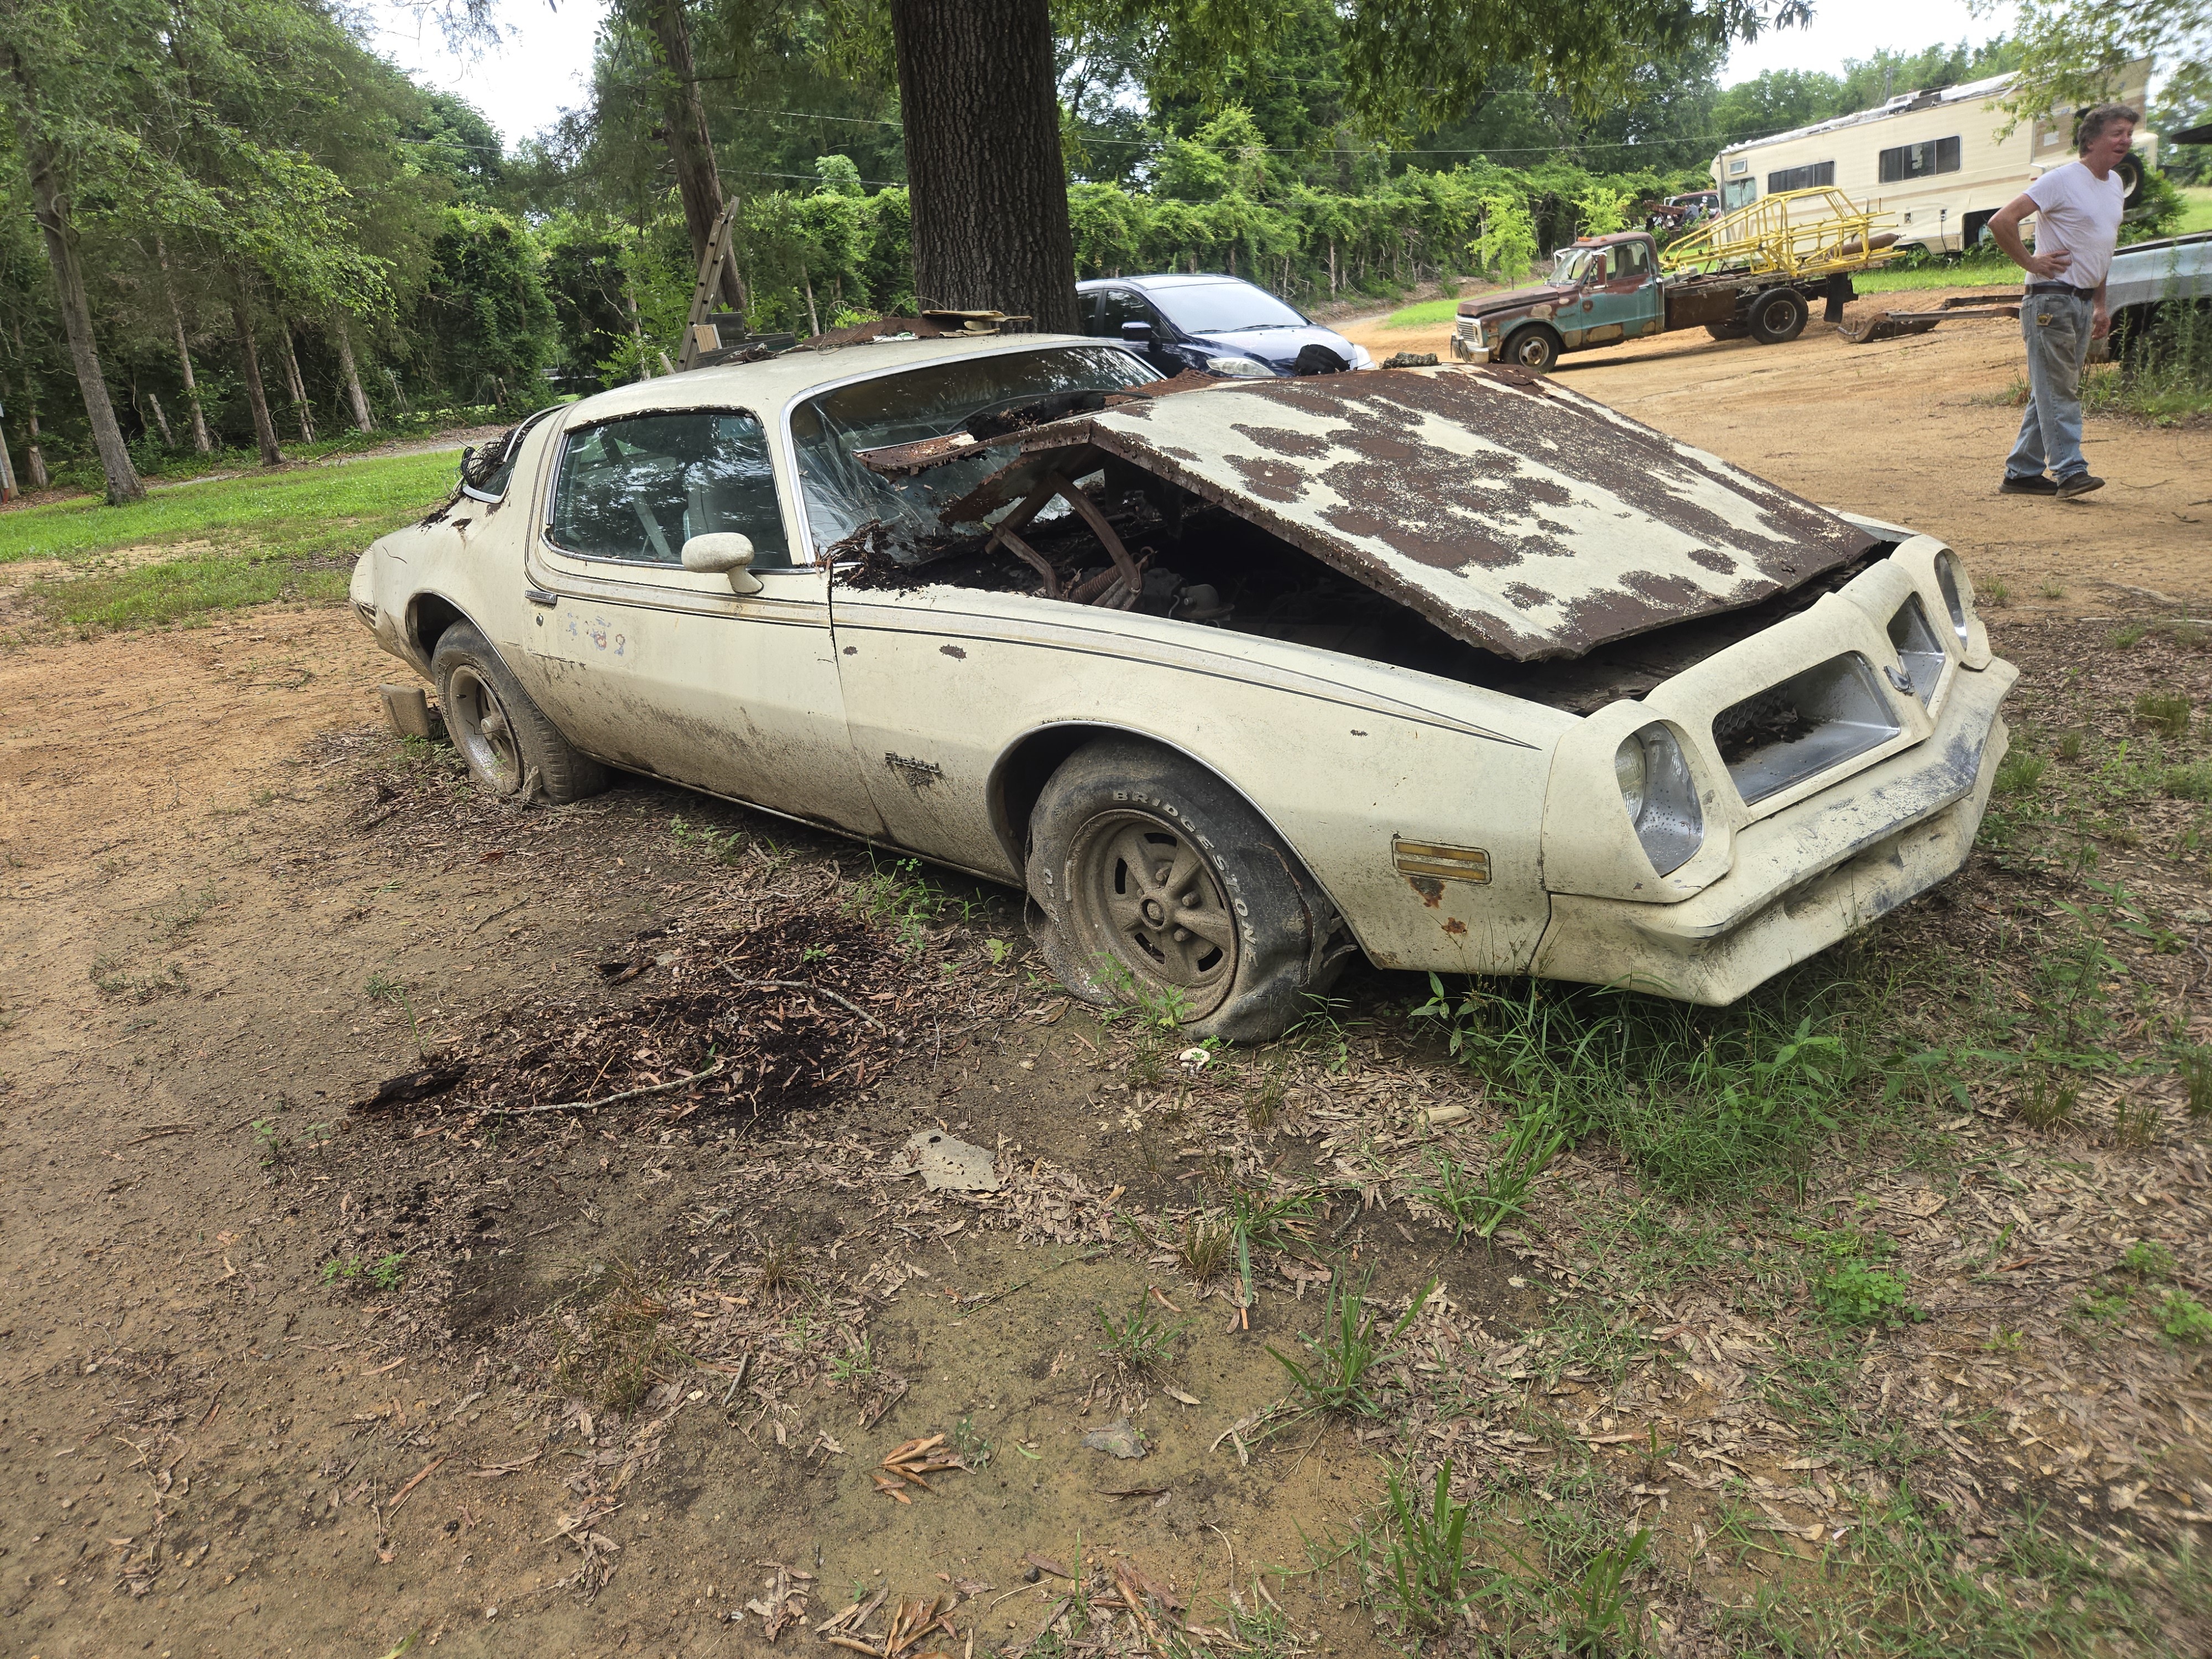
So, a plan was hatched. Upon discussion with the braintrust, we decided that the second best option was to find a decent roller that I could put my 6.0 into, and drive around a bit. Something that didn’t need extensive metalwork, or a whole buttload of effort to obtain a minimum viable product for me to try out firebird ownership. I still had my heart set on a 76. So I went and looked at one that looked like it may be a candidate in mt pleasant. Was listed months ago for 1200, and it took the guy weeks to respond. But he eventually did.
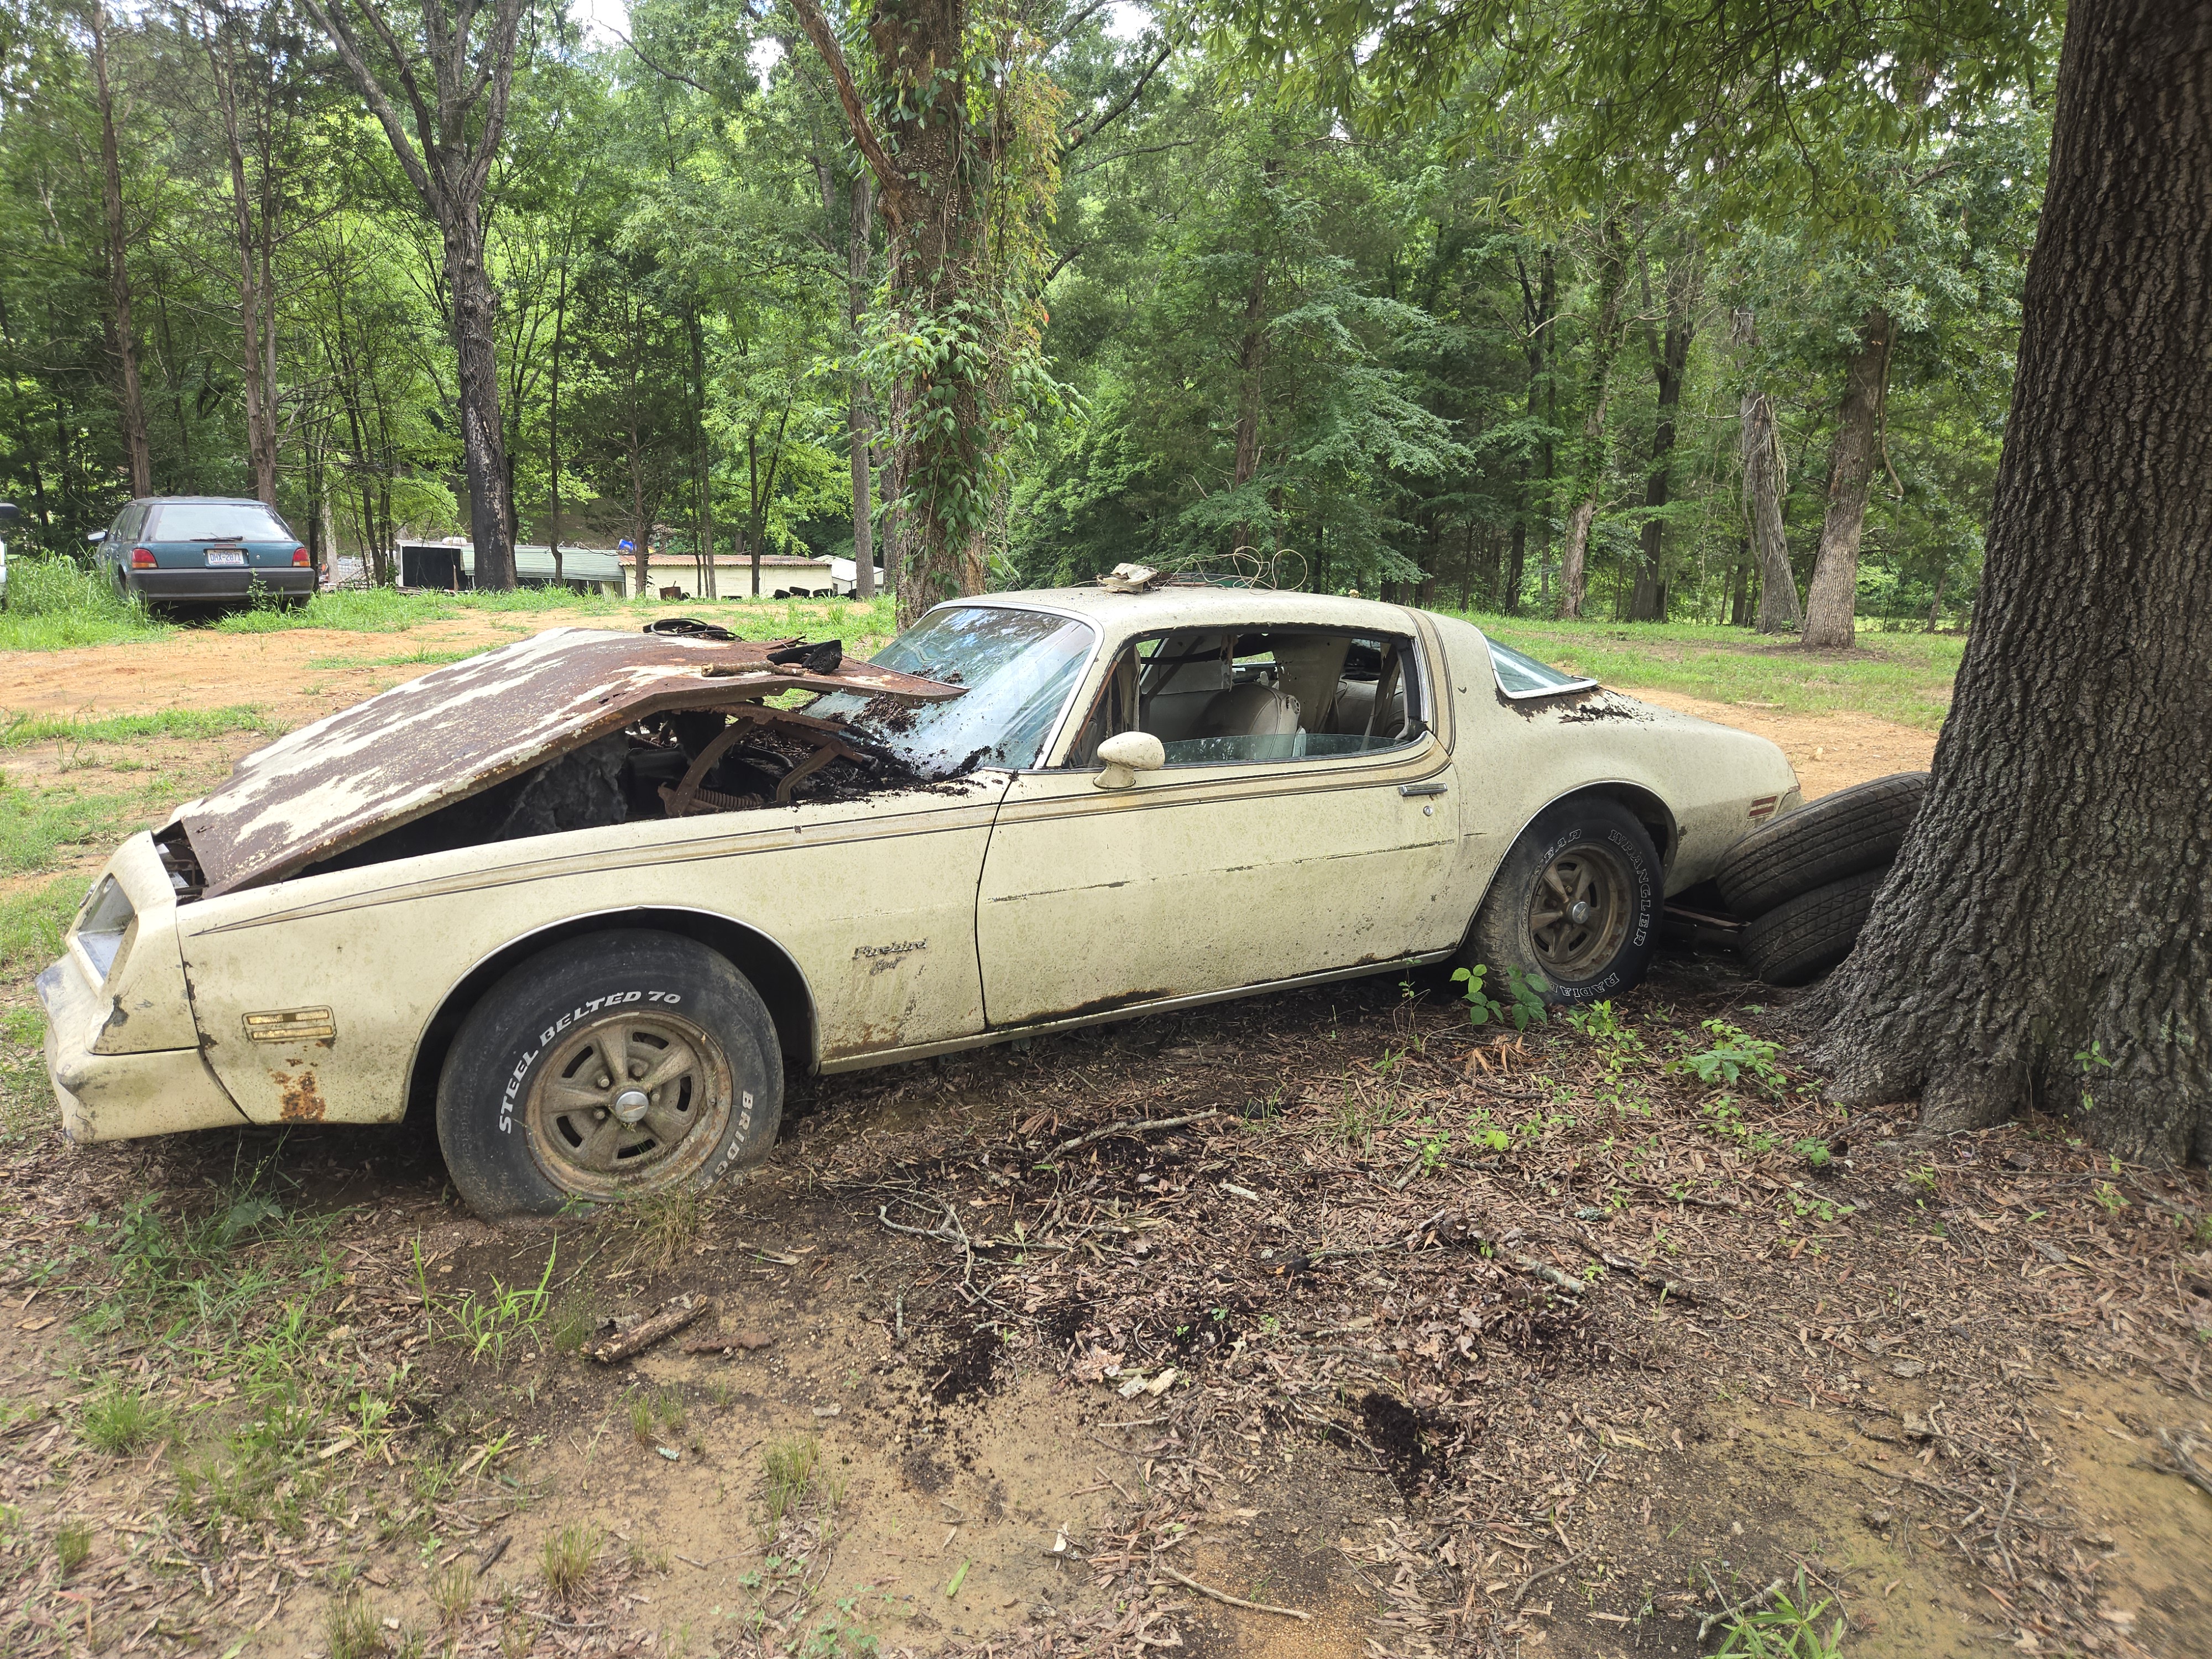 20260628_151527 by Michael Crawford, on Flickr
 20260628_151543 by Michael Crawford, on Flickr
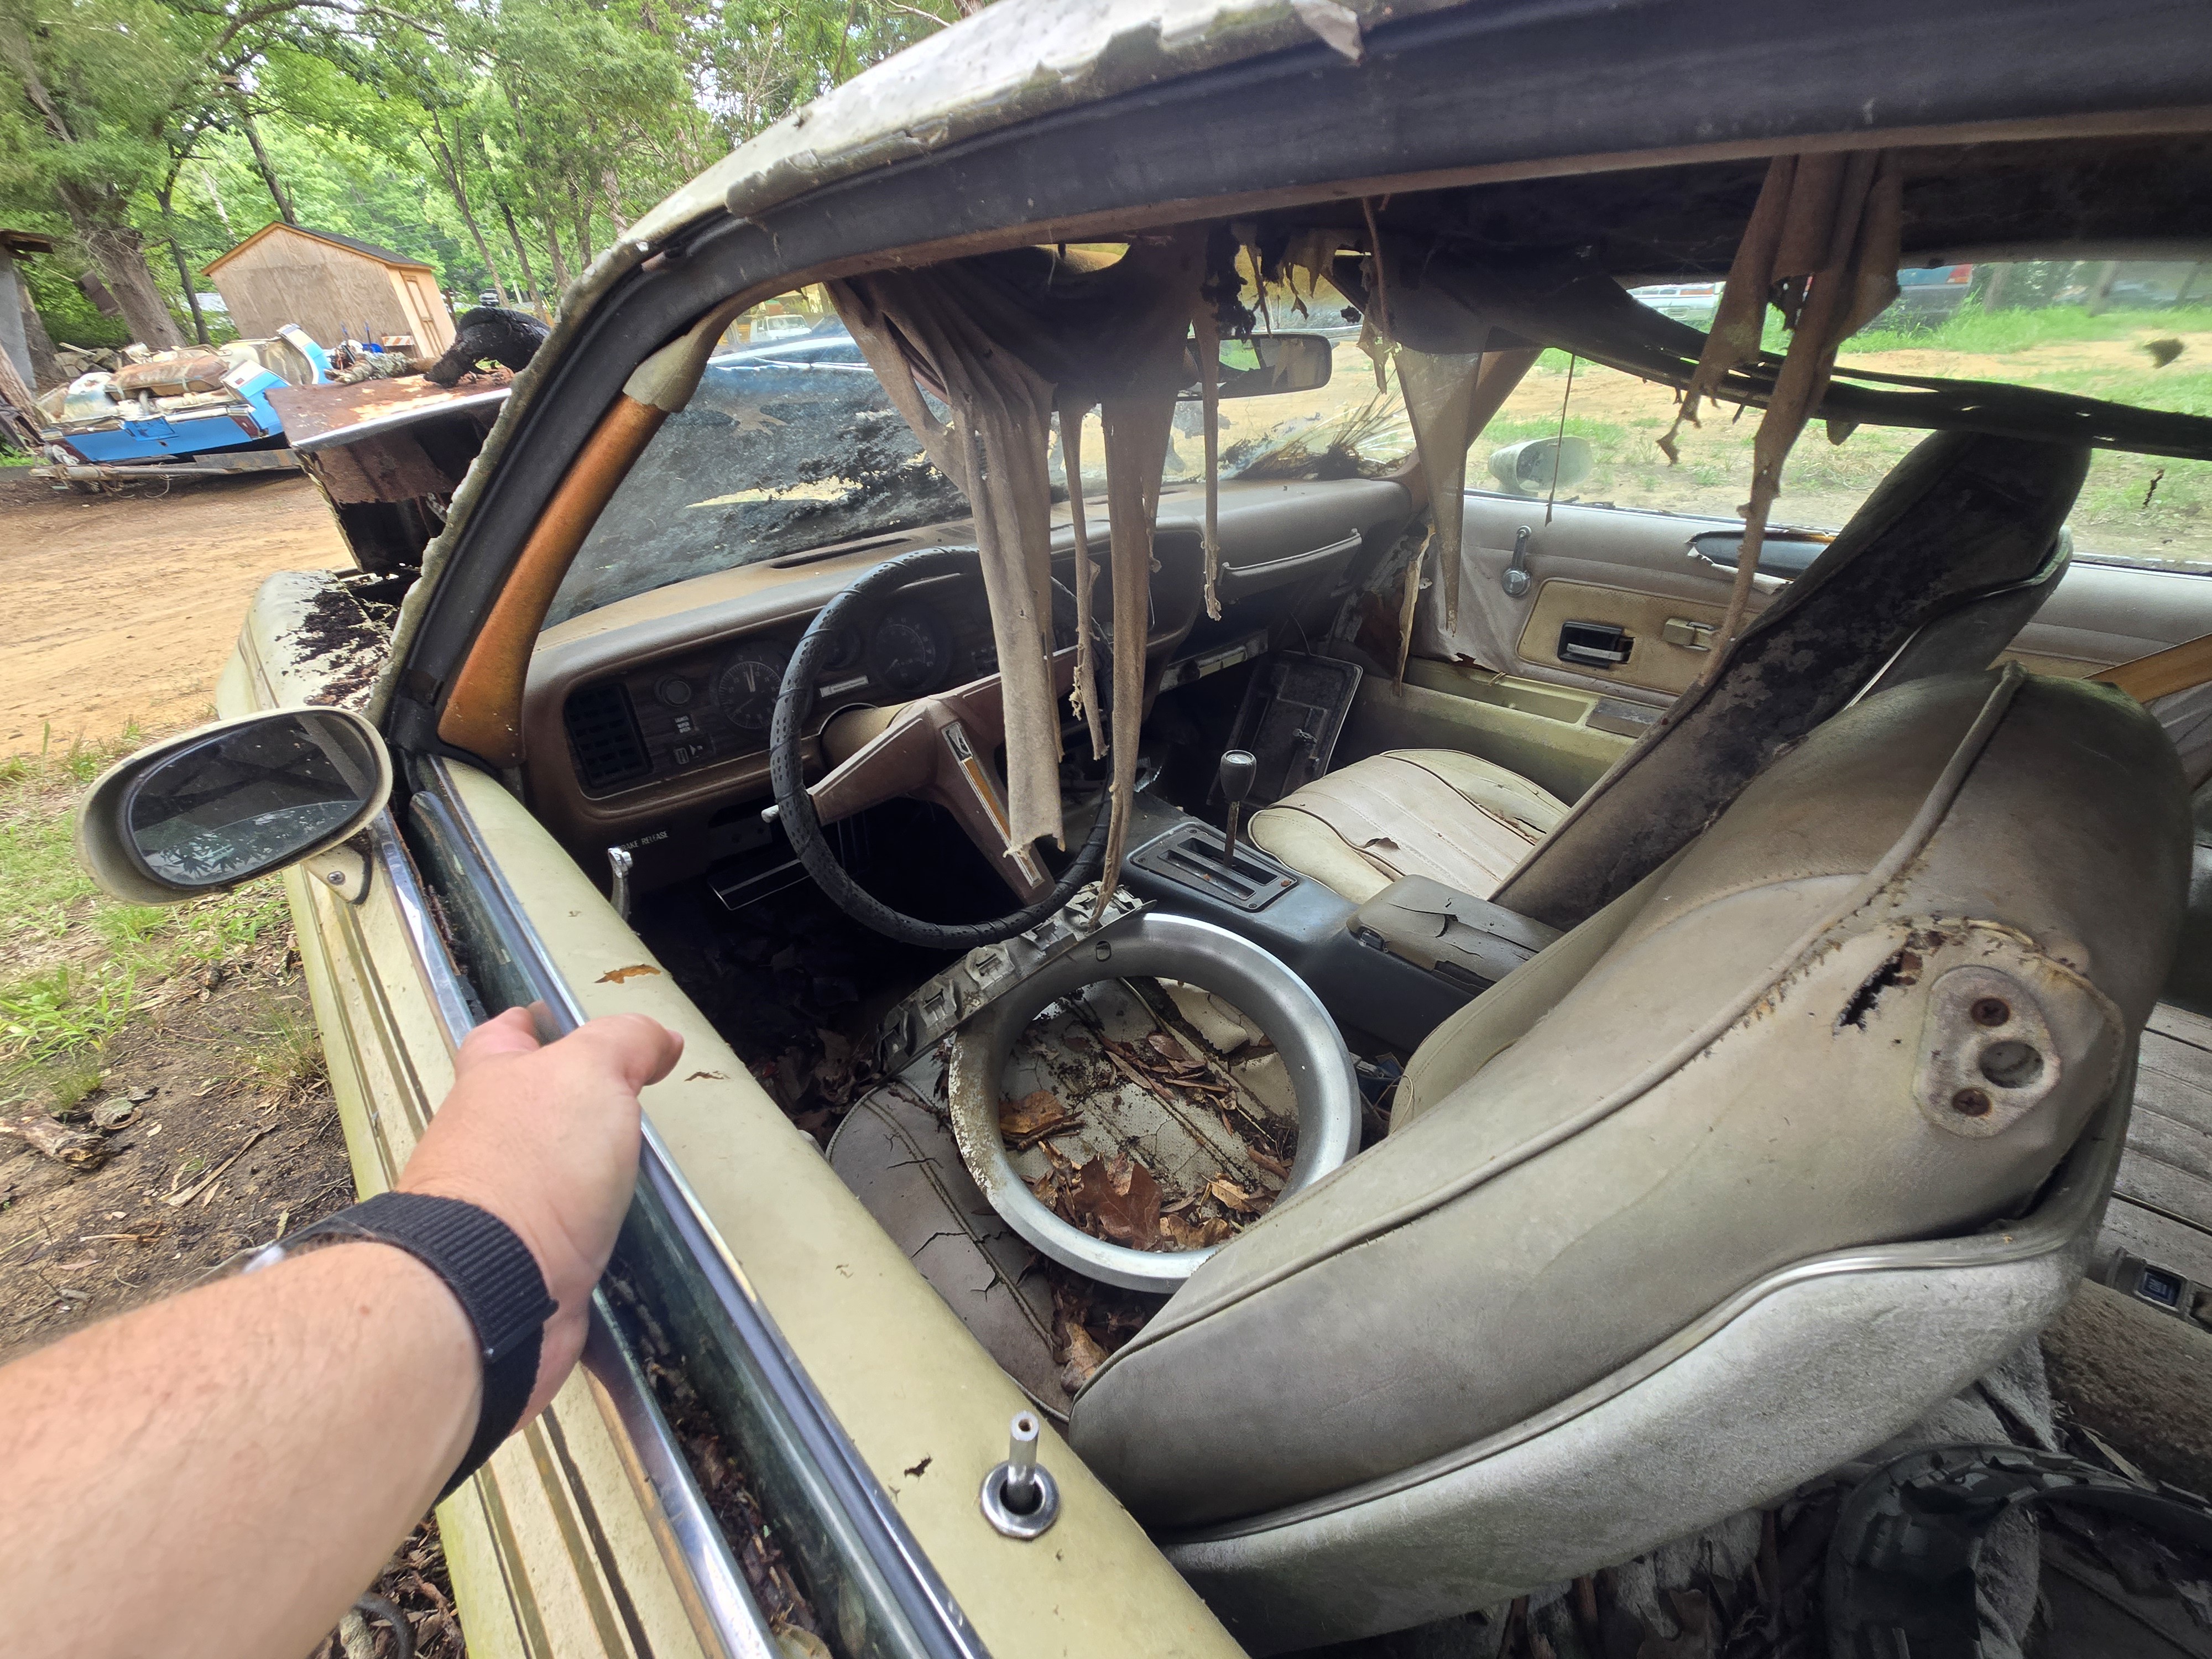 20260628_151706 by Michael Crawford, on Flickr
It was way rougher than I wanted to start with. And no title. But it was a complete 76. And it made my pants tight. The front end, woodgrain dash, rally wheels, d98stripe, the whole package just makes me happy to look at. So I bought it for 550. had runion pick it up and drop it off at my dads, which made firebird number 4, and parts car number 3 in hand right now. Granted, the 71 and 74 will go away together, the 79 is a mistake I should have never bought and really only has a steering column and ac parts I can use…..
Anyway, I came across this shortly afterwards.
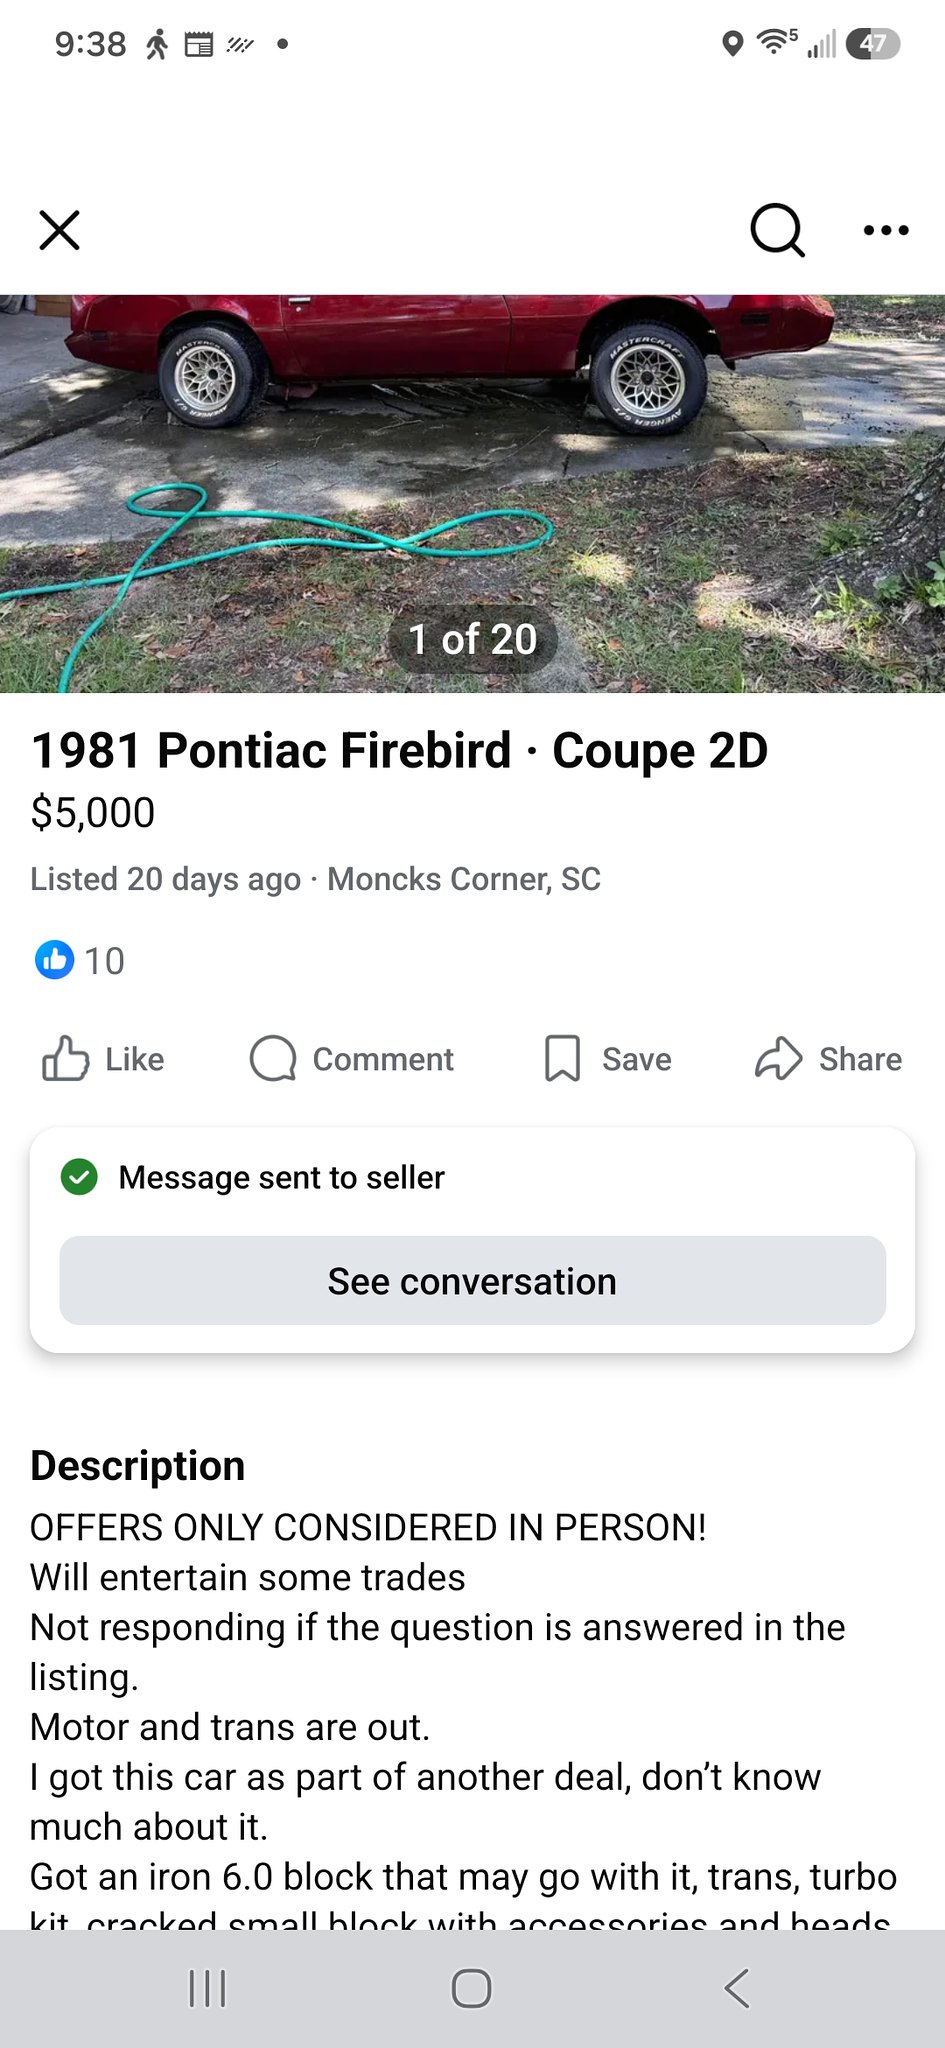 Screenshot_20260711_213807_Facebook by Michael Crawford, on Flickr
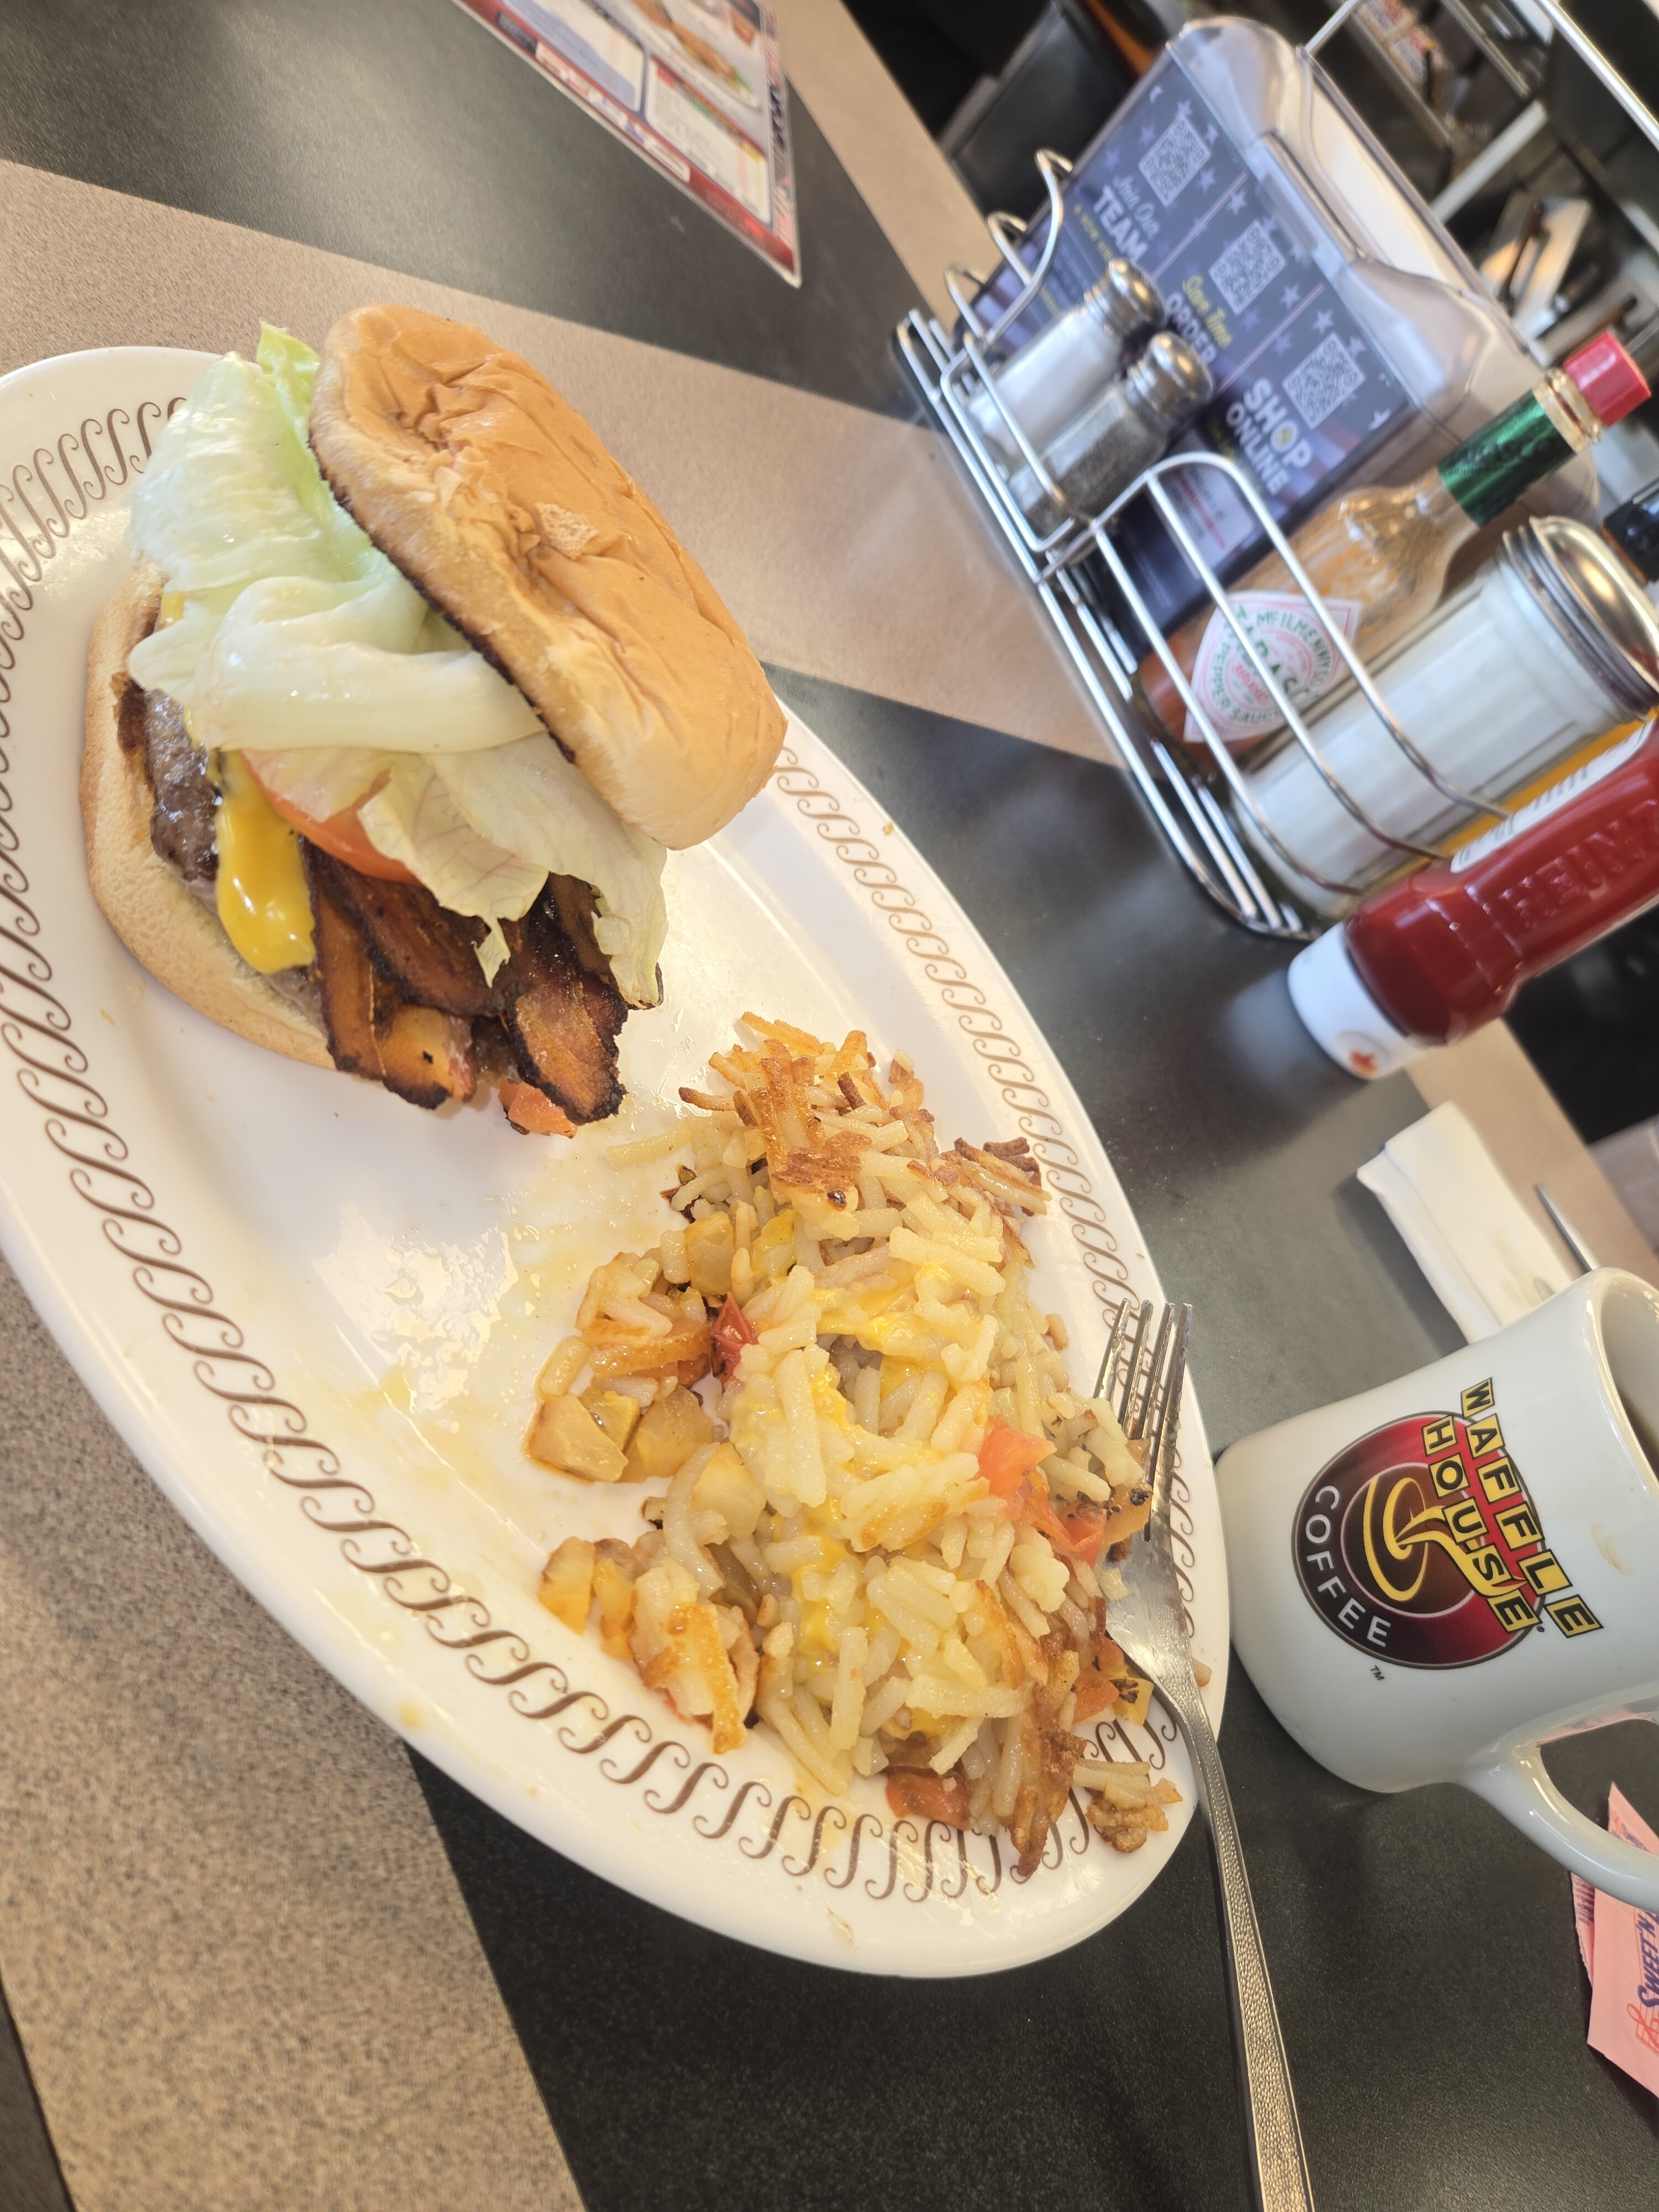
Its an 81, which has to be my least favorite year. It was way more than I wanted to spend, but I messaged anyway. The alligator skin interior beckoned to me. We talked, and he assured me that it was rust free and straight. Kid was early 20s, and the car came with the house he bought as the guy couldn’t take it with him. Story was that the PO froze the 400 up and cracked the block, and decided to go turbo 6.0 but never finished. Car had aftermarket gauges, subframe connectors, slapper bars, new tires and wheels, fiberglass hood, bunch of stereo equipment, and supposedly a tko500. It was good enough for me to be willing to rent a uhaul and travel 4 hours away with a 9mm and 5k in my pocket on Saturday morning. Except that the night before, we got hit by a storm that kicked the crap out of our town. Trees down, windows blown out, power out for most the town, etc. so I had no AC, no CPAP, etc. 2-3 very interrupted and poor hours of sleep later, I left at 4 am for Charleston. I told the guy that id be there at 9:30, so I stopped at waffle house for a very late dinner (or very early?) and a lot of coffee.
 20260711_071621 by Michael Crawford, on Flickr
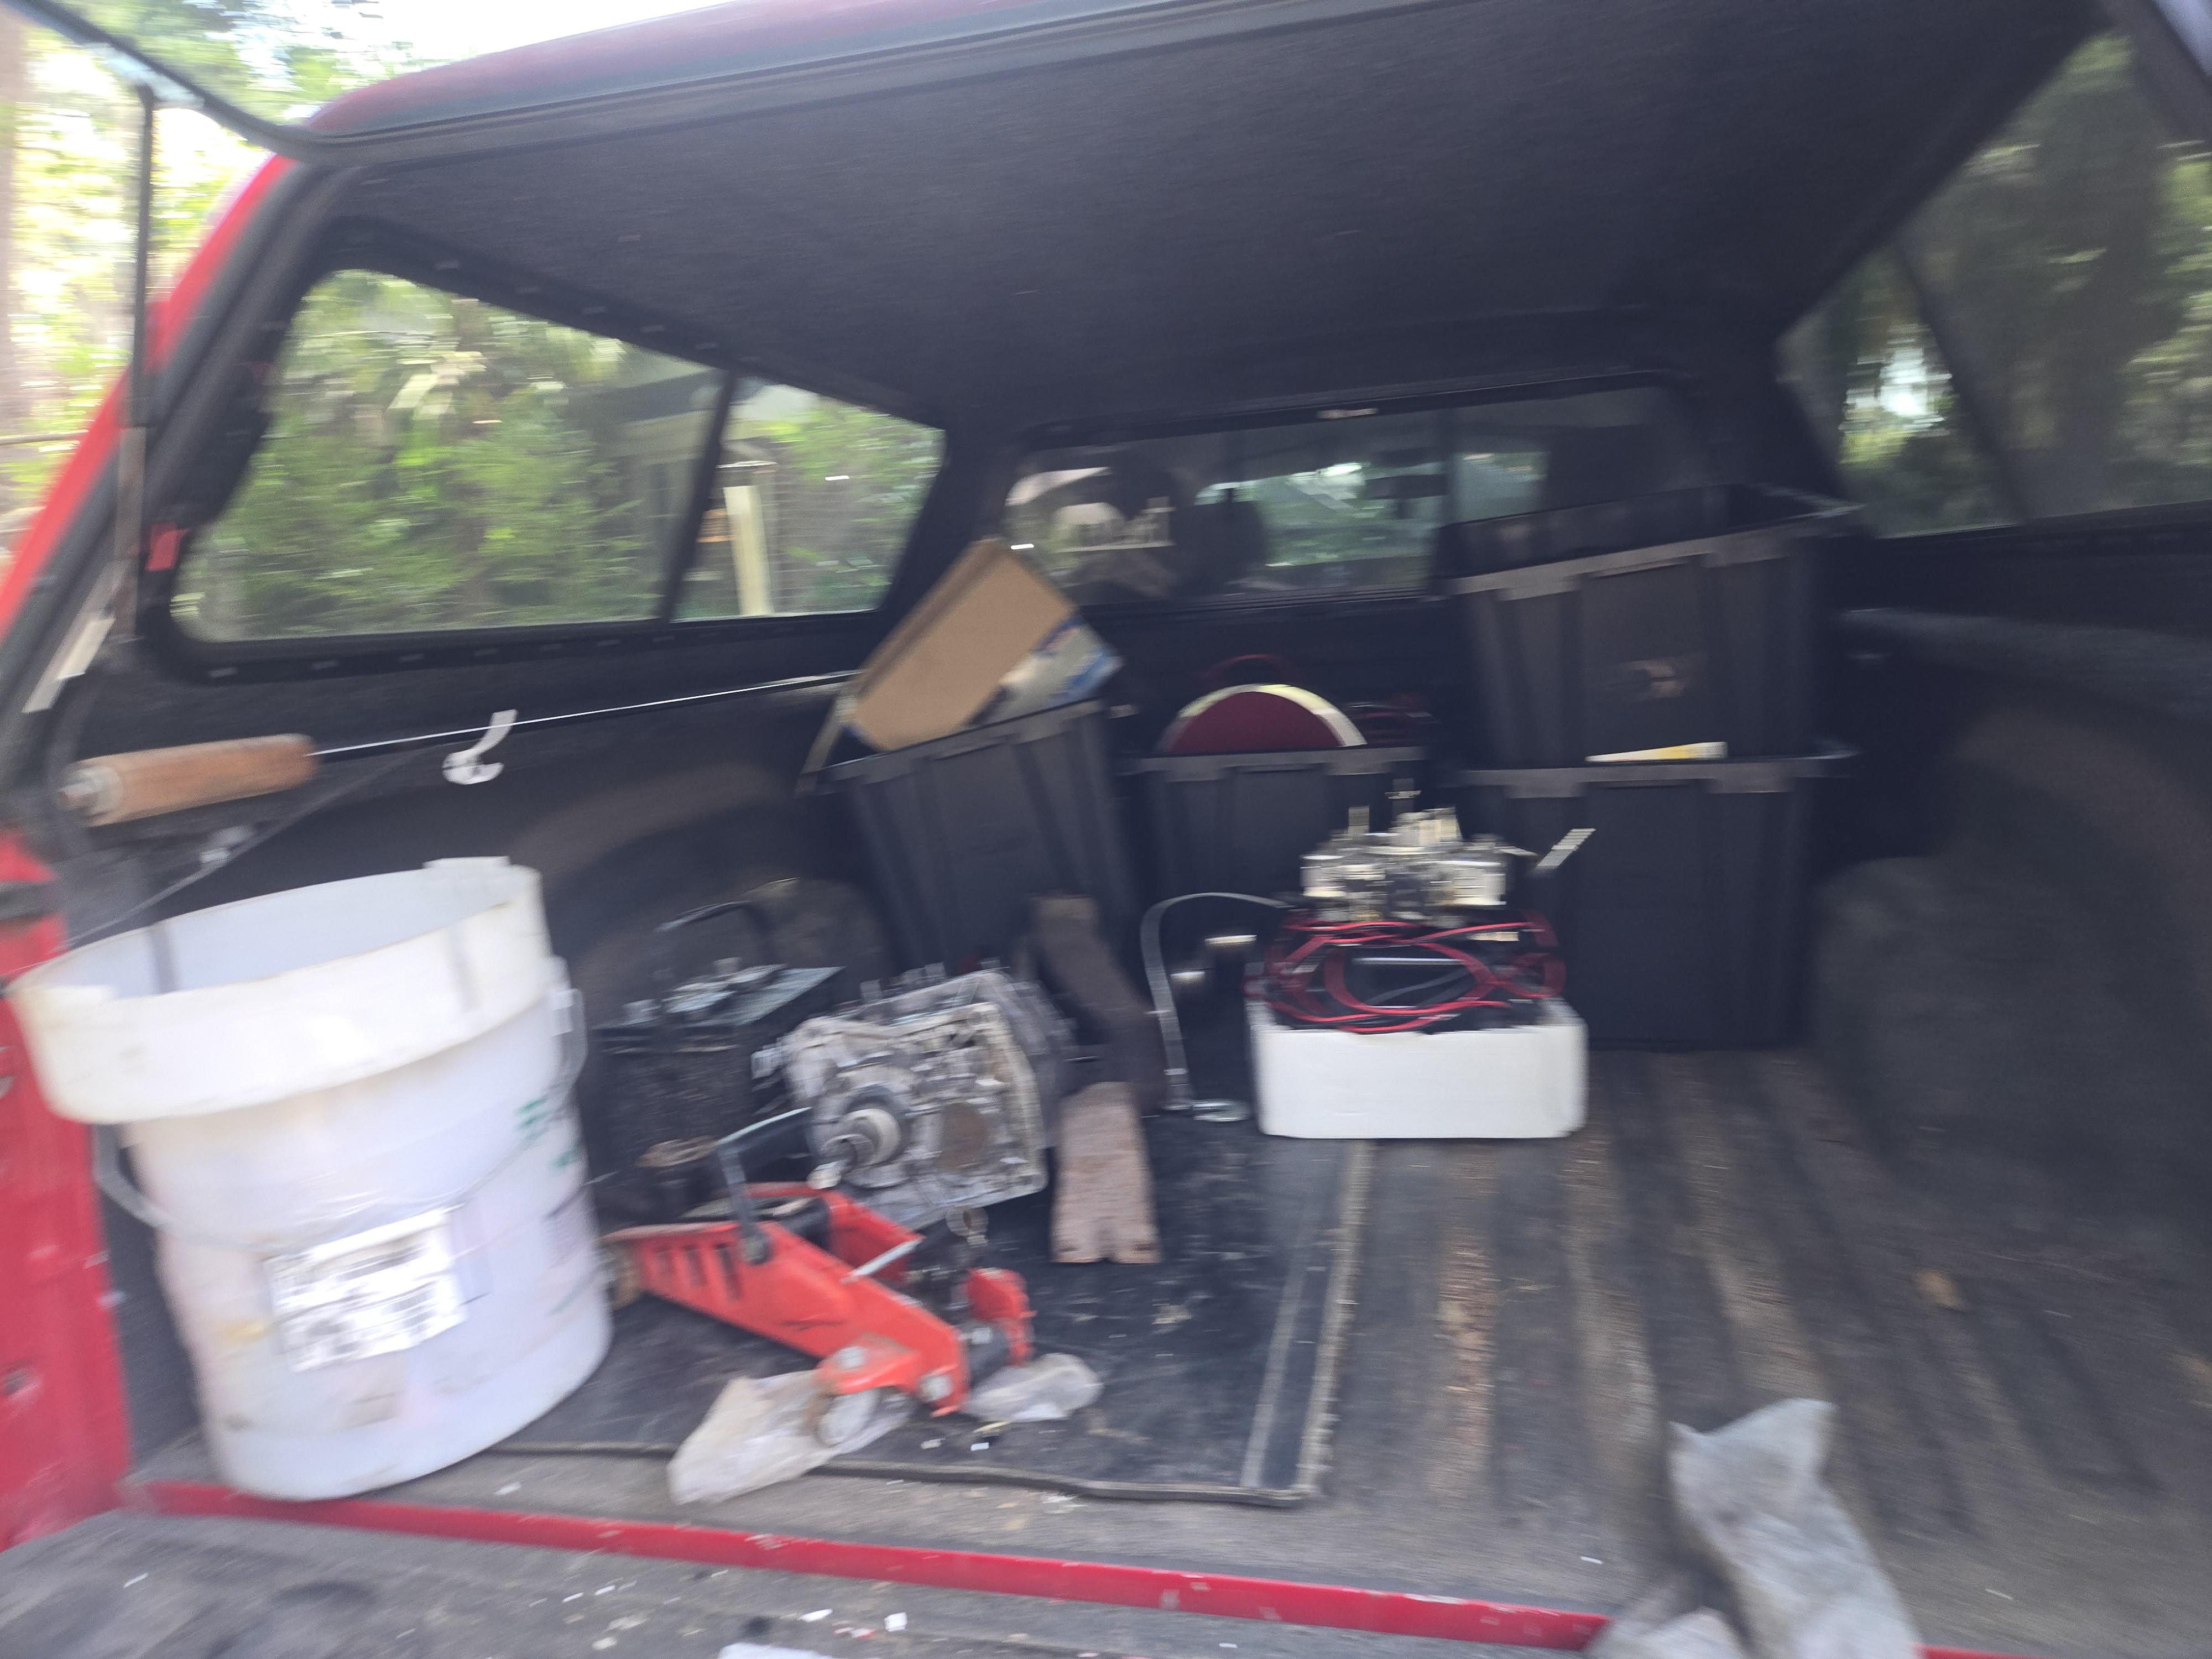
Rolled up, and started inspecting the car. and parts. Found some questionable rust repair, some rust, some kink in the front crossmember, a scrap 6.0, scrap turbo, scrap 6x heads, scrap 400 block, t5, stock oil pan, and the most awesome alligator skin interior I’ve ever seen. I actually was getting back into the truck to leave when he asked me for an offer. Since I was there. So I lowballed him at 2500, he came back at 2800, he kept the 6.0 and turbo stuff. I accepted.
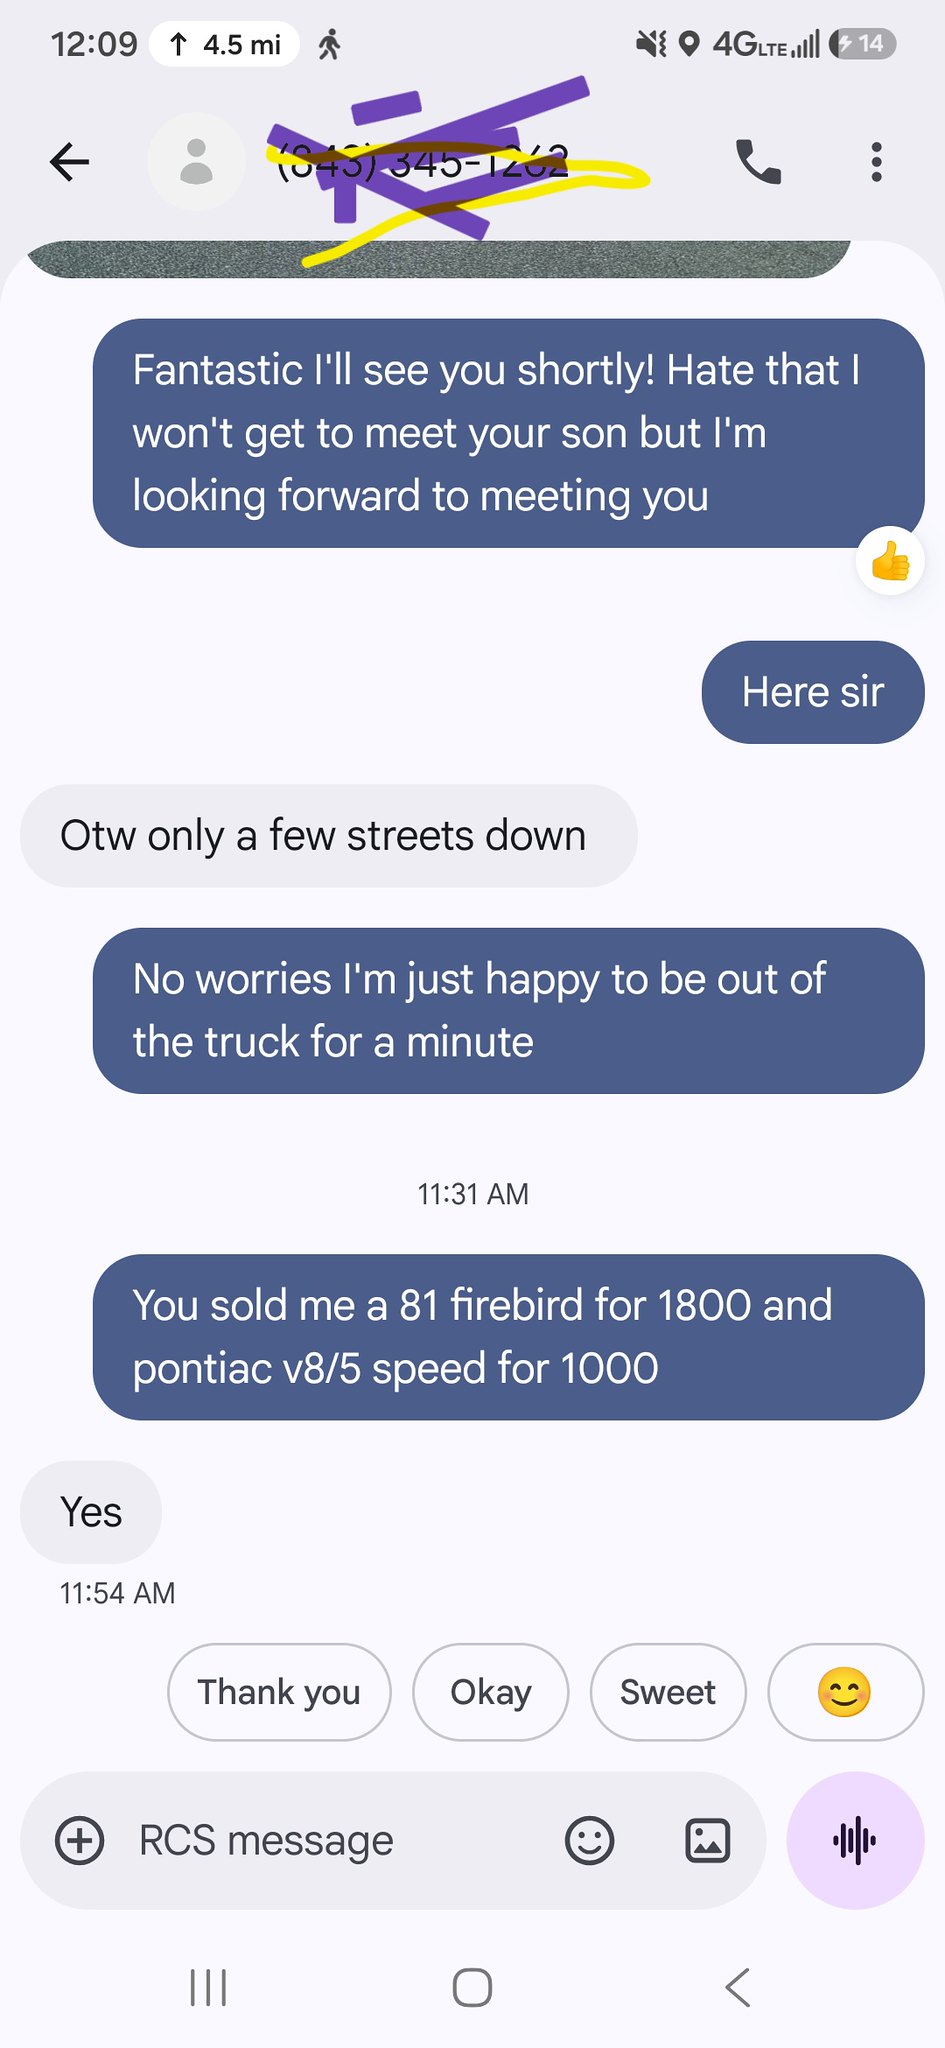 Screenshot_20260711_120930_Messages by Michael Crawford, on Flickr
So that got me this:
 20260711_113638 by Michael Crawford, on Flickr
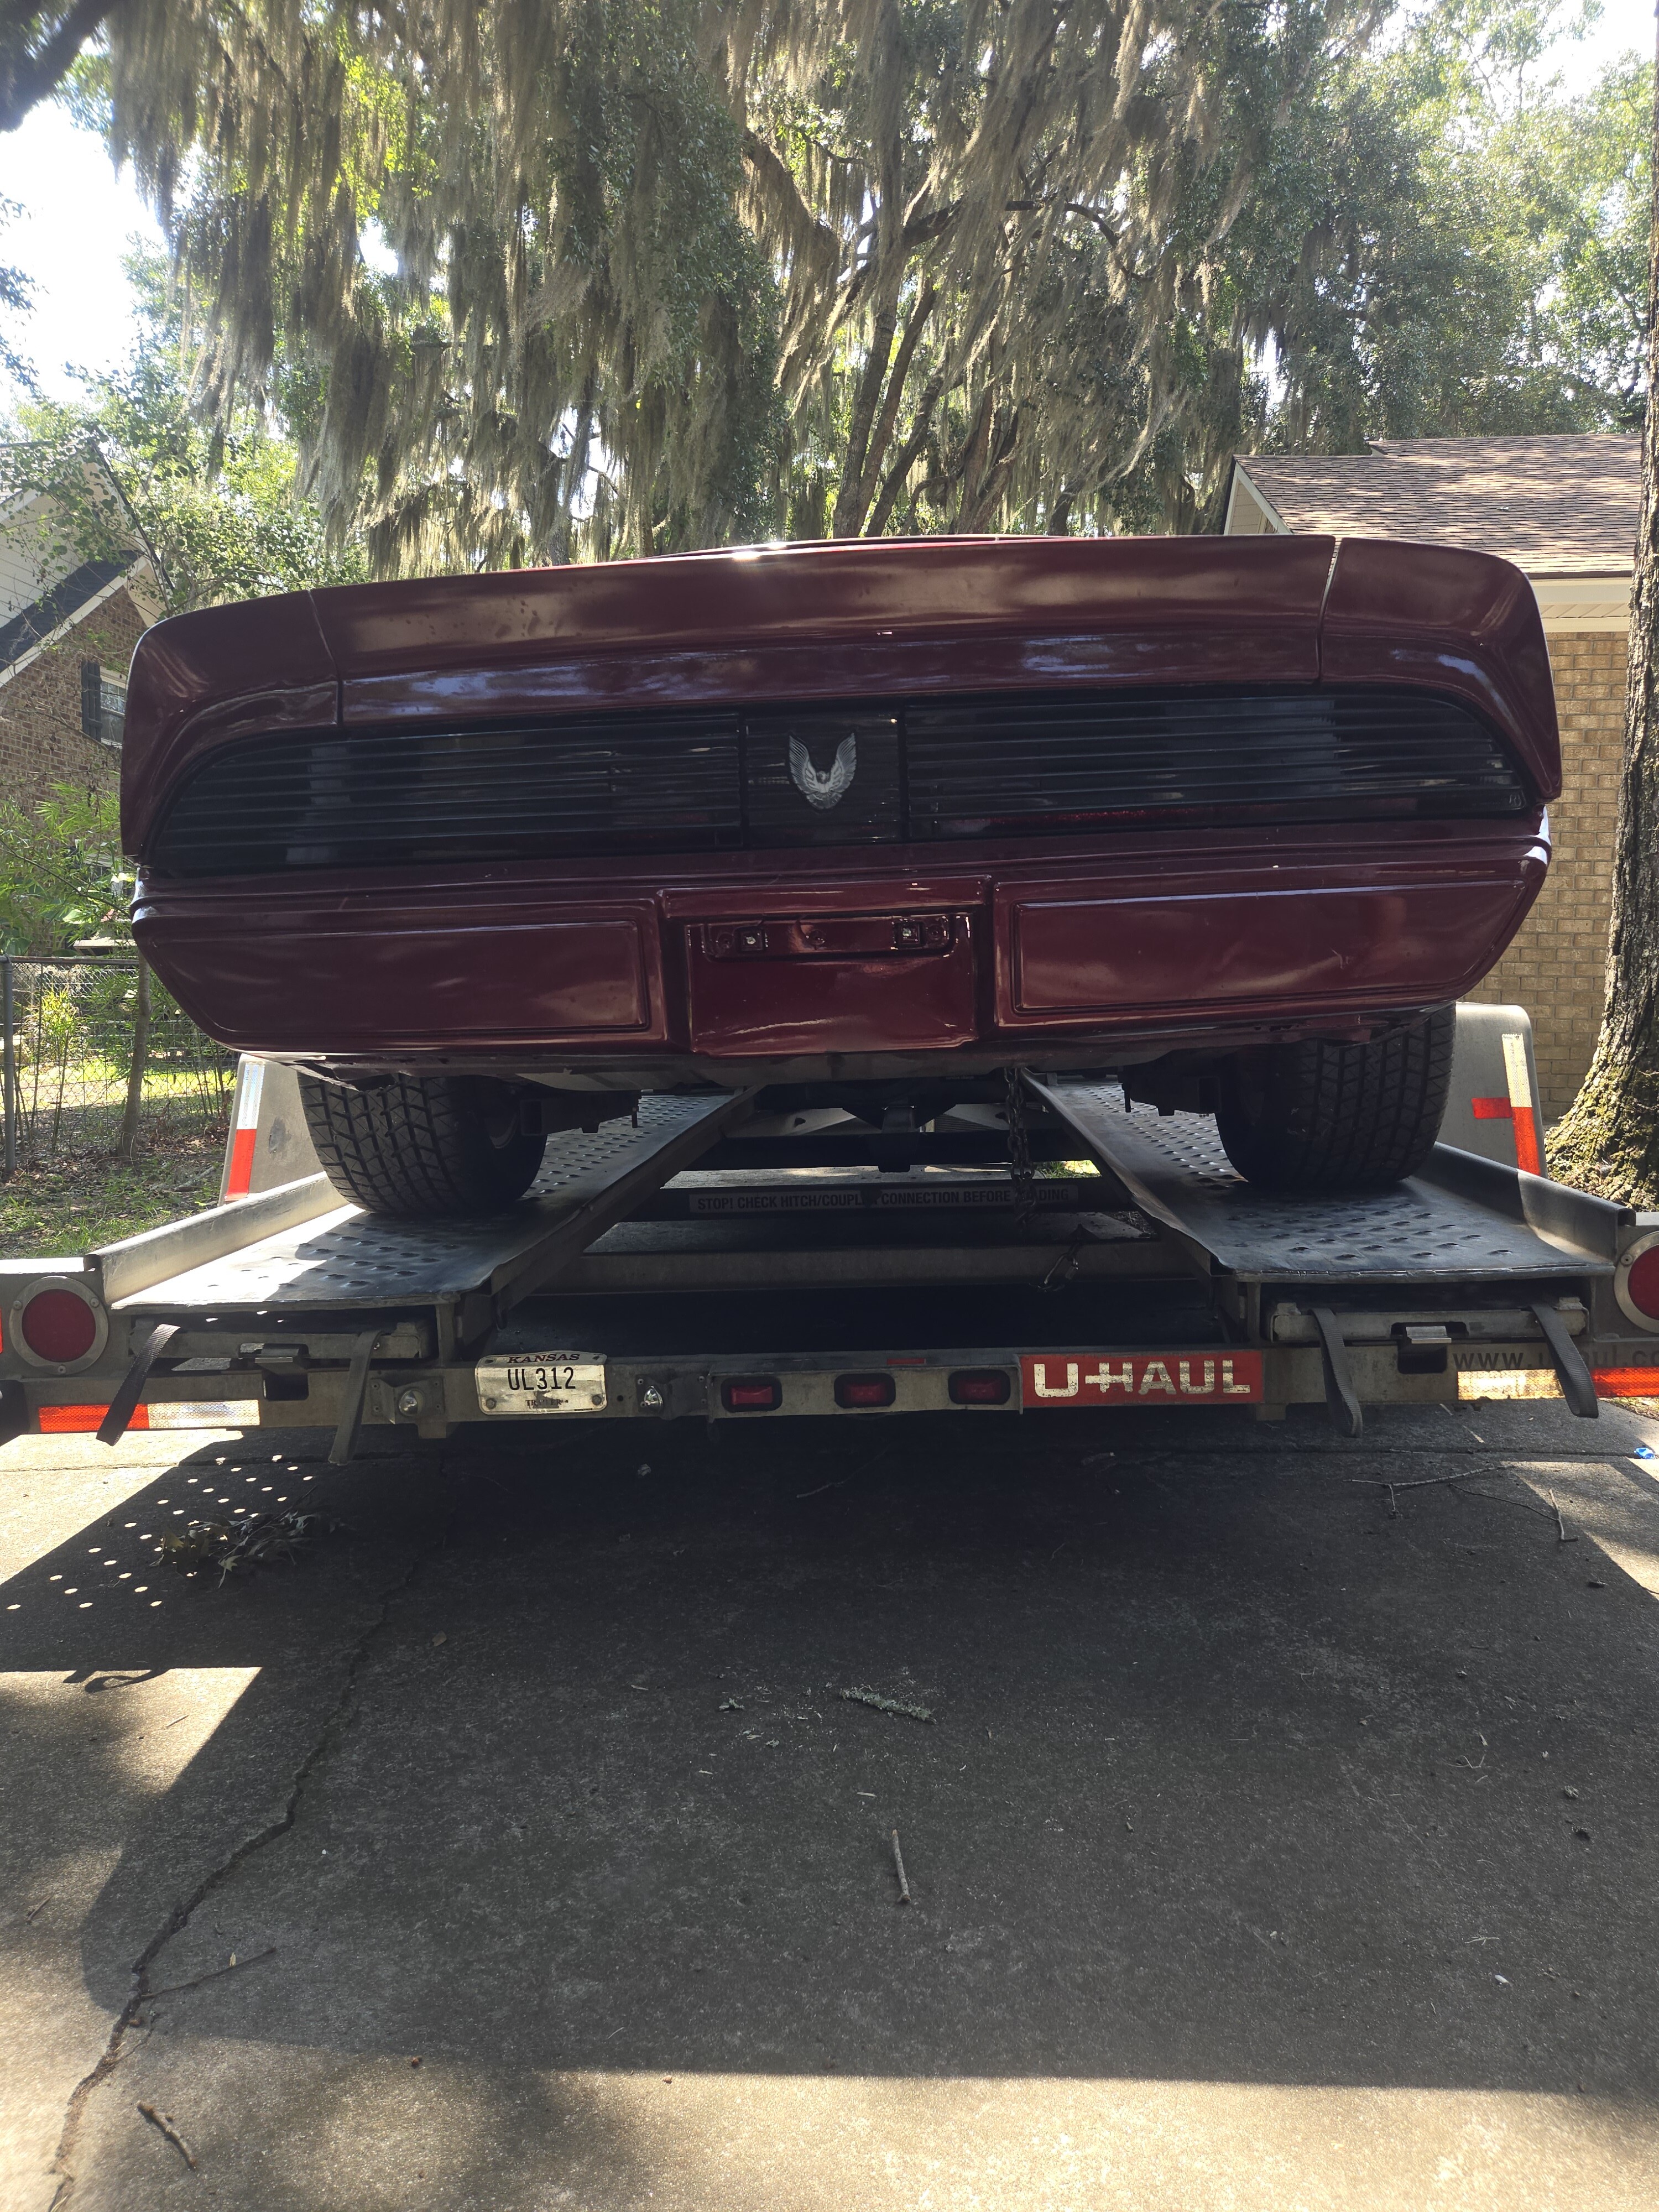 20260711_115149 by Michael Crawford, on Flickr
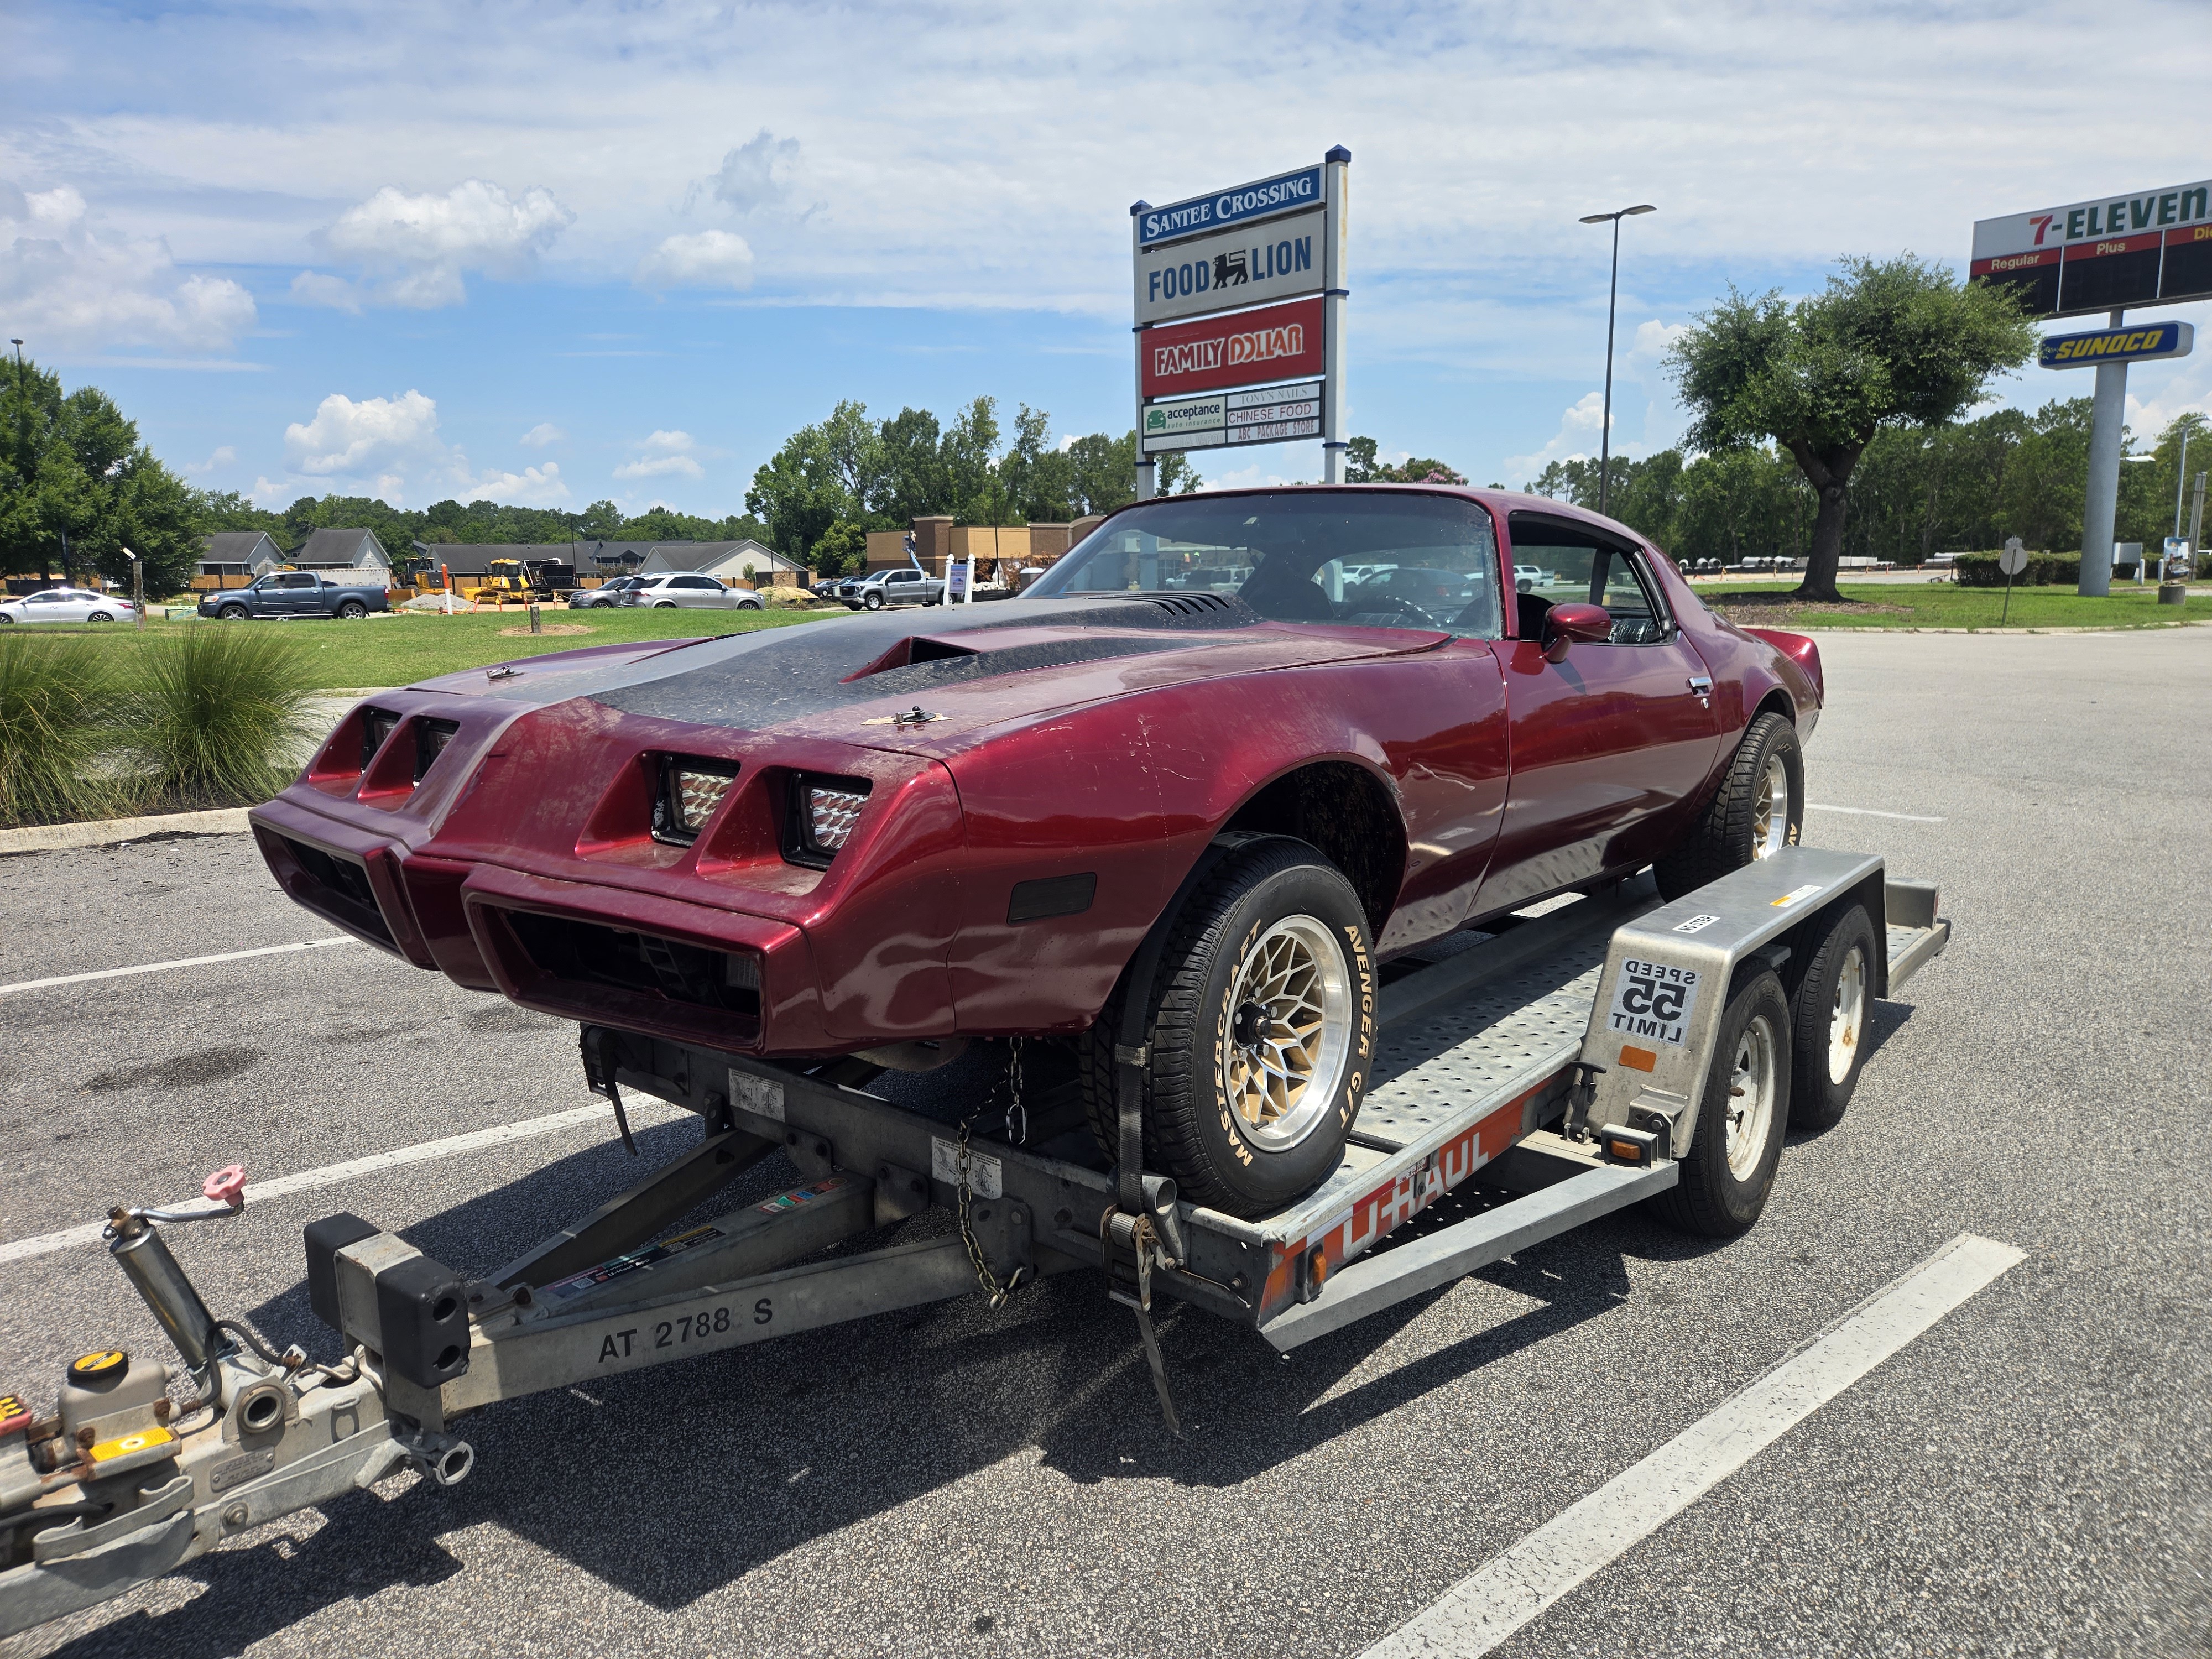 20260711_122048 by Michael Crawford, on Flickr
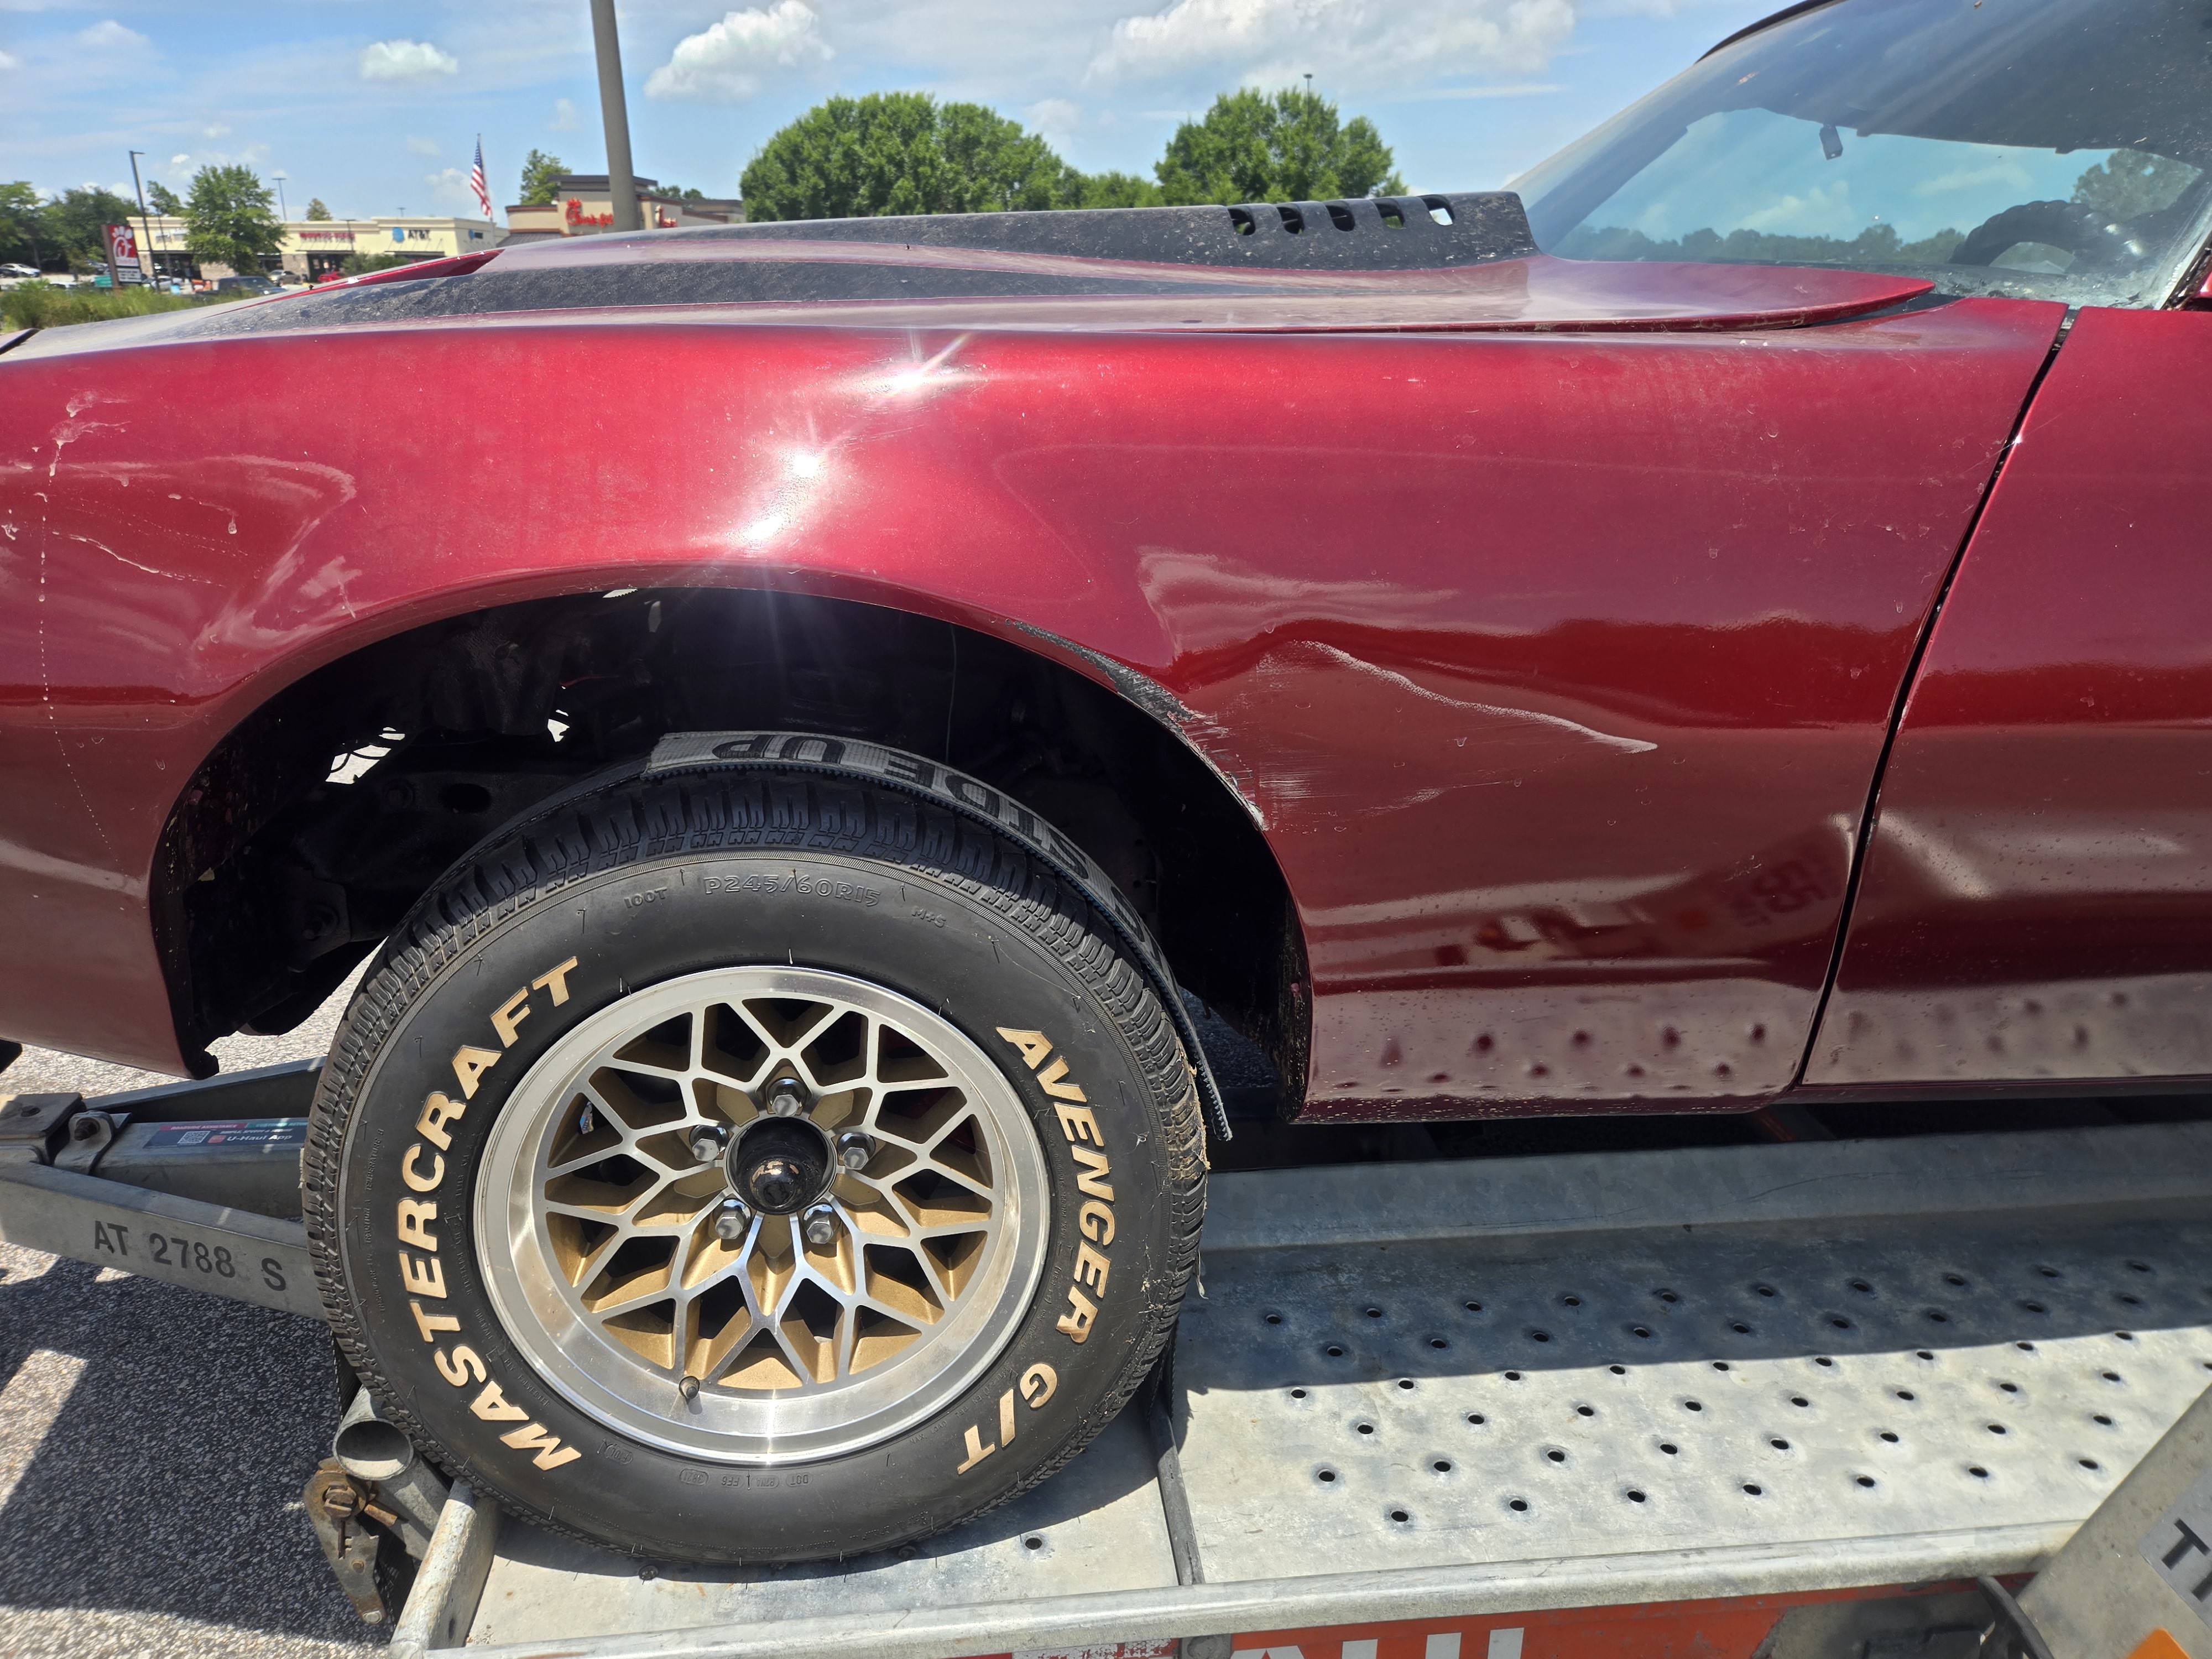 20260711_122053 by Michael Crawford, on Flickr
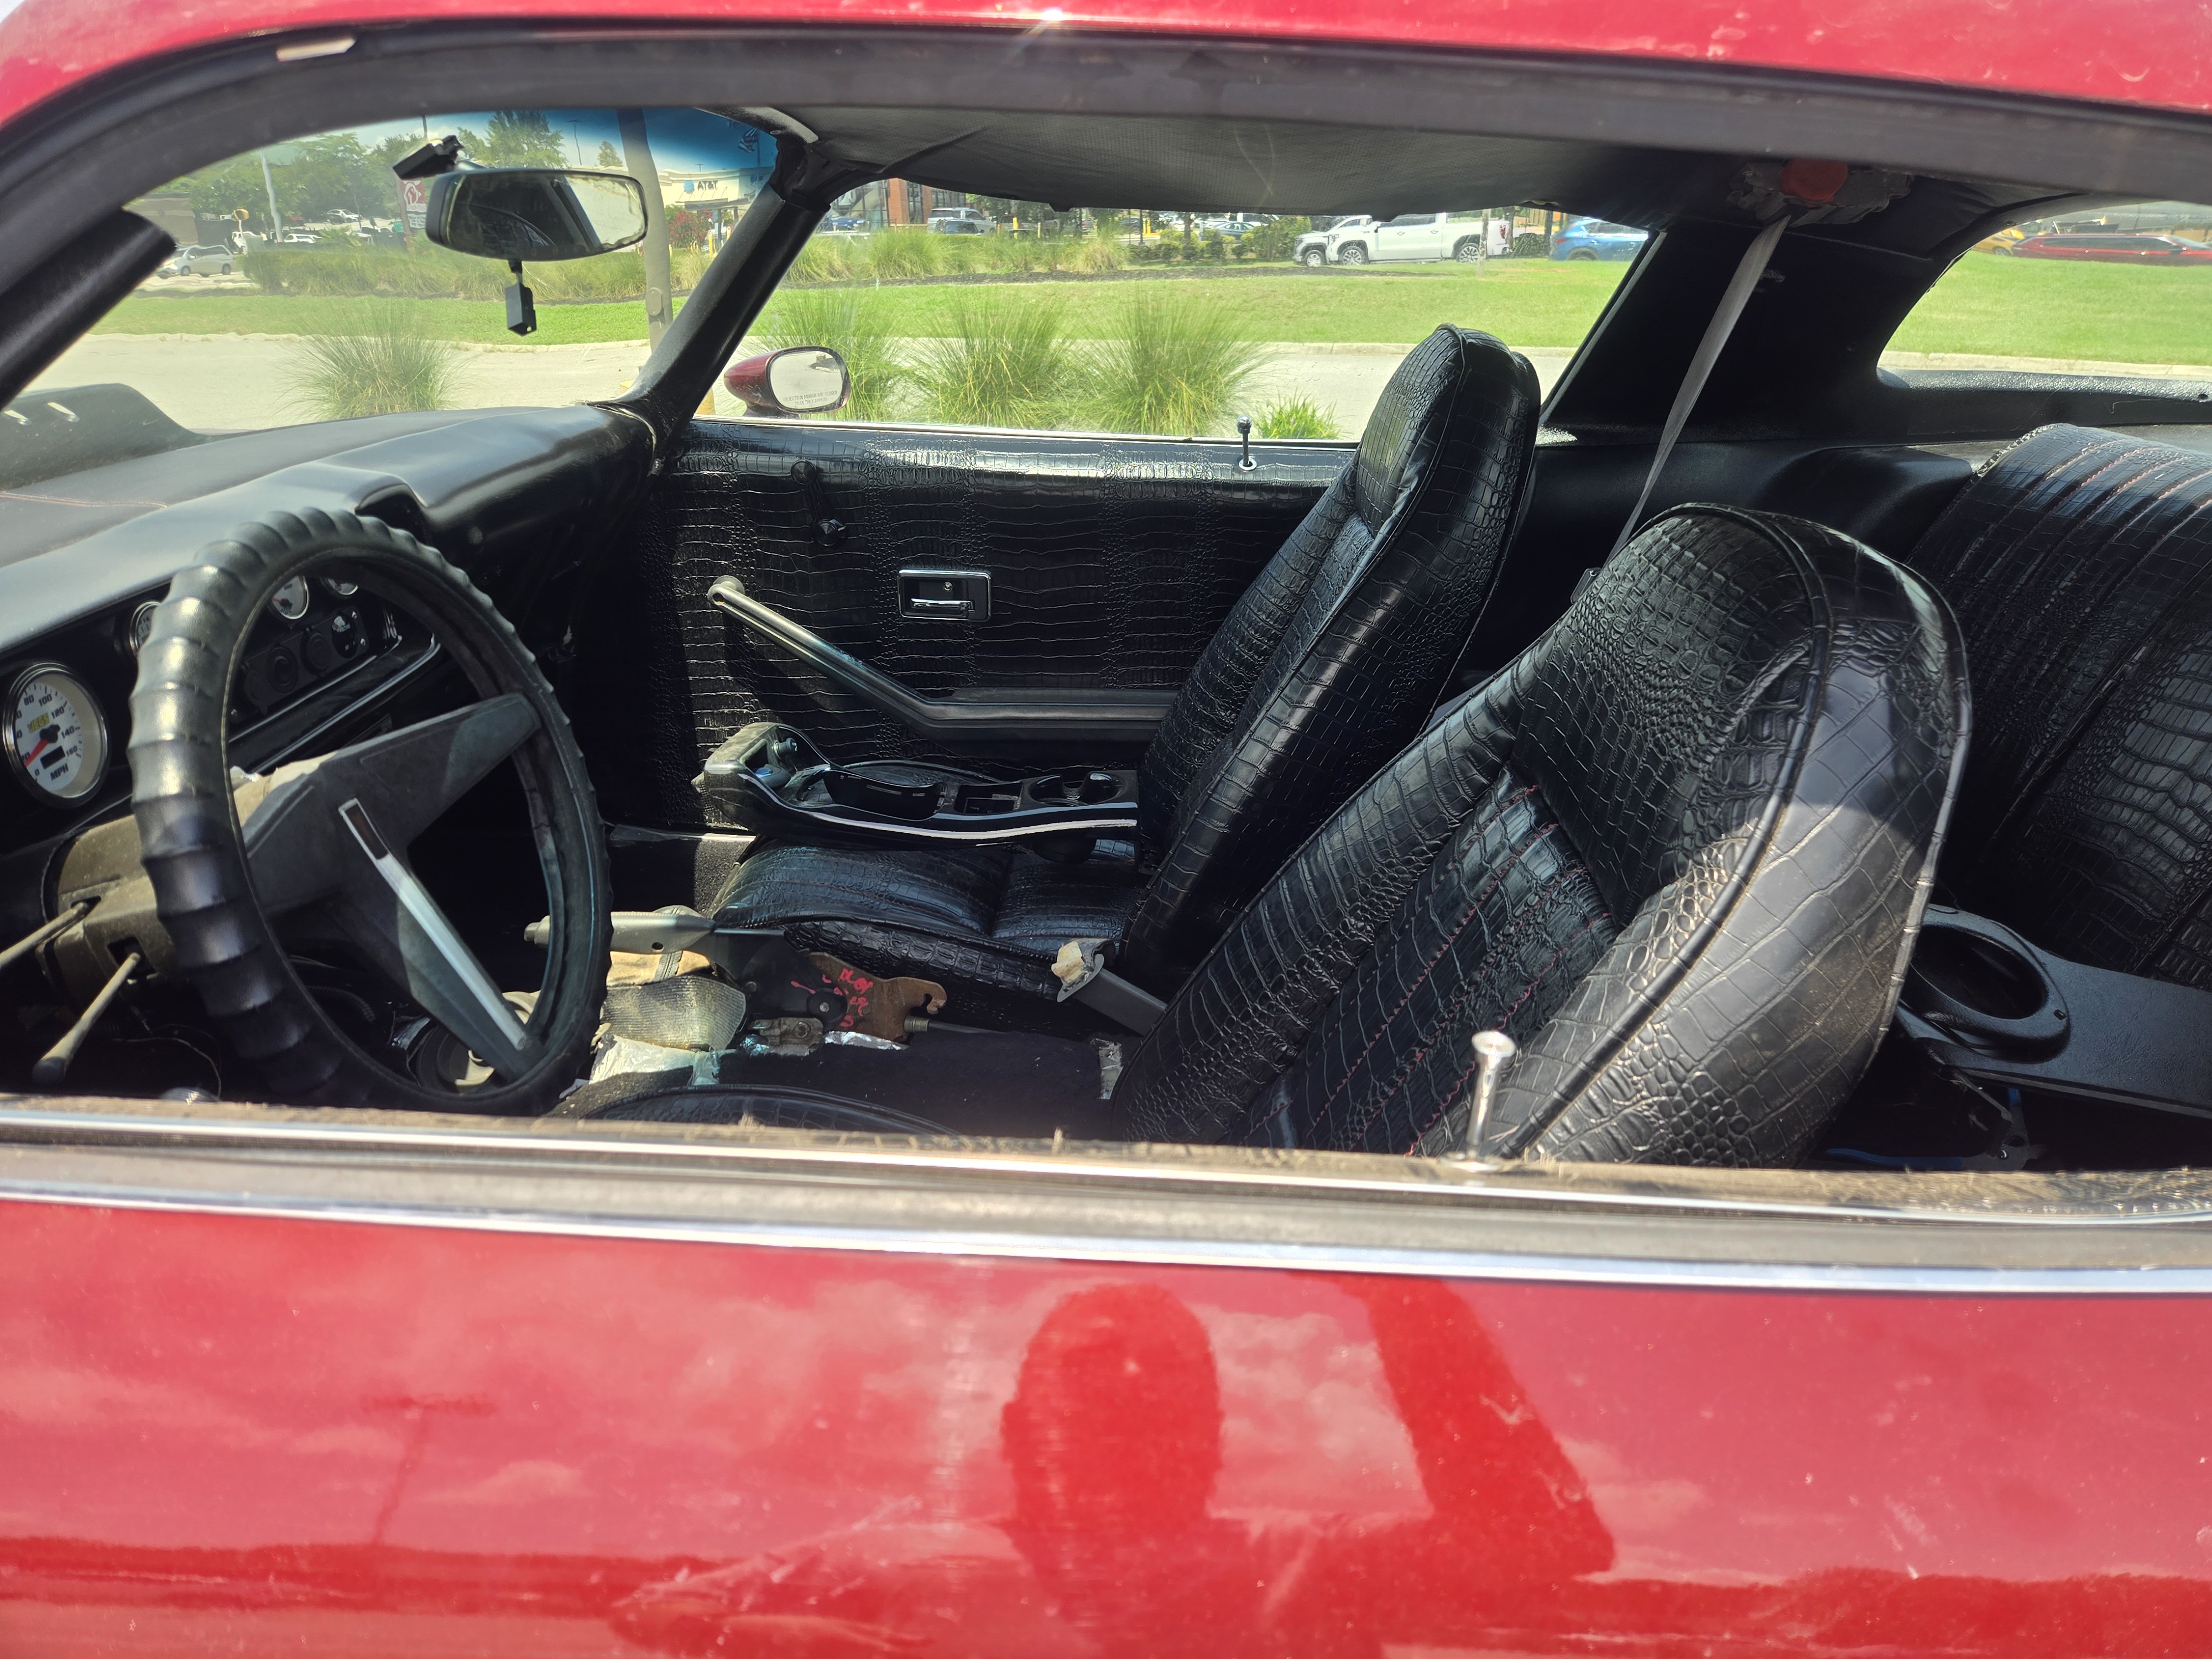 20260711_122058 by Michael Crawford, on Flickr
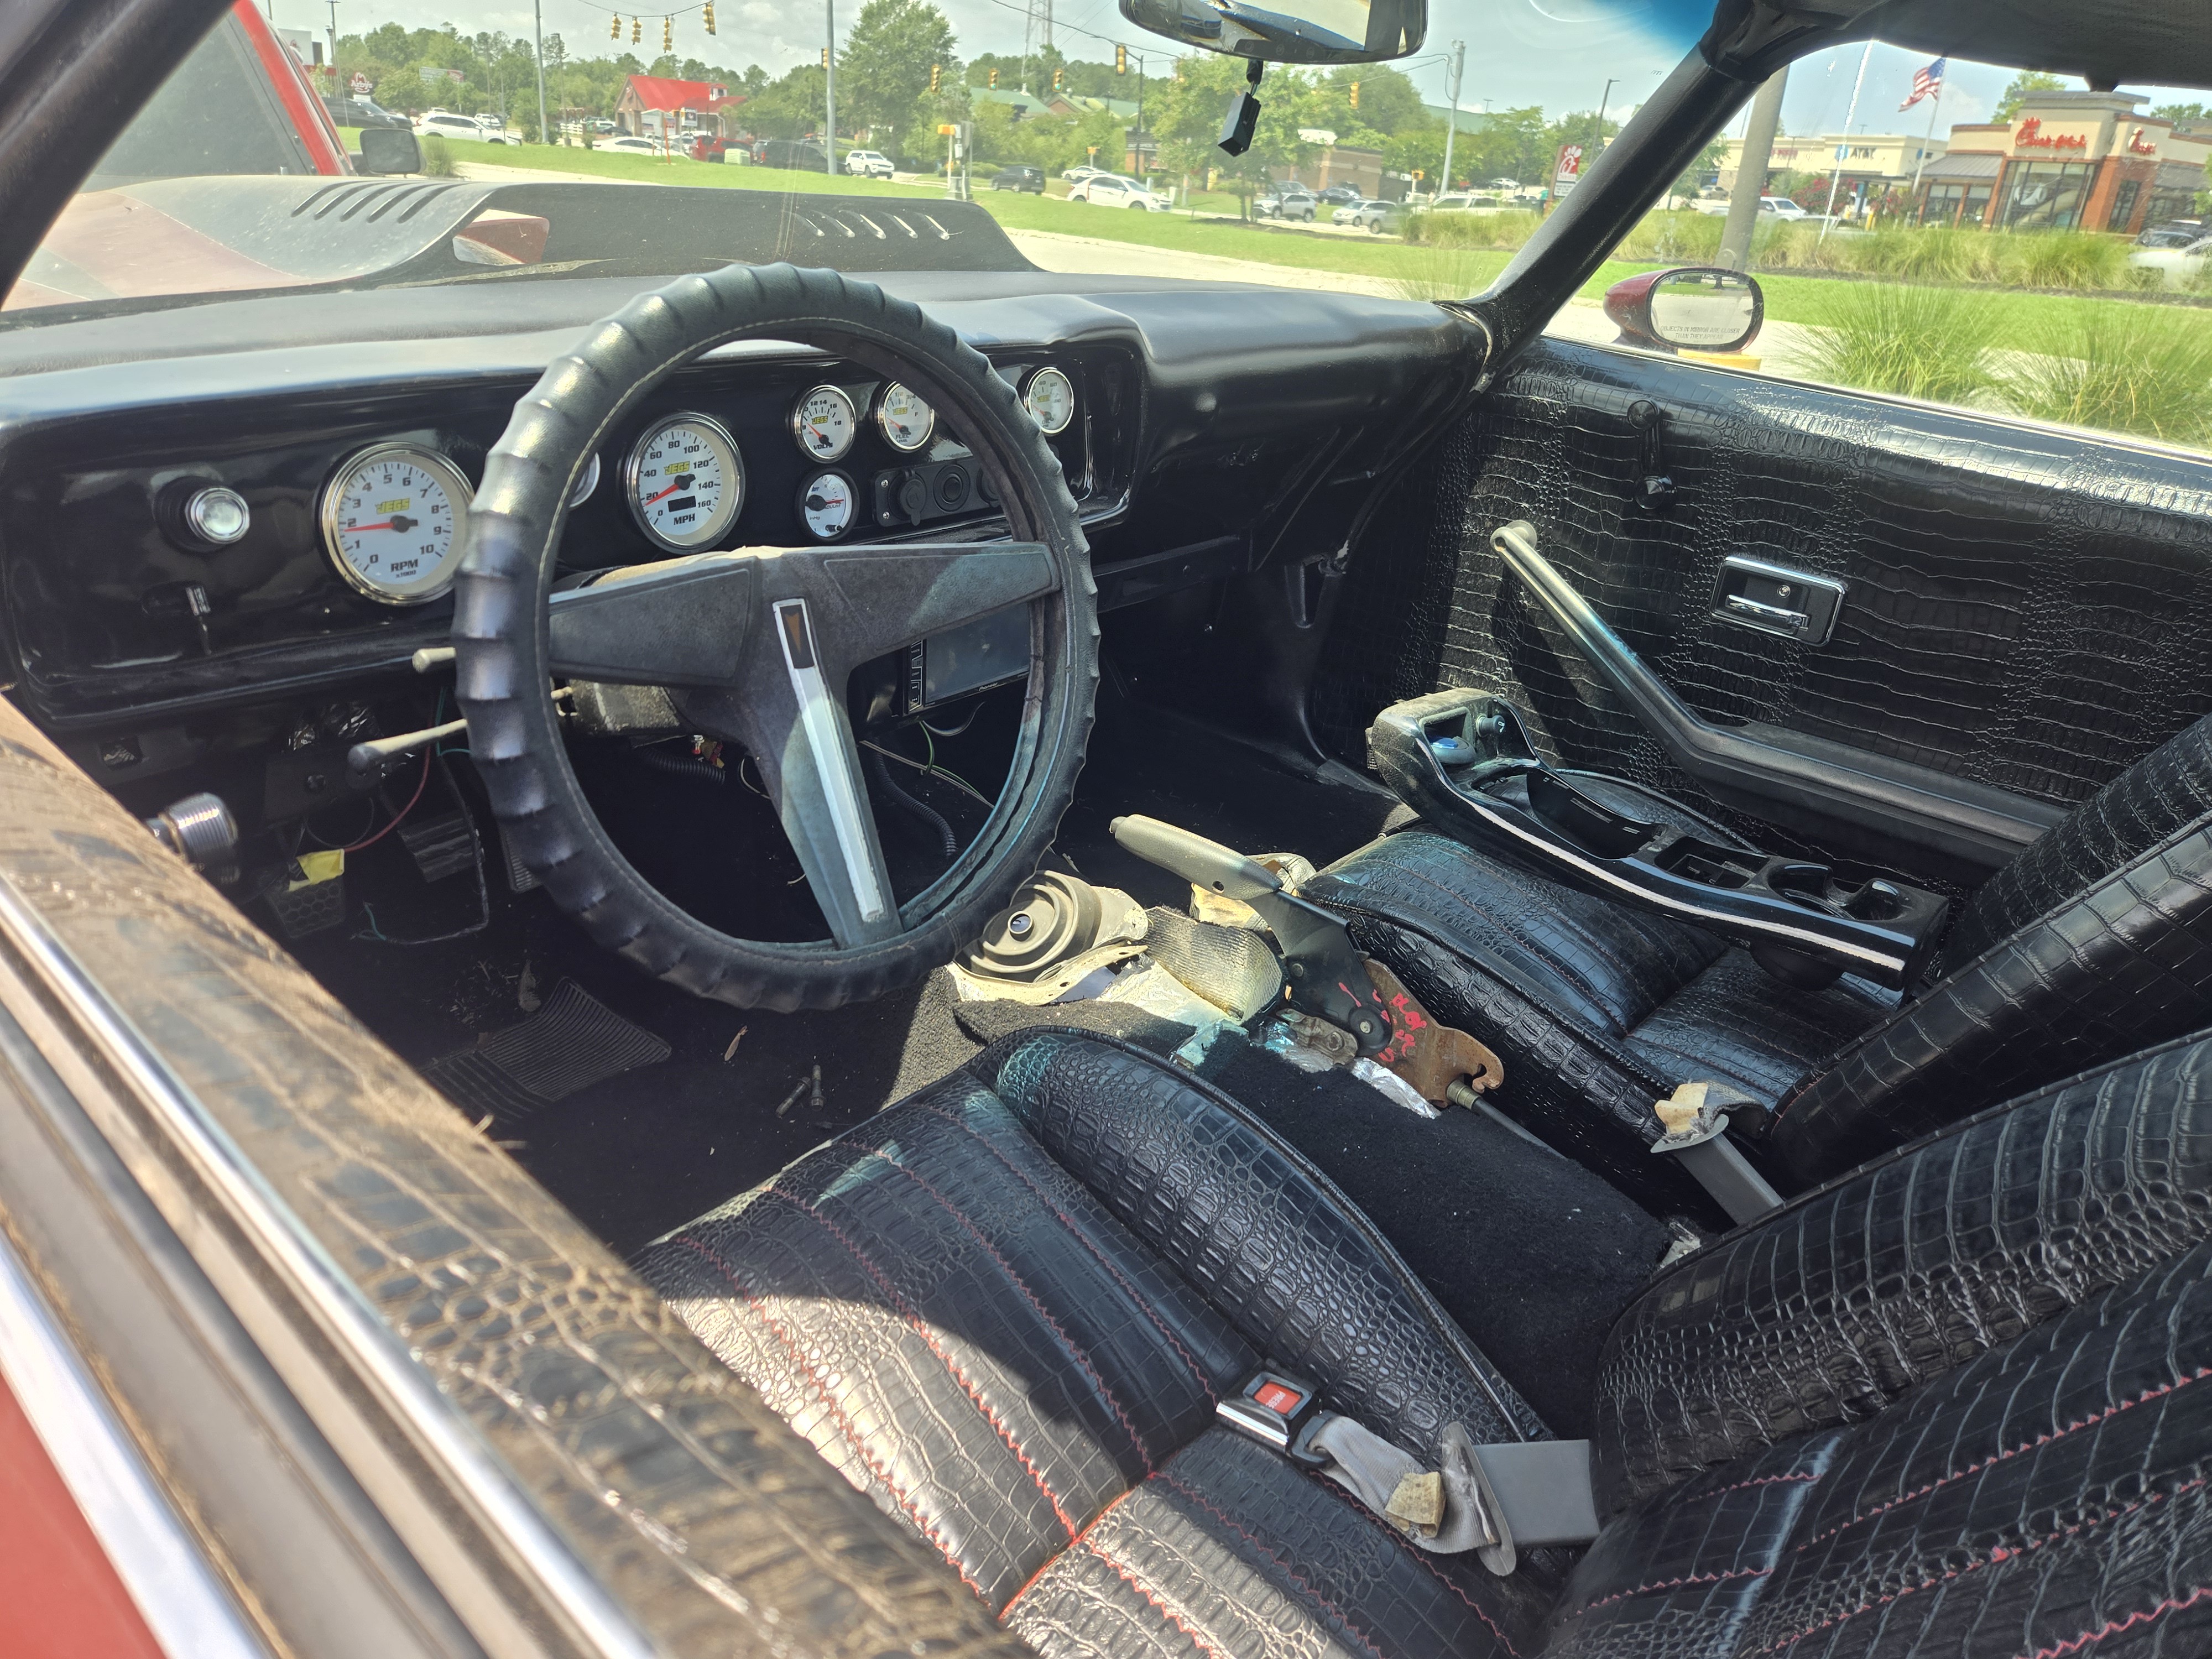 20260711_122102 by Michael Crawford, on Flickr
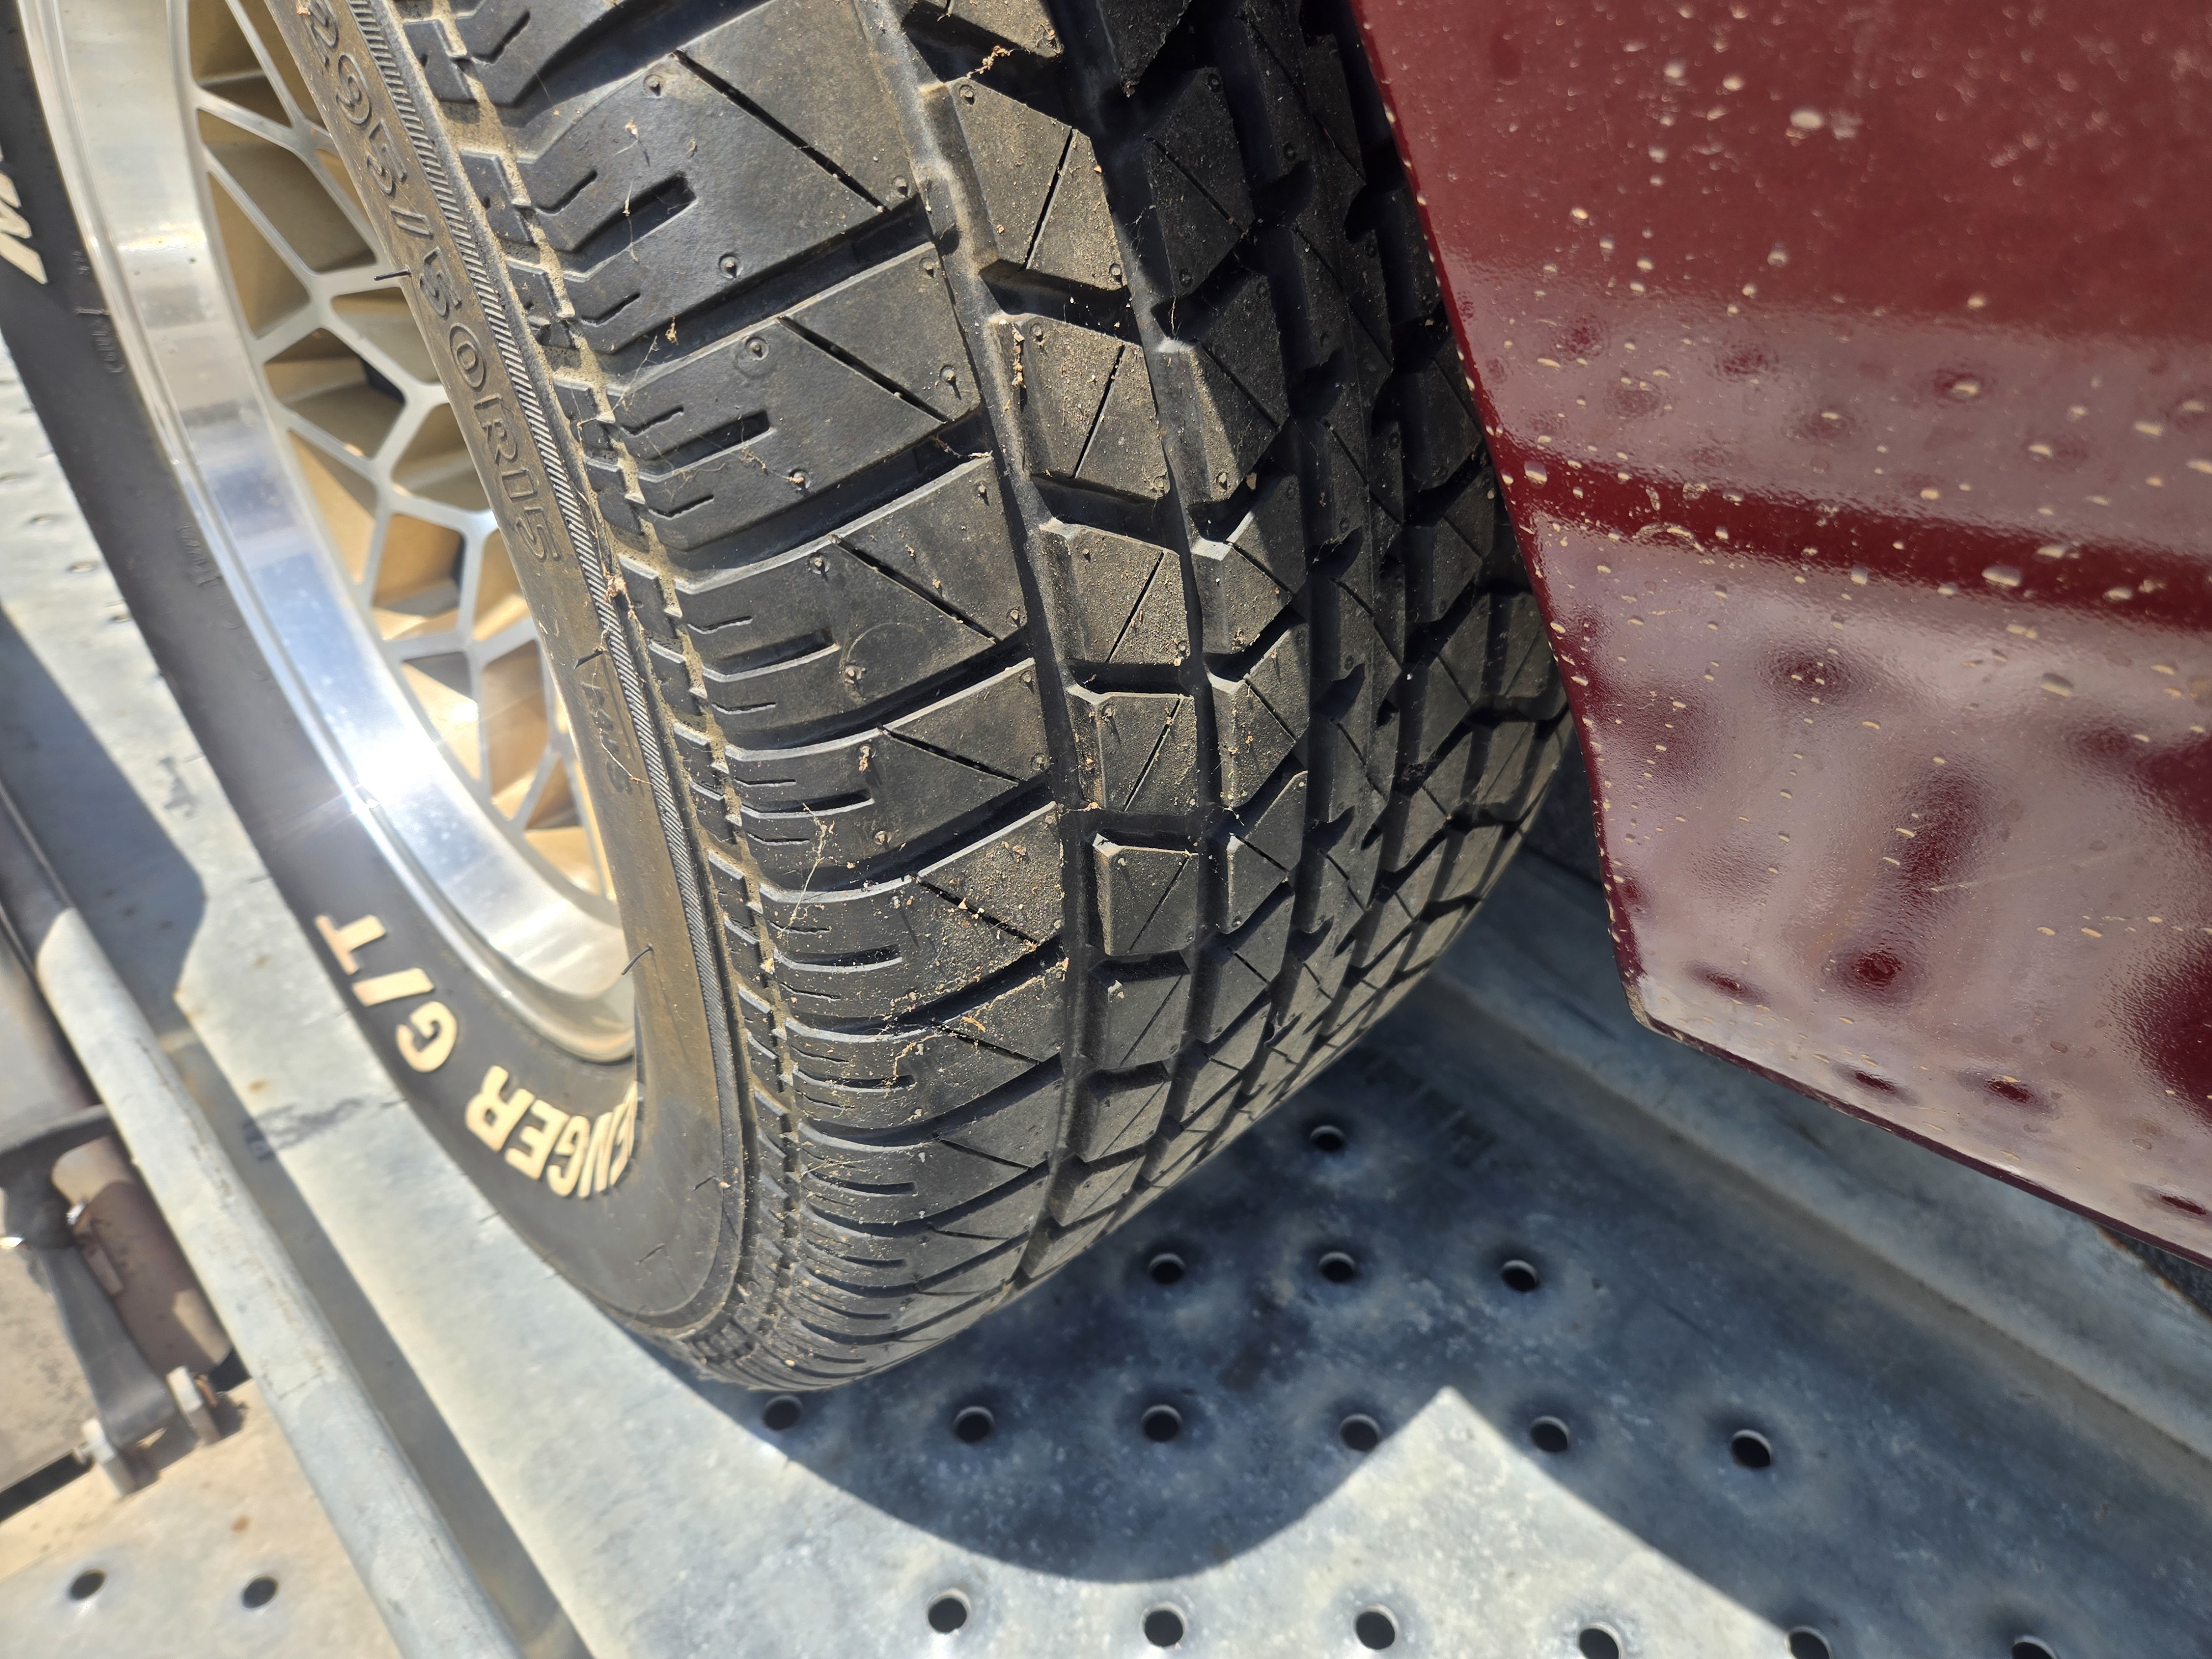 20260711_122121 by Michael Crawford, on Flickr
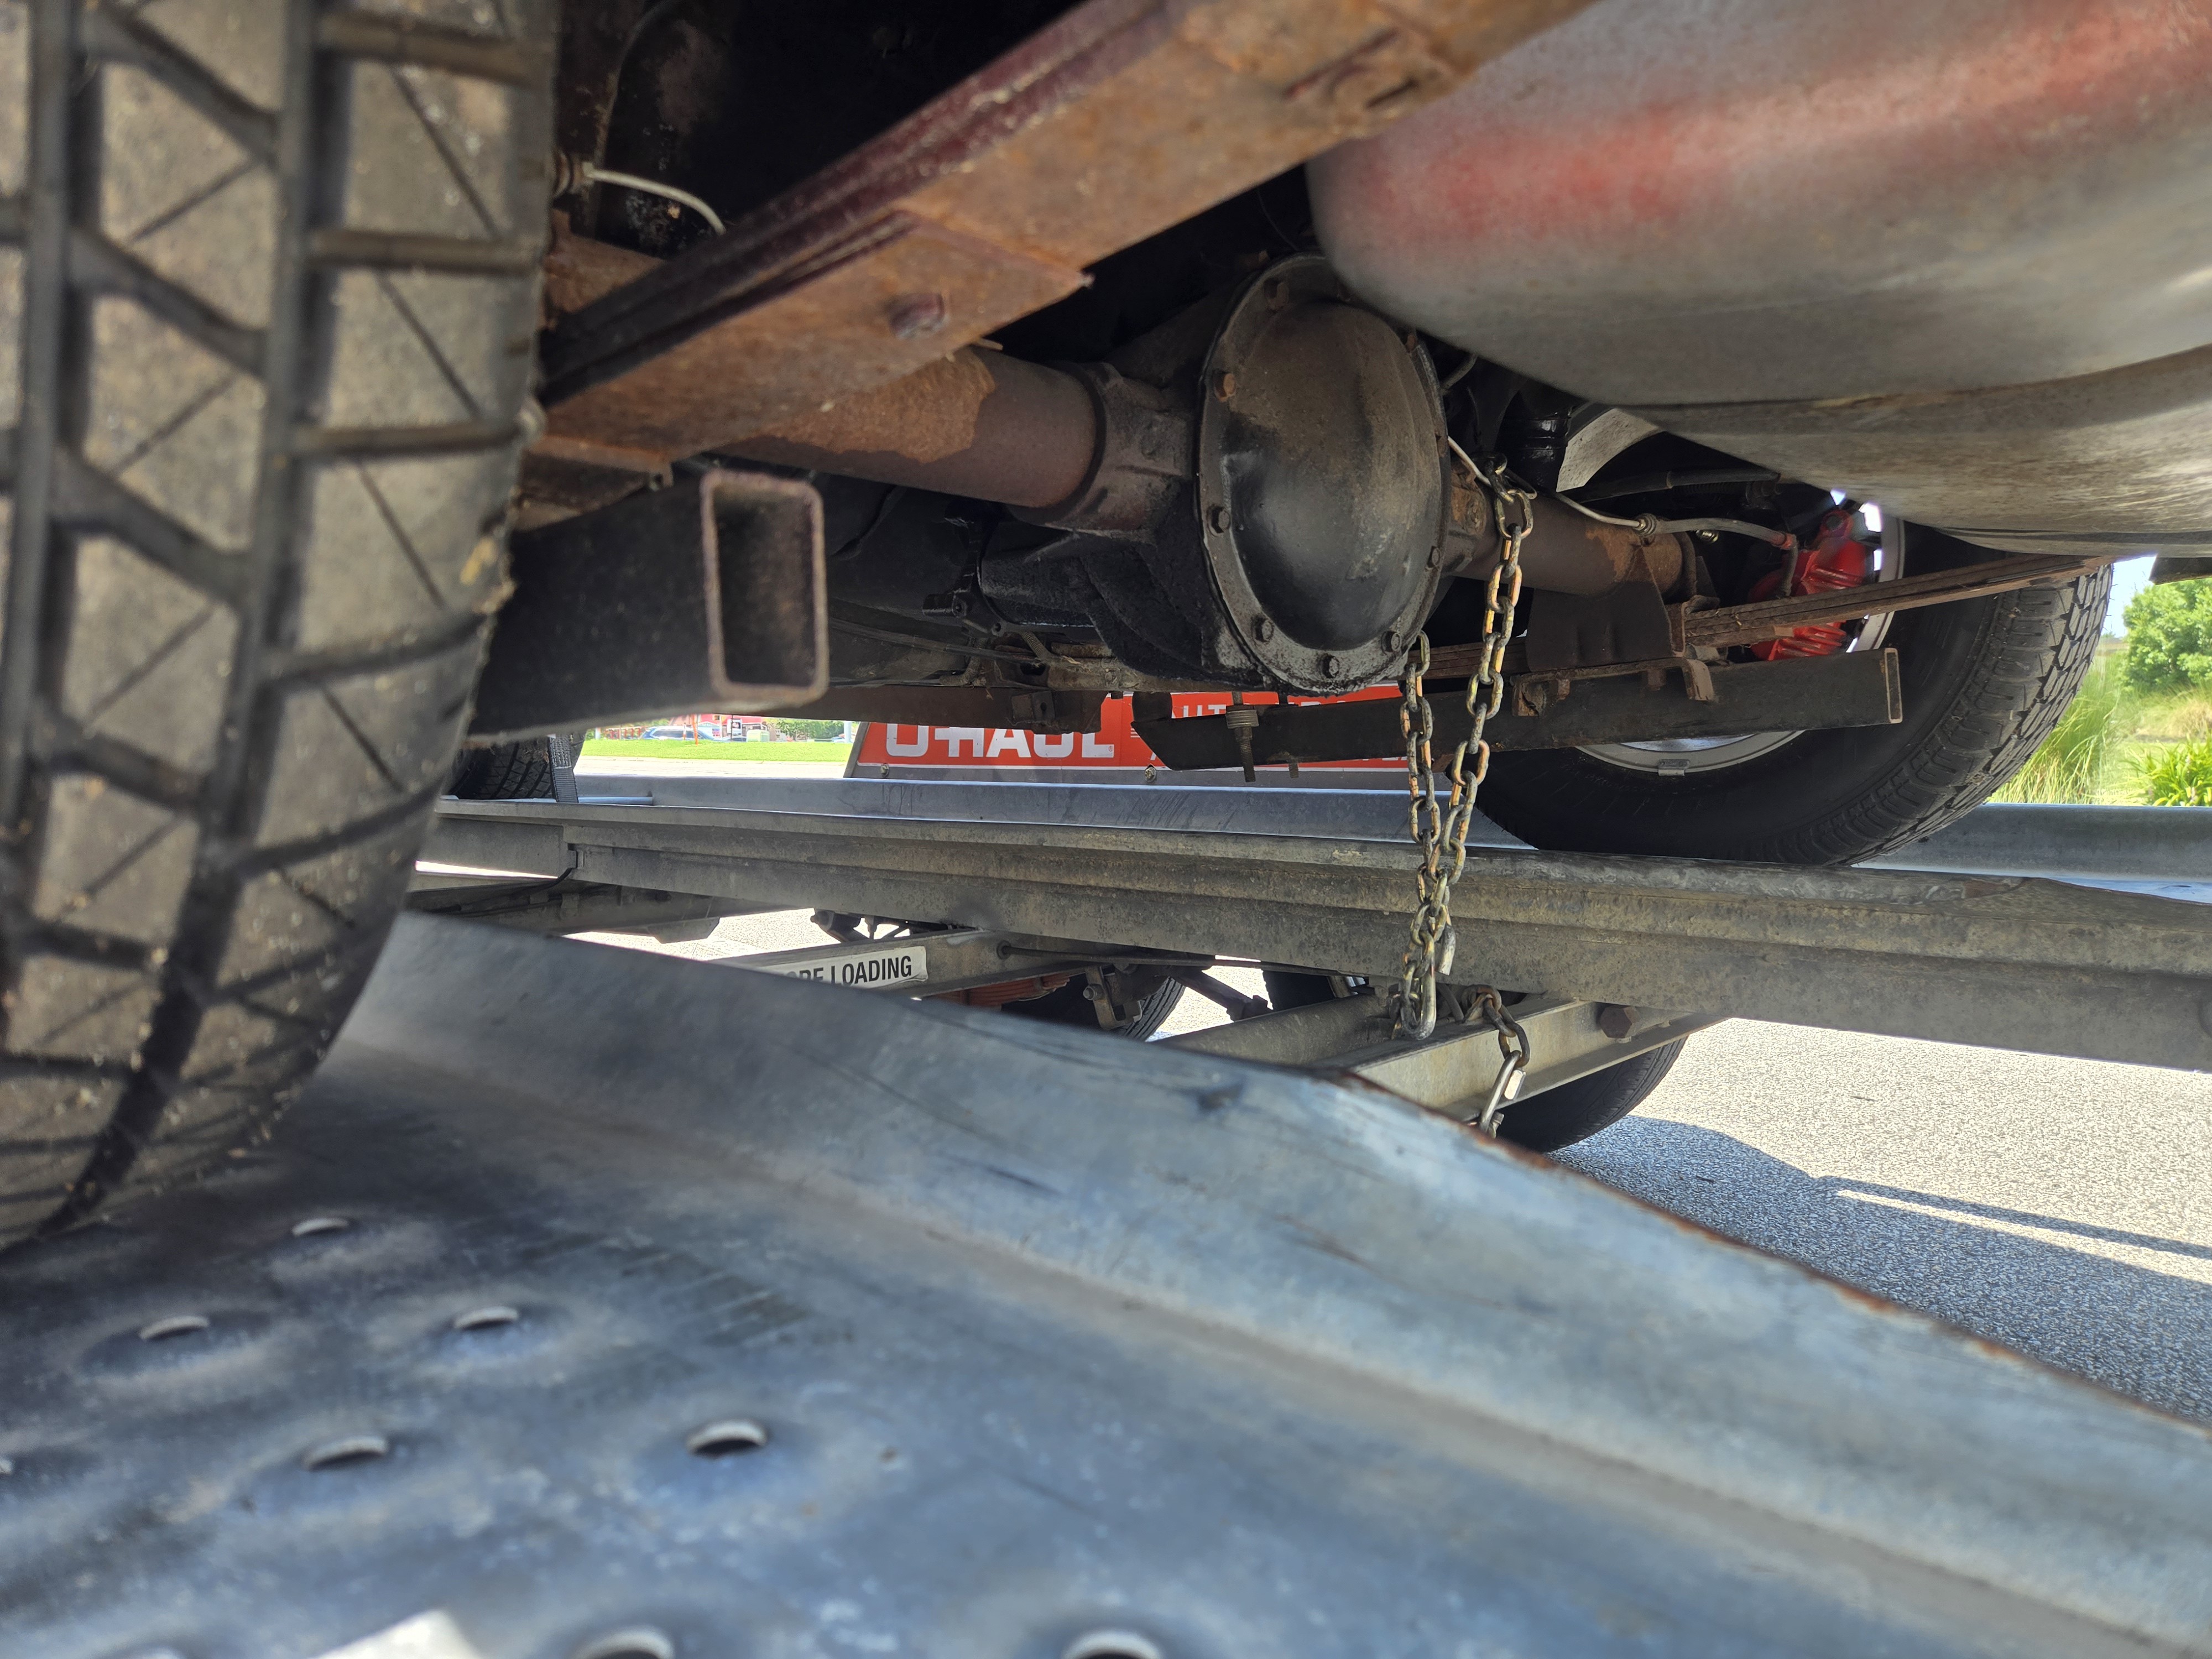 20260711_122149 by Michael Crawford, on Flickr
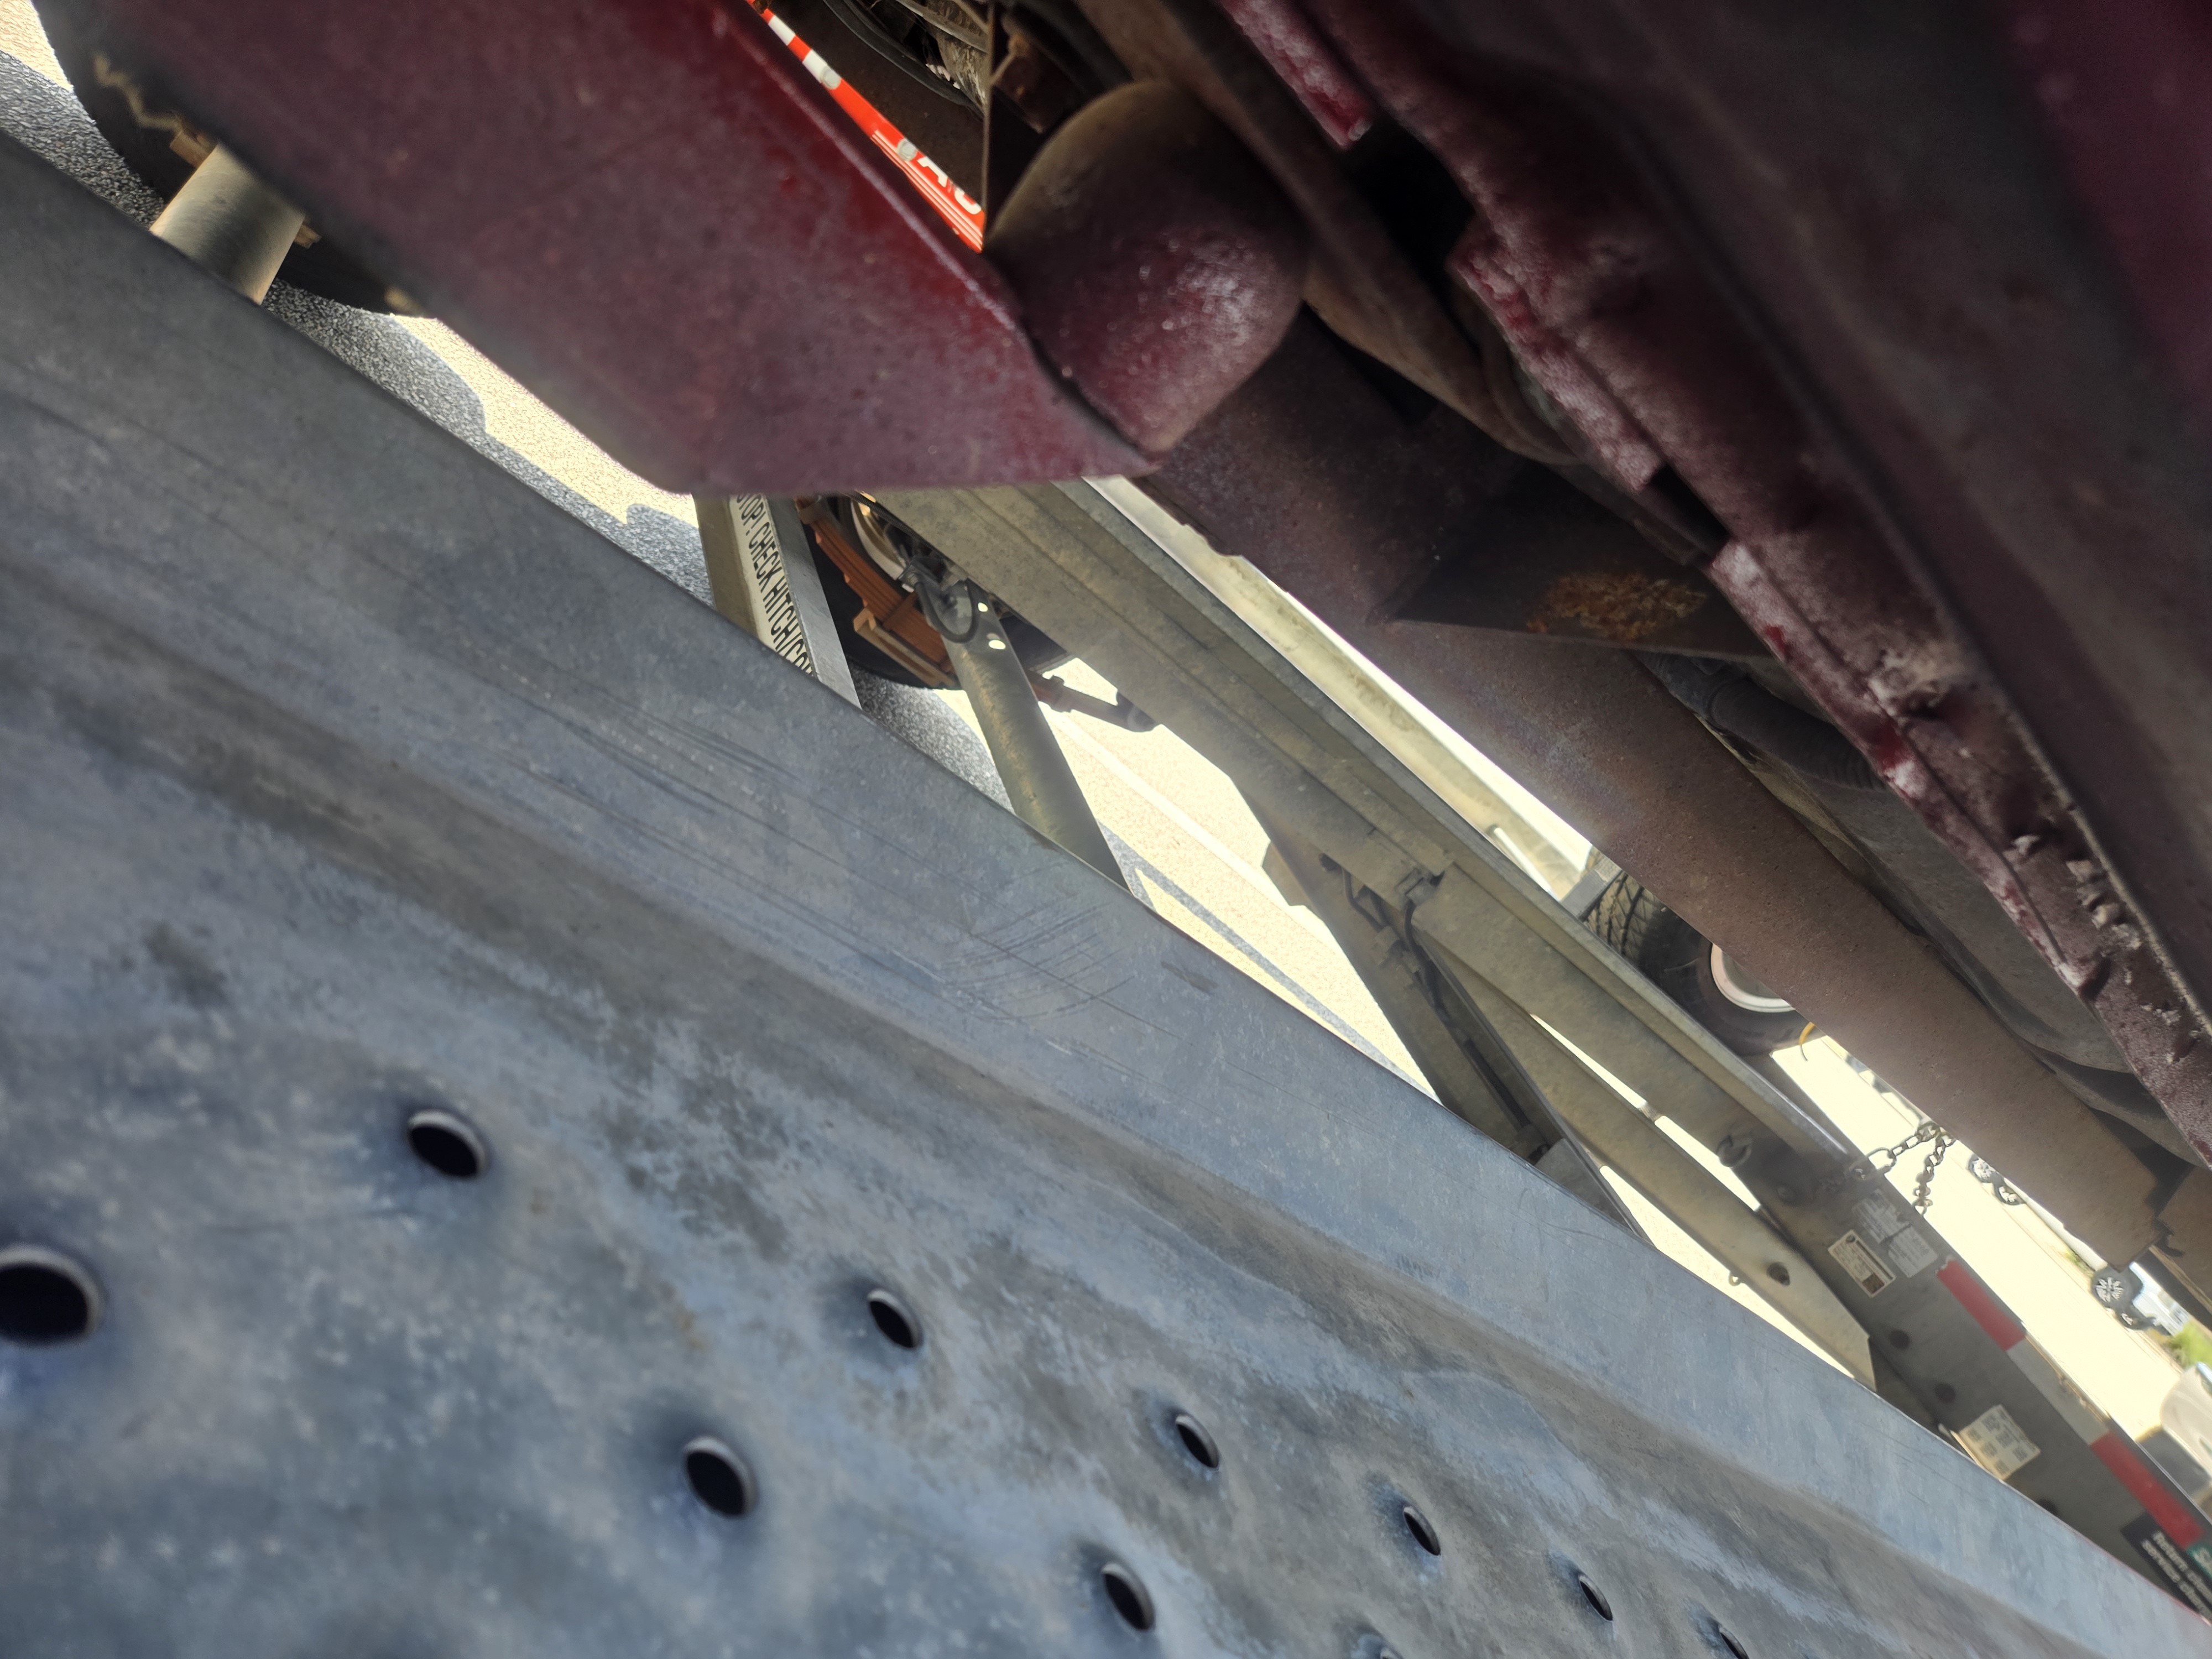 20260711_122204 by Michael Crawford, on Flickr
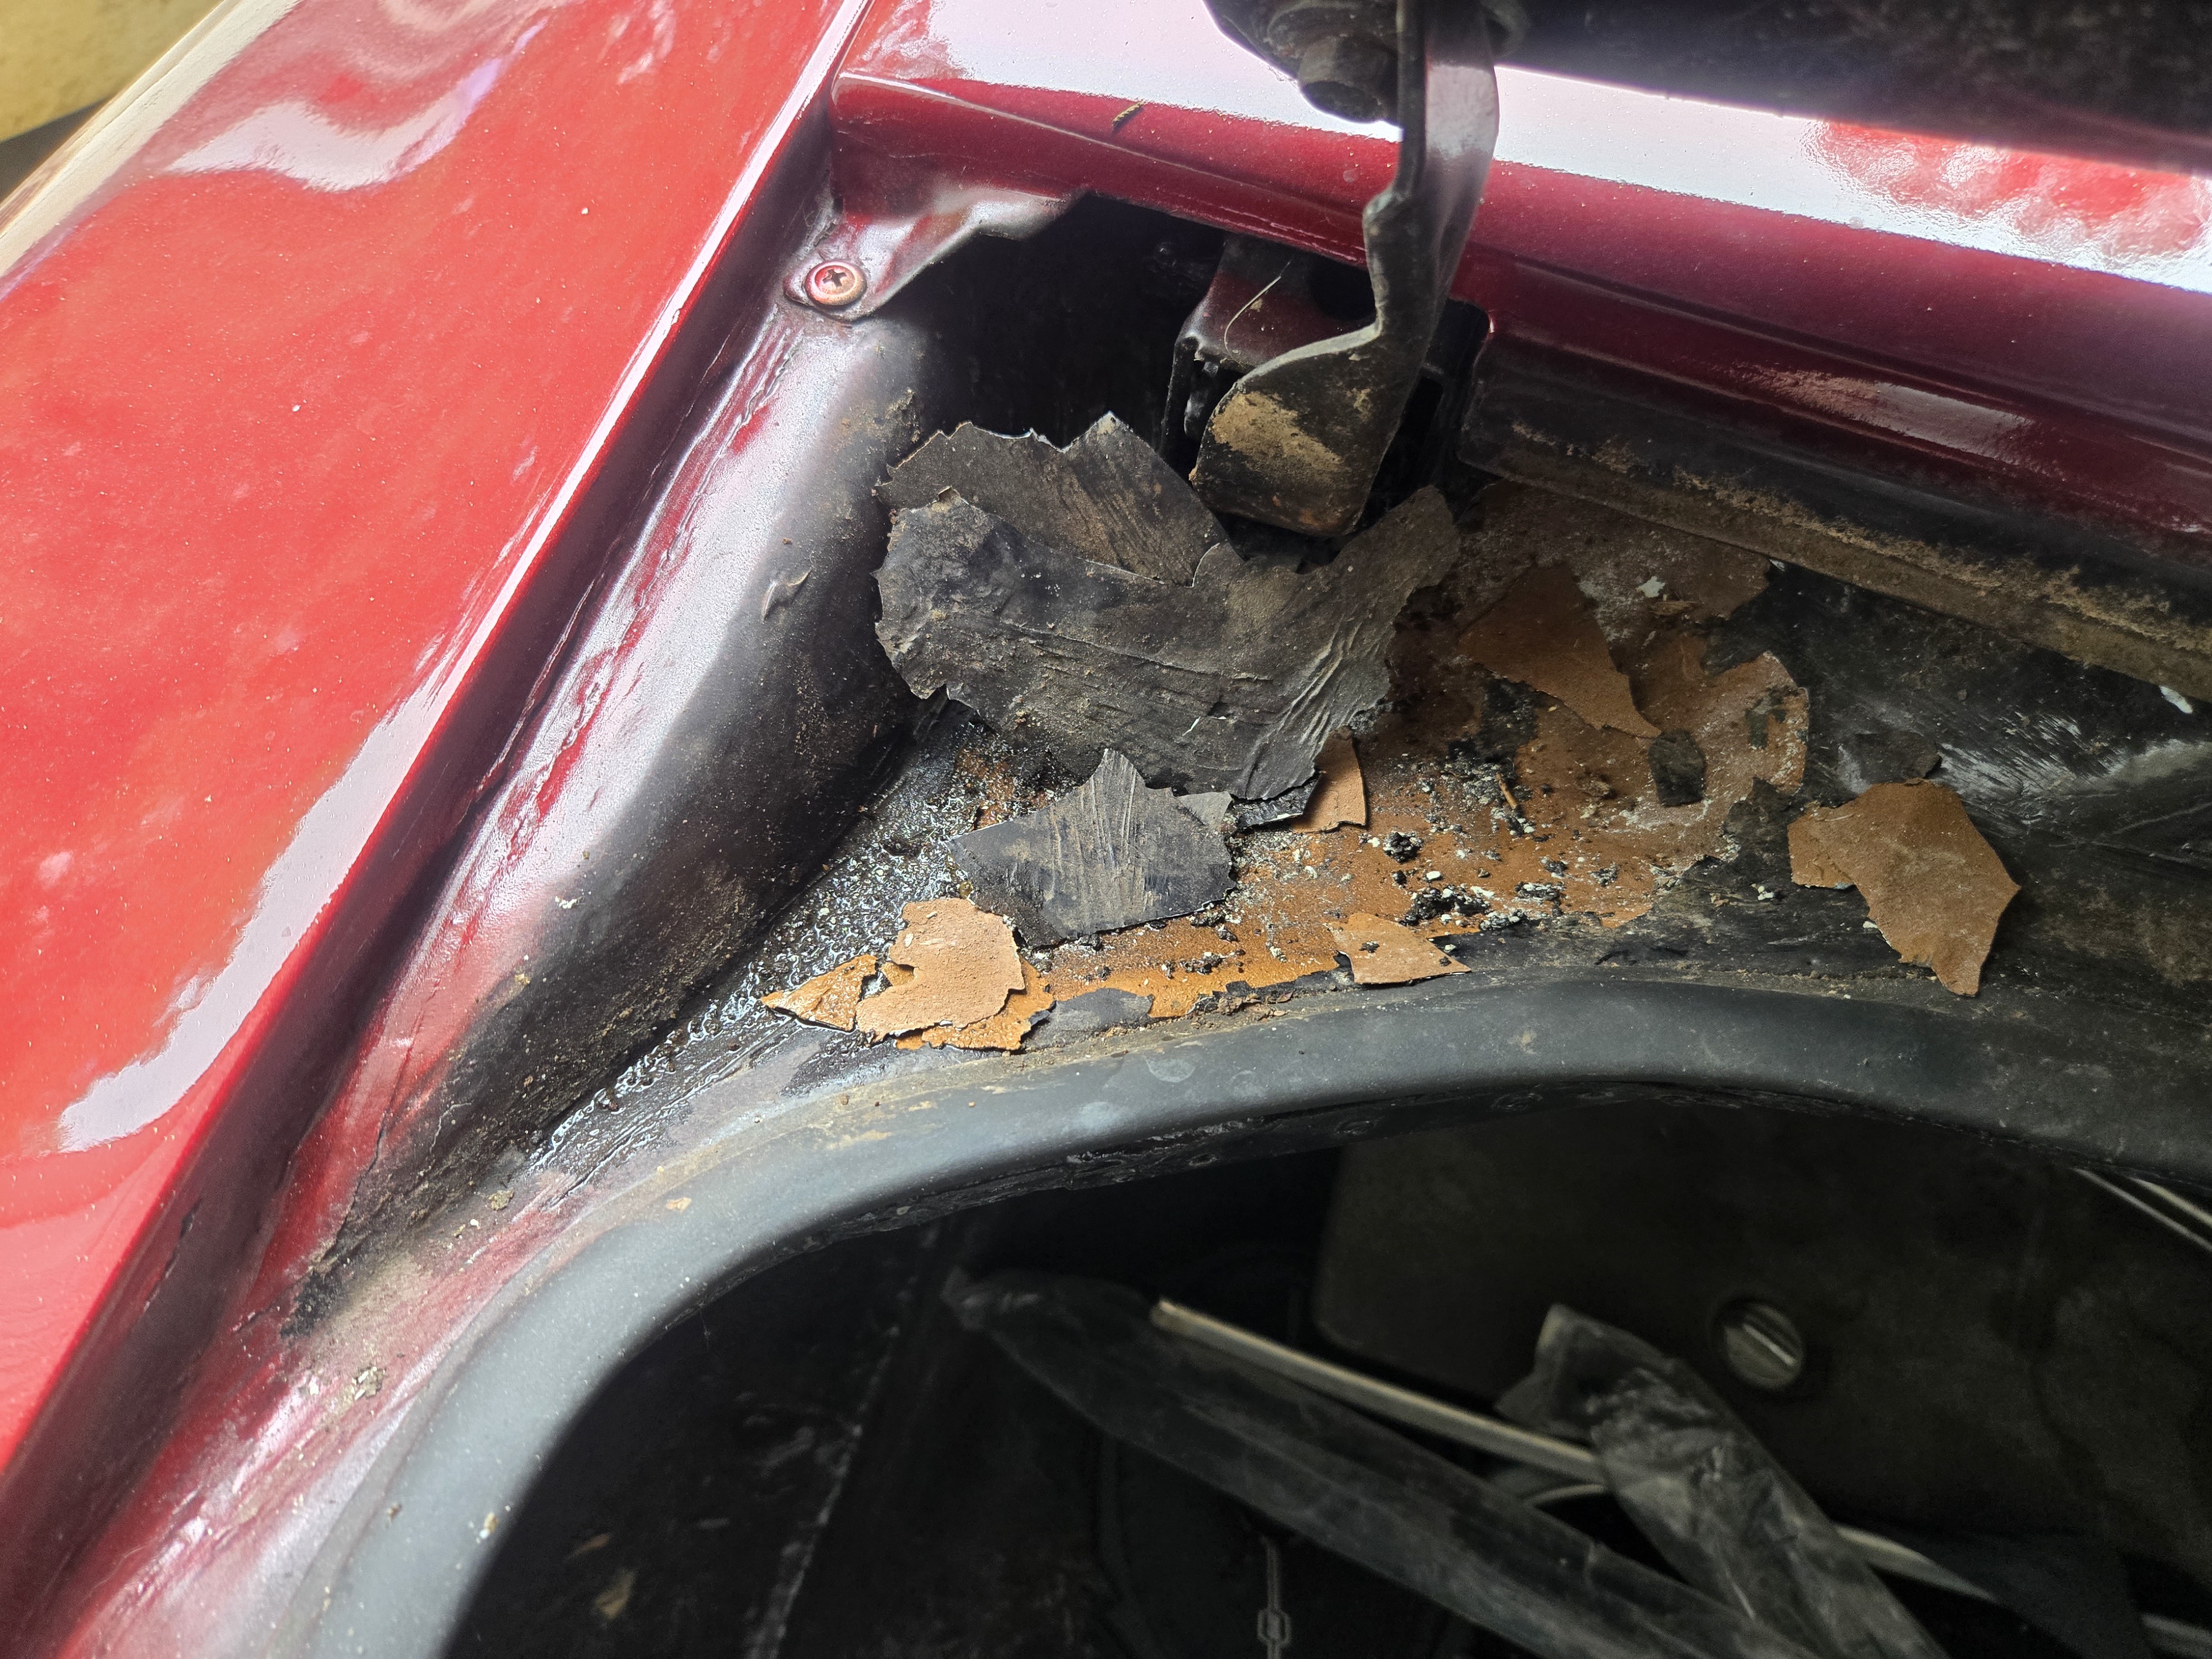 20260712_092626 by Michael Crawford, on Flickr
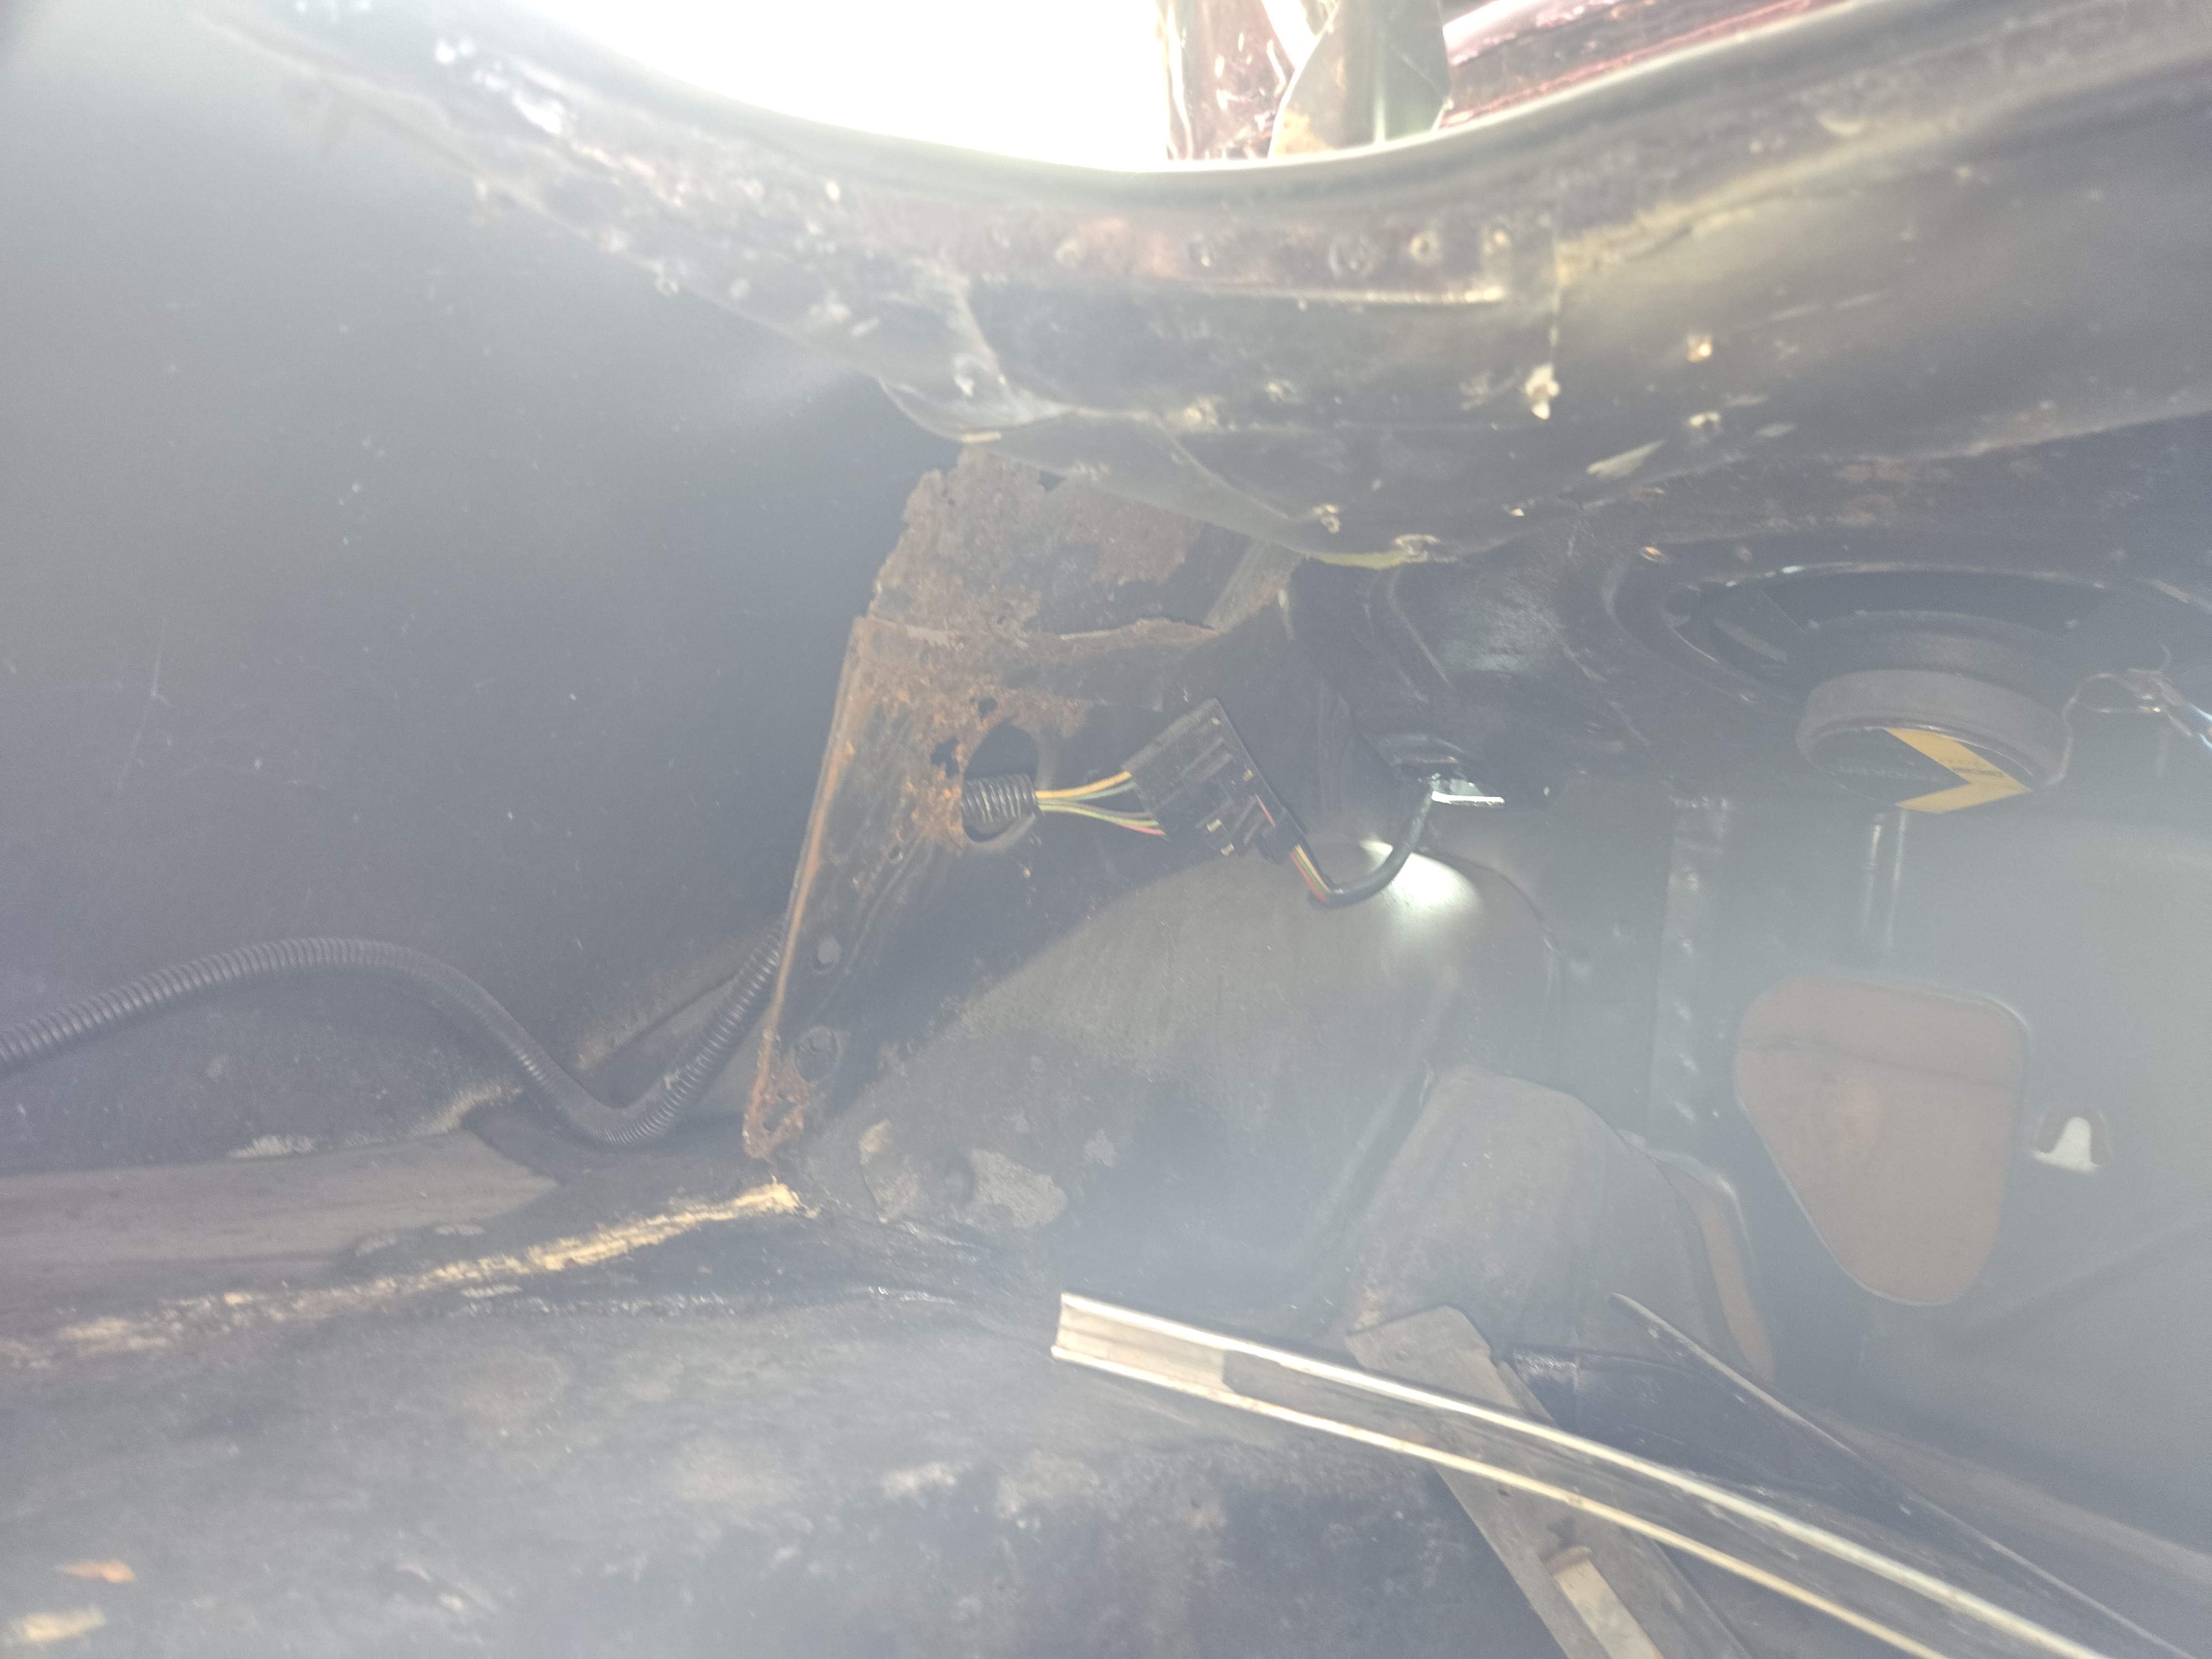 20260712_092633 by Michael Crawford, on Flickr
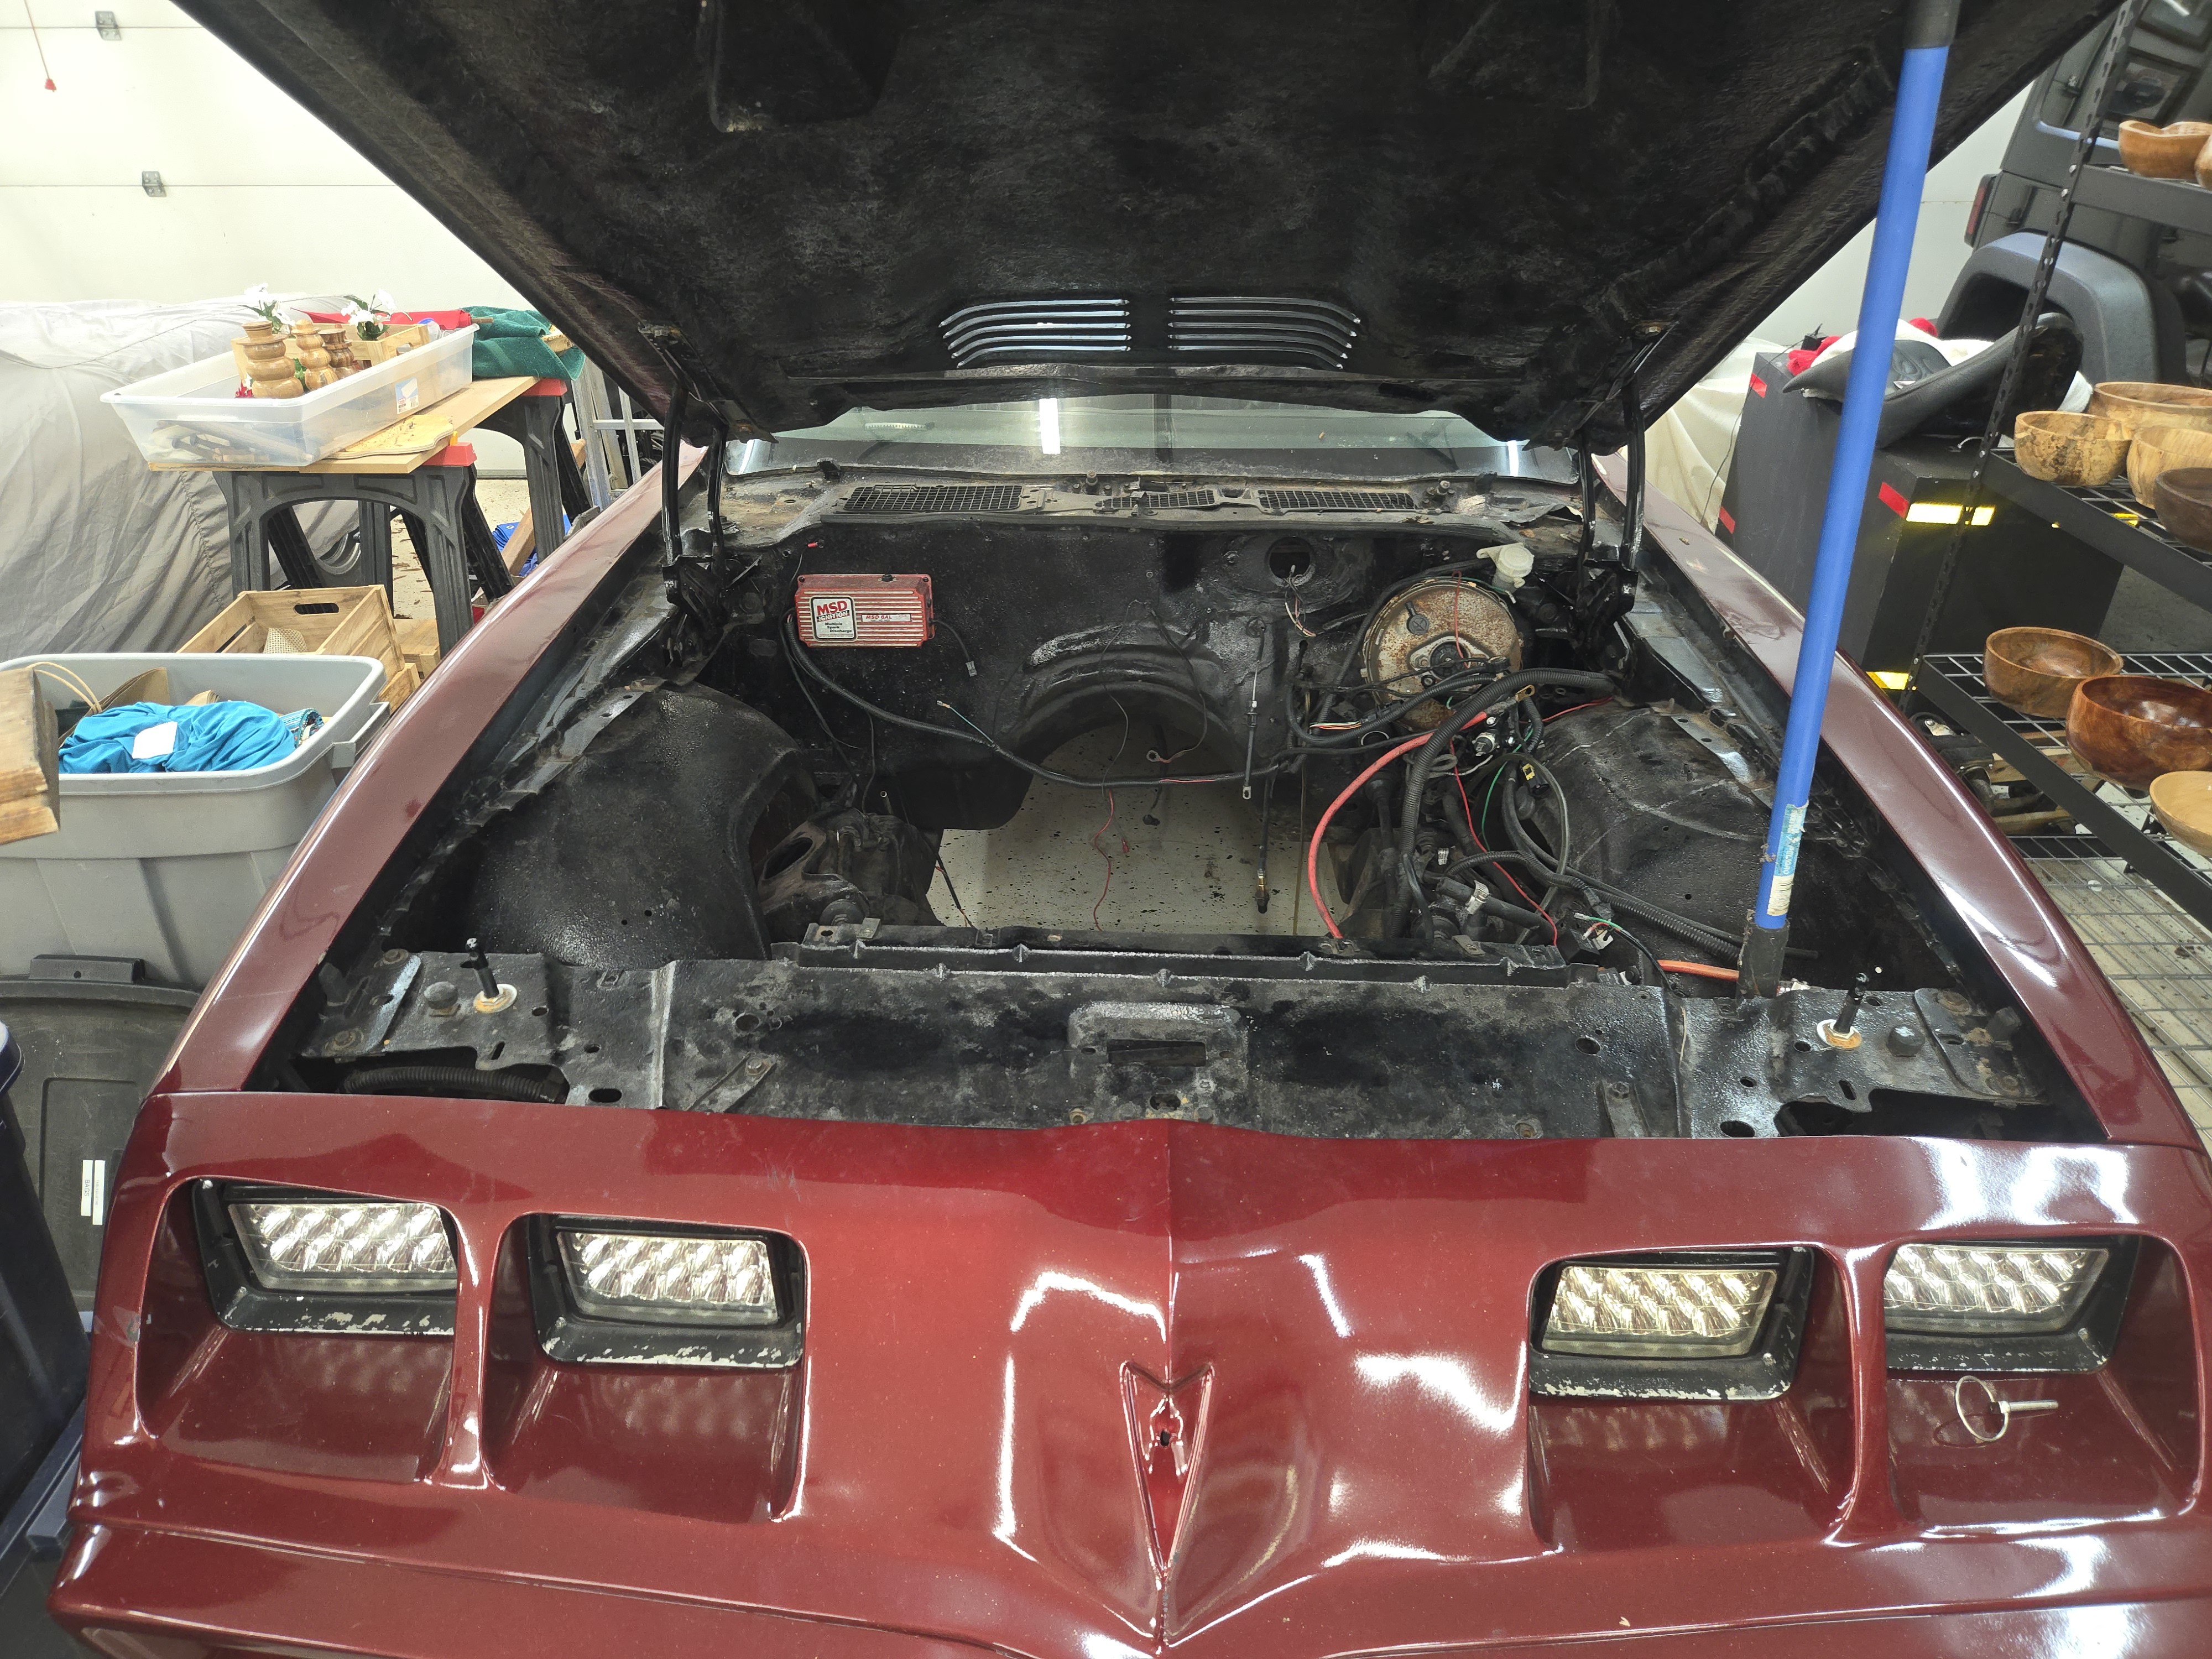 20260712_152941 by Michael Crawford, on Flickr
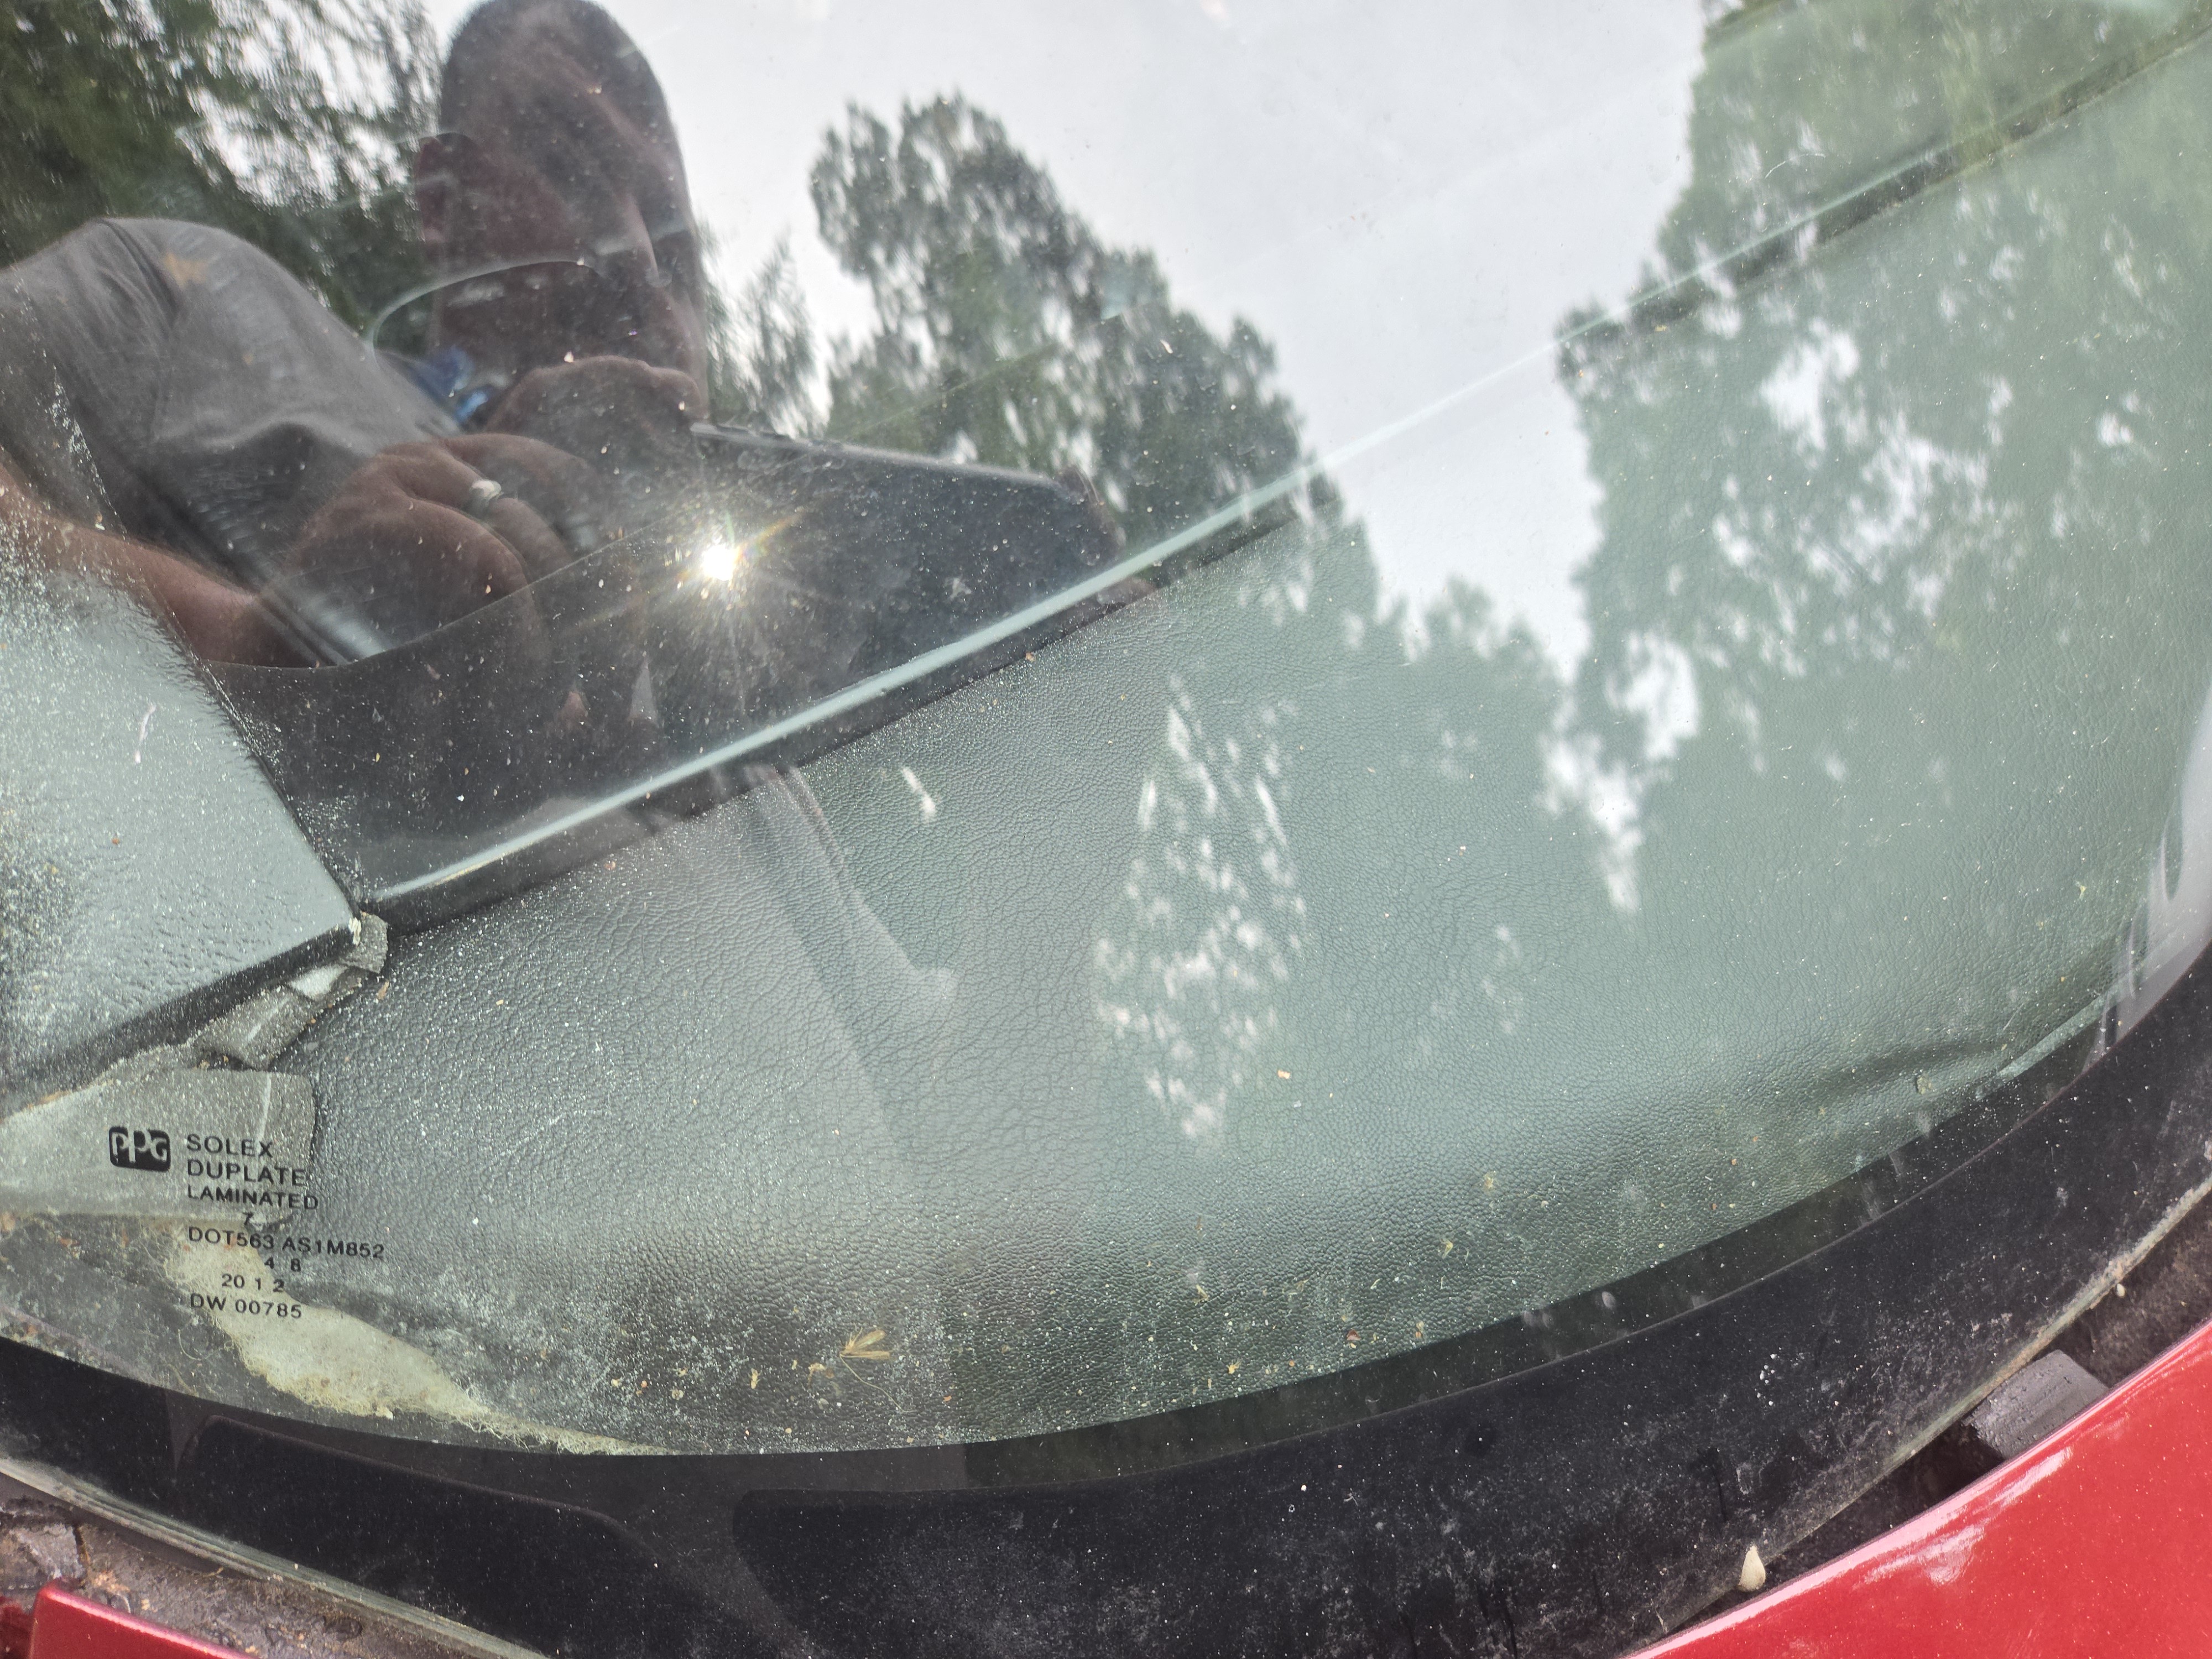
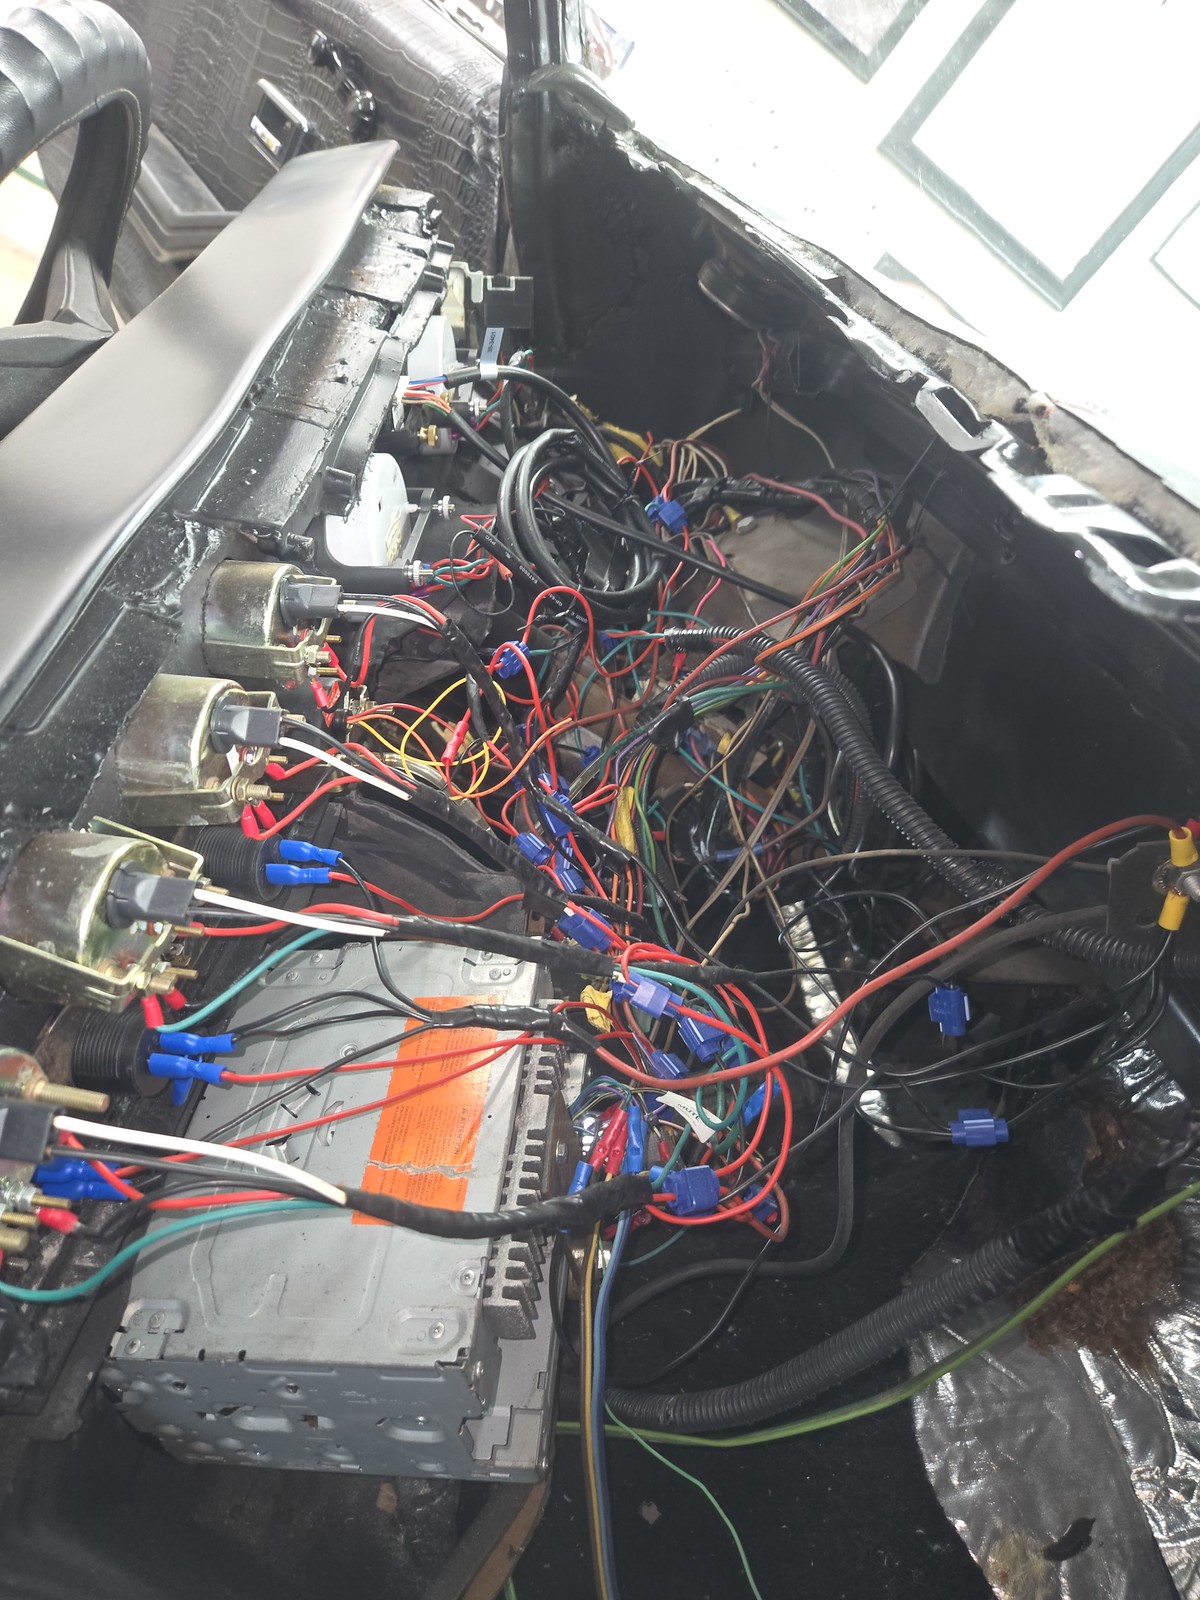
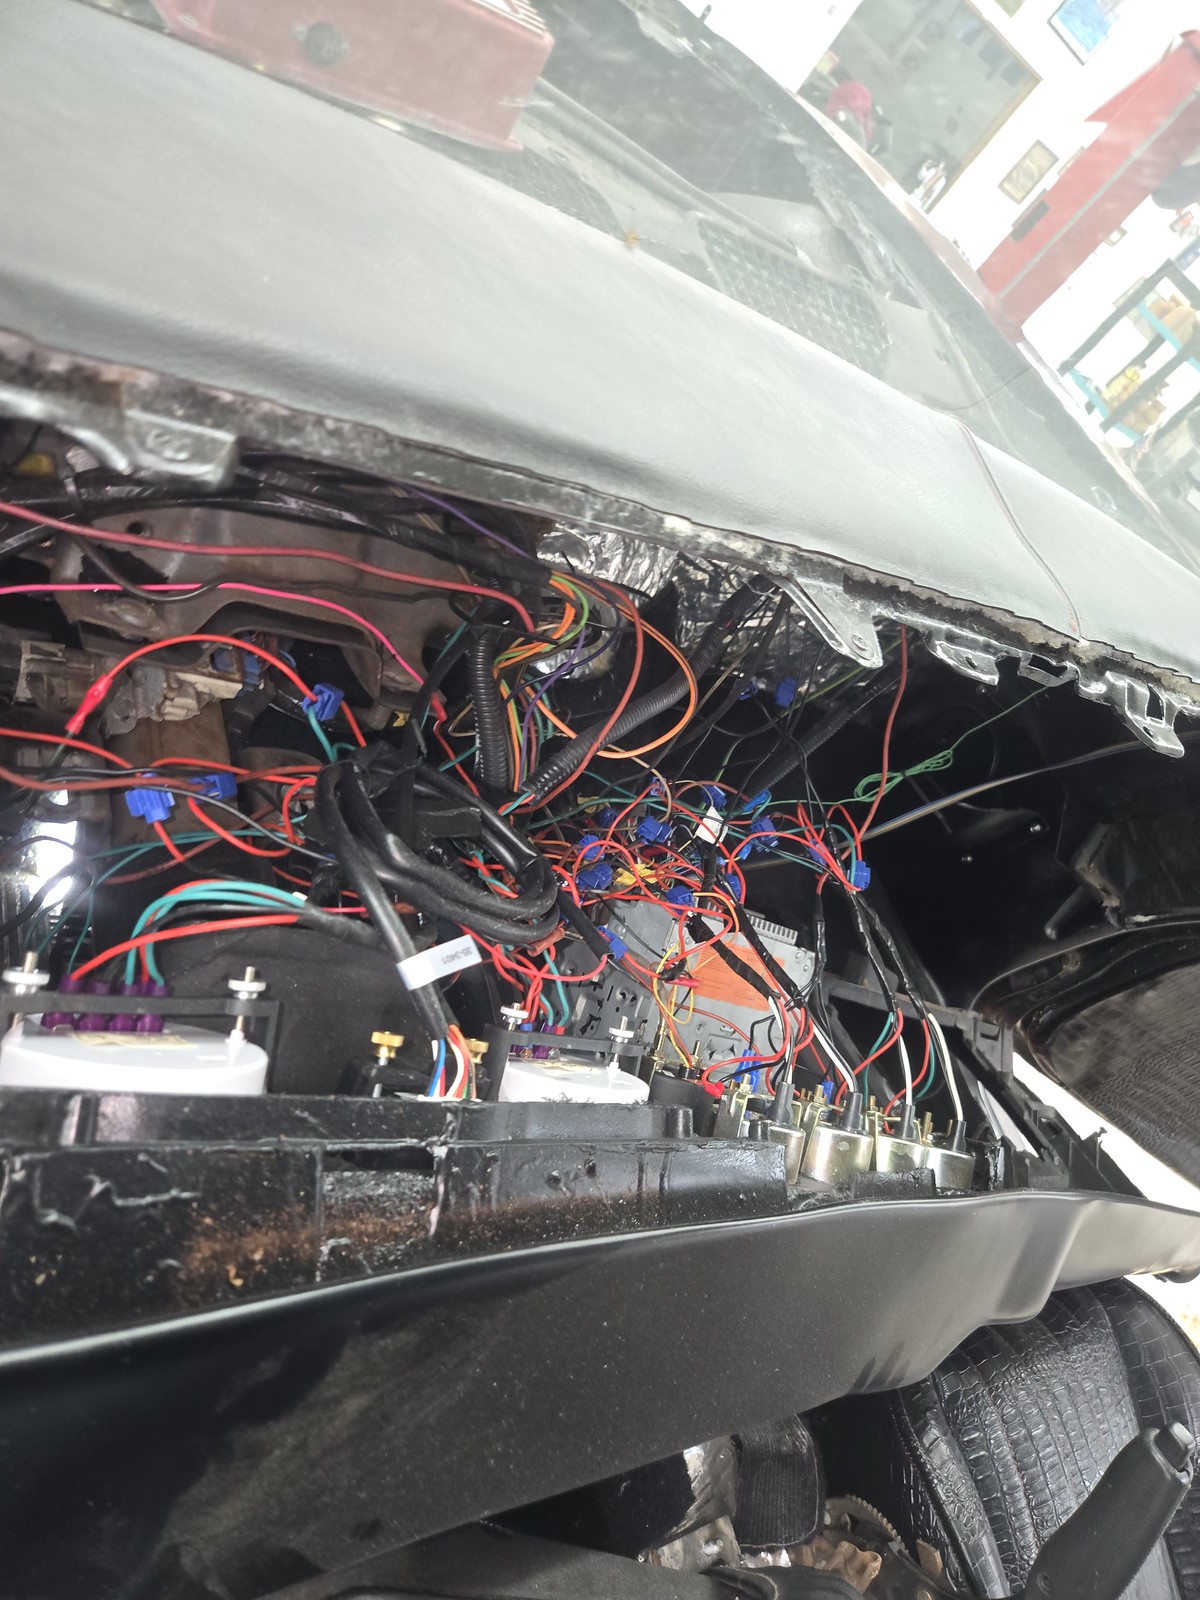
It also has a fantastic factory dash that has been modified and fiber glassed solid, with a dash pad that was glued over the defrost ducts speakers, and vin. As well as a SERIOUSLY hacked and scary wiring harness.
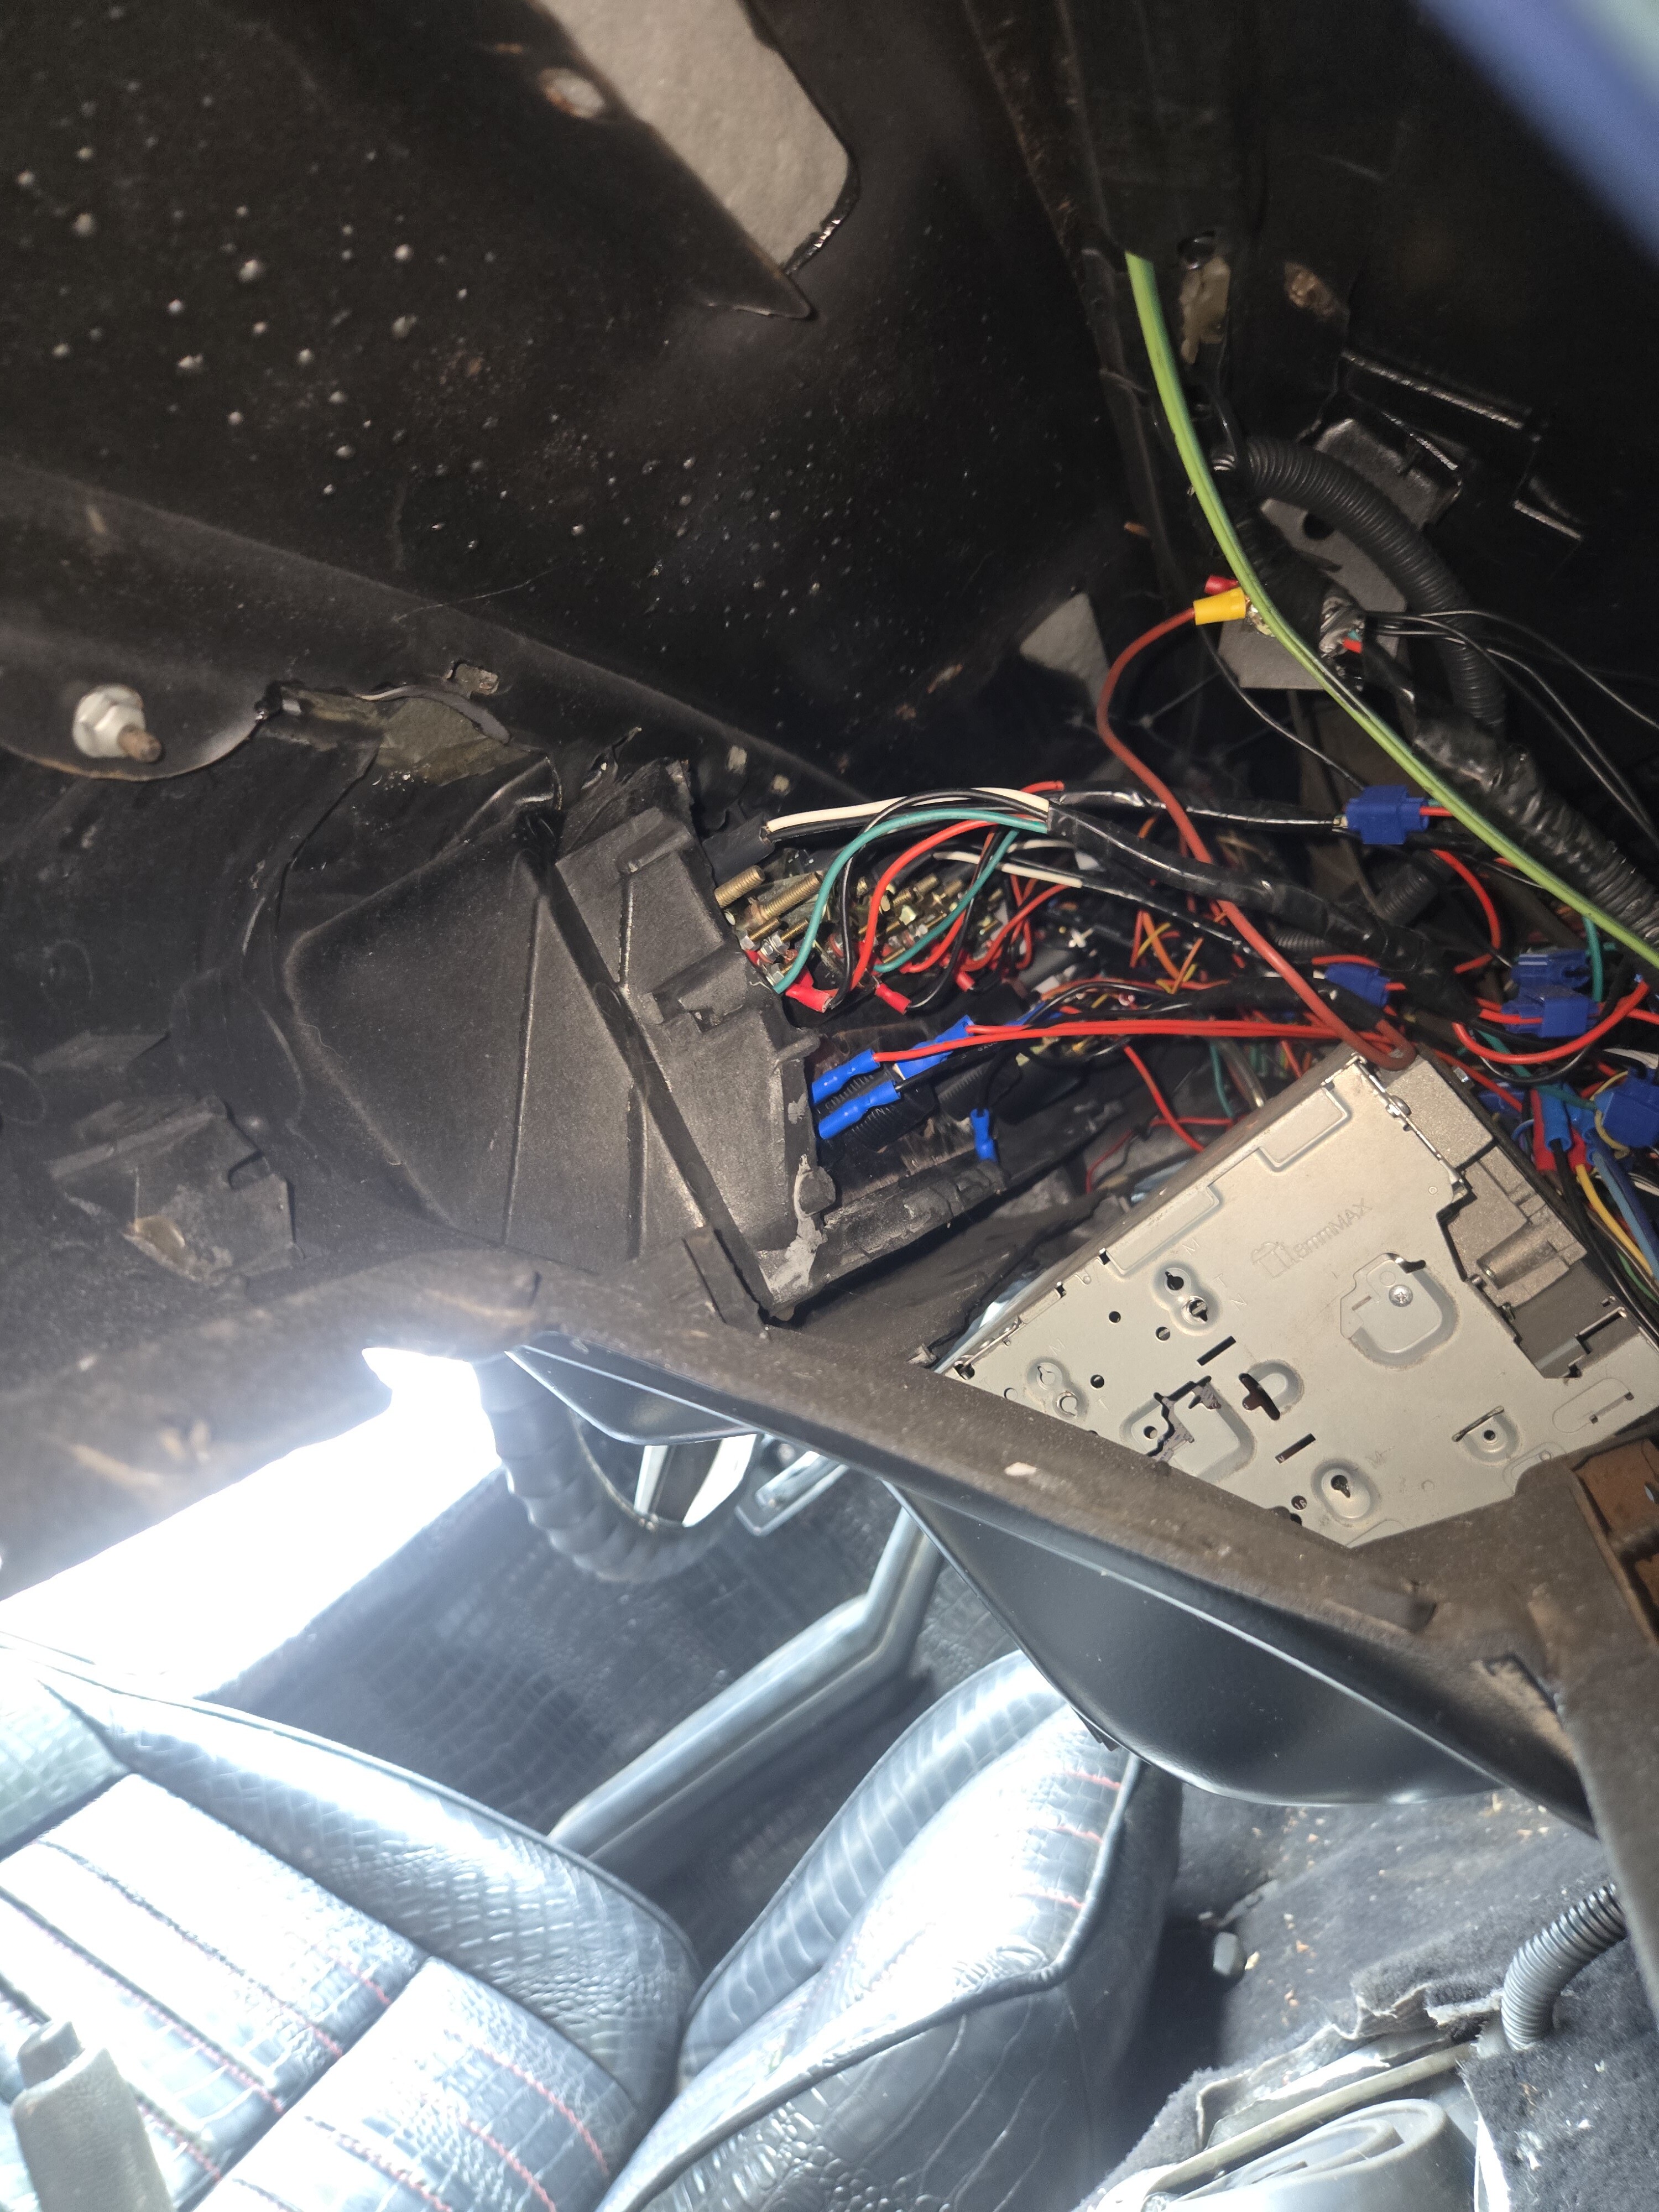 20260712_092730 by Michael Crawford, on Flickr
 20260712_092750 by Michael Crawford, on Flickr
About the only parts in the bins that weren’t drivetrain were a battery, some gauge and interior and trim parts, an aluminum radiator and fans, wiper motor and arms, and some other misc. crap.
Got home 14 hours after leaving, as well as driving through some wind and rain that had trees horizontal.
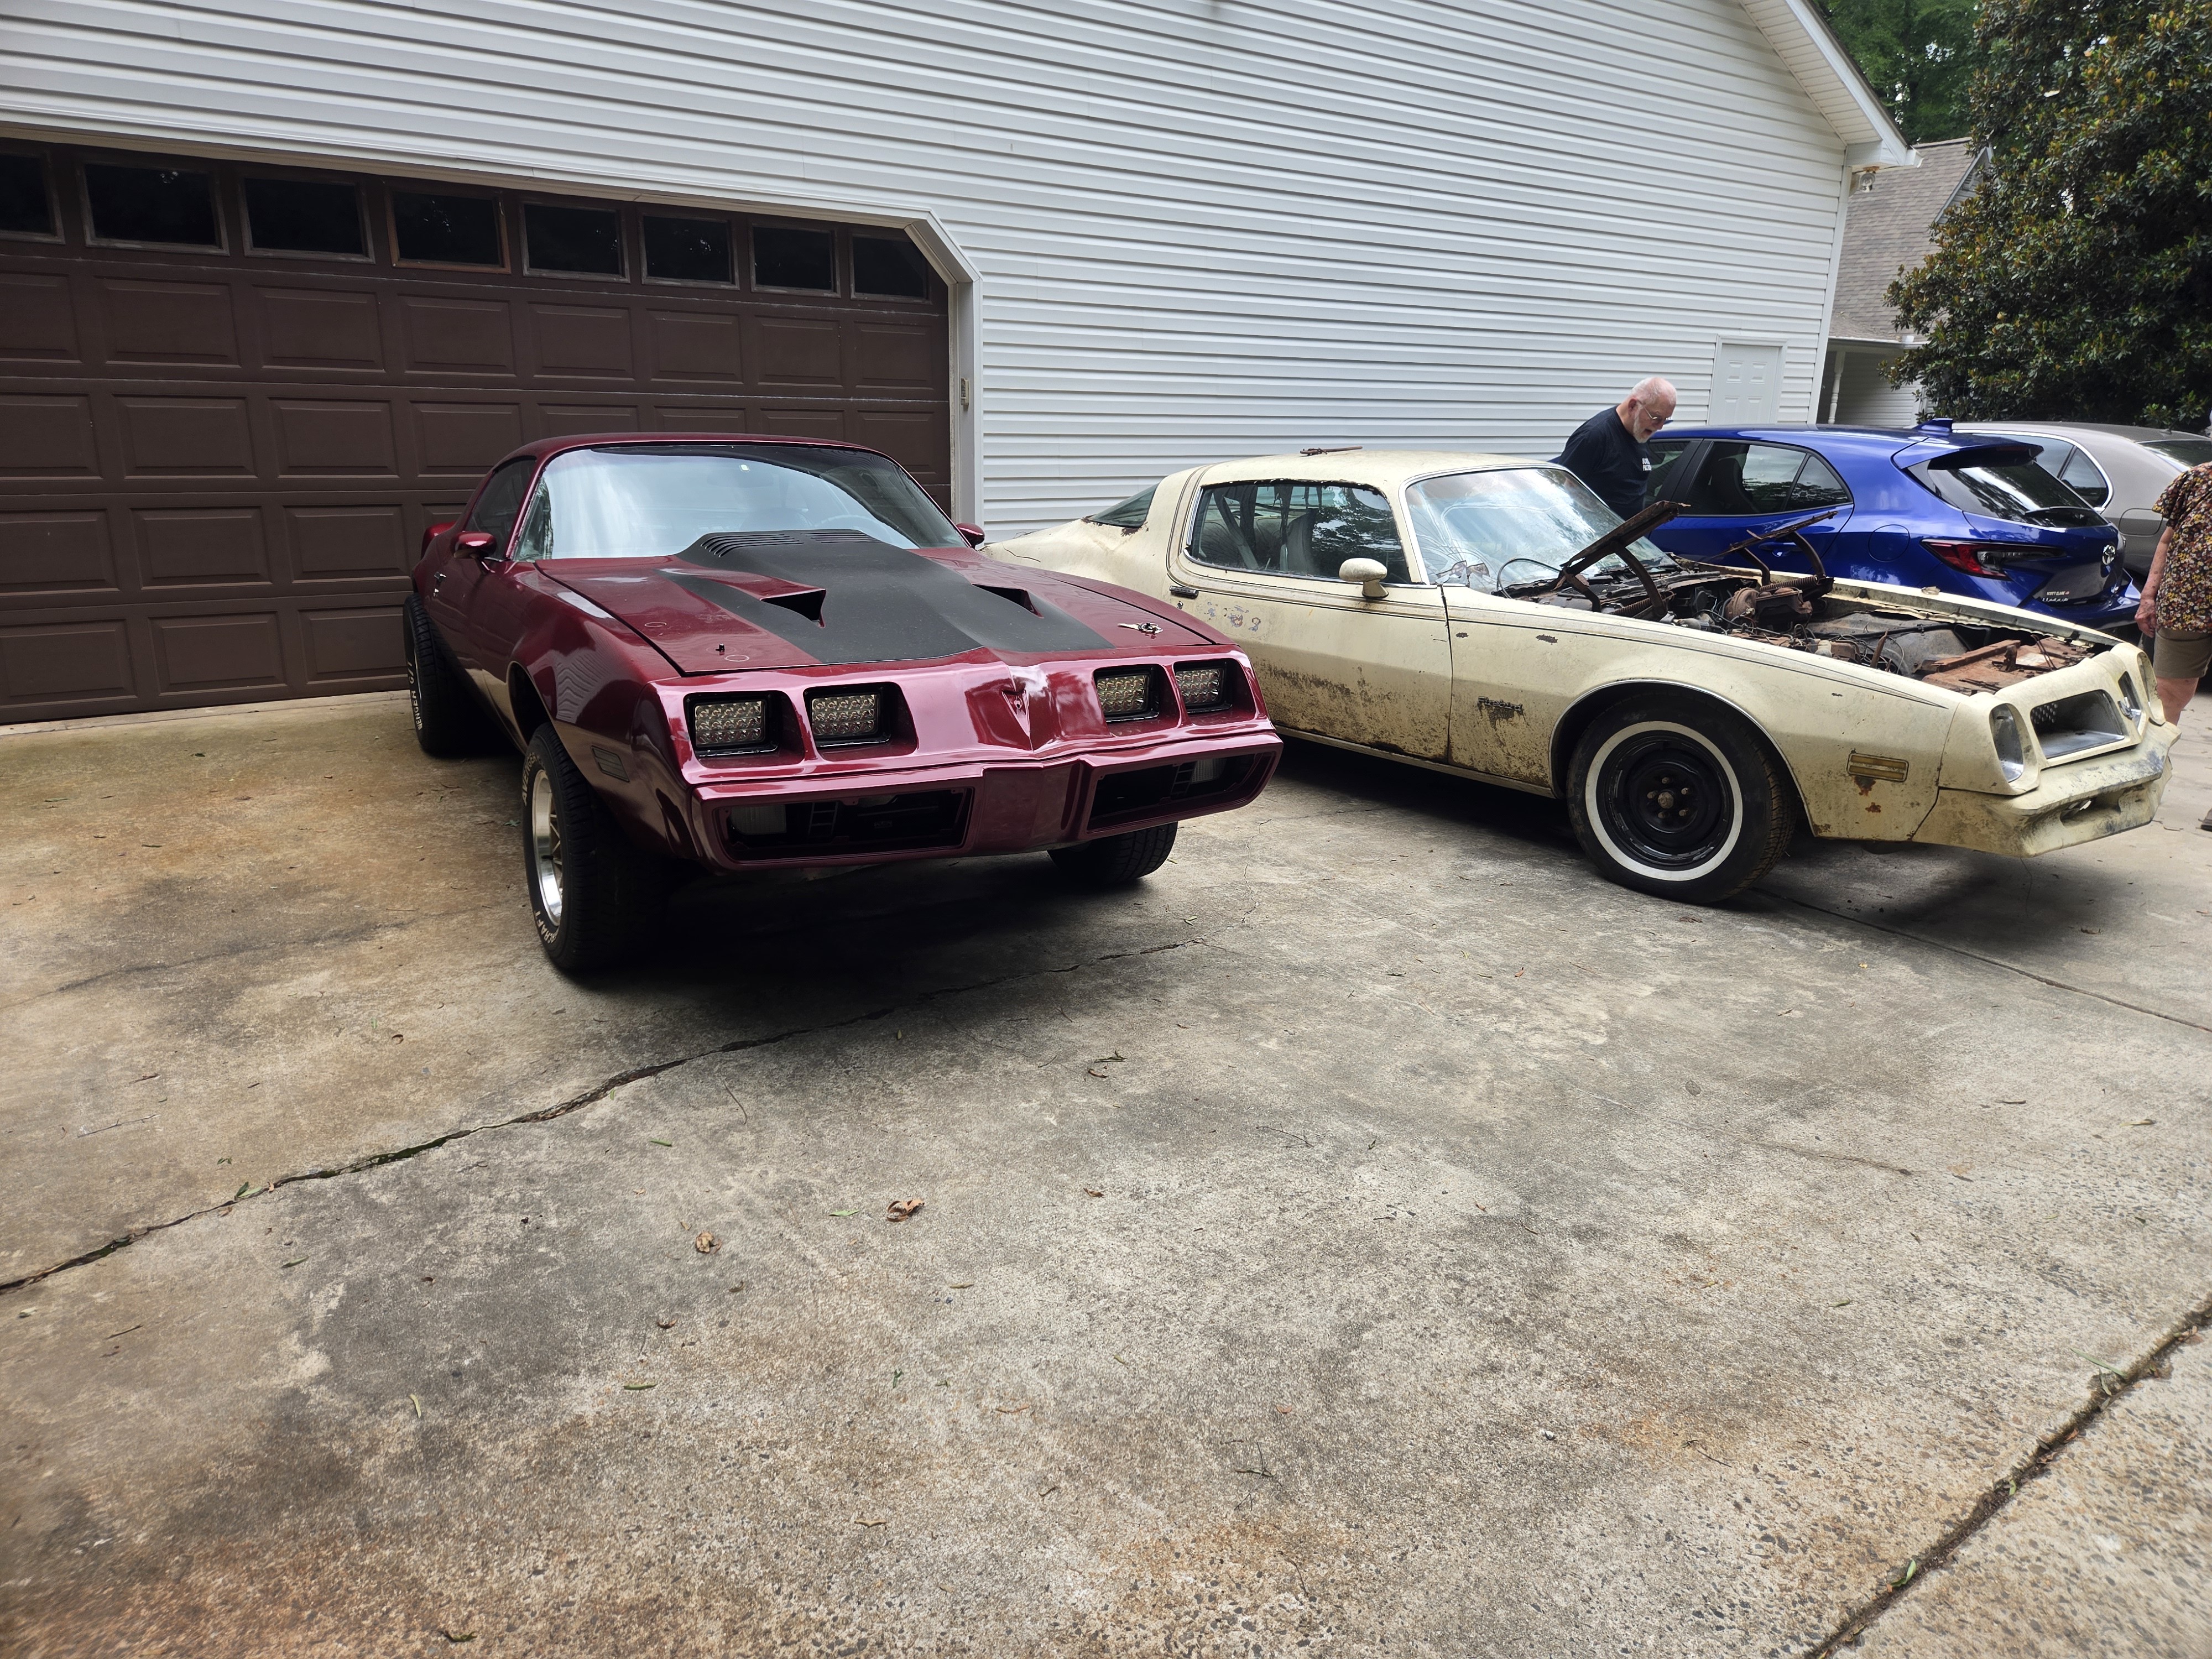
Dropped it at dad’s house next to the 76, dropped the uhaul, and went to bed.
 20260711_163015 by Michael Crawford, on Flickr
Looking at the car a bit closer Sunday, we also have rear disc brakes, and adjustable distribution valve, 6al, no master cylinder, inoperable seatbelts, new weatherstripping, extra speakers, an amp and sub, aem wideband, bedliner engine bay, rebuilt front suspension, wheel spacers and wrong lug nuts loosely holding on the rear wheels, incomplete window trims, a tilt column, new gas tank that has a leak somewhere, no name shocks and lightweight front springs, seriously different alignment shim stacks, new headliner, and other stuff I’m sure I’m forgetting.
It was a good buy for what I want. Especially once I sell off the stuff I don’t want. Shame that he used the nice 6x heads for weight for his garden tiller and then kicked them around the concrete floor until they were scrap, but the intake/5 speed/valve covers/mini starter should more than pay for most of the car I think.
Anyway, let’s talk about where to go from here. Because this is a build thread, not a purchase thread.
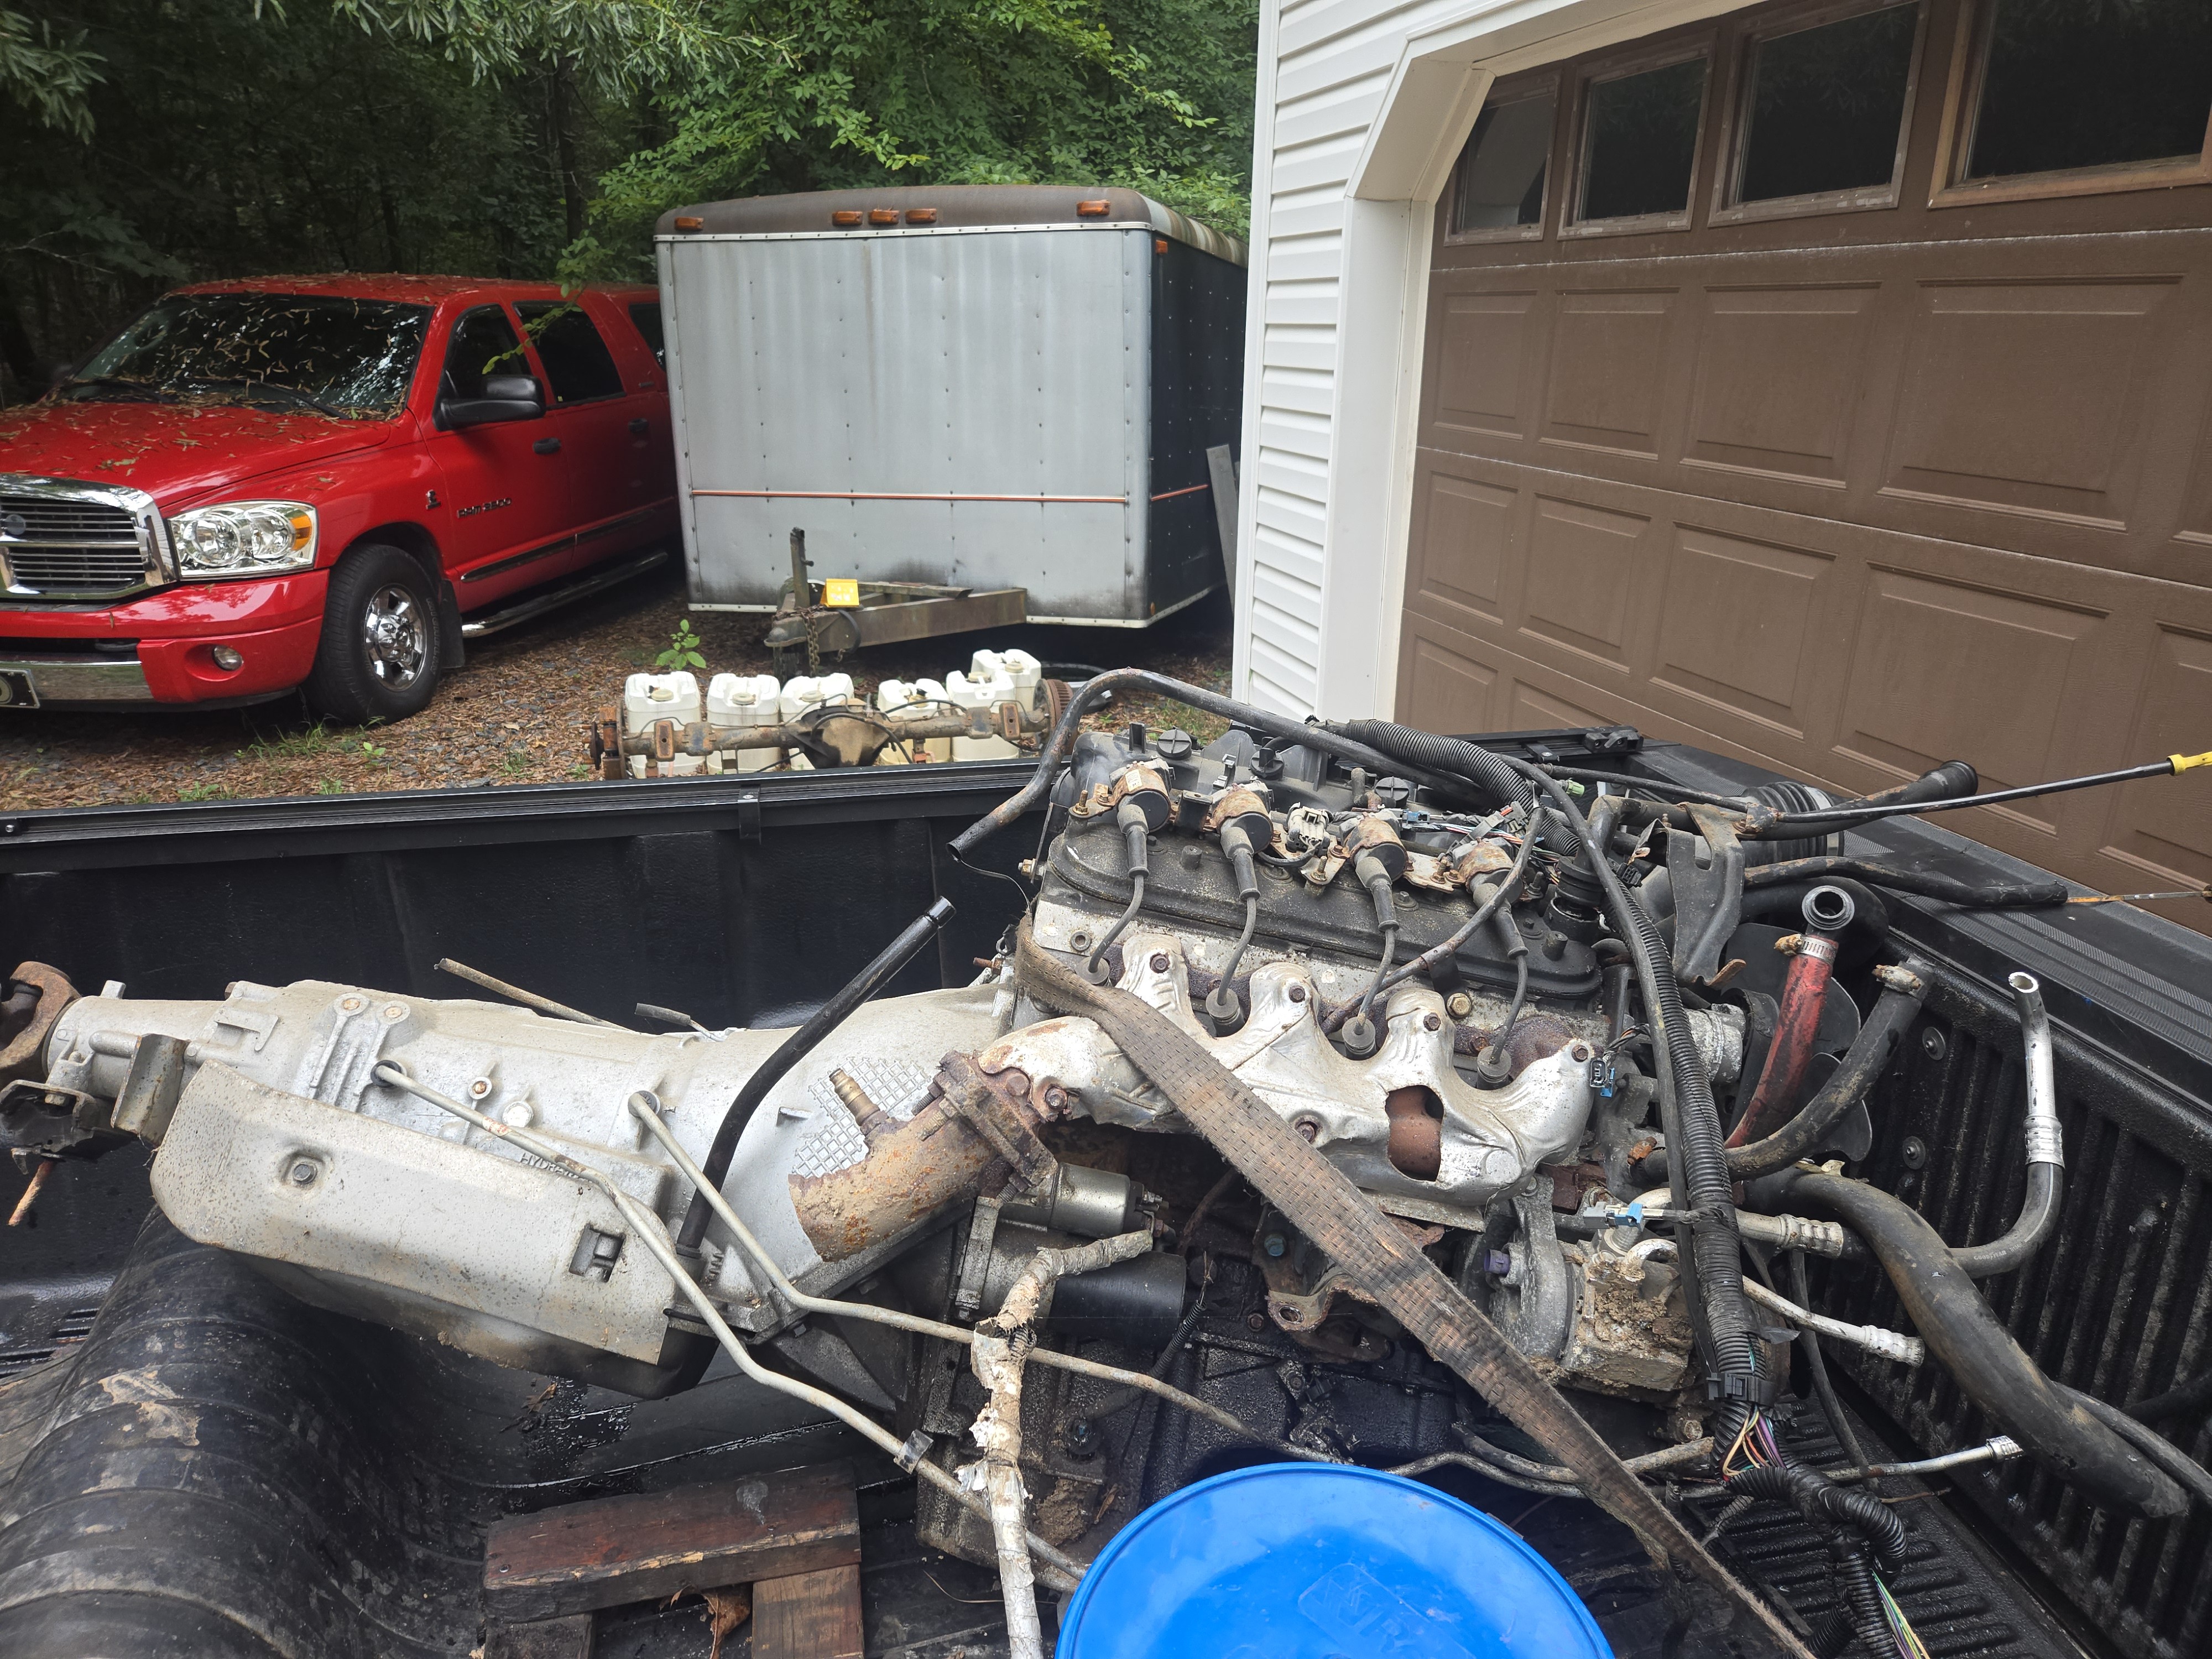
Weve already talked about the plan for minimum viable product. To get there, I have my $600 6.0 4l80e out of a county short bus to put in it. bought it with a miss in it from runion with wiring and accessories and computer a while back as a possibility to swap into my truck, and never used it. so this is the perfect application. Ill clean it up, paint the aluminum aluminum, block black, and sit it in.
 2026-07-12_06-43-52 by Michael Crawford, on Flickr
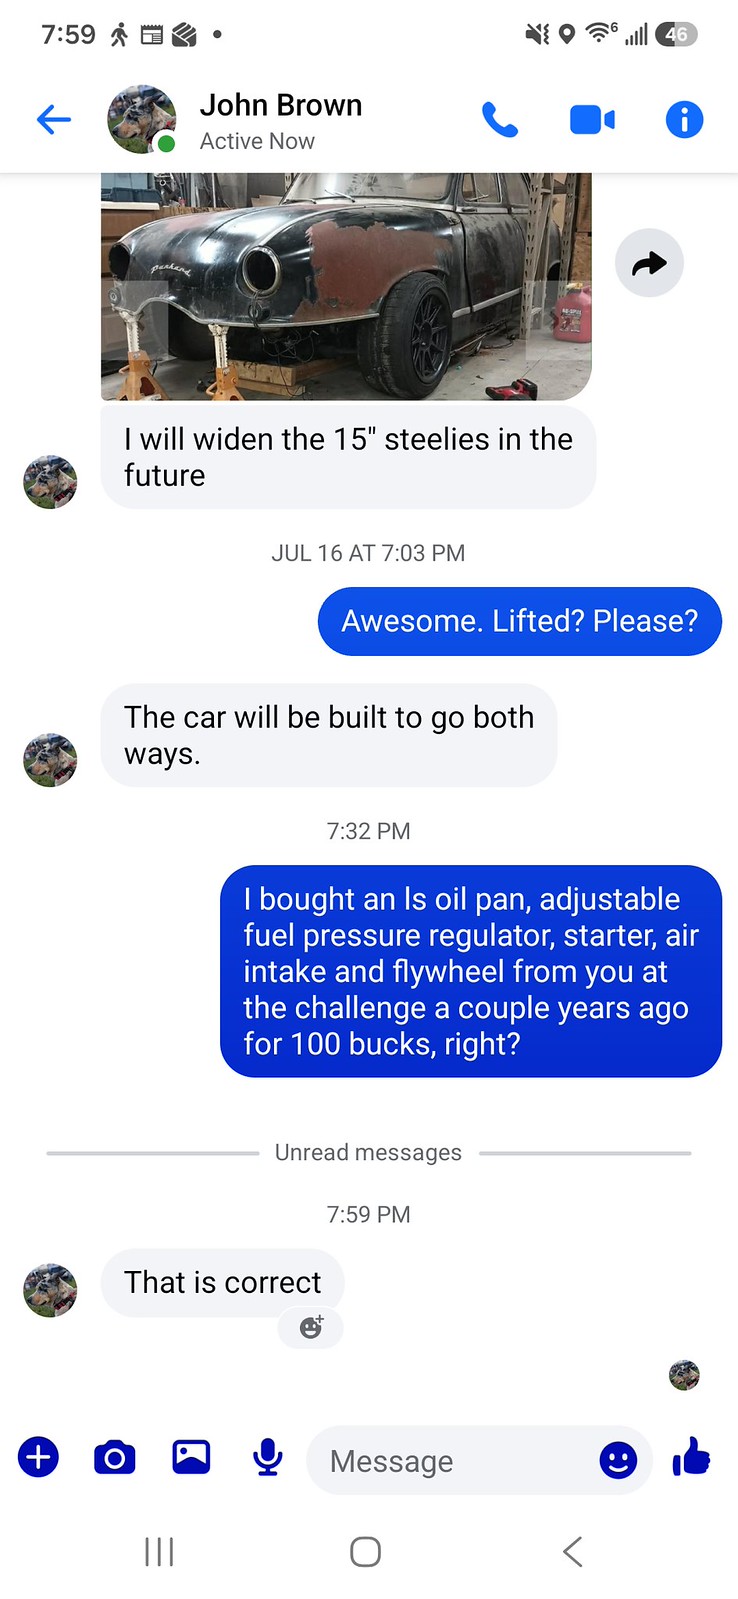
A few years back, I spent 100 bucks and bought an f body clone oil pan, new starter, intake pipe kit, and fuel pressure regulator from john brown at the challenge. So ill use those parts. Ill need to sort exhaust manifolds, mounts, and driveshaft. And then see if the truck accessories and intake will fit. Rewire the car, or bypass all of the janky **** under there now. but, one step at a time.
Step 1.5, immediately after minimum viable product, will be a prep for the GRM challenge. Its an event I have been doing for years. This year, they have introduced the $5000 class, with no exemptions/recoup/freebies/trades/etc except taxes and one set of tires. This is something I have been advocating for long and hard, so I WILL be bringing a car to support it. this is that car.
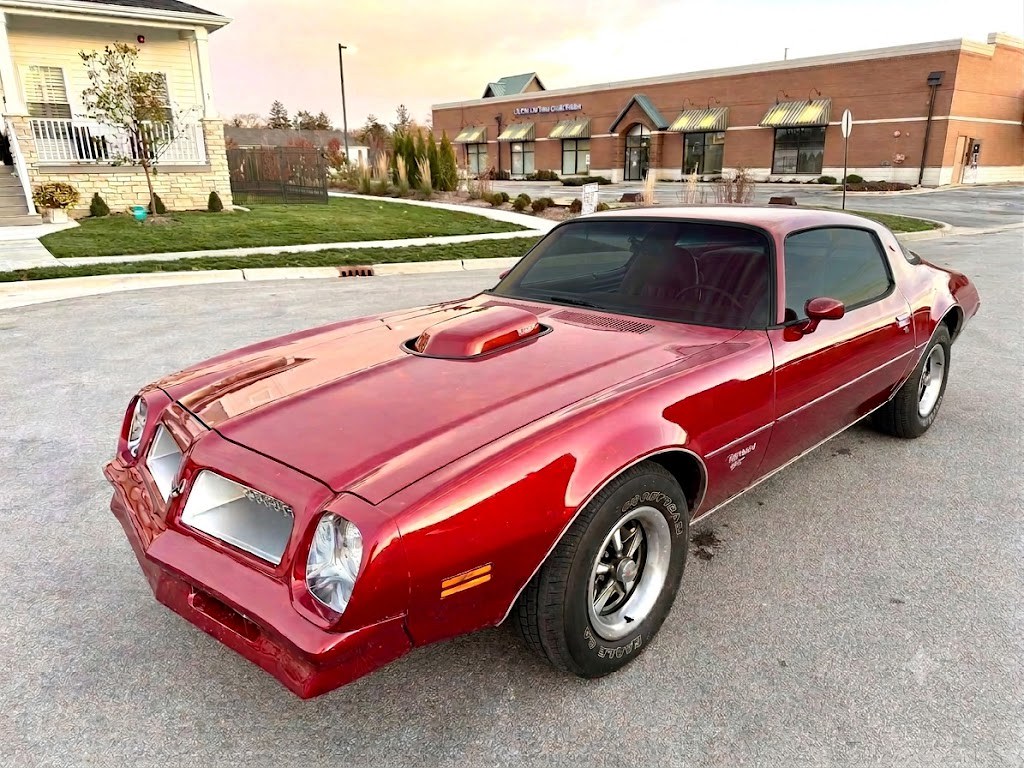
Step 2, assuming I like owning and wheeling a firebird, will be development. It will be turned into a 76 visually, with suspension upgrades, new wiring, stock dash/console/hvac, and different rolling stock. Something like this at the end….
 84568655-bf09-460b-a4f7-7848bbd13745 by Michael Crawford, on Flickr
All this is HIGHLY subject to change, and nitrous. So, stay tuned. Step at a time. So first is getting things organized, brown car squared away, and parts cars dealt with. Then the LS sat down in so that its off the floor.Michael Crawford
1970 plymouth Duster back under construction:
https://www.pro-touring.com/showthre...uring-makeover
1987 GMC S15 https://www.pro-touring.com/showthre...ct-drivabeater
-
07-13-2026 #2
 Registered User
- Join Date
- Sep 2009
- Posts
- 2,996
Sounds like a fun project! I have a soft spot for 76 Firebirds as well. My first restoration was a 76 Trans Am.
1955 Nomad project LC9, 4L80e, C5 brakes, Vision wheels
1968 Camaro 6.2 w/ LSA, TR6060-Magnum hybrid and etc SOLD
1976 T/A LS1 6 Speed, and etc. SOLD
Follow me on Instagram: ryeguy2006a
07-18-2026 #3
Registered User
- Join Date
- Jul 2006
- Location
- Chesapeake, VA
- Posts
- 678
Nice, you're going to increase the cool factor by about 5,000%.
Cars are meant to be driven.
John B
07-19-2026 #4
Registered User
- Join Date
- Aug 2007
- Location
- Albemarle, NC
- Posts
- 1,170
No gonna lie, its been way too long since ive been active here. The pro-touring world moved on from what i build, and i moved to other platforms and such. Been doing turbo miatas, restoring neons, building sport trucks, and rebuilding my marriage (and house). Im glad to be back to my roots with this, and will try to be more engaged in the community here as time allows like i used to be.
Hopefully the old school style of pt build (90s/early2k) is still welcome in this world of dse subframes and tube frames. I think itll be nice to see an old school junkyard/budget build in my driveway again....Michael Crawford
1970 plymouth Duster back under construction:
https://www.pro-touring.com/showthre...uring-makeover
1987 GMC S15 https://www.pro-touring.com/showthre...ct-drivabeater
07-19-2026 #5 Registered User
- Join Date
- Nov 2018
- Posts
- 987
You'll fit back in, no problem.
07-22-2026 #6
Registered User
- Join Date
- Sep 2009
- Posts
- 2,996
With the traffic on the site slowing down, I think any new build is welcome! Keep the posts coming.
1955 Nomad project LC9, 4L80e, C5 brakes, Vision wheels
1968 Camaro 6.2 w/ LSA, TR6060-Magnum hybrid and etc SOLD
1976 T/A LS1 6 Speed, and etc. SOLD
Follow me on Instagram: ryeguy2006a
07-25-2026 #7
Registered User
- Join Date
- Aug 2007
- Location
- Albemarle, NC
- Posts
- 1,170
So, lets do this update on budget and parts sourcing.
The class im running at the challenge this year is the inaugural $5k class, with no exemptions. So everything I buy needs to be in the budget.
Car was 1800
6.0/4l80 with ecm and accessories and dead miss was 600
The ls swap oil pan, spare starter, truck cold air intake, and swap flexplate I bought from john in the challenge parking lot a few years ago for 100 bucks.
 19de3957-da79-469c-bc34-2d0b653eec9c.jpeg by Michael Crawford, on Flickr
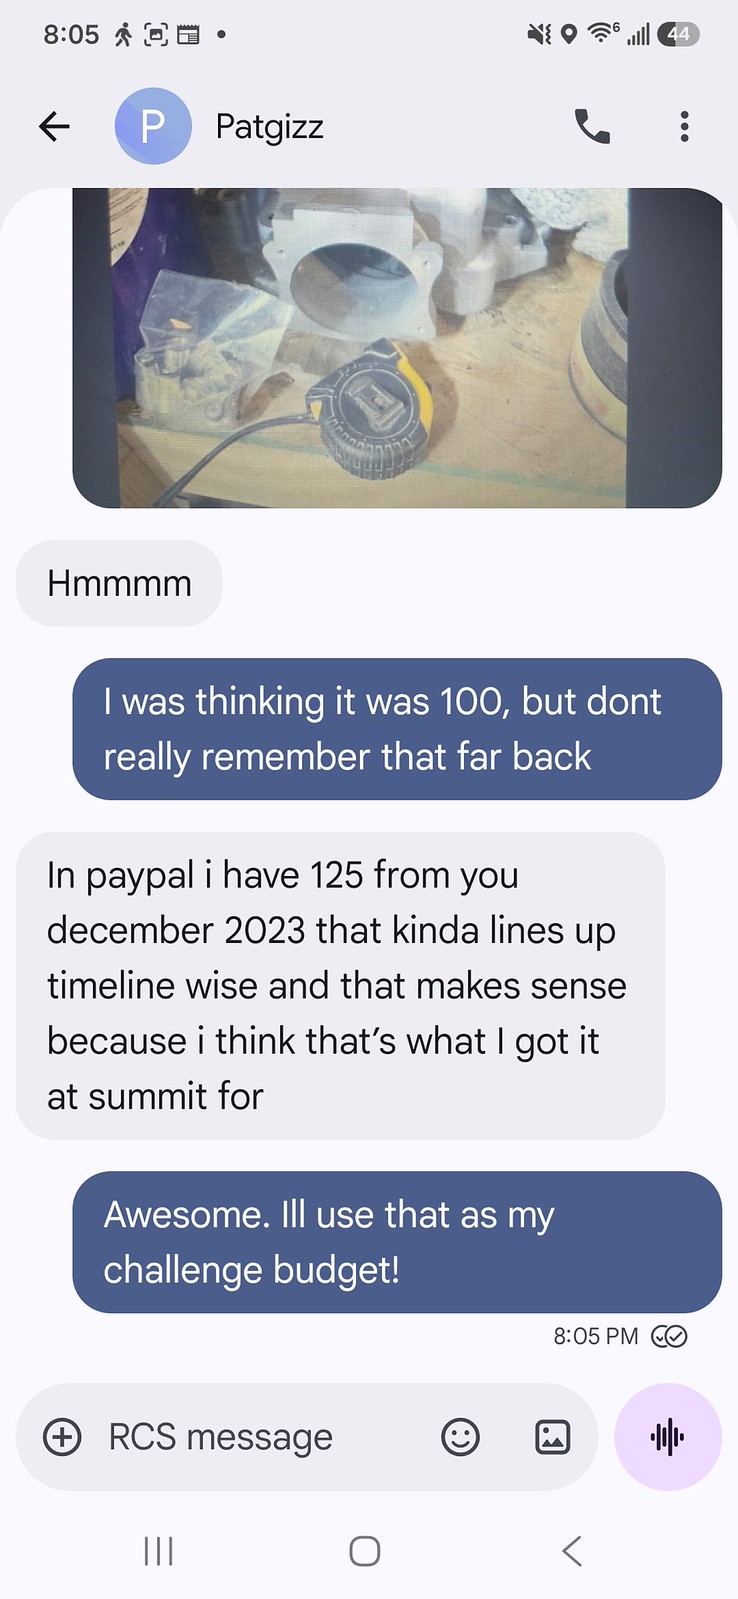
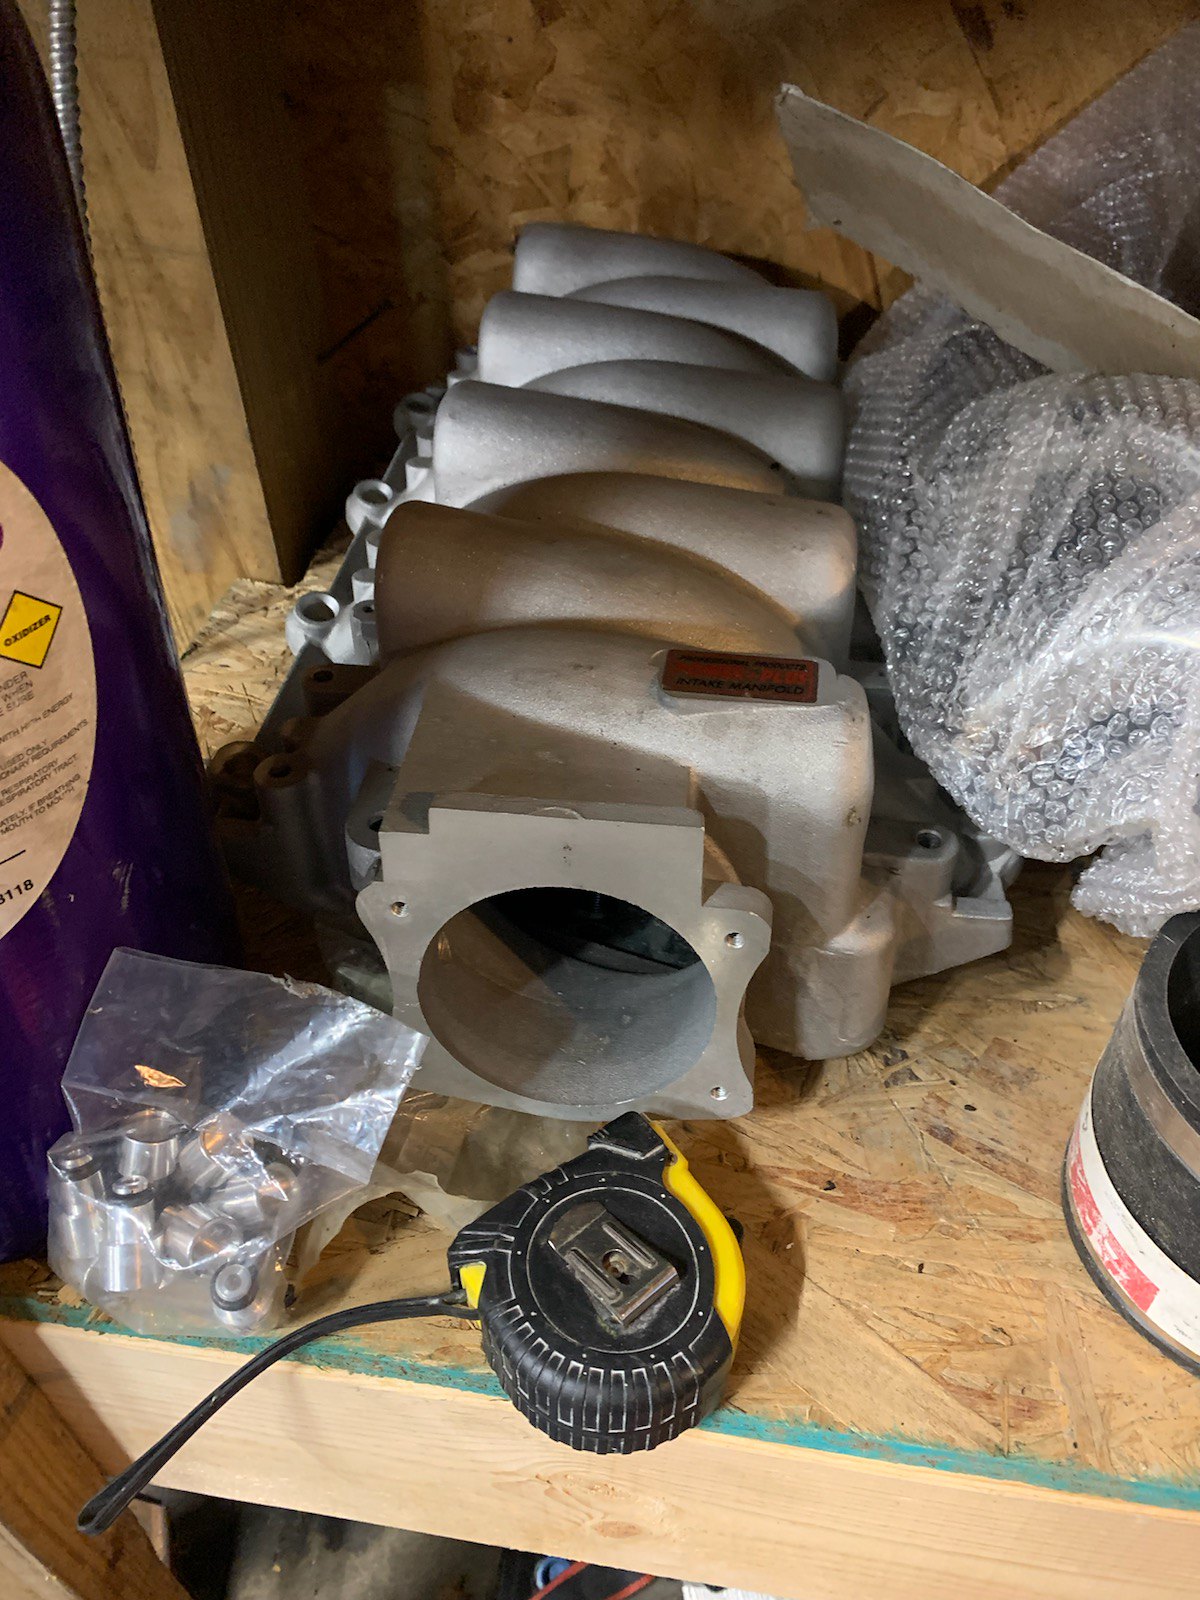
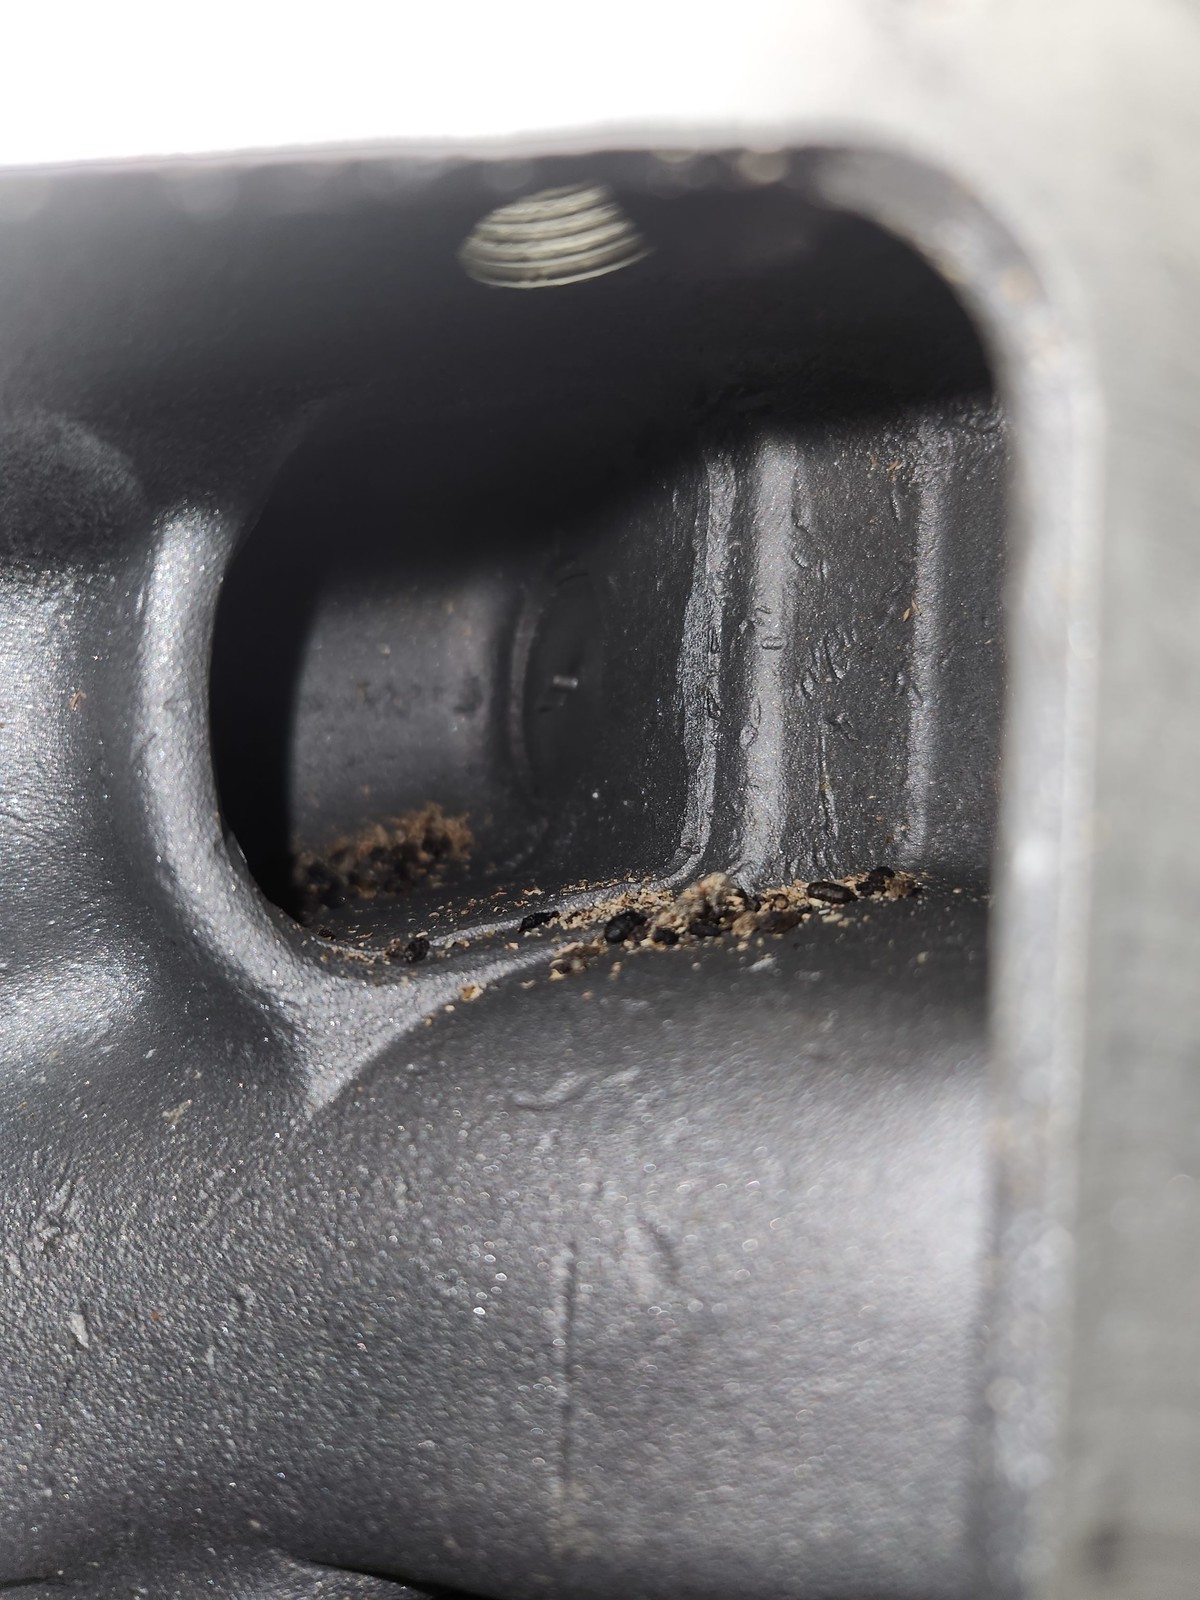
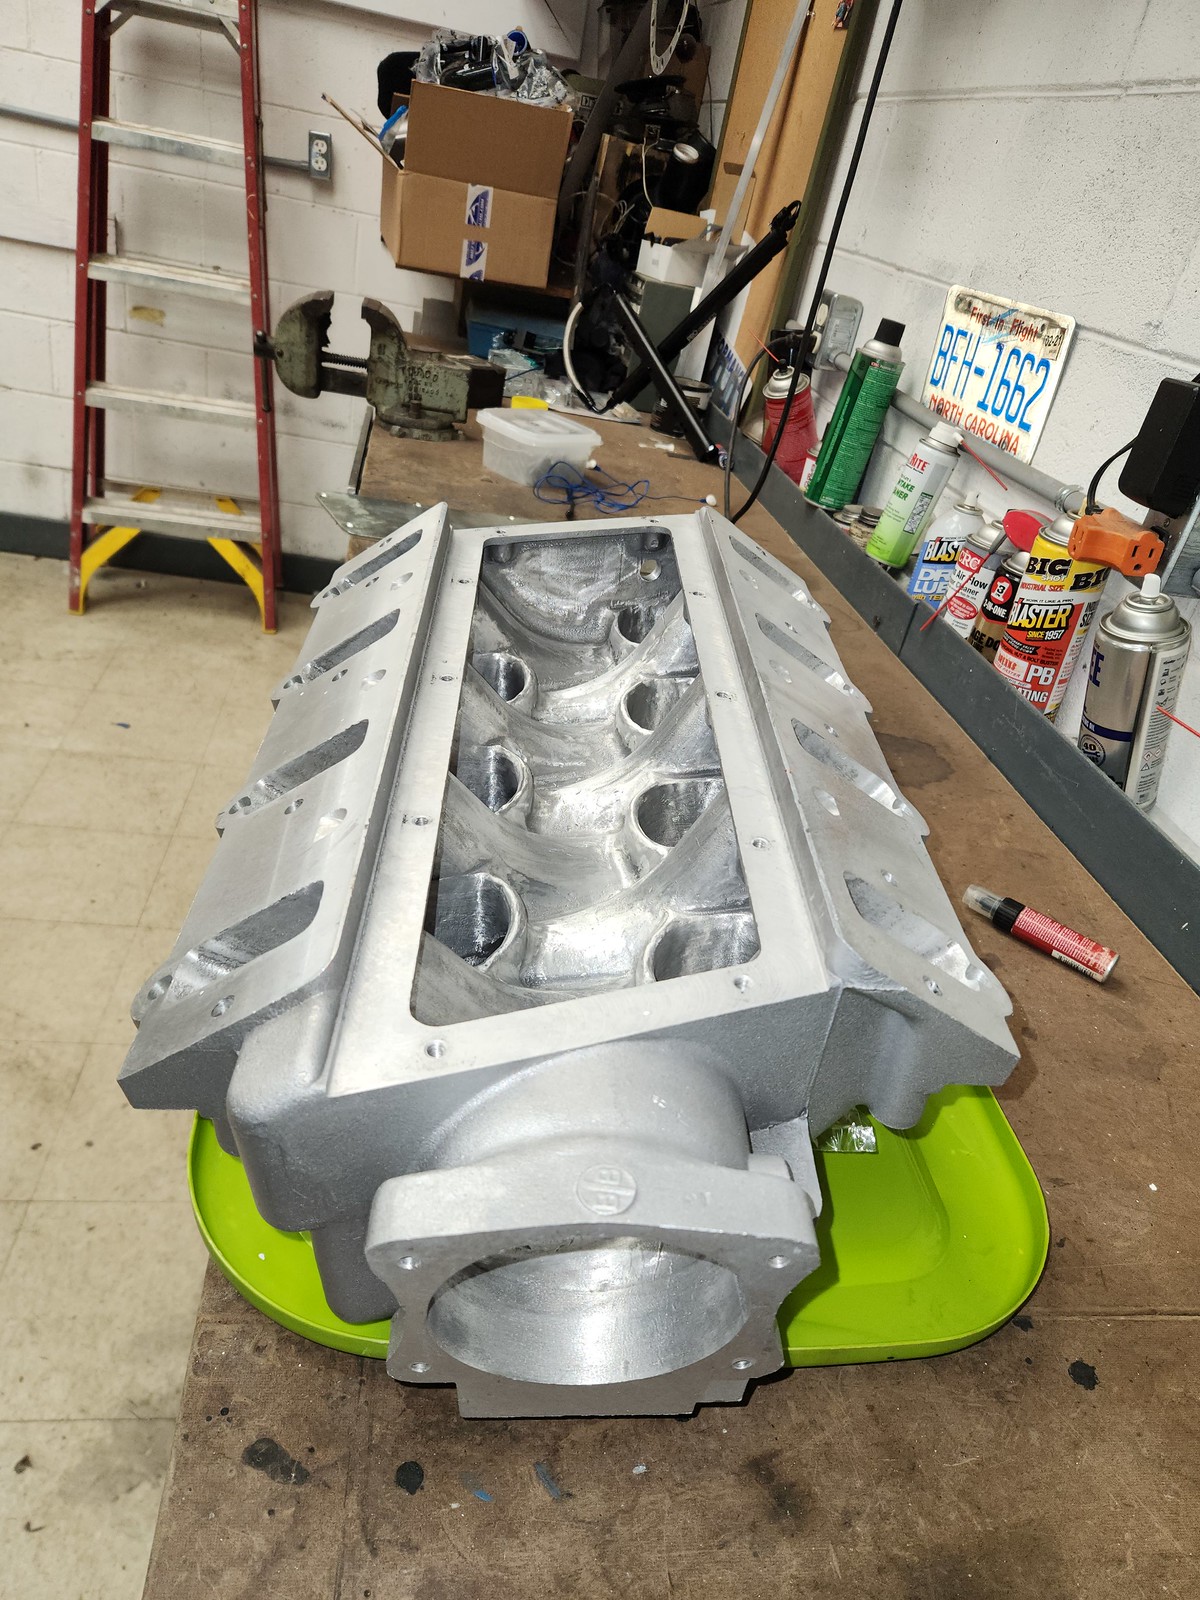
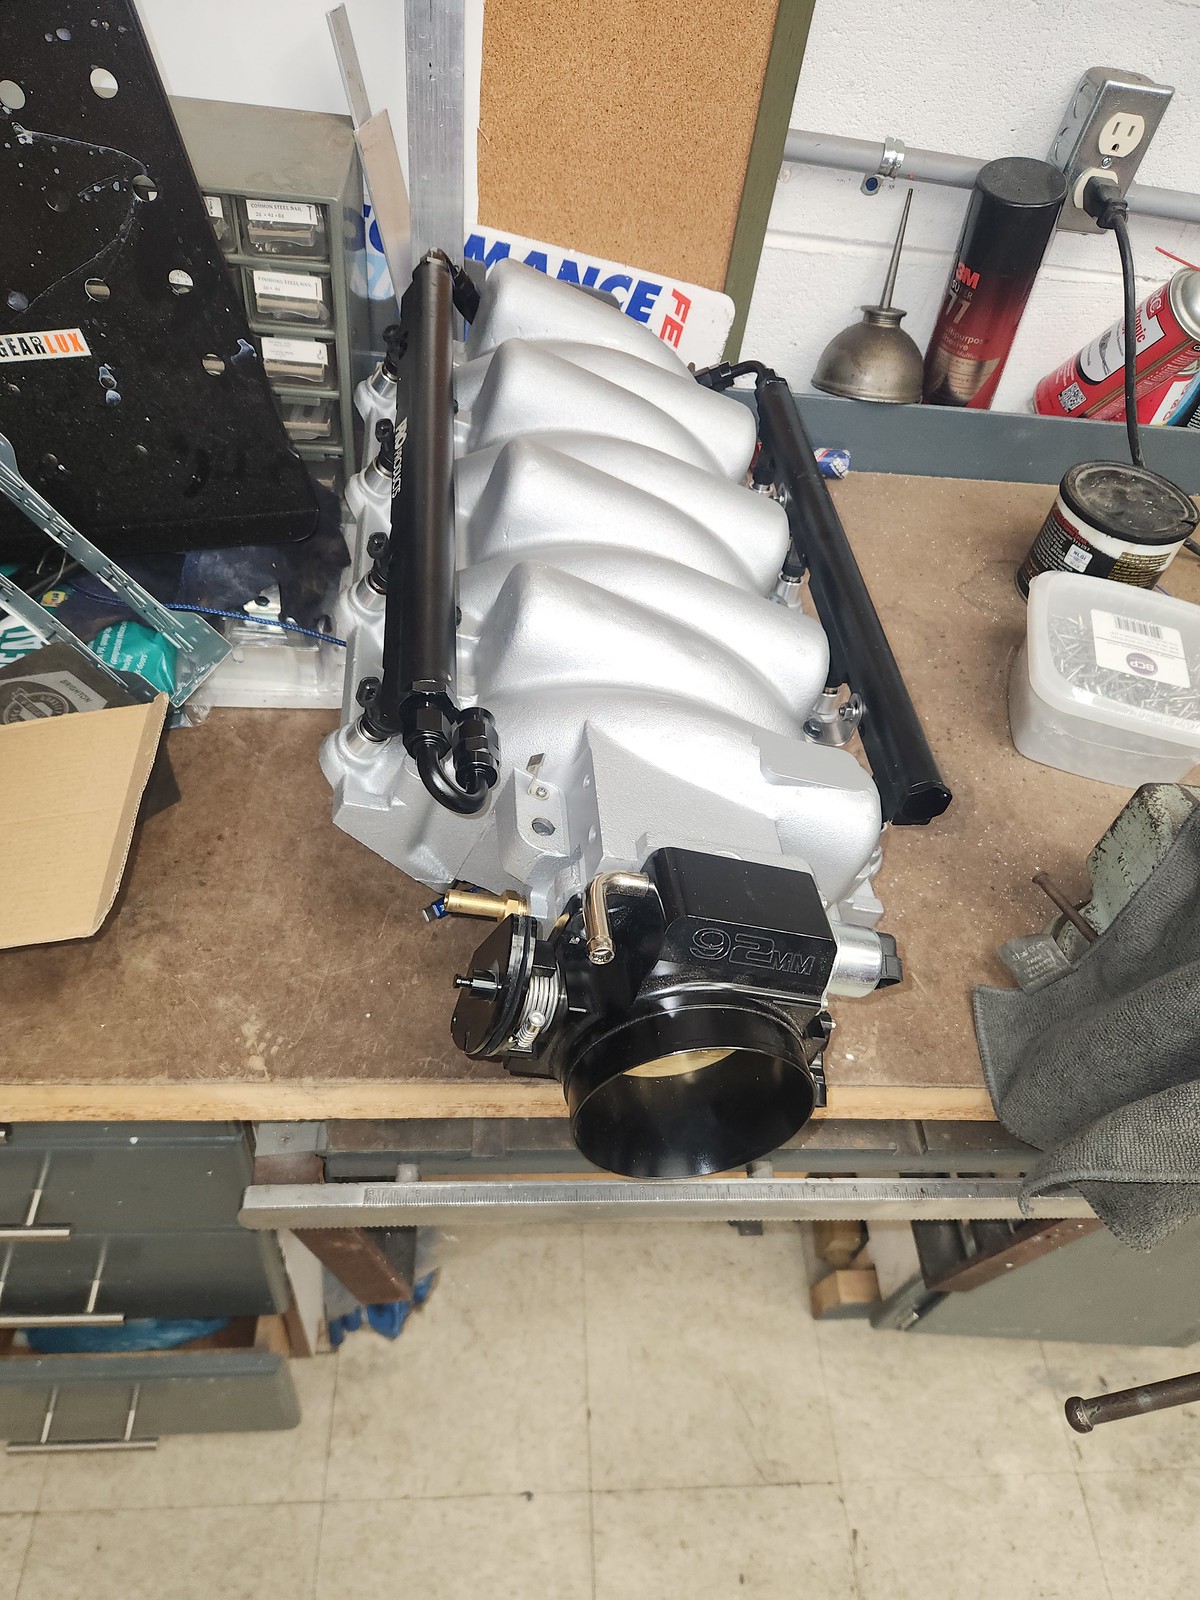
I bought, years ago for another project, a professional products aluminum intake. Paid Patrick 125 bucks for it, and had to get the mouse turds out. I spent a LOT of hours fixing poor casting, port mismatches, etc. lotta time in this one. And it never ran on the ls powered duster/Winston cup chassis it was intended for!
 affc193f-219c-443e-881d-524ada005794.jpeg by Michael Crawford, on Flickr
 694733693 by Michael Crawford, on Flickr
 20230413_065218 by Michael Crawford, on Flickr
 20231024_065041 by Michael Crawford, on Flickr
 20231025_073616 by Michael Crawford, on Flickr
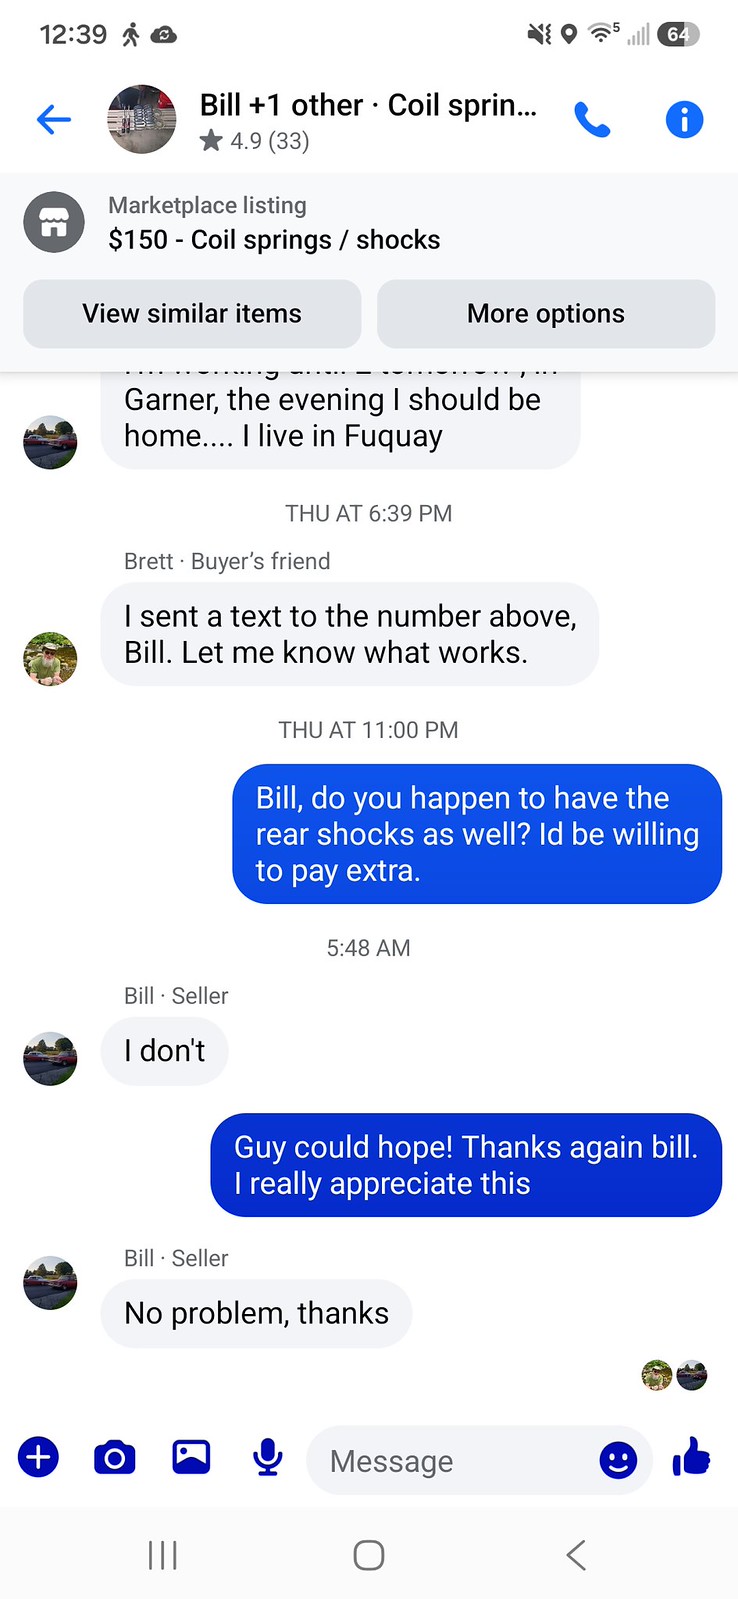
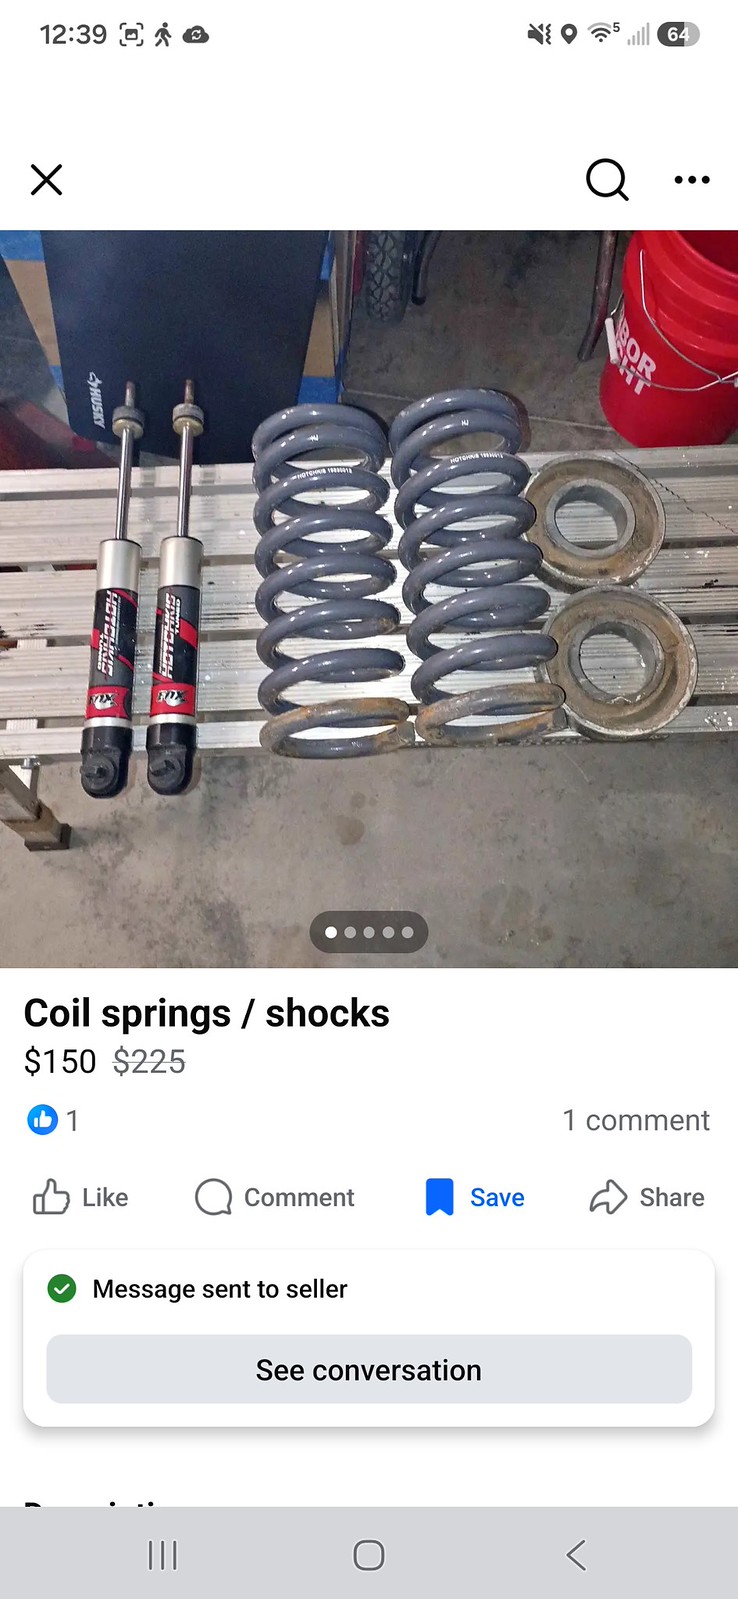
I spent 150 for first gen Hotchkis springs and fox adjustable shocks for the front. Pretty sure I won’t have any trouble with a second gen using these, but it remains to be tested. Brett, a fellow competitor and friend, picked these up for me. They’re in a bucket in his garage in Raleigh. I haven’t even seen them in person!
 1e7c4dfb-9ed9-4d36-8876-b68878c68ae2.jpeg by Michael Crawford, on Flickr
 6bc232f6-c0b4-422b-b8c8-583e7743fa5e.jpeg by Michael Crawford, on Flickr
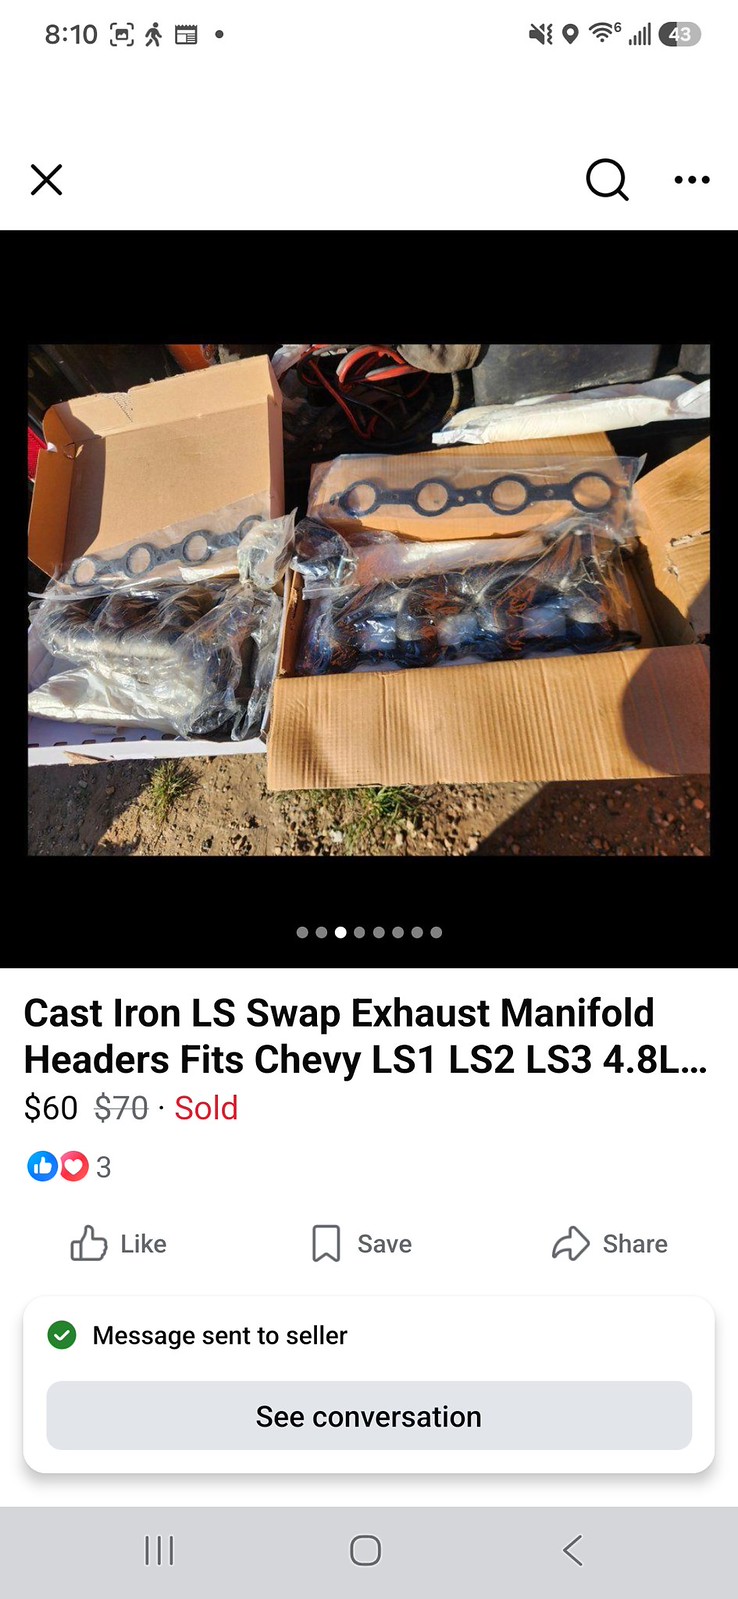
I then found a pair of the iron LS swap manifolds on Facebook listed for 60 dollars, met the guy at a gas station at 7:30 am and he took 40
 5ce36804-6fb0-4f34-8665-307f7a7f0496.jpeg by Michael Crawford, on Flickr
 4ad0e59e-851d-4e45-8fb5-d5008795114d.jpeg by Michael Crawford, on Flickr
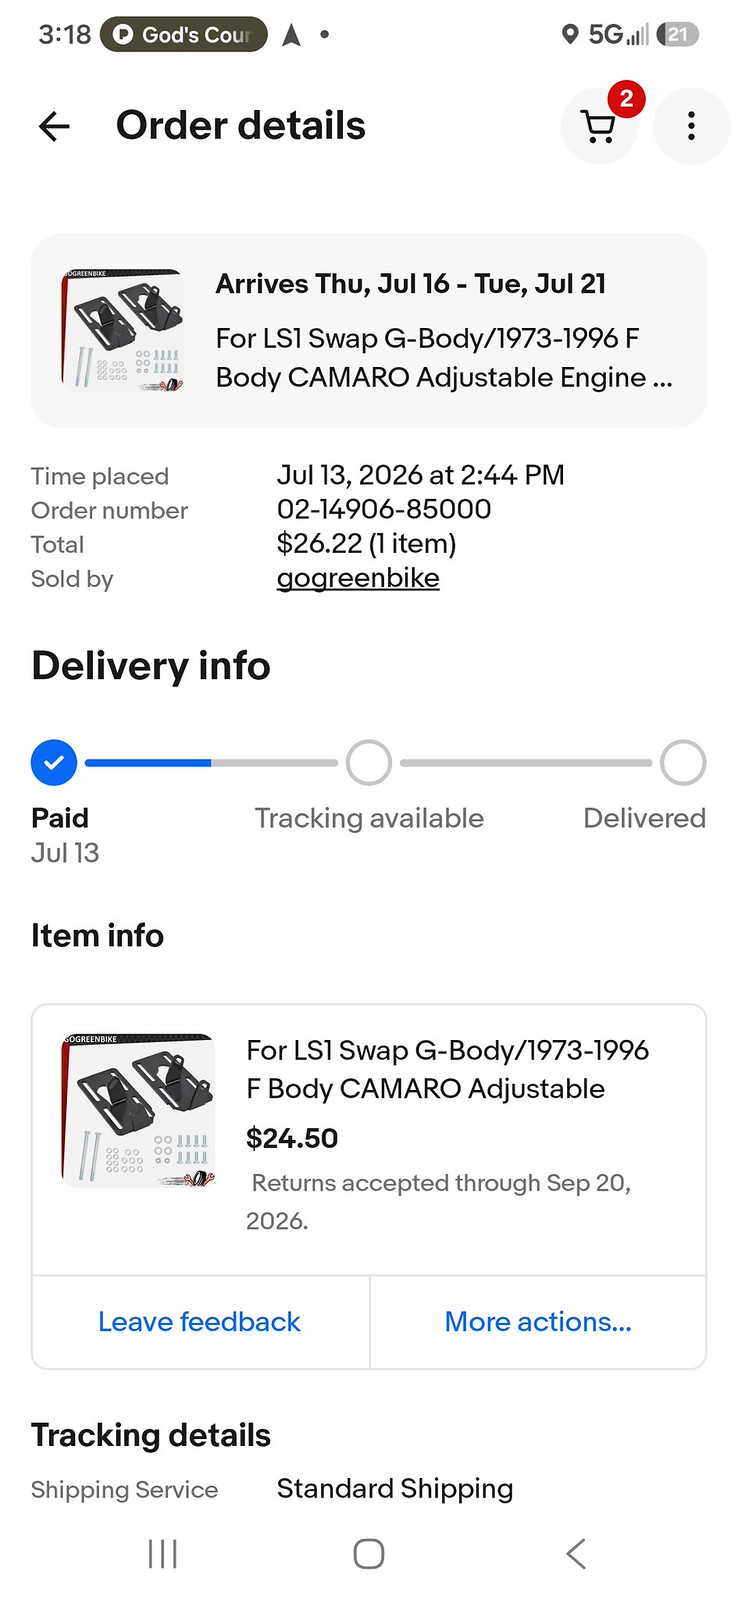
Motor mounts from eBay for 24.50
 925c03be-8b57-4bdc-ae40-c87466848499.jpeg by Michael Crawford, on Flickr
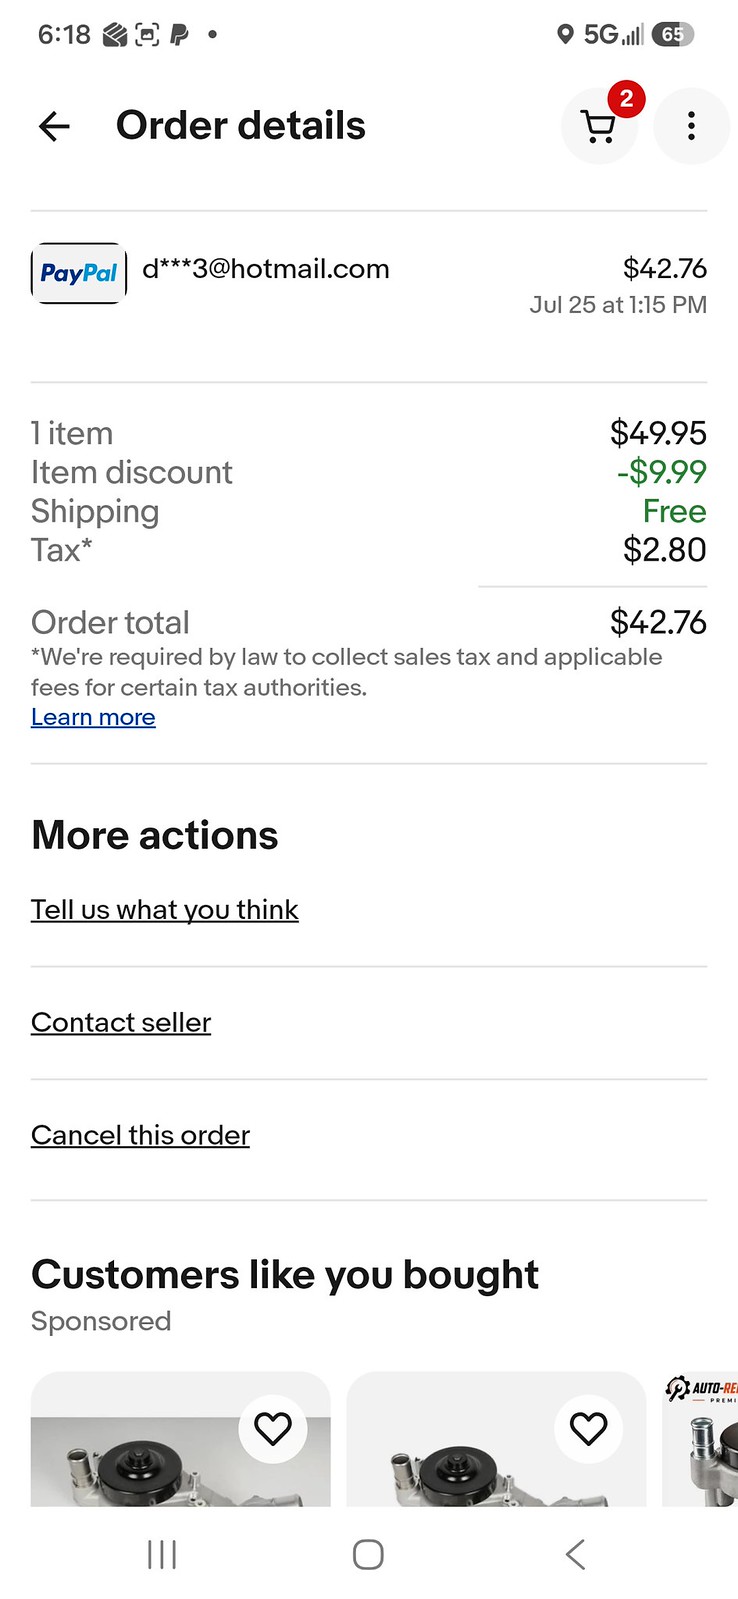
LS3 water pump for 29.99
 5a55eb40-8177-42fe-9395-fa68d967f7f6.jpeg by Michael Crawford, on Flickr
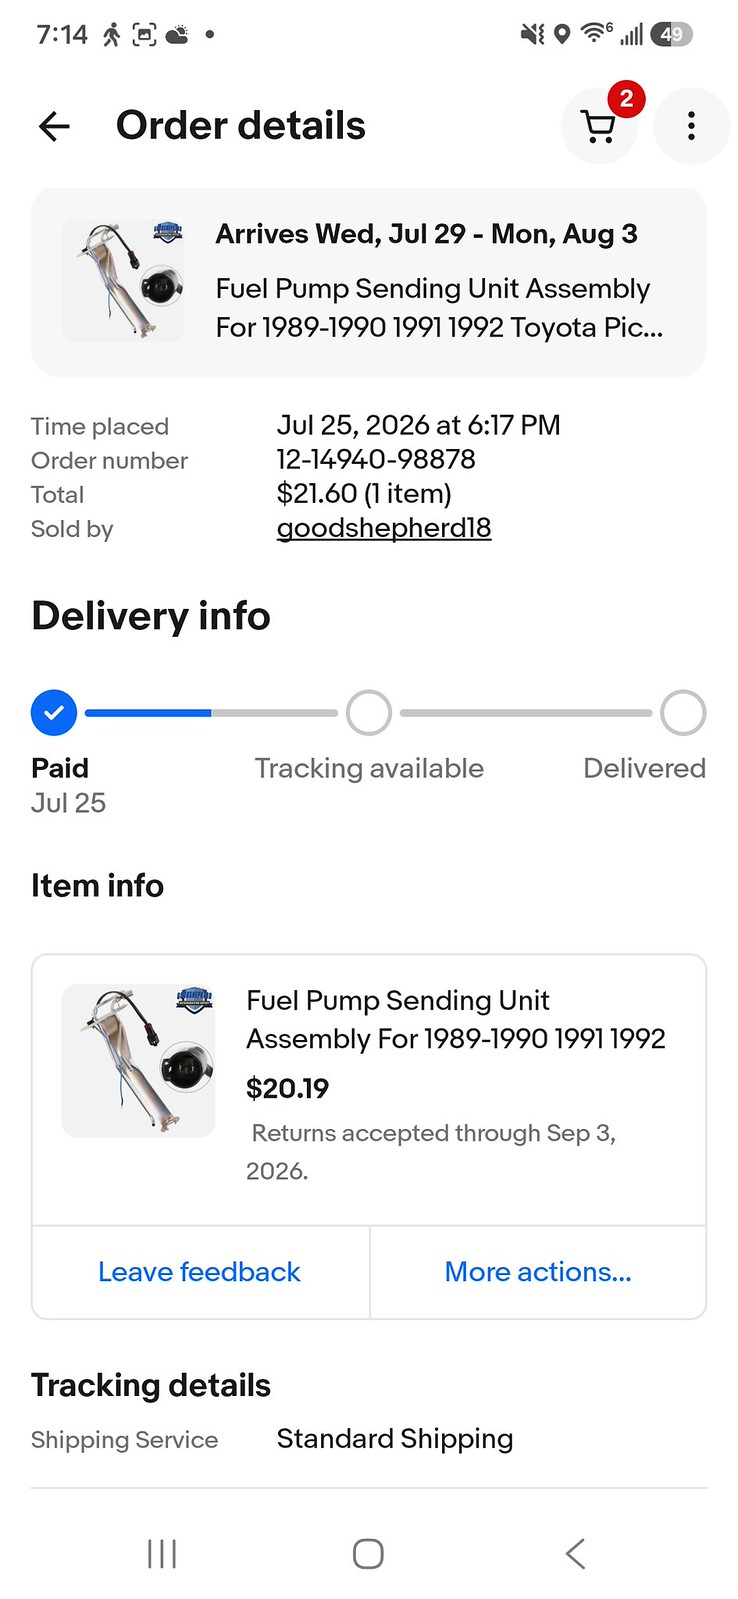
fuel pump hanger to clone the tanks in pa4 for 21.60. ill need to build a sump and a male retainer ring and gasket, but ill still be hundred or more cheaper than the pa4.andno pipe threads!!! Ive had the PA4 in my 70 duster for more than a decade. It’s a solid unit, and easy install. This won’t be easy, but hopefully just as good. If it gives me too much fight, ill spend the 200 bucks instead.
 05c7897e-cb5d-4efb-8c86-7e48319e8fe5.jpeg by Michael Crawford, on Flickr
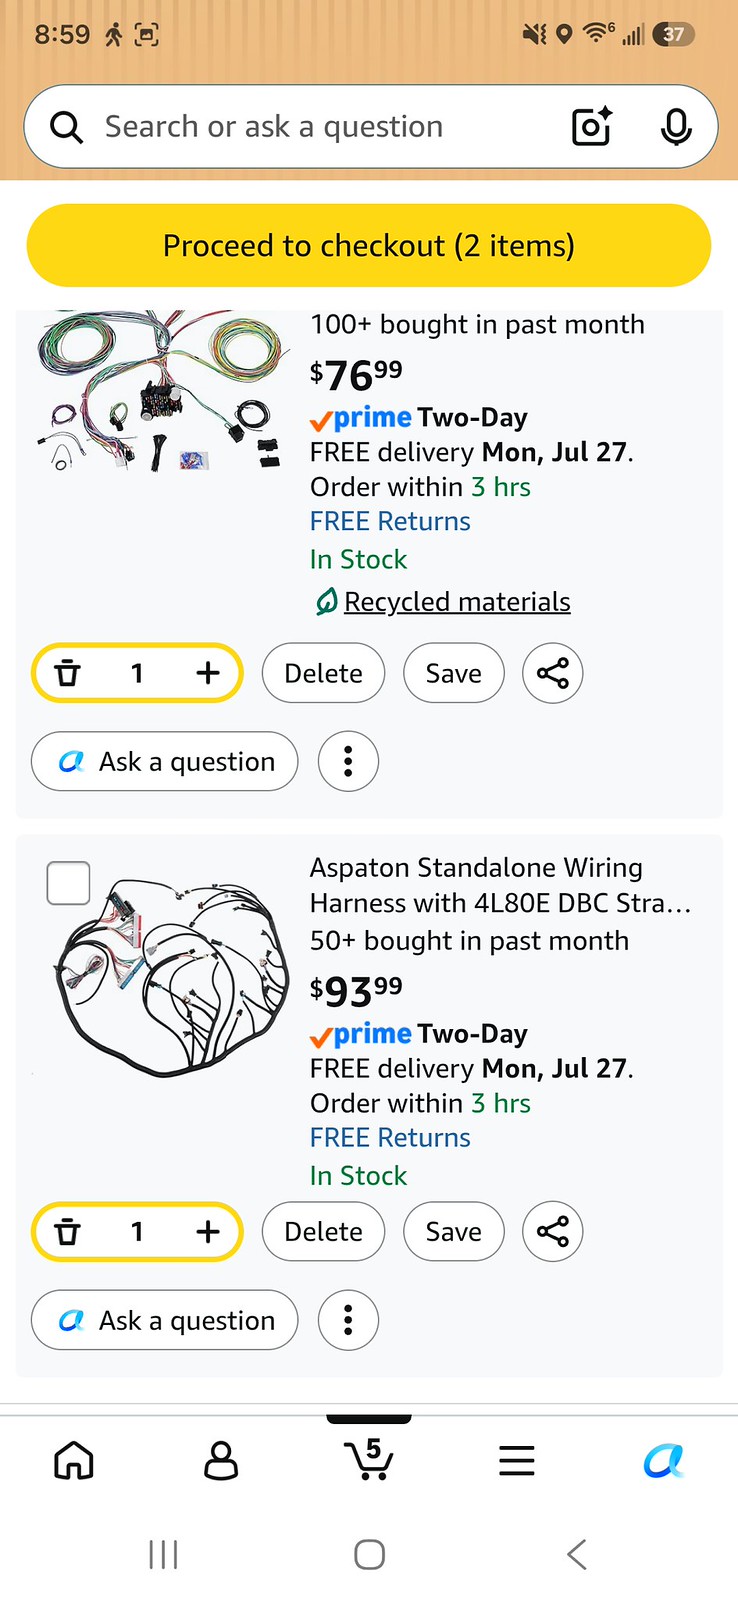
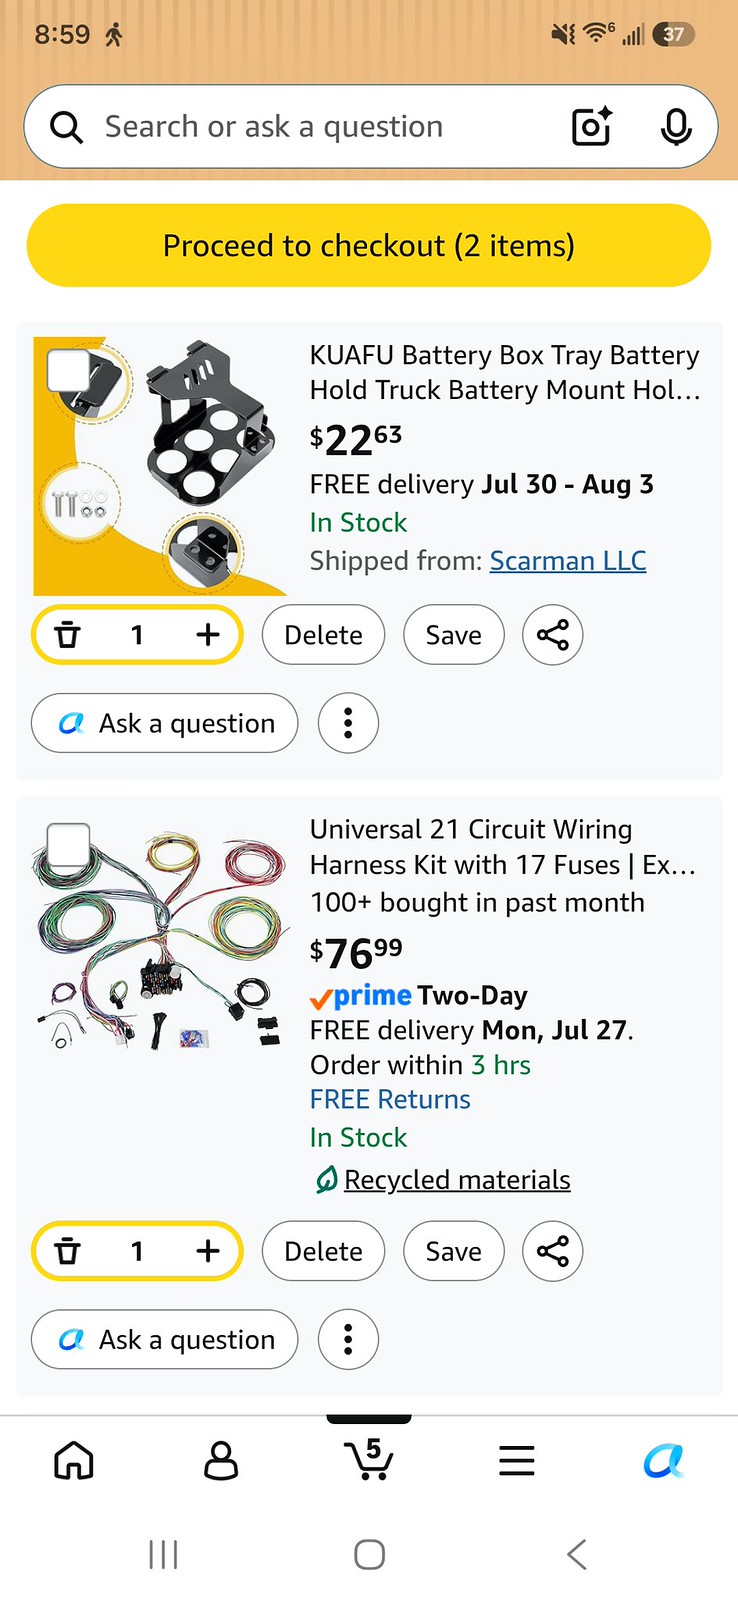
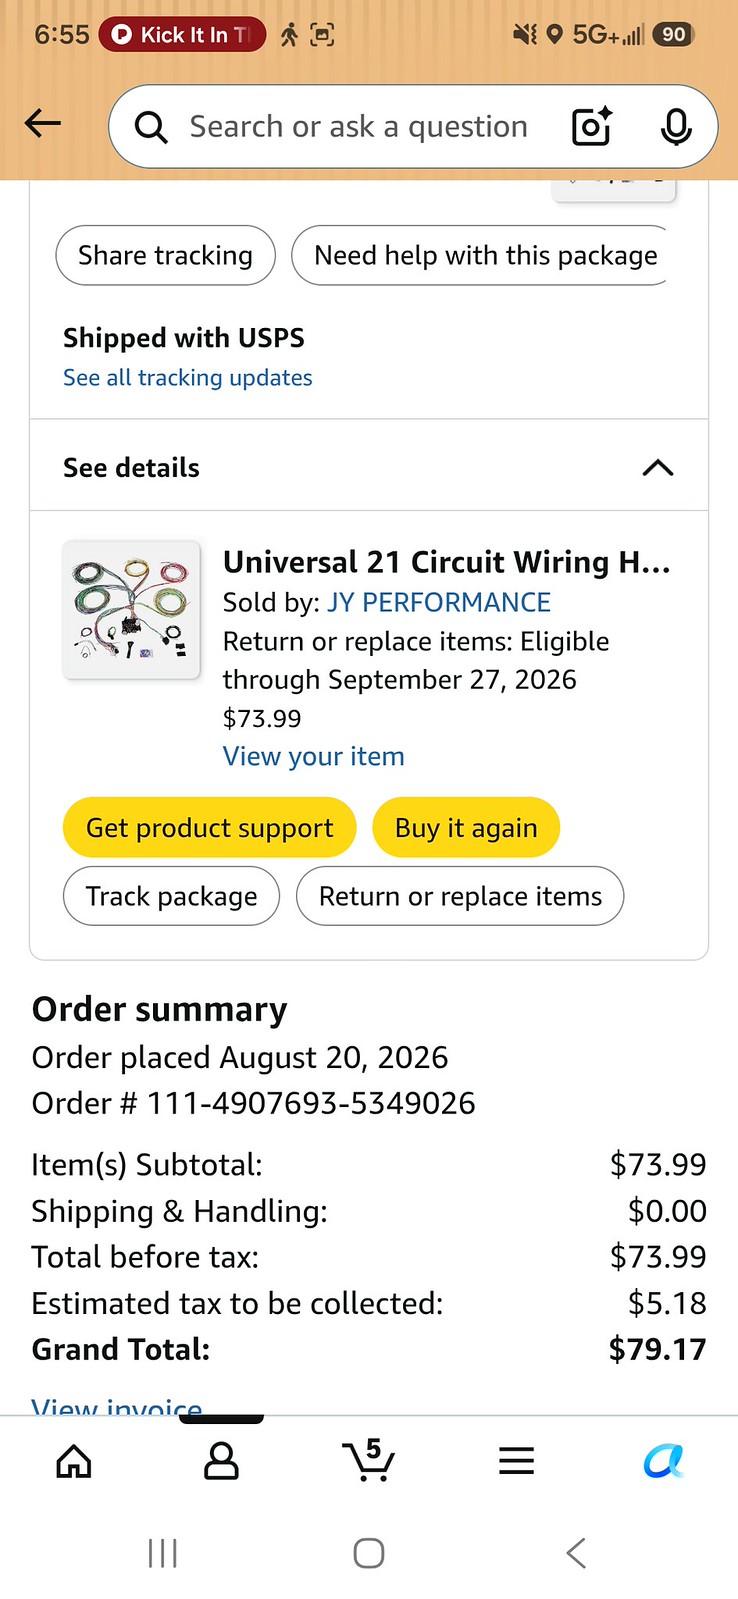
I haven’t ordered yet, so no receipts, but the 21-circuit wiring harness (76.99), ls wiring harness (93.99) and battery box (22.63) will be ordered towards the end of the week
 9ef45586-4de2-46d7-8a2b-54ec4e4e5666.jpeg by Michael Crawford, on Flickr
 b376f16b-68b3-4891-984a-69632c5ad7d4.jpeg by Michael Crawford, on Flickr
I also bought a 79 parts car that had front and rear big sway bars, console, dash parts, trim parts, etc. been a shockingly good purchase, honestly.
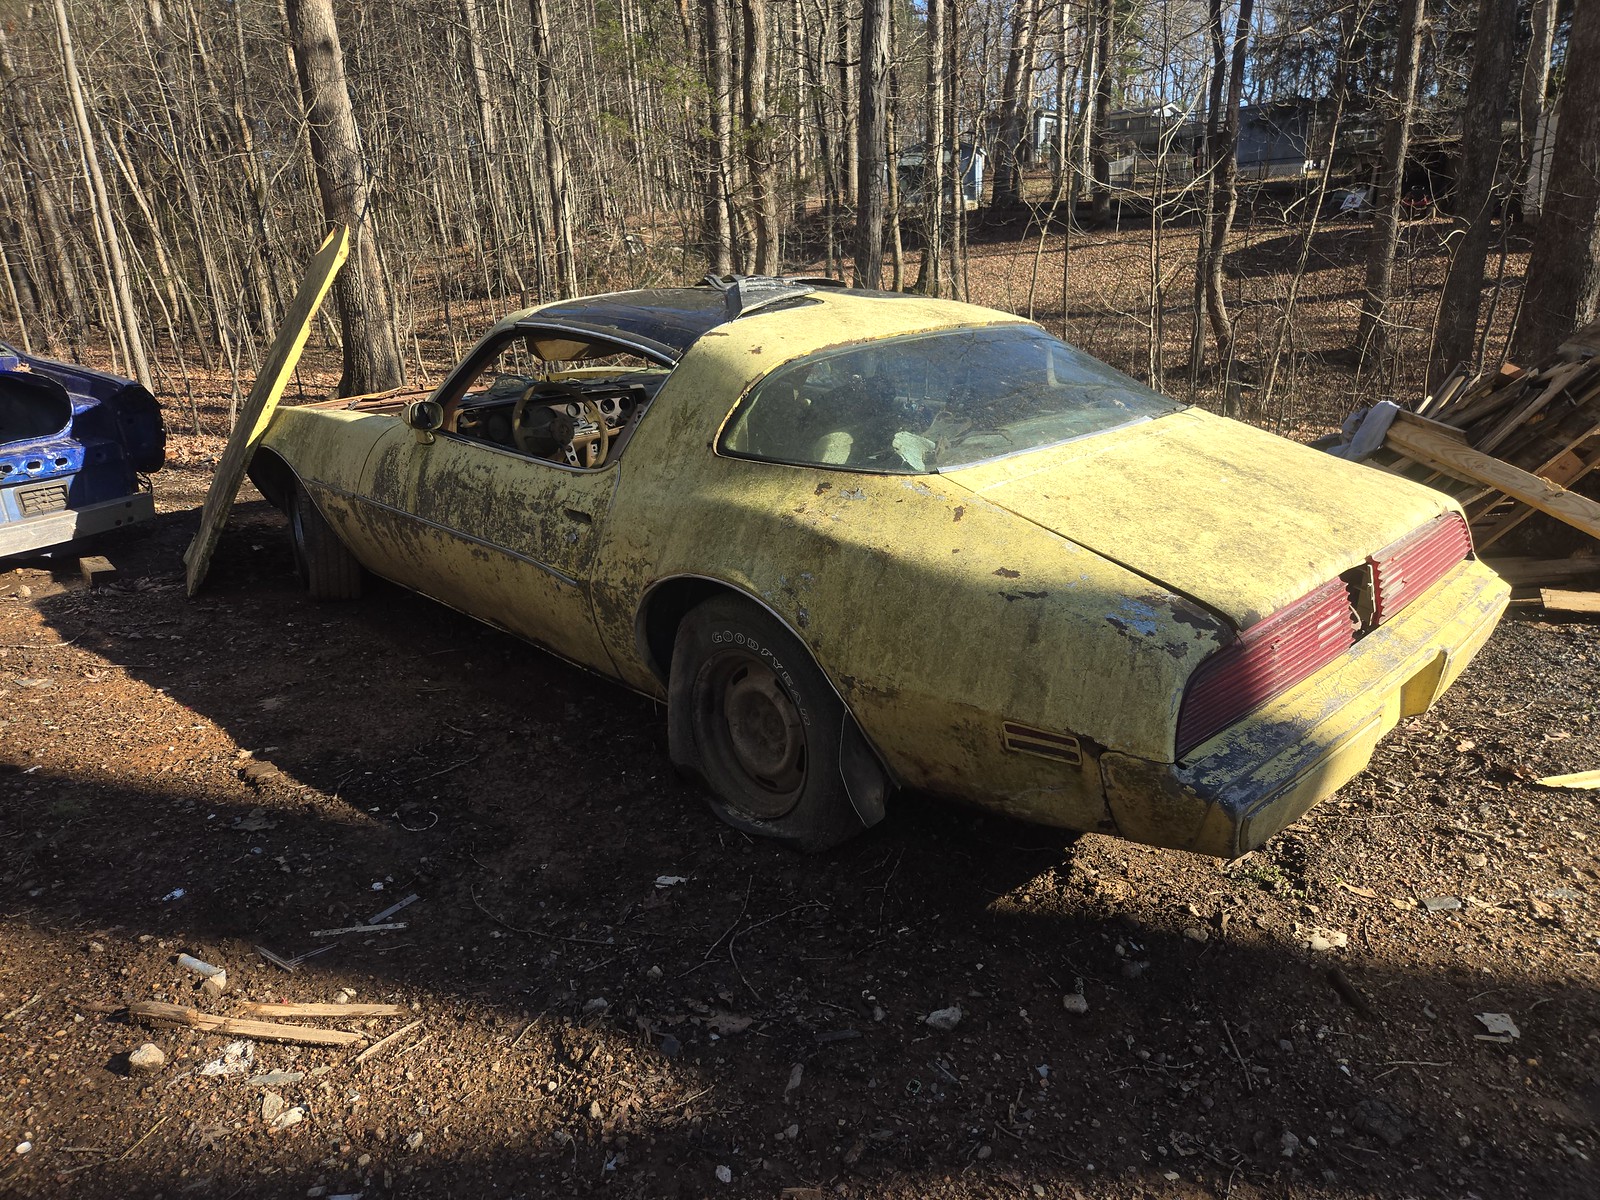 20260216_154141 by Michael Crawford, on Flickr
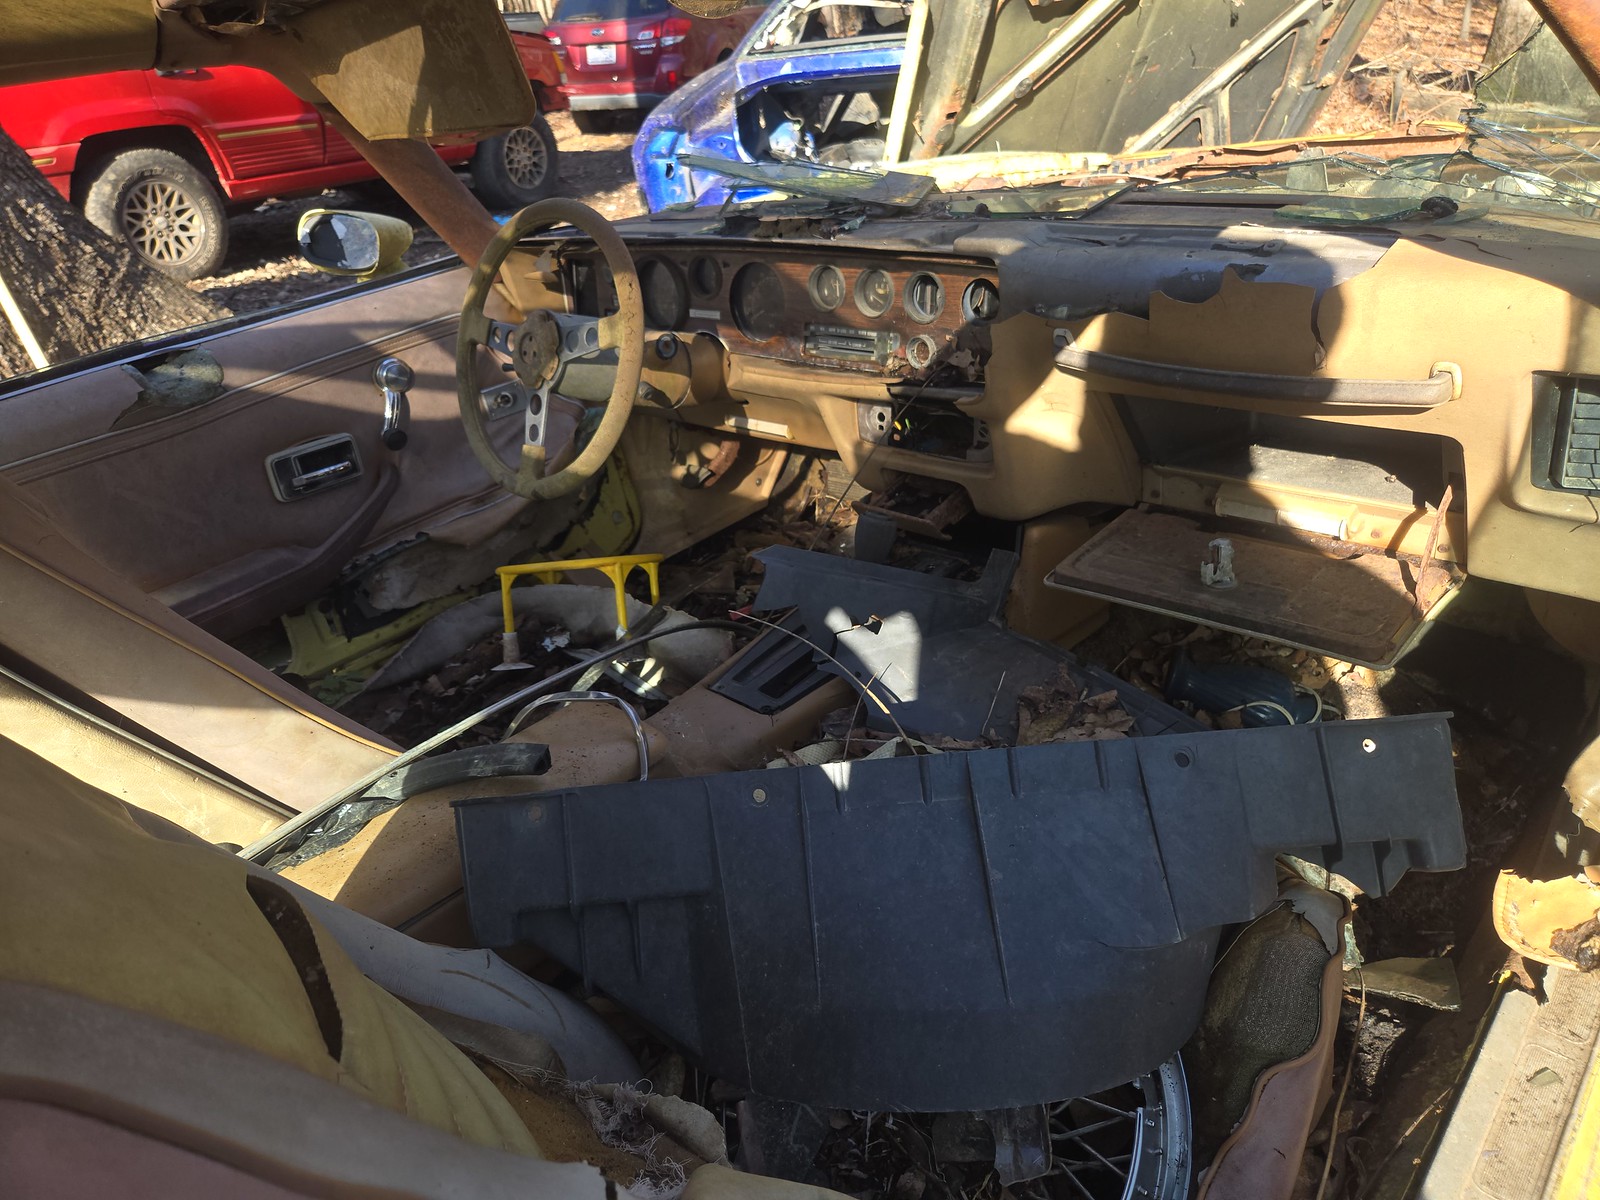 20260216_154312 by Michael Crawford, on Flickr
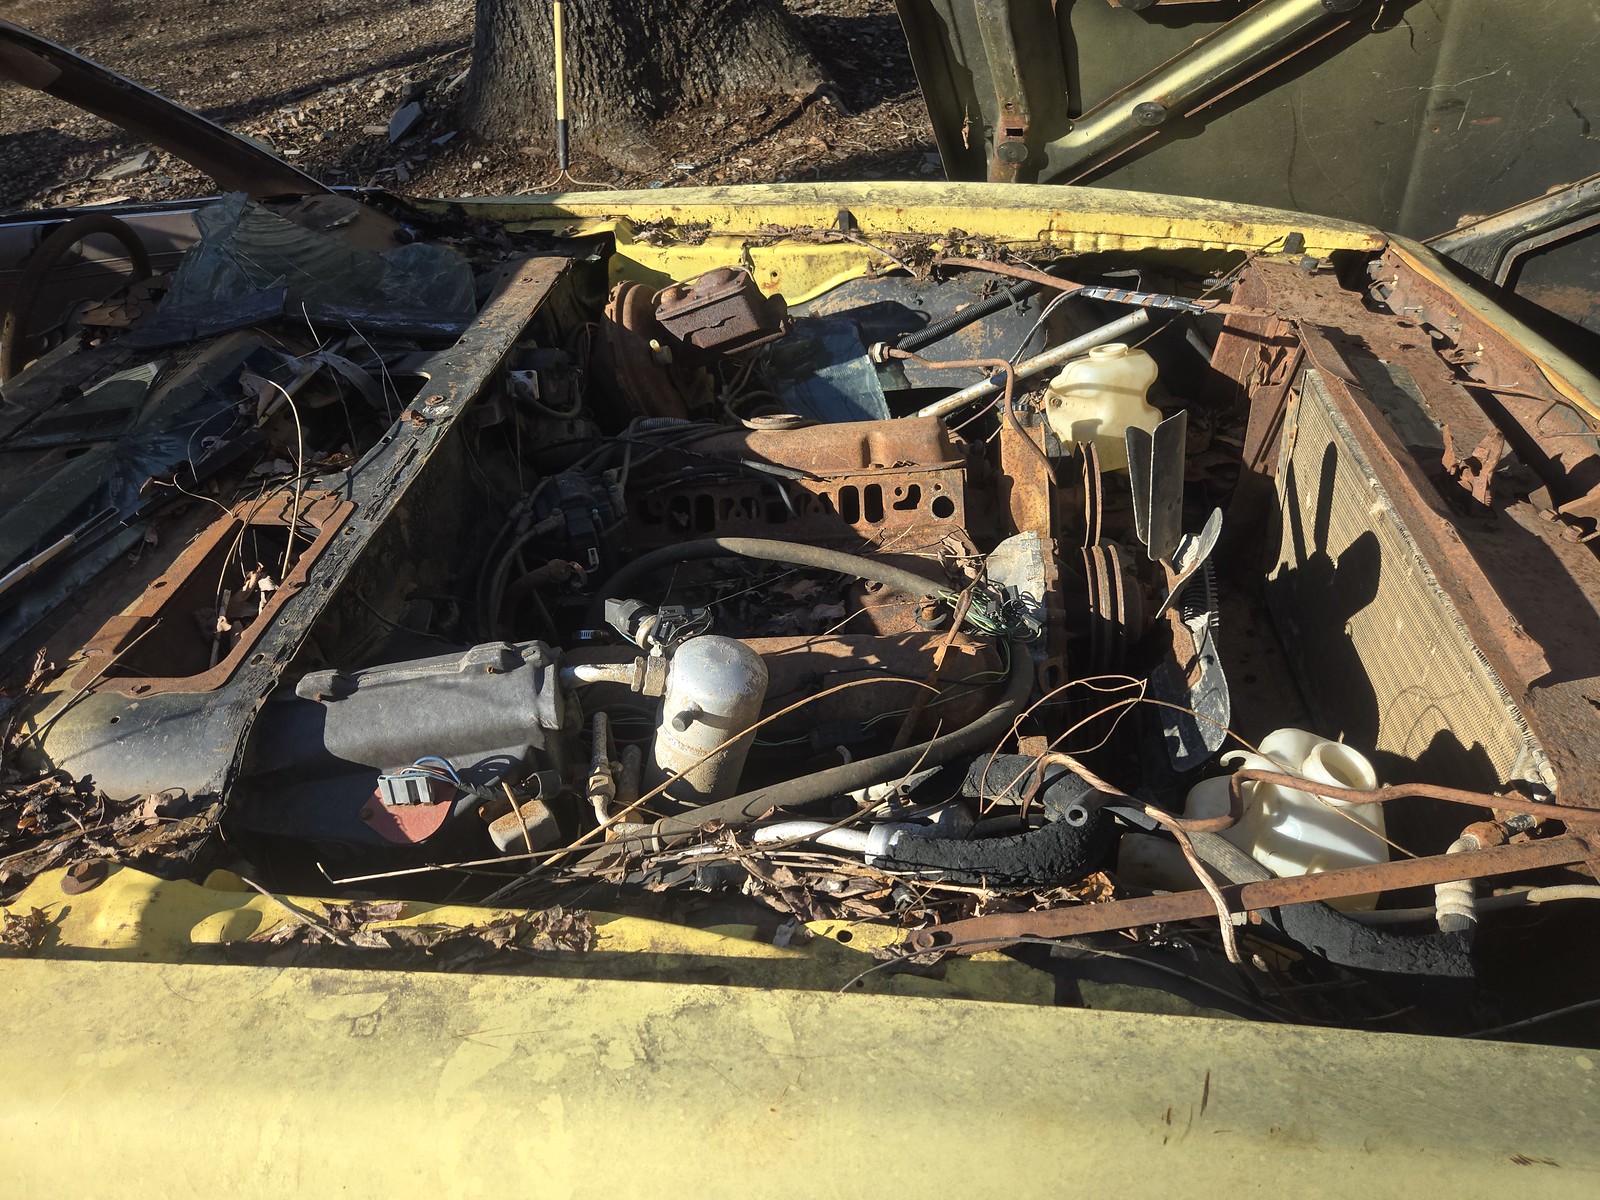 20260216_154324 by Michael Crawford, on Flickr
That brings the current total to……
3384.70. crap. This adds up QUICK.
I still need to find seatbelts, as the ones in this car are JUNK. Ill also need to do fuel lines, hoses, rebuild HVAC at some point, etc. probably some bigger wheels for better access to autocross rubber, make some plates for the gauldstrand mod, etc. lots of stuff I want to do, but that’s after minimum viable product, and challenge.Michael Crawford
1970 plymouth Duster back under construction:
https://www.pro-touring.com/showthre...uring-makeover
1987 GMC S15 https://www.pro-touring.com/showthre...ct-drivabeater
08-28-2026 #8
Registered User
- Join Date
- Aug 2007
- Location
- Albemarle, NC
- Posts
- 1,170
Budget first:
Previous total: 3384.70
New/corrected money:
21 circuit wiring harness $73.99
ok-ish dash, forum fmv of $100.00
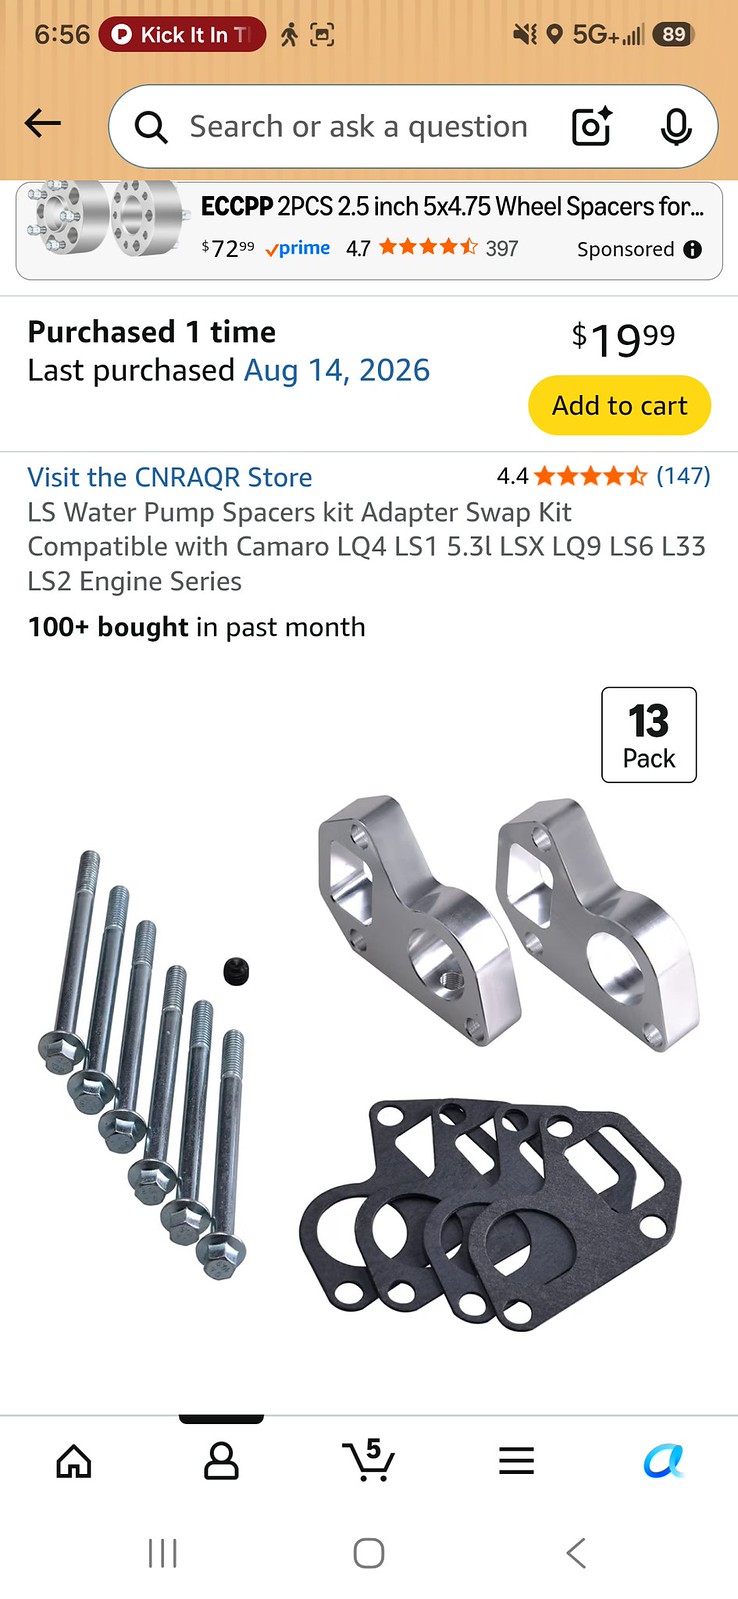
water pump spacers $19.99
trans cooler banjos $12.80
indicator lights and injector adapters $26.21
standalone engine harness $63.75
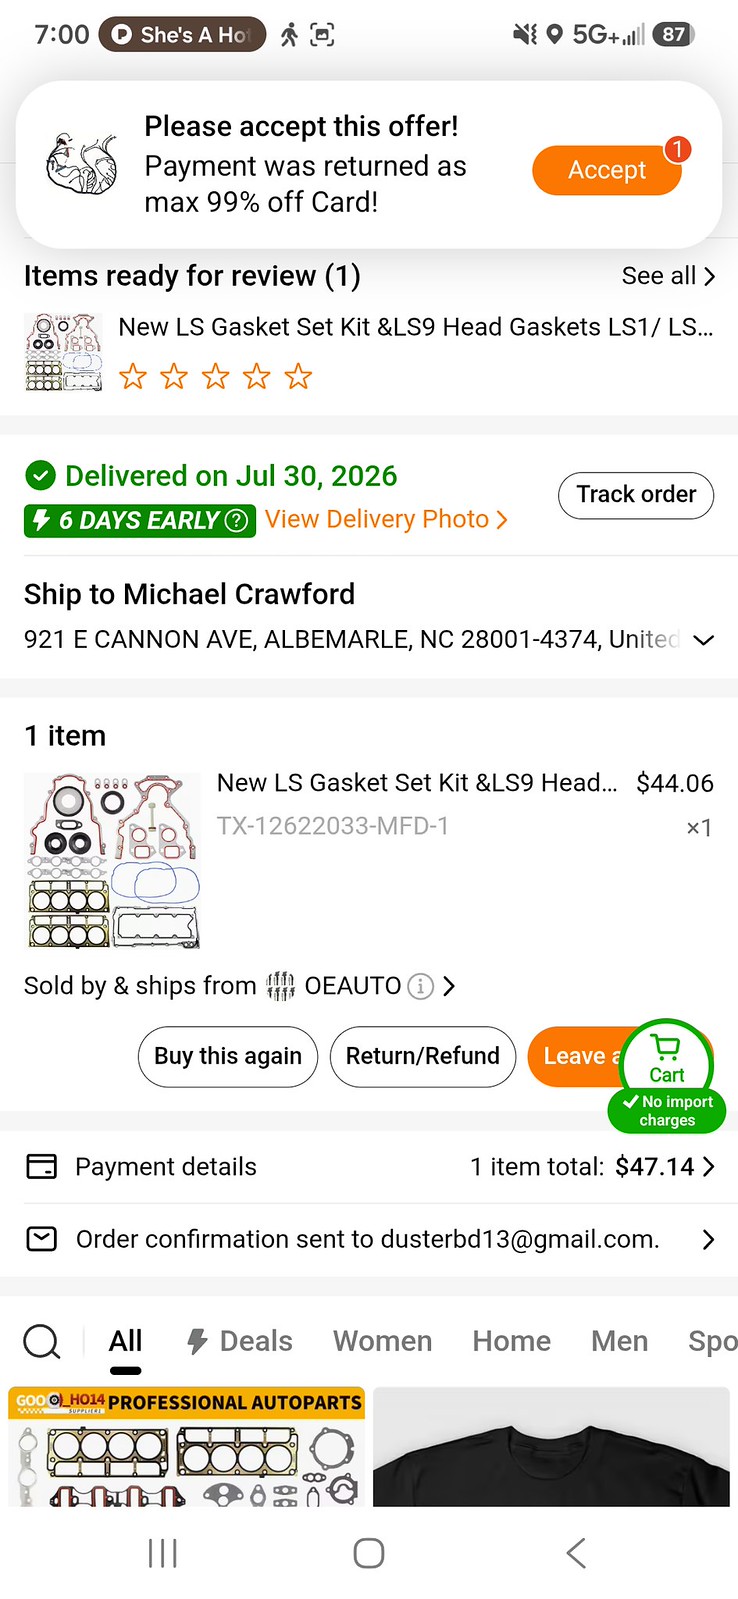
gasket set $47.14
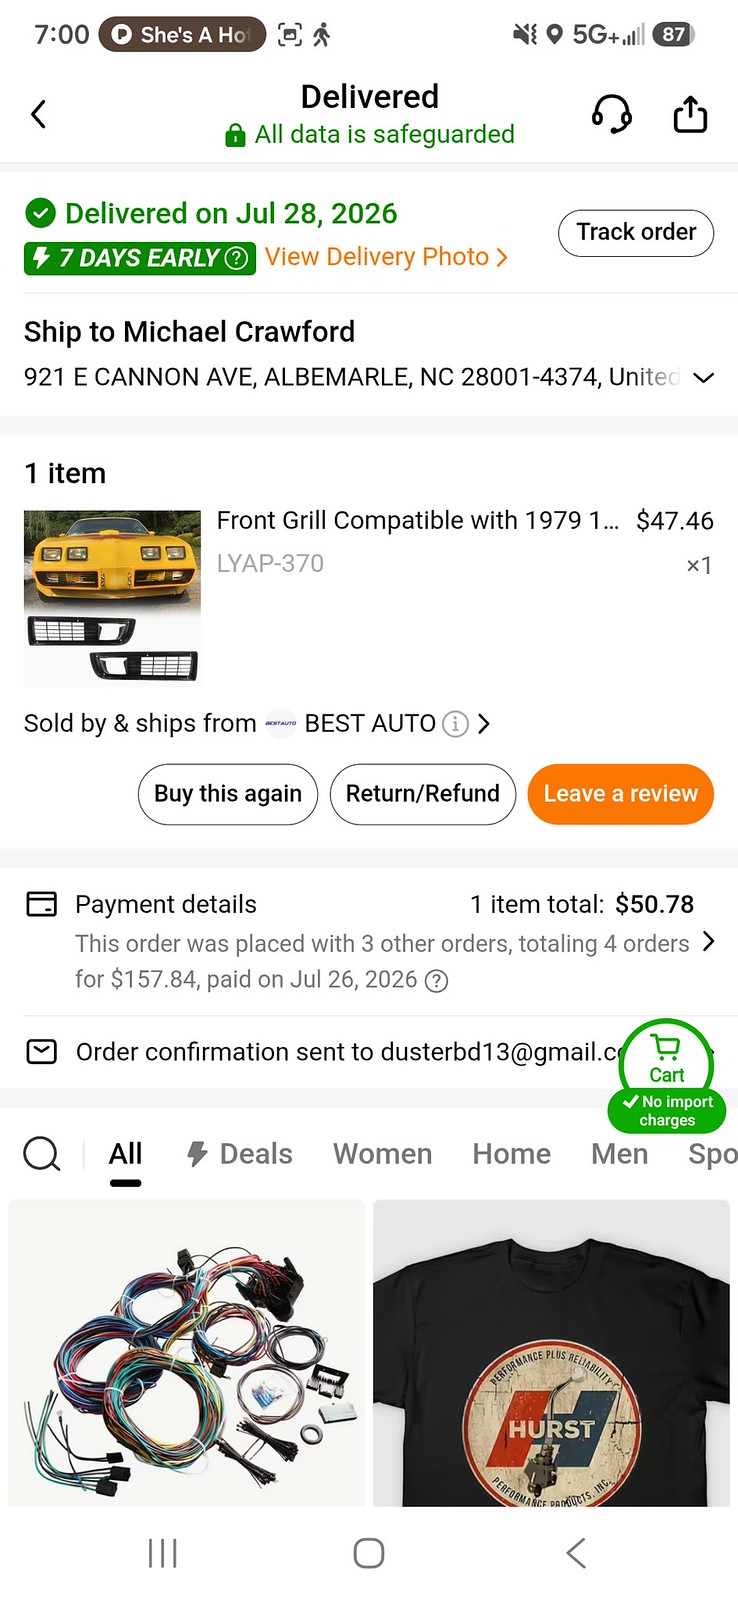
front grills $50.78
plugs and wires $29.59
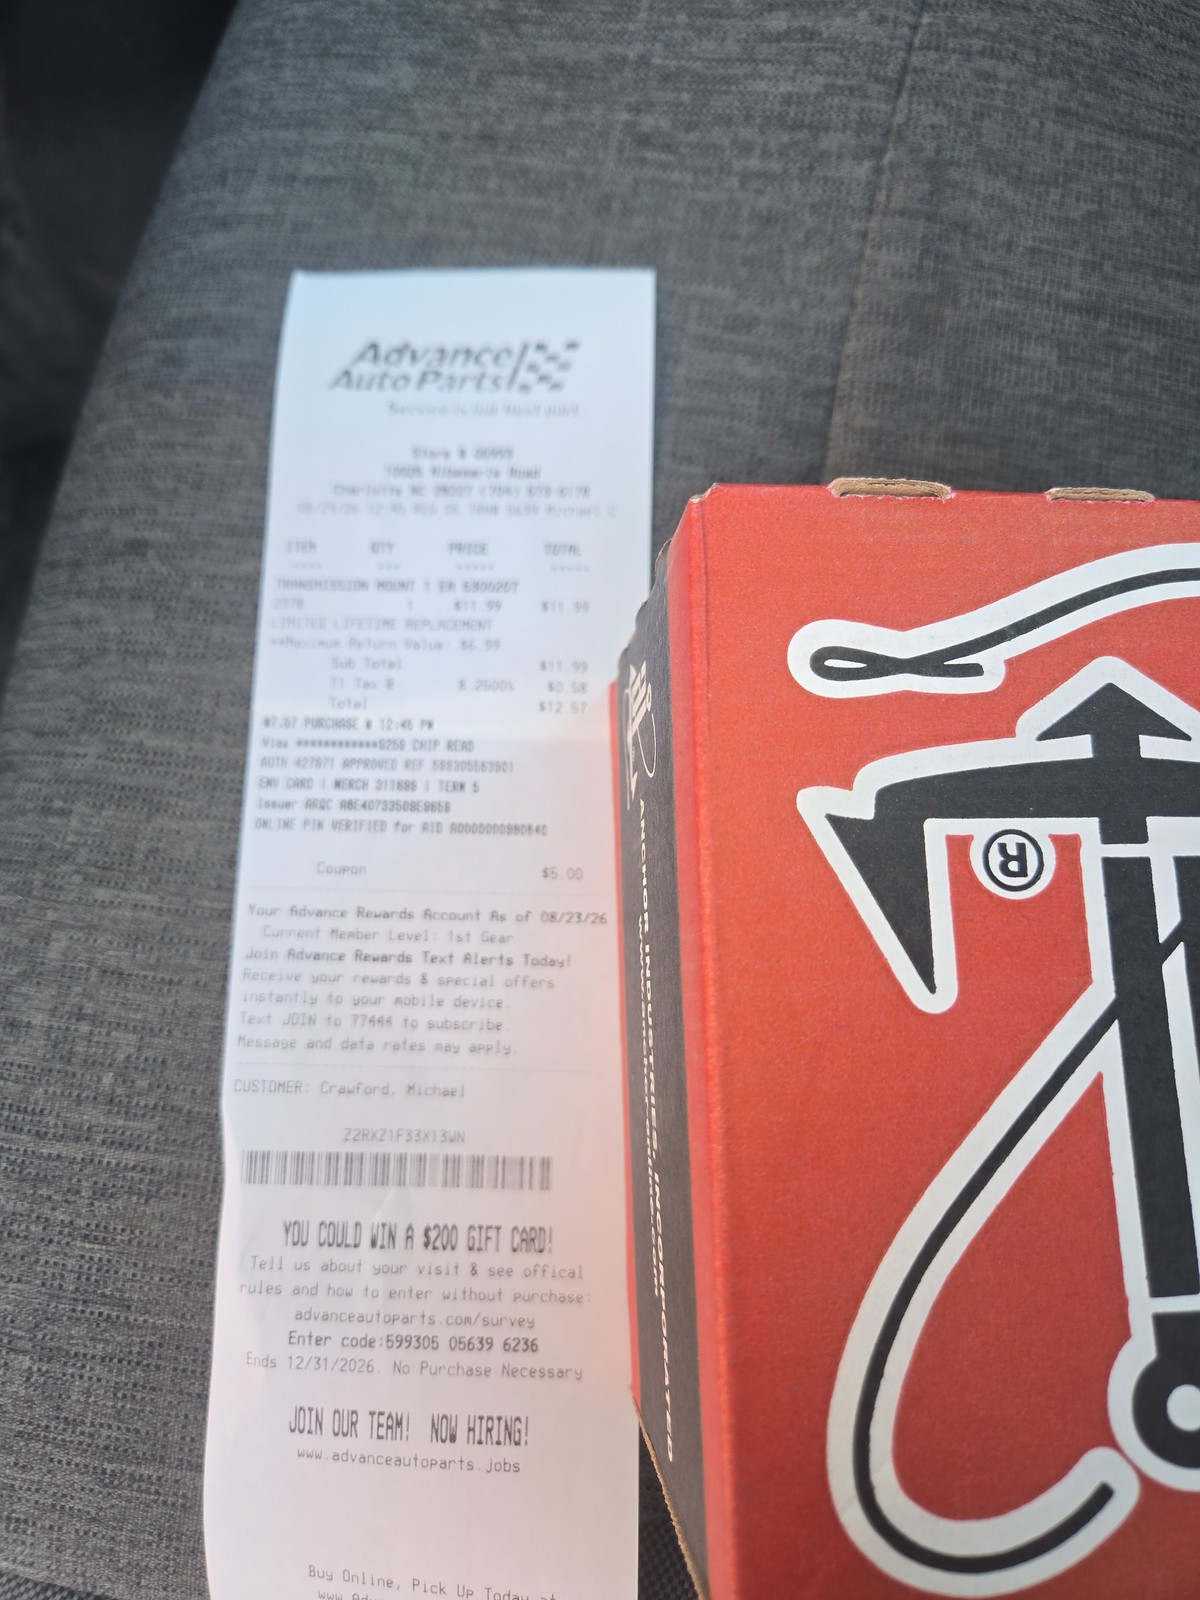
trans mount $7.57
nitrous kit $100.00
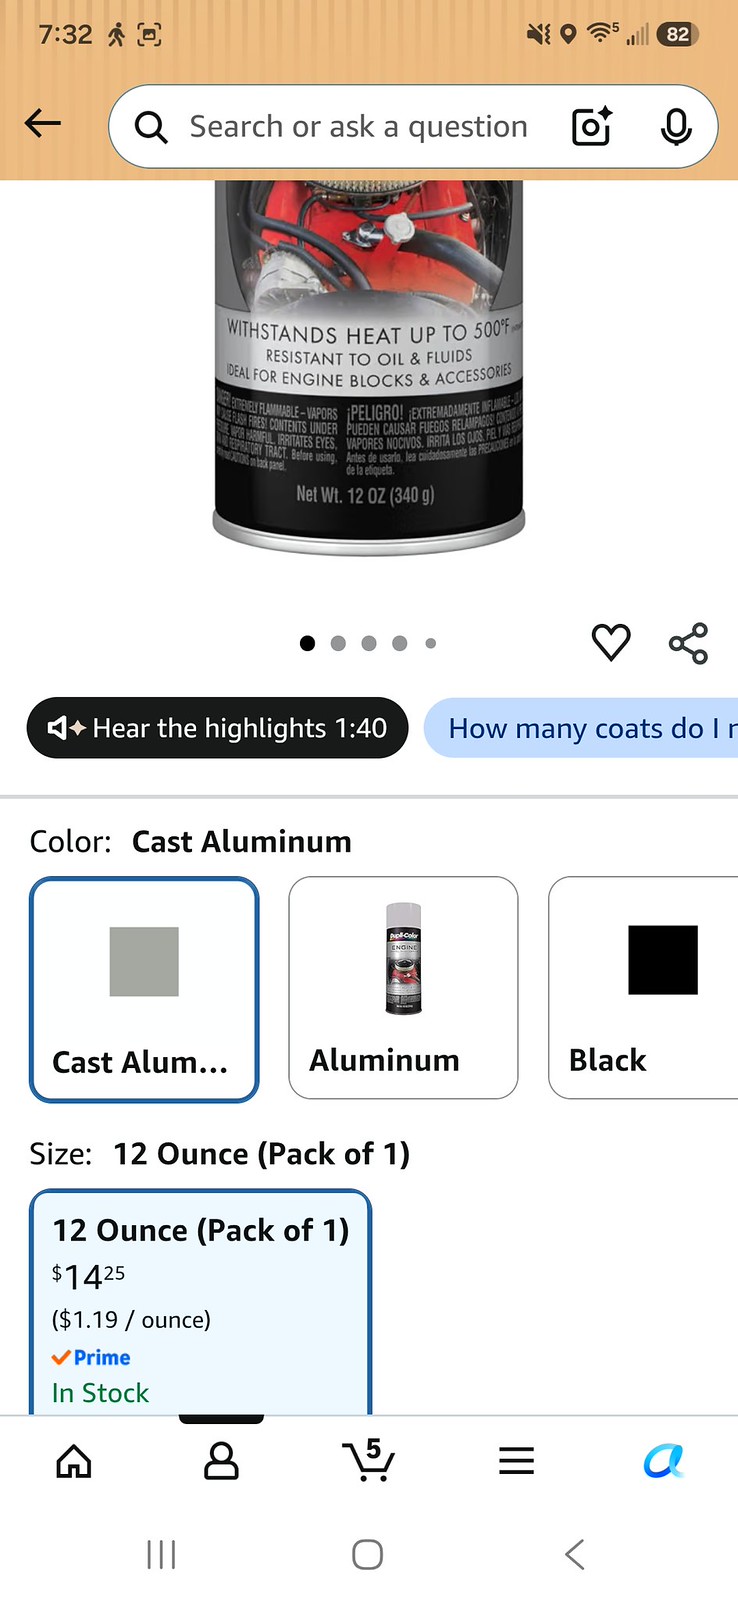
cast coat aluminum $14.25
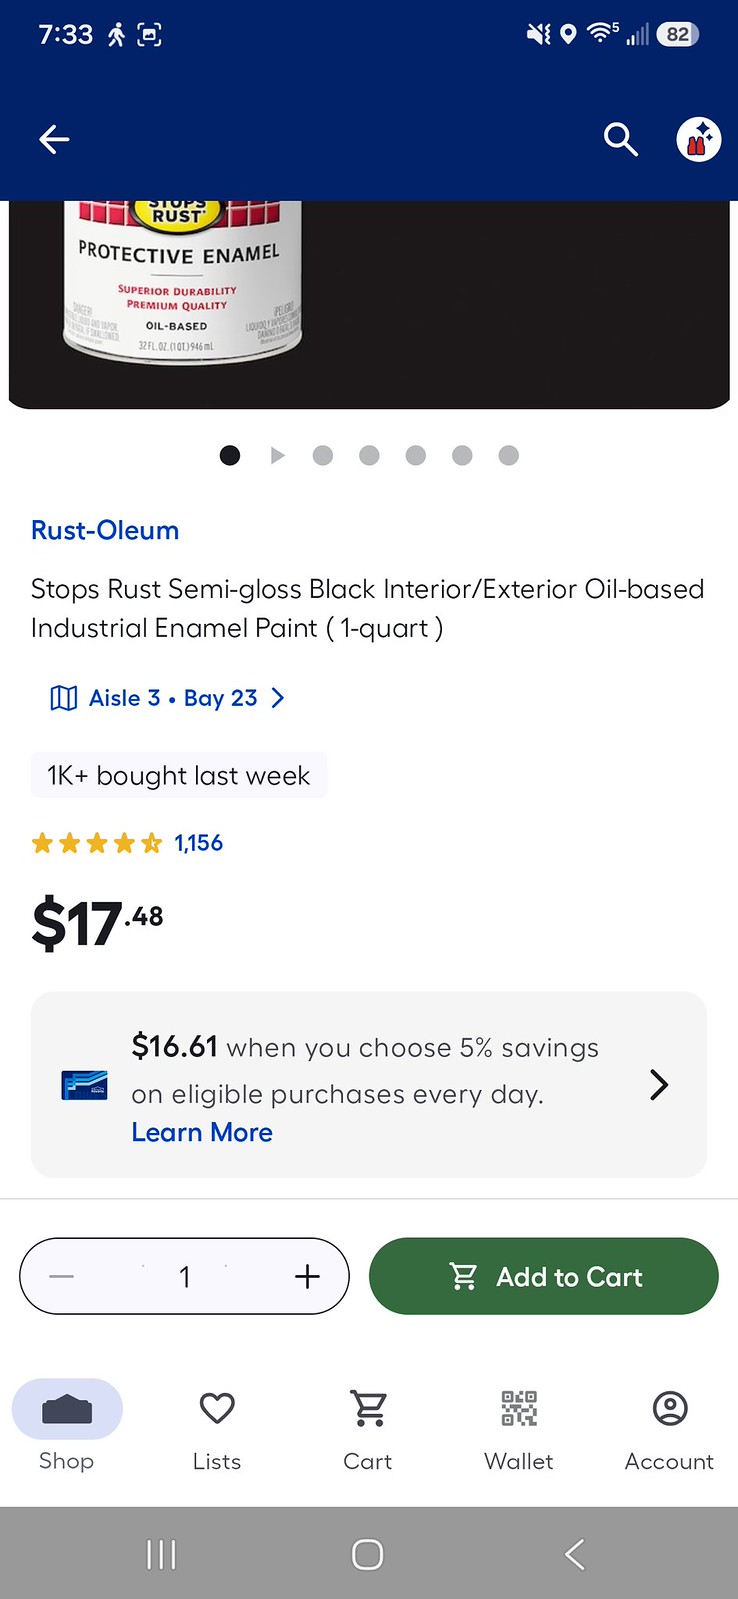
quart gloss rustoleum black $17.48
john deere blitz black $12.91
sheet of clumbia aluminum $5.00
new total: 3780.95
while still on vacation, I made the last update. Then, spent a little more money on stuff shopping around on the internet. The battery tray I ordered didn’t fit the battery that came with the car, and NHRA allows no box installs as long as there’s a rear firewall. I didn’t realize how few and small the holes behind the seat were, so ill just seal it off. I also saved money on the engin and body harnesses, found the front bumper grilles on temu, etc. ill try to link a receipt in with the section it fits in. at the end, ill add misc receipts for line items. That way I don’t lose them!
I guess ill try to go in a chronological order. I probably wont succeed due to me bouncing around like a ping pong ball in a hurricane, but well see how this works out.
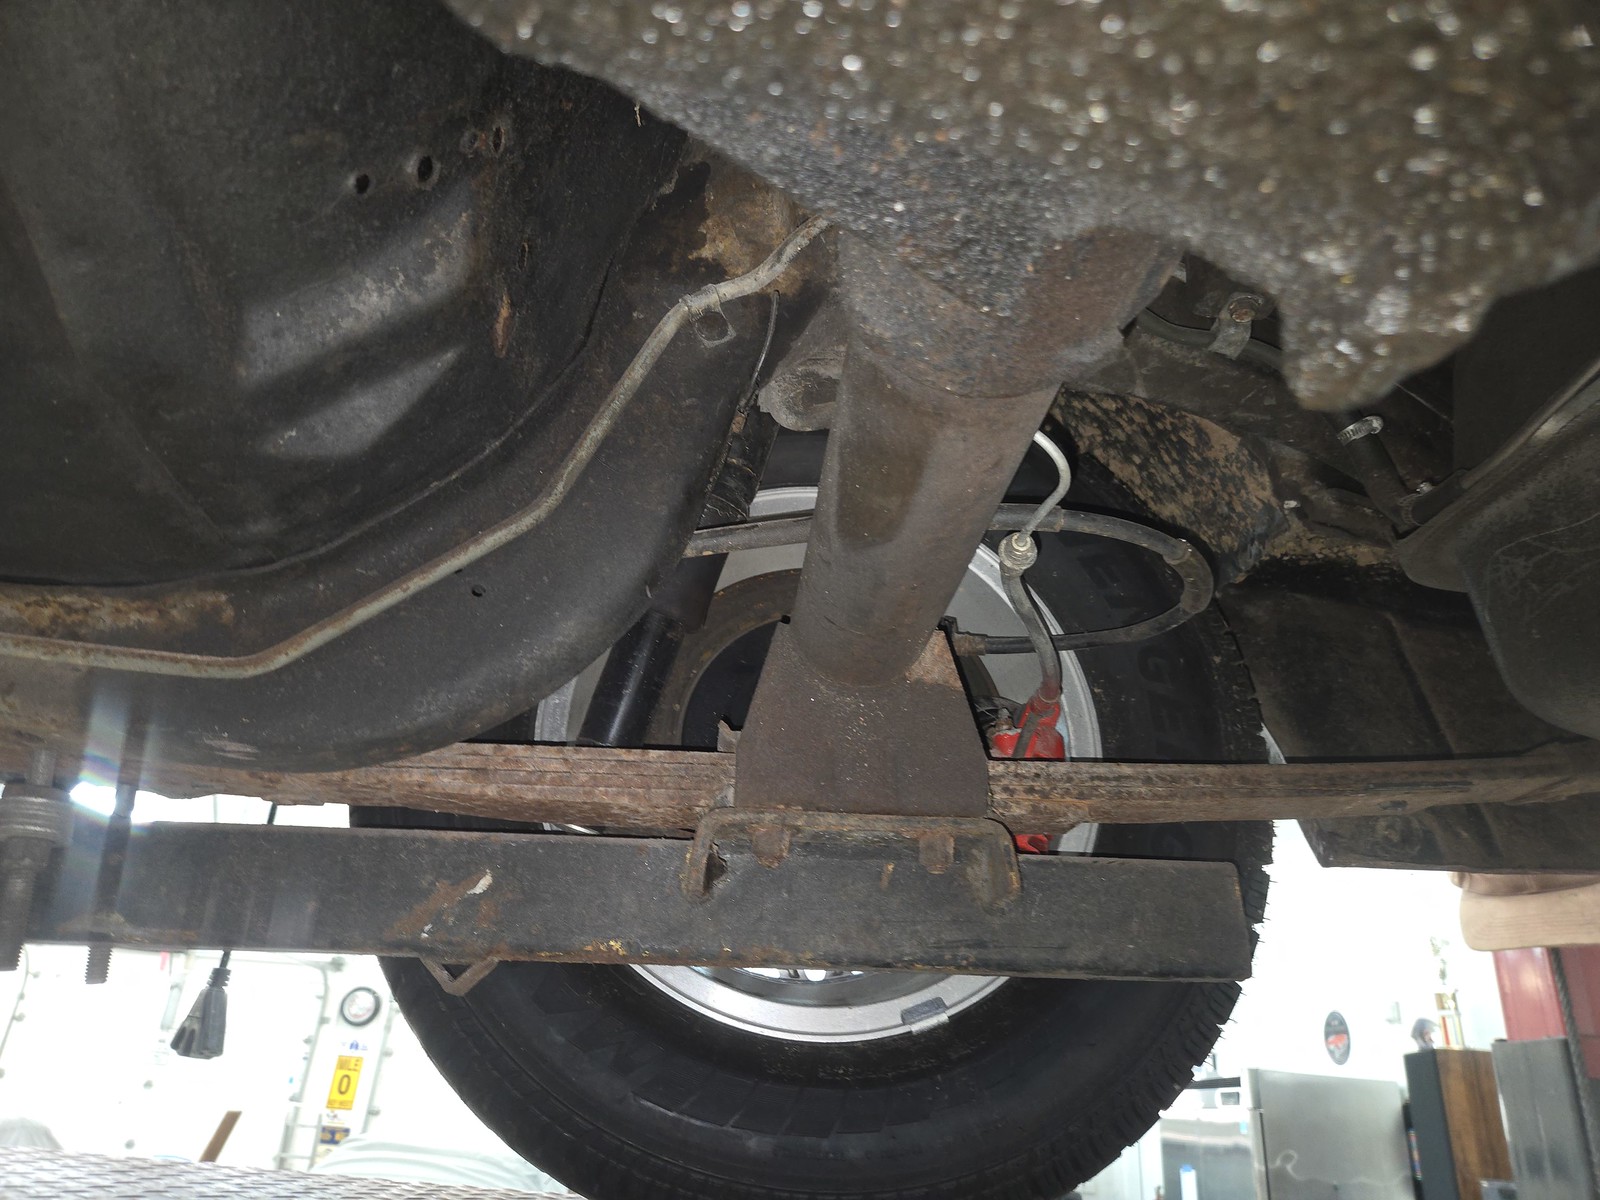
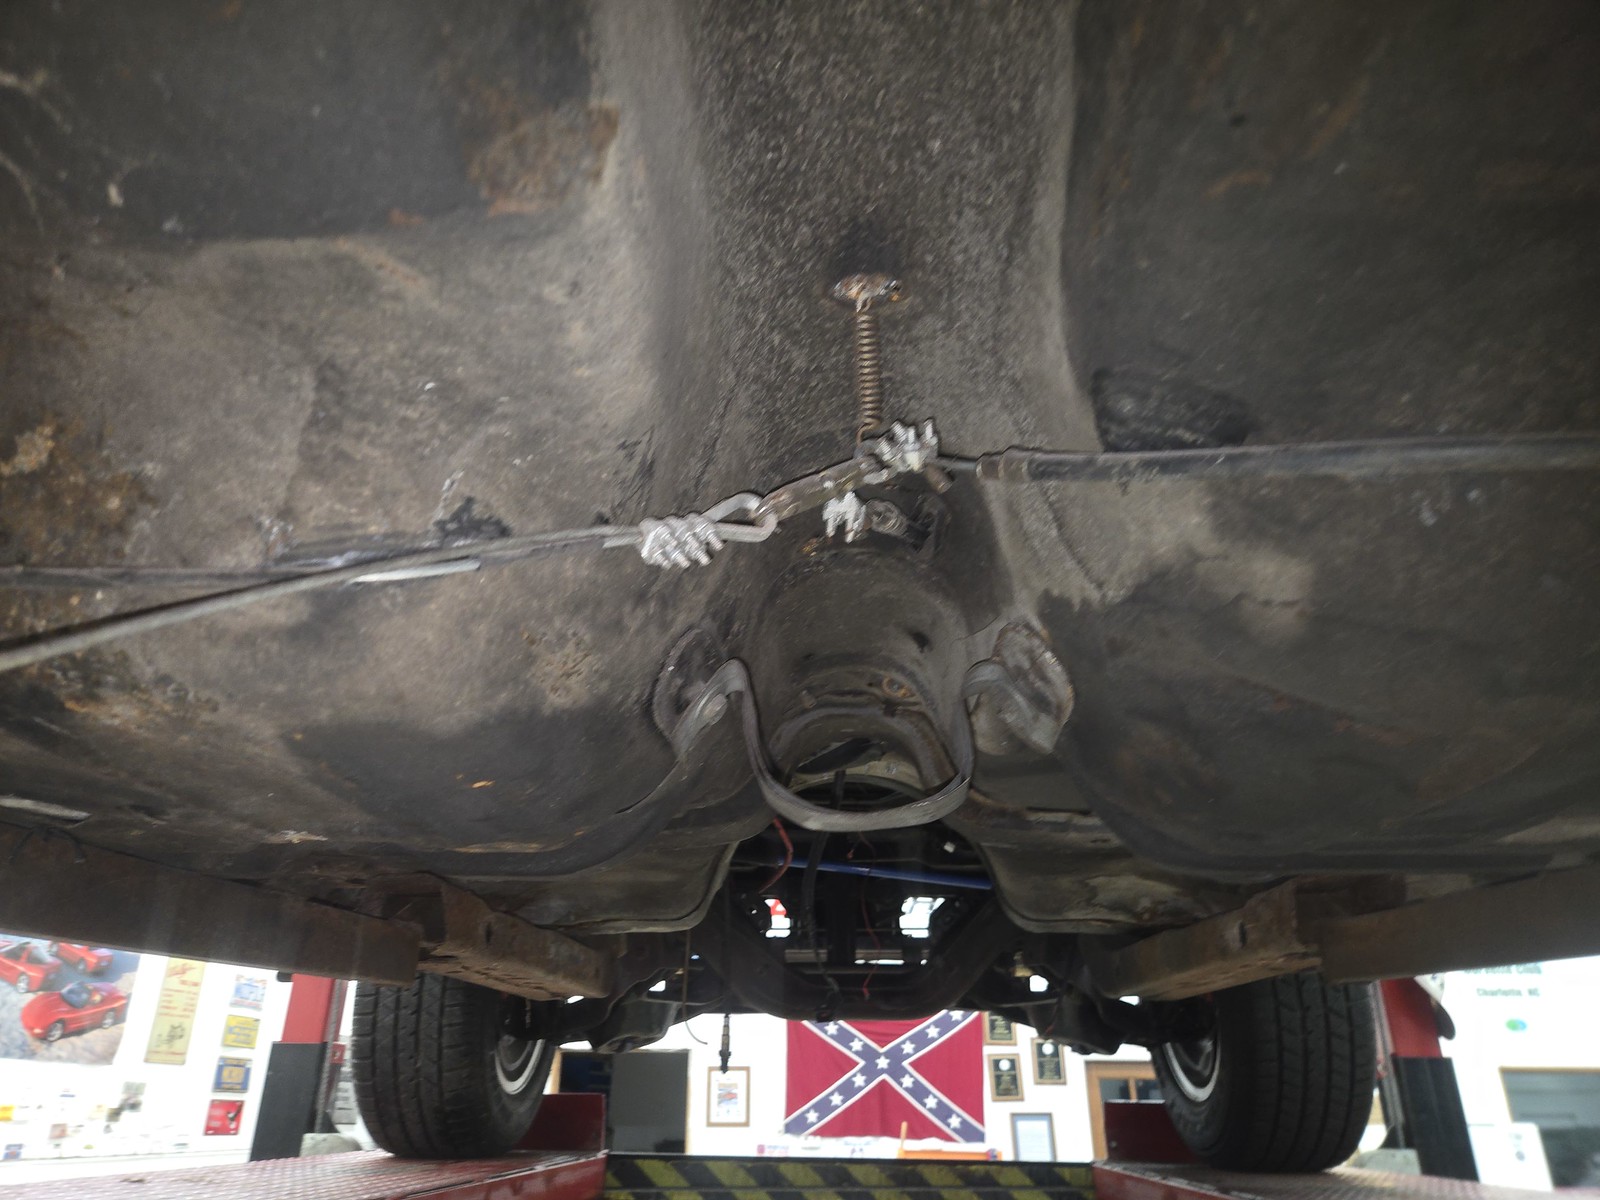
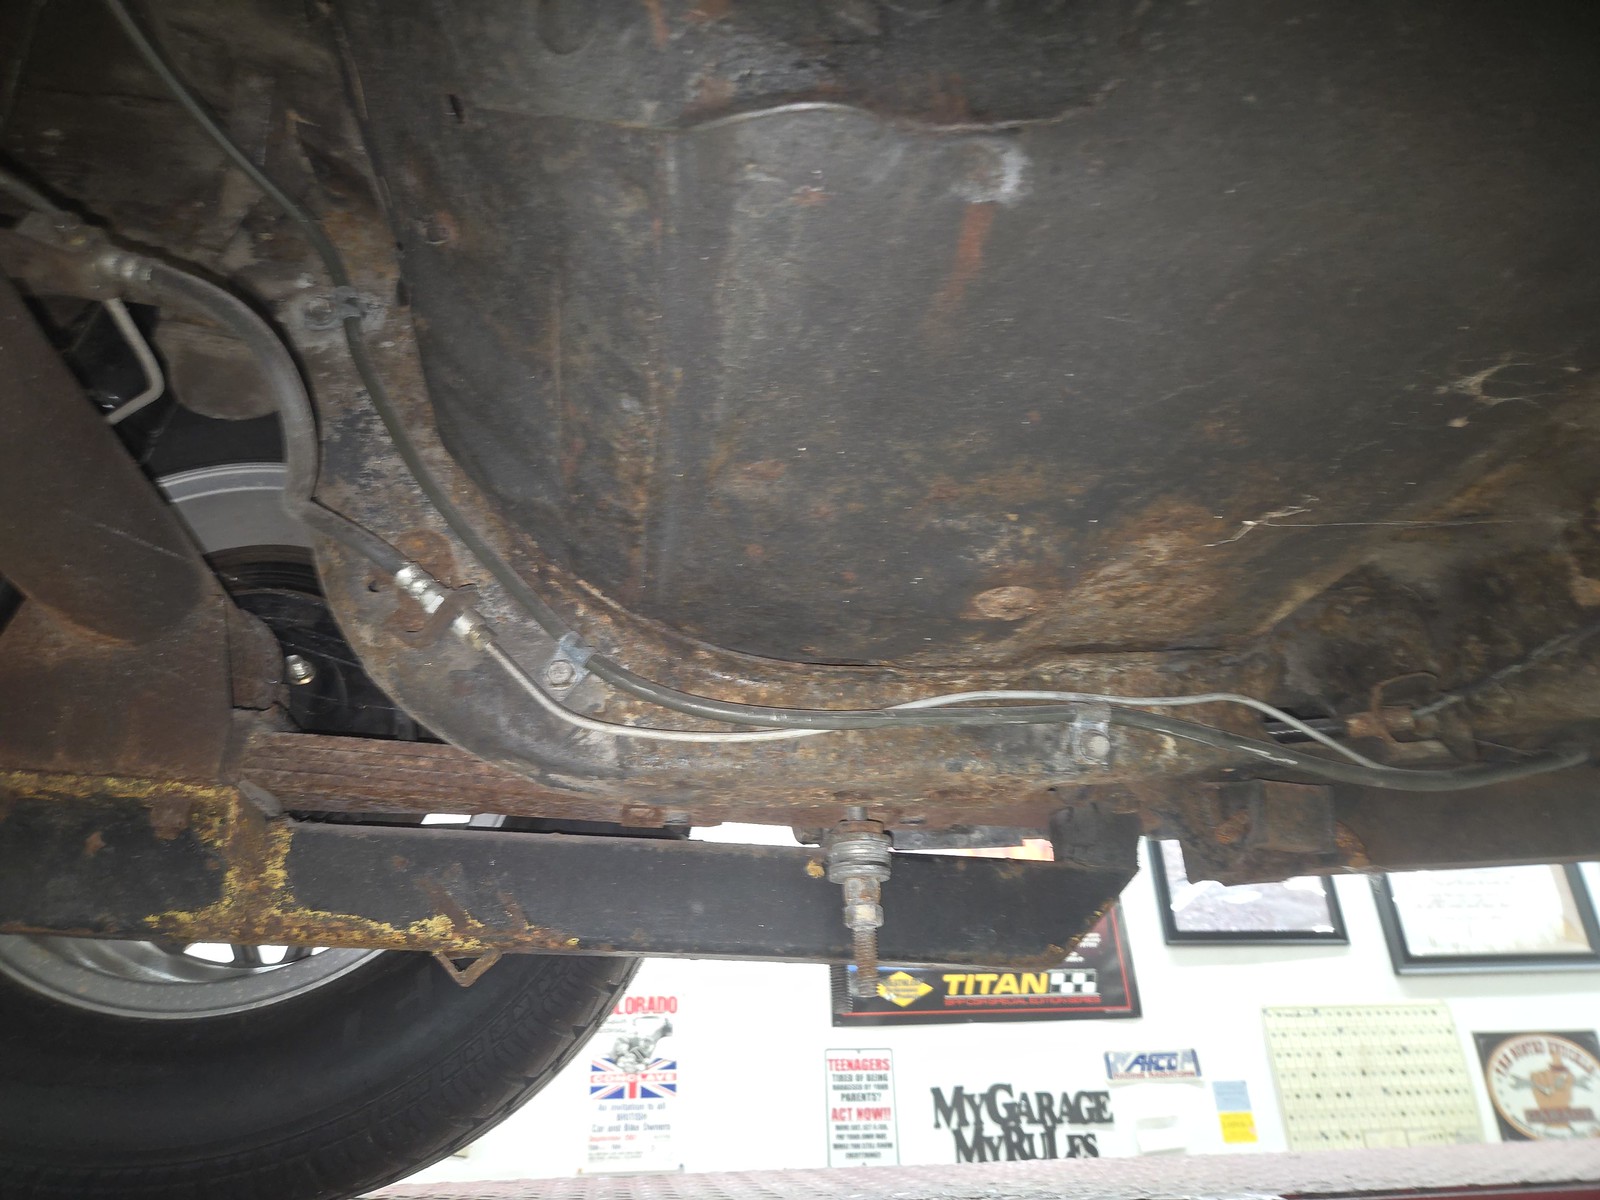
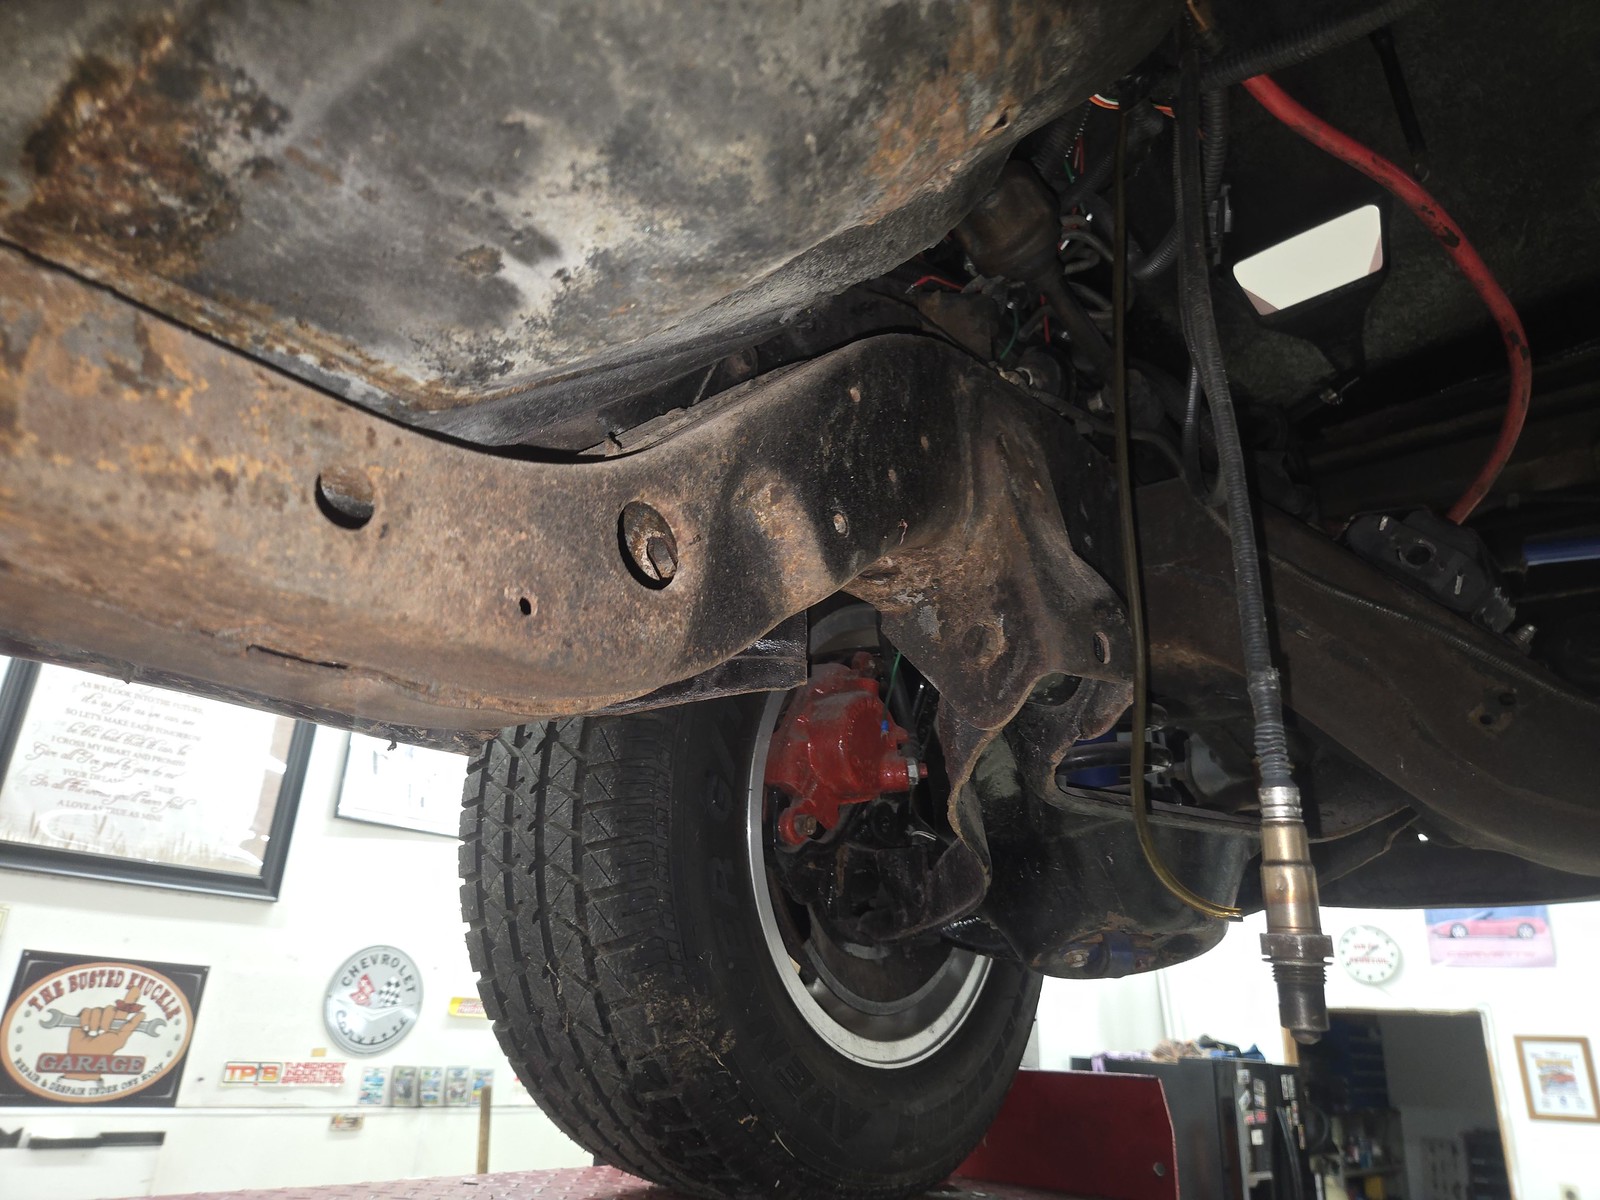
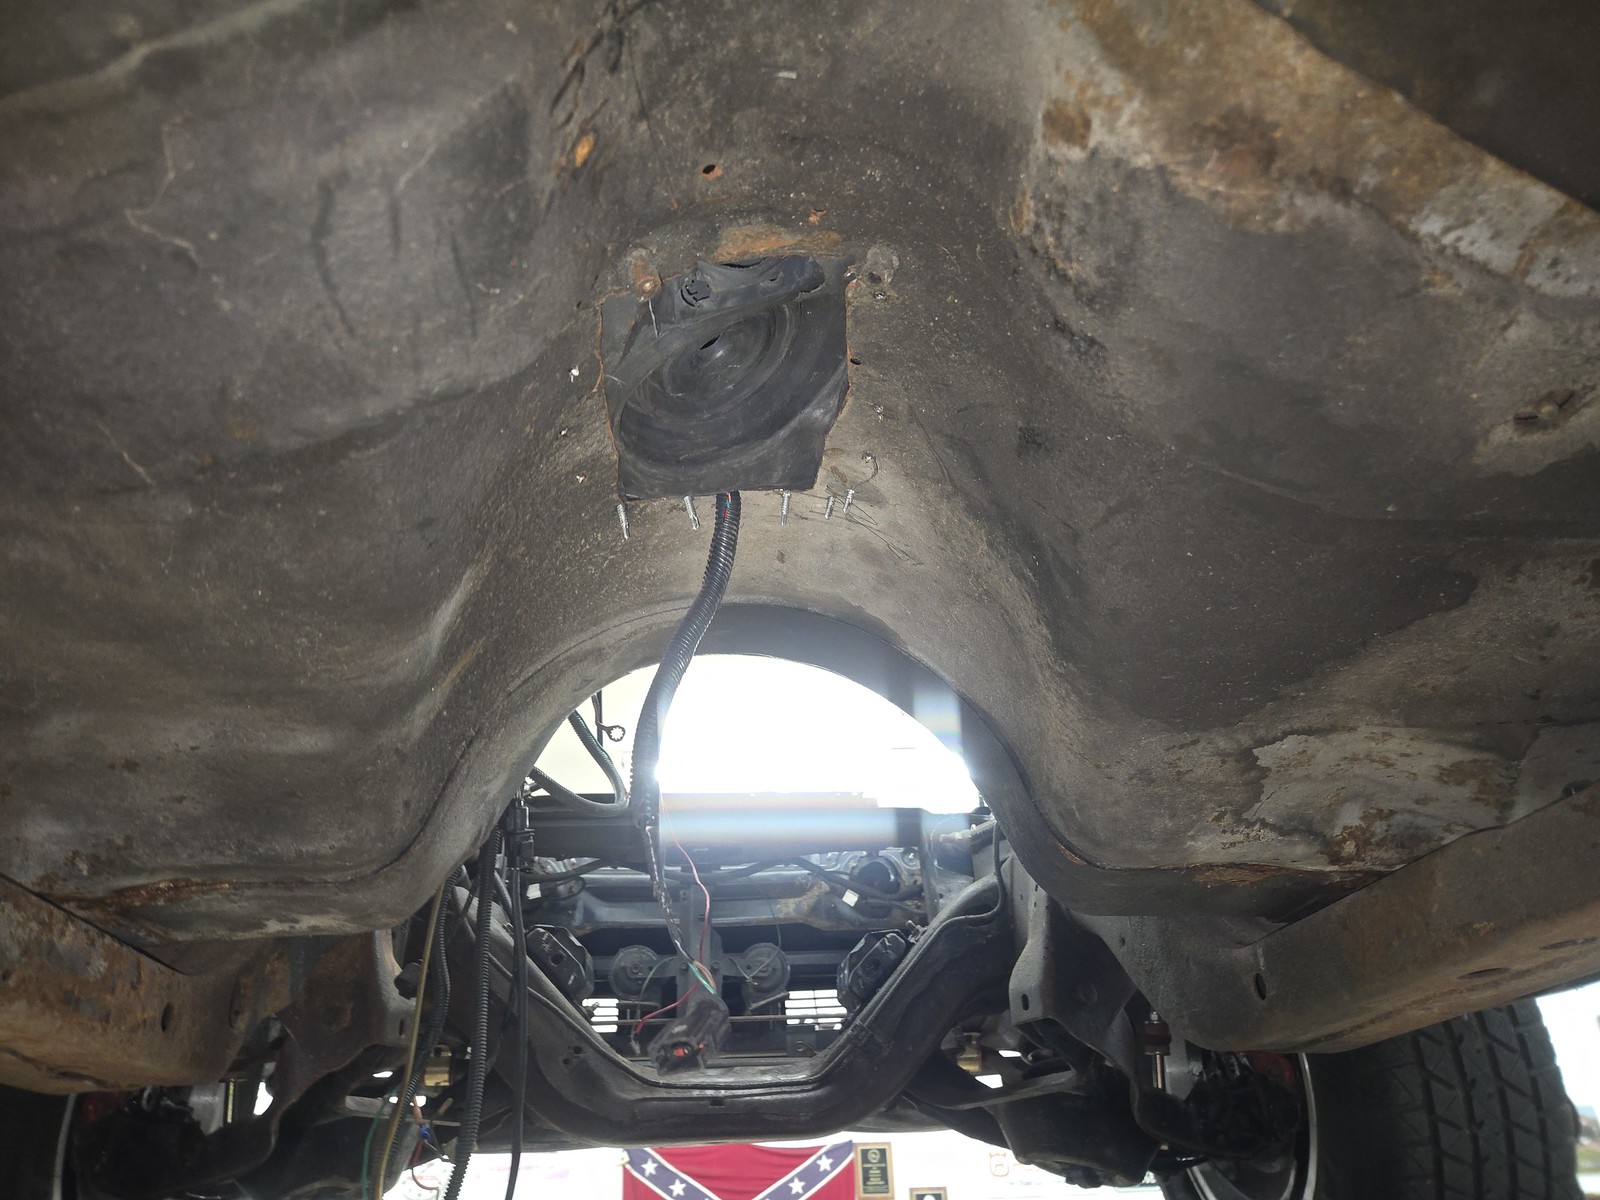
When I got home, I pushed the car around to the lift. I wanted to assess what I bought a bit better. This was after putting the front as high on jackstands as I could, hitting it all with castrol superclean, and then the yellow nozzle on the pressure washer. It blew off a lot of dirt, rust, and spray on bedliner. Had a mess to clean up. But the car was FAR more solid than I thought, and apparently a way better deal than expected. Underneath, we already knew about the subframe connectors, slapper bars, and rear disc brakes. However, I found NO RUST on any of the rockers or floors. Theres some on the rear bumper crossmember, and we knew about the trunk floor. I also discovered fresh control arm bushings and ball joints, fairly recent steering linkage, rear air shocks that appear new, a poorly installed 3/8 steel fuel line run down the drivers side, the factory 5/16 fuel line intact on the passengers side, new looking brake lines and hoses, a leaking rear diff of unknown ratio and condition, shot subframe bushings, and some interesting mods for parking brake and 5 speed. Fuel tank appears all but new, with a sending unit that has feed and return lines in it. looks like either the floor has some massive humps for clearance of something factory up by the front seats, or someone dented it upward for clearance.
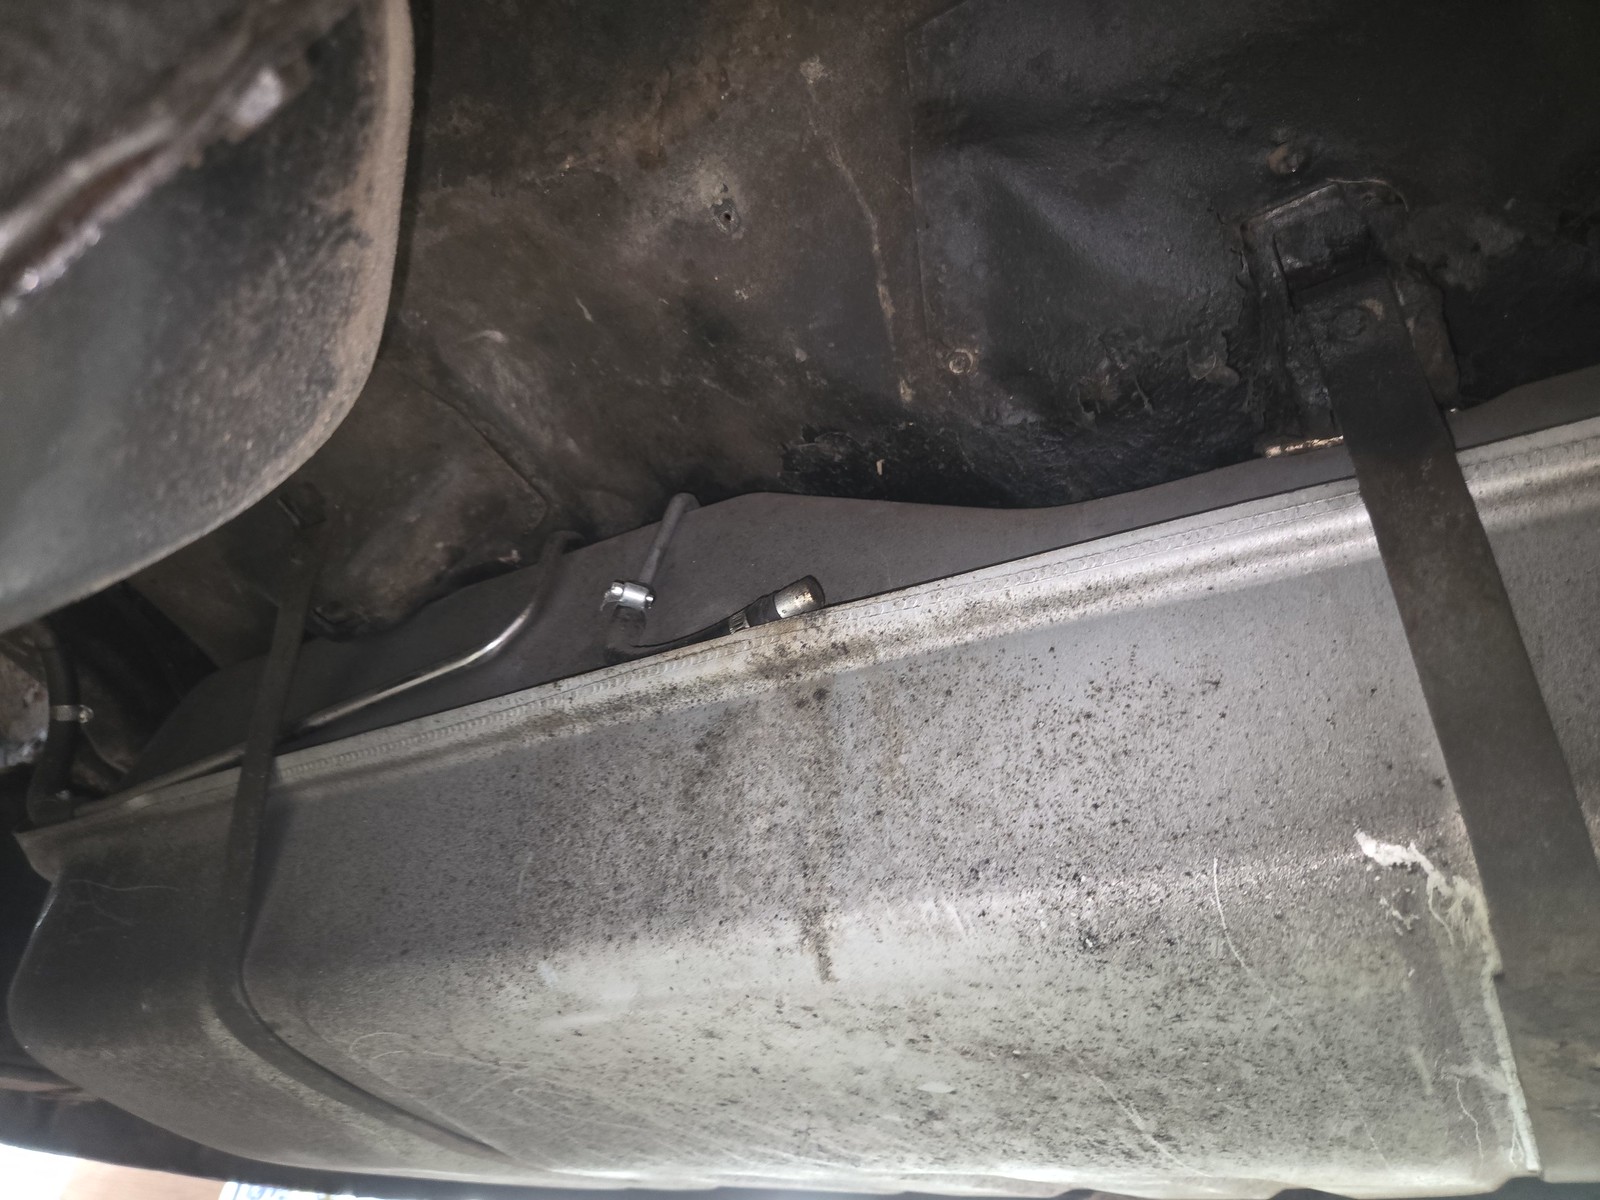 76303ff5-a19c-449f-abe9-59288ca3babe.jpeg by Michael Crawford, on Flickr
 b42f6576-a66d-41bc-b193-f93159c10d6a.jpeg by Michael Crawford, on Flickr
 02df0fe9-96a1-4d5f-b87d-606b214e708a.jpeg by Michael Crawford, on Flickr
 cb0206dc-873a-4668-b235-da9857b4d3a2.jpeg by Michael Crawford, on Flickr
 77d8695f-b1fb-4746-833d-073f5caa42f6.jpeg by Michael Crawford, on Flickr
 5c18fa02-7d62-4724-82fe-657acdc13fbb.jpeg by Michael Crawford, on Flickr
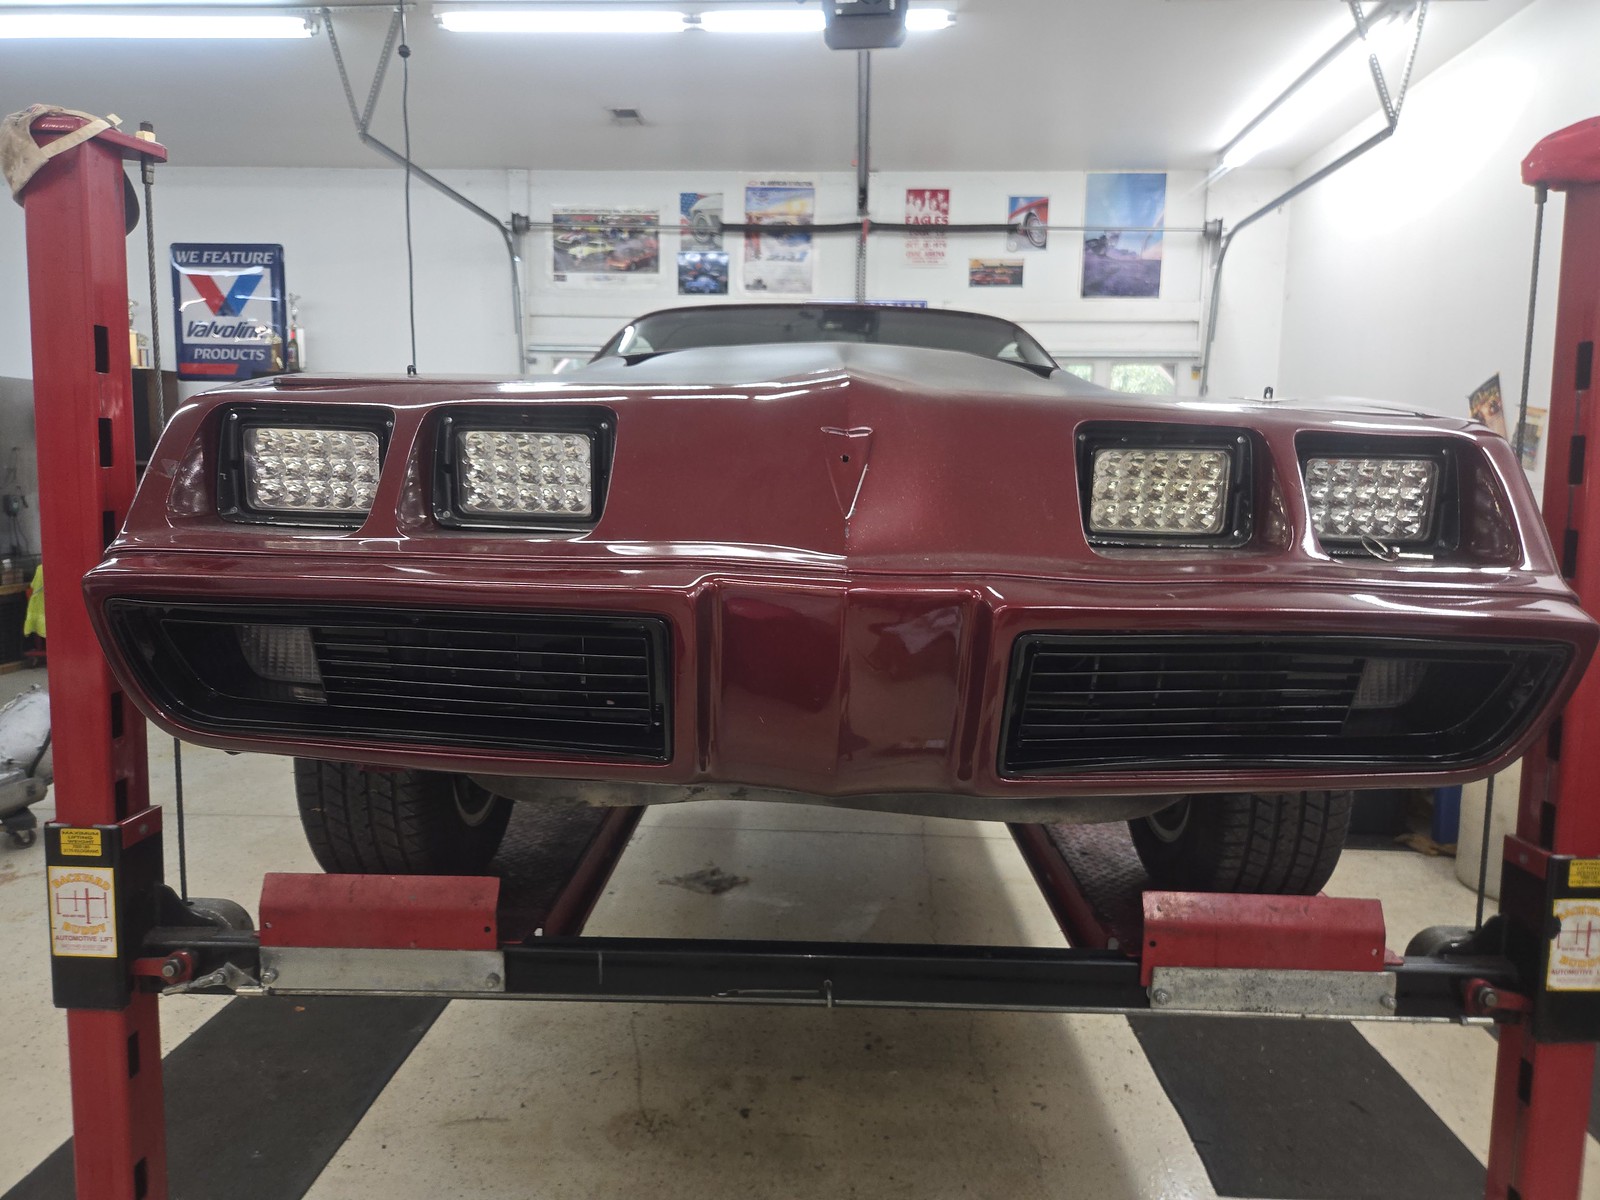
Next order of business was getting my TEMU bumper grills installed. I was SHOCKED to see they came with hardware. As a review, ill say they fit the holes more or less, and look better than nothing. They don’t fit great, but they fit.
 68b97549-6e0f-4ac4-8133-44fc4bb1704b.jpeg by Michael Crawford, on Flickr
 889db6f3-055c-4a3c-84d3-7c8d39bb754e.jpeg by Michael Crawford, on Flickr
Next was starting to consolidate parts. And by consolidate parts, I mean fit the 6.0/4l80e. now, I know that this stage is all about minimum viable product, however I don’t want to have to redo a bunch of stuff at the end to sell OR keep. Some things will be done the same regardless of the path I take. Like cleaning and painting the engine and trans. So step one was getting the engine on a stand and stripped down to long block
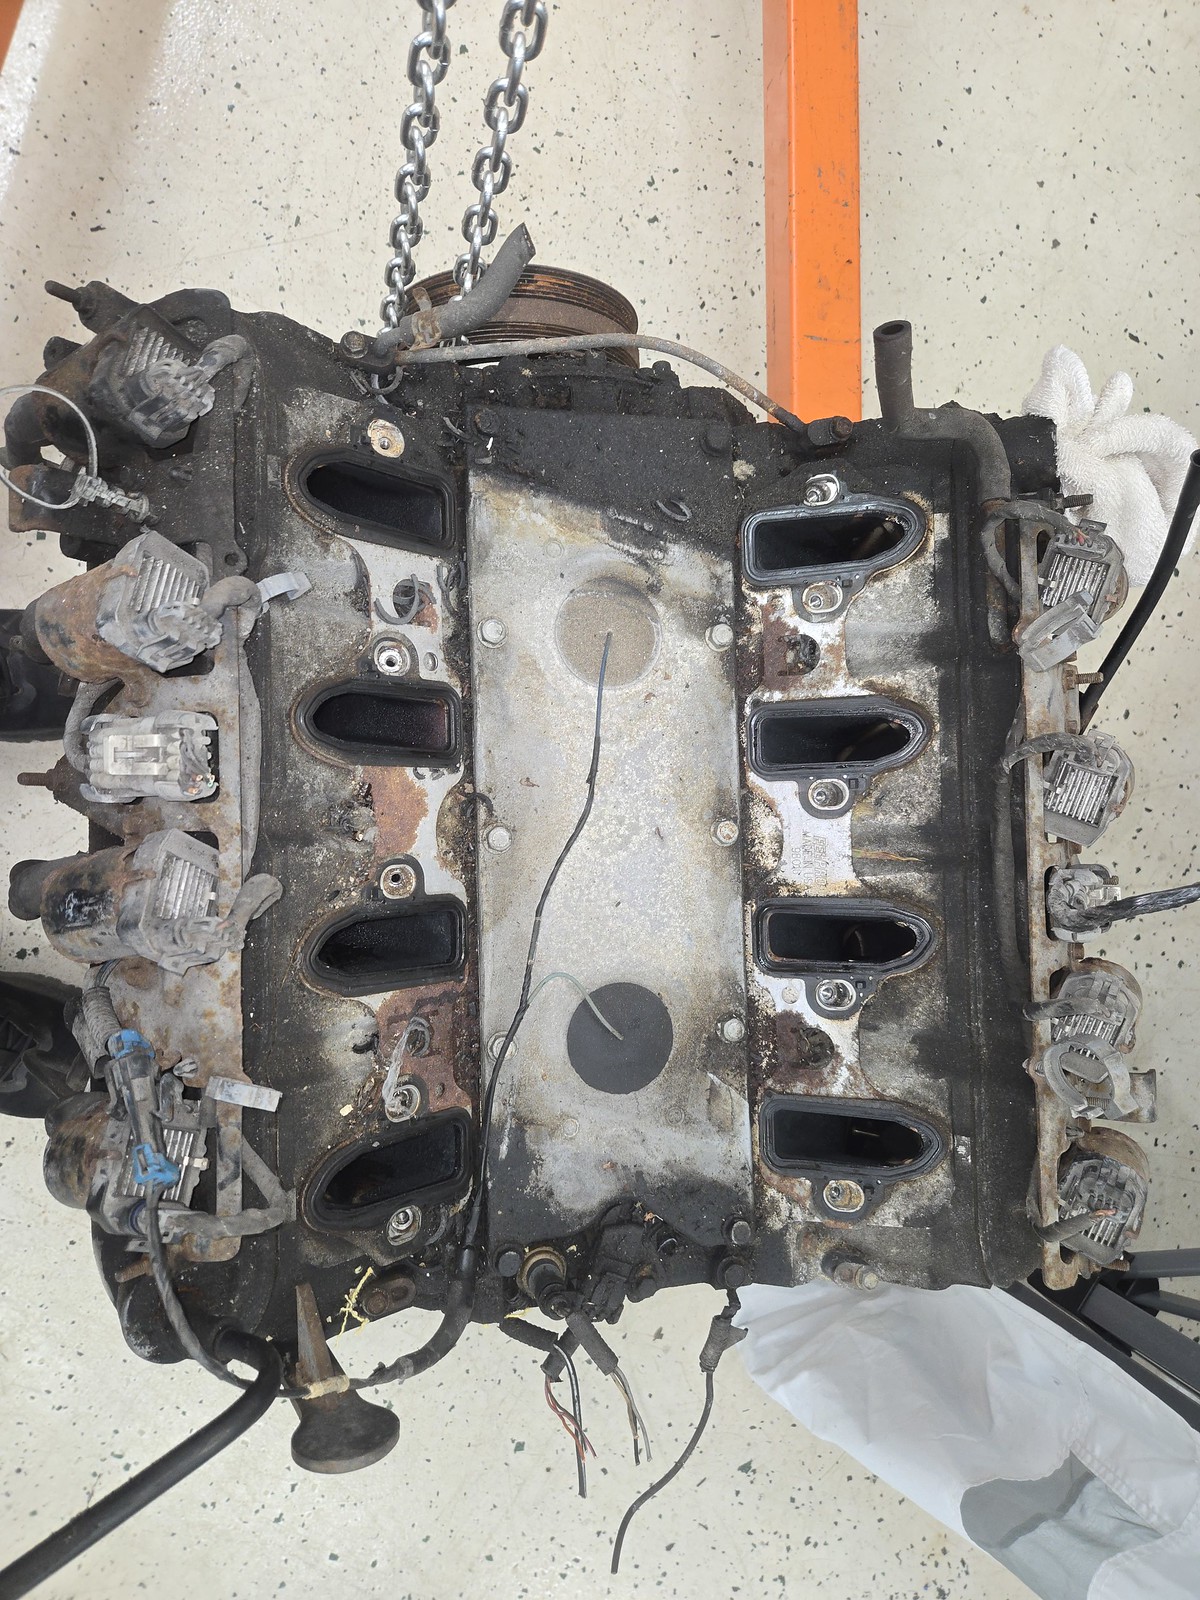 6b6d7b11-ba69-44ab-900c-aece8ae635b0.jpeg by Michael Crawford, on Flickr
Then, getting the 5 broken manifold bolts out of the heads. What ultimately worked was preheating the head and stud with mapp gas, welding a 7/16 washer to the broken stud, and then welding a ½ nut to the washer and stud. Removing wile still red hot from welding. Some took a few tries.
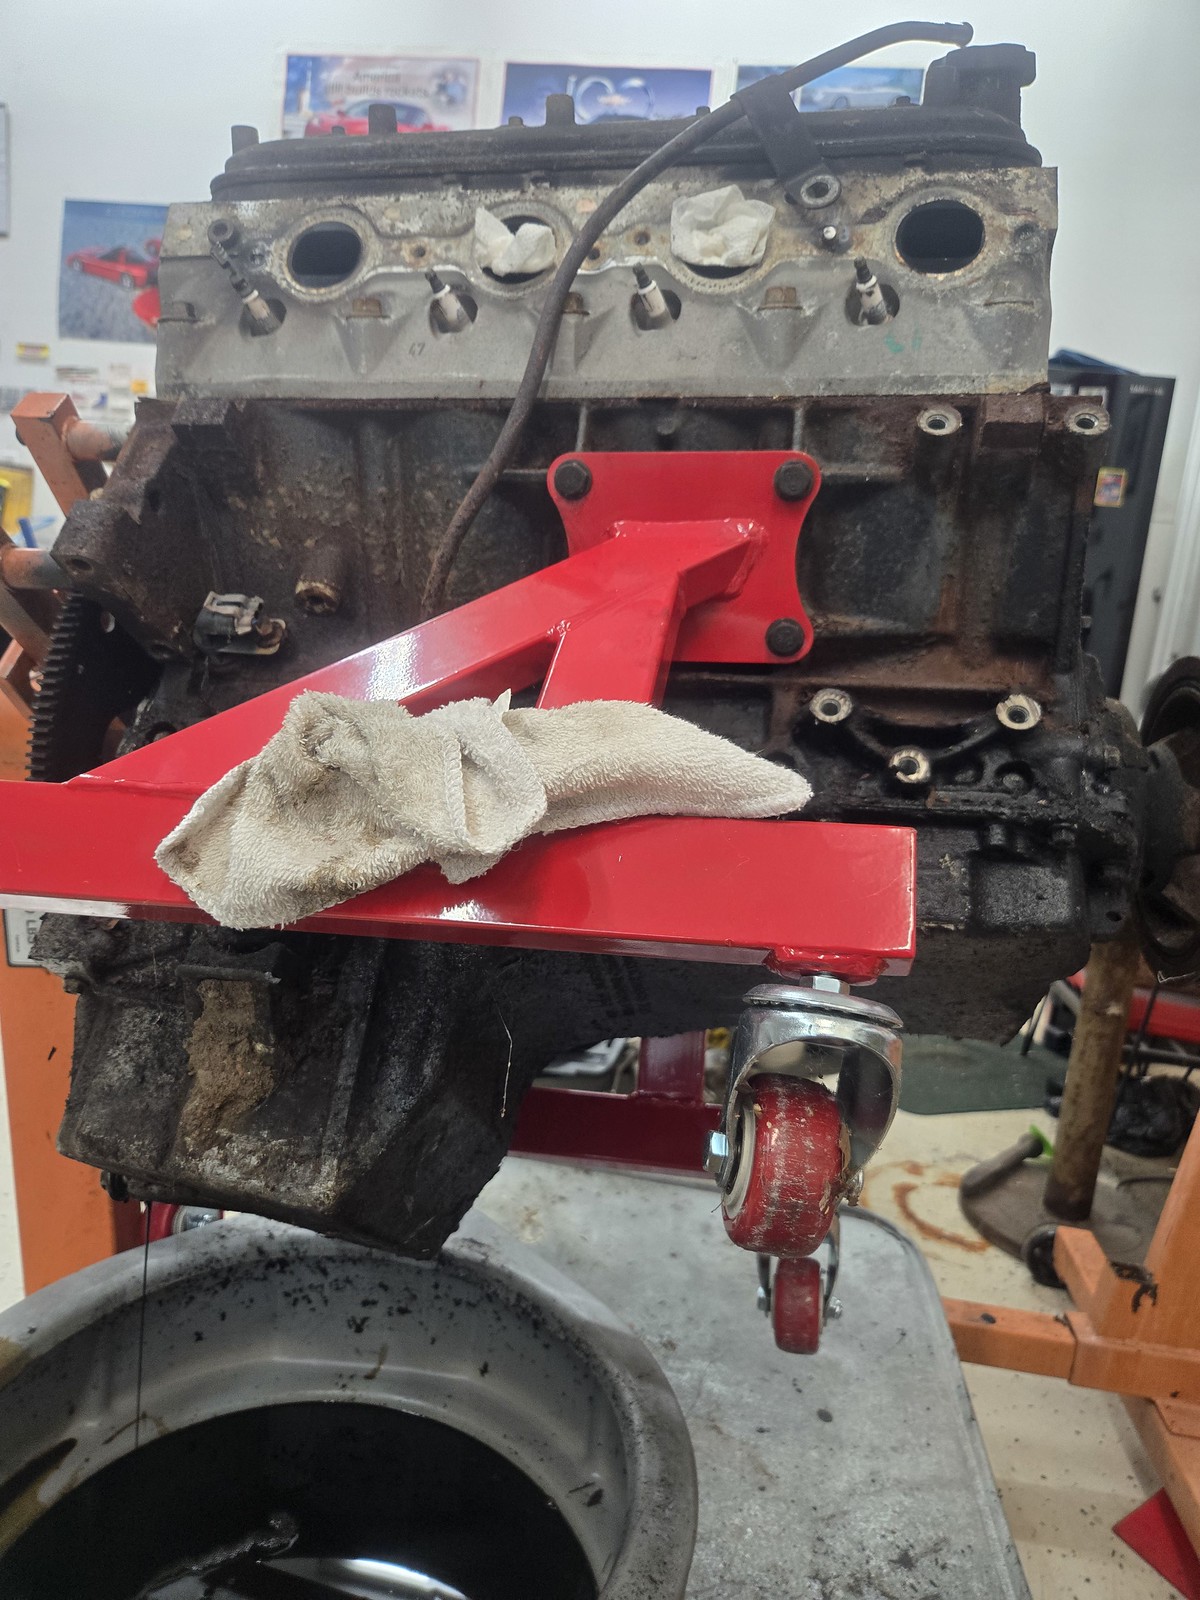 27b7577d-d10e-4fd5-9aa4-753392dd2f10.jpeg by Michael Crawford, on Flickr
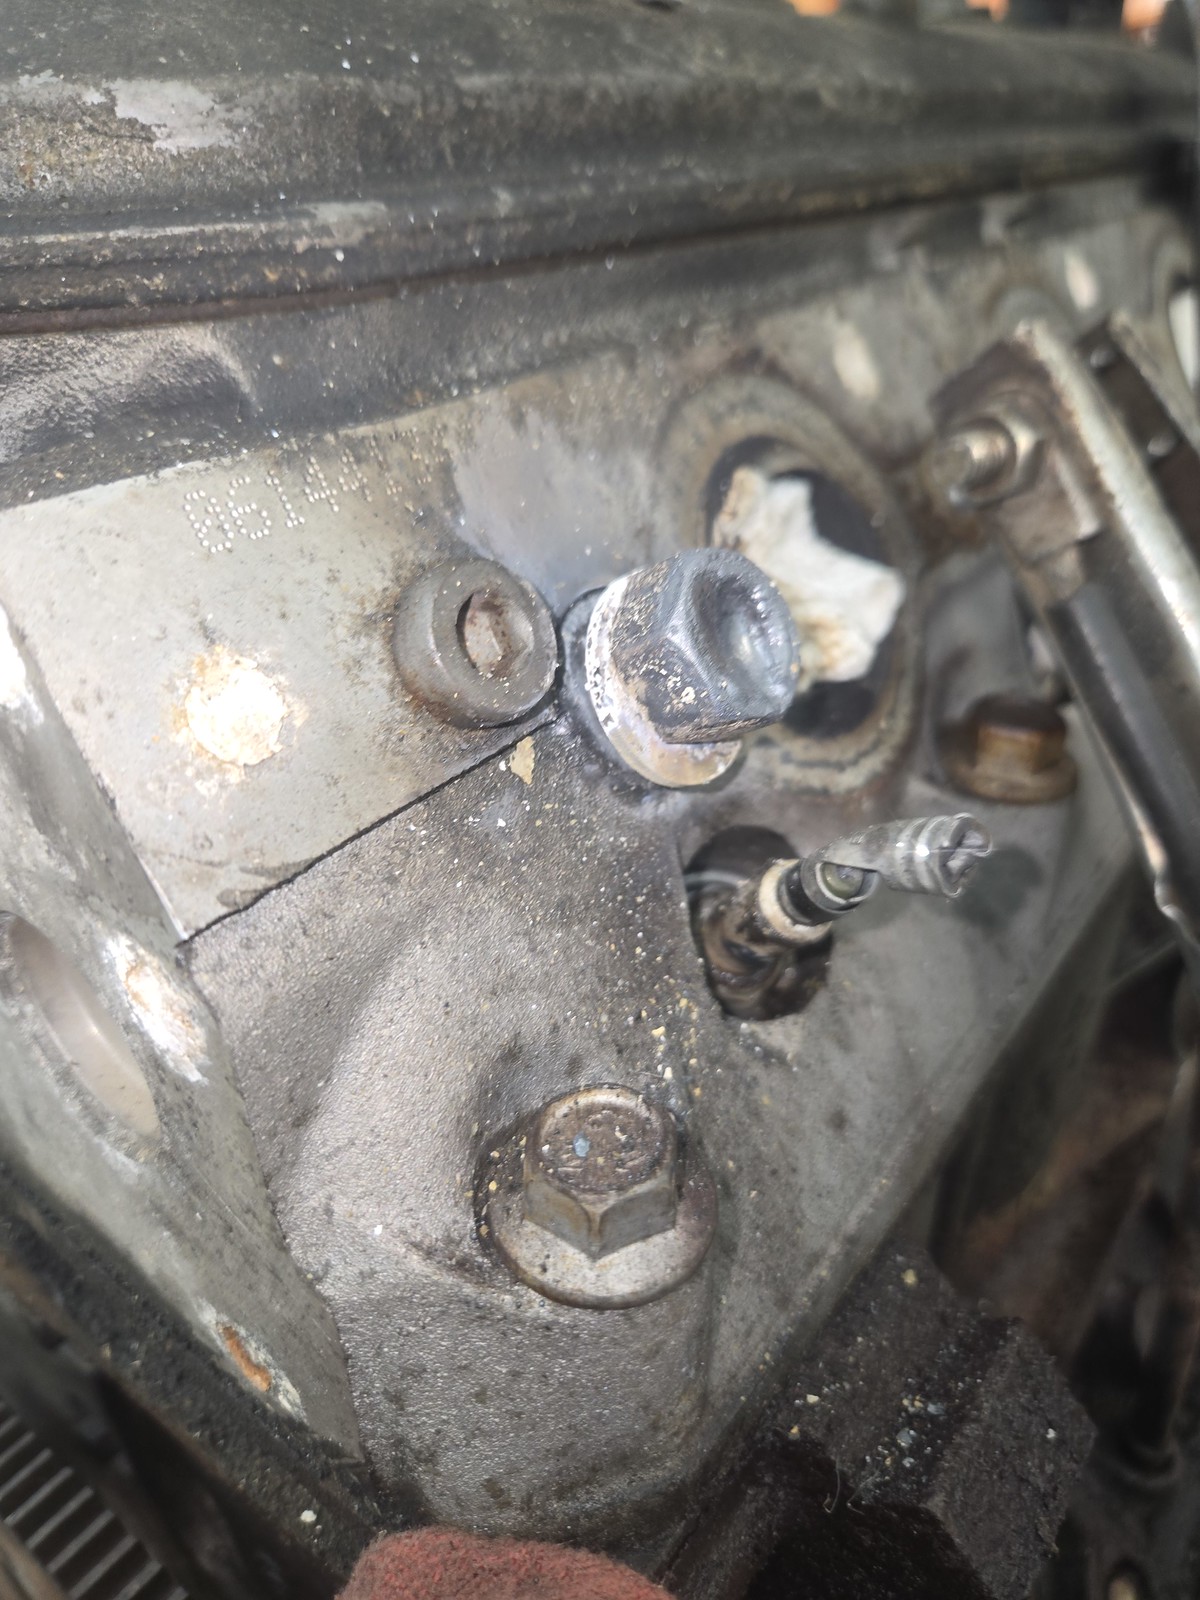 196e482f-67cd-4f87-a5a2-e6e7a25f428a.jpeg by Michael Crawford, on Flickr
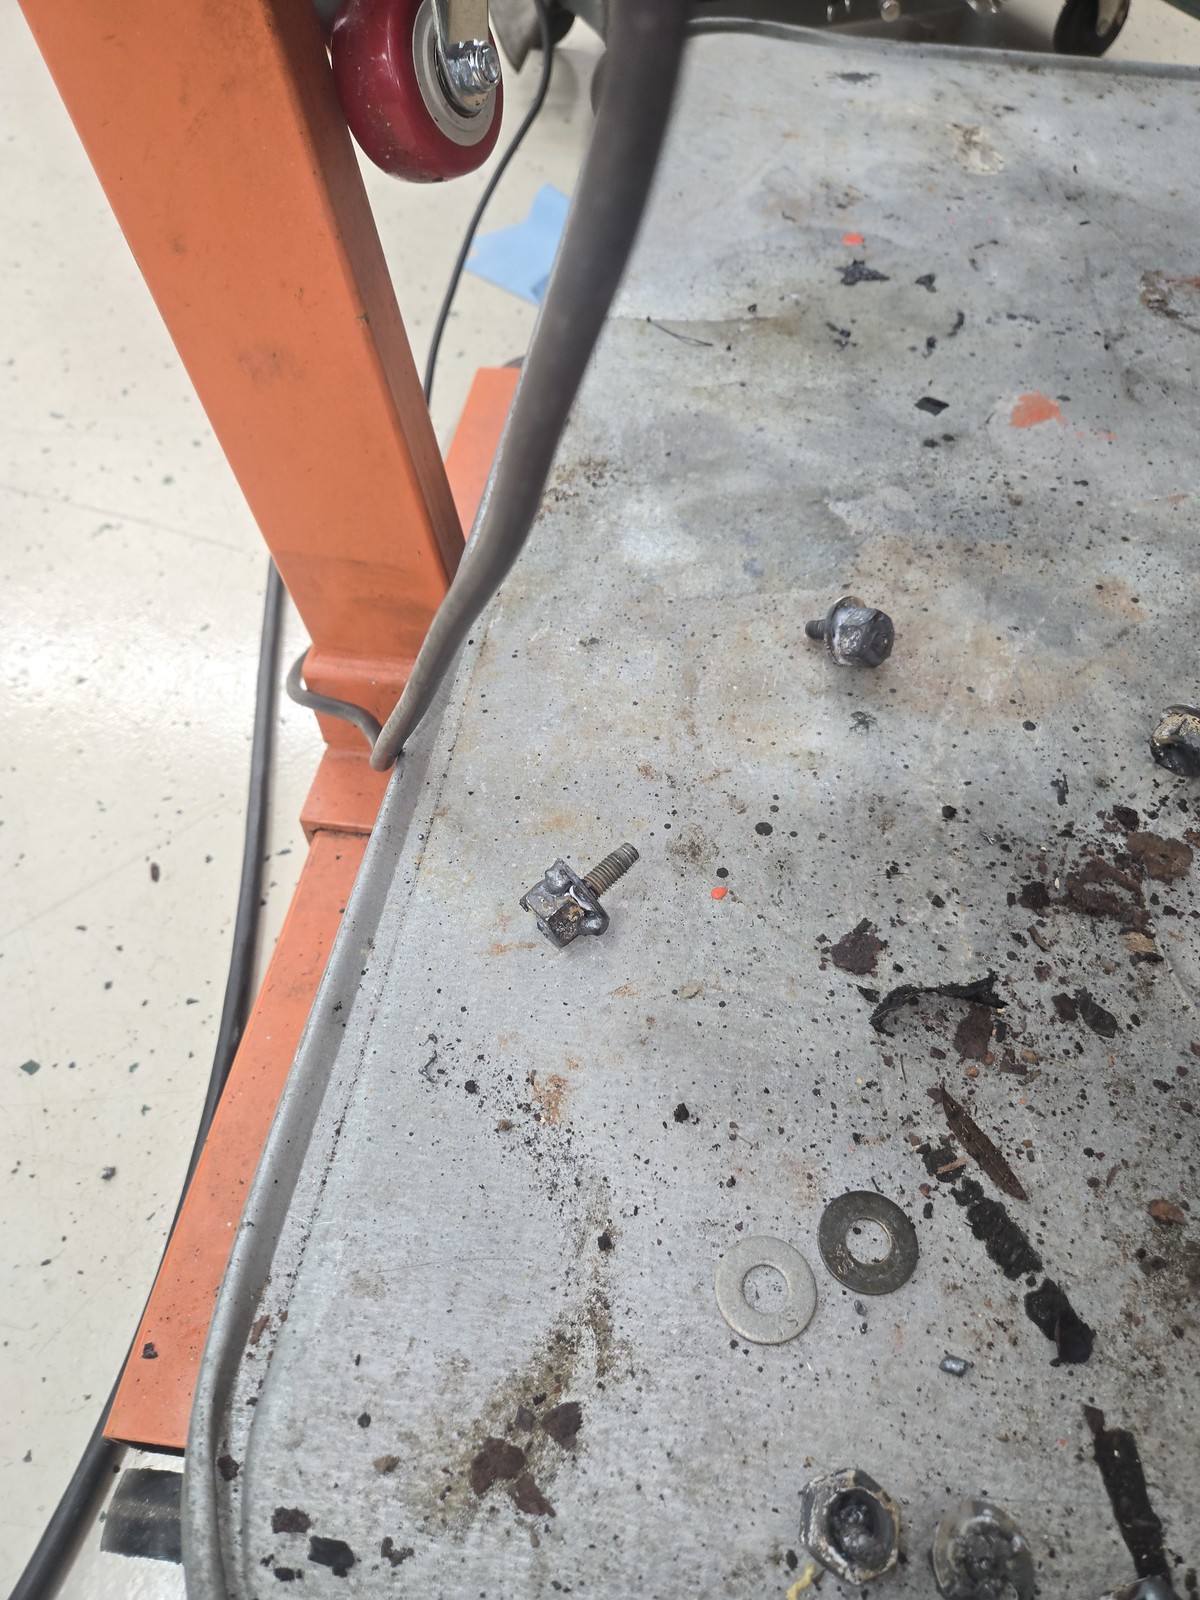 a926a98d-7f14-4938-bcff-d13869987e09.jpeg by Michael Crawford, on Flickr
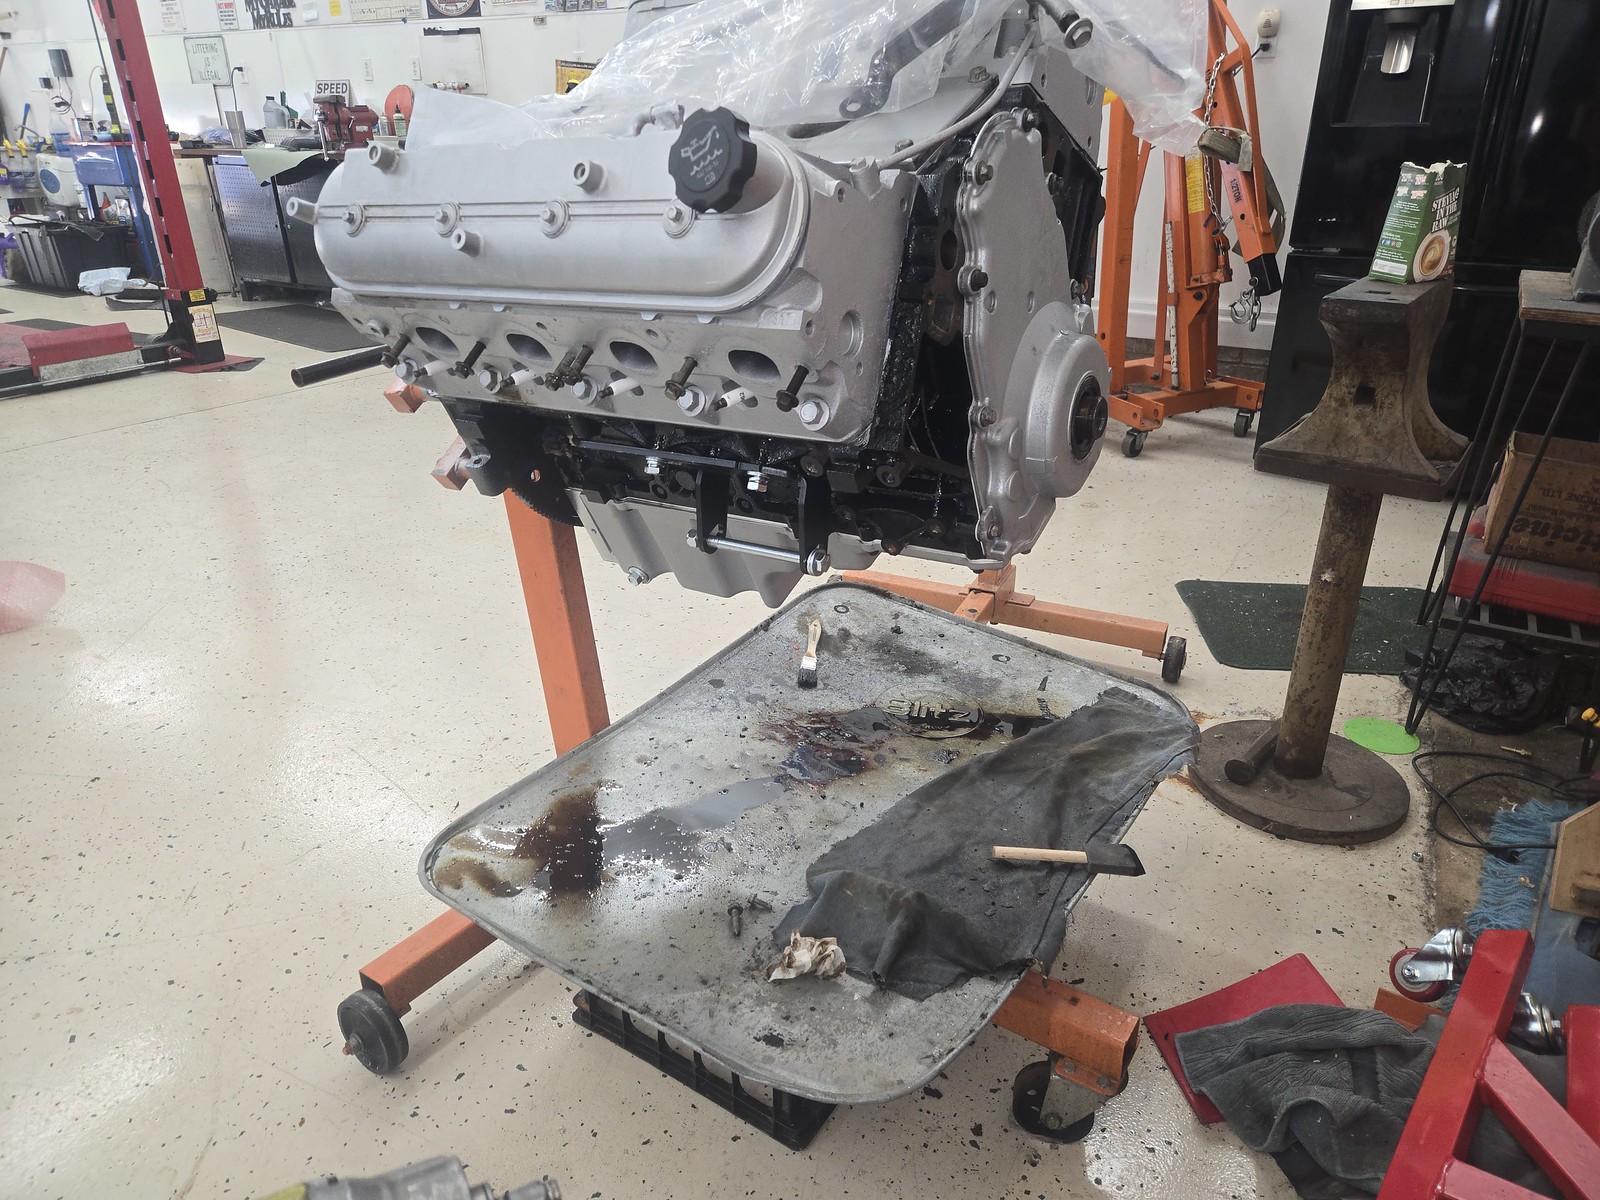
Moved it outside. Filled the ports with paper towels, then bolted down the port covers with the old gaskets. Scraped all the crud I could scrape, superclean, wire bush, and pressure washer later
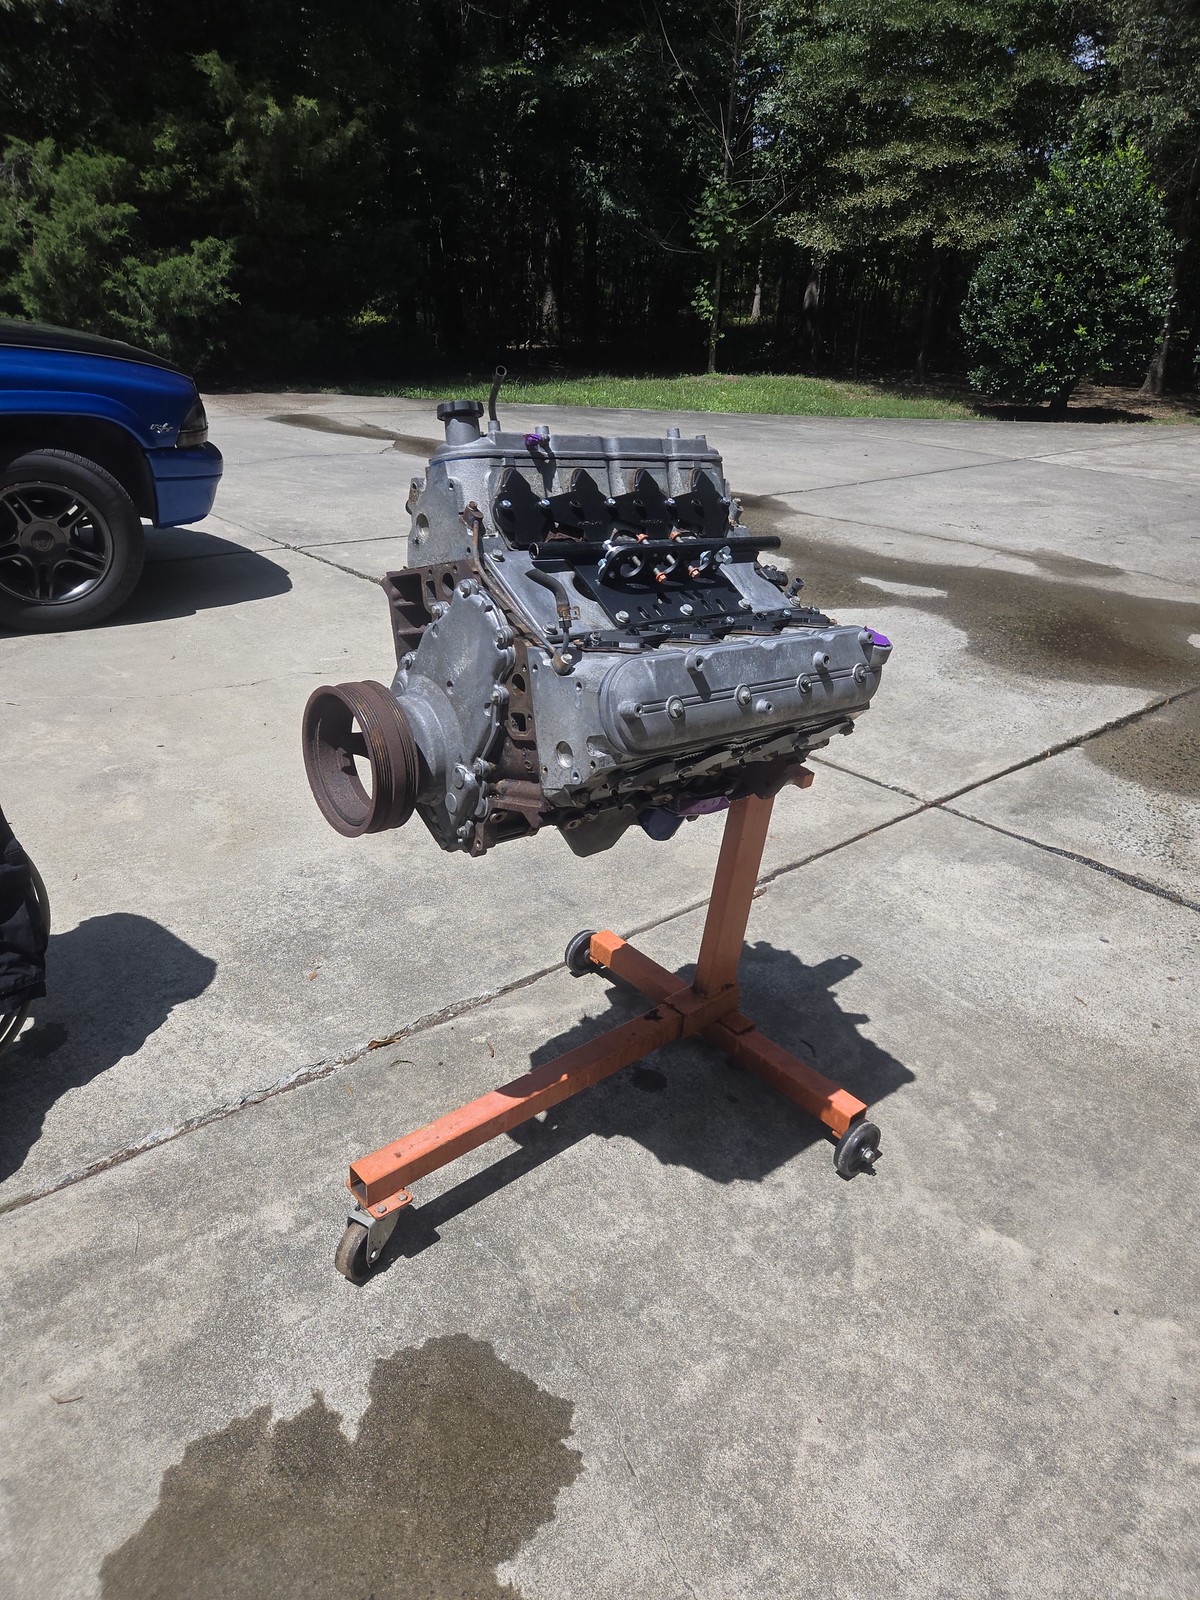 c50857aa-1c6c-4acd-b707-d9f357ddb680.jpeg by Michael Crawford, on Flickr
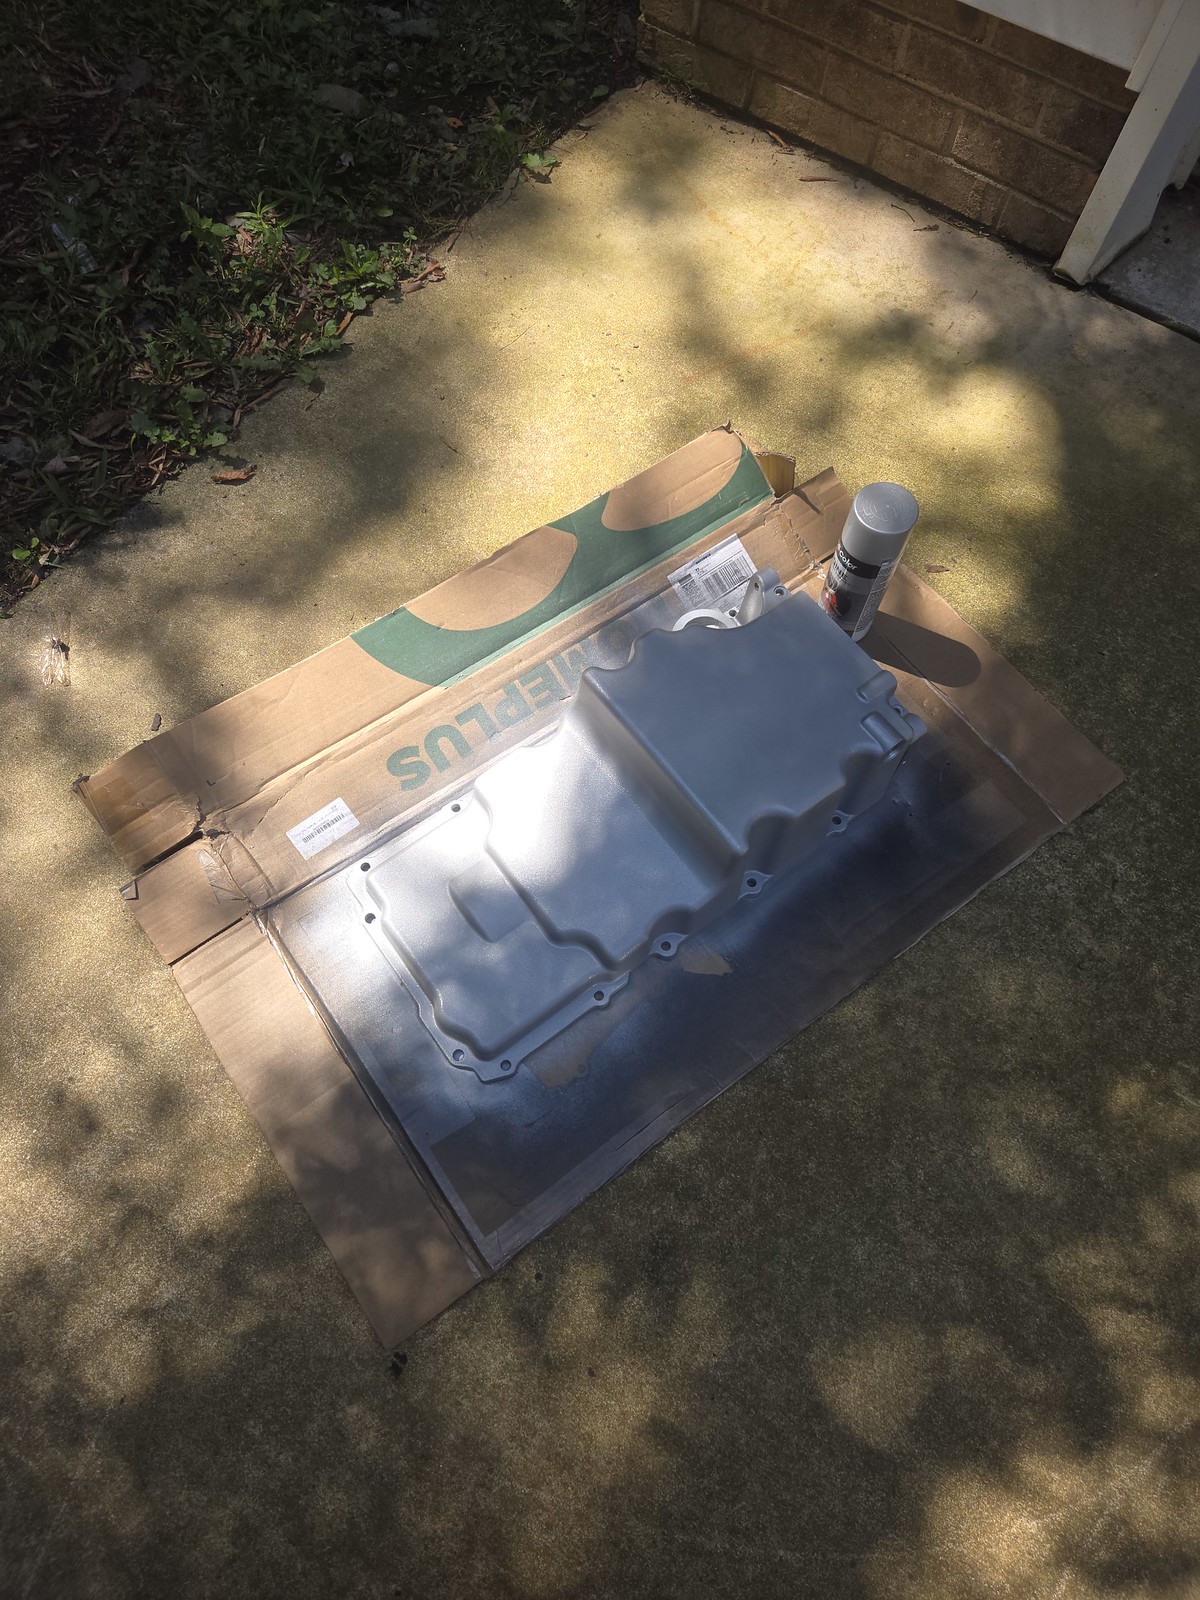
Then, paint block with rustoleum gloss black, the new pan, heads, valve covers, timing cover and valley cover with cast coat aluminum. I also figured out I was sent a vette water pump after I bought spacers. Took the vette pump out of budget as it wont work, but left the spacers in for now. Ill find an LS1 water pump from a Camaro as i know that will do.
 eb247c76-0e23-4913-a1f3-76cff7aa0b00.jpeg by Michael Crawford, on Flickr
 1760bc1e-2a77-405c-a4d3-94e59183f66e.jpeg by Michael Crawford, on Flickr
 e43b7c9f-a61f-4f52-b4ab-cd99240934fd.jpeg by Michael Crawford, on Flickr
 16fd2790-5105-4beb-8a68-31b7a5657a92.jpeg by Michael Crawford, on Flickr
 1fc0e85f-720b-4a78-996e-b7bbef070eb3.jpeg by Michael Crawford, on Flickr
 5896b335-3a50-402e-9e6e-400d895e9950.jpeg by Michael Crawford, on Flickr
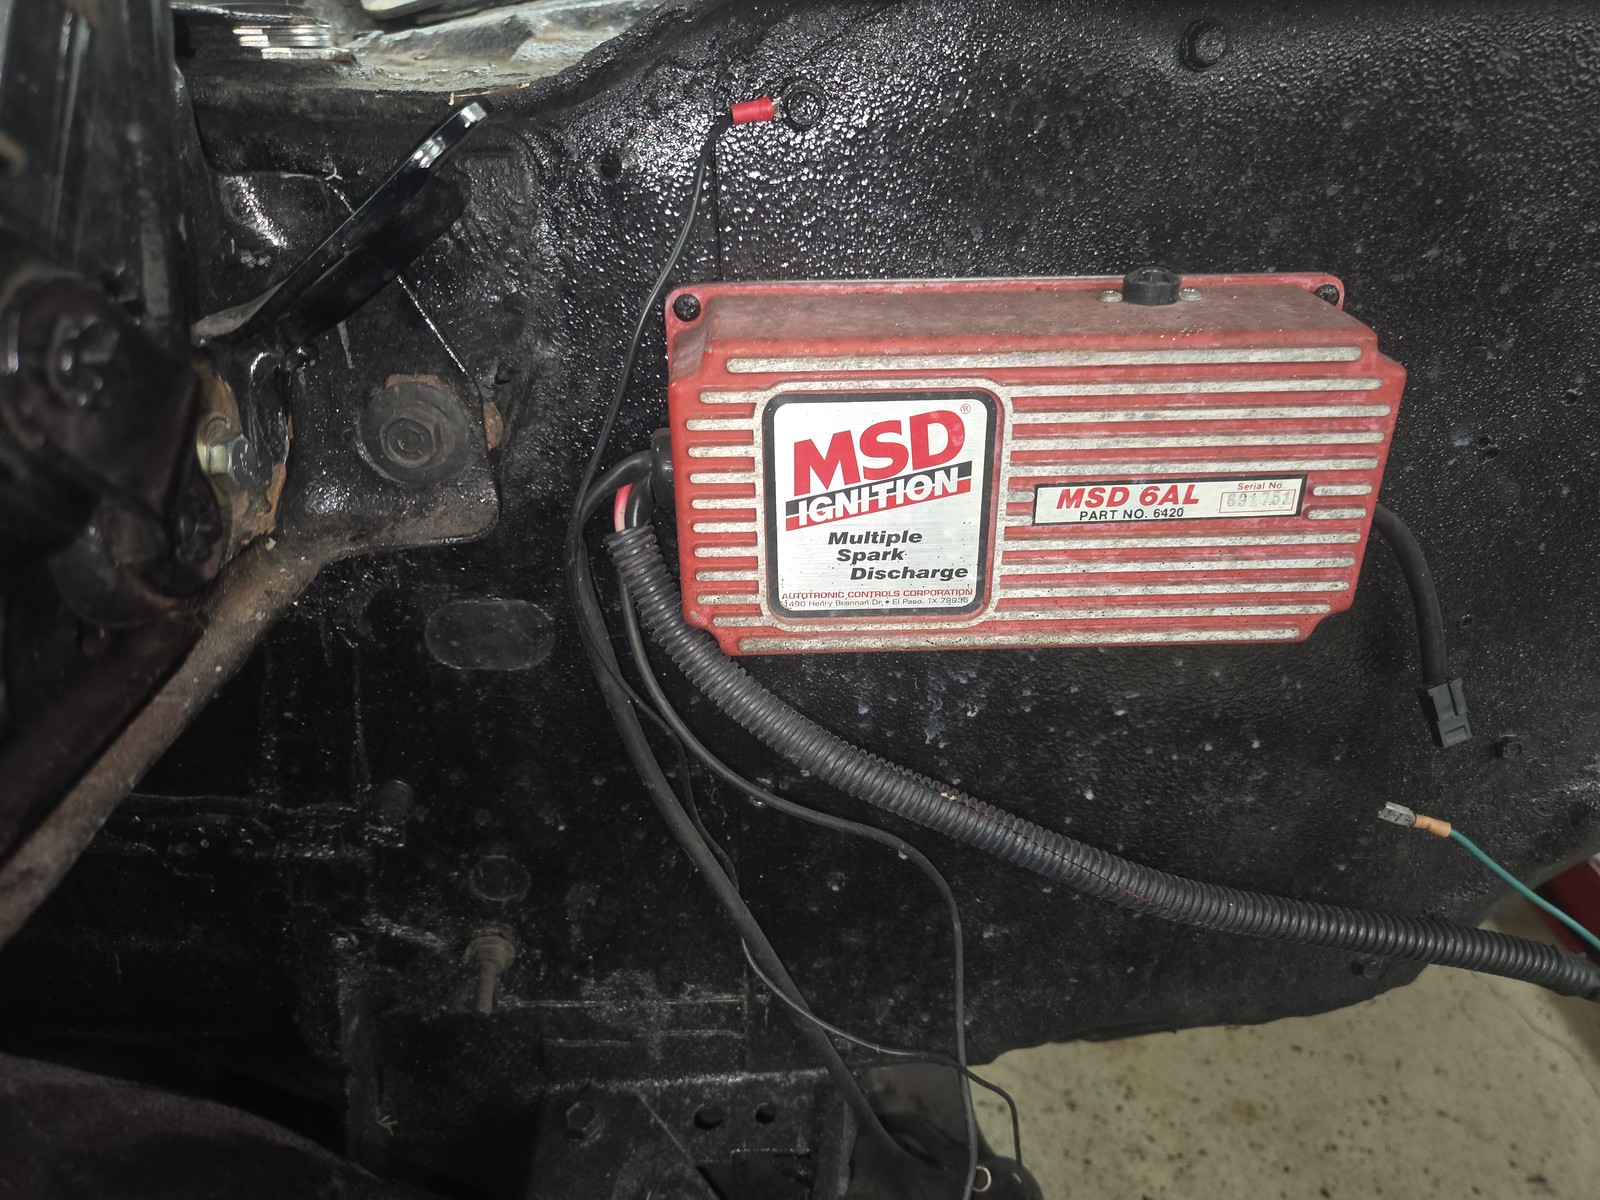
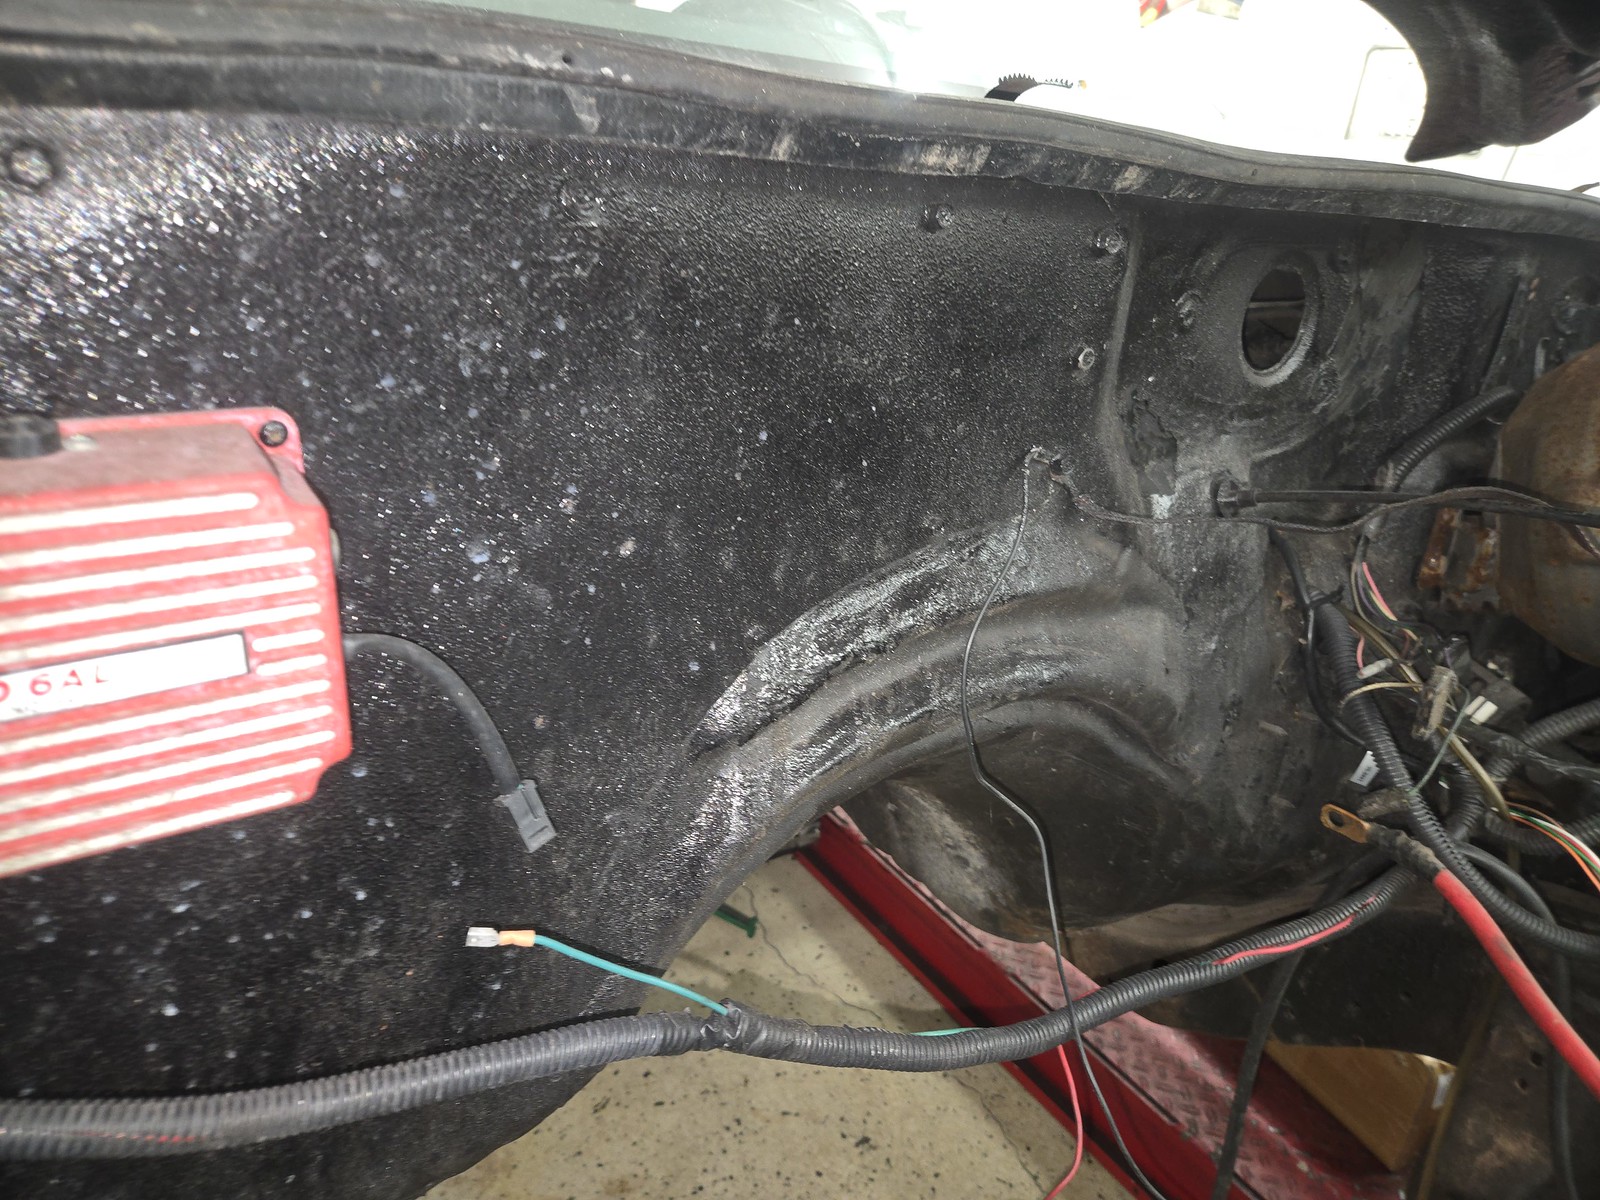
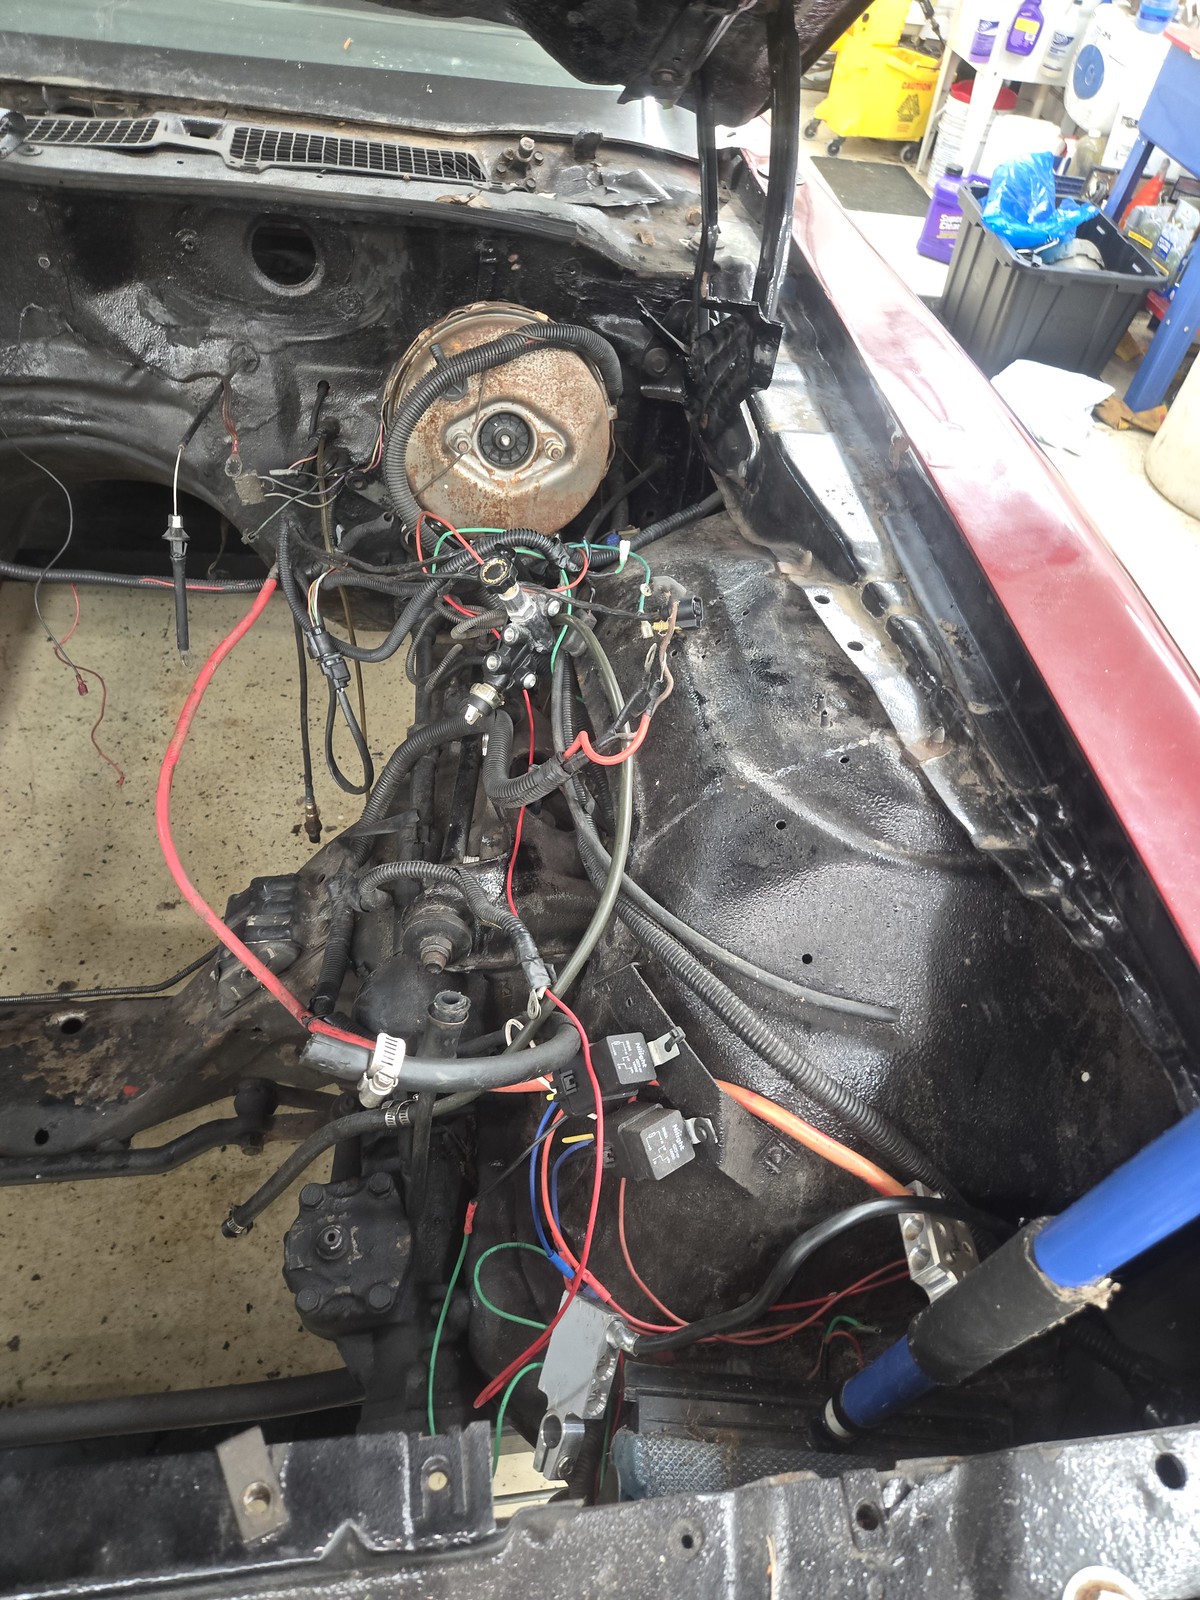
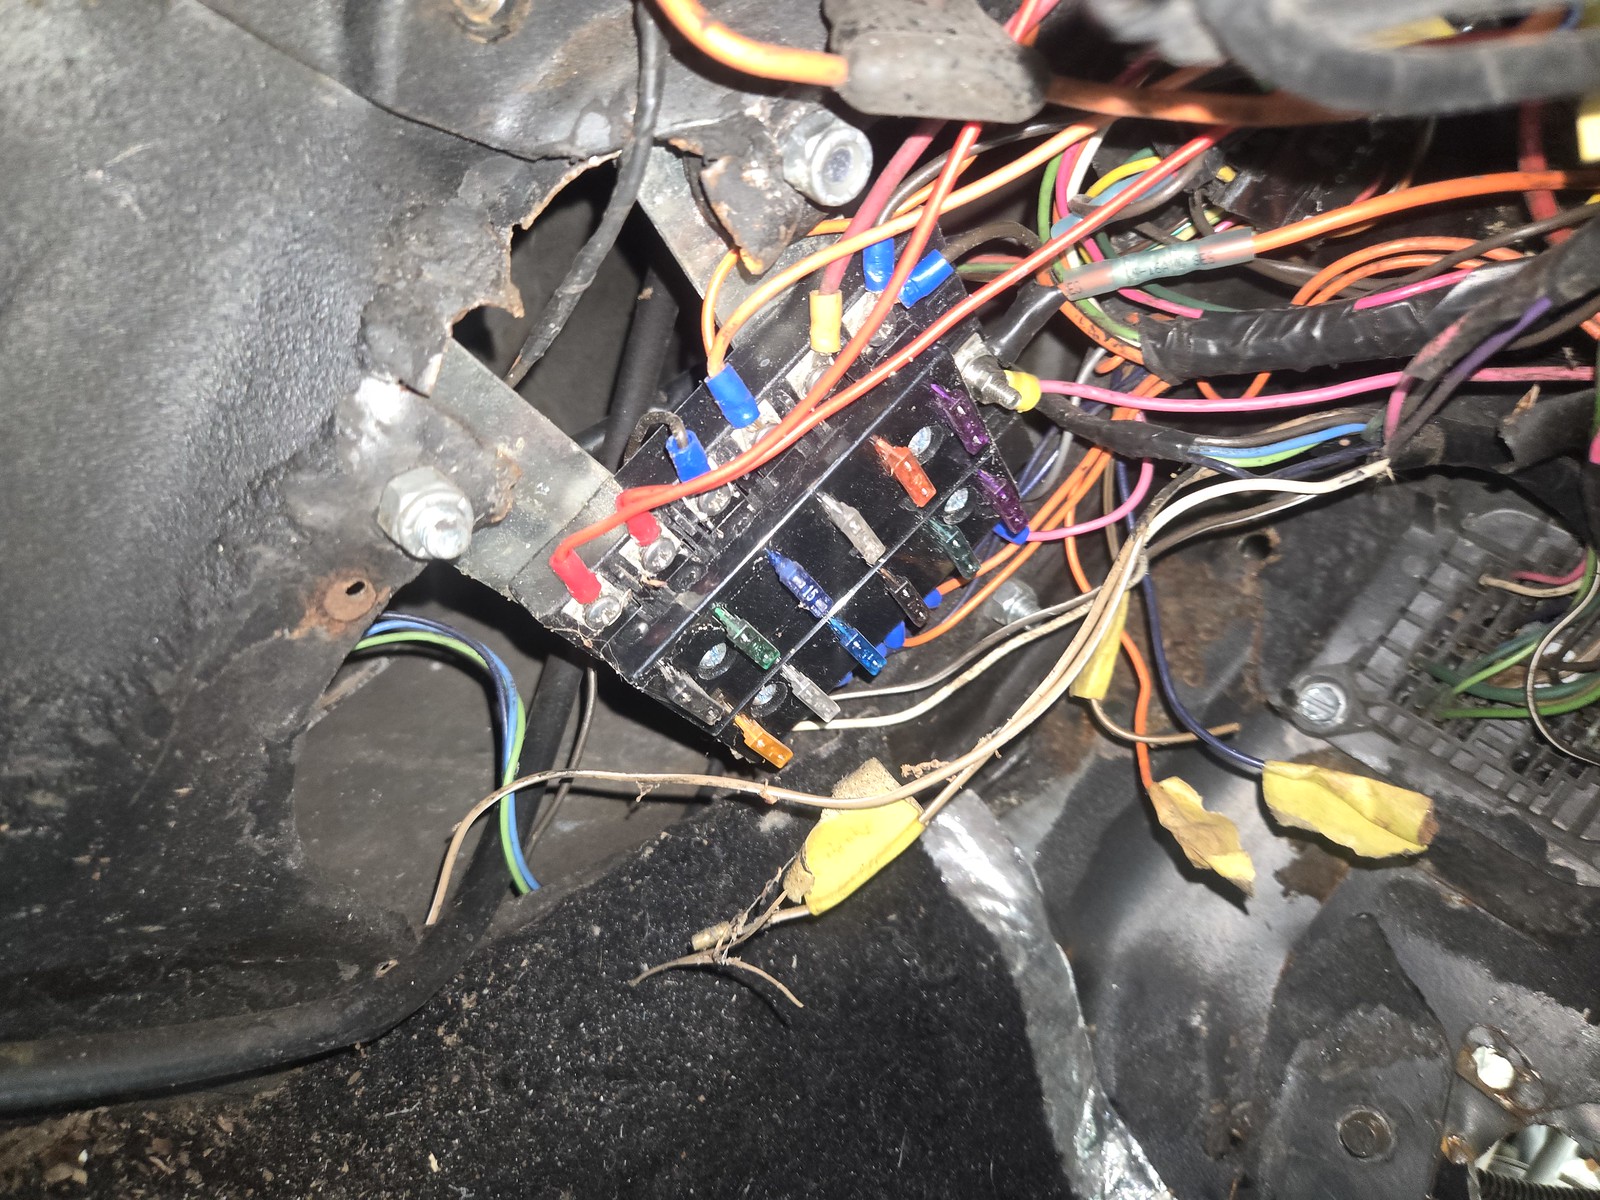
With that all ready to go, I moved on to getting the engine bay prepped for paint. Step one was dealing with the atrocious wiring and firewall that was left. The more I dug in, the worse it got….
 d3995773-4b80-45b8-93c0-bba103bfebb4.jpeg by Michael Crawford, on Flickr
 45317dd6-2ff2-4ff3-81ae-8f8a24df5d65.jpeg by Michael Crawford, on Flickr
 fae9b68d-6bc5-401b-9aec-b250eaa52137.jpeg by Michael Crawford, on Flickr
 3633167f-1df2-4fe9-94f6-d318a7ac9f0b.jpeg by Michael Crawford, on Flickr
 659f61df-a4ac-4312-9b32-443f0818dda0.jpeg by Michael Crawford, on Flickr
 c51052a1-5b14-4cdf-8e15-ffe05966ac61.jpeg by Michael Crawford, on Flickr
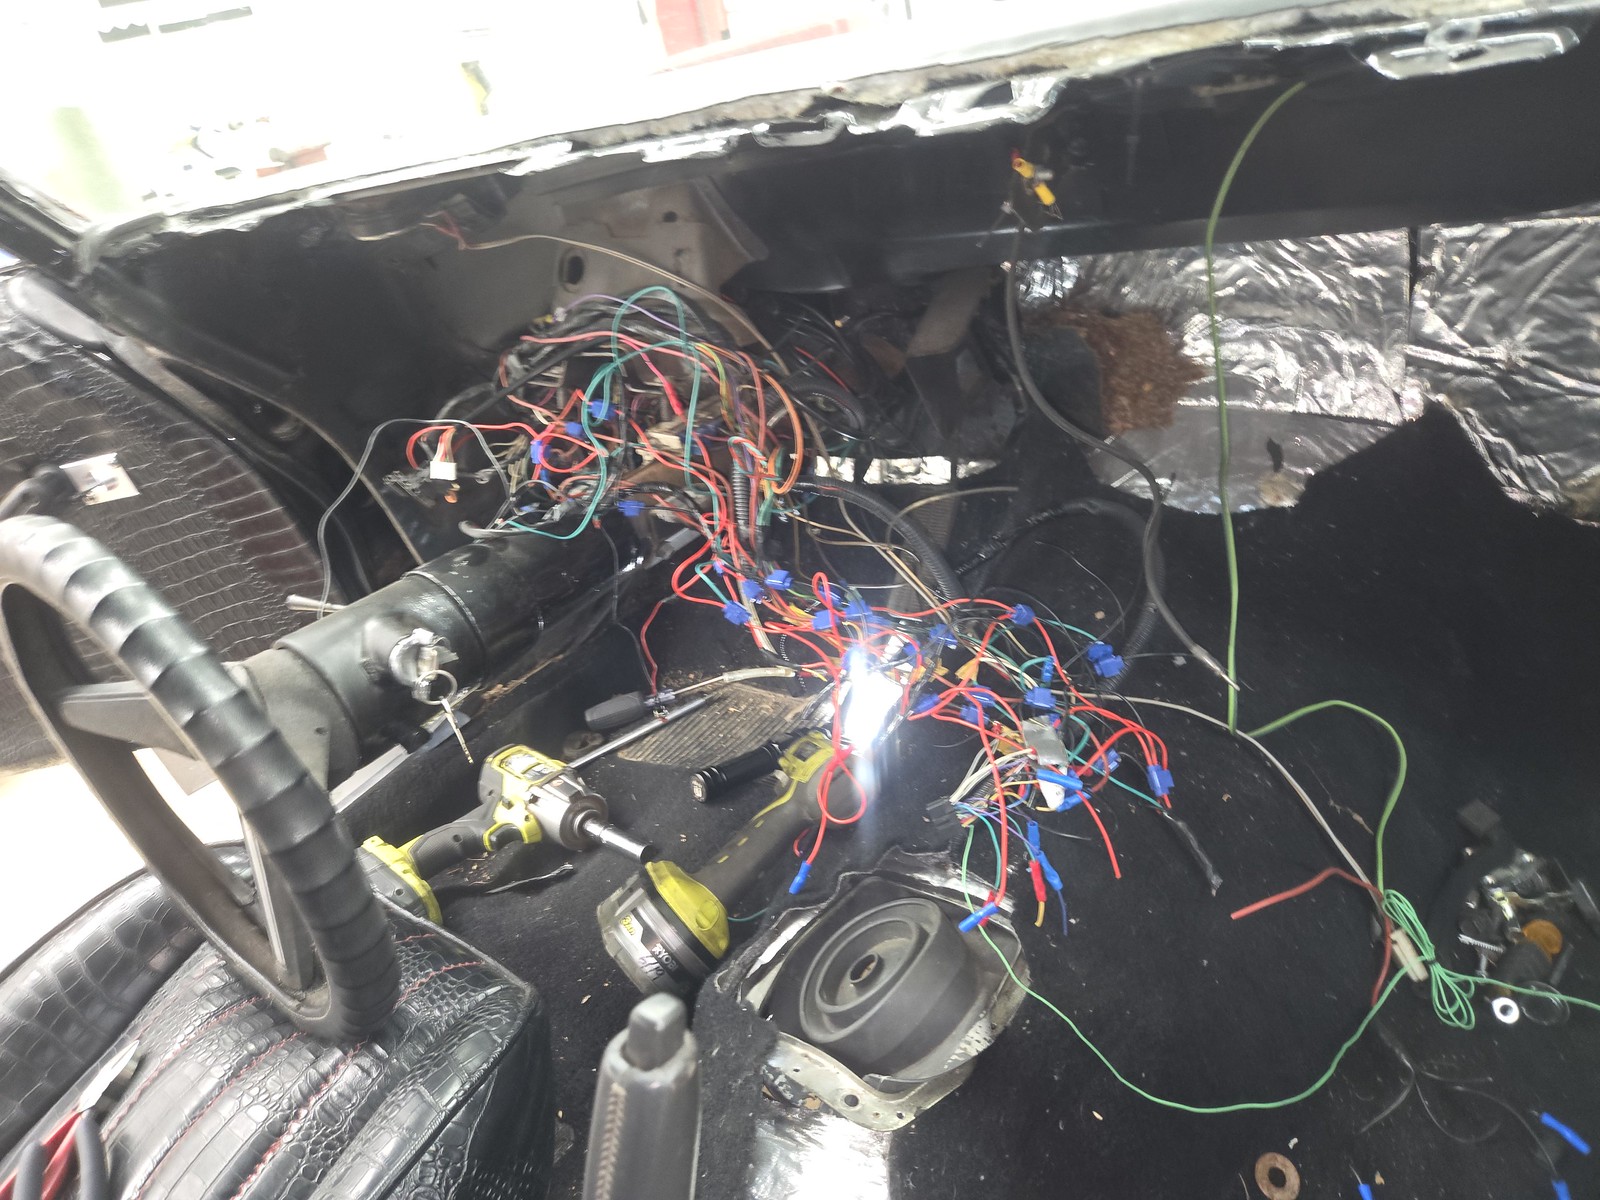 37944510-7035-4136-8056-1046d145cc94.jpeg by Michael Crawford, on Flickr
The wiring was simple enough to diagnose and repair.
 c7914114-66ac-4810-8e3b-5b33ecac51a2.jpeg by Michael Crawford, on Flickr
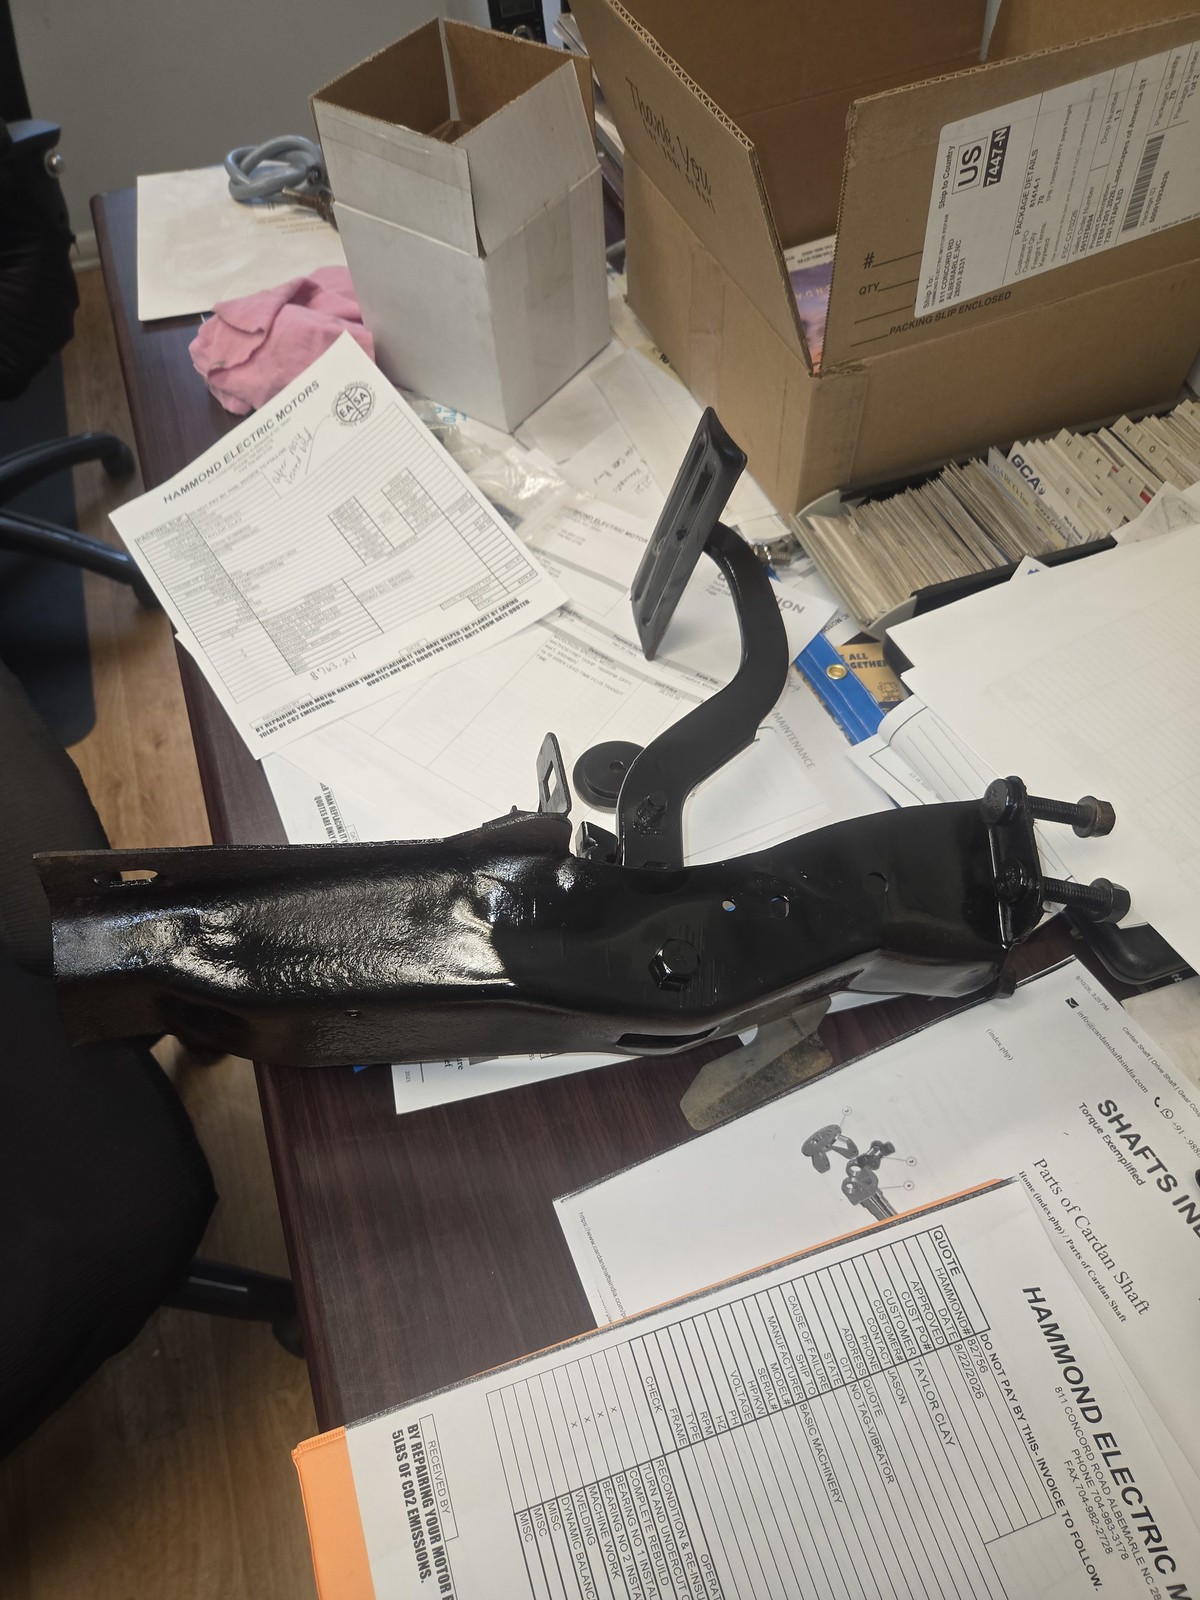
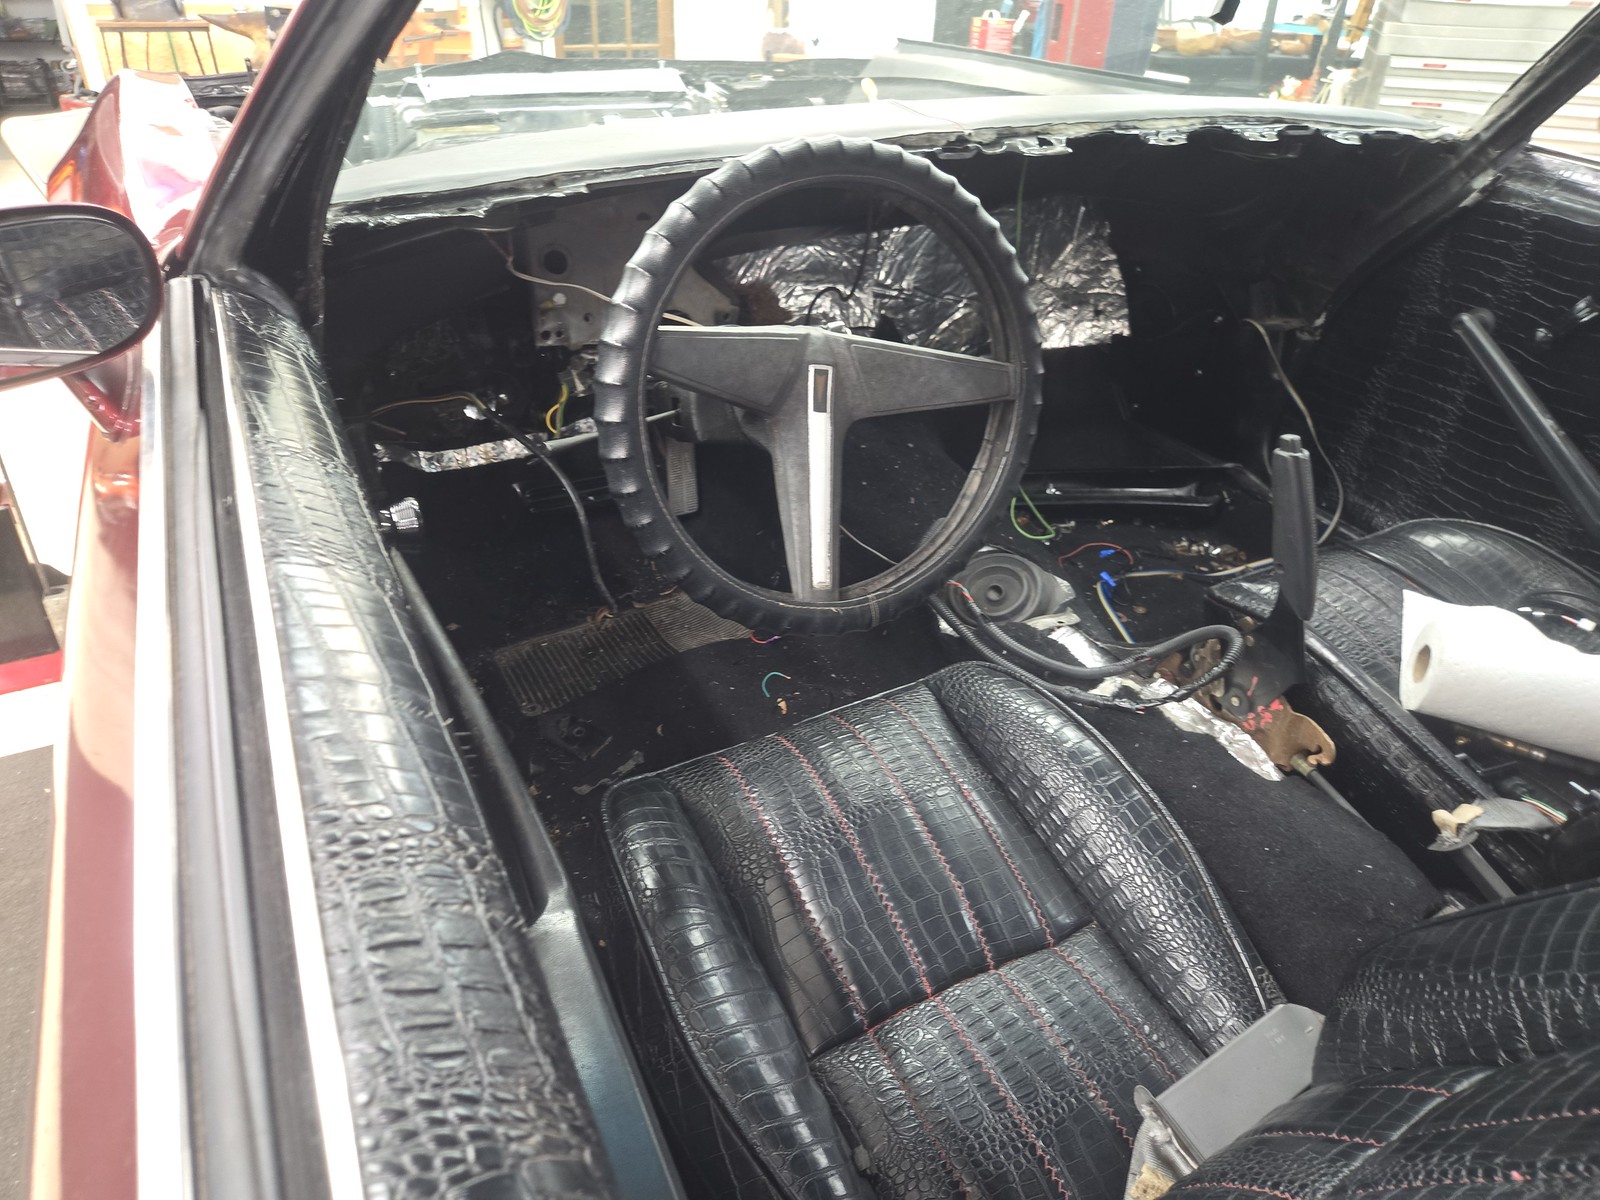
I chopped all that **** out with cutting pliers, saved the connectors I could, and scrapped the rest. Sandblasted and painted the automatic brake pedal assembly from the parts car while I was in there and got it installed too.
 14bb8ae0-e5e7-4708-ad7d-256665f76999.jpeg by Michael Crawford, on Flickr
 07d61fc2-90b7-45c3-96d4-25ea14fb359f.jpeg by Michael Crawford, on Flickr
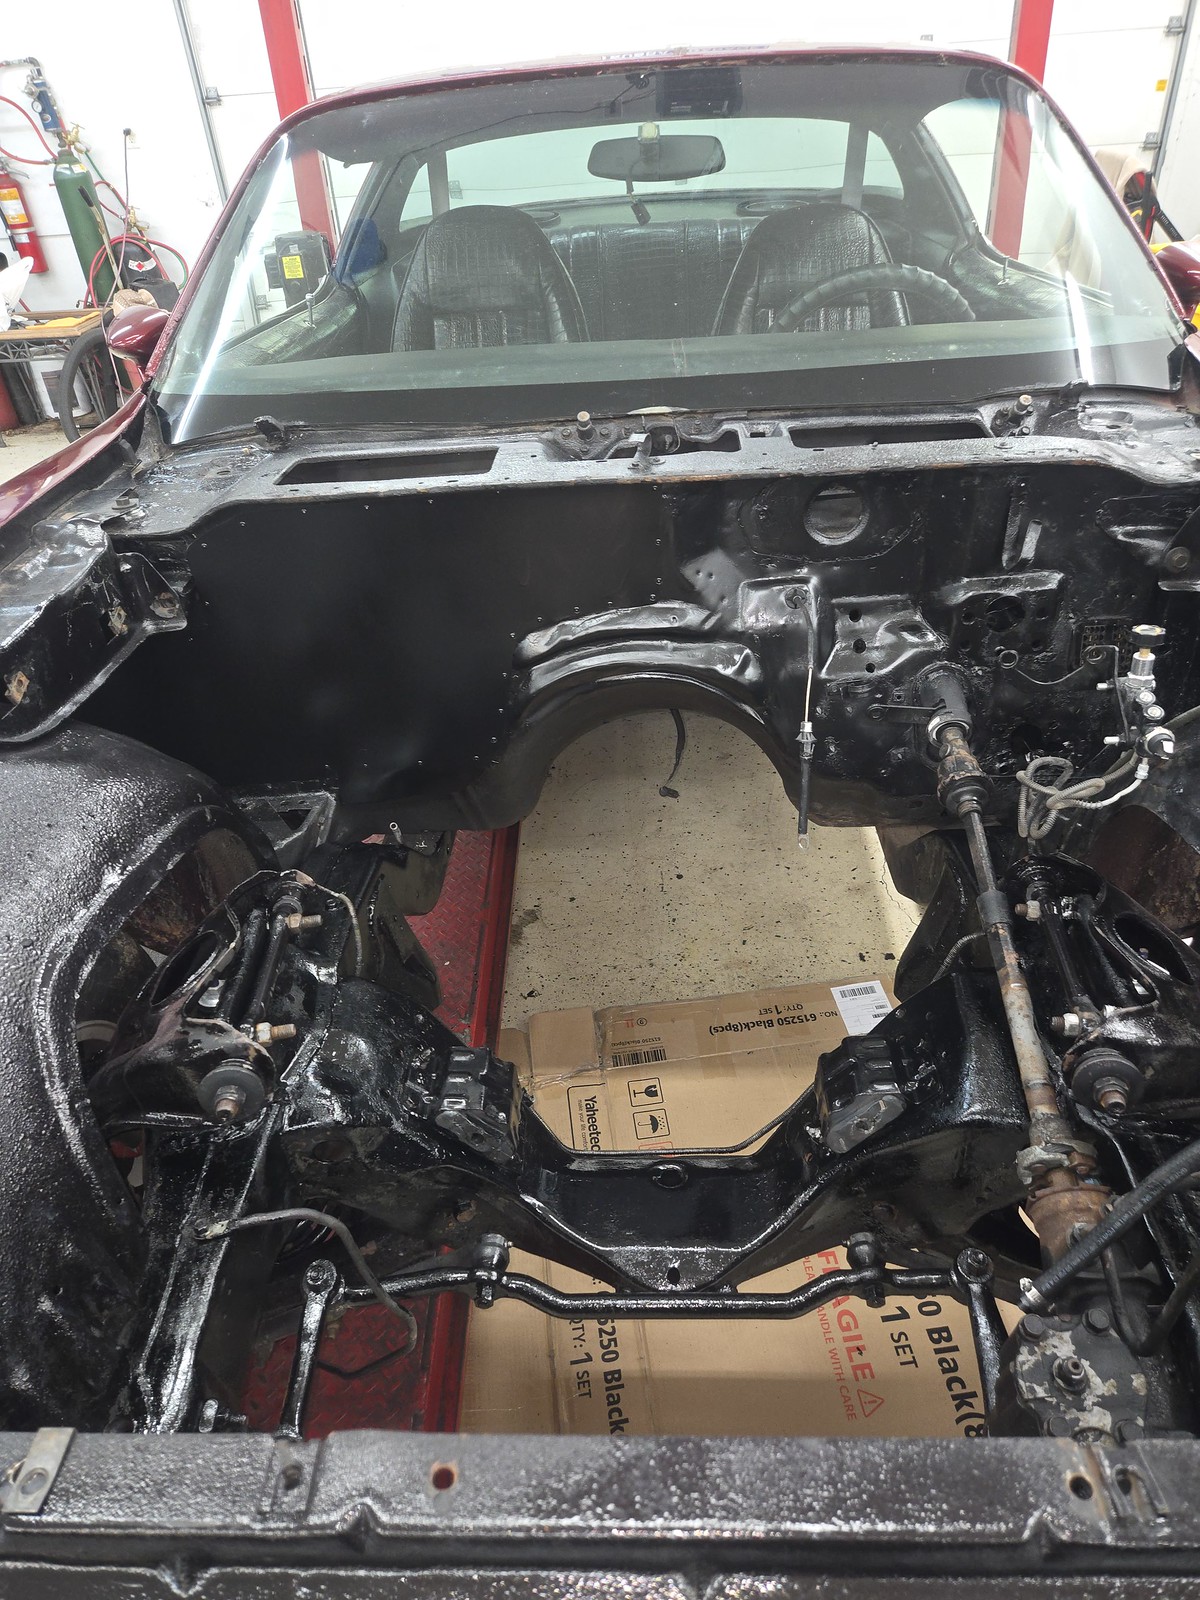
Moved into the bay, and decided that I was stripping the firewall down and redoing it, and painting the frame. That was enough for the time being for minimum viable product.
The previous firewall block off plate missed a bunch of openings, fit poorly, and was held in with ½ headed self-drilling, self-tapping screws. See, I hate self-drill screws. Every flat I’ve ever had has had one of those involved. I won’t use them if there is any other reasonable option.
So, I made a new plate out of a $5 sheet of aluminum
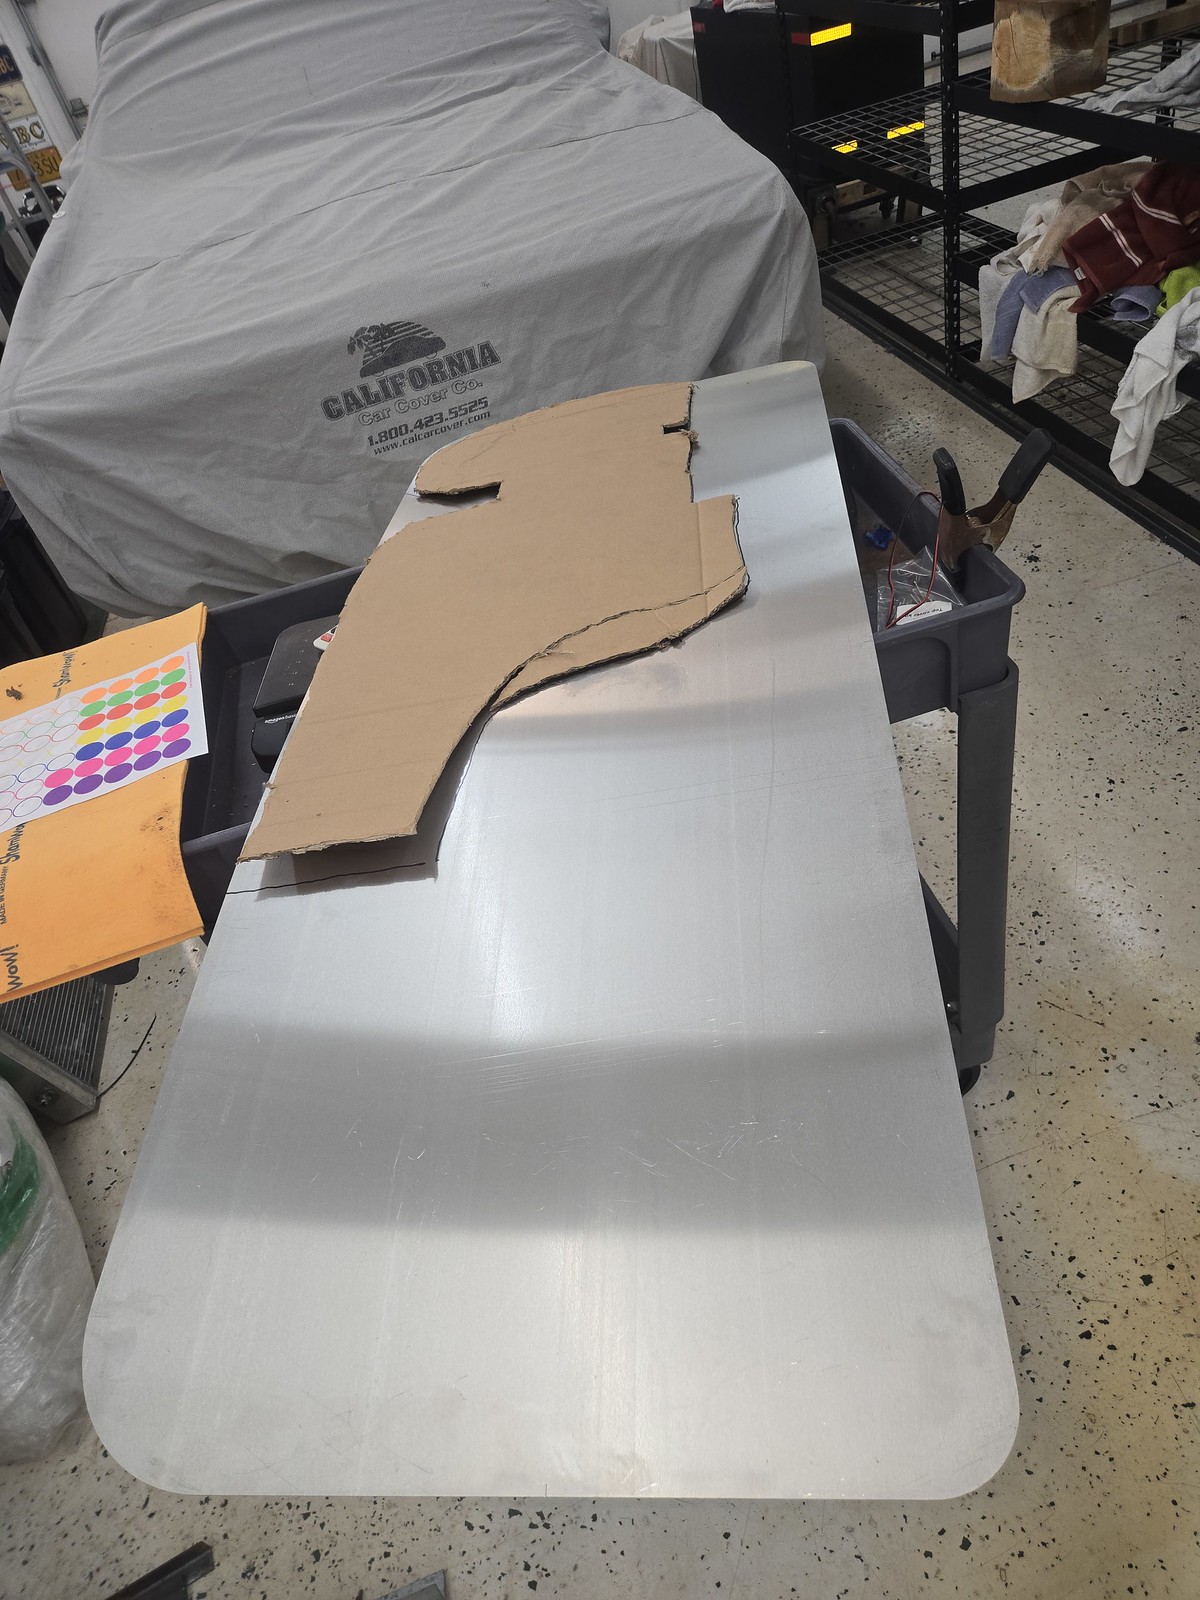 2566a9de-dcc5-4940-80f2-d472de68f761.jpeg by Michael Crawford, on Flickr
Stripped the firewall with an oscillating tool and scraper, sanded, sanded some more, cleaned….
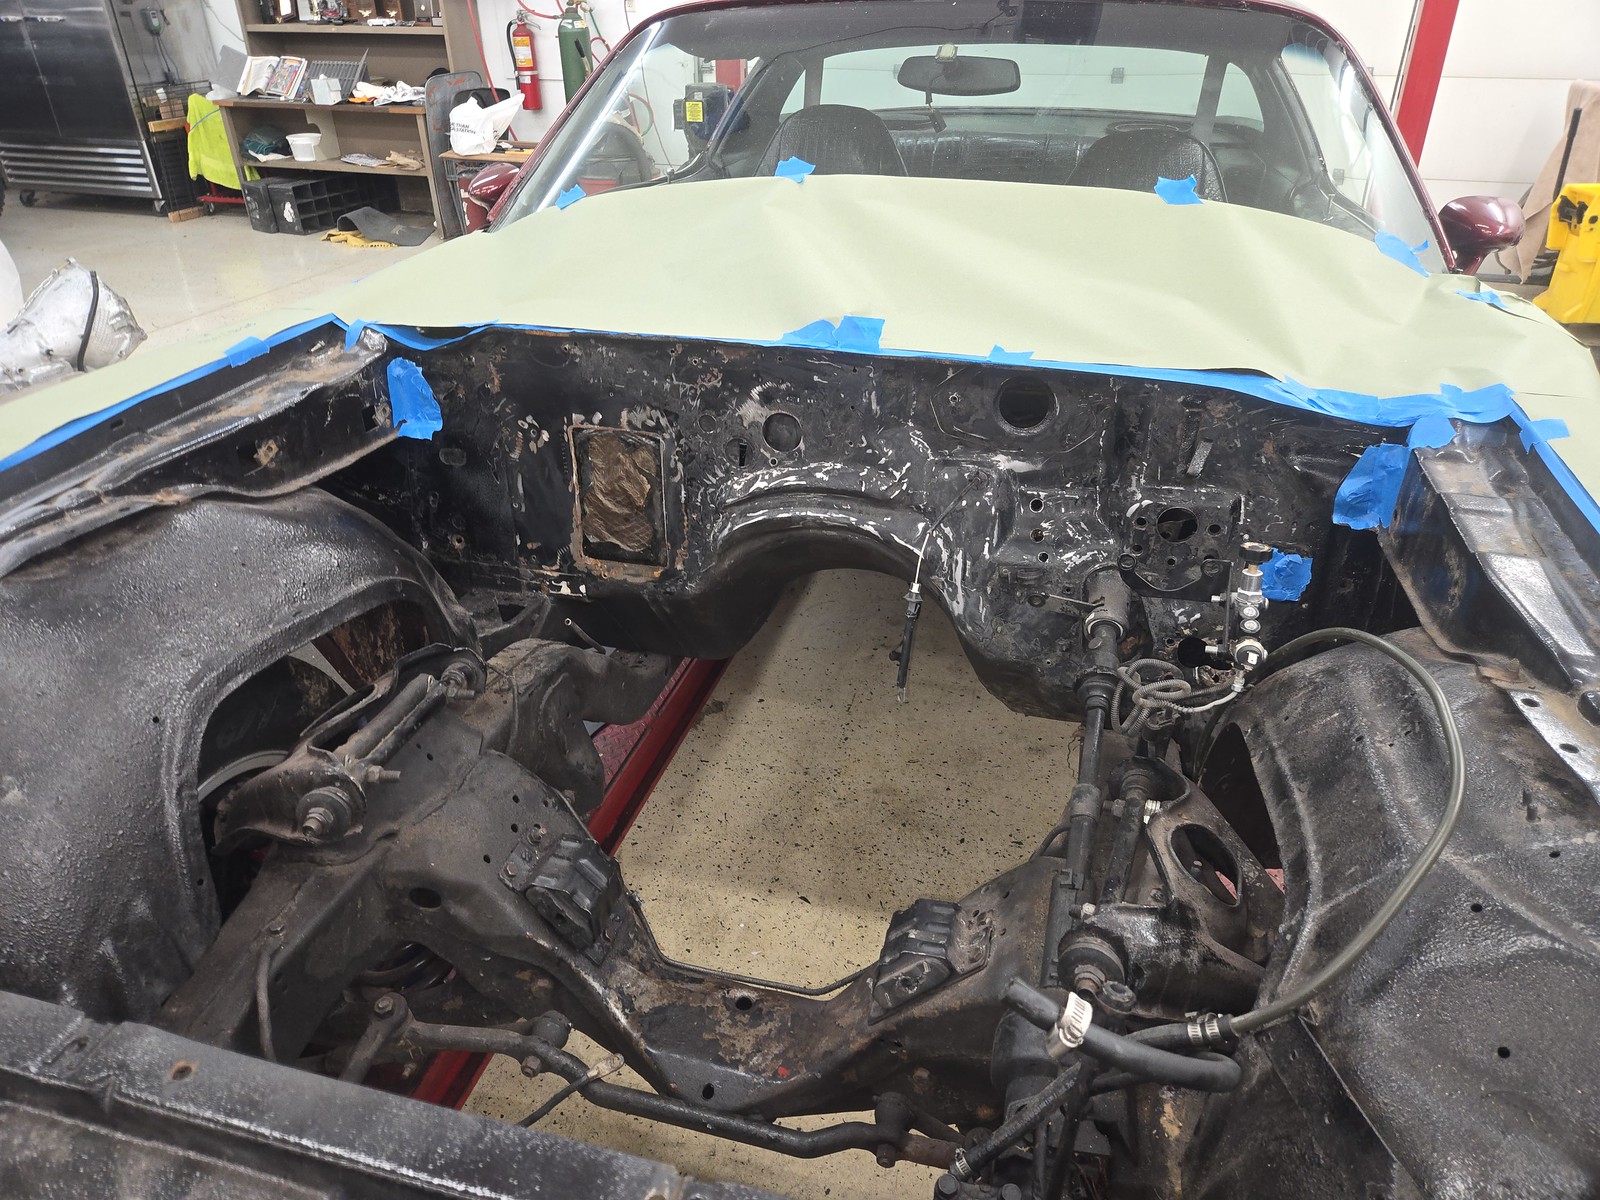 64f5bbdb-dcf1-40f5-872d-6e43ac85e9d0.jpeg by Michael Crawford, on Flickr
Painted the firewall with john deere blitz black. Then, riveted the block off in place, and top coated everything again.
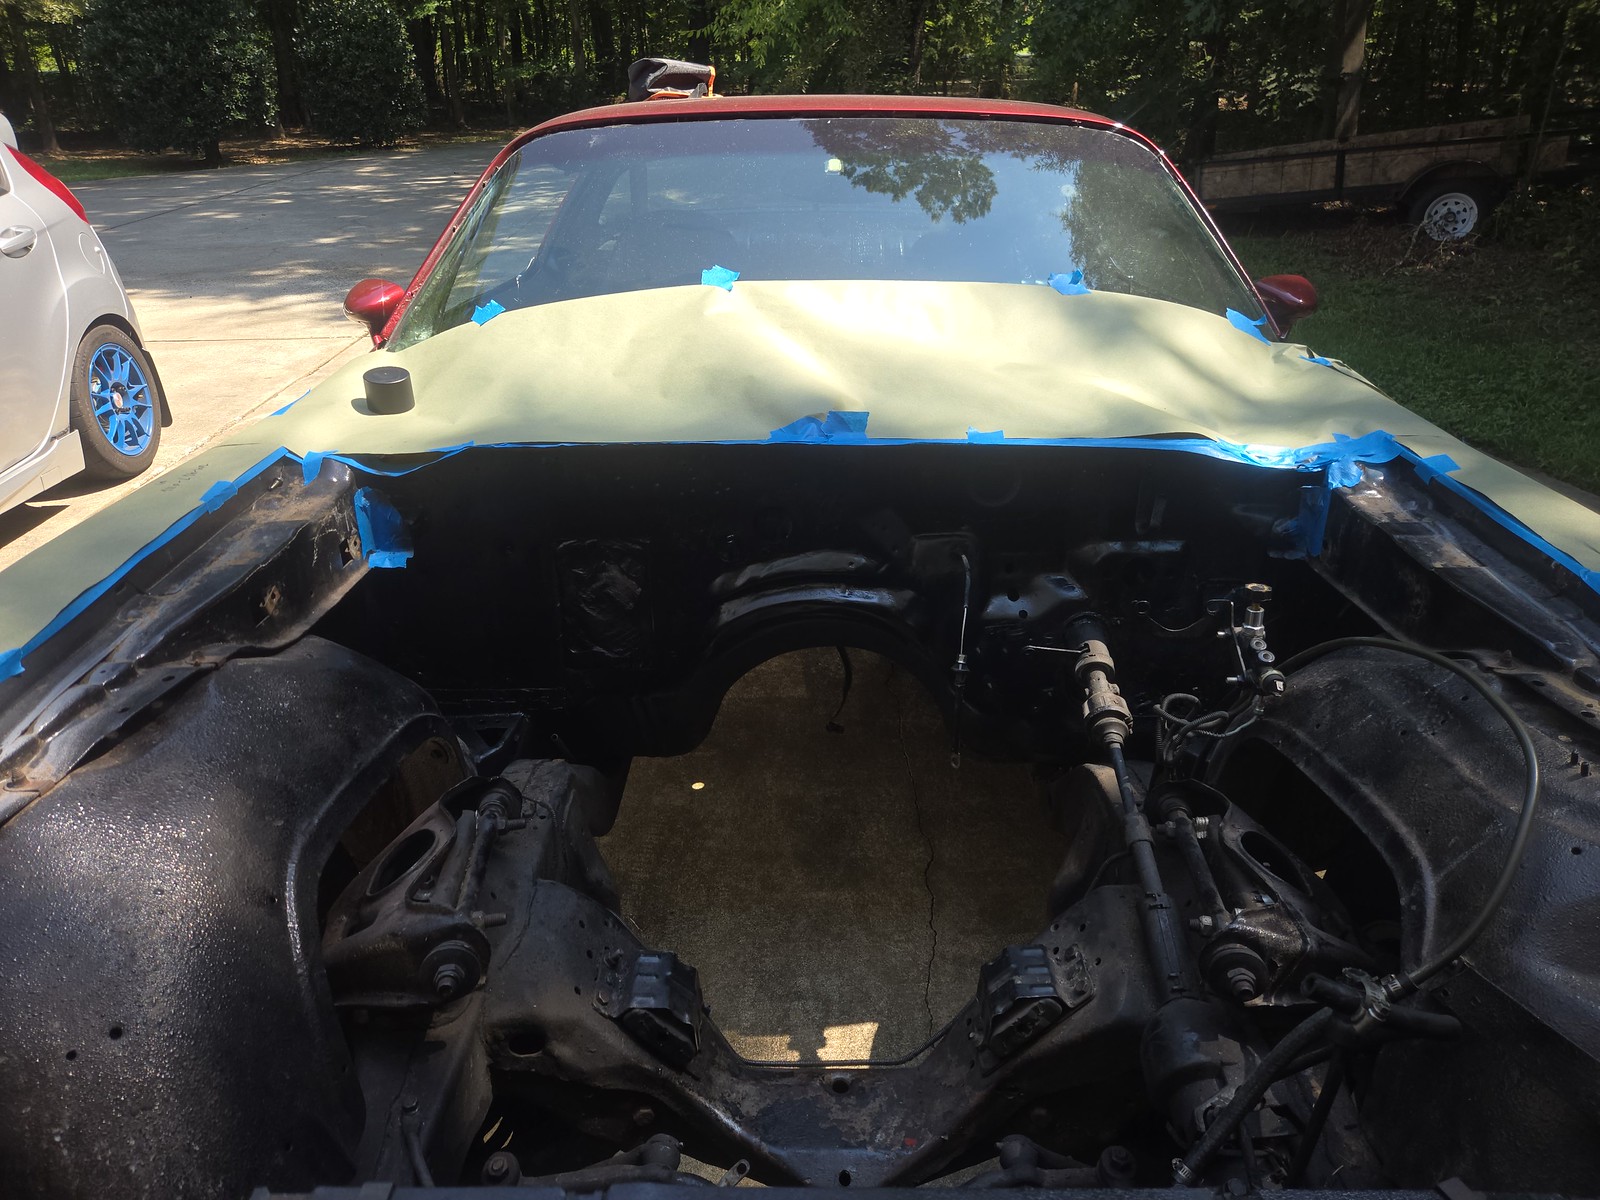 976d4a33-710d-4354-811d-59bd510f8c5a.jpeg by Michael Crawford, on Flickr
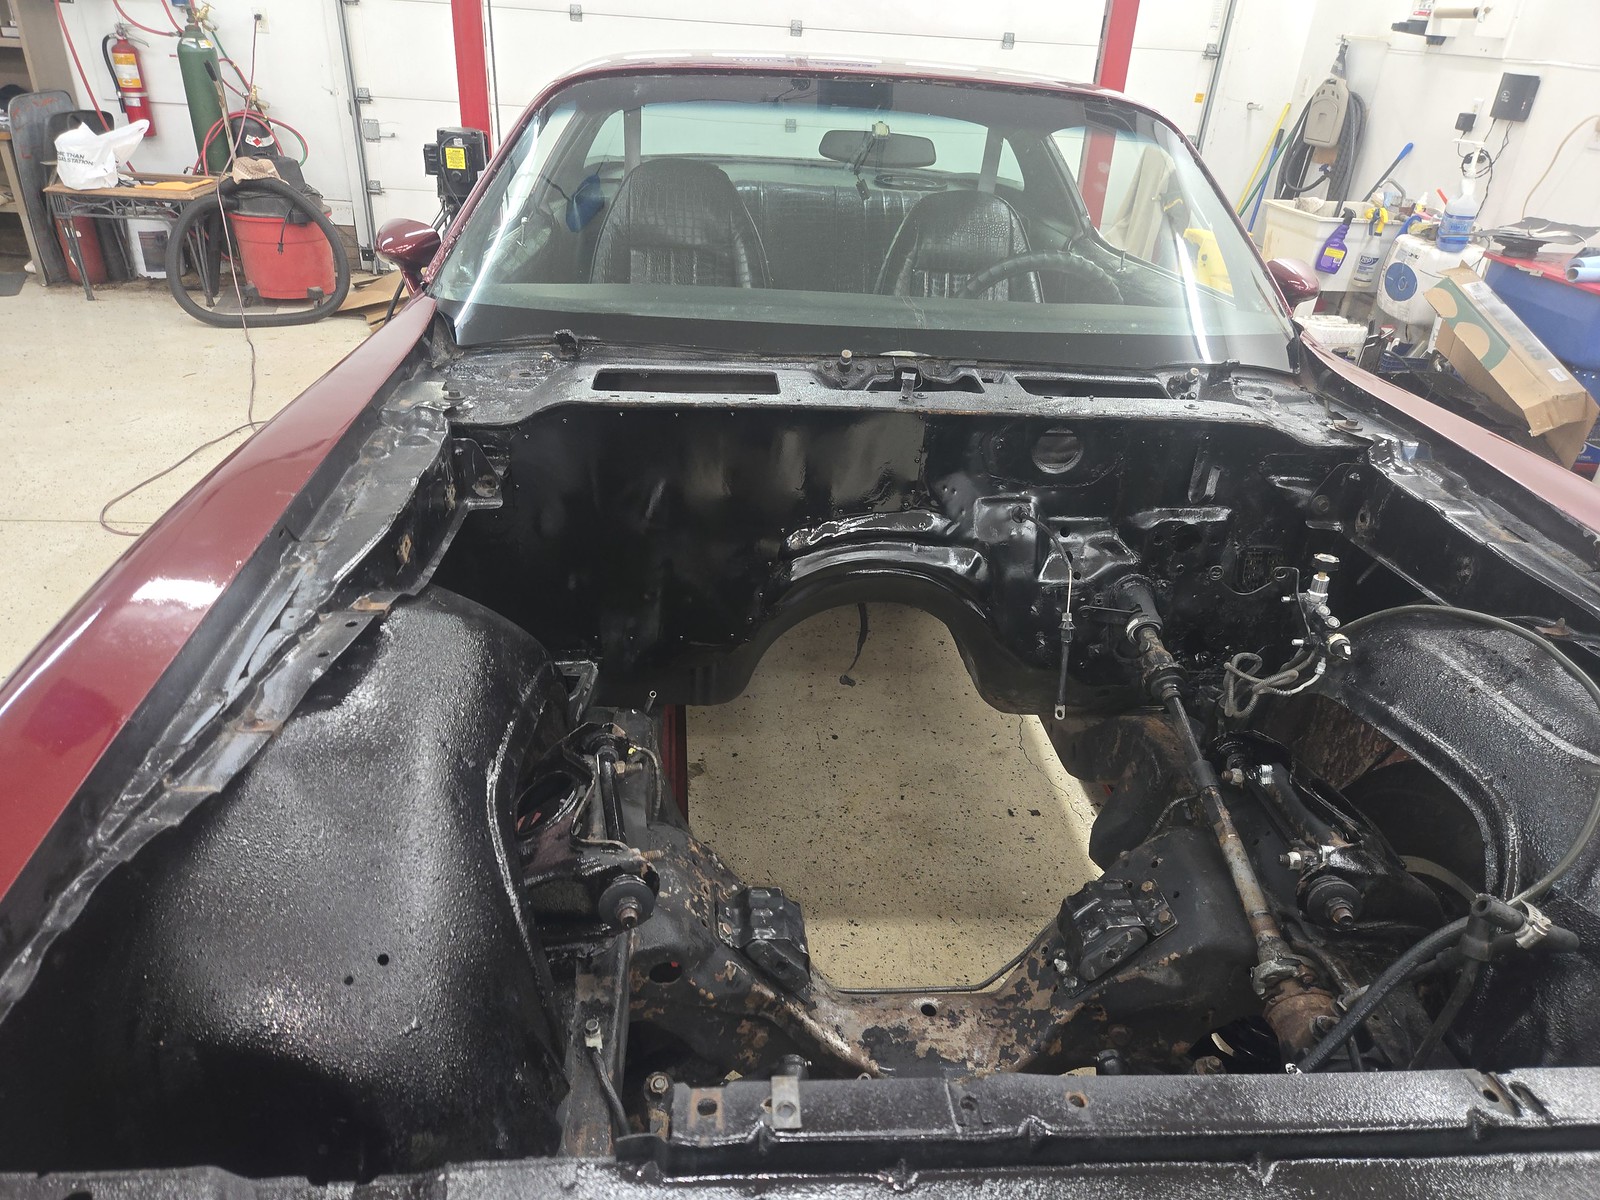 aff79590-786a-4ab1-b47a-a028c5db66c1.jpeg by Michael Crawford, on Flickr
Then painted the frame with more rustoleum
 186eb05e-d30e-42c0-b21a-bac0f739b10e.jpeg by Michael Crawford, on Flickr
Michael Crawford
186eb05e-d30e-42c0-b21a-bac0f739b10e.jpeg by Michael Crawford, on Flickr
Michael Crawford
1970 plymouth Duster back under construction:
https://www.pro-touring.com/showthre...uring-makeover
1987 GMC S15 https://www.pro-touring.com/showthre...ct-drivabeater
08-28-2026 #9
Registered User
- Join Date
- Aug 2007
- Location
- Albemarle, NC
- Posts
- 1,170
Friday of last week, brother dustin, dad and I put the drivetrain in. engine hoist did not have a long enough boom to go from the front, so we had to go from the side, which was a first for me. But it fit right down in. except for the passengers frame mount. It would not line up. But well come back to that.
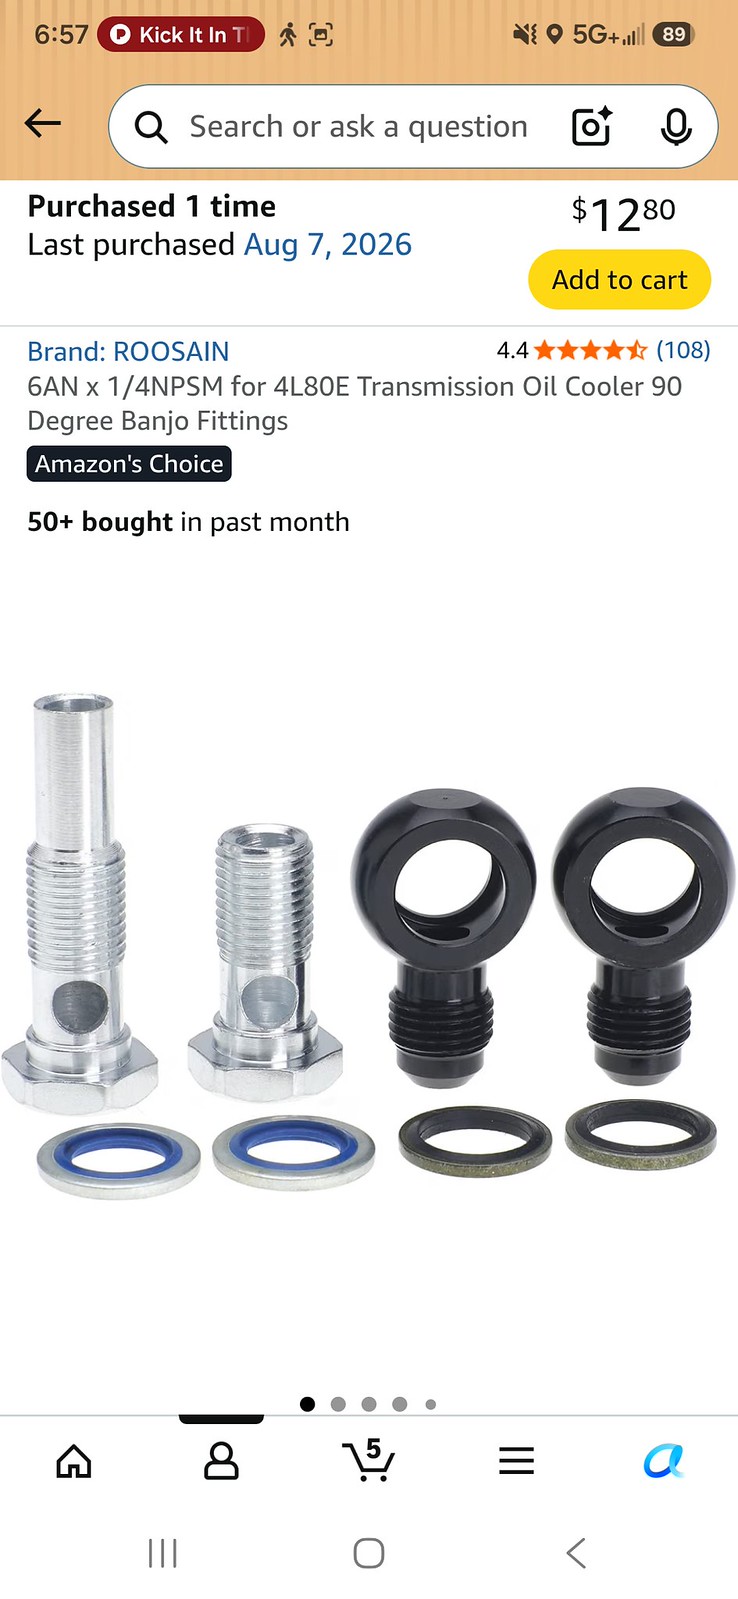
Then, we went to put the 4l80e in from underneath. But first, I was told it NEEDED banjo cooler fittings to clear the tunnel.
 314a796d-fc36-49e5-8c89-3b0b07af2f94.jpeg by Michael Crawford, on Flickr
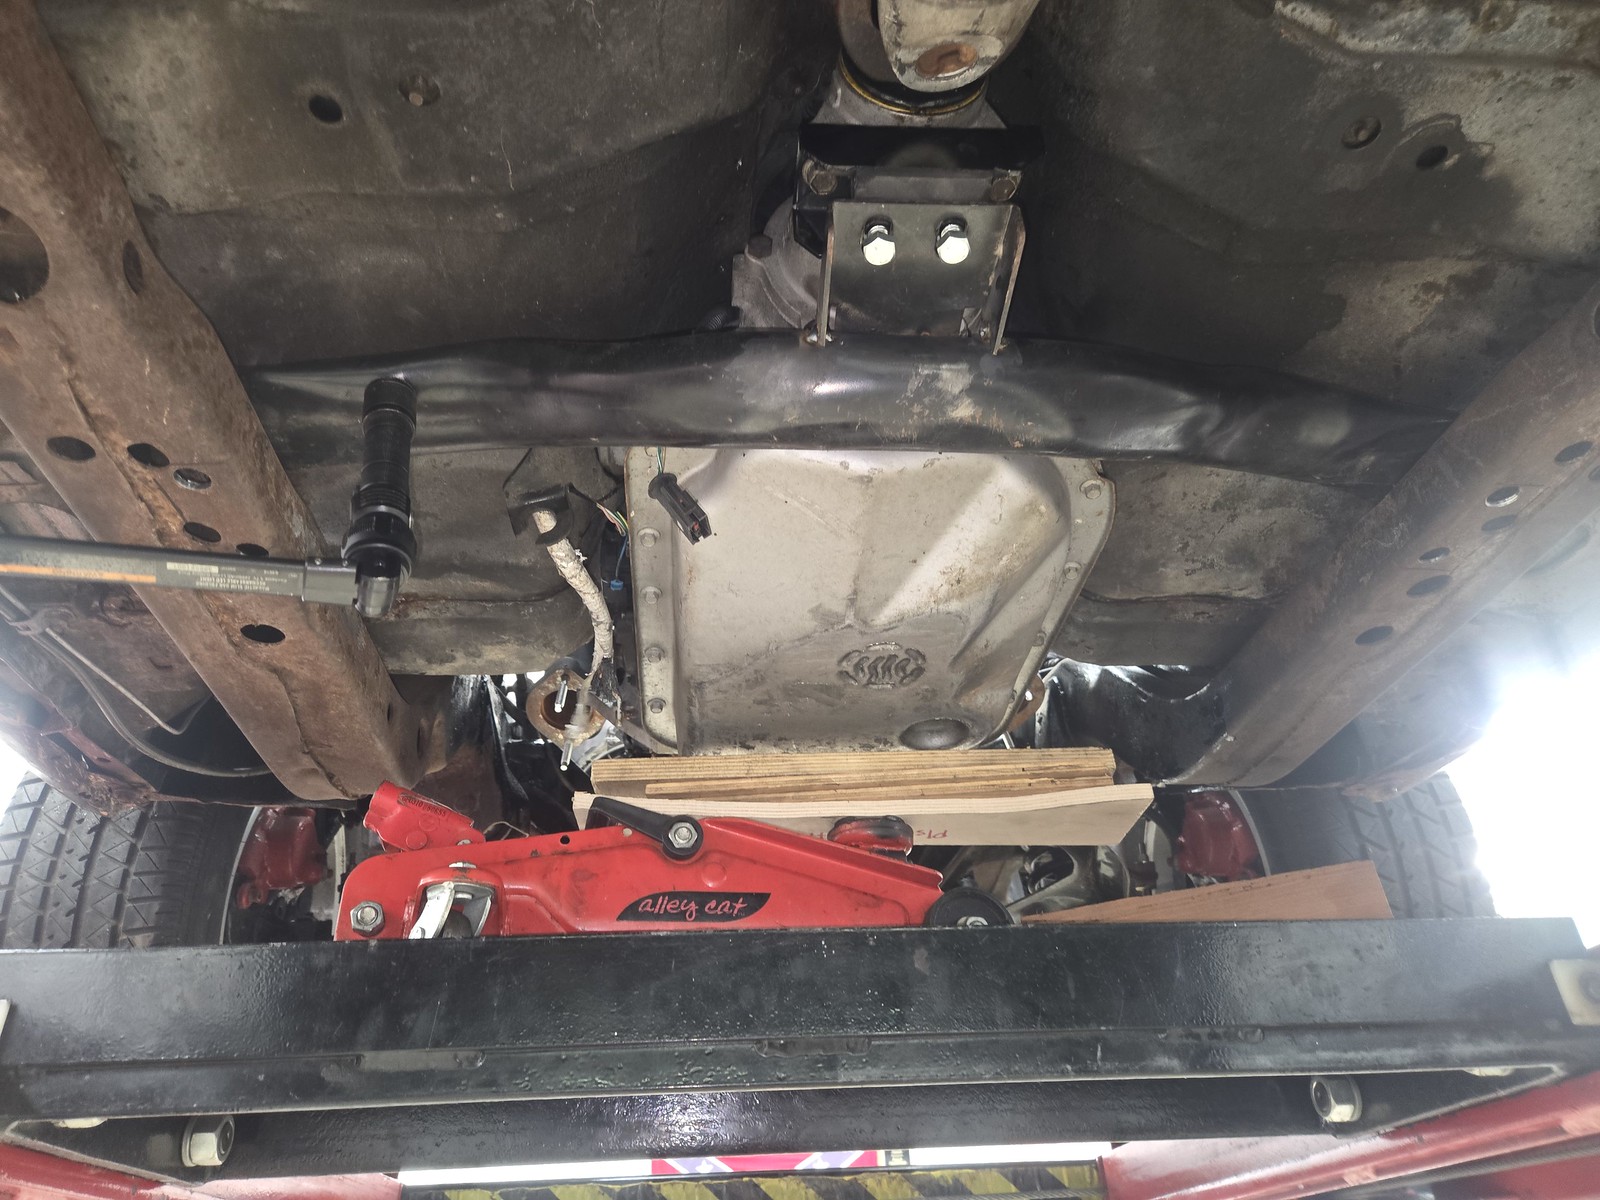
This is not the case in my case, as I have miles of clearance. But I did break off one of the factory cooler fittings, and we had a struggle getting the chunks out with an easy out. But it came after much brayer and finesse. Then, the trans just went right in. no clearance issues anywhere. Had to drill holes and flip the mount pad on the crossmemeber that came with the car (turns out its for an earlier car), but we made it work.
 c1170876-12b8-4c92-8f7f-5566e12f97c7.jpeg by Michael Crawford, on Flickr
 a25c73df-9564-4103-a261-c8f137a6a2f7.jpeg by Michael Crawford, on Flickr
And the drivetrain was in on 2/3 of the mounts!!!!
Brother Dustin for cheese
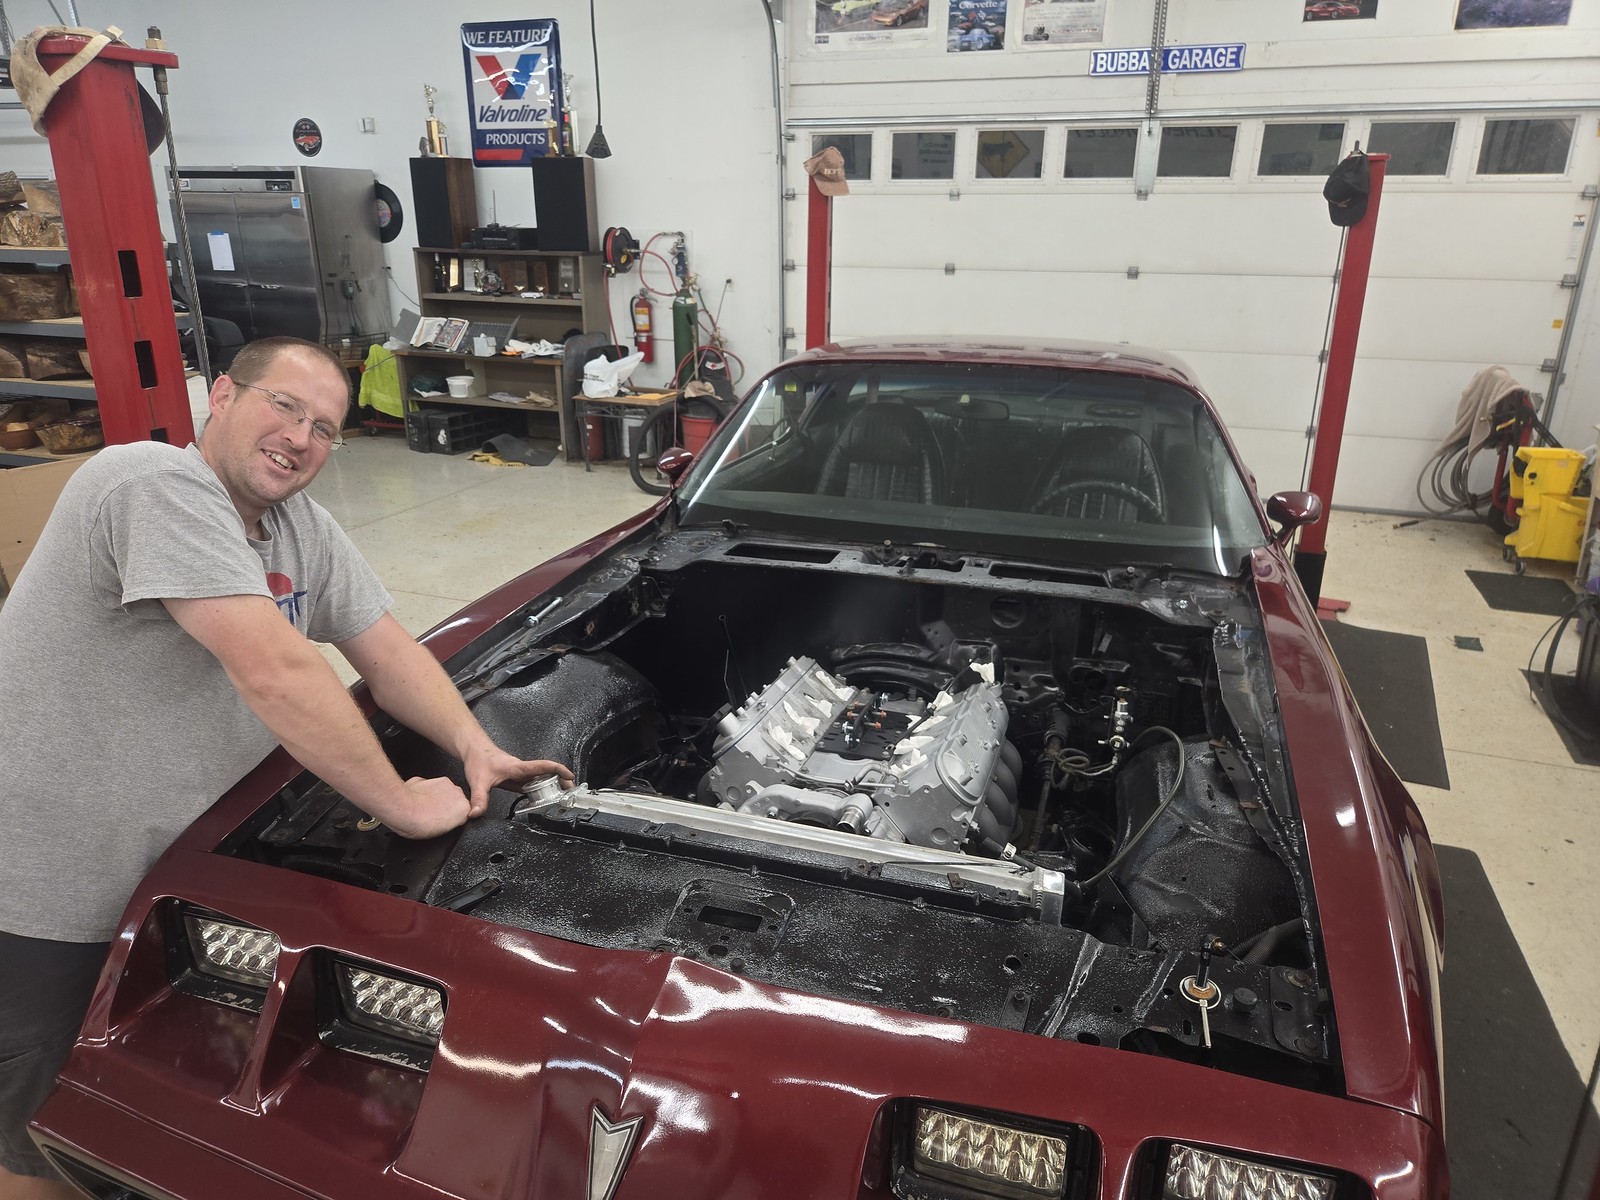 5a980105-dedd-4d85-b82c-aa76d0438bc2.jpeg by Michael Crawford, on Flickr
So the passengers frame mount (that was where it was when I bought the car) was installed an inch too low. Theres a lot of holes in this frame for motor mounts, so I can see where whoever bolted it in made the honest mistake. Brother Dustin was convinced that it could be moved without removing the LCA to get into the pocket. He was technically correct, which as we all know is the best kind of correct. It just took me way longer than dropping the control arm would have. But we got it there.
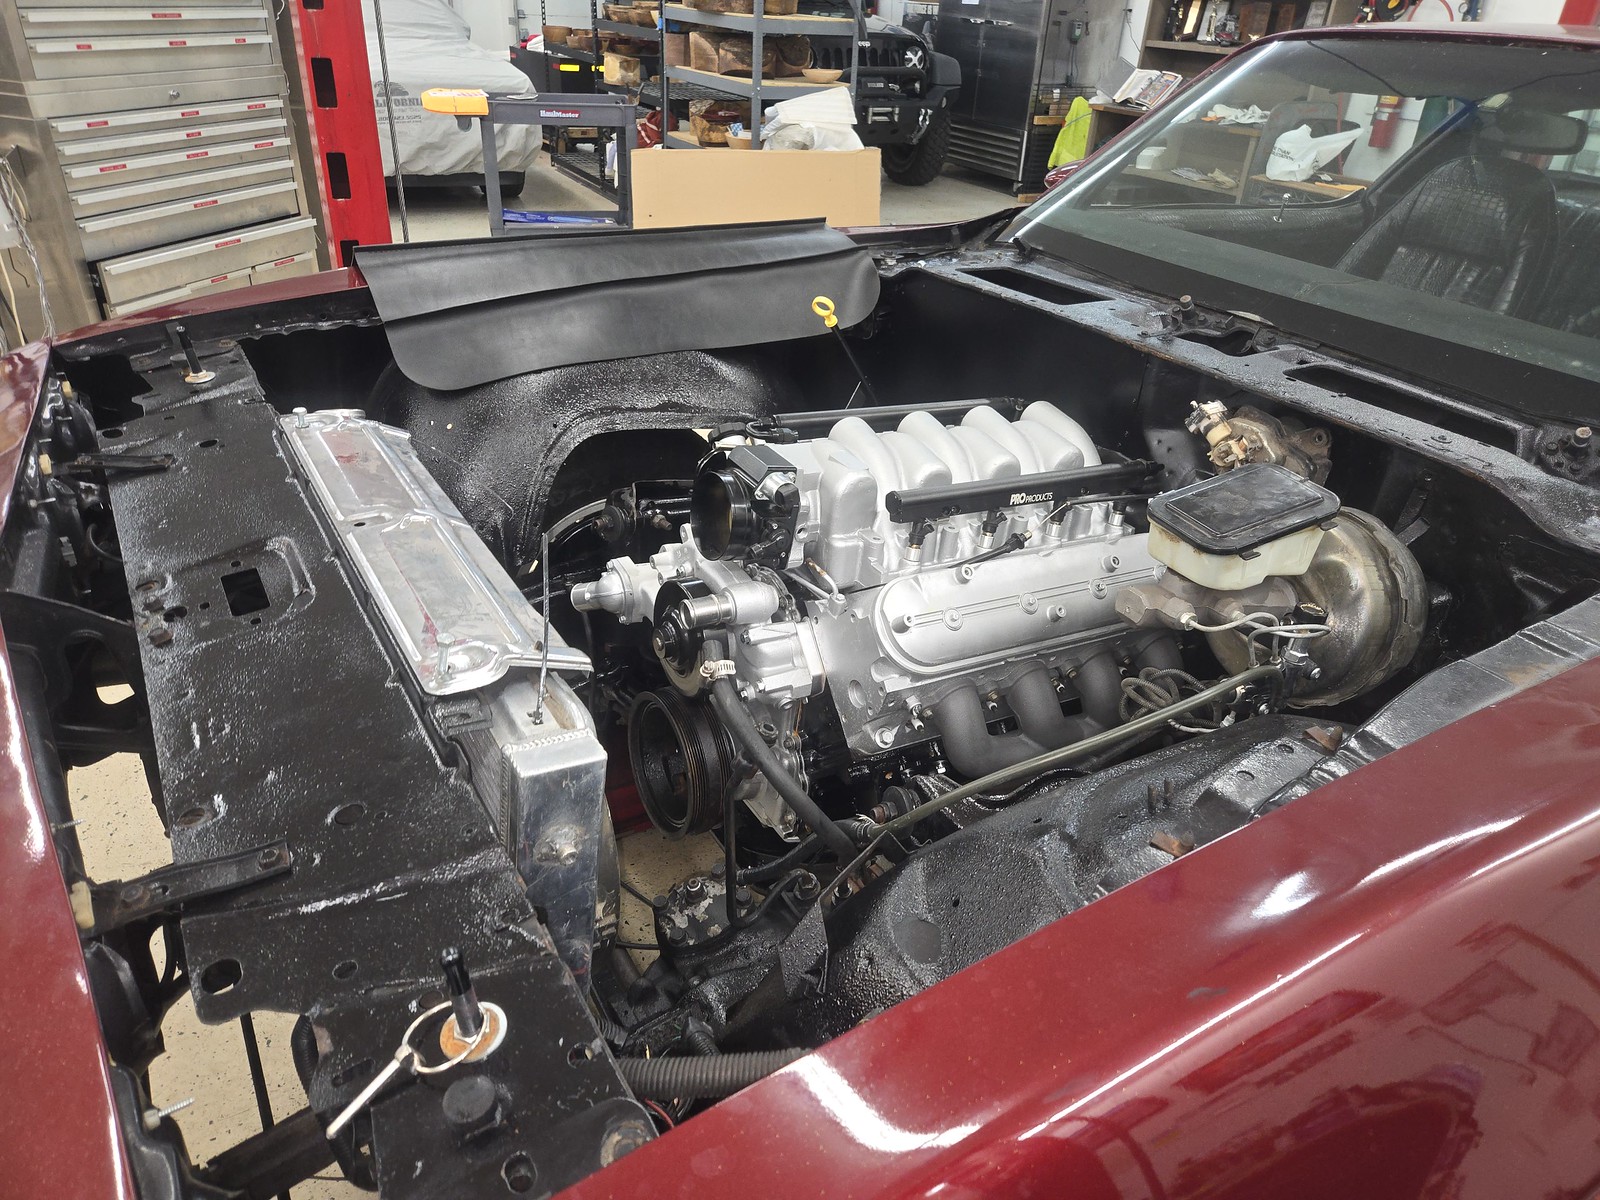 dc179350-d61f-44a0-ba72-e86d31682f49.jpeg by Michael Crawford, on Flickr
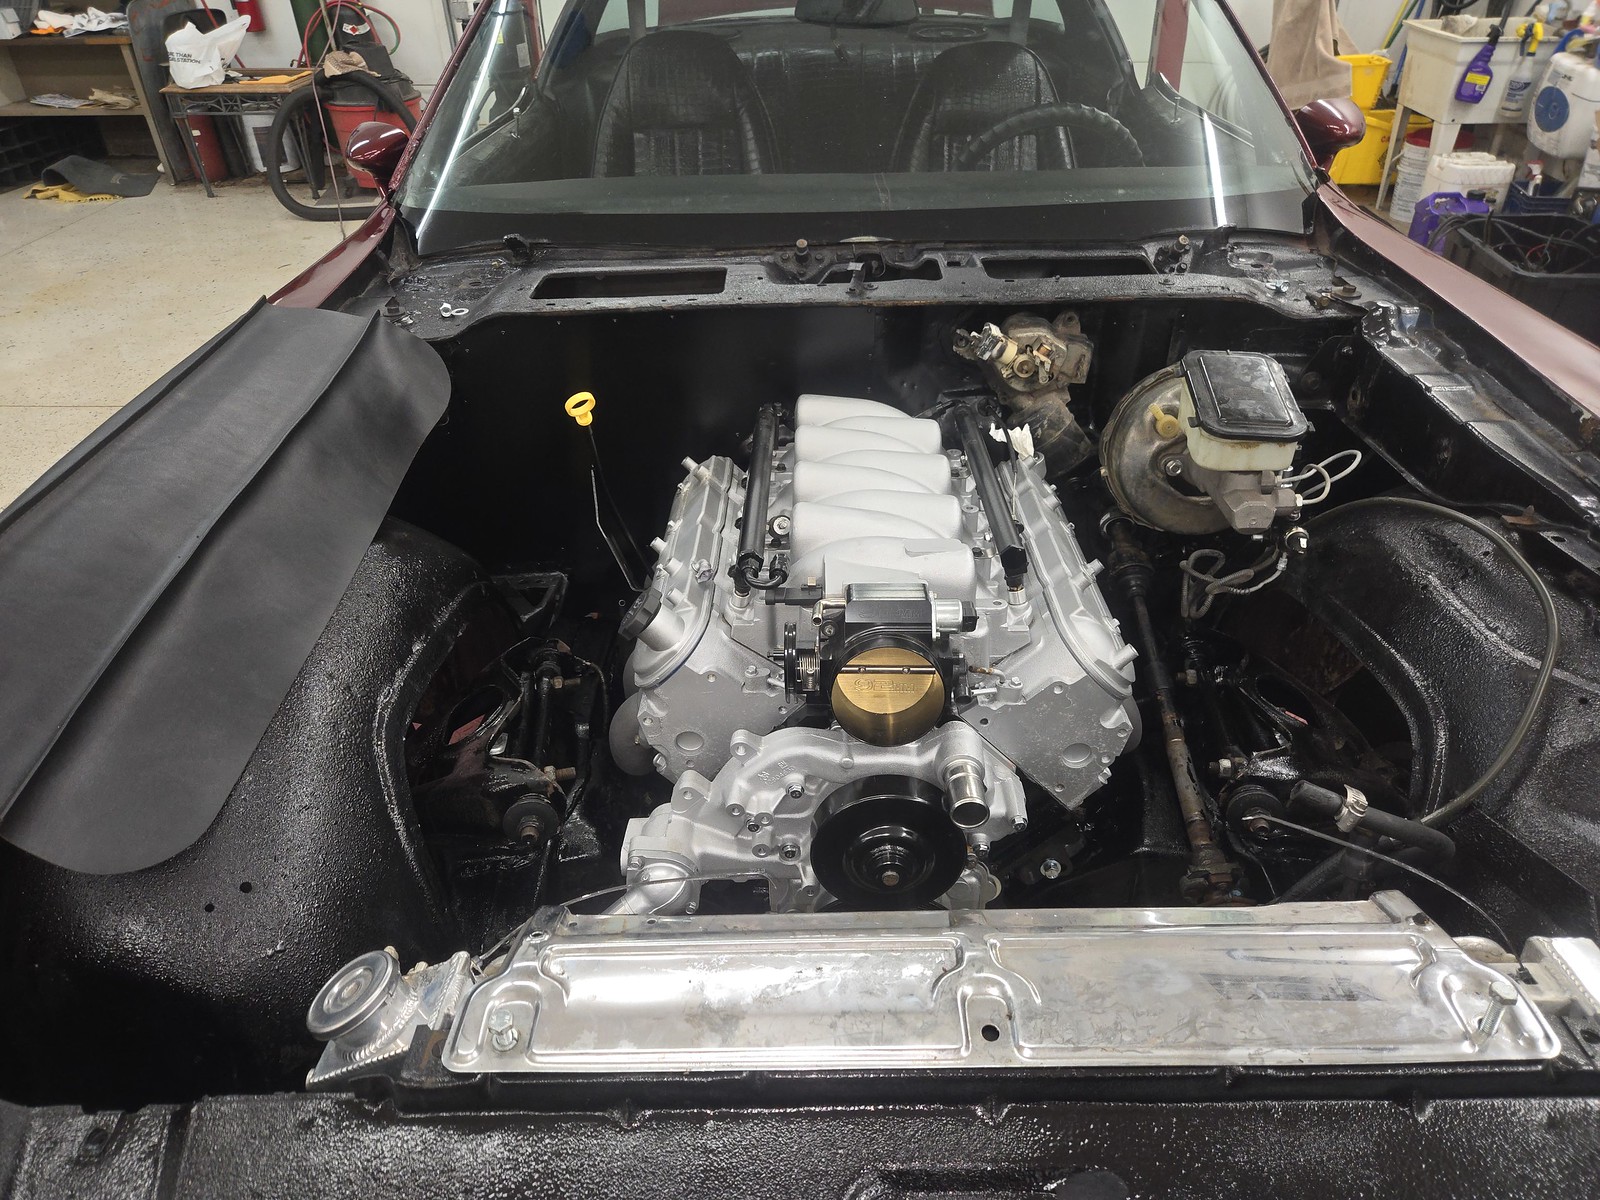 70a35453-c58a-4b9a-970d-bb549c861899.jpeg by Michael Crawford, on Flickr
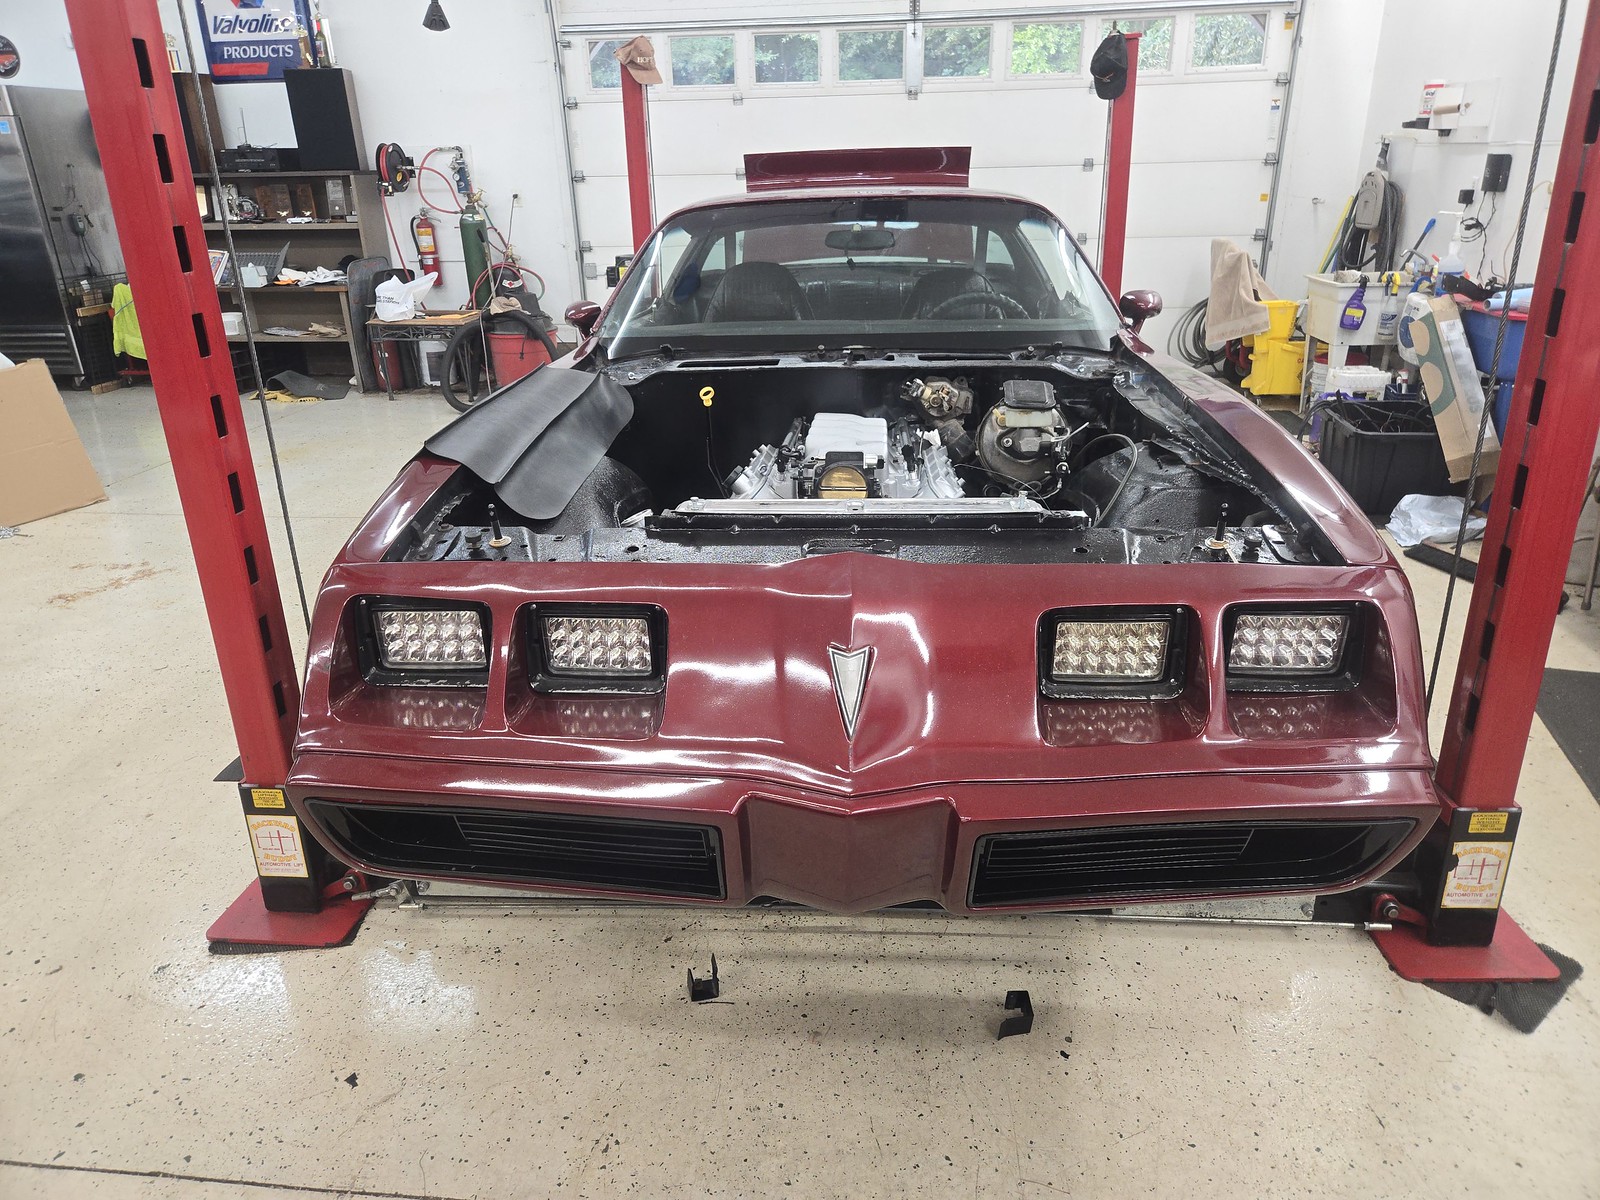 2c24c4a5-7f89-40e9-952c-cd97c22125a4.jpeg by Michael Crawford, on Flickr
Next up, I started building the new dash. I had an ok-ish one in storage that was broken in a few spots, cracked in a few visible places, cut for a din sized stereo, and poorly dyed black. It was given an FMV of 100. I hot wire stapled and epoxied all the damage back together so far.
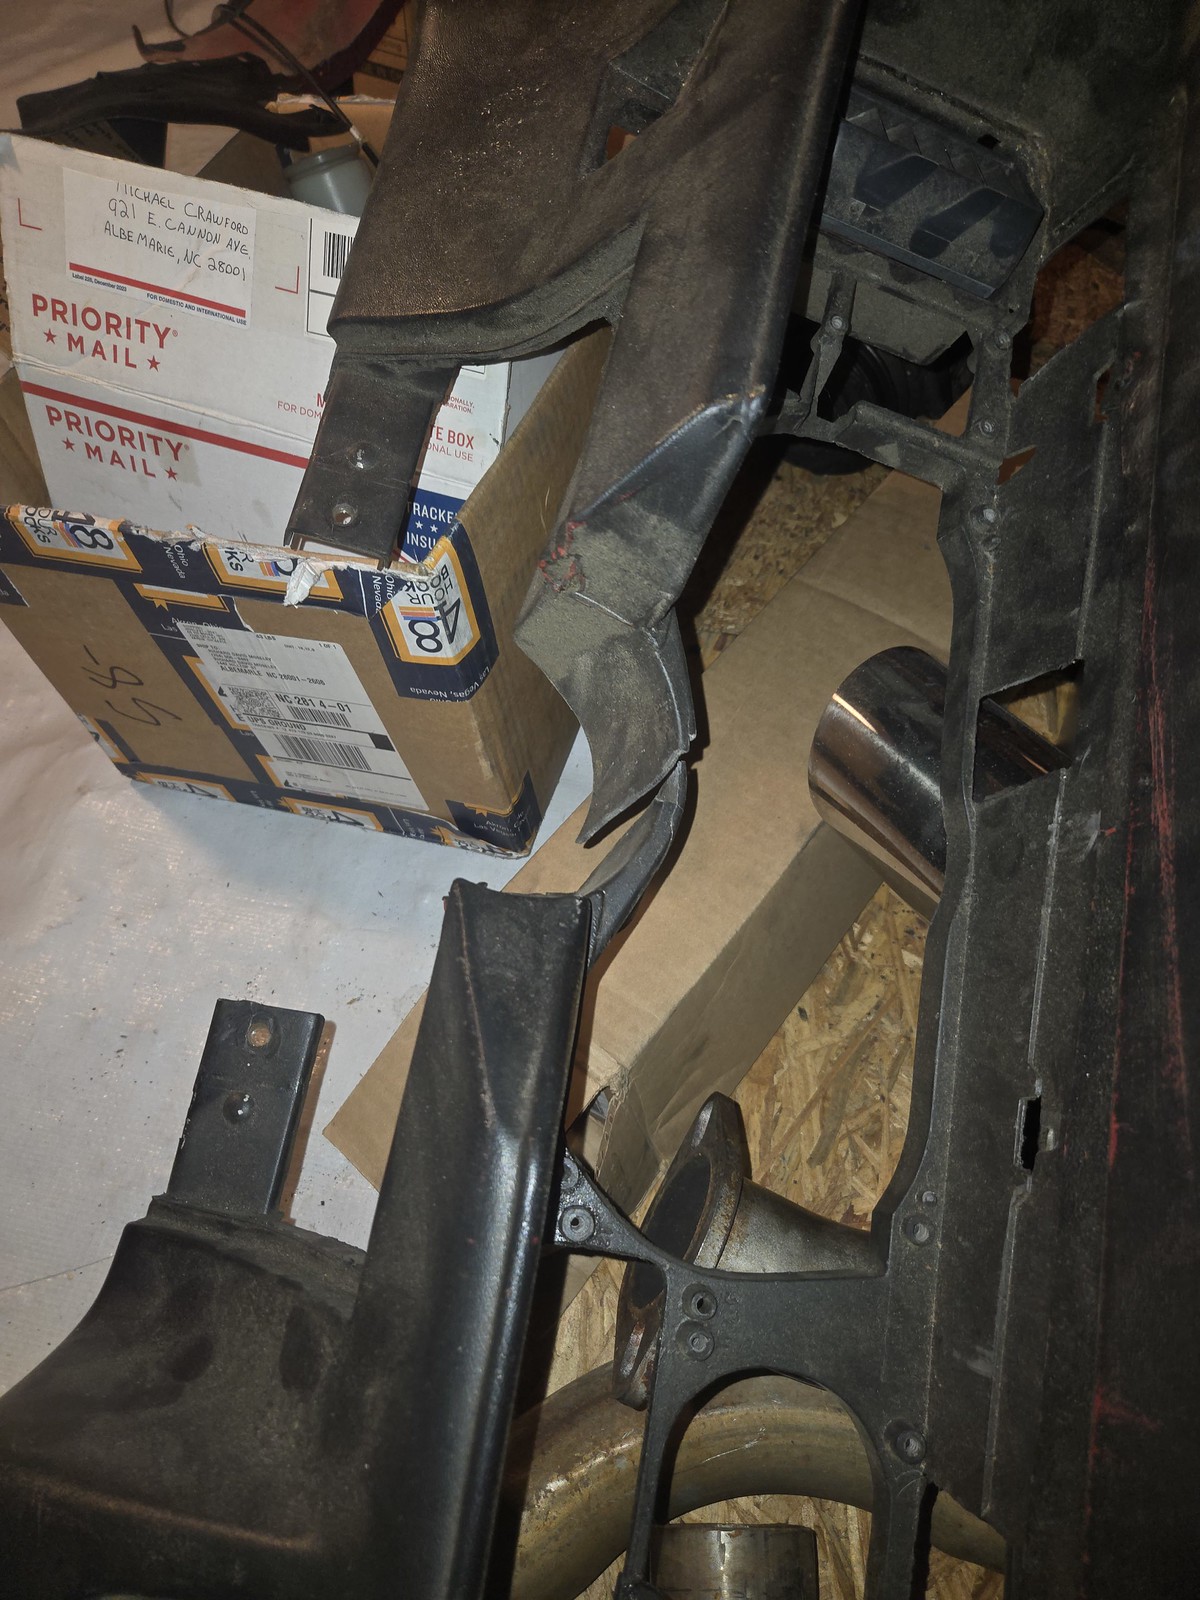 db5be321-38b8-4cd9-b2a9-94536cadd1da.jpeg by Michael Crawford, on Flickr
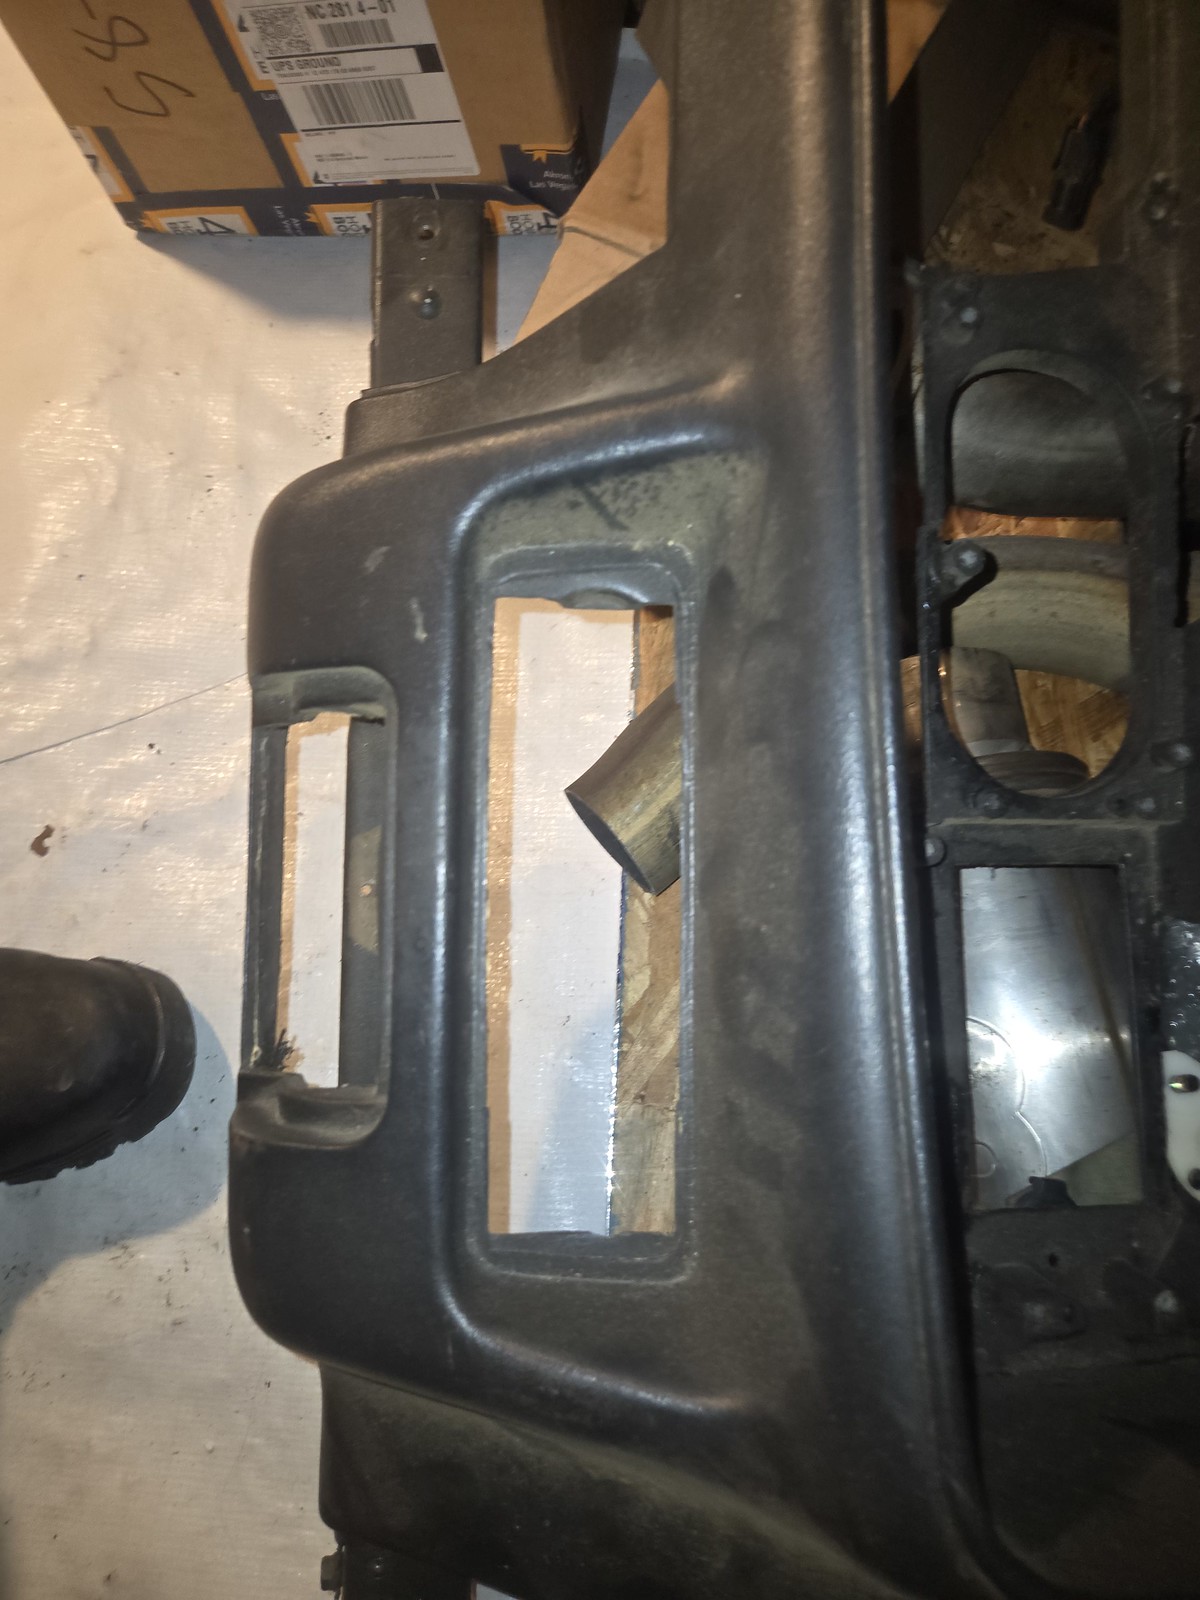 88a7981e-cd25-4eaf-a6dc-d86c4366e3ee.jpeg by Michael Crawford, on Flickr
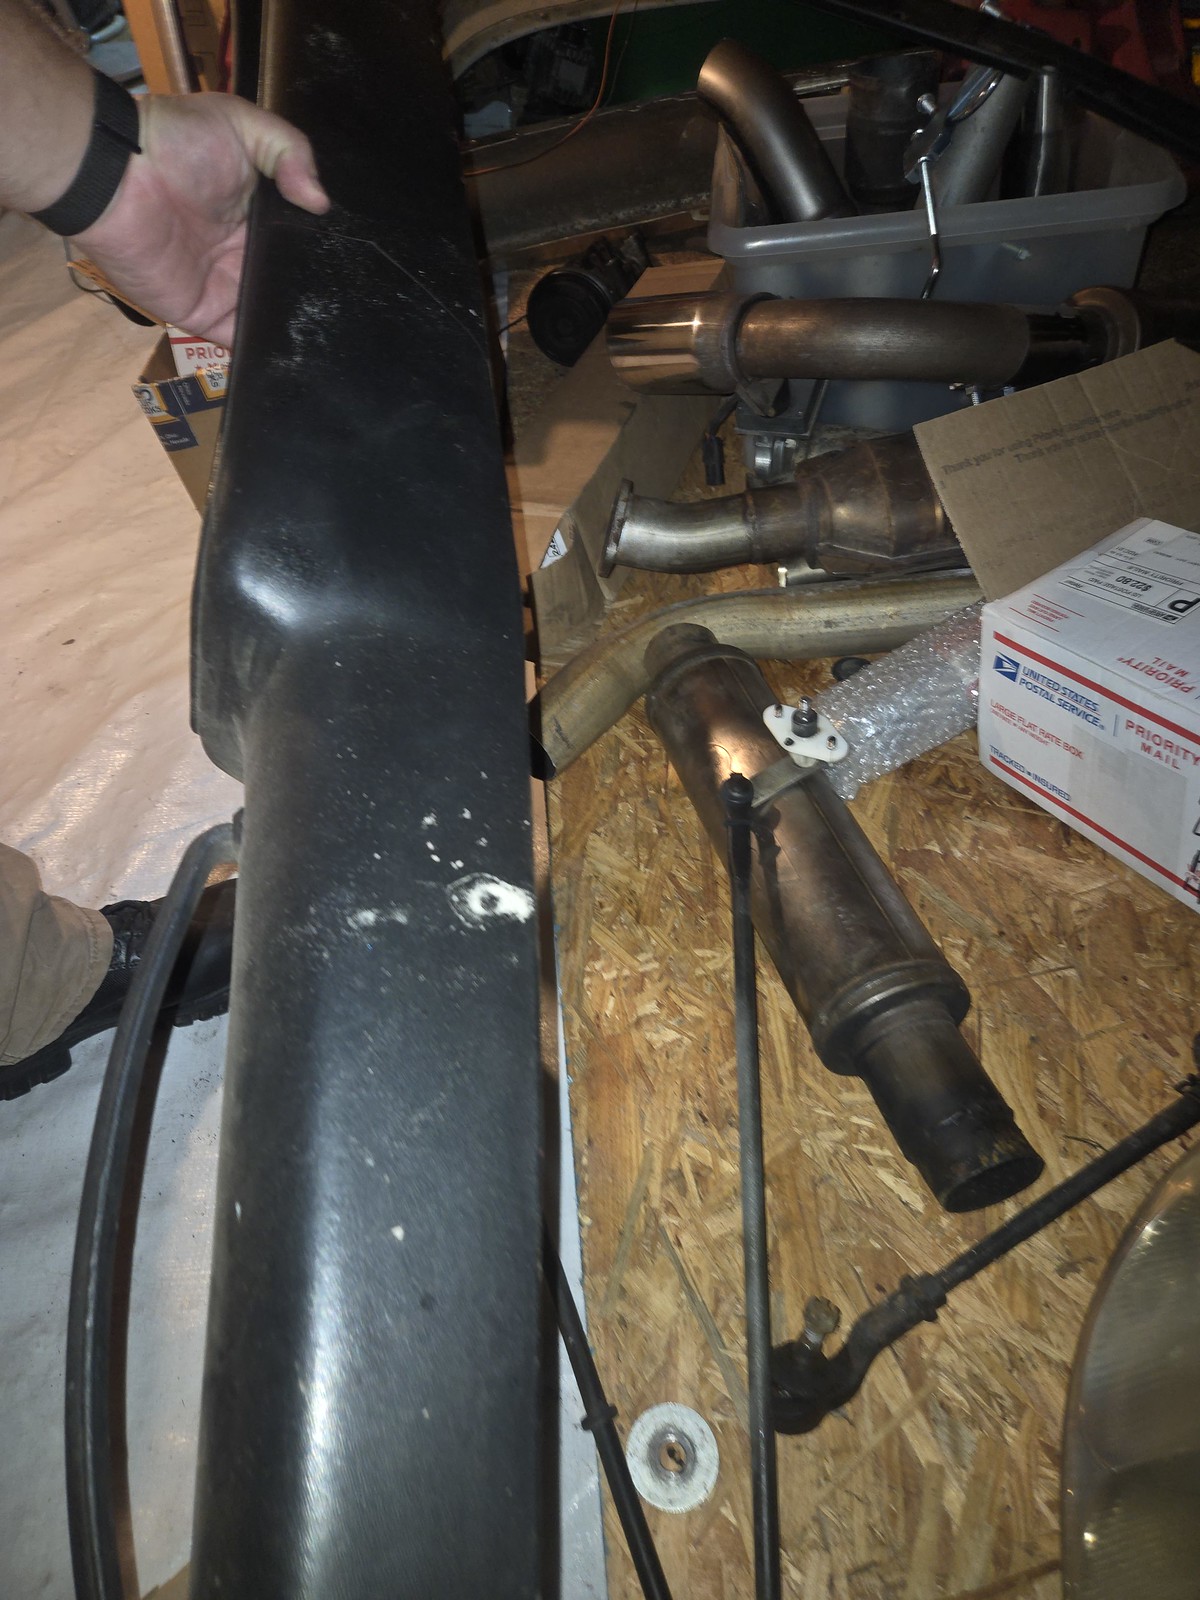 350cab92-9186-4d60-9050-da581a599c77.jpeg by Michael Crawford, on Flickr
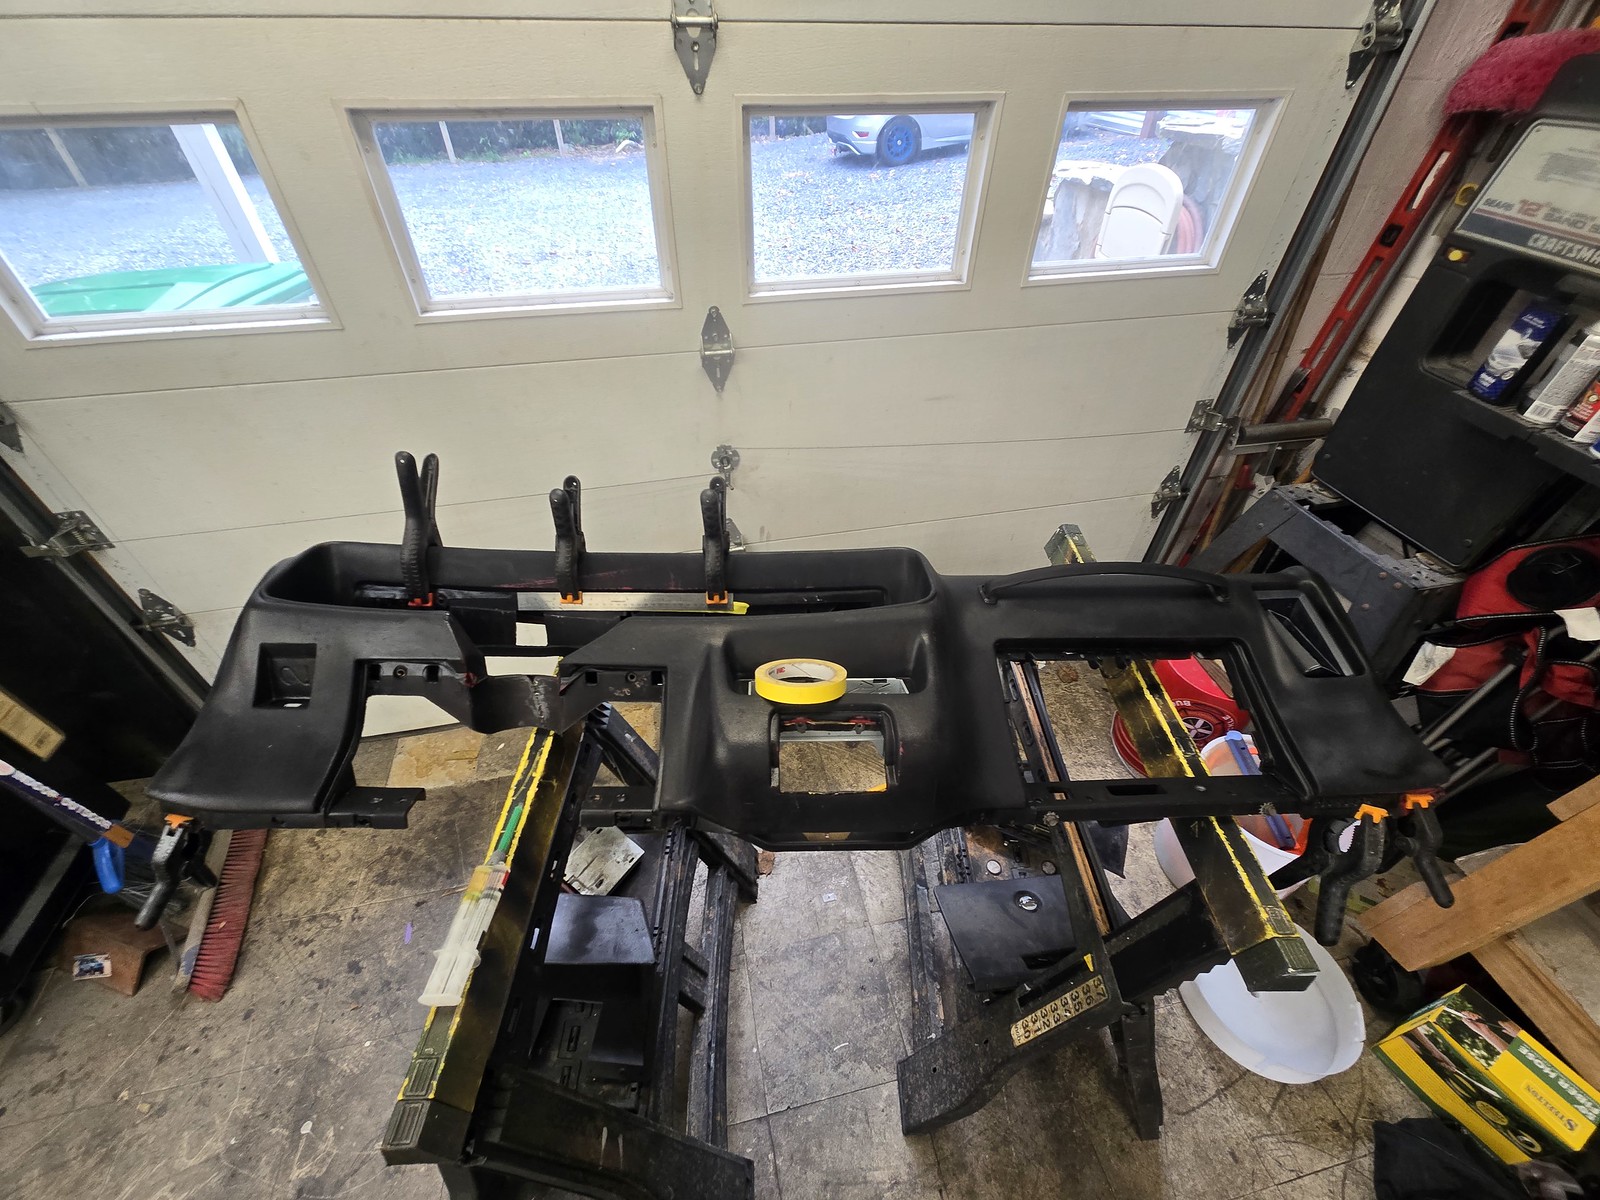 cd0c345f-9ef9-428b-a484-fade6e4a00c0.jpeg by Michael Crawford, on Flickr
Little budget cleanup: I have a nitrous kit I bought years ago that is finally finding a home on this for the challenge run. I also bought a set of spark plugs and wires form ebay. The spark plugs came in boxes labelled “spark plugs” complete with quotes. I’m not sure I should trust them with nitrous.
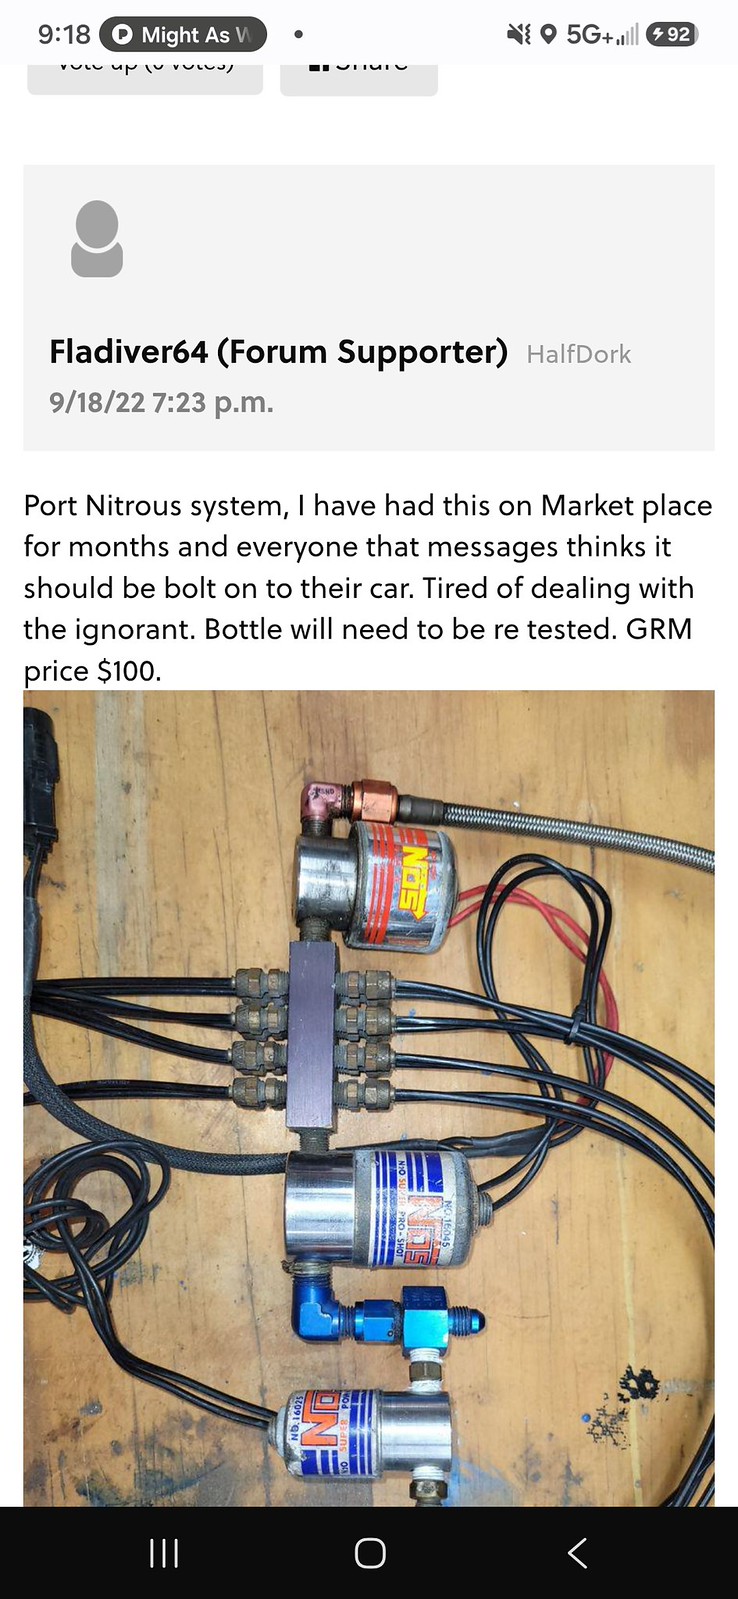 94345d36-3b0b-424b-98dc-8e4a45b7ed14.jpeg by Michael Crawford, on Flickr
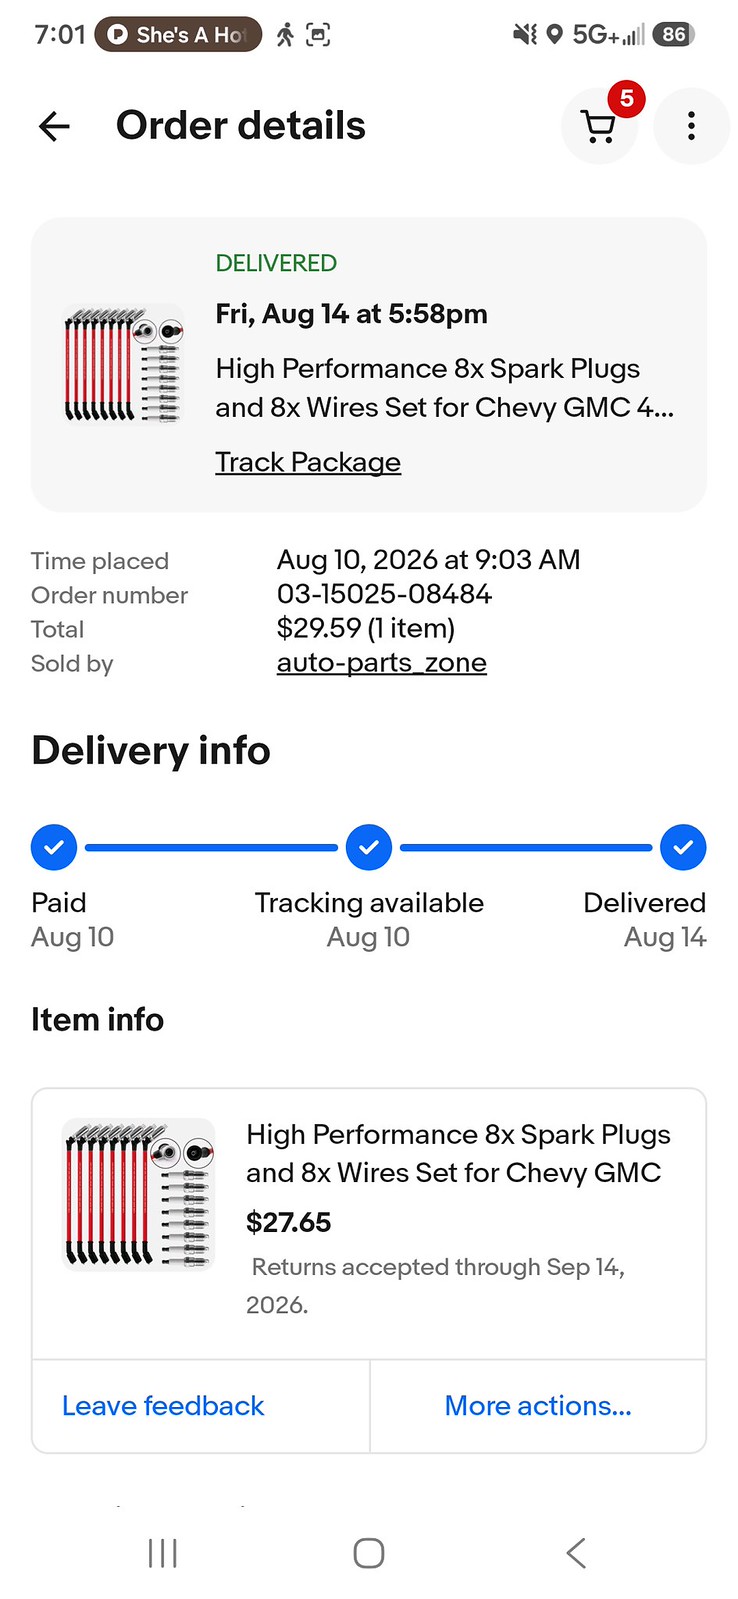 75f24b69-4fa7-453a-92d2-0827eccbd714.jpeg by Michael Crawford, on Flickr
I think that’s all the stuff for this round. I will leave you with an AI photoshop of the car, picture from the seller’s ad no less, lowered properly and on the $100 set of c4 corvette 17x9.5 wheels I have here. Using these depends on if I can find 255 or 275 width 200tw takeoffs cheap enough. 18s are way easier to find, but the 100 set of XXRs (not pictured) I have are only 8.5 wide….
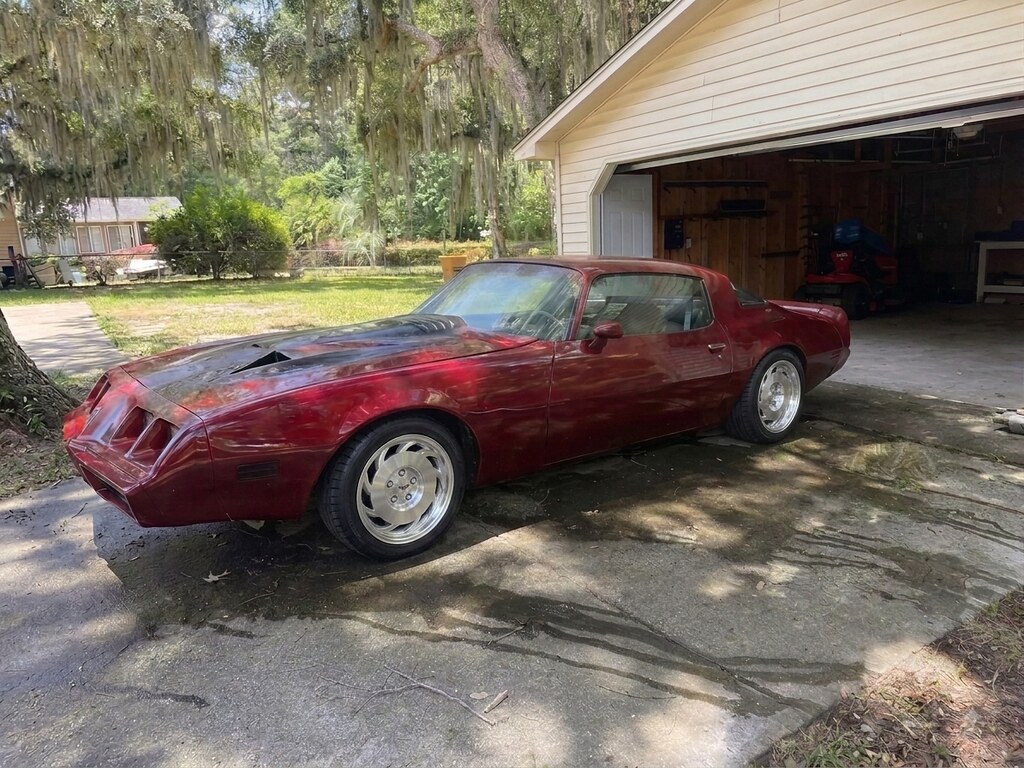 fd4ddec4-6dbf-4522-89b1-2cc20116f3ea.png by Michael Crawford, on Flickr
Michael Crawford
fd4ddec4-6dbf-4522-89b1-2cc20116f3ea.png by Michael Crawford, on Flickr
Michael Crawford
1970 plymouth Duster back under construction:
https://www.pro-touring.com/showthre...uring-makeover
1987 GMC S15 https://www.pro-touring.com/showthre...ct-drivabeater
08-31-2026 #10
Registered User
- Join Date
- Sep 2009
- Posts
- 2,996
I like the wheels on that car. They work surprisingly well.
1955 Nomad project LC9, 4L80e, C5 brakes, Vision wheels
1968 Camaro 6.2 w/ LSA, TR6060-Magnum hybrid and etc SOLD
1976 T/A LS1 6 Speed, and etc. SOLD
Follow me on Instagram: ryeguy2006a
2 Weeks Ago #11
Registered User
- Join Date
- Aug 2007
- Location
- Albemarle, NC
- Posts
- 1,170
Budget first:
Previous total: 3780.95
New/corrected money:
Water pump spacers: rebought from vista auctions for 8.90 vs the original 19.99
Plugs and wires: rebought from vista auctions for 7.75 instead of original 29.59
16an orb to 1.5 $24.85
ecm monut $9.99
camaro water pump $54.00
exhaust flanges $55.98
steering wheel wrap $7.99
sem landau black $26.47
flexible trans dipstick $36.99
8an to 6an reducers 2x $7.99
4 inch silicone 45 $16.97
48re trans cooler line kit $12.35
trans cooler $10.05
6an 70 inch cooler line kit $25.00
300lph external fuel pump $4.30
2pc oxygen sensors $27.30
6an to 5/16 compression fittings 8pk $26.99
trunk mount battery cable, maxi fuse etc $40.00
shop supplies (misc zipties, paint, tape, fittings, etc) $100.00
alternator bracket $30.75
power steering hoses $34.83
radiator fitting $24.94
fuel pressure regulator and fitting kit: $6.60
b&m megashifter: $5
fuel pump mount clamp: $.50
peeling 18x8.5 xxr 531 wheels $100.00
2.5 exhaust and resonators $5.00
boom tubes $25.00
ac condenser $4.30
upol brass monkey $10.99
Krylon matte black $8.99
new total: 4461.16
so, now I’m starting to get nervous if I can pull this off….
Ive got 540 left for wheel adapters, driveshaft, and actually getting it running and driving. I can do this!!
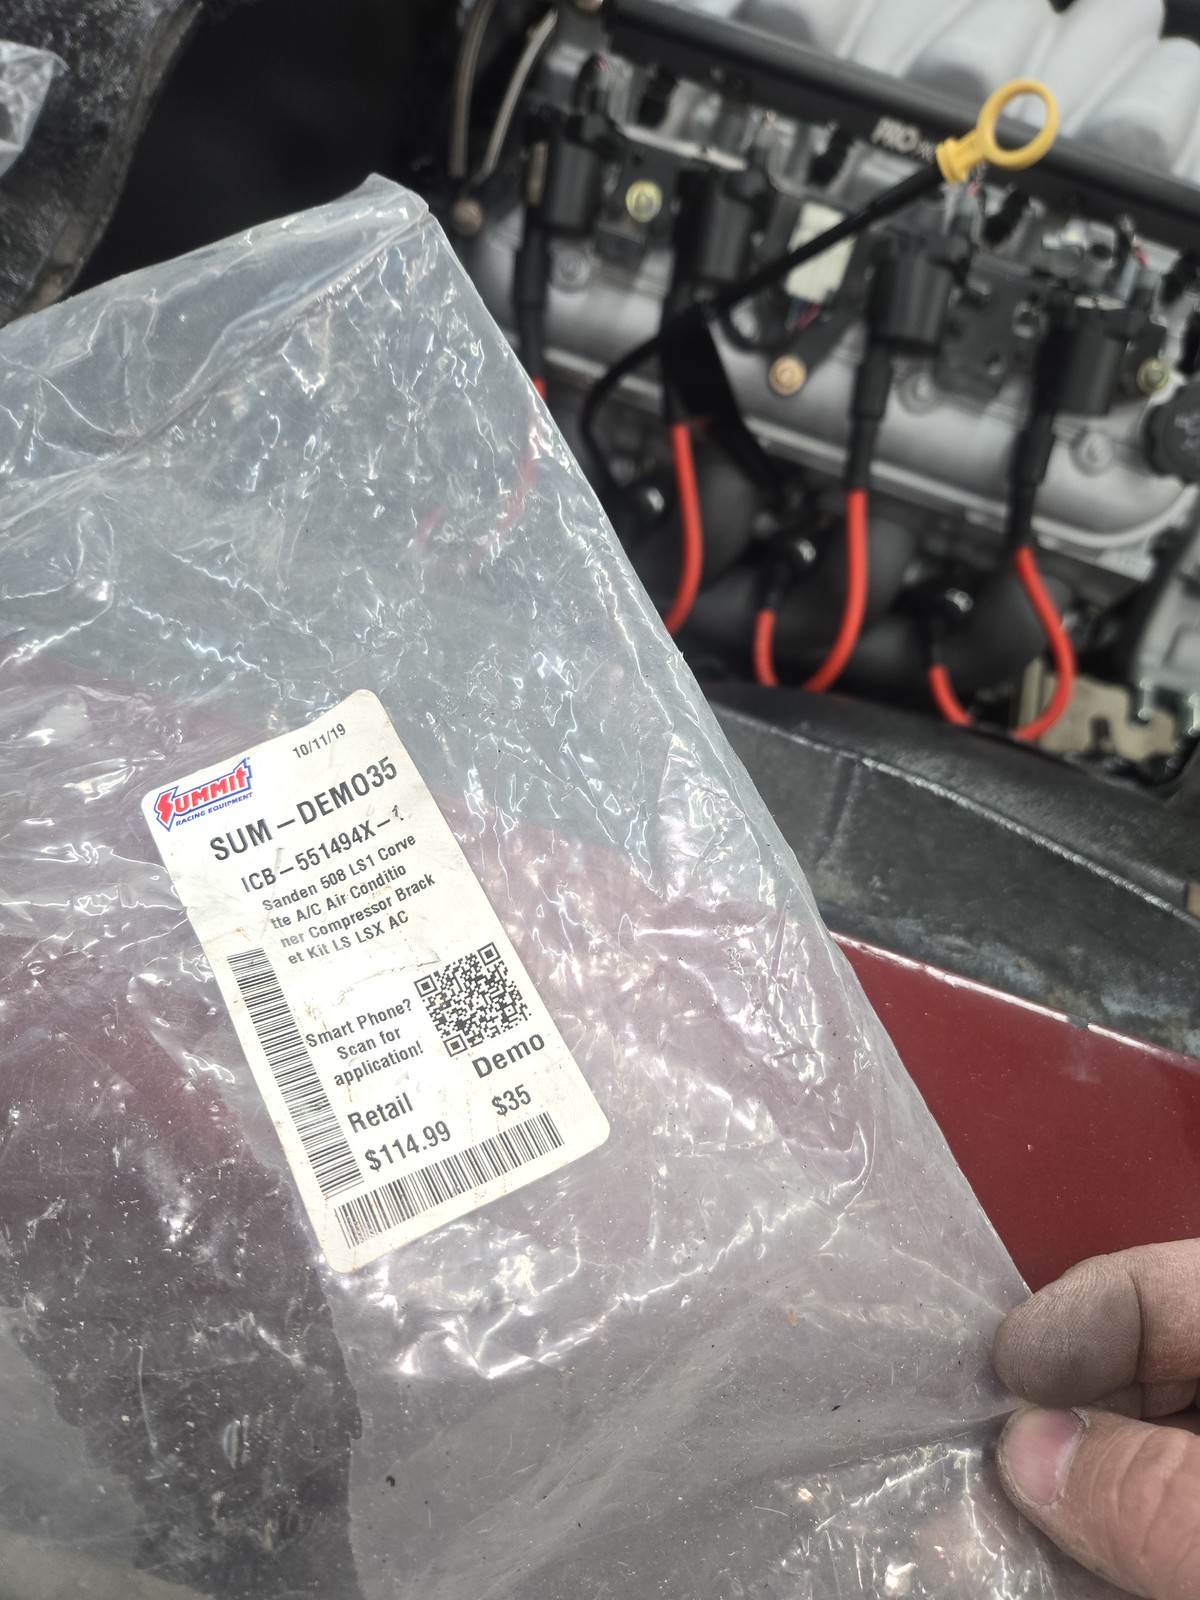
When we last left off, I had the drivetrain bolted down. Ive been a busy man since then. First though, I feel the need to justify a new addiction to all of you. See, I’m a scrounger and a hoarder. I tend to love the thrill of the hunt, the search for good deals and oddball parts, and the collecting of crap. I love being able to search through what I have, and make it work. Right up until the point where what I own, owns me. And then I purge because I have too much crap clogging up the works. So part of this project is getting rid of stuff I already own. Like the LS stuff I bought from john, or the nitrous that’s been here for years, or the battery relocation stuff from my boxes, or that dash from storage. Just stuff that’s HERE. In this update, you’ll see an hvac unit (chineseium old vintage air knockoff that’s vacuum operated that’s been hanging around forever. Paid 300 for it years ago, 20 for the Sanden 508 knockoff, 35 fort the ict billet brackets). Its not going into the budget, as it’ll come out for the challenge, but I’m building around it now so I don’t have to redo stuff later. And it gets stuff off the shelves. Uses up stuff that’ll be trash at some point when I die or get pissed at tripping over it. I’m also using up paints that are on the shelf, hardware from the bolt’s bins, etc. this car isn’t intended to be nice like the turbo Miata or duster. Its supposed to be a fun, trailer park remembrance in action.
I also found the new addiction part of this. Couple of my customers turned me onto an app called vista auctions. Its all amazon returns, starting at 1-dollar bids. The search makes marketplace searching look downright functional, the pictures make craigslist look like time magazine, and the categorization make the aftermath of a tornado look like the Smithsonian. So, the best way to find anything is to doomscroll. Theres even a handy button that auto bids the next denomination with one click, so it’s like auto-lowball walking through a swap meet! It’s fantastic. they run for 2 days, so stuff cycles quick, encouraging continual doomscrolling. Auction listing links to amazon page so you know exactly what you’re getting. Winning bid gets a 15% premium added, and a 2-dollar lot fee added. This has been very, very bad for me. Good for the challenge car though!
The worst part is picking up in charlotte. That traffic SUCKS.Michael Crawford
1970 plymouth Duster back under construction:
https://www.pro-touring.com/showthre...uring-makeover
1987 GMC S15 https://www.pro-touring.com/showthre...ct-drivabeater
2 Weeks Ago #12
Registered User
- Join Date
- Aug 2007
- Location
- Albemarle, NC
- Posts
- 1,170
i keep getting internal server erors when i try to add the rest of the post. any ideas?
Michael Crawford
1970 plymouth Duster back under construction:
https://www.pro-touring.com/showthre...uring-makeover
1987 GMC S15 https://www.pro-touring.com/showthre...ct-drivabeater
2 Weeks Ago #13 Registered User
- Join Date
- Jan 2006
- Posts
- 431
I was going to say the exact same thing before seeing your post. Originally Posted by ryeguy2006a

Yeah, they do go very well with the car.1971 Camaro
GM HT383, MiniRam EFI, AFR heads
"8-speed" trans (700R4 + Gear Vendors OD)
1 Week Ago #14 Administrator
- Join Date
- Jan 2000
- Location
- Thousand Oaks California
- Posts
- 10,219
Testing to see if there is an issue with updating this post.
Larry Callahan
Founder/Administrator of Pro-Touring.com, G-Machines.com and HostMyJunk.com
To advertise on Pro-Touring.com click here
1 Week Ago #15
Registered User
- Join Date
- Aug 2007
- Location
- Albemarle, NC
- Posts
- 1,170
It's weird that I can post directly through the text box but I cannot post copy and paste from my word document for the update
Michael Crawford
1970 plymouth Duster back under construction:
https://www.pro-touring.com/showthre...uring-makeover
1987 GMC S15 https://www.pro-touring.com/showthre...ct-drivabeater
1 Week Ago #16
Registered User
- Join Date
- Sep 2009
- Posts
- 2,996
When I post pictures, I copy the [IMG] code from Flickr.
1955 Nomad project LC9, 4L80e, C5 brakes, Vision wheels
1968 Camaro 6.2 w/ LSA, TR6060-Magnum hybrid and etc SOLD
1976 T/A LS1 6 Speed, and etc. SOLD
Follow me on Instagram: ryeguy2006a
1 Week Ago #17
Registered User
- Join Date
- Aug 2007
- Location
- Albemarle, NC
- Posts
- 1,170
Budget first:
Previous total: 3780.95
New/corrected money:
Water pump spacers: rebought from vista auctions for 8.90 vs the original 19.99
Plugs and wires: rebought from vista auctions for 7.75 instead of original 29.59
16an orb to 1.5 $24.85
ecm monut $9.99
camaro water pump $54.00
exhaust flanges $55.98
steering wheel wrap $7.99
sem landau black $26.47
flexible trans dipstick $36.99
8an to 6an reducers 2x $7.99
4 inch silicone 45 $16.97
48re trans cooler line kit $12.35
trans cooler $10.05
6an 70 inch cooler line kit $25.00
300lph external fuel pump $4.30
2pc oxygen sensors $27.30
6an to 5/16 compression fittings 8pk $26.99
trunk mount battery cable, maxi fuse etc $40.00
shop supplies (misc zipties, paint, tape, fittings, etc) $100.00
alternator bracket $30.75
power steering hoses $34.83
radiator fitting $24.94
fuel pressure regulator and fitting kit: $6.60
b&m megashifter: $5
fuel pump mount clamp: $.50
peeling 18x8.5 xxr 531 wheels $100.00
2.5 exhaust and resonators $5.00
boom tubes $25.00
ac condenser $4.30
upol brass monkey $10.99
Krylon matte black $8.99
new total: 4461.16
so, now I’m starting to get nervous if I can pull this off….
Ive got 540 left for wheel adapters, driveshaft, and actually getting it running and driving. I can do this!!
When we last left off, I had the drivetrain bolted down. Ive been a busy man since then. First though, I feel the need to justify a new addiction to all of you. See, I’m a scrounger and a hoarder. I tend to love the thrill of the hunt, the search for good deals and oddball parts, and the collecting of crap. I love being able to search through what I have, and make it work. Right up until the point where what I own, owns me. And then I purge because I have too much crap clogging up the works. So part of this project is getting rid of stuff I already own. Like the LS stuff I bought from john, or the nitrous that’s been here for years, or the battery relocation stuff from my boxes, or that dash from storage. Just stuff that’s HERE. In this update, you’ll see an hvac unit (chineseium old vintage air knockoff that’s vacuum operated that’s been hanging around forever. Paid 300 for it years ago, 20 for the Sanden 508 knockoff, 35 fort the ict billet brackets). Its not going into the budget, as it’ll come out for the challenge, but I’m building around it now so I don’t have to redo stuff later. And it gets stuff off the shelves. Uses up stuff that’ll be trash at some point when I die or get pissed at tripping over it. I’m also using up paints that are on the shelf, hardware from the bolt’s bins, etc. this car isn’t intended to be nice like the turbo Miata or duster. Its supposed to be a fun, trailer park remembrance in action.
I also found the new addiction part of this. Couple of my customers turned me onto an app called vista auctions. Its all amazon returns, starting at 1-dollar bids. The search makes marketplace searching look downright functional, the pictures make craigslist look like time magazine, and the categorization make the aftermath of a tornado look like the Smithsonian. So, the best way to find anything is to doomscroll. Theres even a handy button that auto bids the next denomination with one click, so it’s like auto-lowball walking through a swap meet! It’s fantastic. they run for 2 days, so stuff cycles quick, encouraging continual doomscrolling. Auction listing links to amazon page so you know exactly what you’re getting. Winning bid gets a 15% premium added, and a 2-dollar lot fee added. This has been very, very bad for me. Good for the challenge car though!
The worst part is picking up in charlotte. That traffic SUCKS.
Then it was on to soft lines and fuel pump. I wanted to run a tanks inc in tank module like I did on my duster. But that $250. I aint got that at the moment. So, the minimum viable solution is an external pump. Ive used ford e2000 pumps with great success in the past before. Bunch of times, and they work well enough. Generally, 23 bucks on eBay. Or, stupid cheap on auction.
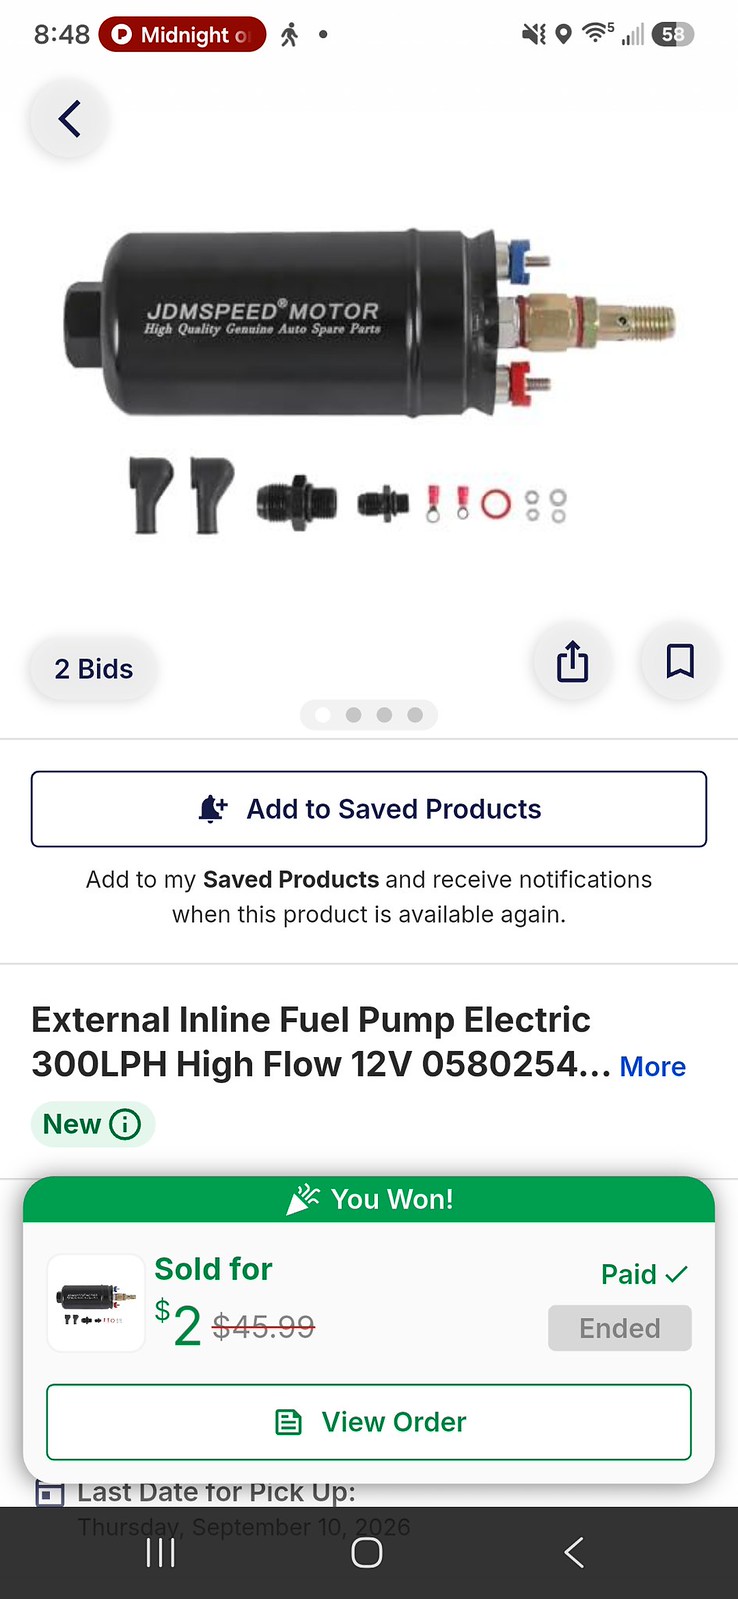 Screenshot_20260919_204818_Vista Auction by Michael Crawford, on Flickr
Wasn’t exactly what was in the box when I opened it, but was close enough that I didn’t care. I also started figuring out soft lines. I had planned doing PTFE 6AN hoses with compression fittings on the hard lines. I have most of the here, but would need to order some extra fittings. However, the auction provided again. A 46re transmission cooler line set came up. They were 6an PTFE lined, 3 hoses. I won the auction cheaper than the fittings I needed. I added an amazon link for the compression fittings I had for a price pint, and bought another fuel pressure regulator at the auction as a cheap way of getting a 90, a couple orb/6an fittings, and 3 6an/6an fittings cheaper than just buying the fittings I needed.
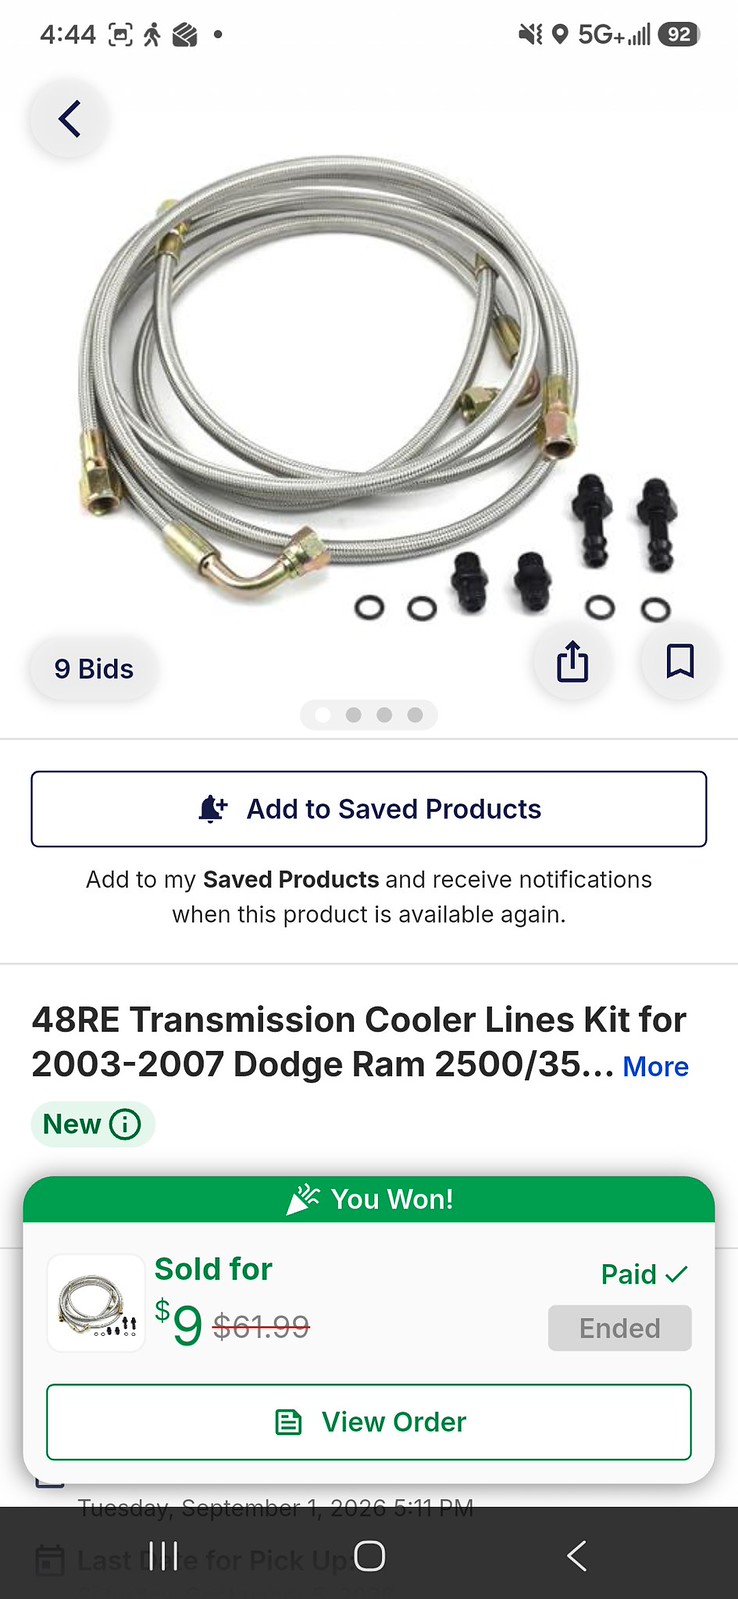 Screenshot_20260905_164436_Vista Auction by Michael Crawford, on Flickr
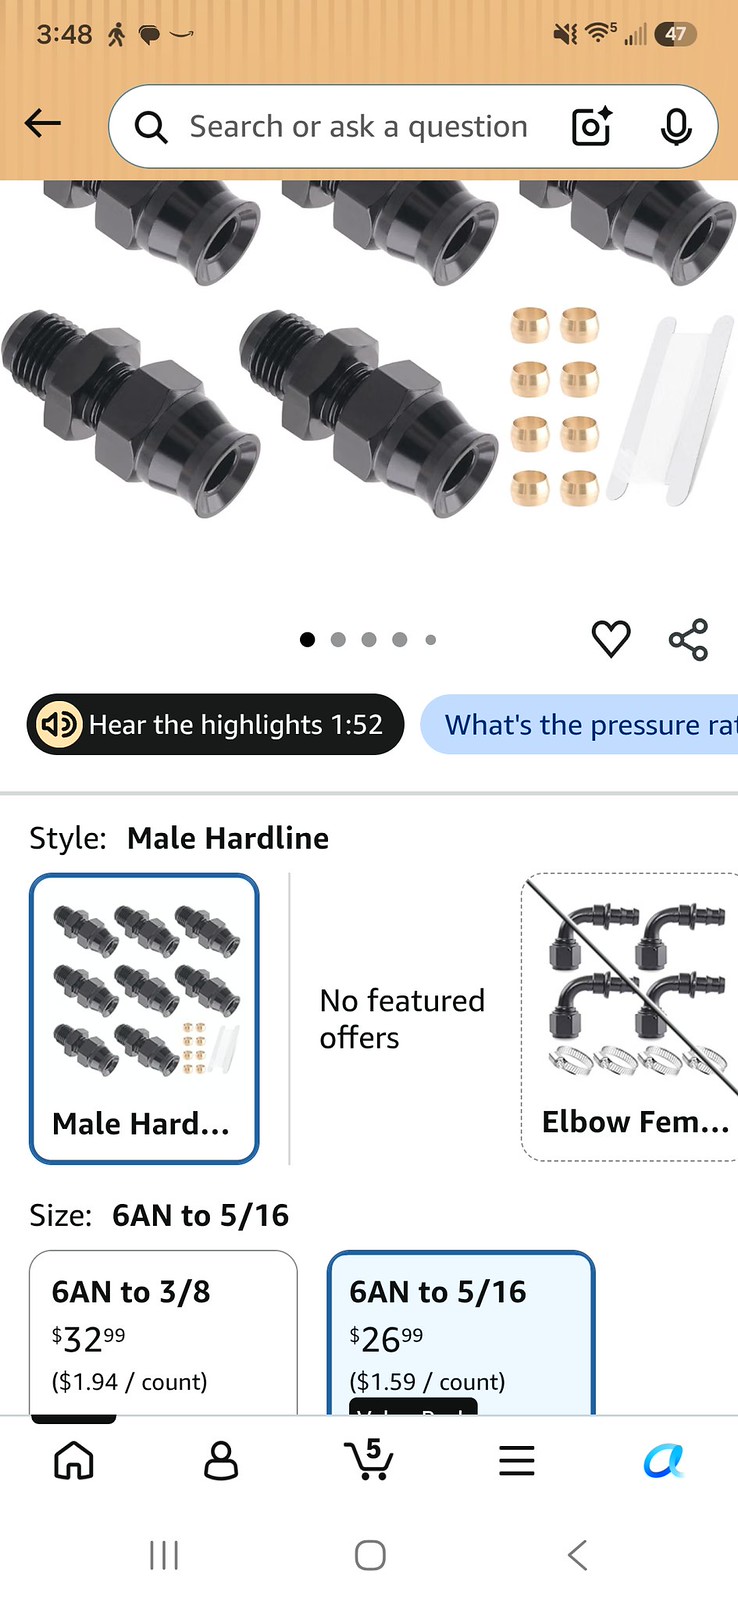 Screenshot_20260914_154847_Amazon Shopping by Michael Crawford, on Flickr
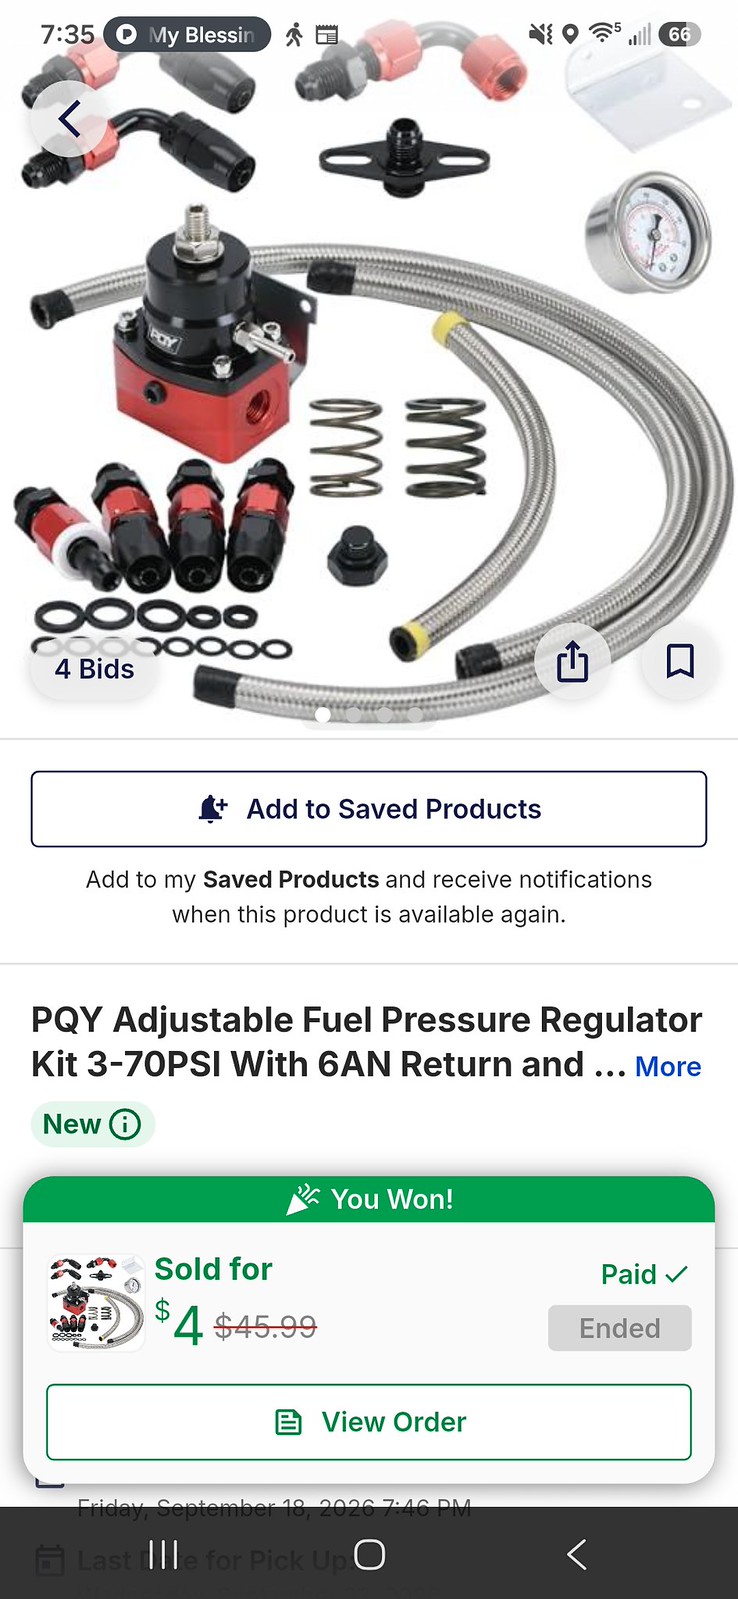 Screenshot_20260919_193553_Vista Auction by Michael Crawford, on Flickr
So, this allowed me to plumb the system. I learned that the factory pickup has VERY good siphon at the fuel tank strap location where I wanted to mount the pump. I also learned that the tank had at least 2 gallons left in it, and that gasoline reacts with arid XX deodorant. But we came out of the tank to the pump with rubber line, from the pump to the made hardline with the shortest of the trans cooler lines and a compression fitting. Then from the made hardline to the feed side of the rails with the medium ;length made hardline and a compression fitting and male/male coupler. Out of the rail to the FPR with a 90, out of the FPR with the longest line to the original hardline with the last compression fitting and another male/male, and to the tank with rubber hose. The rubber hose and clamps were reused from the fuel system that was scabbed on the driver’s side when I bought the car.
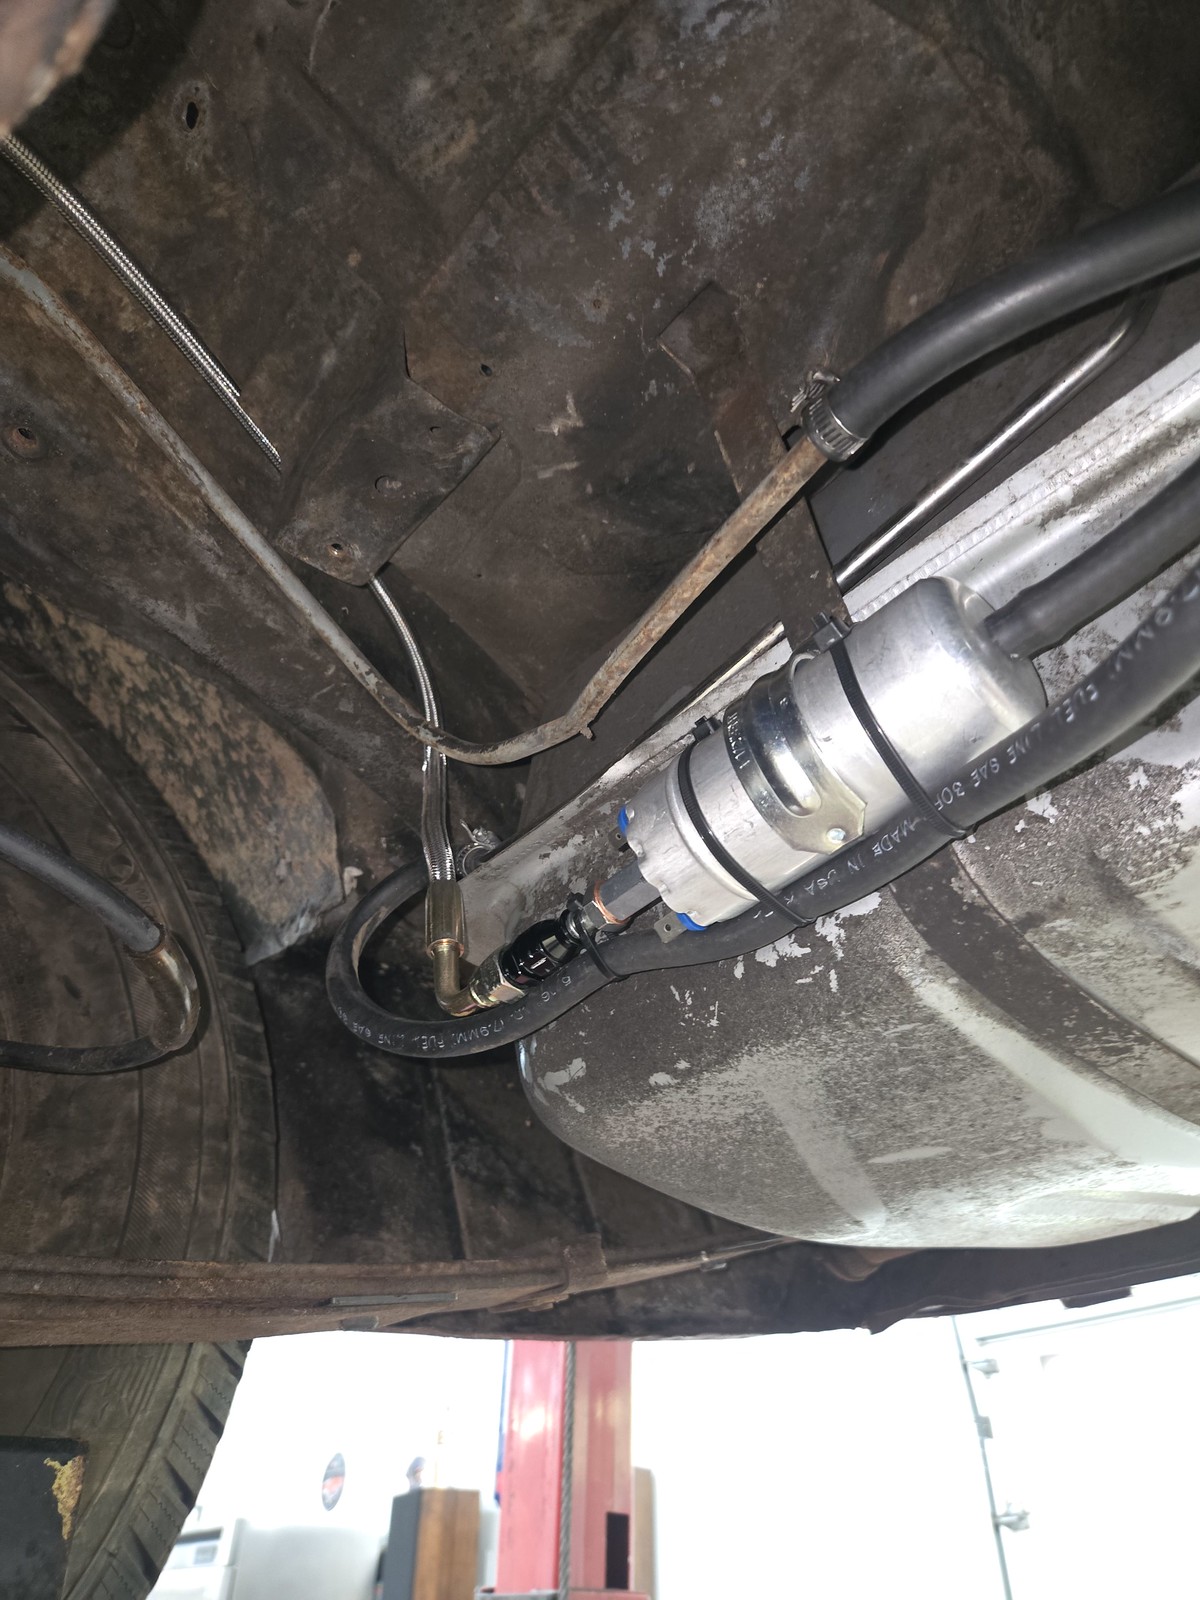 20260919_162627 by Michael Crawford, on Flickr
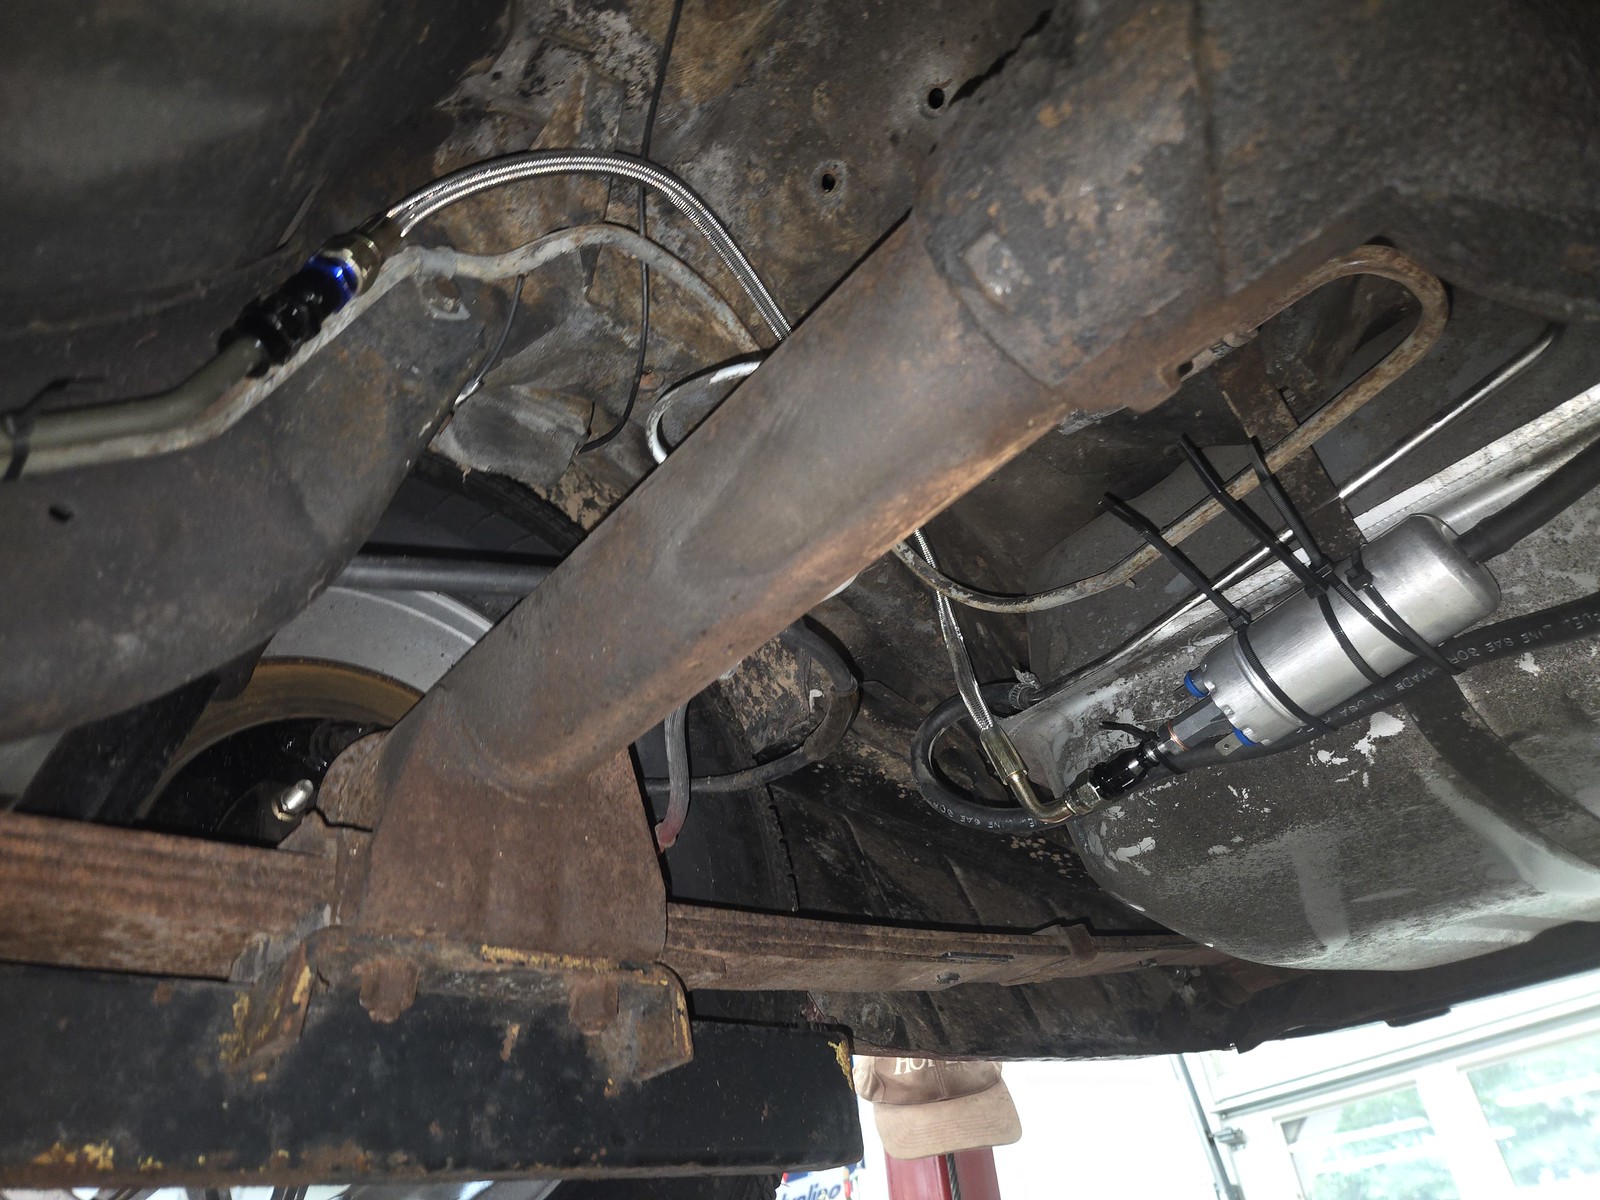 20260906_125616 by Michael Crawford, on Flickr
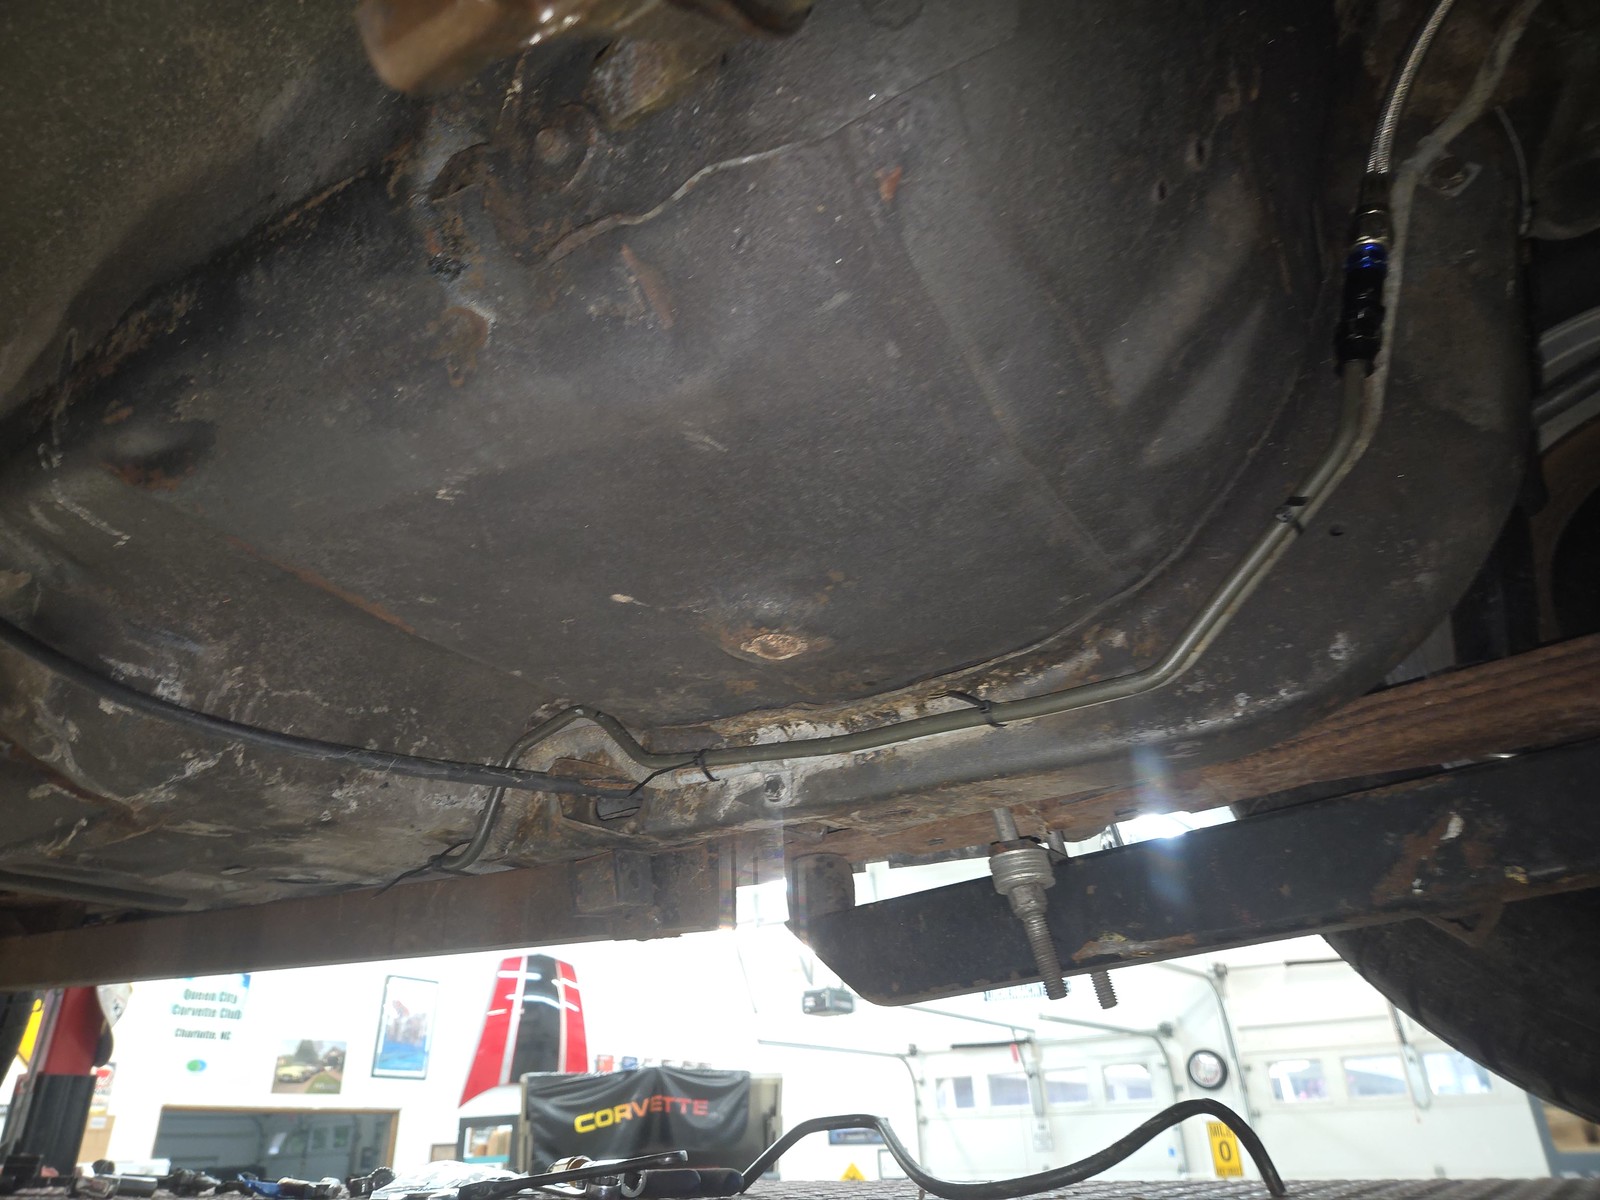 20260906_125625 by Michael Crawford, on Flickr
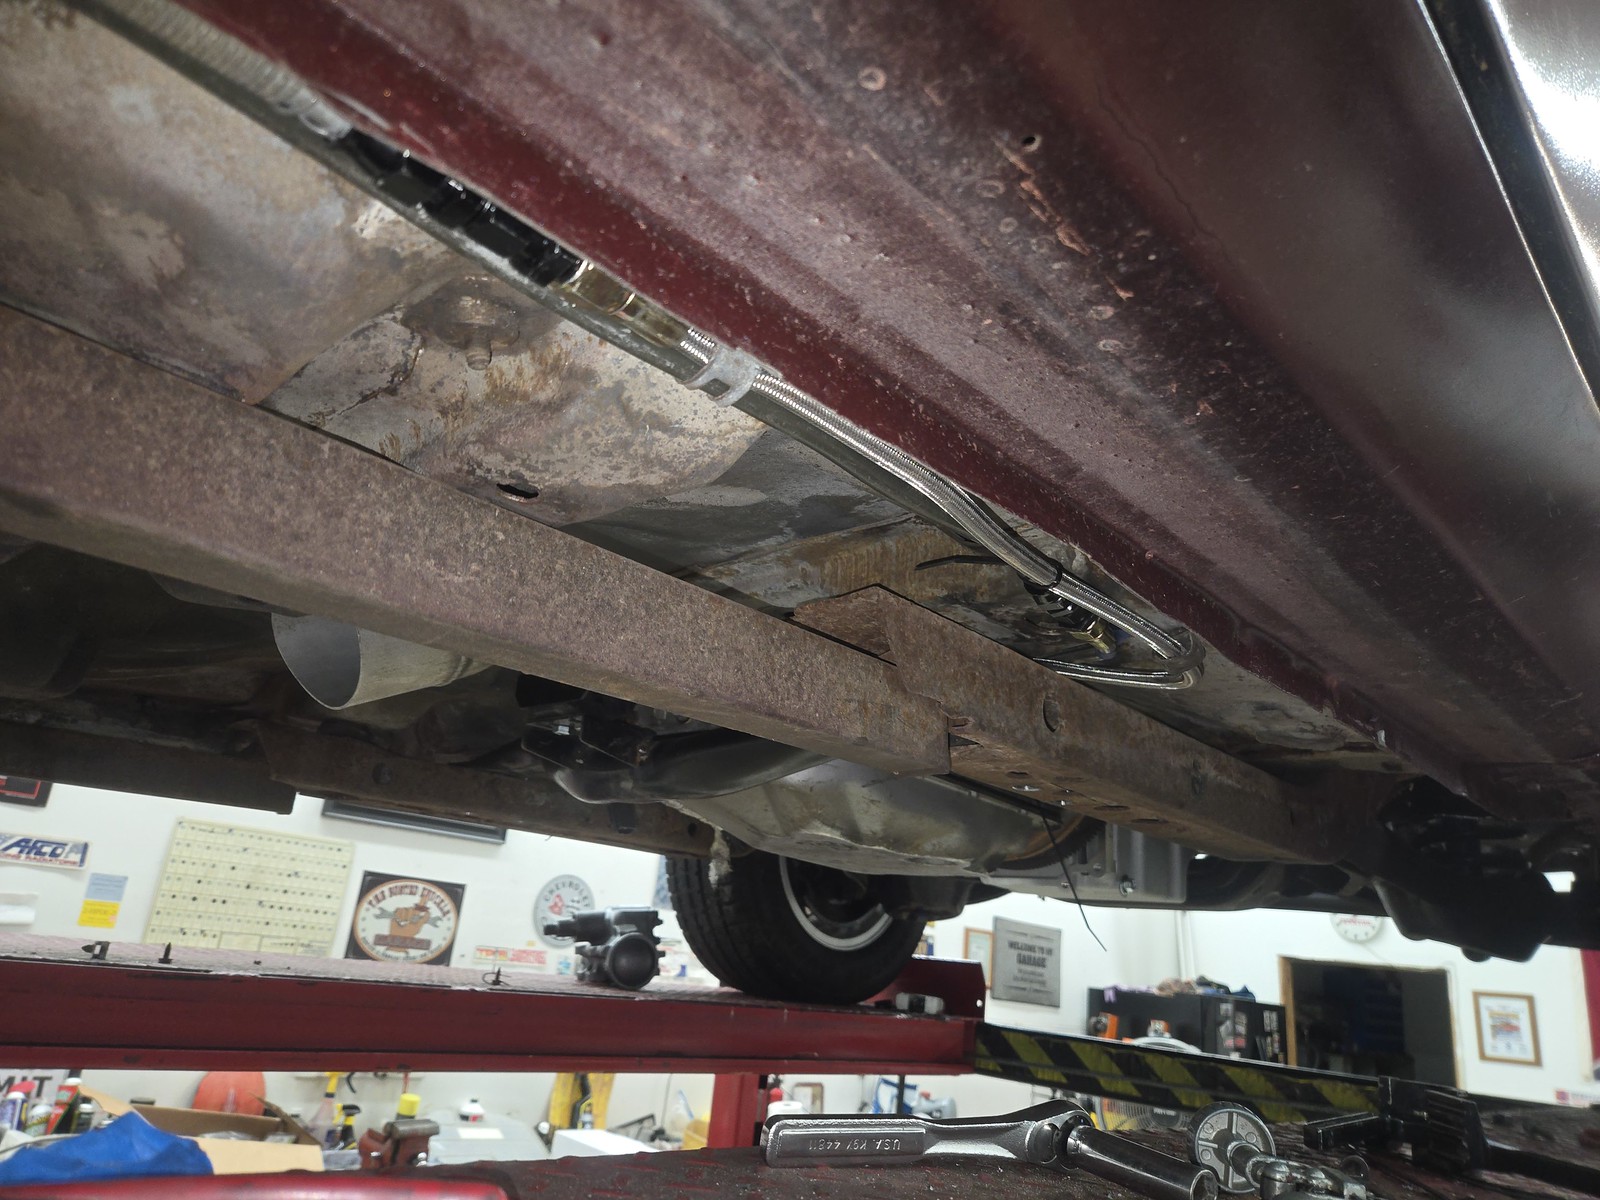 20260906_125632 by Michael Crawford, on Flickr
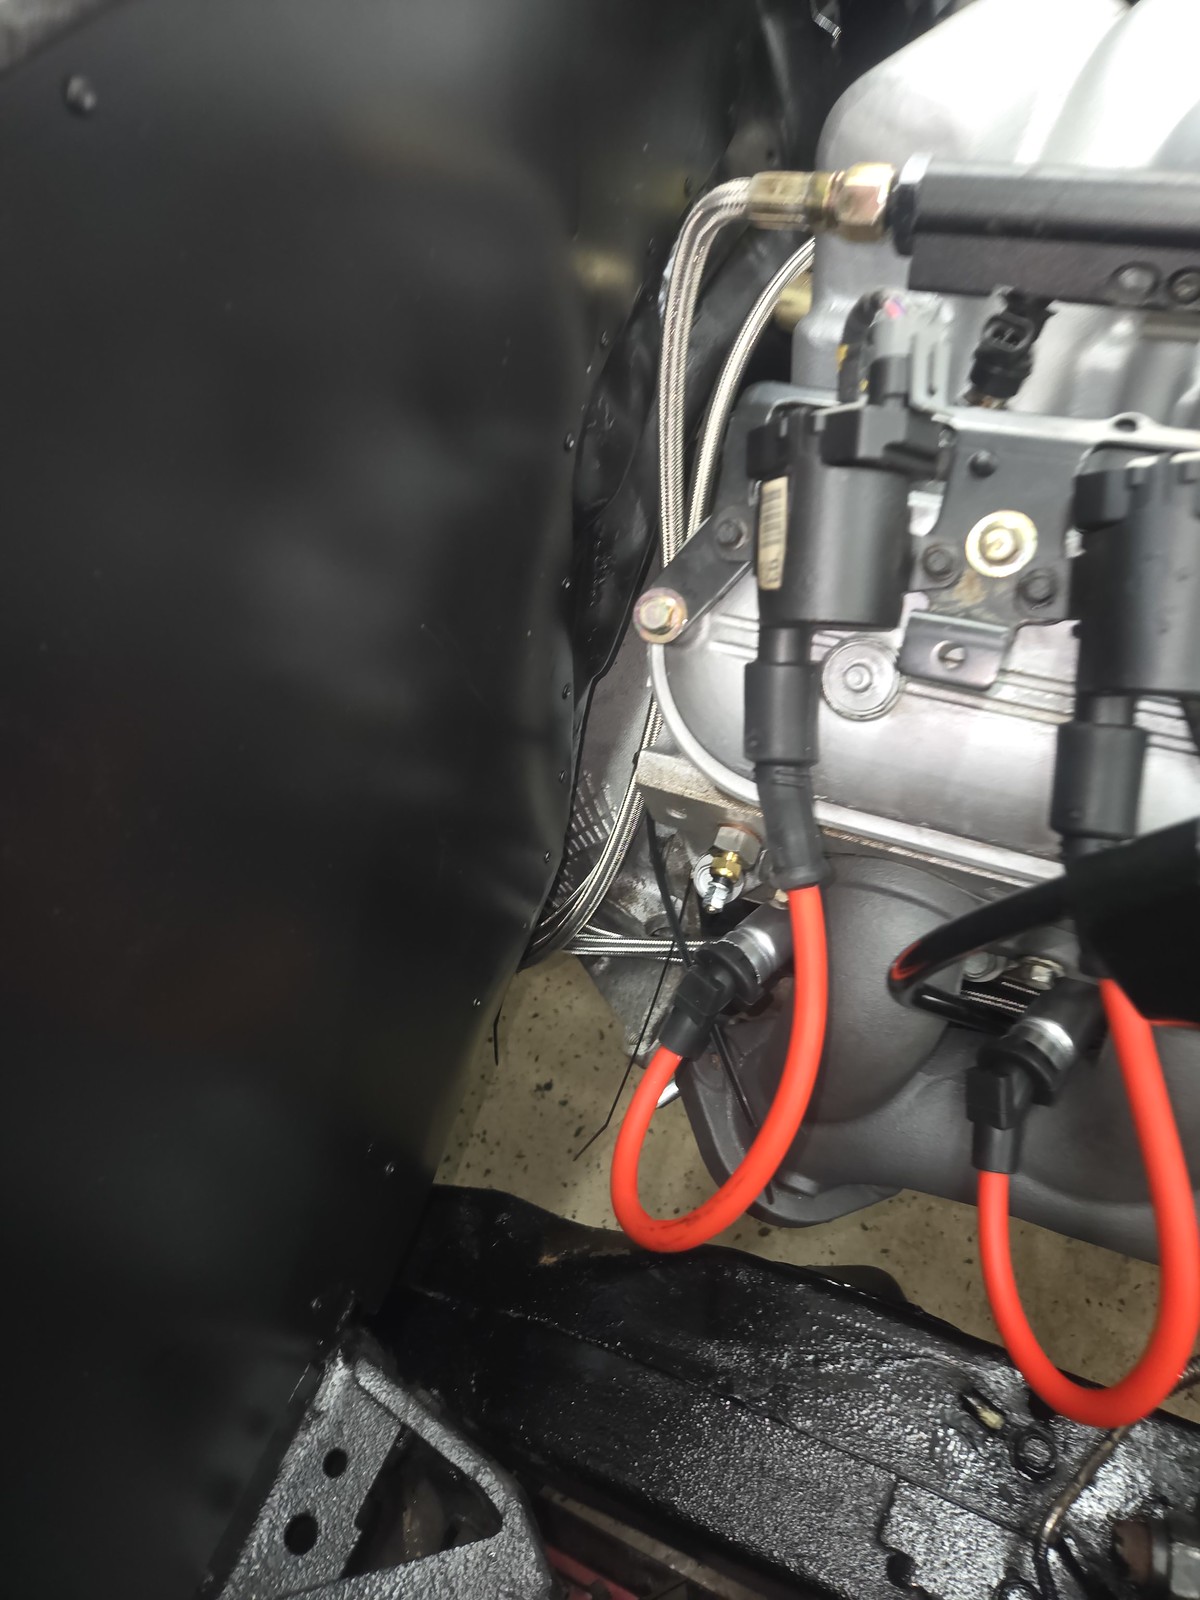 20260906_130234 by Michael Crawford, on Flickr
Added the gauge and called it good.
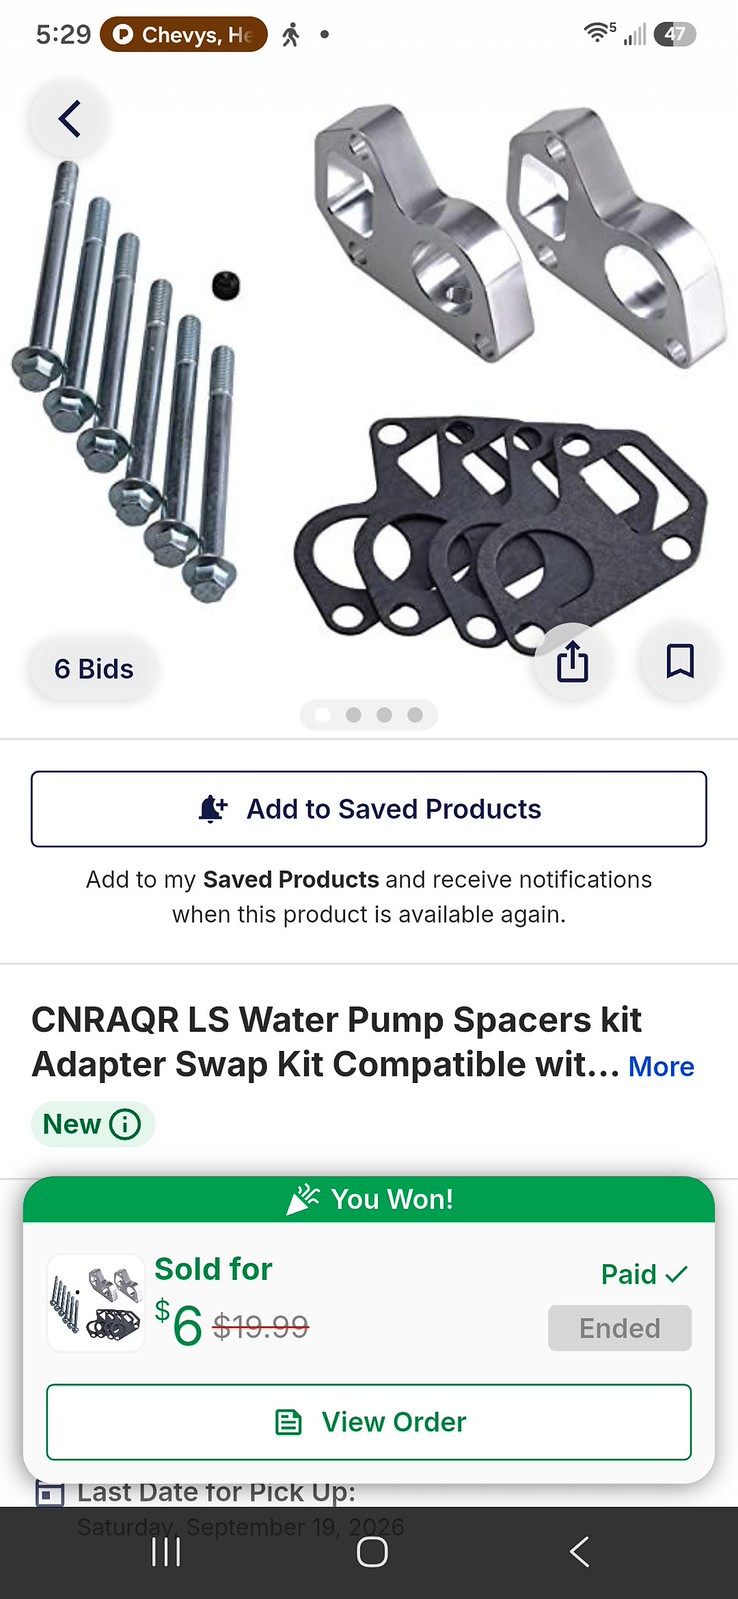
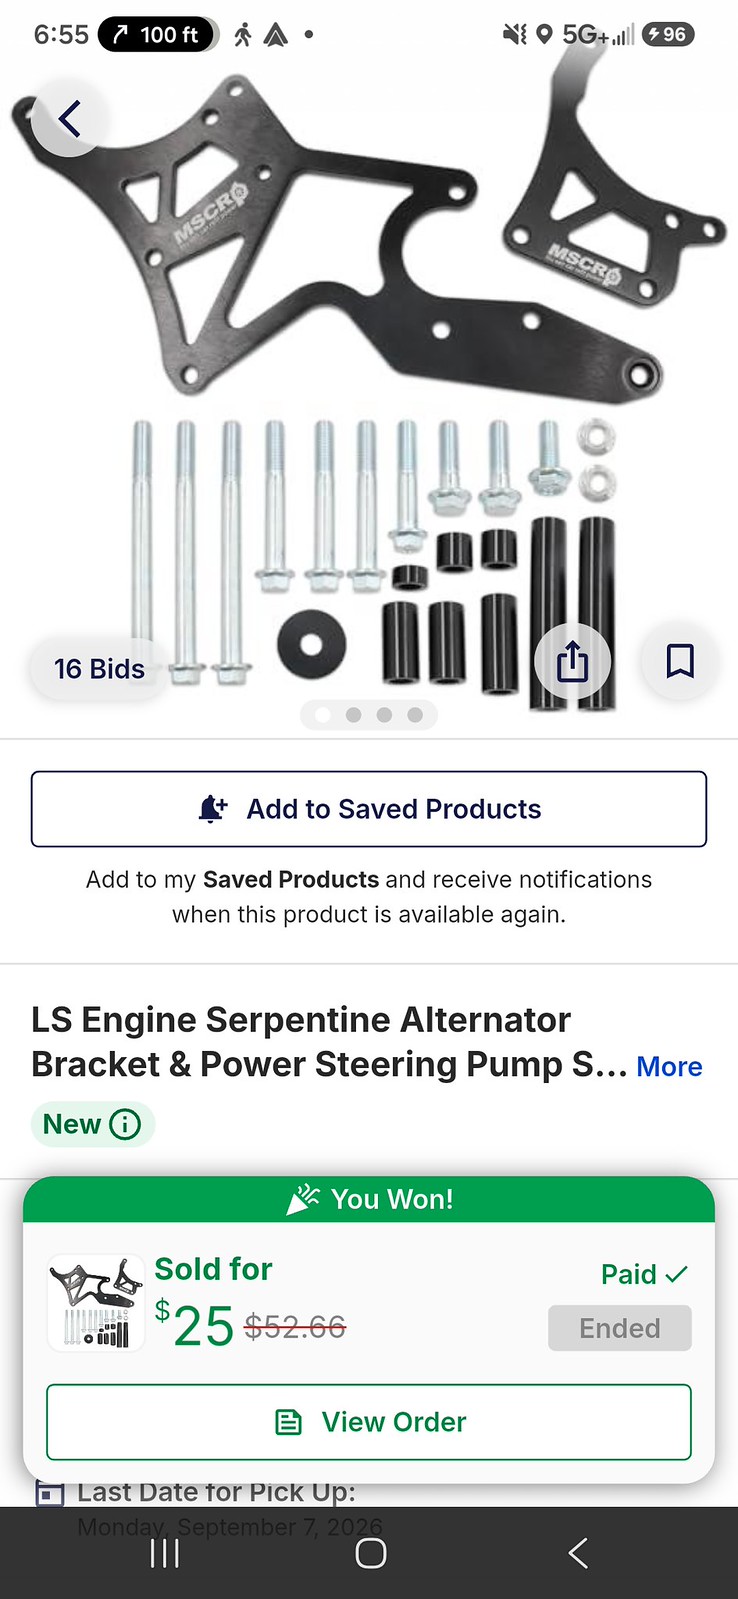
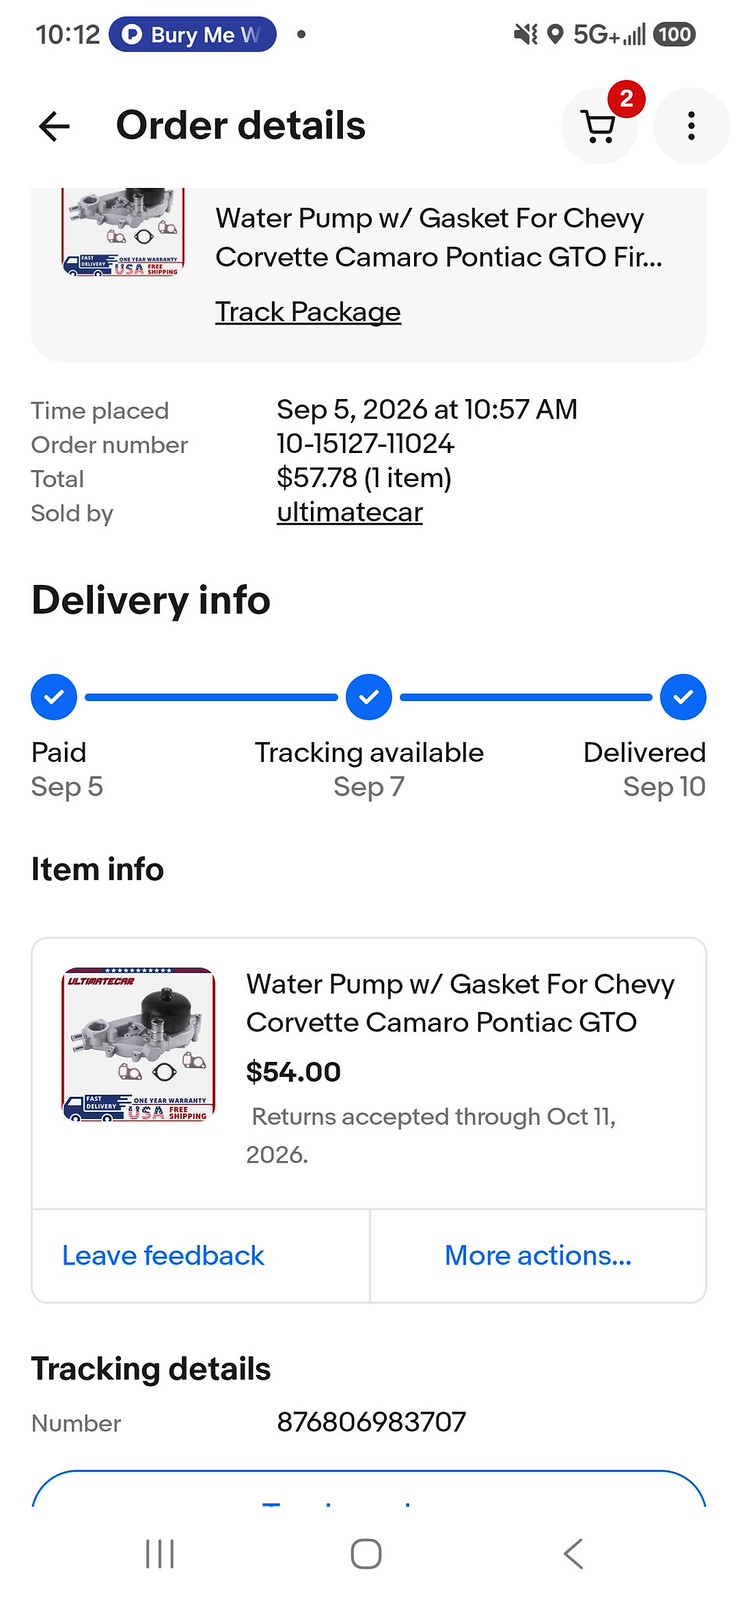
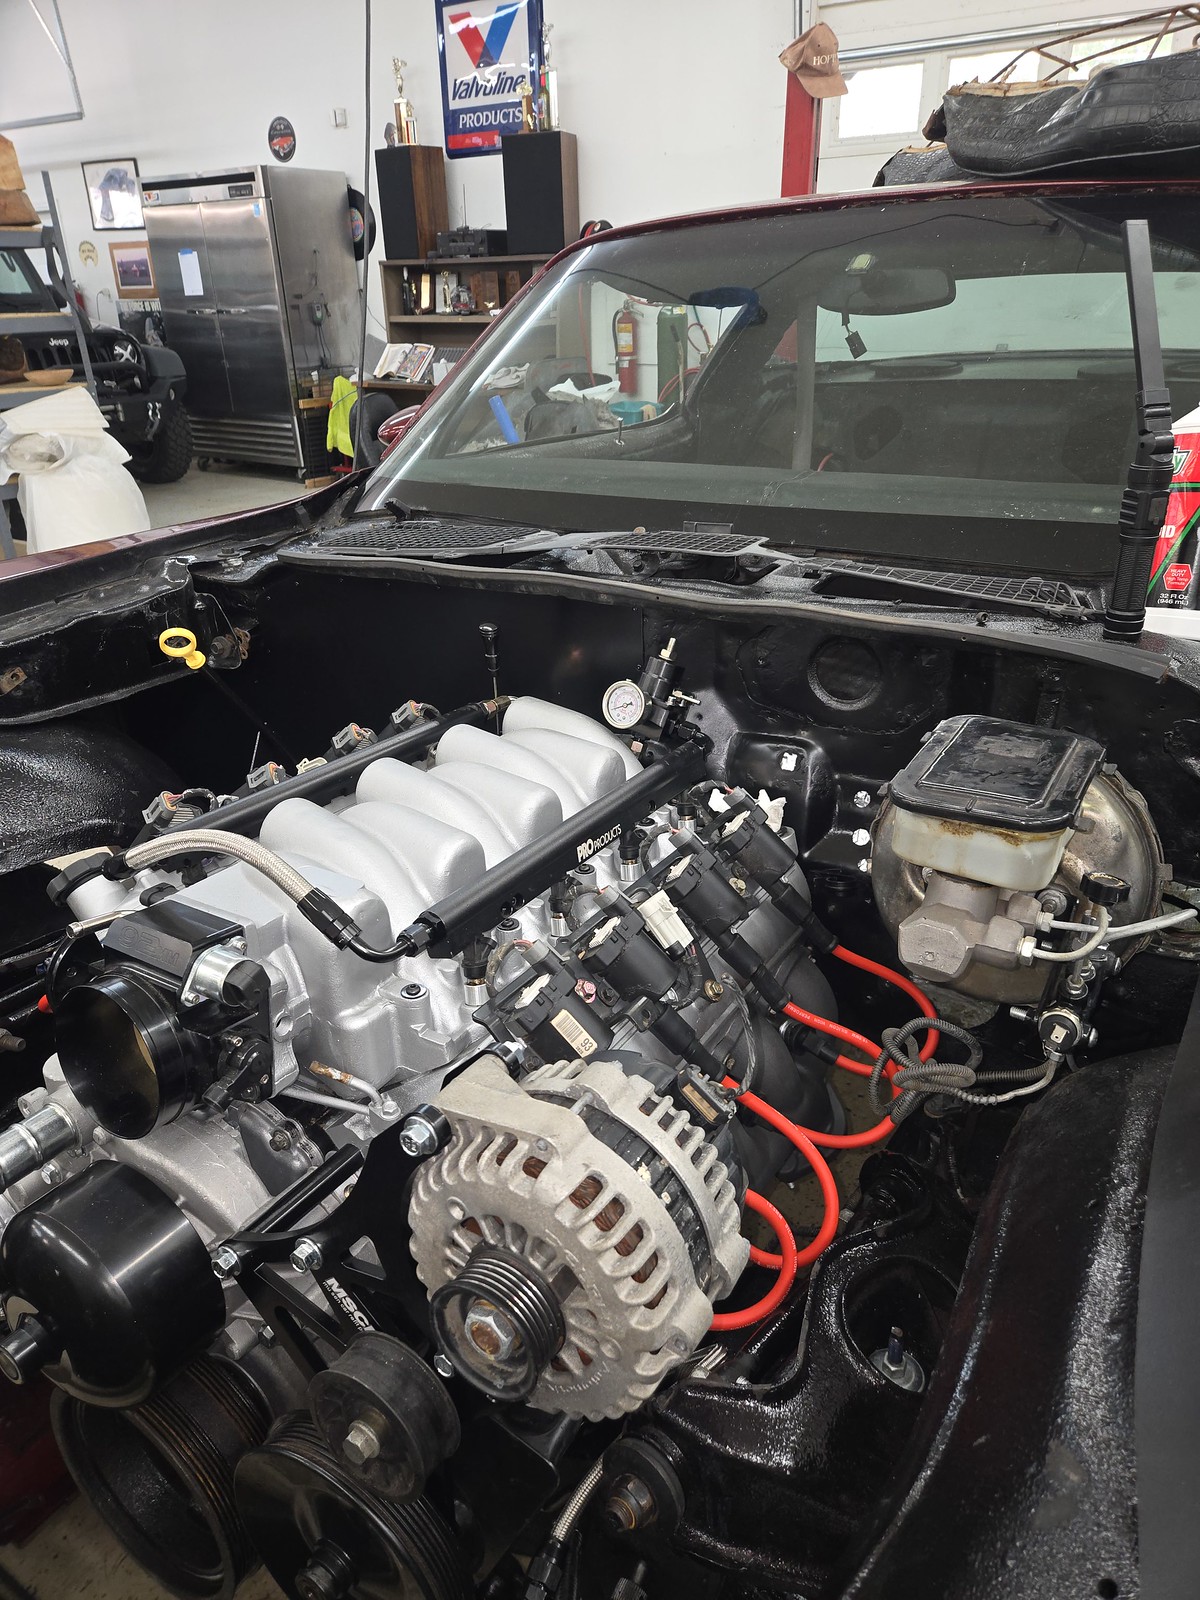
Next, I figure well talk accessories. Let’s start with the aforementioned AC stuff. You’ll see it in this section, and the HVAC box later, as I’m putting it all in place to build around it. since I know it will be going on the car, but its not in the challenge budget, I’m building around it. this will save me time and effort later, which makes for a happy fat boy. The ICT bracket you see is for corvette offset it turns out, so ill sell that on. But the amazon ones with truck spacing are clones, and already anodized black. So, it works. The Sanden 508 is one of 3 I have here form lowballing guys at swap meets. I haven’t paid over 20 bucks for one yet. The main serpentine bracket is an amazon special purchased through the auction, with an eBay LS1 Camaro water pump and auction spacers. I reused the truck power steering pump, power steering pump pulley, and alternator. I still haven’t located the tensioner from the truck accessories in my storage. I know it’s here somewhere….
 Screenshot_20260917_172947_Vista Auction by Michael Crawford, on Flickr
 Screenshot_20260915_065515_Vista Auction by Michael Crawford, on Flickr
 Screenshot_20260914_101238_eBay by Michael Crawford, on Flickr
 20260913_110347 by Michael Crawford, on Flickr
You also notice I blasted, painted and installed the coil packs, swapped out the eBay plugs and wires for cheaper auction options,
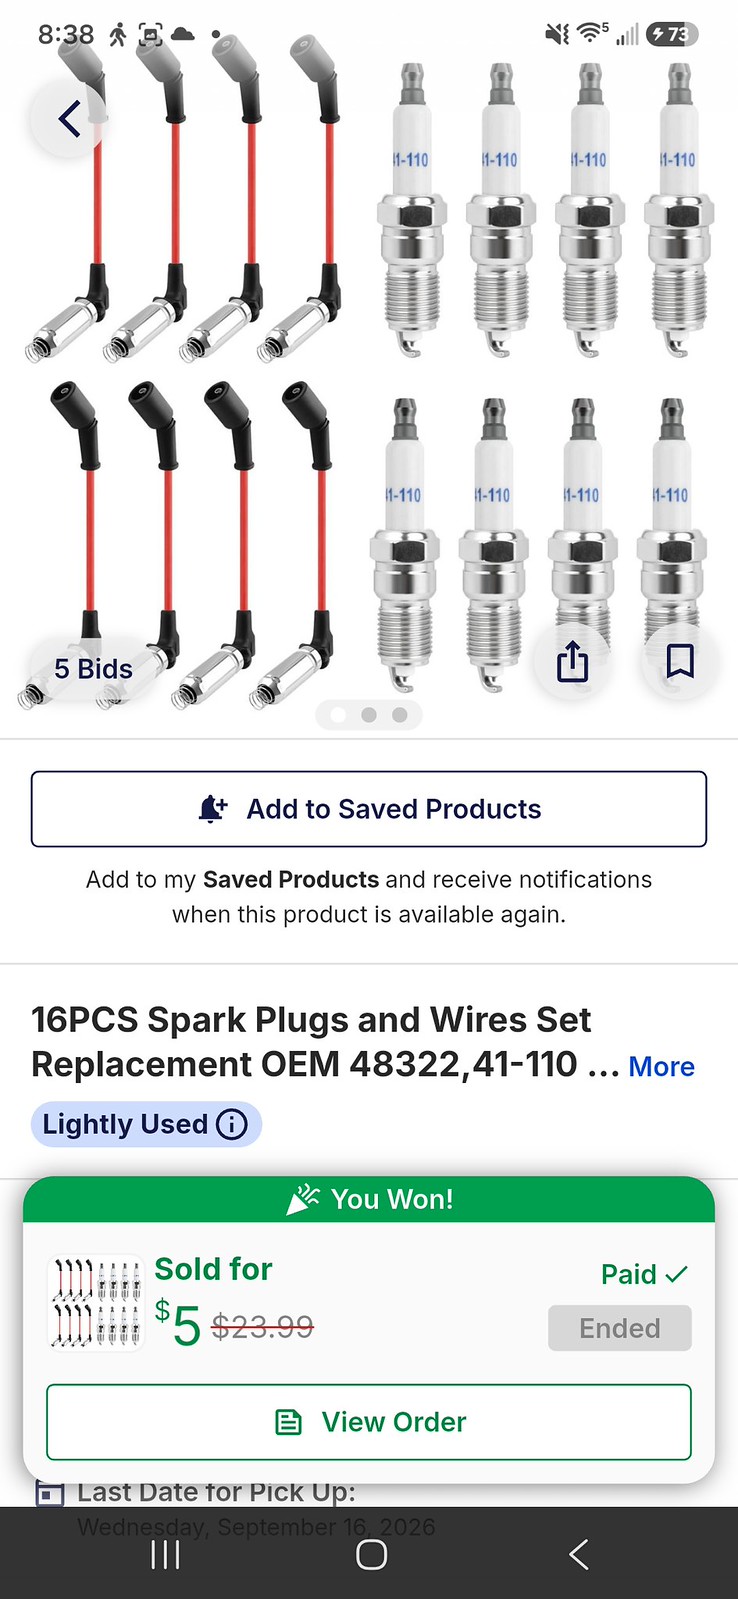 Screenshot_20260912_203849_Vista Auction by Michael Crawford, on Flickr
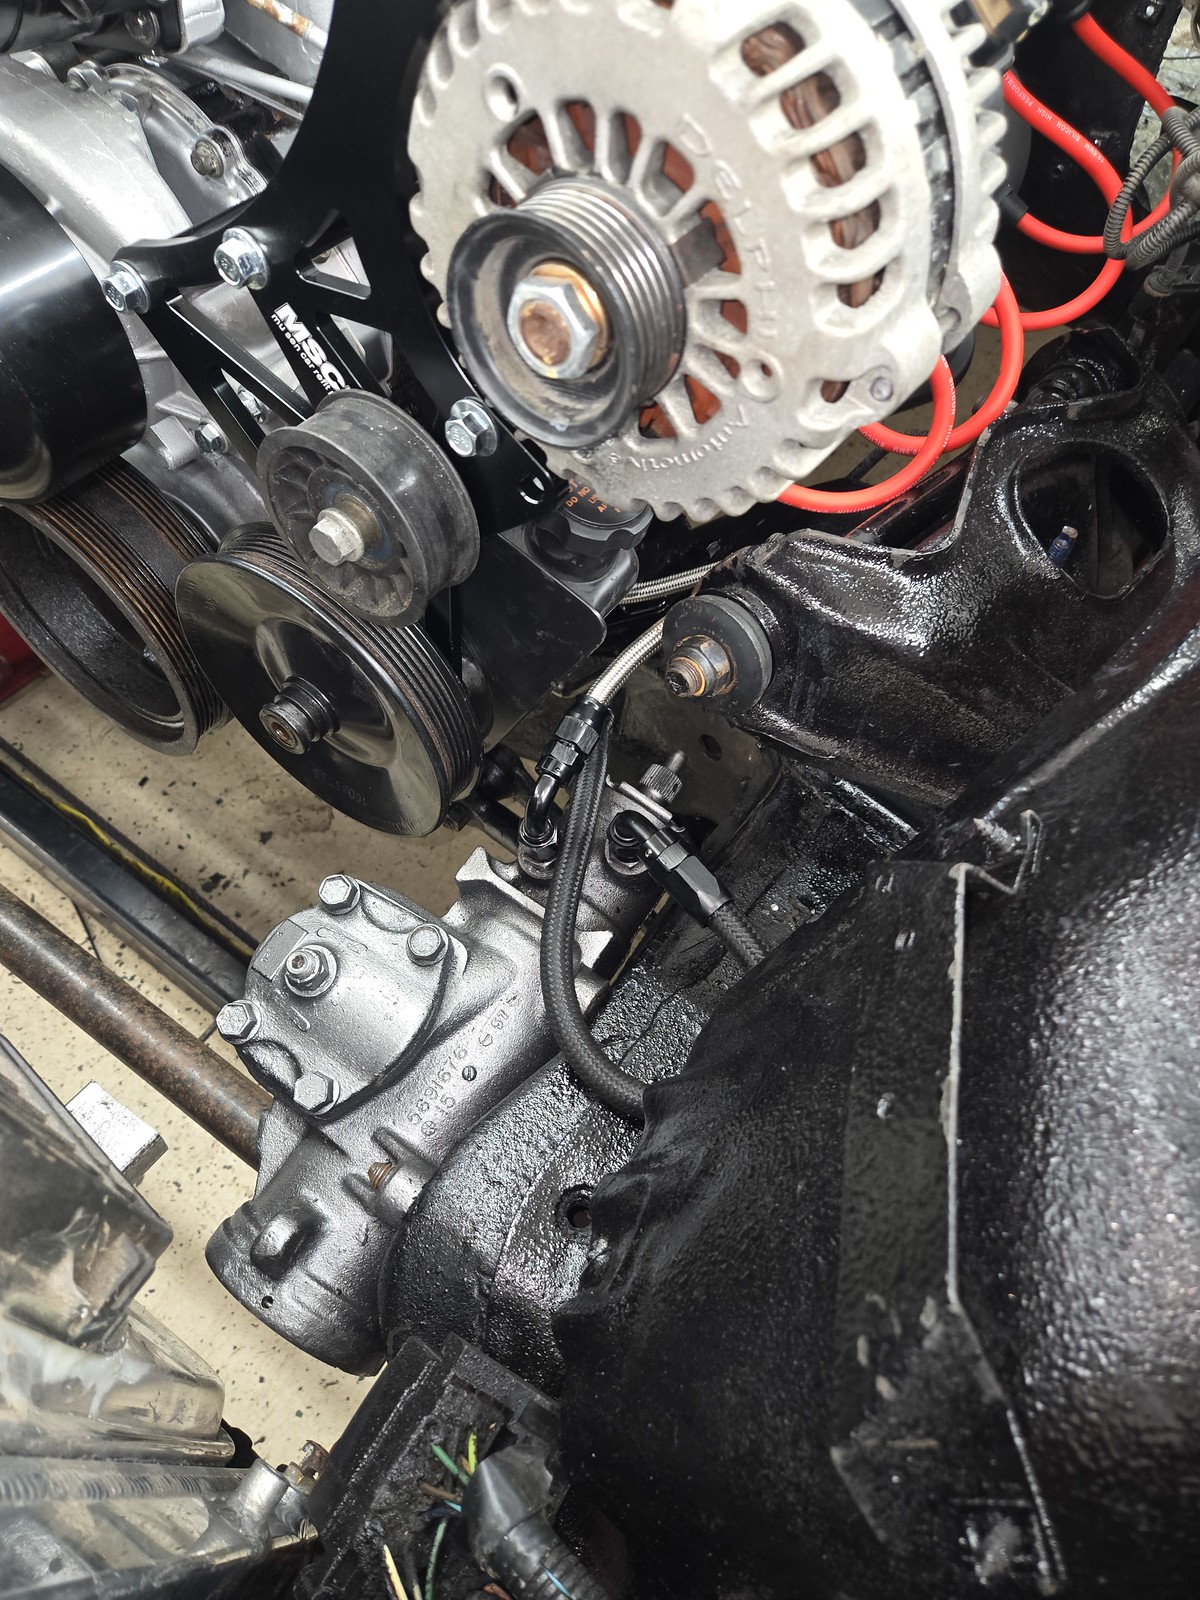
I cleaned and painted the steering box from the parts car, got it bolted down, and plumbed with an amazon 6an line kit to go from o ring pump to flare box fittings. Have to day, I’m not sure I like it, but it’s done. If this box is shot, or leaks, ill go with a jeep grand Cherokee box and double O-rings like God and GM intended.
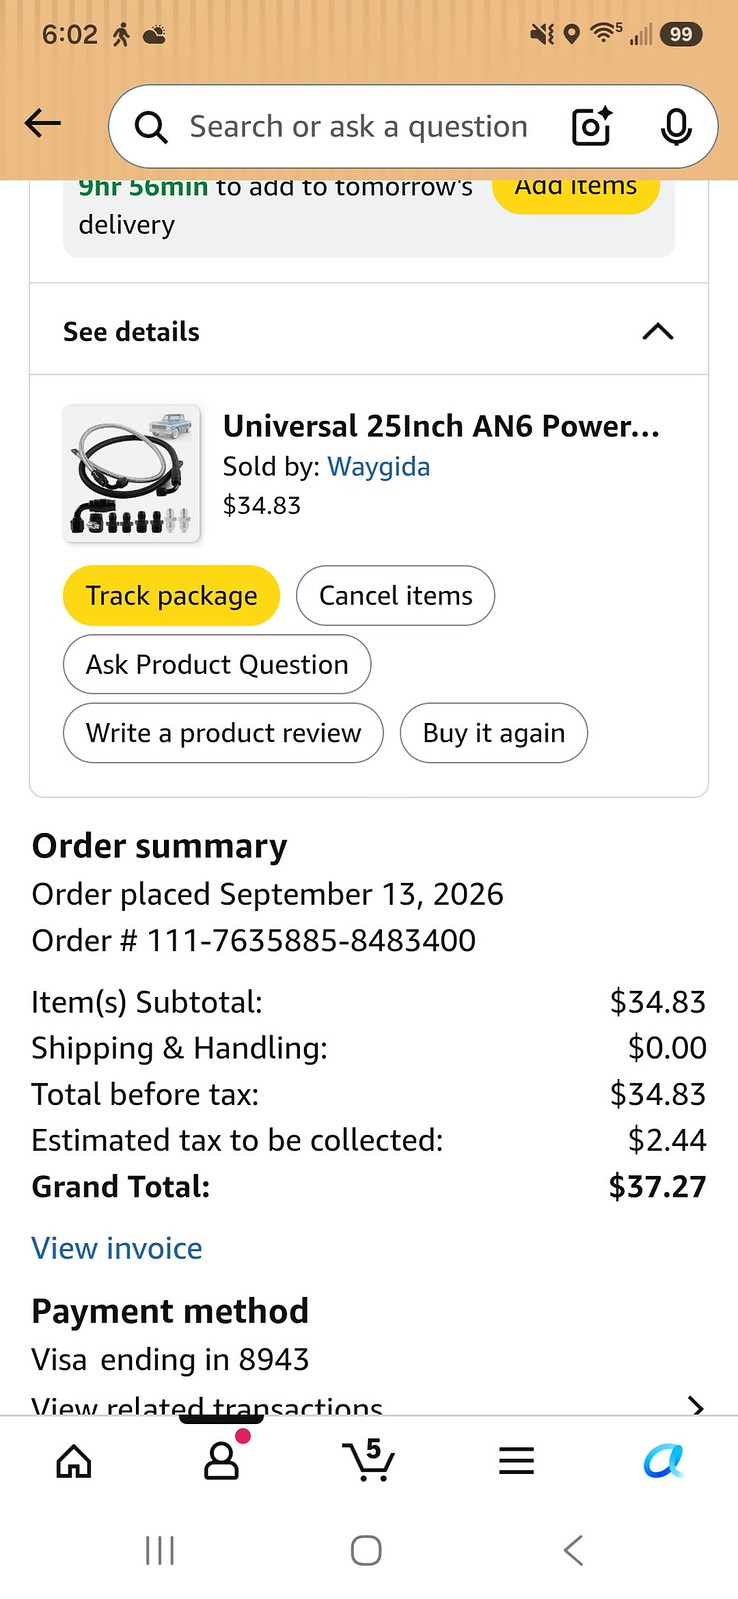 Screenshot_20260915_060254_Amazon Shopping by Michael Crawford, on Flickr
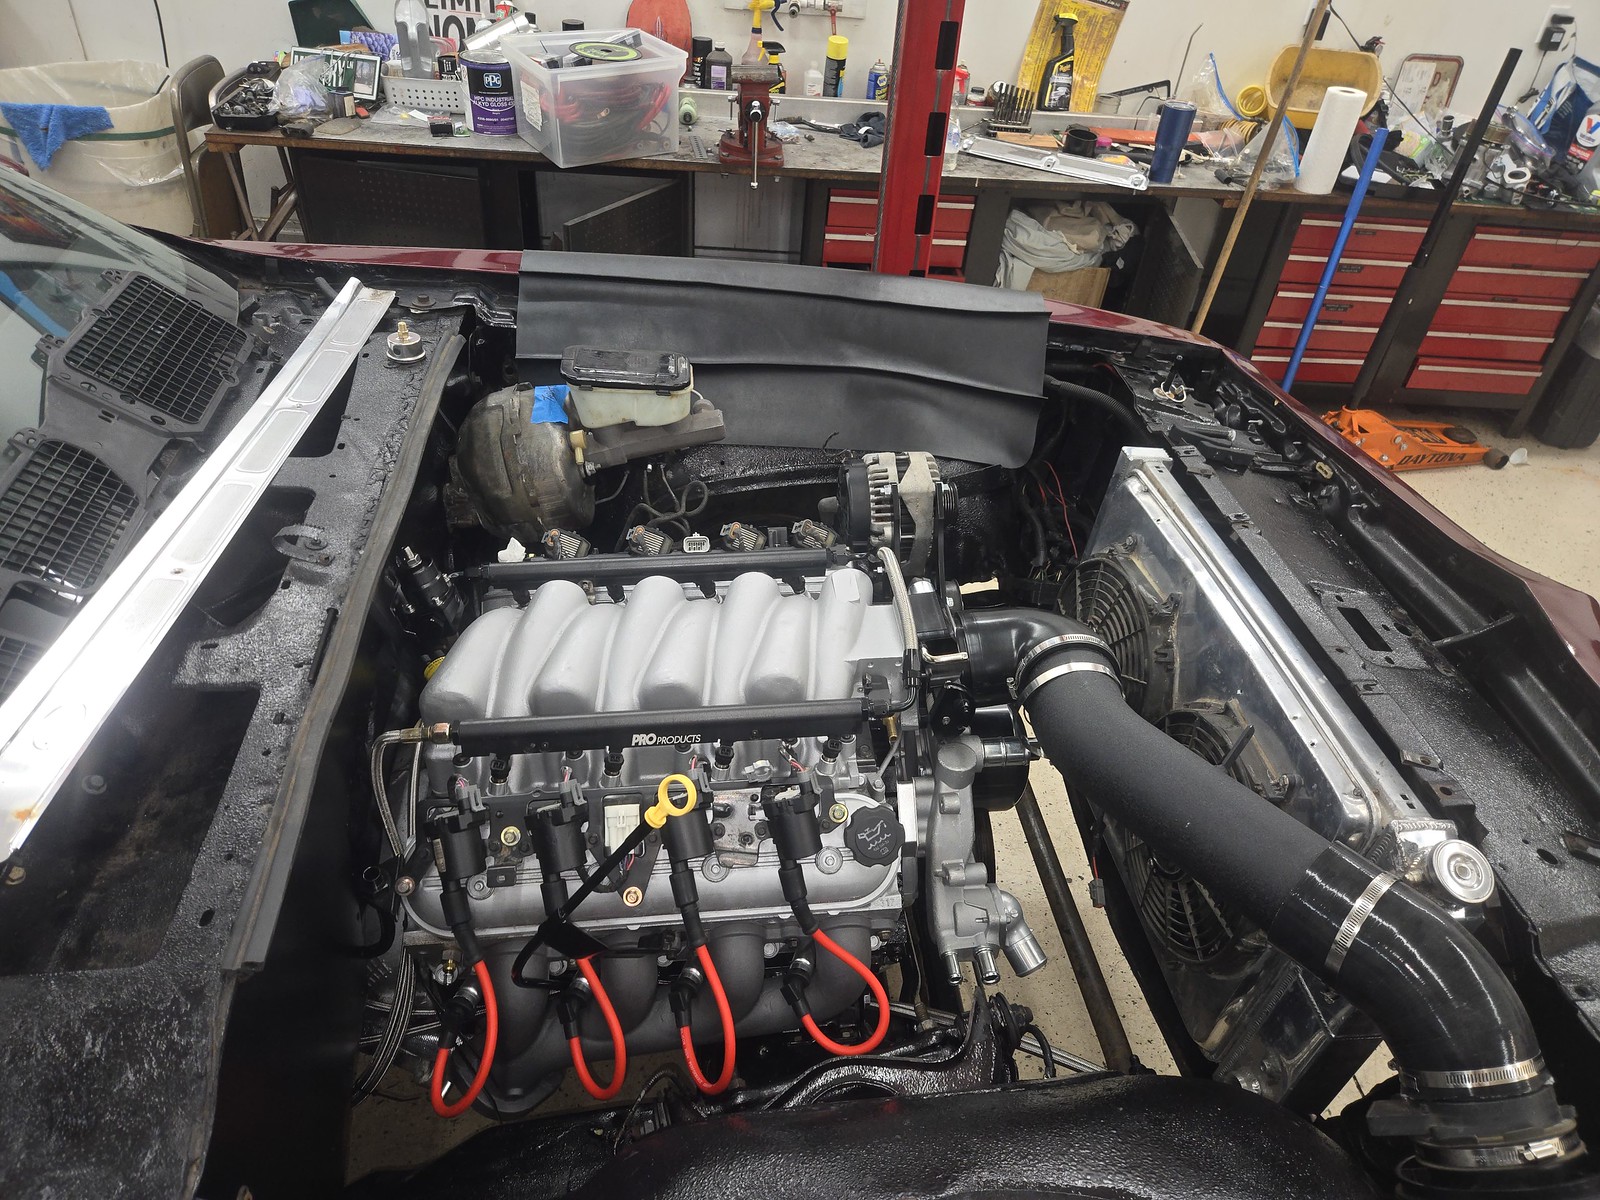
And then we bolted down the intake from john. Pretty sure its an early 200s truck piece, and it needed a 45 elbow to put the filter in a happy spot.
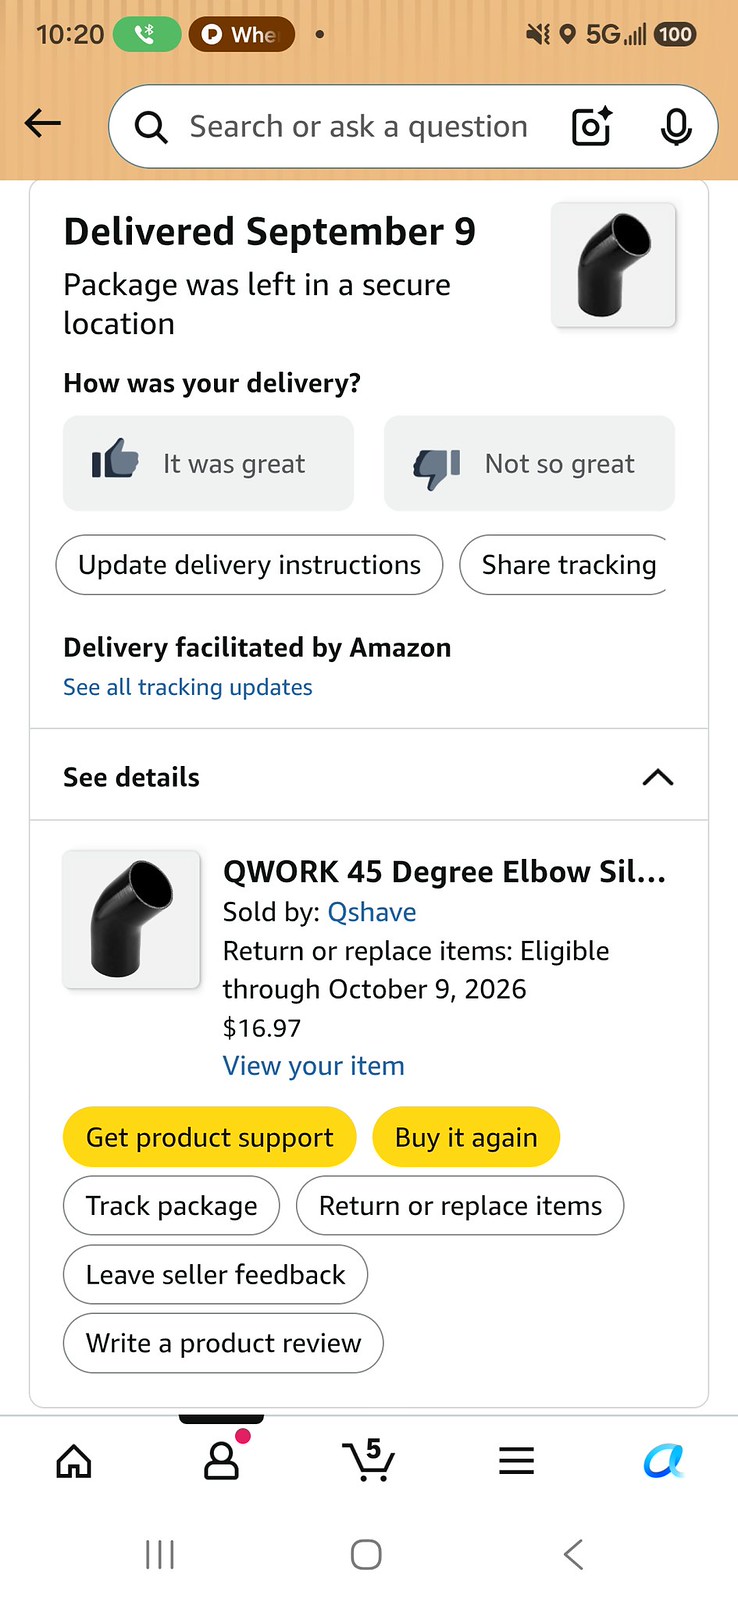 Screenshot_20260914_102010_Amazon Shopping by Michael Crawford, on Flickr
So, when bolted all together, it gets us here-ish
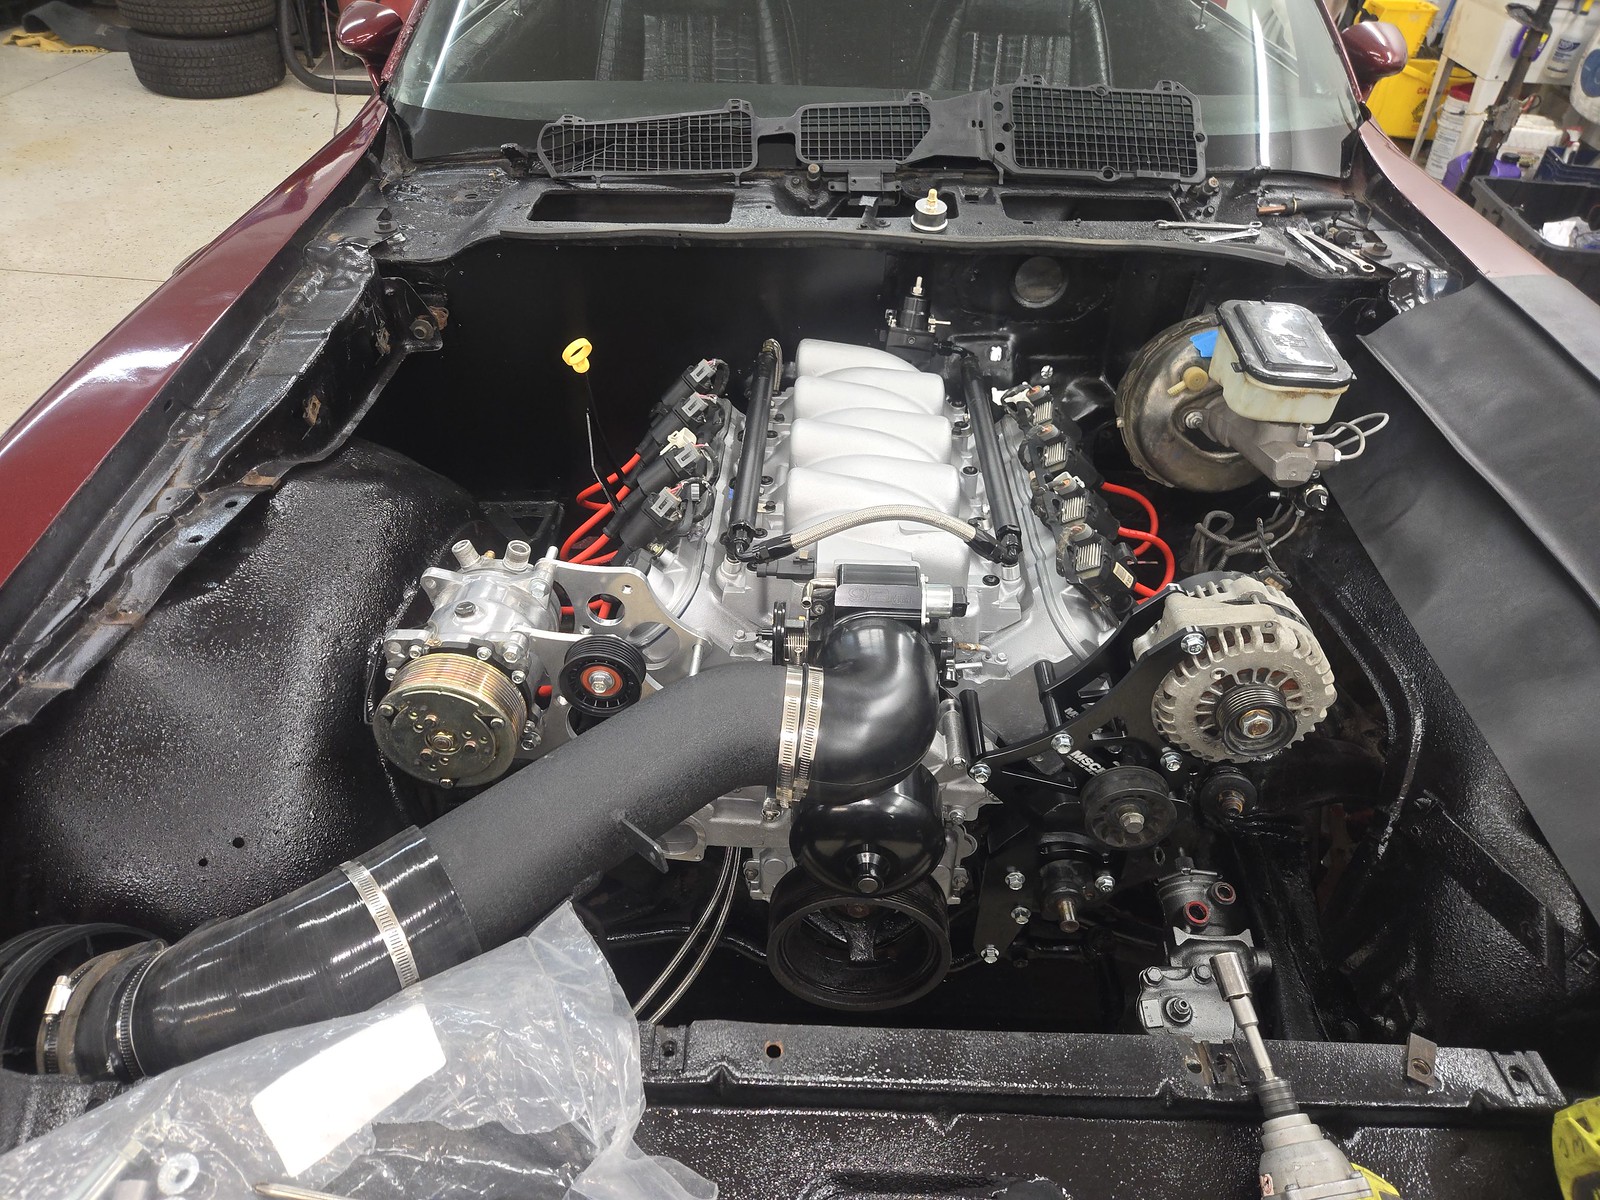 20260913_110003 by Michael Crawford, on Flickr
 20260913_152005 by Michael Crawford, on Flickr
 20260920_132455 by Michael Crawford, on Flickr
 20260920_132458 by Michael Crawford, on Flickr
- - - Updated - - -
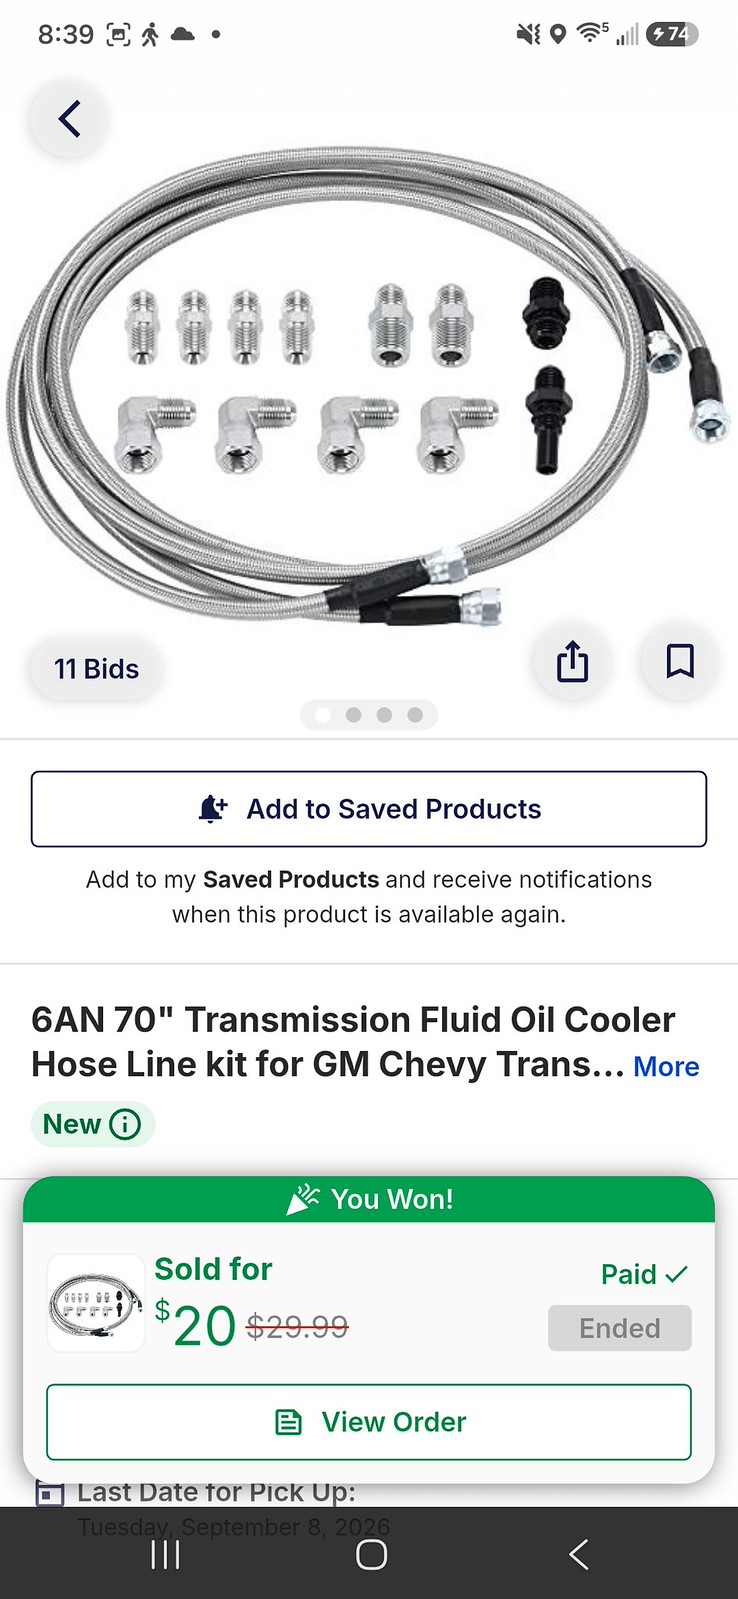
Trans cooler next. I had the 70-inch lines in my cart, as I was told that the bajo fittings and flex lines were the way to go. also, the included LS swap radiator didn’t have an internal trans cooler, so I started hunting one.
Auction to the rescue again!!
 Screenshot_20260912_203923_Vista Auction by Michael Crawford, on Flickr
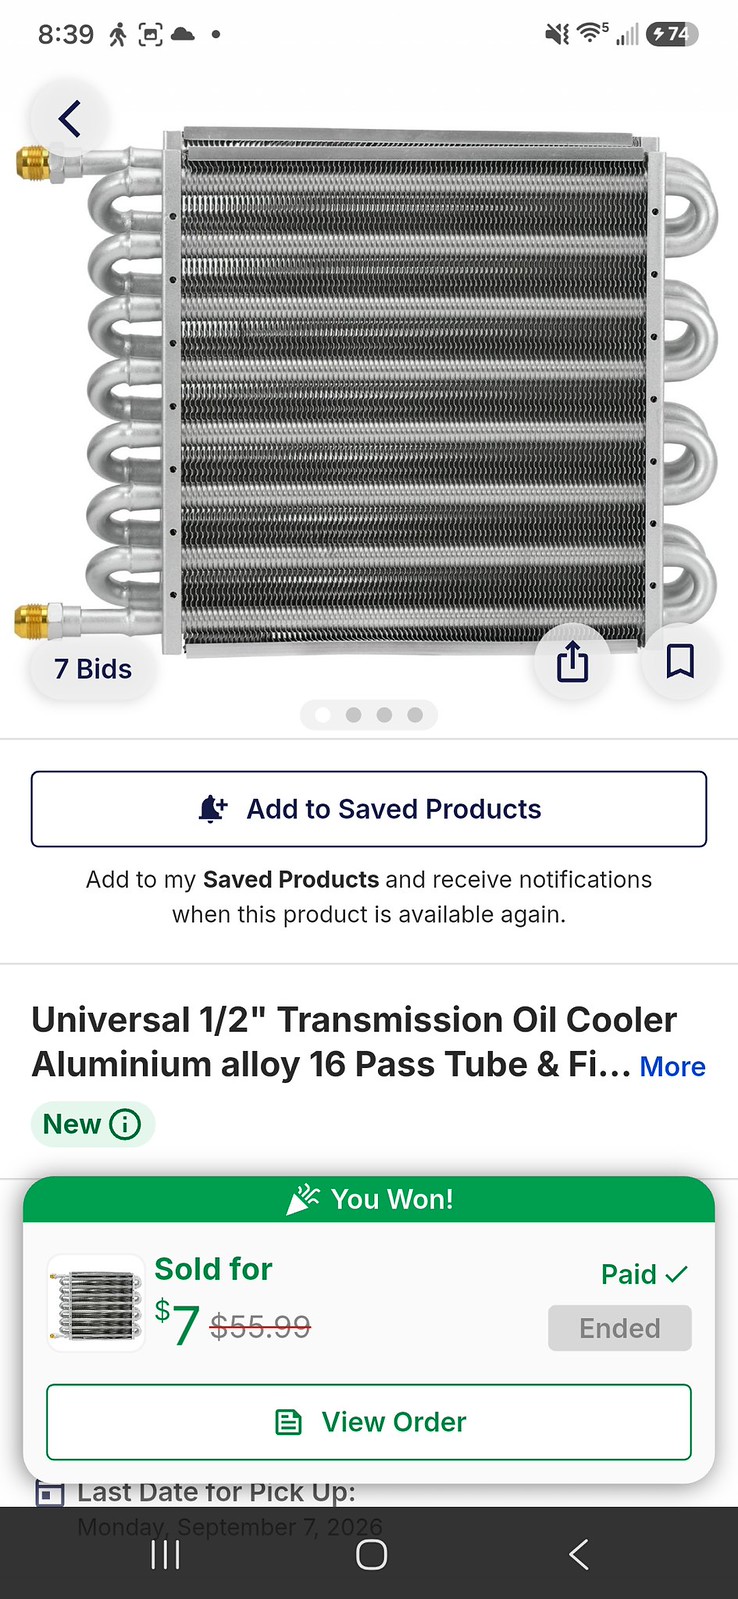 Screenshot_20260912_203942_Vista Auction by Michael Crawford, on Flickr
The giant trans cooler came with 8an fittings, requiring adapters to 6an for the lines
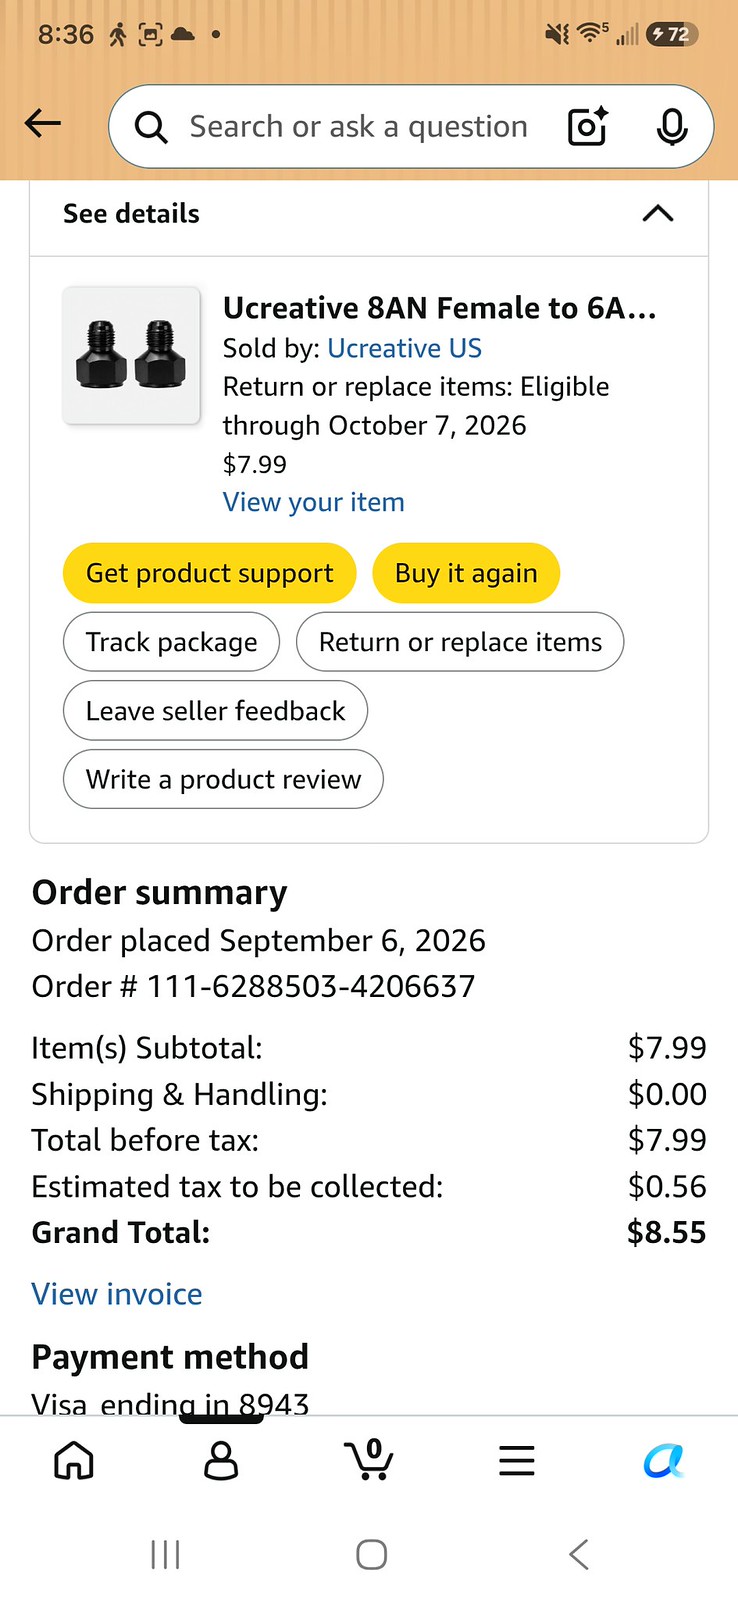 Screenshot_20260912_203646_Amazon Shopping by Michael Crawford, on Flickr
 20260908_152902 by Michael Crawford, on Flickr
I also needed to sort a transmission dipstick. See, I tried every 4l80e and 4l60e tube I could get my hands on. None of them fit. In an effort to get the car actually running, I bought a flexible dipstick from amazon. This thing is a thing….
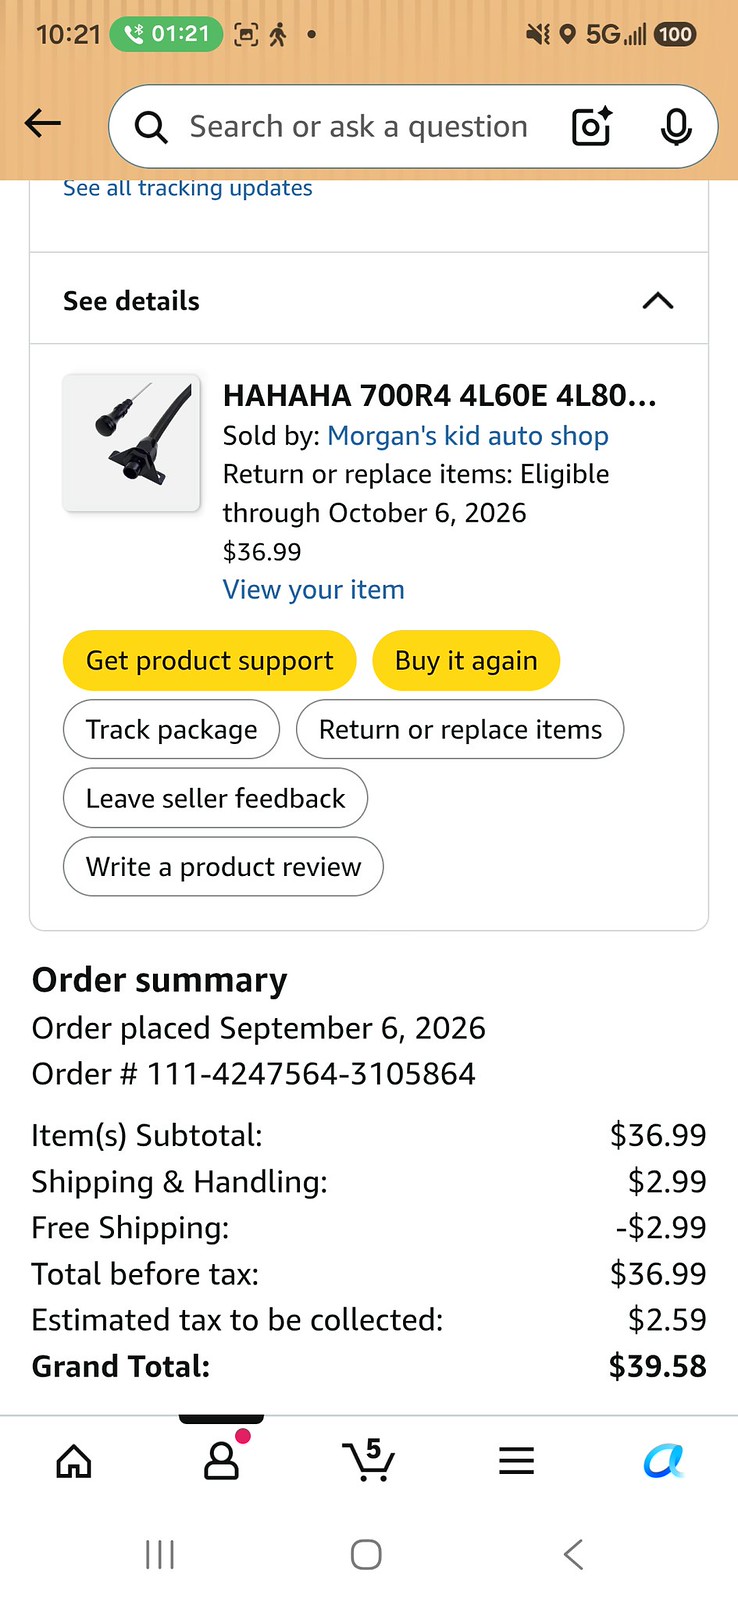 Screenshot_20260914_102103_Amazon Shopping by Michael Crawford, on Flickr
It fits the bore of the trans nice. Machining was nice. Length was STUPID. It was designed to mount to the firewall, and at stock length would have mounted almost at the cowl. And been impossible to fill. Theres also no retention into the trans as delivered. So, not ideal. Or really that functional. But we can fix all of that with a little redneck ingenuity.
So, taking apart my new 36-dollar dipstick, it turns out that it’s made from my favorite material of the week, PTFE lined braided hose! So, I cut that thing down by like 8 inches, heated up a punch with MAPP gas to widen the mouth and make it easier to reassemble, and reassembled it. this made it to where the fill port/top mount was slightly higher than the valve cover, allowing me to use a Miata AC condenser bracket from the corner of the workbench (don’t laugh, it had a captured nut and the right shape) to bolt it to the back of the head while putting downward pressure on the lower o-rings. I still have to shorten the dipstick to make it read right. Ill do that by dropping the pan and lining up the full mark with the top of the pan rail.
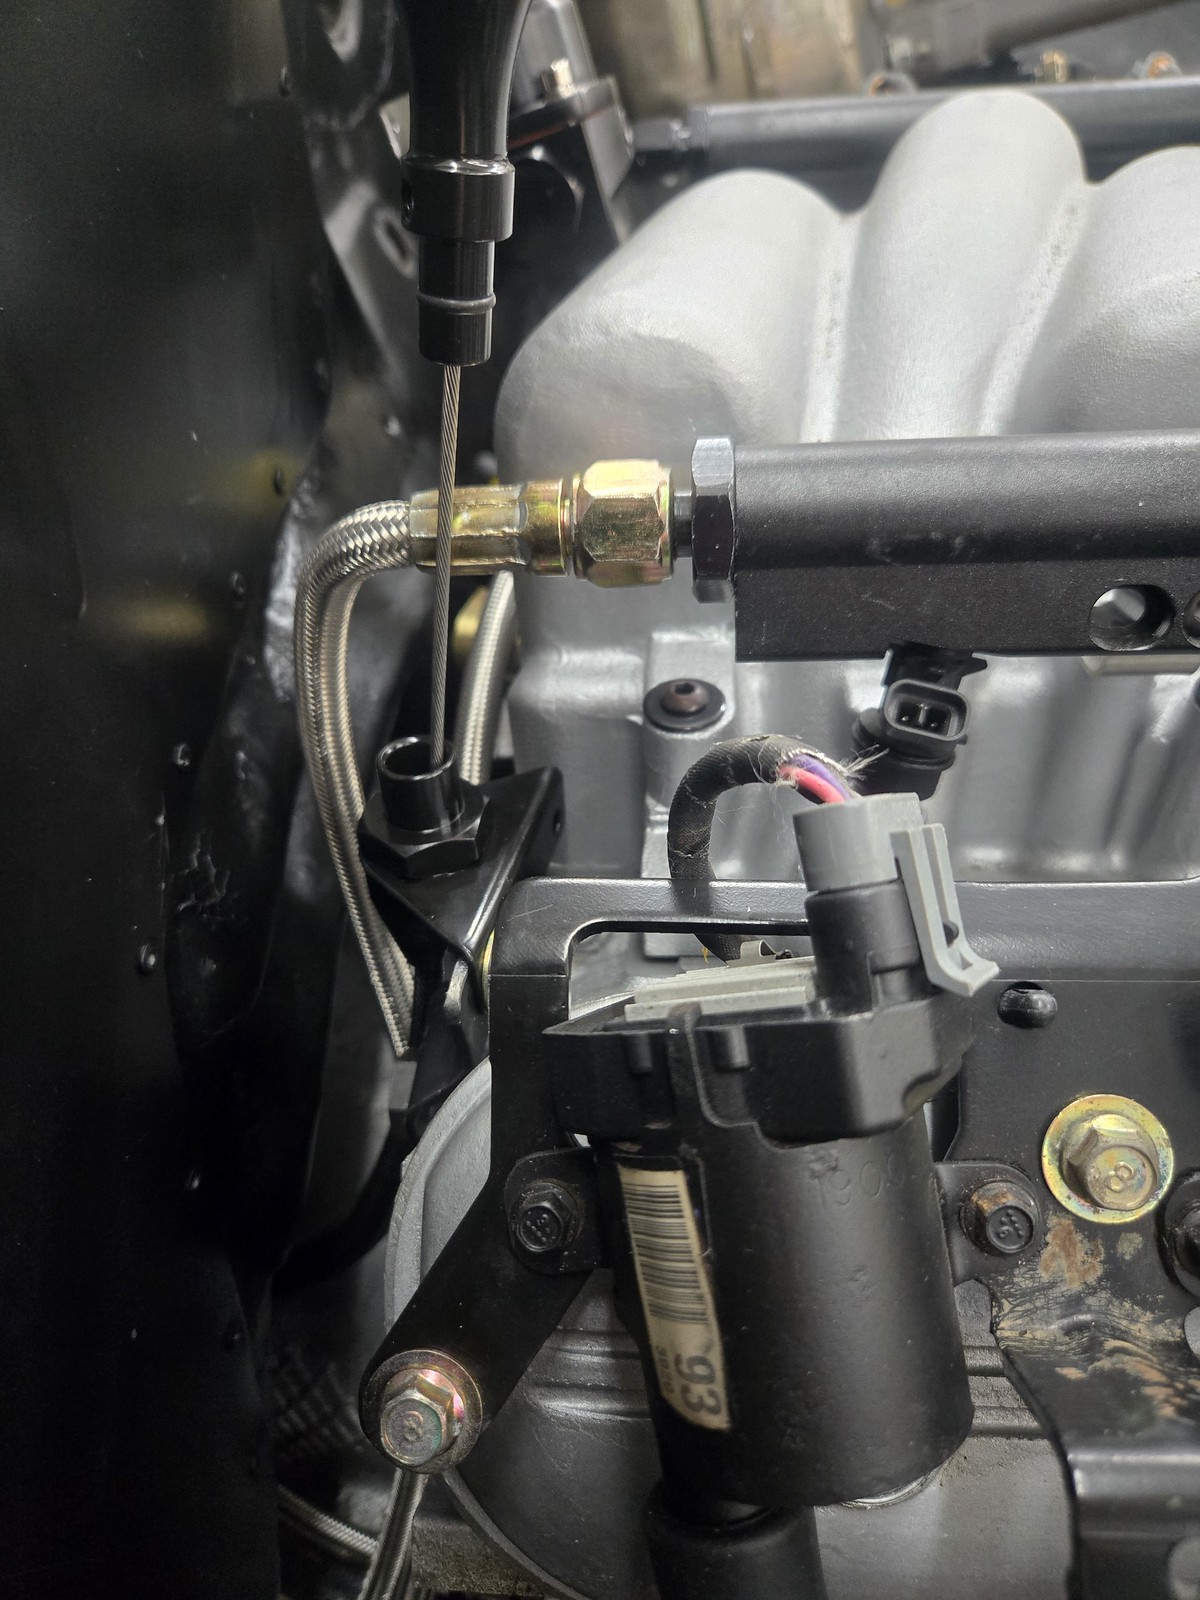 20260915_170324 by Michael Crawford, on Flickr
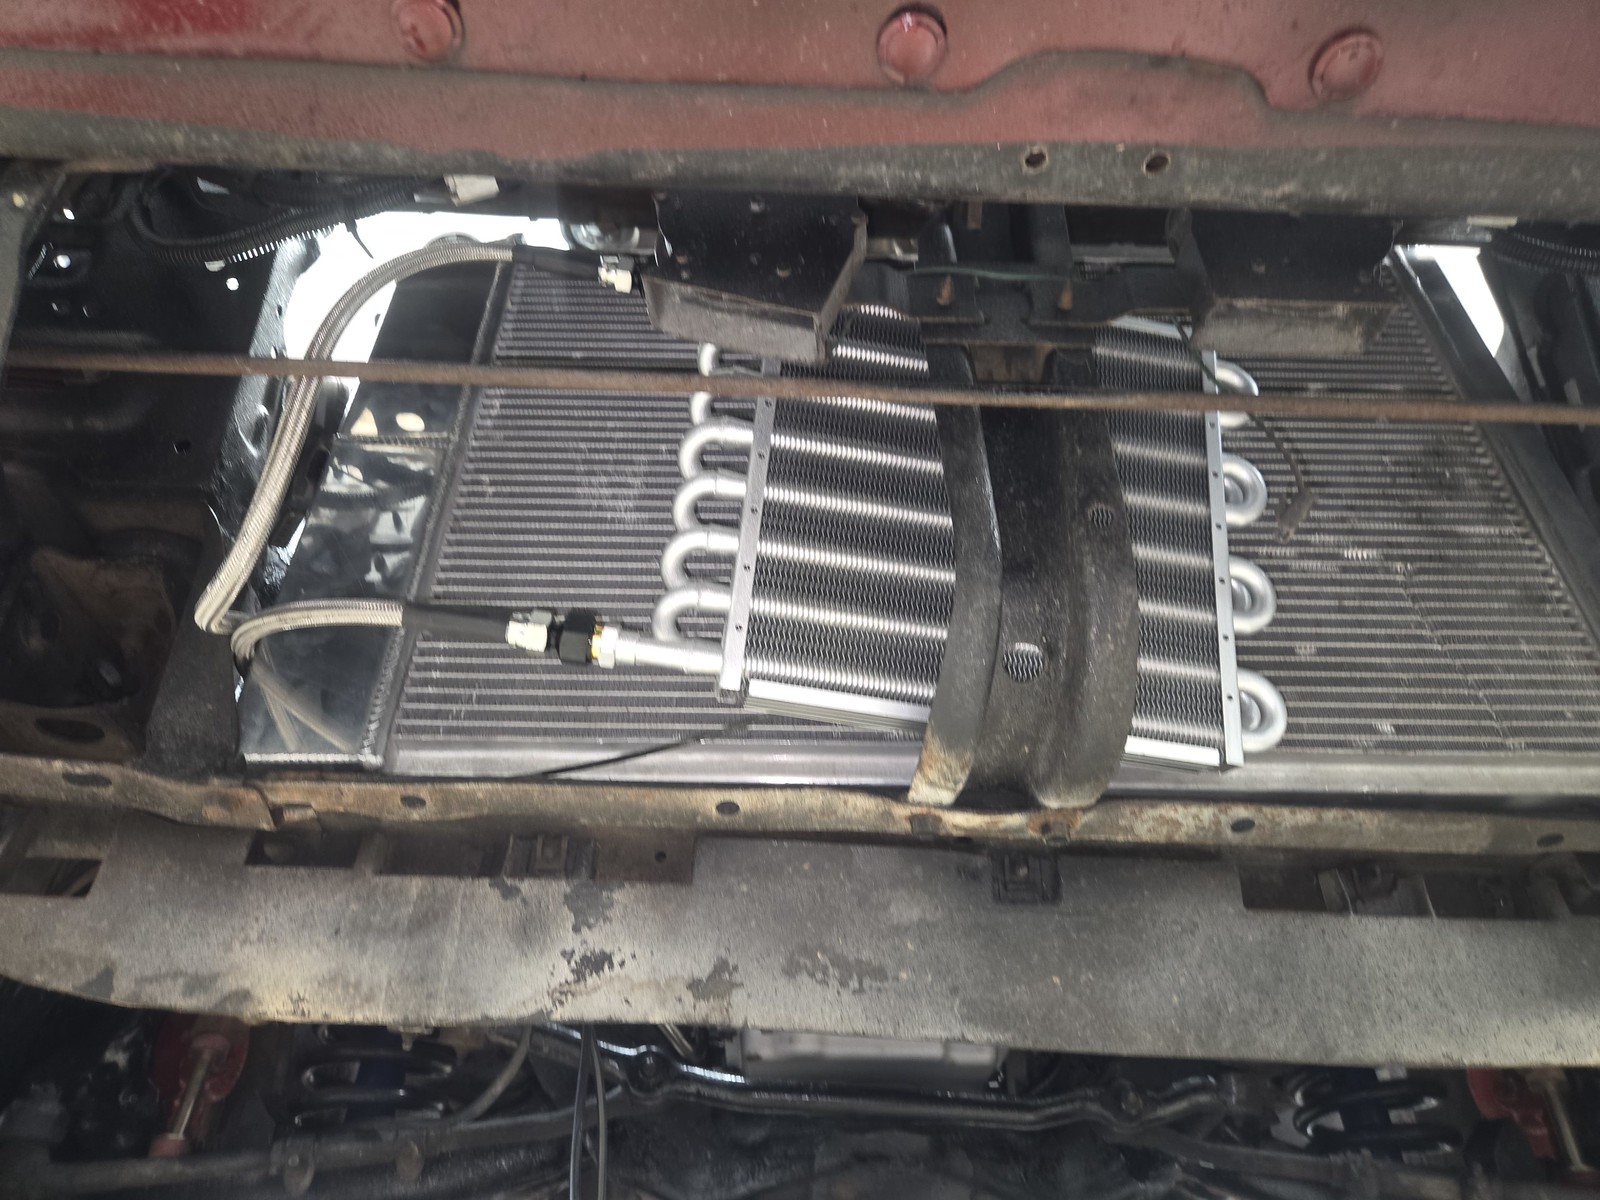
At the other end, I needed to fab a mount for the trans cooler. I mulled it over for a while, and decided that I needed to put the condenser in place before making mounts so I wasn’t fighting myself later. I took a lowball bid on a 2018 nissan rogue condenser, planning to resell. Theyre popular in my area.
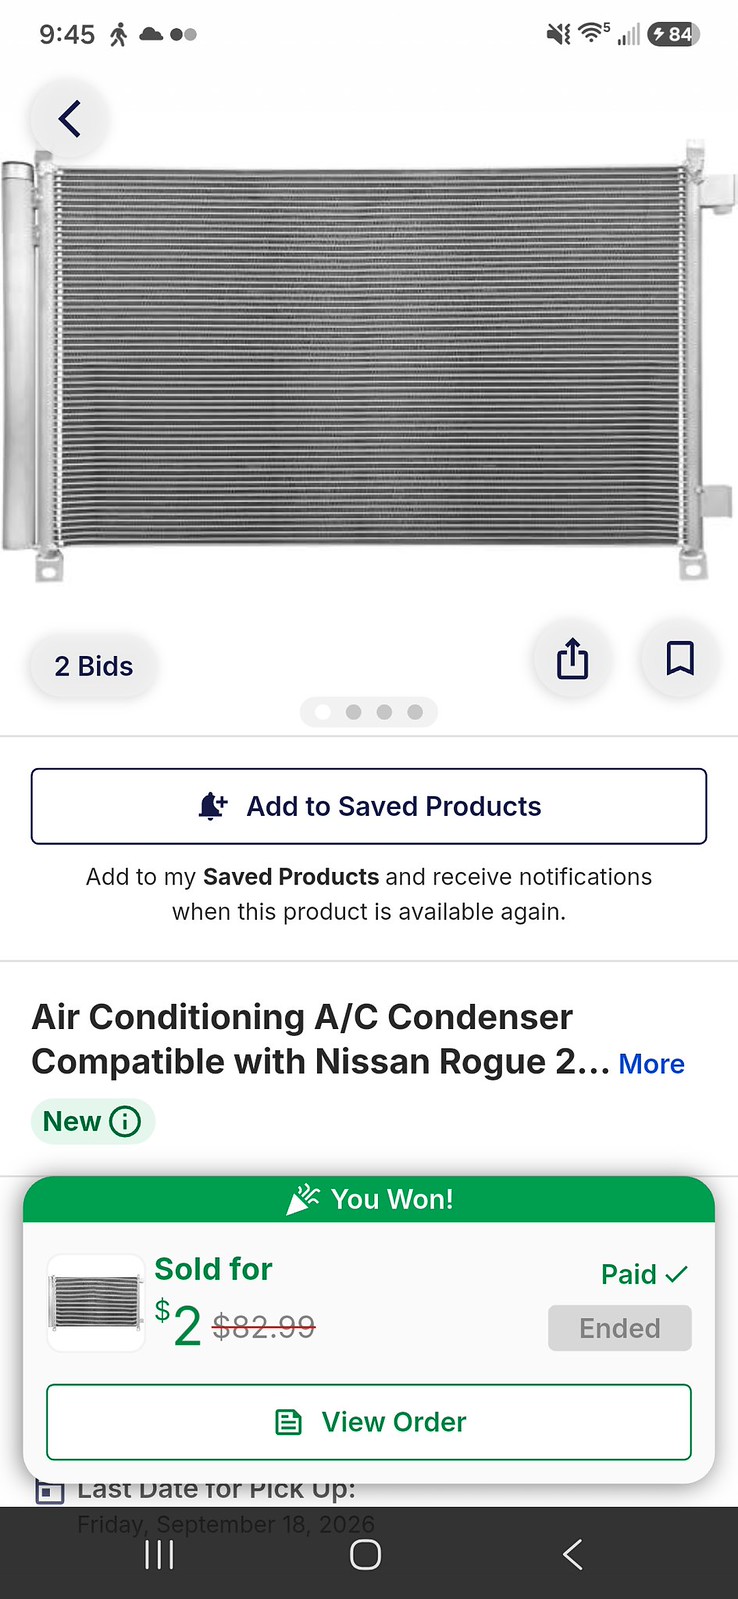 Screenshot_20260915_214516_Vista Auction by Michael Crawford, on Flickr
When I picked it up, it looked like it may be close to firebird size. It also has adaptable fittings, a built in drier, and a standard port for a binary switch. Upon mockup, it fit BEAUTIFUL. The holes even lined up.
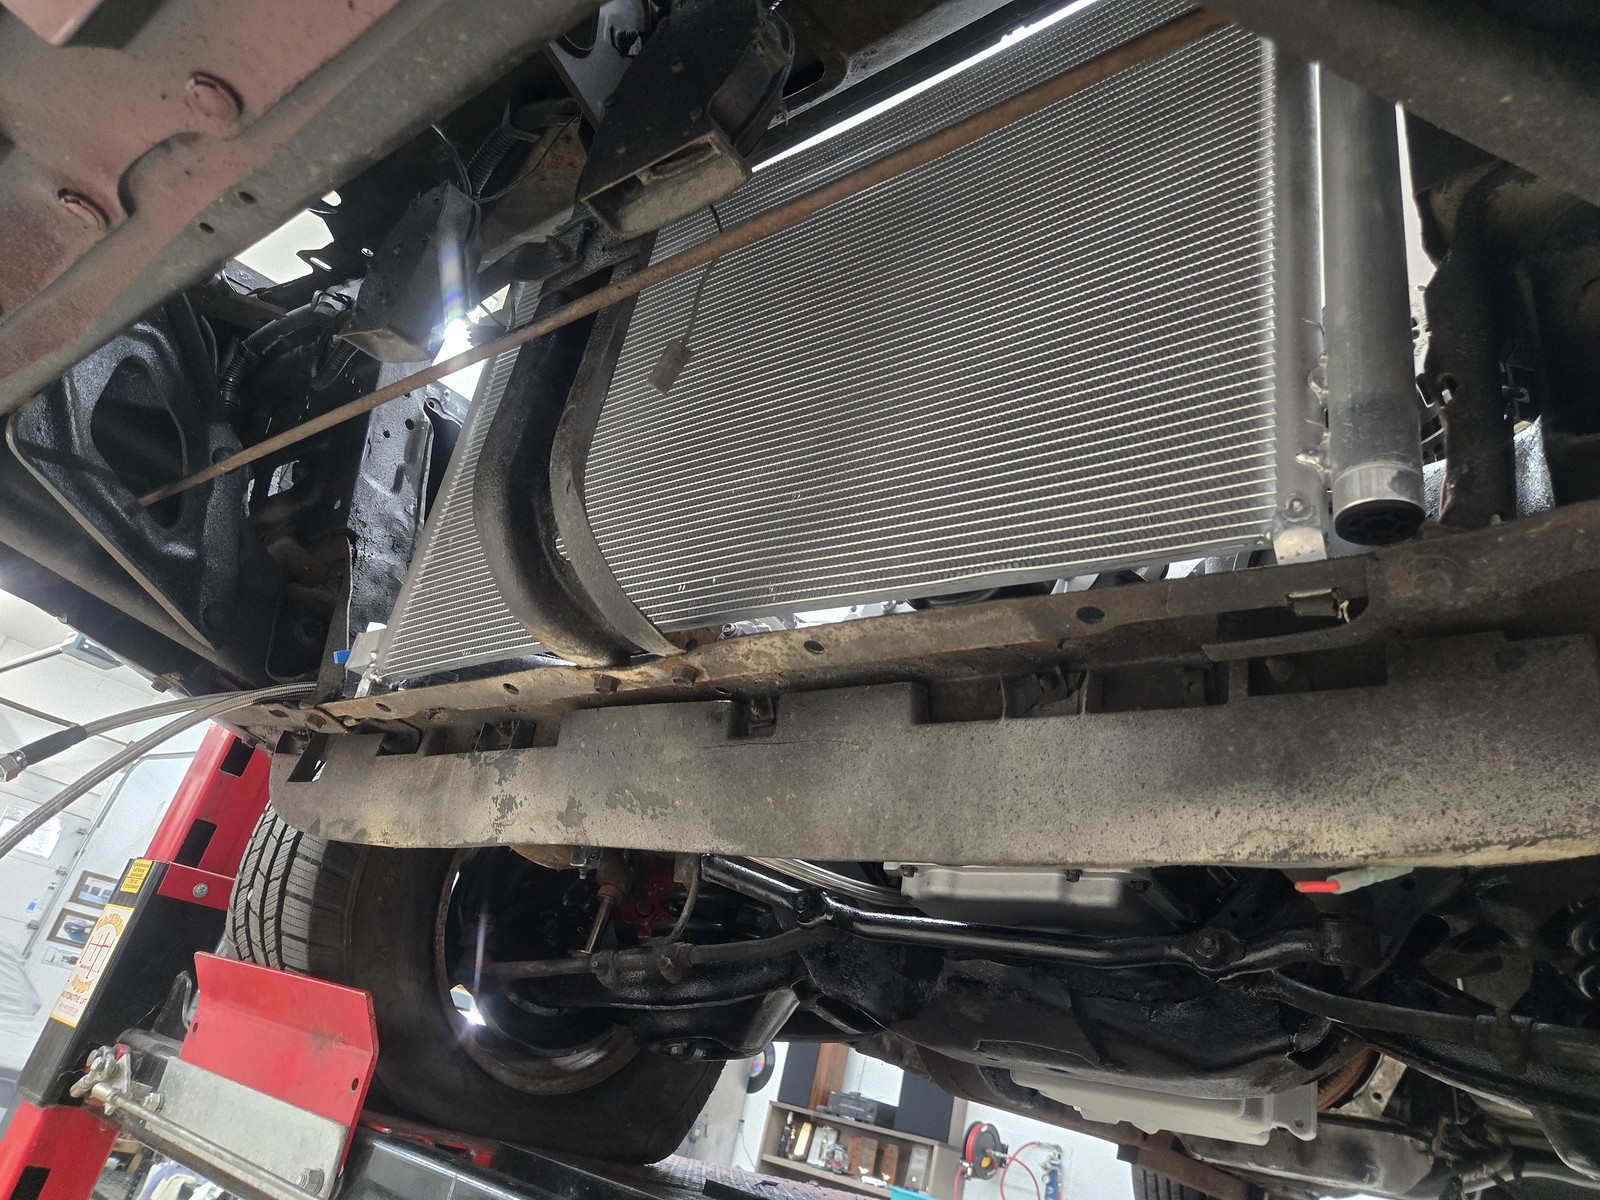 20260915_172416 by Michael Crawford, on Flickr
Allowed me to just use a couple of the fan mounting zip ties and mount the trans cooler right in the middle.
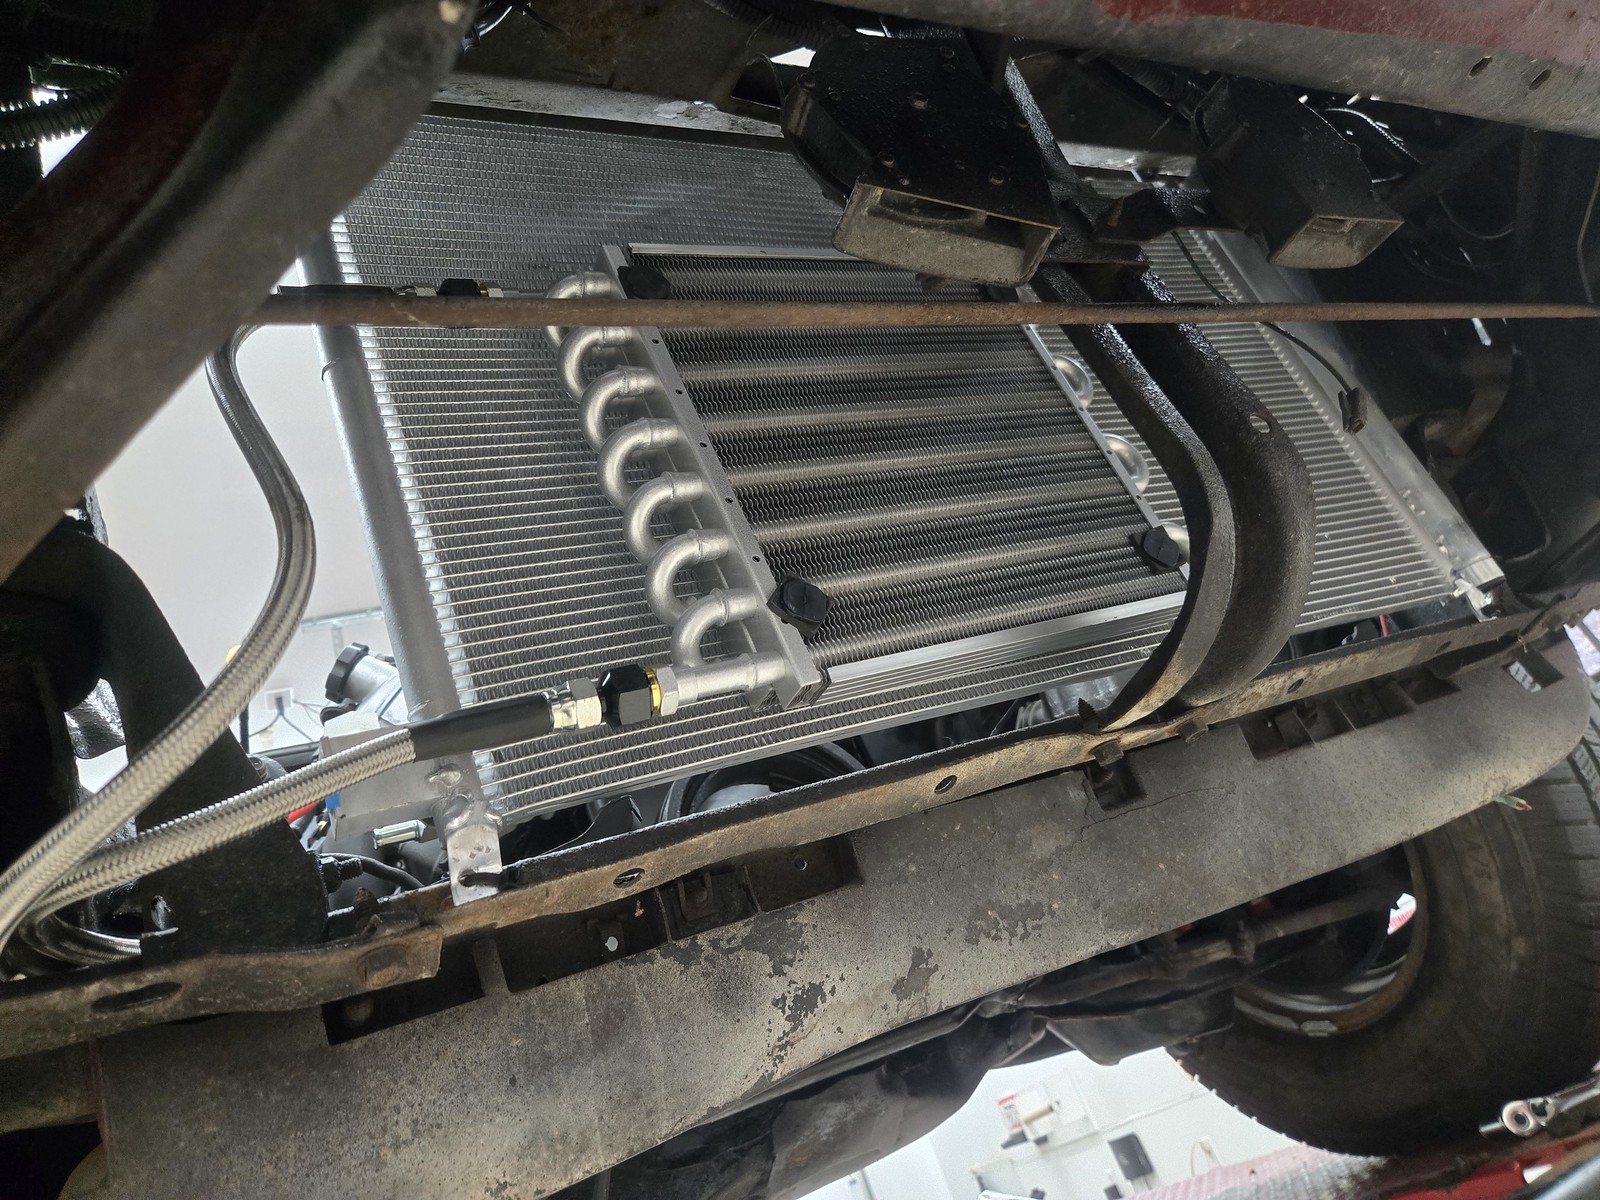 20260915_174729 by Michael Crawford, on Flickr
The radiator placement came after that. Grabbed some used saddles from a GMT400, and started mockup. Had to buy two 16orb barbs for this stupid radiator, so hopefully the dual pass, steam port native, three core radiator is worth it. still in process, and im still thinking through mounts and closeouts.
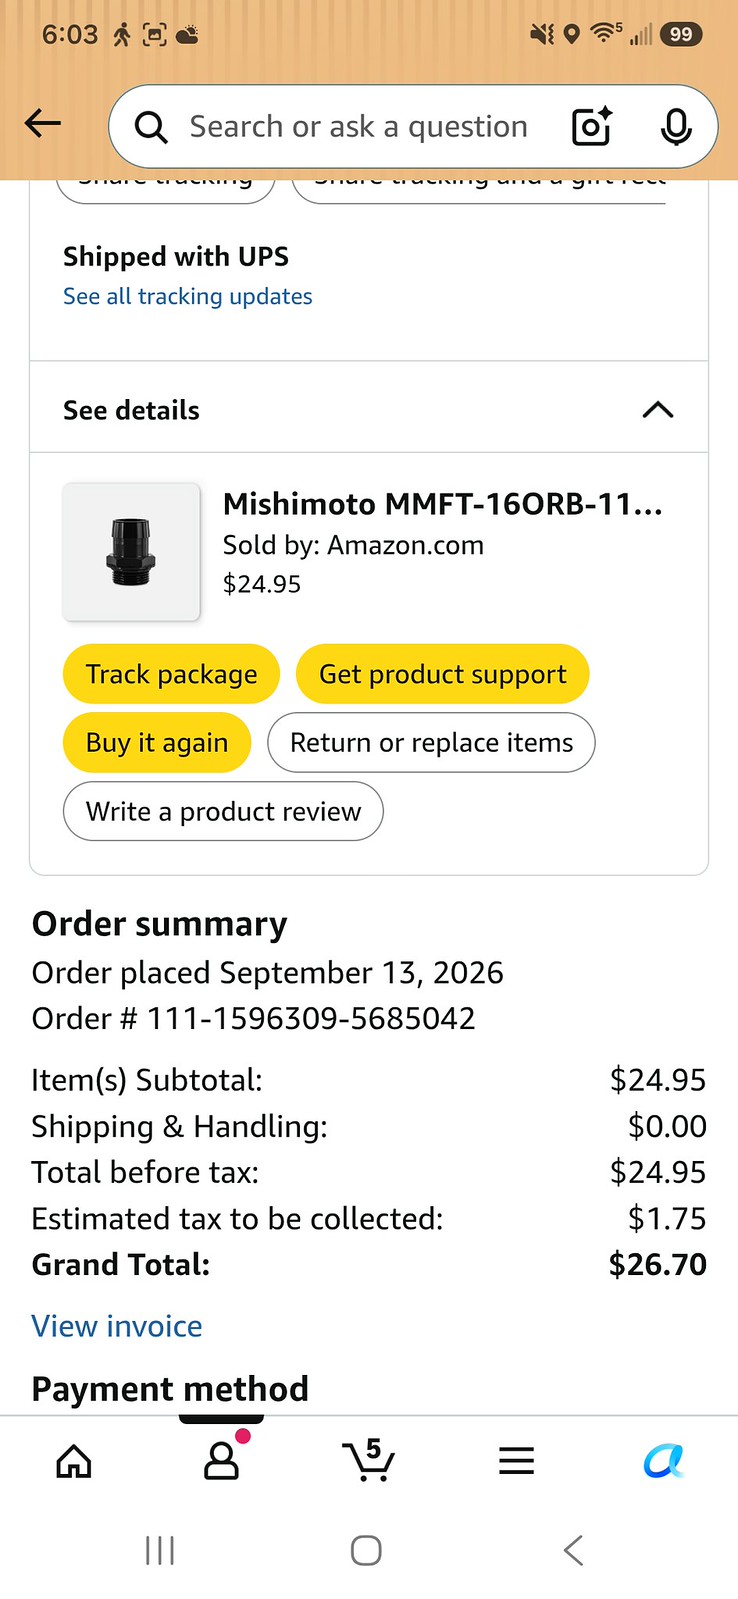 Screenshot_20260915_060304_Amazon Shopping by Michael Crawford, on Flickr
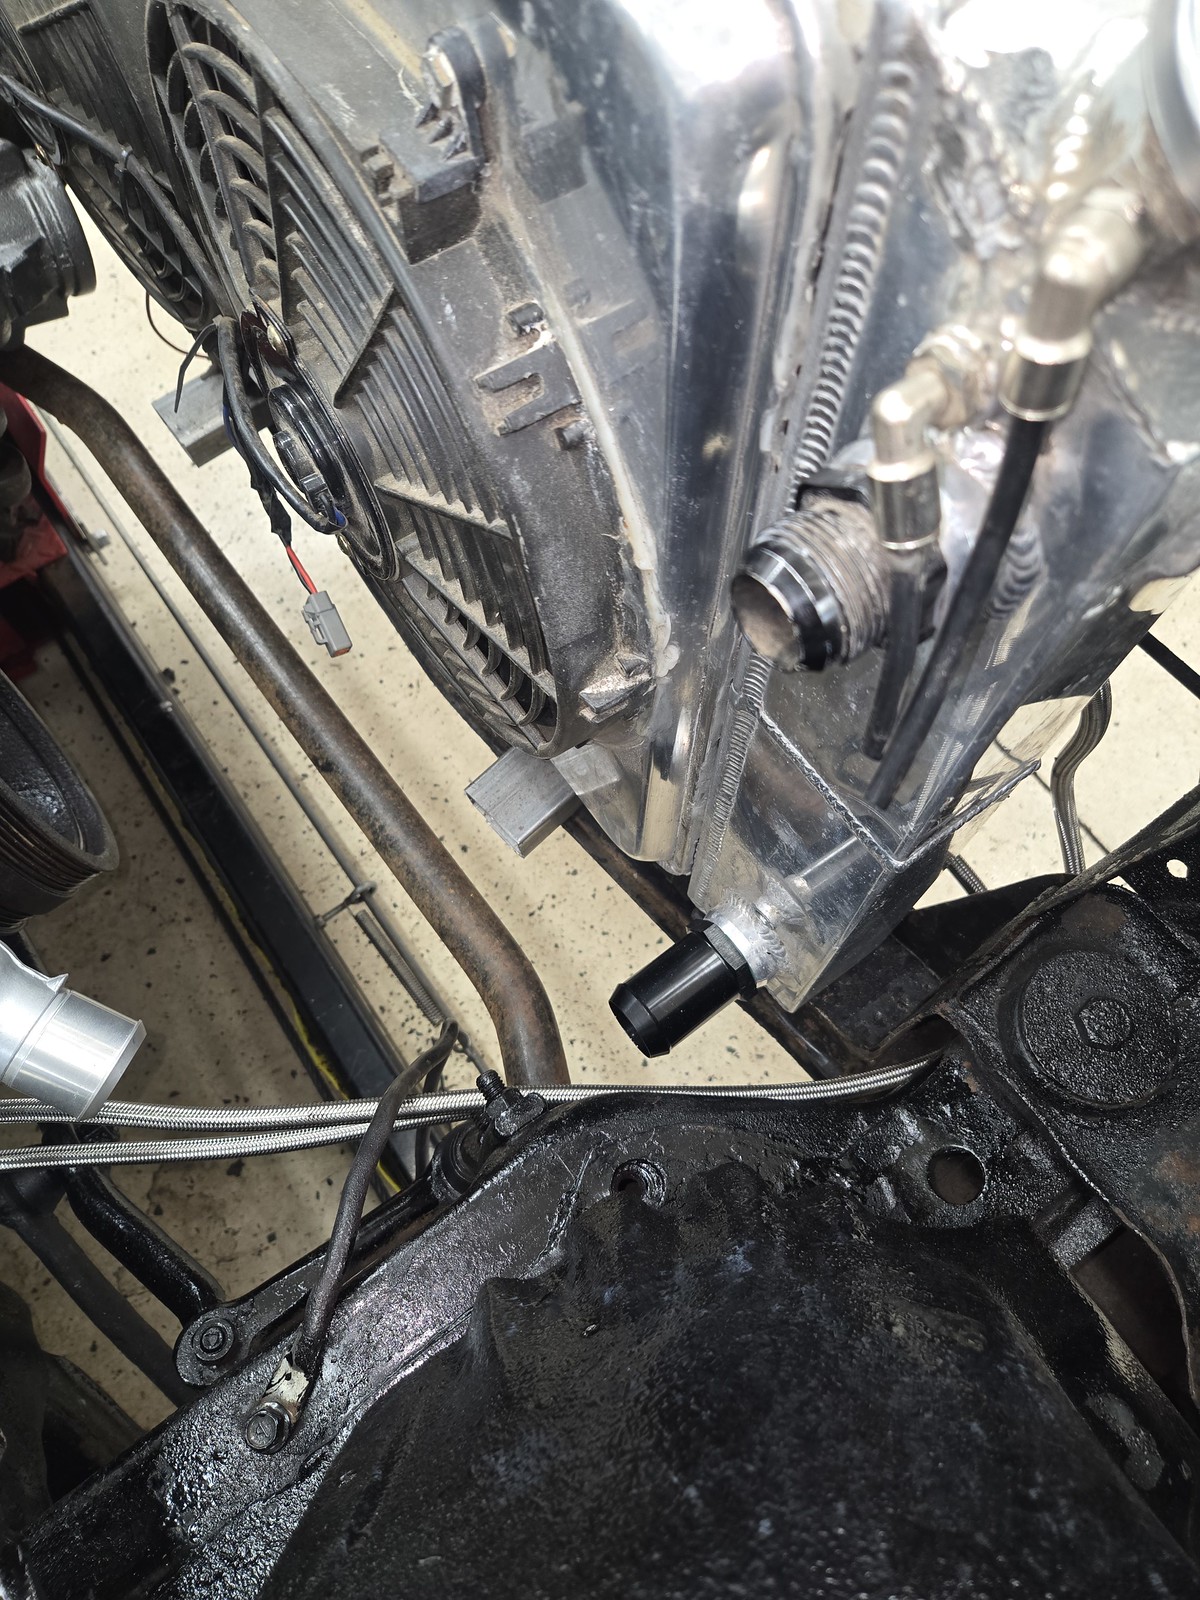 20260920_132619 by Michael Crawford, on Flickr
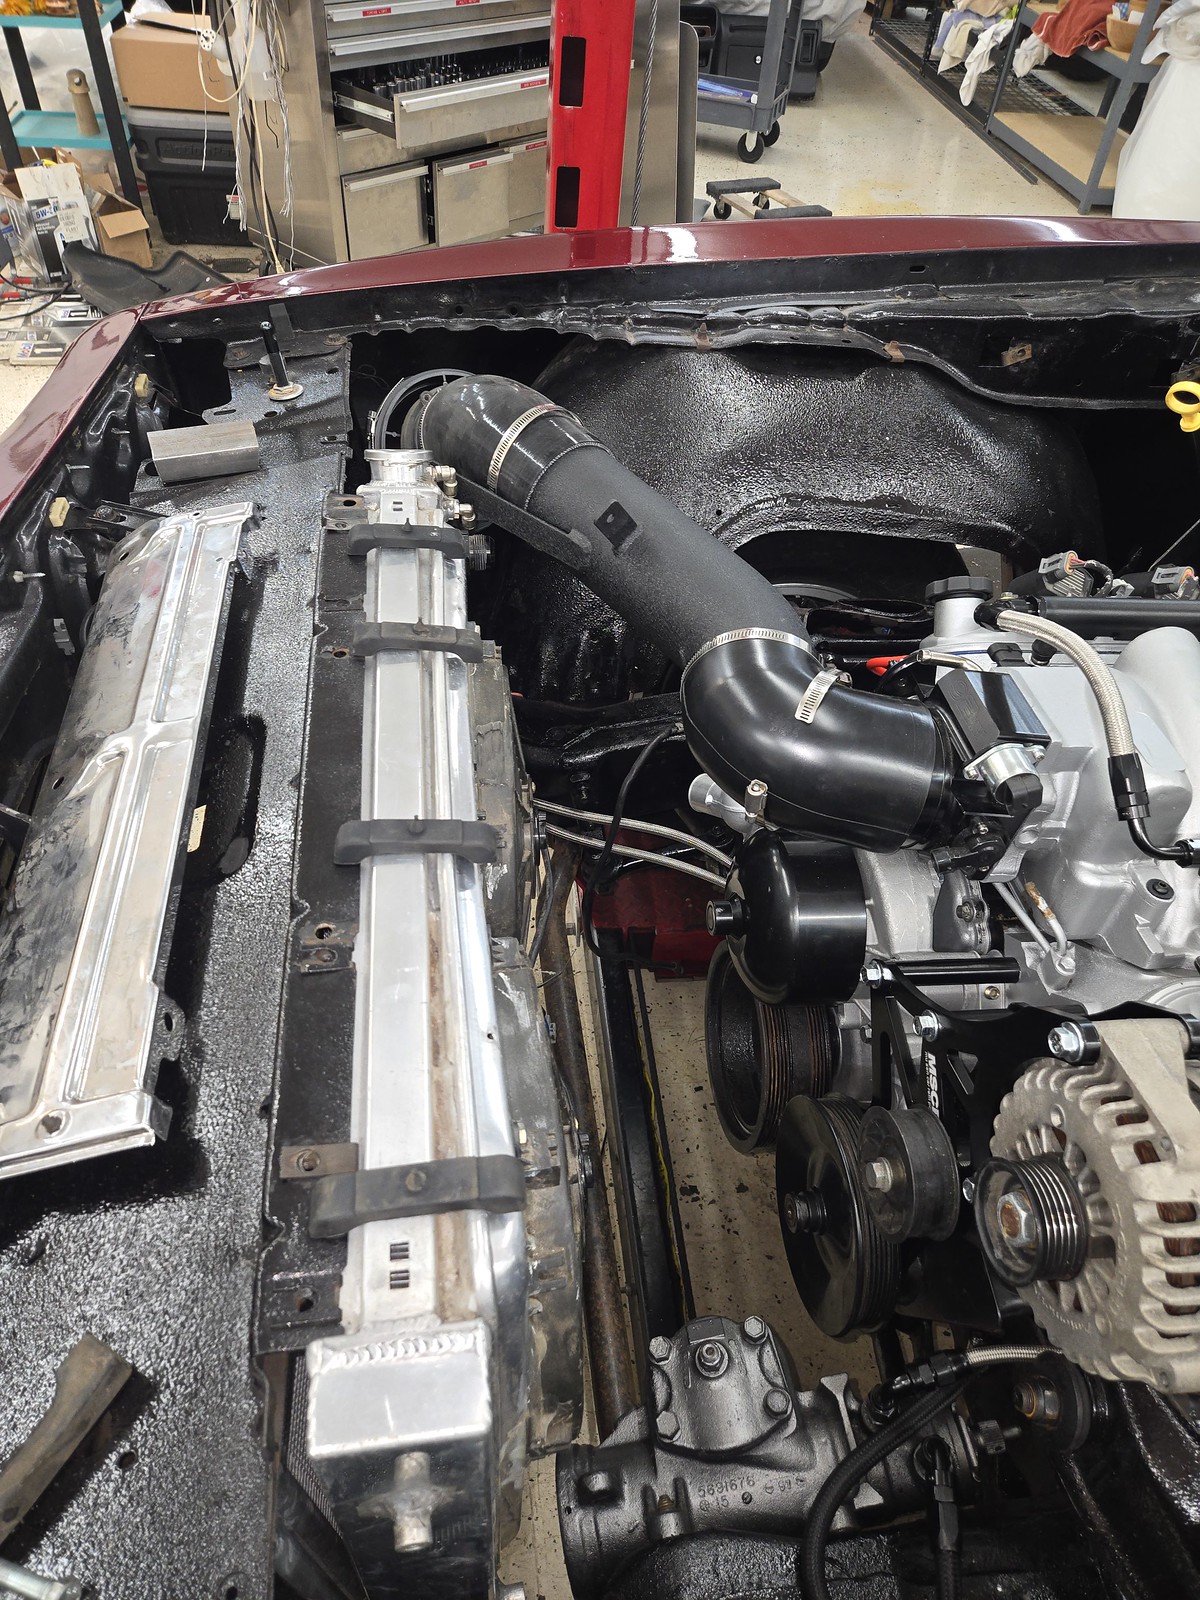 20260920_132952 by Michael Crawford, on Flickr
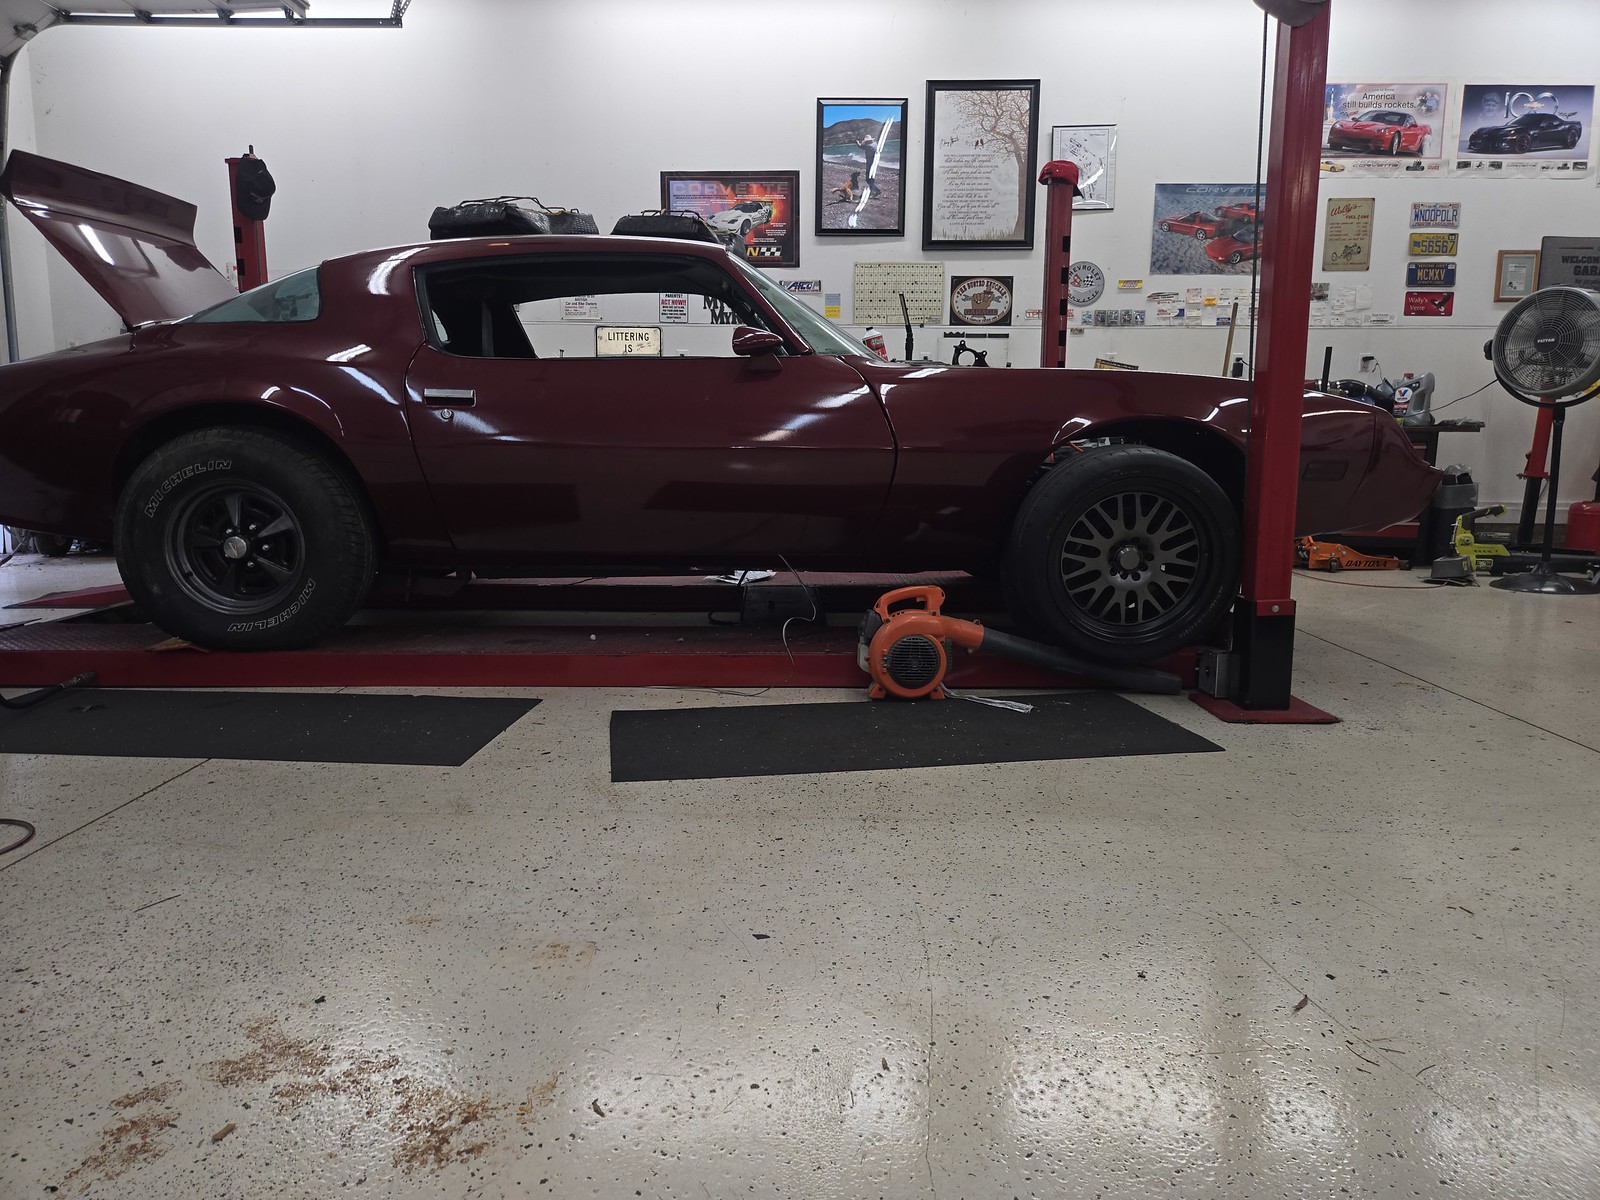
Somewhere in here, I decided to screw around with wheels and tires. I decided I wanted rally wheels. 80PSI in the rear air shocks got us almost level at 4x4 stance.
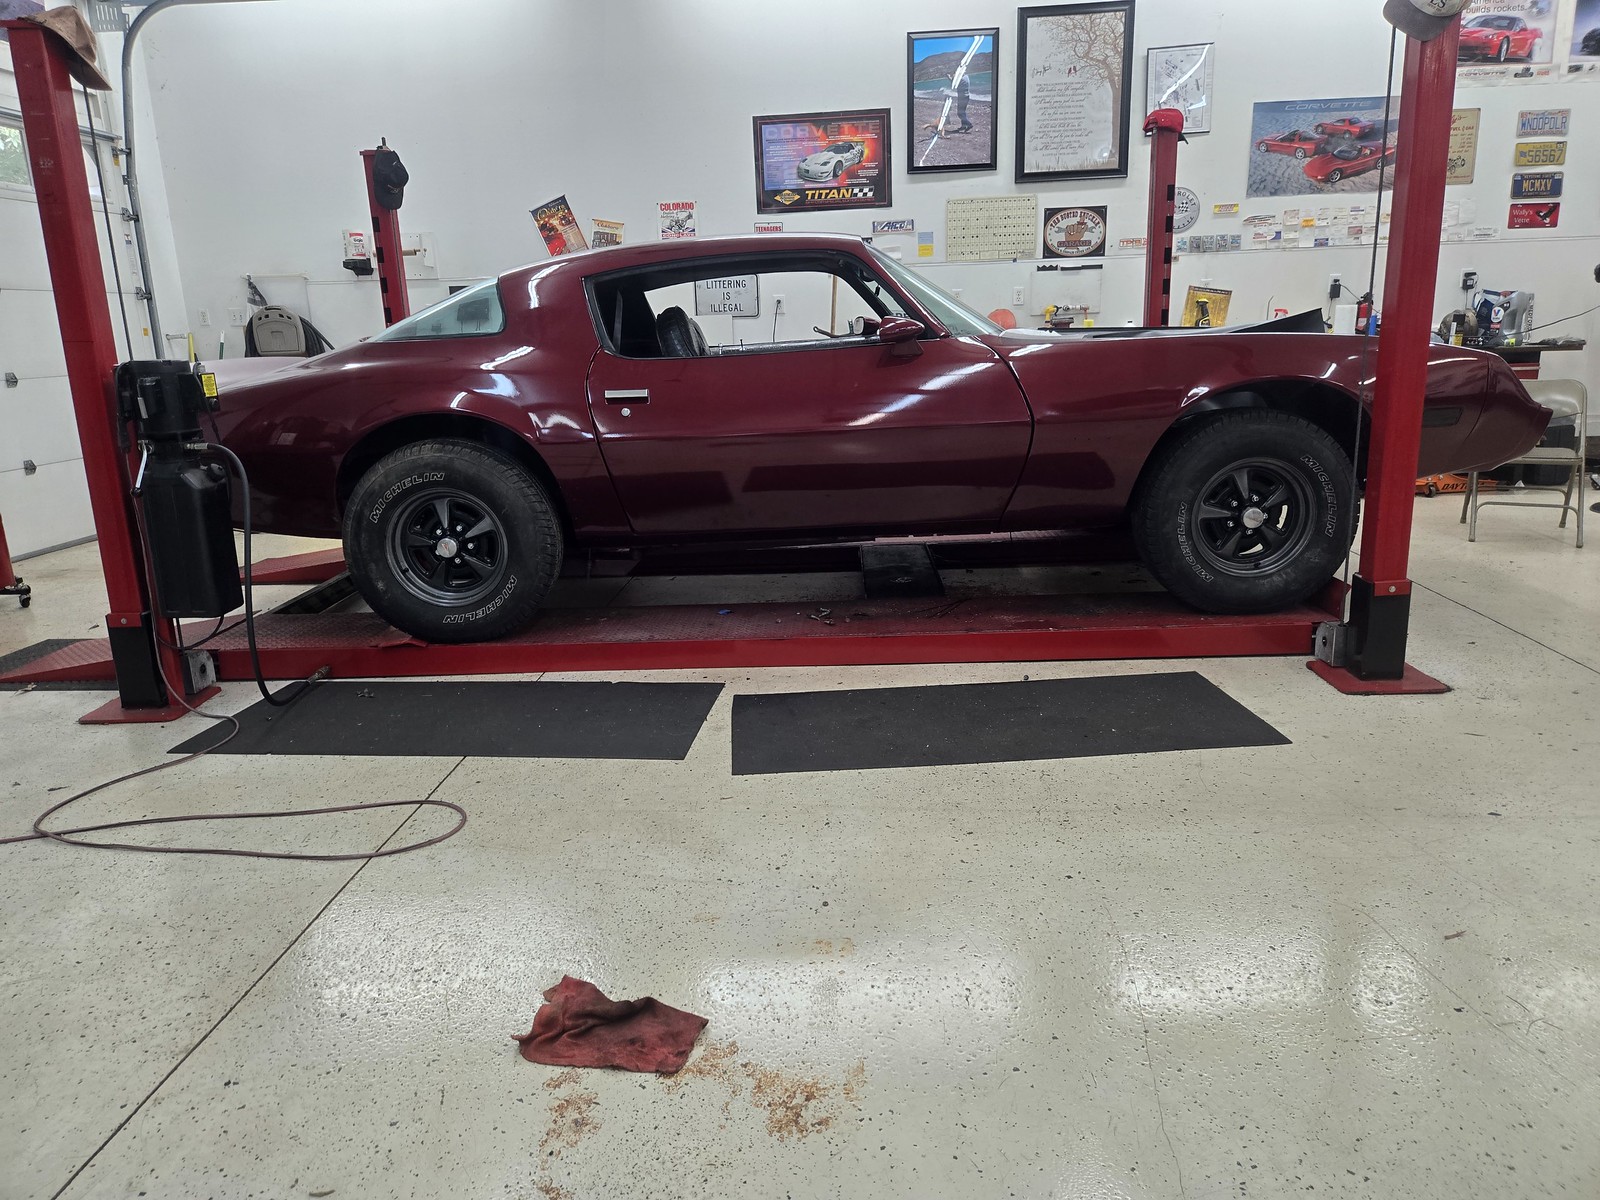 20260906_154755 by Michael Crawford, on Flickr
I don’t like them. They’re on marketplace now.
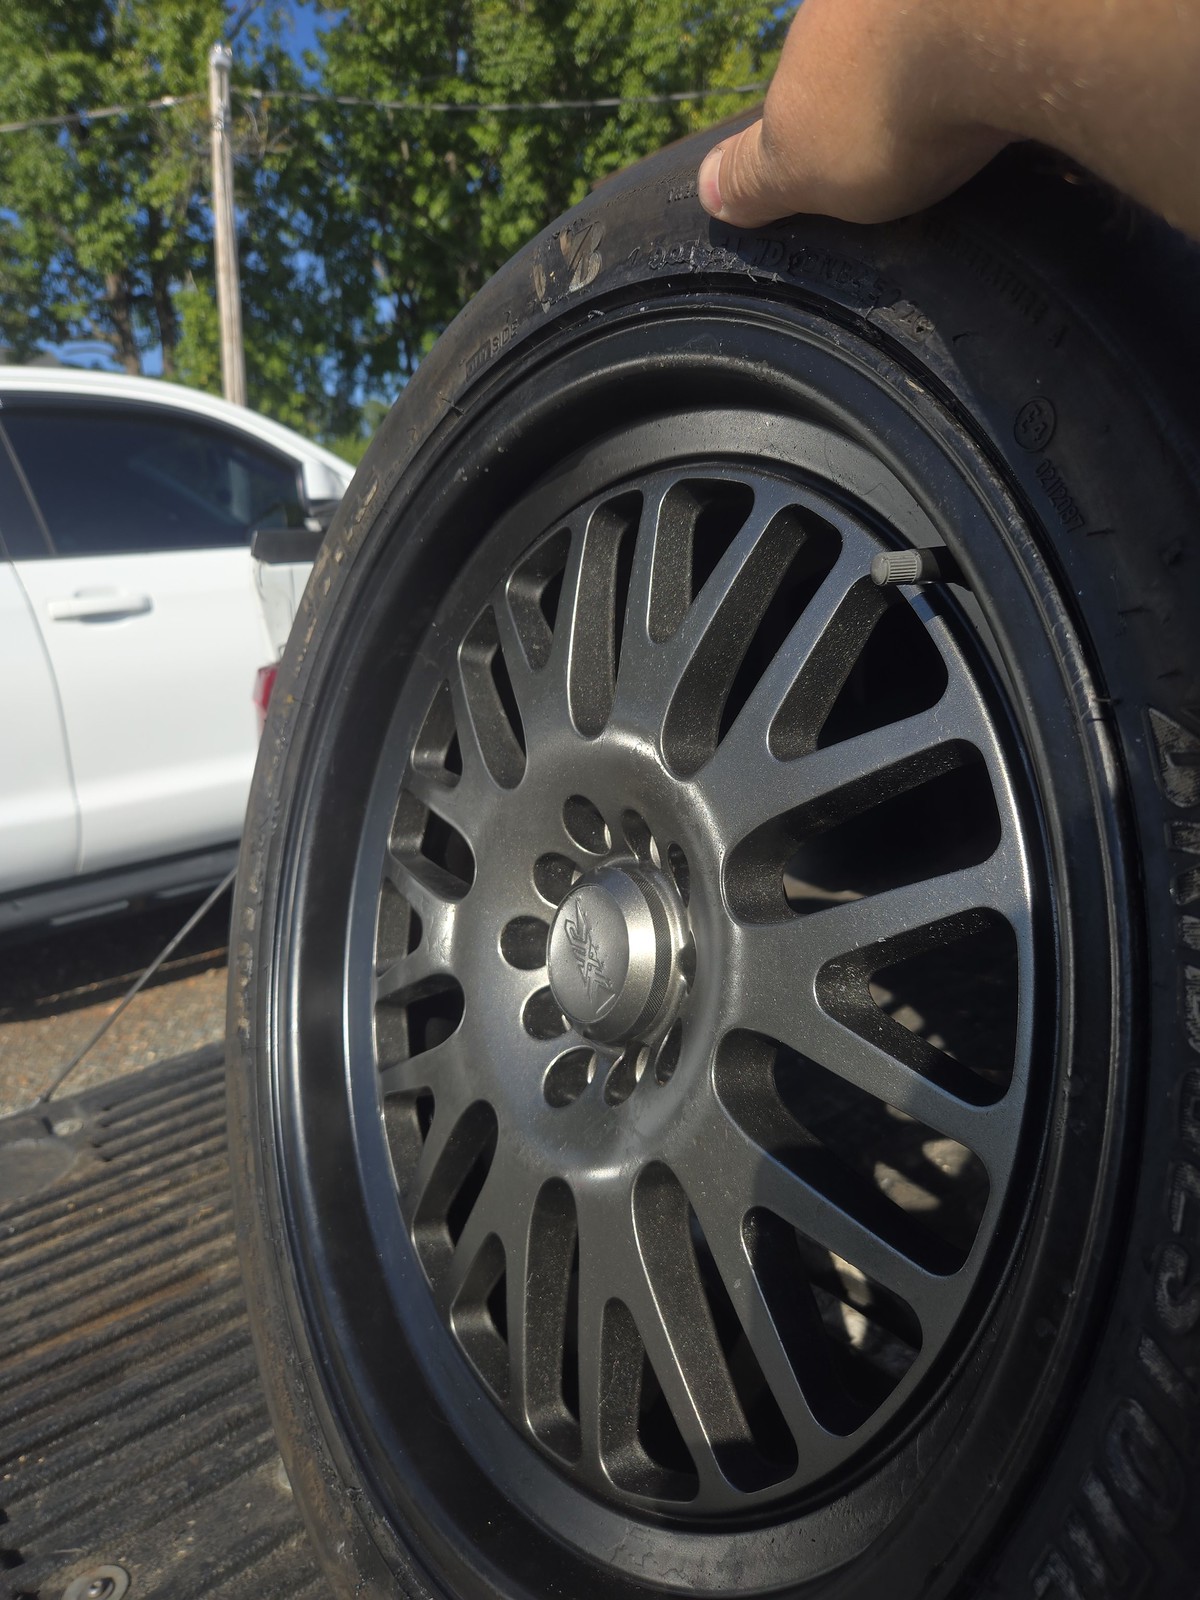
however, this led to playing with the autocross package. I had scored a set of XXR531 wheels a while back with hideously applied spray-paint that was badly half removed over peeling chrome for 100 bucks. They’re 18x8.5, dual drilled 5x100 and 5x114
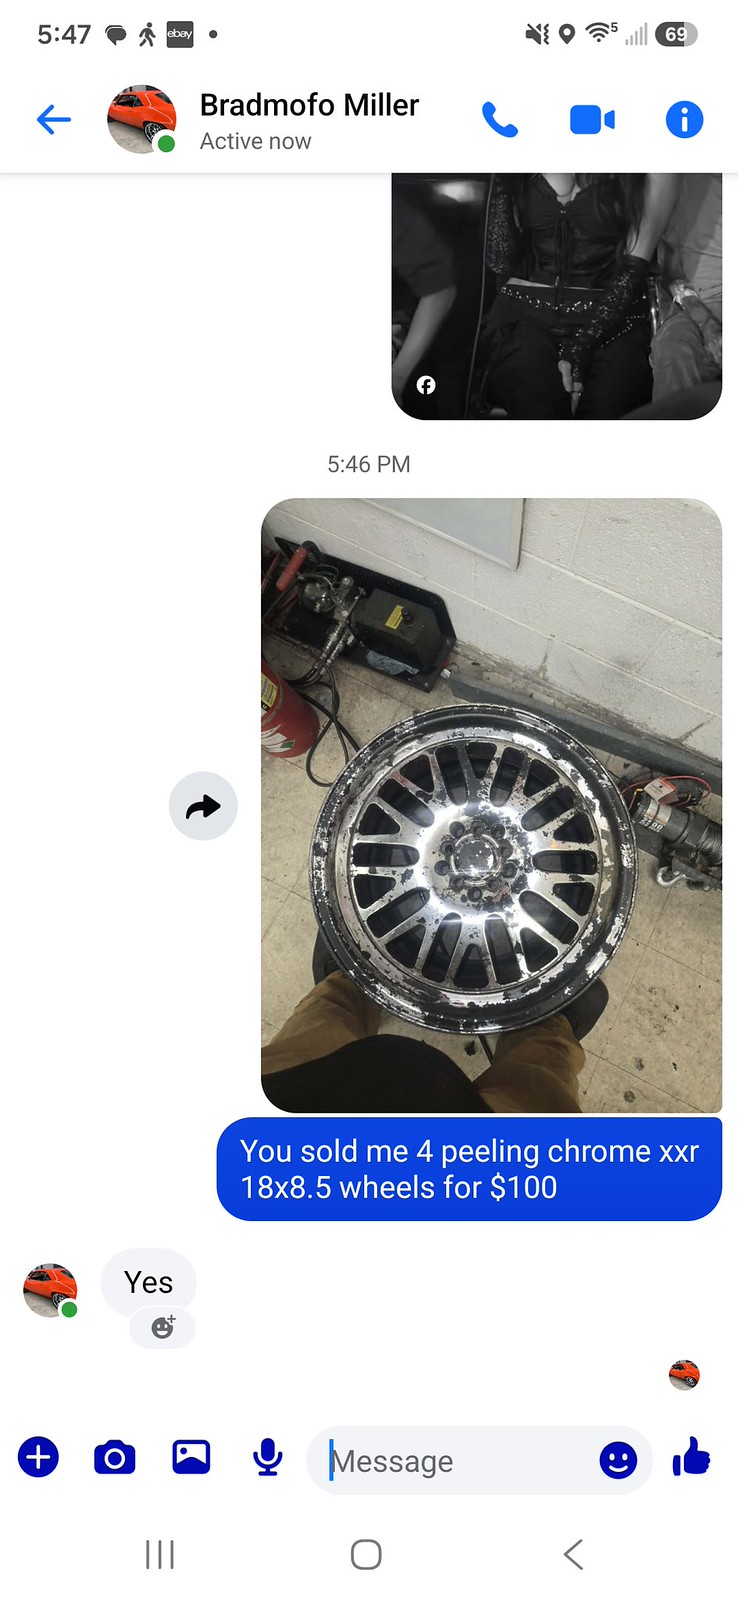 Screenshot_20260831_174716_Messenger by Michael Crawford, on Flickr
I took the first one to work, and sandblasted it. it really didn’t do a whole lot, but I then shot it in the formula I found for dodge brass monkey wheel paint and a satin lip.
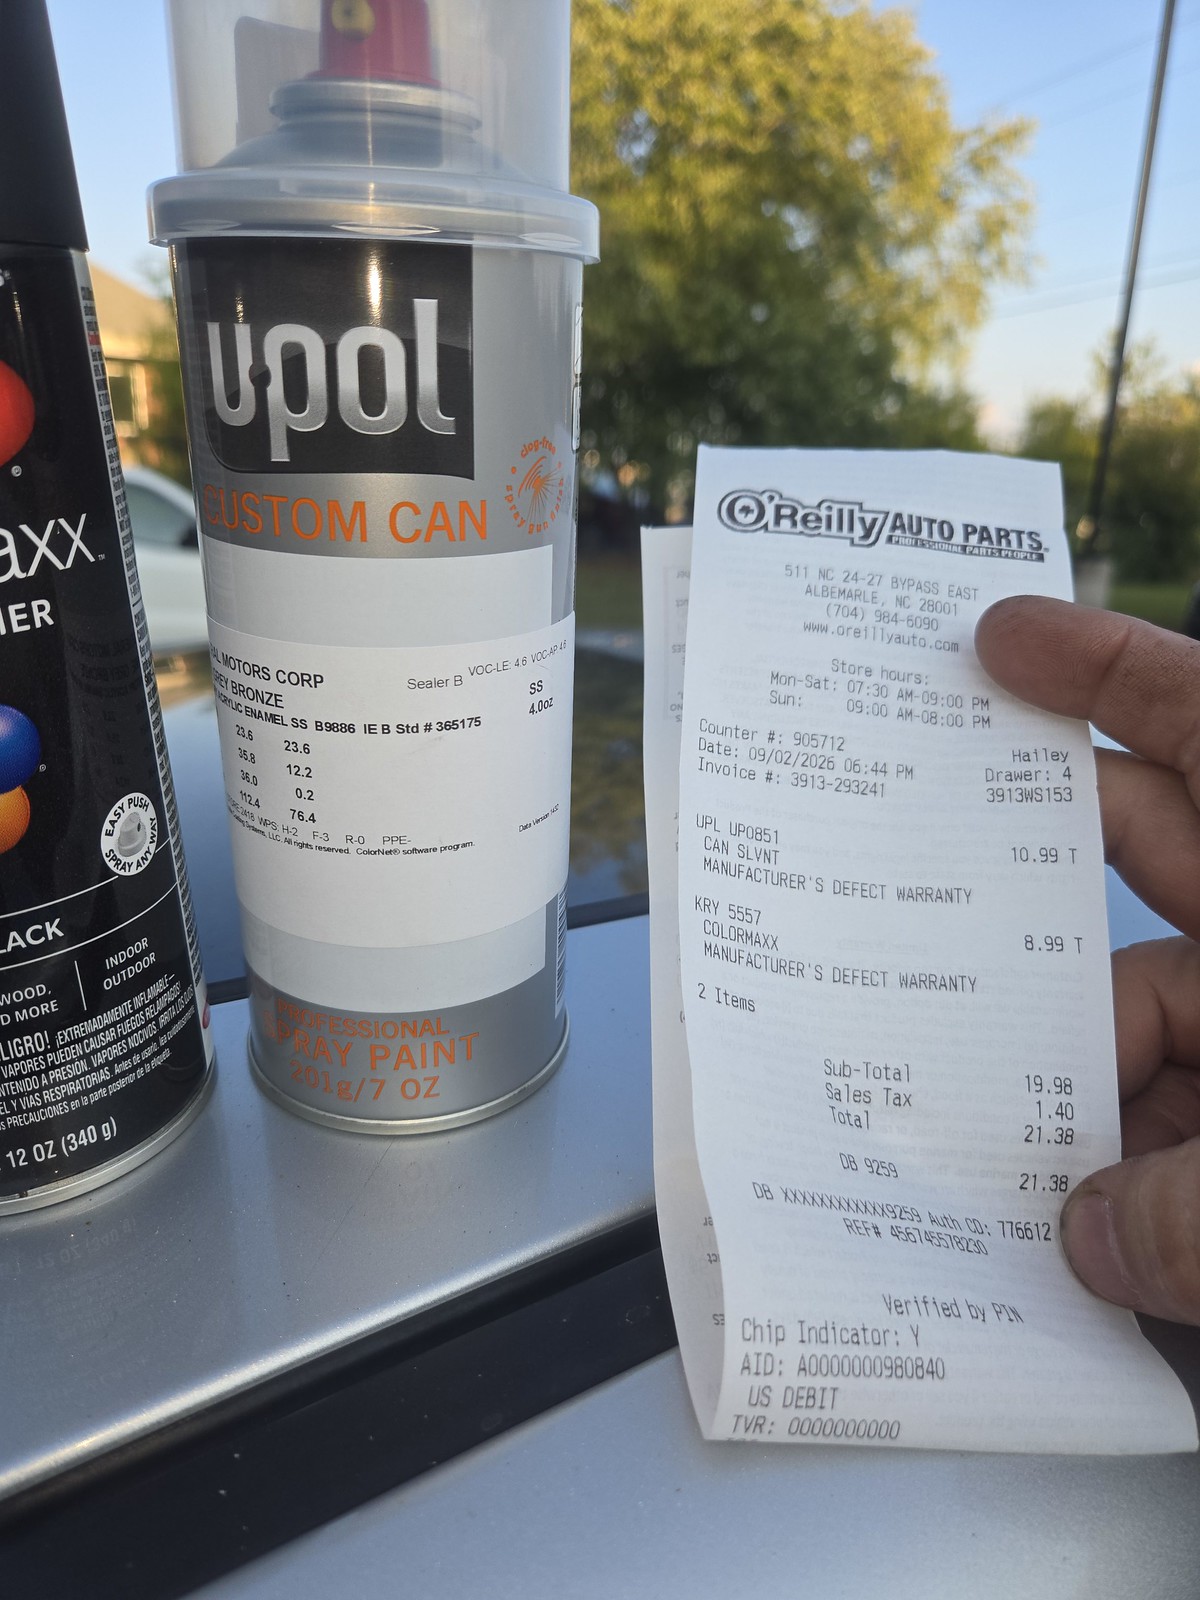 20260902_184550 by Michael Crawford, on Flickr
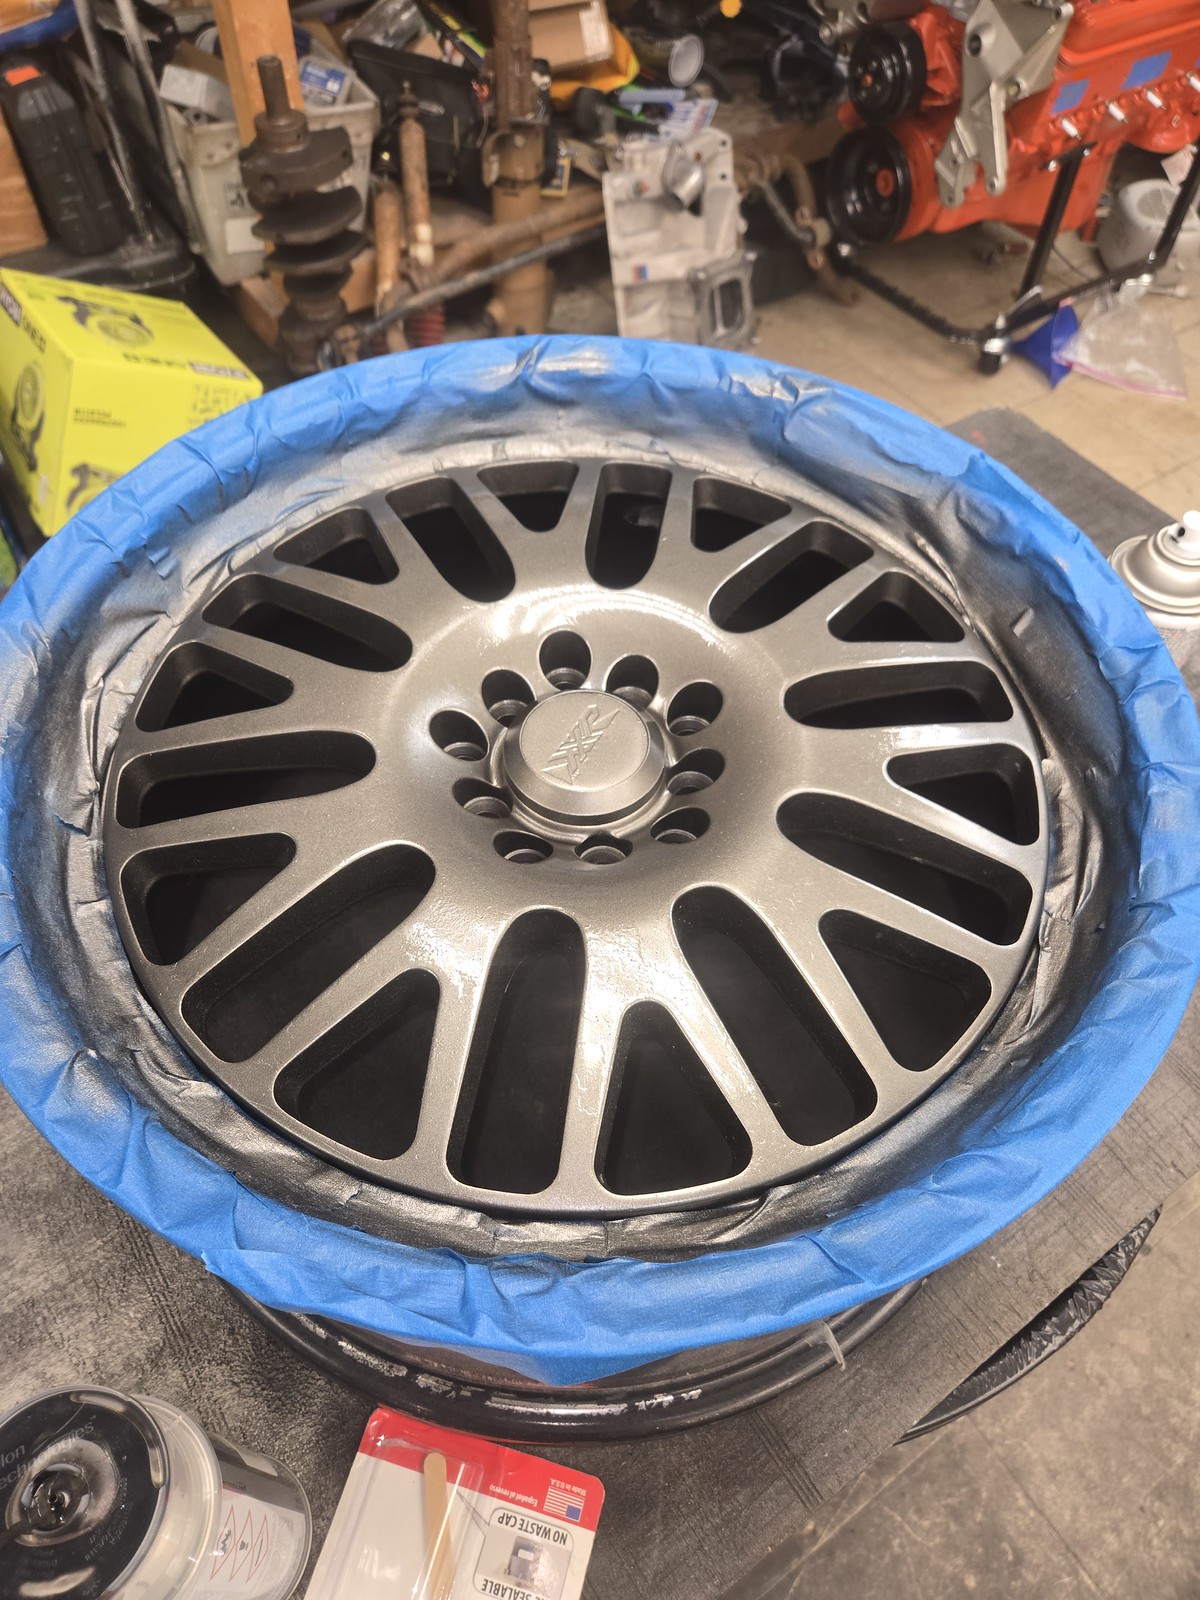 20260903_164444 by Michael Crawford, on Flickr
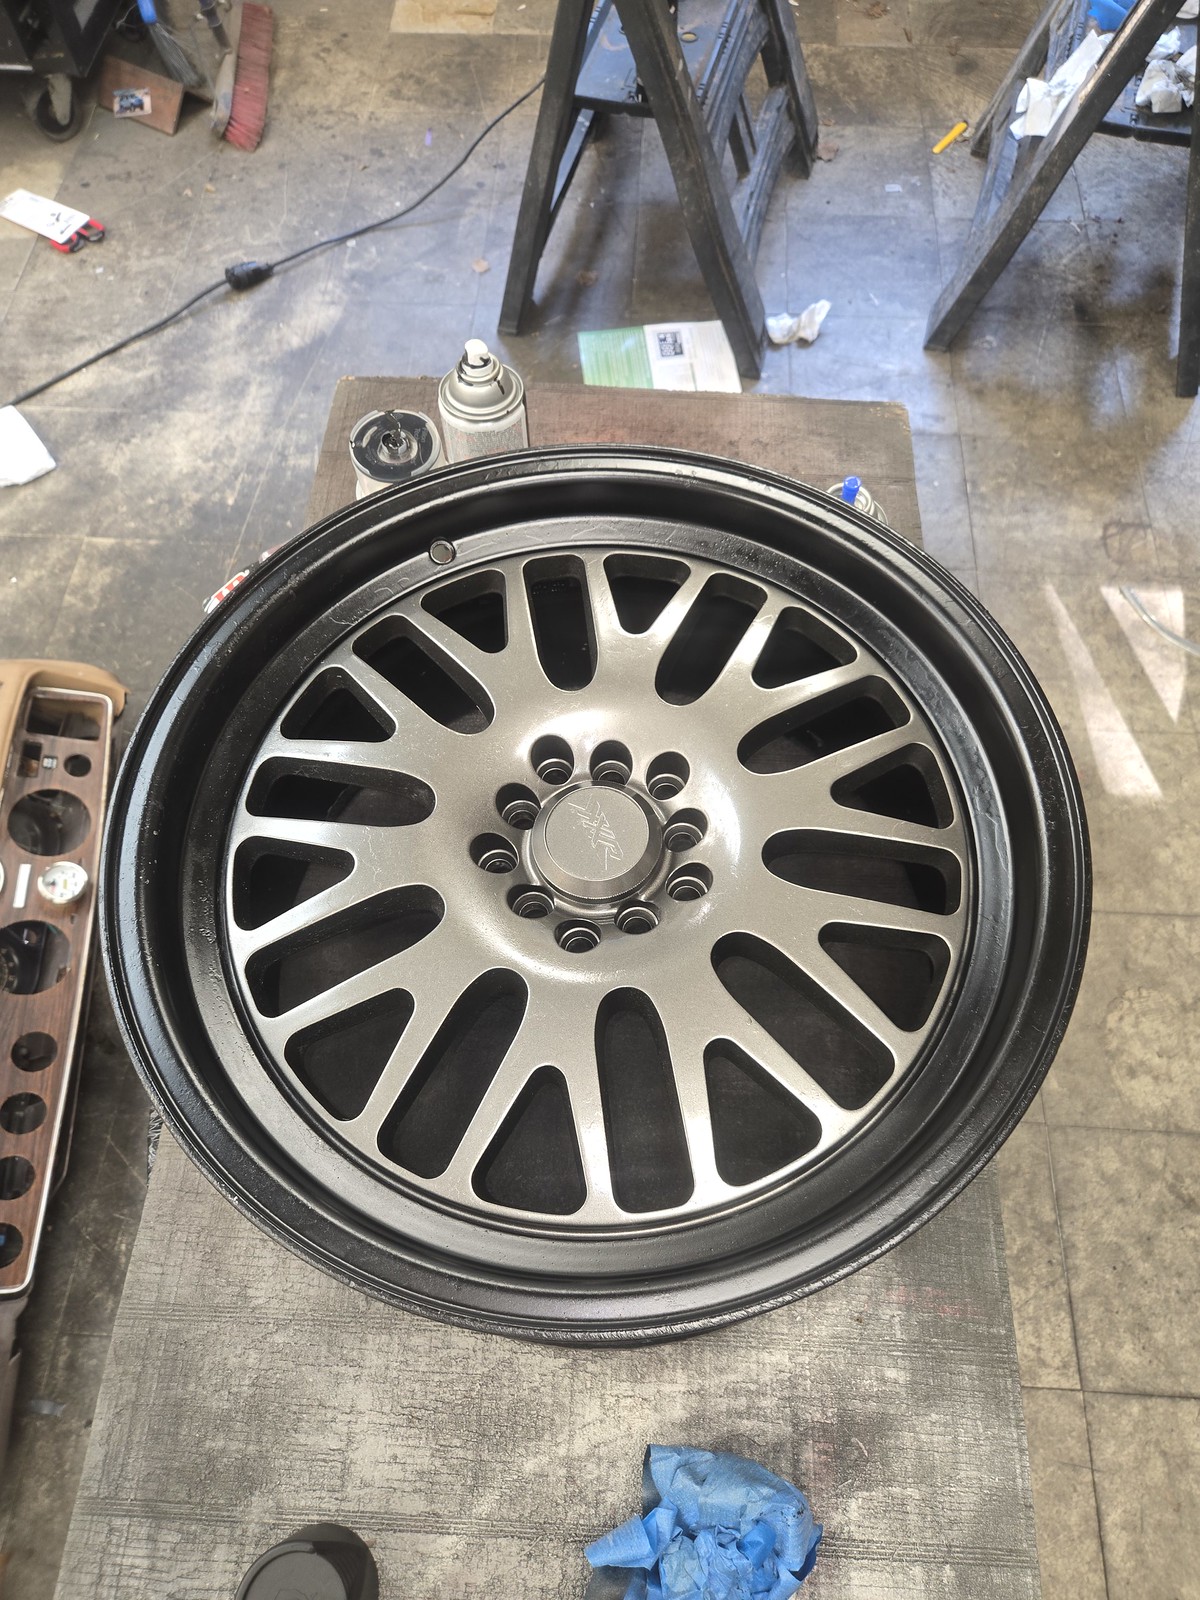 20260903_165137 by Michael Crawford, on Flickr
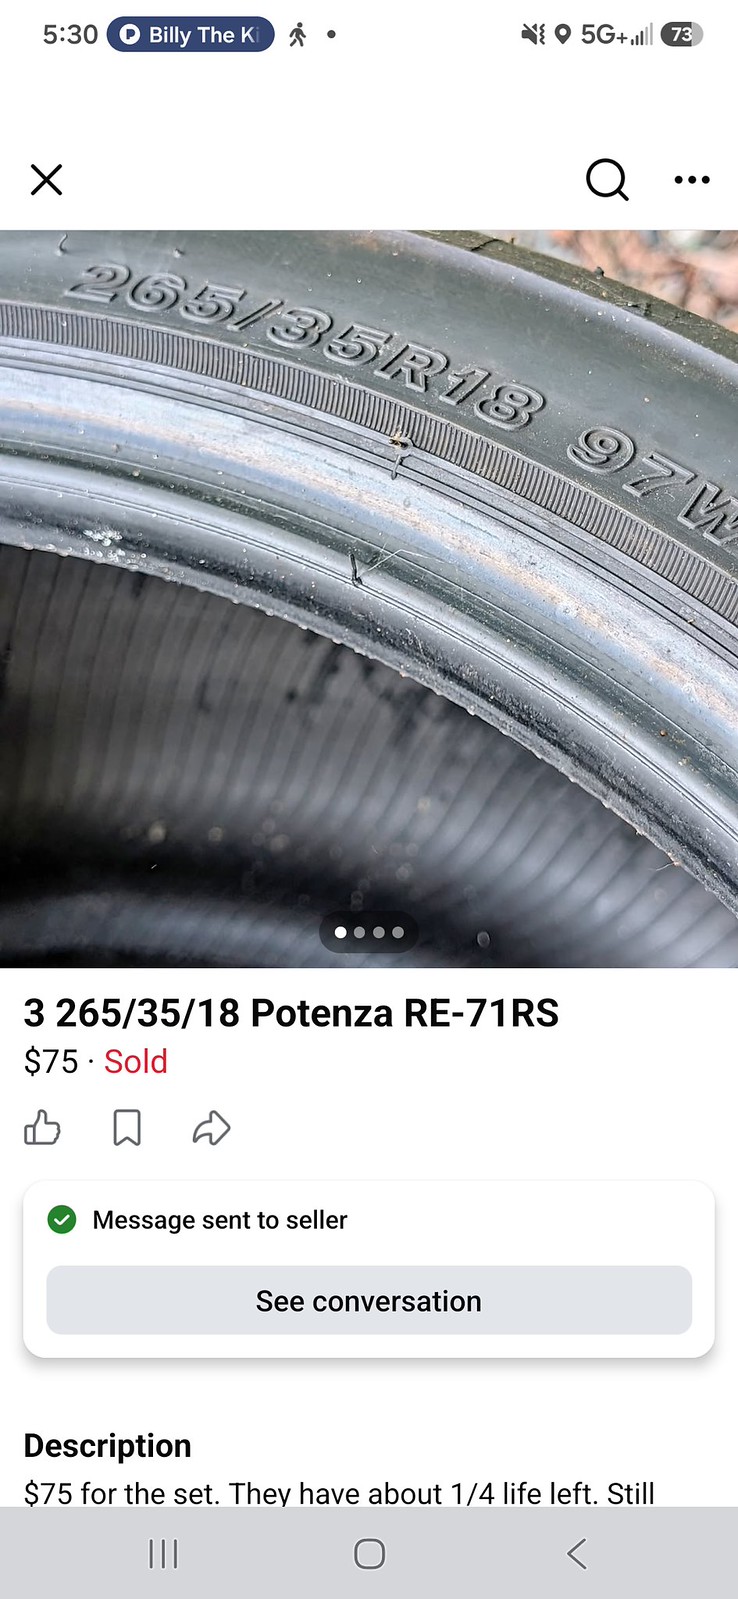
Wrapped in a set of re71s in 265/35/18 I scored for 75 bucks from a local mustang autocrosser
 Screenshot_20260831_173049_Facebook by Michael Crawford, on Flickr
 20260908_164918 by Michael Crawford, on Flickr
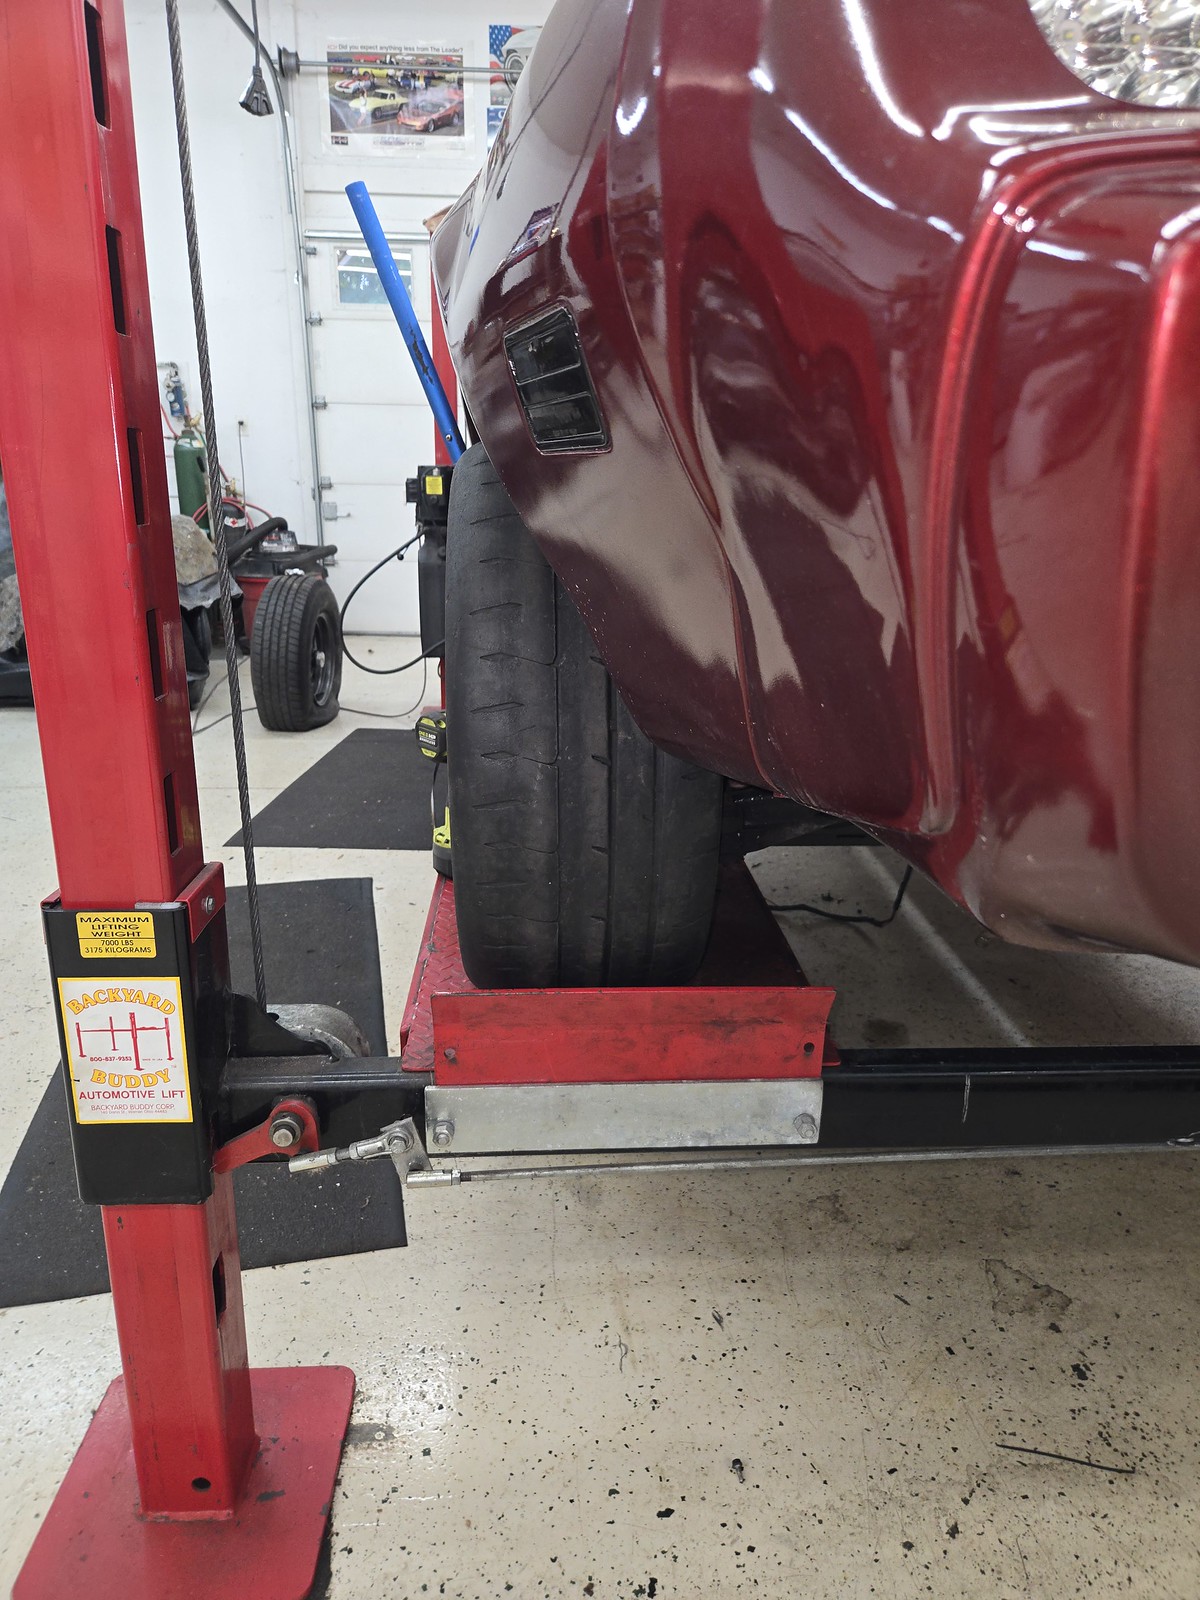
I had a 1.5 thick adapter/spacer here, and its too thick. Needs a 1 inch, and narrow lug nuts for the wheel. And a HELL of a whack with the lowering stick.
 20260920_085415 by Michael Crawford, on Flickr
 20260920_090647 by Michael Crawford, on Flickr
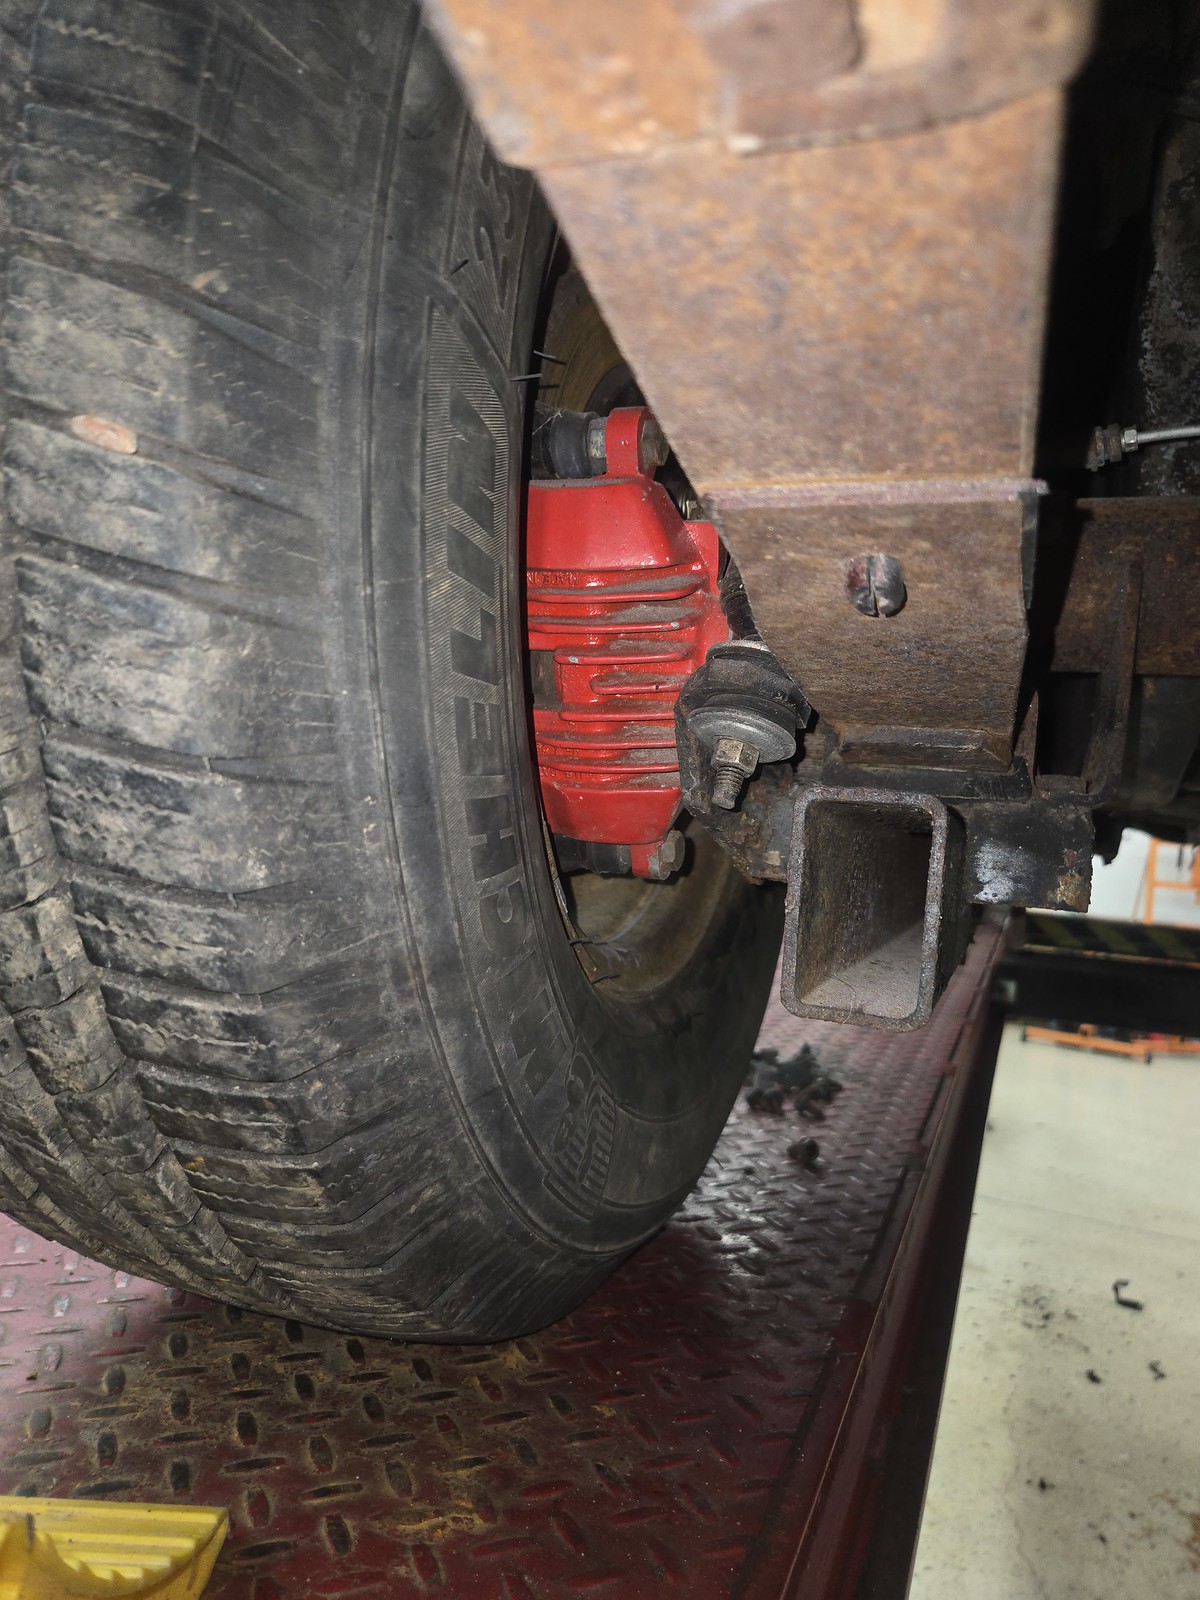
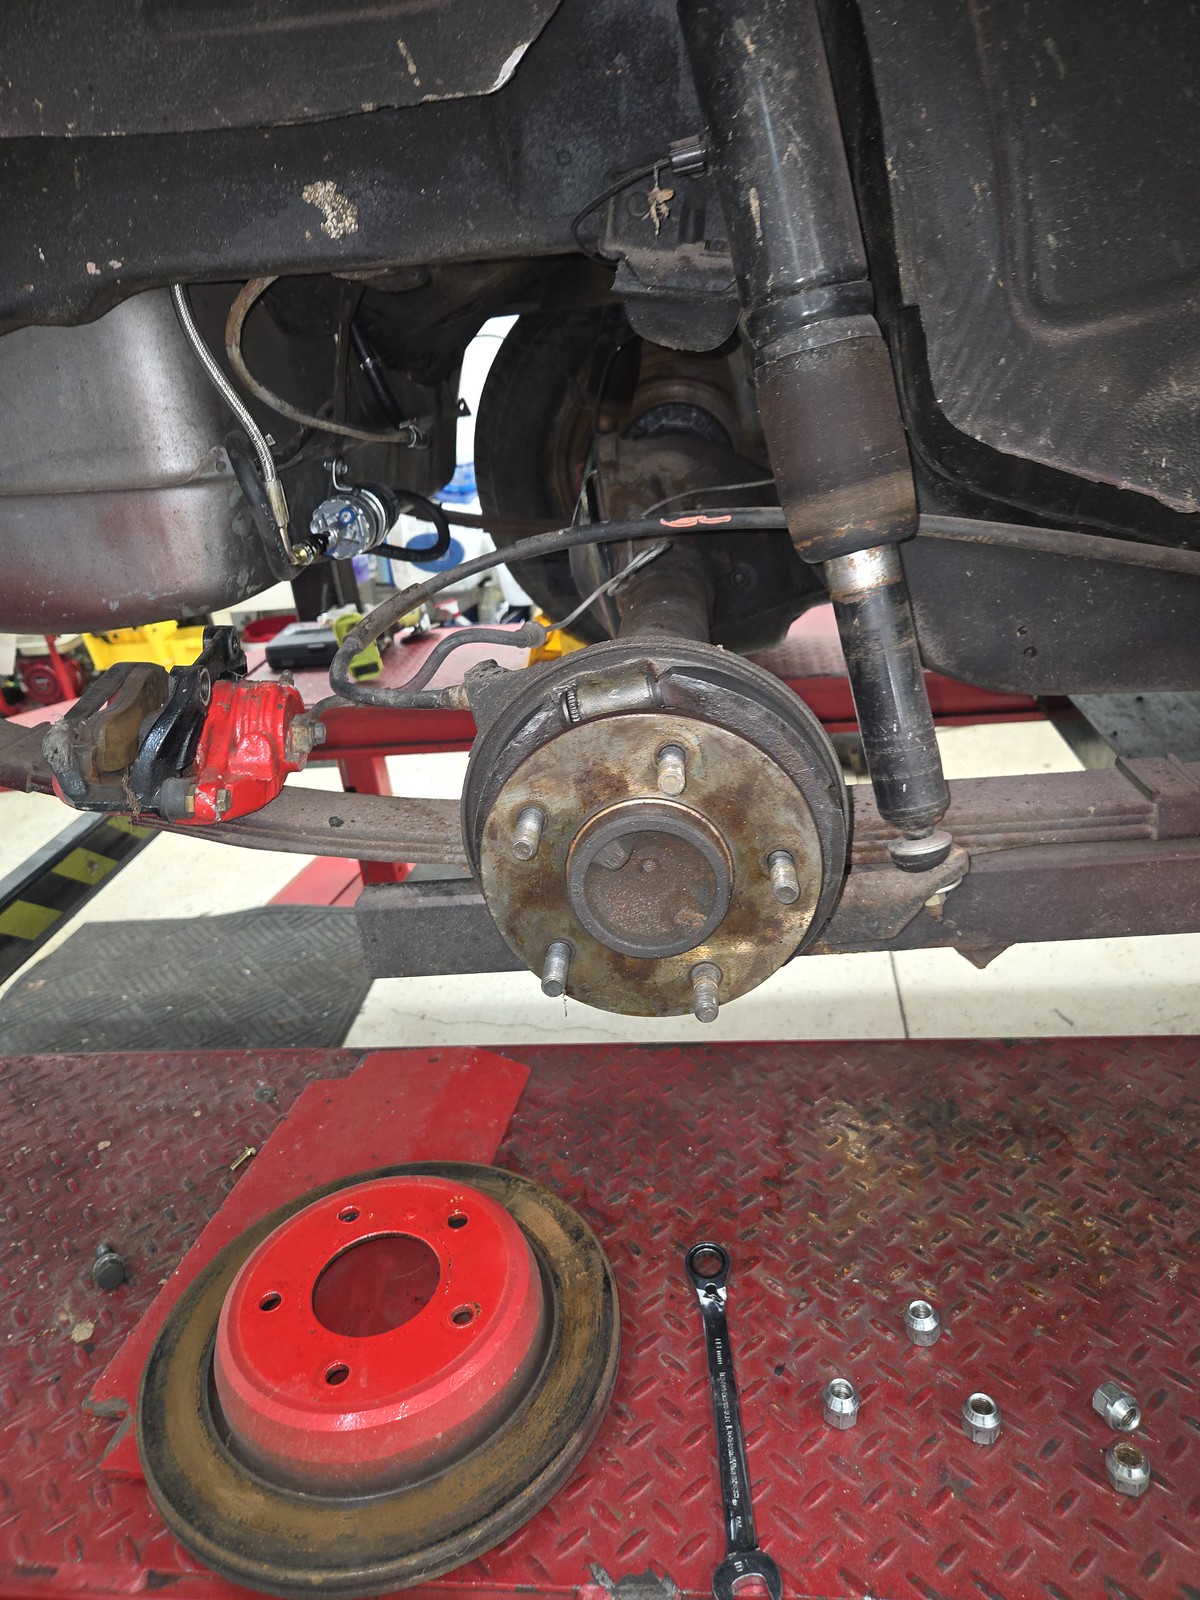
While doing this, I investigated the rear spacers the PO put on. They’re adapters for 5x5 to 5x4.75. so, digging deeper into the rear disc swap…
 20260906_154328 by Michael Crawford, on Flickr
 20260920_110020 by Michael Crawford, on Flickr
So, it’s a b-body rear disc. With 5x5 axles. That weren’t redrilled. How the hell did they do that? I honestly cannot figure out just what happened here, why it happened, or what the hell they were smoking at the time. Short term solution is bleed the brakes, and run the adapters, figure it out later.
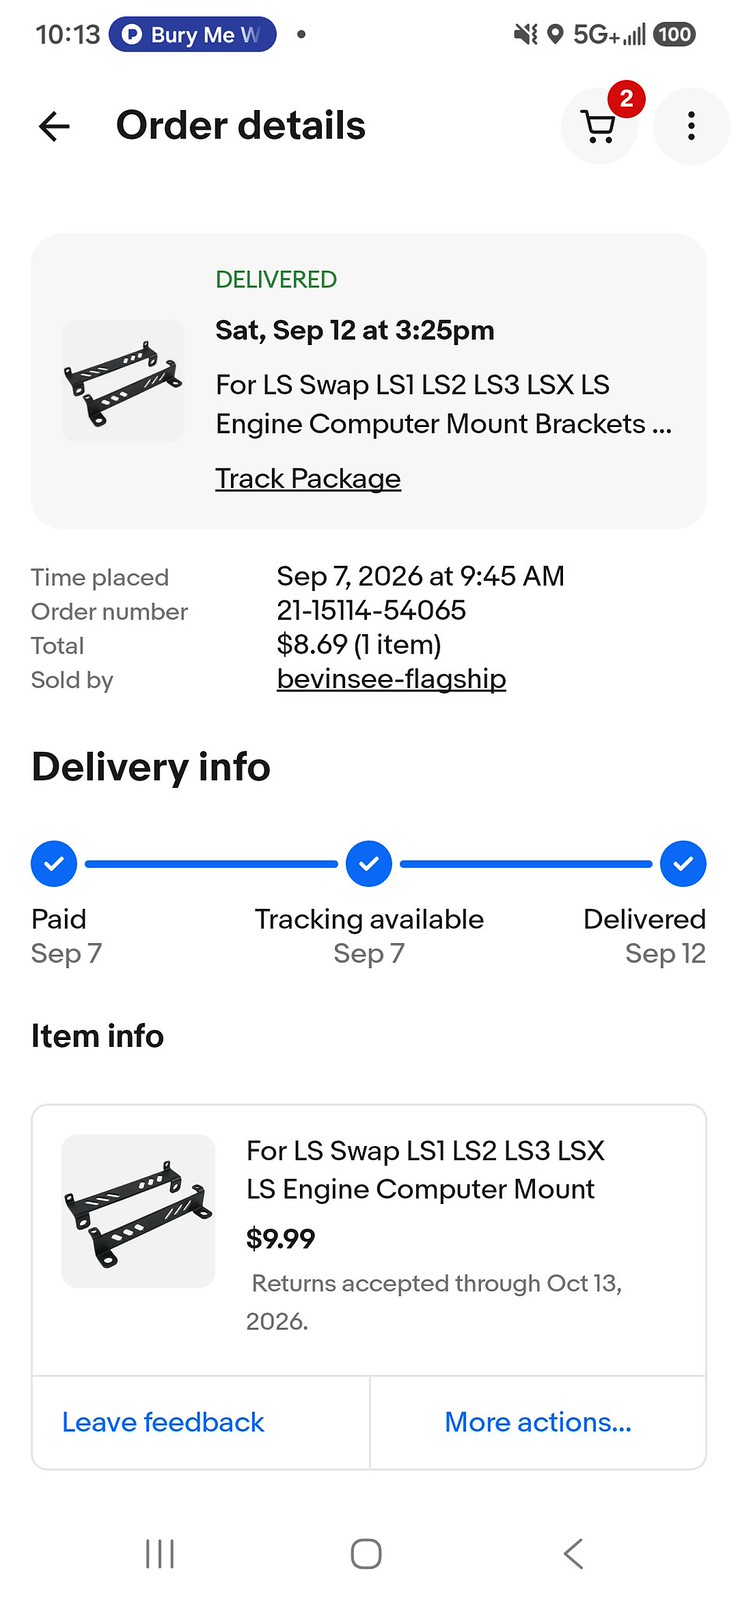
Anyway, onto the next thing for minimum viable product for a test drive. Ecu mounting. To mount the ECU, I ordered some brackets from eBay.
 Screenshot_20260914_101300_eBay by Michael Crawford, on Flickr
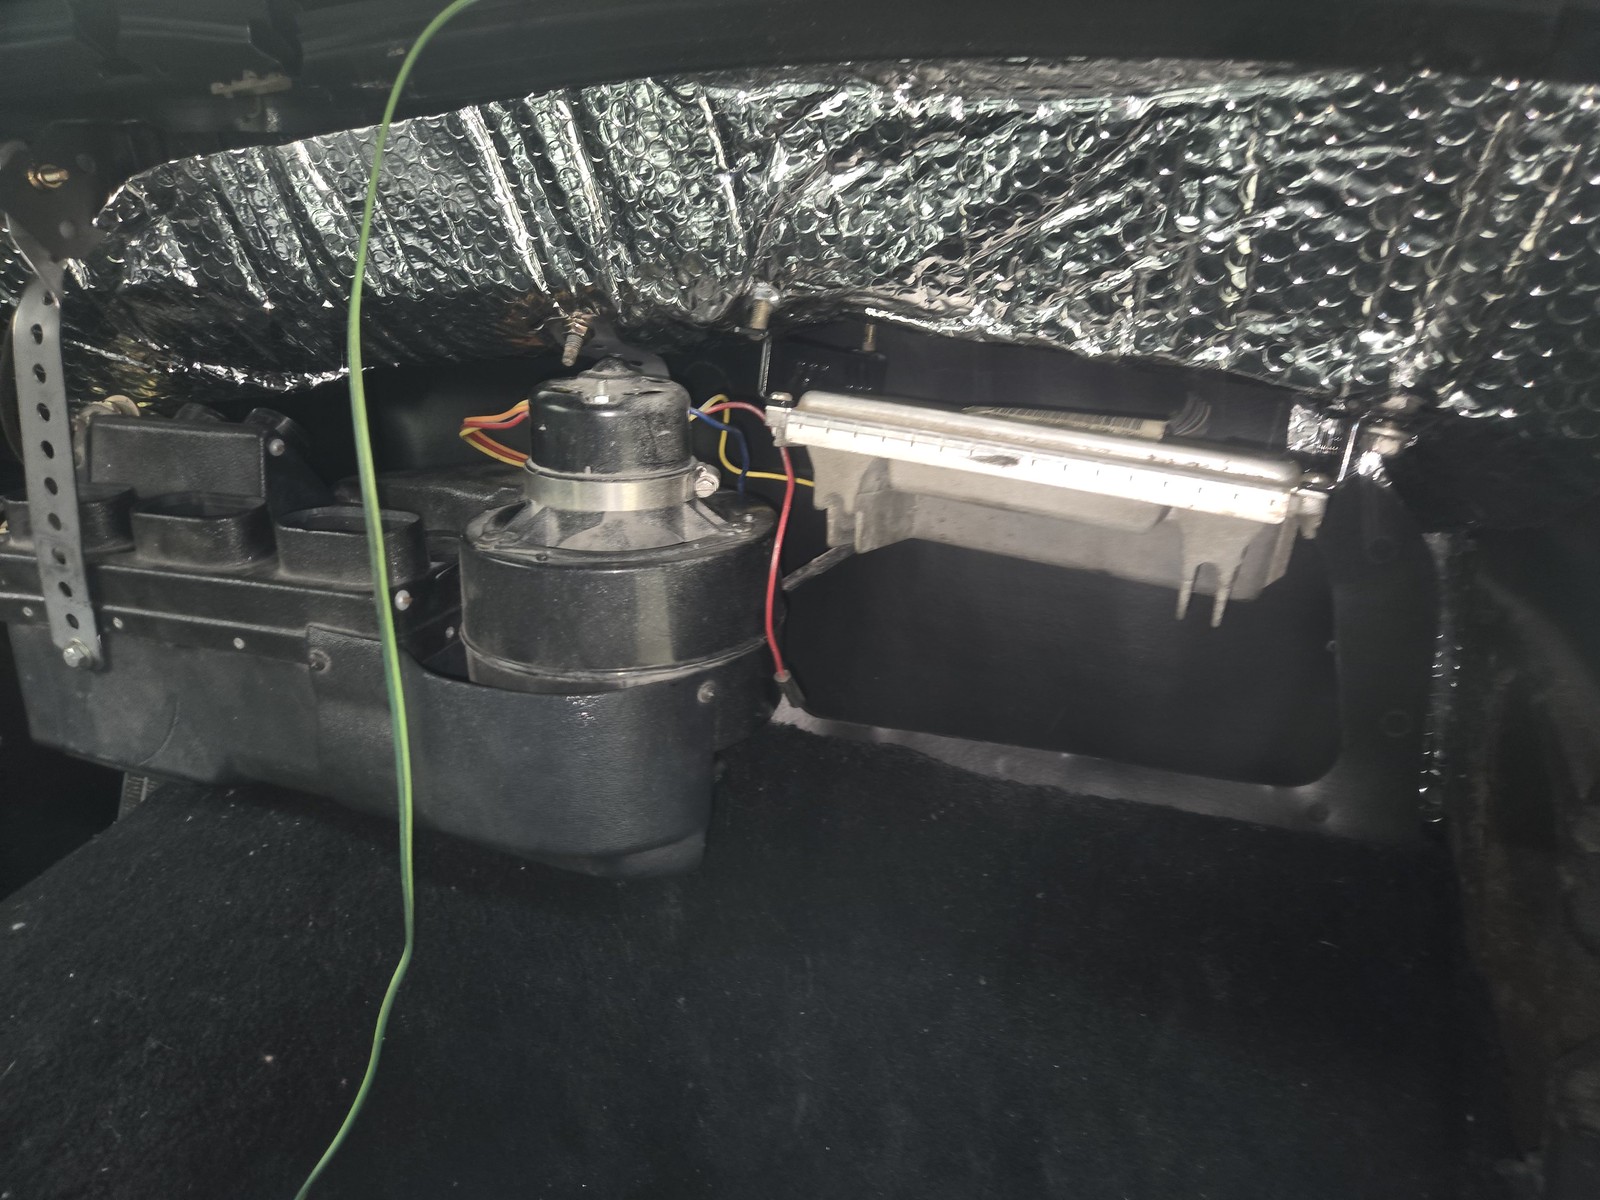
Then, figured out where I wanted it. this included making sure it would play nice with the HVAC box. So I mounted that too. For the bolts that go through the cowl, I used some o-rings and RTV on flange bolts to ensure a leak free seal. Nutted and loctited on the interior side to make studs.
 20260913_151953 by Michael Crawford, on Flickr
I then had to make sure that the dash fit around all this. For science.
So I dyed the repaired storage dash with sem landau black, installed the white face gauges in the hammered bezel along with the switches harvested from the fiberglass atrocity. Fit right in place!
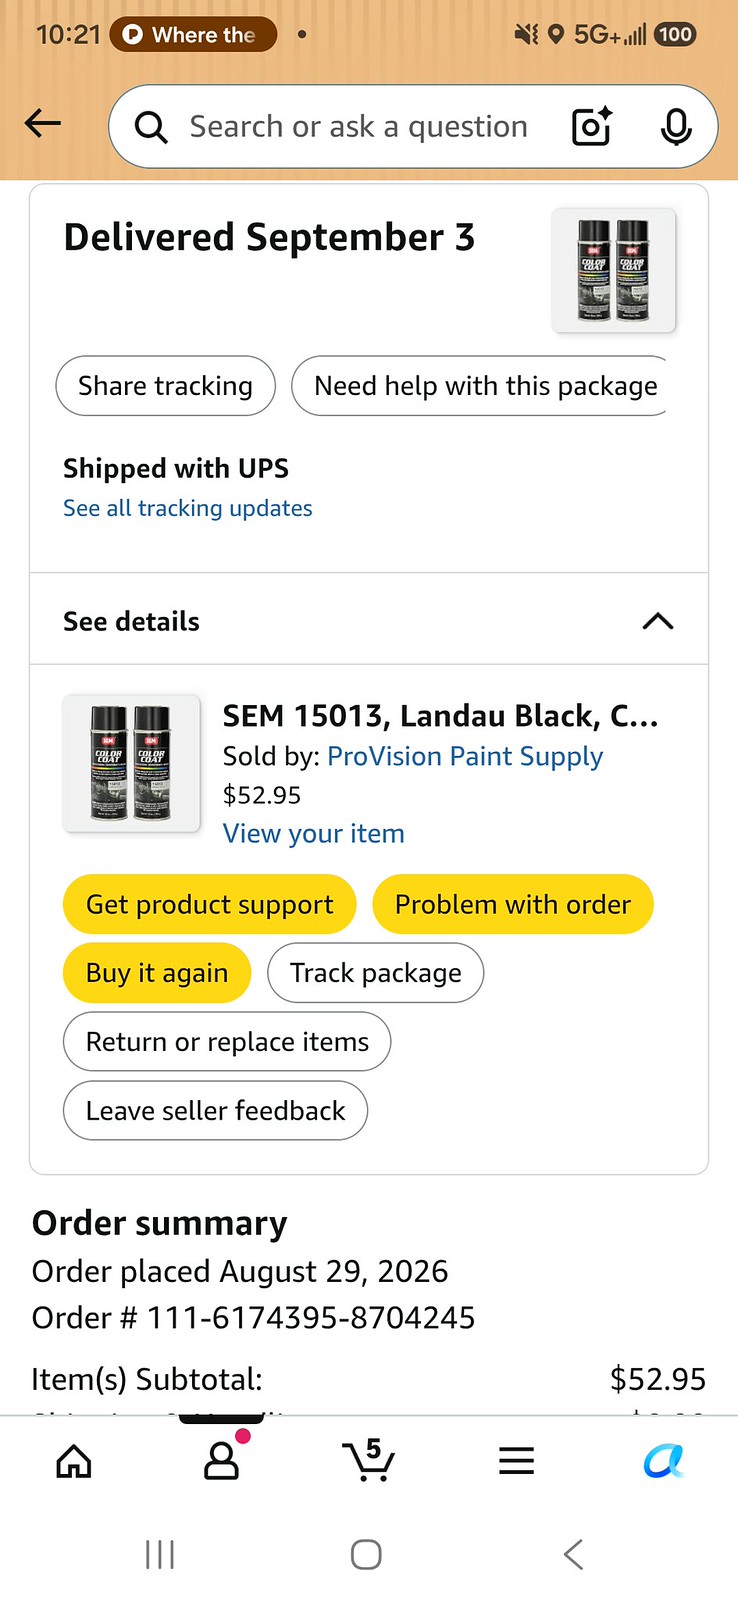 Screenshot_20260914_102129_Amazon Shopping by Michael Crawford, on Flickr
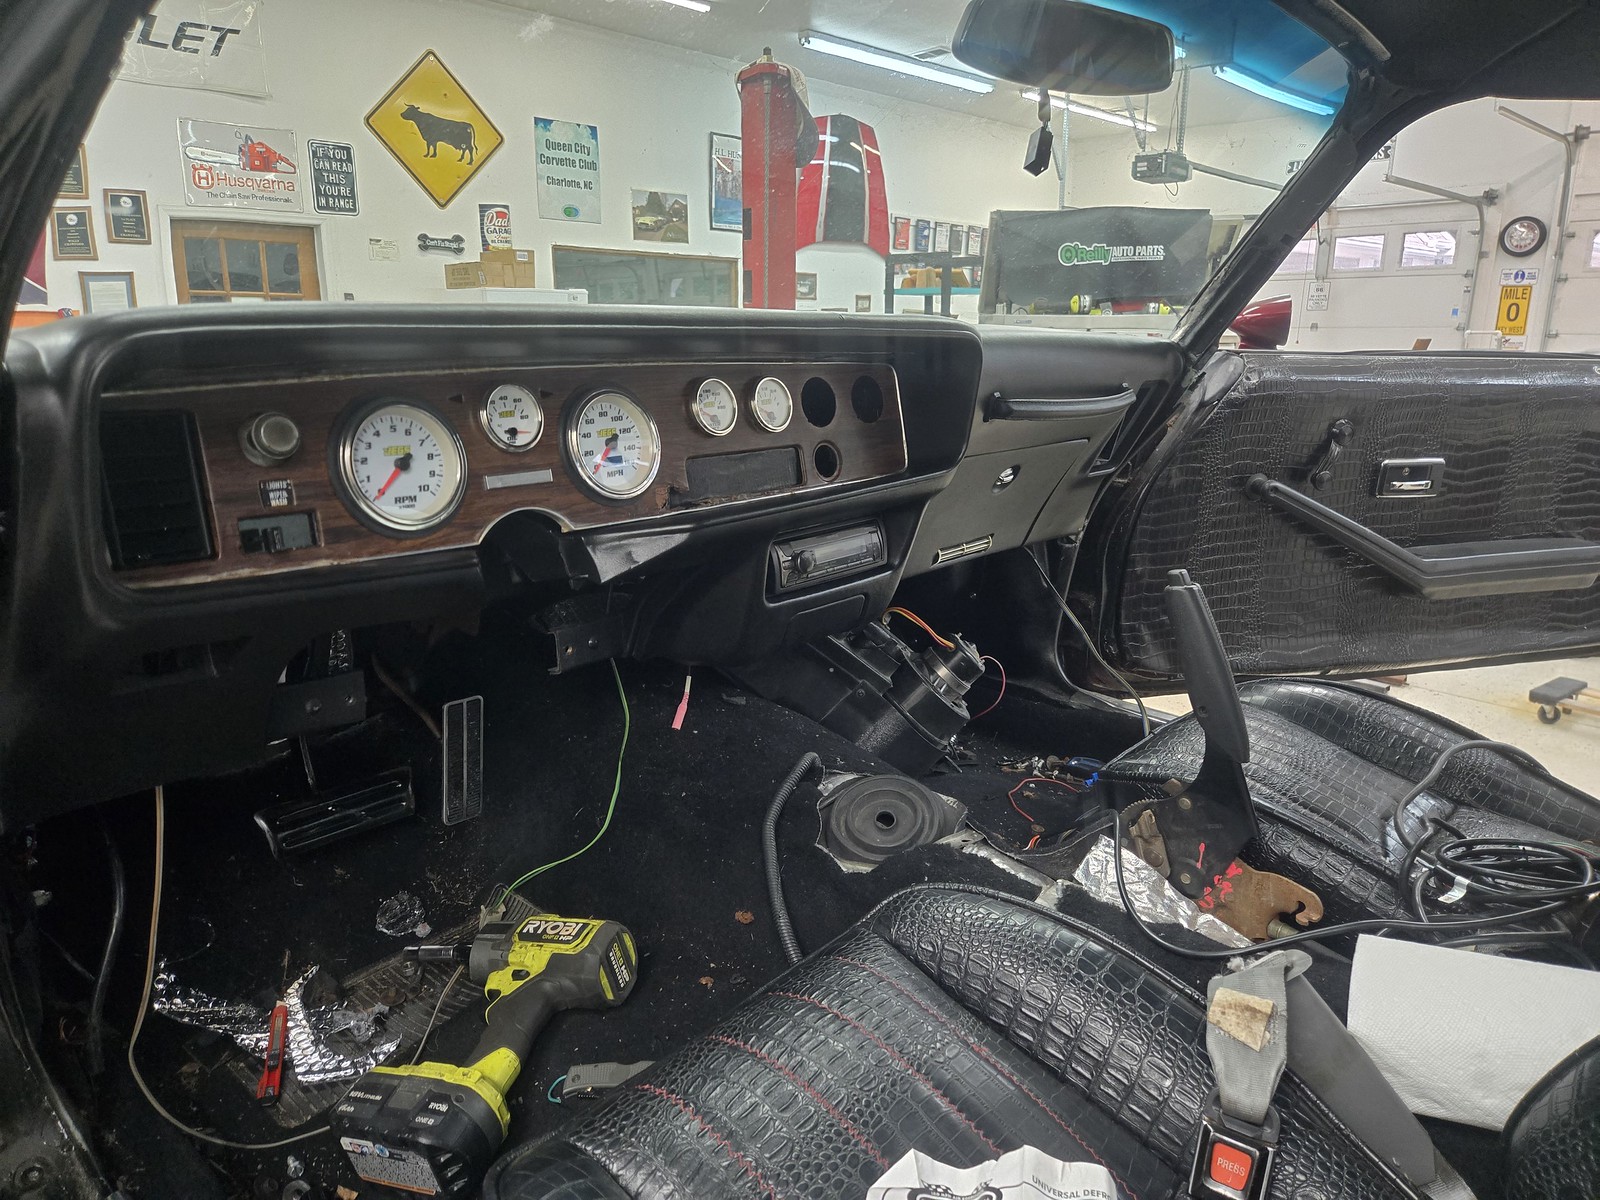 20260907_092825 by Michael Crawford, on Flickr
Stock console still wouldn’t fit, however. Due to the handbrake that was scabbed in, along with the brackets for that atrocious console they had in here. I also needed to pull some interior to run battery cables. Which means pull ALL the interior!!
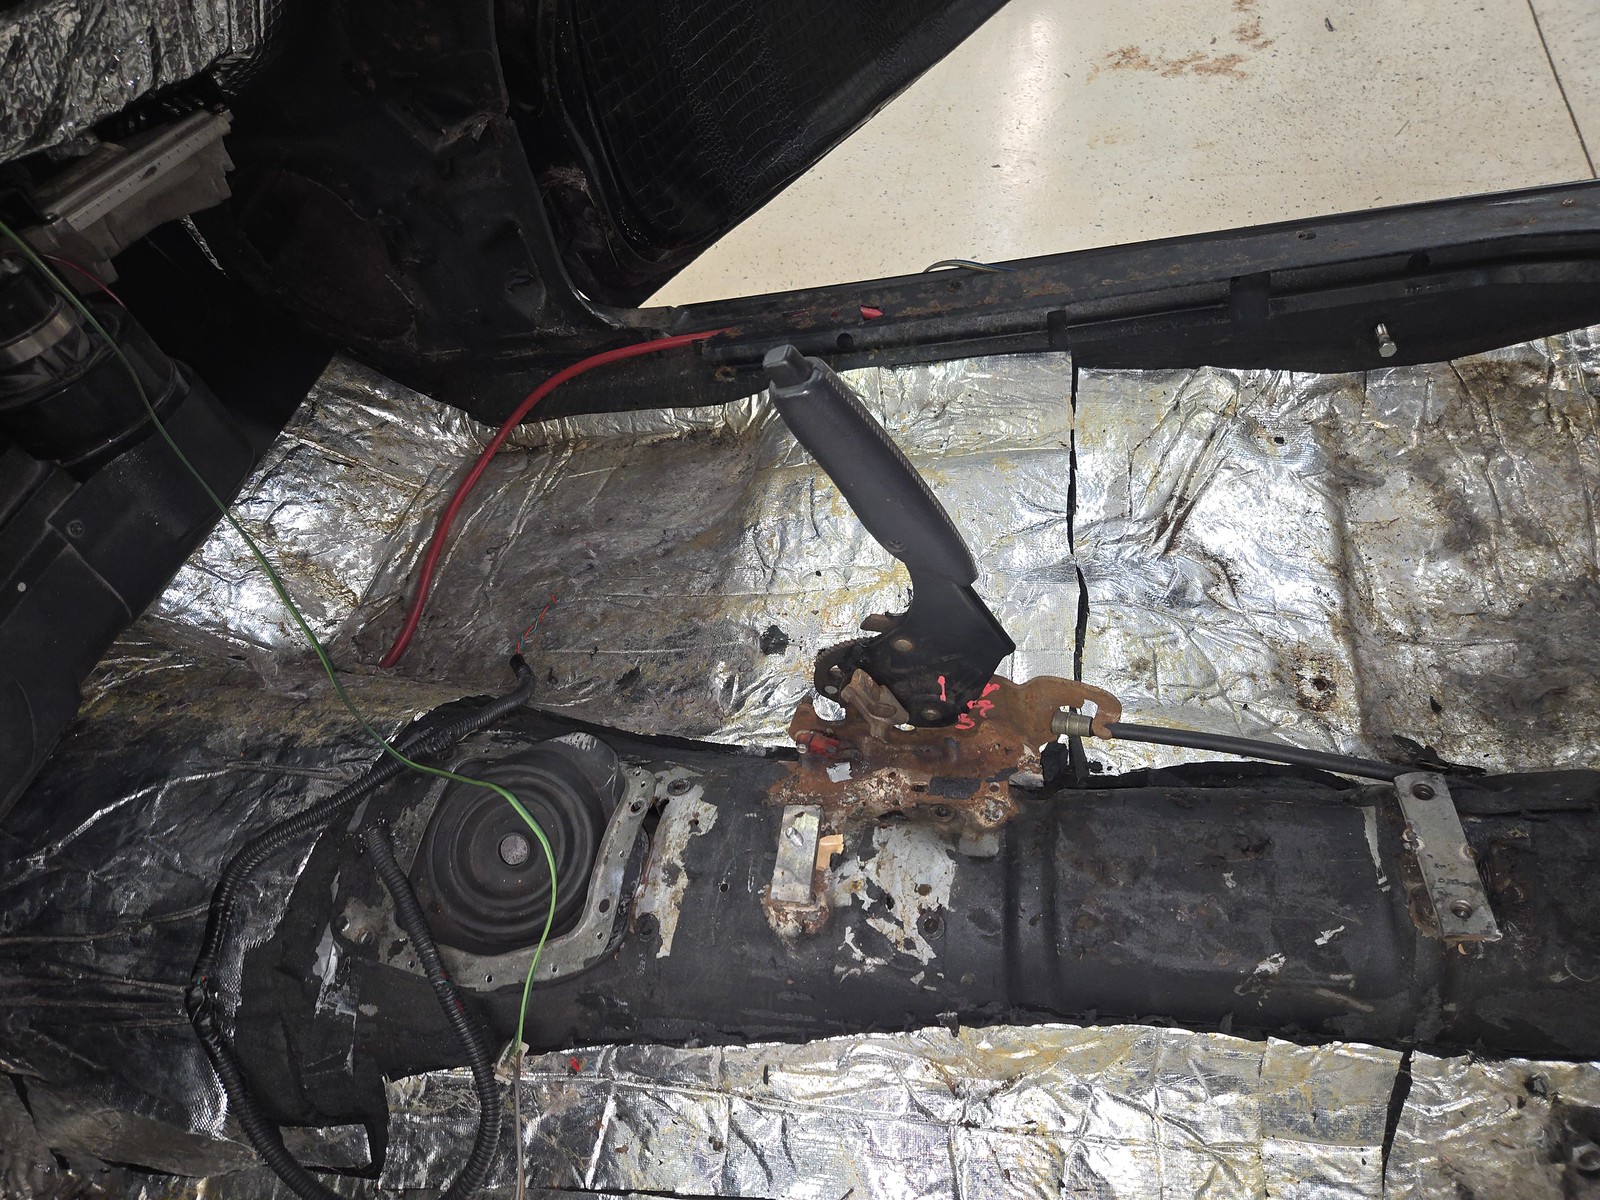 20260919_165805 by Michael Crawford, on Flickr
I chopped out the handbrake, leaving me some sins in the floor to deal with next. But luckily, the factory threaded inserts (though loose and spinning in the floor) for the shifter are still present so I have something to locate the console from and rebuild the rear mounts that are missing.
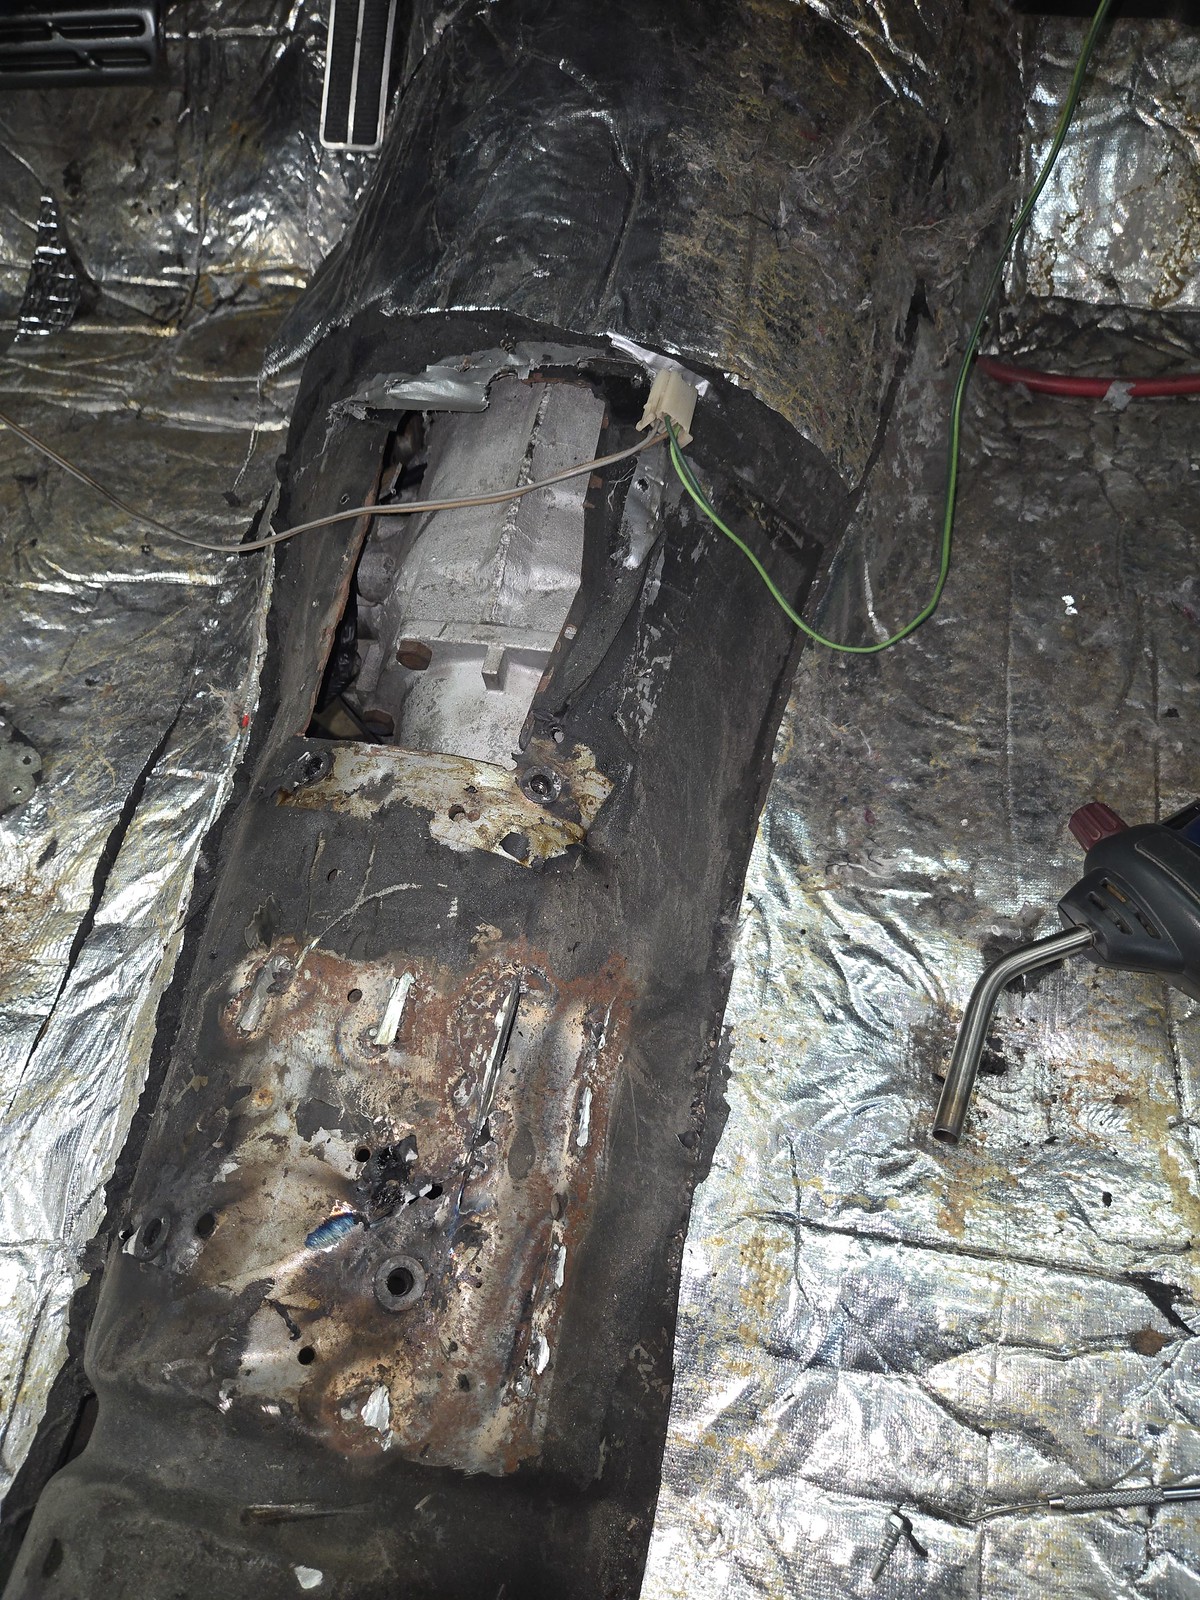 20260919_173326 by Michael Crawford, on Flickr
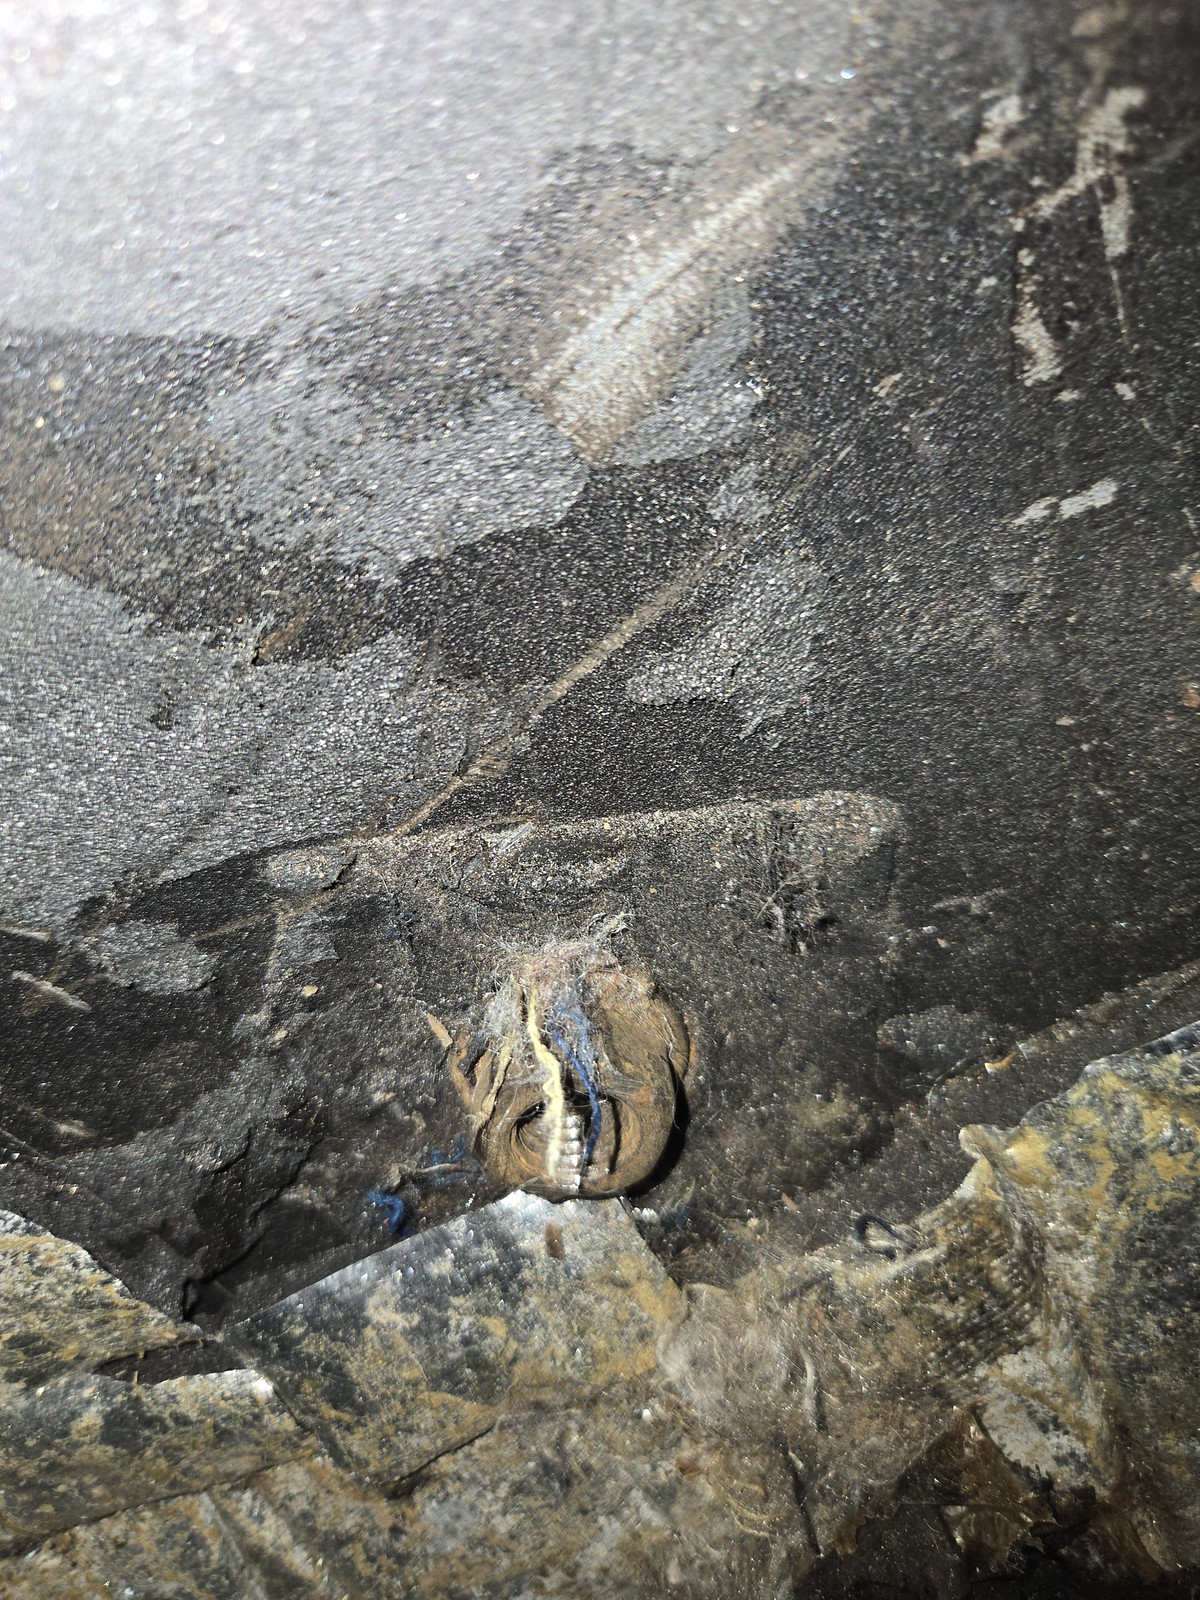
During this, I uncovered more sketchy crap. The PO used some bolts through the inner seatbelt anchors form the underside to make some sort of flimsy driveshaft safety loop. Then put a nut on the two exposed threads, and threaded the anchor bolt for the seatbelt lath into this nut. So it was held in by hopes and politician’s promises.
 20260919_173559 by Michael Crawford, on Flickr
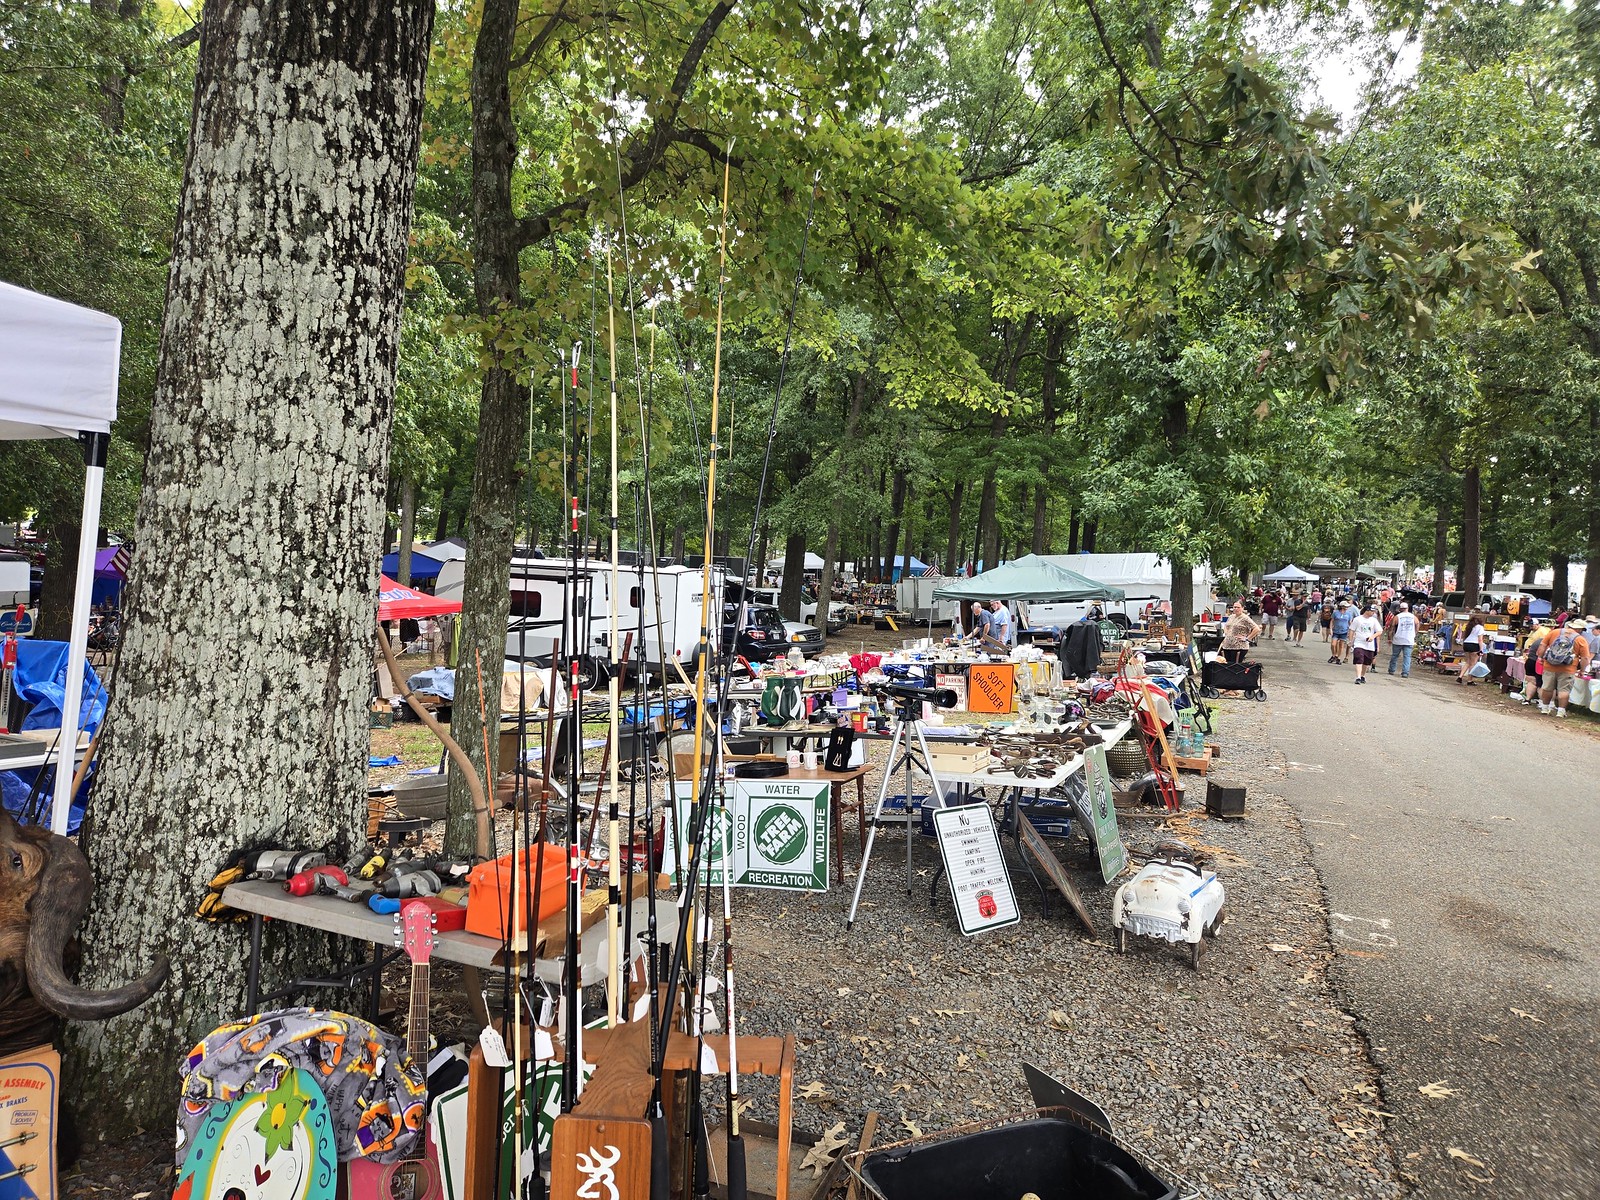
I however, cannot save the stock shifter. Ive tried. But its SOOOO far rotted out. Luckily, this weekend was the denton pickers fest. It was a good time. 22k steps…
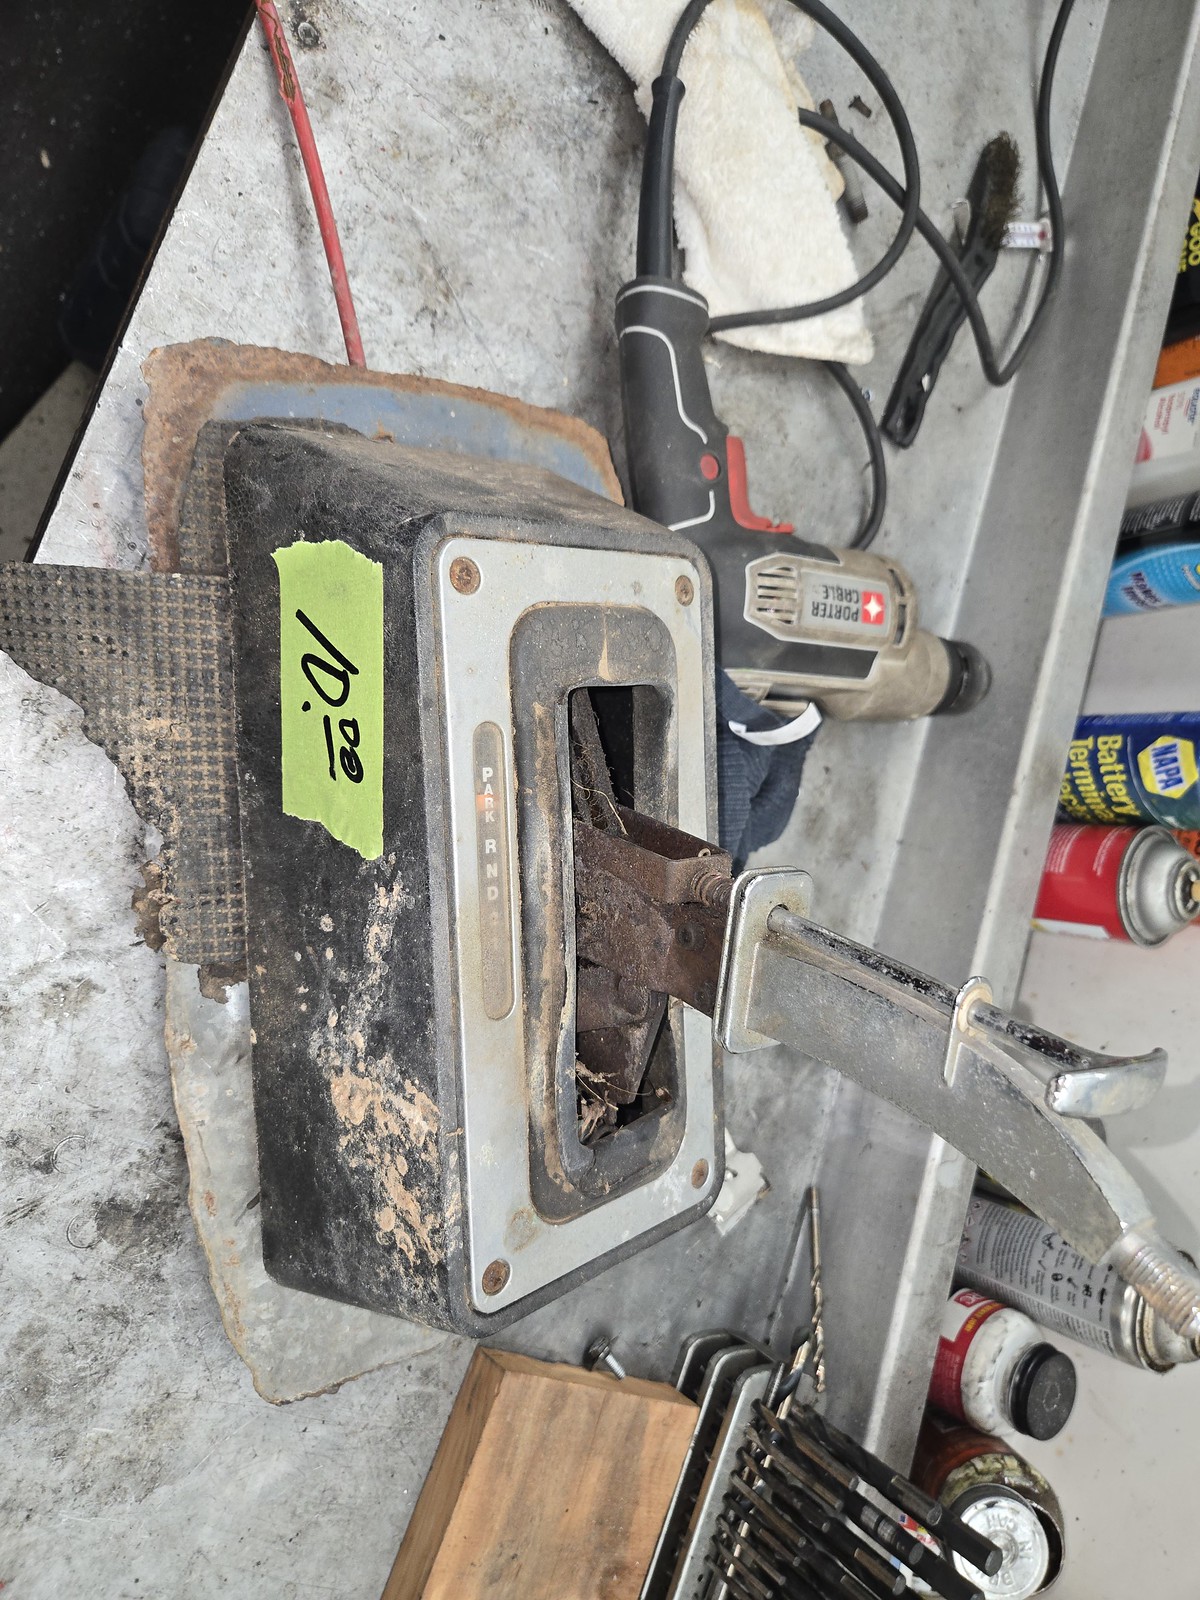
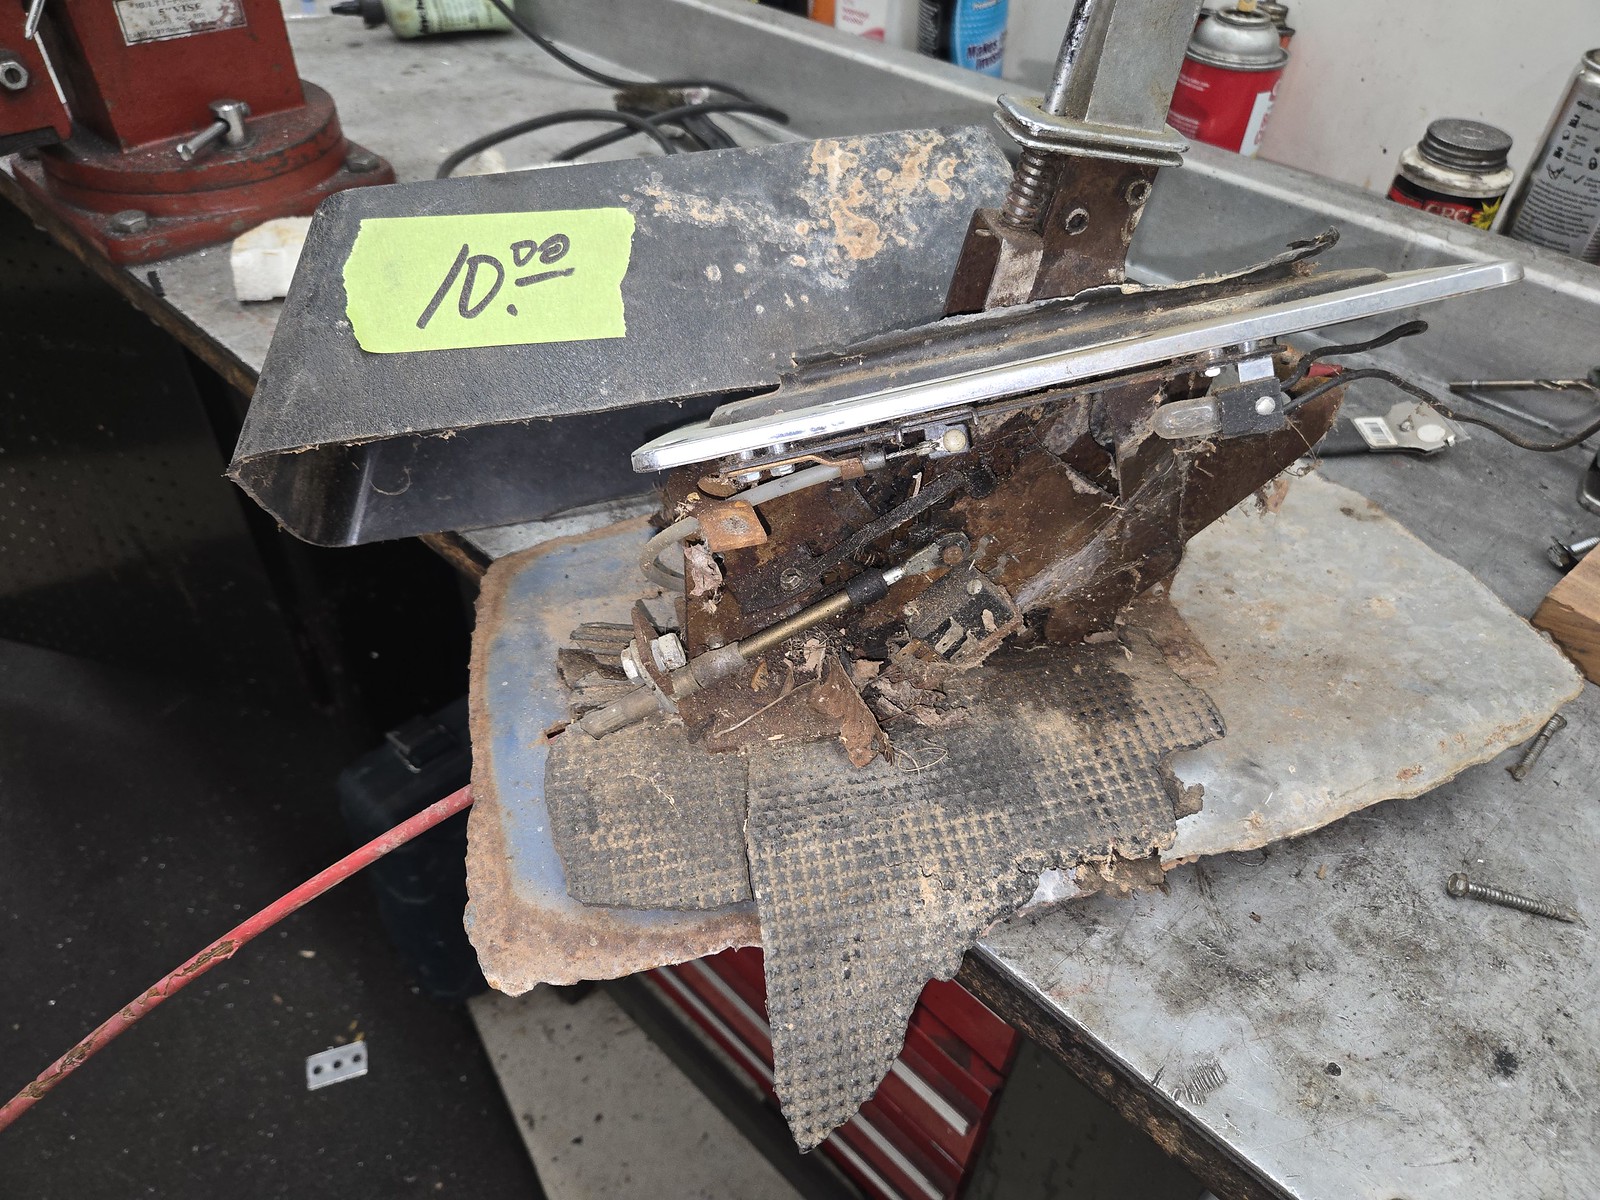
I found a very stiff to operate b&m megashifter with the cable and brackets with a $10 tag on it. lowballed the guy at 5, and he took it. figured out after I got home that there’s a pin you can pull, and it’ll run a 4speed auto!! I have to figure out how to square it up in the hole, mount it, etc, but step at a time here. First was taking it apart and getting it freed up. Which was pretty easy. Found it also had the backup light switch and neutral safety switch in it. SCORE! I need to figure out the dimensions for the bracket that b&m includes in the bolt in version of this shifter so I can locate it properly, and then fab up a top plate of some fashion to close it out. However, pretty is secondary to test drive at this point.
 20260919_105041 by Michael Crawford, on Flickr
 20260920_091249 by Michael Crawford, on Flickr
 20260920_091751 by Michael Crawford, on Flickr
Battery got mounted in the trunk, and mostly wired up. Cutoff switch will be put into the side marker light hole with an aluminum plate for challenge purposes, and moved inside the trunk afterwards.
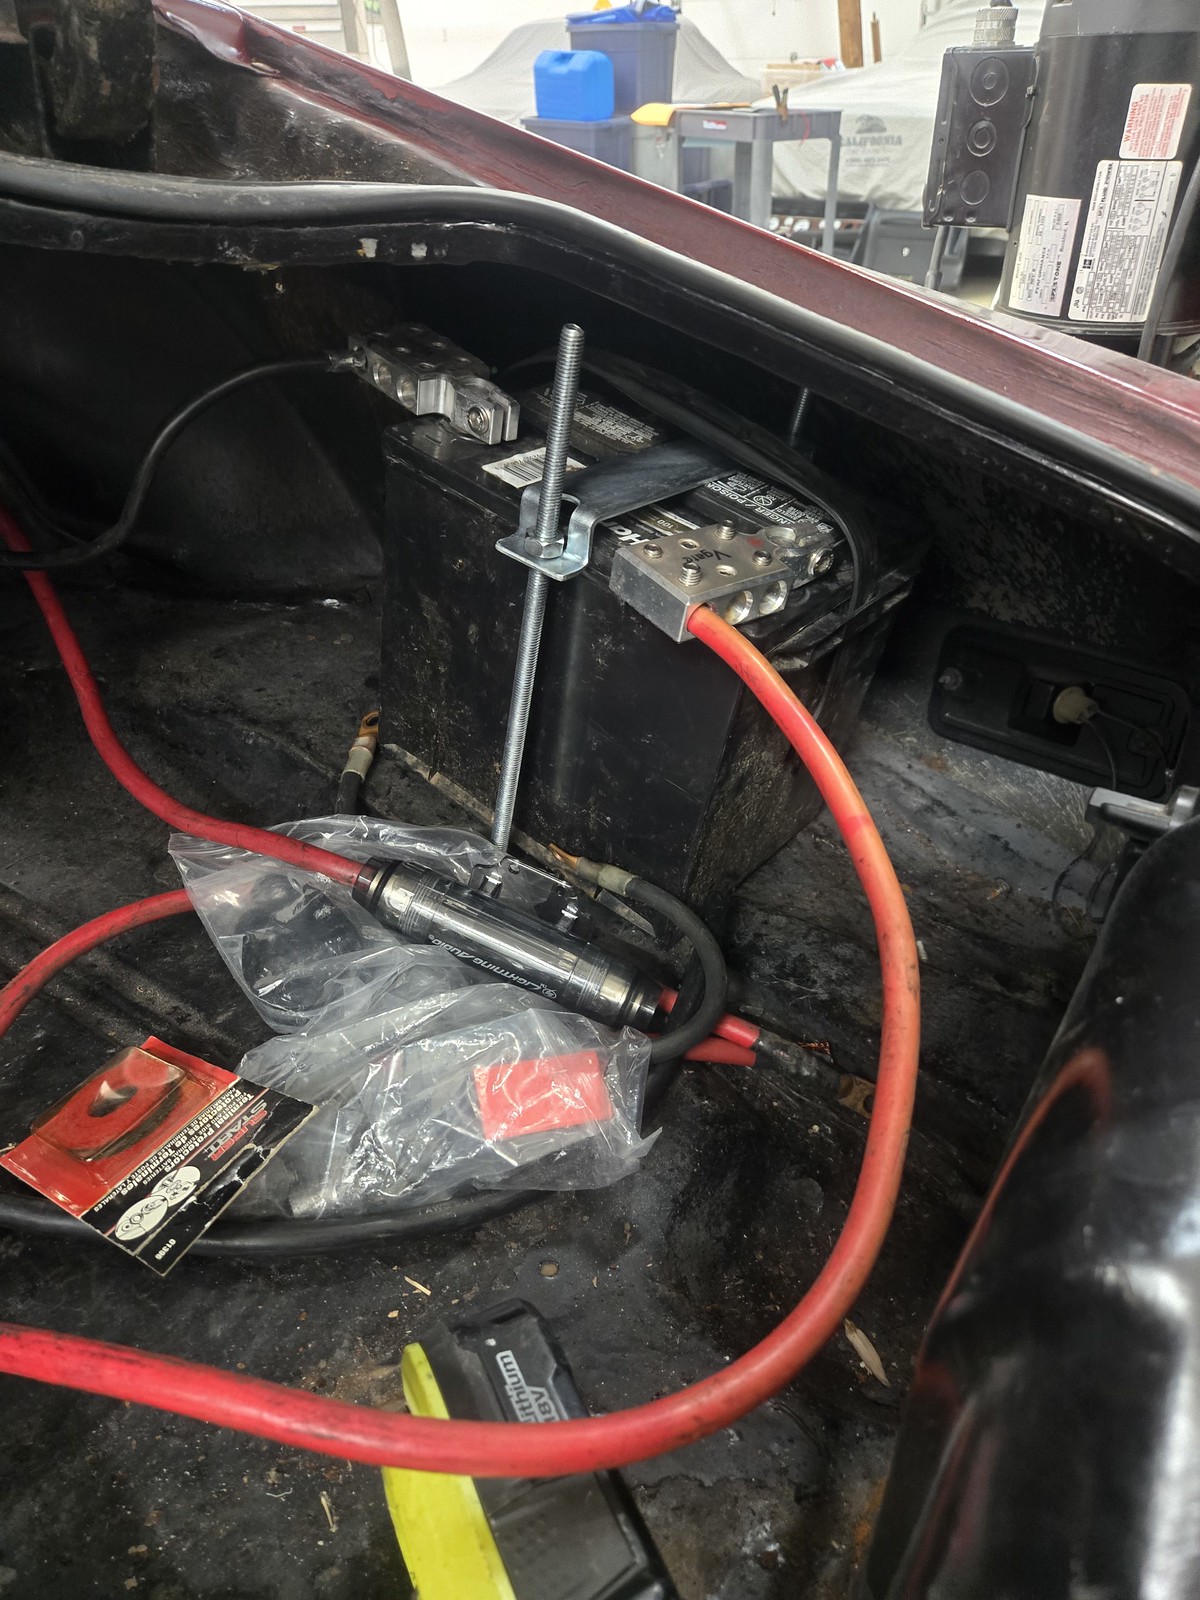 20260915_193752 by Michael Crawford, on Flickr
Lastly, I started off making up some exhaust plans. Bought some boom tubes from marketplace, and some 2.5 inch exhaust and glasspacks from runion. When coupled with some flanges that I have to get yet, and some m18x1.5 nuts for o2 bungs, I should have a sub 50 dollar minimally viable exhaust!
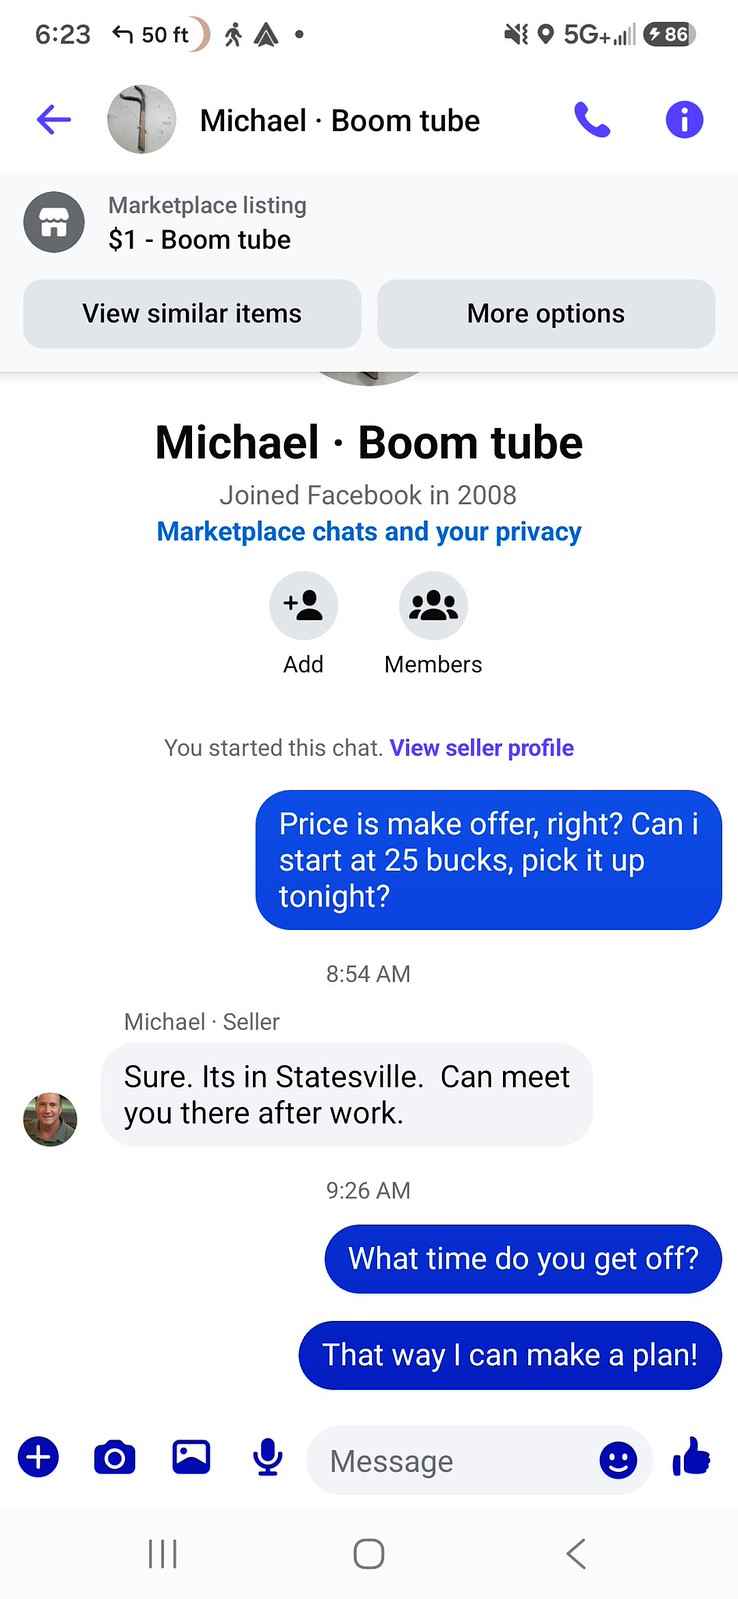 Screenshot_20260916_182307_Messenger by Michael Crawford, on Flickr
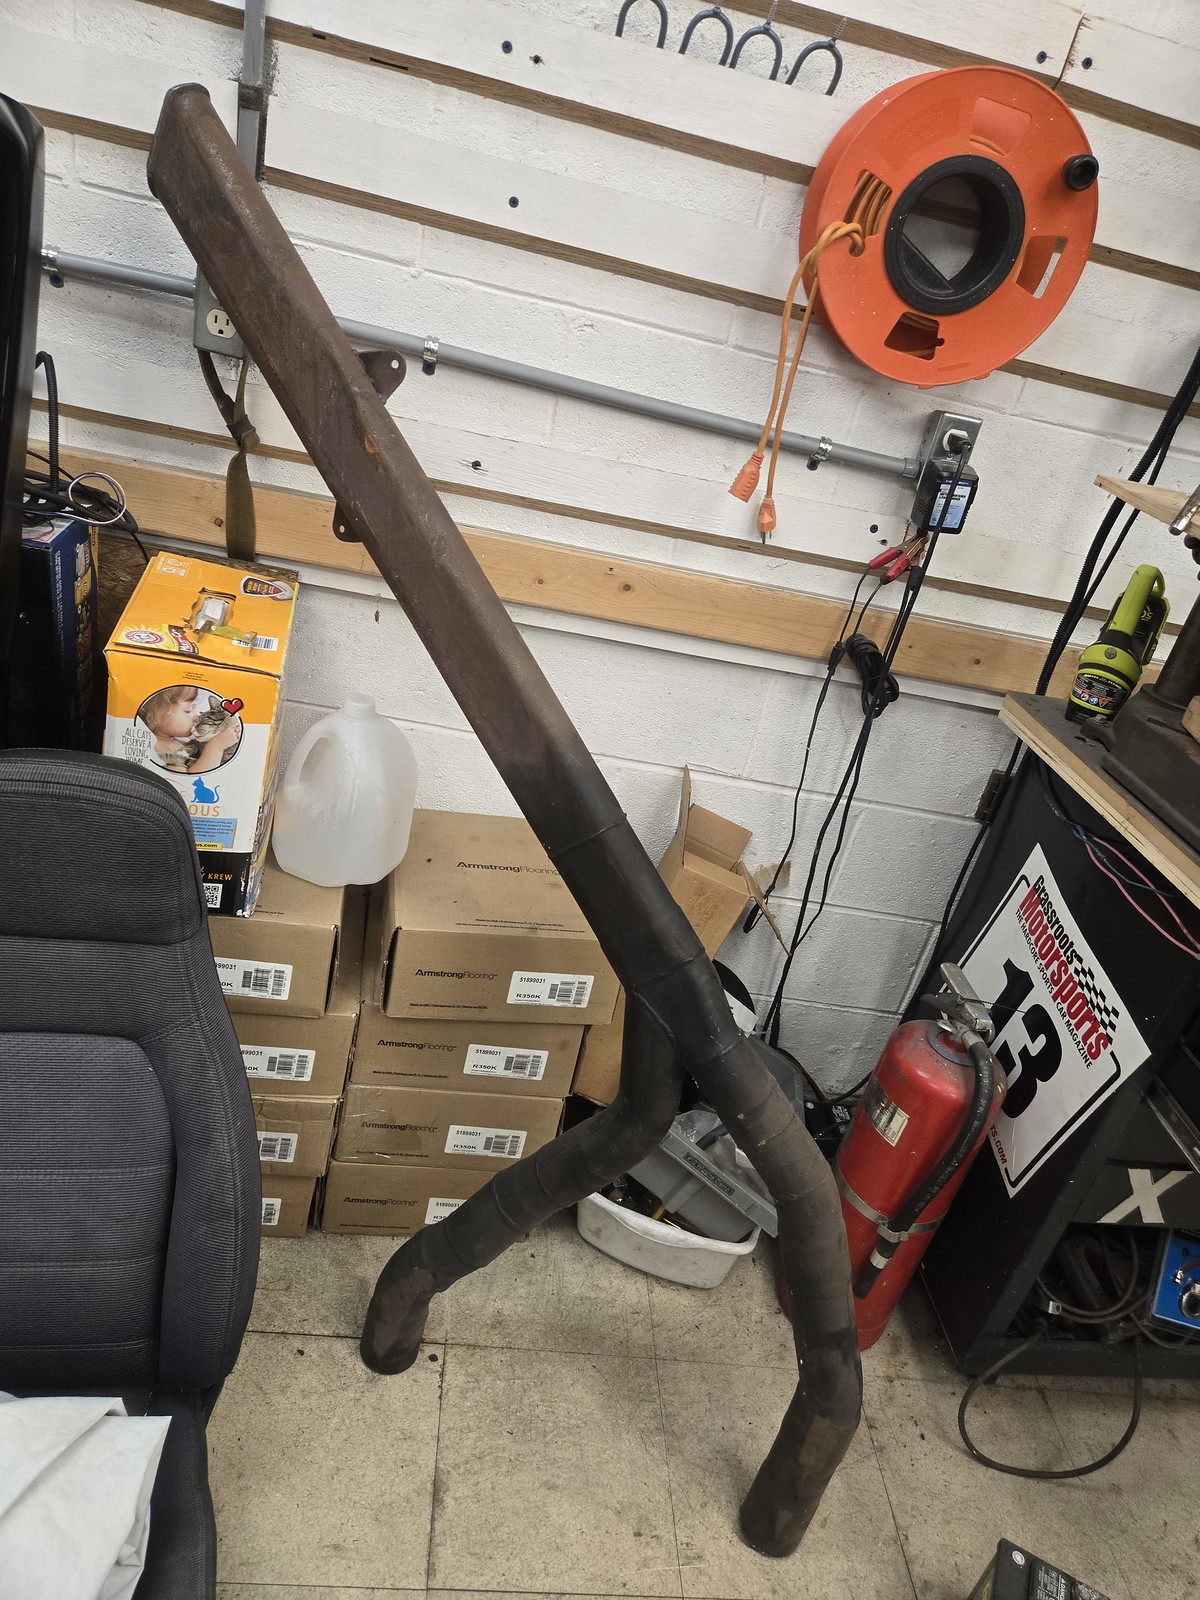 20260916_195607 by Michael Crawford, on Flickr
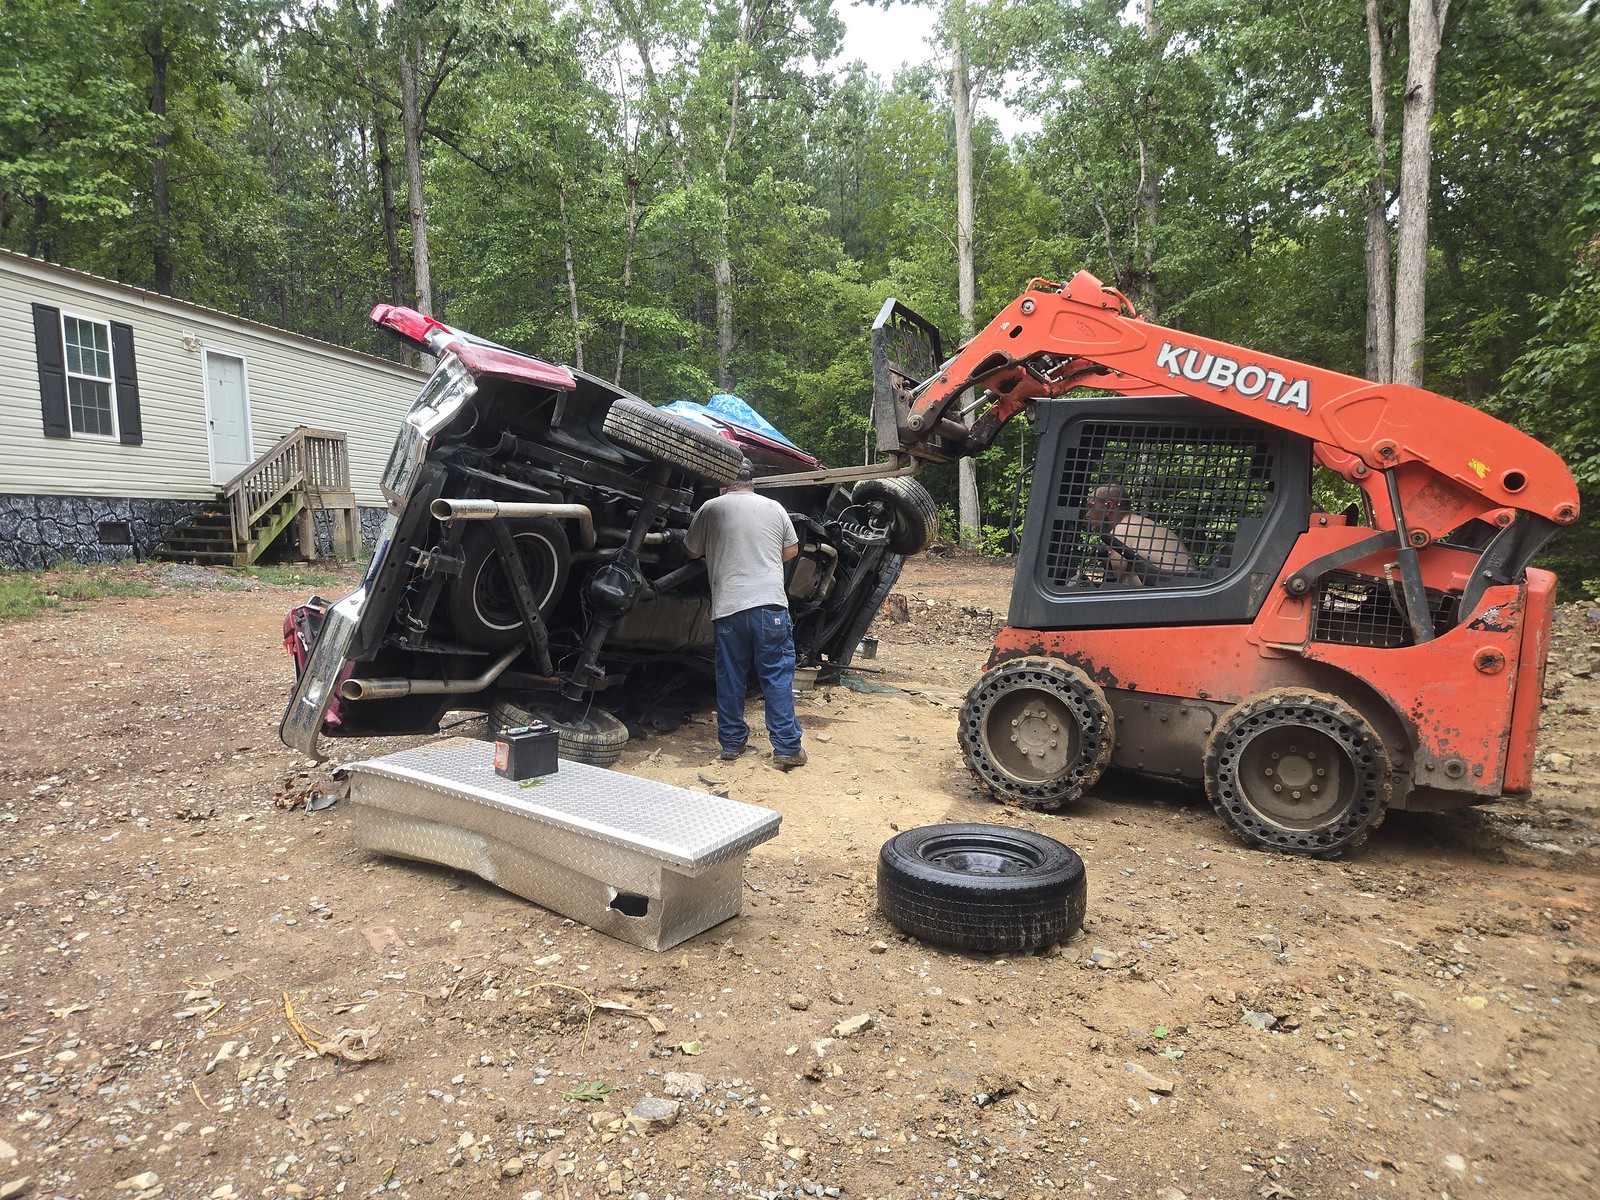 20260905_160517 by Michael Crawford, on Flickr
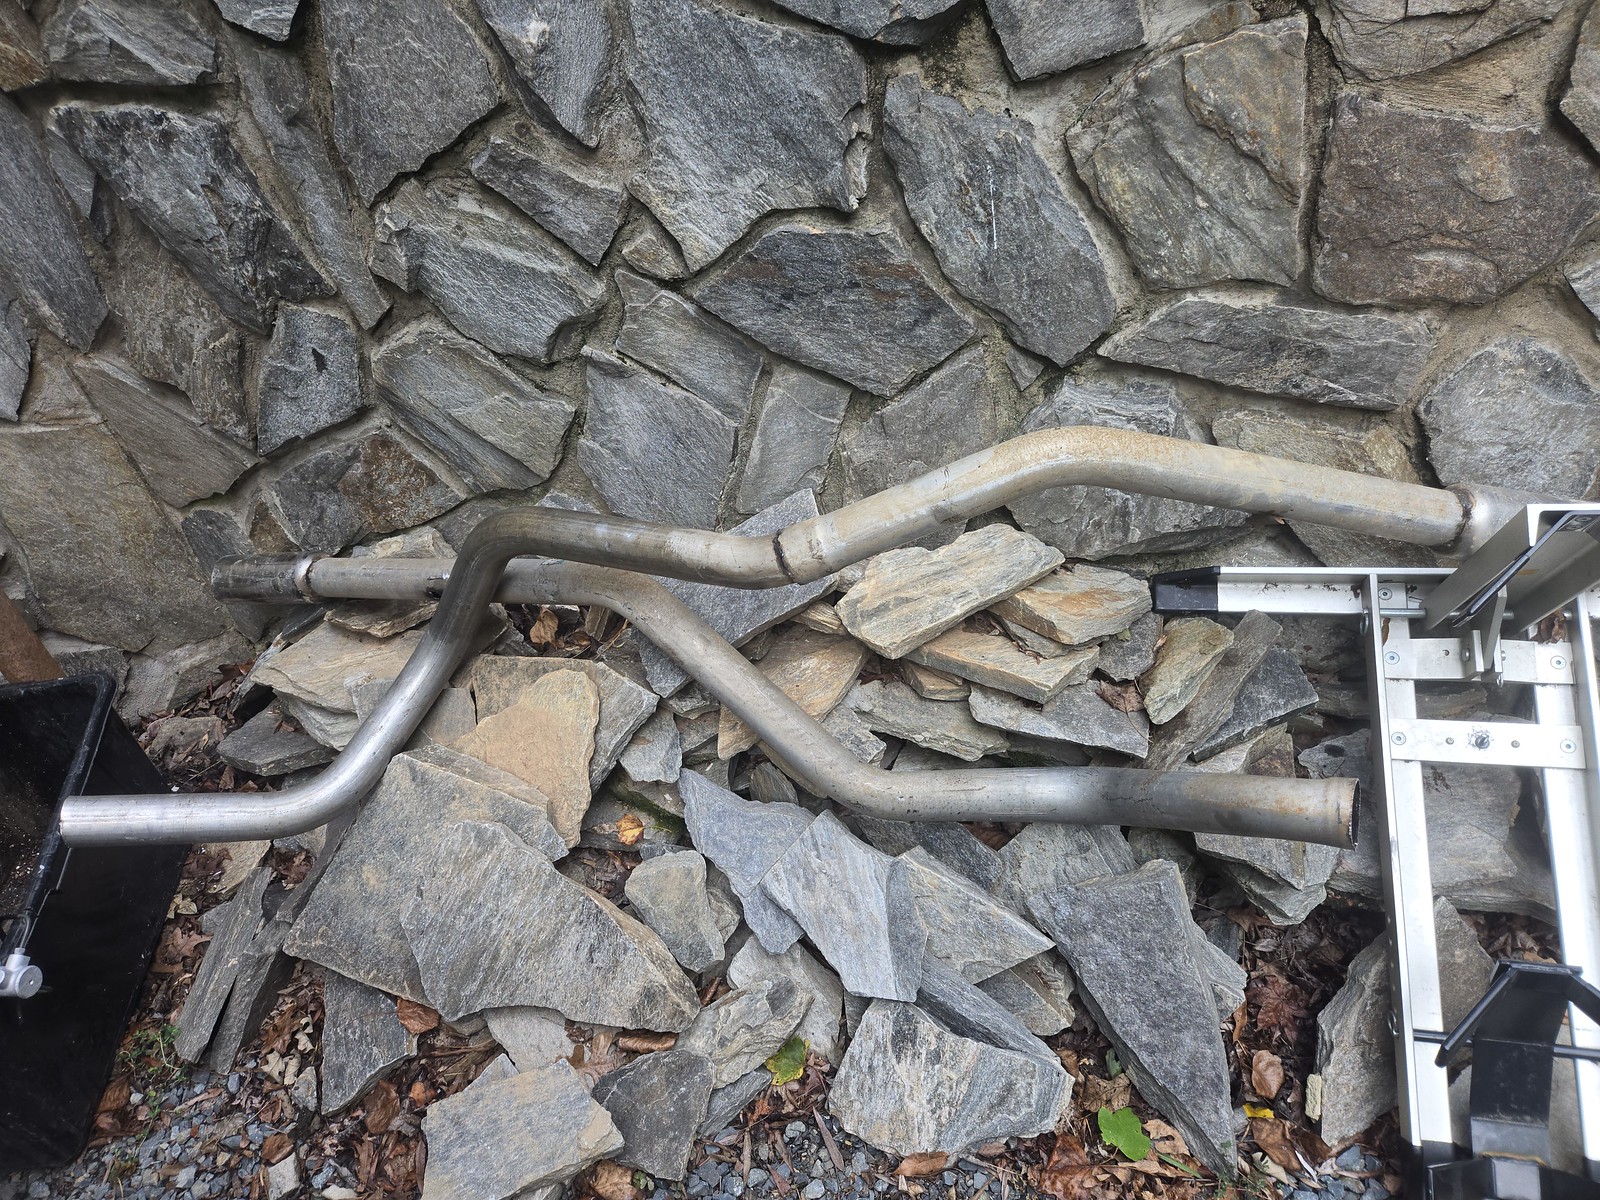 20260905_174219 by Michael Crawford, on Flickr
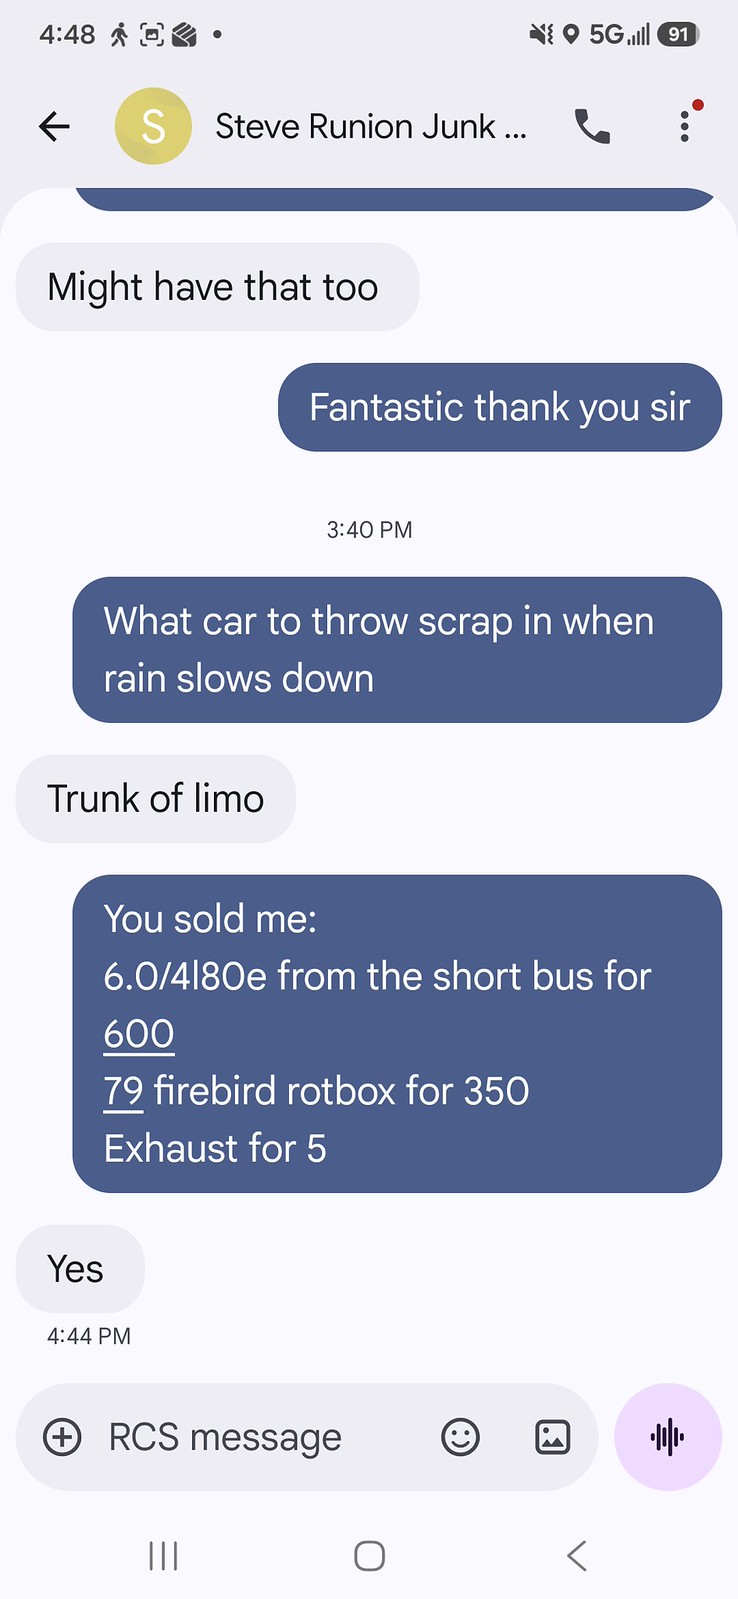 Screenshot_20260905_164856_Messages by Michael Crawford, on Flickr
I think that gets us current. It sure feels like more work than it looks like…..Michael Crawford
1970 plymouth Duster back under construction:
https://www.pro-touring.com/showthre...uring-makeover
1987 GMC S15 https://www.pro-touring.com/showthre...ct-drivabeater

 Reply With Quote


