

Results 1 to 10 of 10
Threaded View


-
04-04-2018 #1

 Registered User
- Join Date
- Nov 2010
- Location
- Ventura County CA
- Posts
- 556

REAR 3pt Seat Belt Install Morris Classics '70 Nova
My 7yo son outgrew the car seat I was using in my '70 Nova last year. It was attached via the OE lap belts and put him in a 5 point harness, but now he's in a booster and has to use whatever belt is in the car. The safety of my kids is very important to me, so I ordered a set of Morris Classics 3 point retractable belts for the back of the car from Matt's Classic Bowties. The interaction with MCB was great - very friendly and speedy fulfillment. The belts themselves are not cheap and I considered adapting something else, but I thought having a ready-made solution would speed things along. My son's been begging for a drive and I can't wait to get out with him again.
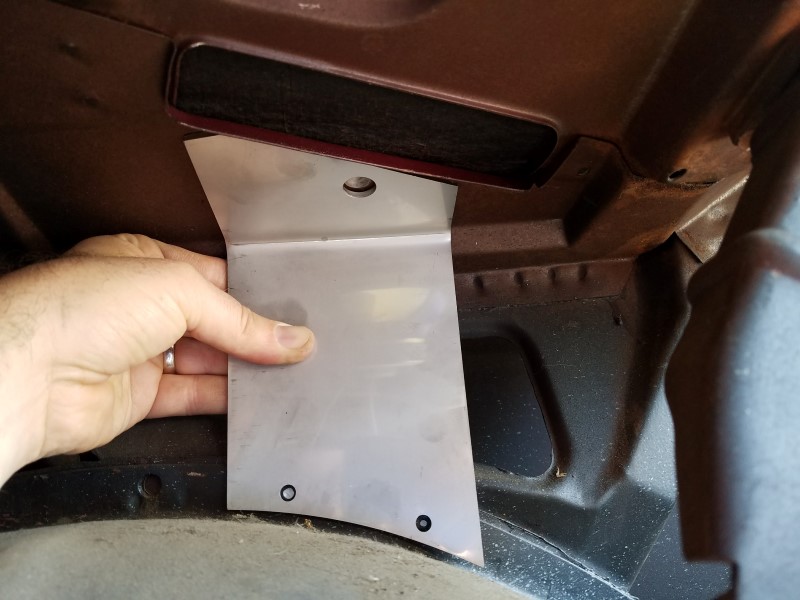
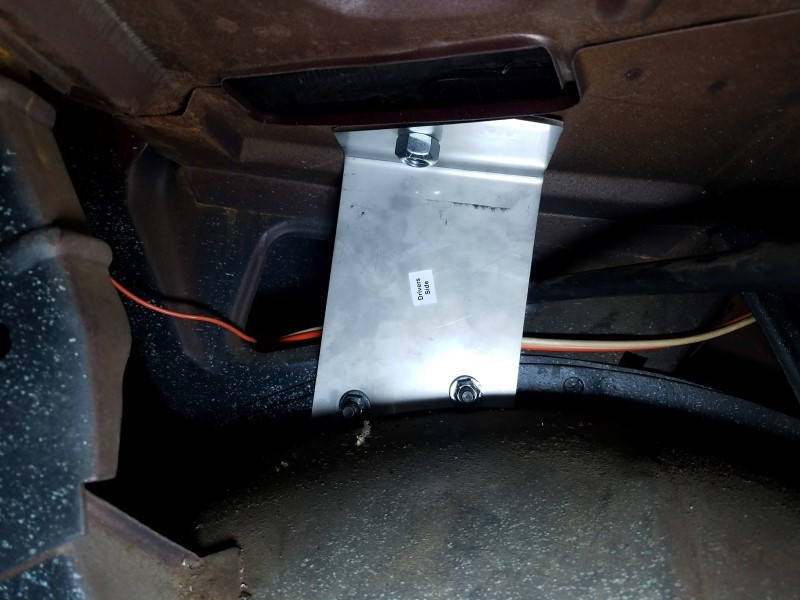
The trick to this belt install is having a suitably reinforced mounting point for the retractor. I understand there was a rarely-ordered 3 point belt option for the Nova that mounted to the package tray, but the area is probably 18 gauge or thinner sheet metal. Morris came up with a simple angle bracket that ties from the package tray down to the wheel tub seam and trunk support brackets. I really like this solution since it attaches to a nicely reinforced area in the trunk; I don't think they do this the same way on the 1st gen Camaro.
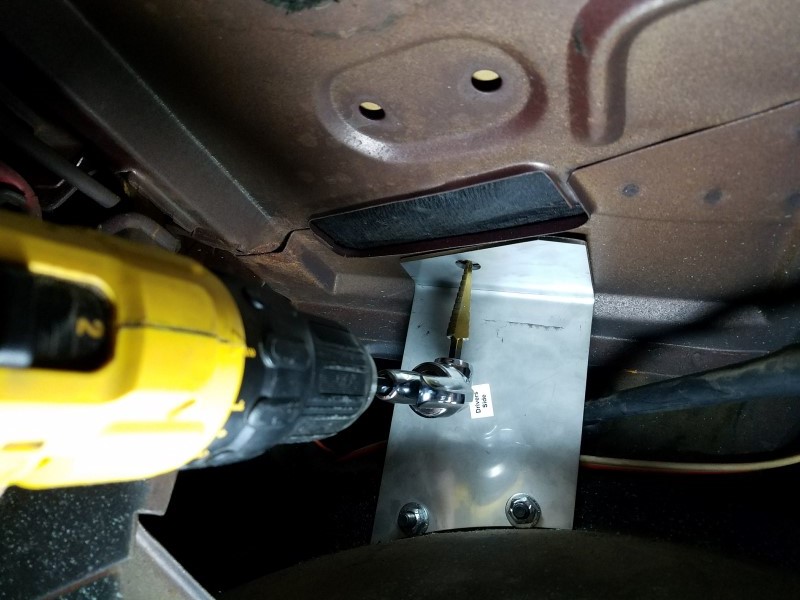
Installation requires drilling three holes in a very confined space. Here is the mounting bracket in position:
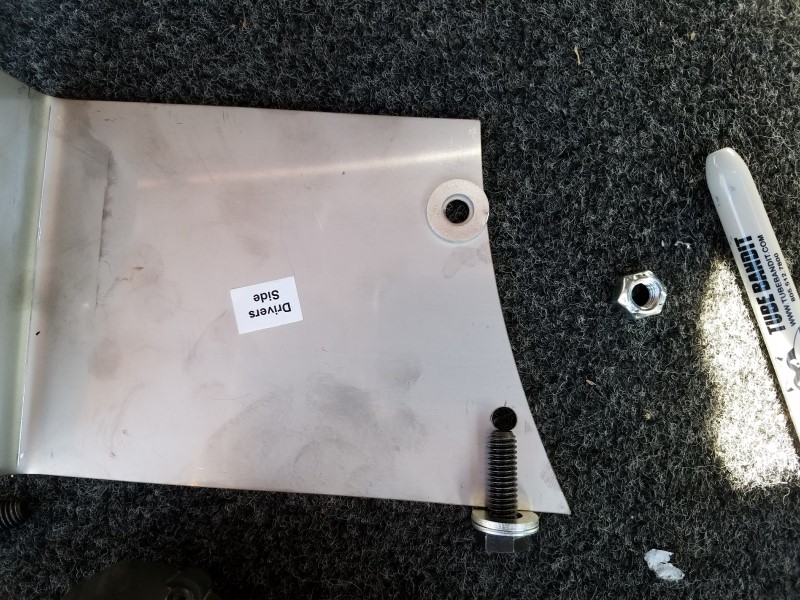
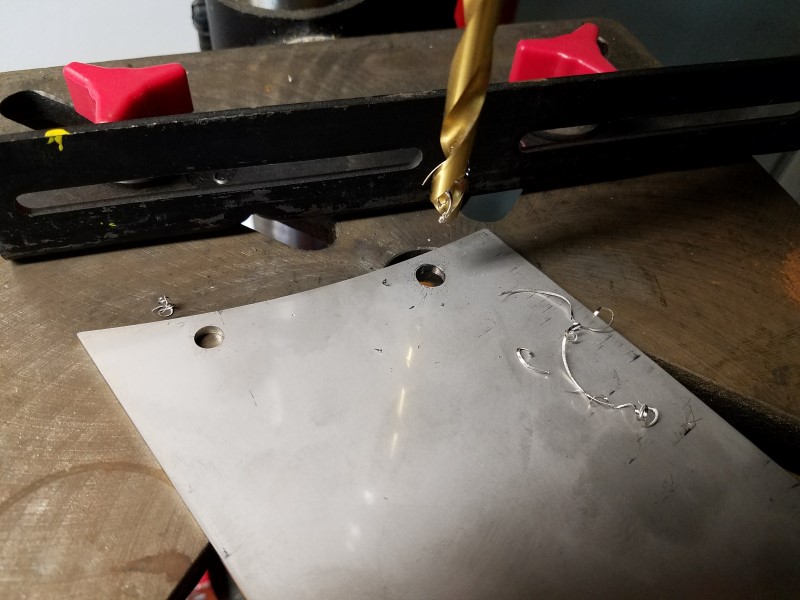
It's not a good sign when the supplied 5/16" fasteners do not fit through the holes in the supplied bracket. I called Morris and apparently I was the first to tell them the holes were undersized. They confirmed there was an error at the laser cutter and told me to go ahead and drill the holes to the correct size.
The photos don't do it justice, but this bracket is located in a very tight space inside the trunk. I did a lot of cussing while tightening up the little 5/16" all-metal lock nuts (aka crimp nuts) because they were too close to the edge to get a socket on and I had to use an open ended wrench about 1/8 turn at a time to snug them down. This took quite a while, especially while contorted awkwardly in the trunk. If you read the instructions, the brackets should have about 1/8" gap at the bottom and I may have put them a little closer; sliding the bracket back a little might give more gap and allow space to use a ratchet. Fortunately I didn't drop any hardware or tools down into the quarter panel.
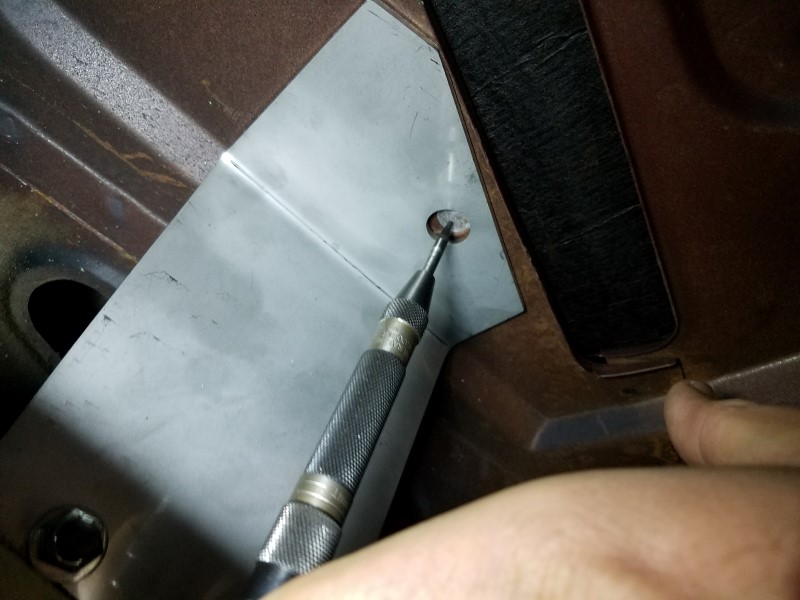
In the next photo you can see the bracket shifted a little after attaching the lower bolts at the wheeltub. This is why you should drill the larger retractor mounting hole after the bottom bolts are installed. I ignored my original marking and used a spring-loaded center punch to locate the new center of the hole for drilling. A spring-loaded center punch is a tool everyone should have; it makes punching a locating dimple very easy even in confined spaces.
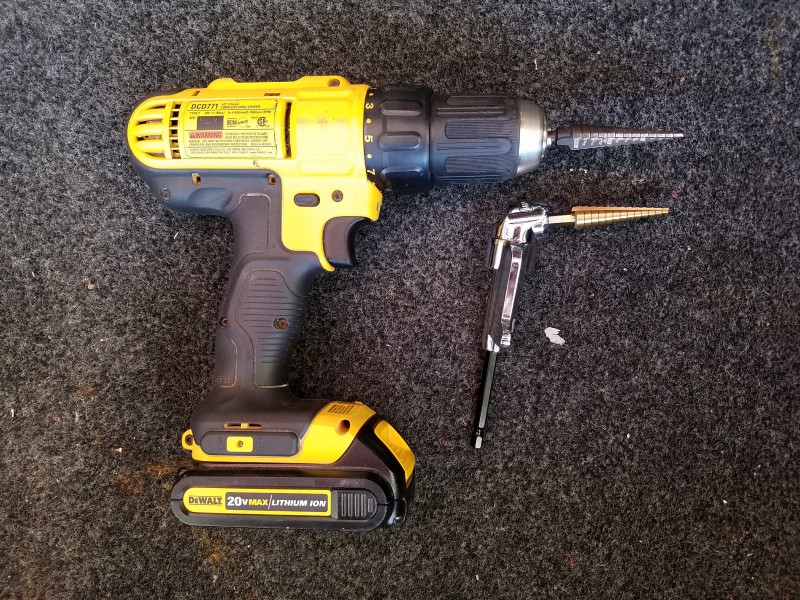
My next problem was drilling the 1/2" hole up through the package tray. From experience I know only a step bit aka unibit would make a satisfactory hole in this sheet metal. What I wasn't counting on was the lack of space between the package tray and the wheel tub. There is only about 5-1/2 inches to work with in there and it's not nearly enough space for a standard drill. Even a right angle drill would probably not fit due to the length of the chuck and drive system. The solution I came up with was to use a Milwaukee offset hex driver P/N 48-32-2100 and a Harbor Freight hex drive step bit. This offset driver is not exactly 90 degrees (although they do make that as well P/N 49-82-8510), but it was on the shelf at my local big box hardware store. Here's a comparison of my cordless drill and the offset driver with step bits.
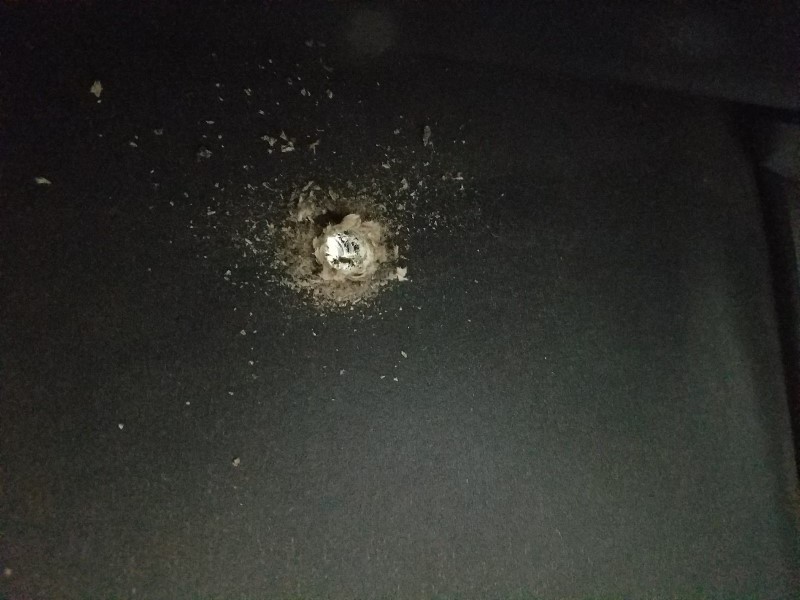
That goofy setup did the trick. I was able to make the hole up through the package tray. It even carved through the tray itself without any drama.
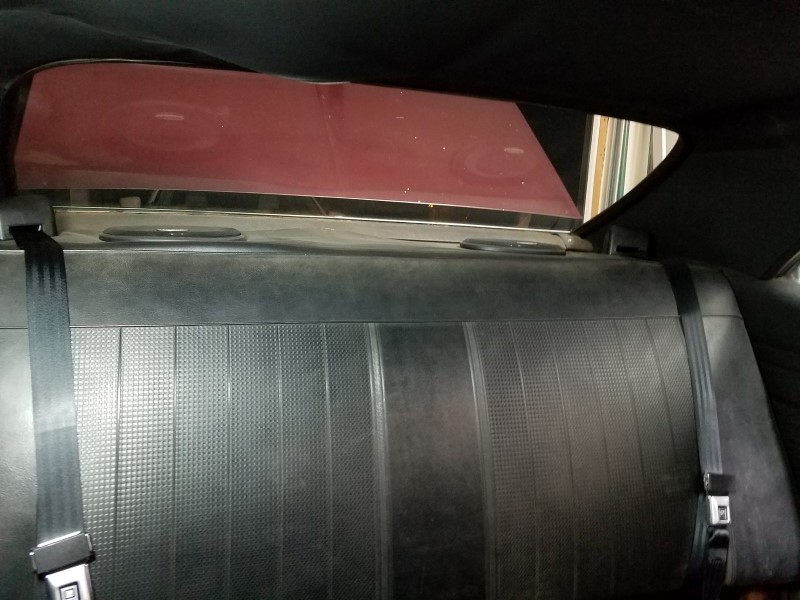
Next I sat the retractors and pushed the 1/2" bolts down from the inside of the car. Below are both brackets installed with the retractor attachment nuts loosely attached - I didn't have a helper in the garage last night so I will need to go back in and put washers on before tightening these down.
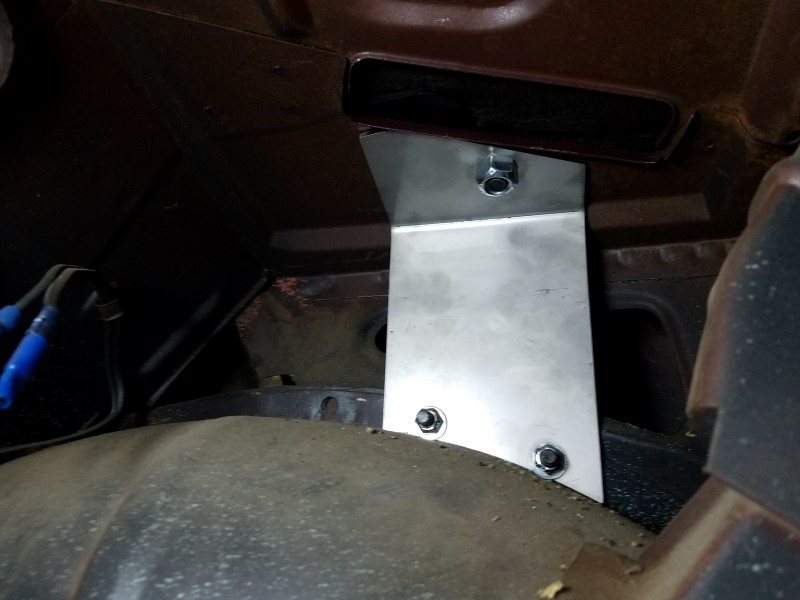
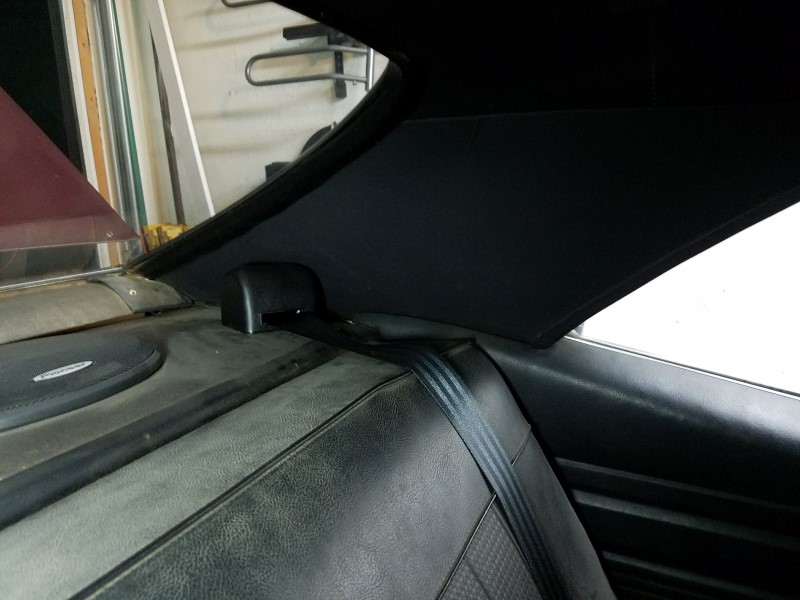
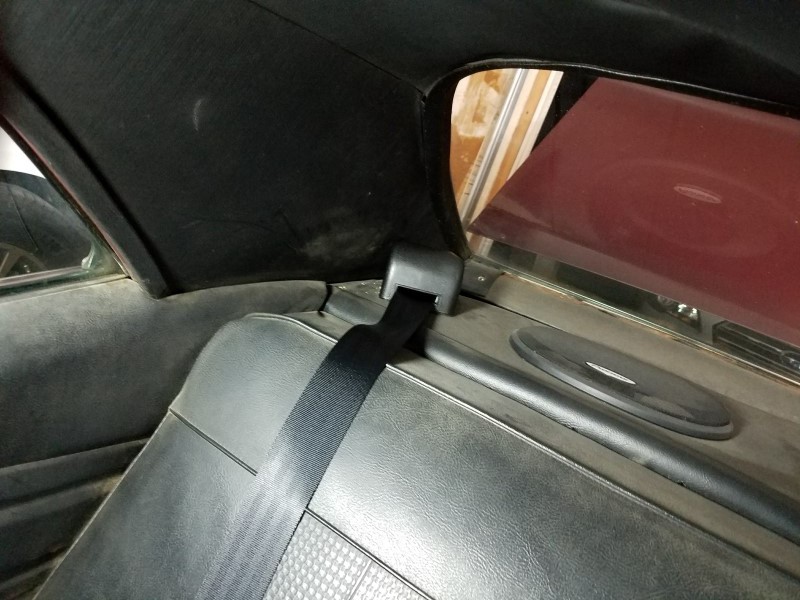
The next photos show where the retractors sit in the car. They are tucked back very close to the sail panels. I am really happy with the location. They are about as out of the way as I could hope.
 Clint - '70 Nova "restomod" cruiser & autocross family car

-

 Reply With Quote


