


Results 21 to 36 of 36
Thread: 1976 Trans Am Pro-Touring Build
-
03-24-2017 #21
 New to Pro-Touring
- Join Date
- Feb 2017
- Posts
- 99
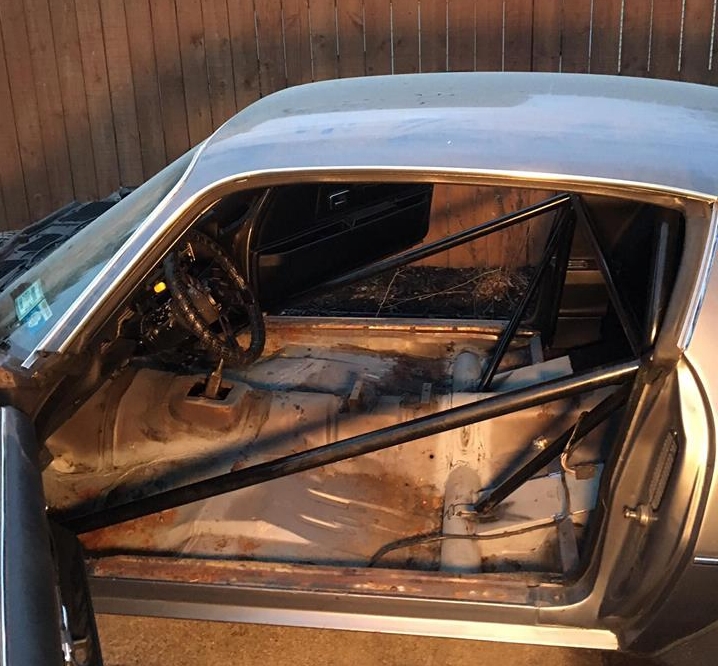
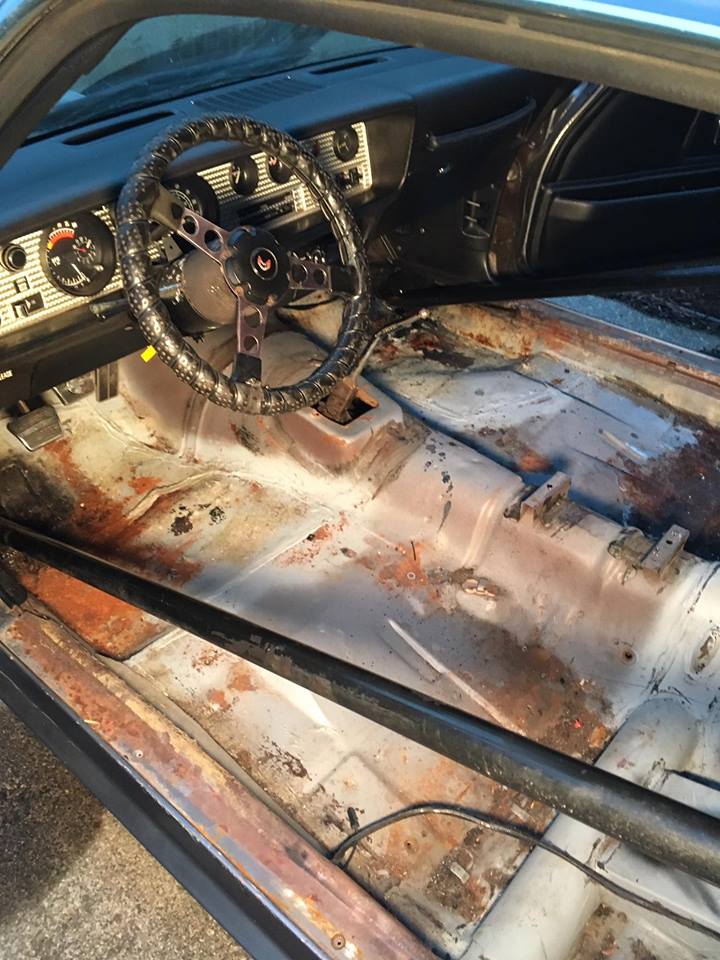
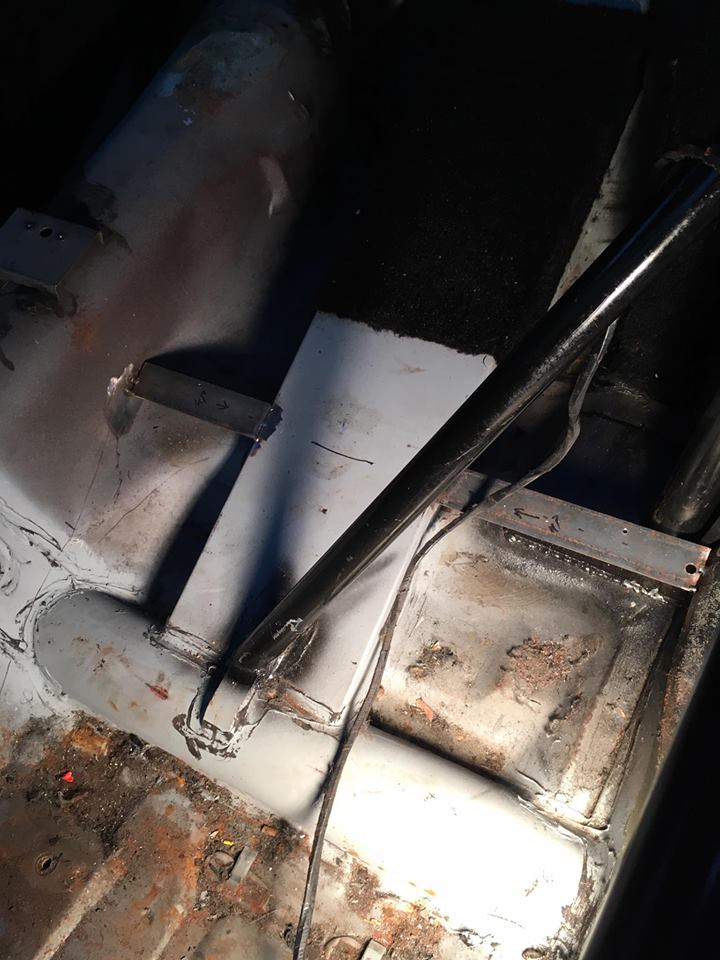
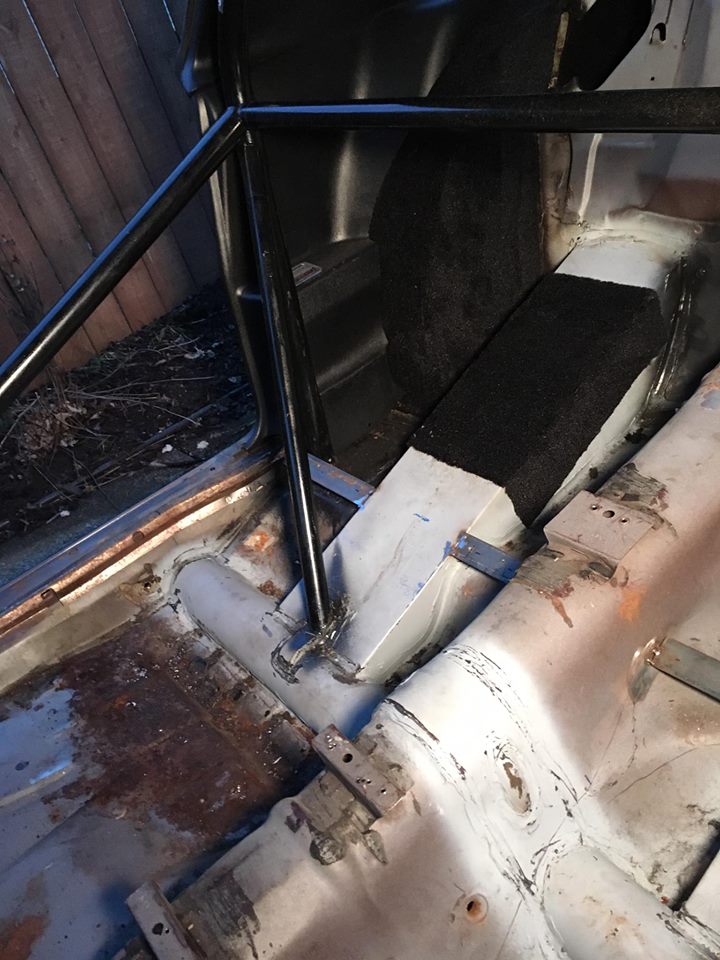
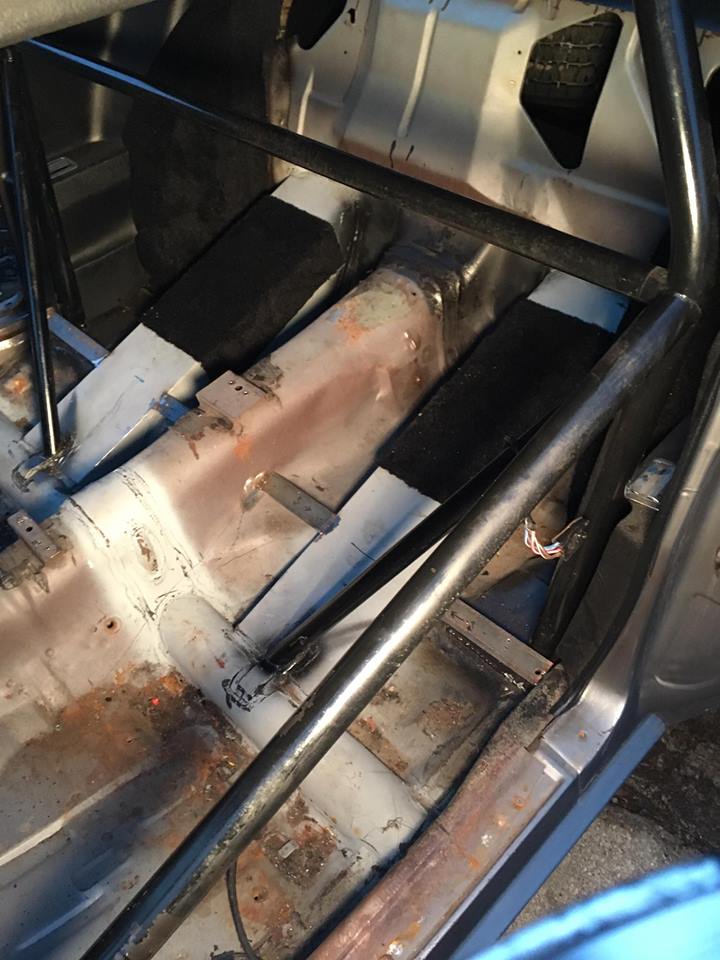
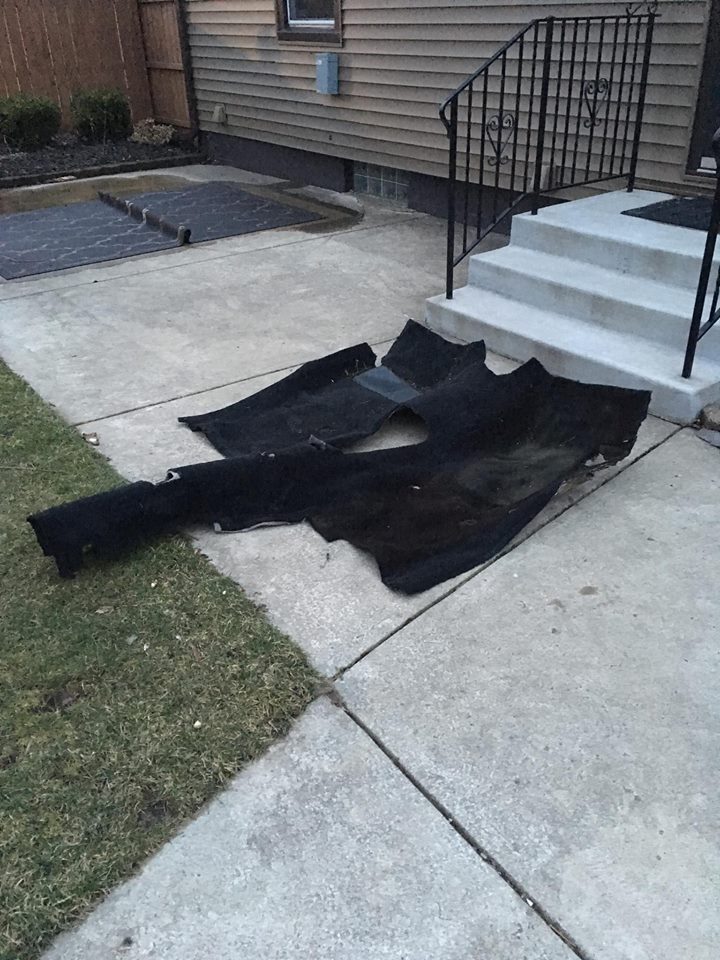
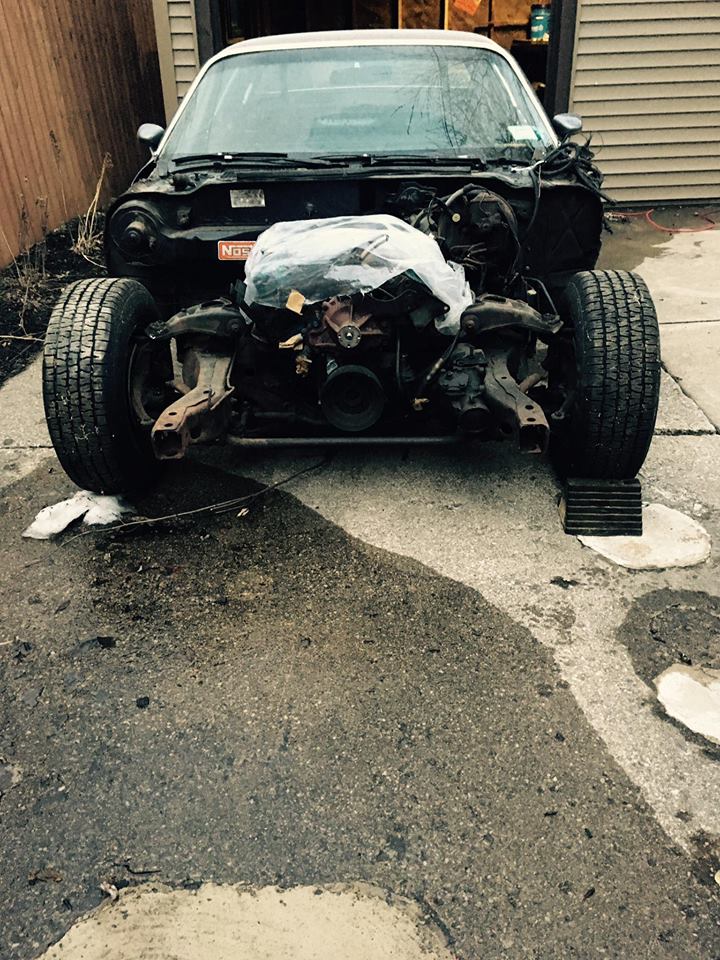
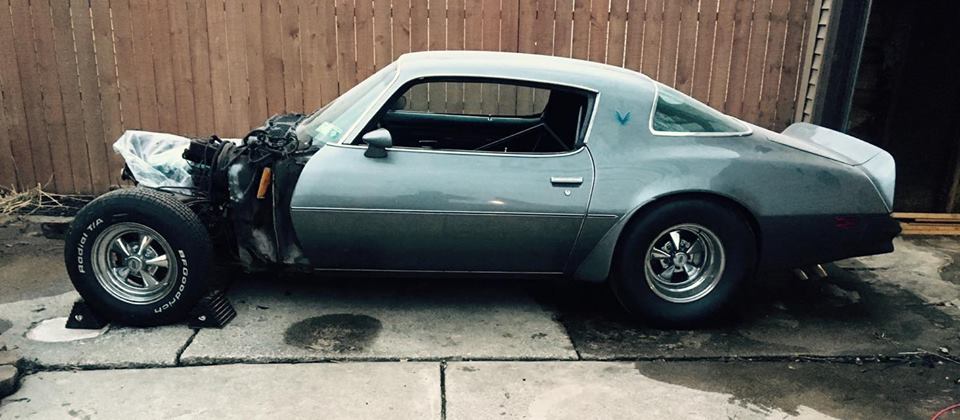
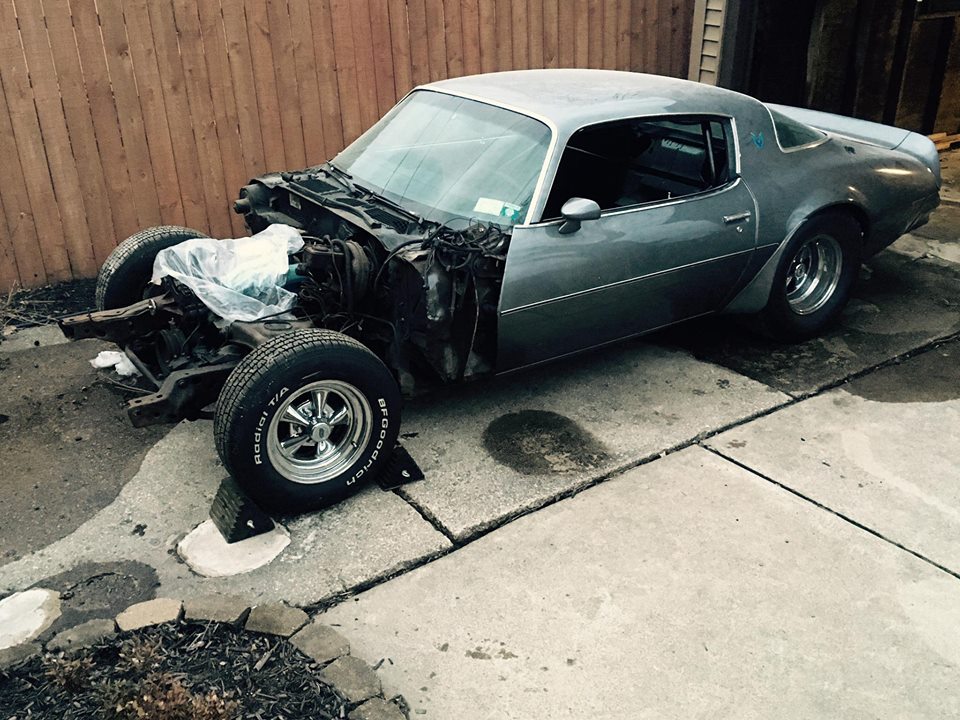
Tonight I got around to removing the rest of the back seat(s), seat belts, center console, the entire carpet and doorsills.
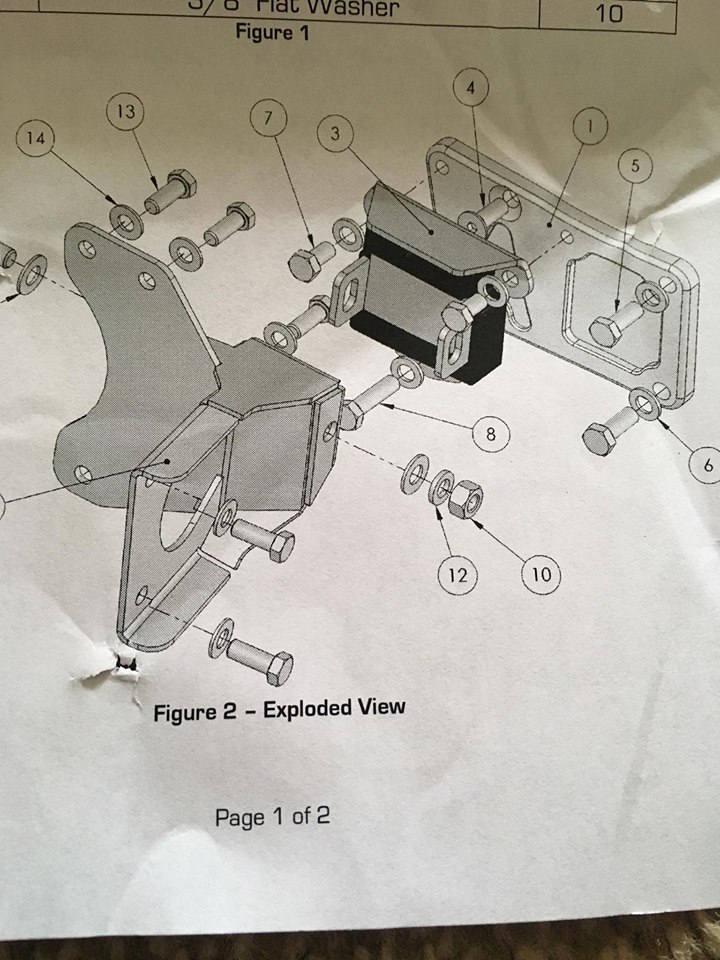
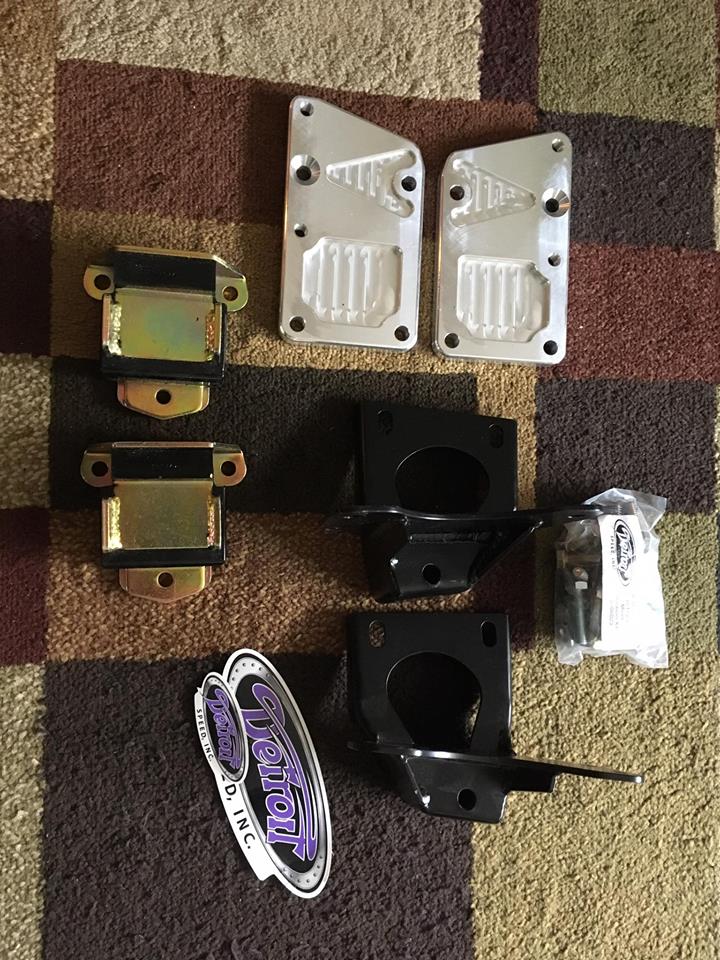
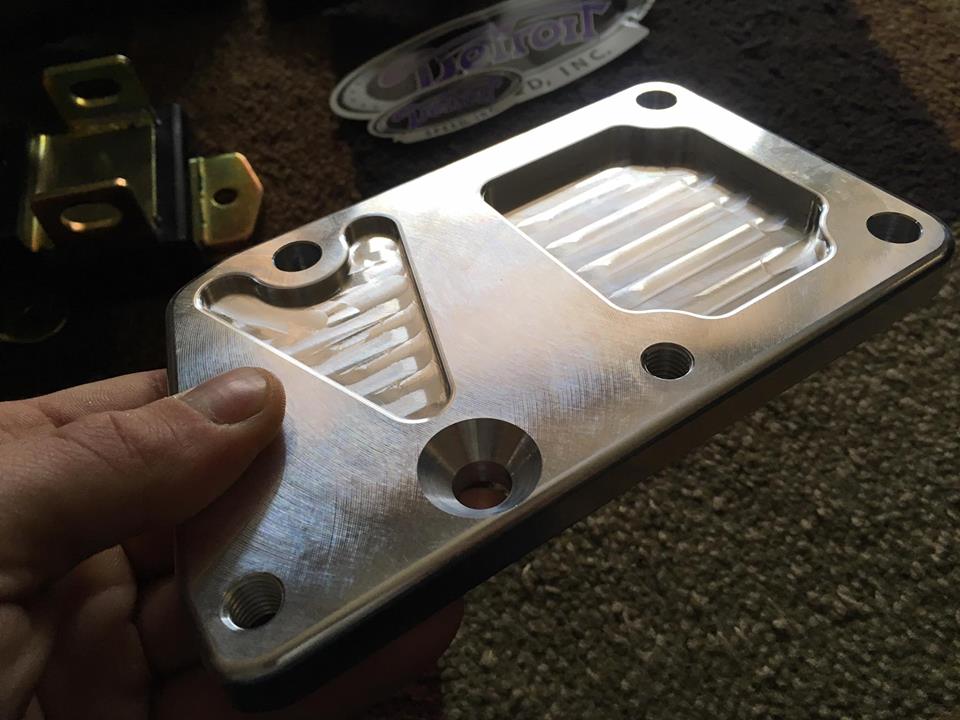
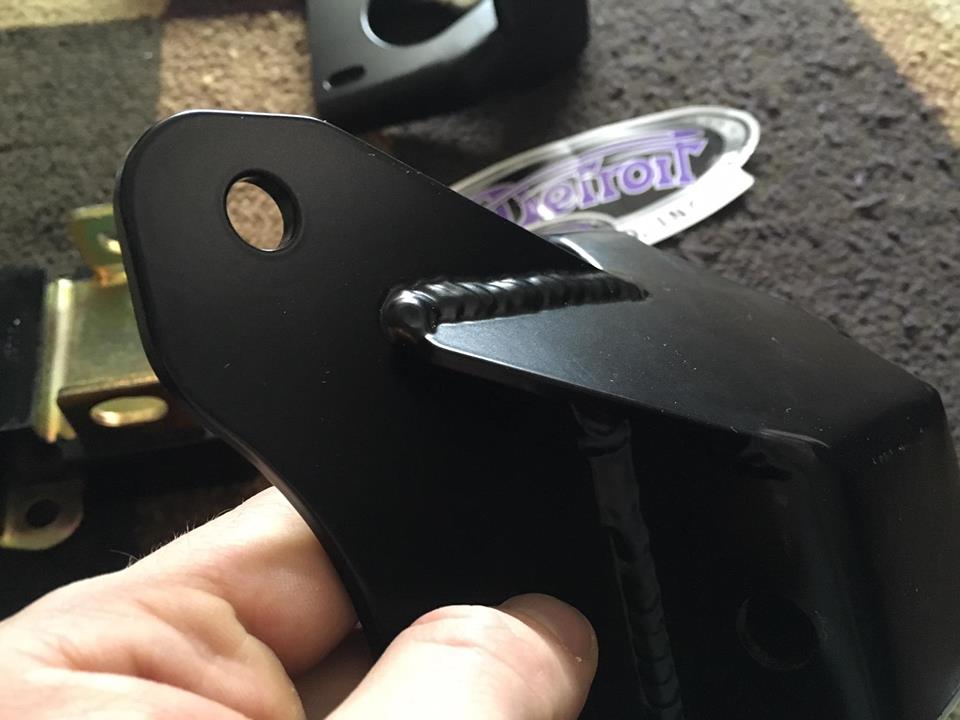
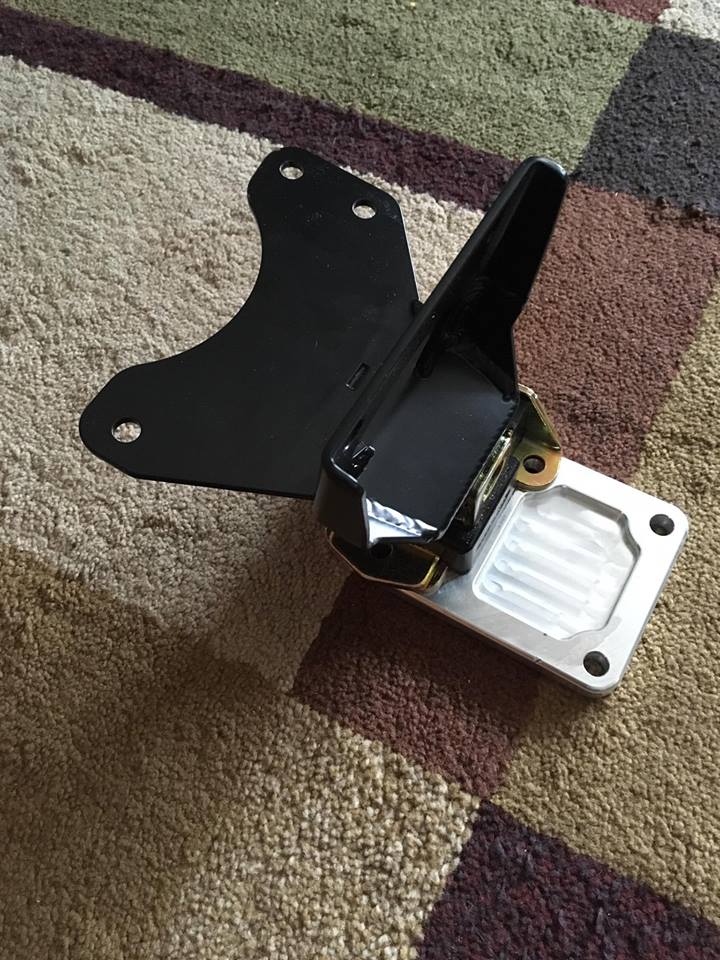
I also ended up ordering Detroit Speed's Ls7 engine mounts today so my builder can mock up a dummy T56 and Ls1 for the new transmission tunnel he'll be cutting when I drop it off in mid April/late April.
Carpet Removed/Some status photos:

- - - Updated - - -
I just ordered the POR15 trunk and floorpan repair kit. It comes with a three stage application process.
Before it gets here I've got to head up to Niagara Falls and pick up seam sealer (for the pans), painters tape, painters paper to protect the door panels and dash, a few masks, paint thinner, some wire brushes and some elbow grease.
Temperature depending, I'm going to go at those pans pretty hard tomorrow and on Sunday with a shop vac and wire brushes. I need to remove all the loose debris, and rough up the surface of the pans. Overall they are in great shape for a 41 year old car.
Only surface rust on the low spots. Most of the factory seam seal is still doing its job but I'm going to replace them all anyway. You can tell this thing really only has 38,xxx original miles.
I'll remove the kick panels, and gas pedal tomorrow in preparation for the POR15.
-
03-26-2017 #22
New to Pro-Touring
- Join Date
- Feb 2017
- Posts
- 99
3/25:
It might not look like much but that's 6 hours of non stop wire brushing and sanding. I'm happy I'm doing this myself because it's tasks like this that are best done by the owner. It's simply elbow grease and time. Any shop would've taken an equal amount of time or simply gone straight to POR15 without the prep work I'm putting in.
I was hoping I'd be able to avoid taking my grinder out but I think I'm going to buy a few grinder disks and take as much as I can down to bare metal before the Marine Cleaner and metal etching spray go down. Do it right or don't do it at all.
Pics from the afternoon (all driver's side; haven't touched passenger side yet:
Rocker area - Driver's side; still tidy as hell:
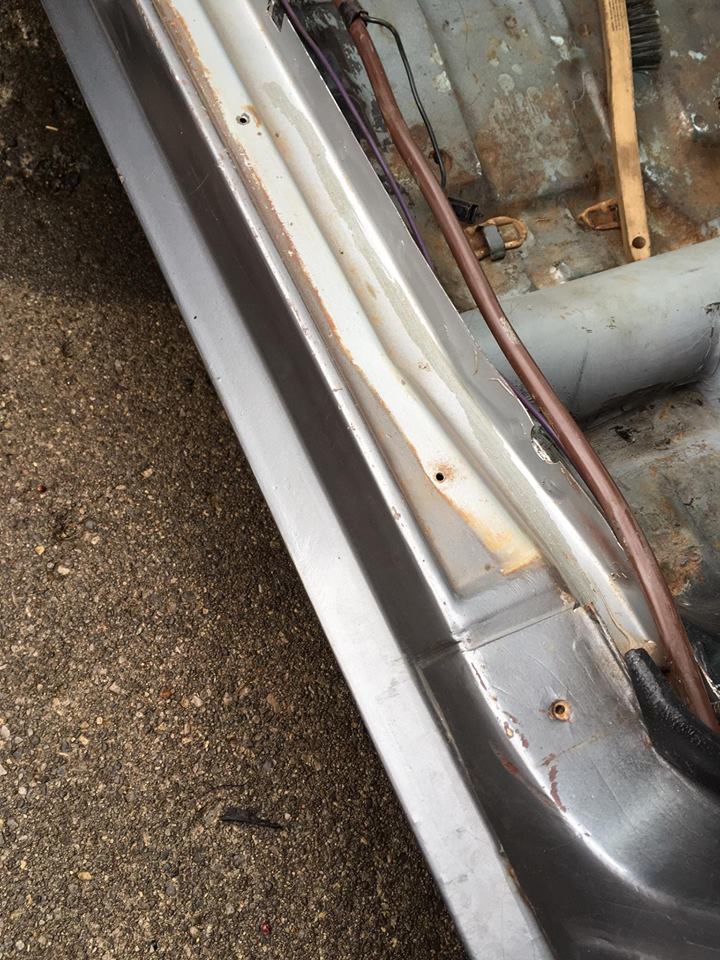
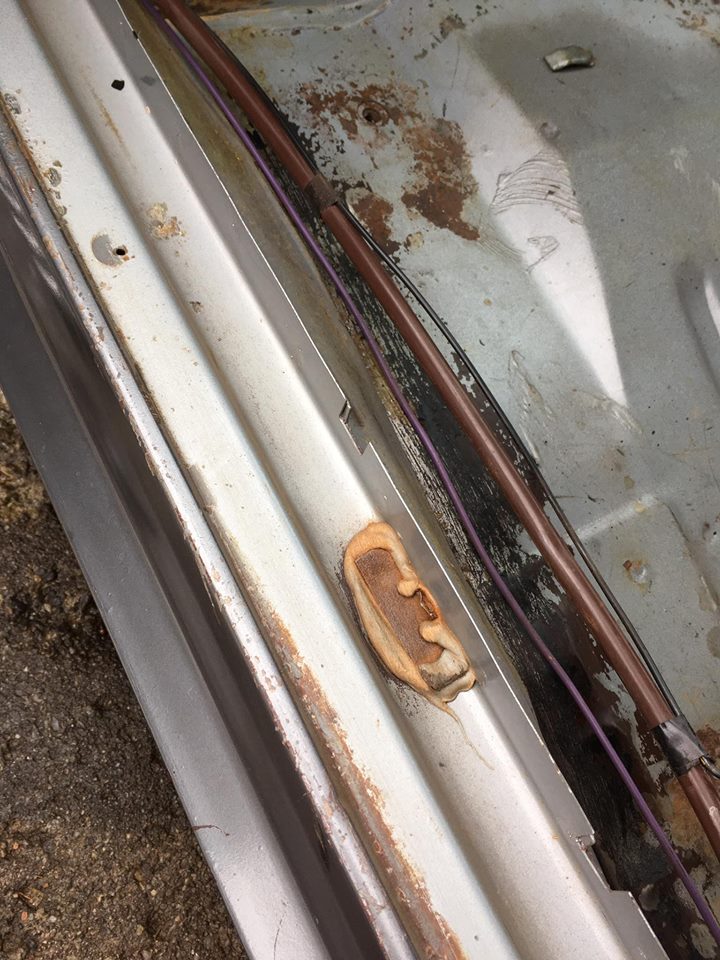
Another of the rocker:
Driver's side pan under seat after sanding/wire brush:
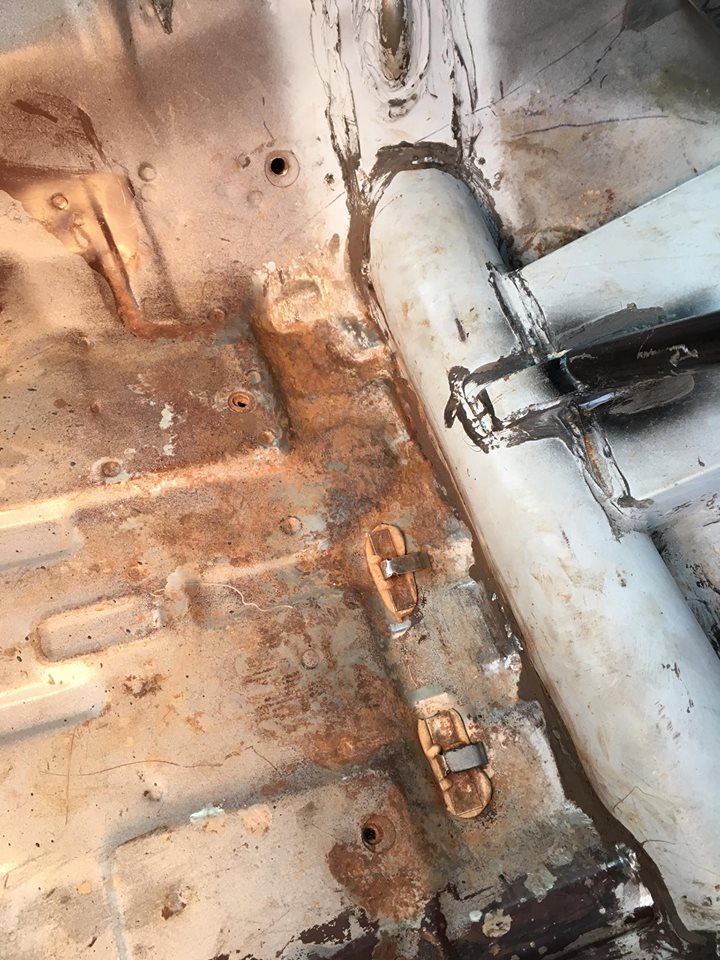
Another of the Driver's side seat pan area (lowest point of the entire pan), only surface rust:
This is the worst area of the entire pan, driver's side foot well area. That's the e-brake cable leading out to the rear. The pic makes it look a lot worse than it is; a wire wheel will tidy this up nicely:
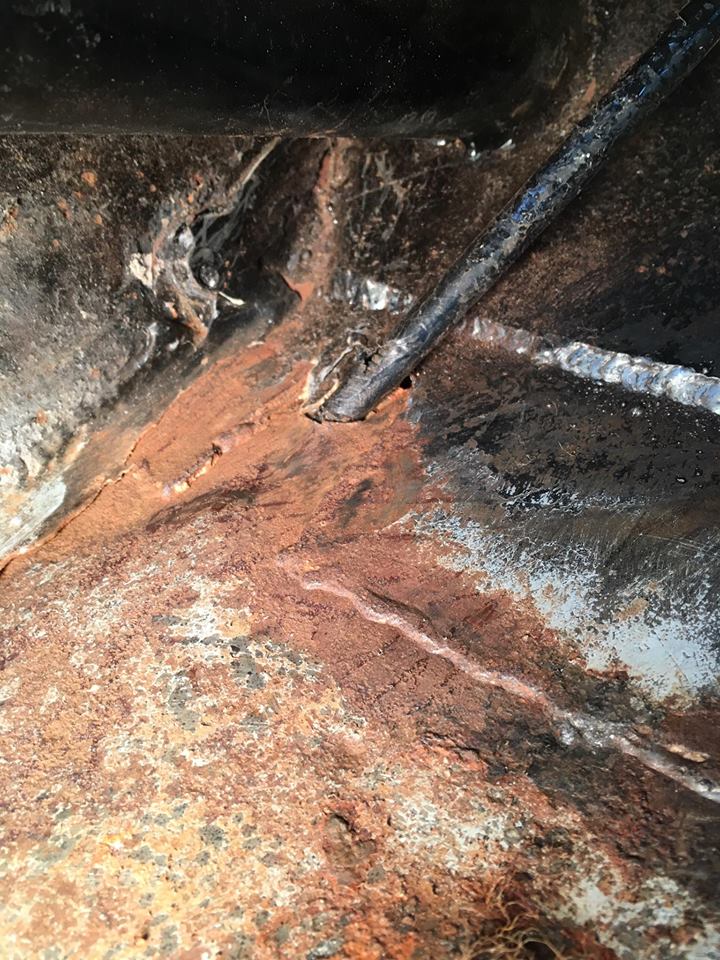
Driver's side rear ladder bar channel (between it and the B-pillar) post sanding/wire brush:
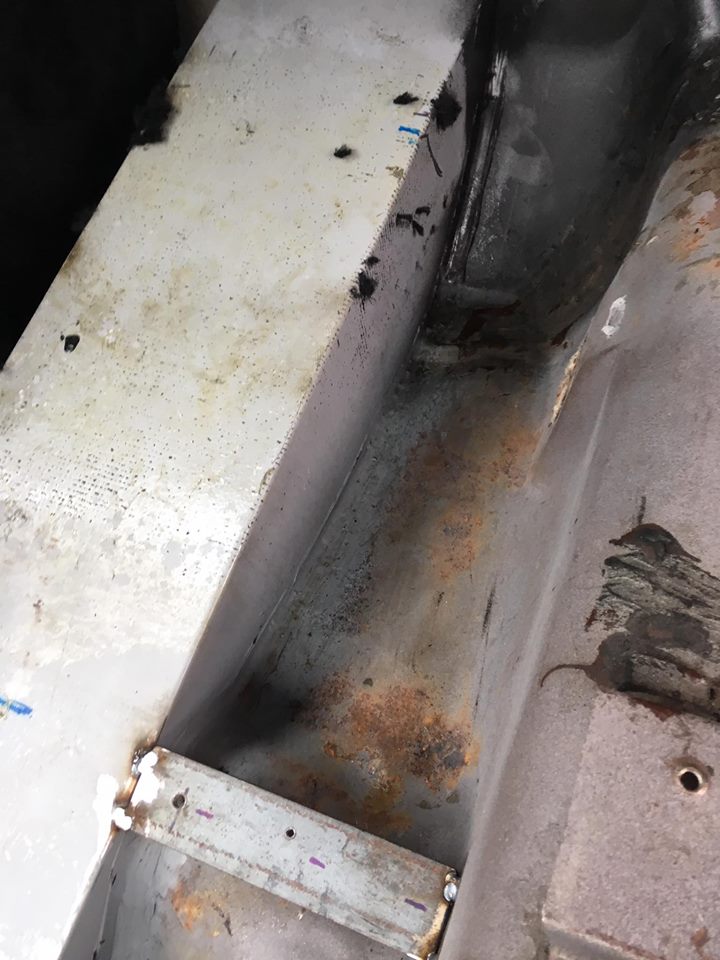
Another of the ladder bar channel post sanding:
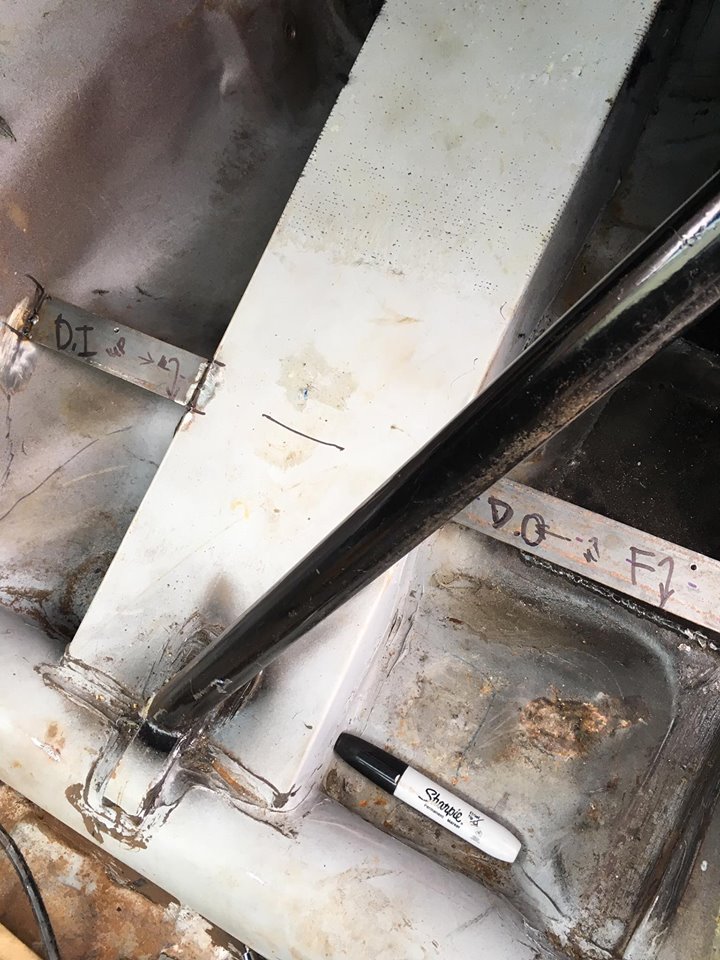
The only three pieces of factory seam seal that failed in 41+ years:
-
03-26-2017 #23
New to Pro-Touring
- Join Date
- Feb 2017
- Posts
- 99
3/26:
What started off being a simple floor pan massaging has turned in to a complete interior tear down, cowl tear down and firewall clean up (inside and outside). It's turned in to this because I'm going to have a whole two summer's where I'm paying this all off while the car will be ripped apart.
With it being in that state, and since I'm already this far in it only makes sense to rip everything out, lay new heat shield down, prep the firewall and re-wire the whole thing.
And with that Sunday was more deconstruction than anything else; taking special care not do damage any interior pieces, not to break any clips or clamps. It's very time consuming and tedious work and kind of a shame because 8 years ago I paid an interior specialist to finish it and now I'm going in reverse to get at everything I need to.
So today I removed all brake lines, fuel line, power steering line, and the main wiring harness that resided forward of the firewall and inside the engine bay. I also removed the brake booster, heater core, cabin fan assembly, and wiper motor assembly.
I also loosened the fuse box behind the steering wheel, the glove box, most of the air ducting assembly, kick panels, A pillar covers, B pillar covers, roof line trim and other misc. trim pieces.
I also removed the door panels and will be removing the doors this weekend when I have a buddy to assist. The doors on 2nd Gen F Bodies are very heavy and I decided to replace the door hinges with aftermarket strengthened ones. I've heard they don't make them any more so if they don't and I need to save the stock ones I want those doors off while my legs hang out of the car for hours on end over the next few years - give those hinges a rest.
I'll also be removing the dashboard this weekend. I need to do this for a few reasons. 1) To get at the firewall fully, and 2) To remove the heater core. I can't get to that ****er without pulling the entire dashboard out. If it wasn't for this most of what I ended up deciding to rip today out never would have been considered but one thing led to another...
- - - Updated - - -
Firewall/Engine Bay: Heater removed, fan assembly removed, wiper assembly removed, brake booster removed, fuel line cut forward of firewall, brake lines removed forward of fire wall, Speedo disconnected, wiring harness (engine bay portion) removed.
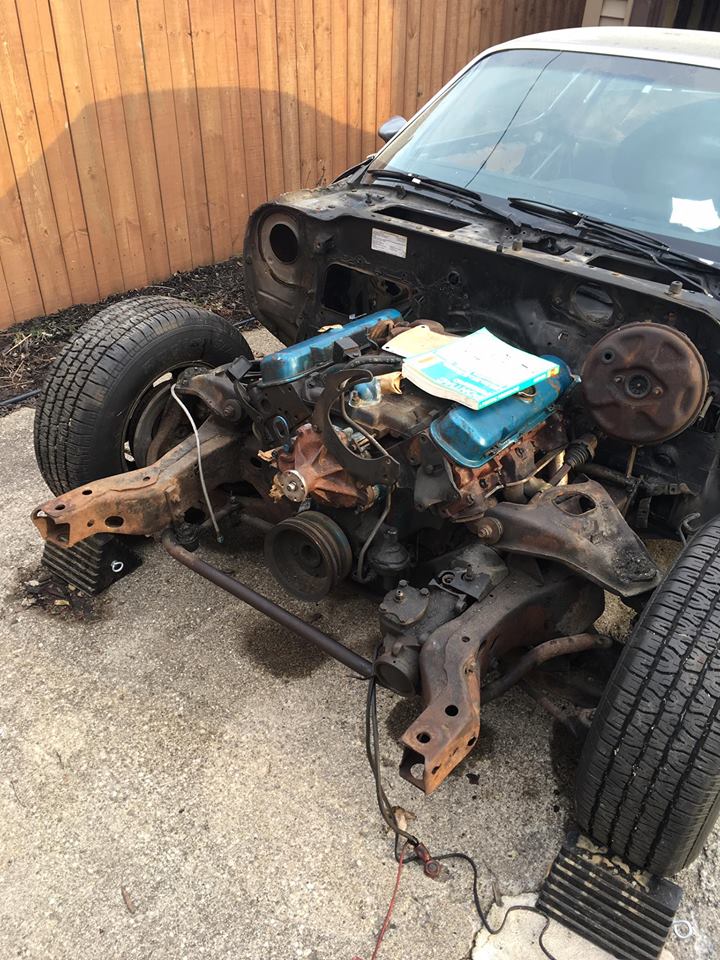
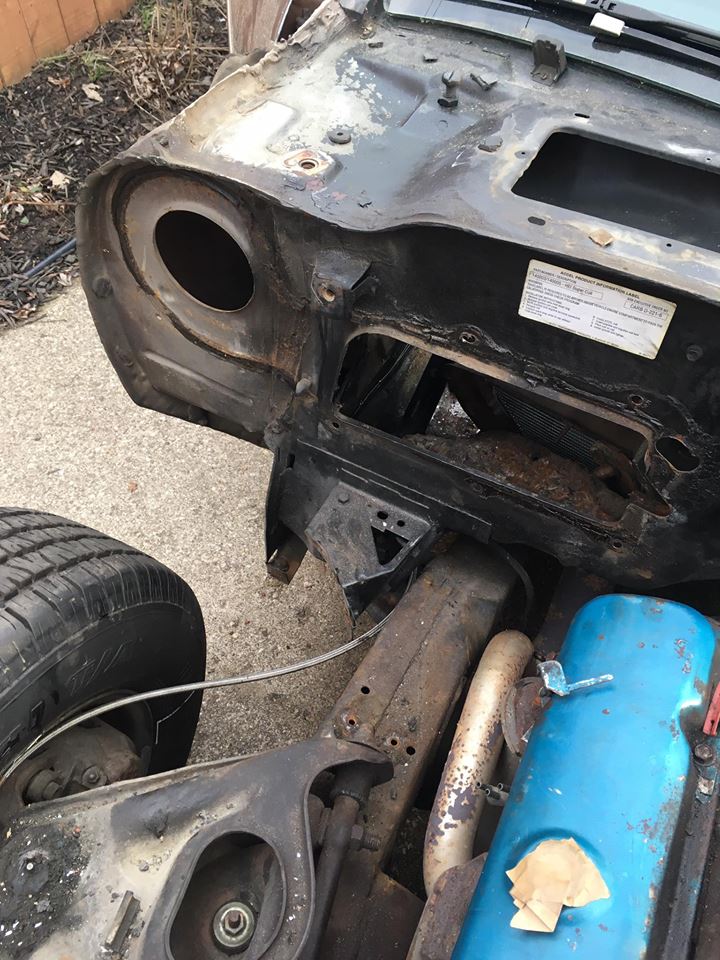
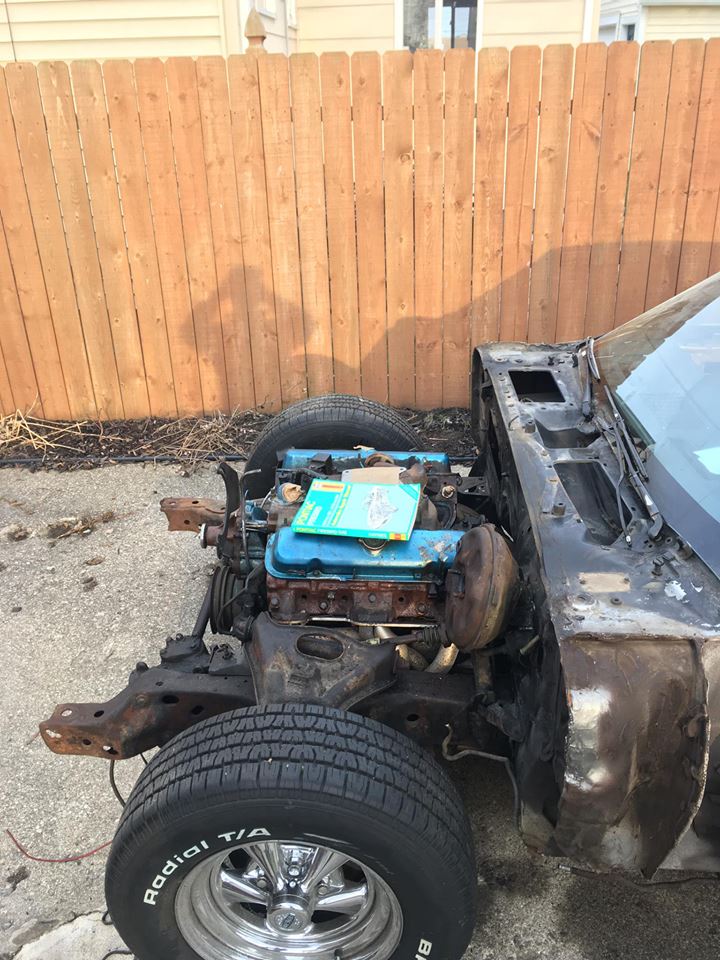
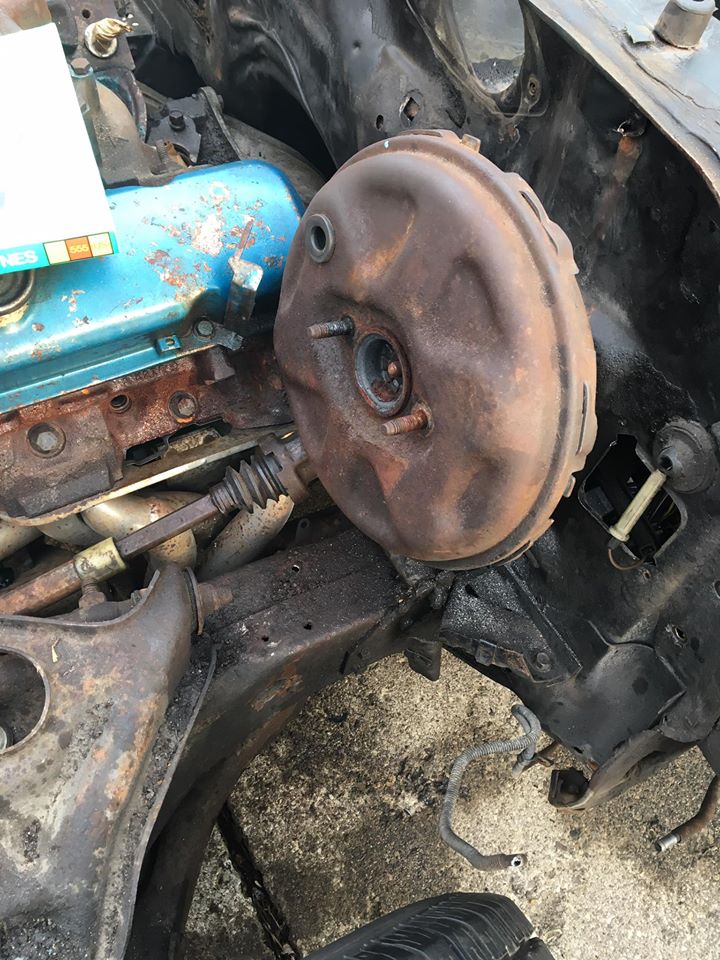
The only issue so far that I can't get past is the last bolt holding the master cylinder on. I stripped it and then took a reciprocating saw to it but it's still snug as a bug. I'm replacing the entire assembly with a manual brake system from Wilwood so the shop will just take a torch to it and get it off.
03-26-2017 #24
New to Pro-Touring
- Join Date
- Feb 2017
- Posts
- 99
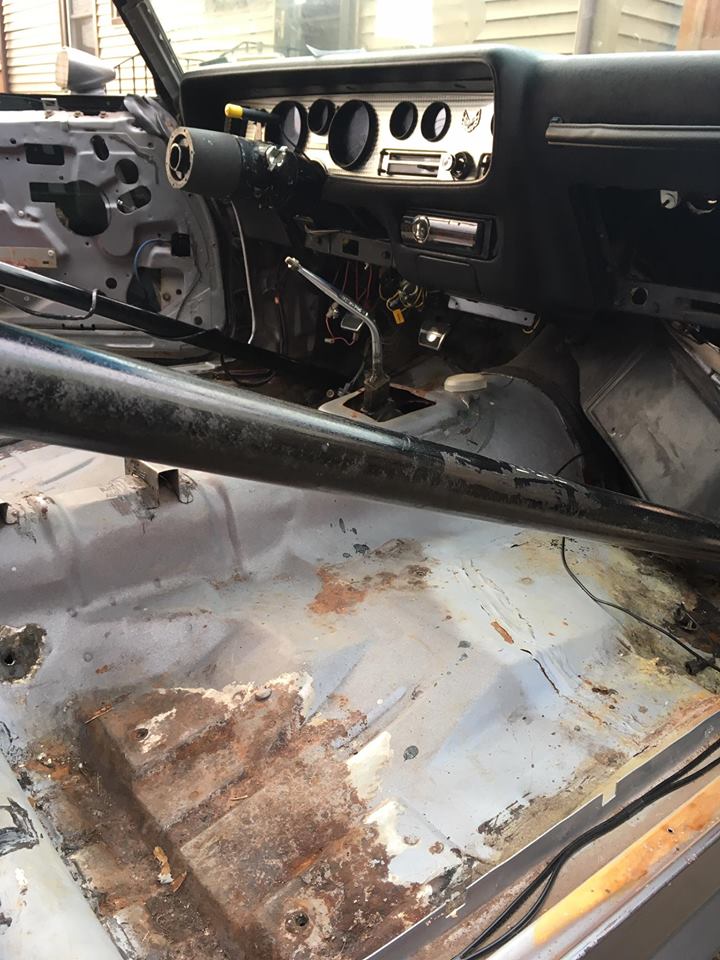
B Pillar trim removed:
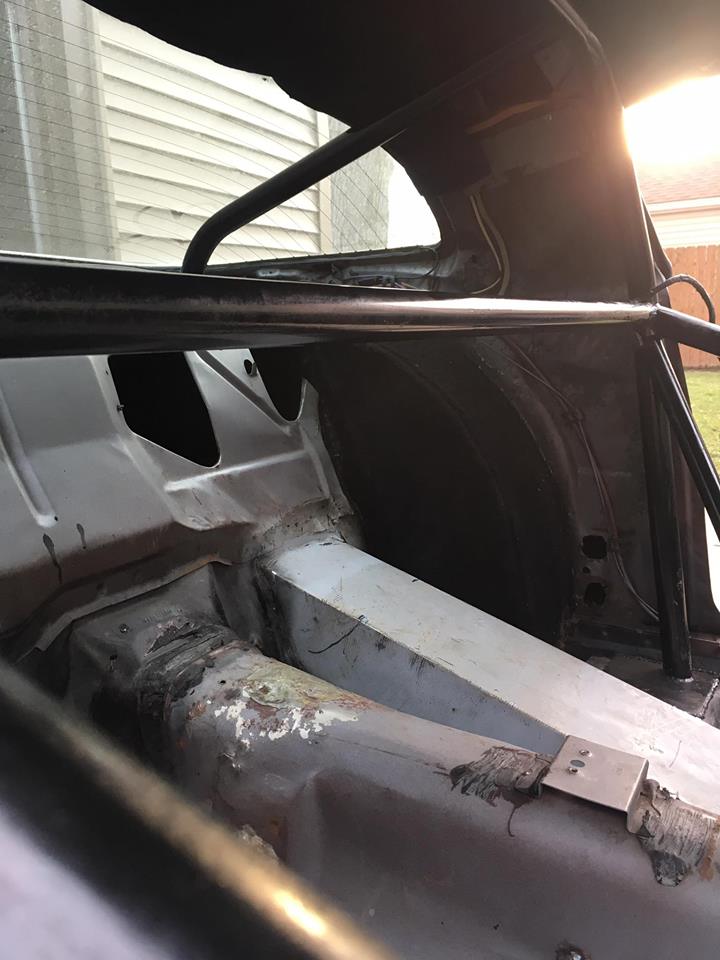
Passenger Door Panel and A Pillar removed:
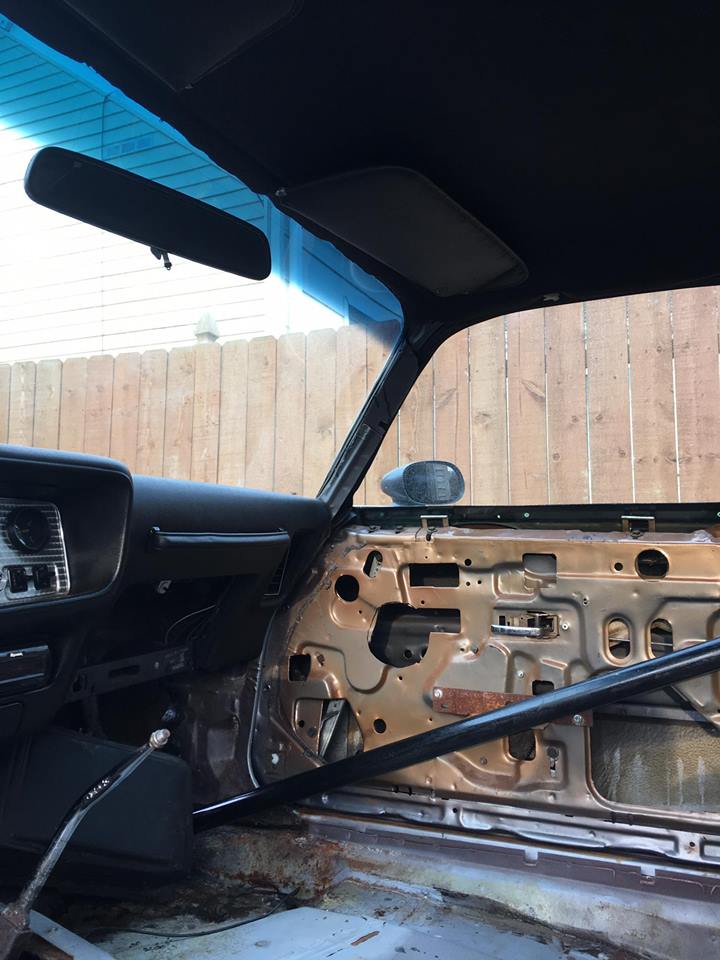
Passenger B pillar trim removed:
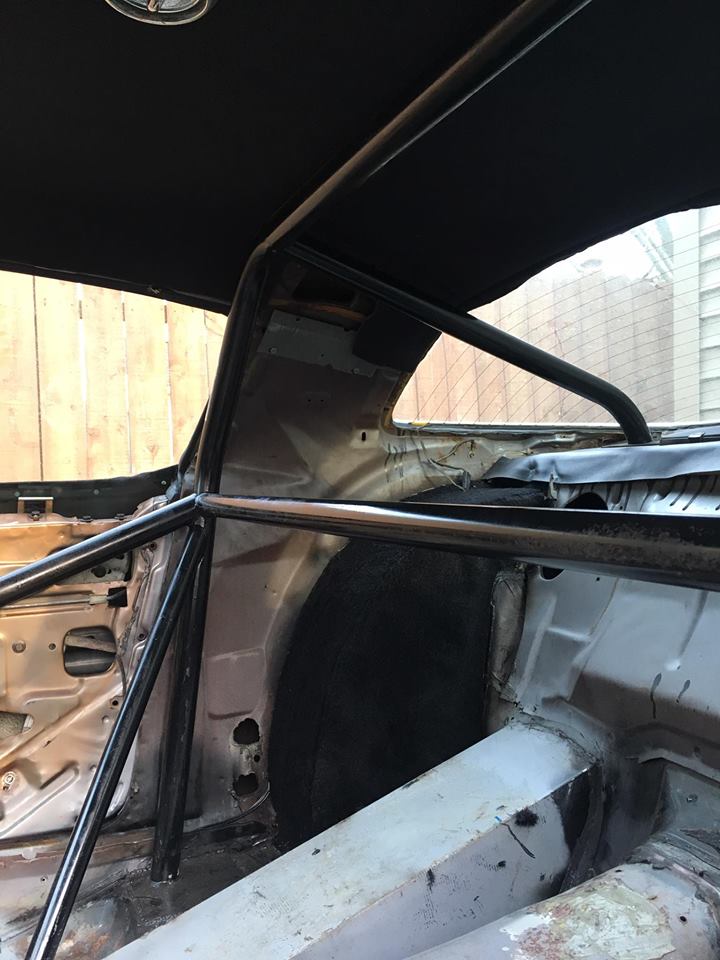
Drivers side door panel removed and steering wheel:
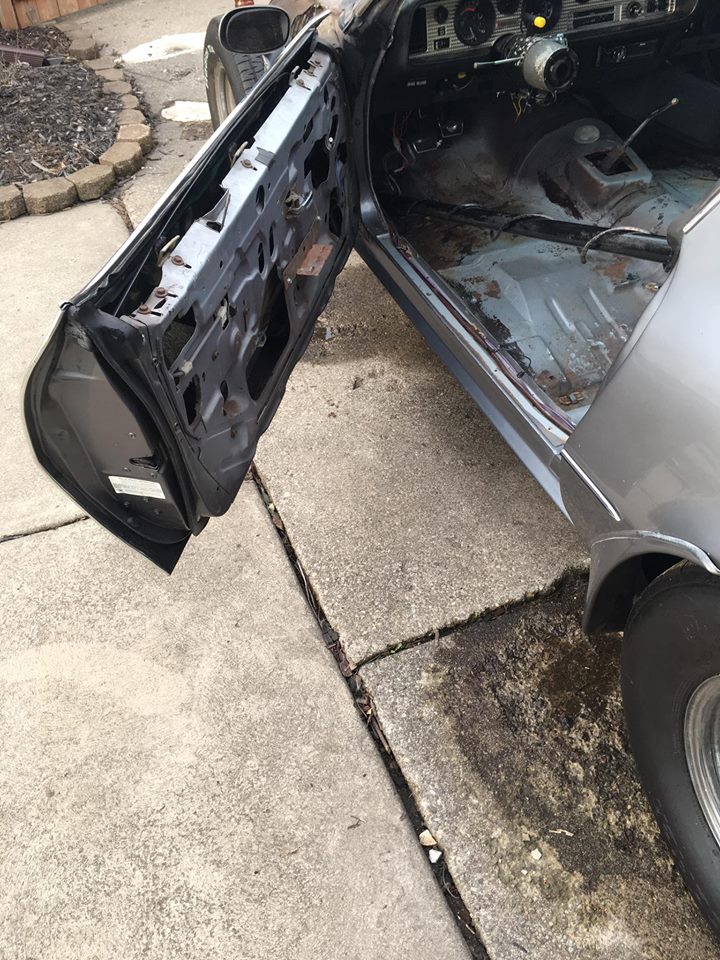
Drivers side door jam and underside:
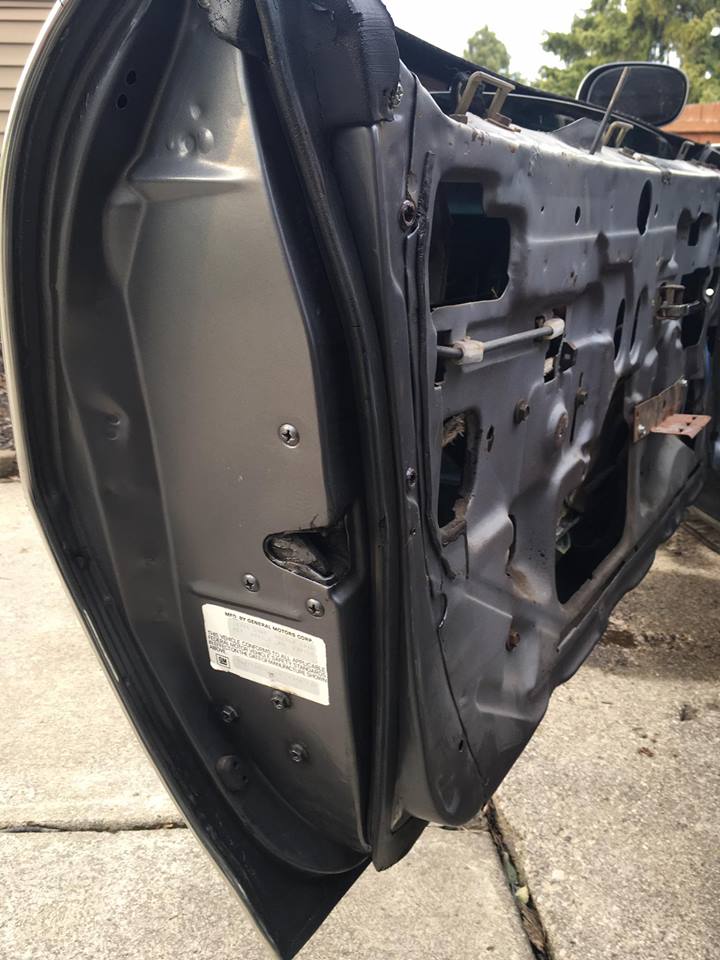
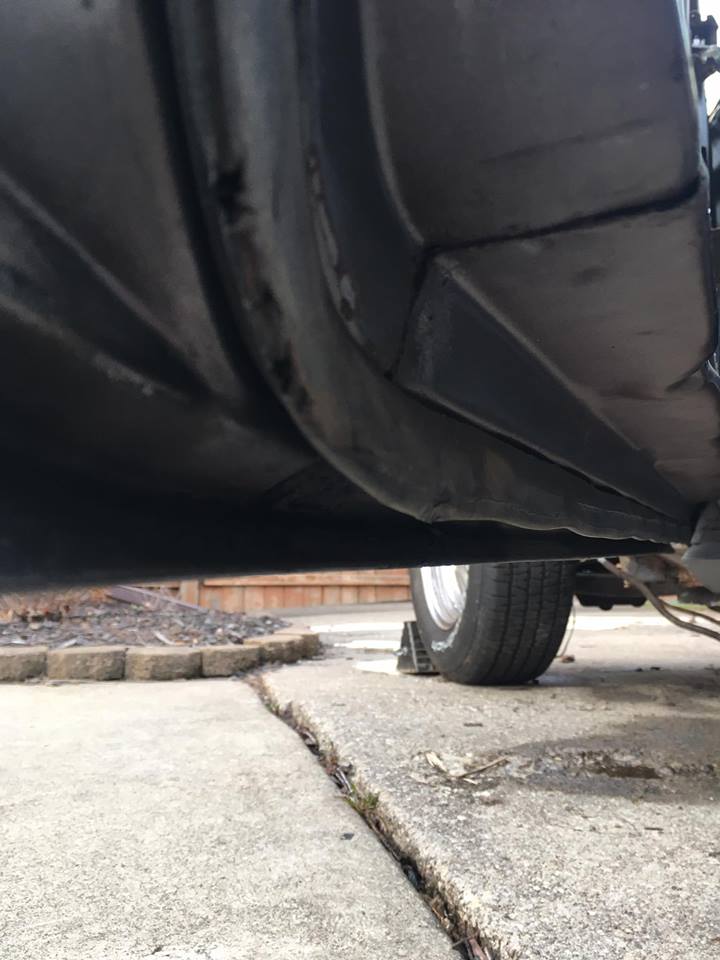
Passenger side door jam and underside:
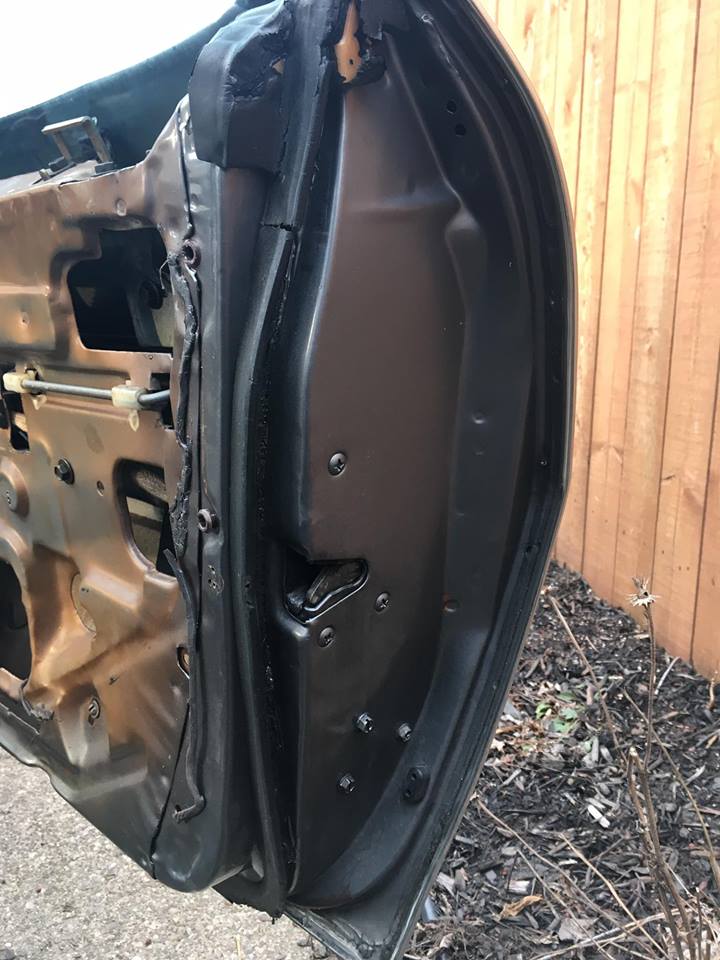
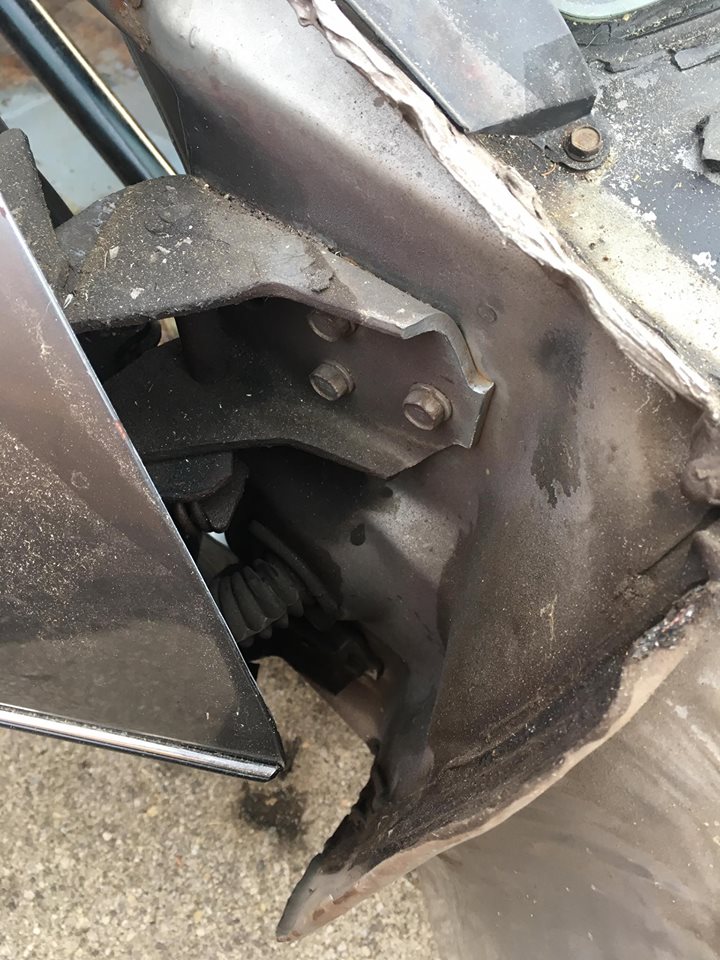
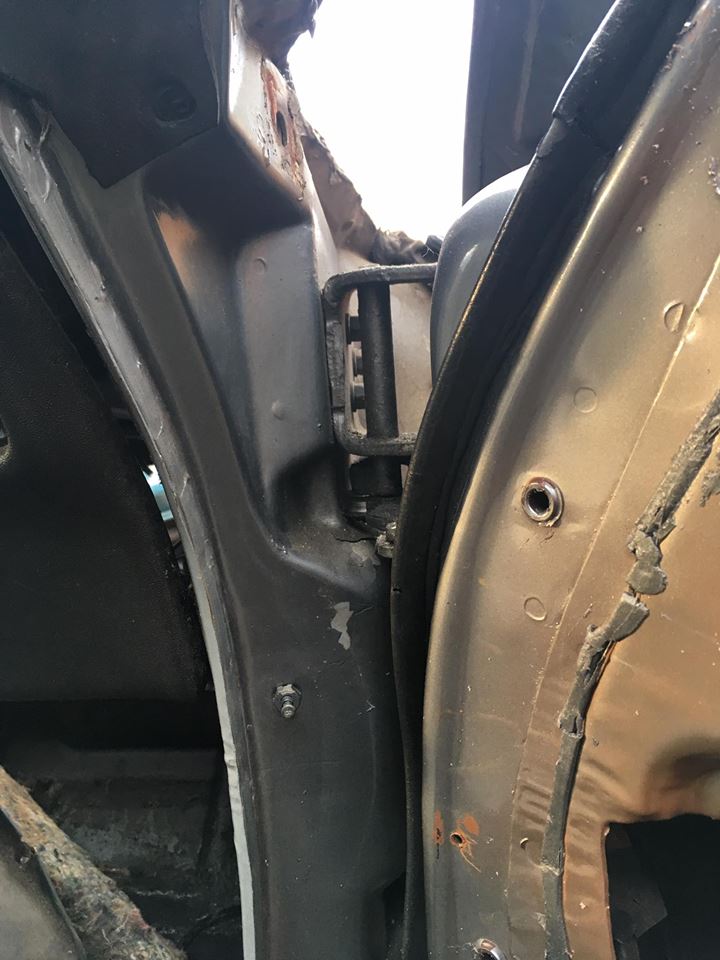
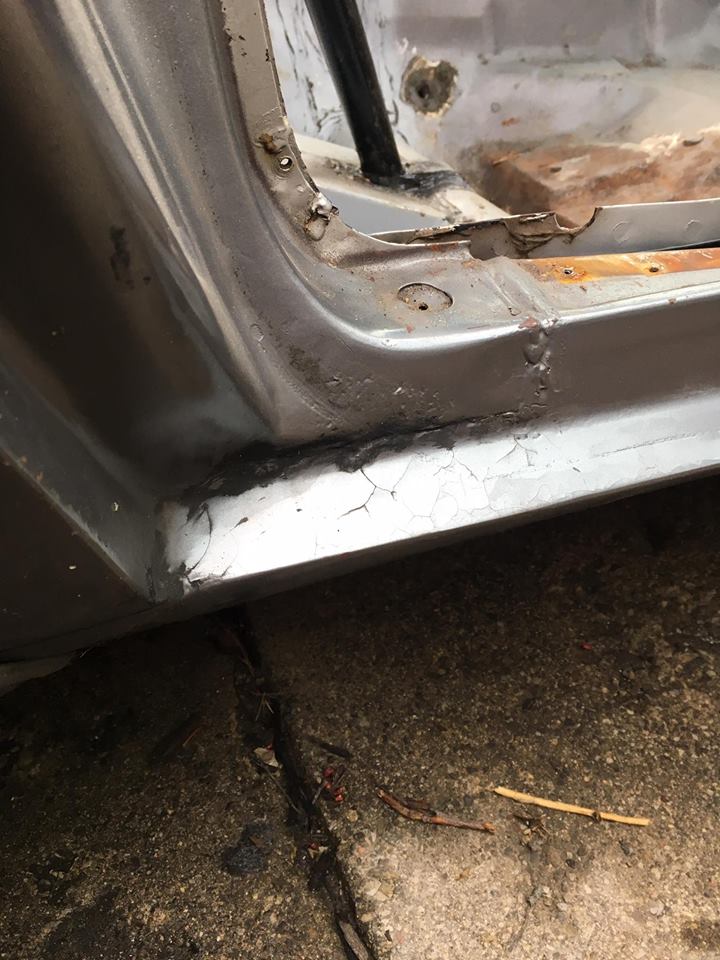
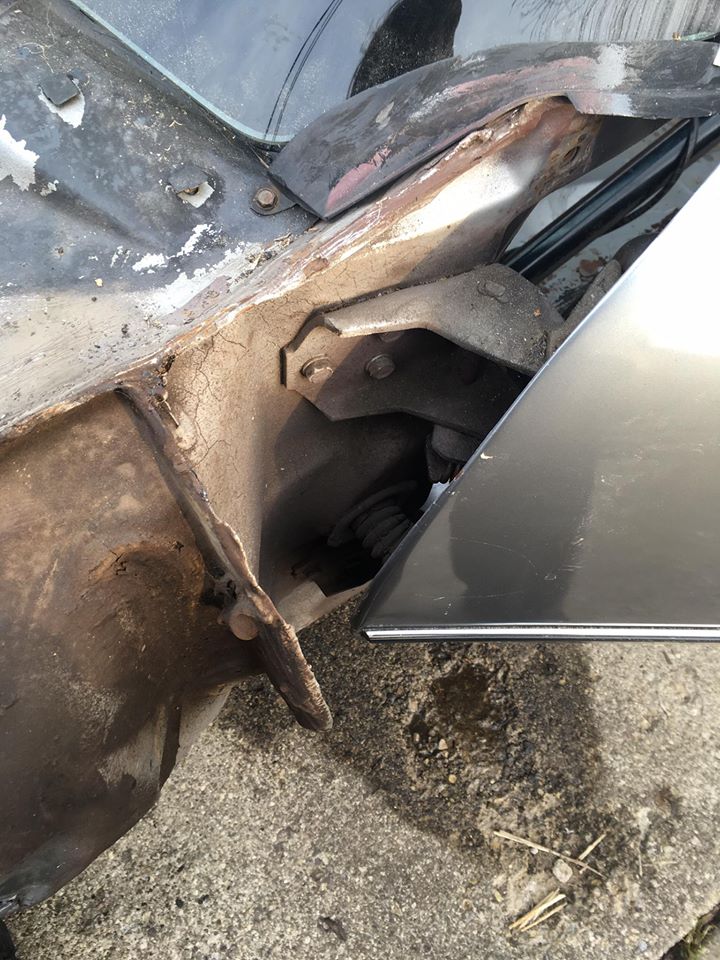
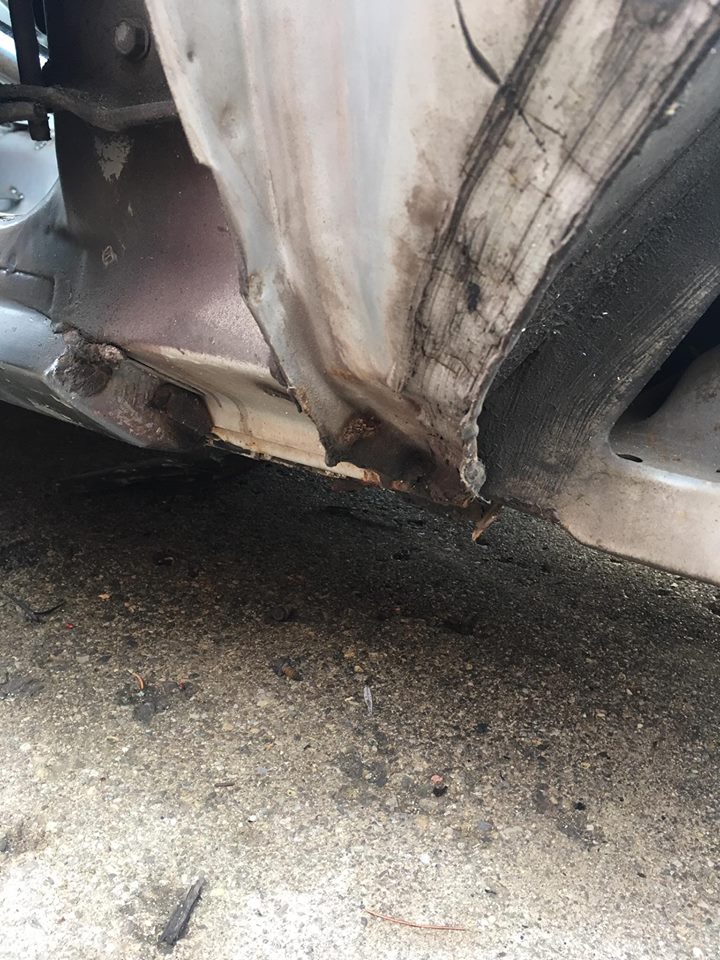
Cowl area condition:
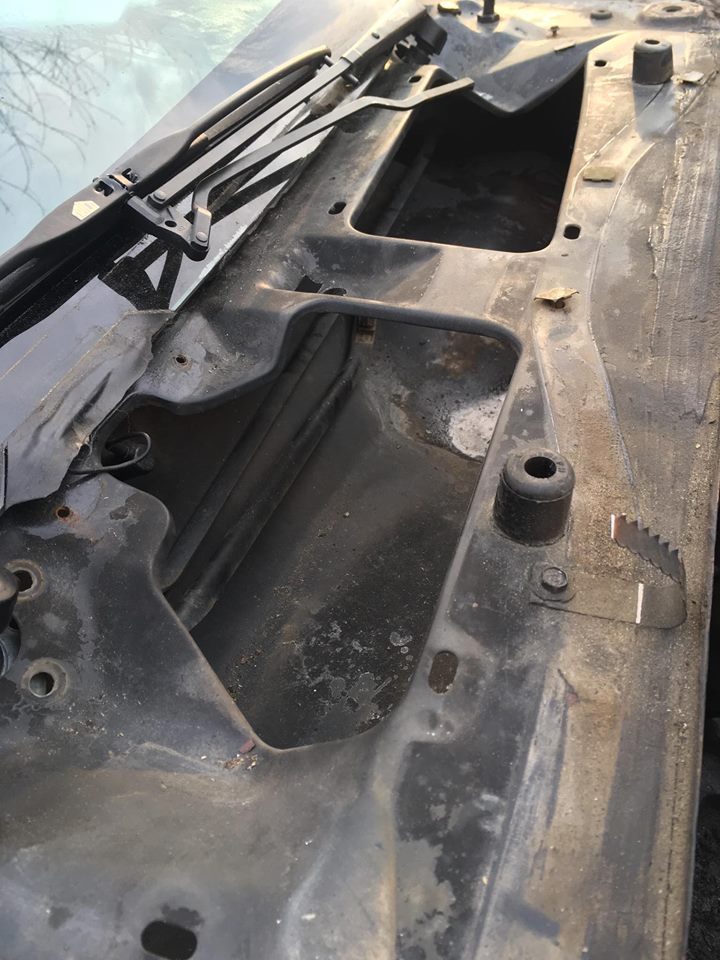
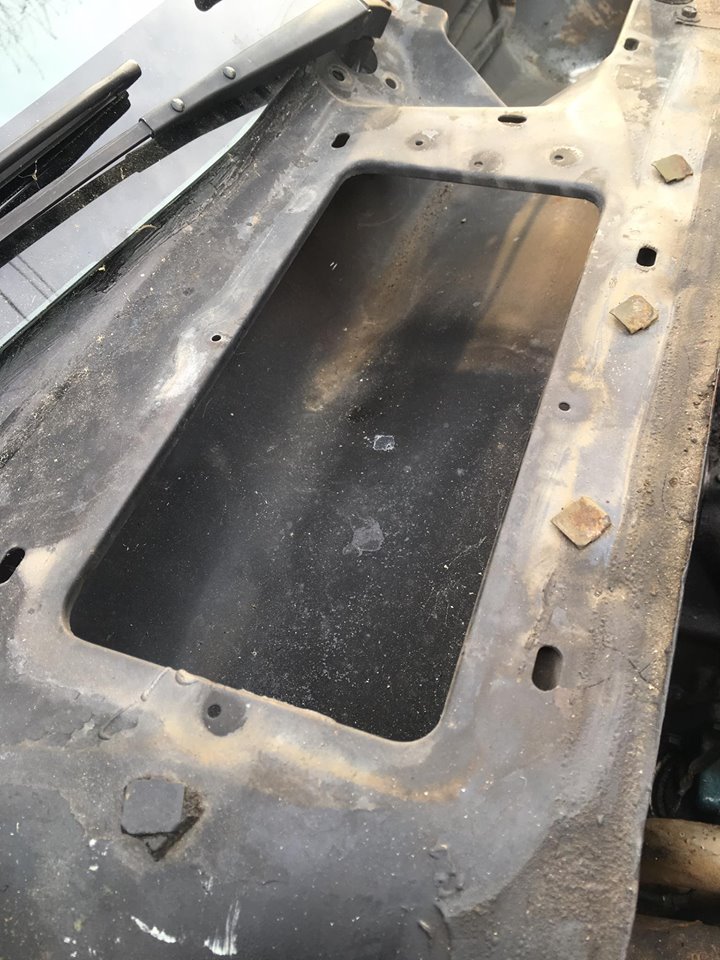
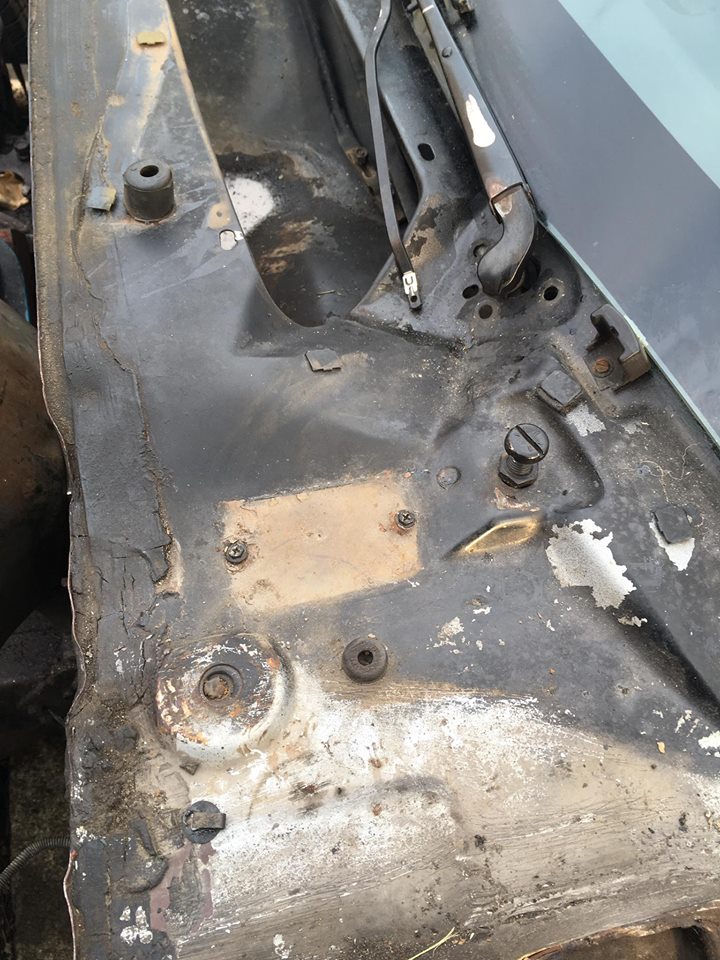
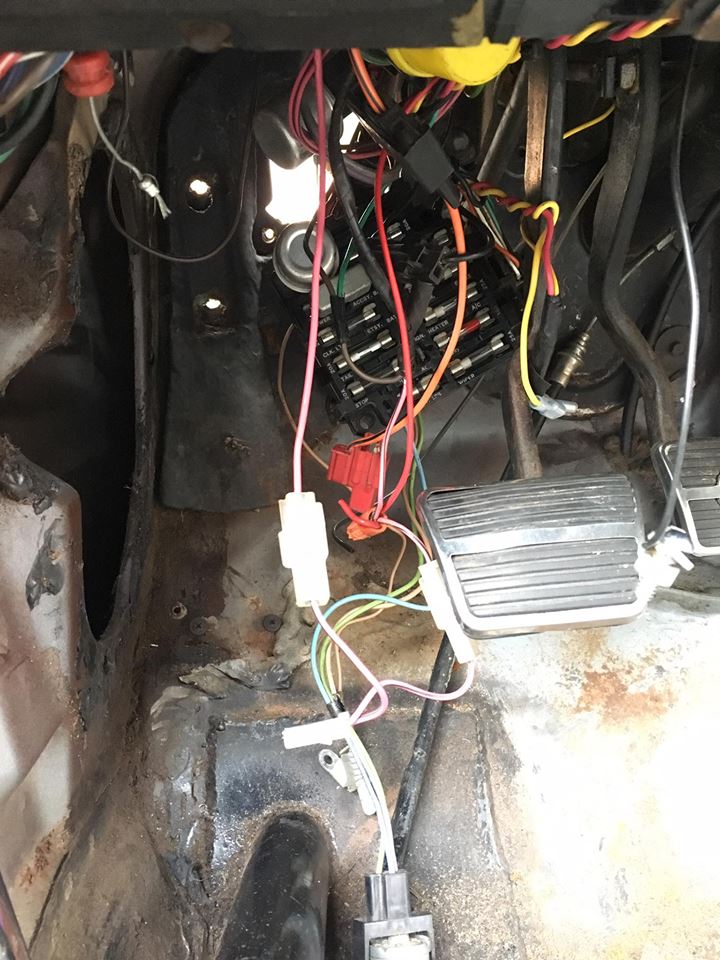
Fuse box disconnected. Will be replaced by Ls7 harness. This will all get re-wired; one by one:
Tired suspension:
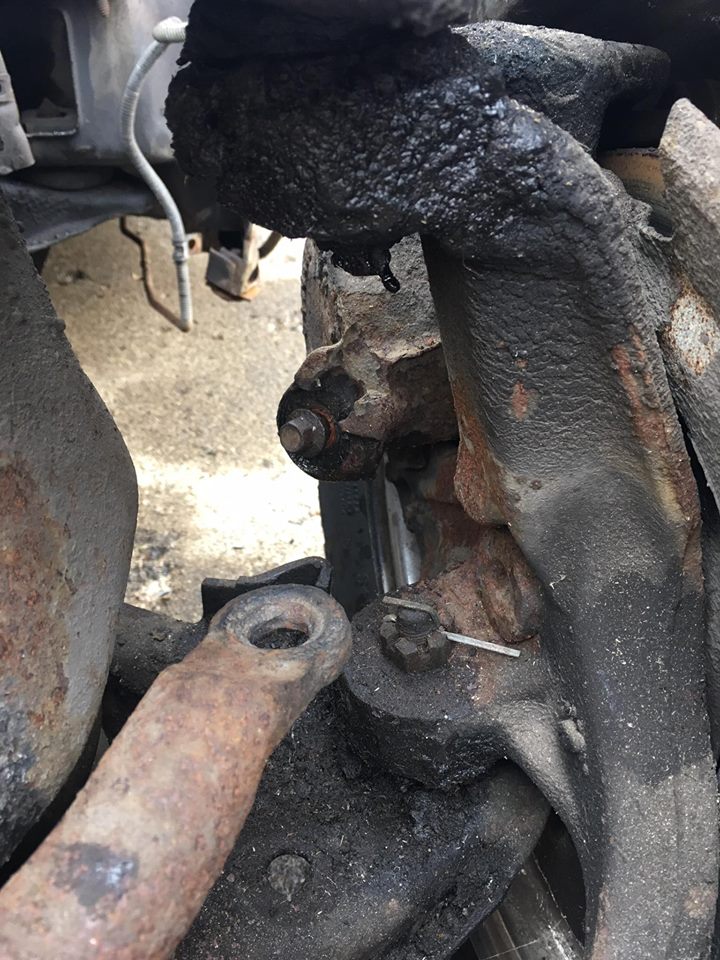
Time to bag and tag:
03-27-2017 #25
Registered User
- Join Date
- Apr 2011
- Posts
- 52
Very impressive build.
Question: what do you expect to get out of the upgraded subframe over the stock unit? Wondering if I should upgrade mine also but don't really understand the benefits...especially for the high cost.
03-28-2017 #26 Registered User
- Join Date
- Aug 2008
- Location
- Charleston, SC
- Posts
- 354
Keep in mind that bolt to the vacuum booster is a stud that comes off your brake and clutch pedal assembly. I wouldn't cut it. You need to just pull the assembly out from the inside the car if all the nuts are off. That assembly pushes through the firewall in those four holes and then attaches to the steering wheel column brace as well. Take those two nuts off inside the car and the whole assembly should slide out.
04-03-2017 #27
New to Pro-Touring
- Join Date
- Feb 2017
- Posts
- 99
I haven't removed the brake and clutch assembly yet but I plan to after I get the dash out as I prep for sand blasting. I plan on picking up a Wilwood brake and clutch pedal assembly anyway. They are not cheap; approx. $290 - $450 depending on model. Originally Posted by Doug1

The firewall needs to be re-enforced, or at least it should be.
04-05-2017 #28
New to Pro-Touring
- Join Date
- Feb 2017
- Posts
- 99
3/29:
Removed:
Headliner, tail lights, rear spoiler, trunk carpet, visors, interior dome light and some wiring.
A few logistics are starting to materialize in terms of where the car is going, in what order and when it's due...where: To simplify things for the chassis builder I'm sending the car out to have it stripped of the following things at a buddies shop near my home.
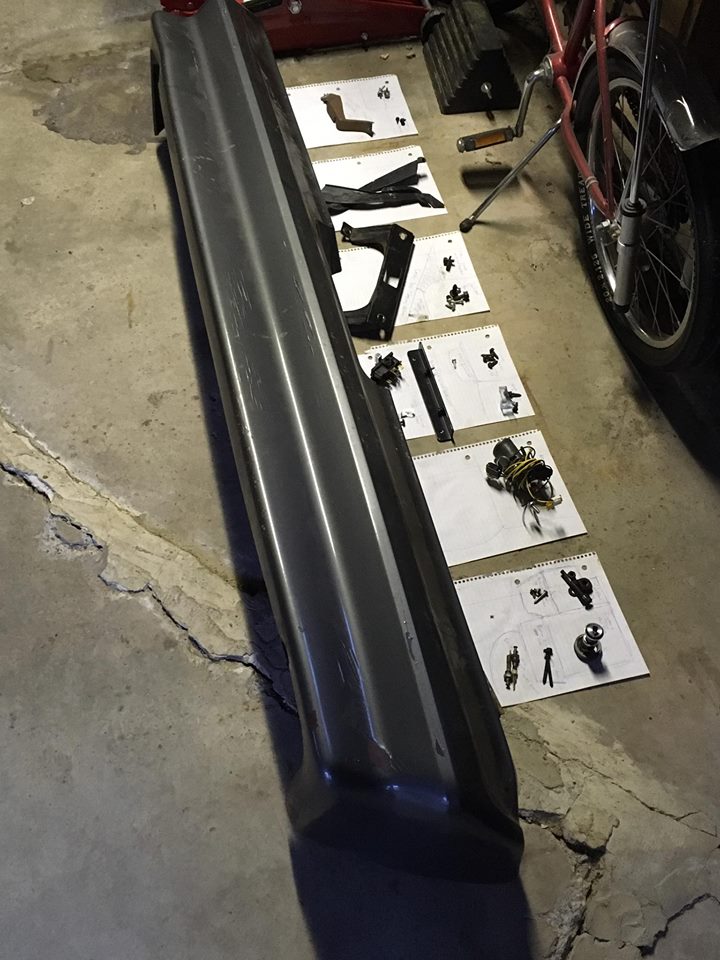
Motor, trans. trans support, master cylinder, steering column, fuel lines, brake lines, e-Brake cable, gas tank, rear bumper, and exhaust.
In exchange, I'm giving him my old Pontiac 400. Straight up flip. I'm keeping the old master cylinder, mufflers, bumper, steering column and trans. support.
From there the car is getting sent out to get blasted. I'm most definitely getting the undercarriage blasted and SPI epoxied. Depending on the cost of the undercarriage blast and spray I'll have either the trunk blasted and painted, the interior blasted and painted or a combination of the three; whatever fits in to my budget still setting aside monies for the sub frame install, tunnel and connectors. Whatever I don't get blasted and painted this go-round will have to wait until next year. From calling around the going rate for sand blasting costs 180 per hour + setting the vehicle in position ($60). Over the phone, I was quoted for 5 hrs for the undercarriage (~$1000). I was not quoted for the epoxy spray. My chassis guy has a friend who may be cheaper...again, waiting on an estimate.
From there the car is going to the chassis shop to have the new sub frame installed and T56 tunnel cut.
From there it's coming back home where I will address the firewall and cowl areas.
Apparently my Detroit Speed LS7 engine mounts arrived at my house a moment ago.
Fun times.
04-05-2017 #29
New to Pro-Touring
- Join Date
- Feb 2017
- Posts
- 99
3/31 - Weather blows. In preparation for blasting and spray, disassembly continued:
Car leaves for engine/trans. and final strip on April 11th. As of April 1st, I still need to remove the dash, some wiring and heater core. I may even get around to dropping the tank and what remains of the fuel and brake lines if I feel comfortable enough getting her off all fours and on to jack stands. We'll see.
On 3/31: I removed the rear deck, speakers and a few misc. trim pieces. A buddy stopped over in the afternoon to assist in the removal of the doors and storage. They are heavy as ****. The Ring Brothers make a reinforced hinge for second gens for about $700. I might pick up a pair later this year. Grab them while you can. They are the only alternative to repo OEM.
I planned on getting the dash out on Saturday but weather was too ****ty to work outside so we pulled the doors off and quit for the day. I have another friend driving in from out of town to assist with the dash either on Sunday or sometime this week. Fingers crossed for less rain.
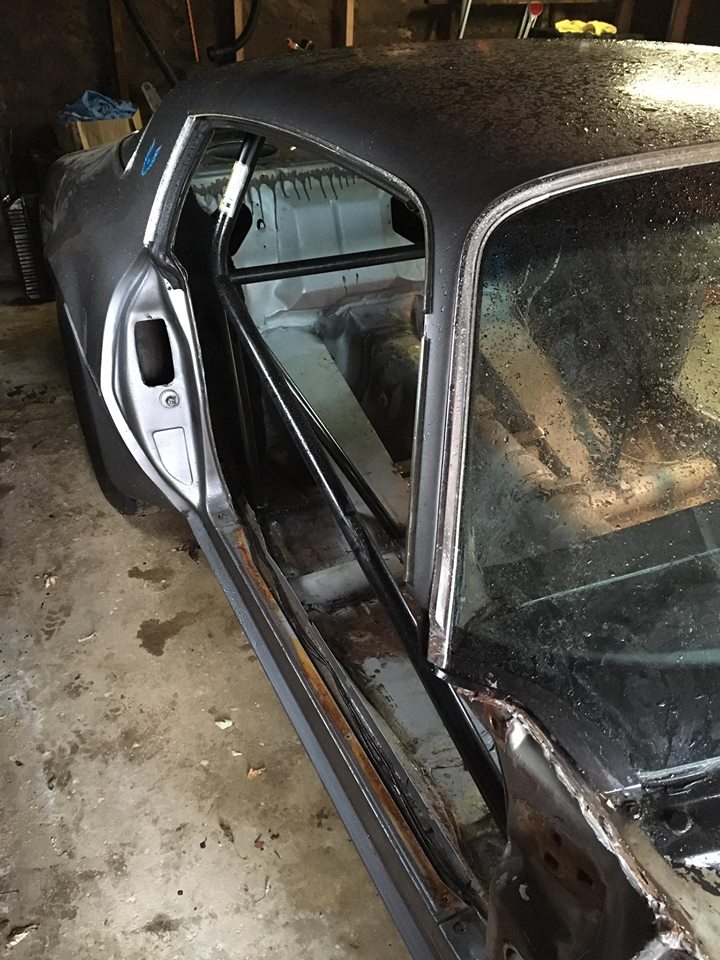
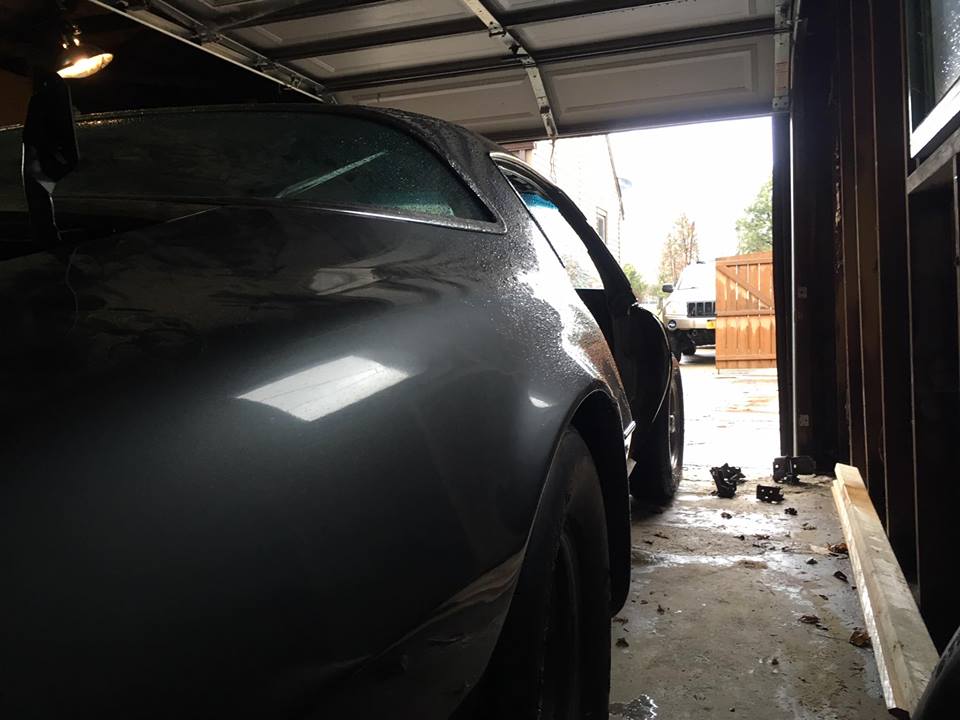
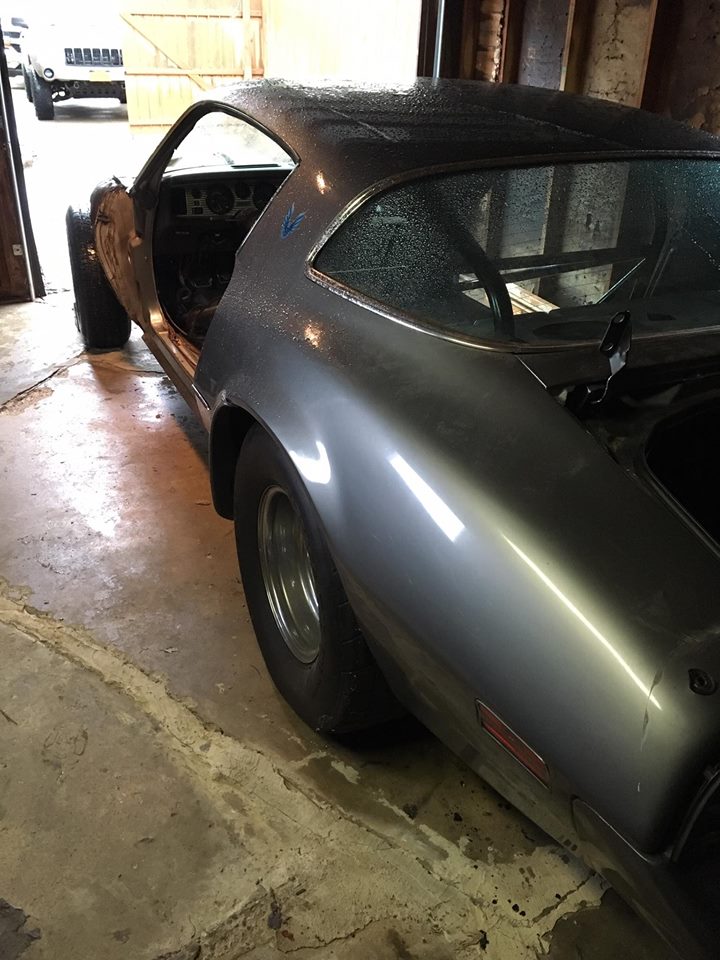
D.S.E/ Ls7 Engine Mount:
04-05-2017 #30
New to Pro-Touring
- Join Date
- Feb 2017
- Posts
- 99
4/5: Staged car for tank, fuel line, e-brake, and brake line removal
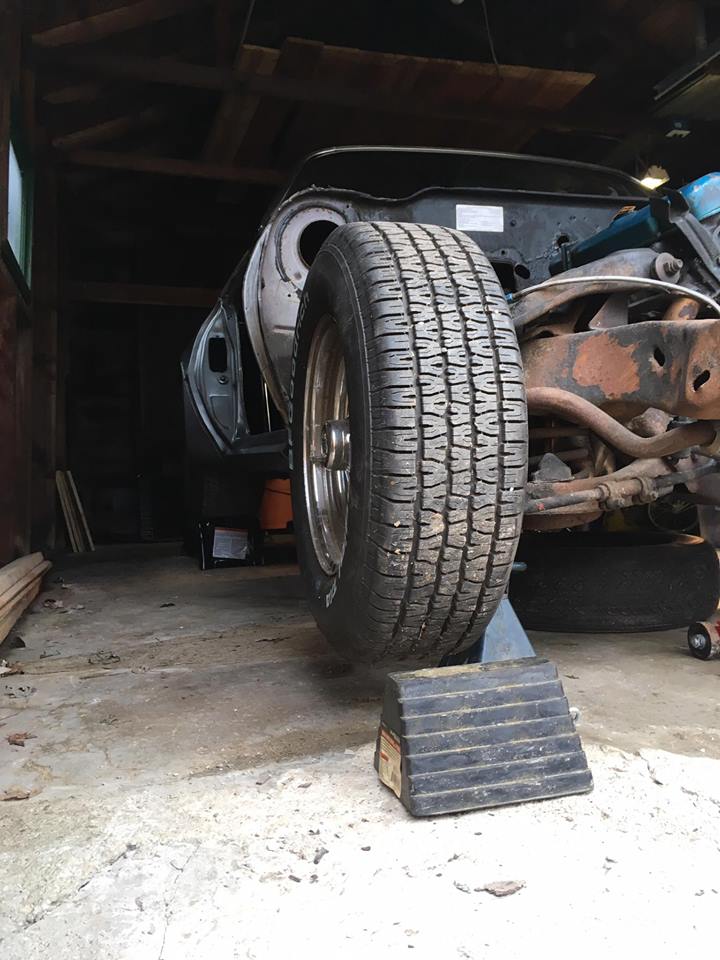
I've been putting off getting the car on four jack stands for many reasons. It was mainly because getting a car off of all fours is downright terrifying. In addition to this and after reading countless F-Body threads I've become aware that lifting an entire end of an F-Body is the preferred method (mainly because of the uni-body construction). An F-Body without its doors is even worse.
Some body flex can occur when lifting these cars at one corner at a time. Obviously my roll cage assists in defending against this but it's still mildly concerning. With it in first gear I lifted the front by the sub frame cross member (both front wheels at the same time) and placed my 2 3 ton jack stands in place on the second notch (so probably 15 inches in the air) under the lower control arms. In order to ensure they were seated correctly I took a hammer to the base to ensure all four feet were flush with the concrete. I then rocked each corner to ensure it wasn't going anywhere and tossed an old 9 inch wheel below the motor and pulled out the floor jack.
Next, I grabbed a 1 inch thick piece of maple and placed it between the differential and floor jack, and raised the rear. I then placed wheel/tire ramps below each rear tire instead of jack stands. Threw another wheel below the rear shock towers and rocked the whole car in every direction making sure it wasn't going anywhere.
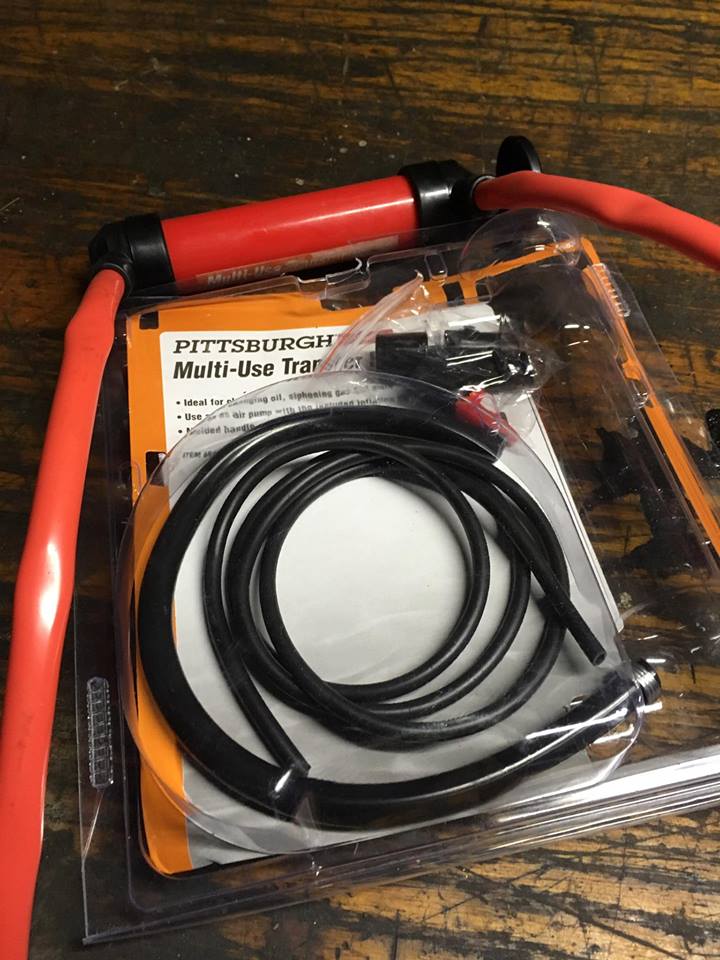
Anyway, I picked up a siphon pump and two wheel ramps from Harbor Freight. There was roughly 19 gallons of 95 octane in the old tank. Luckily my Jeep was on a half tank so I fueled it up and then took the remainer to my lawn mower, my girlfriends car and my neighbors. The Harbor Freight siphon pump I picked up is a great deal; worked like a champ ($6.49).
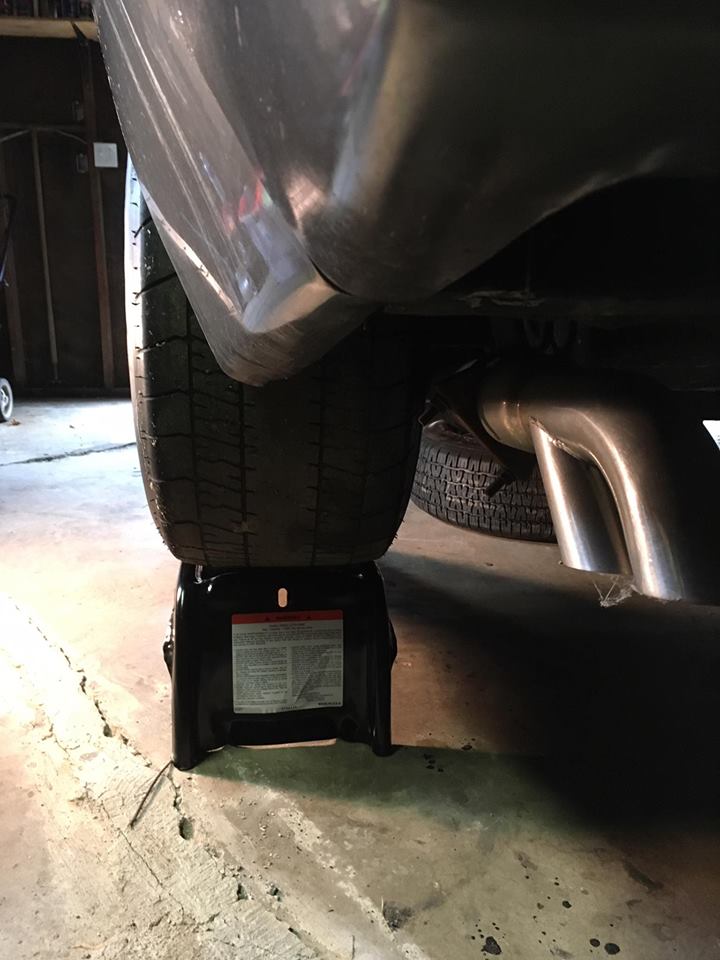
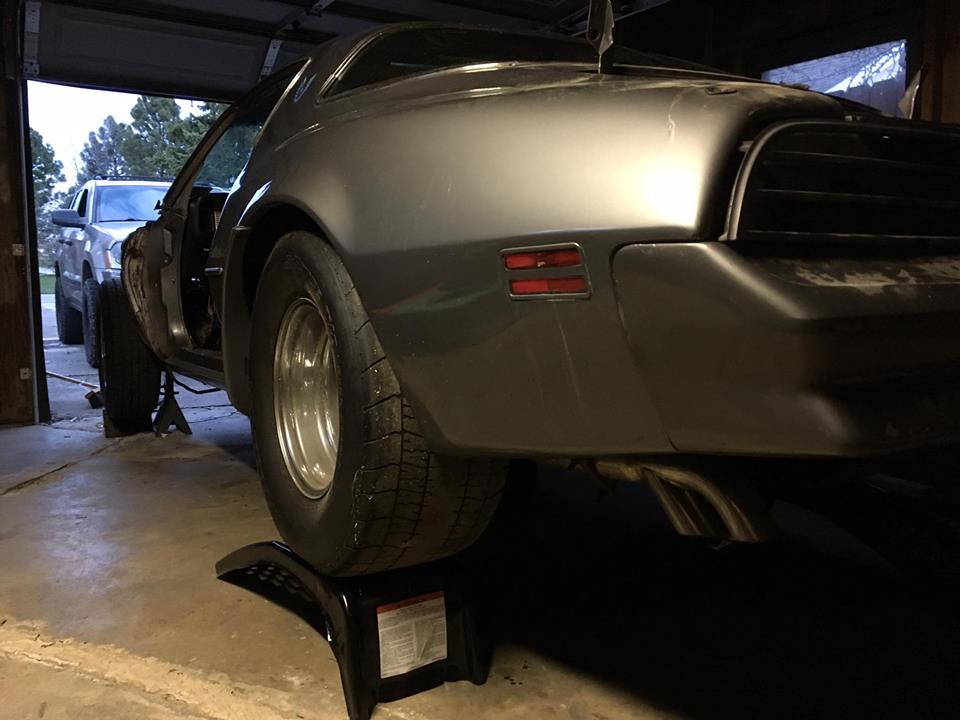
Just a few things to wrap up before it gets shipped out for sand blast and respray: My plan for this weekend is to remove the dash, tank, fuel and brake lines, truck carpet, rear bumper, lights, heater core, steering column and some misc. The D.S.E. front sub frame and sub frame connectors should ship out next Friday.
Car gets shipped out on Tuesday.
04-06-2017 #31
New to Pro-Touring
- Join Date
- Feb 2017
- Posts
- 99
I finally got an estimate of what it's going to cost to have it tossed on a rotisserie, blasted, SPI epoxied and then painted. Budget depending, I was hoping to have the undercarriage, interior pans, and interior trunk each/all blasted/SPI/and painted.
As it turns out...just having it tossed on the rotisserie and having the undercarriage blasted/SPI and painted is going to cost ~$2,000. So, while I may be able to afford the interior pans and trunk as well...the budget is a little too tight for comfort at the moment.
Undercarriage is definitely going to happen. Still waiting on my builder to give his final quote for the sub frame instal/sub frame connectors and t56 tunnel quote. After I get that I'll be able to assess if I can afford the interior pans and trunk massage as well.
Getting really excited now!
- - - Updated - - -
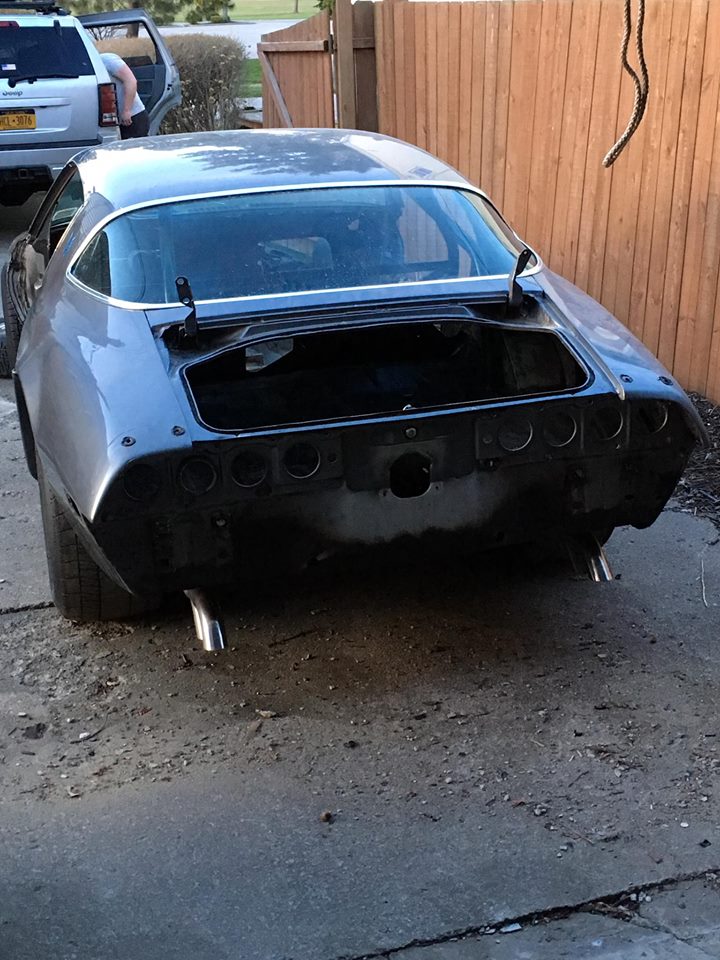
4/6: Removed rear bumper, tail light housings, nitrous line, loosened brake lines and fuel line (just waiting on fuel tank drop to remove brake and fuel lines completely).
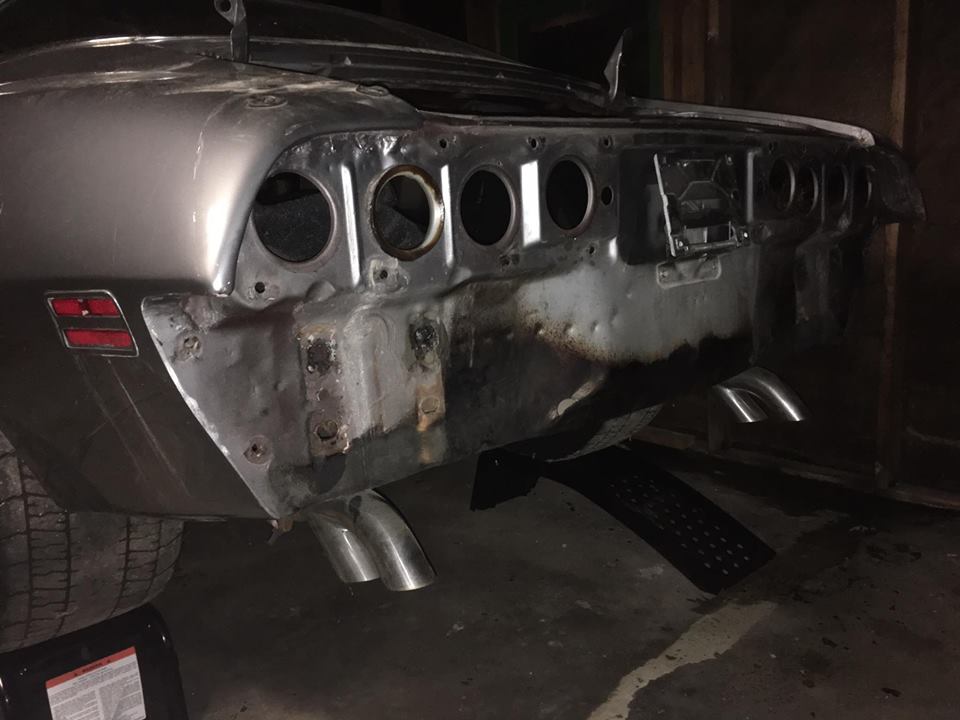
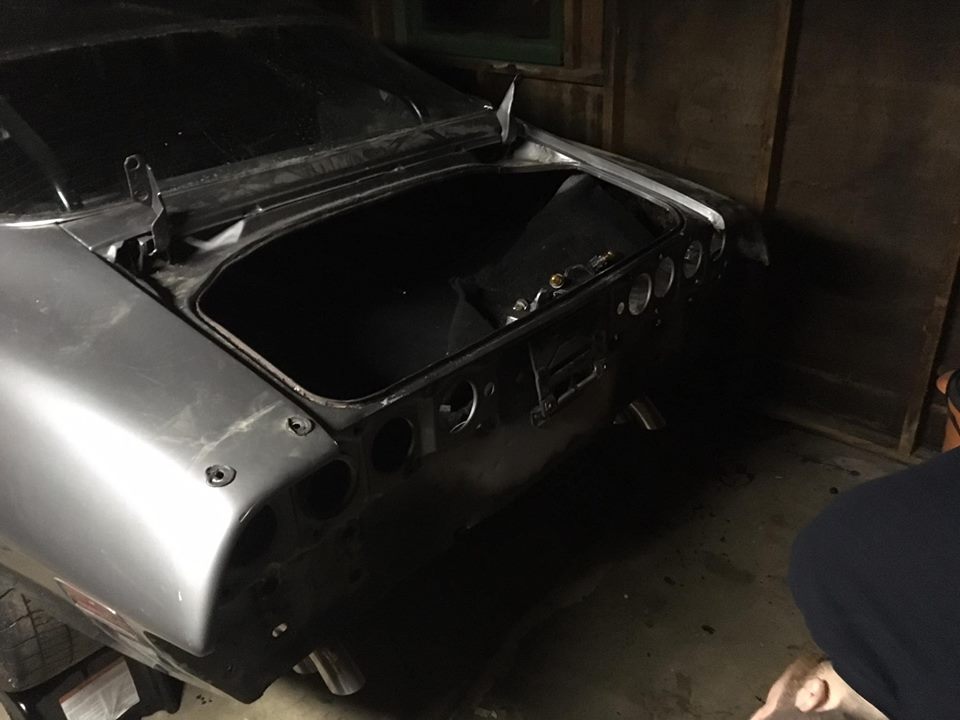
04-07-2017 #32 Registered User
- Join Date
- Sep 2009
- Posts
- 2,995

Looks like you are making a lot of progress there! Nice work.
Just thought I would mention that when I installed my LS1/t56 I didn't have to modify the trans tunnel at all and had plenty of room everywhere. Unless those mounts you are using are much higher than the Dirty Dingo mounts I used, you shouldn't have to mod the tunnel.
1955 Nomad project LC9, 4L80e, C5 brakes, Vision wheels
1968 Camaro 6.2 w/ LSA, TR6060-Magnum hybrid and etc SOLD
1976 T/A LS1 6 Speed, and etc. SOLD
Follow me on Instagram: ryeguy2006a
04-10-2017 #33
New to Pro-Touring
- Join Date
- Feb 2017
- Posts
- 99
Edit:
I just spoke with Kevin from D.S.E.. As it turns out the D.S.E. sub frame (and engine mount) pushes the motor back. It's not the mount that's the problem; it's the sub frame itself. Their frame requires the use of their mount. A new tunnel will need to be cut. I'm not familiar with factory auto 2nd gens but even with factory 4-speed 2nd gens; that tunnel needs to be cut.
04-10-2017 #34
New to Pro-Touring
- Join Date
- Feb 2017
- Posts
- 99
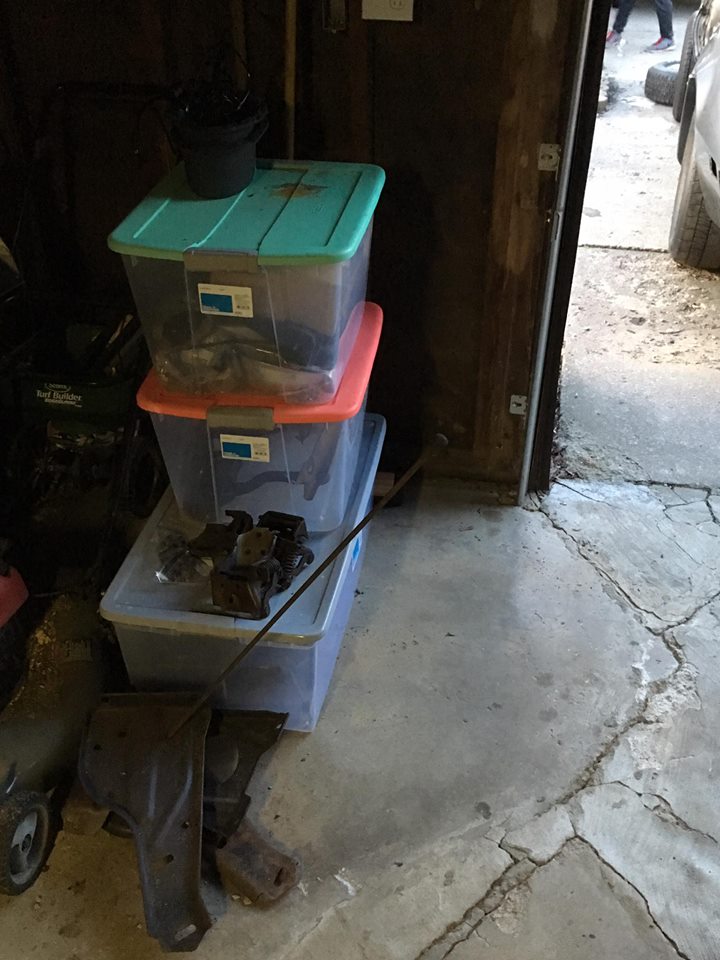
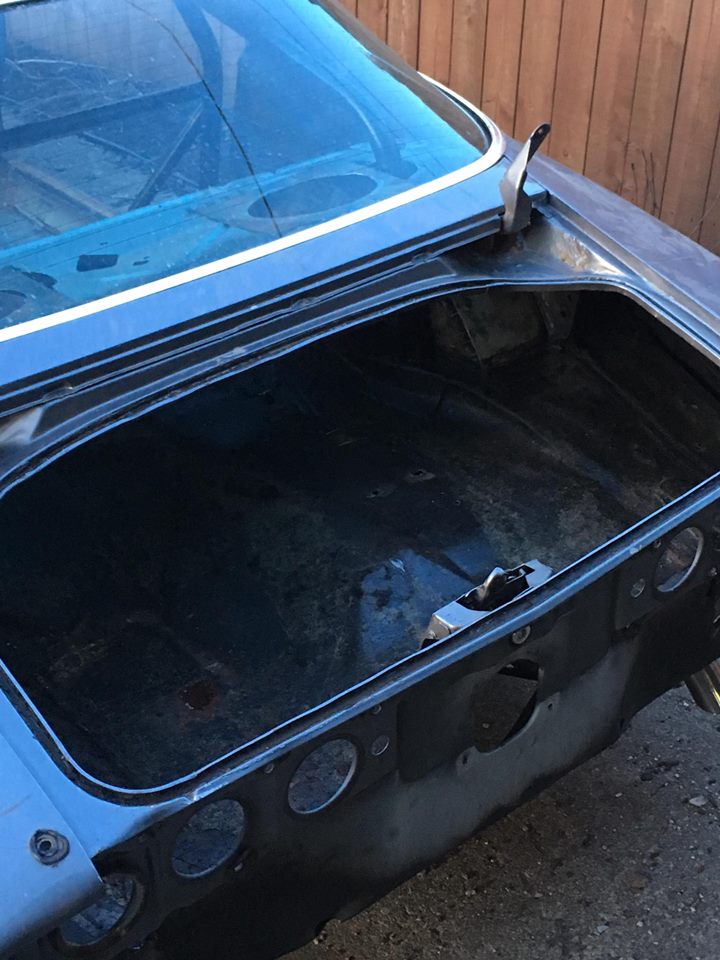
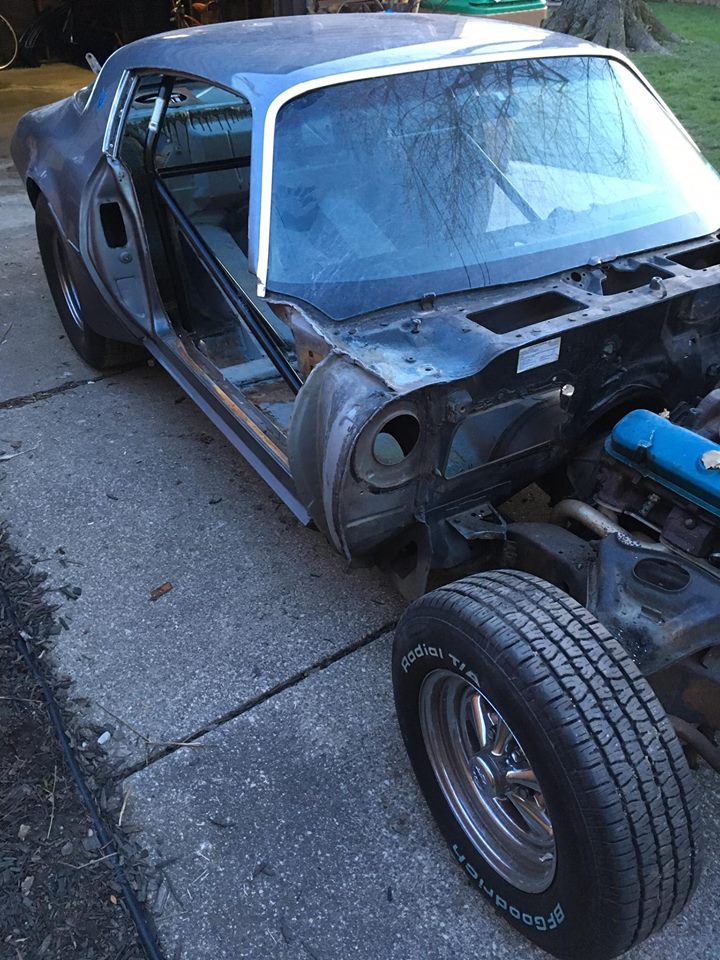
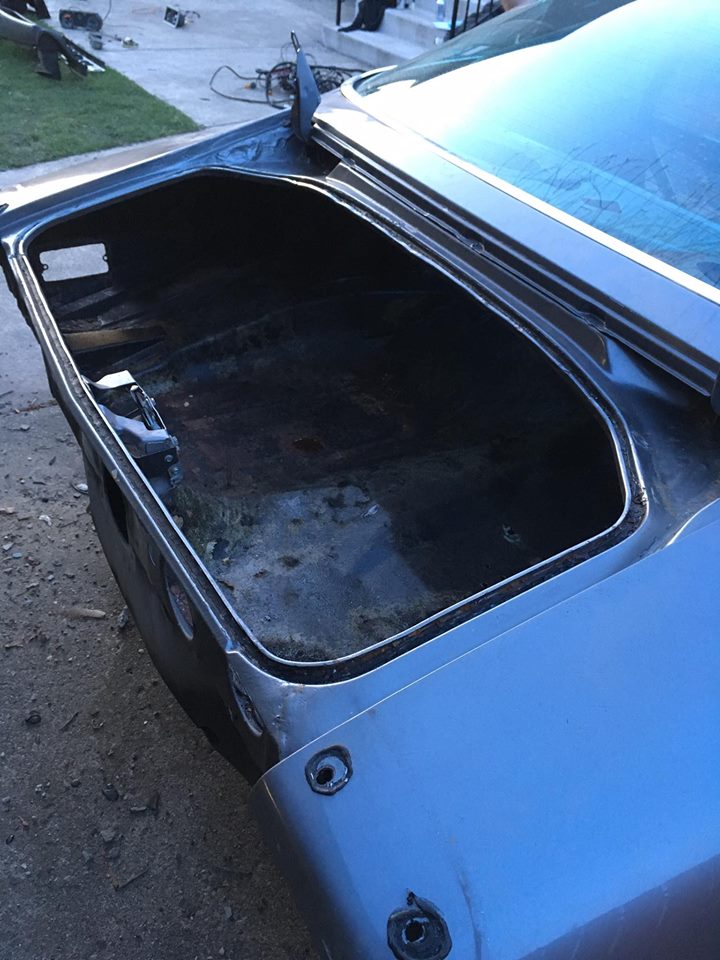
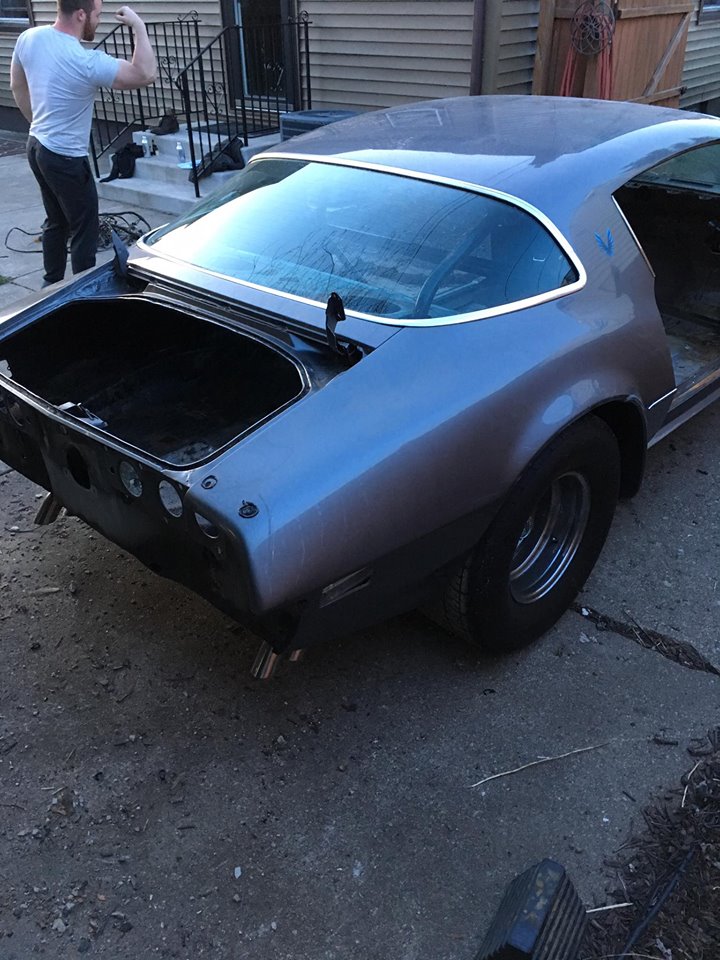
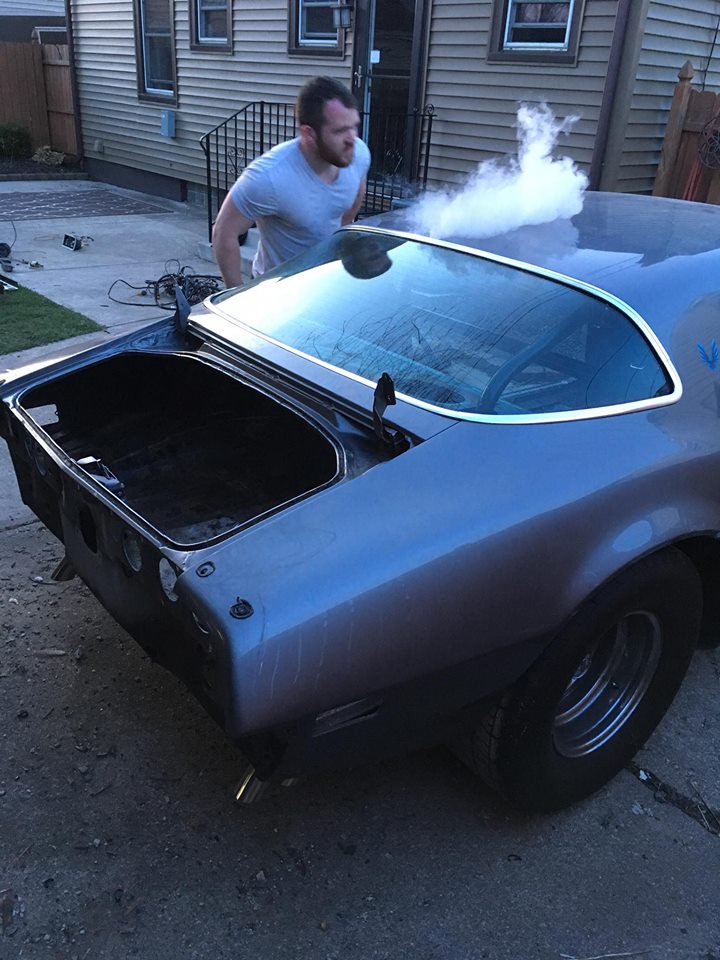
4/8: Dropped gas tank, all fuel lines, brake lines, all wiring of 'back-half',
trunk carpet, and rear plate holder -
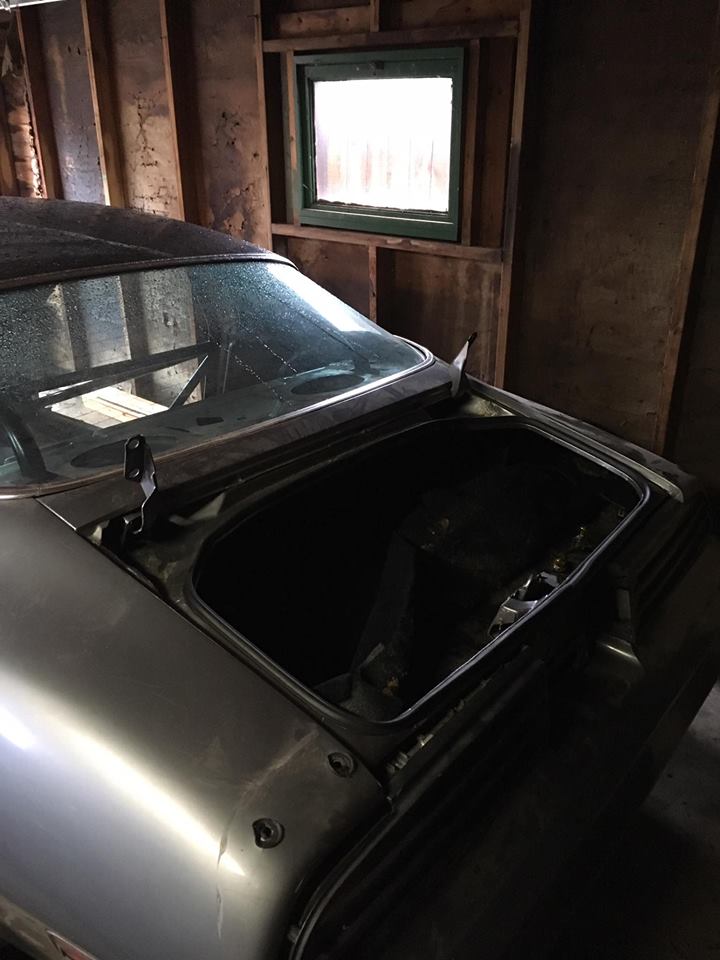
Upon dropping the tank and pulling the trunk carpet I found one small rust hole in the trunk pan. I'm very disappointed. I didn't expect to find anything warranting metal repair. I have a few options. Option 1 would be to just patch it with option two being replacing the entire pan.
I flooded the trunk pan with brake cleaner to loosen up as much of the carpet glue and trunk tar as I could in preparation of what direction I decide to take tomorrow. It's difficult to explain where the hole is but based on all aftermarket replacement pans I've seen for sale...I don't think those pans even 'cover' this section of the trunk where the hole resides. I may have to have this hole patched in addition to biting the bullet and having the whole trunk pan replaced.
I'll pick up a few grinder wheels tomorrow and dig in to it after I remove the dashboard.
I took a ton of photos of the underside to send over to my sand blaster/metal repair/paint guy to give him an idea of what we're working with here but they are all close ups and not really worth posting on here/a forum. Here are a few of the tank, lines, trunk and this damn rust hole.
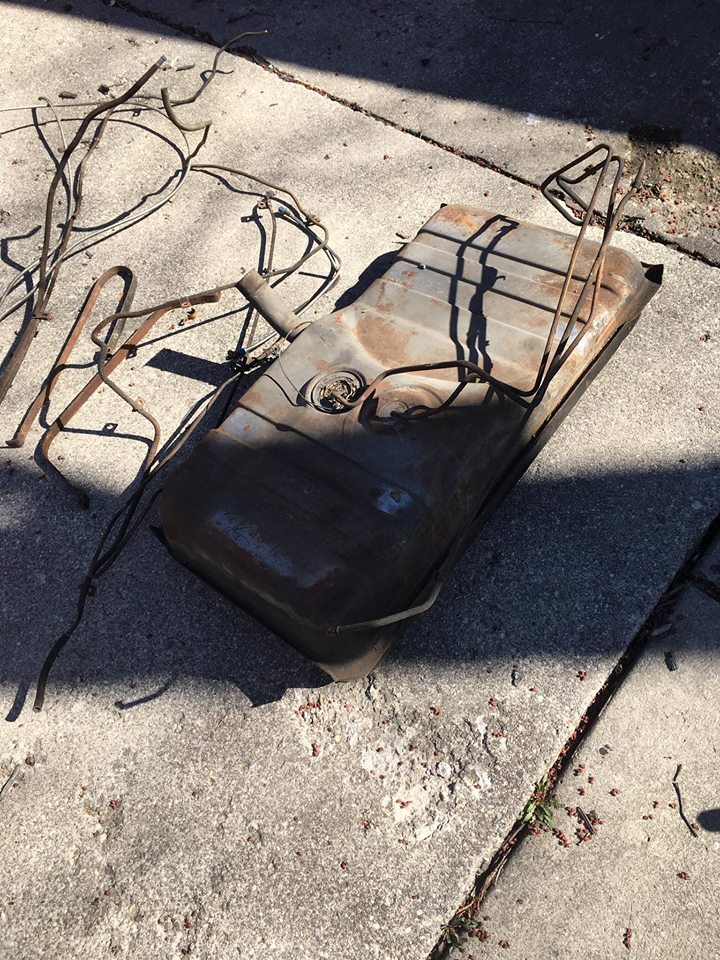
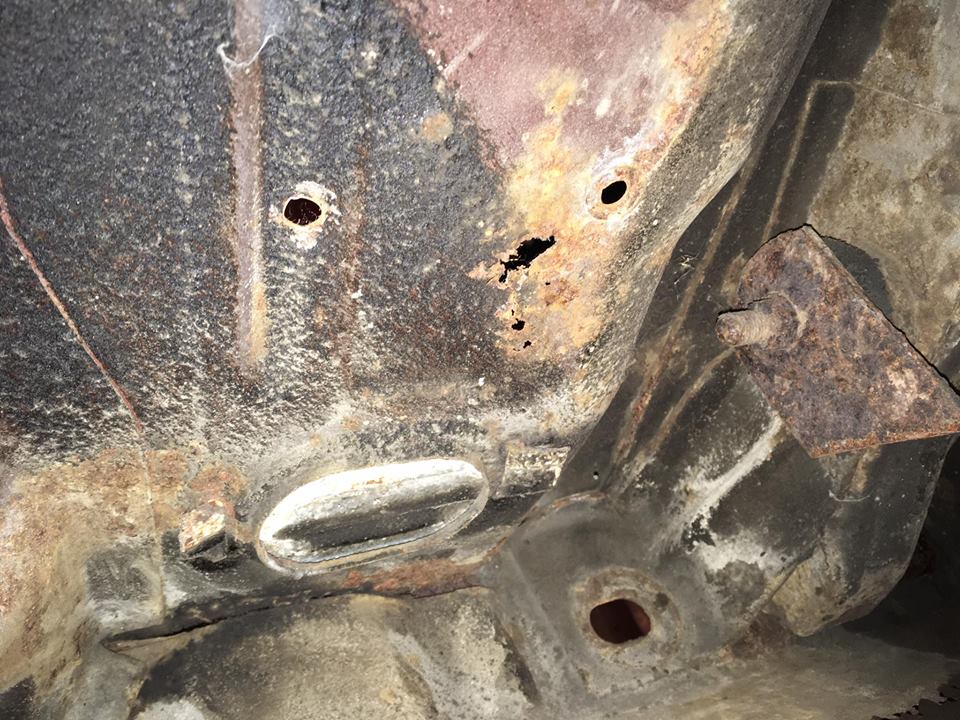
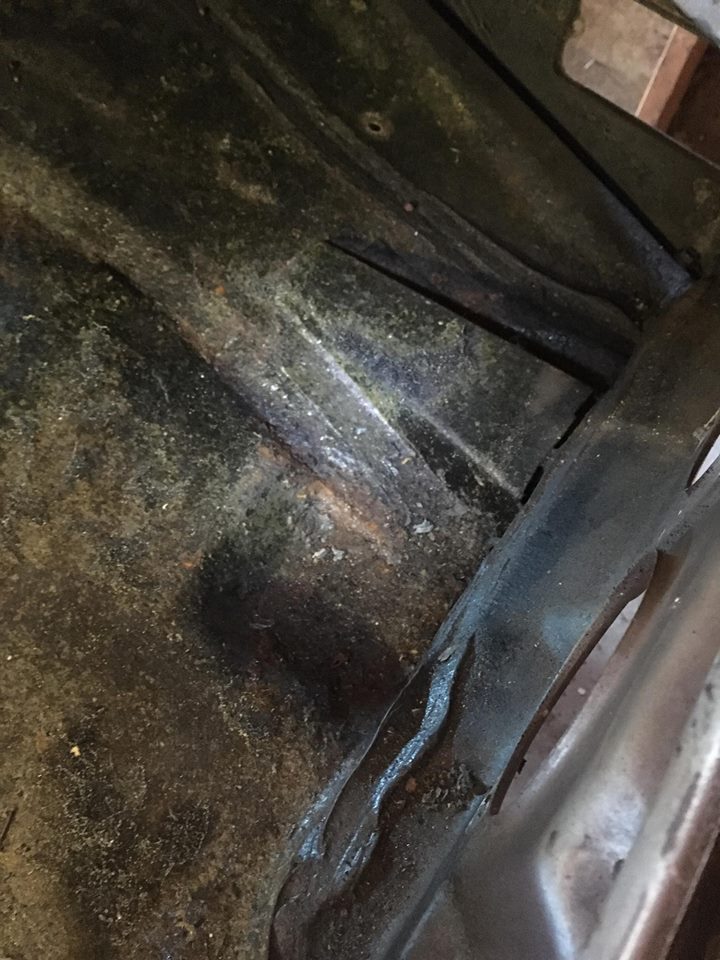
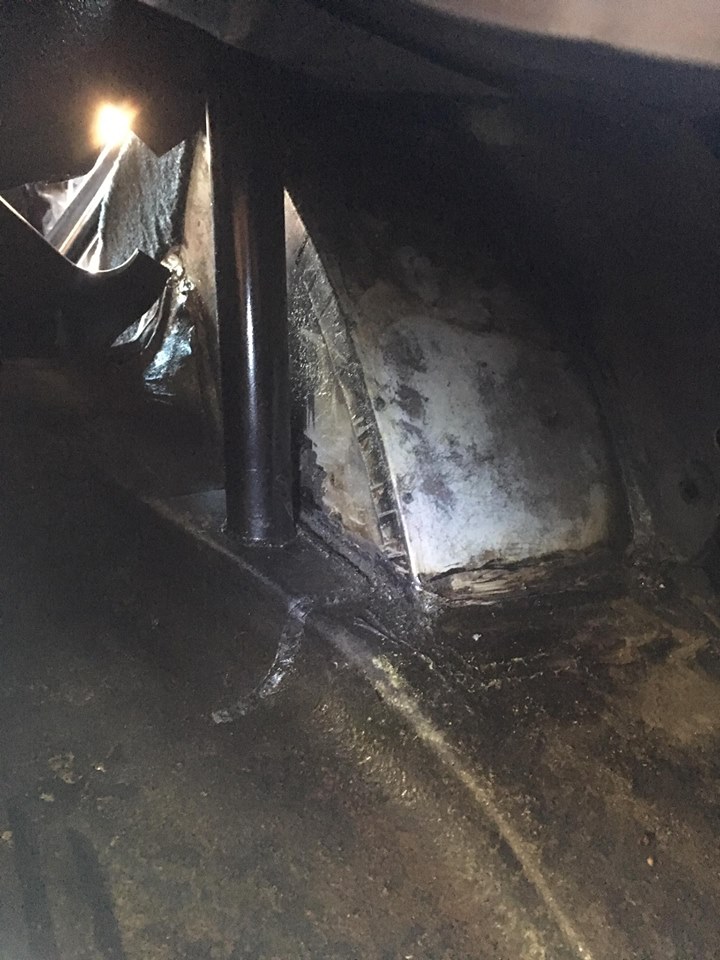
The trunk pan seems super thin. The bottom of it (looking at it from the bottom) is rust free. Whatever rot developed originally originated from within; not from salt/water/exposure to the elements; old age is what did that pan in.
I foresee the grinder wheel only worsening the hole(s). But, if the grinder does/did...sandblasting sure as well will too.
Overall I can't be too upset. I spent a good 30 mins picking and poking under that car today. No other MAJOR concerns looking forward to the blast.
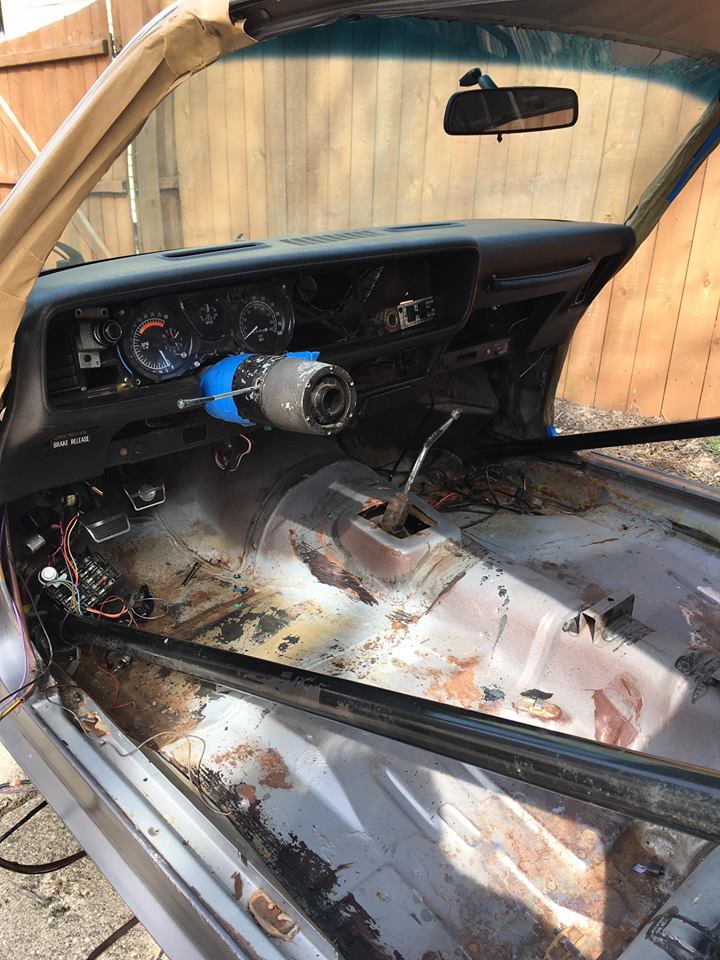
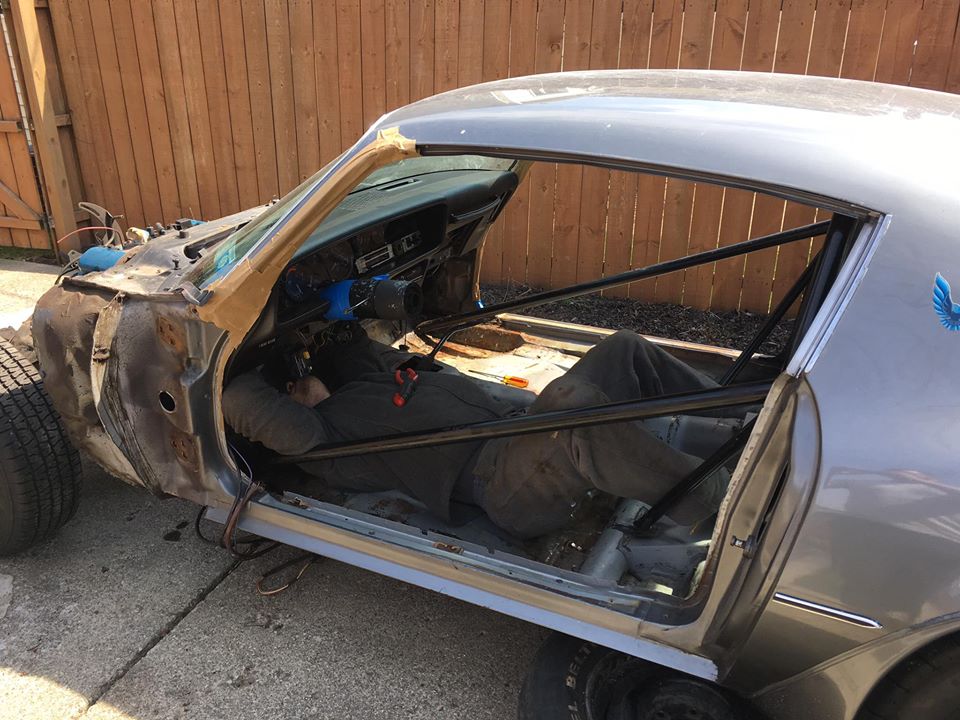
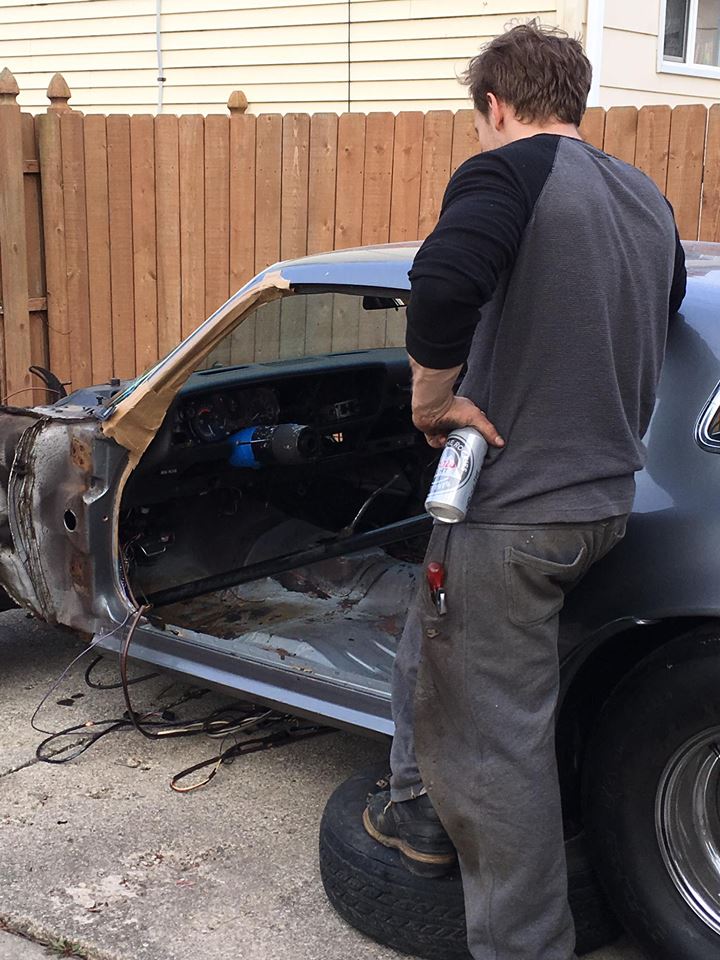
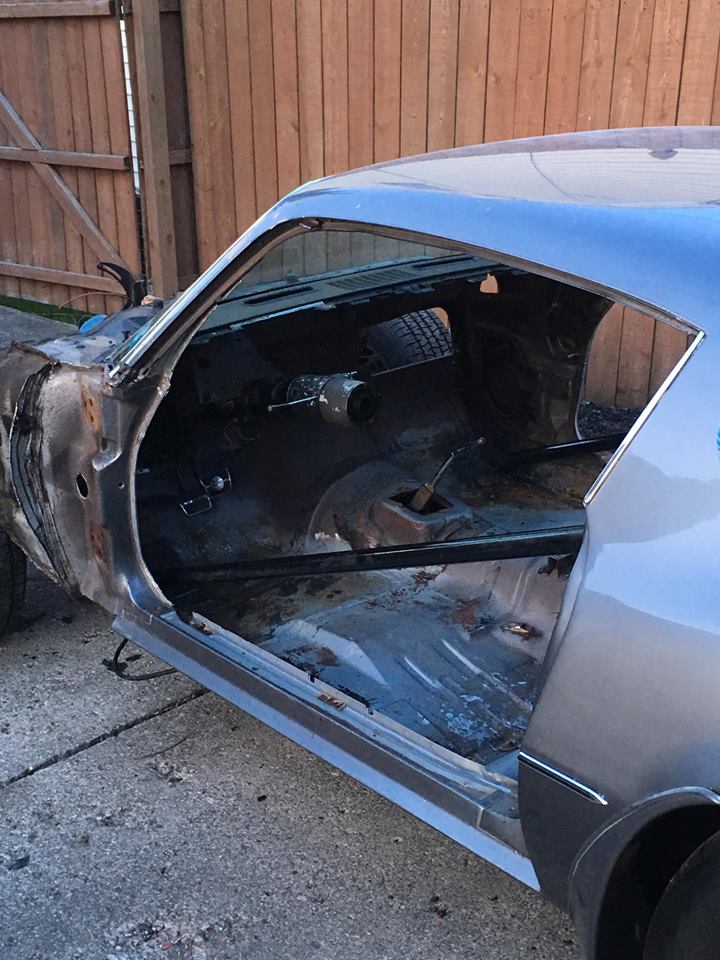
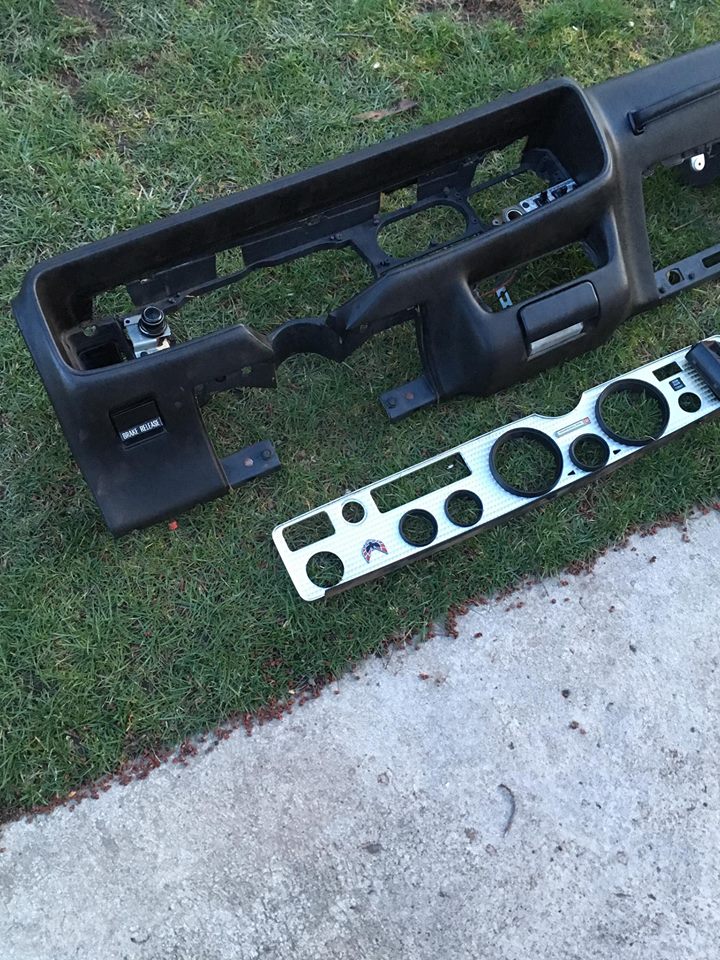
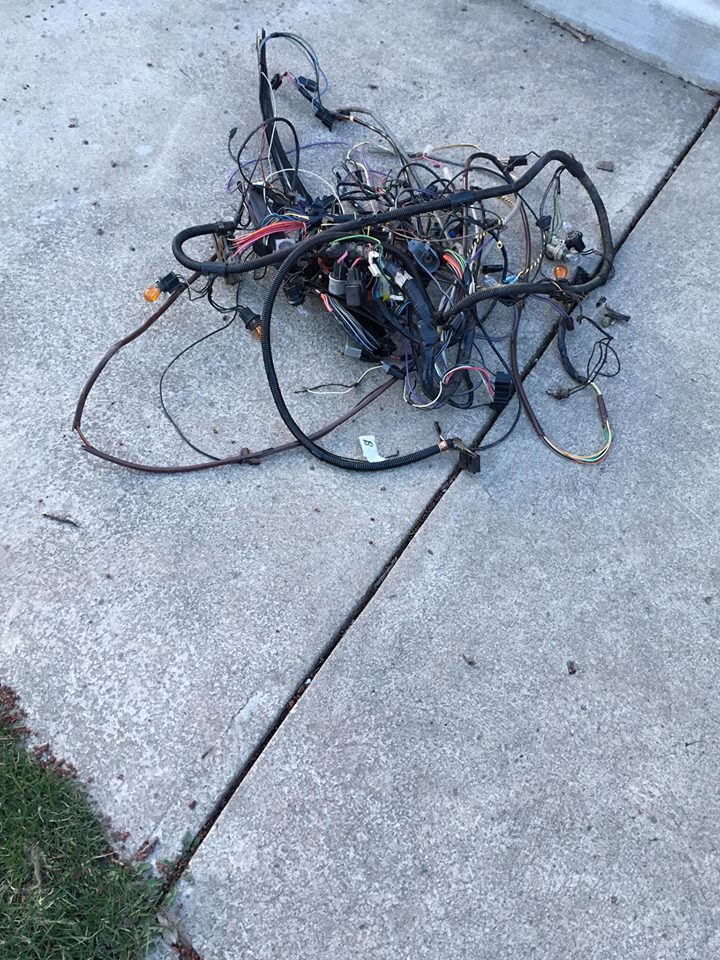
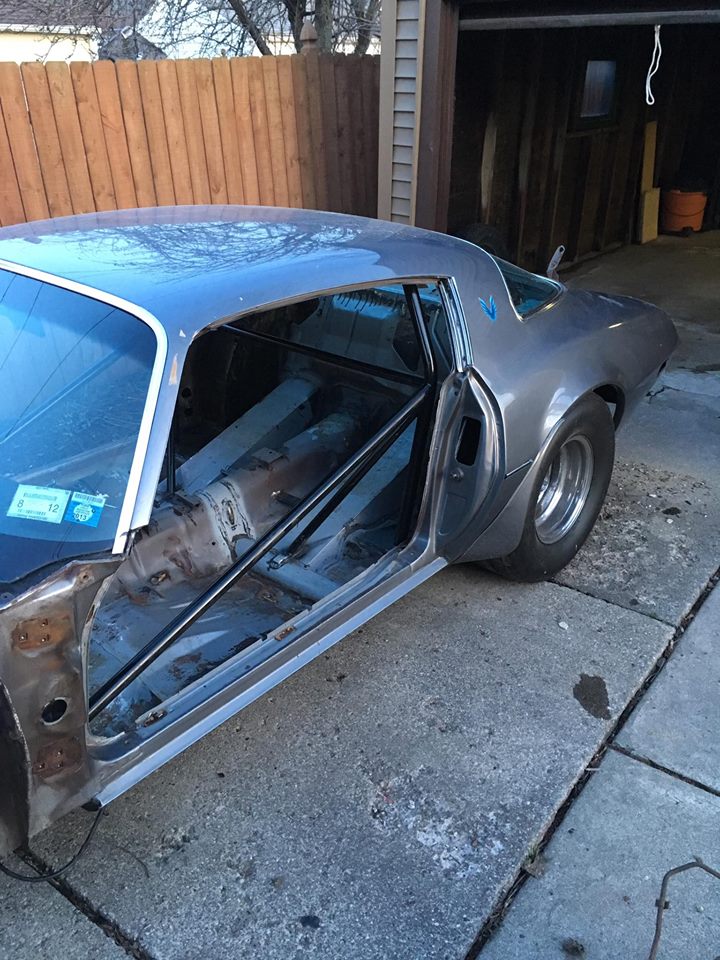
4/9: Removed Dash and all wiring -
Today a buddy of mine and I removed the Dashboard and all wiring from the car. There is not a single wire/cable in that car any longer. Other than a few clips and retaining cable braces it's as stripped as I can take it prior to handing it over.
We didn't break a single tab, clip, clamp or anything. Not a single bolt or nut as been misplaced or unidentified. I'm extremely proud of this.
I didn't have enough time today to dig in to the trunk pan although I wanted to. I simply ran out of day light. Weather was perfect. Couldn't have been happier with today's teardown.
Thank you for following.
04-17-2017 #35 Registered User
- Join Date
- Sep 2015
- Location
- St Louis, MO
- Posts
- 141
Being a hardtop with a cage I would not be overly concerned about flex. You can always install door braces during transport. I had a t top on a rotessori with door braces and hauled it around with out any issues.
12-04-2017 #36
New to Pro-Touring
- Join Date
- Feb 2017
- Posts
- 99
12/4: Update
It has been a while.
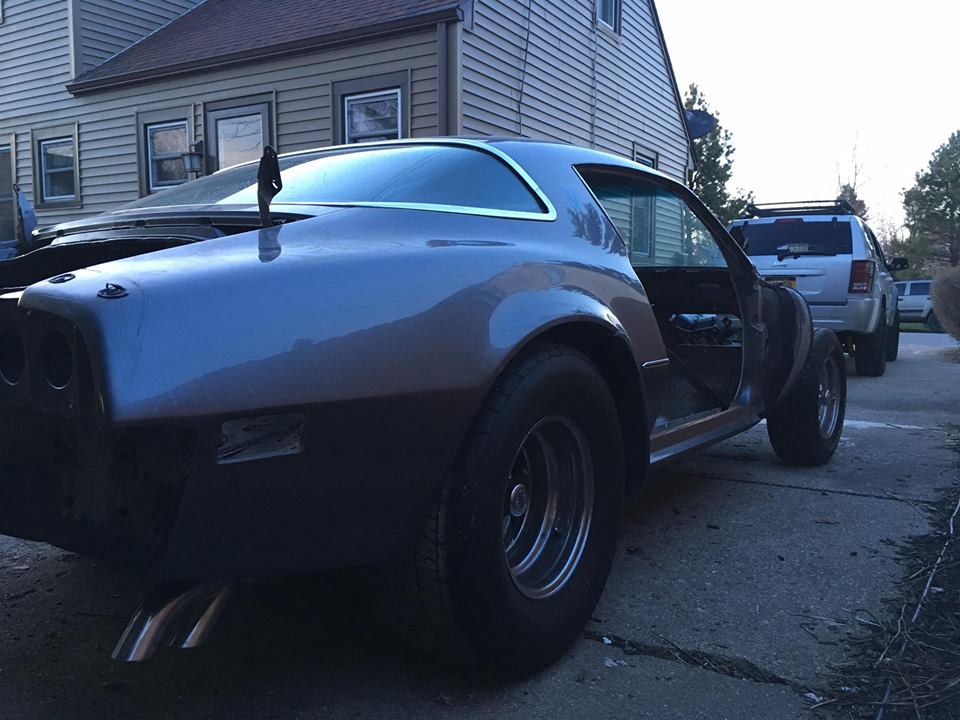
Back in July I pulled the motor, transmission, and exhaust. I sent it out to have it prepped for media blasting. It has been there ever since. The main hold up was the factory under-coating in the drop downs within the trunk, the undercoating near the gas tank (under the car). Media blasting with glass and walnut did the job easily for the interior pans and most other areas...but the trunk area/gas tank area; what a PITA. In some places it was as thick as 2 inches. A combination of heat guns, putty knives, aircraft stripper and media was used.
Next up is getting it back in the shop for firewall/cowl area work, transmission tunnel, sub frame connectors, sub frame install. It's not getting a heater again so I picked up the fill plate from Detroit Speed. Also picked up the t56 hump panel from Holley. Powdercoated Detroit Speed frame, their LS7 mounts and their connectors are sitting on a wooden pallet (ever since May).
Still need to pick up some cheapo 17 inch wheels and tires or some serious wheel spacers to mount the 15 inch cragars back on so I can wheel it around. 17 inch wheels are needed to clear the control arms.
Should get some photos up here pretty soon.
Edit: Also. I decided to leave it in primer since I have yet to plumb exhaust, brake hardline and fuel hardline. There's no point to spray epoxy just yet since all of the hangers and clips/clamps have yet to be welded in place. Painting will have to wait for a few more years.

 Reply With Quote


