


Results 41 to 60 of 83
-
01-13-2017 #41

 Registered User
- Join Date
- May 2012
- Posts
- 412

Messing around with the custom trim rings my friend Marco cut for me. Nothing is painted to match the rim colour yet but you can see the image with the electric actuator behind the roll bar. One shot is with the extension bar to lift the top and one is what it would look like if the car was topless. Not much looking out of the ordinary for as clean a look as I can manage. Actuators cost only $65 each and weigh 1.5 lbs a piece.
-
01-15-2017 #42
Registered User
- Join Date
- Mar 2008
- Location
- Chapel Hill, NC
- Posts
- 337

Car looks great. Love the top...where'd you get it?
One word of caution...the windshields are known for cracking if there's tension put on them. The frame is brass and will flex easily. Be careful when lifting the top. If you lean too hard into it, I could see the windshield frame flexing forward and you'll be replacing the window (or fitting a lexan one which a lot of guys have done).Dan
Chapel Hill, NC
***PM me if you're close by and can help with my 65 Mustang Fastback project***
-
01-15-2017 #43
Registered User
- Join Date
- May 2012
- Posts
- 412
Thank you for the heads up Dan. I saw that on a forum somewhere before I started so I made these steel brackets that put vertical sheet on the windshield braces. And then I installed 1/8" Lexan behind the small holes I cut out and ran it down to the body so the pressure is off the glass and on the body instead. Top is a total of 22 pounds and is pivoted off those brackets.
-
01-15-2017 #44
Registered User
- Join Date
- May 2012
- Posts
- 412
I finished painting and installing everything last night. All that's left is to wire the switch and paint top and bottom of the roof. It's been about a 200 hour undertaking making all of these one of parts. Very satisfying when it's done. Oh and the top came from Mr. Bruce. I found him on the Cobra Forum. I'm in Toronto and I don't know if that's close to you but it would be nice to run into you and your 65. Keep in touch
-
01-15-2017 #45
 Registered User
- Join Date
- Sep 2013
- Location
- sw Kansas
- Posts
- 1,661
Anxious to see it finished.

-
01-16-2017 #46
Registered User
- Join Date
- May 2012
- Posts
- 412
Numbers are on. It's exactly what I was after for this car.
-
01-17-2017 #47
Registered User
- Join Date
- May 2012
- Posts
- 412
Before and aftet
-
01-19-2017 #48
Registered User
- Join Date
- May 2012
- Posts
- 412
Did some body filling, high build and lots of sanding to get the underside of the fibreglass ready for paint. Has a durable suede finish to it. One more pass tomorrow to even it out.
-
01-19-2017 #49
Registered User
- Join Date
- May 2012
- Posts
- 412
A product from Canadian Yire. Car surface repair isle.
01-20-2017 #50
Registered User
- Join Date
- May 2012
- Posts
- 412
Today build prime and block. Sunday lay down the green. Monday weatherstrip the bottom, install the rear glass. Should be good
01-21-2017 #51
Registered User
- Join Date
- May 2012
- Posts
- 412
How to black out the perimeter of your Lexan glass. I cut the 1/8" sheet to shape and removed about a two inch strip of protective coating from it. Then I used 1"-1/4 tape to mask the area being painted To get an even line to follow with the striping tape. Once you've spent the time getting a very good line with the masking tape you follow right next to it with the green striping tape. Take your time because it will be the final clean line of your paint. Once that is stuck down we'll you can remove the 1"-1/4 masking tape to expose the area to be paired. Of course the pictures loaded in reverse order. Lol.
01-21-2017 #52
Registered User
- Join Date
- May 2012
- Posts
- 412
Give the surface a quick wipe for dust and lay on light coats of your colour. BTW this is all done on the back side of the glass. It would be in the car and not in the elements. Do not remove the protection from the outside of the glass or you'll have to cover it up from overspray. Once you have built up a solid black finish DO another few passes because it will still be transparent up to the light. Learned that one the hard way. Light pass with the heat gun is my truck to flashing off the solvent do you don't get wrinkling from laying on coat after coat. And I do mean light. Keep the gun moving. Once a couple of hours have passed and you can touch the surface you can peel back and check out your work. Good luck. Hope it was helpful.
01-22-2017 #53
Registered User
- Join Date
- May 2012
- Posts
- 412
Baking in the oven.
01-22-2017 #54
Registered User
- Join Date
- May 2012
- Posts
- 412
Done
01-22-2017 #55
Registered User
- Join Date
- May 2012
- Posts
- 412
Pic
01-22-2017 #56
Registered User
- Join Date
- May 2011
- Location
- Brisbane, Australia
- Posts
- 453

Looks fantastic Angelo. Looks like it rained for the occasion as well.
1967 Mustang Fastback - widebody https://www.pro-touring.com/threads/...stang-Fastback
1966 Plymouth Fury III
1961 Oldsmobile 88 "bubbletop" = next project
01-23-2017 #57 Registered User
- Join Date
- Jan 2010
- Location
- Delaware
- Posts
- 689
Absolutely beautiful. Everything you did was well thought out and executed. But I can't imagine not taking the top off on my healey replica. lol I love going topless.
1973 Trans Am 455 SR block, ported 6x-8 heads, solid cam, Victor intake, 830 CSU carb, aluminum rods, 77mm Garrett turbo and methanol injection. 1064hp at the flywheel@5500 rpm
01-23-2017 #58
Registered User
- Join Date
- May 2012
- Posts
- 412
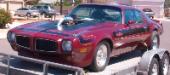
Thanks my friend. We are supposed to be knee deep in snow but another mild day do I took it outside for some shots.
01-23-2017 #59
Registered User
- Join Date
- May 2012
- Posts
- 412
I like the Healey and 73 Firebird. I had a rag 69 firebird for 9 years and the top went down only a few times a summer. Just me I guess.
01-23-2017 #60
Registered User
- Join Date
- May 2012
- Posts
- 412
Car has some nice curves and the top I think just keeps the party going.

 Reply With Quote


